• Activity ideas by age
    • Seasonal activities
    • Materials & fillers
    • Getting Started
    • Taste Safe
    • All activity ideas
  • Shop
  • Freebies
  • About
Menu

Goodnight Fox

1974 San Luis Ave
Mountain View
16502243796
Dramatic & Sensory Play for Early Learners

Your Custom Text Here

Goodnight Fox

  • Activities
    • Activity ideas by age
    • Seasonal activities
    • Materials & fillers
    • Getting Started
    • Taste Safe
    • All activity ideas
  • Shop
  • Freebies
  • About

Delightful Donut Shop Sensory Play: Printable Kits and Activities

August 10, 2024 Kylie Tuosto

Step into the sweetest sensory play experience with our donut shop-themed activities! Perfect for imaginative and tactile exploration, our free printable kits and dramatic play setups are designed to keep little ones engaged and learning. In this blog post, we'll dive into three fun and delightful sensory activities that your children will love.

Download & Print

Felt Donuts Sensory Bin

Our first sensory bin features soft, colorful felt donuts that are perfect for imaginative play and fine motor skill development. This activity encourages creativity as children pretend to bake and serve their own felt donuts.

Materials Needed:

  • Felt donuts

  • Sensory bin

Activity Instructions:

  1. Fill a sensory bin with felt donuts in various colors and designs.

  2. Encourage your child to pretend to bake, decorate, and serve the donuts.

  3. Use this opportunity to discuss different types of donuts and flavors.

IMG_2834.JPEG IMG_2863_jpg.JPEG IMG_2836_jpg.JPEG IMG_2839_jpg.JPEG

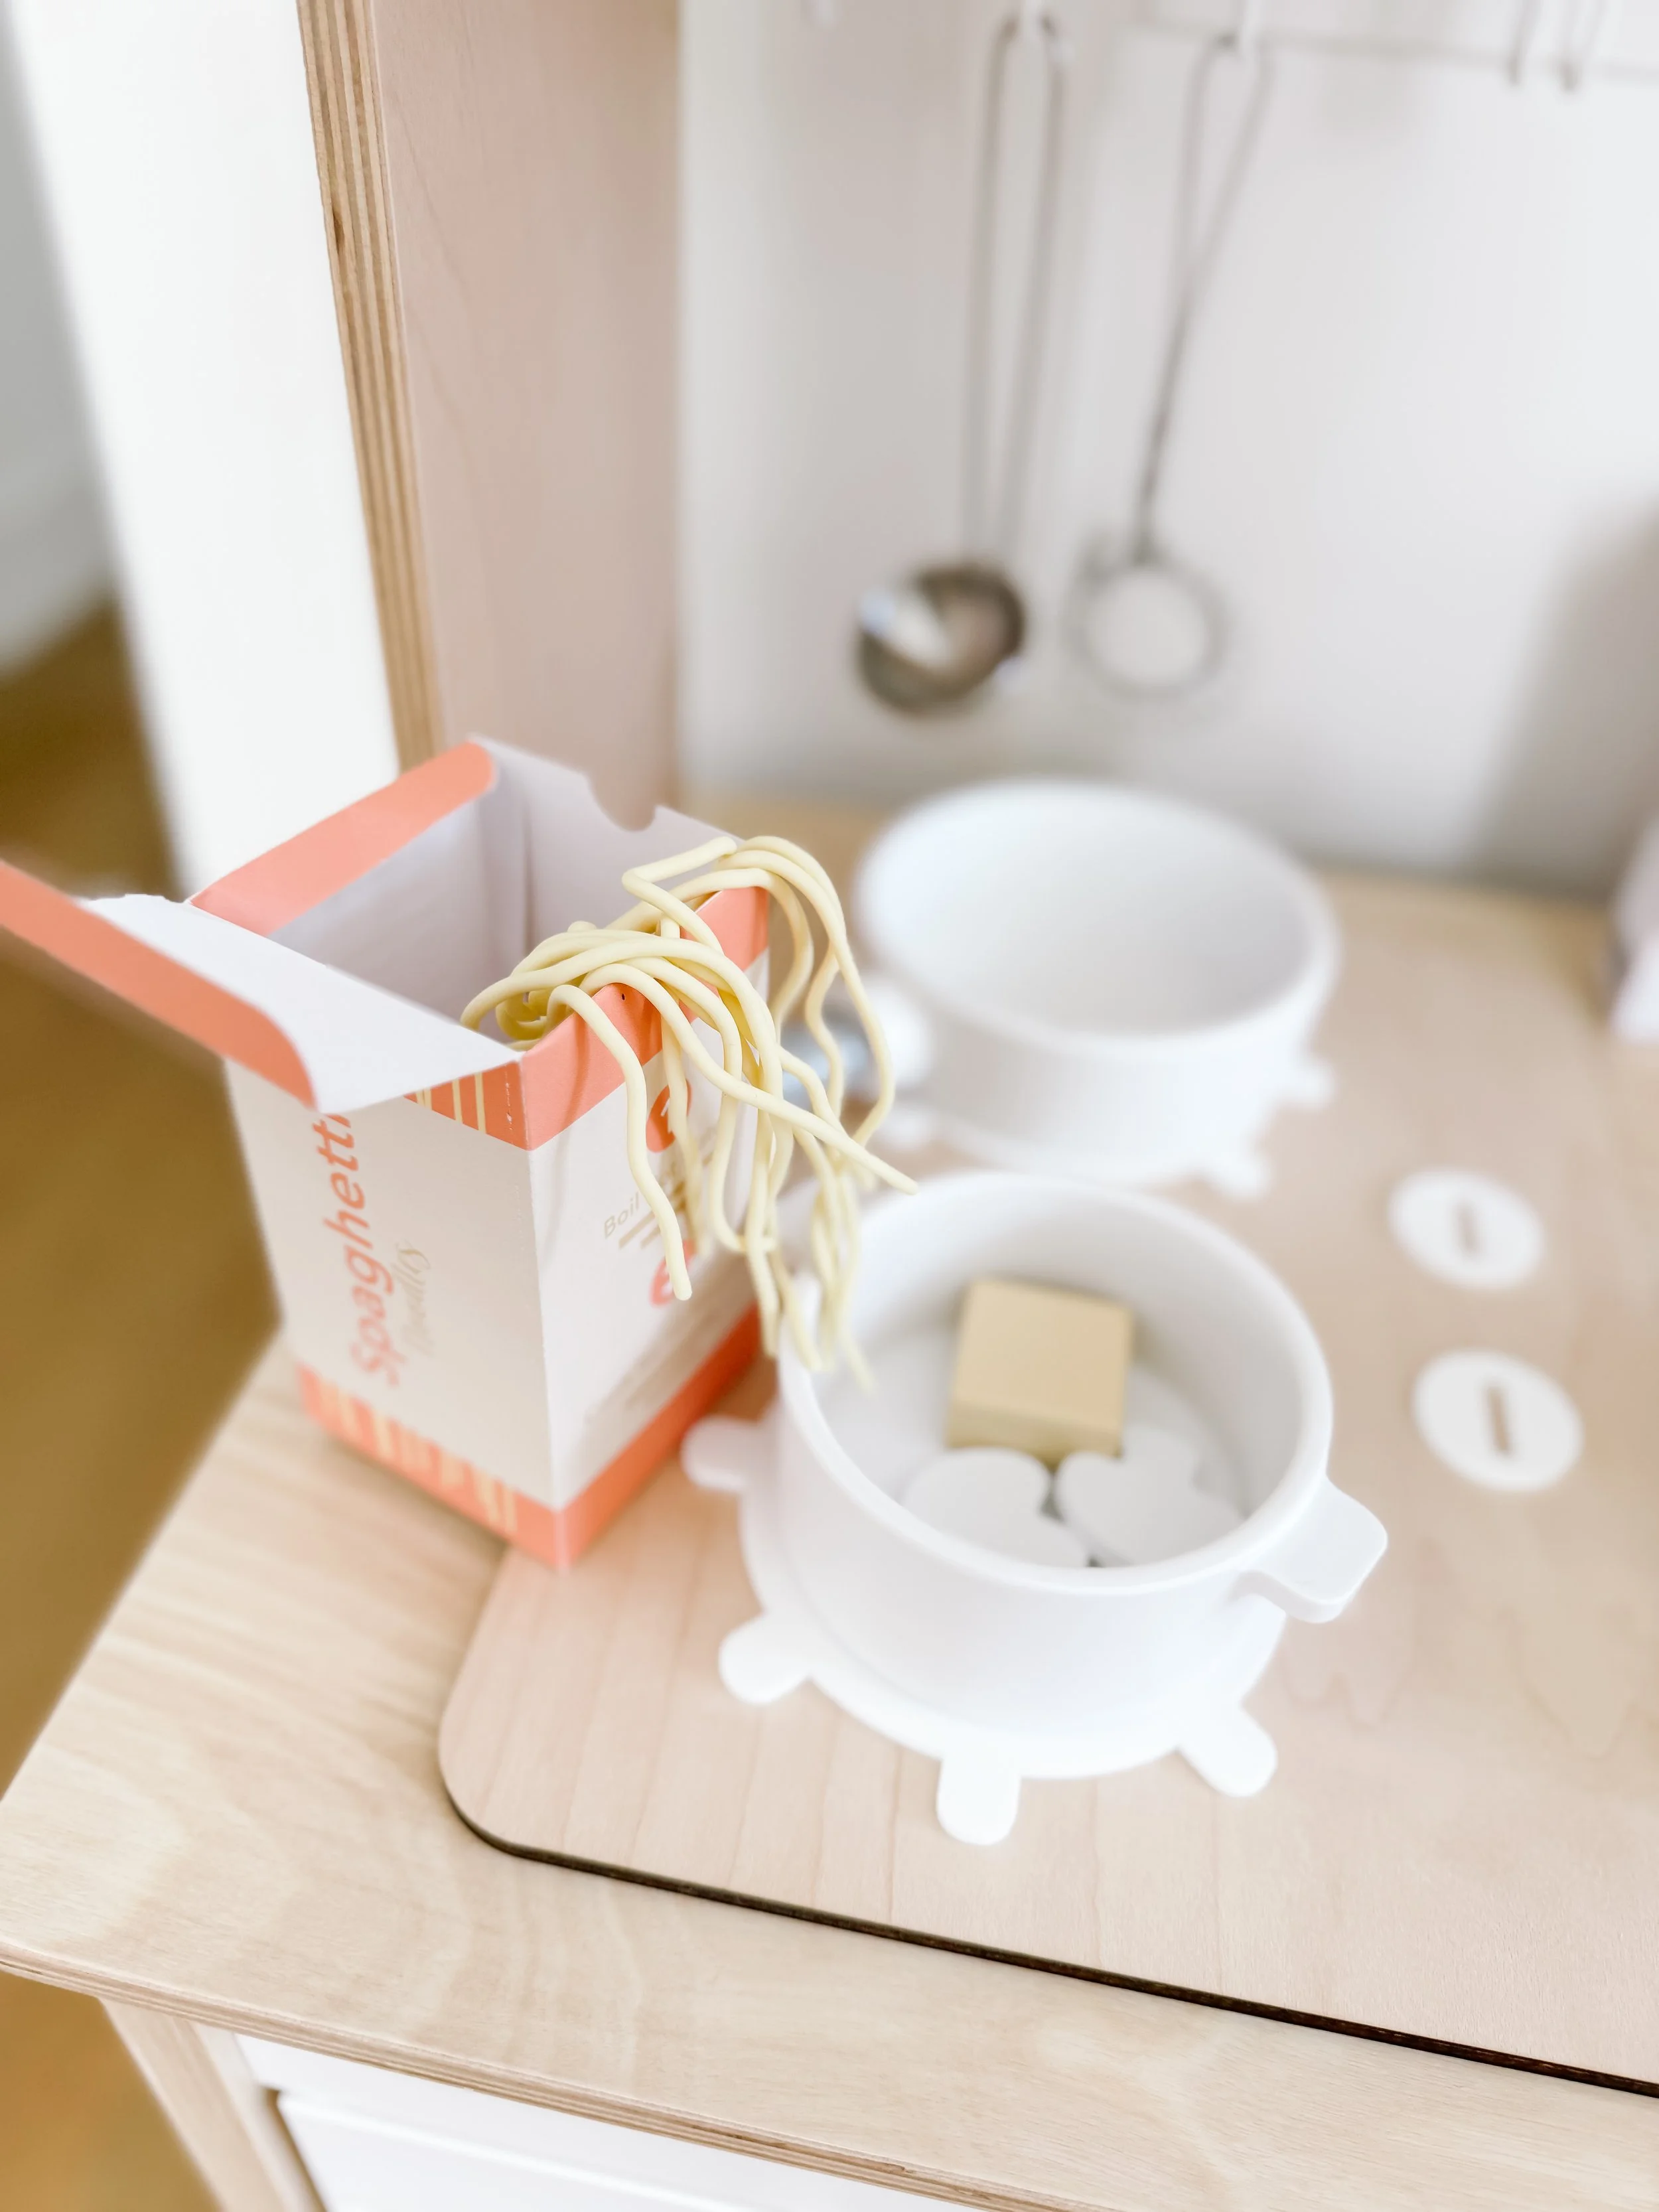
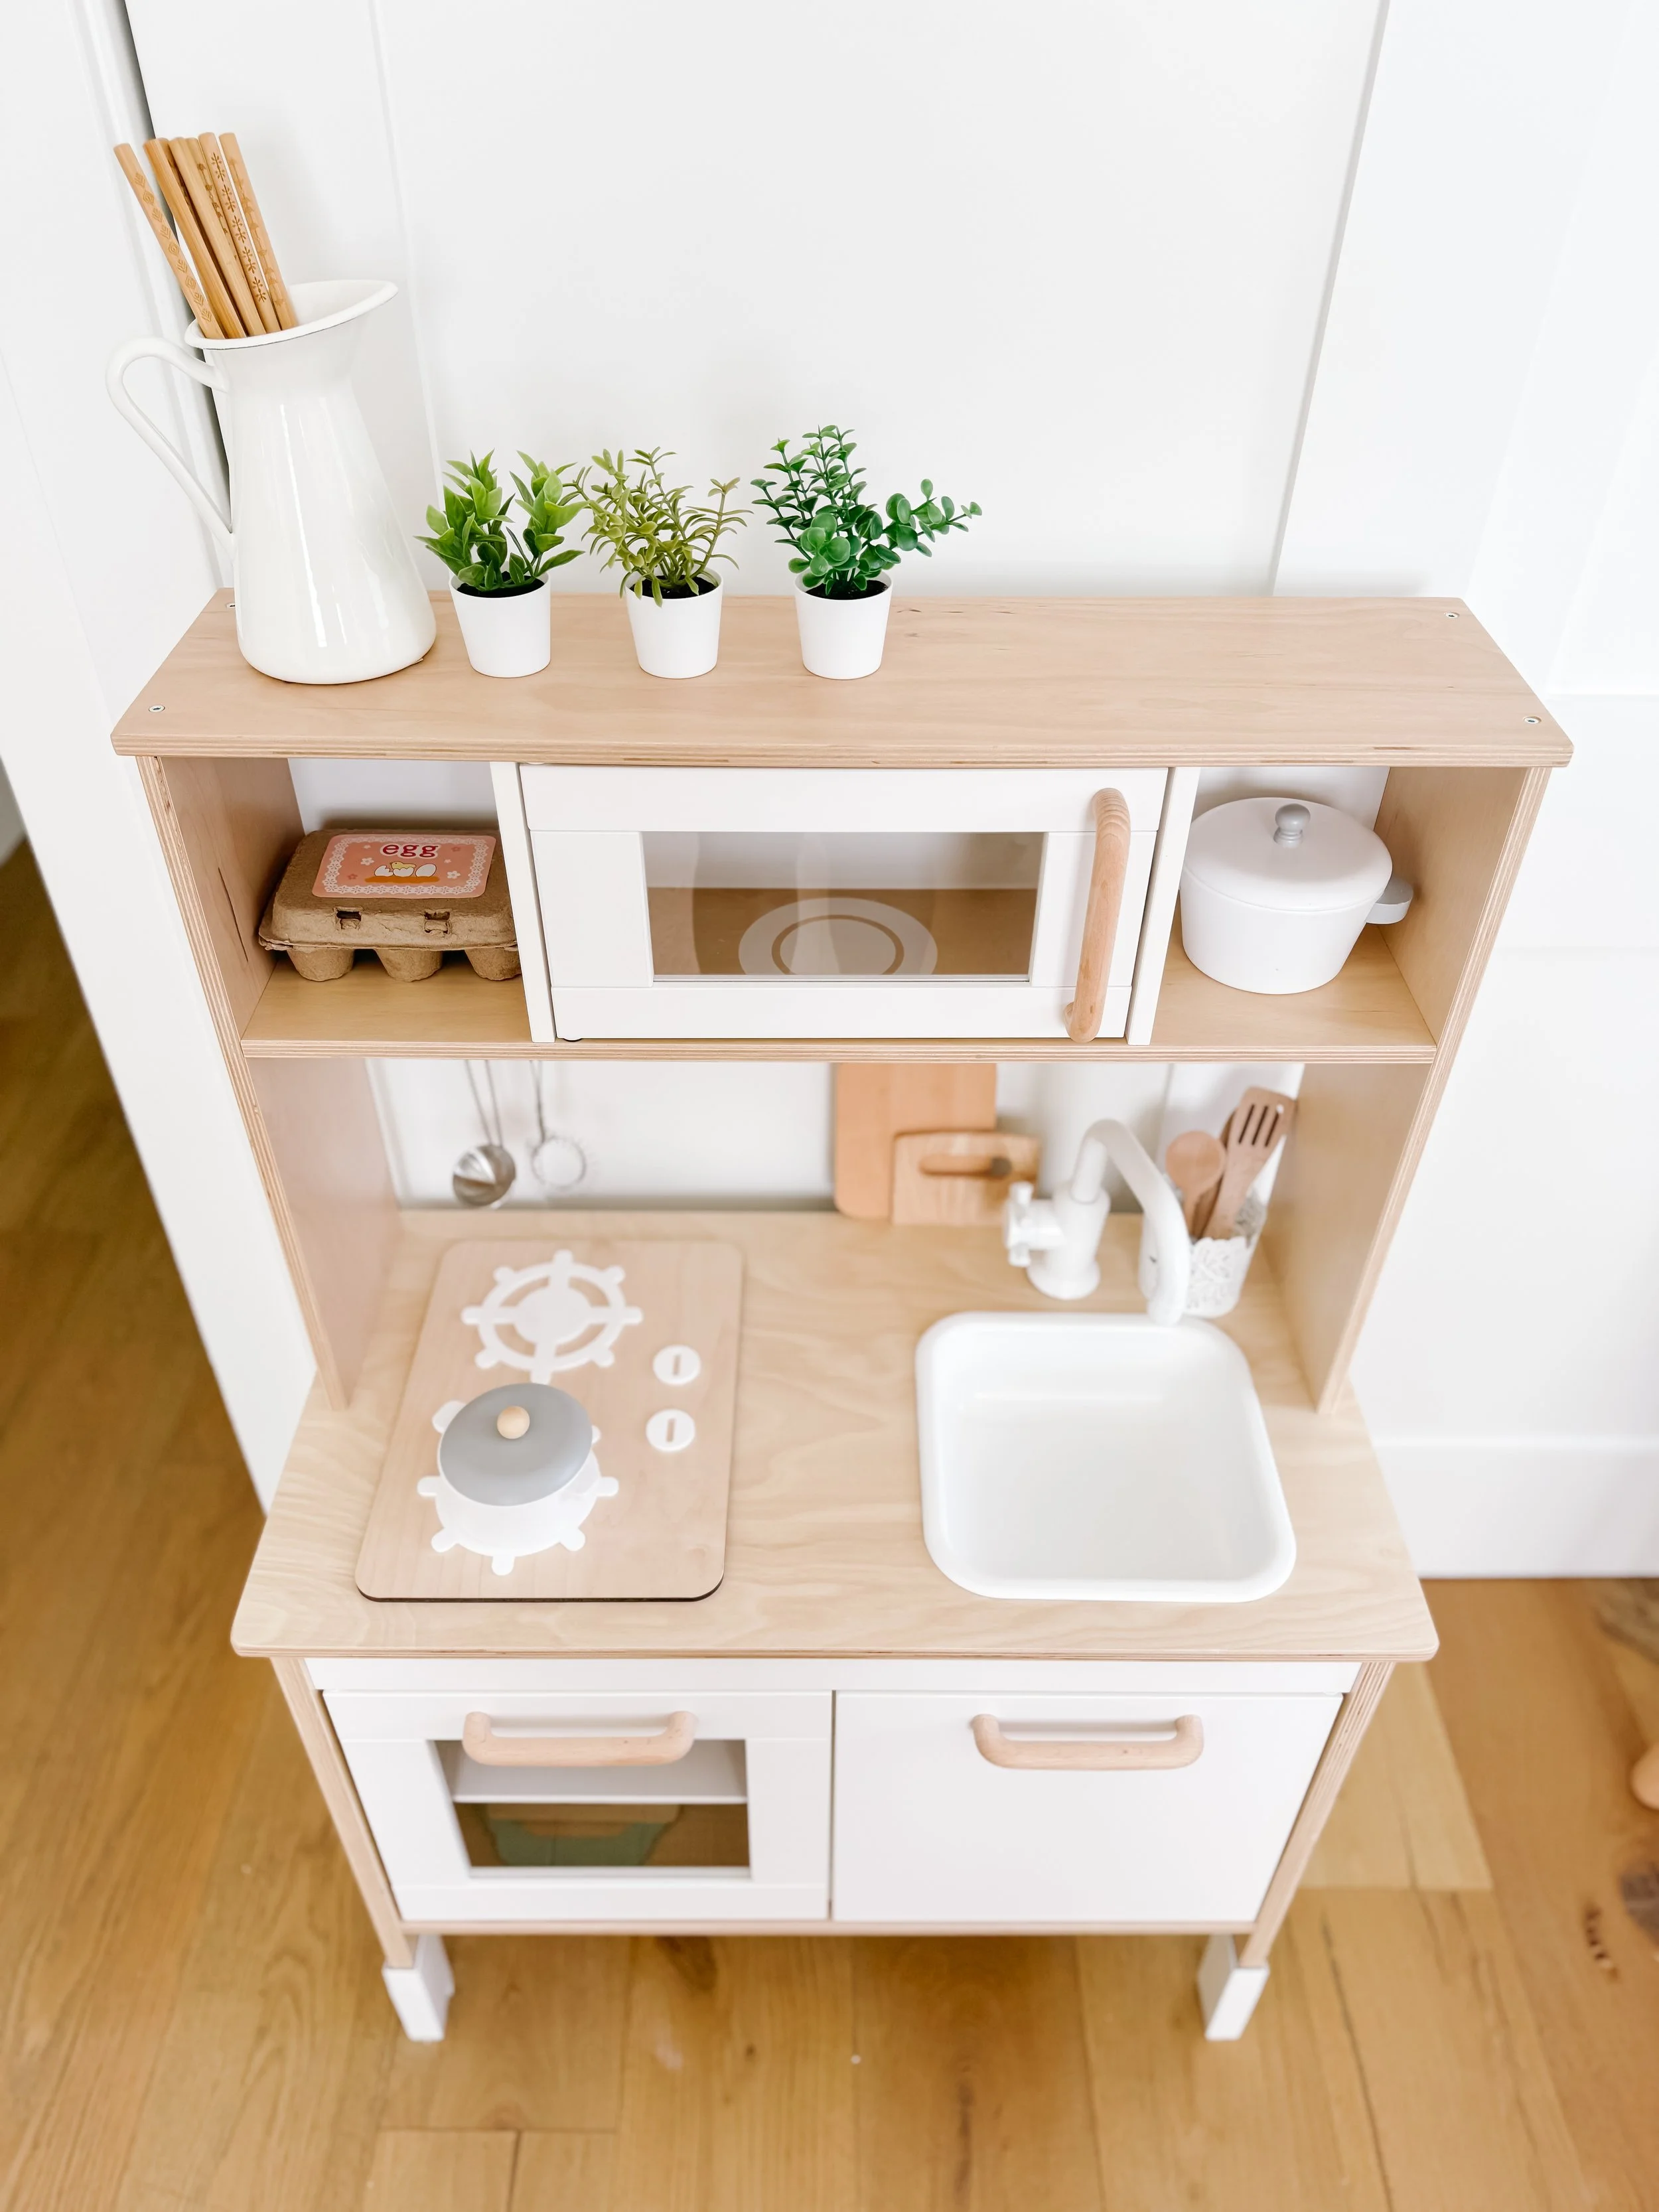
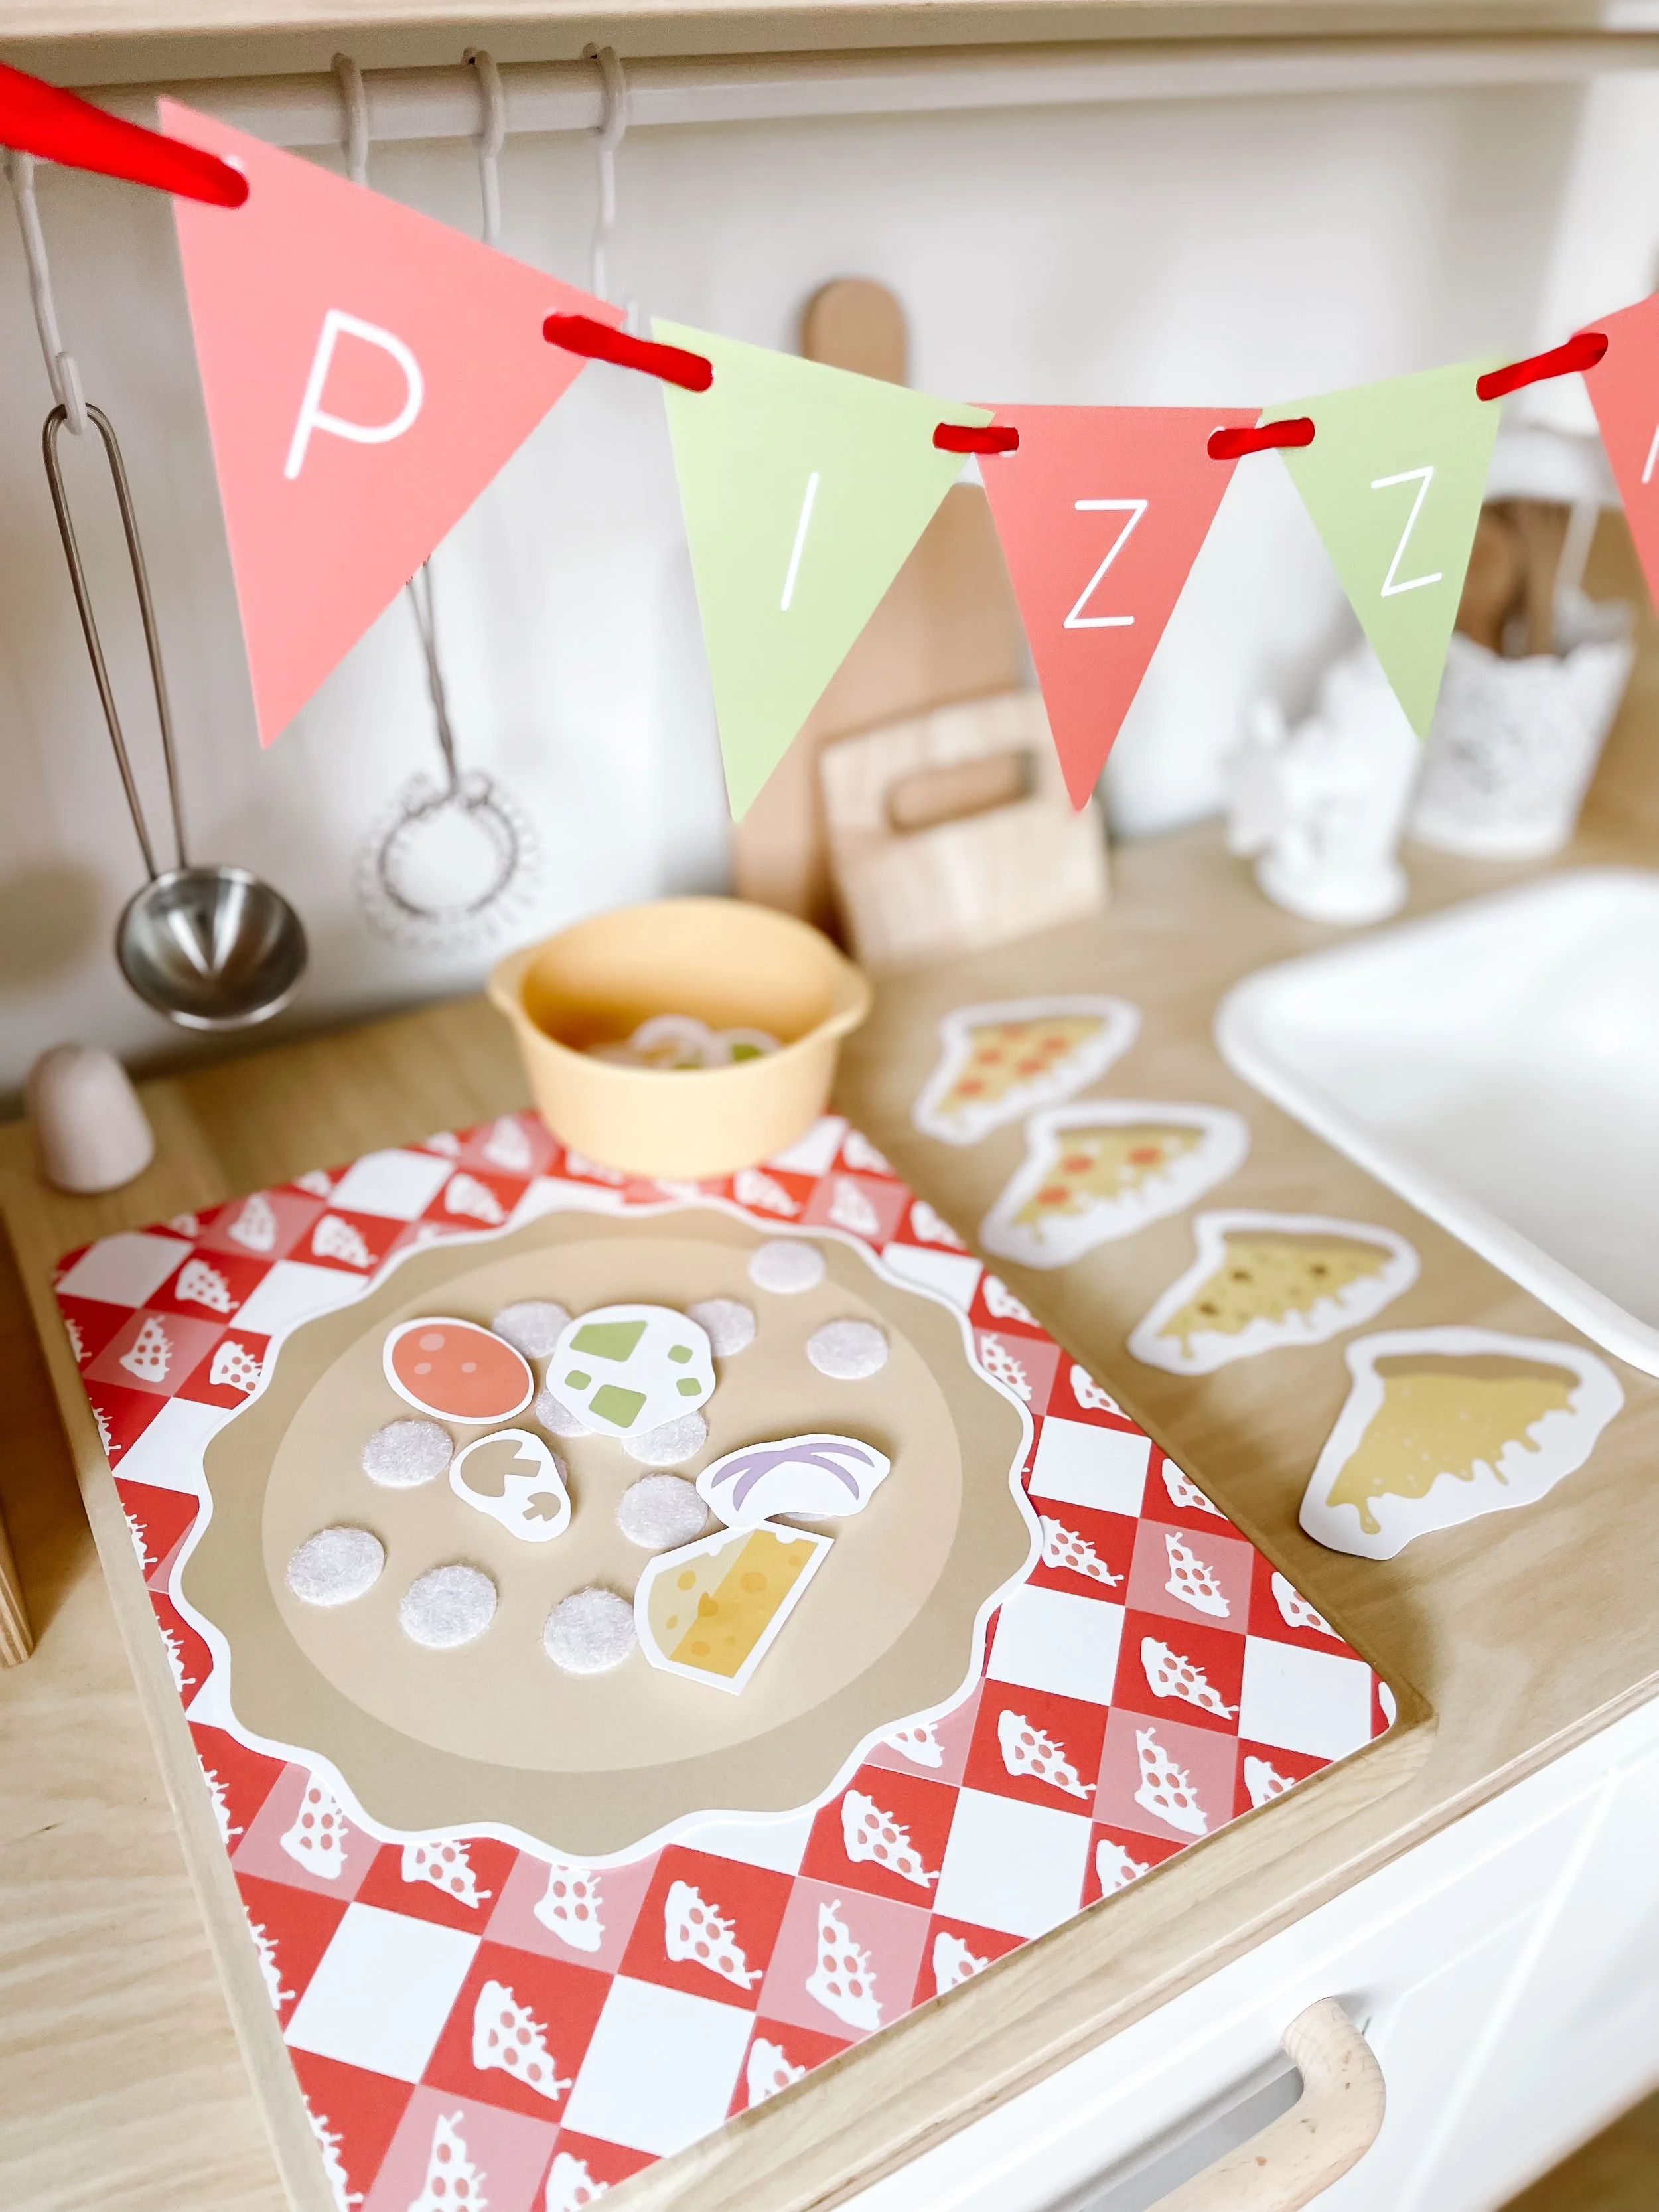
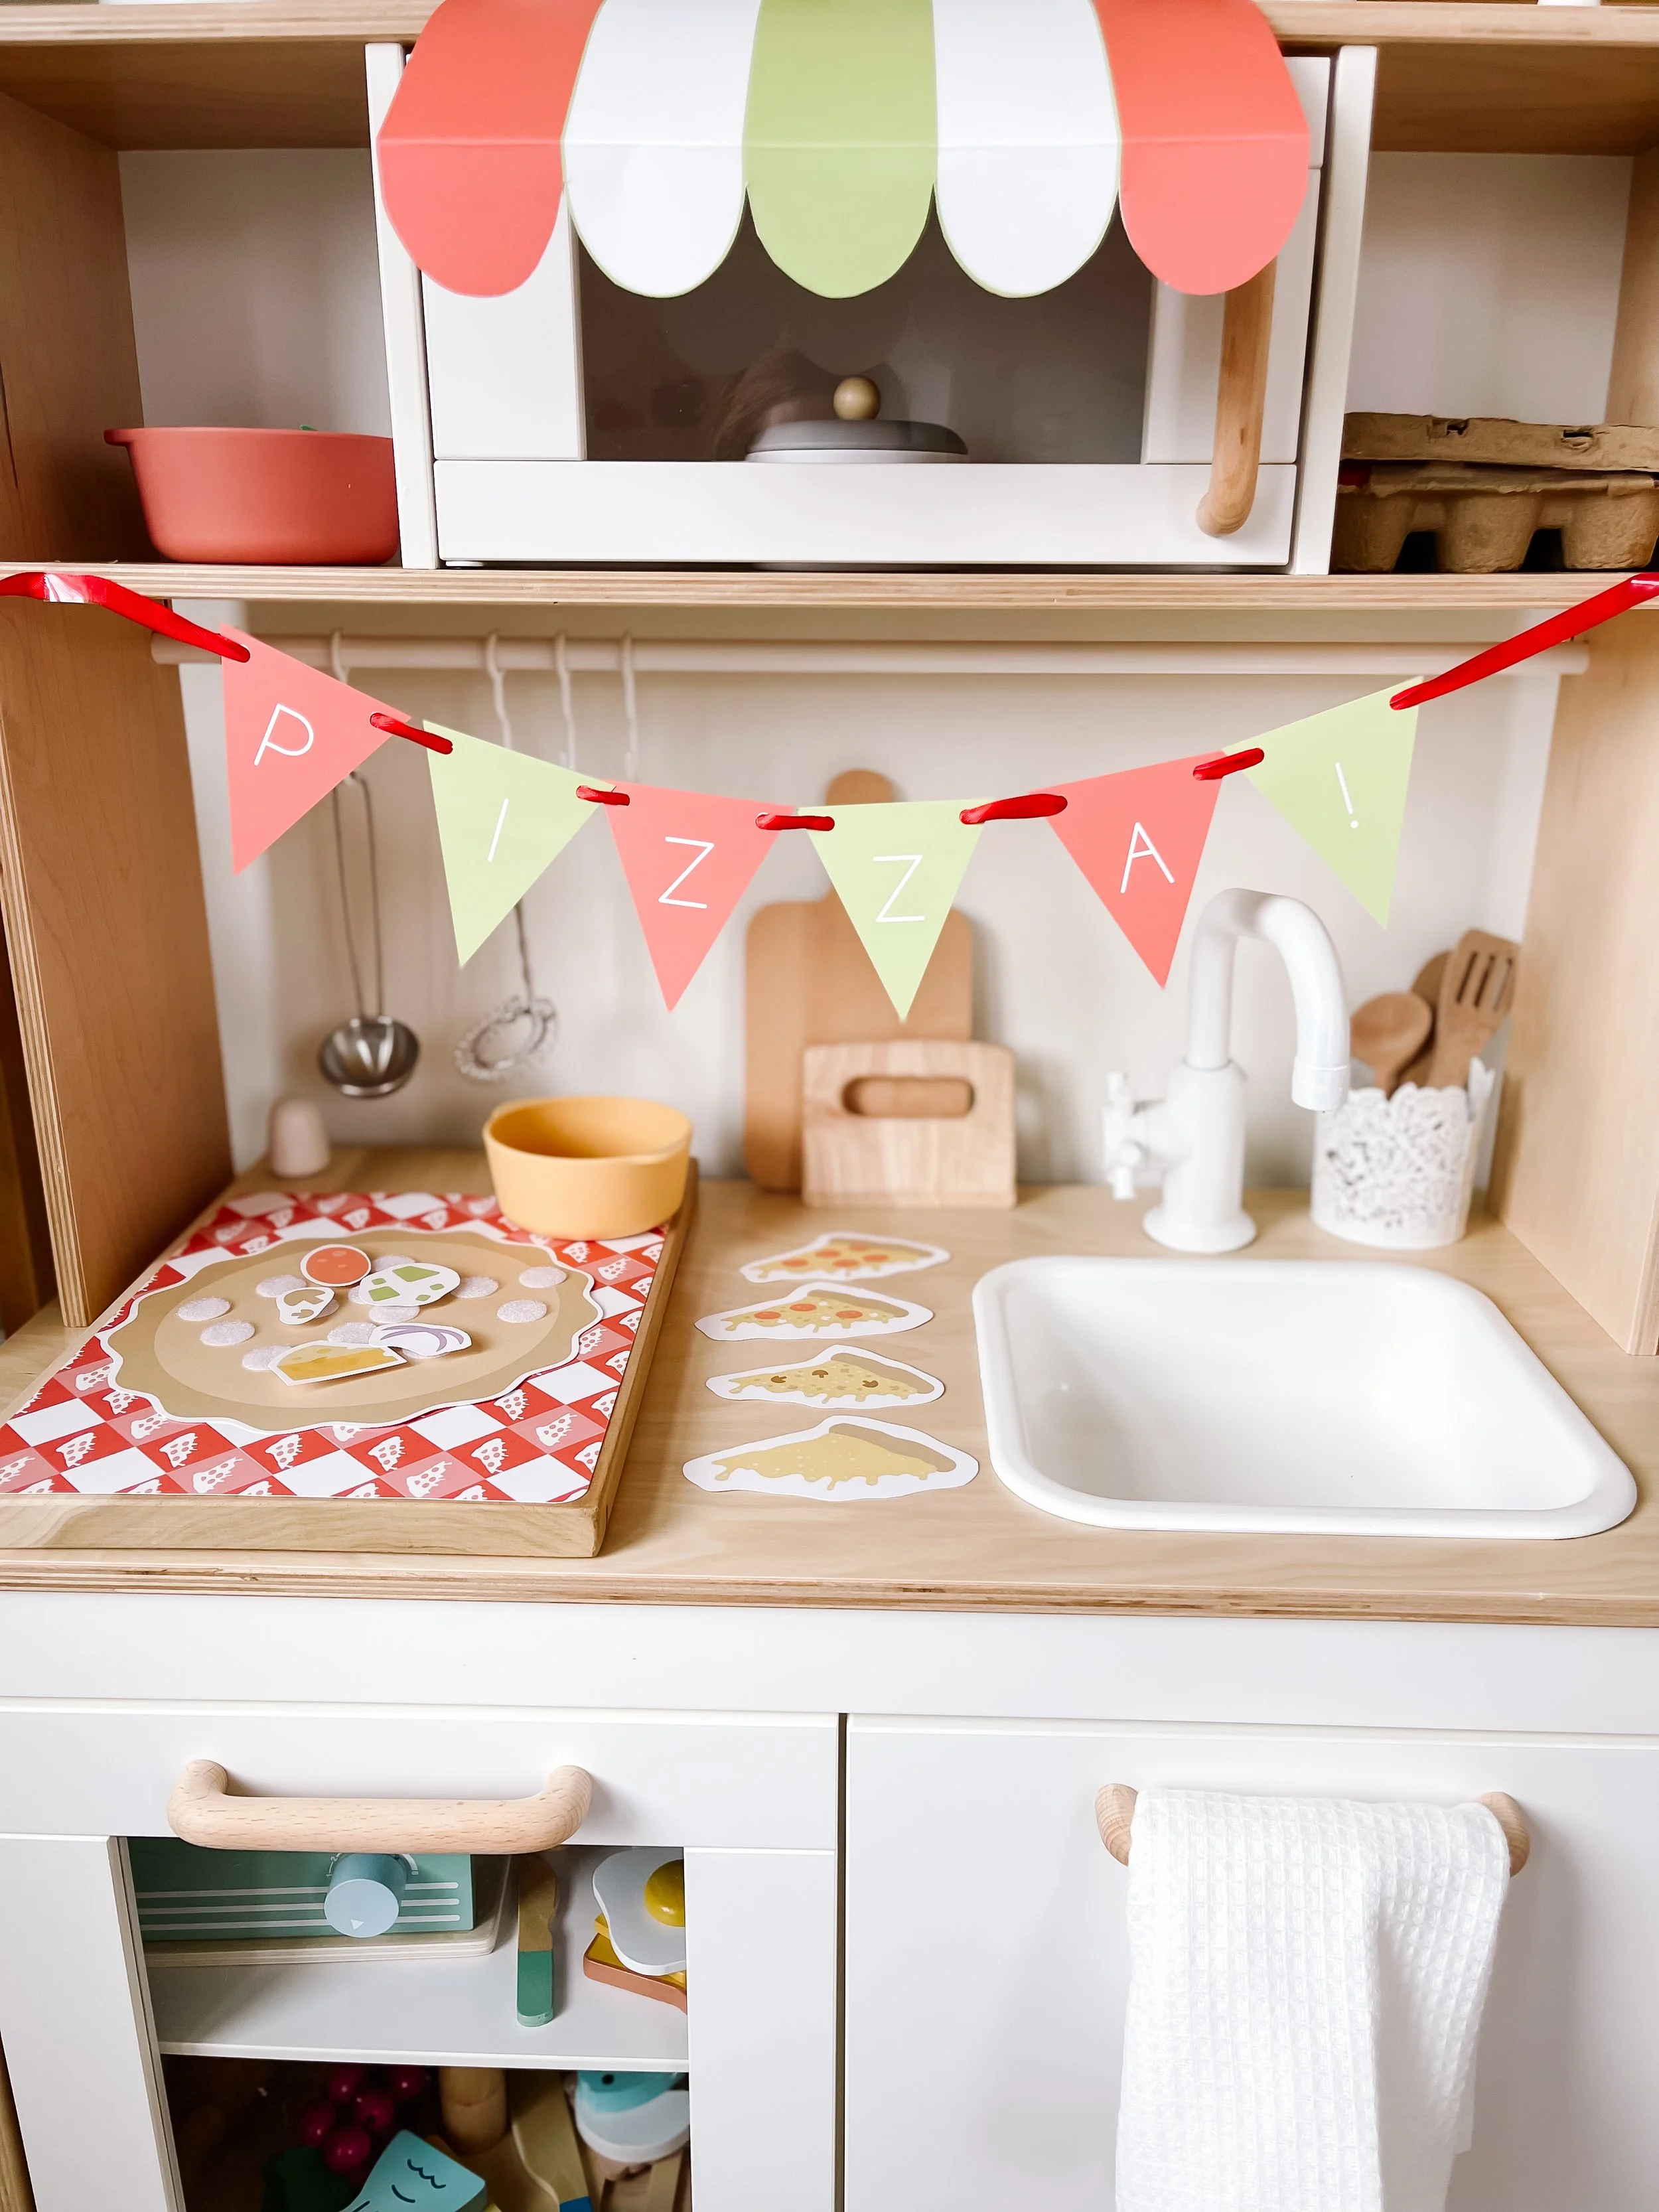
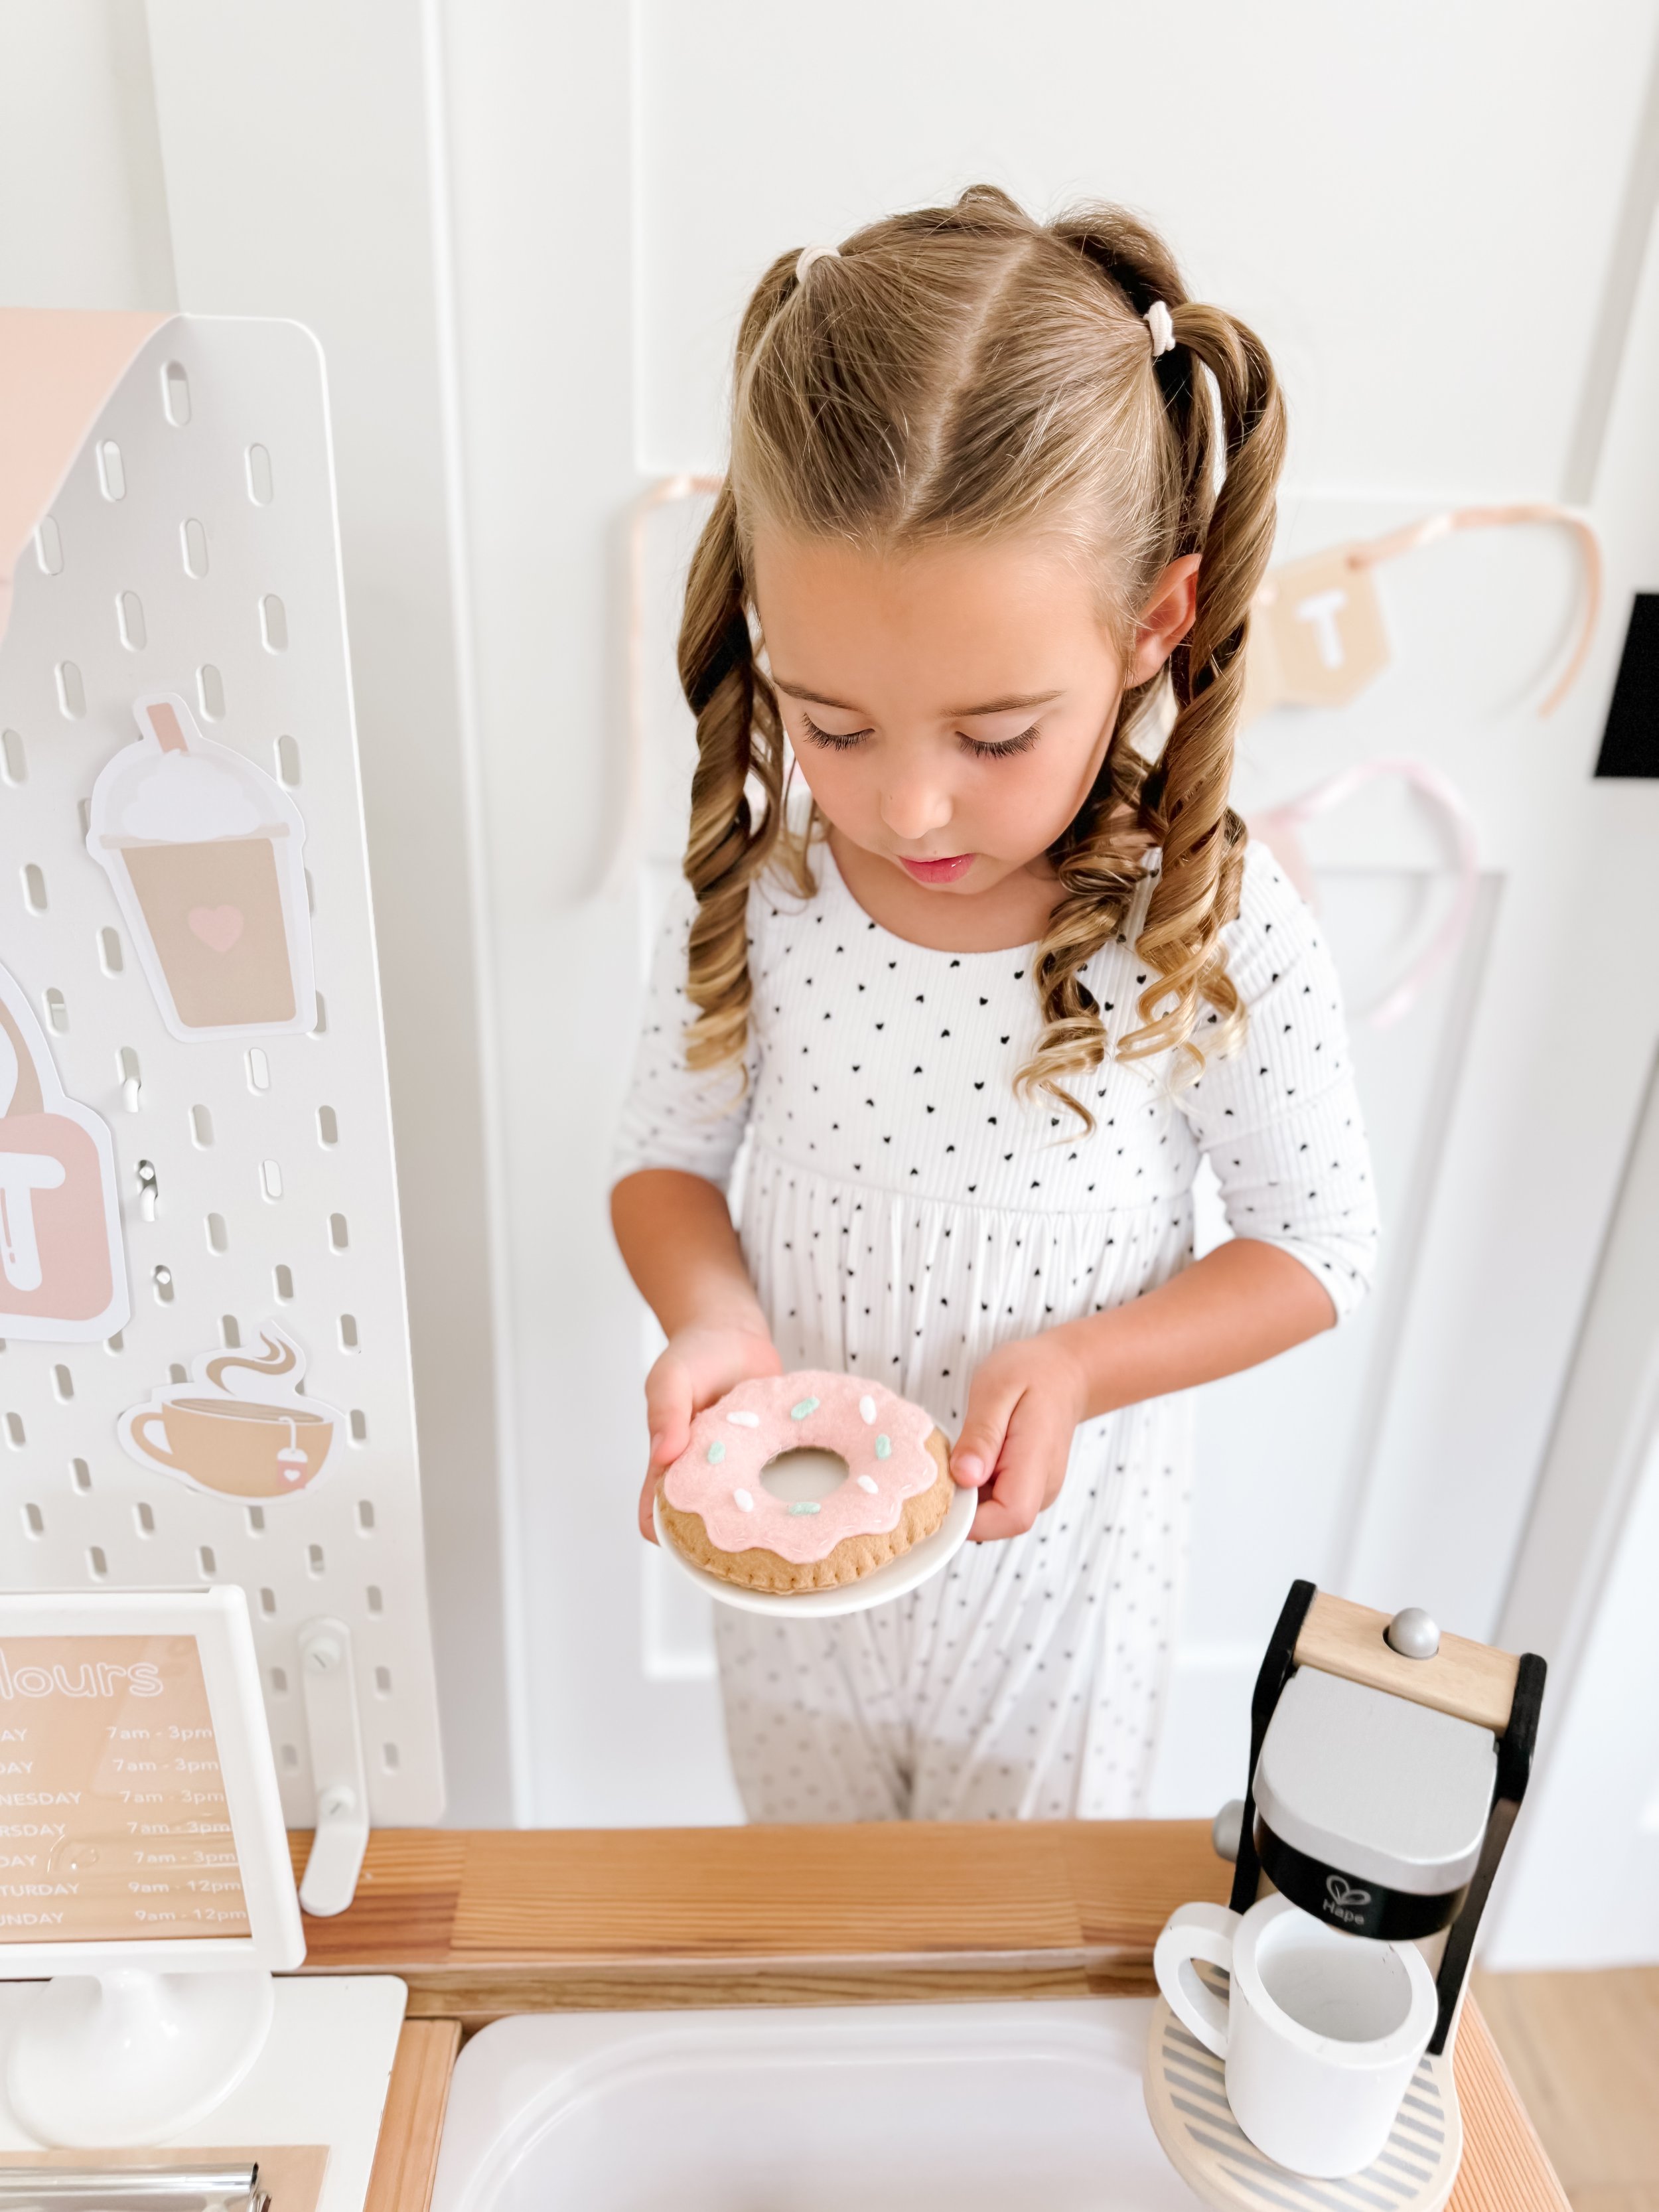
Donut Shop Dramatic Play

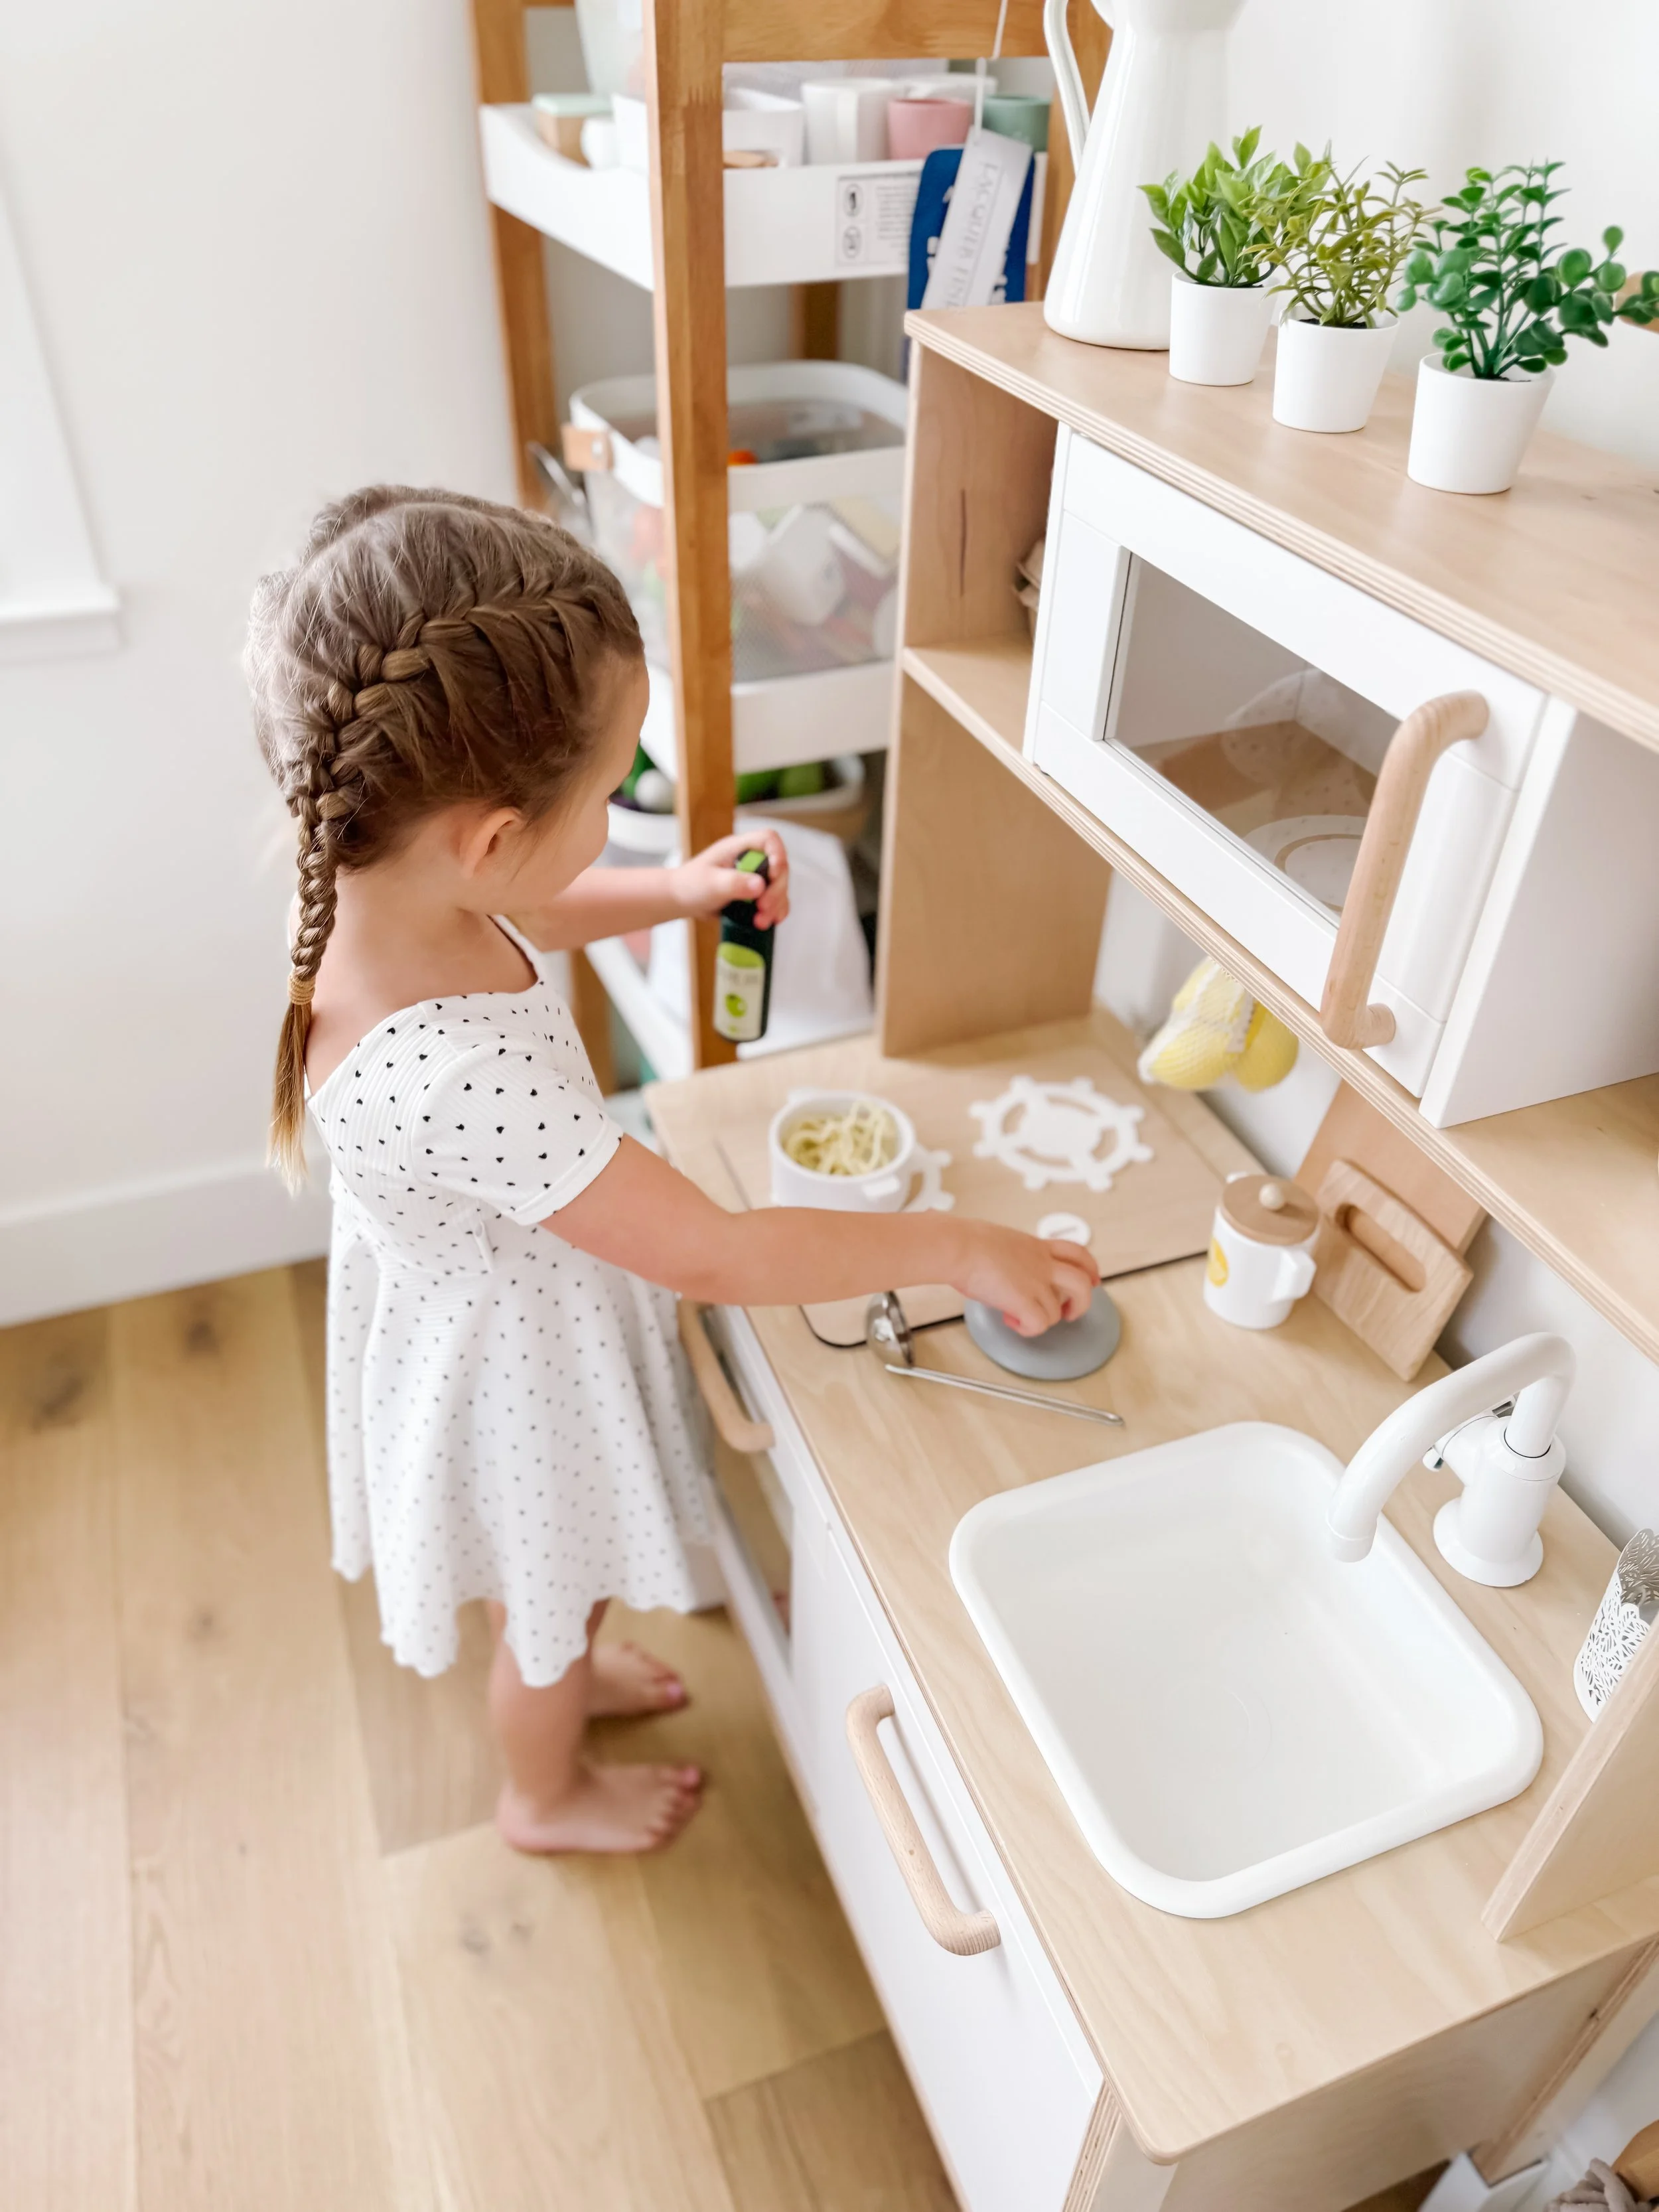
Next, we have a donut shop dramatic play setup, which transforms your play area into a bustling donut shop. This activity fosters imaginative play and social skills as children role-play as bakers, cashiers, and customers.

Materials Needed:

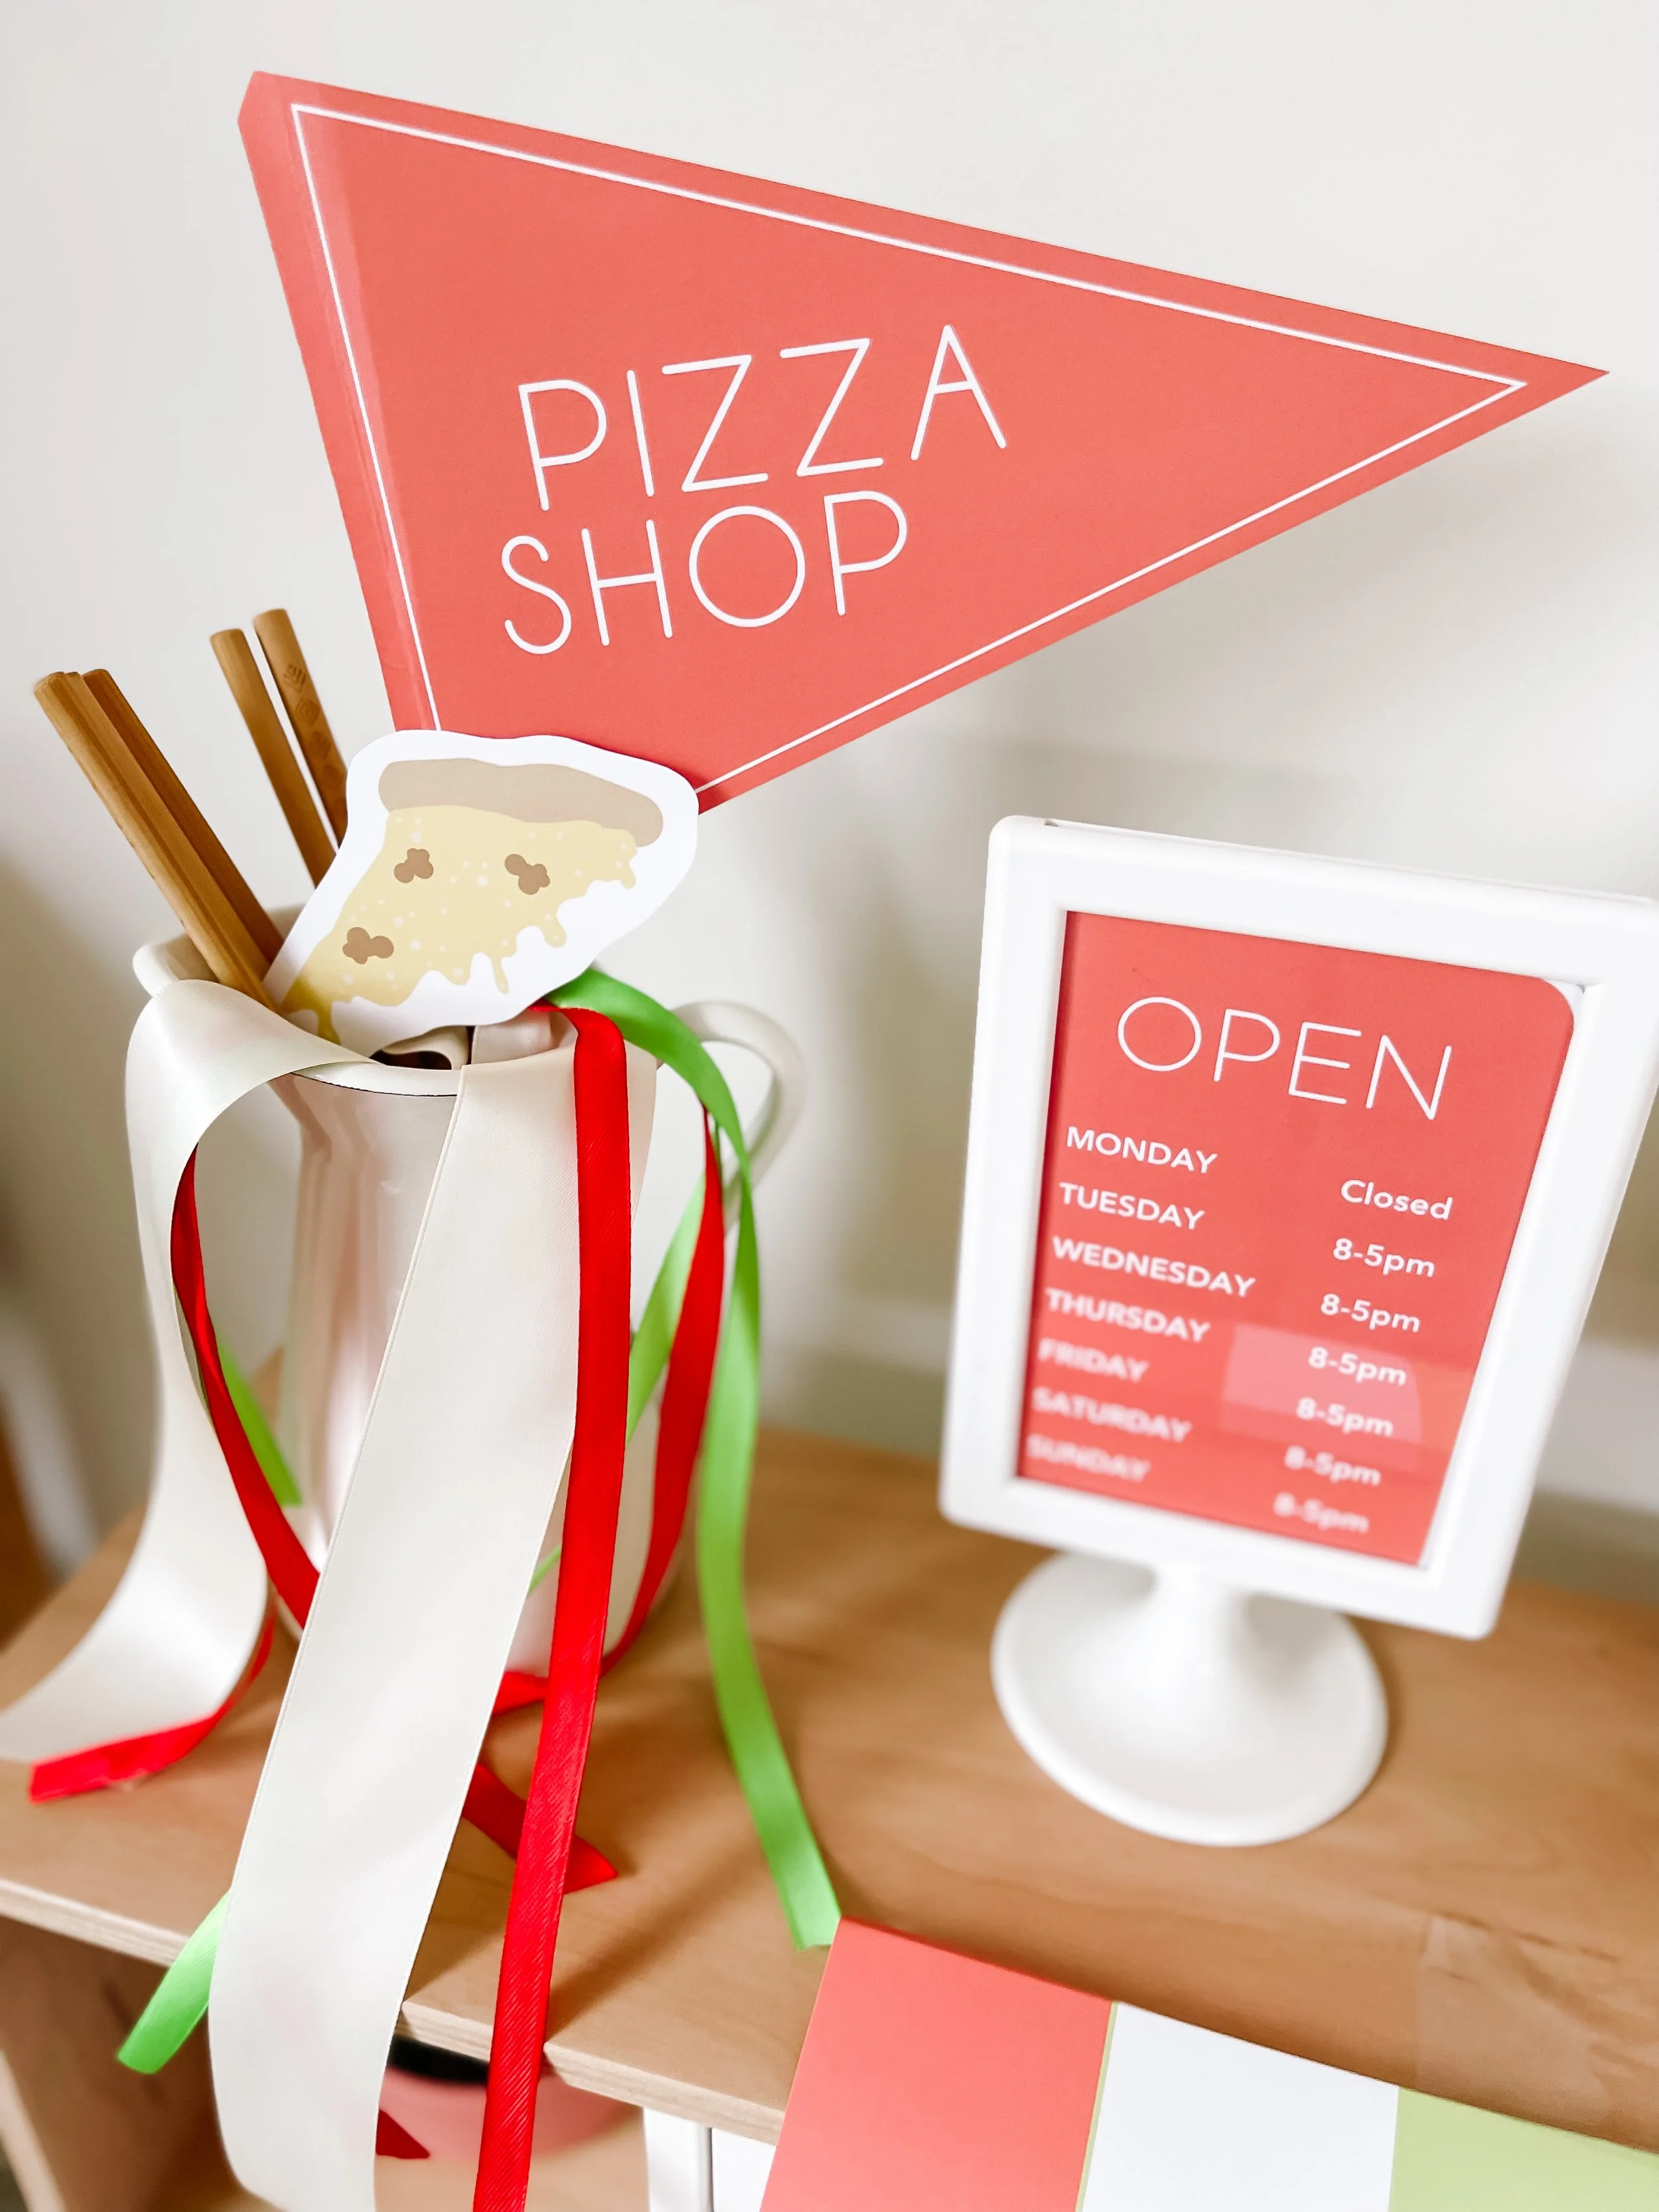
  • Donut shop play setup (cash register, play money, menu, etc.)

  • Pretend donuts (felt, plastic, or homemade)

  • Sensory bin

Activity Instructions:

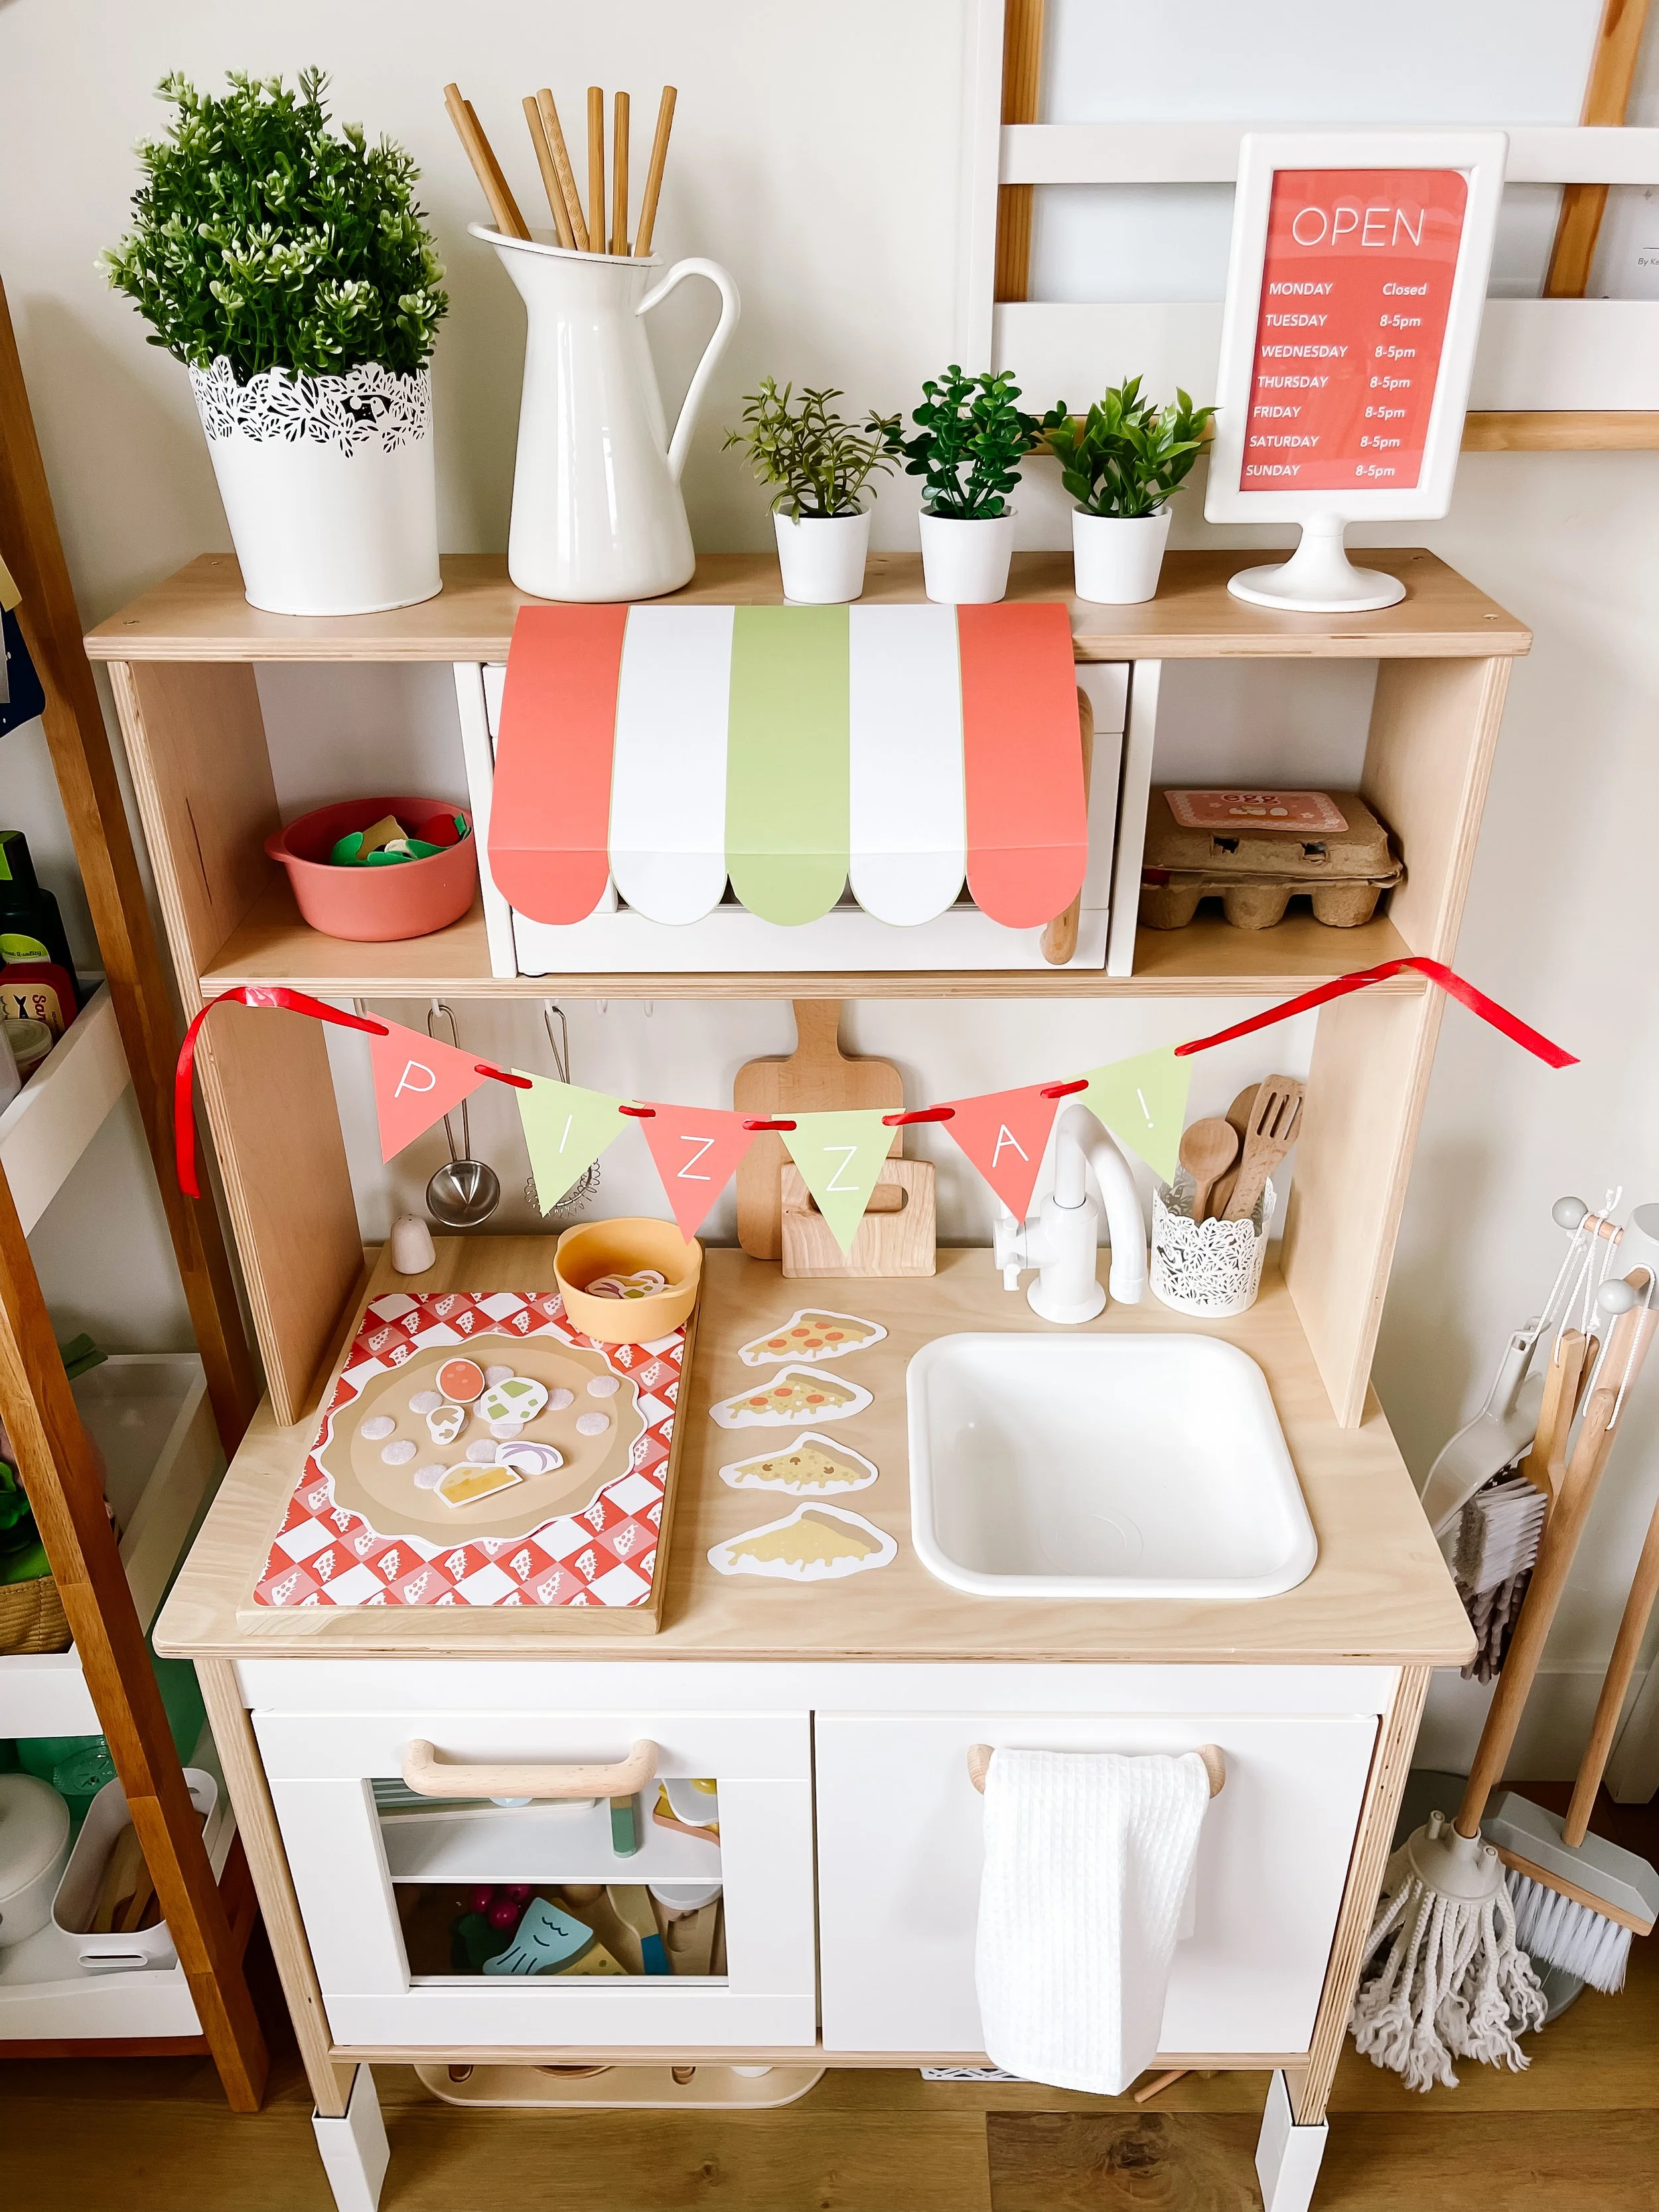
  1. Set up a donut shop play area with a cash register, play money, and a menu.

  2. Provide pretend donuts for your child to sell.

  3. Encourage your child to take on different roles such as baker, cashier, and customer.

  4. Engage in role-play scenarios to enhance social interaction and imaginative play.

IMG_2835.JPEG IMG_2850_jpg.JPEG IMG_2838_jpg.JPEG IMG_2840_jpg.JPEG IMG_2841_jpg.JPEG IMG_2858_jpg.JPEG

Pool Noodle Donuts with Shaving Cream Frosting and Sprinkles

Our third activity involves creating pool noodle donuts with shaving cream frosting and sprinkles. This activity combines sensory exploration with creative fun, allowing children to decorate their own donuts.

Materials Needed:

  • Pool noodles (cut into donut shapes)

  • Shaving cream

  • Sprinkles (real or craft)

  • Sensory bin

Activity Instructions:

  1. Cut pool noodles into donut shapes and place them in a sensory bin.

  2. Provide shaving cream and sprinkles for your child to use as frosting and decorations.

  3. Encourage your child to decorate the pool noodle donuts, exploring the textures of the shaving cream and sprinkles.

  4. Discuss the different ways to decorate donuts and the sensory experience of the materials.

IMG_2842_jpg.JPEG IMG_2843_jpg.JPEG IMG_2845_jpg.JPEG IMG_2846_jpg.JPEG IMG_2850_jpg.JPEG

Donut shop sensory play is a delightful way to engage children in imaginative play while developing fine motor skills and creativity. With our free printable kits and the detailed activities above, your little ones are sure to have a blast while learning and playing. Dive into these sweet sensory activities and watch their creativity soar!

25 Words Donut Shop Play Vocabulary List

  1. 1. Donut

  2. 2. Bake

  3. 3. Frosting

  4. 4. Sprinkle

  5. 5. Shop

  6. 6. Customer

  7. 7. Baker

  8. 8. Cashier

  9. 9. Menu

  10. 10. Flavor

  11. 11. Decorate

  12. 12. Serve

  13. 13. Purchase

  14. 14. Pretend

  15. 15. Sweet

  16. 16. Glaze

  17. 17. Dough

  18. 18. Fill

  19. 19. Topping

  20. 20. Display

  21. 21. Order

  22. 22. Ring

  23. 23. Hole

  24. 24. Soft

  25. 25. Create

Explore the magic of sensory play with these donut shop-themed activities and let your child's imagination take flight. Don't forget to download our free printable kits for even more fun and engaging play!

IMG_2868_jpg.JPEG
IMG_2875_jpg.JPEG
IMG_2878_jpg.JPEG
IMG_2890_jpg.JPEG
IMG_2893_jpg.JPEG
IMG_2897_jpg.JPEG

By incorporating these sensory activities into your playtime, you'll provide endless entertainment and developmental benefits for your children. Happy playing and happy baking!

Tags donut shop, donut shaving cream activity, donut sensory play, donut themed activity ideas, kids ideas for donut activities, donut play, dramatic play printables, free printable activities for kids
2 Comments

IKEA Play Kitchen Hack: How I Turned Ours Into a Functional Learning Space (+Pretend PLay Shops)

January 31, 2024 Kylie Tuosto

What You’ll Learn In This Post:

  • How to organize an IKEA play kitchen for better play

  • How to encourage independent play

  • How to turn your kitchen into a pizza shop, bakery, and more

  • Quick hacks/swaps to make the Duktig IKEA kitchen look beautiful in your home


When I first brought home our IKEA play kitchen, I loved how cute it looked—but I quickly realized it wasn’t being used to its full potential.

It was more of a toy than a space.

So I decided to transform it into something more intentional—a functional, engaging learning space that would encourage independent play, creativity, and real-life skill building. I hope you love this IKEA play kitchen hack as much as I do.

What started as a simple upgrade turned into one of the most used areas in our home.

ikea play kitchen before DIY remodel
ikea play kitchen diy transformation remodel into kids learning space

The Before

Before the transformation, the play kitchen felt:

  • underutilized

  • lacking structure

  • missing opportunities for meaningful play

It had the basics, but it didn’t invite my daughter to stay and play for long periods of time.
I wanted to create a space that felt:

  • inviting

  • purposeful

  • and easy for her to use independently


The Transformation

Instead of treating this like a toy, I approached it like a mini functional space within our home.
Every change I made was focused on one goal: making play more engaging, accessible, and intentional.

IMG_5373_jpg.jpg IMG_5364.jpg IMG_5365.jpg IMG_5366.jpg IMG_5367_jpg.jpg IMG_5370.jpg IMG_5371.jpg IMG_5372_jpg.jpg IMG_5374_jpg.jpg

What I Changed

1. Created Defined Play Zones

I styled the kitchen so each area had a purpose:

  • cooking area

  • prep space

  • storage

  • display

This helped guide play naturally and made it easier for my daughter to understand how to use the space and created a pretend play shop experience.


2. Simplified and Rotated Materials

Instead of overcrowding the space, I:

  • reduced the number of items

  • displayed only a few at a time

  • rotated items to keep it fresh

This instantly made the space feel calmer and more engaging.


3. Made Everything Kid-Accessible

One of the biggest changes was making sure everything was within reach.

  • easy-to-grab utensils

  • open storage bins

  • visible materials

This allowed for independent play without constant help.


4. Added Real-Life Play Elements

I incorporated items that mimic real-life kitchen experiences:

  • play food

  • containers and jars

  • simple prep setups

This turned pretend play into something more meaningful and immersive.

Printable Play Food →


5. Styled It Like a Real Space (Not a Toy)

This was the biggest shift.
Instead of treating it like a toy, I styled it like a mini version of a real kitchen:

  • neutral colors

  • simple decor

  • clean layout

This made it feel like a true part of our home.


The Result

After the transformation, everything changed.
This space became:

  • one of the most used areas in our home

  • a go-to for independent play

  • a place where my daughter can engage for longer periods of time

It’s no longer just a toy—it’s a functional learning environment.


Why This Works

This setup works so well because it focuses on:

  • simplicity over clutter

  • access over perfection

  • function over decoration

By making the space easy to use and visually inviting, it naturally encourages more play.


The Game-Changer: Turning Your Play Kitchen Into Shops

One of my favorite parts about this setup is that it’s not just a play kitchen—it’s a fully customizable play space.
With just a few simple swaps, we can completely transform it into different themed shops using our GoodnightFox printables.
This keeps the space feeling new and exciting without needing to buy new toys.
Example:
Pizza Shop Setup
For this setup, we turned the kitchen into a pizza shop by adding:

  • printable pizza menus

  • shop signage + banner

  • play pizza ingredients and toppings

  • themed accessories

Suddenly, the same kitchen becomes an entirely new experience.


Why This Works So Well

Instead of constantly buying new toys, we:

  • reuse the same base setup

  • swap out printables and a few props

  • create a completely new play theme

It’s a simple way to:

  • extend play time

  • spark imagination

  • introduce new vocabulary and concepts


IceCream.png
Ramen.png
Bakery.jpeg
GroceryStore.png
FallCafe.png

Other Shop Ideas You Can Create

This same setup can easily transform into:

  • Ice Cream Shop

  • Coffee Shop

  • Bakery

  • Ramen Shop

  • Grocery Store

Each one creates a brand new play experience using the same space.


A Simple Way to Keep Play Fresh

Rotating themes every few weeks has made a huge difference in how long my daughter stays engaged.
It turns this from a one-time setup into something that evolves over time.
And the best part?
It takes just a few minutes to switch everything out.


Tips for Creating Your Own Play Kitchen Setup

If you want to recreate this in your own home:

  • start with what you already have

  • remove more than you add

  • keep materials visible and accessible

  • rotate items to keep interest high

  • think of it as a “real space,” not just a toy


Final Thoughts

Transforming this IKEA play kitchen completely changed how my daughter plays at home.
It’s a simple shift, but it made a huge difference.
And the best part?
You don’t need a lot of space or expensive materials to create something just as impactful.


ikea kitchen makeover

I’m so excited to share this little labor of love — our DIY play kitchen. We recently purchased the IKEA Duktig play kitchen and I couldn’t wait to give it a very small but beautiful renovation. I definitely wasn’t ambitious enough to take on an entire paint just, but just by spray painting all of the grey pieces white, it become a completely modern and beautiful kitchen to go with our modern white farmhouse vibes.


Links to everything featured:

I want to start by sharing links to everything included here so that you can recreate this look! As far as children’s kitchen renovations go, these are some of the simplest accents you can find. I tried to keep everything as cheap and cost effective as possible because I really didn’t want to overspend.

Kitchen transformation

Here’s everything I used to spruce up the look of the kitchen itself. It cost about $100 total to do the makeover of the kitchen itself. Which is quite reasonable considering most other play kitchens cost $150 or more.

  1. Ikea DUKTIG Kitchen - $79

  2. Handles - $14.99

  3. Knobs - $10.79

  4. Sand paper sponges - $8.99

  5. White Spray Paint — Luckily I already had spray paint and primer on hand!

  6. Wood & white acrylic stove Use code GOODNIGHTFOXFRIEND to save

Get the Stove

IMG_4710.jpg
IMG_4711_jpg.jpg
IMG_4715.jpg
IMG_4729.jpg
IMG_4730.jpg
IMG_4770.jpg
IMG_4900.jpg

STEP BY STEP INSTRUCTIONS for the cutest DIY IKEA DUKTIG Modern Play Kitchen renovation

I wanted to go super light weight on this transformation so I kept the steps as simple as possible.

  • Step 1: Open up the IKEA Duktig Kitchen — I opened it up and laid out the pieces. There’s actually way more pieces than I thought and it took me about 2 hours total over the course of 3 days to put it all together. Mostly because I was quite literally waiting on the paint to dry.

  • Step 2: Pull out the grey pieces and use the sand paper sponges to sand them down. I sanded them until I saw consistent scratches across the surface area. You can definitely see and feel the dust of the plastic so make sure to wipe down or wash and dry the pieces before you paint them.

  • Step 3: Lay the pieces out in a card board box to paint. Shake your spray paint bottles vigorously. Make sure to go slow and do very light coats of paint. It’s a terrible long and patience-trying process. I probably did 20 coats of paint over the course of 3 days. I did 10min drying time between each coat. If you spray too much, the paint will pool and drip. Then you have to wait for it to dry, sound out the drips and reapply. It’s more painful to sand and repaint so just GO SLOW and WAIT.

  • Step 4: Flip over the pieces to coat the other sides. If you don’t wait for a full dry before you do this the pieces will stick to the cardboard.

  • Step 5: If you see any cracks or drips you can sand them out. For this final finish, I sanded with a nail buffer because the small grain.

  • Step 5: Completely the assembly of the kitchen!


IMG_5082.jpeg
IMG_5121_jpg.jpeg
IMG_5093.jpeg
IMG_5057_jpg.jpeg
IMG_5067_jpg.jpeg
IMG_5097_jpg.jpeg
IMG_5103_jpg.jpeg
IMG_5115_jpg.jpeg
IMG_5127_jpg.jpeg

The most adorable play food

Once you have your kitchen assembled, you’re of course going to want to go grocery shopping! So I’ve assembled the perfect list of where to find the best play food sets. They’re both comprehensive and so adorable.

Felt Play Food

  • DIY Felt Food by Felted Food

  • Felt Play Food by IKEA

Wooden Play Food

  • Wooden Egg Carton

  • Wooden Playfood from Temu

  • Steak Dinner Play Food

  • Pasta Dinner Play Food

  • Toast & Jam Play Food

  • Grocery Items by Tender Leaf

  • Lemonade Set

  • Tea Set by NuniKids

Printable Play Food

  • Printable Play Food by Goodnightfox


White & Wood play kitchen utensils & Appliances

And of course you’re also going to want the most adorable pots, pans, and utensils to match.

  • White Collander

  • Ikea Milk Jug

  • Stainless Steel Pots & Pans


Printable play food
IMG_5139.jpeg IMG_5137.jpeg IMG_5124.jpeg IMG_5136.jpeg IMG_5133_jpg.jpeg IMG_5132.jpeg IMG_5123.jpeg

Stocking the play kitchen with thE cutest wood play food

Stocking Sofia’s play kitchen with the most adorable play food was so much fun. I really wanted beautiful pastel colors and I was able to find a variety of options for very reasonable prices on Temu and a few on Amazon. Better yet, we were able to store about 10 different sets of play food all within the kitchen and our tier stacking shelves. I was surprised that everything fit! Sofie also got an adorable little kitchen appliances set for the holidays and everything matched perfectly together.

IMG_5110_jpg.jpeg IMG_5103_jpg.jpeg IMG_5108_jpg.jpeg IMG_5076.jpeg IMG_5109_jpg.jpeg IMG_5104.jpeg IMG_5102_jpg.jpeg

Pretend Salad Play Food

Sofia had a blast mixing up this adorable salad play food set. It sparked so many ideas for her about what flavor combinations would work well together, what the dressings would taste like and should she be adding salt and pepper? It was so much fun to watch her eyes light up and she mixed it together. I love this play food set because it has such soft and beautiful pastel colors and the food pieces all lay nice and flat in the bowl.

IMG_5056.jpeg IMG_5062_jpg.jpeg IMG_5072_jpg.jpeg IMG_5057_jpg.jpeg IMG_5058.jpeg IMG_5064.jpeg

Time for a tea party

We absolutely loved this cute little tea party set by NunuKids. It comes on this adorable little tray — and while everything doesn’t quite fit on the tray (my only gripe), it’s such a cute little set with the little lemon slices and teaspoons and tea pots. I can’t wait to do an entire dramatic play setup for a tea party. It’ll be so much to have this set handy.

IMG_5126_jpg.jpeg IMG_5093.jpeg IMG_5094.jpeg IMG_5127_jpg.jpeg

Let’s make breakfast!

Okay breakfast is totally one of my favorite meals so I’m definitely a sucker for the breakfast play food. I got these two adorable sets of play food and they just look so cute together. They include eggs, cheese, butter, jam, bread, orange juice, milk, and of course the cutest little toaster. Sofie got an absolute kick out of the toaster because she can use the handle to pop up the bread and it goes flying around the play room.

IMG_5068_jpg.jpeg IMG_5067_jpg.jpeg IMG_5076.jpeg IMG_5071.jpeg IMG_5069_jpg.jpeg

Making a fruit salad

I couldn’t resist this cute fruit salad kit either! It comes with two dressings, fruit, salad utensils and the cutest little pink mixing bowl. This was the first one Sofie go to play with and her eyes lit up when she saw the bright colors. And of course the grapes are a fun sensory texture to enjoy. The salad gave us a great opportunity to talk about healthy fruits and how different types of carbohydrates effect our bodies differently — I’m always one to throw a little education into the fun.

IMG_5121_jpg.jpg IMG_5122.jpg

Pantry Items

I’ve been obsessed with these pantry items from Tender Leaf for a really long time now. So when I decided the take the plunge and buy the play kitchen, these were top of my list. I love the different textures of the bag of peas, the lemons, and of course the high quality of the play food itself. I knew these items would be a great addition to my Ikea play kitchen renovation.

IMG_5115_jpg.jpg IMG_5116_jpg.jpg IMG_5117.jpg

Popsicles play food

You can’t have a play kitchen without a few sweet treats! And I just loved the look of these pastel popsicles. They’re so perfect for summer play activities and Sofia loves giving them out.

IMG_5080.jpg IMG_5081.jpg

Burger Time PLAY FOOD

I’m so obsessed with this little cheese burger set. It’s so perfect for a fun fast food night.

IMG_5097_jpg.jpg

Charcuterie board play food

This little cheese board was too adorable to pass up! I just loved the little cheese plate and since we often have a cheese plate for our fancy dinner nights at home this was the perfect way for Sofia to make believe.

IMG_5444_jpg.jpeg IMG_5441_jpg.jpeg IMG_5446.jpeg IMG_5445_jpg.jpeg IMG_5442_jpg.jpeg

Cutest lemonade stand wooden play food

I couldn’t resist this adorable set. It’s such a cute way to make a sweet lemonade stand! And I want to repurpose this kit for my lemonade stand dramatic play setup.


The Cutest Wood Stove for IKEA DUKTIG

I had this stove custom designed by @WonderYearsPlay because I knew I needed to complete the white & wood look. Debbie did such an amazing job and I couldn’t wait to share it with all of you play kitchen lovers. You can purchase the Wood & white acrylic stove here and don’t forget to use code GOODNIGHTFOXFRIEND to save!

Tags ikea play kitchen hack, ikea play kitchen ideas, kids play kitchen setup, toddler pretend play kitchen, play kitchen organization ideas, dramatic play kitchen setup, pretend play shop ideas, pizza shop pretend play, kids bakery pretend play, dramatic play printables, toddler dramatic play setup, learning through play kitchen, easy sensory play setups, indoor activities for toddlers, toddler sensory play ideas
5 Comments

Doctors office dramatic play kit

May 30, 2022 Kylie Tuosto

Sofia loves pretend play so I knew this doctors office dramatic play setup would be a huge hit. This time I laminated all of the materials so that they would last longer and I’m glad I did because Sofia loved pretending to be a doctor. Dramatic play is so great for expanding toddler’s minds and exposing them to new words, phrases, and objects. Here’s a little more about what’s included in this kit:

  • Doctors Office Play Kit Wooden

  • Doctors Office Printable Signs & Dramatic Play Kit

  • Human Body Flashcards

  • human Organs Flashcards

Download & PRINT

IMG_2703.jpg IMG_2704.jpg IMG_2705.jpg IMG_2715.jpg

Transform Your Play Space with a Doctor-Themed Dramatic Play Setup

Creating a doctor-themed dramatic play setup can be an engaging and educational experience for children. Using our printable doctor dramatic play materials, you can set up an immersive and fun play area that encourages learning and creativity. Here’s how you can create three exciting bins to enhance the experience:


IMG_2716.jpg IMG_2717.jpg IMG_2719.jpg IMG_2721_jpg.jpg IMG_2723.jpg IMG_2726.jpg IMG_2728.jpg IMG_2729.jpg IMG_2738.jpg

Bin 3: Doctor Supplies

Here’s everything you need to setup your doctor supplies bin! This one is great for dramatic play — pretend to be the doctor and patient with the printable intake form. Use the cotton swabs and tongue depressors to treat minor illnesses!

  • Cotton balls

  • Swabs

  • Tongue depressors

  • Bandaids

Instructions:

  1. Collect Supplies: Gather all the doctor supplies and organize them in a bin.

  2. Set Up Stations: Create different stations for each type of supply, encouraging kids to use them in their pretend play.

  3. Role Play: Children can use cotton balls for cleaning wounds, swabs for checking ears and throats, tongue depressors for oral exams, and bandaids for treating pretend injuries.


IMG_2744_jpg.jpg IMG_2742_jpg.jpg IMG_2743_jpg.jpg

Bin 2: Blood and Guts

Here’s everything you’ll need to create a blood and guts sensory plan bin. This one is perfect for little ones who like to get their hands dirty! Especially perfect because it’s taste safe — and dare I say yummy!

  • Egg noodles

  • Red food coloring

Instructions:

  1. Cook the Noodles: Boil the egg noodles according to the package instructions until they are fully cooked.

  2. Add Color: Drain the noodles and mix in red food coloring until the noodles are evenly coated.

  3. Set Up the Bin: Place the red-colored noodles in a sensory bin.

  4. Pretend Surgery: Kids can use the noodles to simulate blood and guts, practicing their surgical skills in a fun and safe environment.


IMG_2745_jpg.jpg IMG_2750_jpg.jpg IMG_2751_jpg.jpg IMG_2752_jpg.jpg IMG_2754_jpg.jpg IMG_2755_jpg.jpg IMG_2760_jpg.jpg IMG_2761_jpg.jpg

Bin 3: Frozen Organs

Here’s everything you need to make this frozen organs sensory activity bin.

  • Human organ silicone molds

  • Jello mix

  • Human body tray

  • Ice

Instructions:

  1. Prepare the Jello: Follow the instructions on the Jello mix to prepare the solution.

  2. Pour into Molds: Pour the Jello into the human organ silicone molds and let it set in the refrigerator.

  3. Create the Frozen Body Tray: Once the Jello organs are set, place them in a human body tray filled with ice.

  4. Freeze: Place the entire tray in the freezer until the organs and ice are completely frozen.

  5. Play Time: Let kids explore the frozen organs, encouraging them to identify and "operate" on the different body parts.


Vulputate Commodo Ligula Elit Condimentum Aenean eu leo Quam Cursus Amet Pellentesque Risus Ridiculus Porta Etiam Ultricies Vulputate Commodo Ligula Elit Condimentum Aenean eu leo Quam Cursus Amet Pellentesque Risus Ridiculus
Gallery Block
These are example images. Double-click here to replace these images with your own content. Learn more

25 Doctor Themed Vocabulary Words for Preschoolers

Expand your child's vocabulary with these doctor-themed words:

  1. 1. Stethoscope

  2. 2. Thermometer

  3. 3. Syringe

  4. 4. Patient

  5. 5. Bandage

  6. 6. Prescription

  7. 7. Diagnosis

  8. 8. Heartbeat

  9. 9. Checkup

  10. 10. Nurse

  11. 11. Medicine

  12. 12. Hospital

  13. 13. Exam

  14. 14. Treatment

  15. 15. Cure

  16. 16. Infection

  17. 17. Virus

  18. 18. Vaccine

  19. 19. Pulse

  20. 20. X-ray

  21. 21. Surgeon

  22. 22. Emergency

  23. 23. Cast

  24. 24. Chart

  25. 25. Clinic

Creating a doctor-themed dramatic play setup with these bins is a fantastic way to combine fun and learning. Don’t forget to download our printable doctor dramatic play materials to complete your setup. Visit the link in our bio to get started!


IMG_2774_jpg.jpg IMG_2776.jpg IMG_2780_jpg.jpg IMG_2812_jpg.jpg IMG_2814_jpg.jpg IMG_2815_jpg.jpg

Benefits of Doctor Themed Sensory Play

Engaging in sensory play, especially with themed setups like our doctor dramatic play, provides numerous benefits for children:

  1. Fine Motor Skills: Handling small items like cotton balls and swabs helps improve dexterity and hand-eye coordination.

  2. Imaginative Play: Pretend play scenarios foster creativity and imagination, allowing children to explore different roles and scenarios.

  3. Language Development: Using themed vocabulary during play helps expand a child’s language skills and comprehension.

  4. Social Skills: Playing in a group setting encourages teamwork, communication, and sharing.

  5. Cognitive Growth: Sensory play stimulates brain development by engaging multiple senses at once.


IMG_2859_jpg.jpg IMG_2860_jpg.jpg IMG_2861_jpg.jpg IMG_2862_jpg.jpg IMG_2866_jpg.jpg IMG_2868_jpg.jpg IMG_2869_jpg.jpg IMG_2870_jpg.jpg IMG_2871_jpg.jpg IMG_2872_jpg.jpg IMG_2873_jpg.jpg IMG_2874_jpg.jpg IMG_2875.jpg IMG_2876_jpg.jpg IMG_2877_jpg.jpg IMG_2878_jpg.jpg

Buy the flashcards

First off, these Body Parts Flashcards and Human Organs Flashcards were a great introduction to everything inside and outside of the body. These are super basic human anatomy, but Sofia loved pointing them out on her own body. And internal organs are challenging because she can’t see them, but we used phrases like “this is a stomach, like when your tummy is saying it’s hungry” and that really helped her imagine where they were.

IMG_8146.jpeg
IMG_8137.jpeg
IMG_8145.jpeg
IMG_8143.jpeg
IMG_8148.jpeg
IMG_8138.jpeg
IMG_8150.jpeg
6FA66DA8-CF5D-447F-90D8-B7EE8B2704BE.png
IMG_8139.jpeg
IMG_8140.jpeg
IMG_8141.jpeg
IMG_8142.jpeg
IMG_8144.jpeg
IMG_8147.jpeg
IMG_8149.jpeg
IMG_8151.jpeg
IMG_8146.jpeg IMG_8137.jpeg IMG_8145.jpeg IMG_8143.jpeg IMG_8148.jpeg IMG_8138.jpeg IMG_8150.jpeg 6FA66DA8-CF5D-447F-90D8-B7EE8B2704BE.png IMG_8139.jpeg IMG_8140.jpeg IMG_8141.jpeg IMG_8142.jpeg IMG_8144.jpeg IMG_8147.jpeg IMG_8149.jpeg IMG_8151.jpeg

The dramatic play all starts with the waiting room. Sofie put on the nurse badge and nurse hat and asked us to wait in the waiting room while she prepped the doctors office. She loved tidying up and getting everything ready. Then when we came in, she started by asking about my pain level using her pain level chart. This was a great way for us to discuss when it’s okay to be really upset vs when a boo boo is no big deal.

After assessing my pain level, Sofie proceeded with the patient exam. She started by getting my name and birthdate and all of the details and then filled out the form. She asked me where it hurt and today I told her my eyes were itchy and throat itchy from allergies. So she marked that down on her form and got to practice identifying her body parts.

After asking her up front exam questions, Sofie proceeded to checking all of my vital signs. She started with the blood pressure monitor which she loved wrapping around my arm. Then she moved on to her stethoscope (which she’s always afraid of at the doctor) and she used it to listen to my lungs.

Then she moved on to her diagnosis and of course wanted to use everything in her doctors toolkit to remedy my allergies. She started by giving me a shot in my arm (which she also hates at the doctor) so it was nice for her to get to be the one to administer the shot. Then she gave me a bandaid to cover up my shot, just like they do at the doctors.

After that she decided I should probably take some medicine to make me feel better and she gave me the little tray of pills and the pill bottle. Then she remembered she forgot to take my temperature so she used her thermometer to do that. She loves the real thermometer we have at home so it was great to see her interacting with the fake one.

IMG_8297.jpeg
IMG_8319.jpeg
IMG_8242.jpeg
IMG_8298.jpeg
IMG_8250.jpeg
IMG_8288.jpeg
IMG_8300.jpeg
IMG_8312.jpeg
IMG_8292_jpg.jpeg
IMG_8293_jpg.jpeg
IMG_8283.jpeg
IMG_8252.jpeg
IMG_8322.jpeg
IMG_8271.jpeg
IMG_8321.jpeg
IMG_8311.jpeg
IMG_8286.jpeg
IMG_8243.jpeg
IMG_8294_jpg.jpeg
IMG_8305.jpeg
IMG_8306_jpg.jpeg
IMG_8307_jpg.jpeg
IMG_8309_jpg.jpeg
IMG_8320.jpeg
IMG_8235.jpeg
IMG_8241.jpeg
IMG_8240.jpeg
IMG_8269.jpeg
IMG_8275.jpeg
IMG_8274.jpeg
Tags doctor office play, doctor dramatic play, dramatic play printables, printable resource library, nurse dramatic play, sensory play for kids, sensory activties

Get Featured

Have a shop that specializes in baby gifts? I'd love to feature your shop and products in one of my weekly roundups. Email me at goodnightfoxstudio@gmail.com.

Have a small shop?

Check out GoodnightFox wholesale we’d love to have you carry the GoodnightFox brand.

Free Letter of the Week Guide

Sign up with your email address to get a weekly Letter Guide A-Z for 26 weeks of sensory play inspiration.

You’ll also get access to free printables, new products and promotions.

Thank you! Check your email for your free 26-Letter of the Week activity guide printable poster.


Free Printable Activities

Check out our free printable library of resources. From activity books, dramatic play kits, memory games, flashcards and more, you can try the entire goodnightFox collection free.


GOODNIGHTFOX

Play-based learning resources that help toddlers learn through play. Sensory play ideas, free printables, and hands-on learning tools designed for busy parents and curious little learners.

Get Free Printables →

EXPLORE

  • Start Here

  • Toddler Activities by Age

  • Seasonal Toddler Activities

  • Sensory Play Ideas

All Activity Ideas →

SHOP

  • Flashcards

  • Learning Kits

  • Memory Games

  • Dramatic Play

  • Playschool Planner

Shop All →

ABOUT

  • Our Story

  • Contact

  • FAQ

  • Privacy Policy

  • Terms & Conditions

  • Wholesale

  • Newsletter

© 2026 GoodnightFox
Play-Based Learning for Toddlers