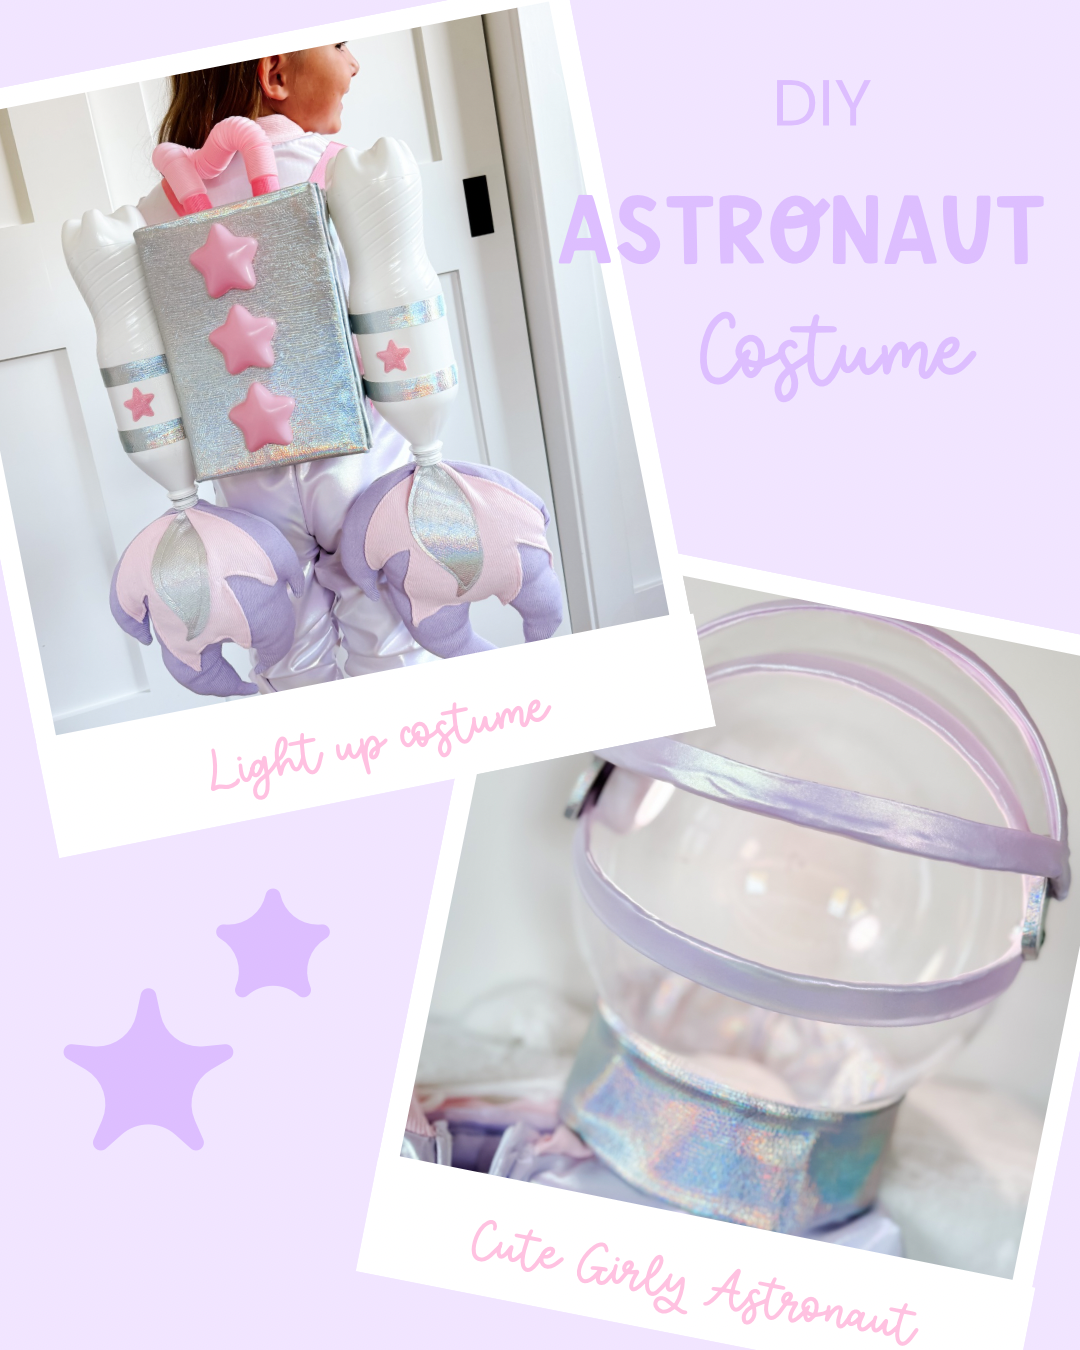
Blast off into creativity with this dreamy DIY astronaut costume that’s out of this world! Whether your little one is dressing up for Halloween, a school space day, or just wants to explore the galaxy during imaginative play, this sparkly astronaut outfit is the perfect girly twist on the classic spacesuit. With metallic pastels, shimmer, and stars, it’s equal parts space explorer and shooting star.
The best part? You can make it at home with simple craft supplies and a little creativity. Let’s walk through the step-by-step tutorial.
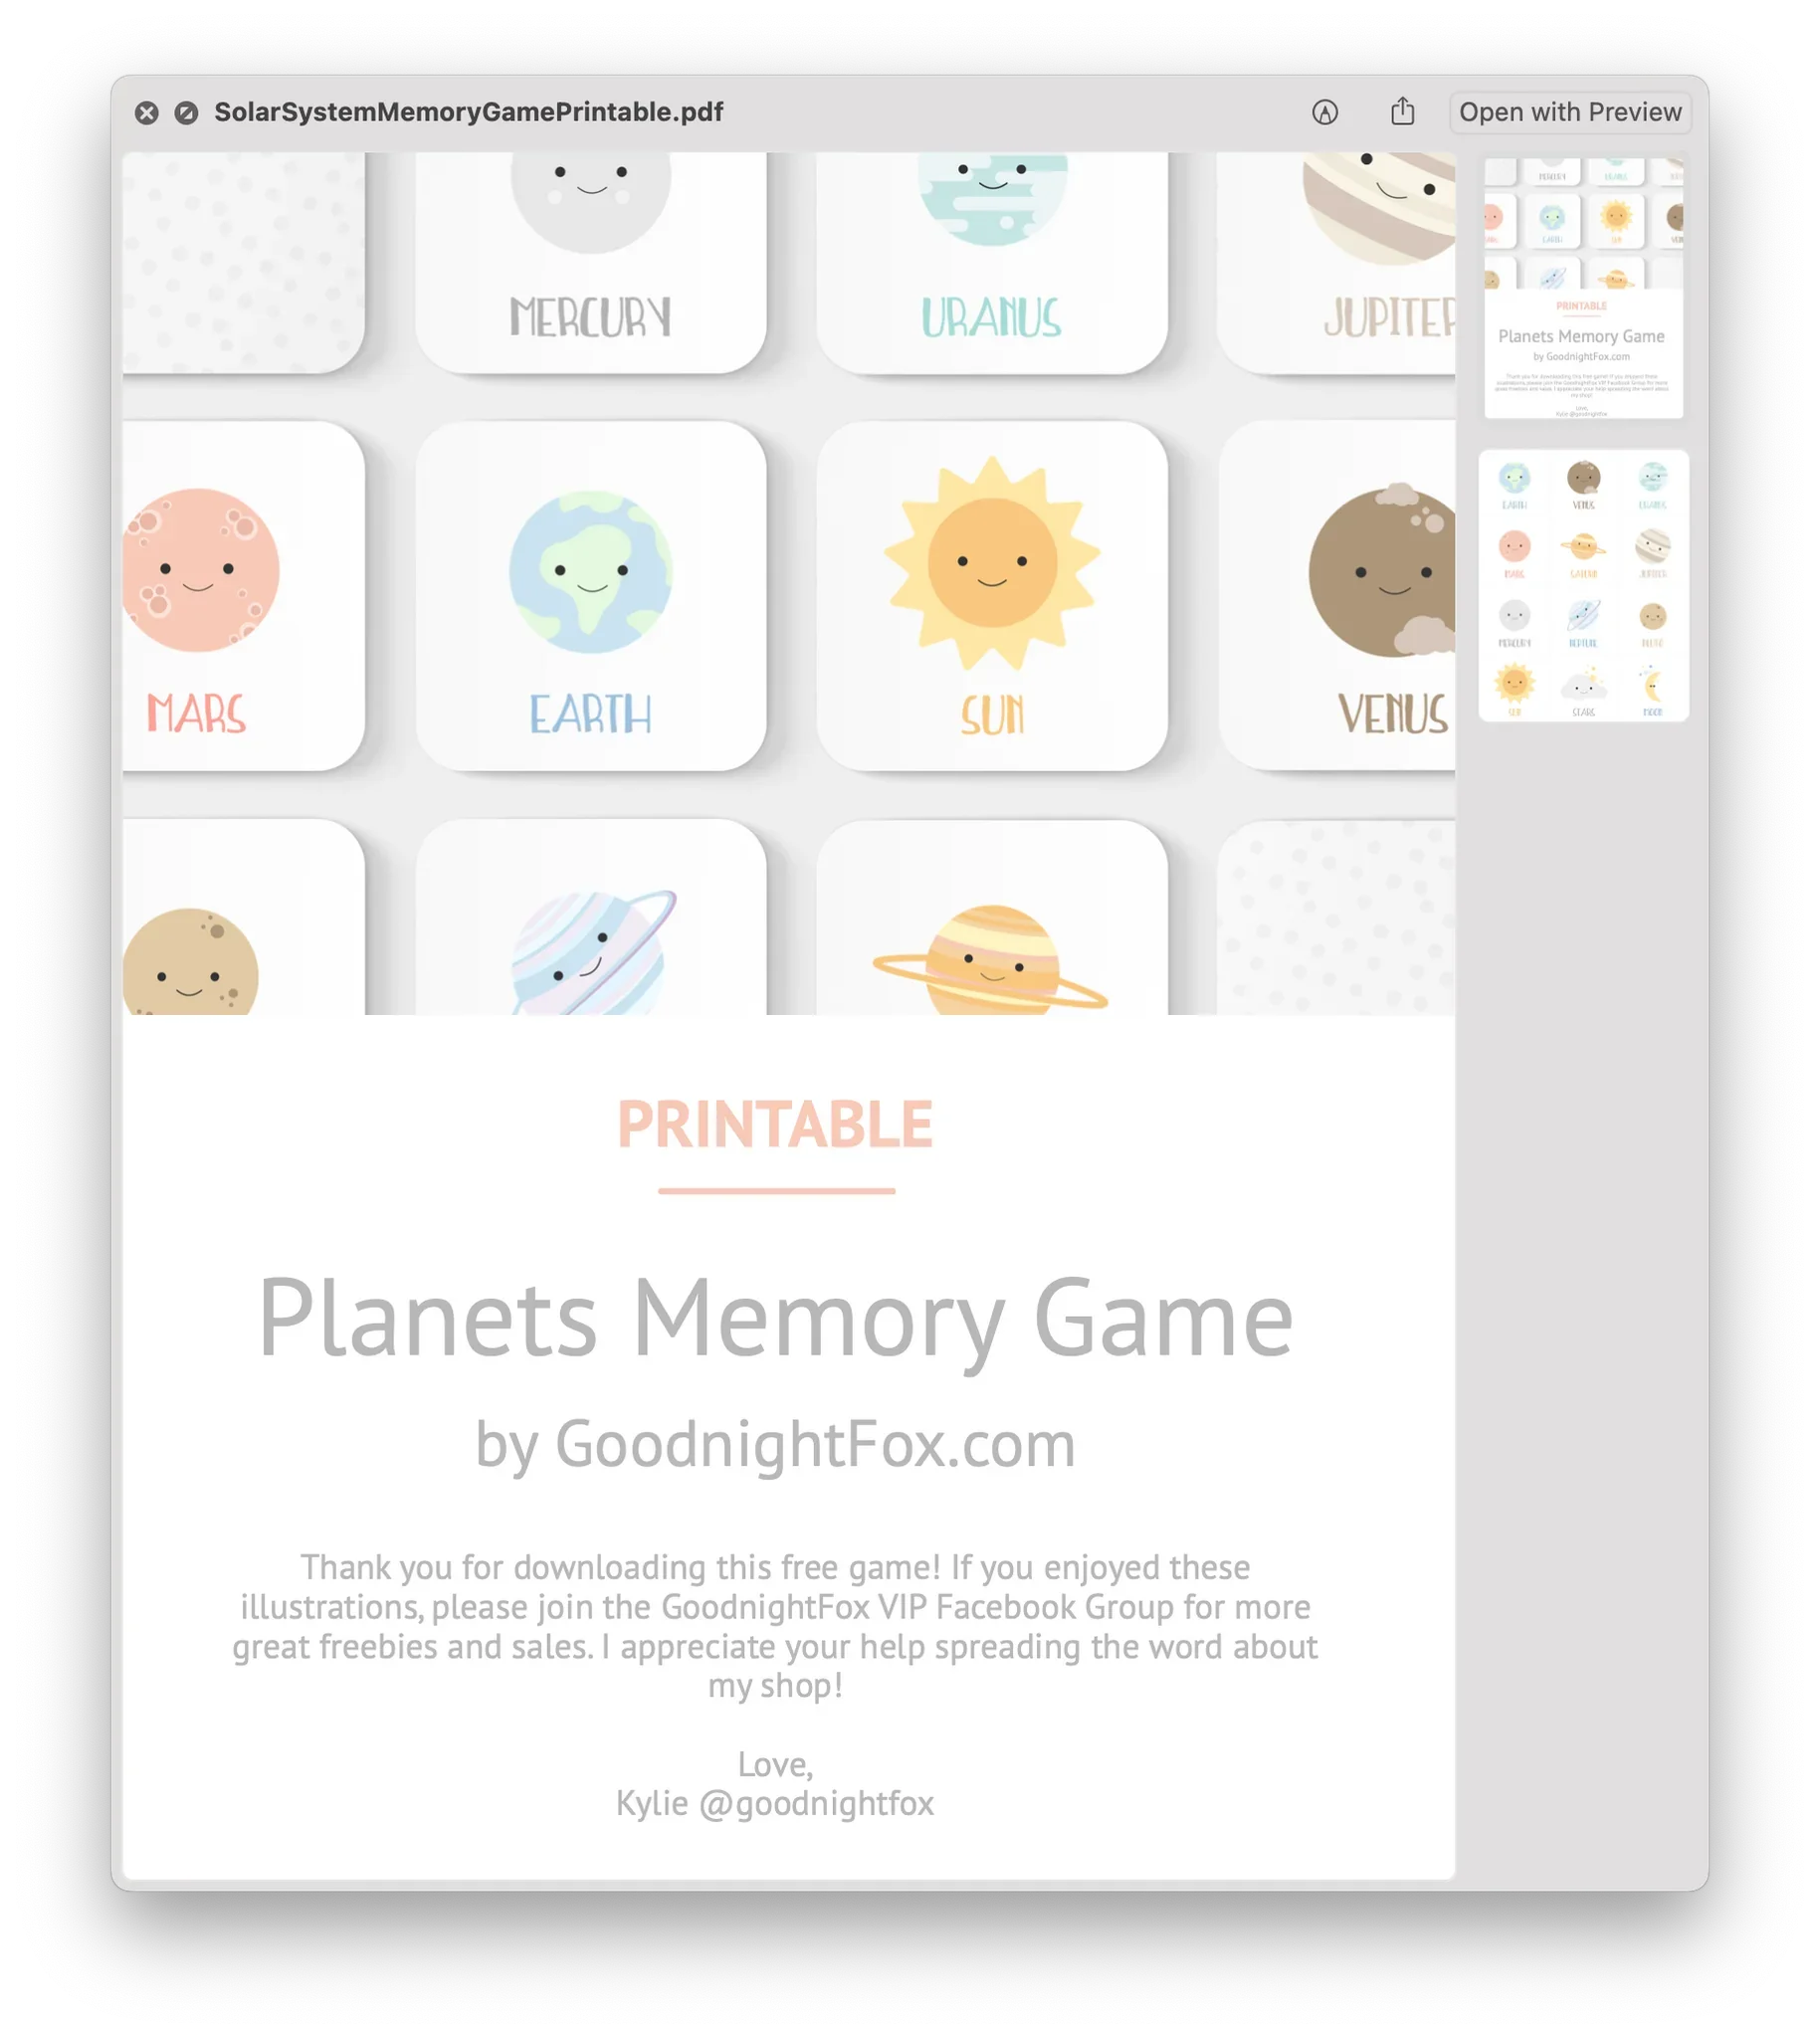
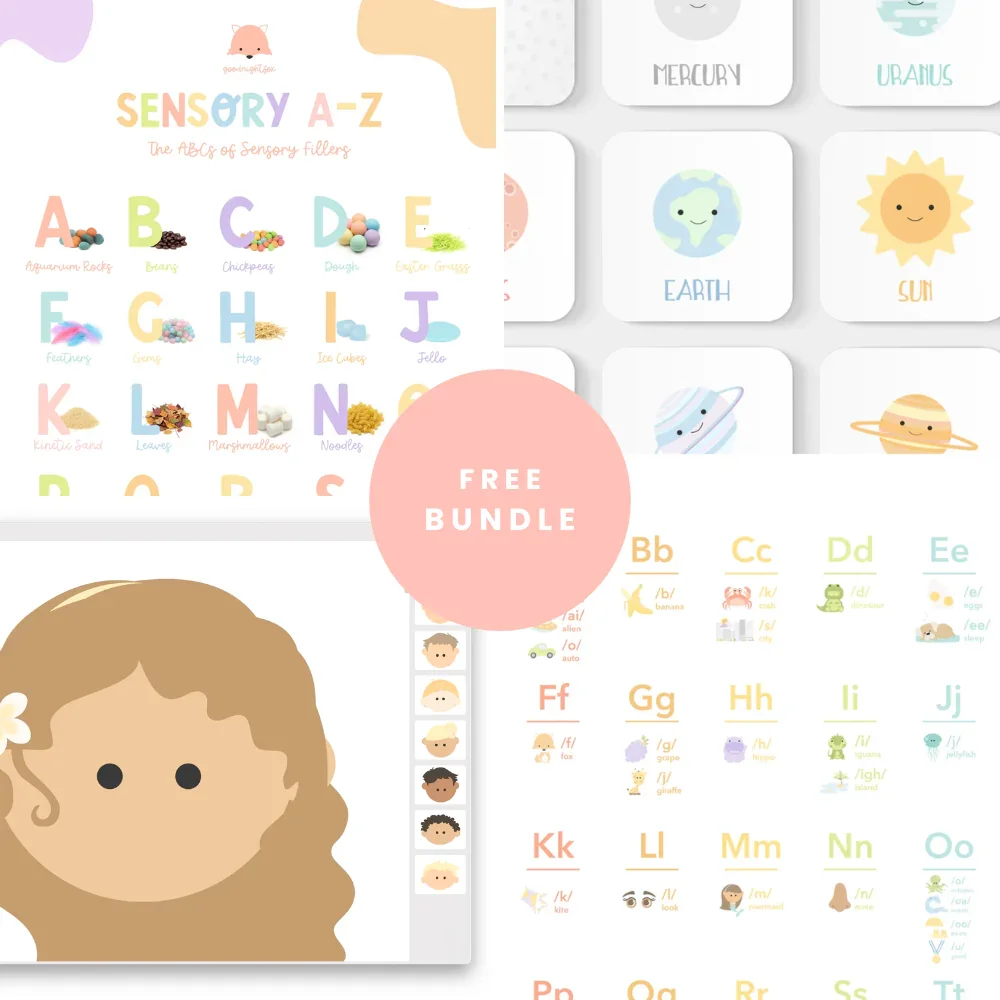
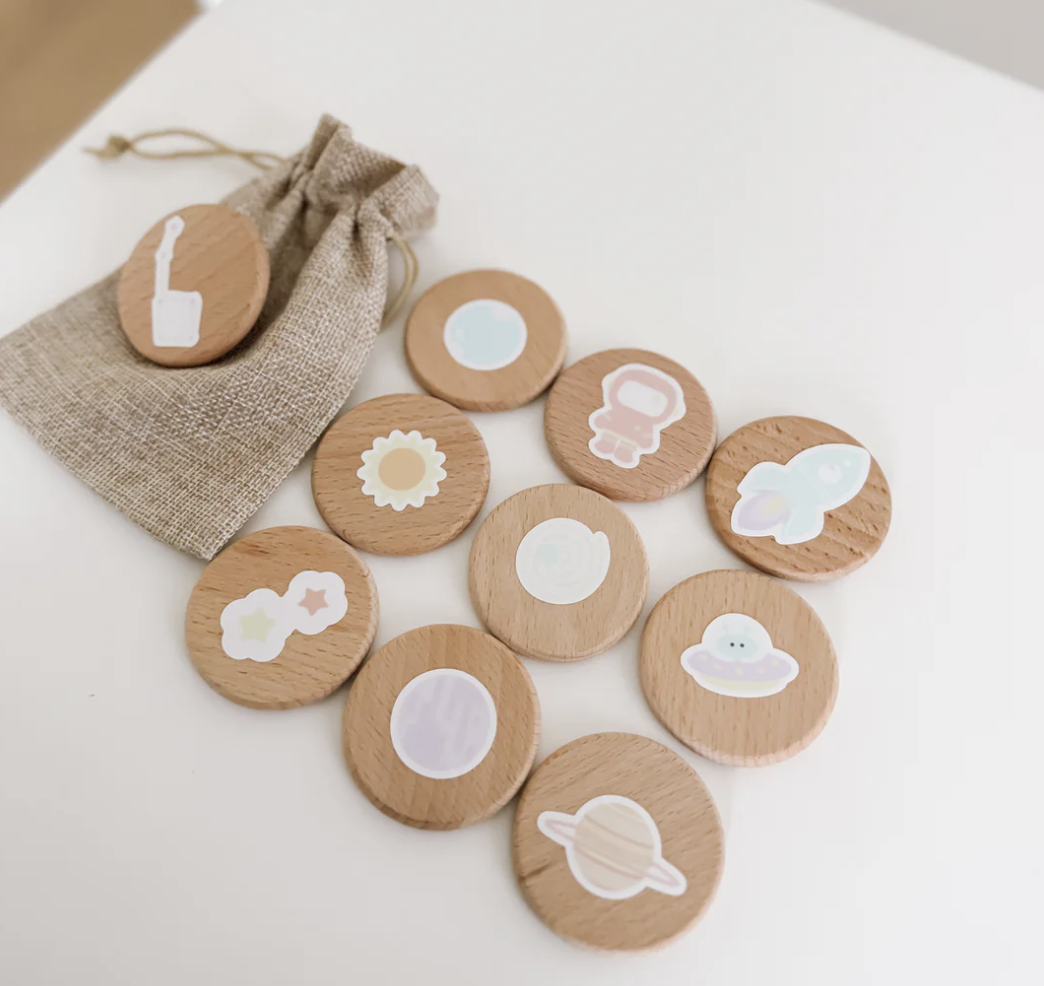
Free Planets Memory Game
Join thousands of parents who get printable activities, sensory play ideas, and play-based learning inspiration delivered to their inbox. Start with a free printable planet memory game you can use today.
Download the Planets Memory GameEasy DIY Astronaut Costume for Kids
Looking for an easy DIY astronaut costume for kids? This cardboard astronaut costume is a simple, budget-friendly craft that doubles as a space-themed STEM activity and creative pretend play idea. It’s perfect for preschoolers, kindergarten kids, and homeschool families who want hands-on learning through play using everyday materials.


Materials Needed
For the Spacesuit:
Basic sewing machine and matching thread (I used white and light pink)
For the Helmet:
For the Jetpack:
2 empty plastic soda bottles
Cardboard box (for the pack base)
Pink flexible fidget tubes or you can do glow in the dark fidget tubes!
For the Rocket Flames:
Learning Through Play: Space & STEM
This DIY astronaut costume isn’t just a fun dress-up activity — it also supports early learning through play. As kids build and wear their astronaut costume, they practice:
Problem-solving and early engineering skills while assembling the costume
Fine motor skills through cutting, taping, and decorating
Creativity and imaginative play by acting out space missions
Early science learning by talking about astronauts, planets, and space travel
While you work on the costume together, try asking questions like:
What do astronauts do in space?
How do rockets get into space?
What planets are in our solar system?
This turns a simple craft into a meaningful space STEM activity for kids.


Step 1: Create the Astronaut Suit
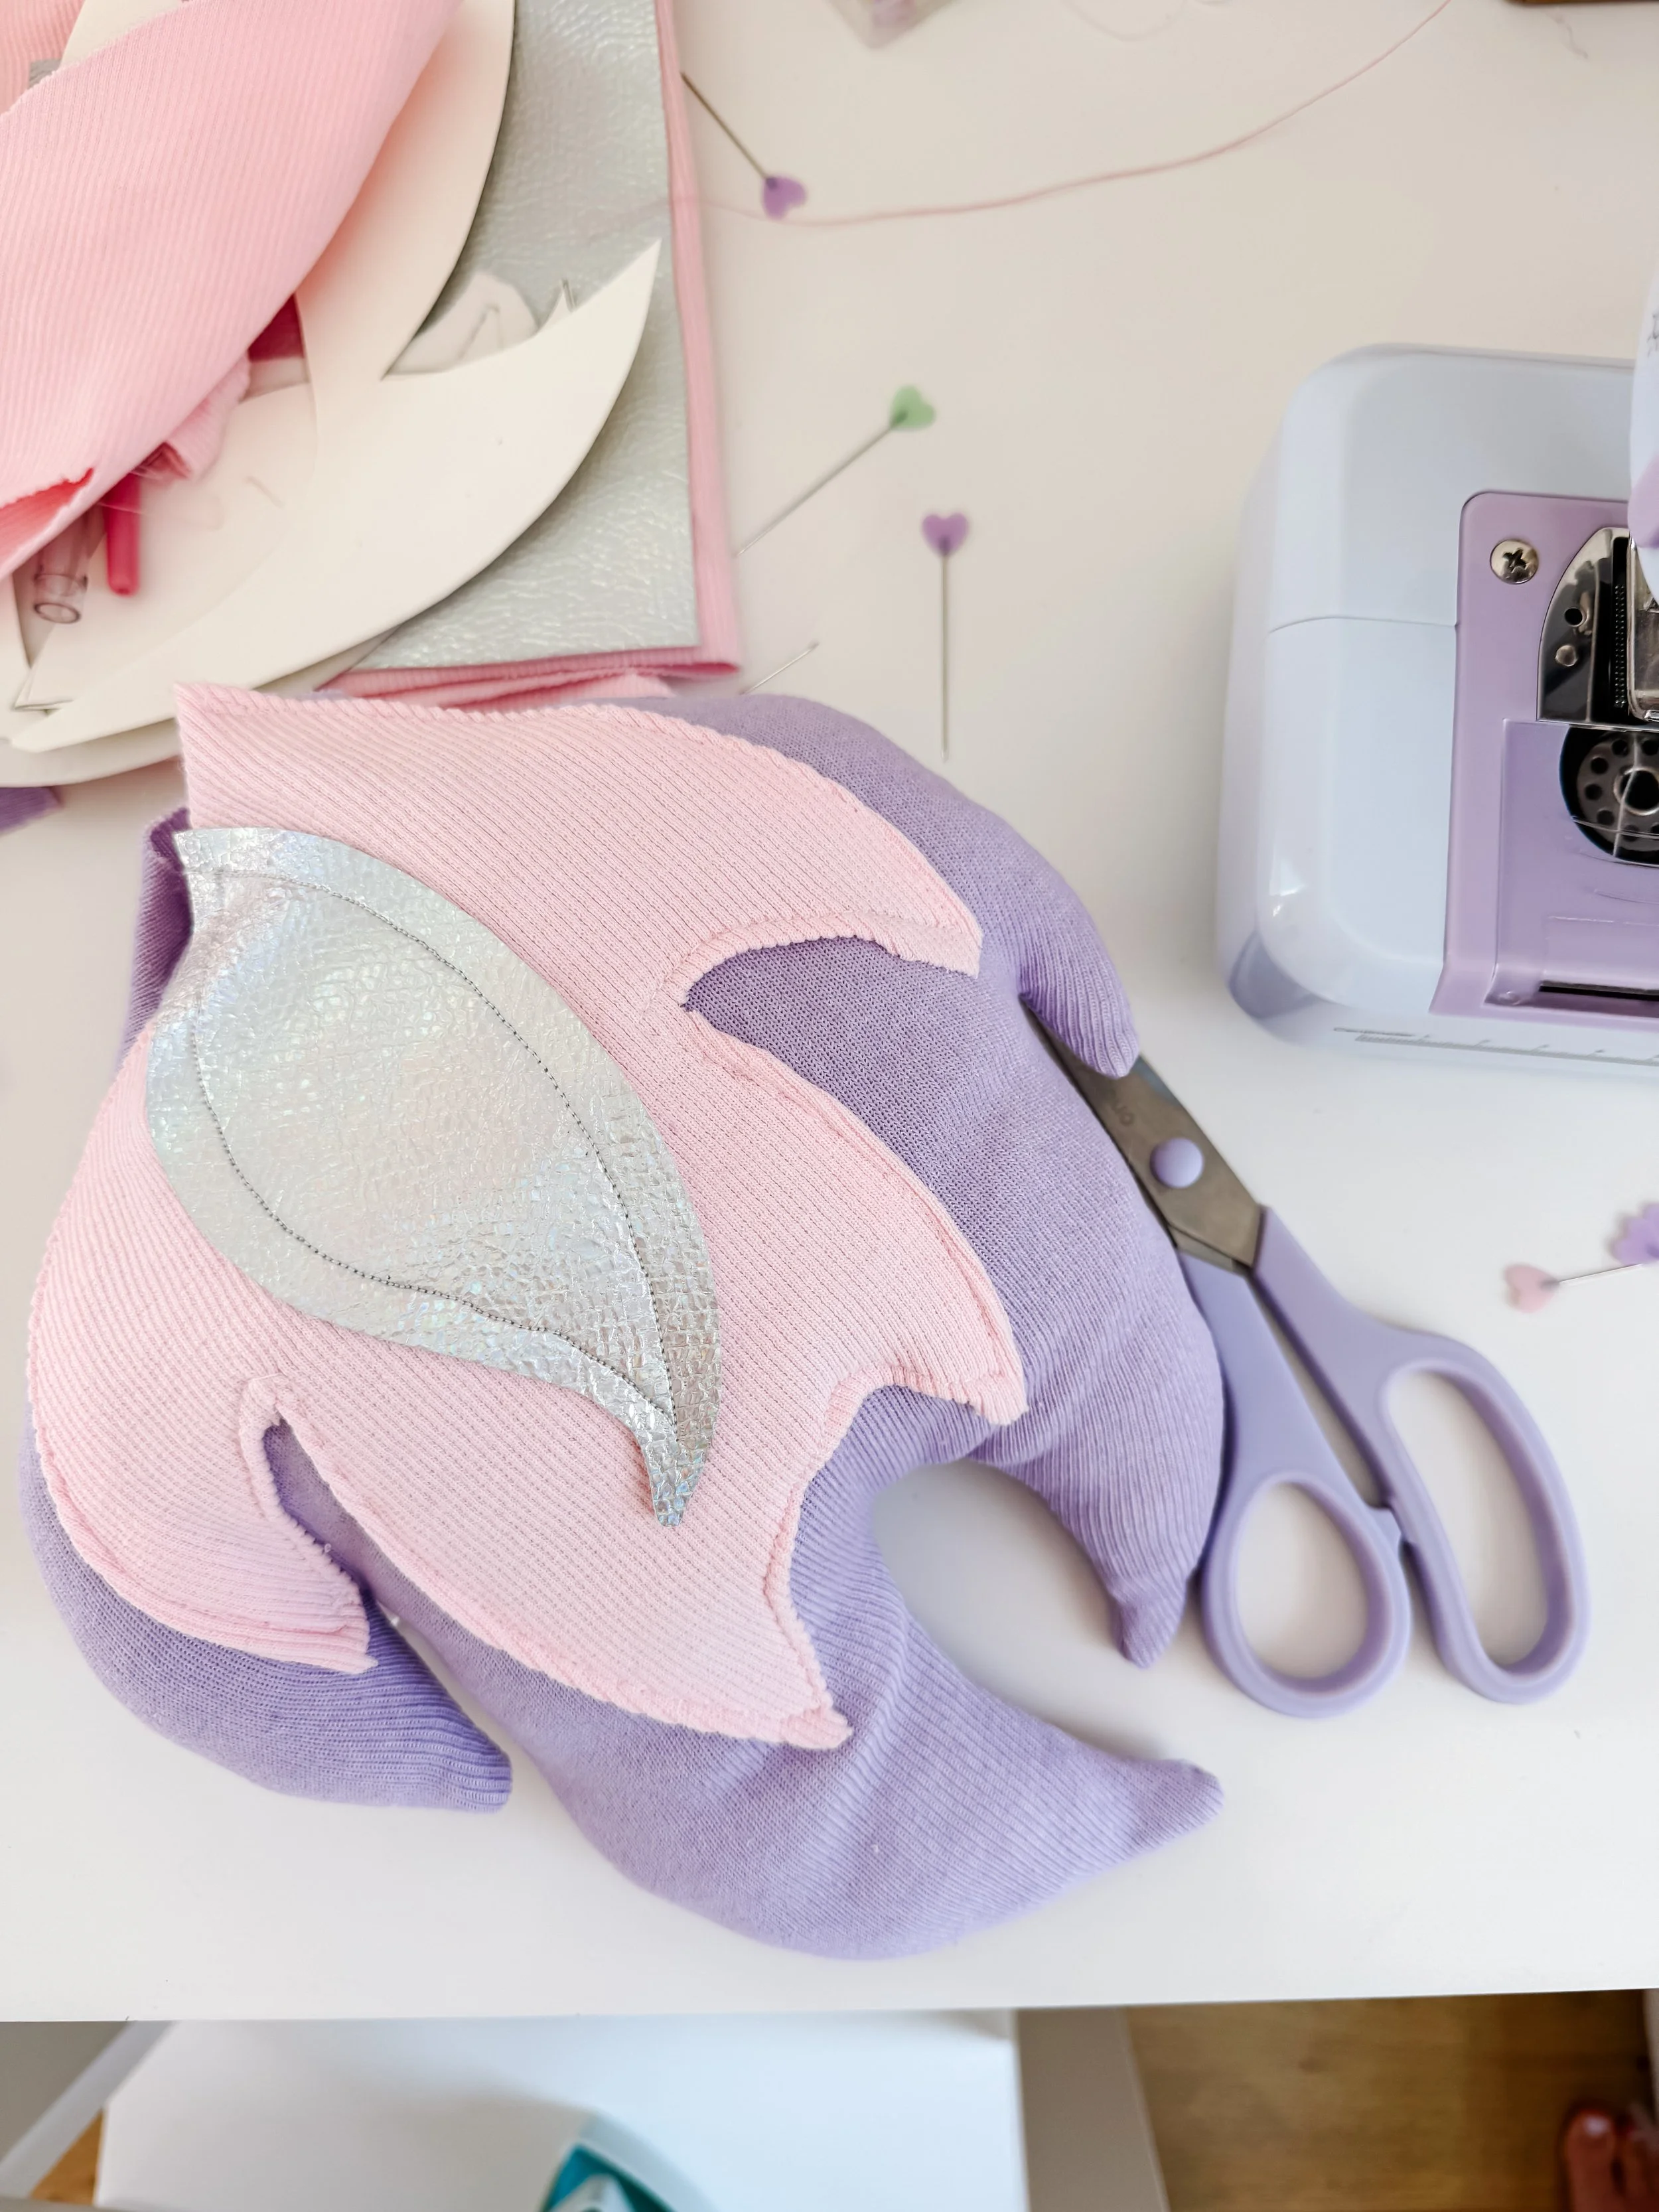
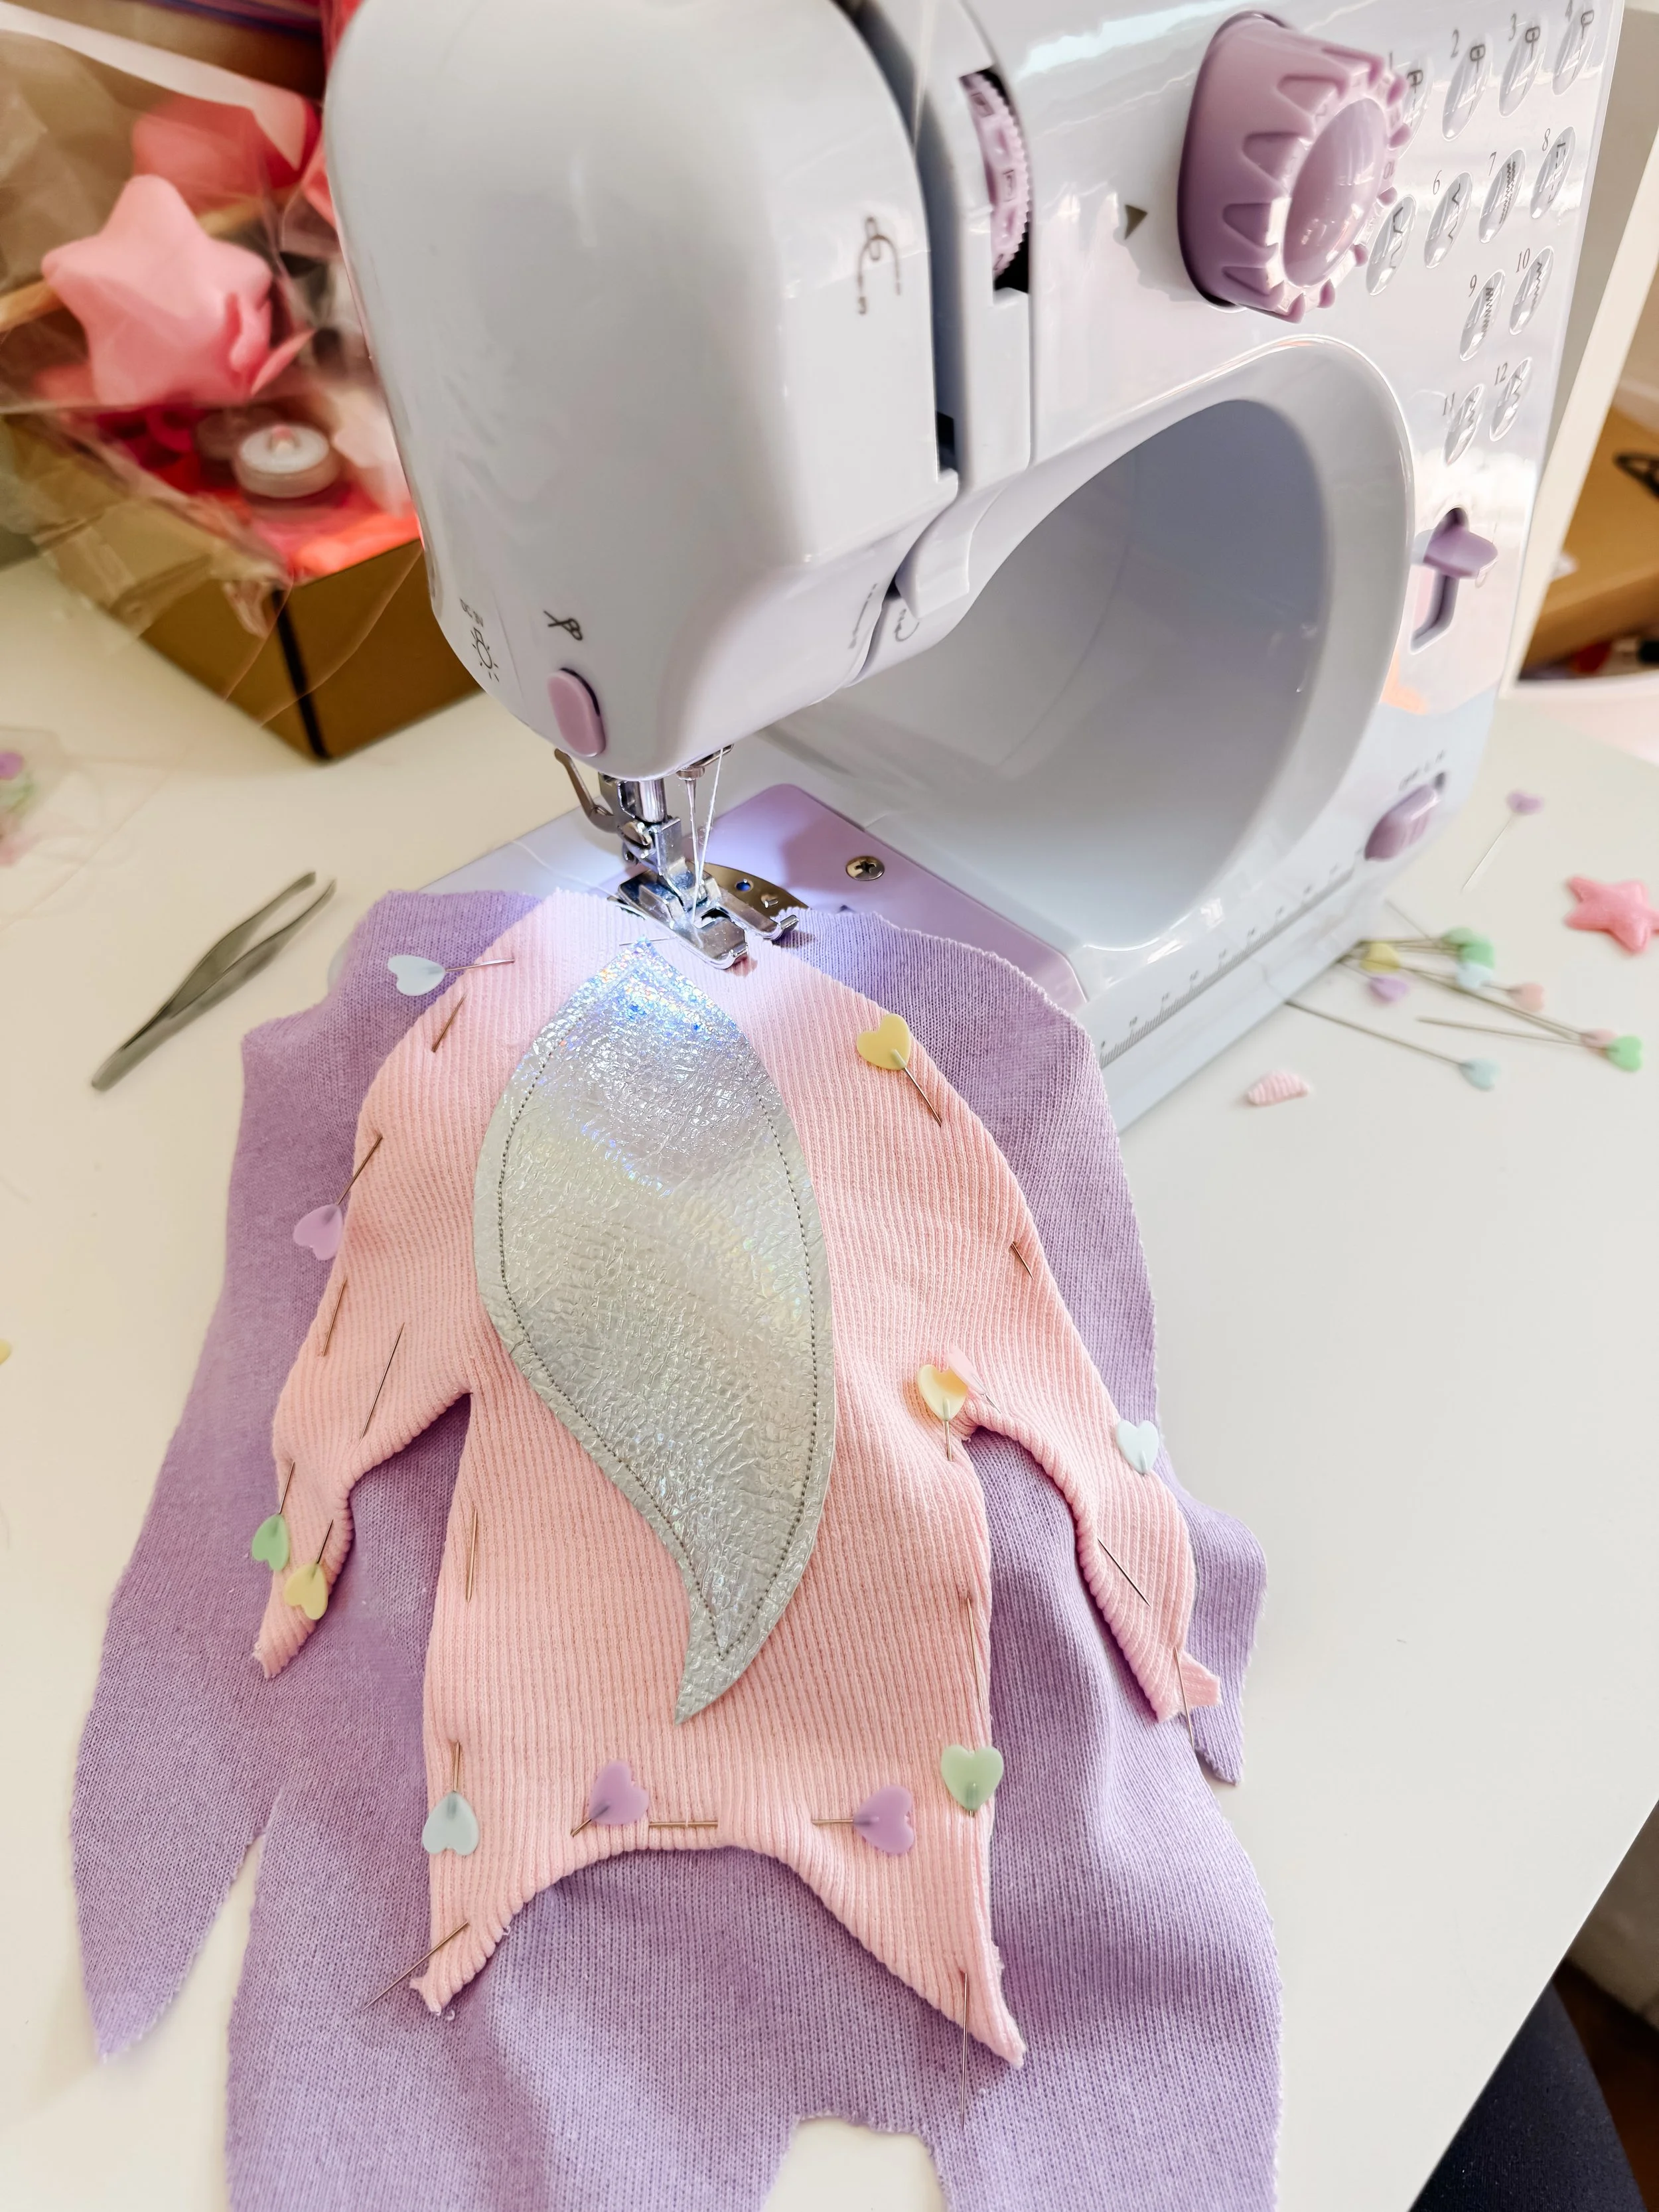
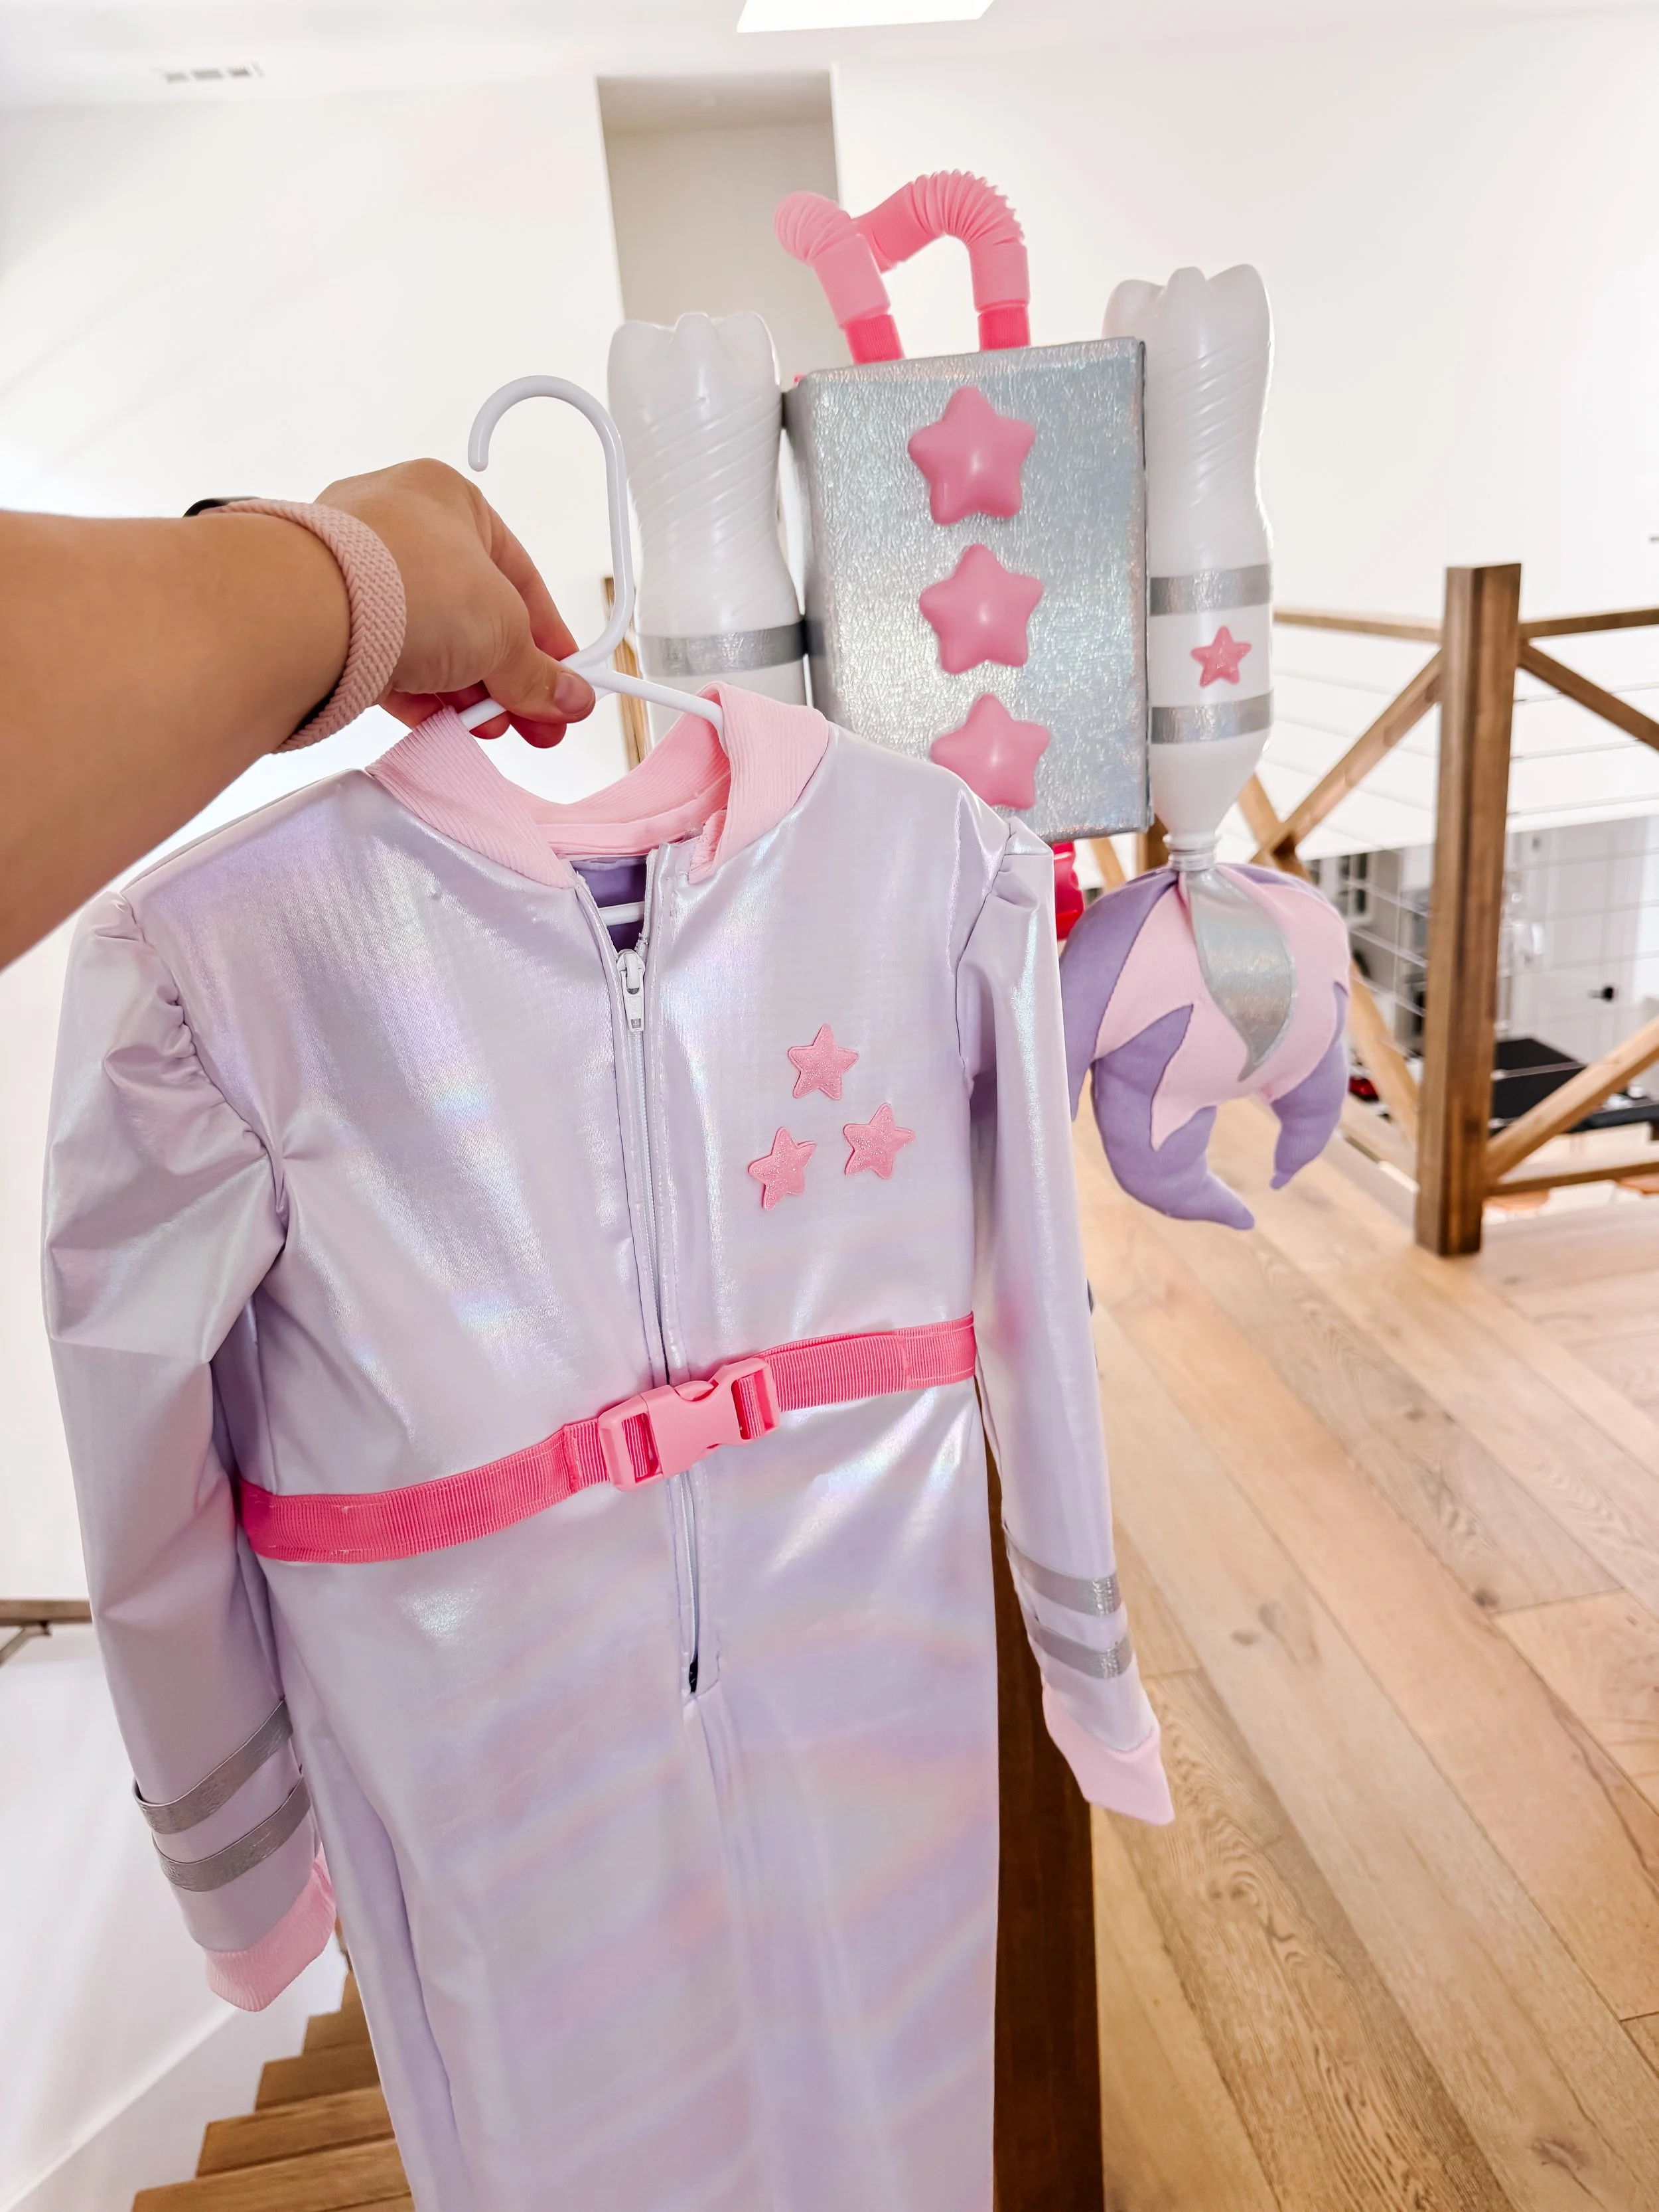
Start with a shiny jumpsuit or metallic leggings and a matching top. A pastel iridescent fabric works beautifully to give it a magical touch. You’ll need a sewing pattern for a zipper onesie or jumpsuit. I fused two fabrics together so that the suit would have a comfortable purple velvet lining to keep my daughter warm on Halloween night. You’ll want to cut the fabric, fuse it together using an iron, and then follow the sewing pattern instructions. If you want to skip this step you can also just purchase a jumpsuit, onesie, or metallic silver top and bottoms and then add the embellishments.
Add a pink ribbon belt around the waist to break up the metallics and add a girly pop of color. Even though it’s non-functional, I added the buckle for a little extra flare and to make it look more realistic. You can also add vertical straps, but I chose not to because I knew the jet back could have vertical stripes as well.
Attach star patches or cut stars from pink felt and glue or sew them onto the chest and sleeves. I added silver stars using the faux leather fabric to the elbows for a cute extra effect. And I added small pink glittery star patches to the chest. I chose not to do a NASA logo, but you can also try that instead. I cut out long strips of the faux leather silver fabric to use for stripes on the sleeves and pants.
✨ Pro Tip: If you don’t want to sew, fabric glue works perfectly!


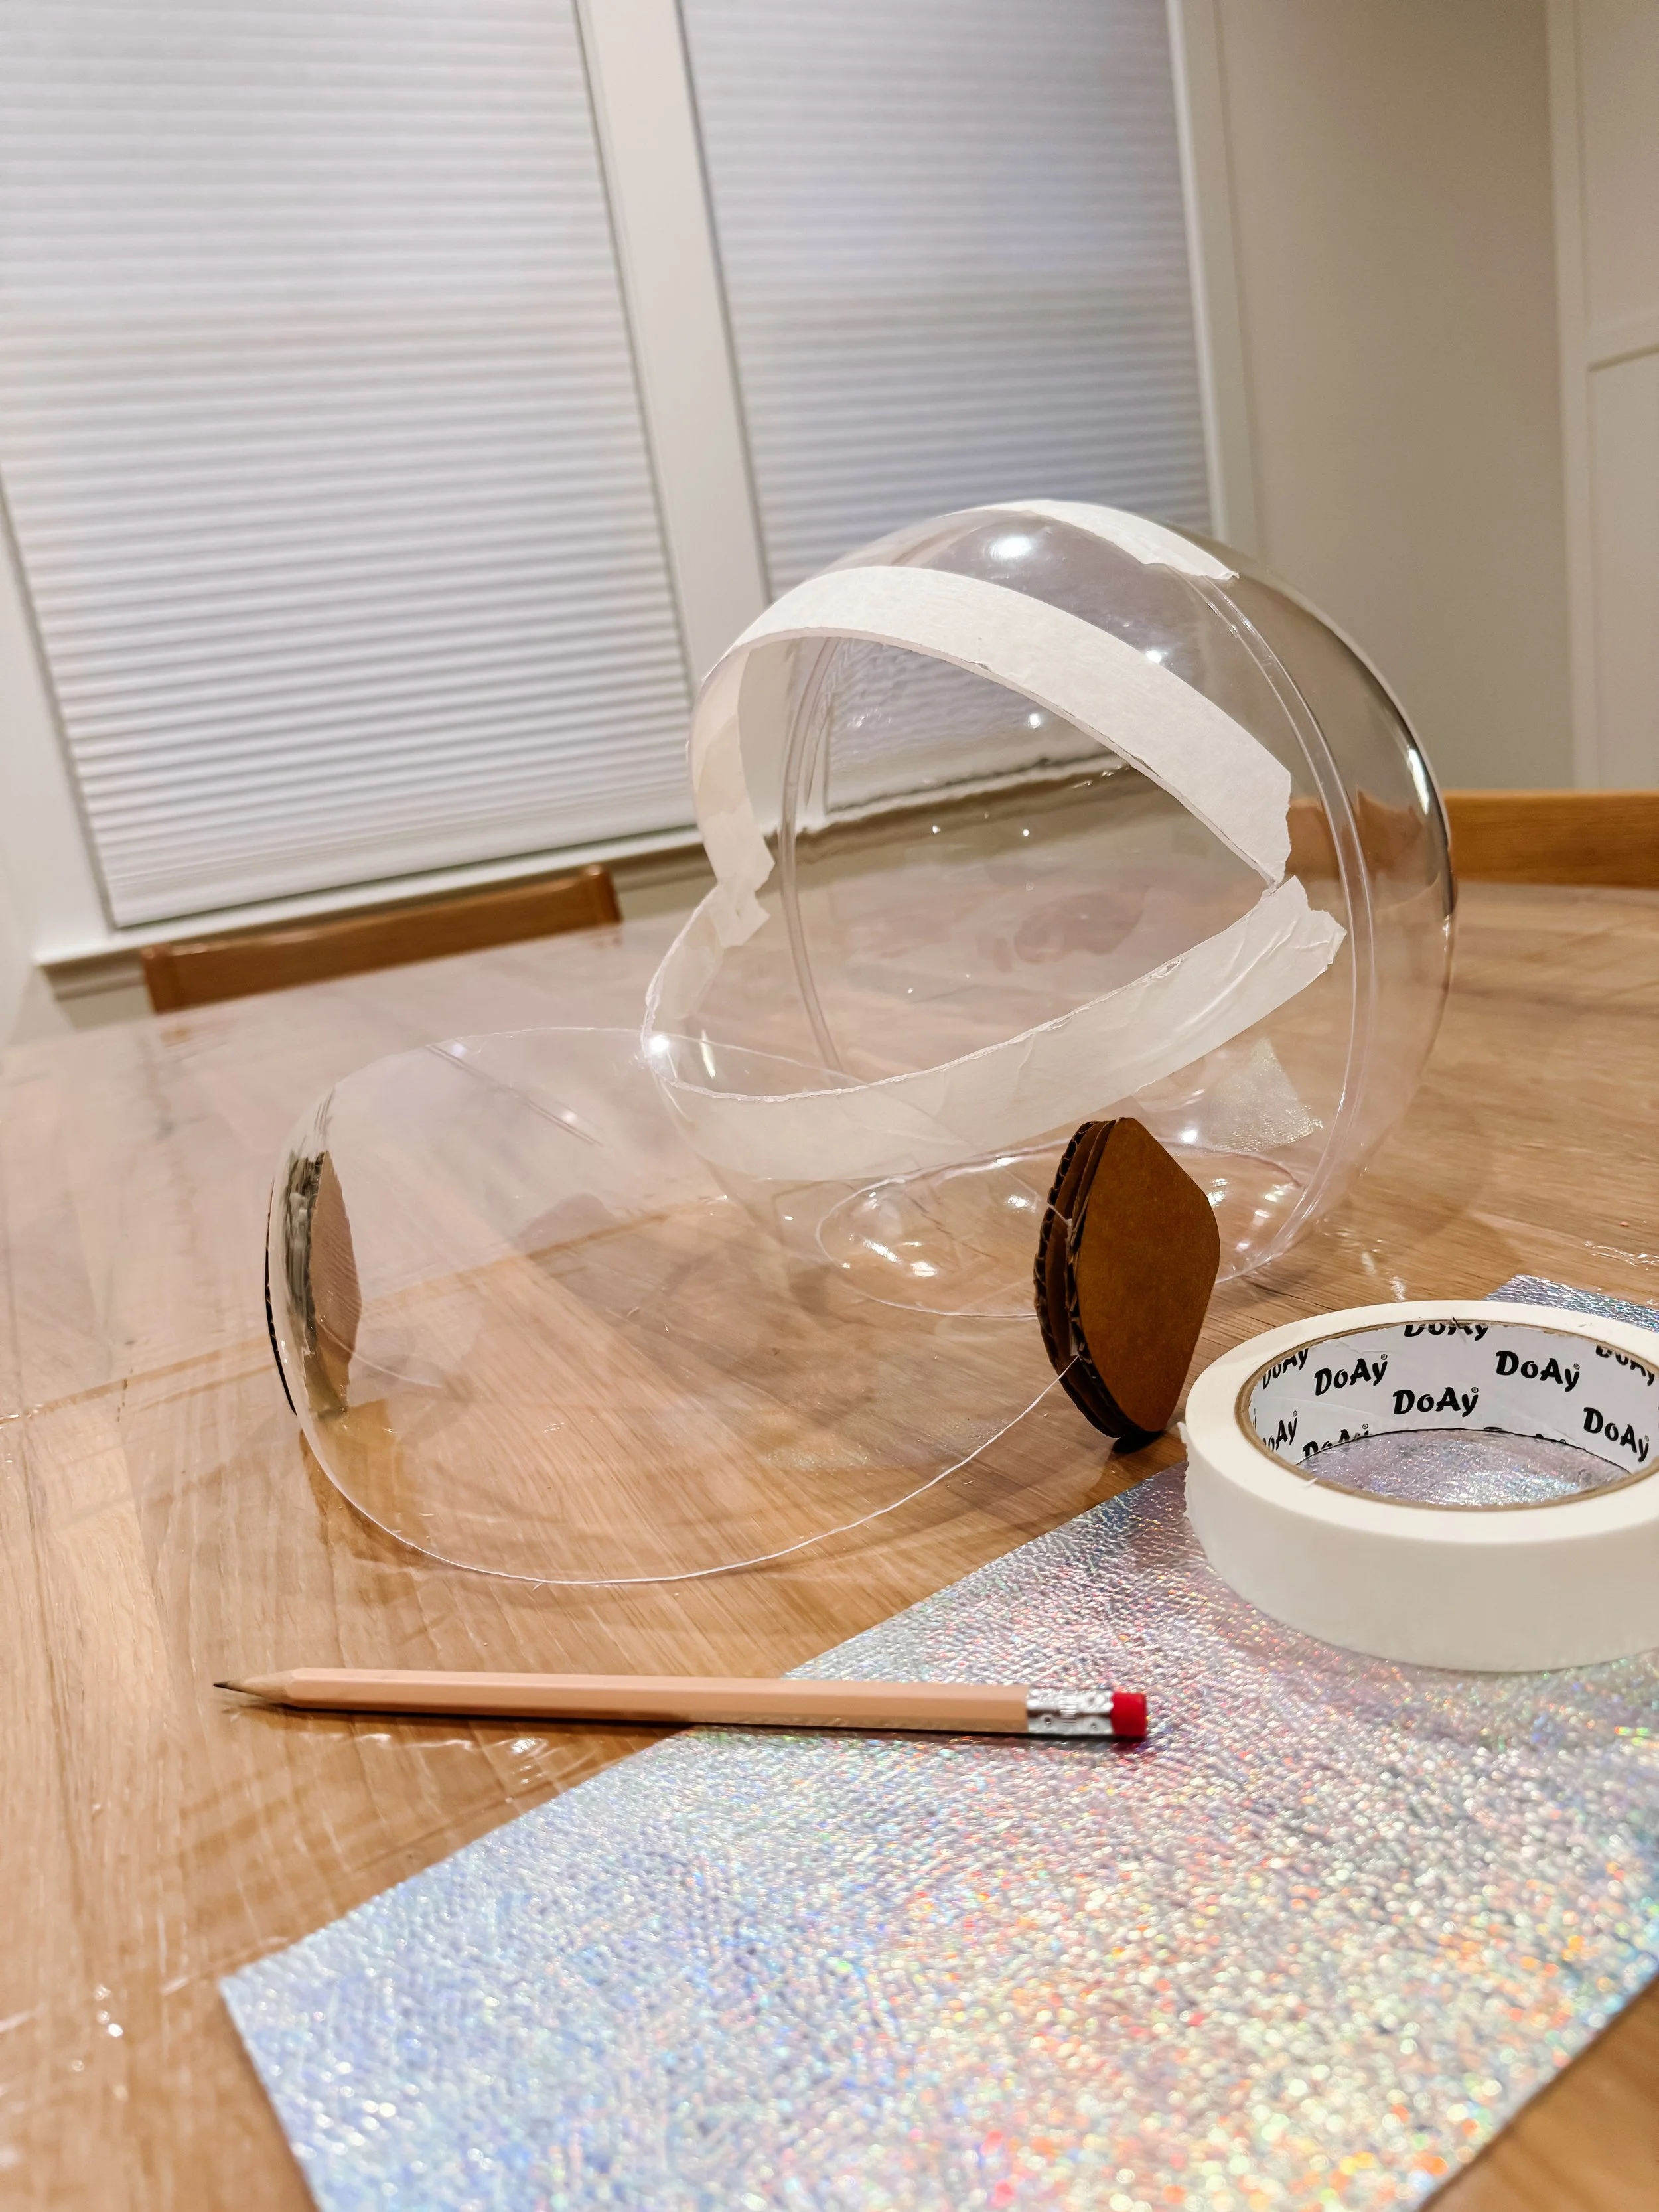
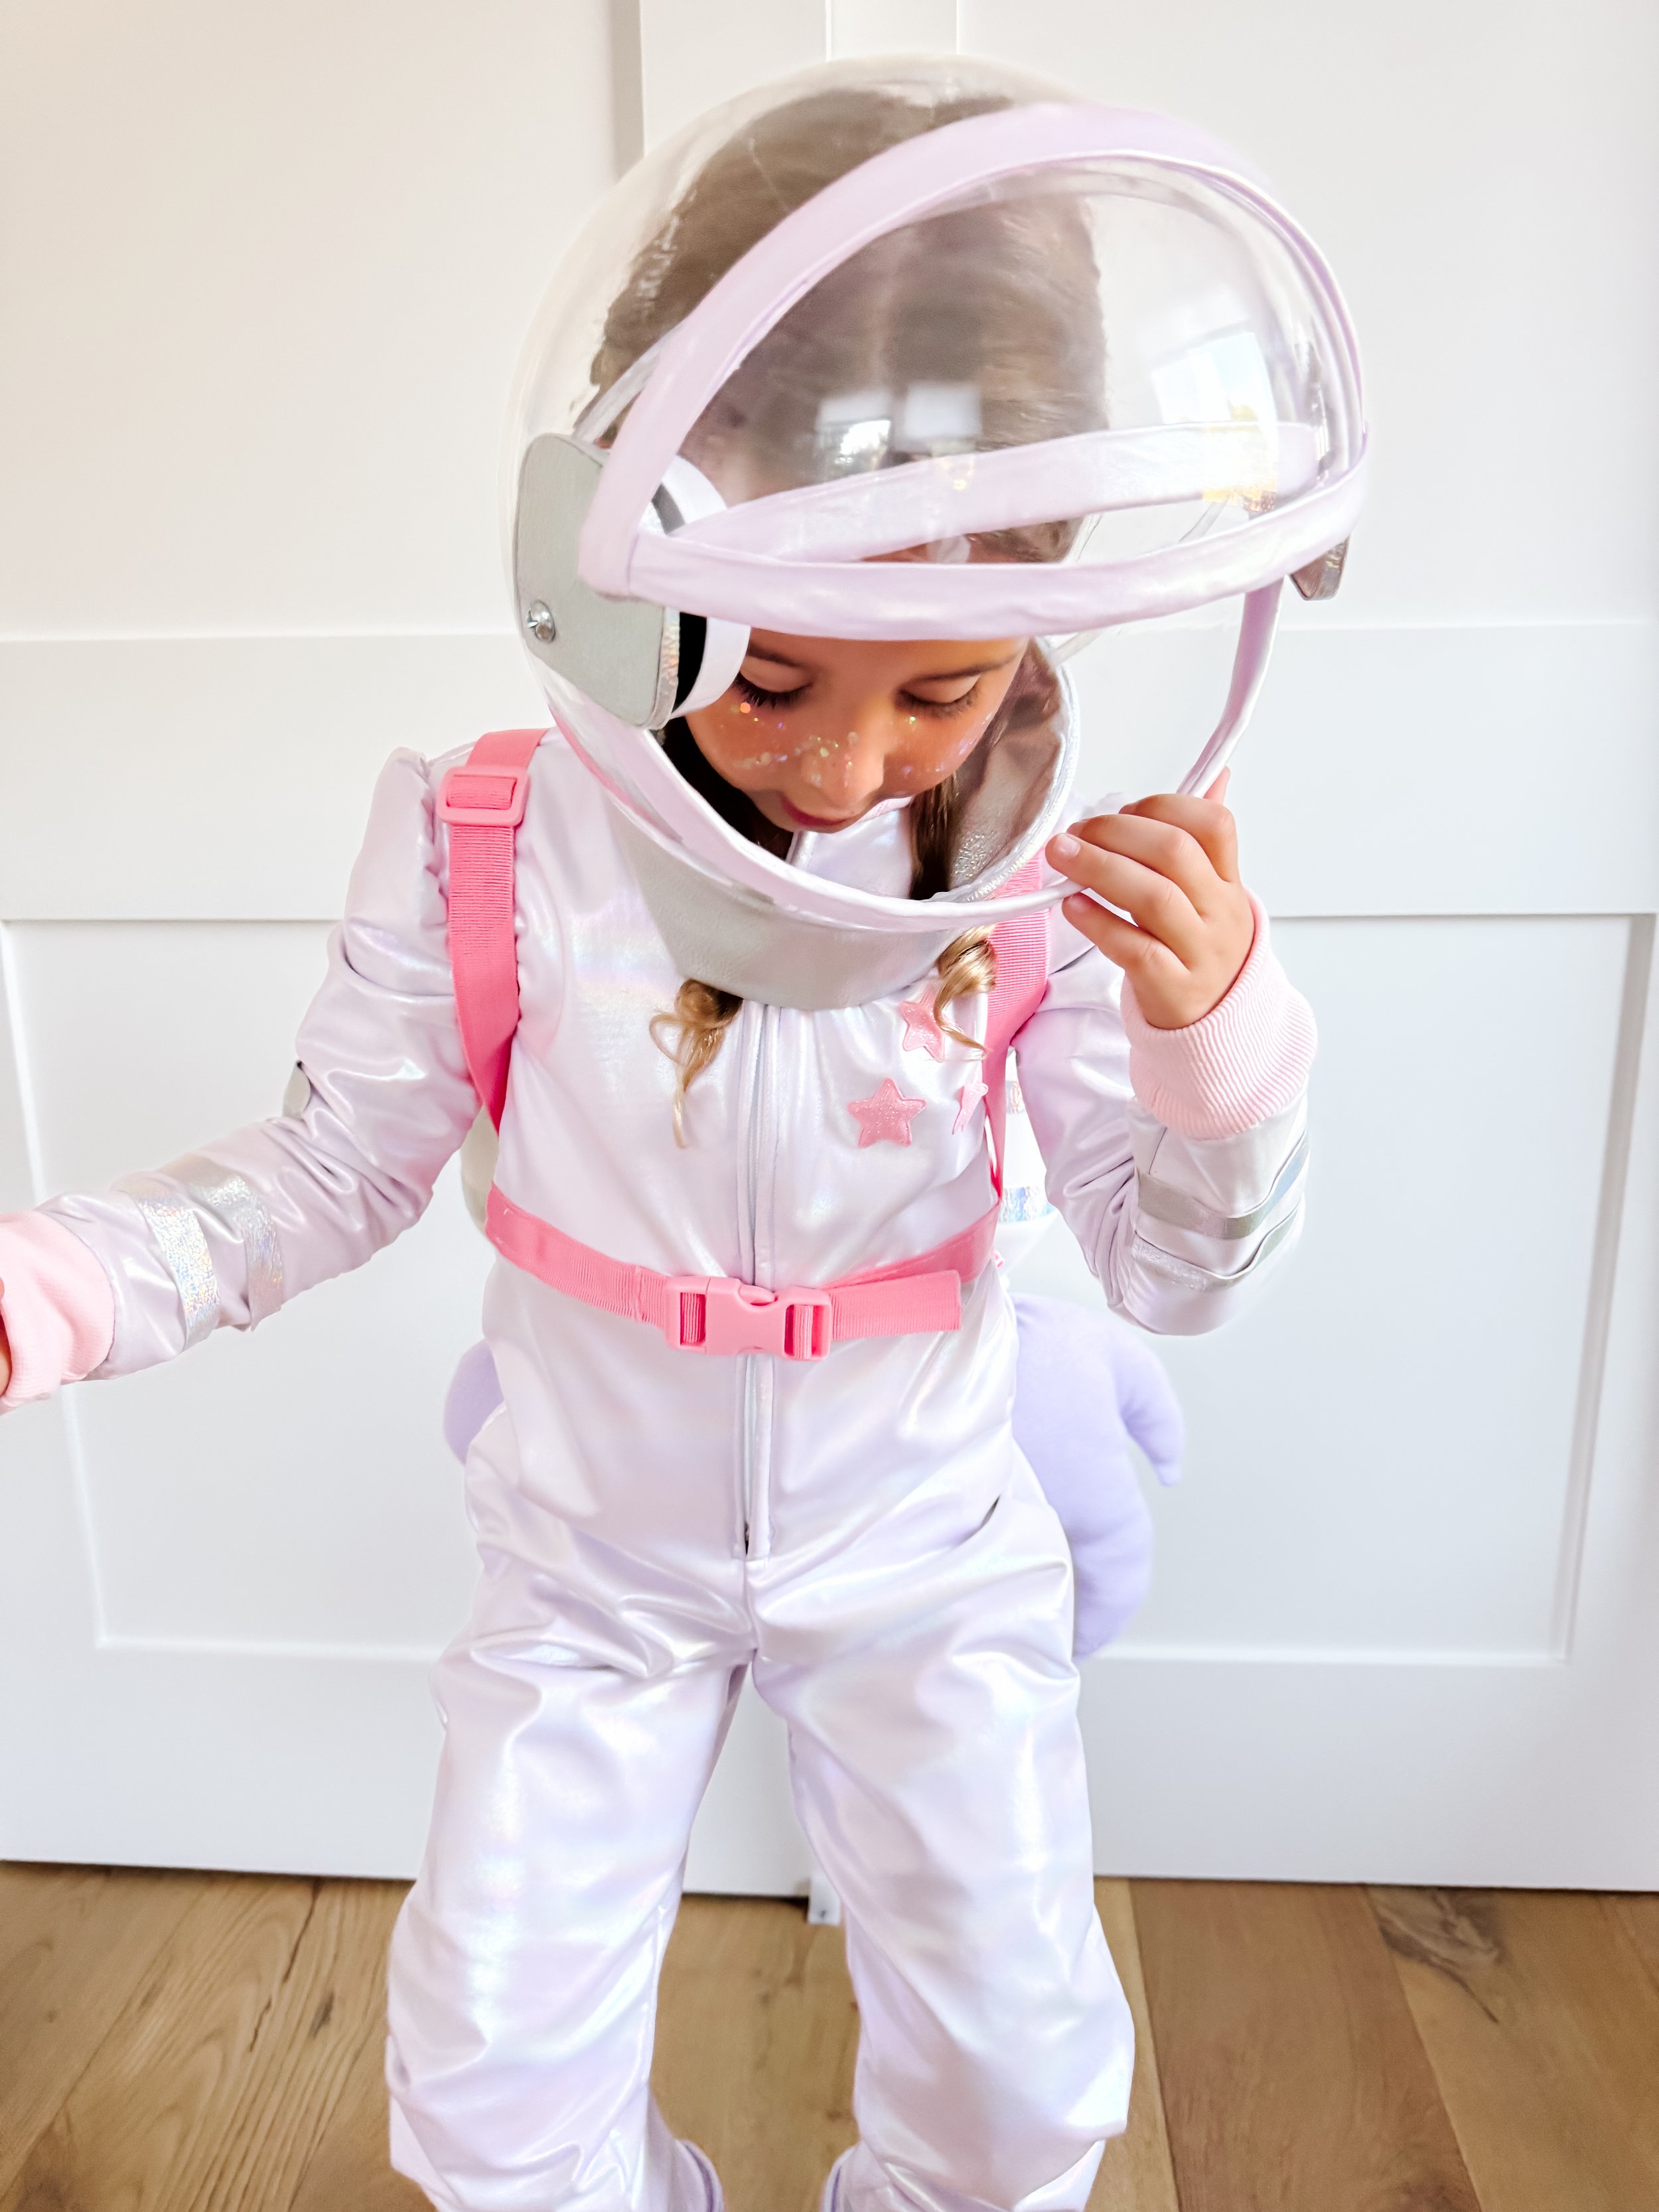
Step 2: Make the Astronaut Helmet
Use a large clear globe or bubble as the helmet base. You’ll want to mark with masking tape or marker the places where you want to cut. You’ll need to cut and approximately 20-22” diameter circle on the bottom of the globe. And then you’ll want to cut out the visor shape. I used a few different tips of the Dremel to do the cutting. This is the part that takes the most amount of time. The Dremel will get hot and the acrylic will start to melt and clump the longer you cut. So just be patient and stay as close to the line as possible. You can use various sanding tips to smooth out rough edges. So just do a rough cut first and then come back later to make it more even and smooth. You may find that your child’s head is larger than mine. So measure their head first — this is really important! You don’t want to have to cut the entire circle twice. I didn’t do this and then I had to spend a lot more time expanding the neck hole. Pro tip: You can find a large enough dinner bowl that fits over your child’s head, then place that bowl on top of the globe and trace it so that you can cut a perfect circle.
Cut lavender fabric strips to create the framing around the helmet. Secure with hot glue or use silver duct tape. I folded the fabric in twice and because it was stretchy, I pulled it tight. Just note that the hot glue can clump and cause bumps underneath which will be visible if you don’t smooth them out. So it’s important to fold over the fabric so that it’s thicker and to smooth at the glue as you go. You’ll want to do this for both the visor piece and the opening so that there are no sharp or rough edges near your child’s face.
Make the hinges for the visor using cardboard and silver faux leather fabric. Take a square piece of cardboard and cut out a rounded triangular shape like in the pictures. You’ll need one of these for each side of the visor. Cover the cardboard on both sides with a piece of the faux leather silver fabric and cover the edge with a small thin strip as well. To assemble the visor and hinge, you’ll need to glue the visor piece to the silver card board hinges. The cardboard should be on the outside of the helmet piece but the inside of the visor piece. The visor is glued to the hinge — and the hinge will be screwed to the helmet allowing the visor to freely swing open and closed. Next you’ll want to Dremel a small hole (just large enough for your bolt to pass through) through the helmet. Give yourself enough clearance from the corner, but also make sure your visor will stretch far enough. I recommend gluing the hinges to the visor first before securing the hinge to the helmet. Once you have a hole drilled through the hinge and the helmet, you’re ready to secure the visor. Push the bolt through and secure the nut in place on the inside. You should use a small enough bolt that it’s not poking out near your child’s face.
✨ Optional: Add small star stickers or patches for extra shimmer.


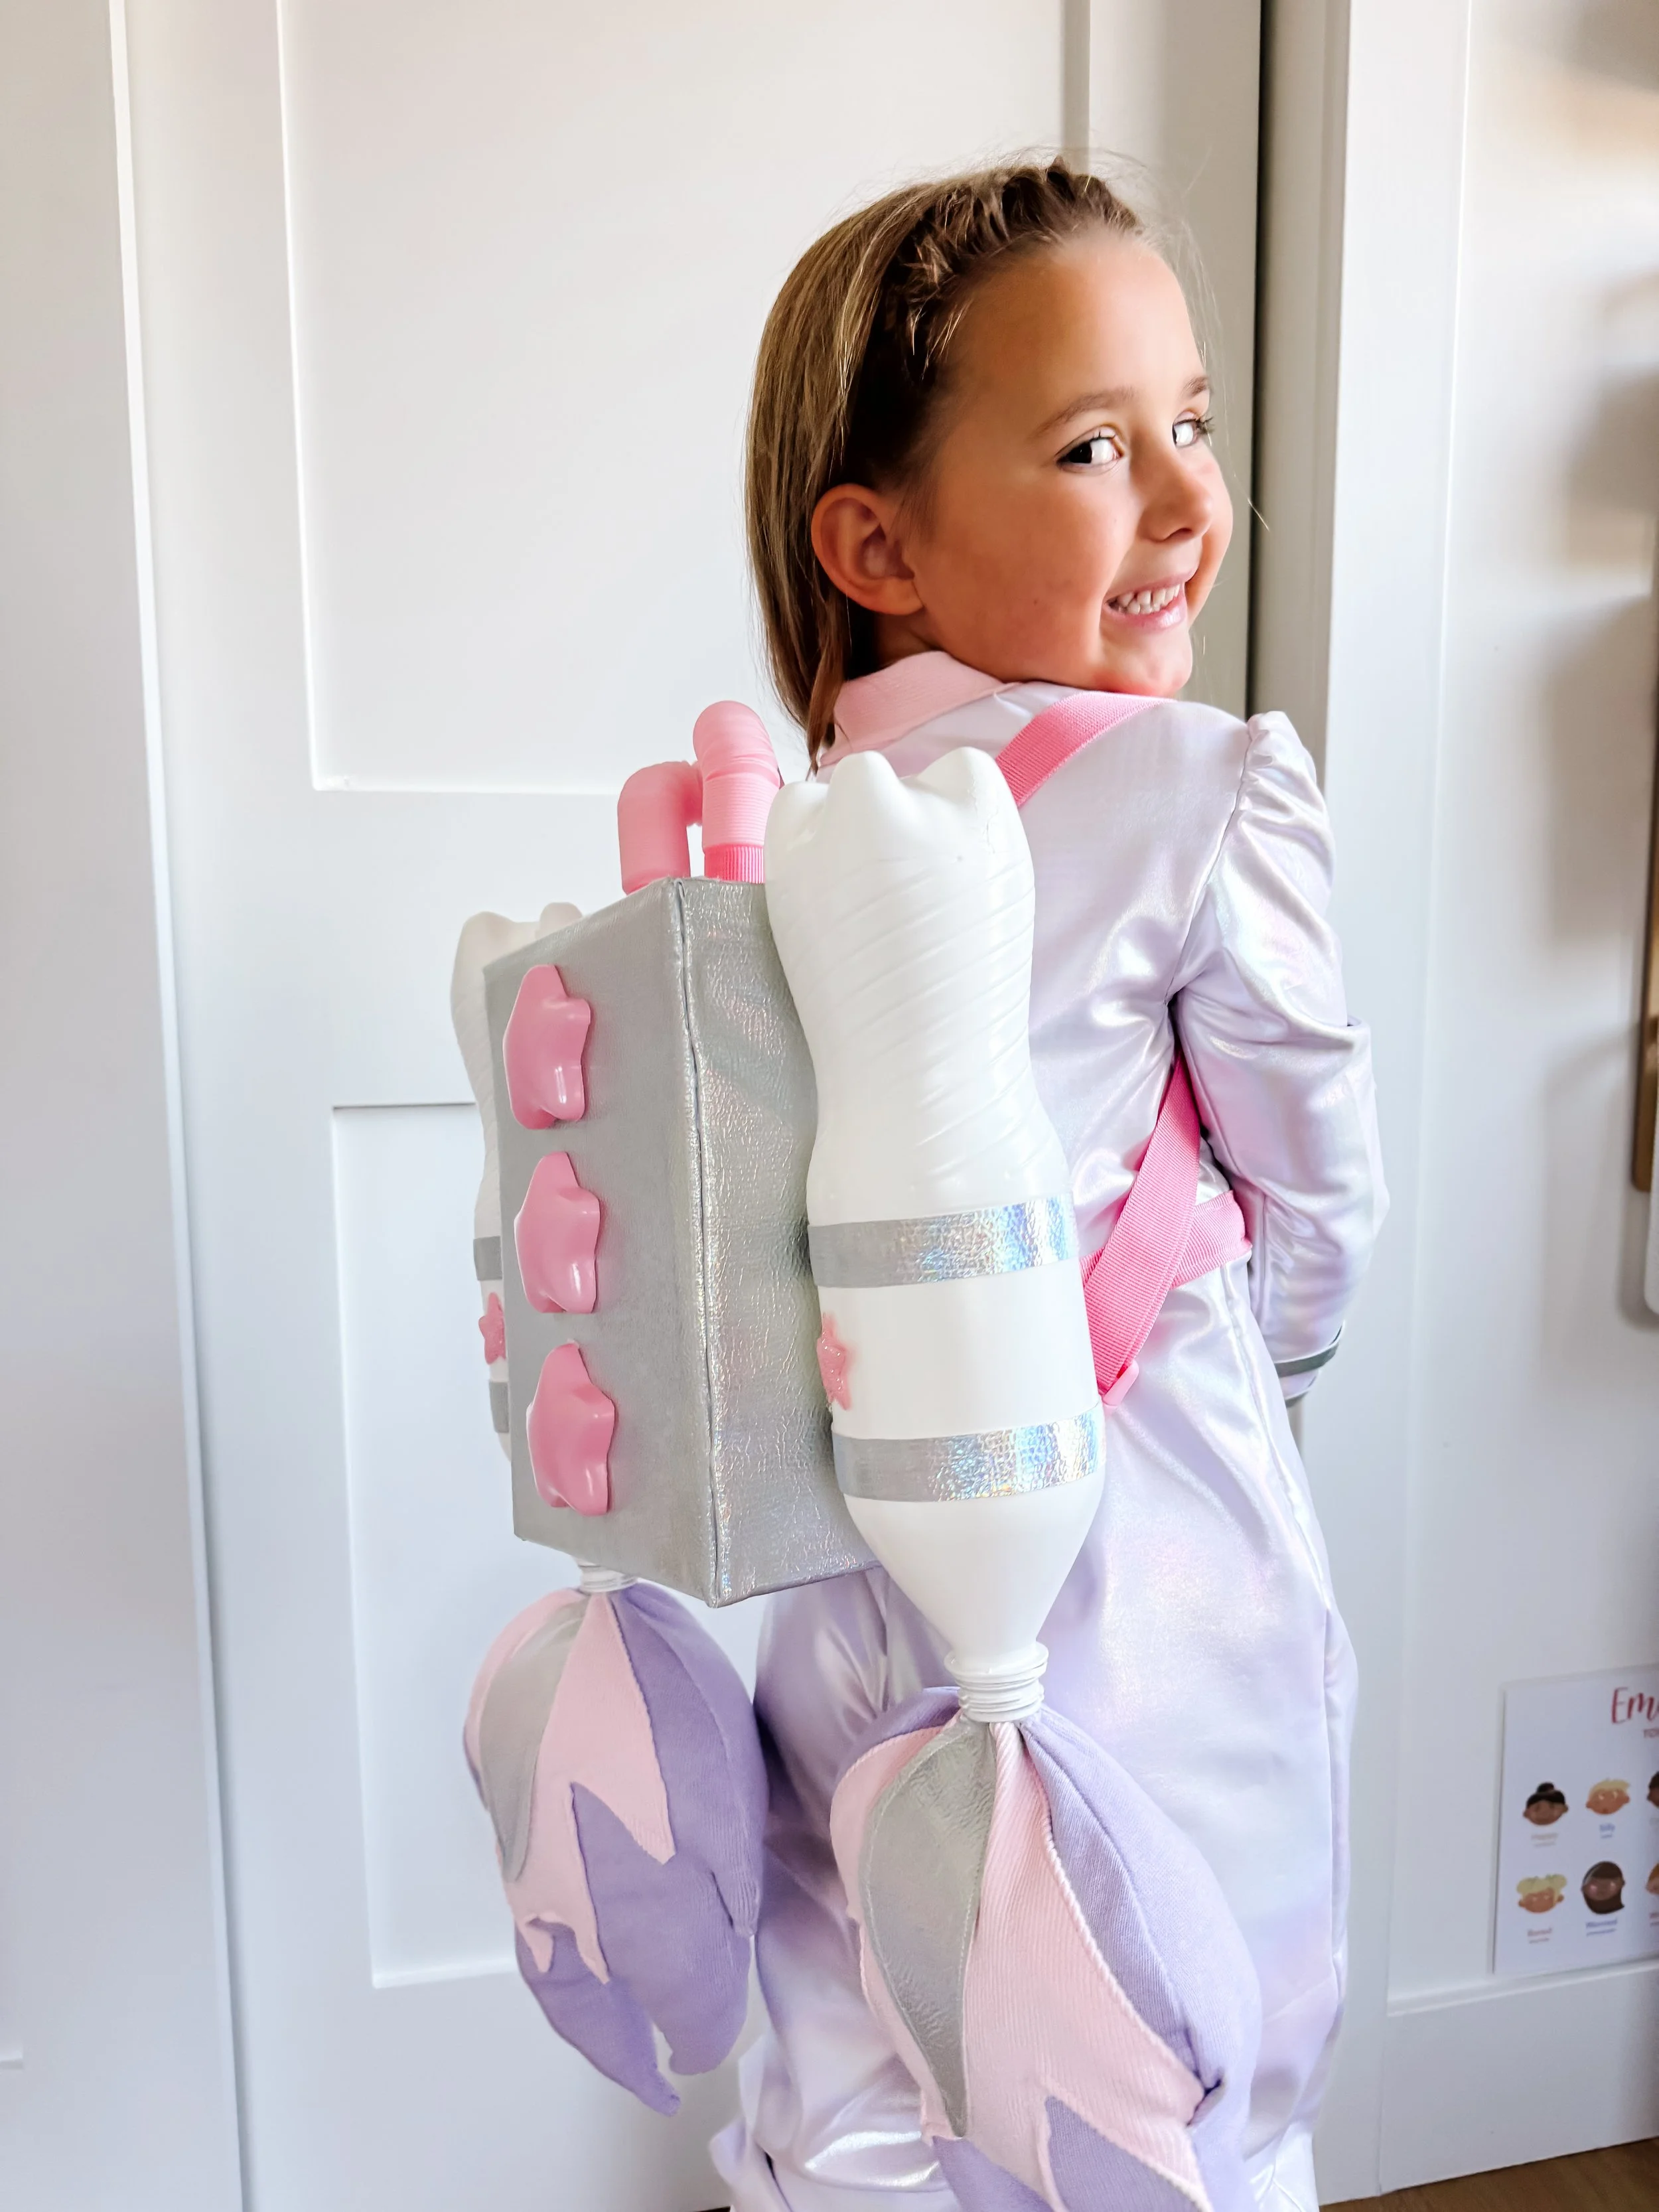
Step 3: Build the Jetpack
Spray paint two empty soda bottles silver (or wrap them in metallic paper). I spray painted them white for a clean look. Make sure you go slowly with the spray paint, allowing it to dry at least 10-15min between coats. Do a light mist for each coat in order to avoid drips. If you have a primer spray paint, that can help ensure that the paint doesn’t crack.
Decorate the bottles with strips of holographic faux leather fabric and small pink felt stars. You can also add lights to the inside of the jet back if you want it to light up at night.
Attach the bottles side by side onto a cardboard box wrapped in silver faux leather fabric. This forms the jetpack base. You can use fabric glue or super for this. You’ll want to find a stable place to set the jet back so that it can dry completely and the bottles are secure.
Glue pink bendy straws or tubing into the top of the bottles for fun “oxygen hoses.” I used pastel pink fidget tubes, but you can also use white or glow in the dark for an added effect. You can also add string lights to the inside to make it light up.
Attach pink backpack straps so your child can wear it easily. I followed the same looping pattern as one of Sofia’s backpacks at home to make the straps adjustable. This makes it easier to ensure it works for multiple years. Just follow how your existing backpack works as you feed the straps through the pink buckles. I put the clippable claw buckles at the bottom so that it would be easy to take on and off.
✨ Want extra glow? Add battery-operated LED lights inside the bottles!


Step 4: Add Rocket Flames
Cut flame shapes from pink, lavender, and silver felt. Layer them together to create a “shooting flame” look.
Glue the flames into the bottom opening of the soda bottles.
Let them dangle freely for movement while your little astronaut blasts off into space!
Step 5: Final Touches
Put on the sparkly suit, belt, and helmet.
Strap on the jetpack.
Add silver gloves or holographic boots if you have them.
And just like that—you’ve created the most adorable pastel astronaut costume ever!
Why We Love This Costume
It’s budget-friendly and mostly made from recycled materials.
The girly twist with pastel colors and sparkles makes it stand out from store-bought costumes.
It’s perfect for playtime beyond Halloween—kids can explore space from their playroom year-round.
How to Extend This Space Activity
Once the astronaut costume is finished, keep the learning going with these easy activity extensions:
🚀 Space Mission Pretend Play
Have your child pretend they’re going on a space mission. Ask them where they’re traveling and what they discover.
🪐 Planet Sorting Game
Cut out paper planets and sort them by size, color, or order from the sun.
👩🚀 Astronaut Training Course
Create a simple obstacle course and pretend it’s astronaut training with low gravity, moon rocks, or space tunnels.
These extensions help stretch playtime and turn dress-up into a full space learning experience.
More DIY Costume Ideas
If you loved this girly astronaut costume, check out our other DIY dress-up tutorials:
DIY Super Hero Costume
🚀 Ready to blast off? Save this tutorial for Halloween or your next space-themed birthday party. Don’t forget to share your creations with us using #GoodnightFoxCostumes so we can see your little astronauts in action!


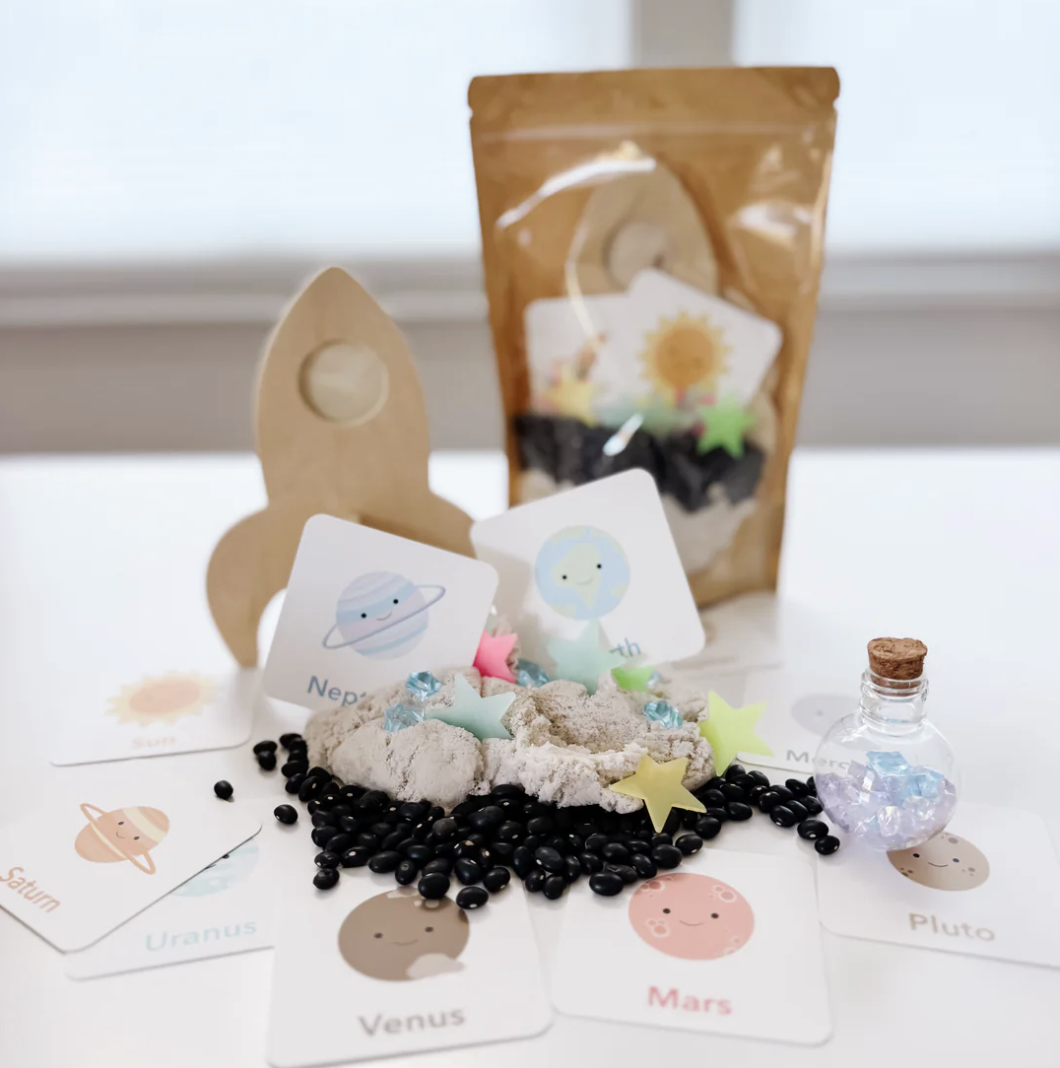
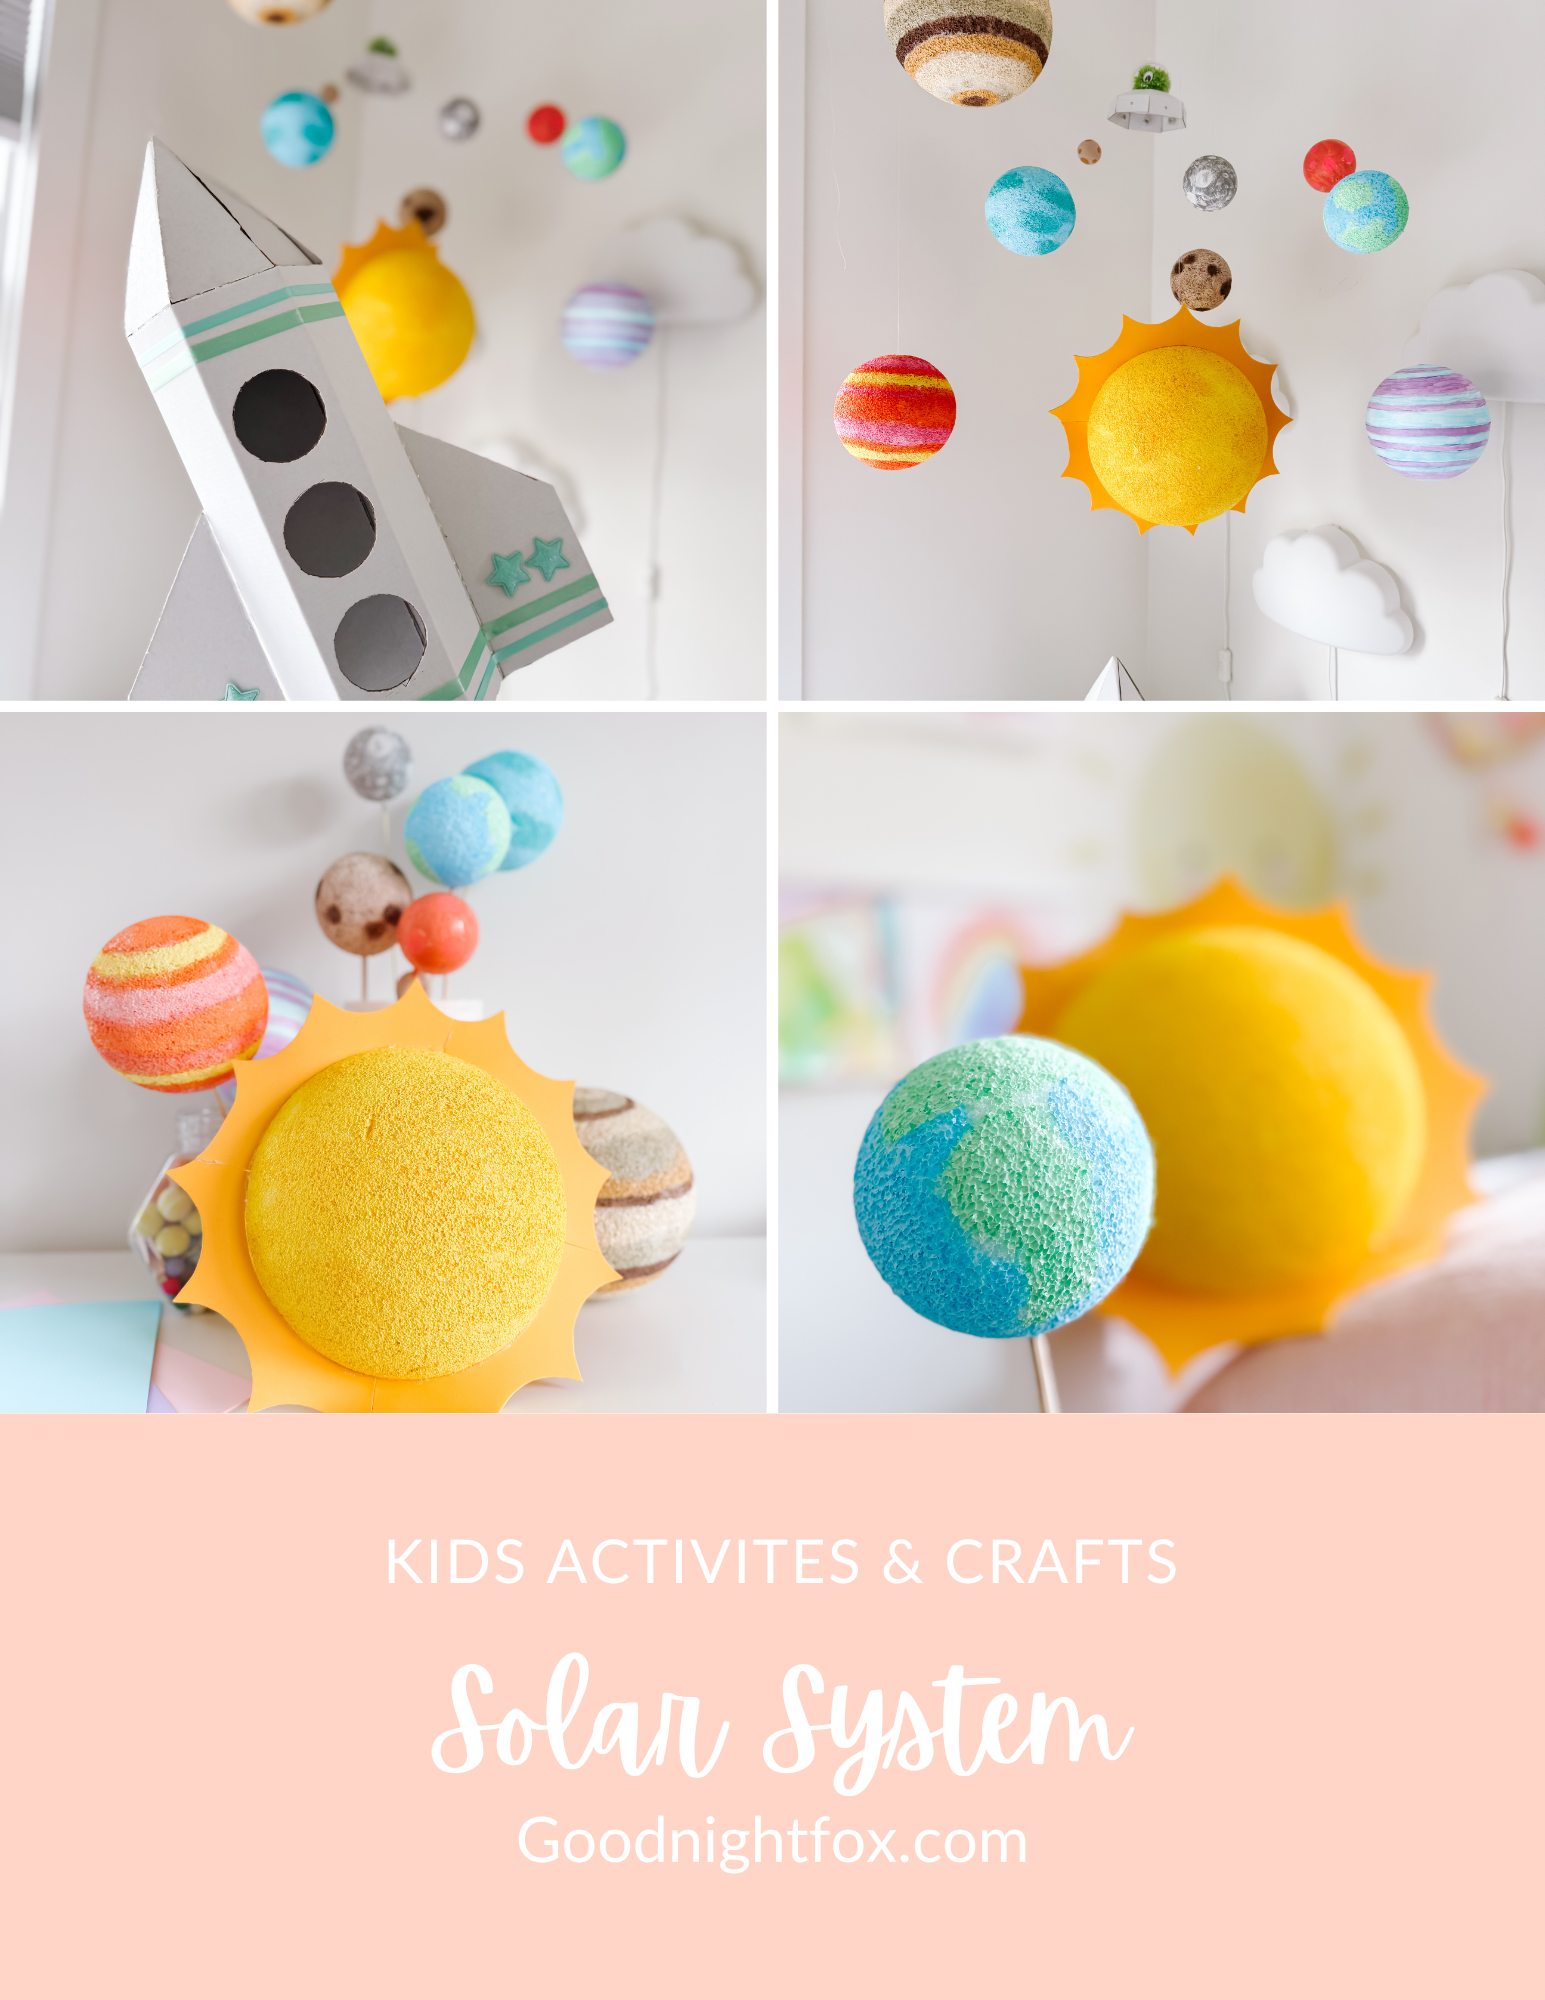
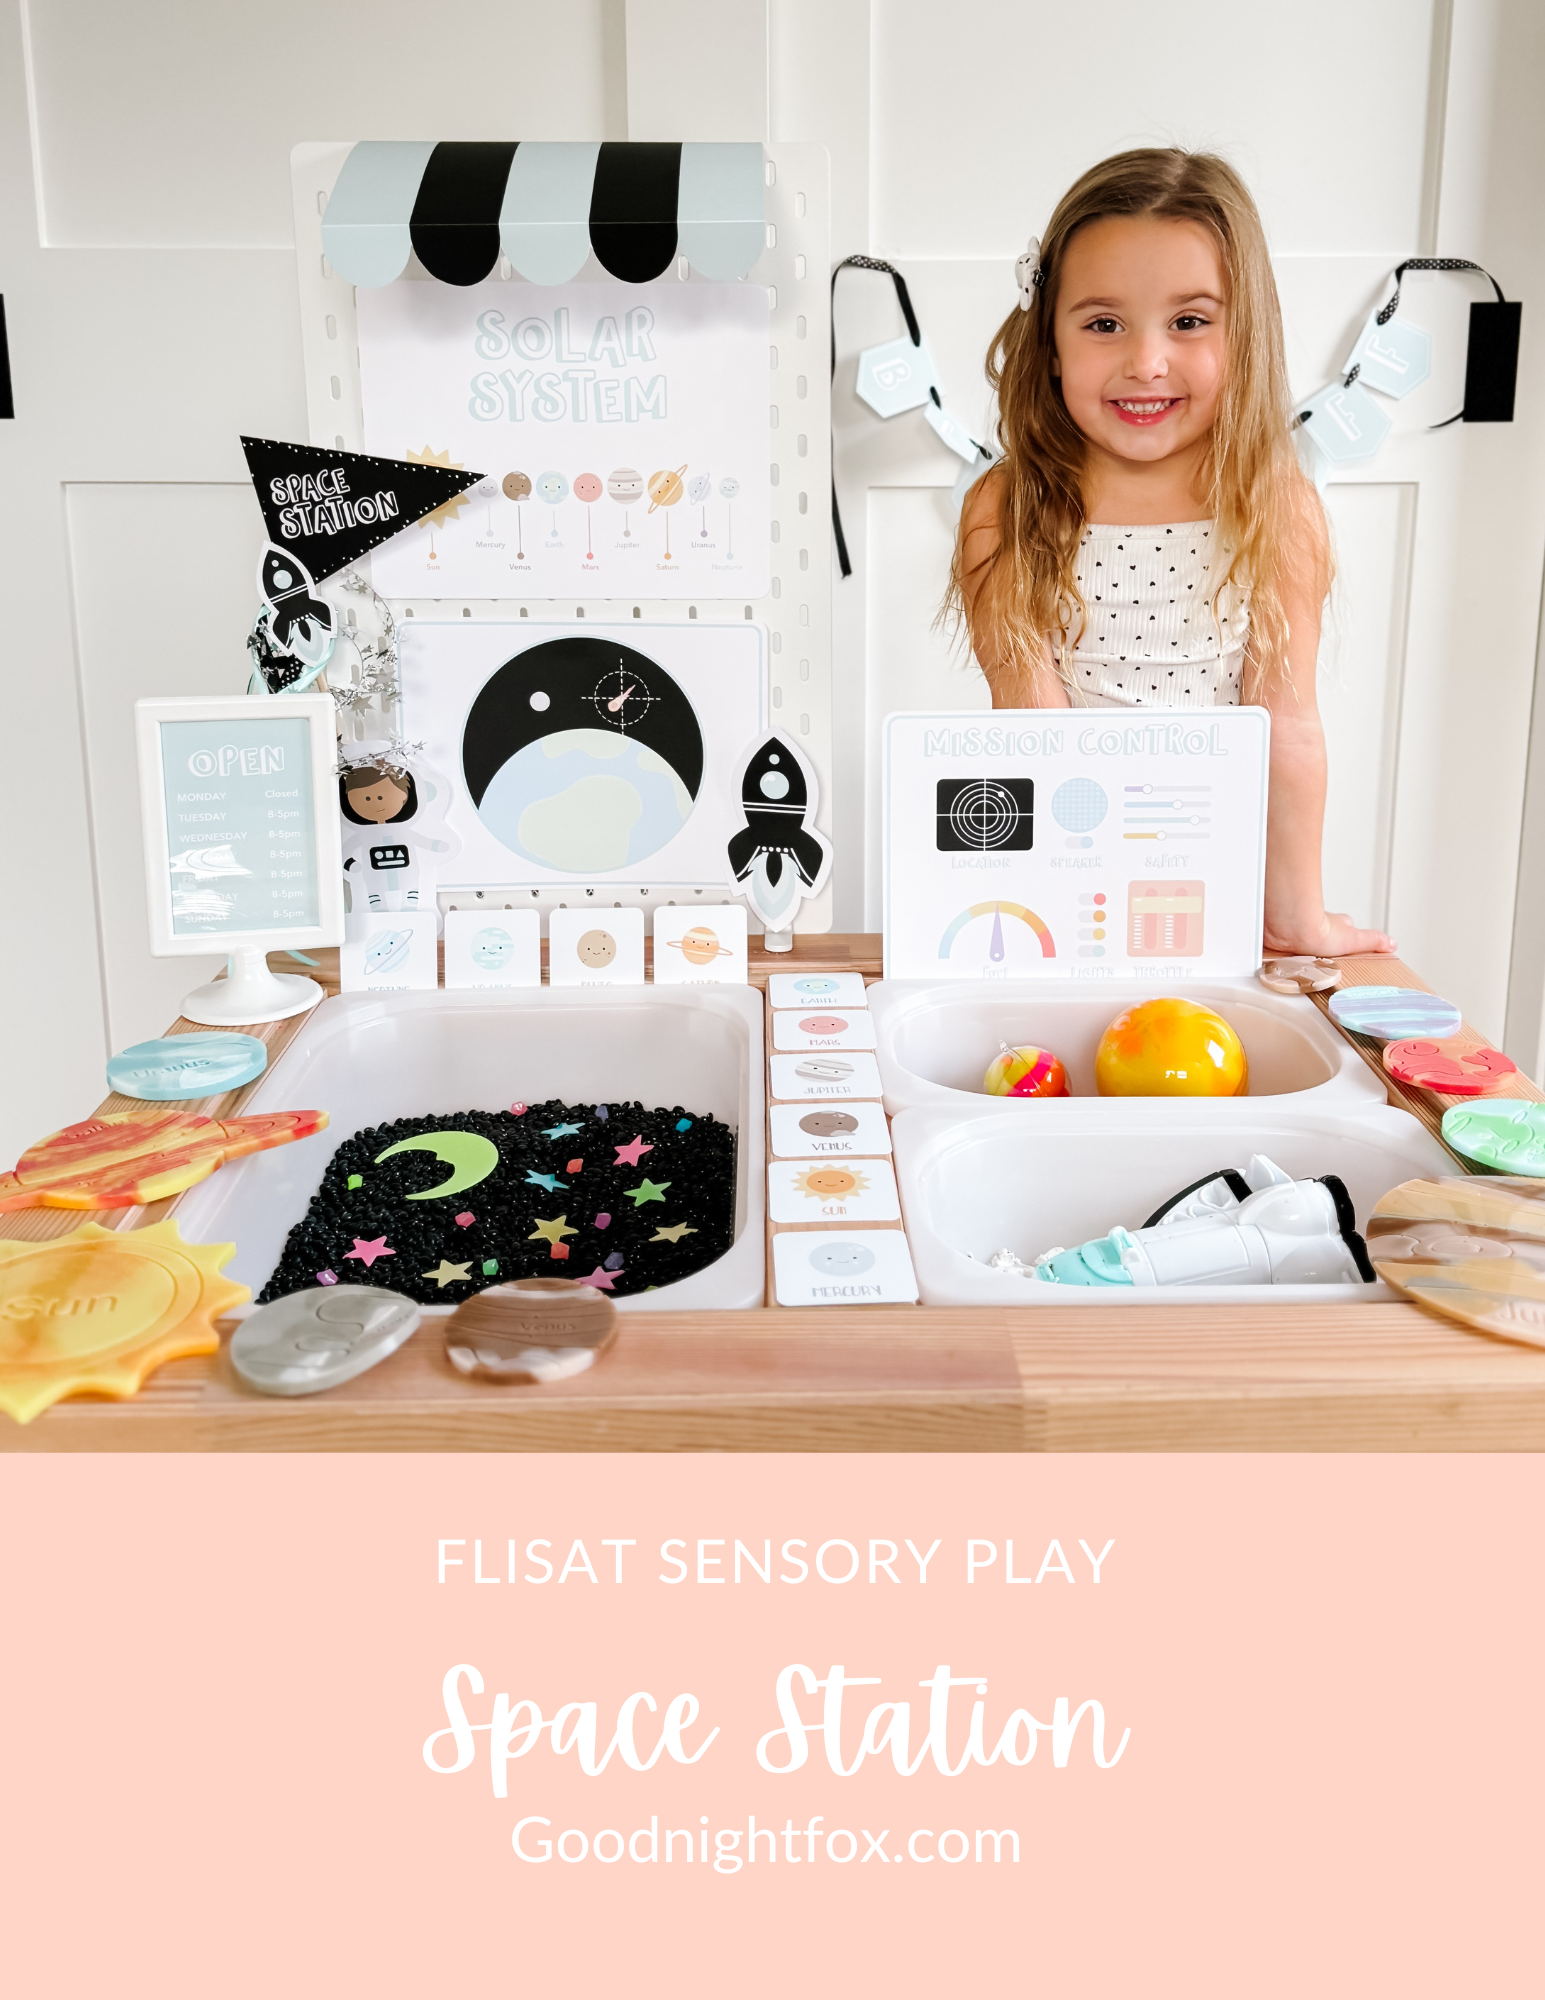
More Space & STEM Activities for Kids
If your child loved making this astronaut costume, here are more space-themed learning activities to explore:
These activities pair perfectly with imaginative play and help reinforce early science and STEM concepts through hands-on learning.
Turn Dress-Up Into a Full Learning Day
Want to turn this astronaut costume into a complete space-themed learning experience?
Our homeschool resources include space-inspired activities, sensory play ideas, and printables designed to help kids learn through play. They’re perfect for preschoolers, kindergarten kids, and homeschool families looking for low-prep, high-engagement activities.
👉 Explore our space learning resources and free printables to extend the fun beyond this craft.