
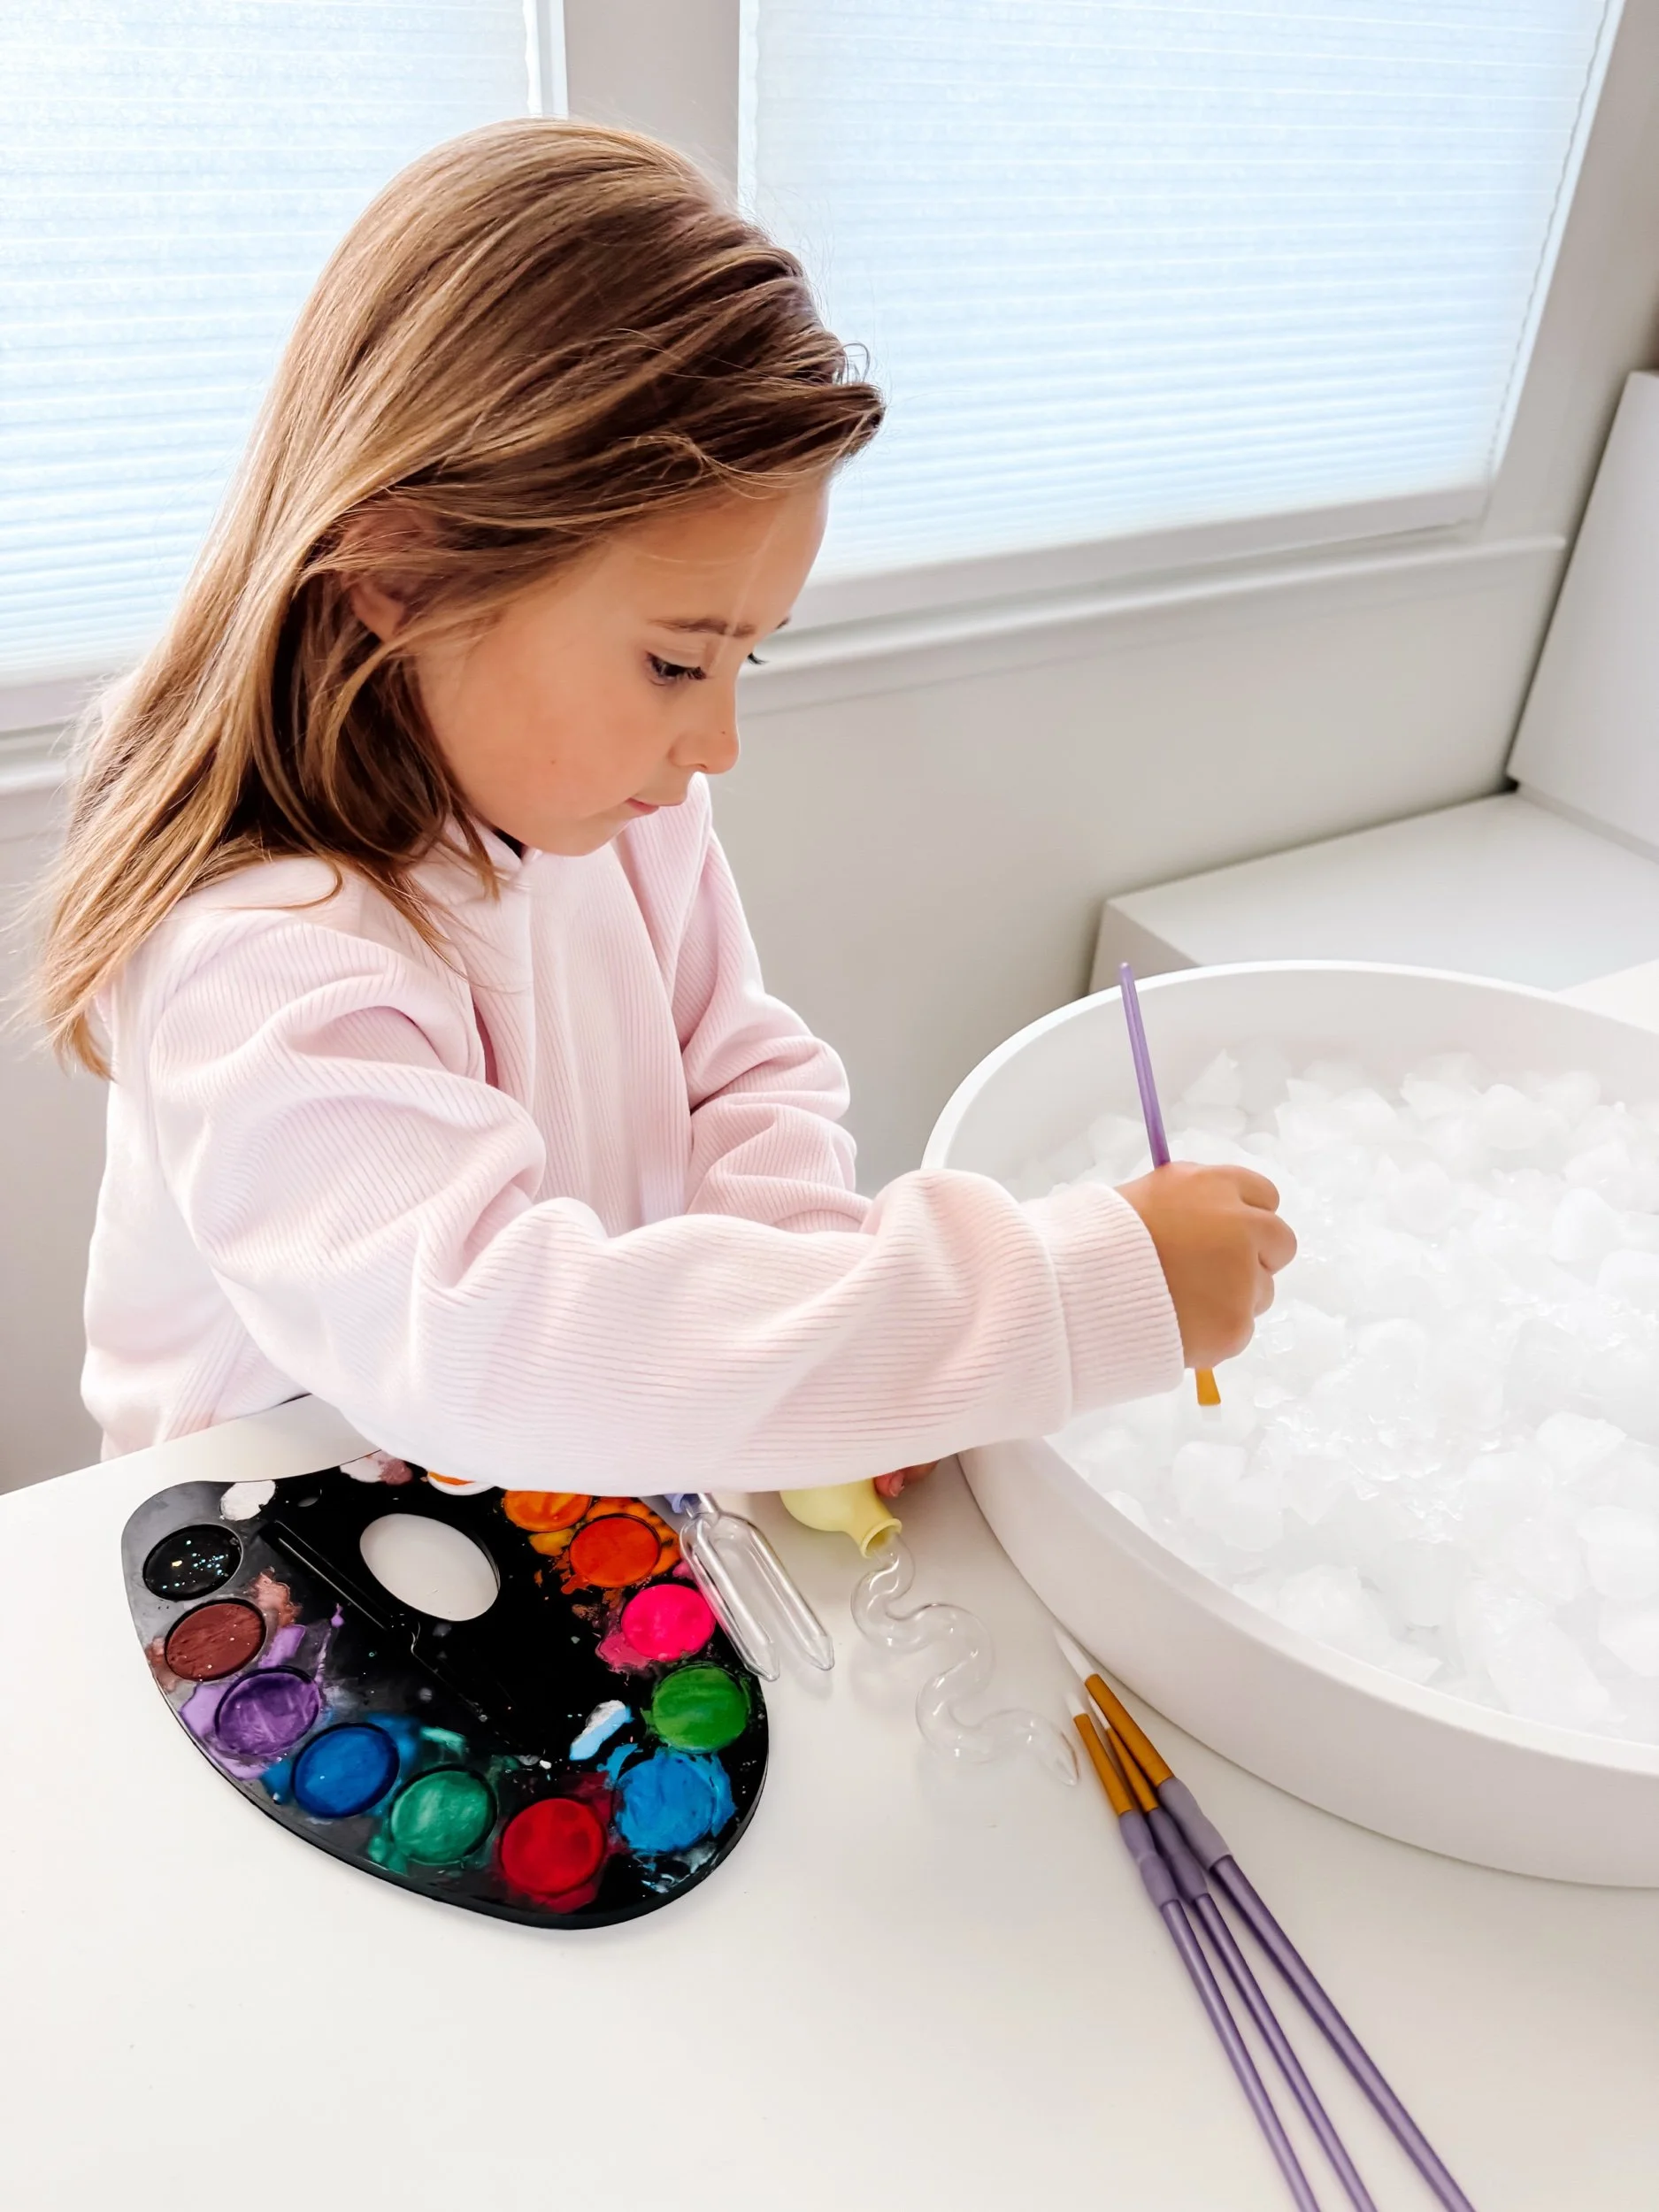
If you’re looking for a magical winter sensory art activity that keeps preschoolers and homeschool kids engaged for ages, this Winter Ice Painting Activity is a must-try! Using a big play tray, ice blocks, watercolors, and drippers, kids transform frozen cubes into vibrant mini art pieces while exploring color mixing, melting effects, and hands-on sensory play.
This easy, low-prep setup combines STEM + art, and it’s one of the most affordable sensory play ideas for toddlers during the colder months.
⭐ What You Need
Large play tray or shallow bin
Ice cubes or frozen blocks (silicone molds make fun shapes!)
Liquid watercolors or food coloring
Ice droppers / pipettes / drippers
Small cups or bowls
Optional: warm water for melting experiments
Towels or a mat for drip-catching
🎨 Learning Objectives by Age Group
0–6 months
Visual stimulation from bright colors on ice
Sensory introduction to cold temperatures (always fully supervised)
6–12 months
Cause-and-effect: watching color spread and ice melt
Early language: “cold,” “blue,” “wet,” “melt”
12 months–2 years
Fine motor strengthening using drippers
Simple color recognition
Sensory exploration through touch and visual observation
3–4 years
Color mixing experimentation
Early science: observing how warm water changes ice
Strengthening hand/finger muscles through squeezing and dripping
4–6 years
Introduction to states of matter (solid → liquid)
Intentionally creating secondary colors
Artistic planning and experimentation
Observing gradients, saturation, and melting timelines
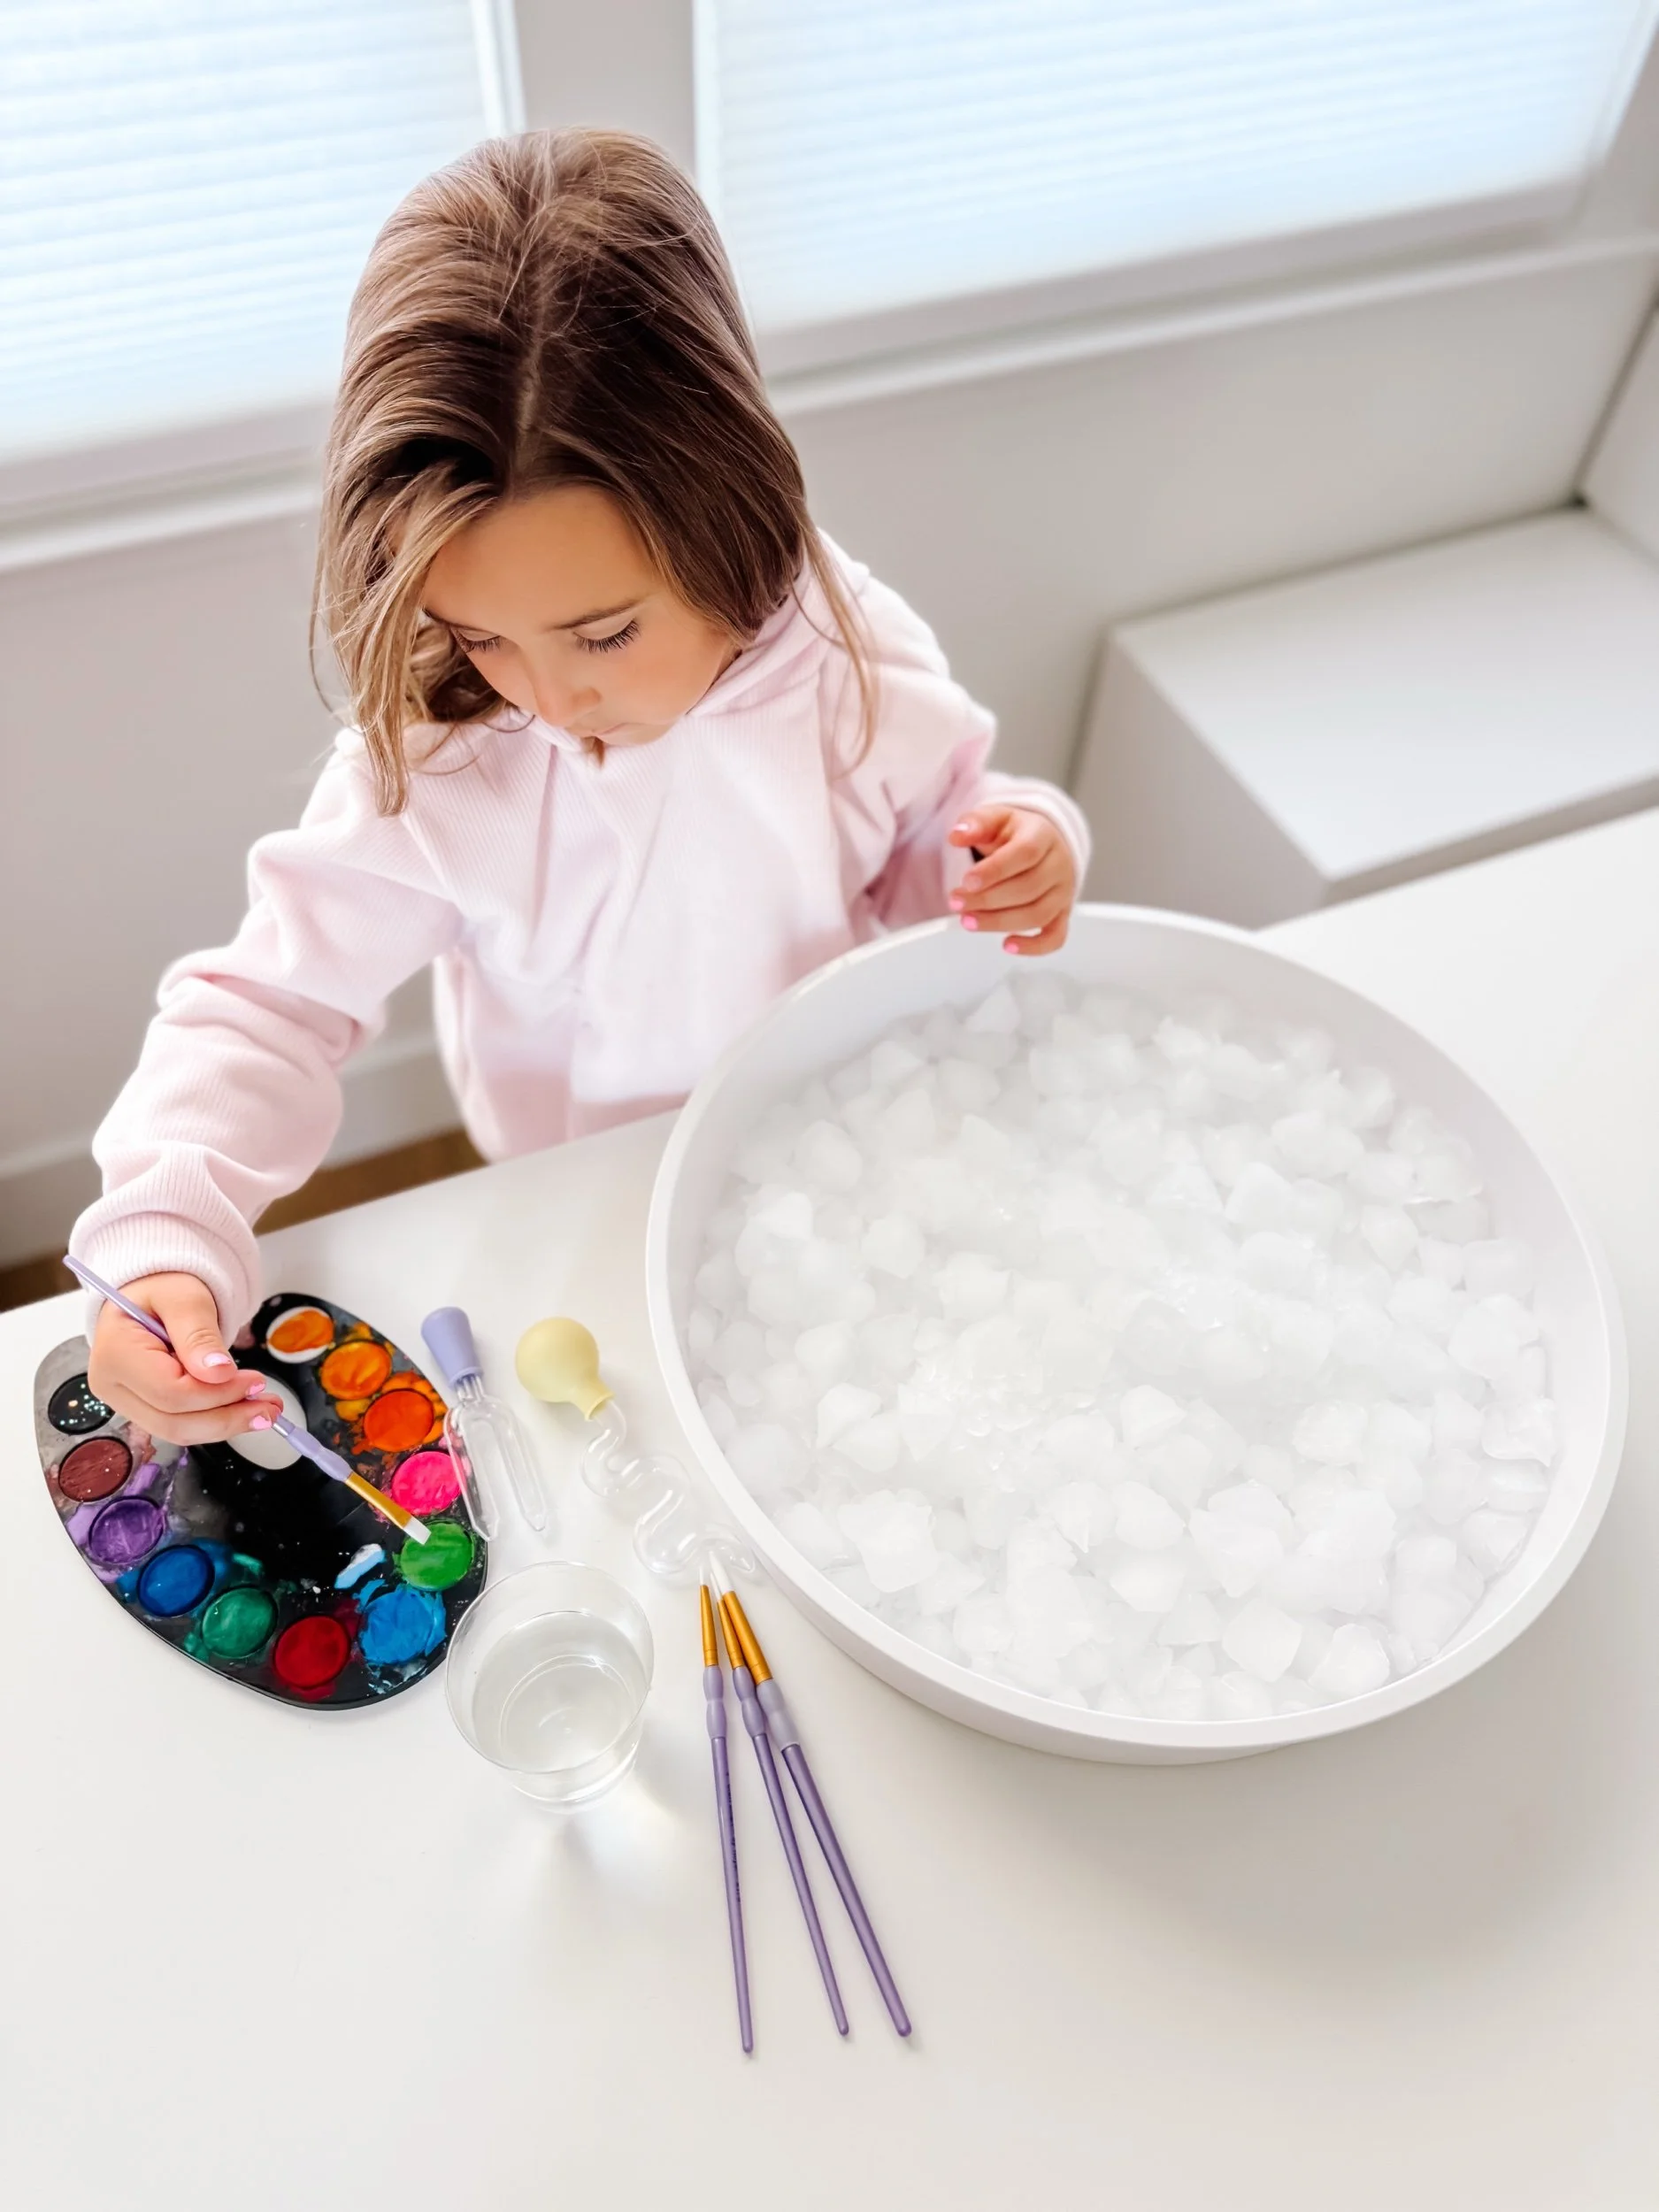
🎨 Sensory Activity: Winter Ice Painting
A perfect mix of sensory play, art, and science!
Materials
Ice
Watercolors
Drippers
Tray
Optional warm water
Instructions
Fill your tray with ice cubes or large frozen blocks.
Pour watercolors into small cups and set out drippers.
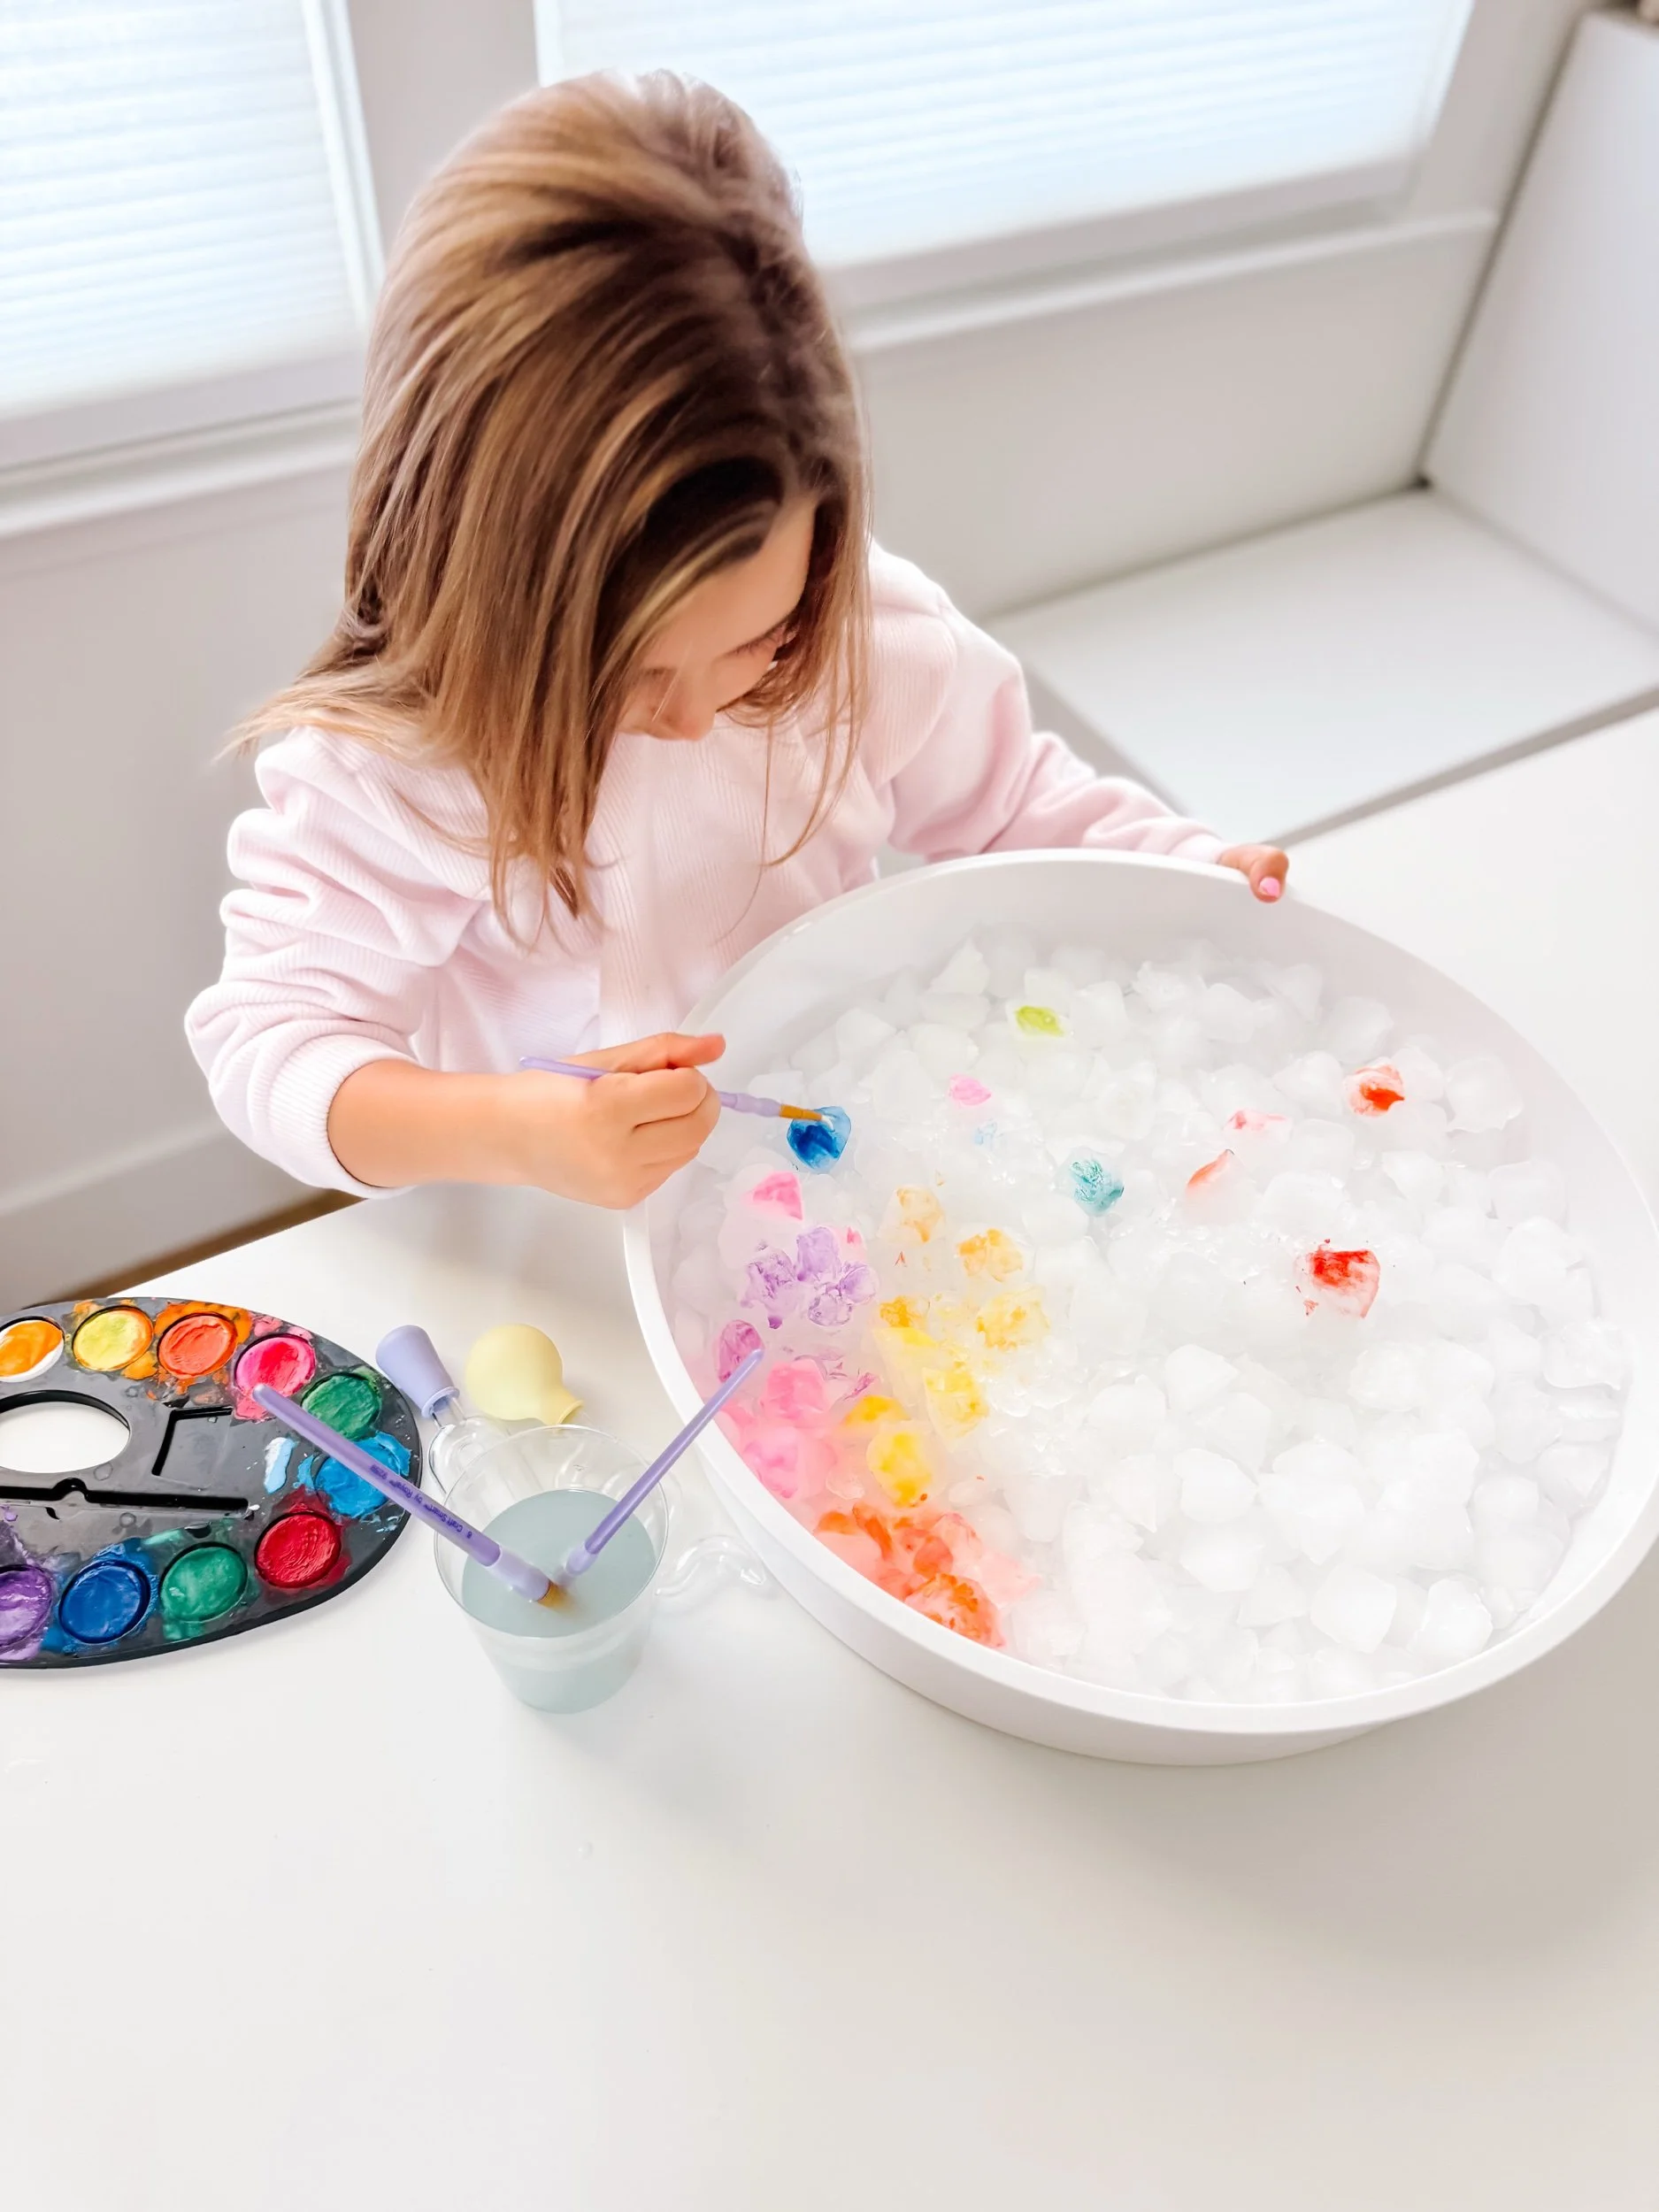
Invite kids to squeeze and drip color onto the ice.
Watch the colors swirl, blend, and slide across the melting surface.
Add warm water for a “melting rainbow” effect.
Encourage kids to experiment: layering colors, mixing hues, or creating patterns.
Let them paint, melt, and explore freely!
Kids naturally stay engaged for long stretches as they drip, mix, and observe the constantly changing artwork.
💬 Educational Discussion Prompts for Homeschool Parents
Turn this into a mini winter lesson by asking:
“What happens when you add warm water to the ice?”
“Can you tell me how the colors move across the ice?”
“Which colors mix to make new ones?”
“What does the ice feel like? Smooth? Rough? Slippery?”
“Is the ice melting faster when you add more color?”
“What happens if you drip two colors in the same spot?”
“Let’s predict: which color will spread the fastest?”
These questions build language, STEM thinking, observation skills, and creative reasoning.

❄️ Benefits of Winter Ice Painting
Strengthens fine motor control
Encourages creative exploration
Teaches color theory naturally
Builds early science understanding
Boosts independent play
Great for toddlers and preschoolers stuck indoors
Mess-free when contained to a tray
Uses simple household materials

🧠 Vocabulary Words (Winter + Art)
Freeze
Melt
Drip
Color
Mix
Shade
Ice
Water
Cold
Liquid
Solid
Paint
Blend
Observe
Experiment
Create
Transform
Squeeze
Drop
Spread
Pattern
Texture
Surface
Temperature
Change