What You’ll Learn In This Post:
How to organize an IKEA play kitchen for better play
How to encourage independent play
How to turn your kitchen into a pizza shop, bakery, and more
Quick hacks/swaps to make the Duktig IKEA kitchen look beautiful in your home
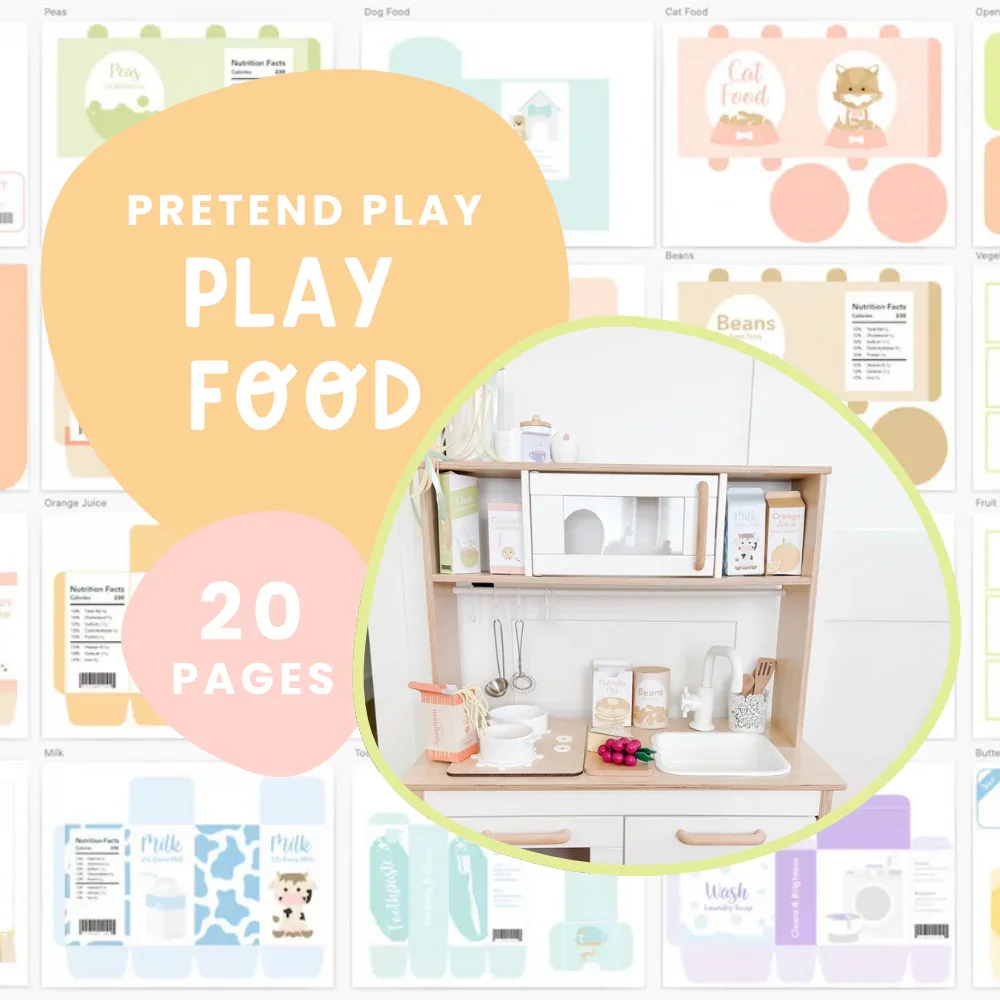
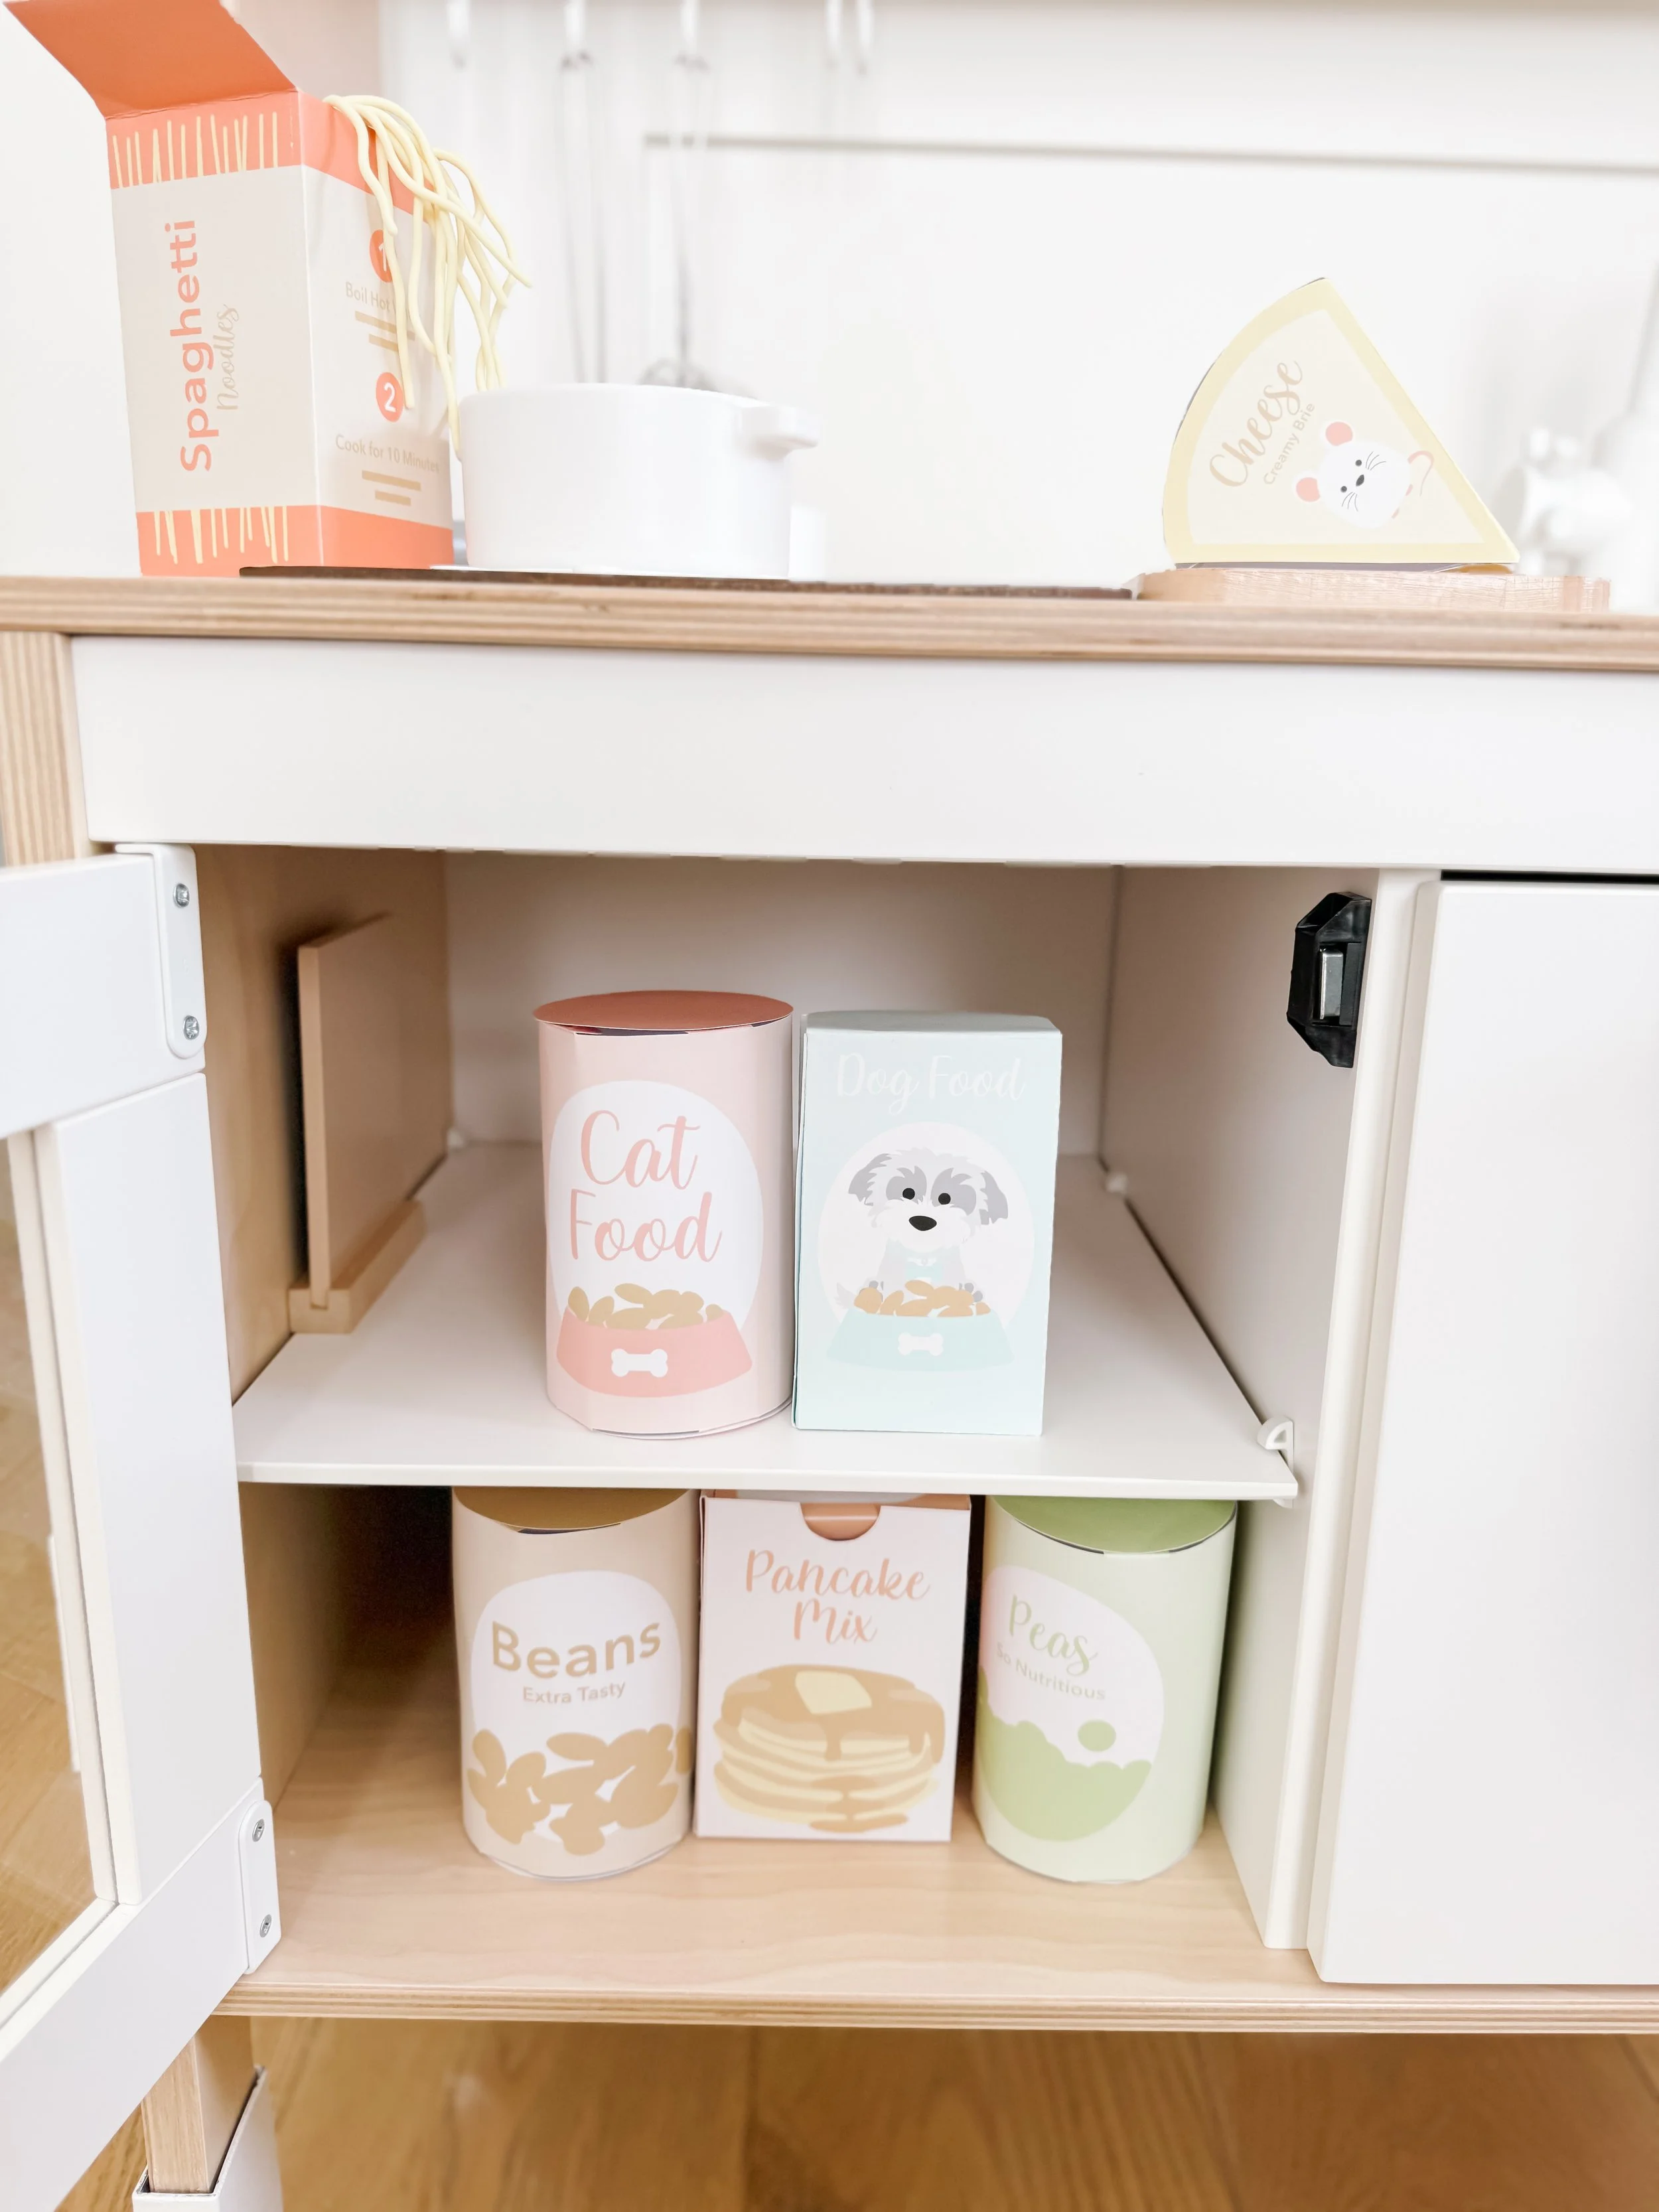
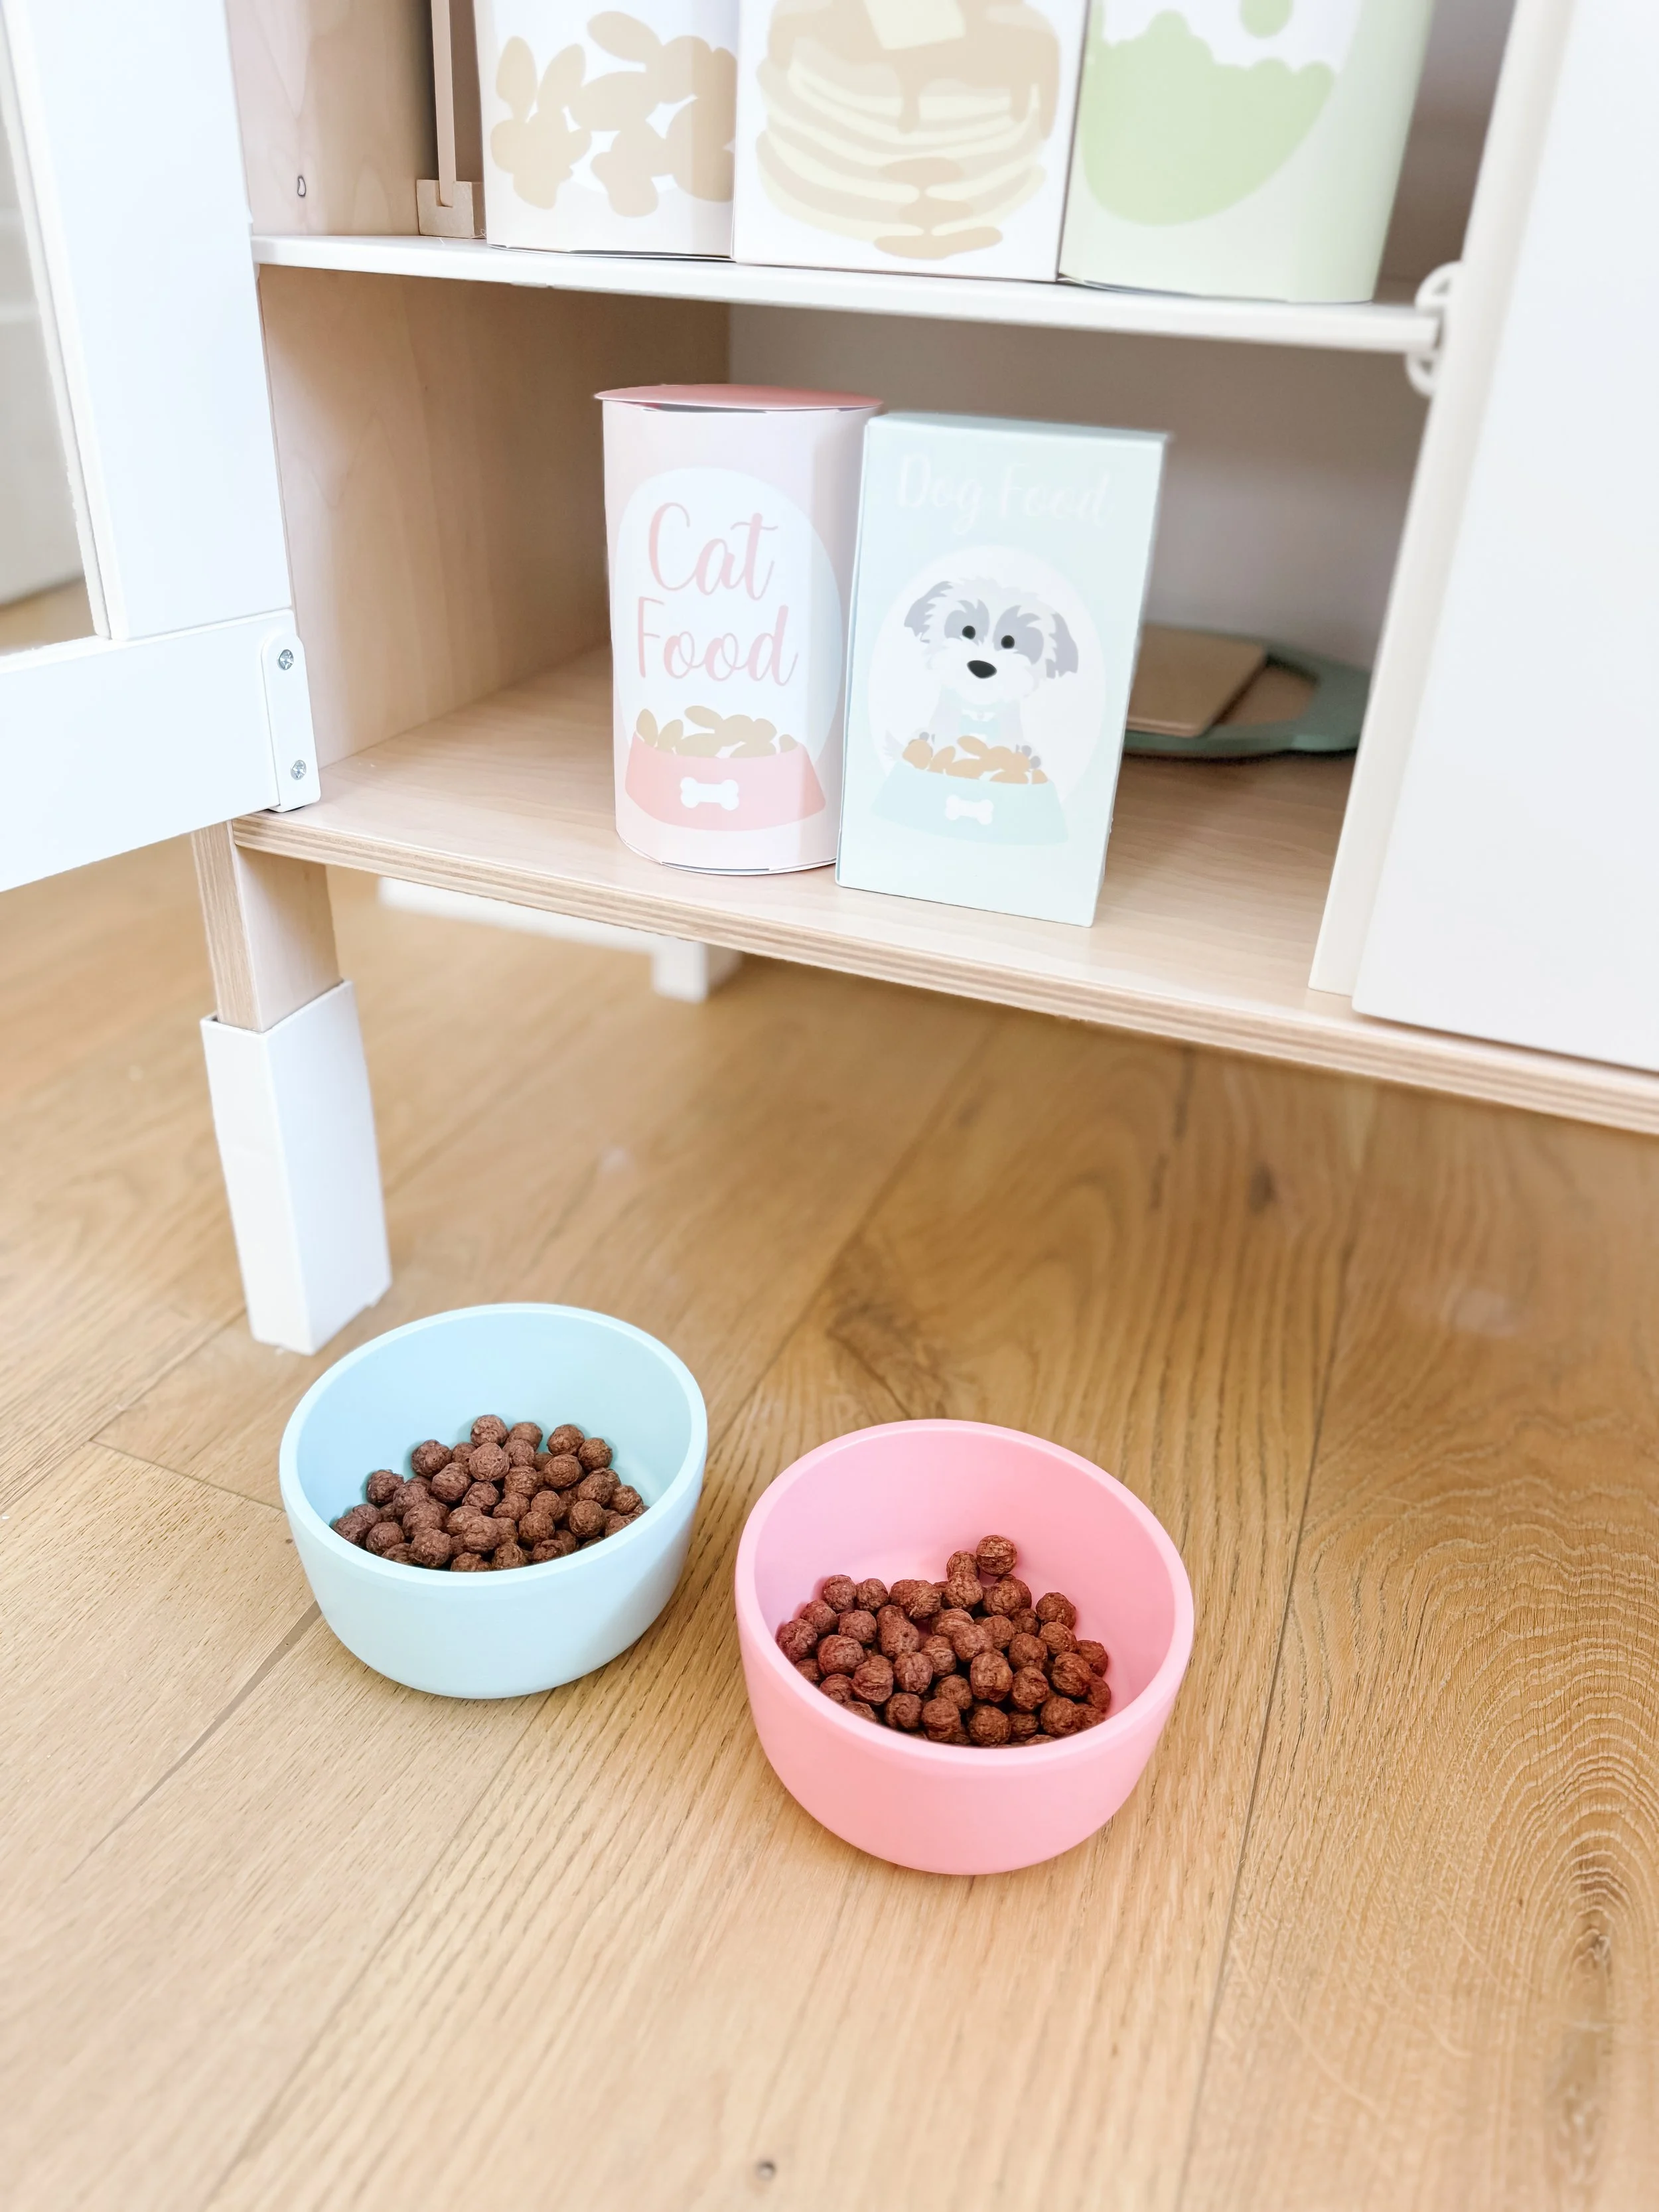
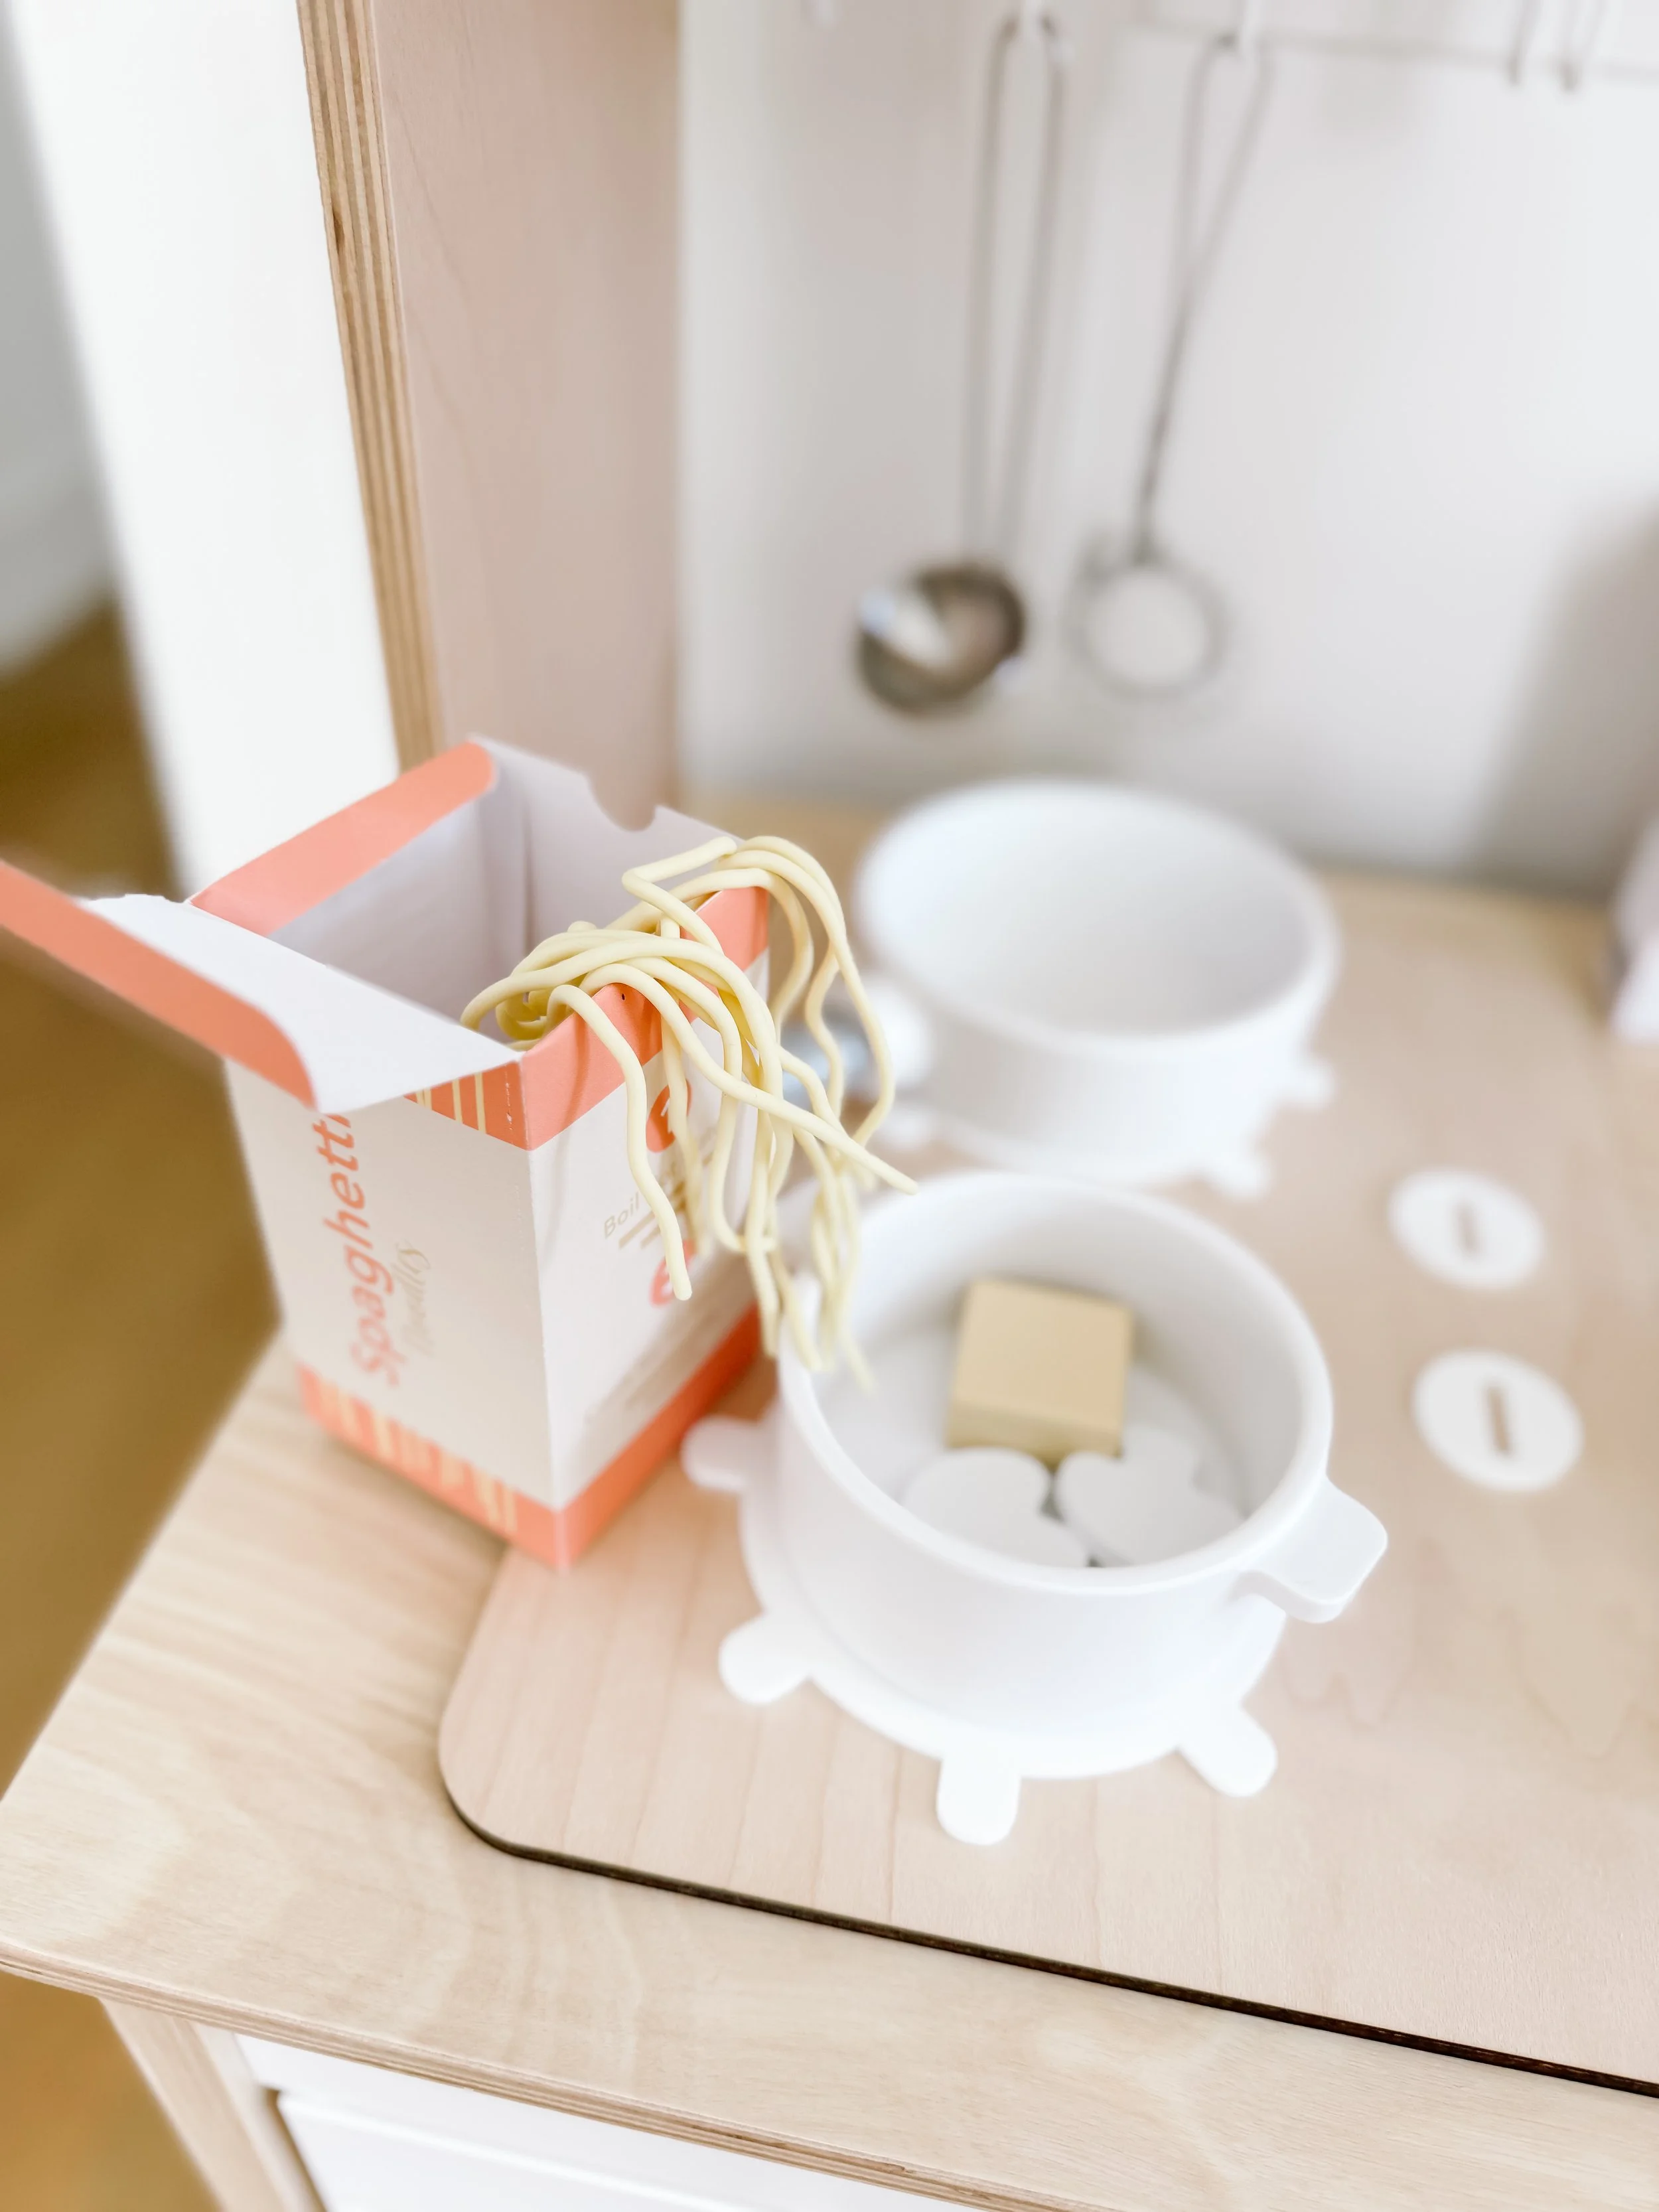
Printable Play Food
Join thousands of parents who get printable activities, sensory play ideas, and play-based learning inspiration delivered to their inbox. Start with this adorable printable play food you can use today.
Download the Printable Play FoodWhen I first brought home our IKEA play kitchen, I loved how cute it looked—but I quickly realized it wasn’t being used to its full potential.
It was more of a toy than a space.
So I decided to transform it into something more intentional—a functional, engaging learning space that would encourage independent play, creativity, and real-life skill building. I hope you love this IKEA play kitchen hack as much as I do.
What started as a simple upgrade turned into one of the most used areas in our home.
The Before
Before the transformation, the play kitchen felt:
underutilized
lacking structure
missing opportunities for meaningful play
It had the basics, but it didn’t invite my daughter to stay and play for long periods of time.
I wanted to create a space that felt:
inviting
purposeful
and easy for her to use independently

The Transformation
Instead of treating this like a toy, I approached it like a mini functional space within our home.
Every change I made was focused on one goal: making play more engaging, accessible, and intentional.


What I Changed
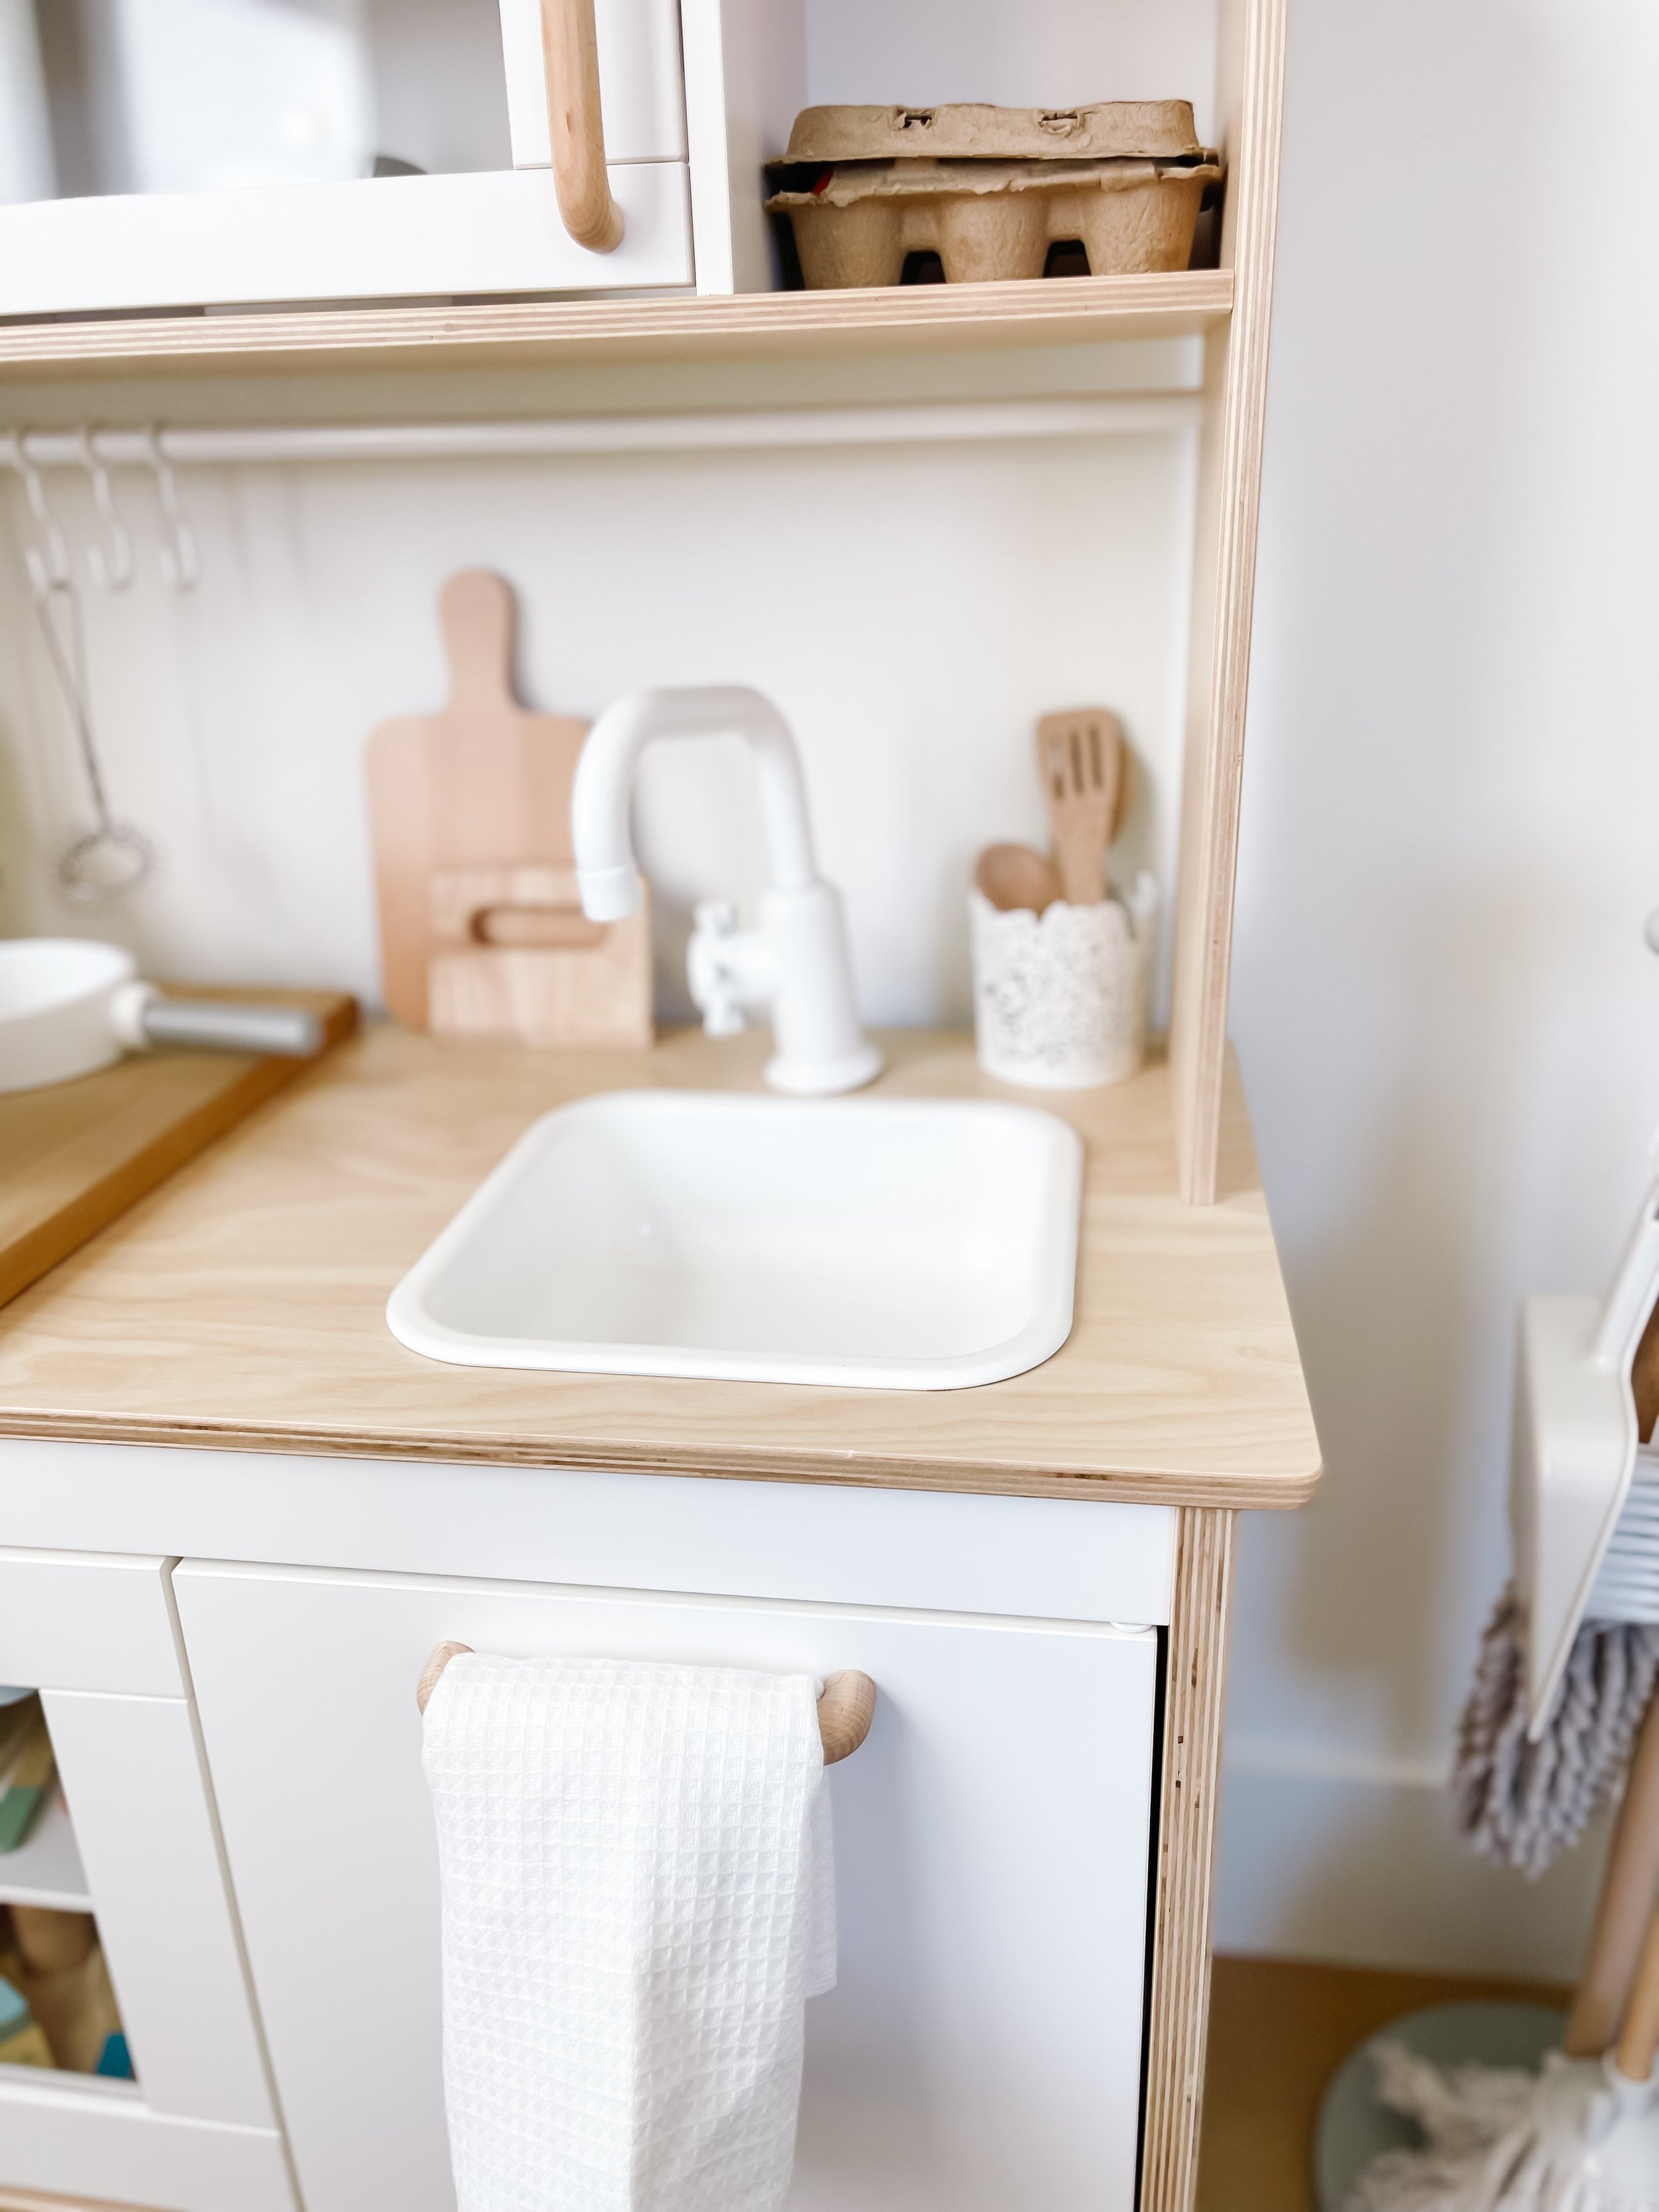
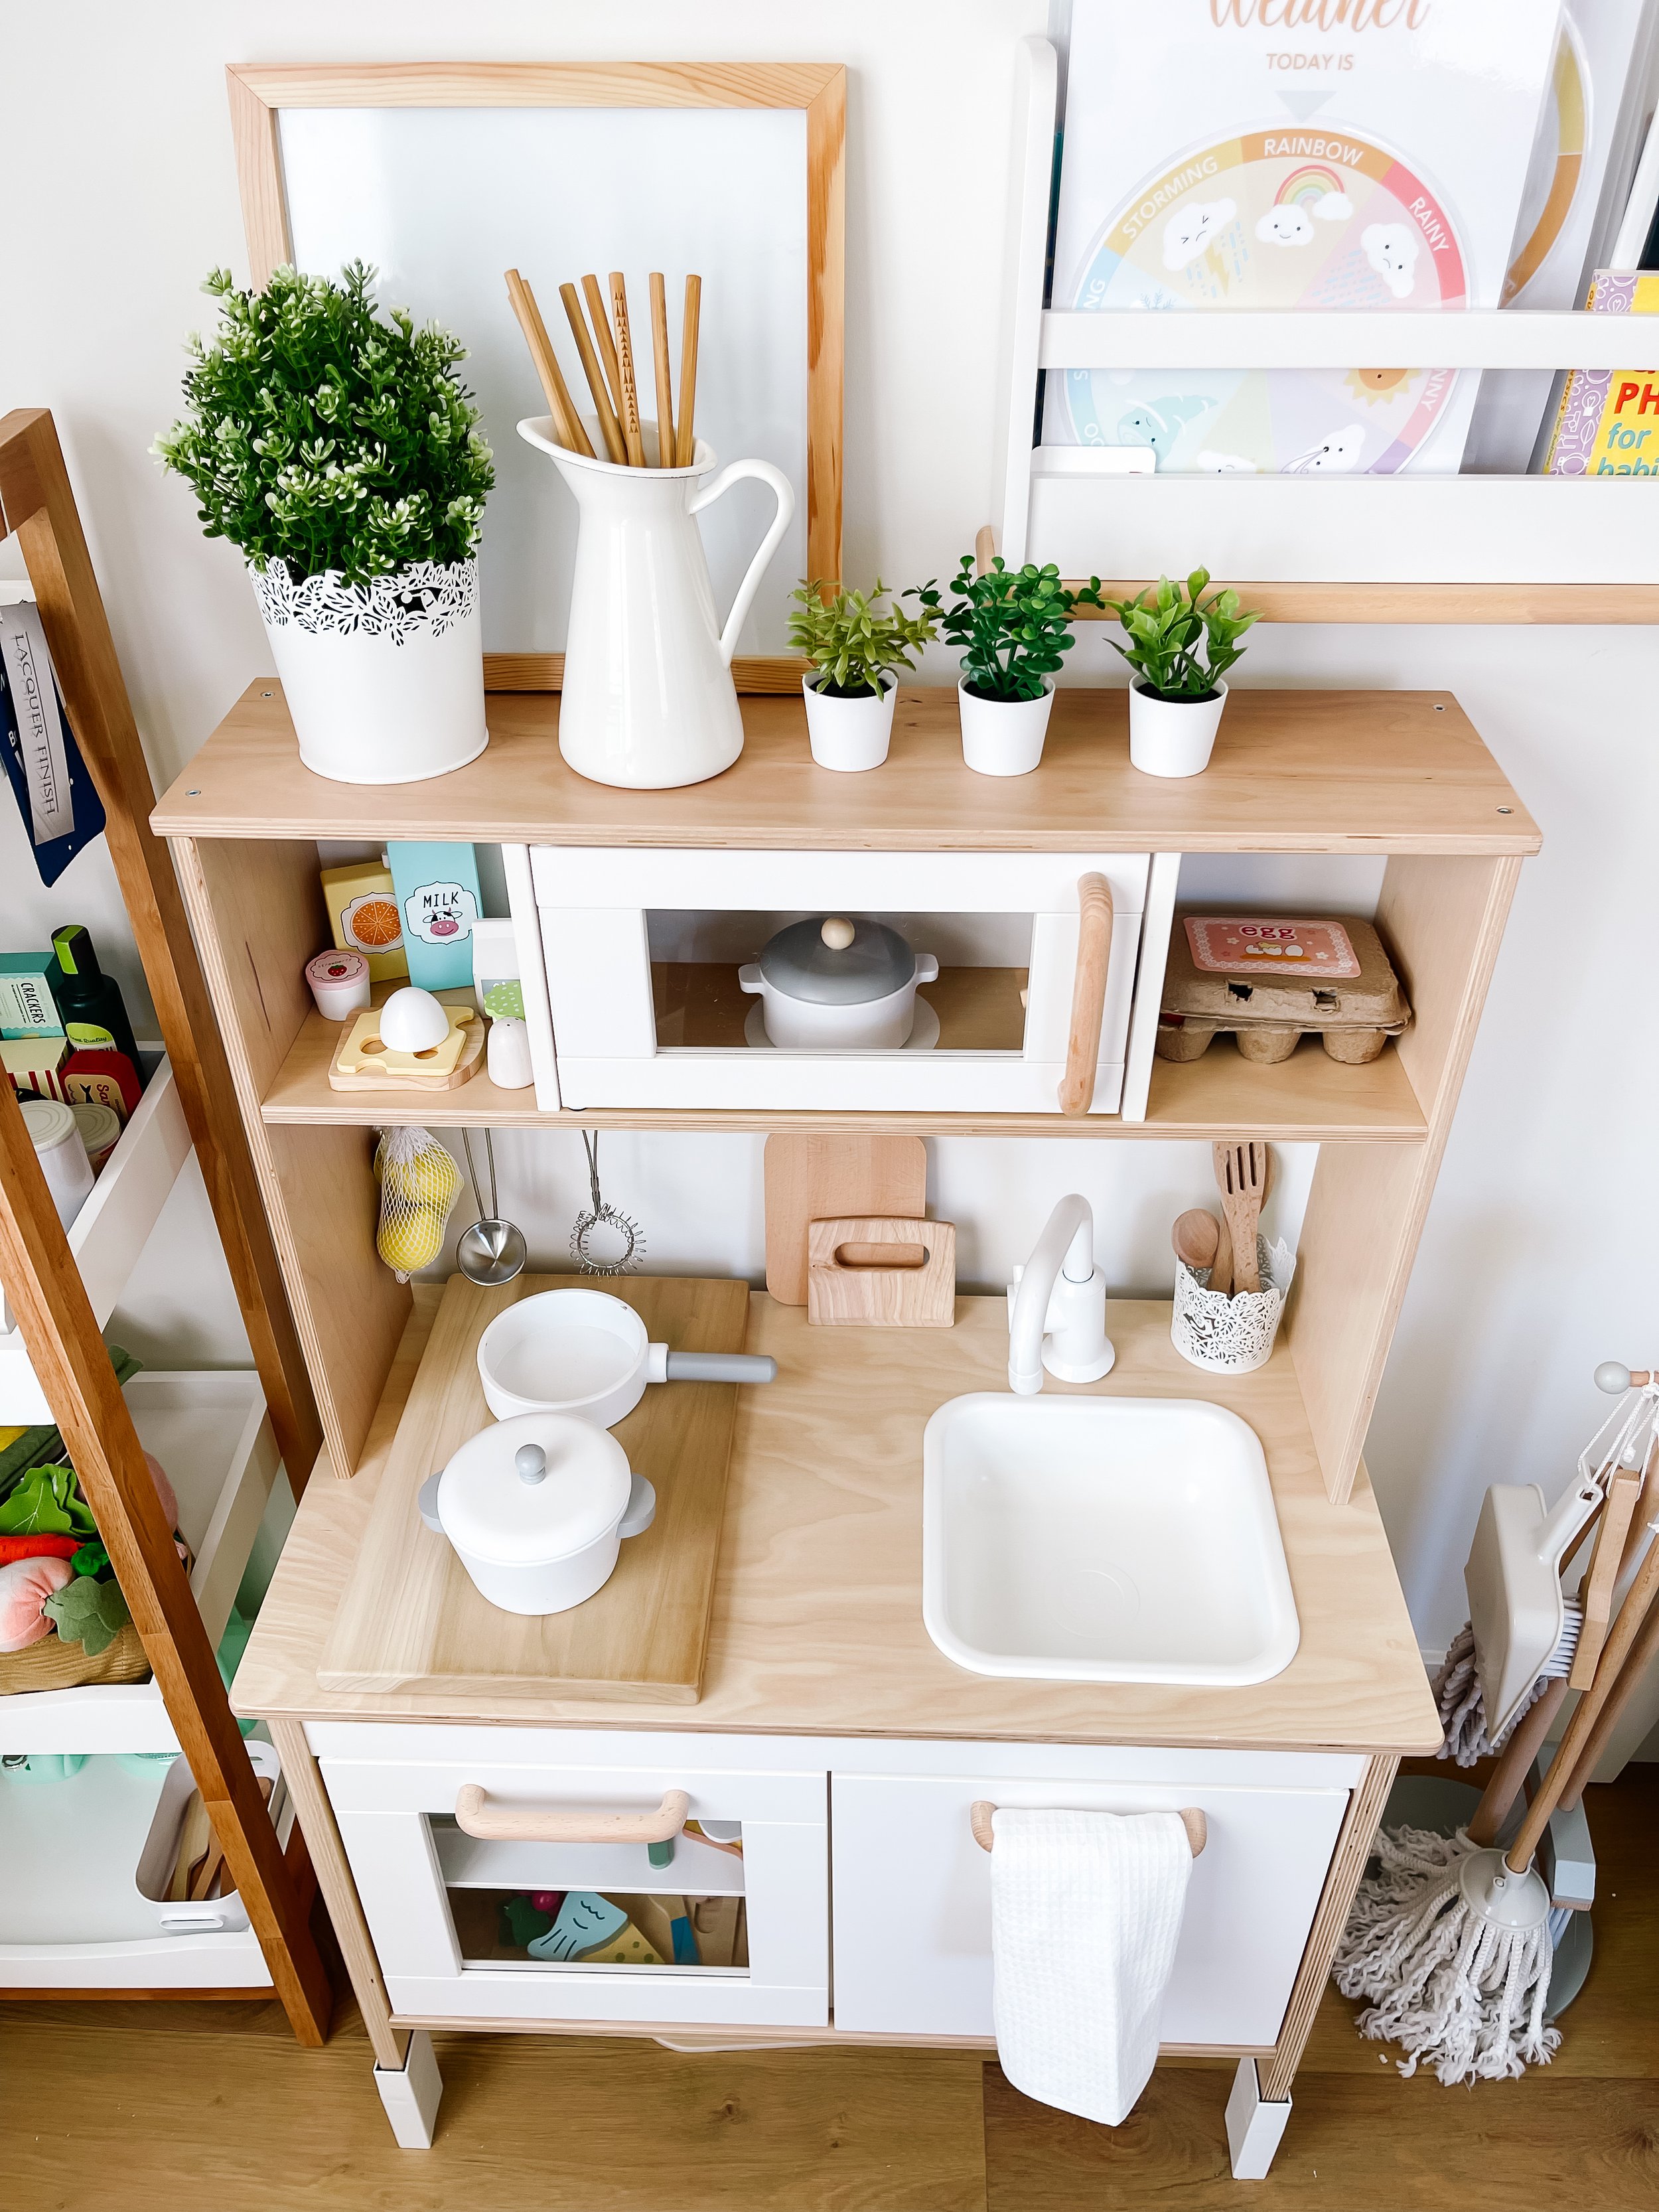
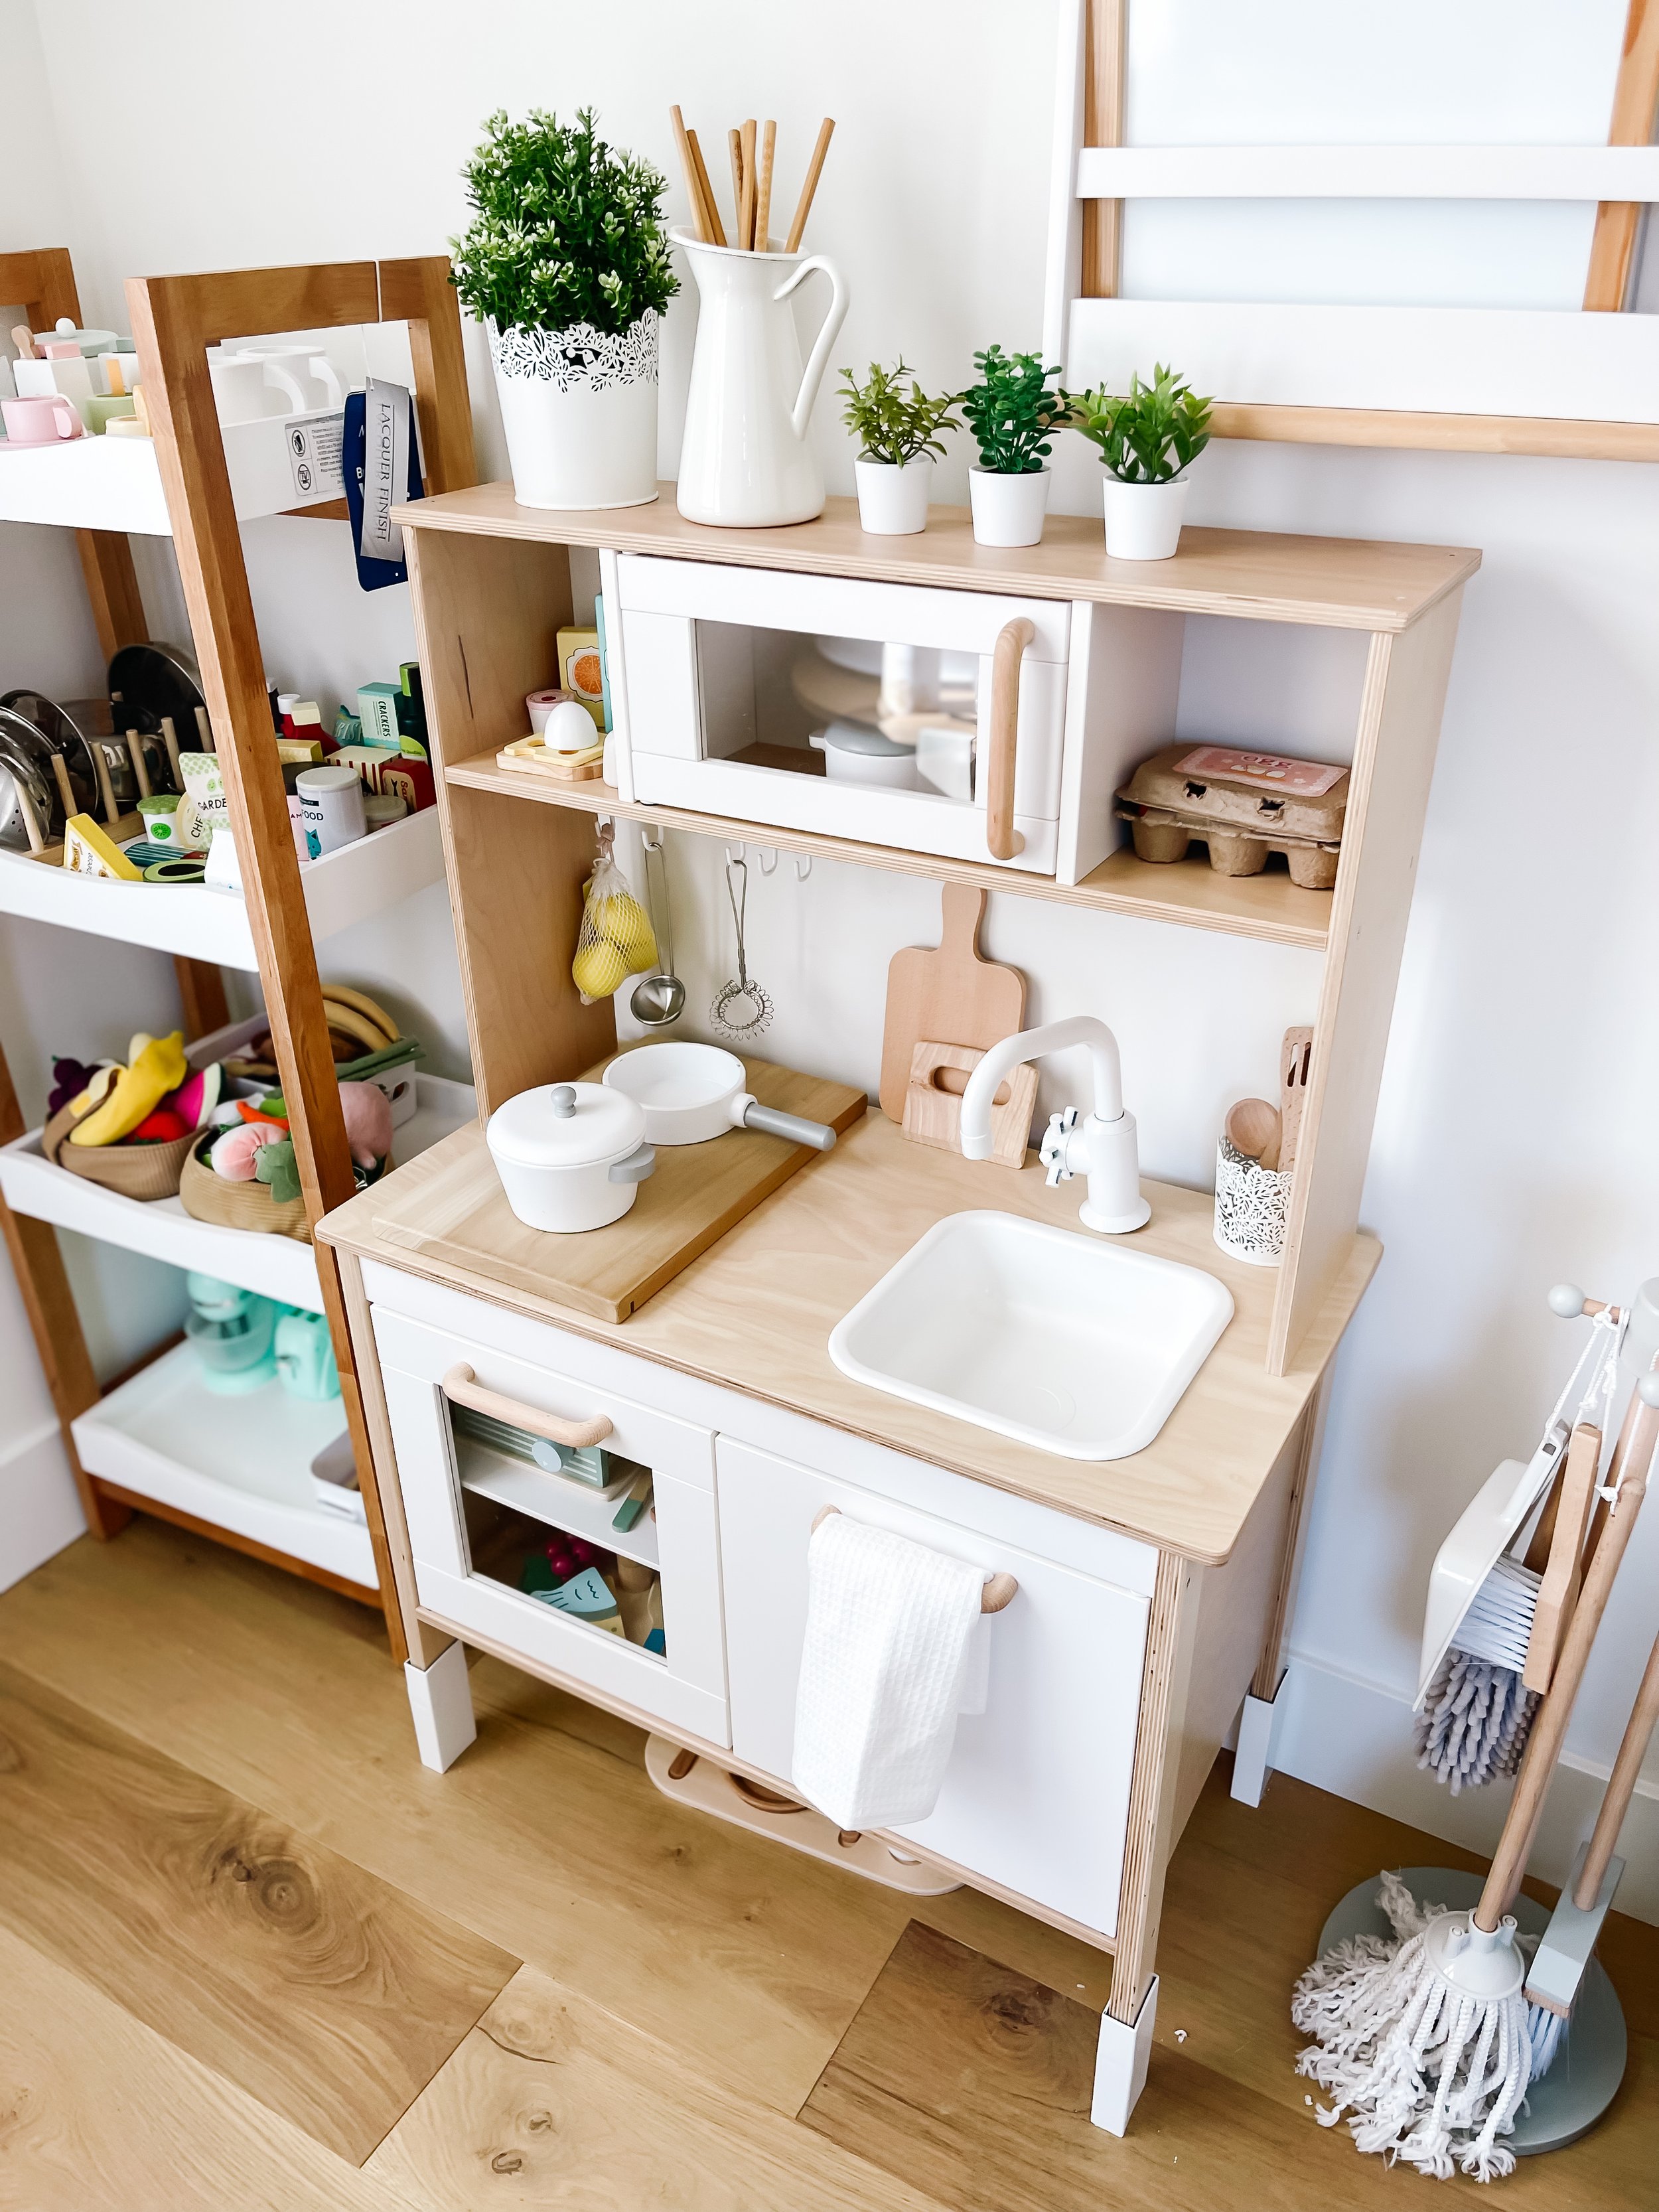
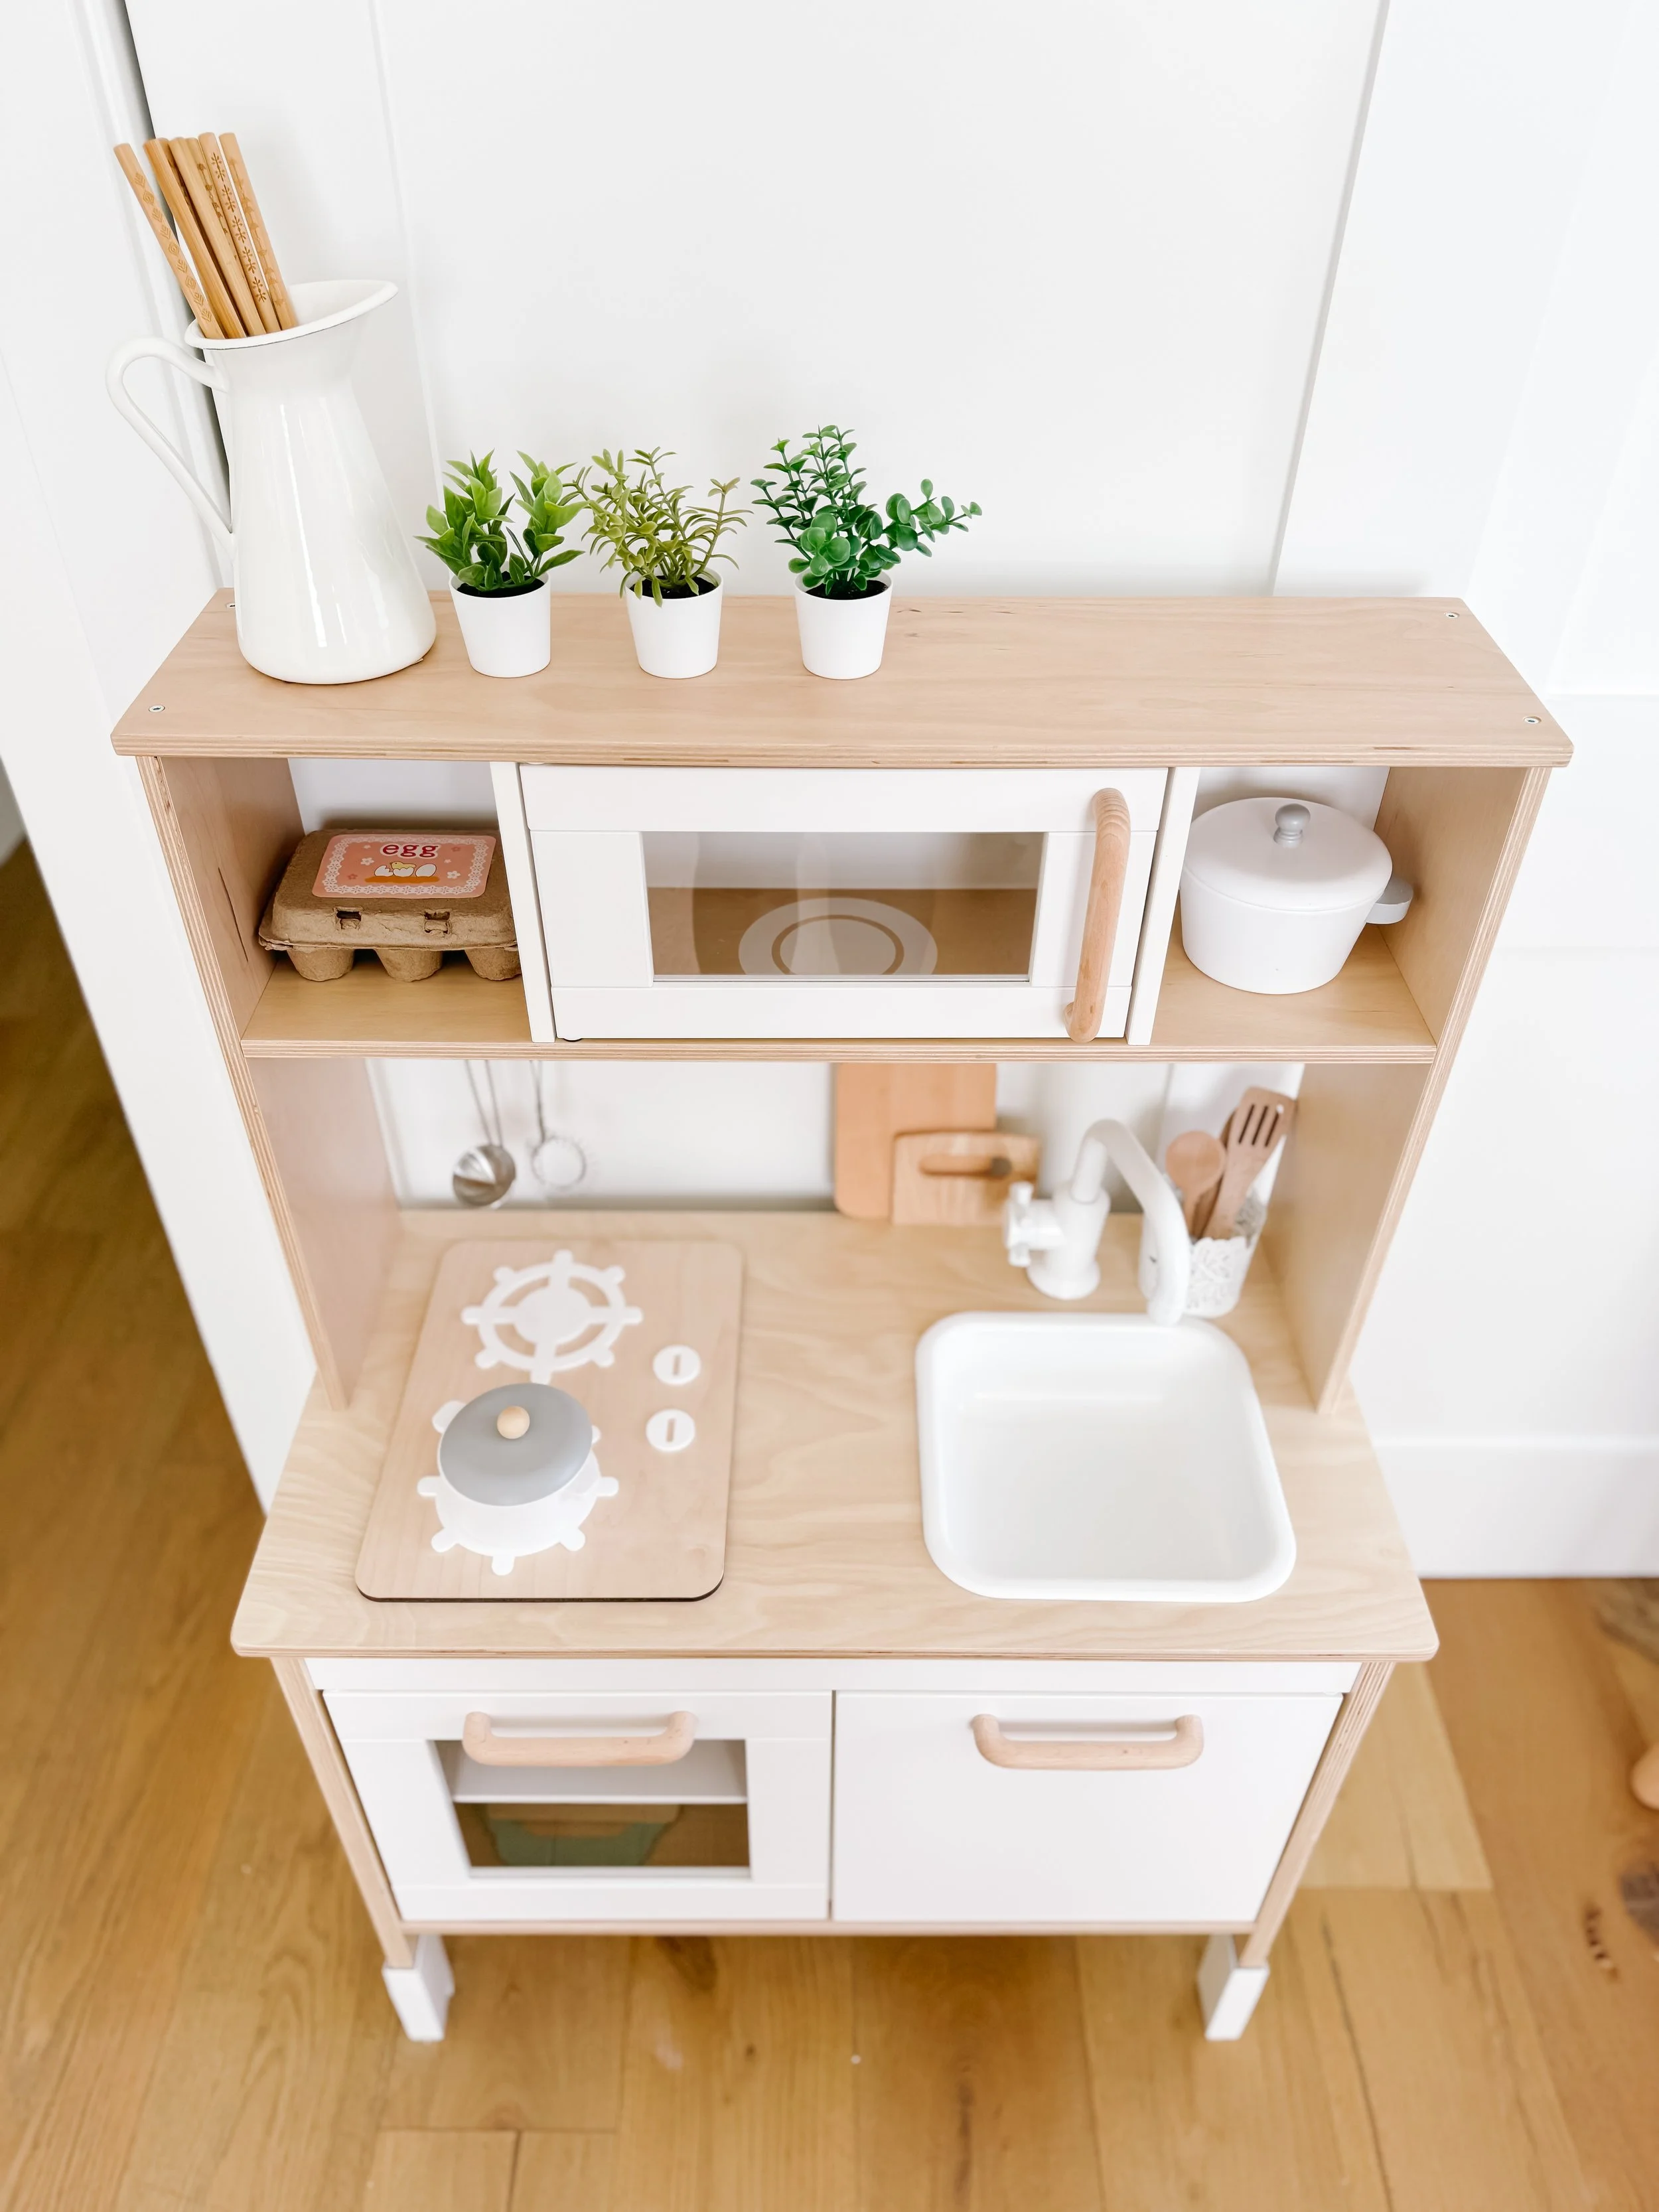
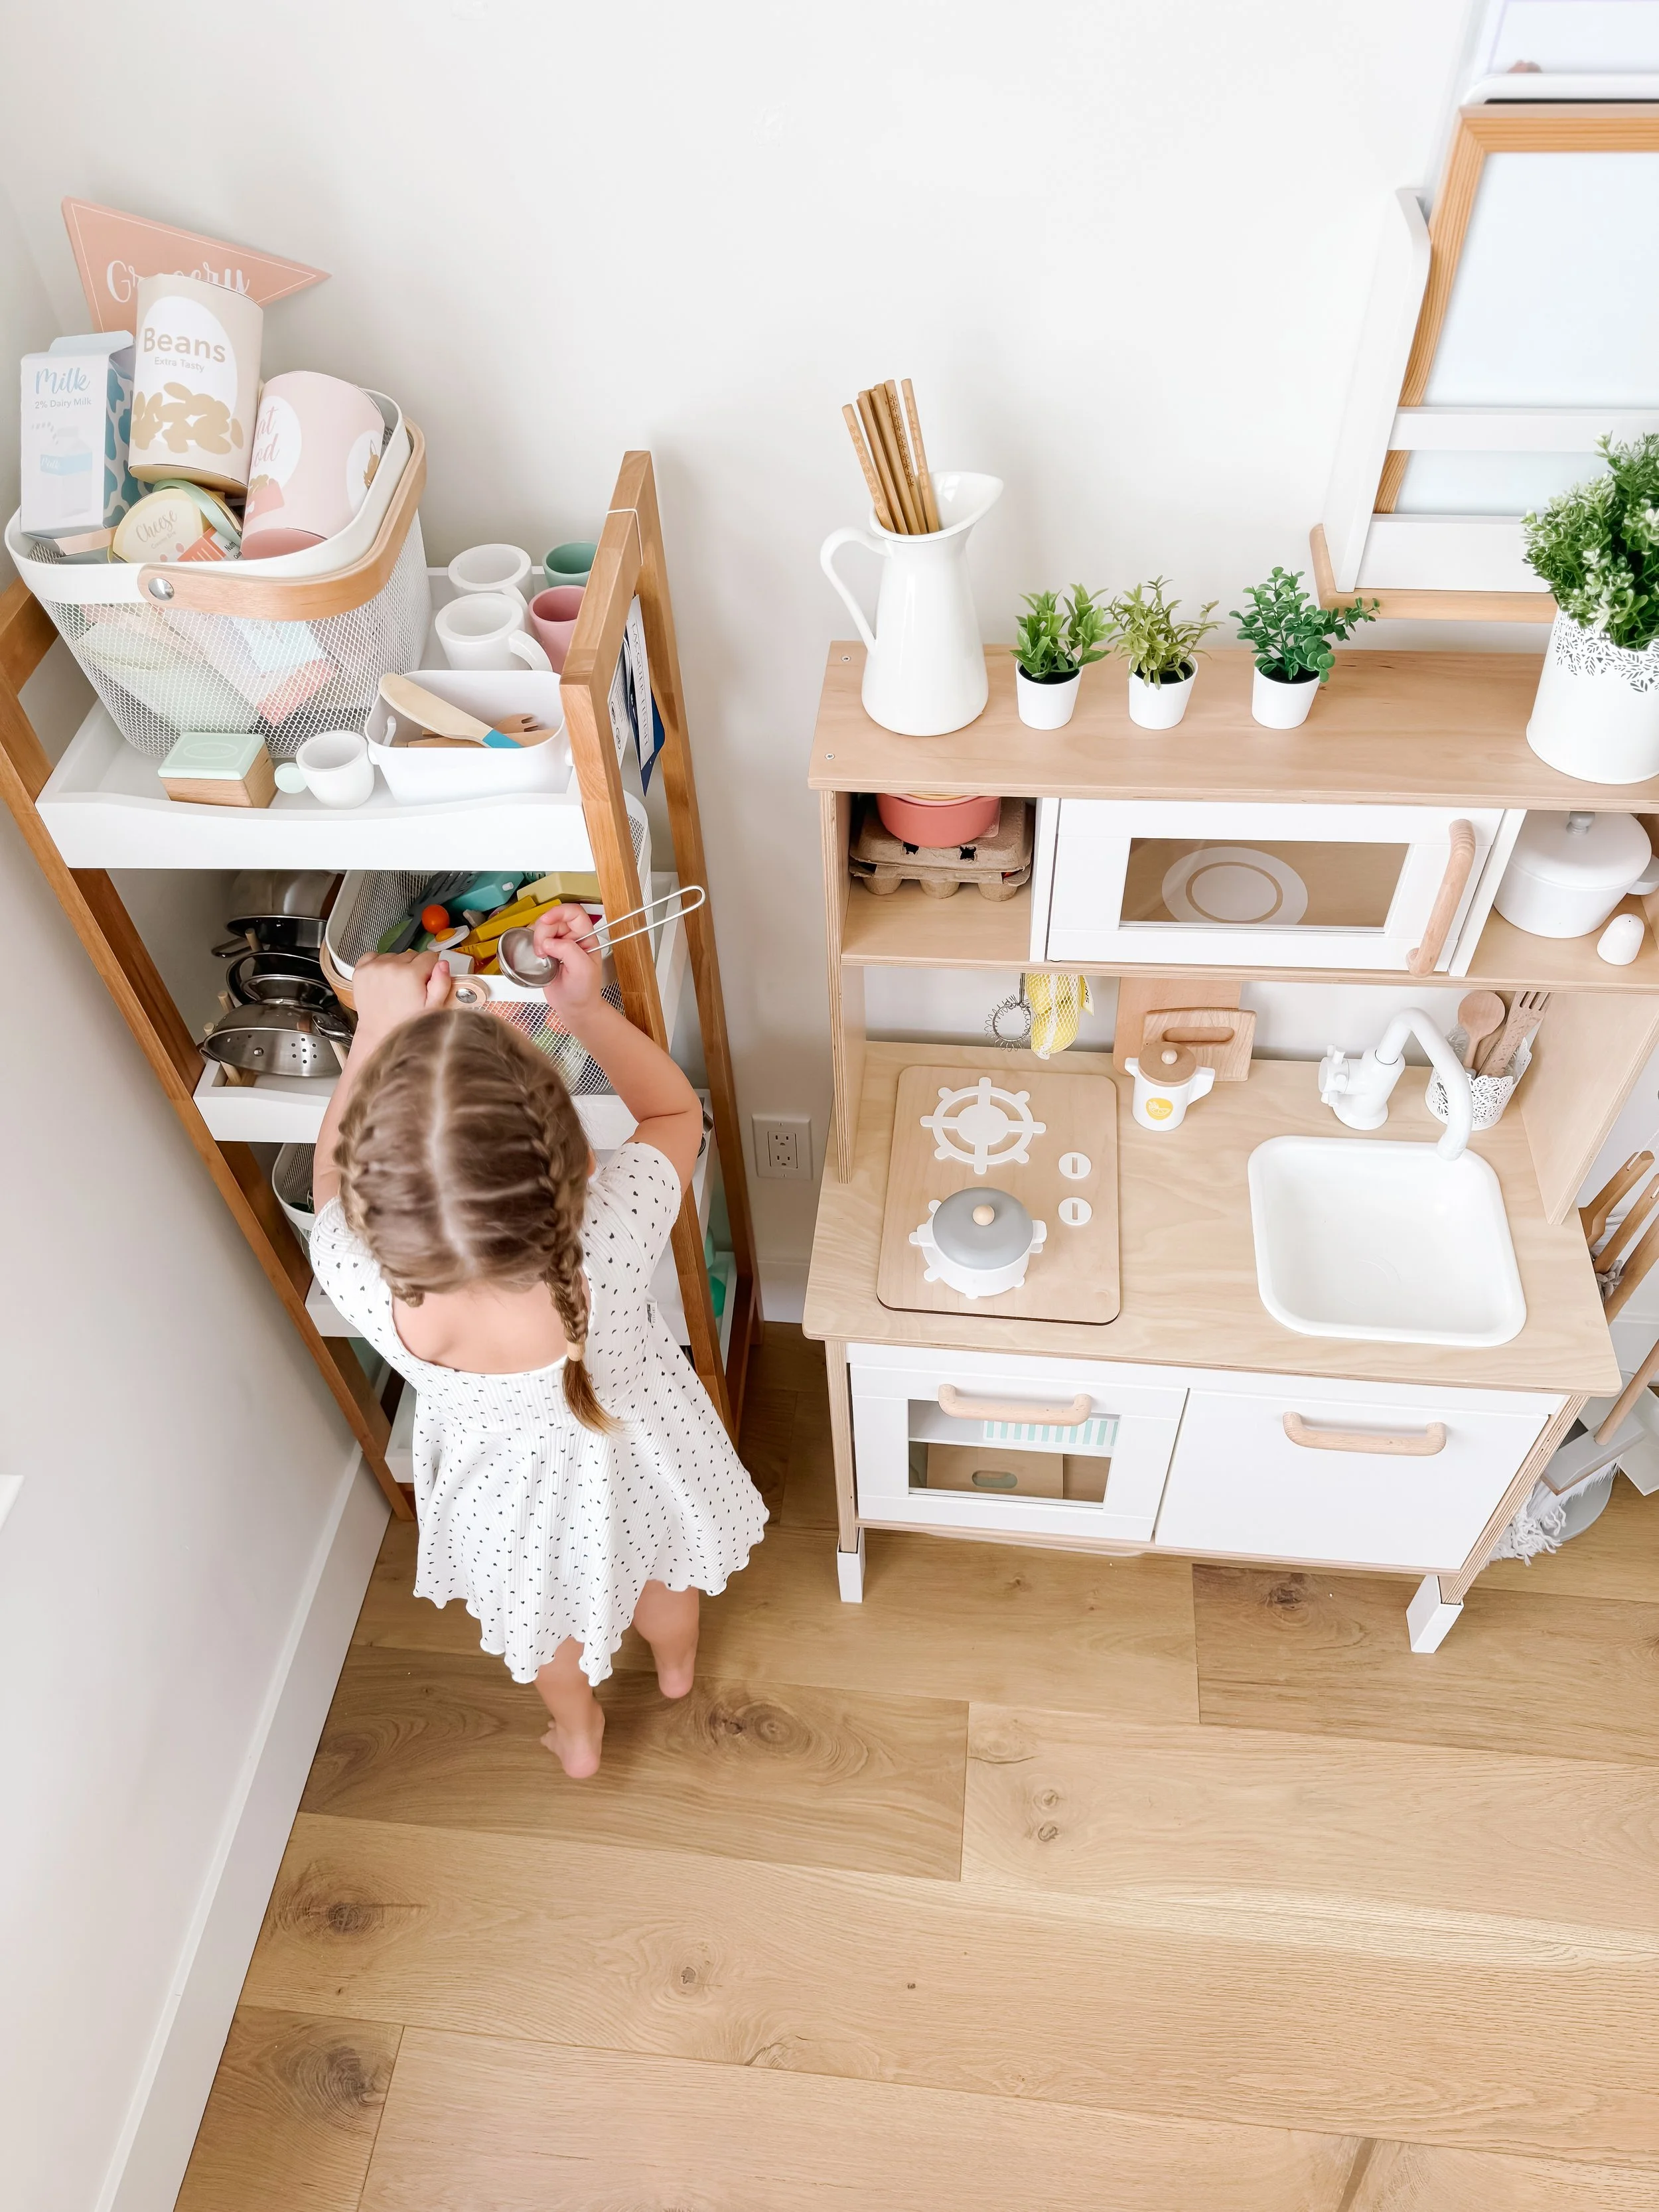
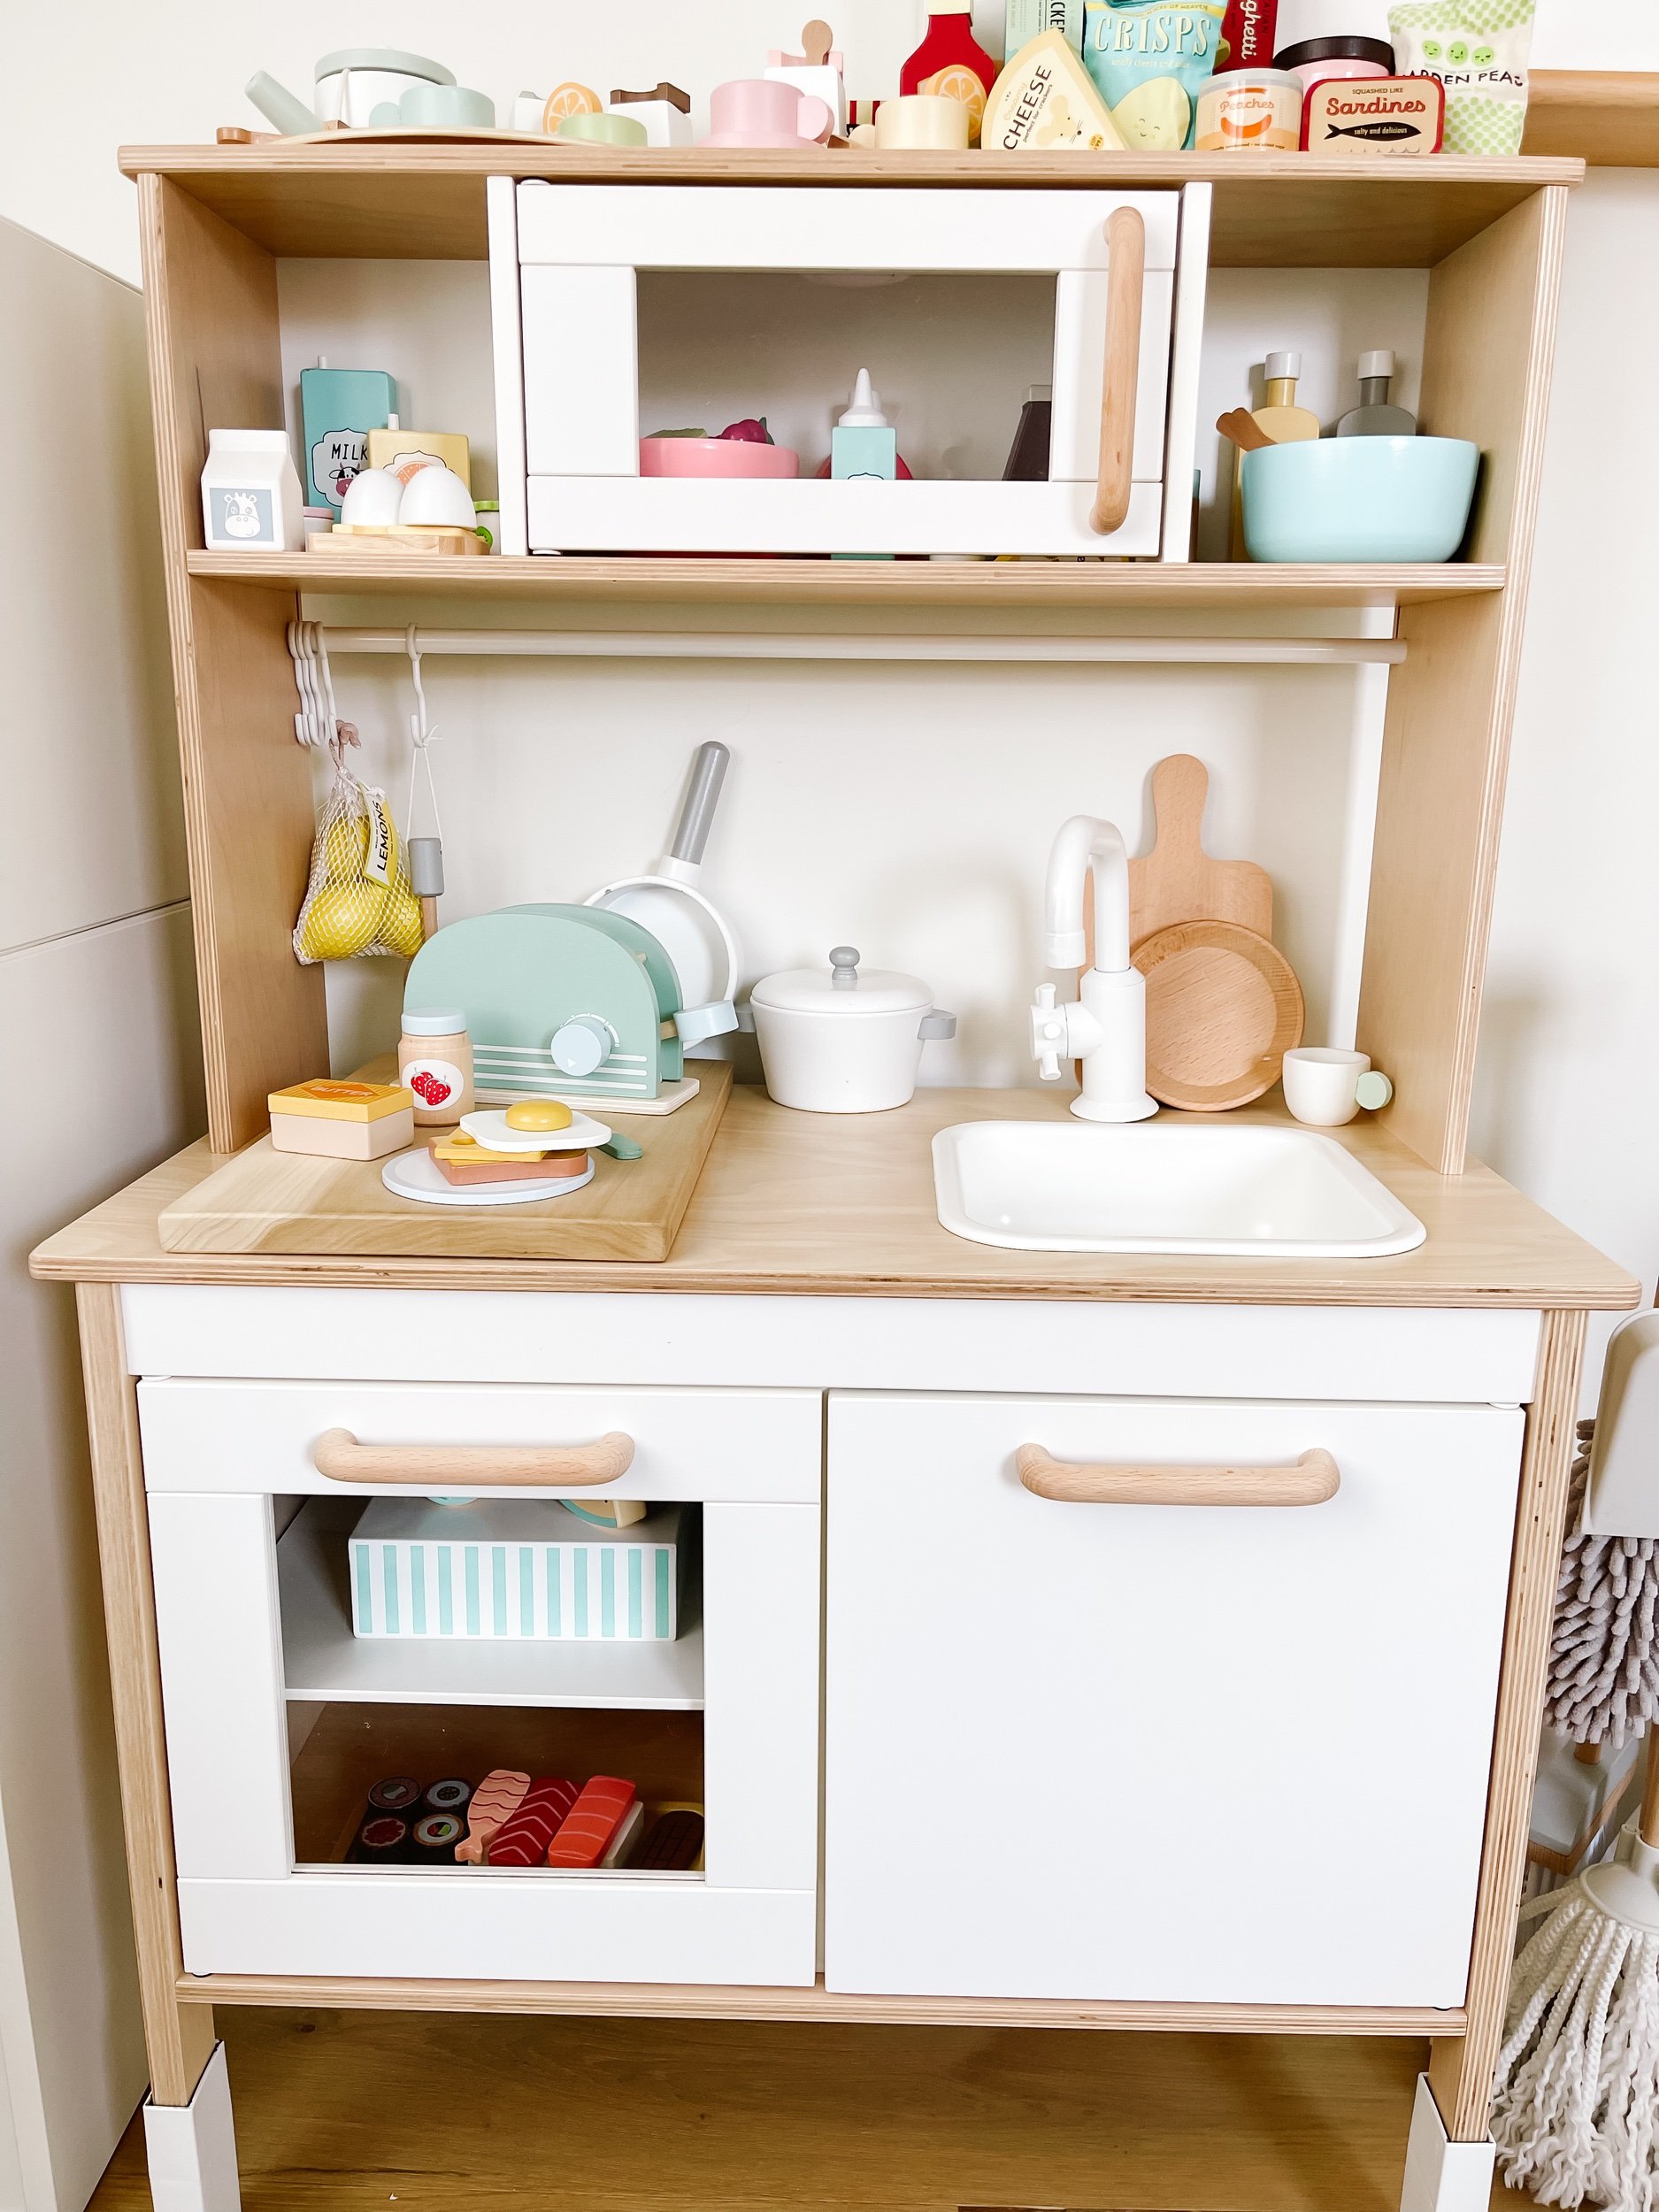
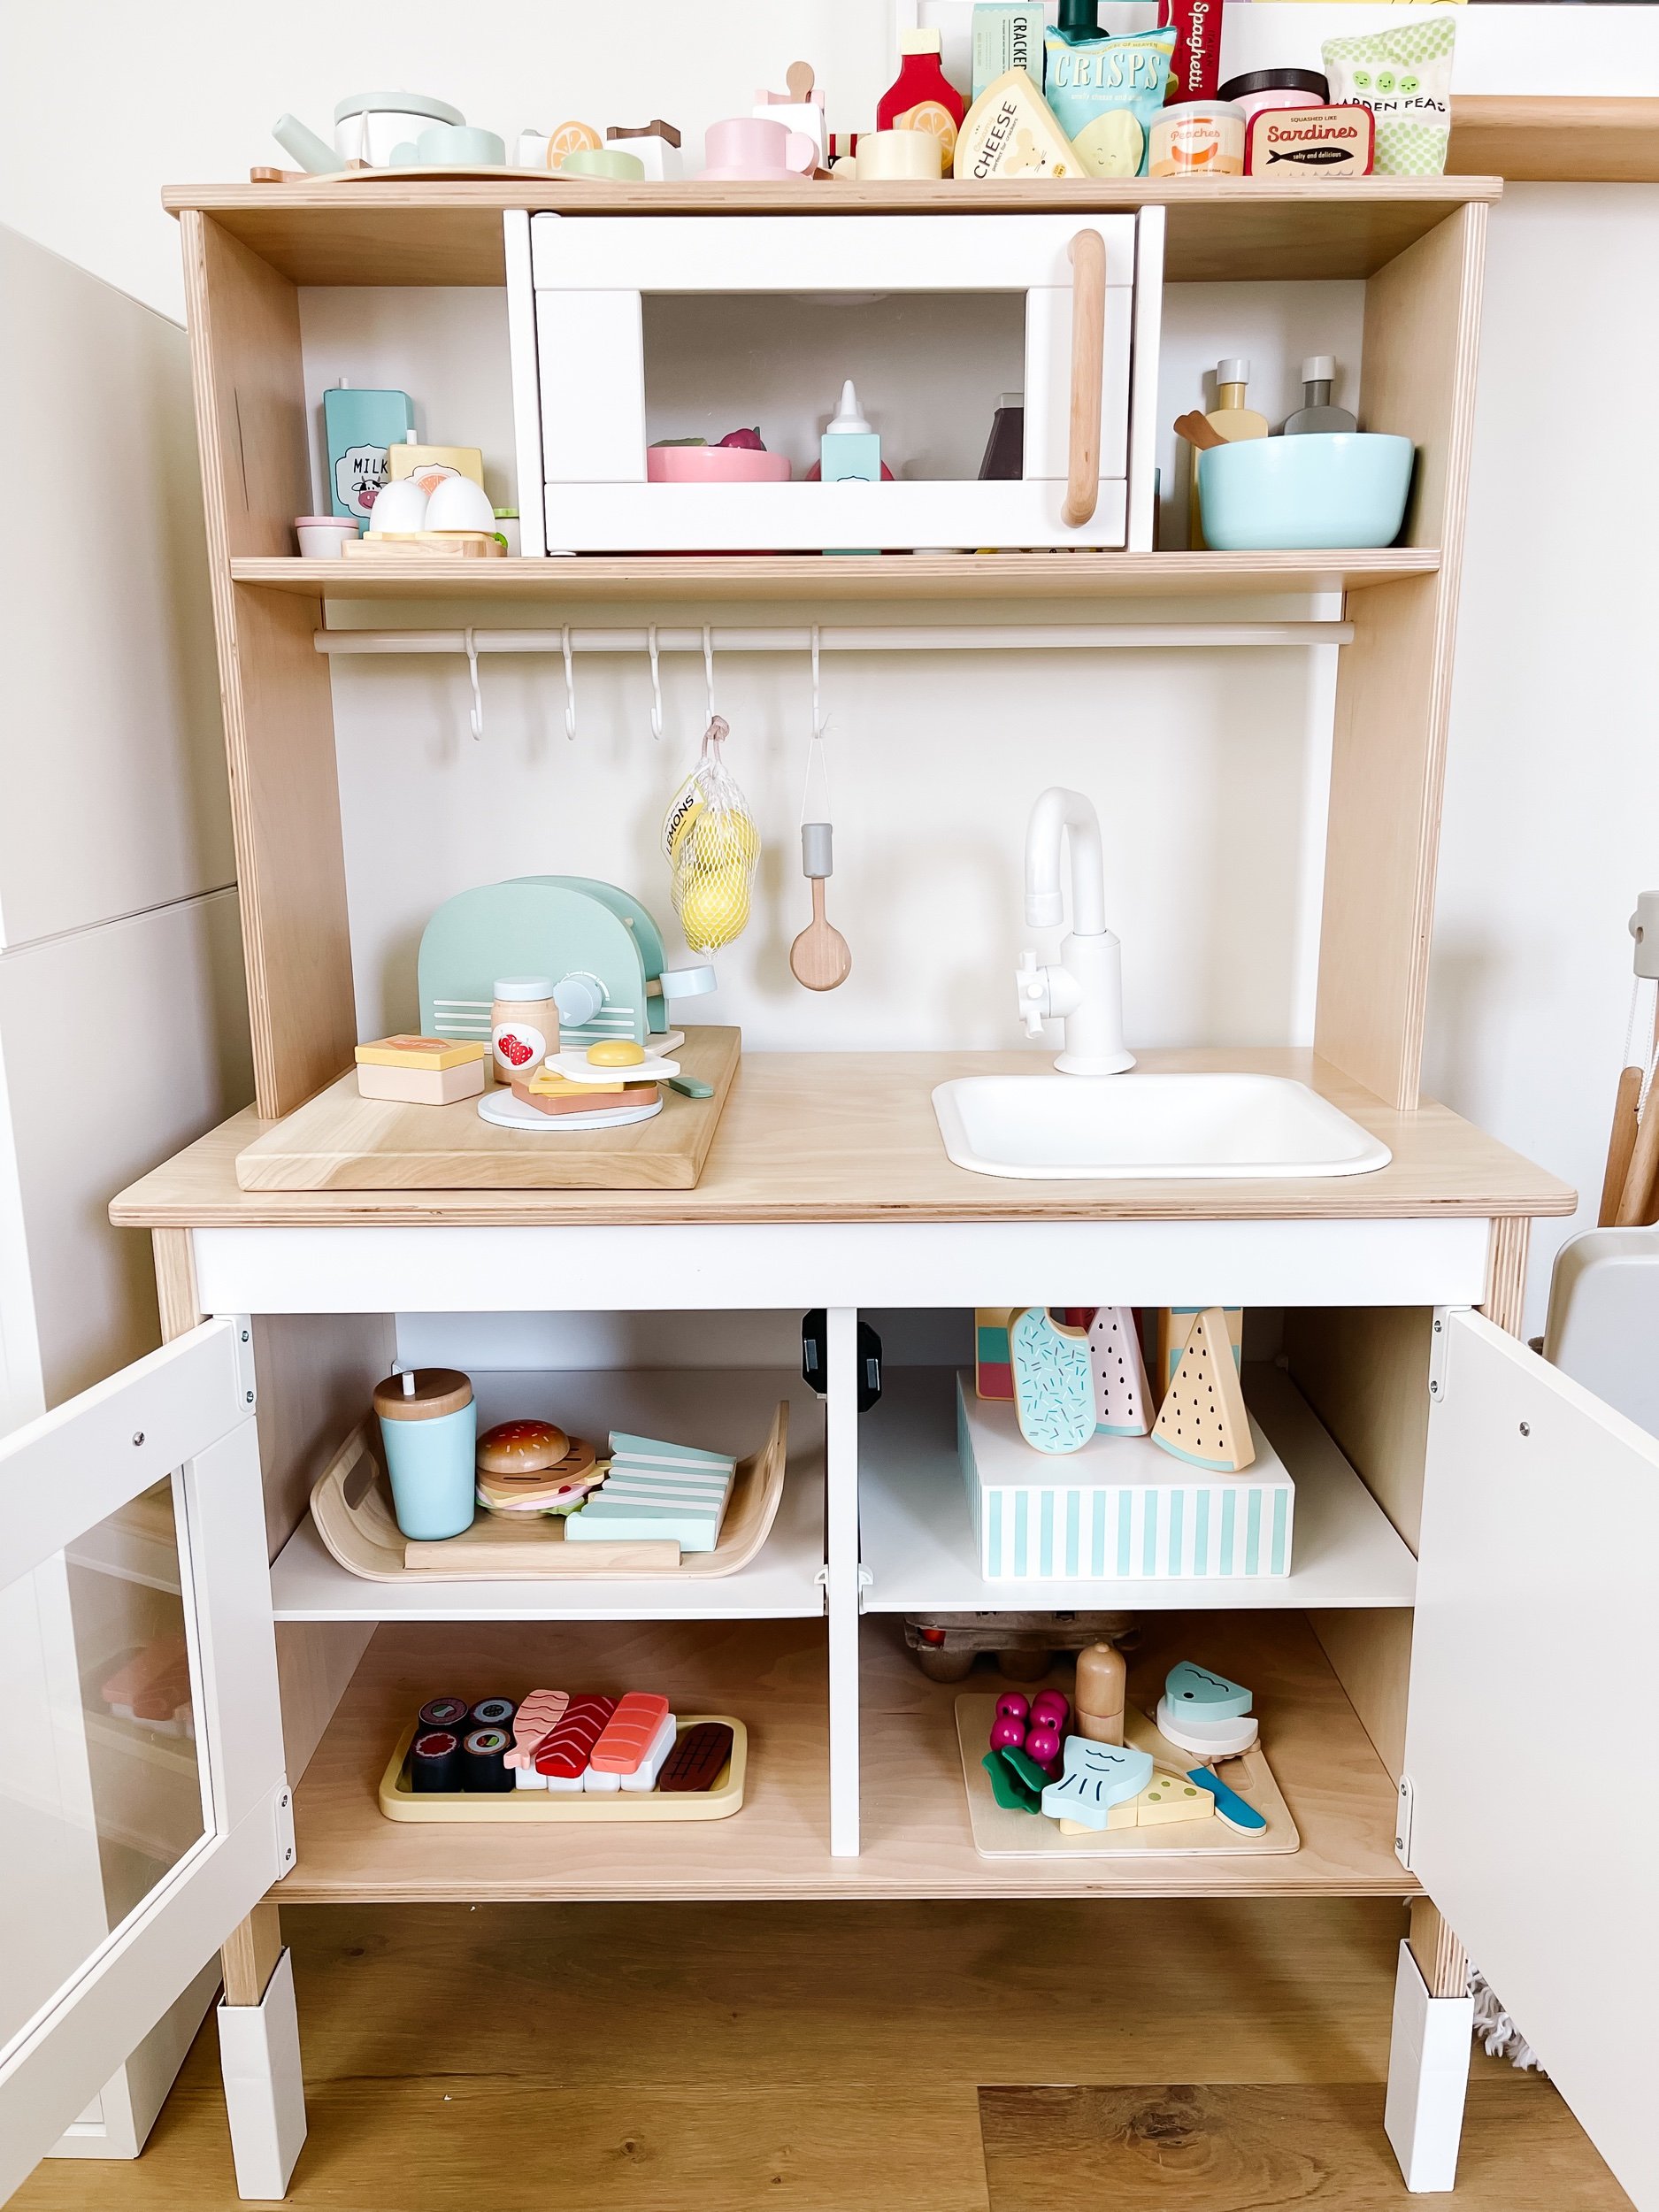
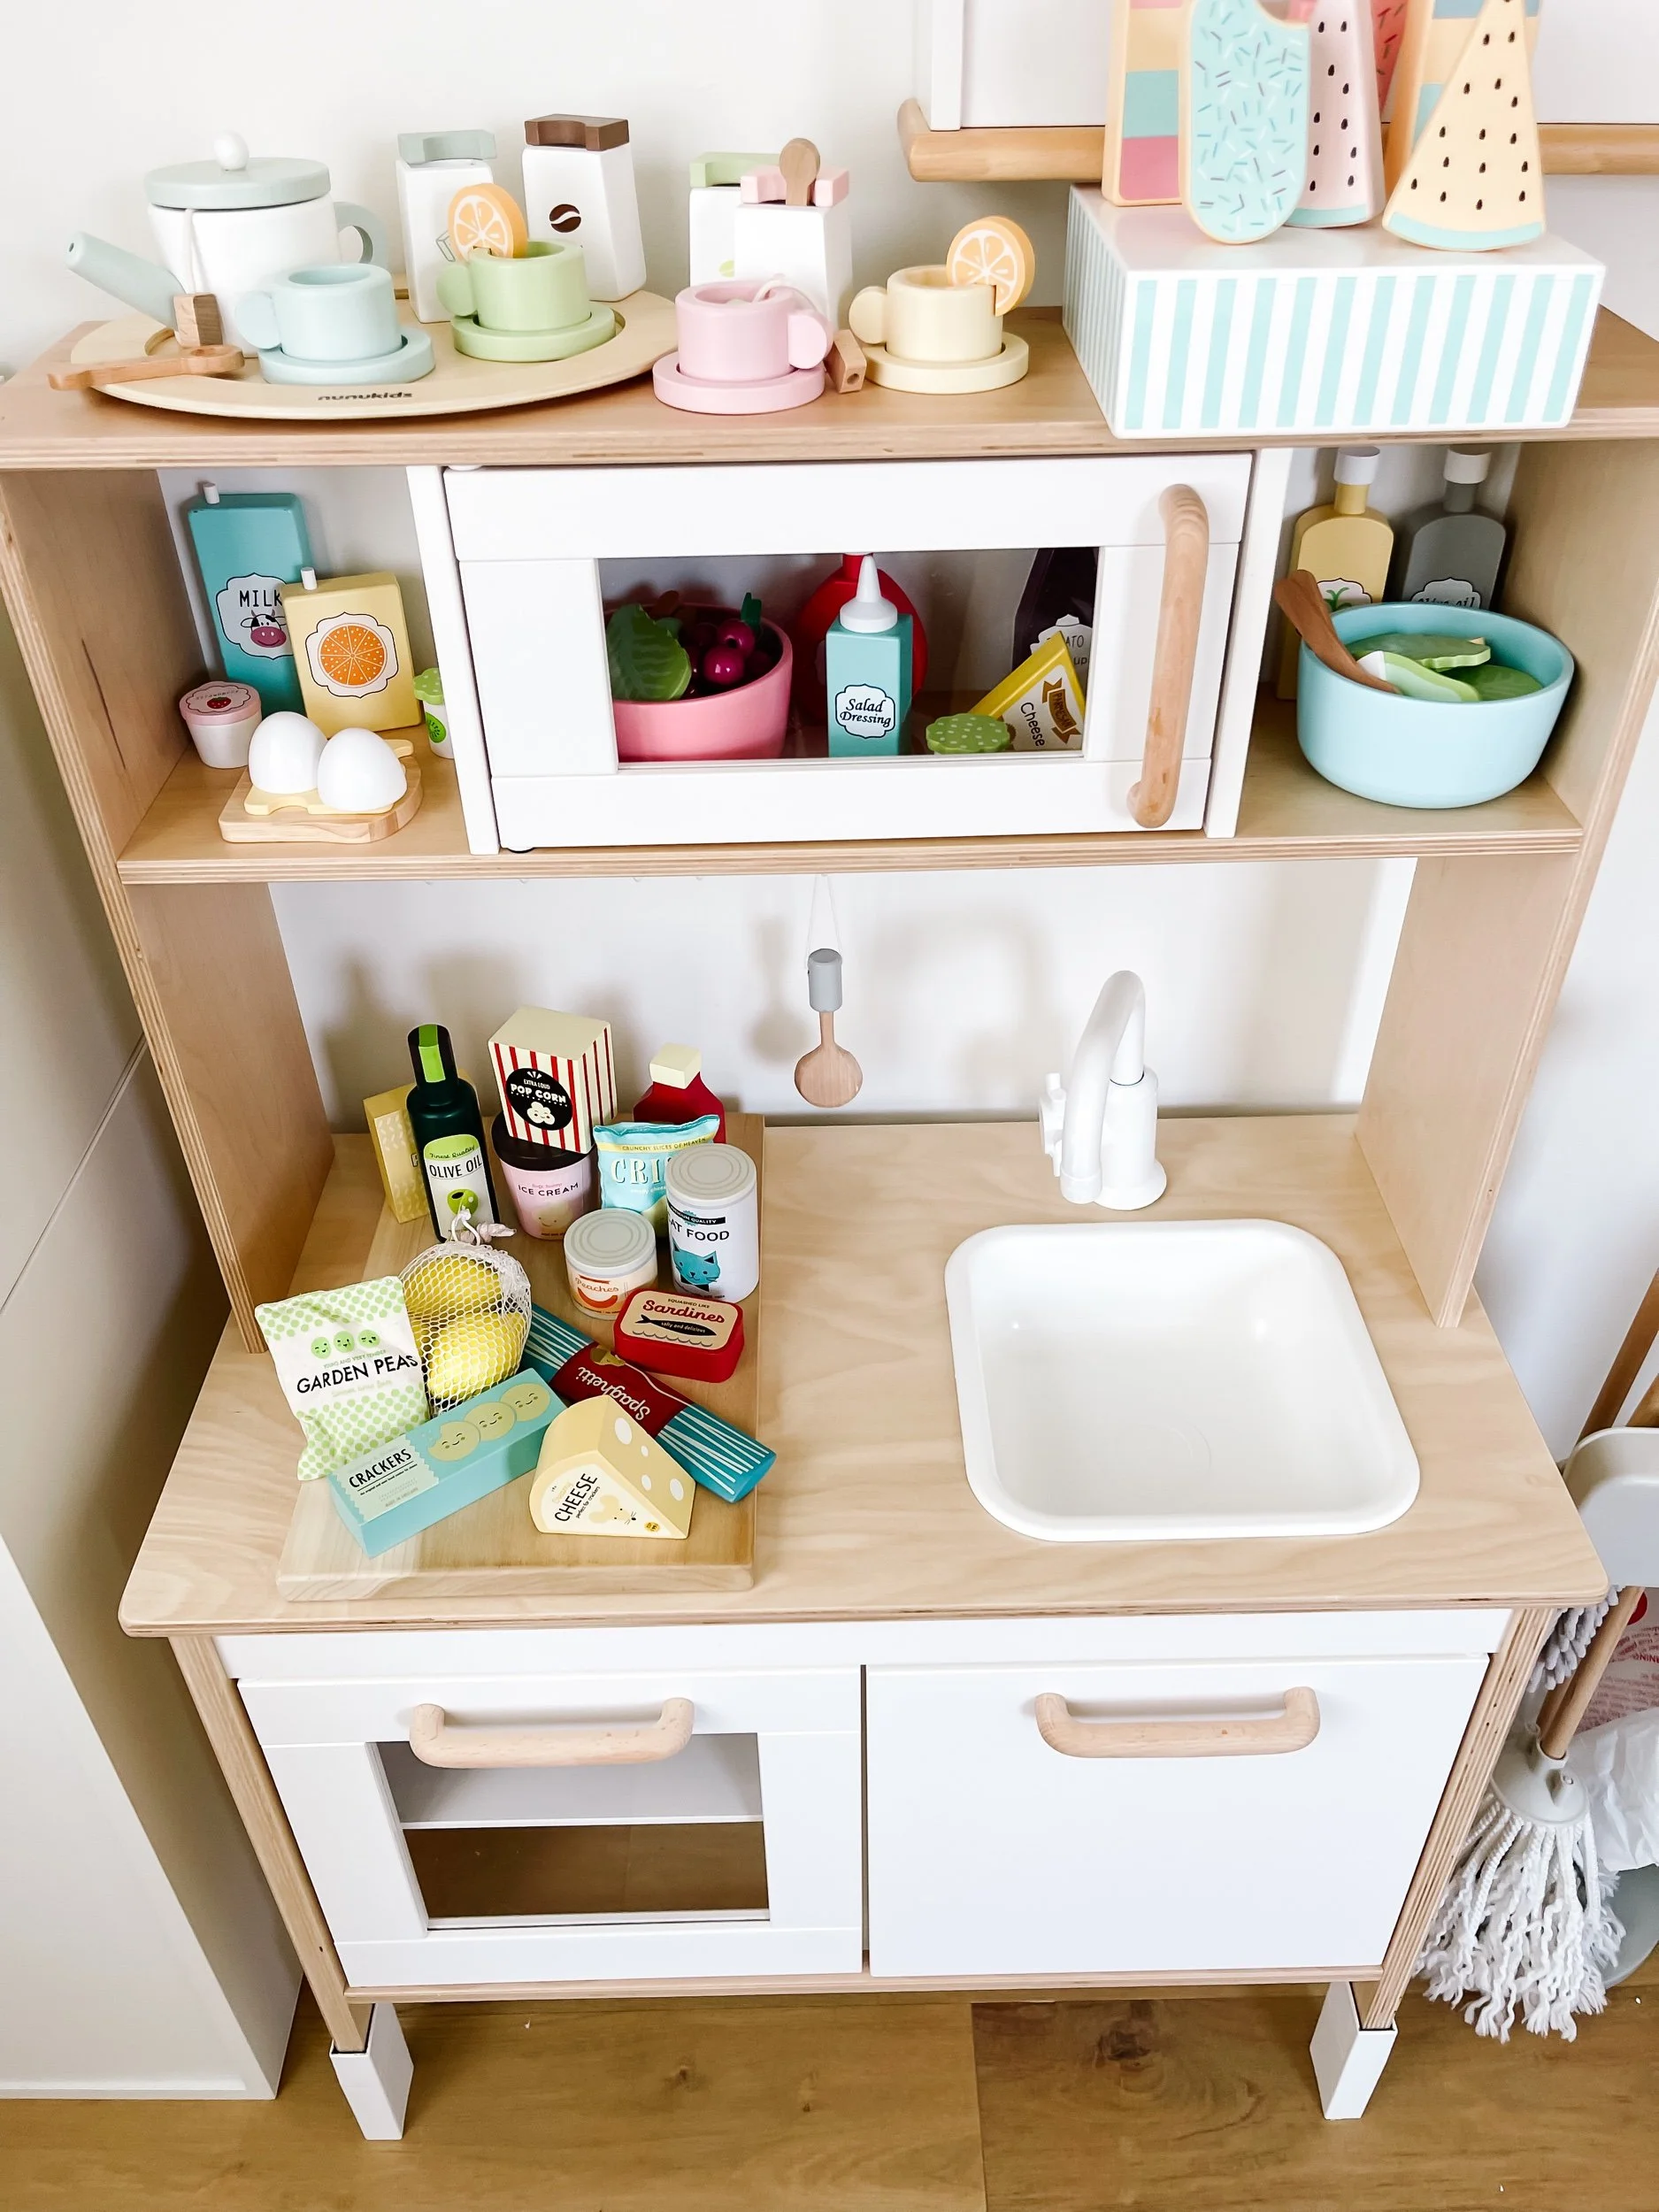
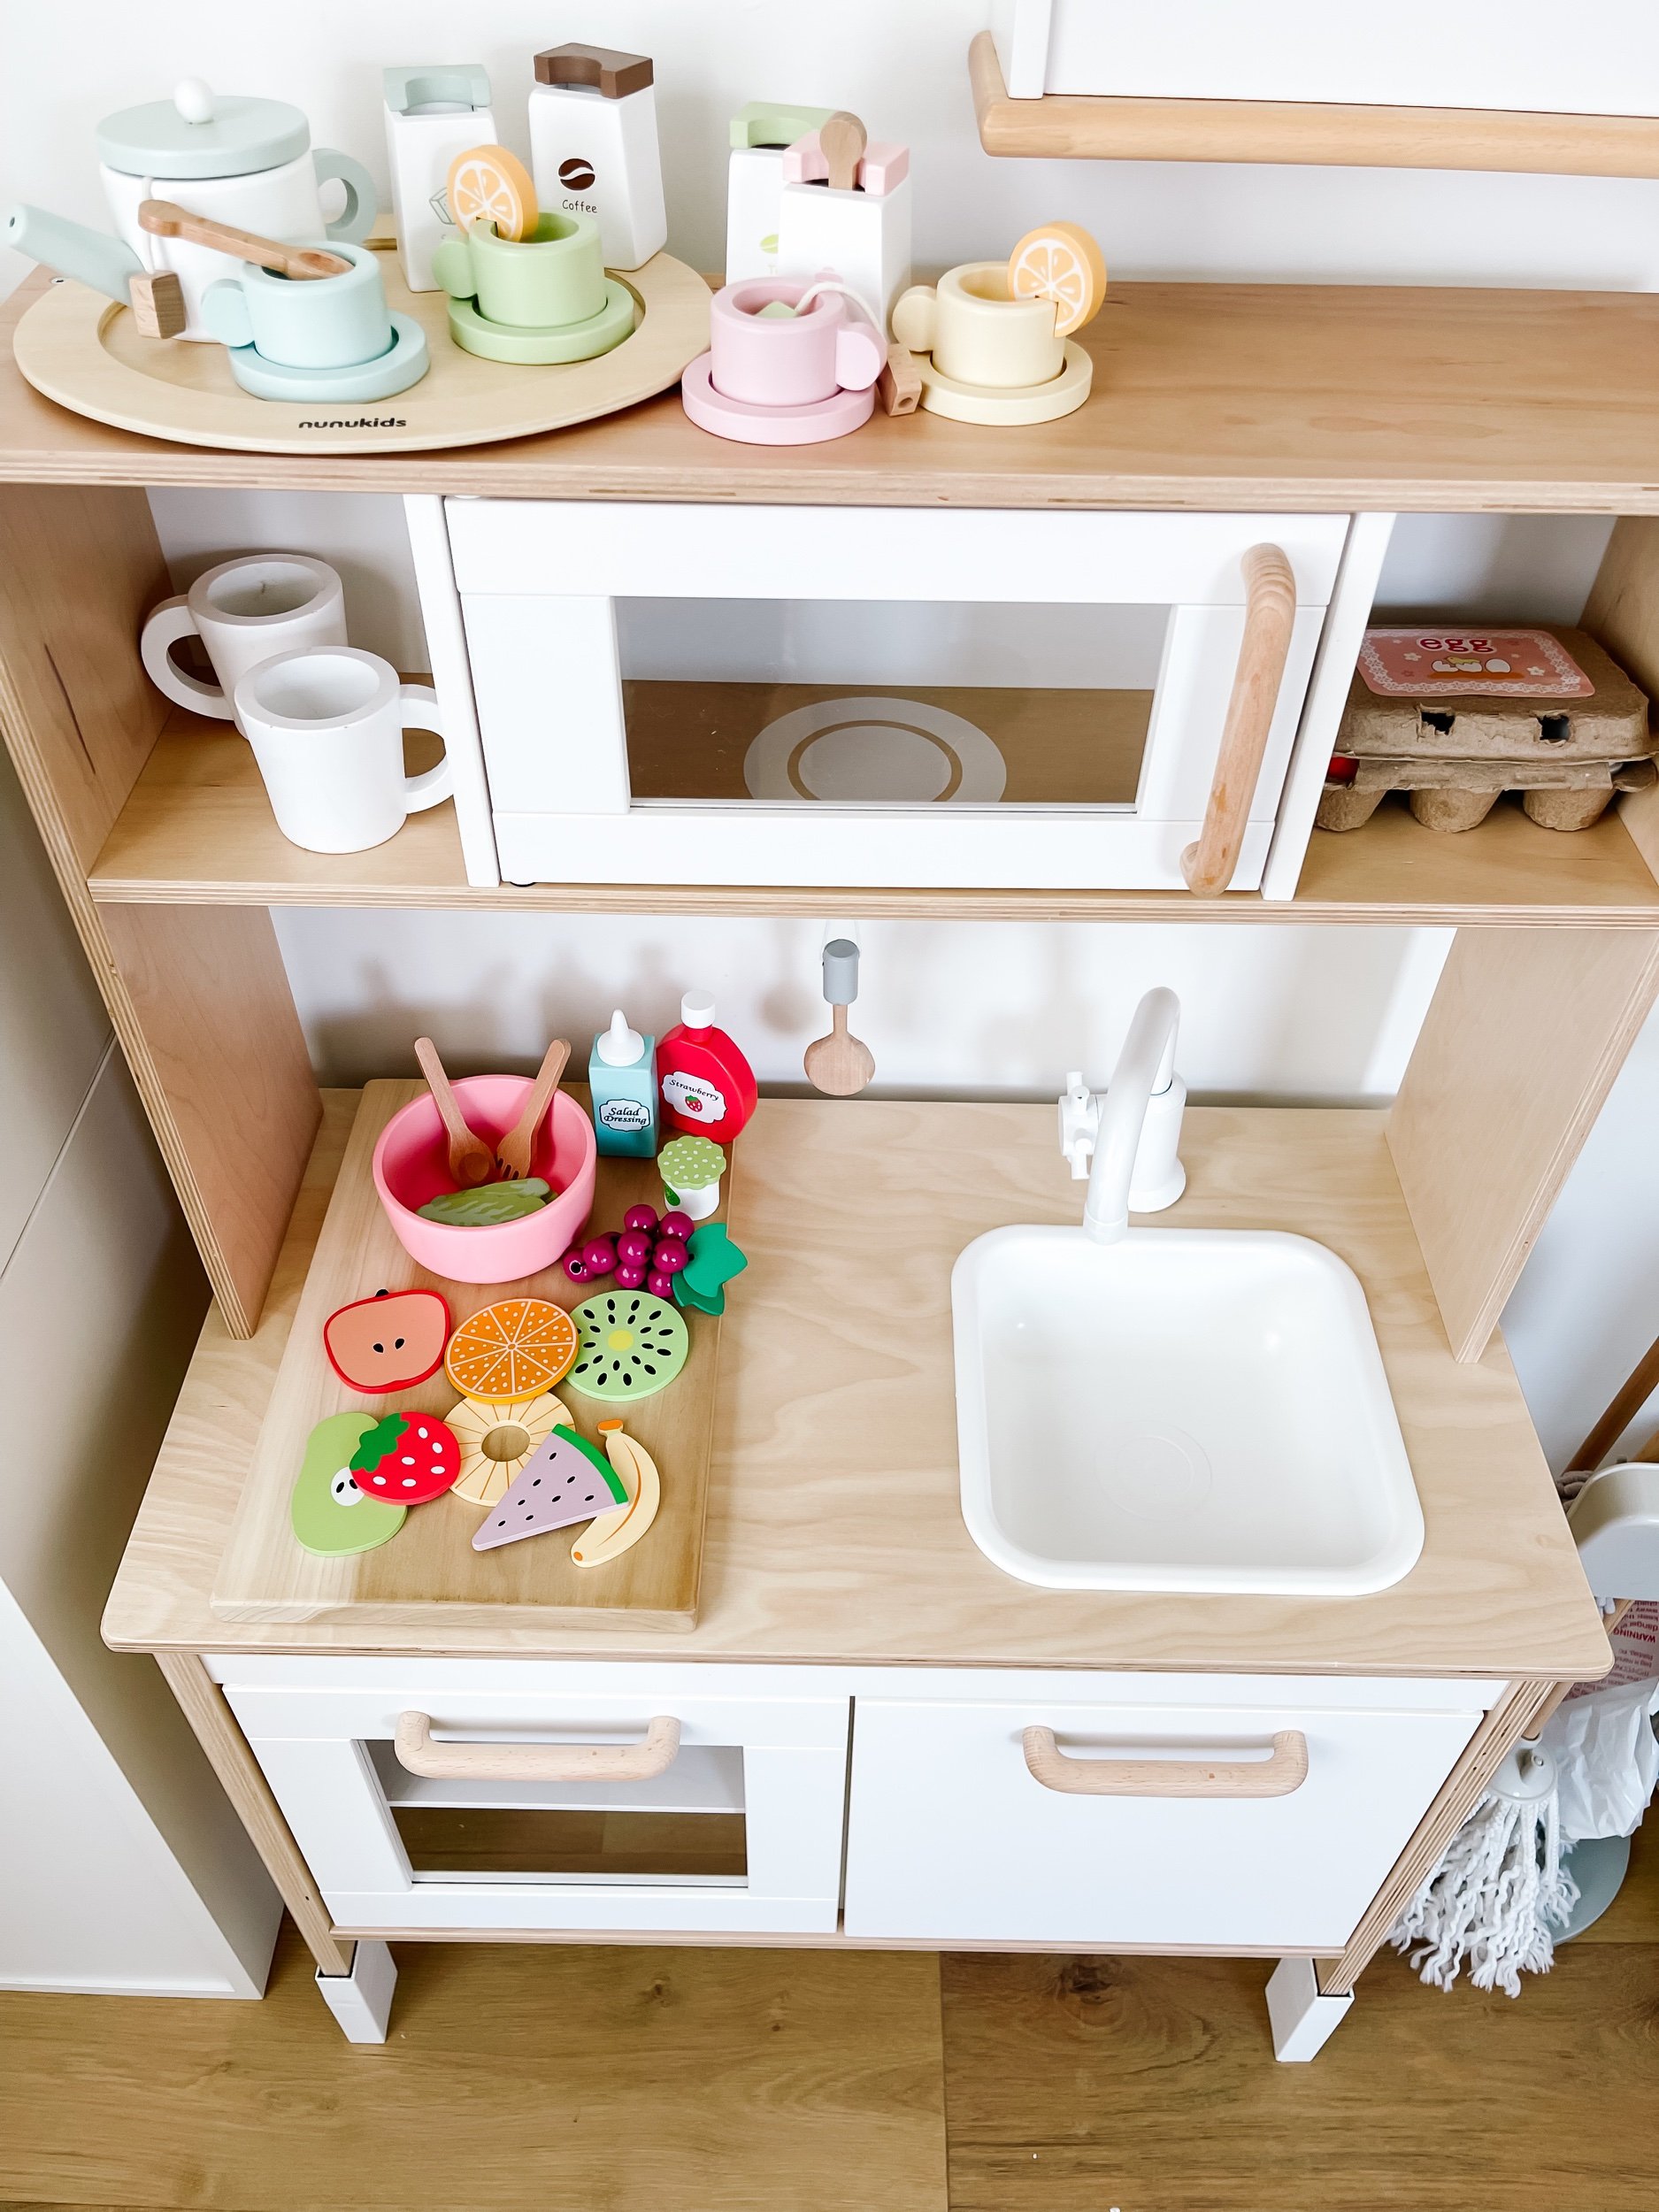
1. Created Defined Play Zones
I styled the kitchen so each area had a purpose:
cooking area
prep space
storage
display
This helped guide play naturally and made it easier for my daughter to understand how to use the space and created a pretend play shop experience.
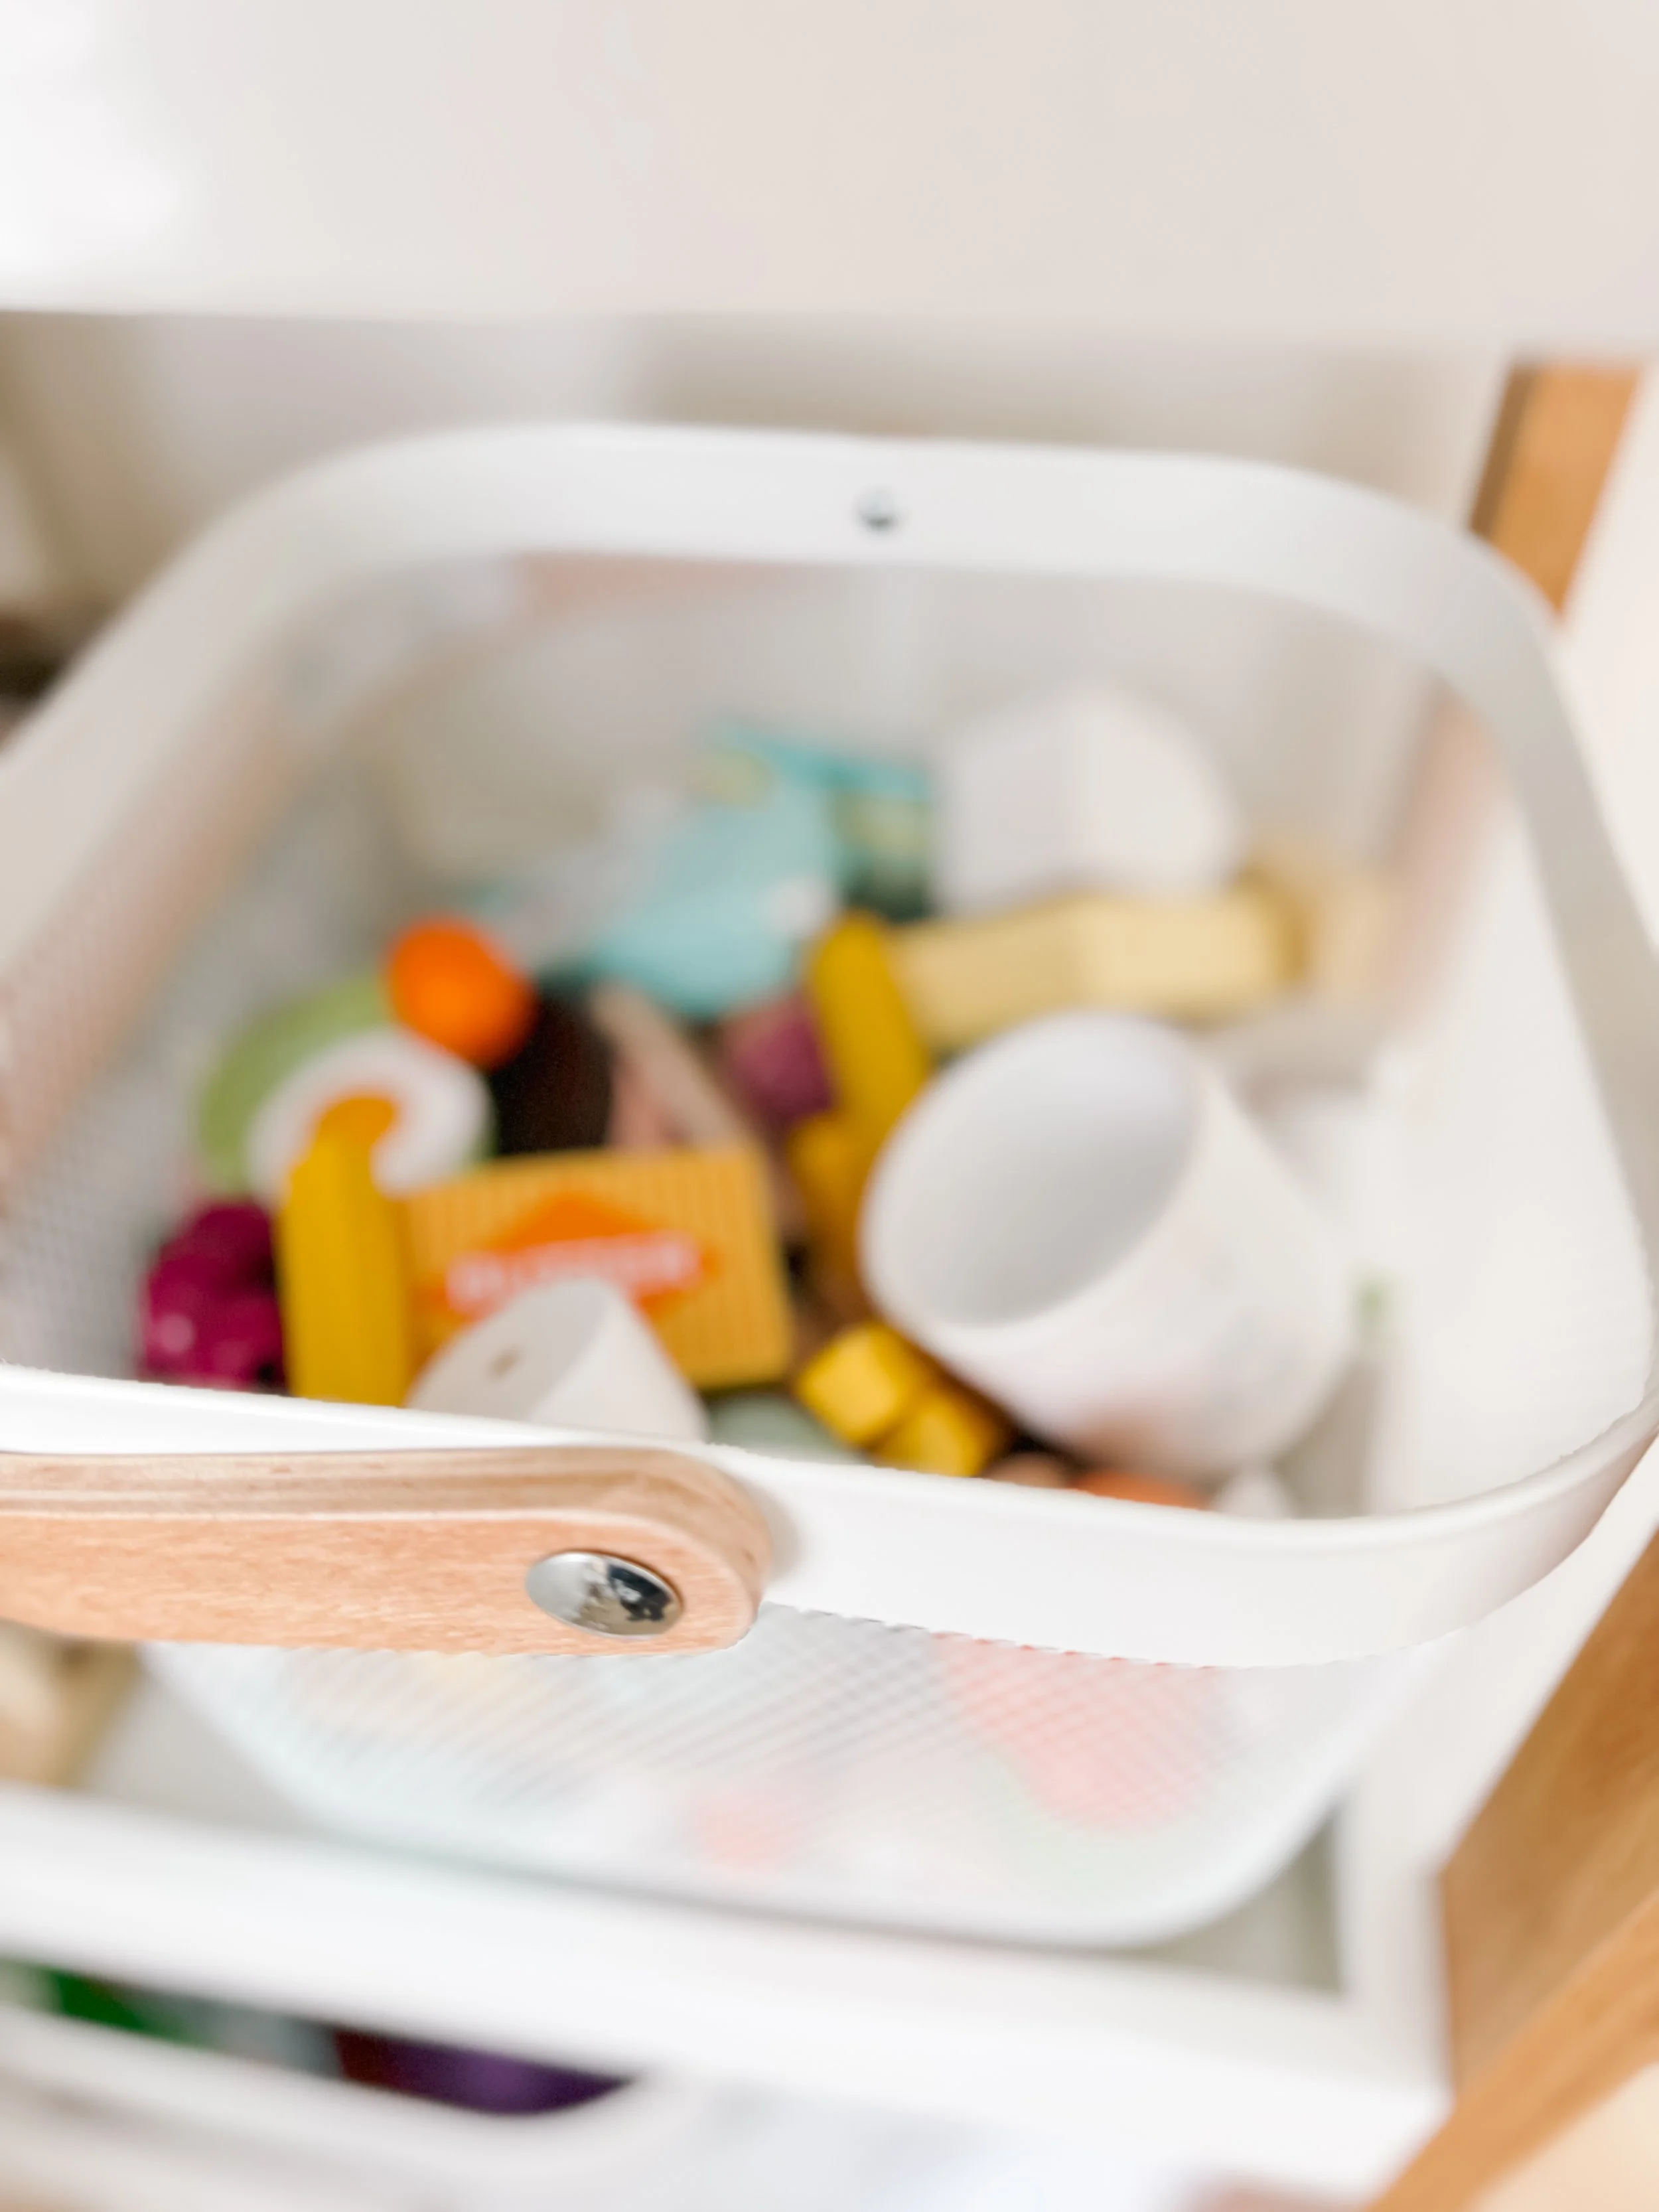
2. Simplified and Rotated Materials
Instead of overcrowding the space, I:
reduced the number of items
displayed only a few at a time
rotated items to keep it fresh
This instantly made the space feel calmer and more engaging.
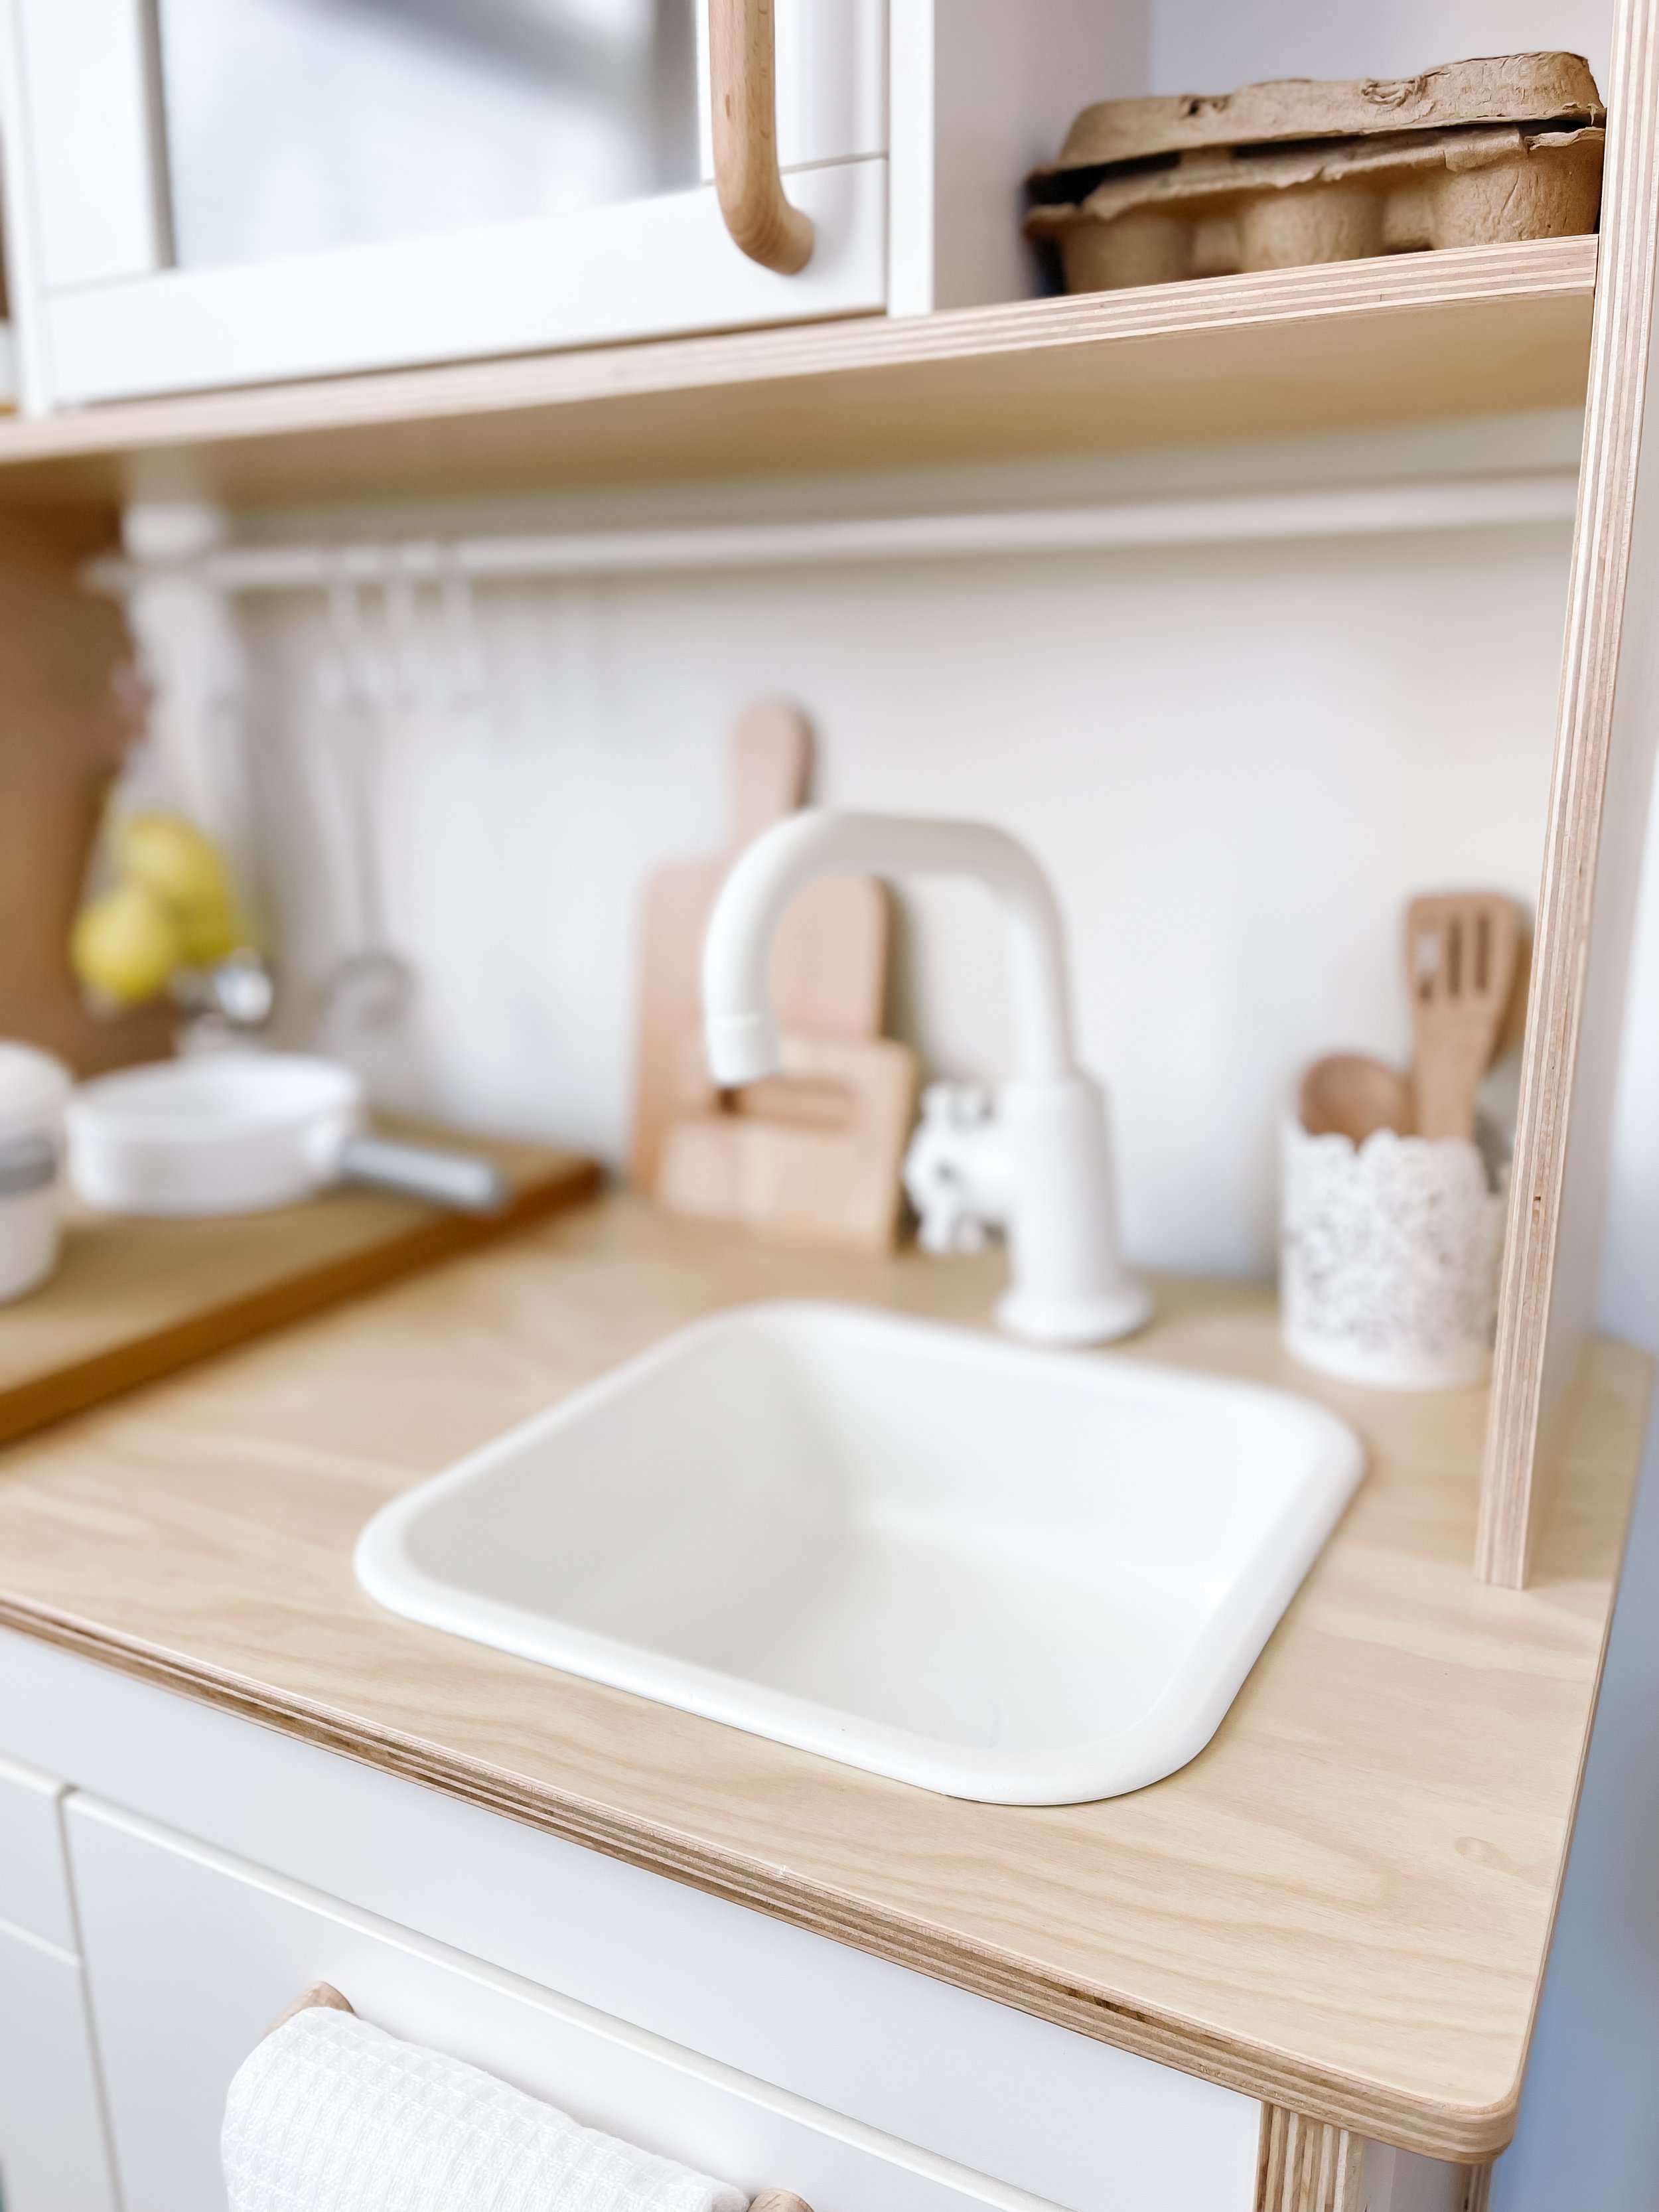
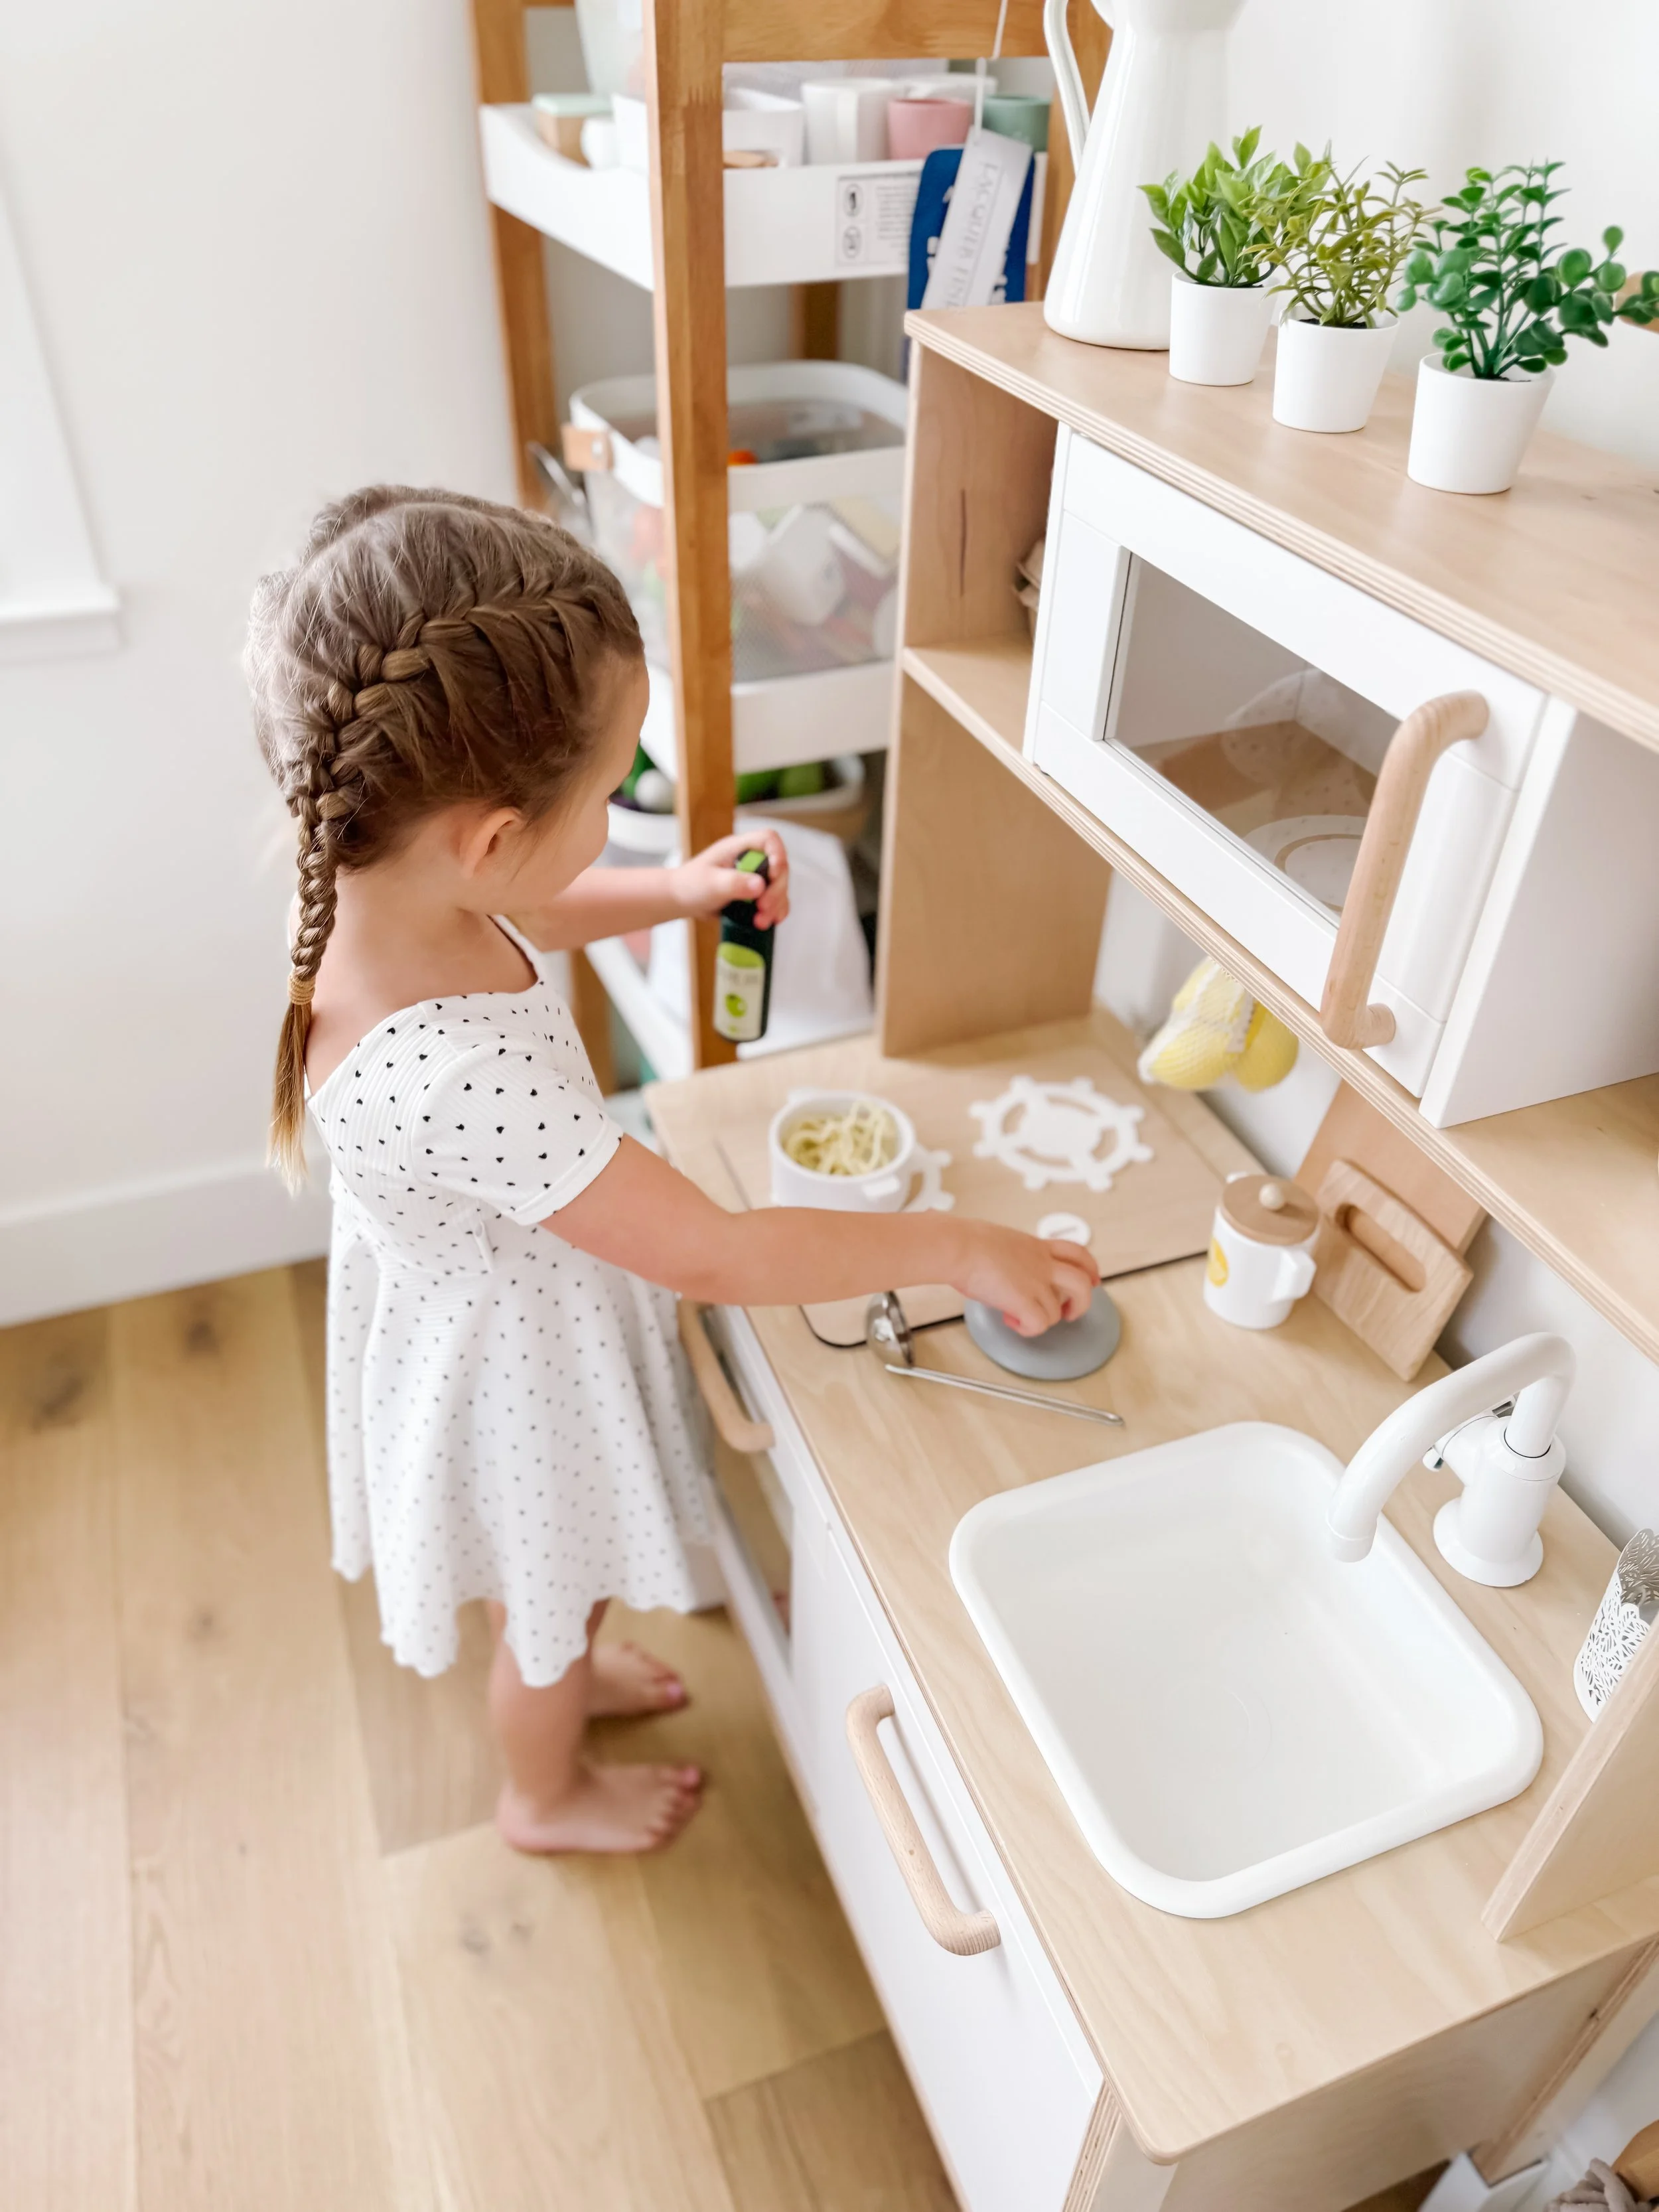
3. Made Everything Kid-Accessible
One of the biggest changes was making sure everything was within reach.
easy-to-grab utensils
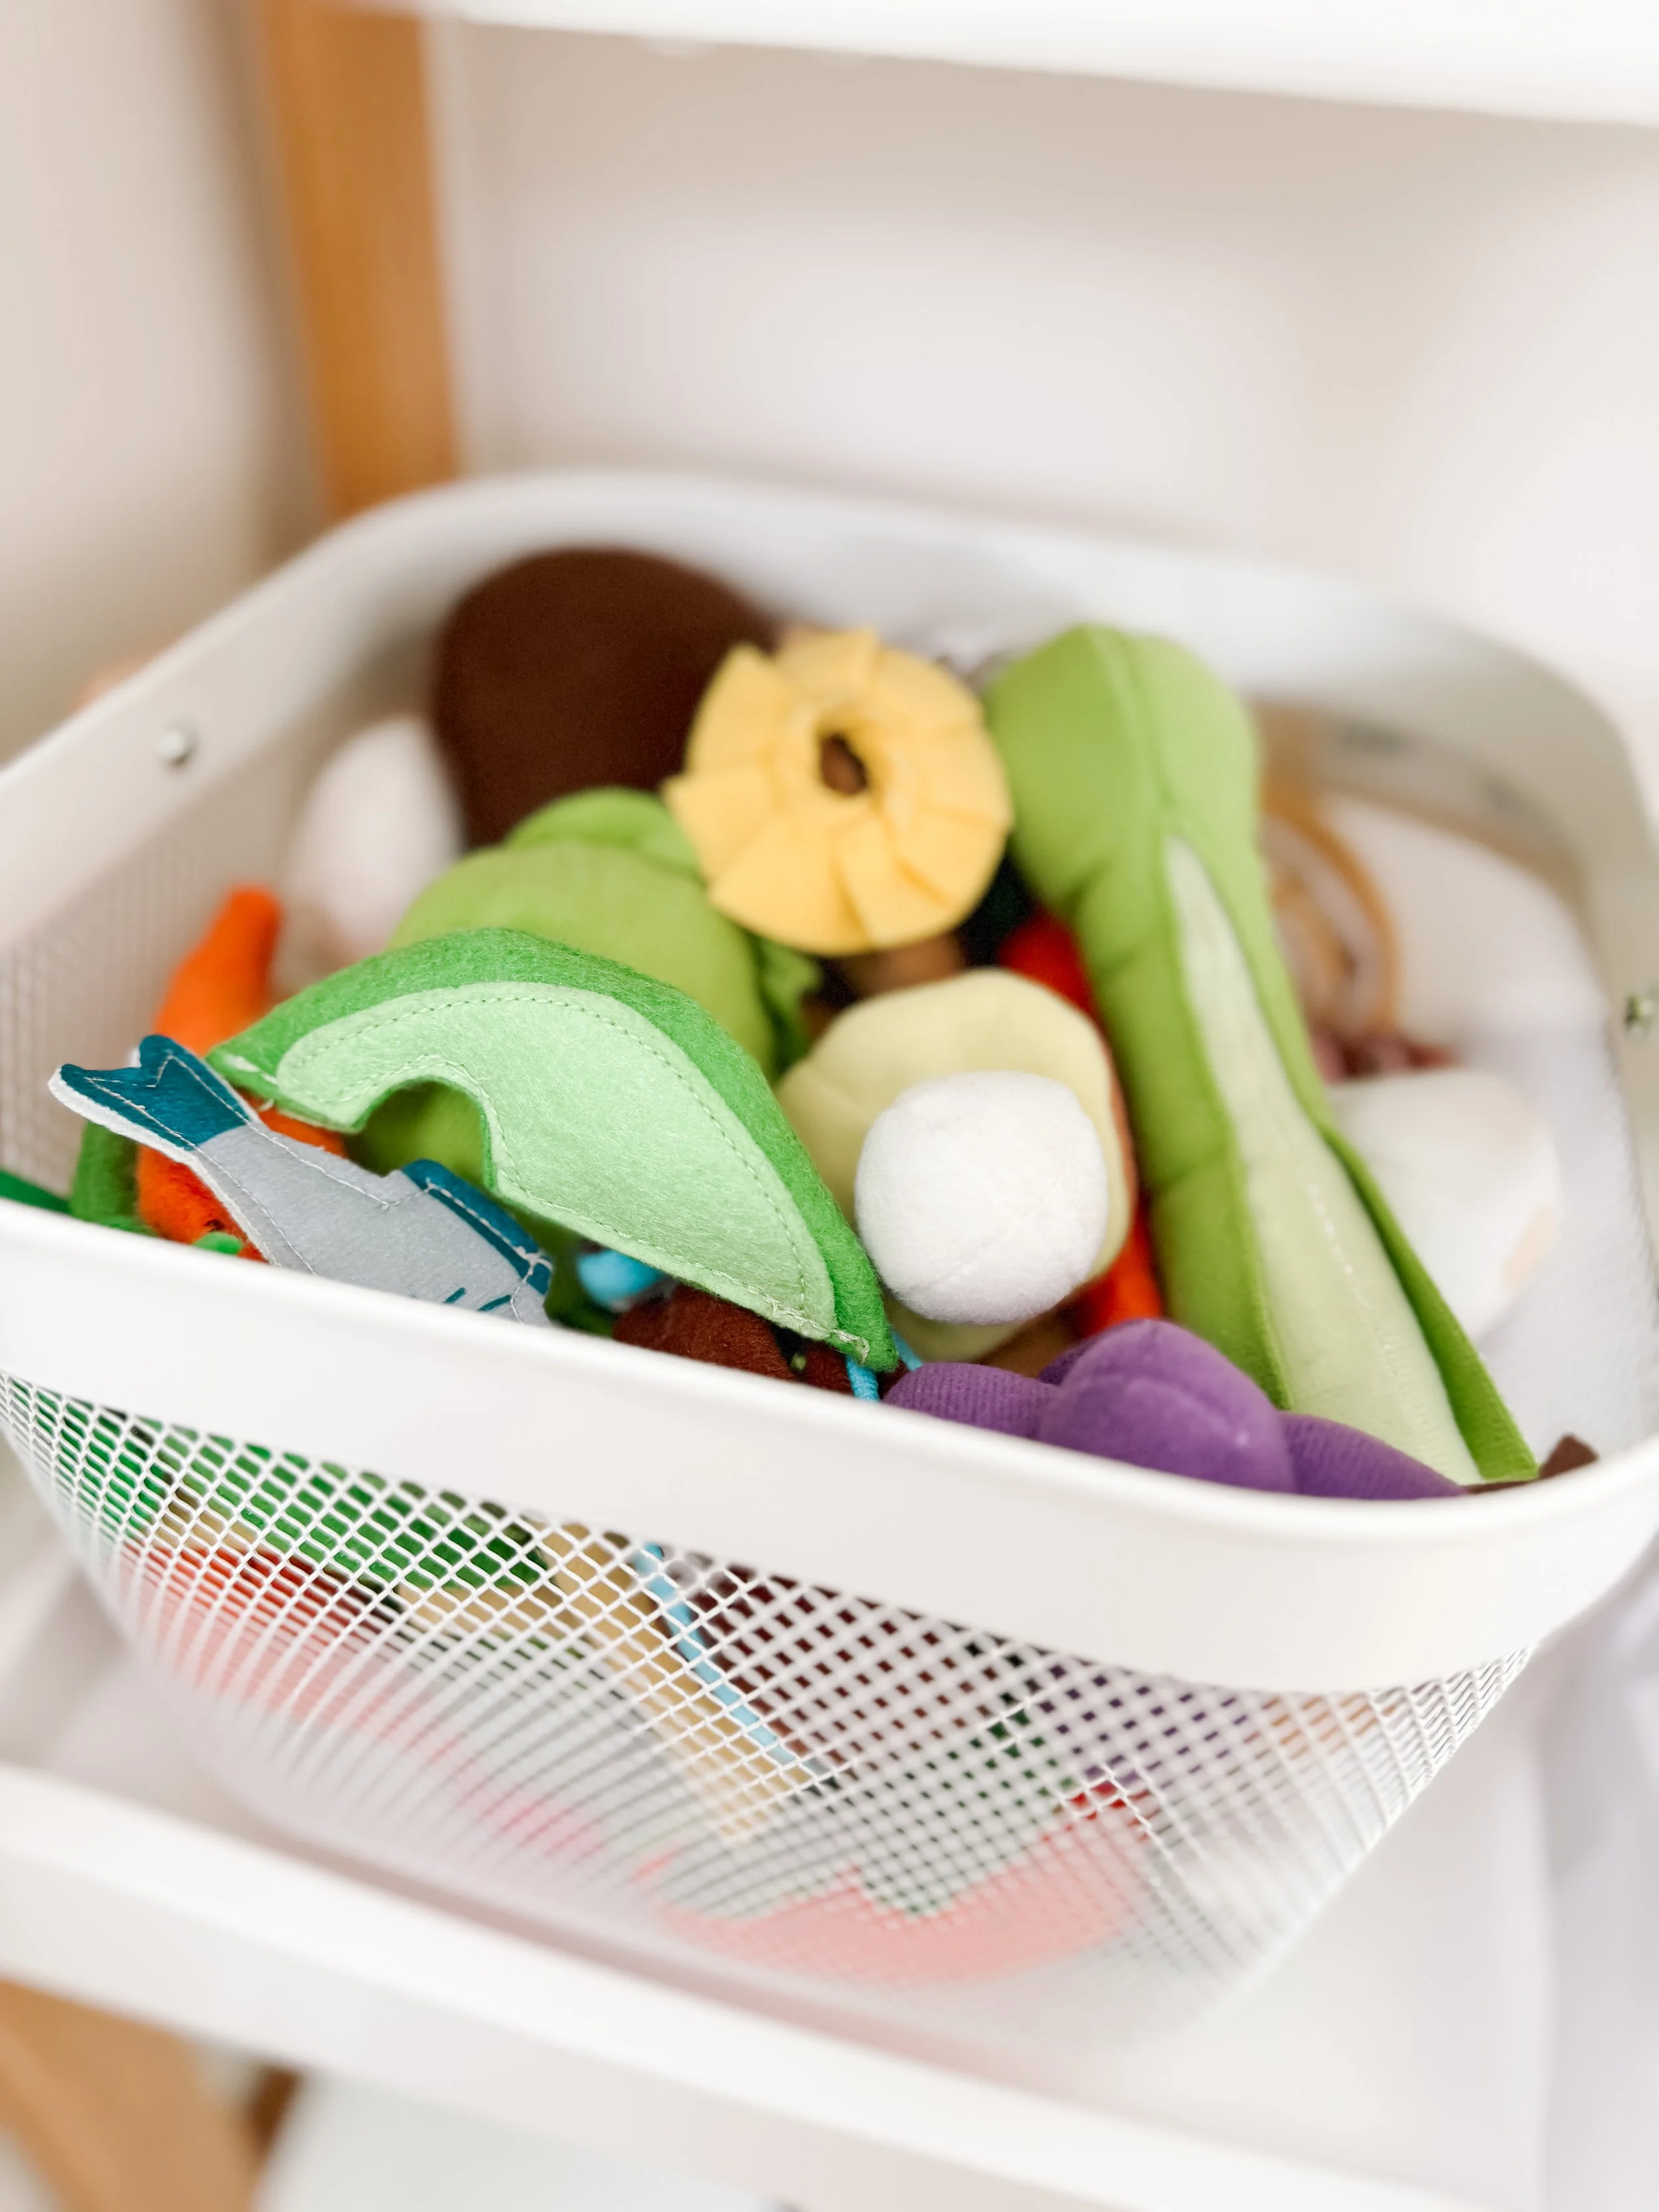
open storage bins
visible materials
This allowed for independent play without constant help.
4. Added Real-Life Play Elements
I incorporated items that mimic real-life kitchen experiences:
play food
containers and jars
simple prep setups
This turned pretend play into something more meaningful and immersive.

5. Styled It Like a Real Space (Not a Toy)
This was the biggest shift.
Instead of treating it like a toy, I styled it like a mini version of a real kitchen:
neutral colors
simple decor
clean layout
This made it feel like a true part of our home.
The Result
After the transformation, everything changed.
This space became:
one of the most used areas in our home
a go-to for independent play
a place where my daughter can engage for longer periods of time
It’s no longer just a toy—it’s a functional learning environment.
Why This Works
This setup works so well because it focuses on:
simplicity over clutter
access over perfection
function over decoration
By making the space easy to use and visually inviting, it naturally encourages more play.
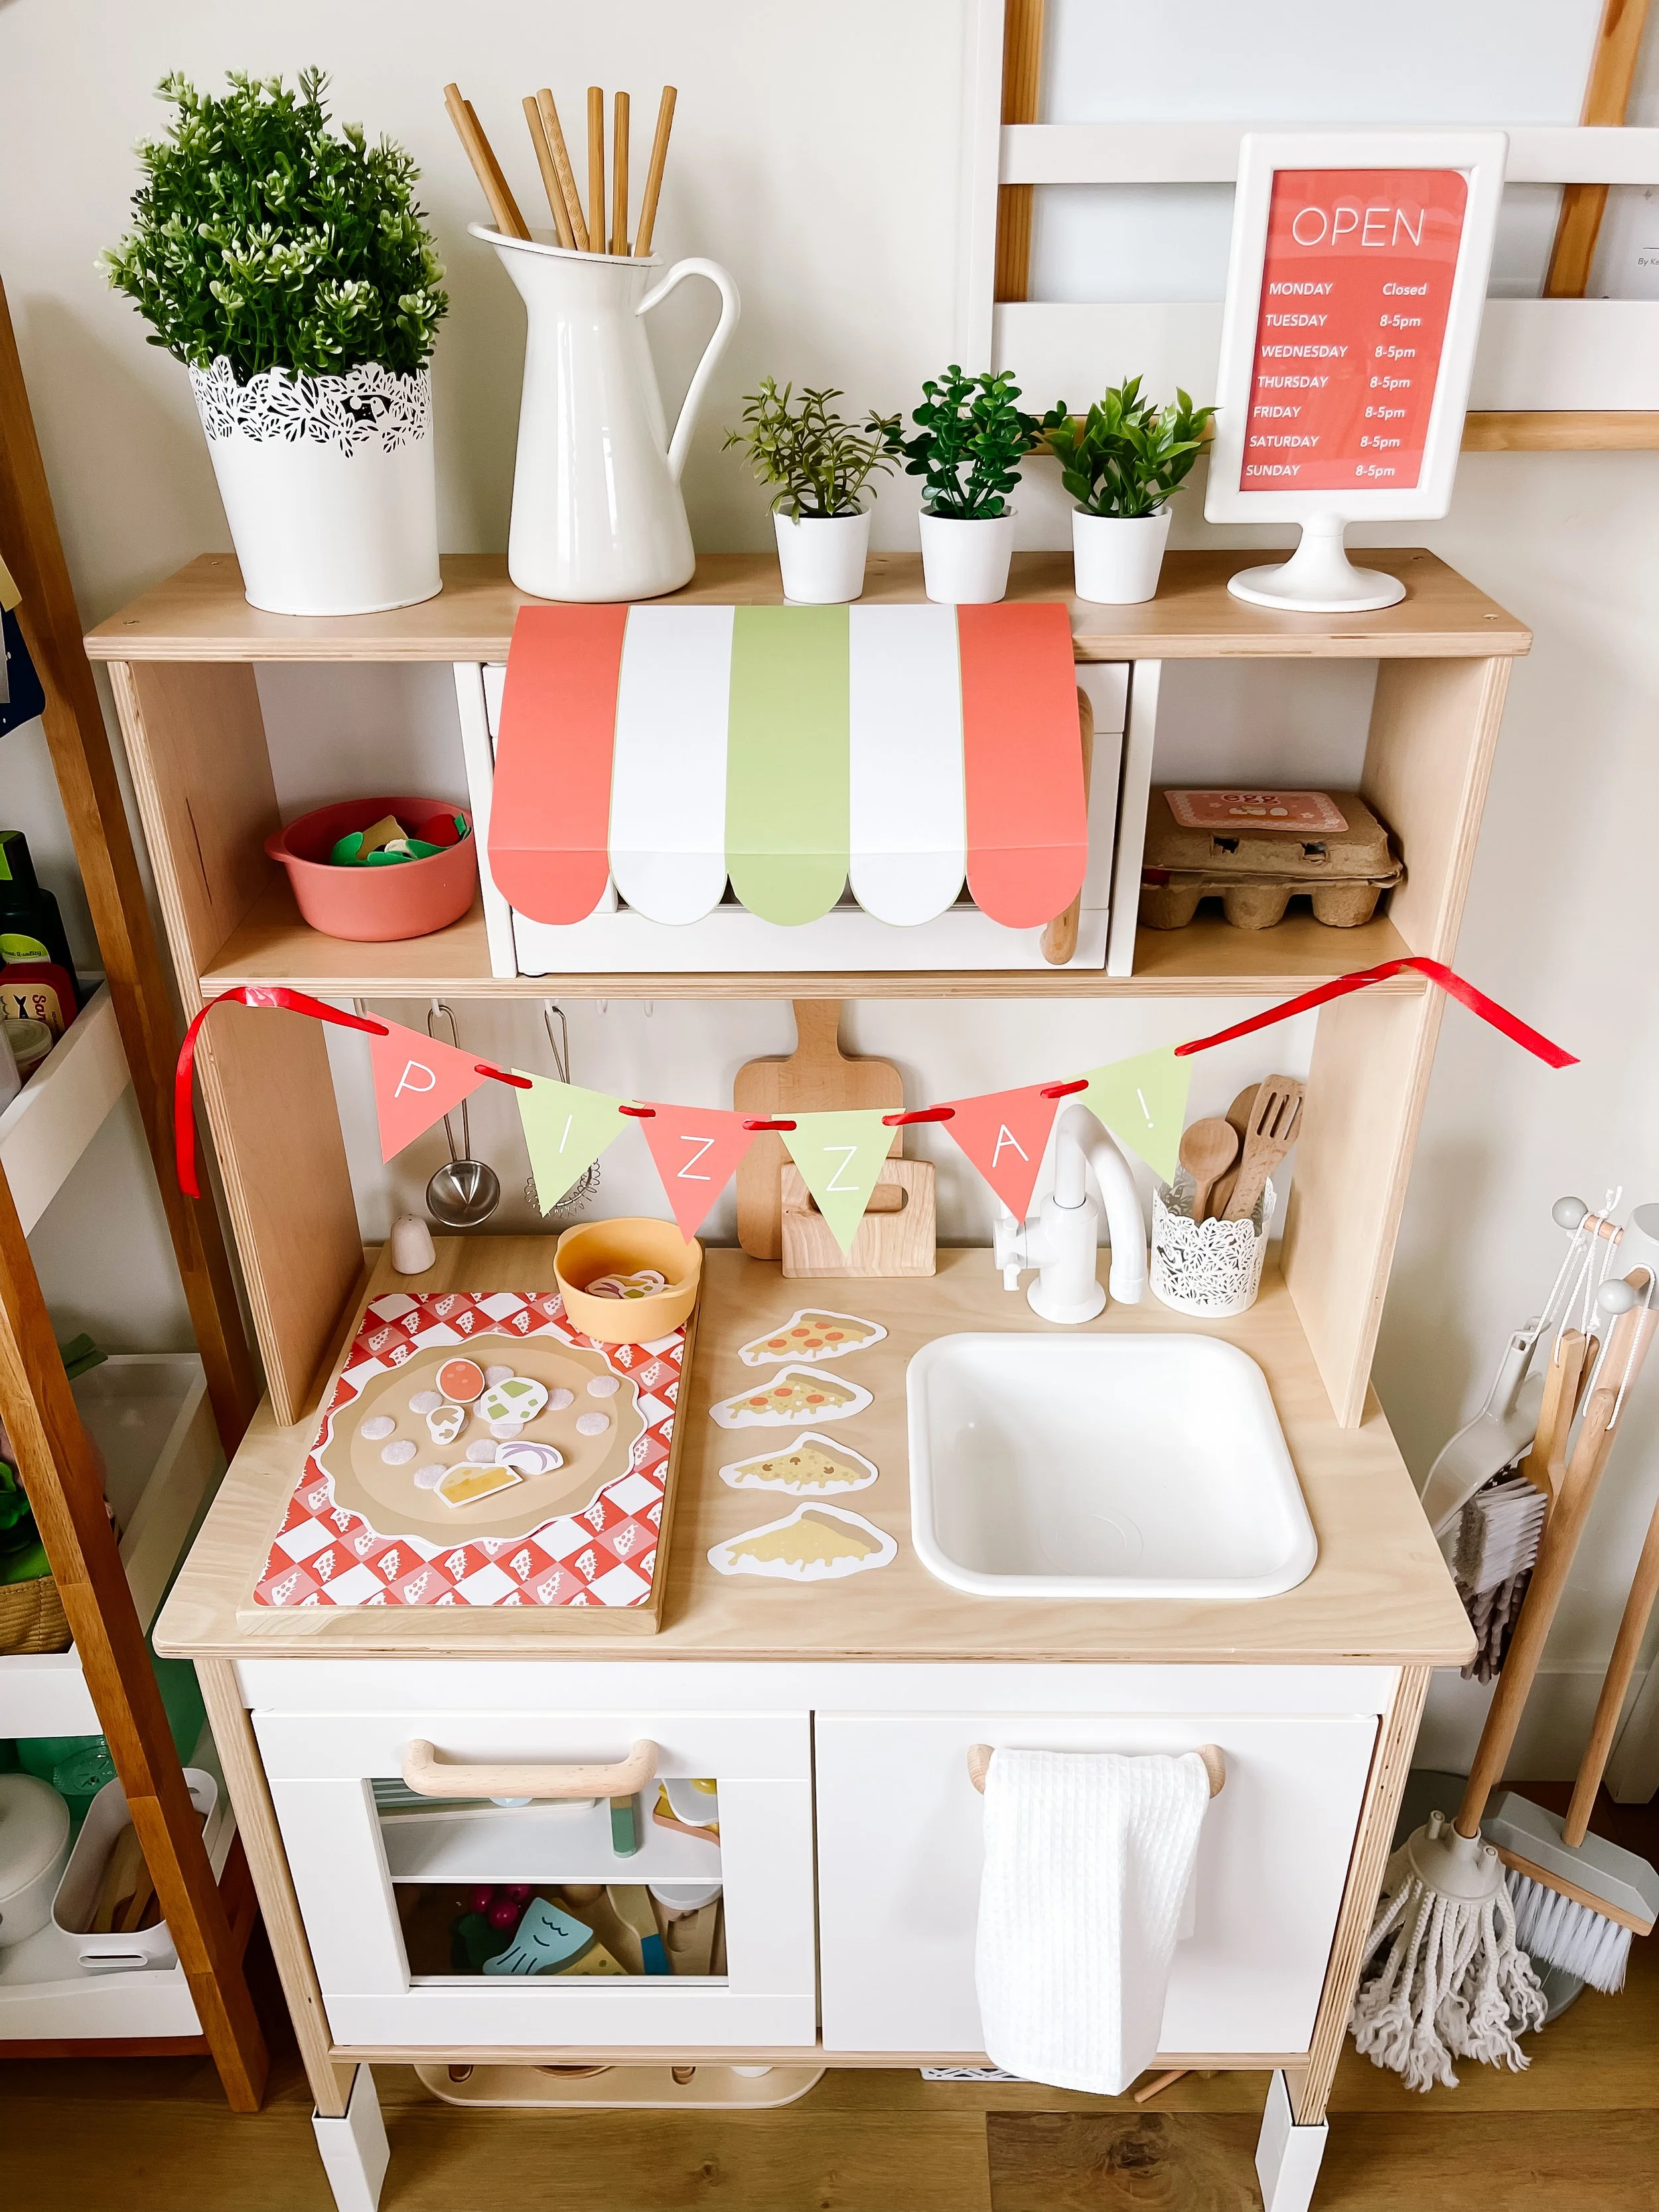
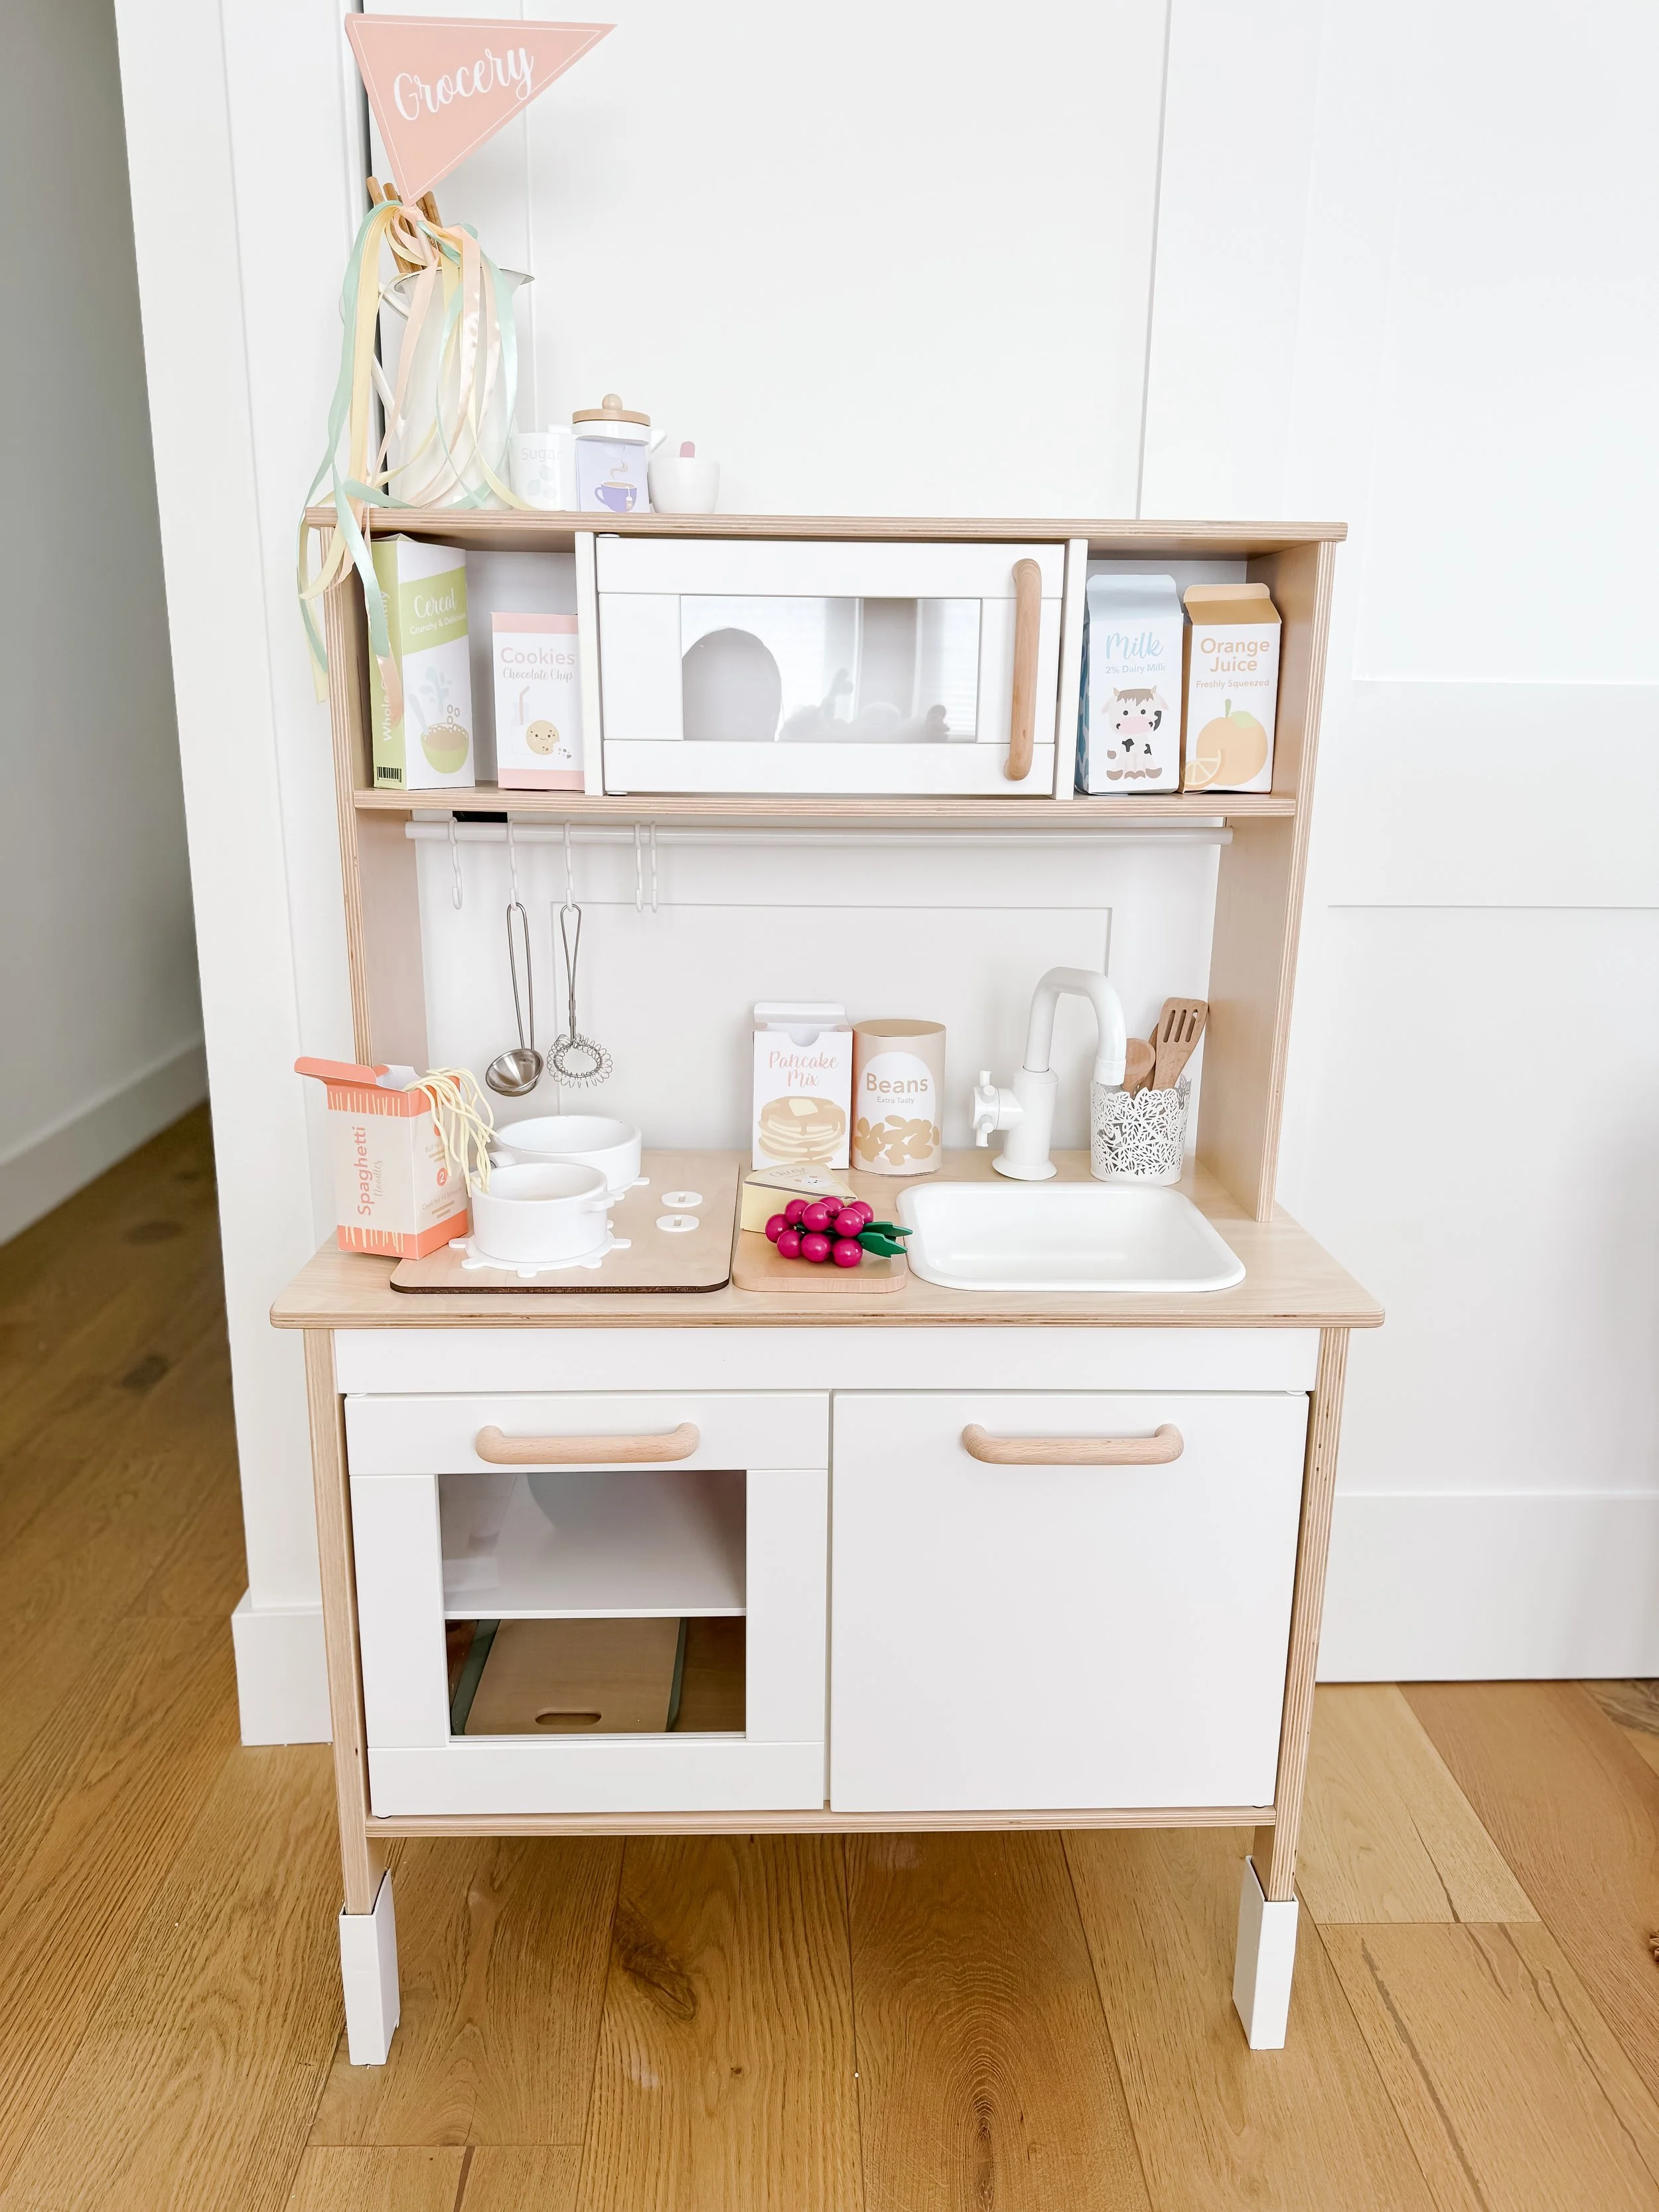
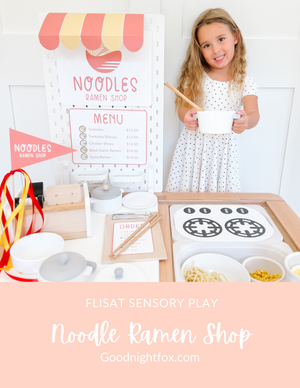
The Game-Changer: Turning Your Play Kitchen Into Shops
One of my favorite parts about this setup is that it’s not just a play kitchen—it’s a fully customizable play space.
With just a few simple swaps, we can completely transform it into different themed shops using our GoodnightFox printables.
This keeps the space feeling new and exciting without needing to buy new toys.
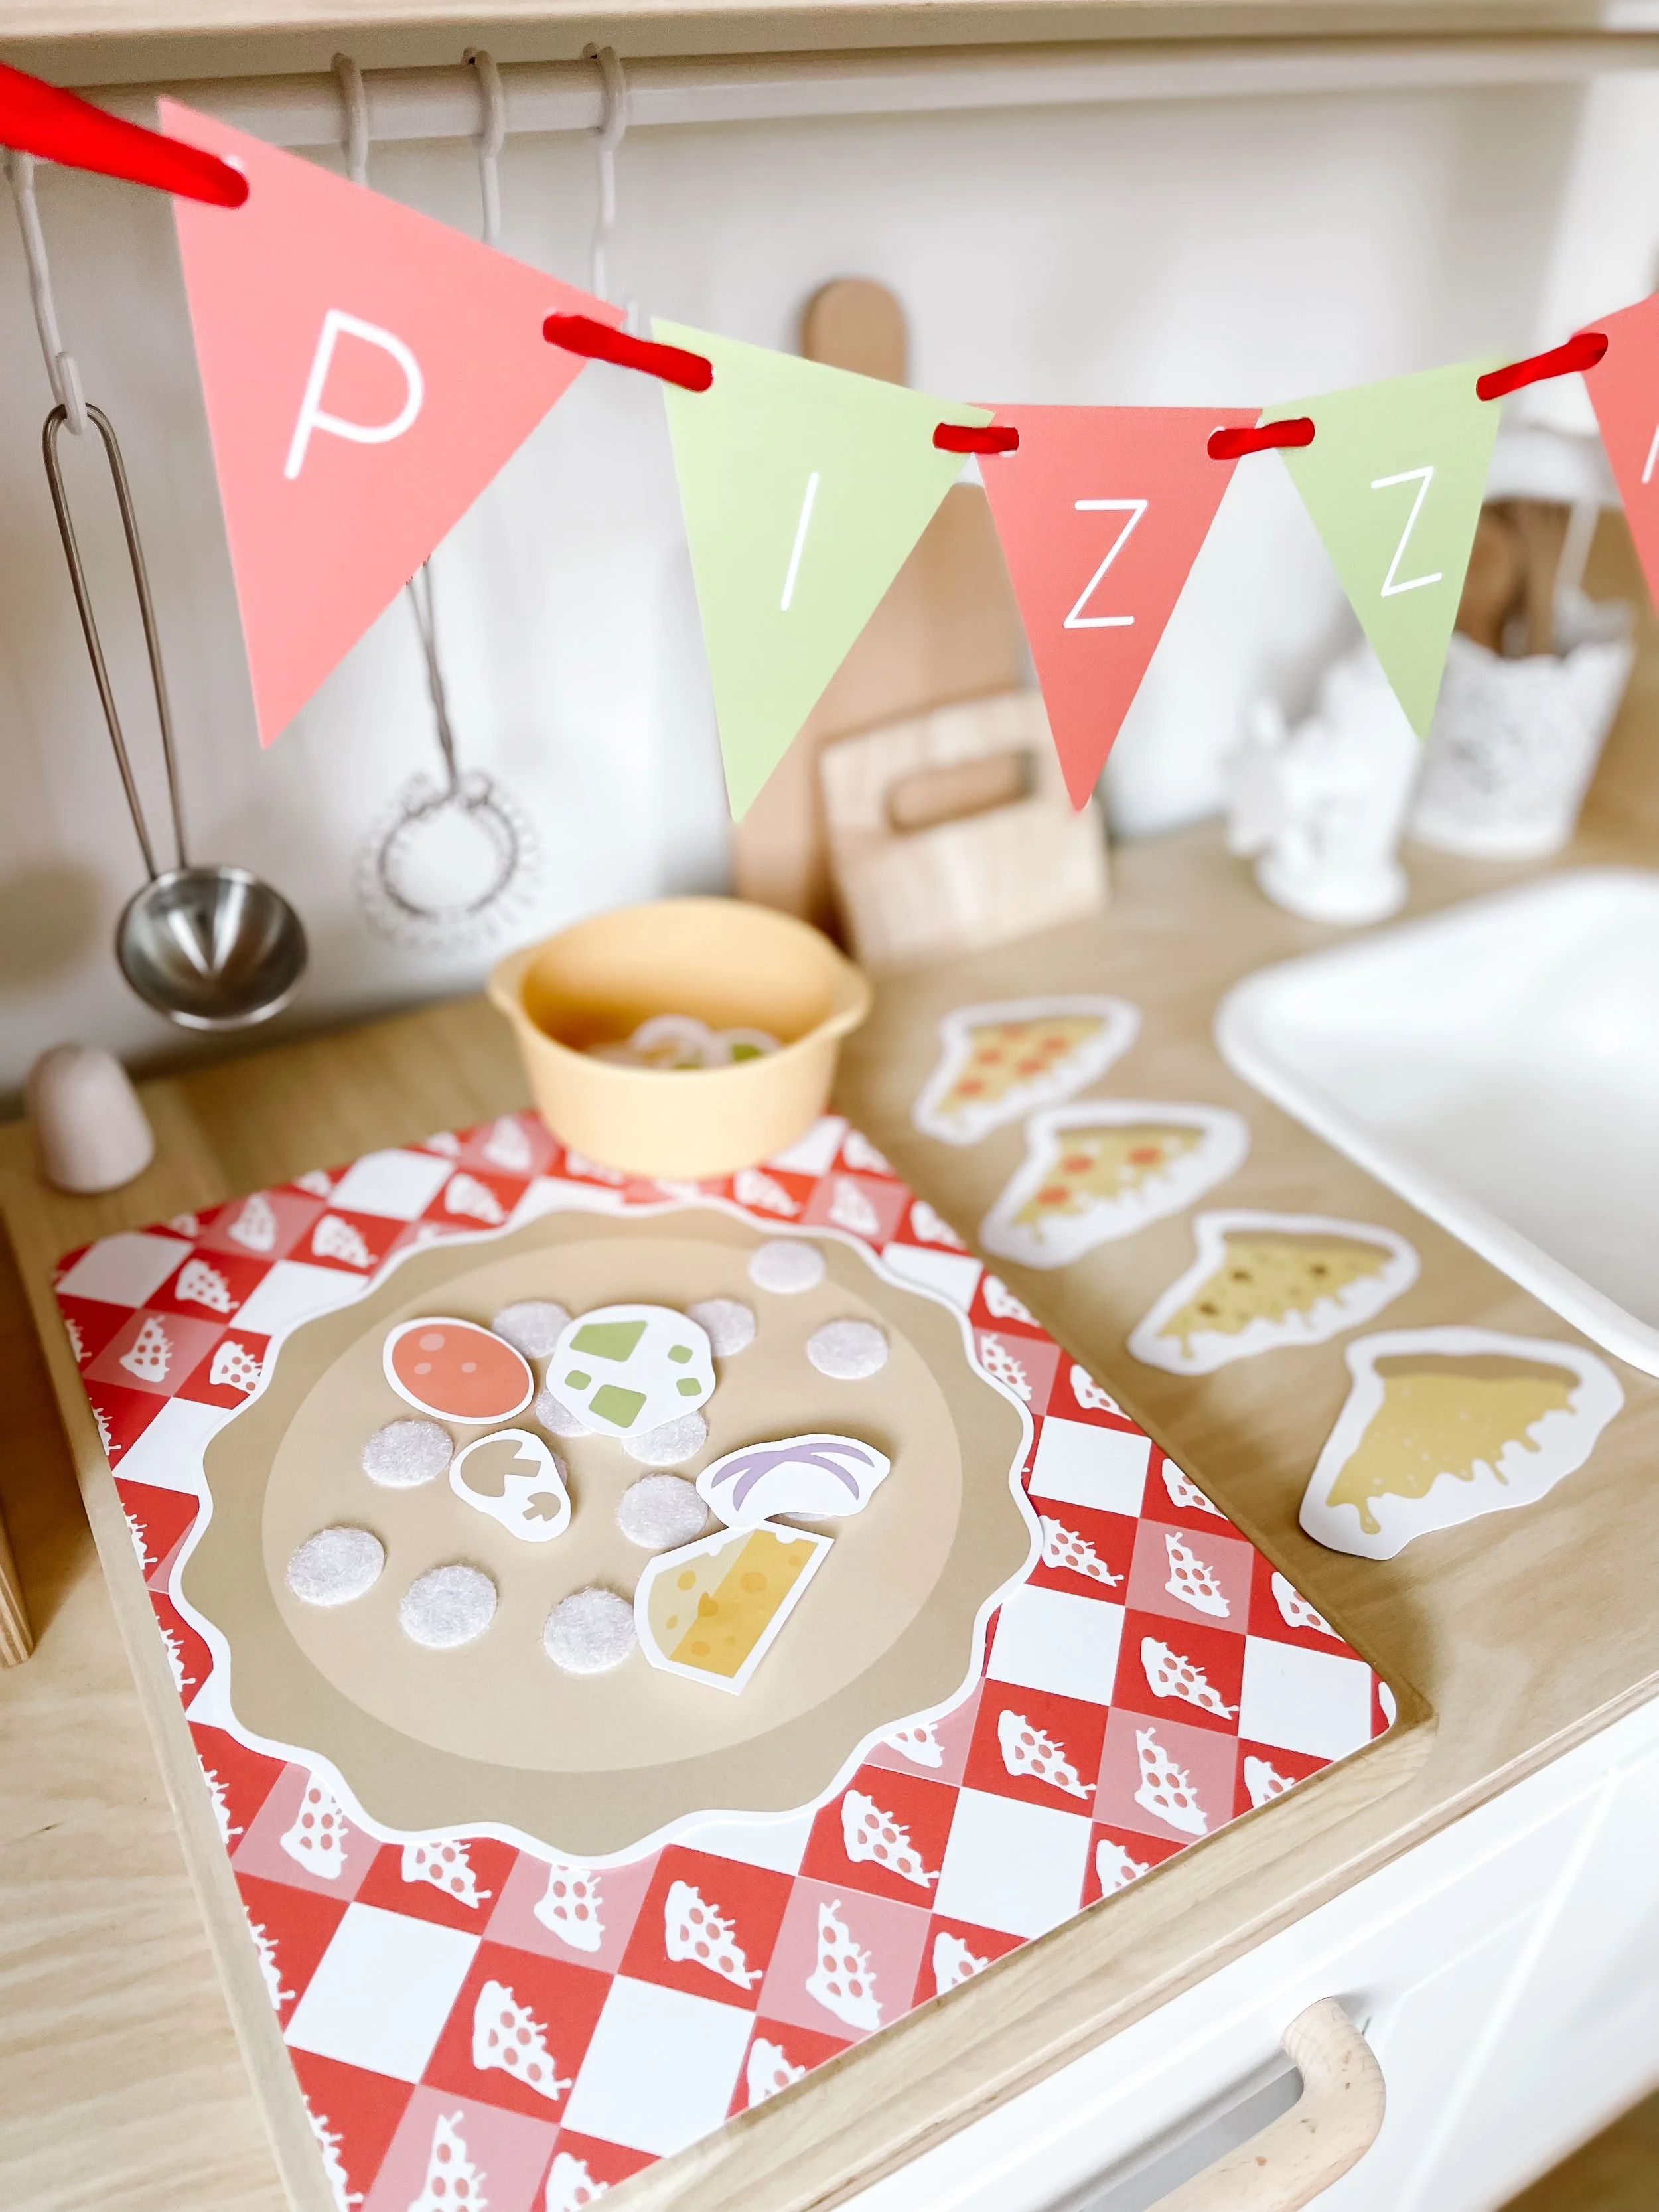
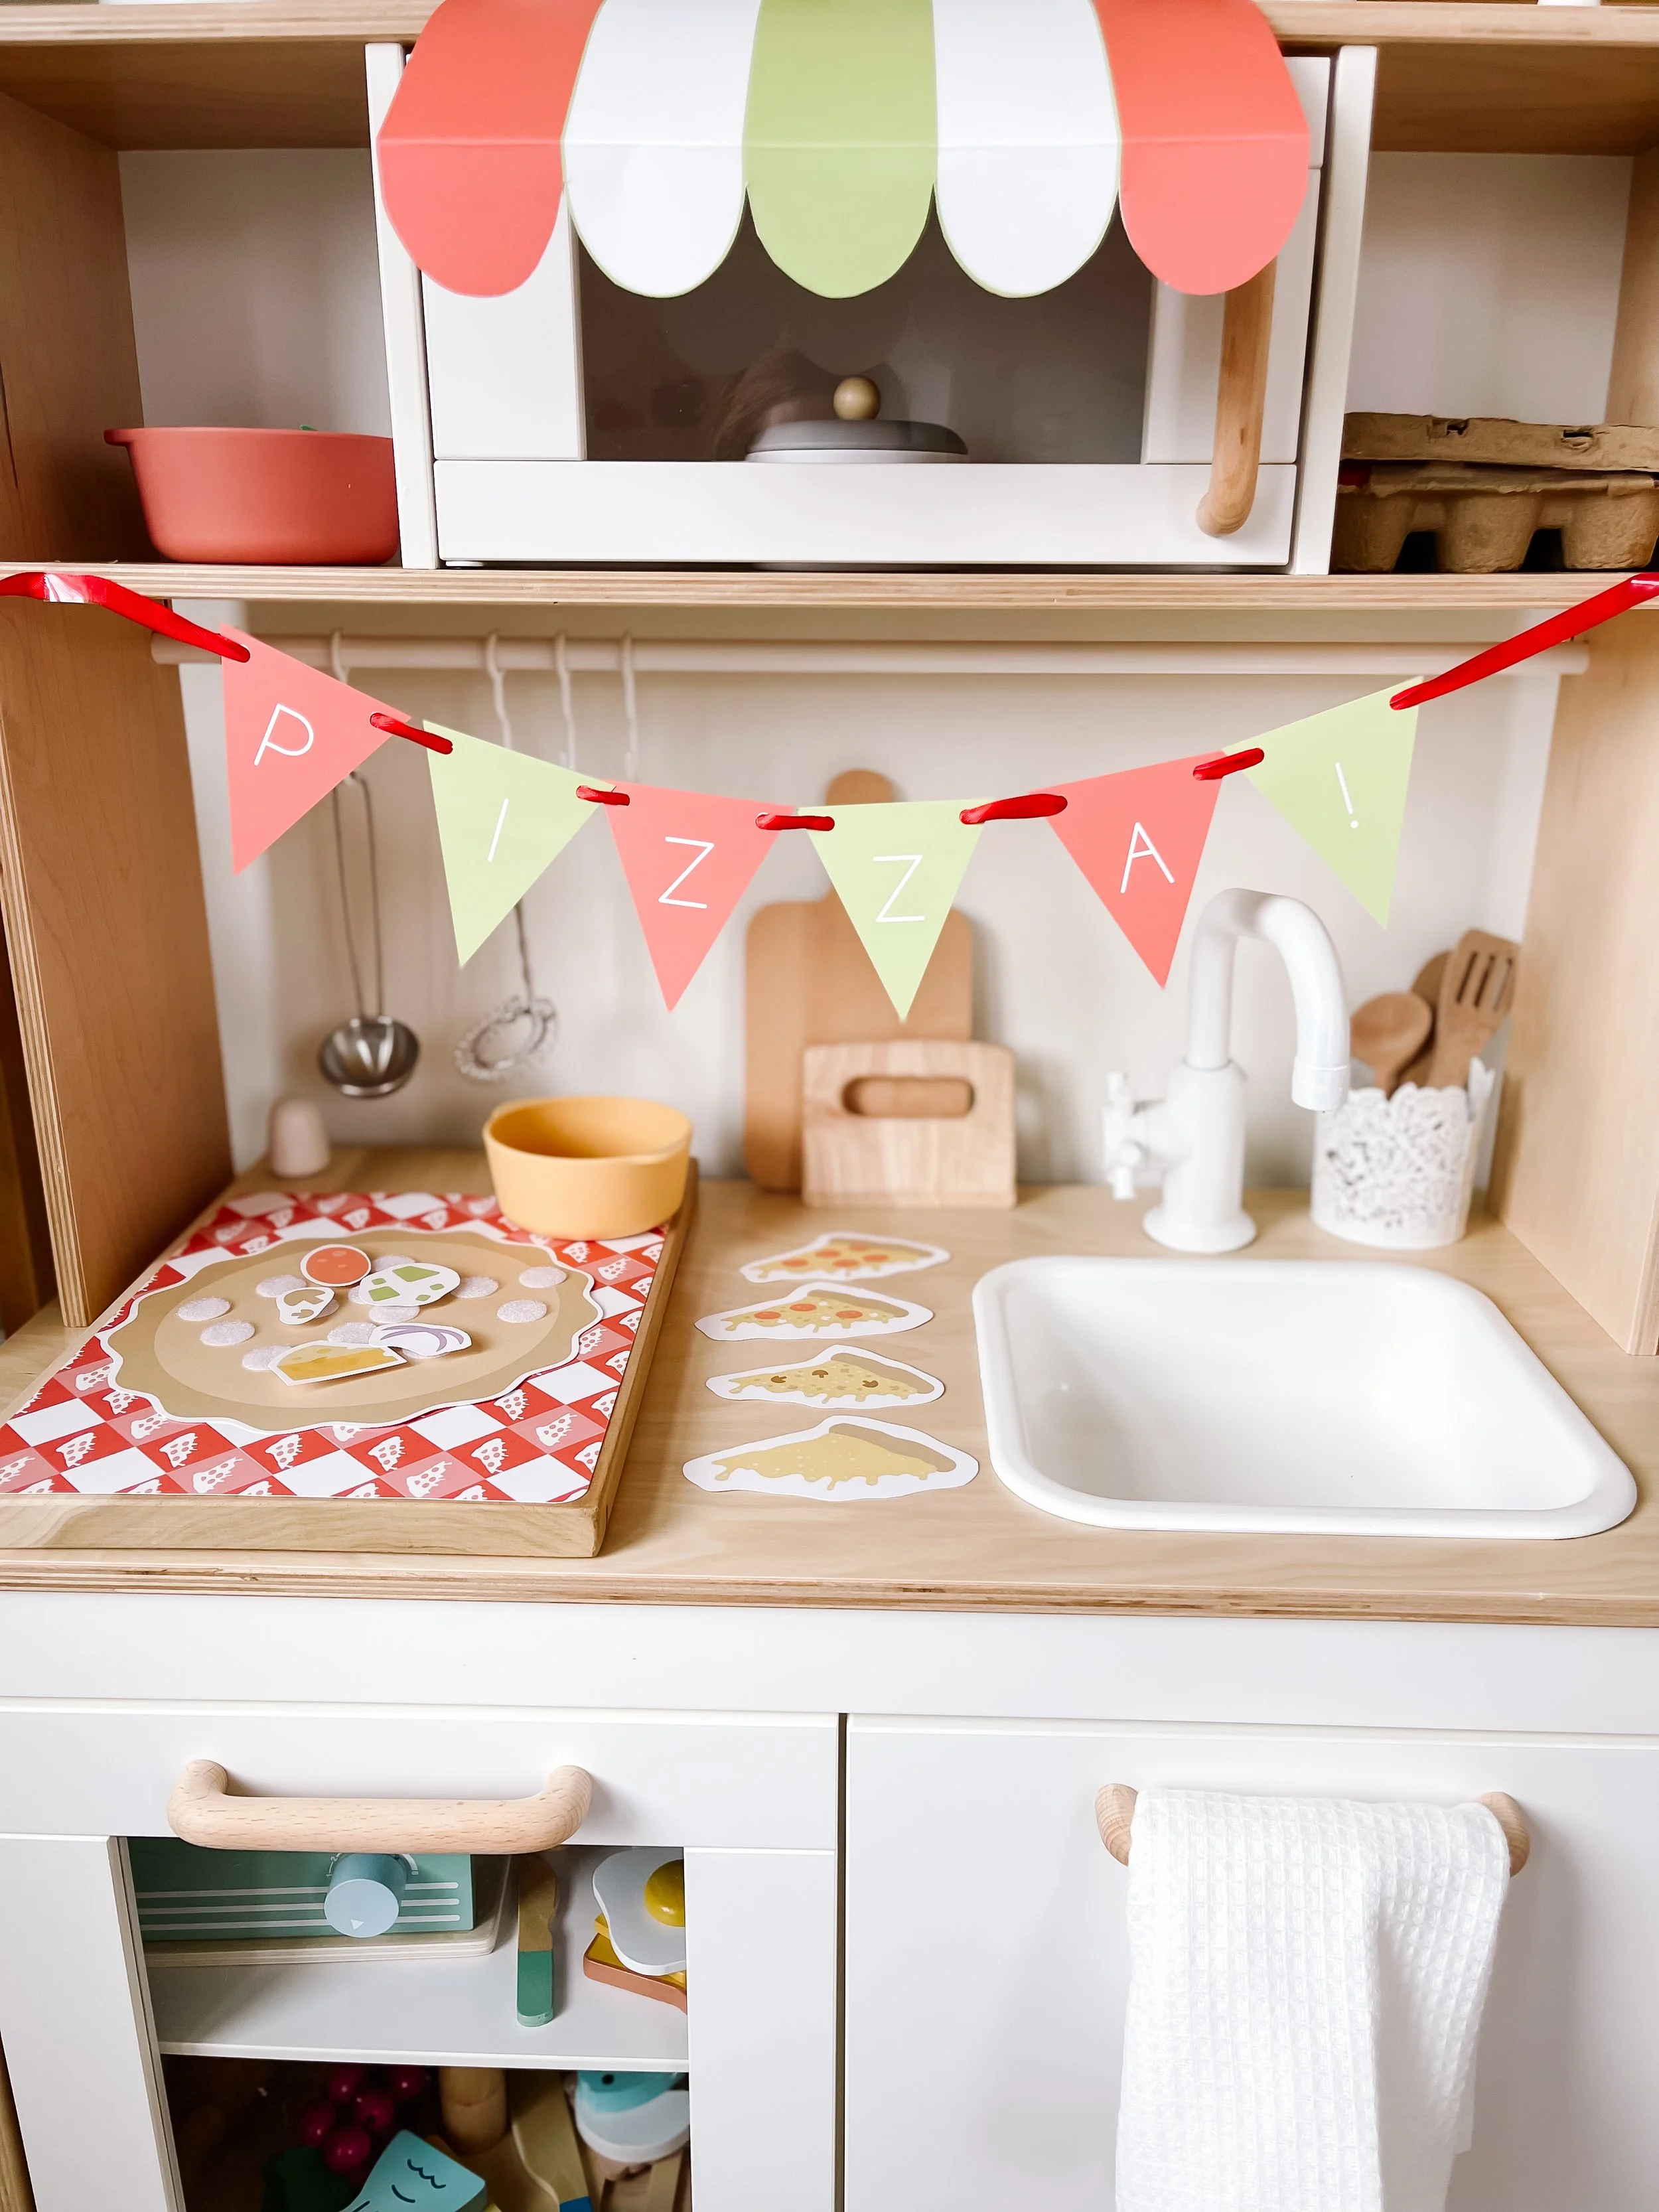
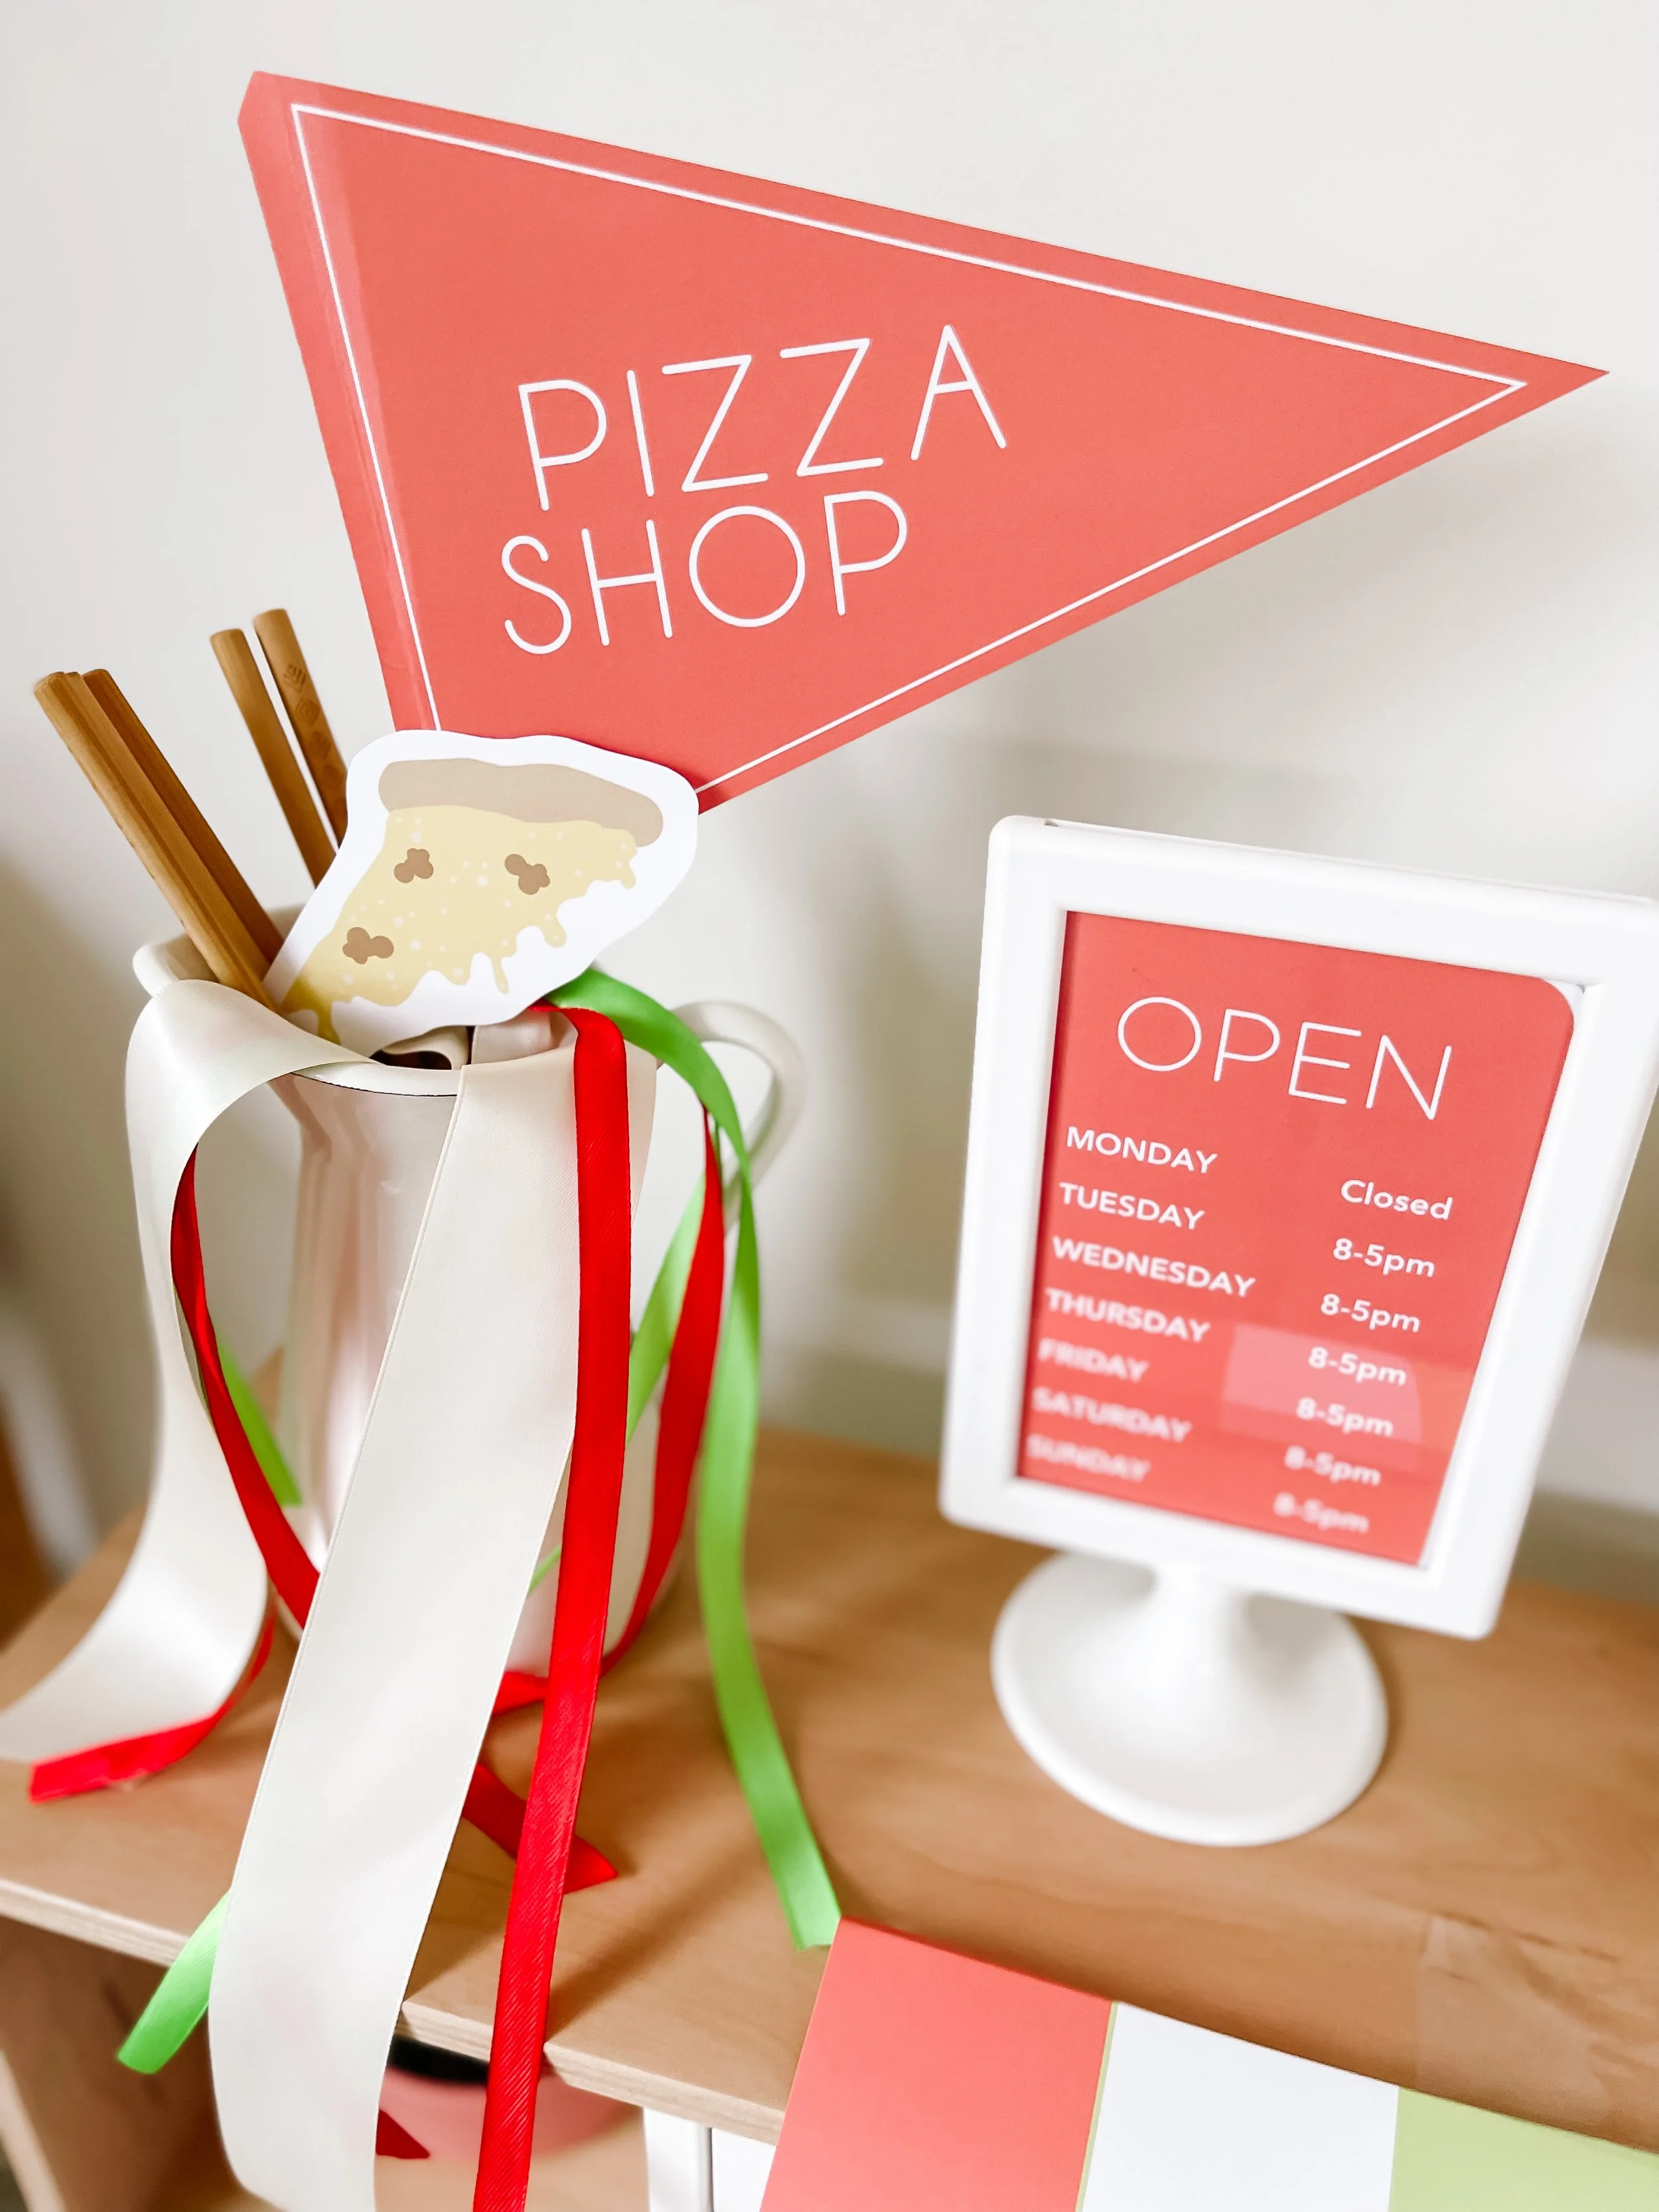
Example: Pizza Shop Setup
For this setup, we turned the kitchen into a pizza shop by adding:
printable pizza menus
shop signage + banner
play pizza ingredients and toppings
themed accessories
Suddenly, the same kitchen becomes an entirely new experience.
Why This Works So Well
Instead of constantly buying new toys, we:
reuse the same base setup
swap out printables and a few props
create a completely new play theme
It’s a simple way to:
extend play time
spark imagination
introduce new vocabulary and concepts
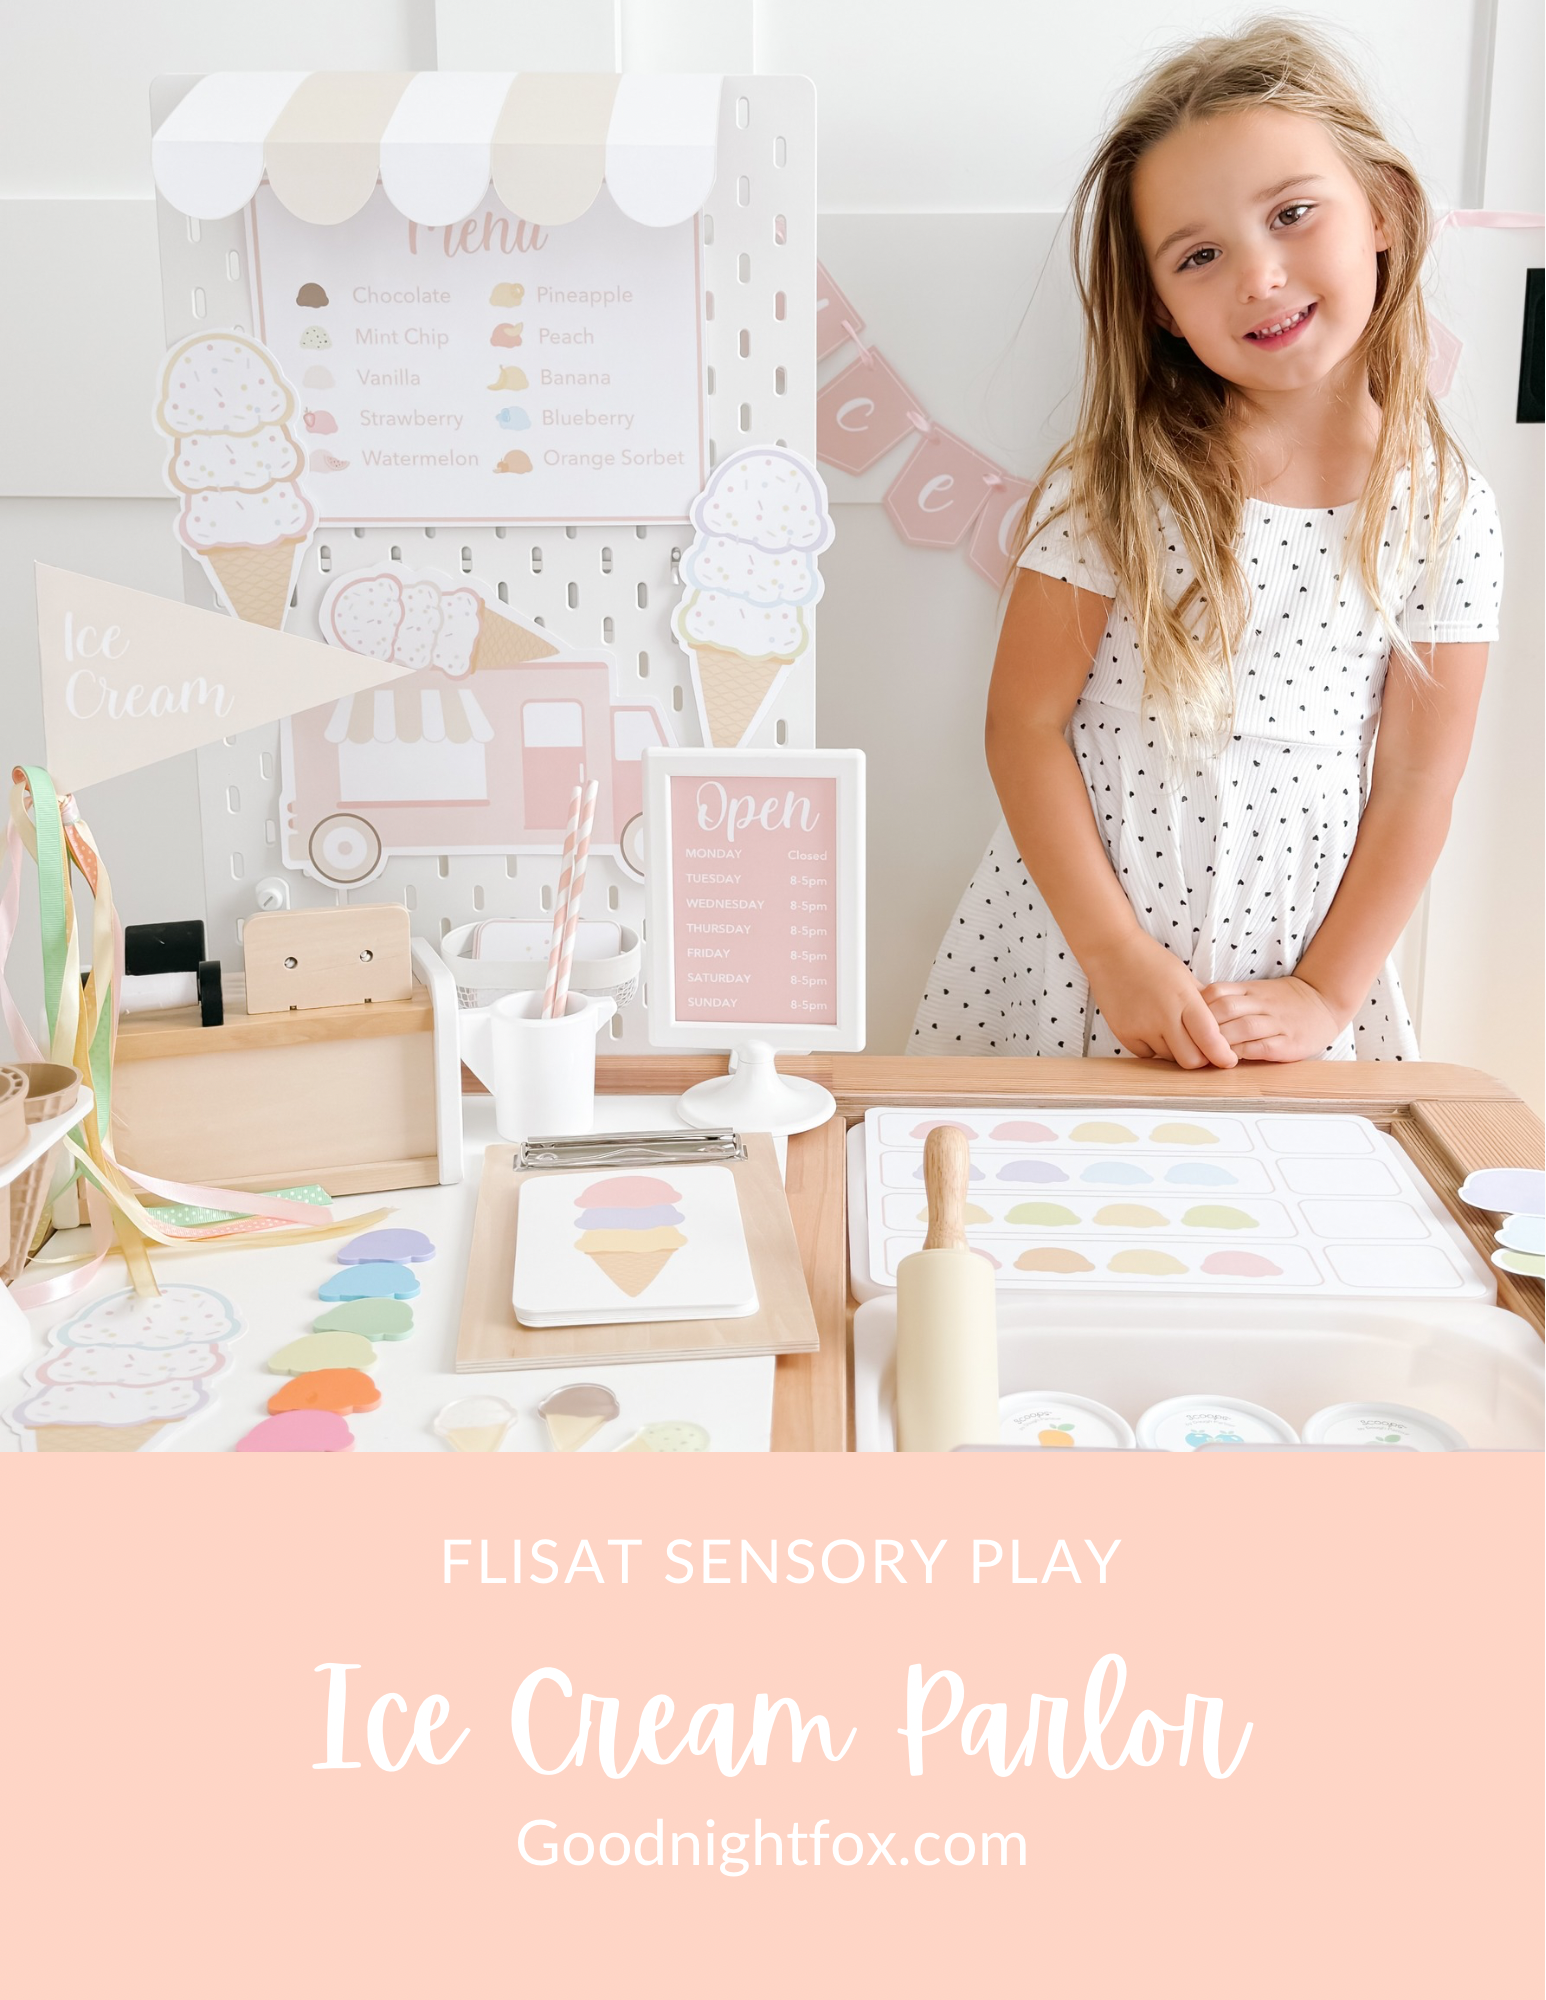
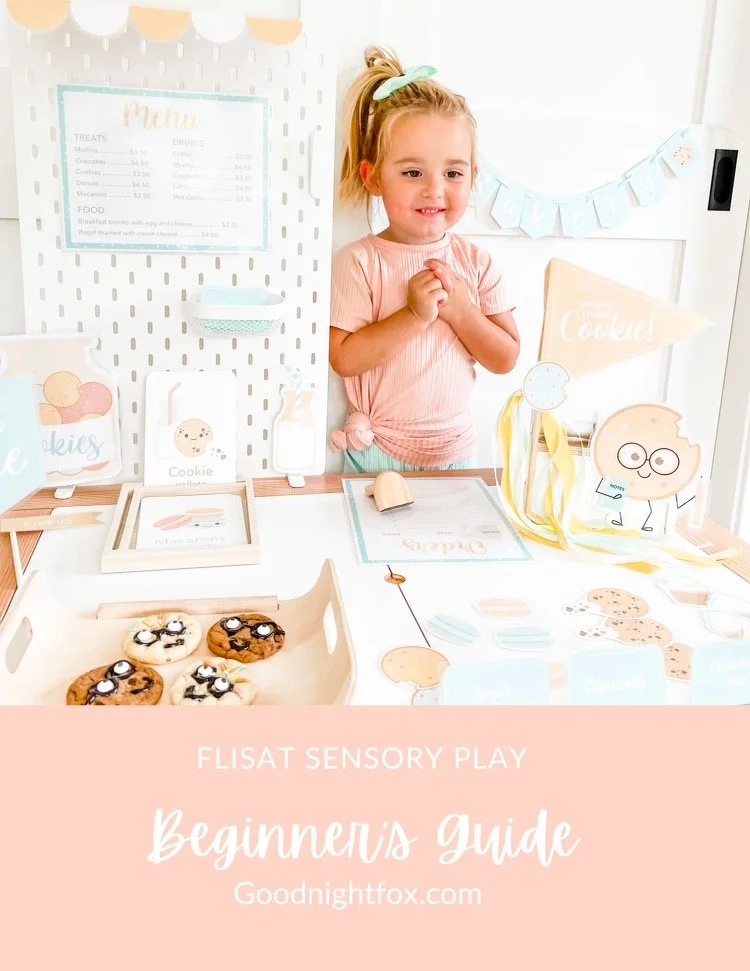
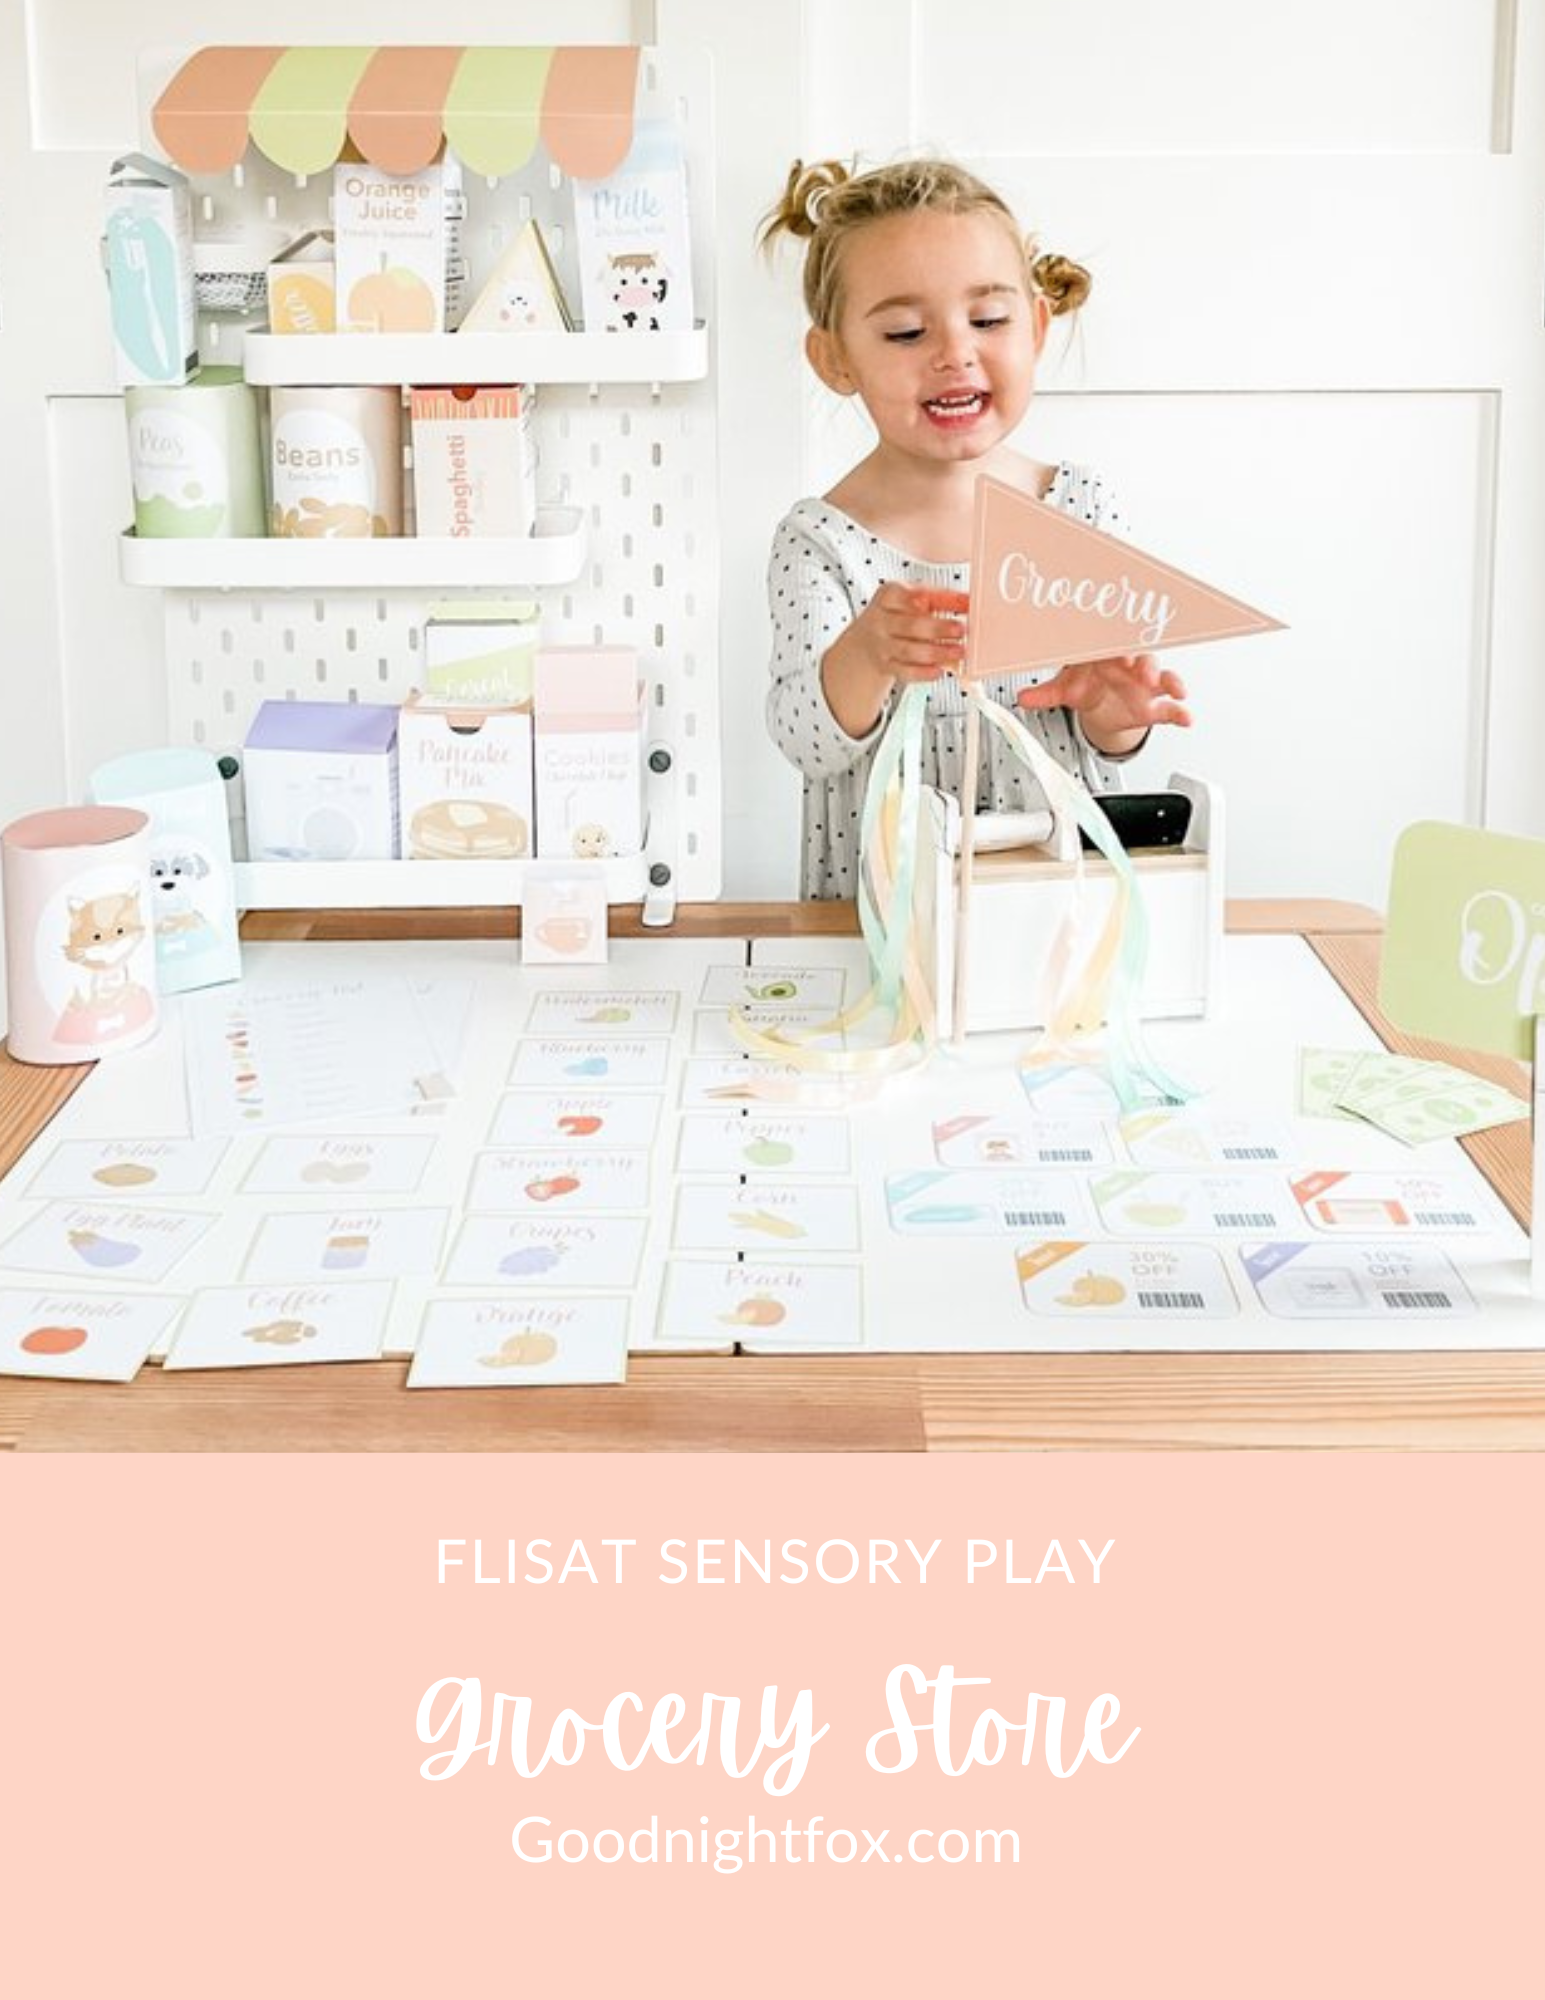
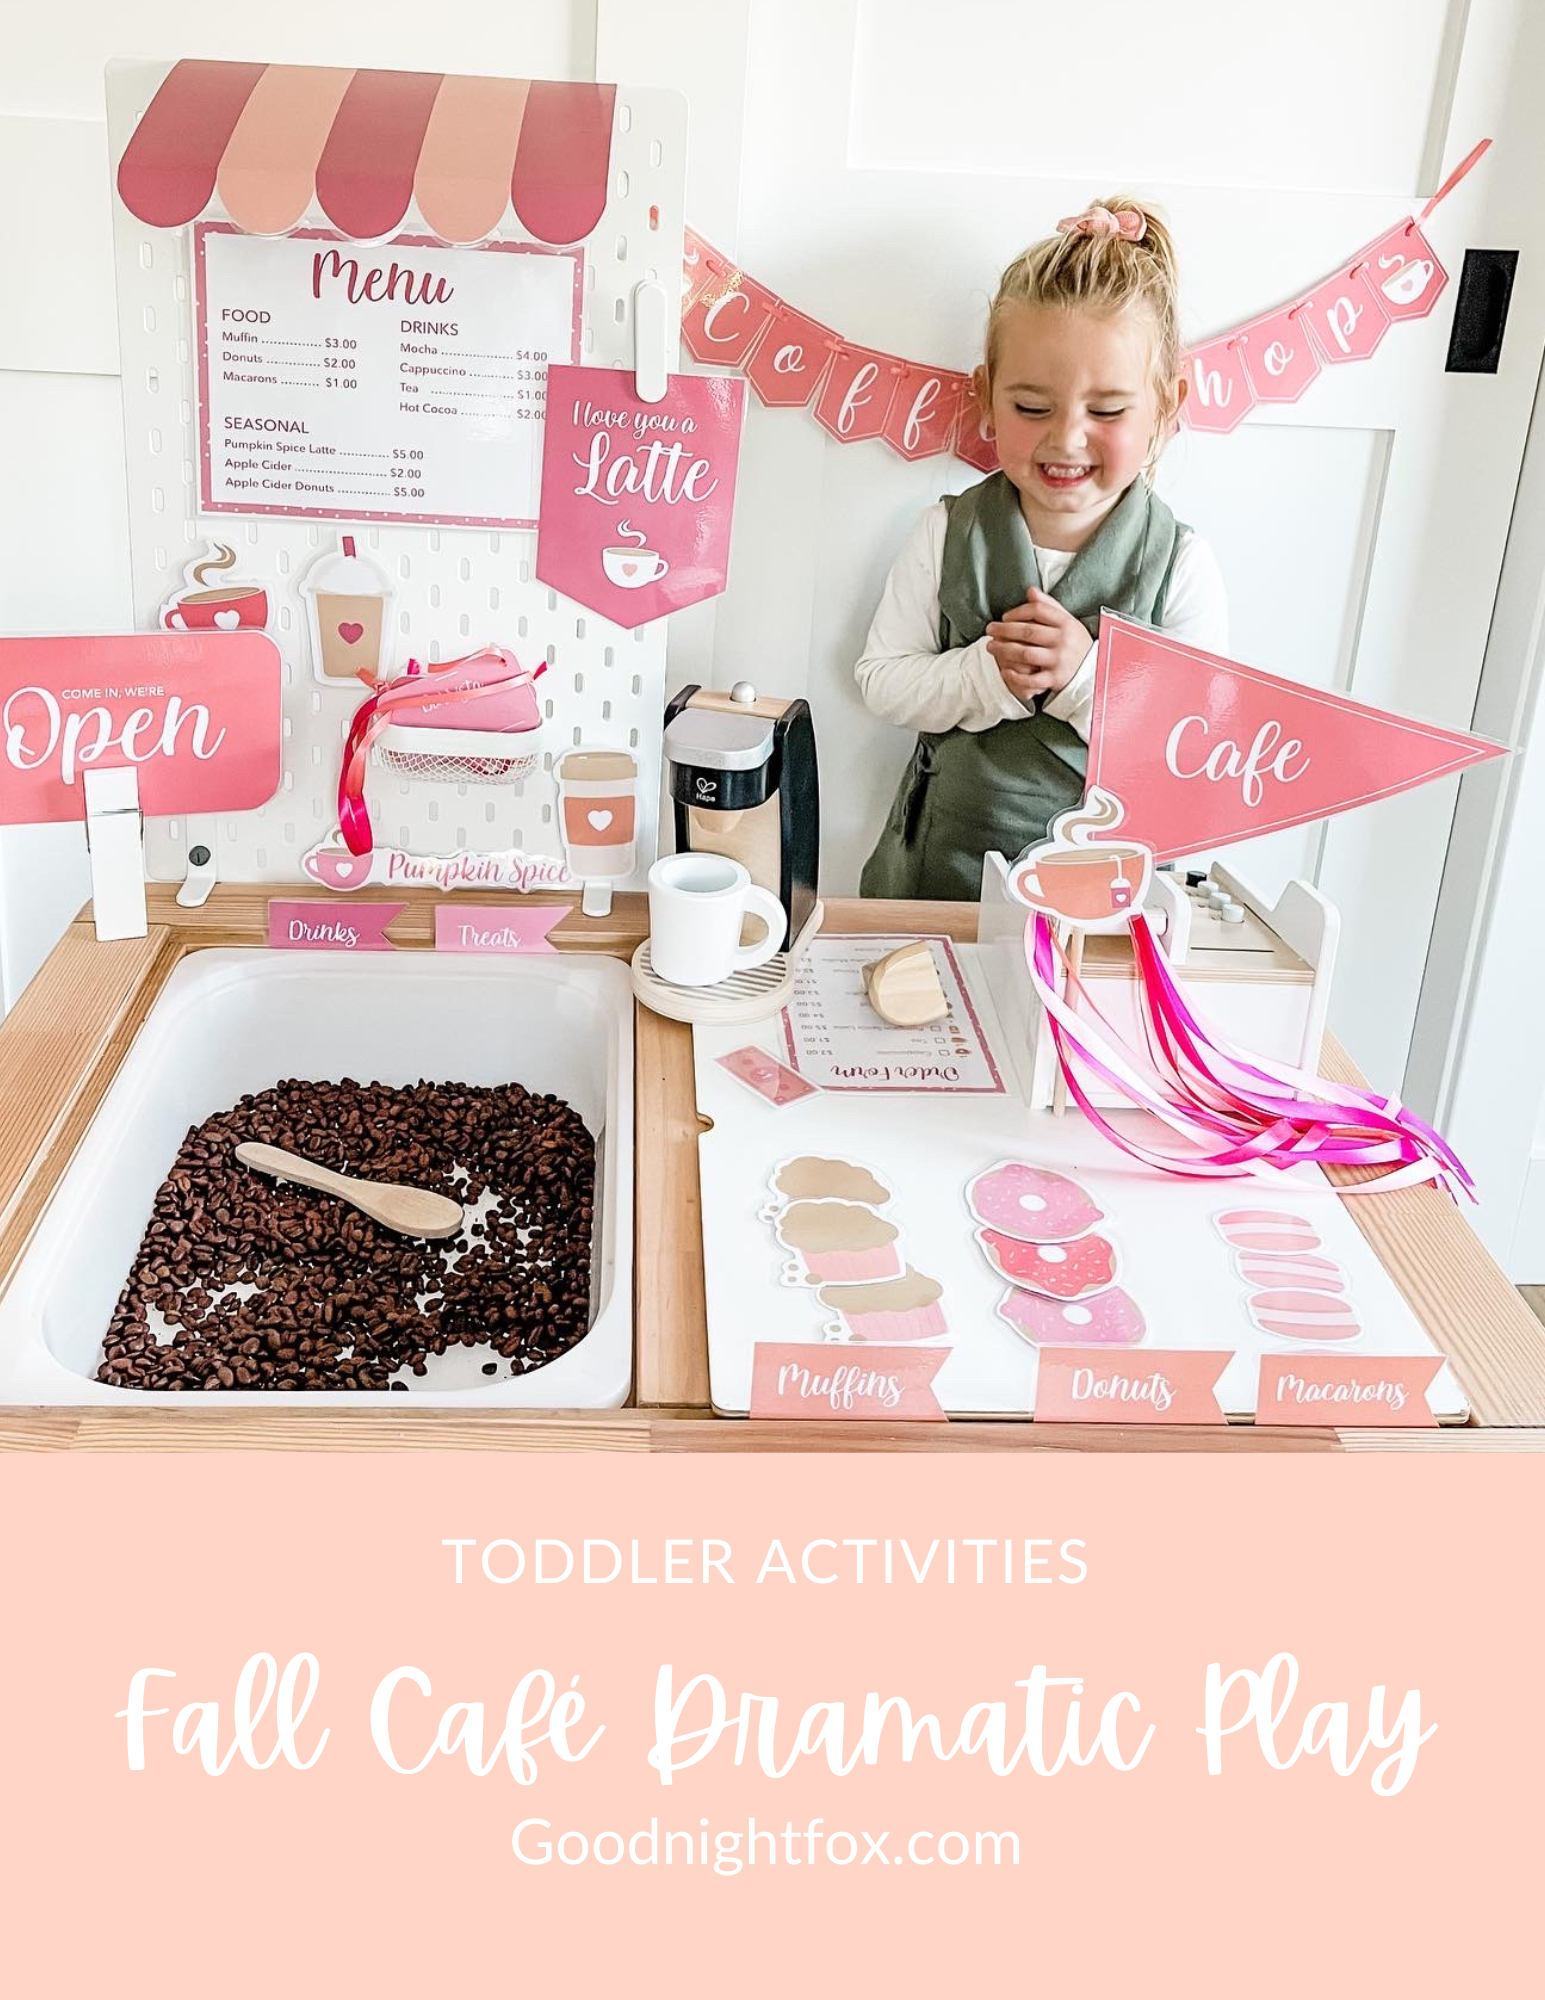
Other Shop Ideas You Can Create
This same setup can easily transform into:
Each one creates a brand new play experience using the same space.
A Simple Way to Keep Play Fresh
Rotating themes every few weeks has made a huge difference in how long my daughter stays engaged.
It turns this from a one-time setup into something that evolves over time.
And the best part?
It takes just a few minutes to switch everything out.

Tips for Creating Your Own Play Kitchen Setup
If you want to recreate this in your own home:
start with what you already have
remove more than you add
keep materials visible and accessible
rotate items to keep interest high
think of it as a “real space,” not just a toy
Final Thoughts
Transforming this IKEA play kitchen completely changed how my daughter plays at home.
It’s a simple shift, but it made a huge difference.
And the best part?
You don’t need a lot of space or expensive materials to create something just as impactful.

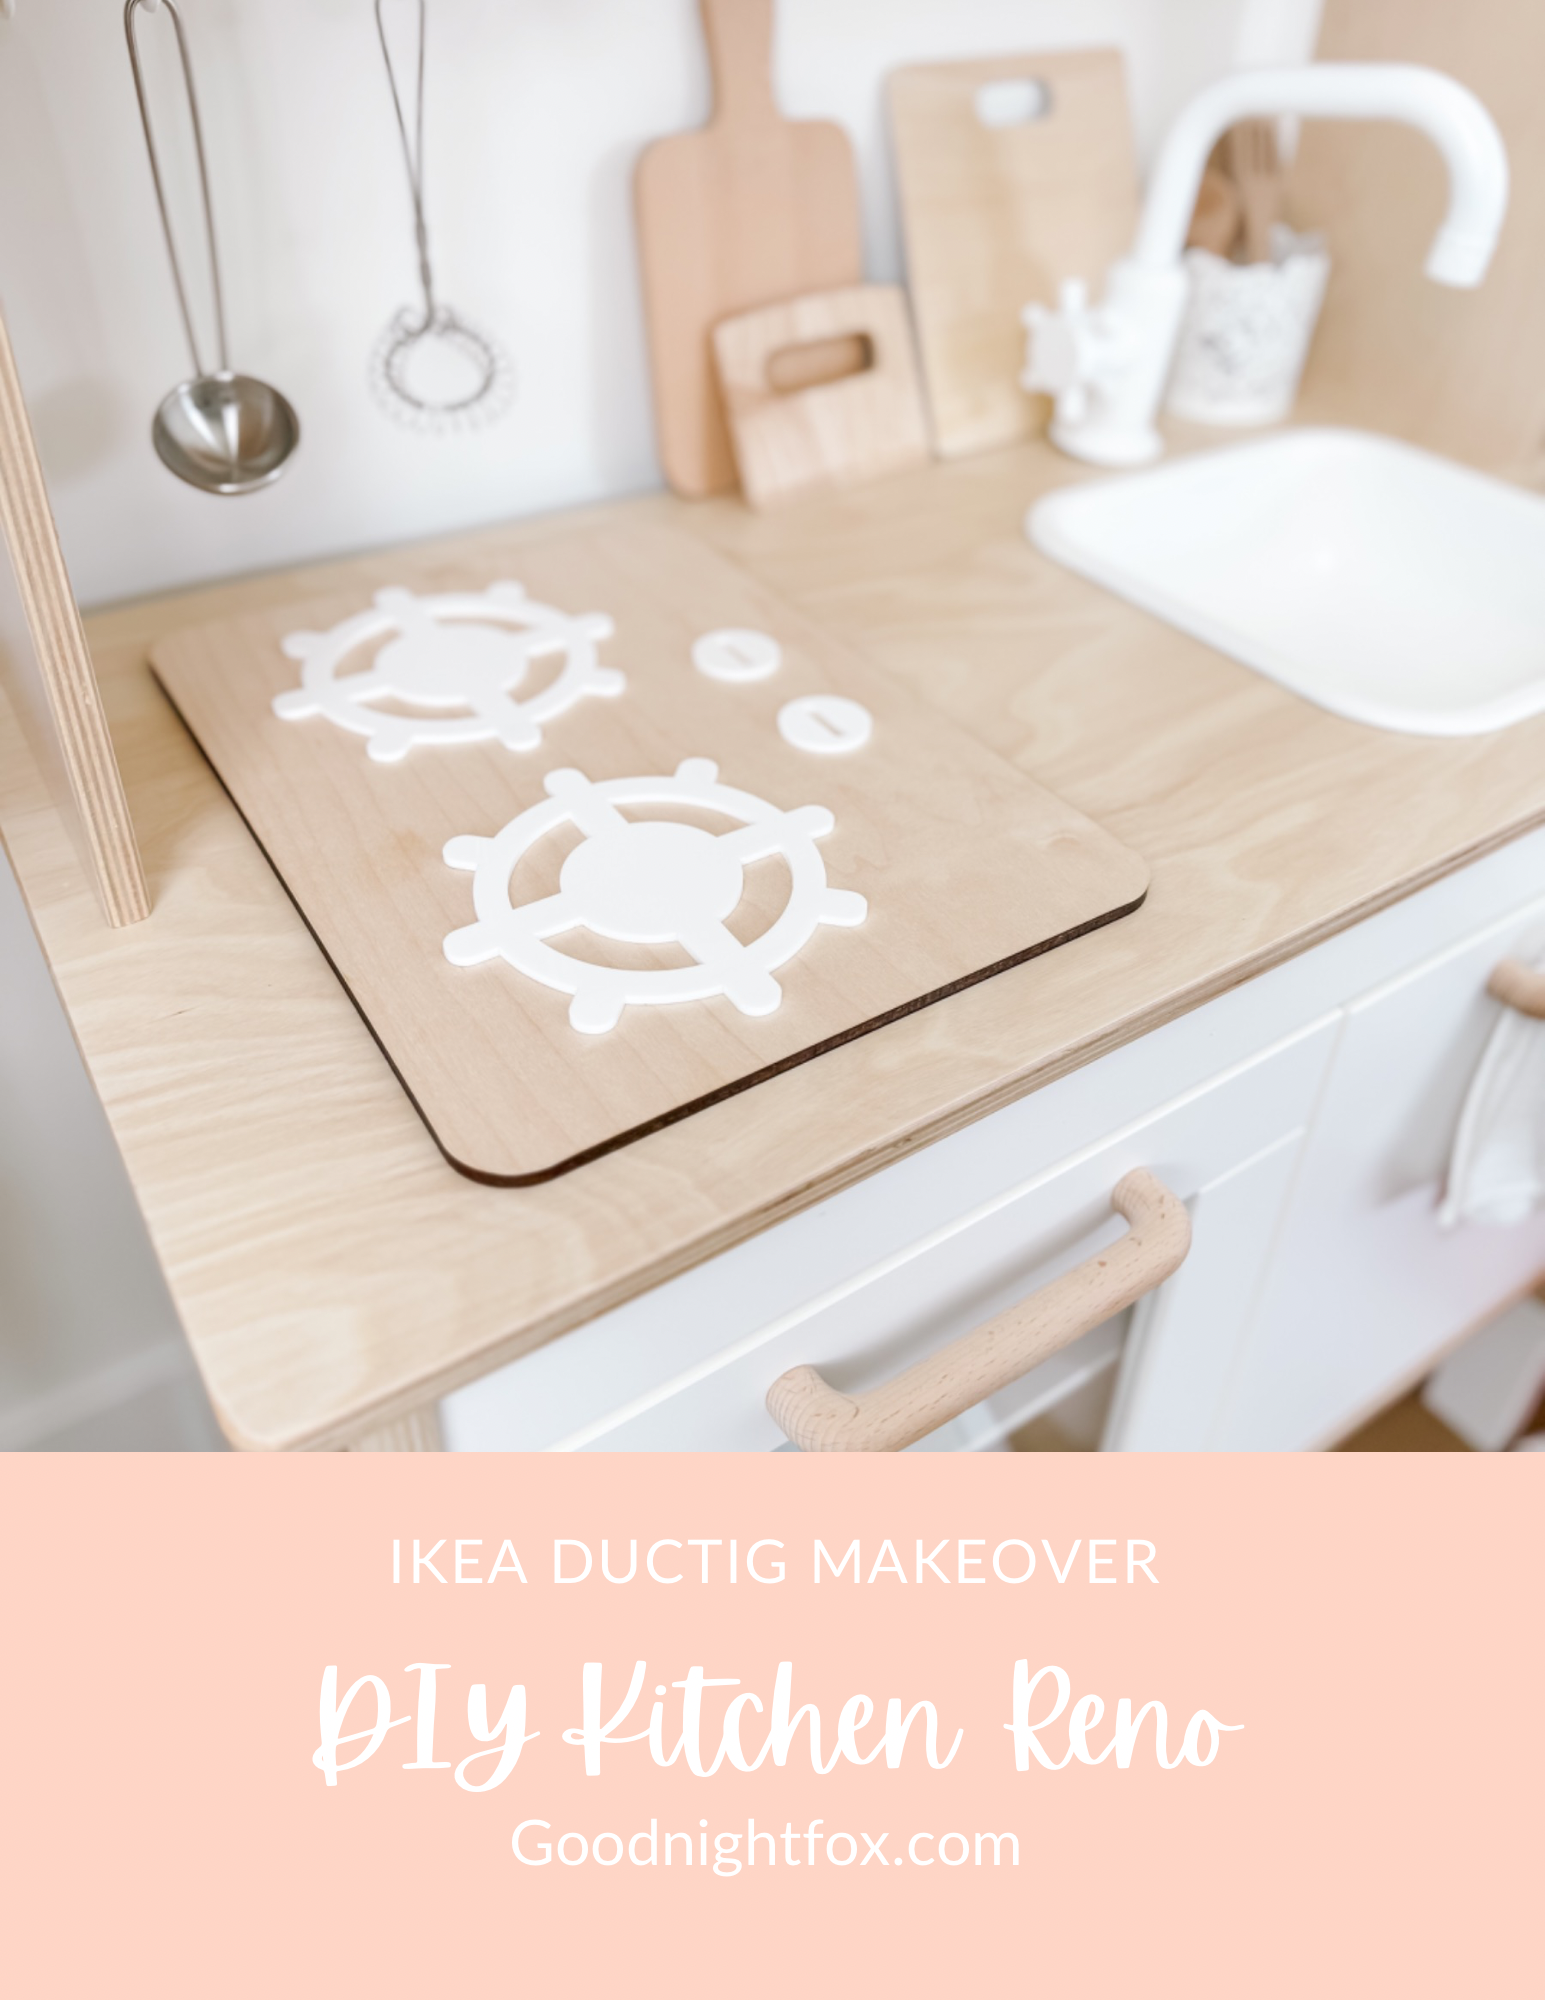
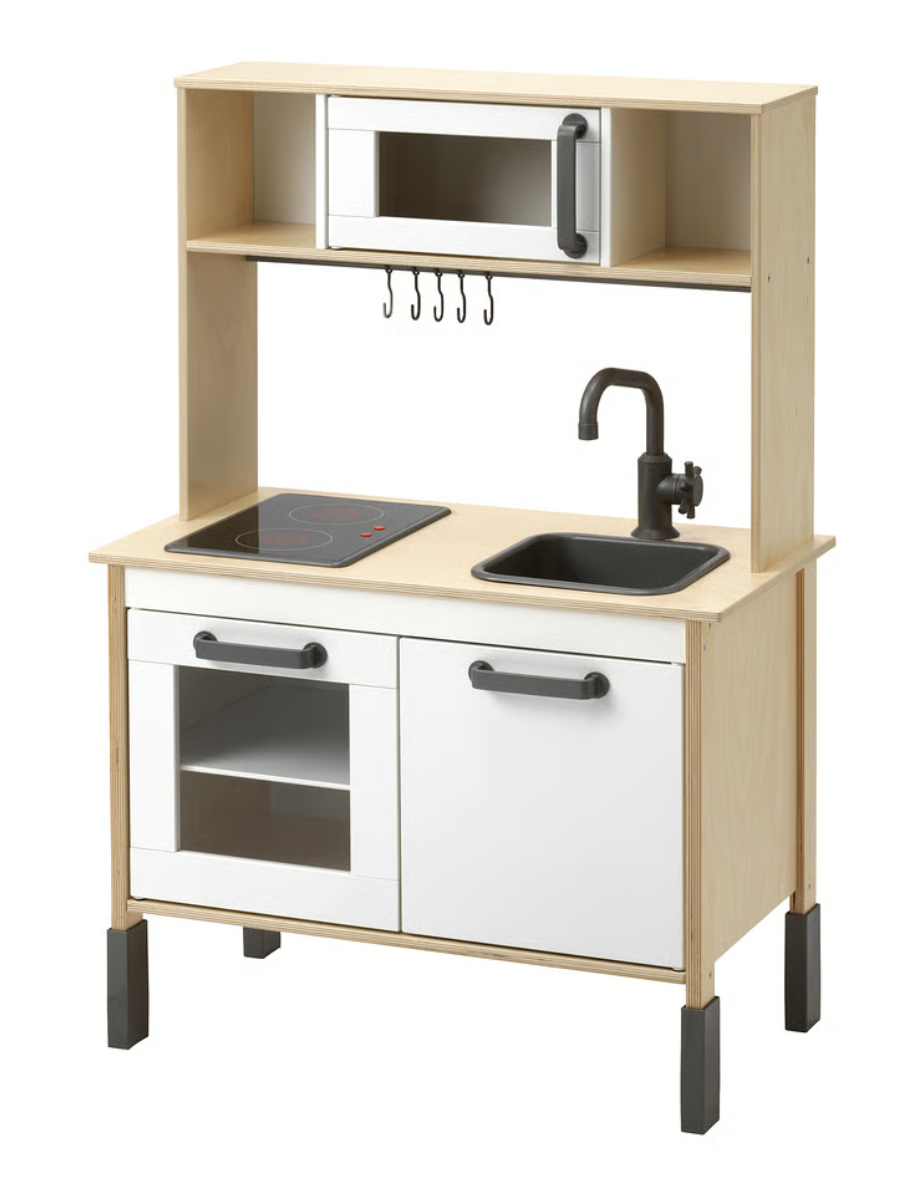
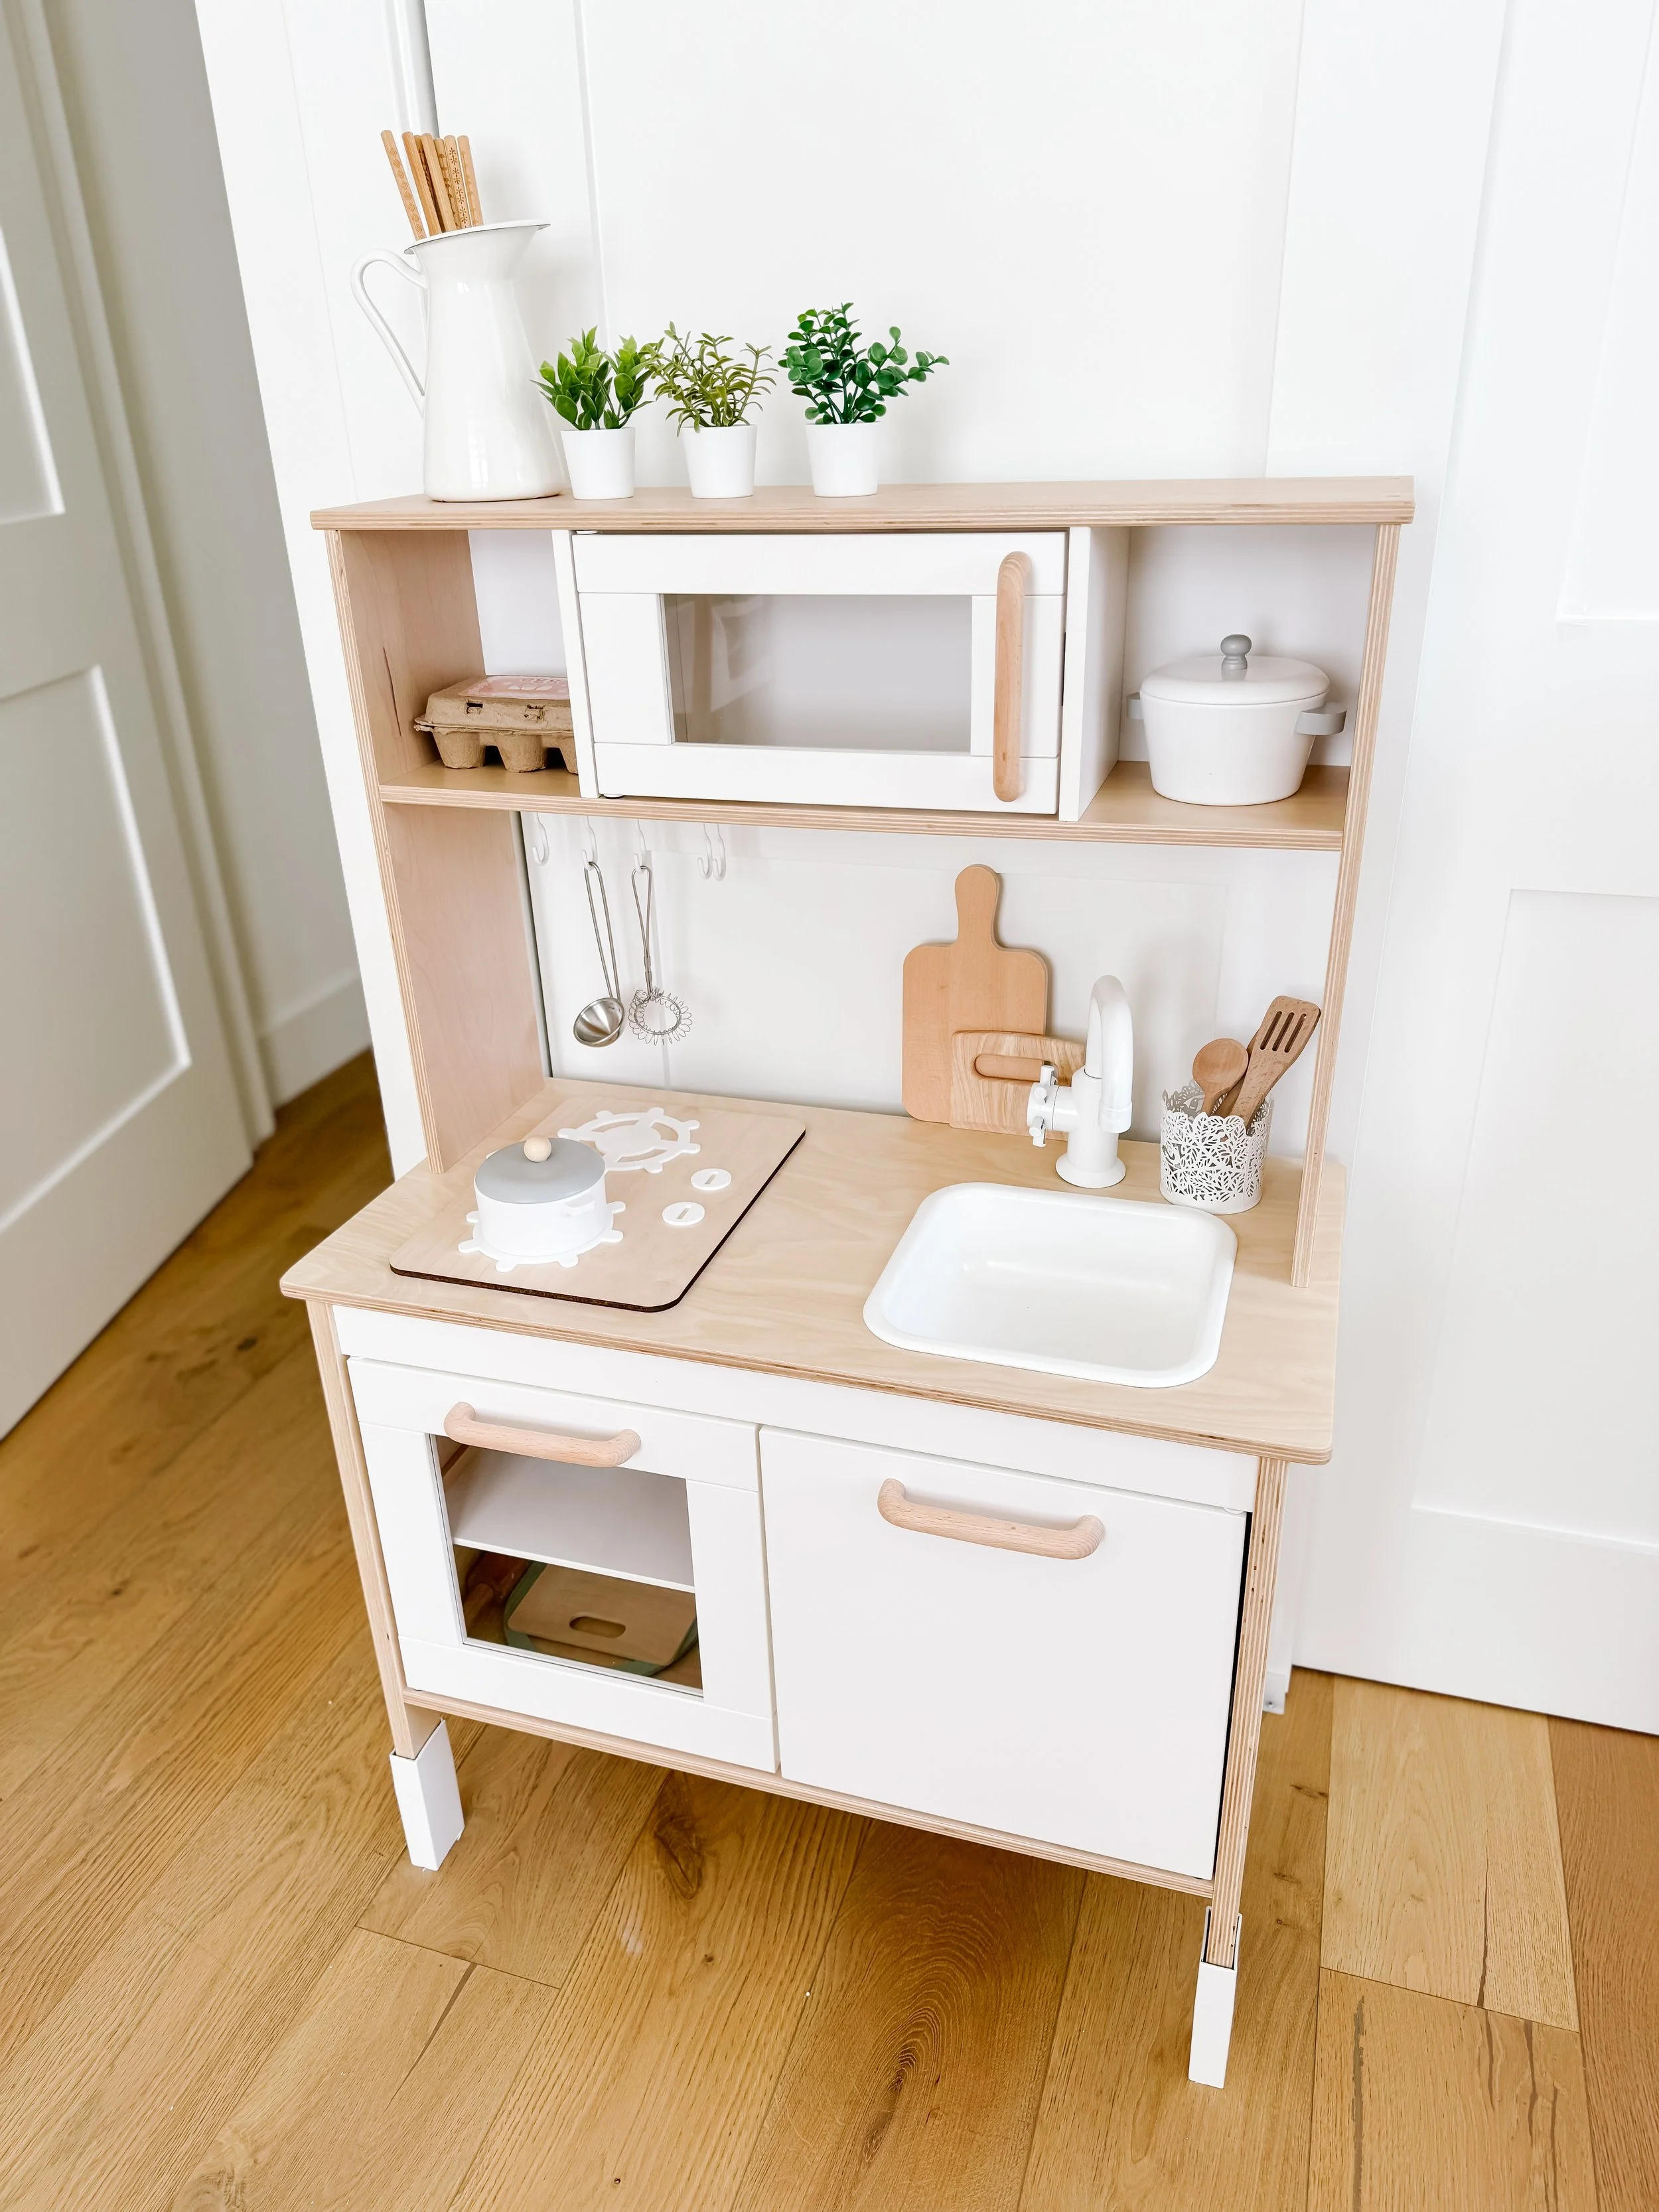
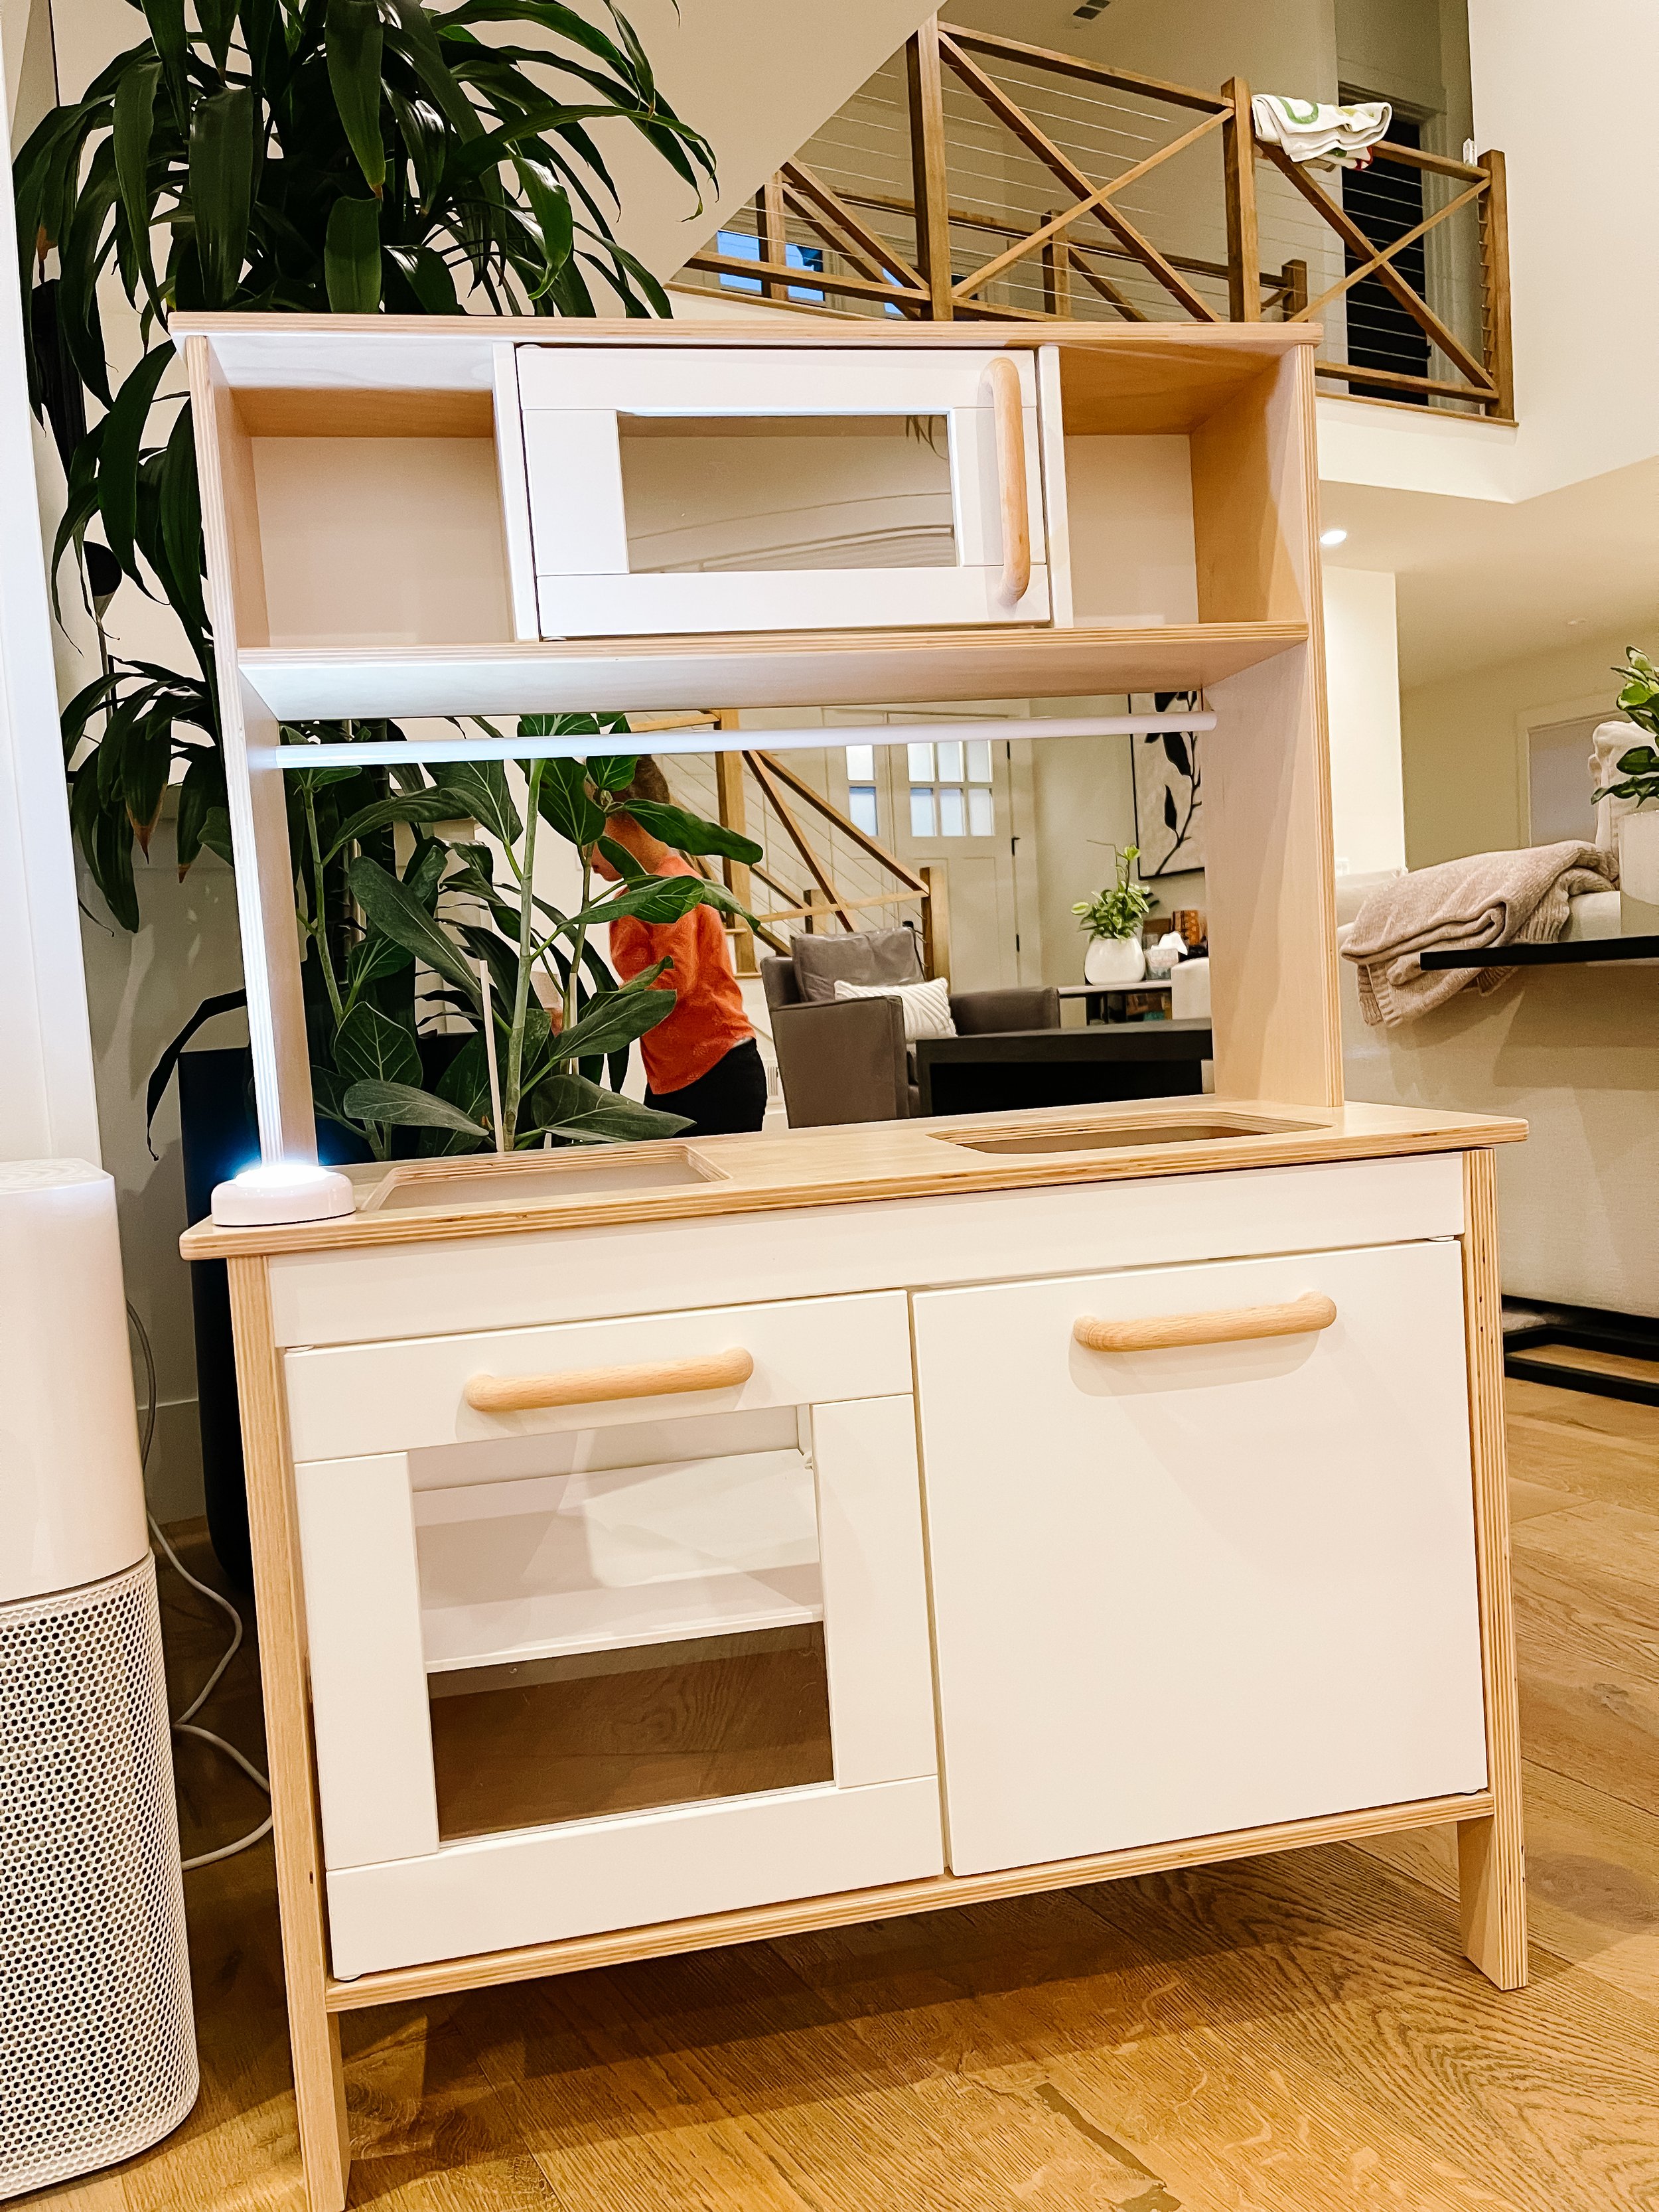
I’m so excited to share this little labor of love — our DIY play kitchen. We recently purchased the IKEA Duktig play kitchen and I couldn’t wait to give it a very small but beautiful renovation. I definitely wasn’t ambitious enough to take on an entire paint just, but just by spray painting all of the grey pieces white, it become a completely modern and beautiful kitchen to go with our modern white farmhouse vibes.
Links to everything featured:
I want to start by sharing links to everything included here so that you can recreate this look! As far as children’s kitchen renovations go, these are some of the simplest accents you can find. I tried to keep everything as cheap and cost effective as possible because I really didn’t want to overspend.
Kitchen transformation
Here’s everything I used to spruce up the look of the kitchen itself. It cost about $100 total to do the makeover of the kitchen itself. Which is quite reasonable considering most other play kitchens cost $150 or more.
Ikea DUKTIG Kitchen - $79
Handles - $14.99
Knobs - $10.79
Sand paper sponges - $8.99
White Spray Paint — Luckily I already had spray paint and primer on hand!
Wood & white acrylic stove Use code GOODNIGHTFOXFRIEND to save
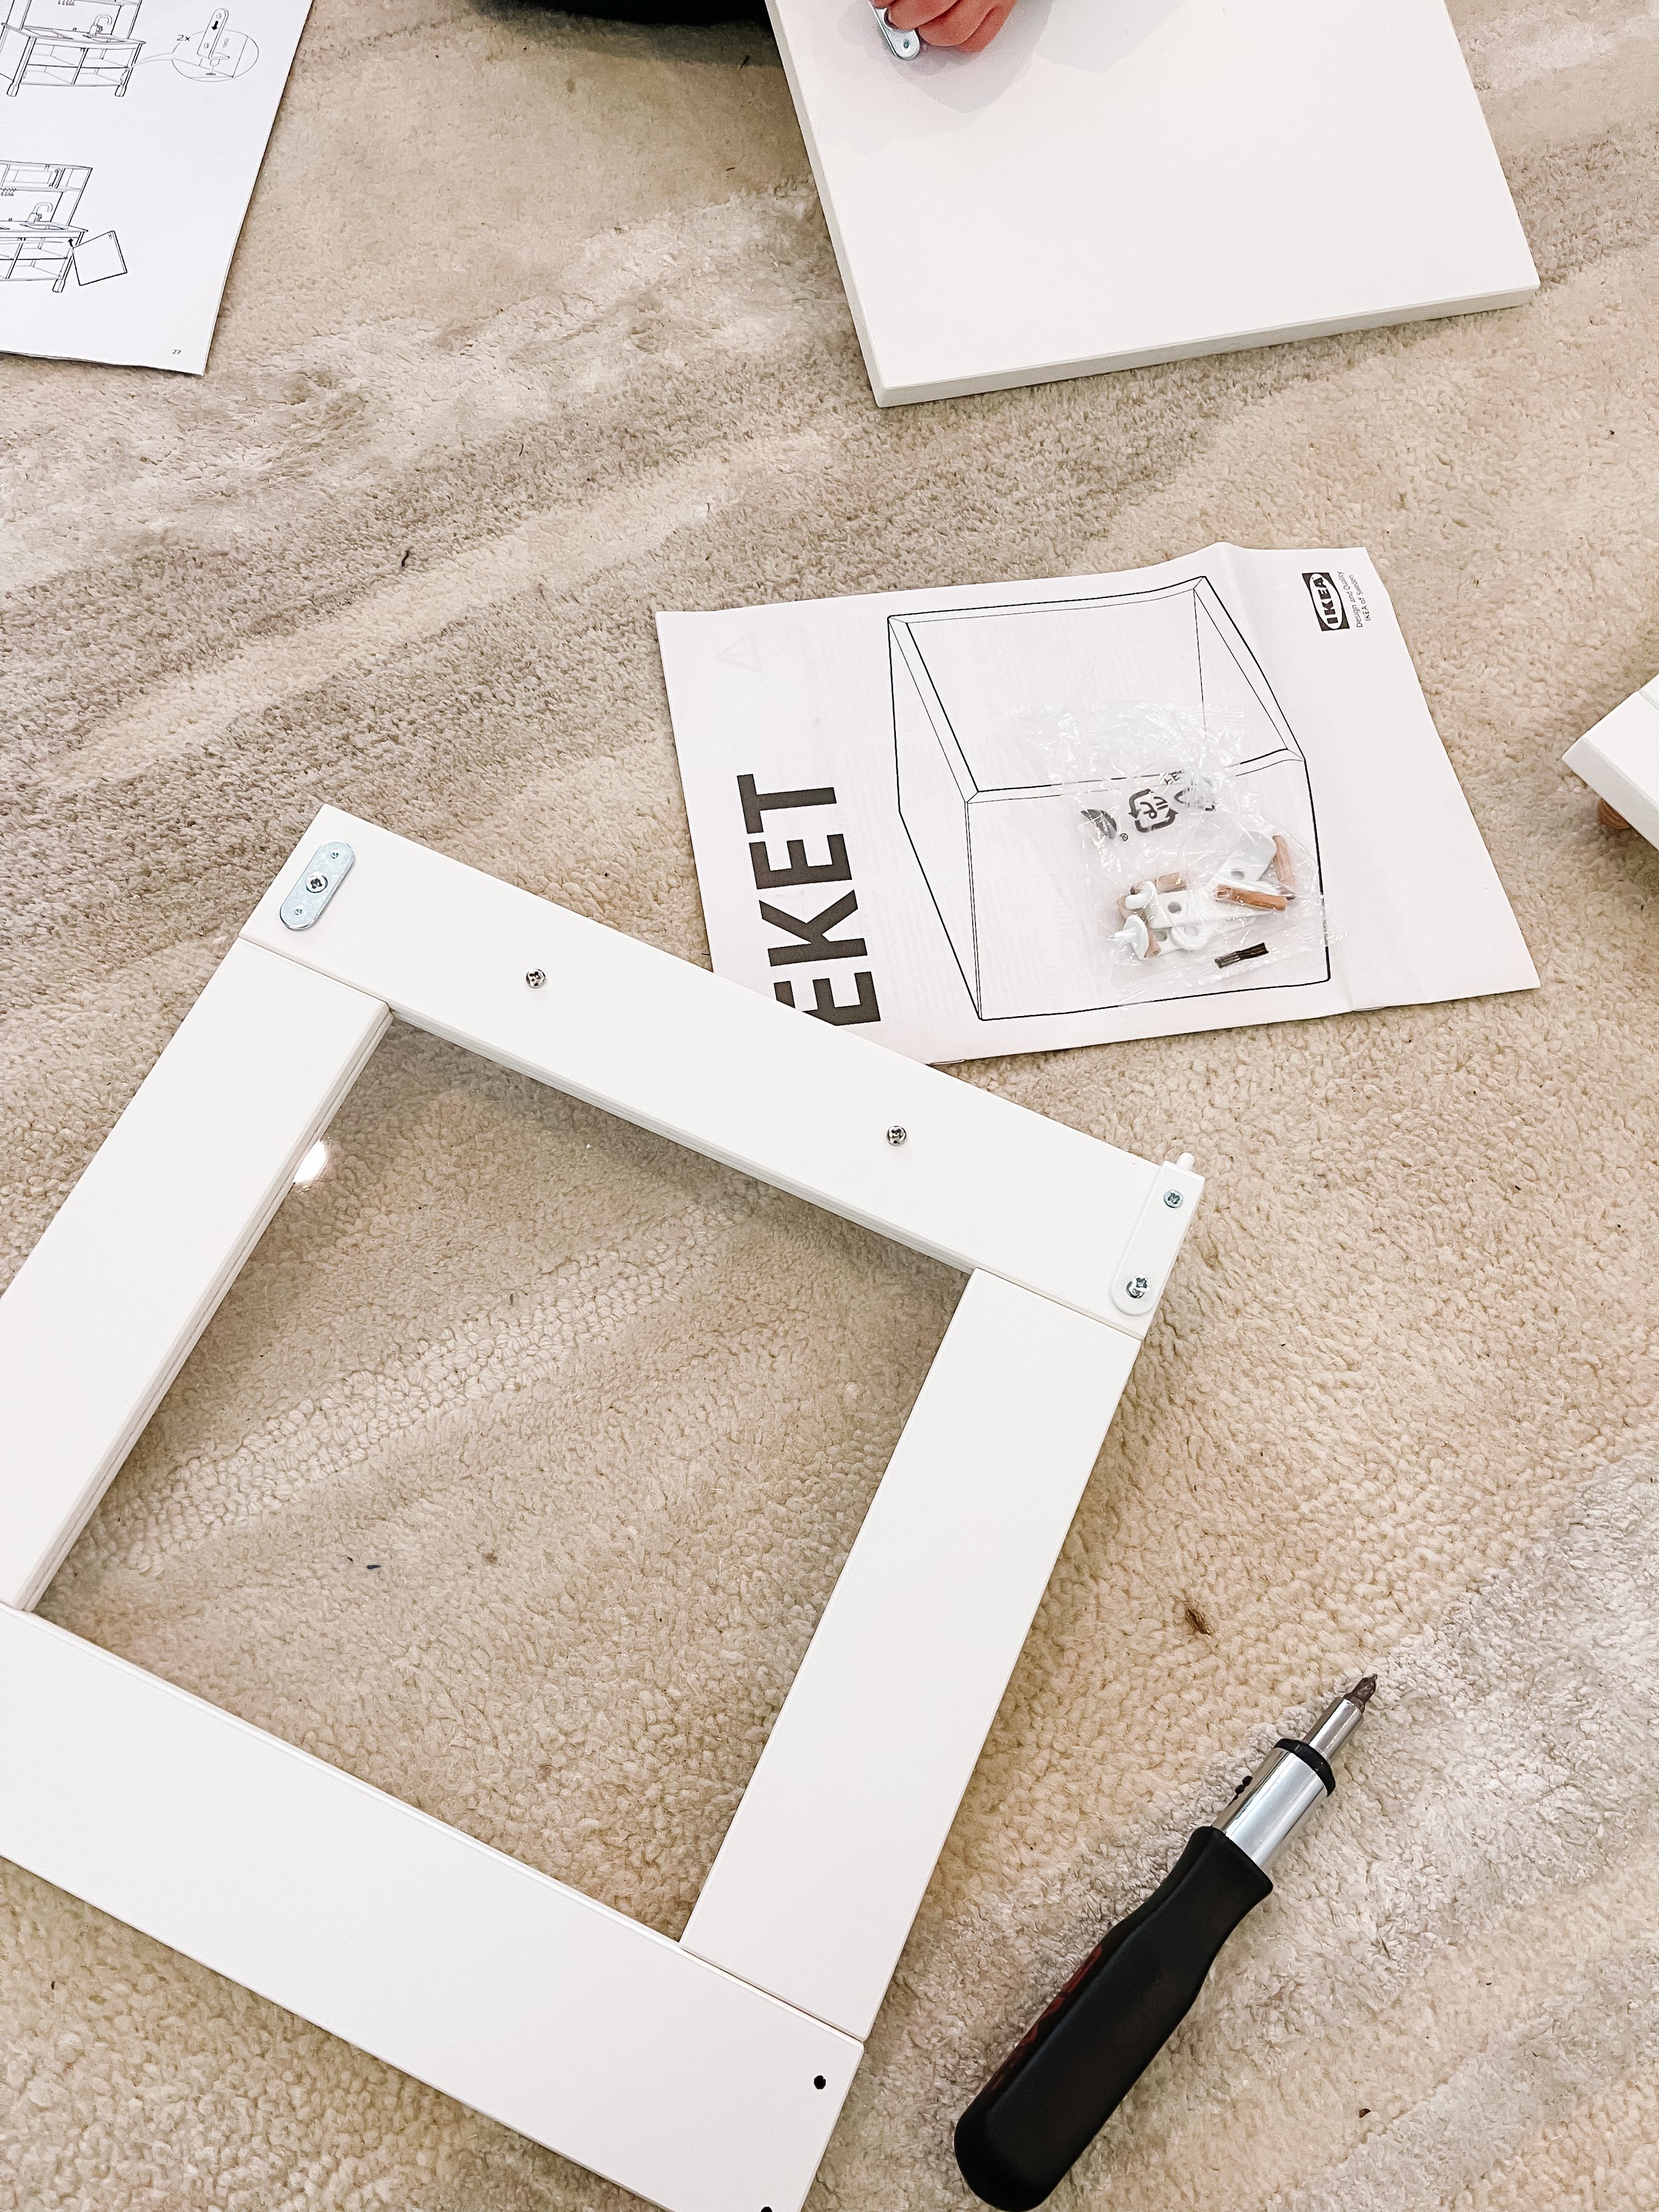
STEP BY STEP INSTRUCTIONS for the cutest DIY IKEA DUKTIG Modern Play Kitchen renovation
I wanted to go super light weight on this transformation so I kept the steps as simple as possible.
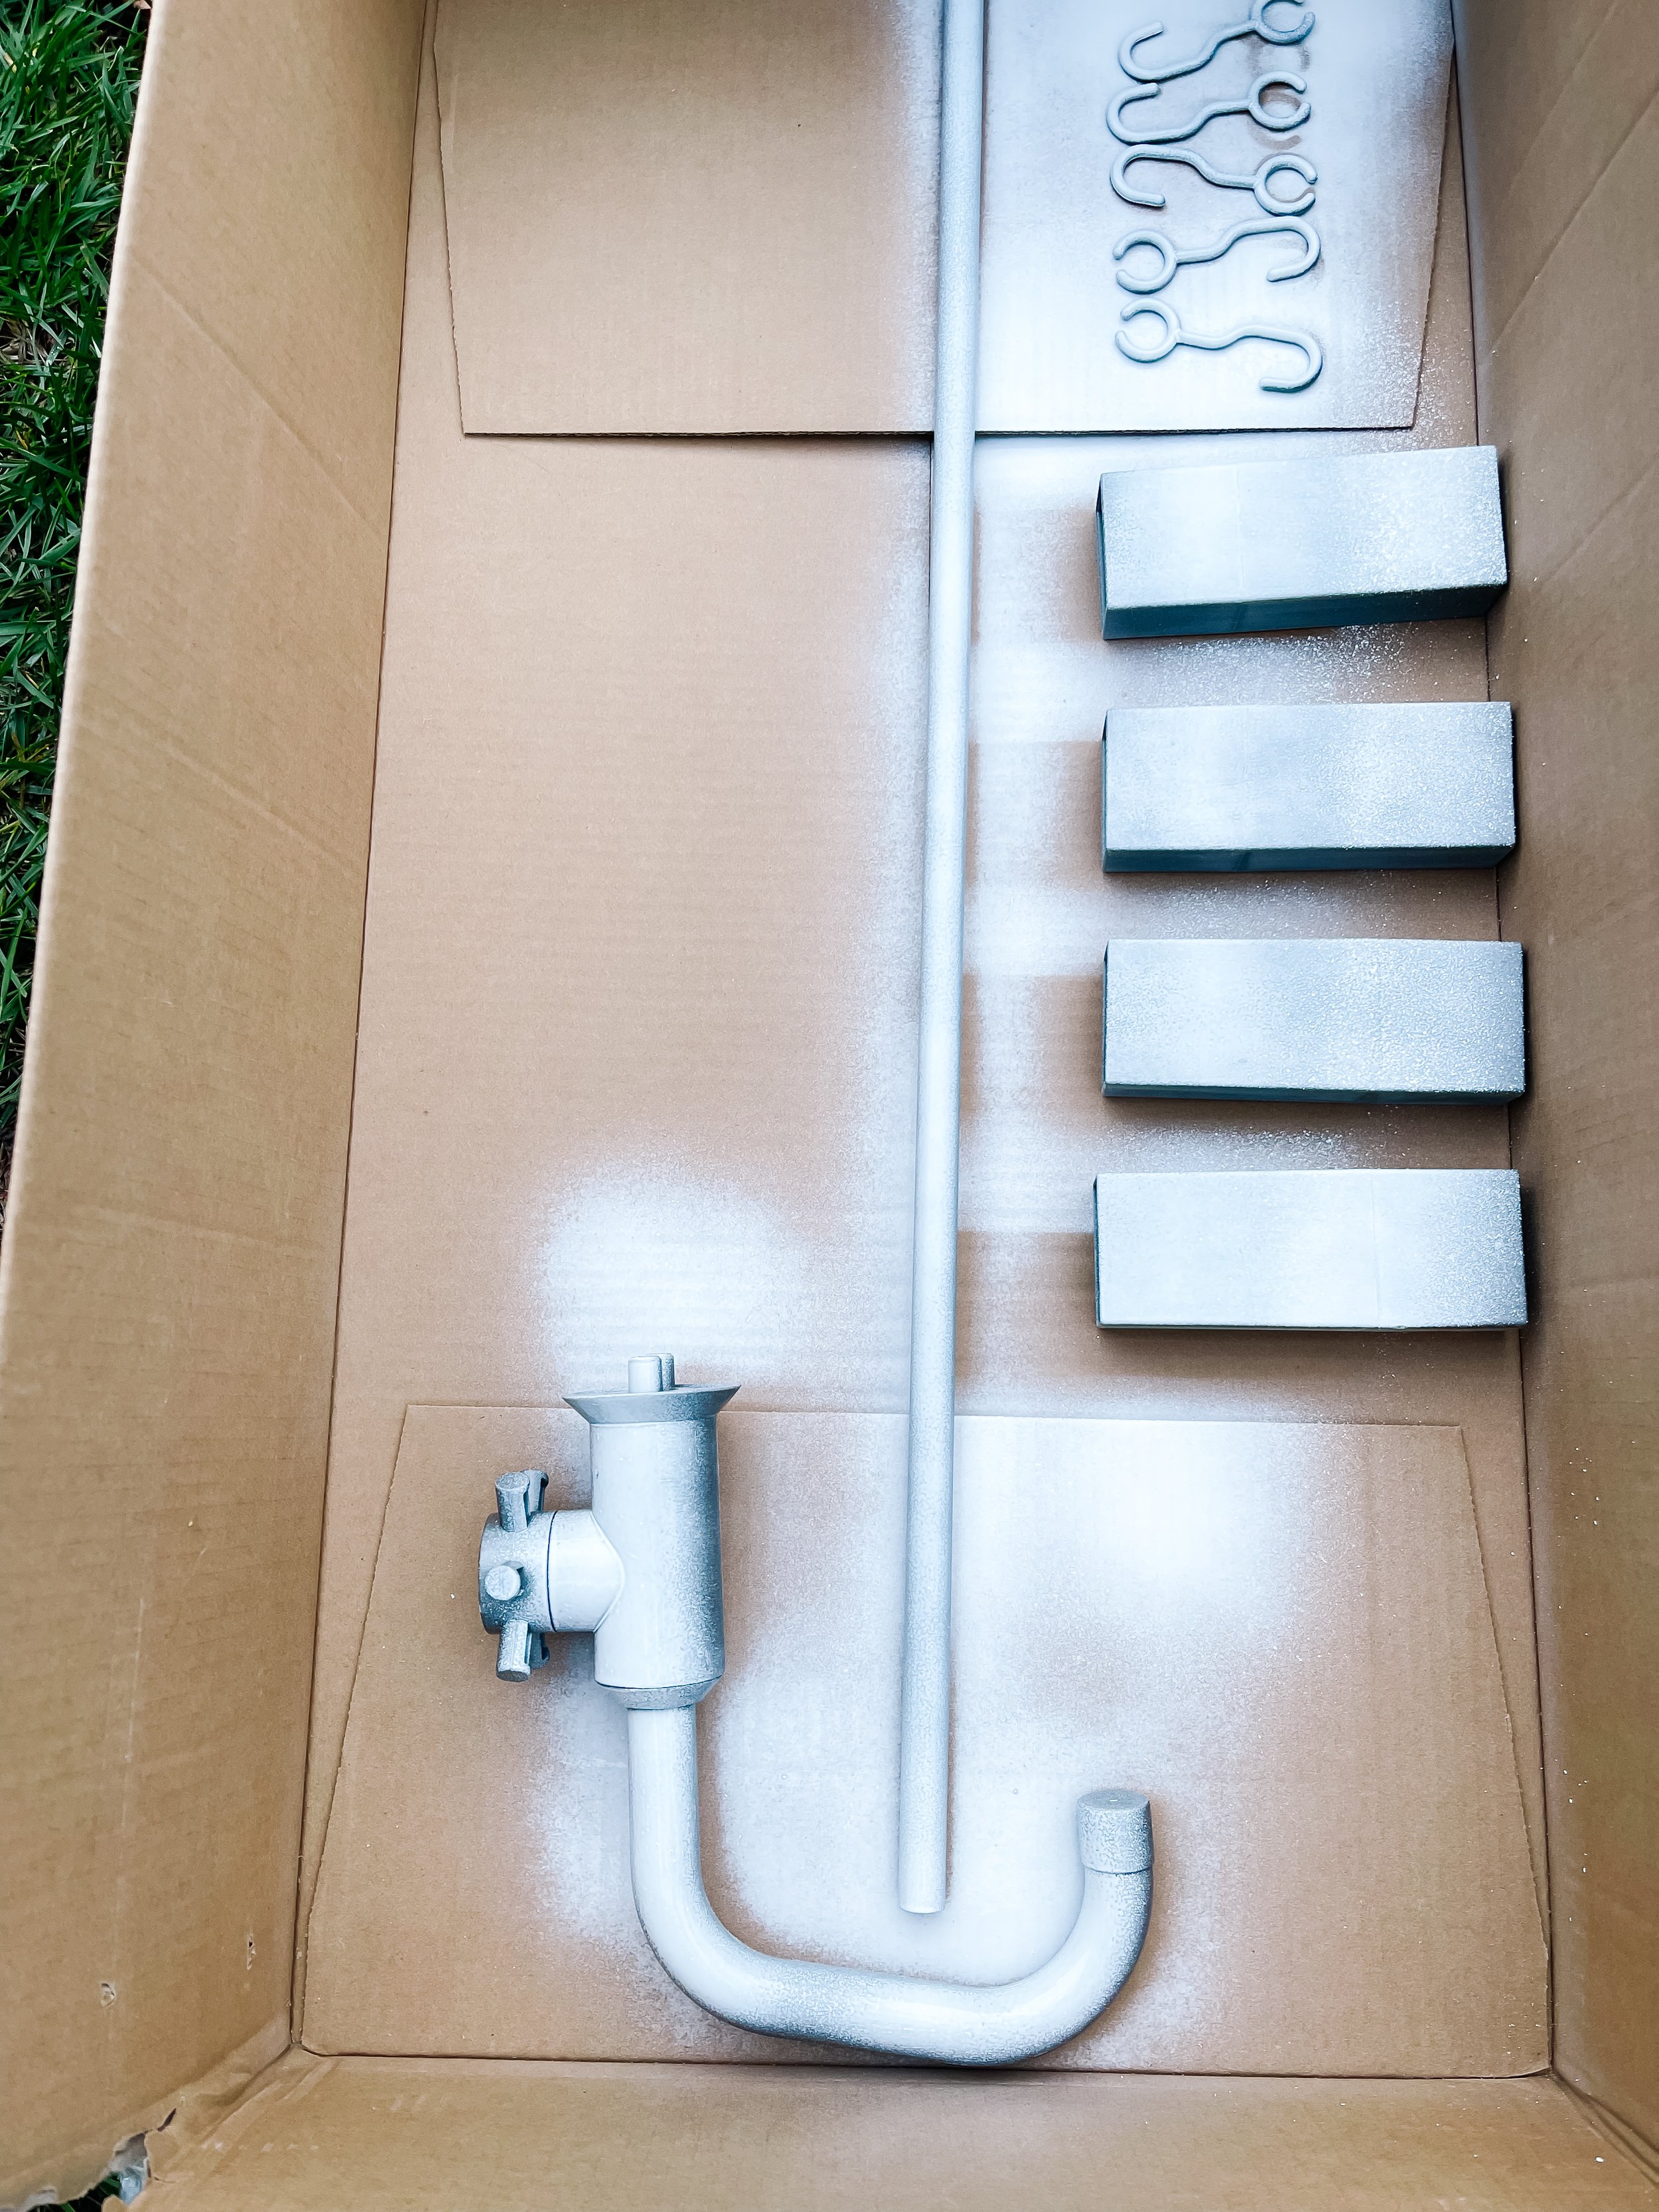
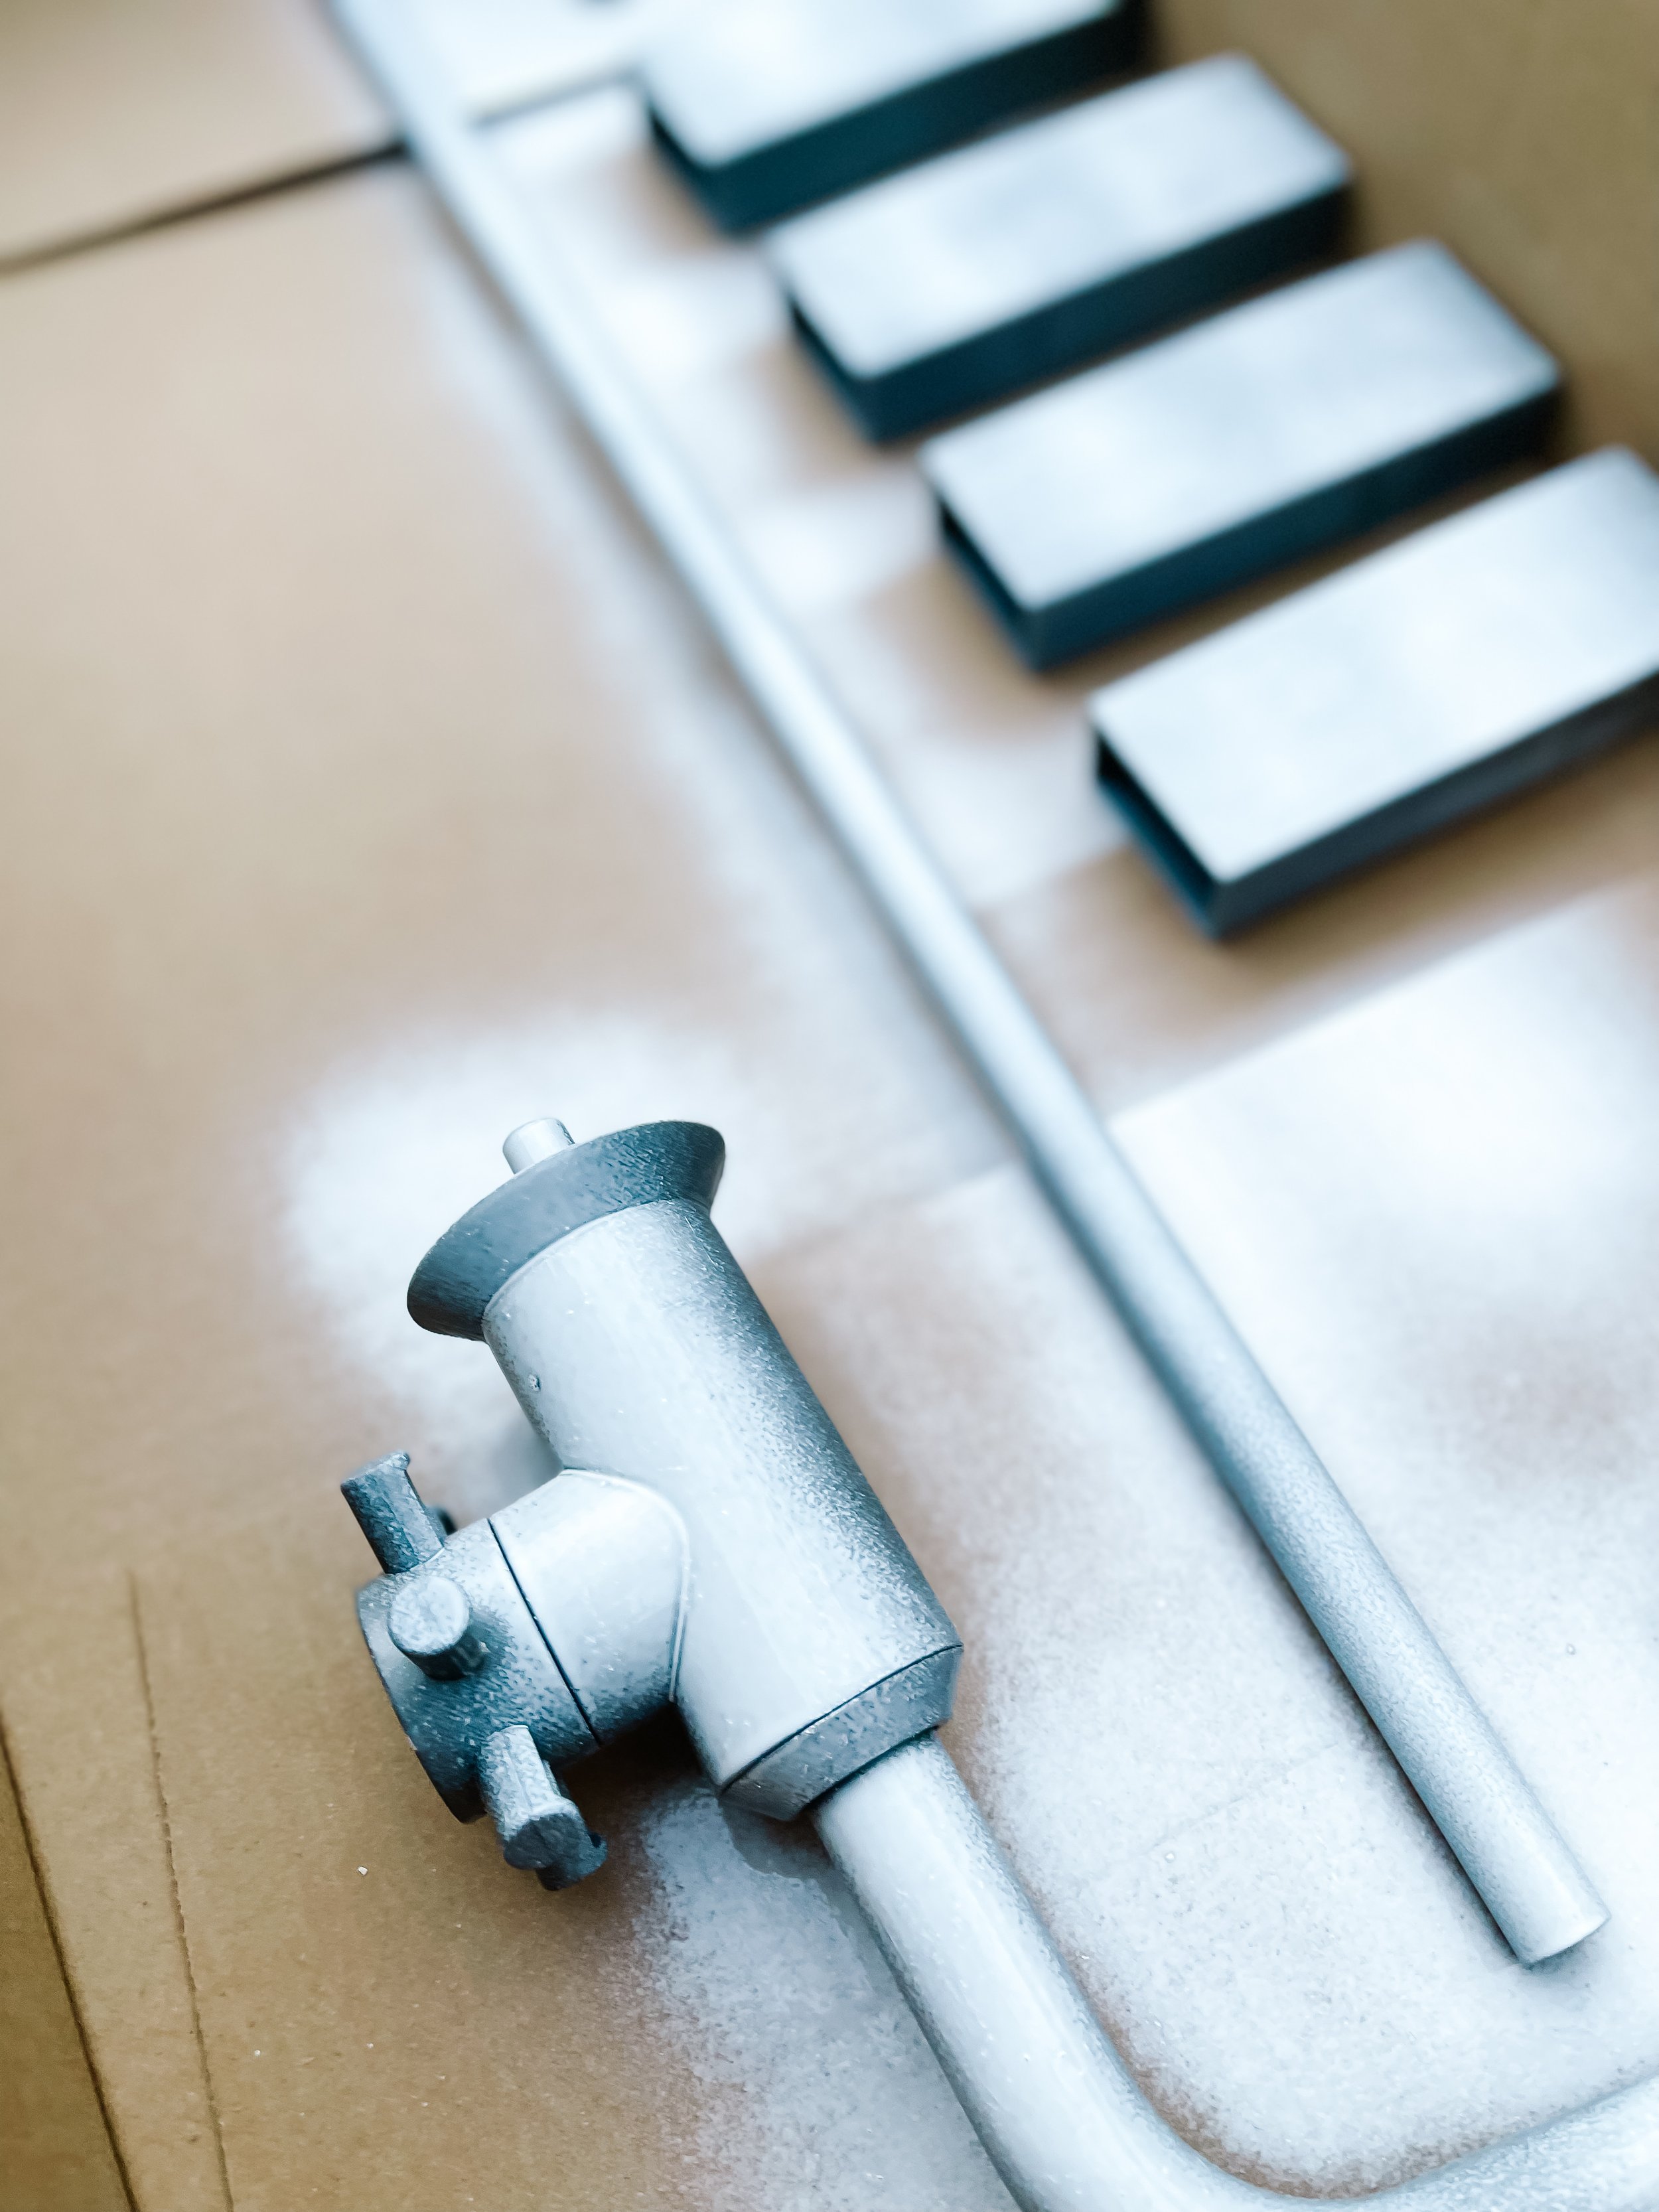
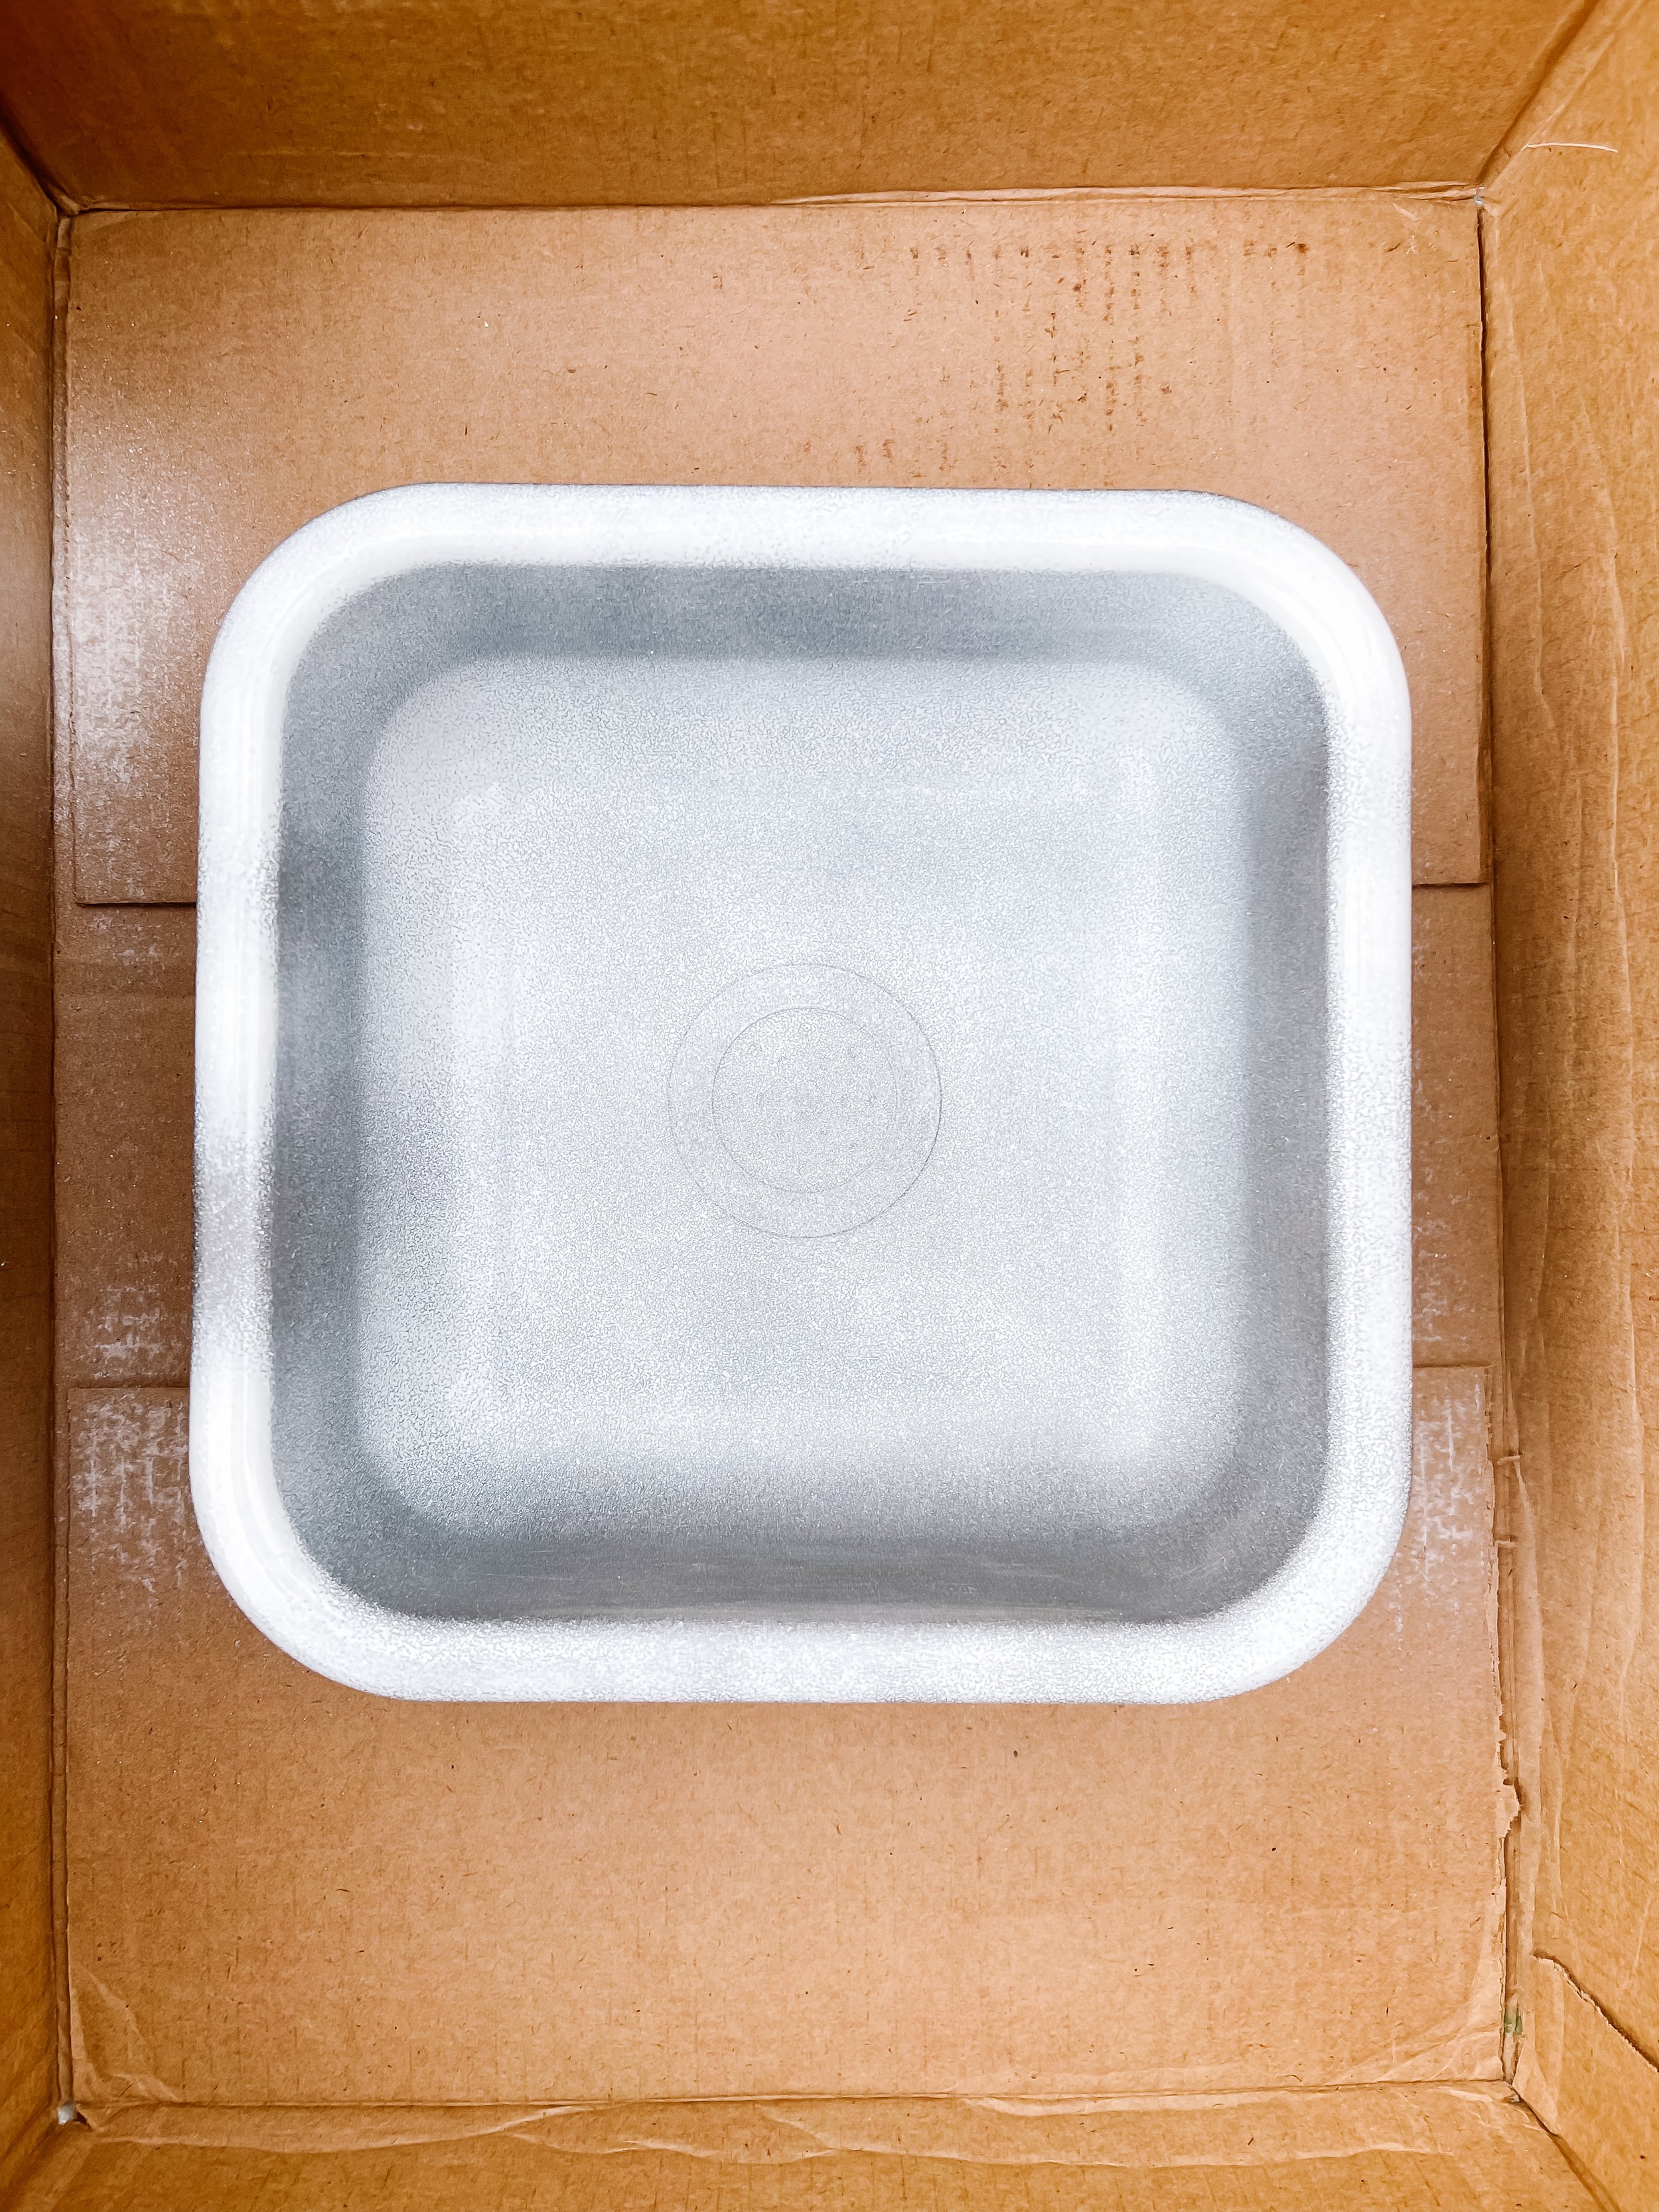
Step 1: Open up the IKEA Duktig Kitchen — I opened it up and laid out the pieces. There’s actually way more pieces than I thought and it took me about 2 hours total over the course of 3 days to put it all together. Mostly because I was quite literally waiting on the paint to dry.
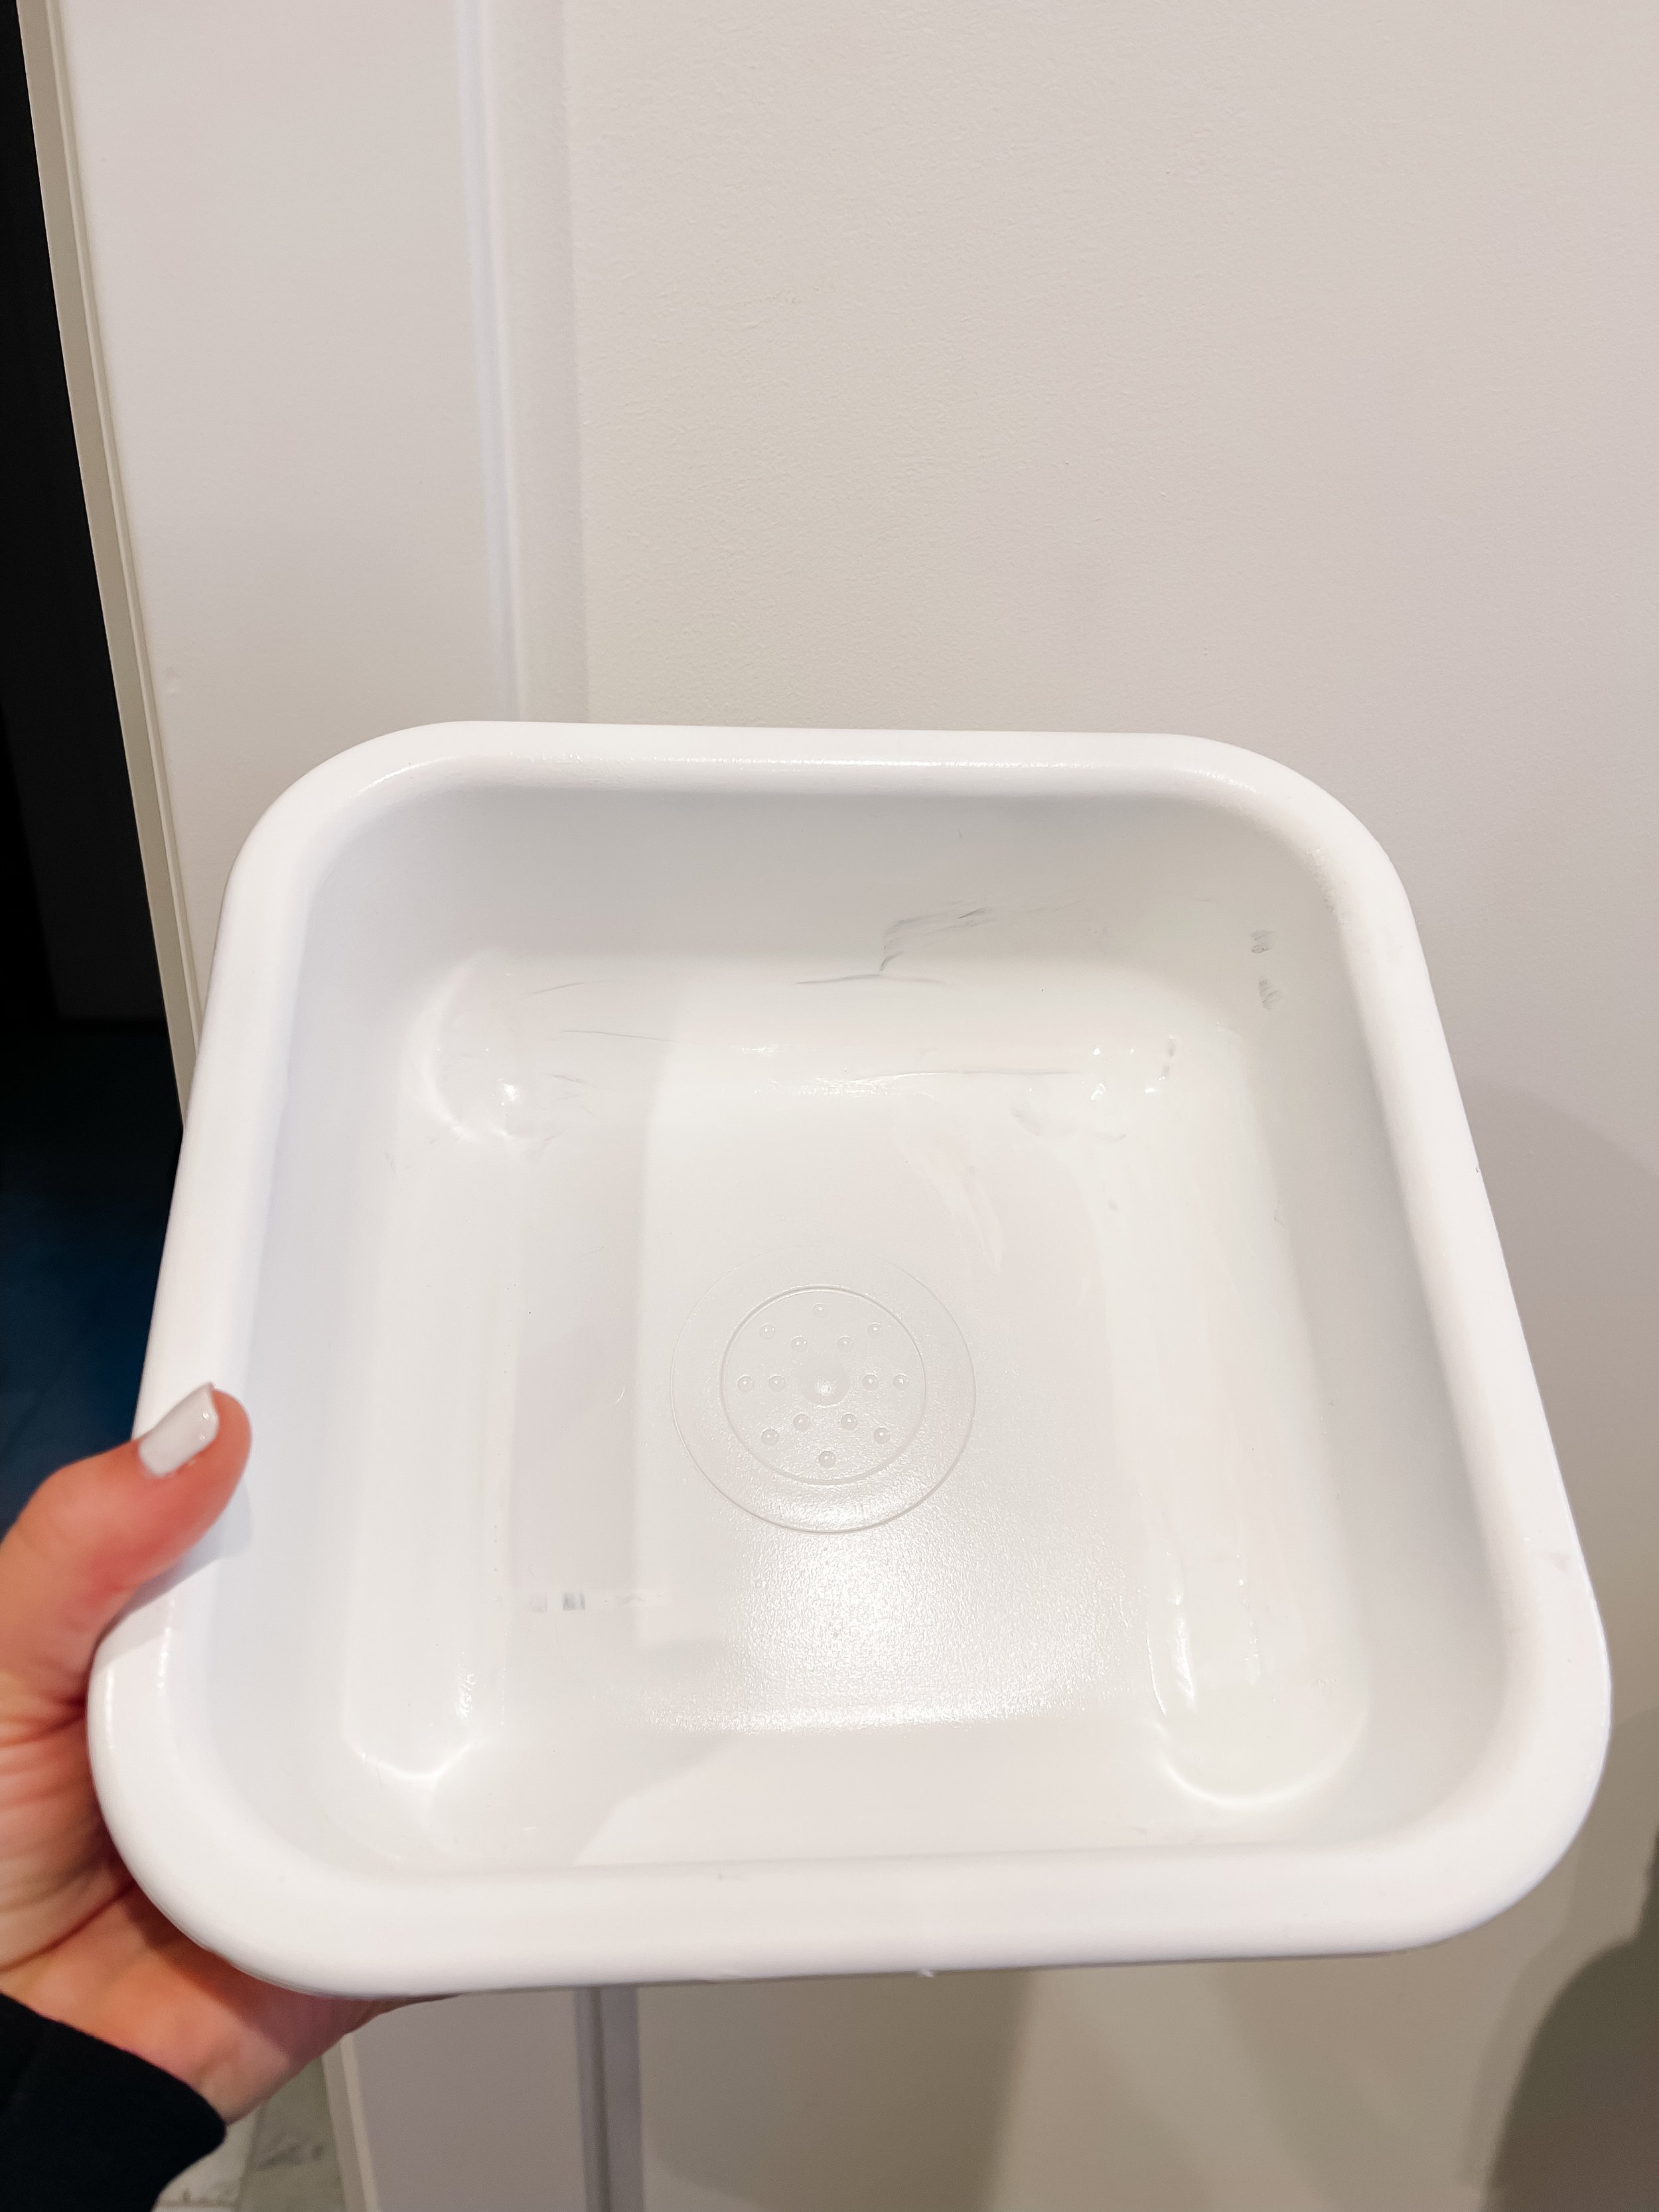
Step 2: Pull out the grey pieces and use the sand paper sponges to sand them down. I sanded them until I saw consistent scratches across the surface area. You can definitely see and feel the dust of the plastic so make sure to wipe down or wash and dry the pieces before you paint them.
Step 3: Lay the pieces out in a card board box to paint. Shake your spray paint bottles vigorously. Make sure to go slow and do very light coats of paint. It’s a terrible long and patience-trying process. I probably did 20 coats of paint over the course of 3 days. I did 10min drying time between each coat. If you spray too much, the paint will pool and drip. Then you have to wait for it to dry, sound out the drips and reapply. It’s more painful to sand and repaint so just GO SLOW and WAIT.
Step 4: Flip over the pieces to coat the other sides. If you don’t wait for a full dry before you do this the pieces will stick to the cardboard.
Step 5: If you see any cracks or drips you can sand them out. For this final finish, I sanded with a nail buffer because the small grain.
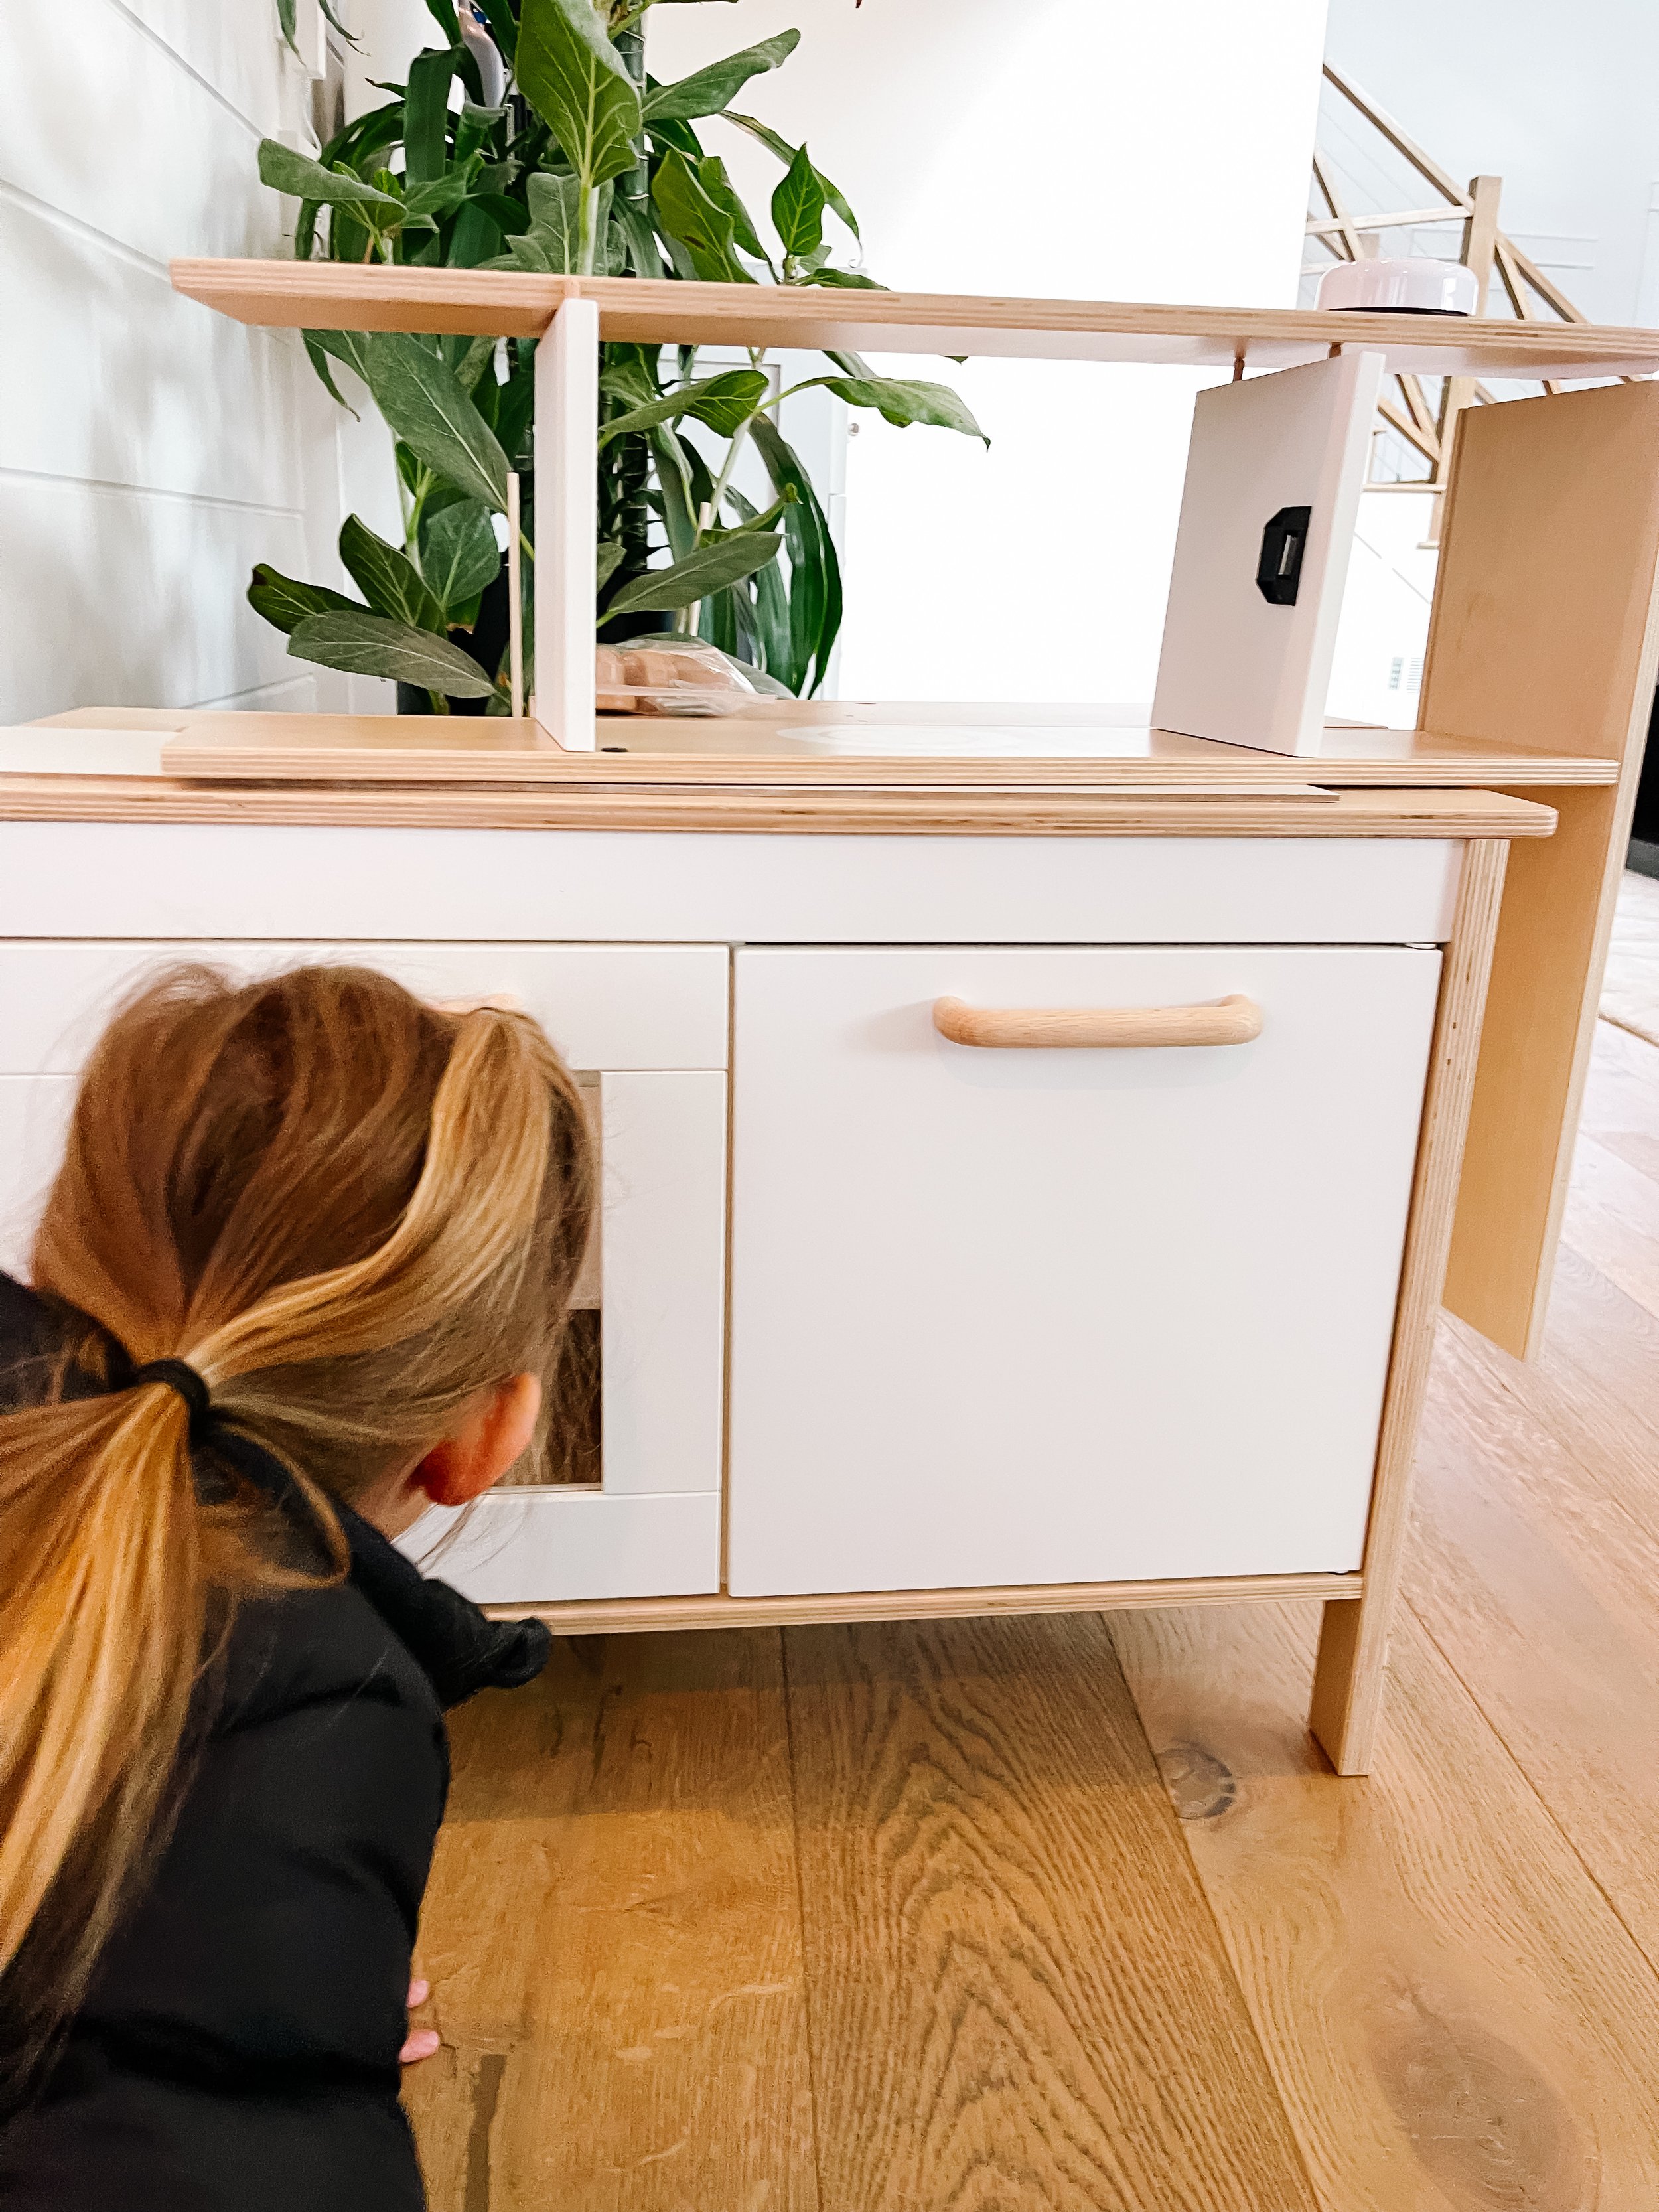
Step 5: Completely the assembly of the kitchen!


The most adorable play food
Once you have your kitchen assembled, you’re of course going to want to go grocery shopping! So I’ve assembled the perfect list of where to find the best play food sets. They’re both comprehensive and so adorable.
Felt Play Food
DIY Felt Food by Felted Food
Printable Play Food
White & Wood play kitchen utensils & Appliances
And of course you’re also going to want the most adorable pots, pans, and utensils to match.
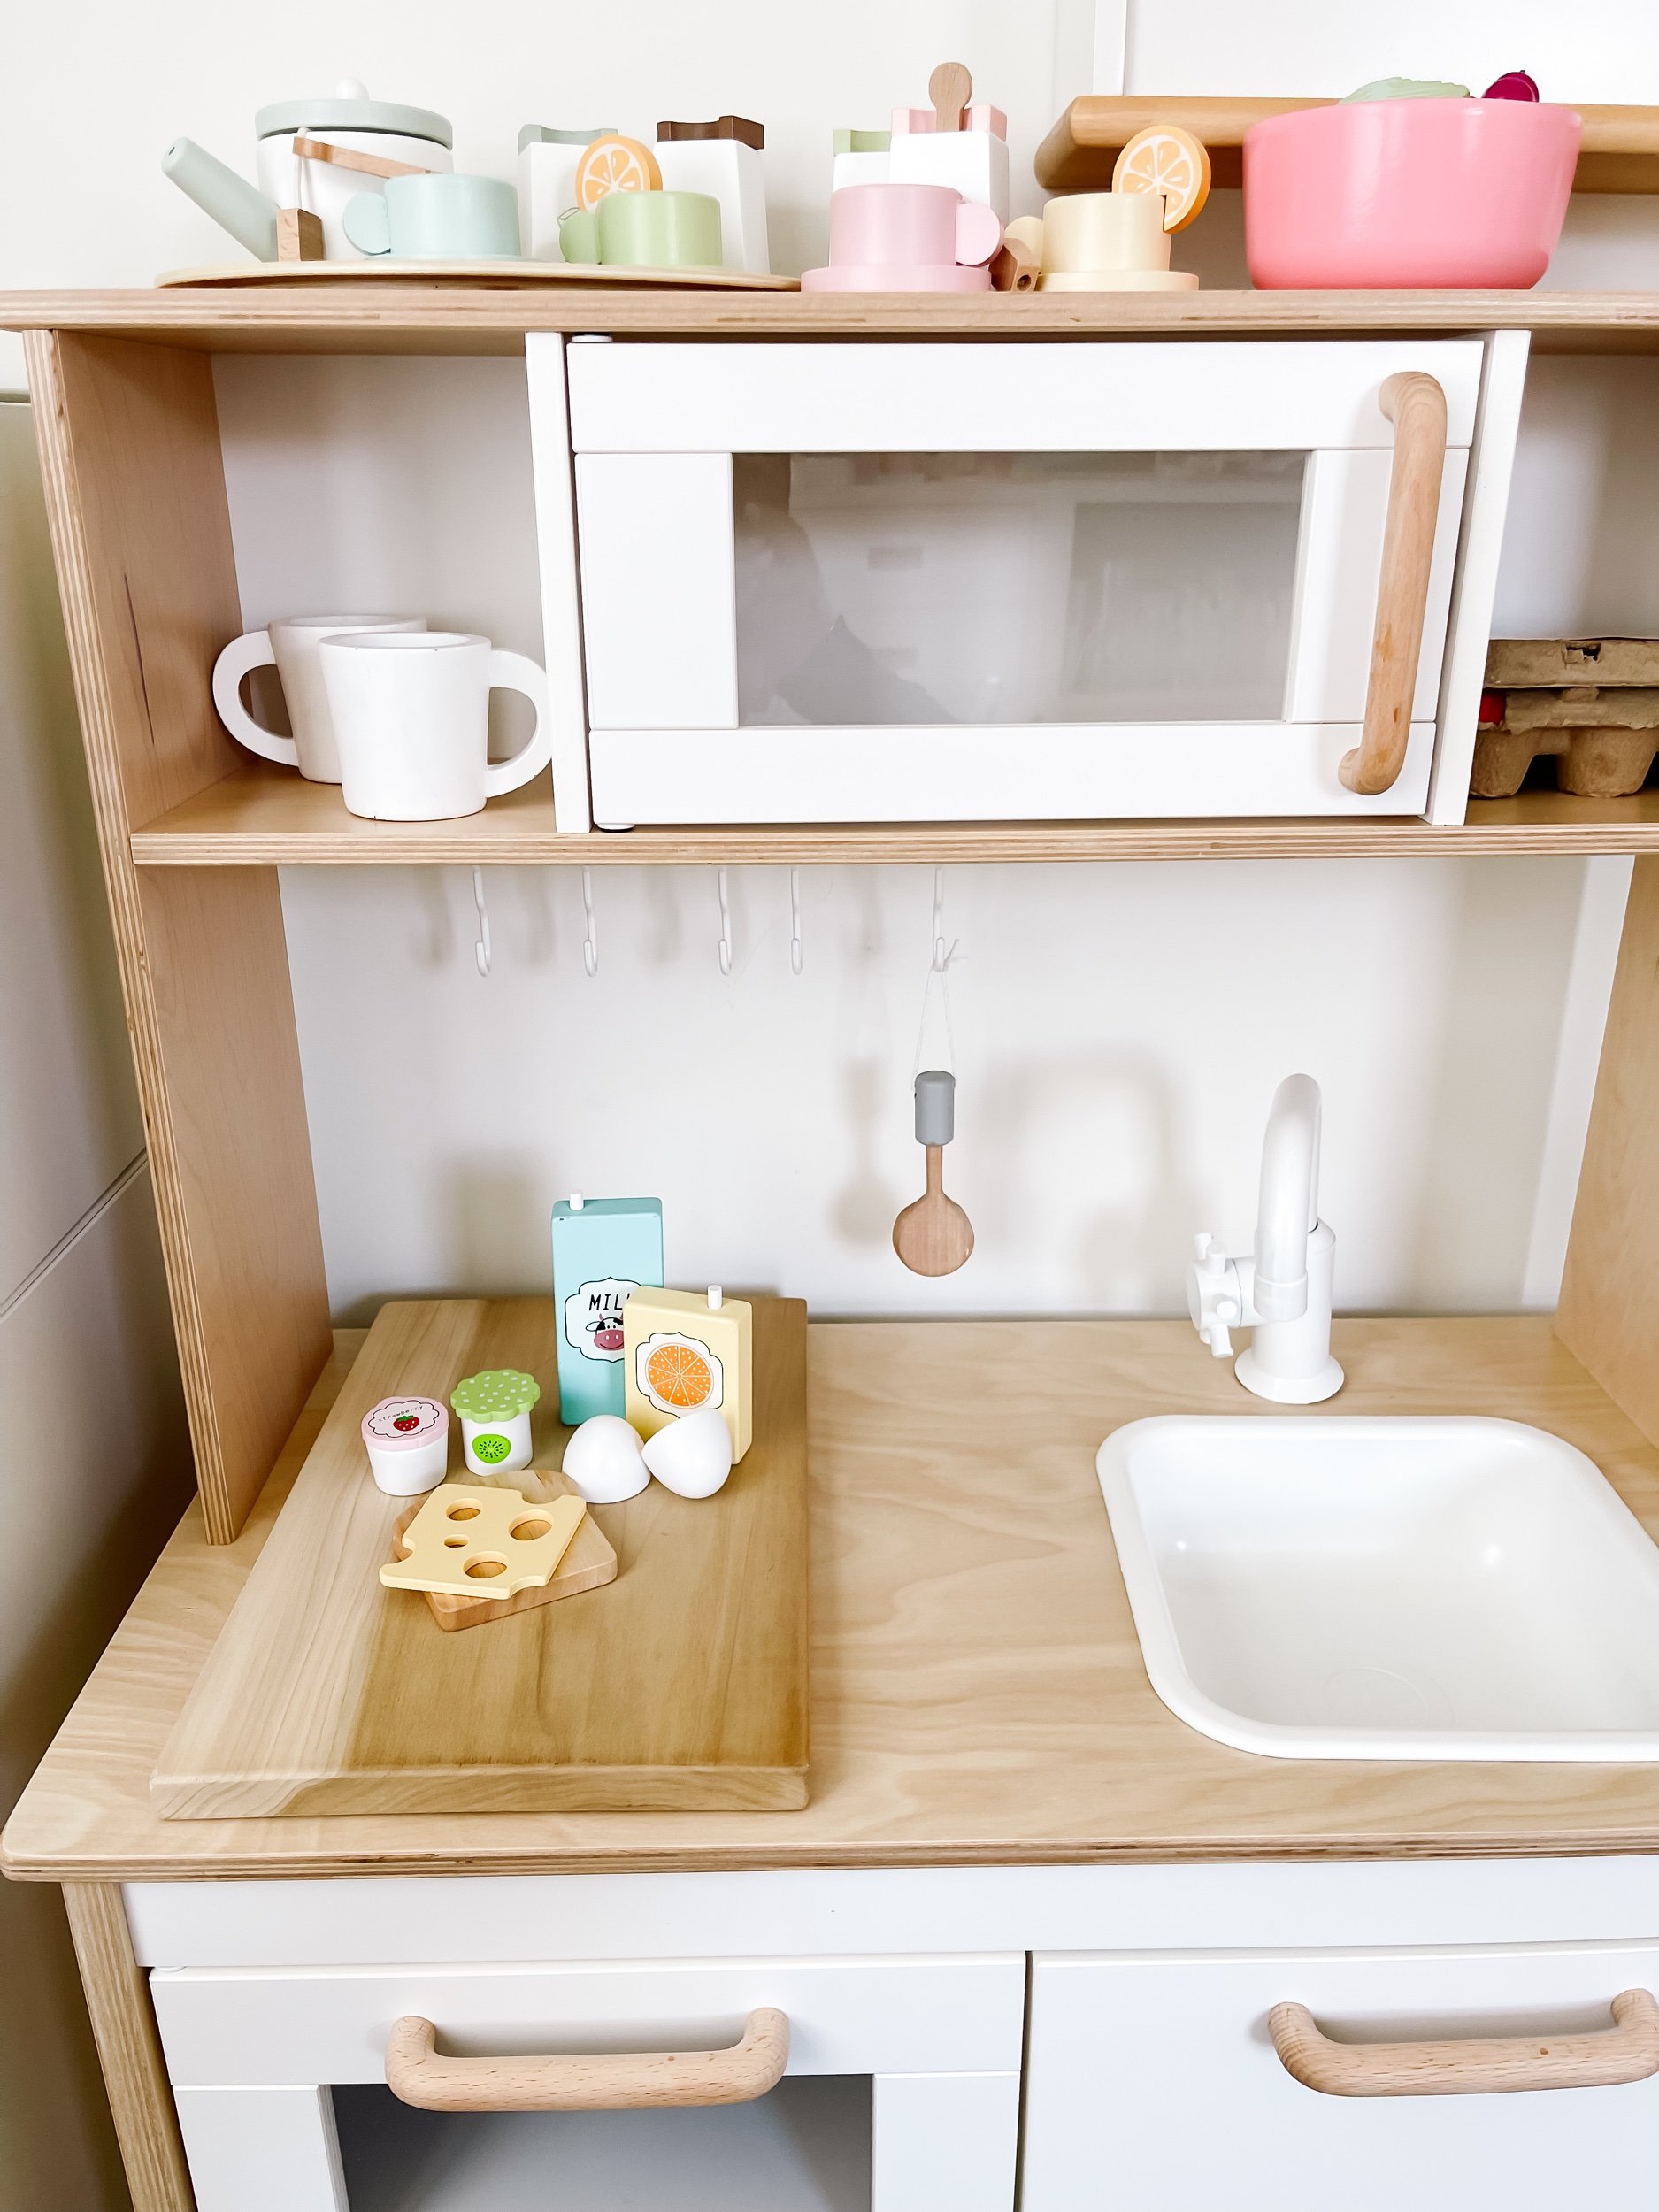
Stocking the play kitchen with thE cutest wood play food
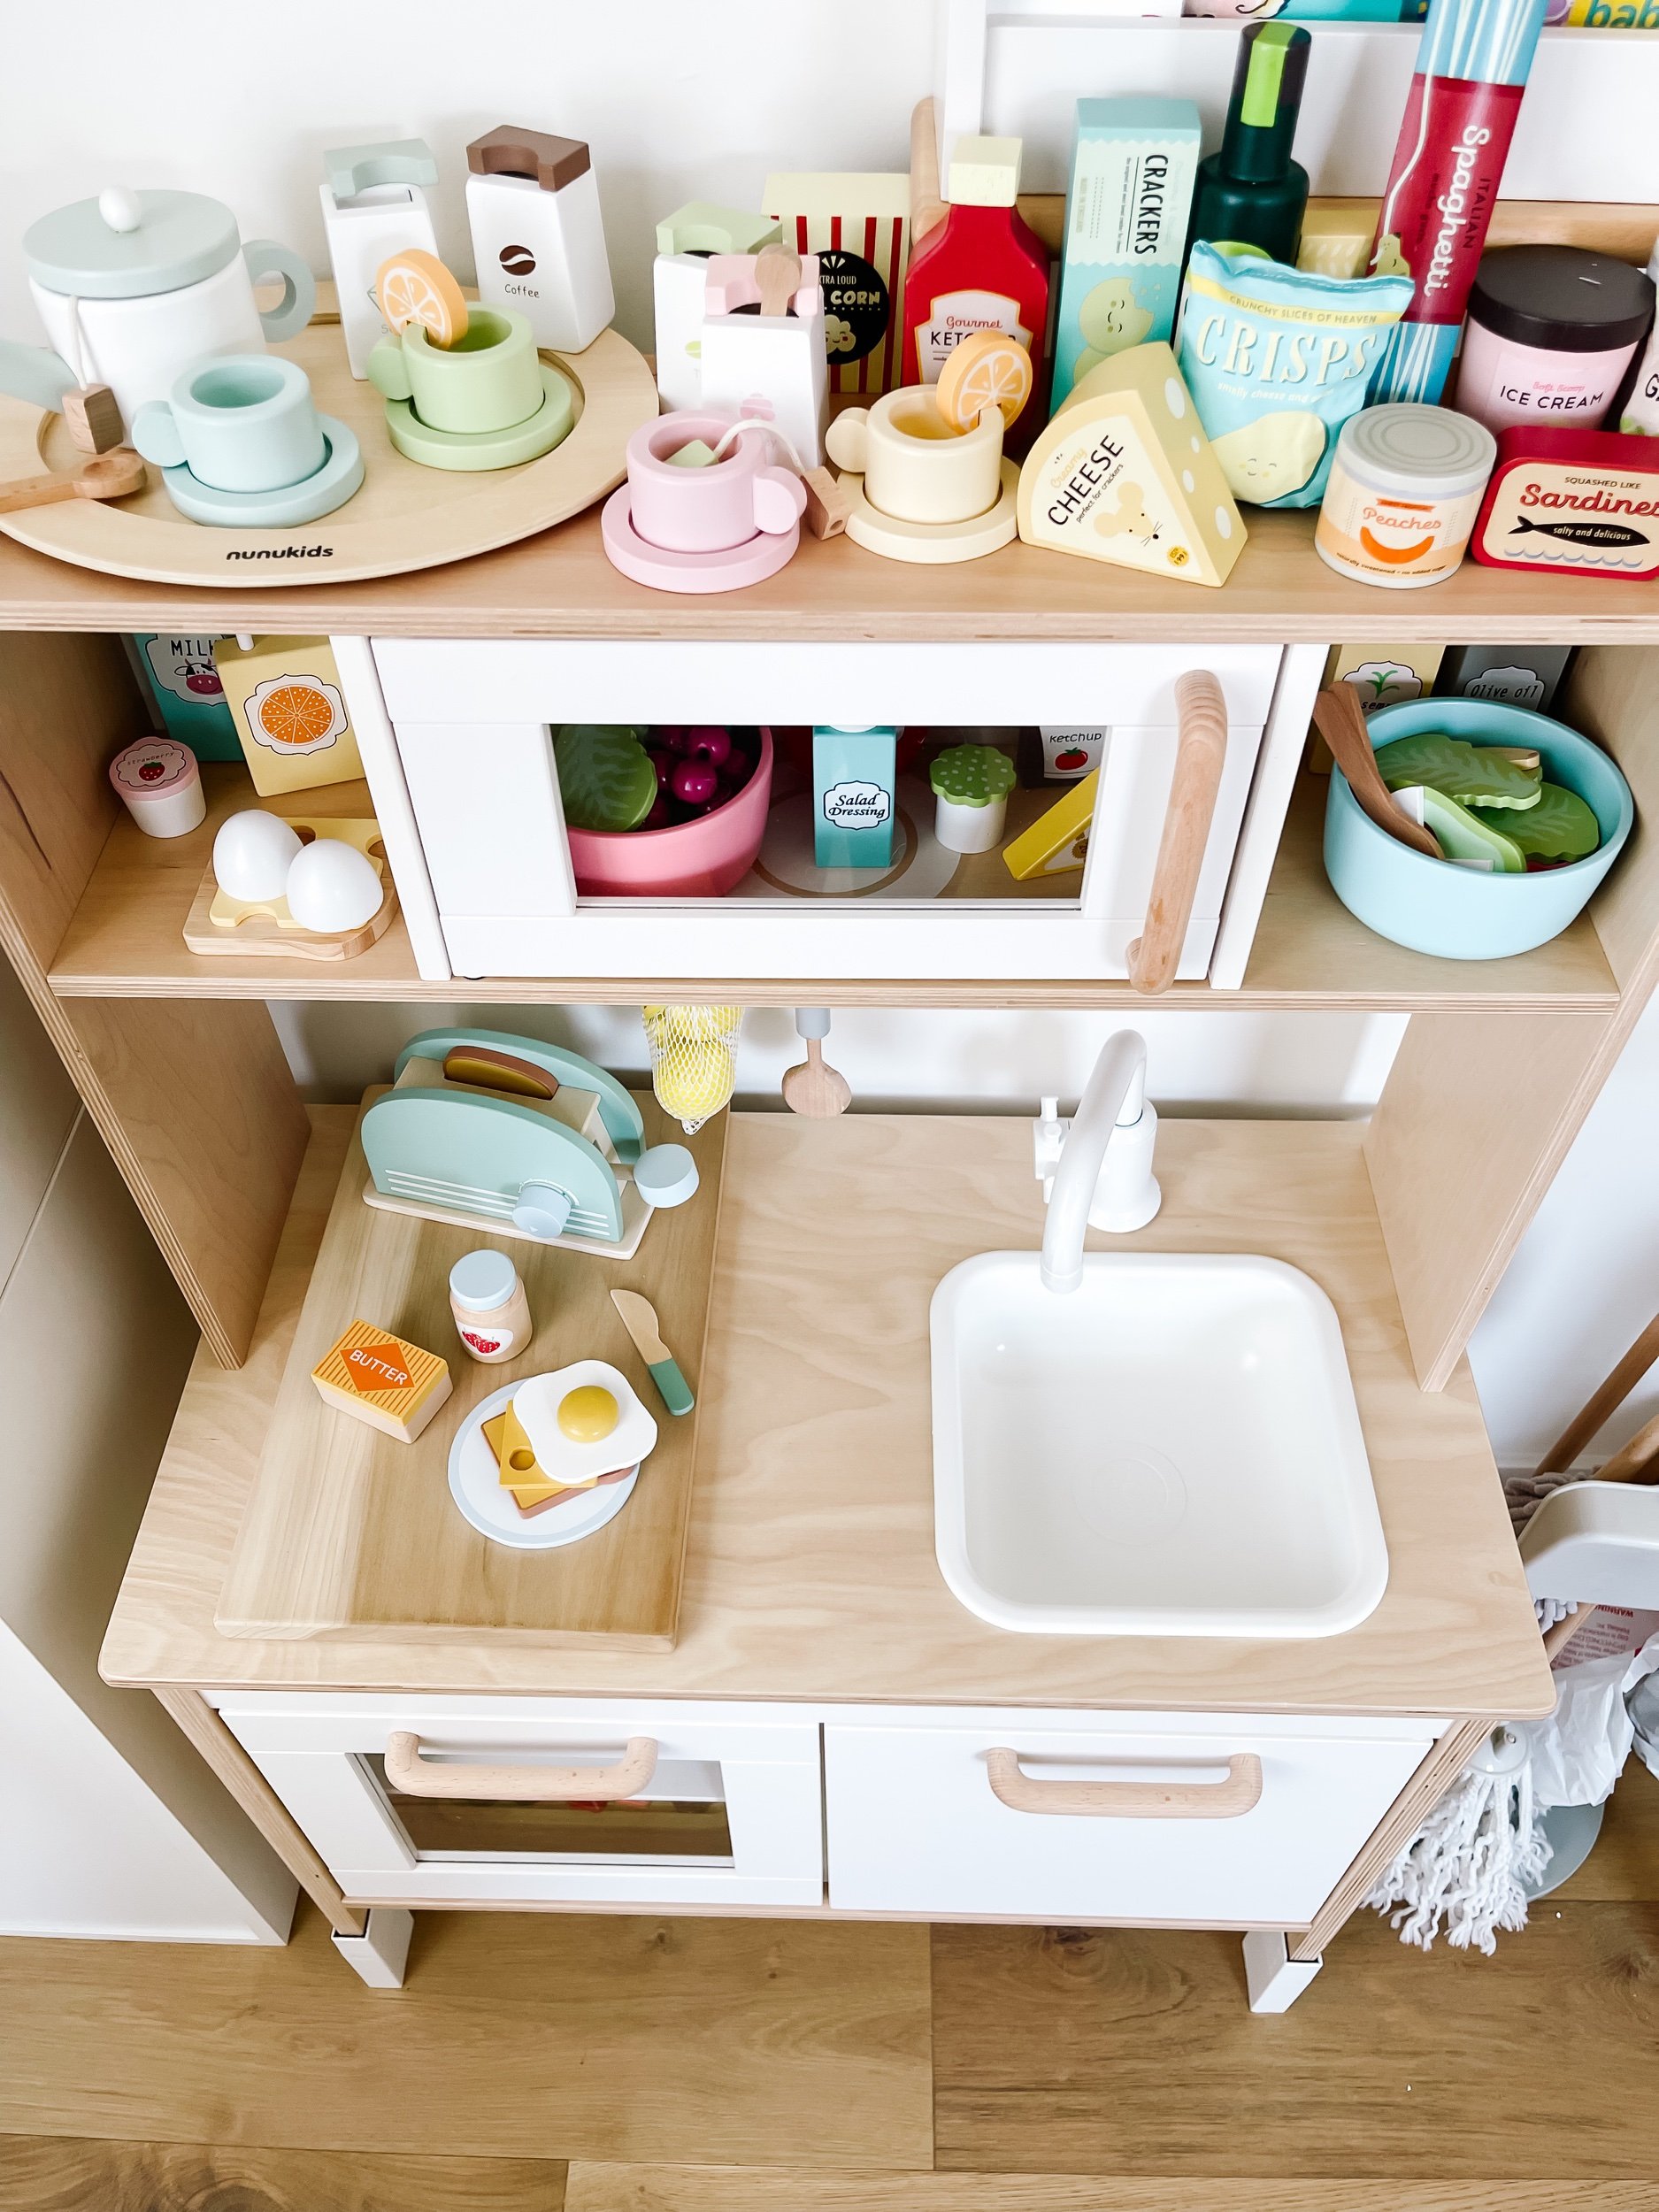
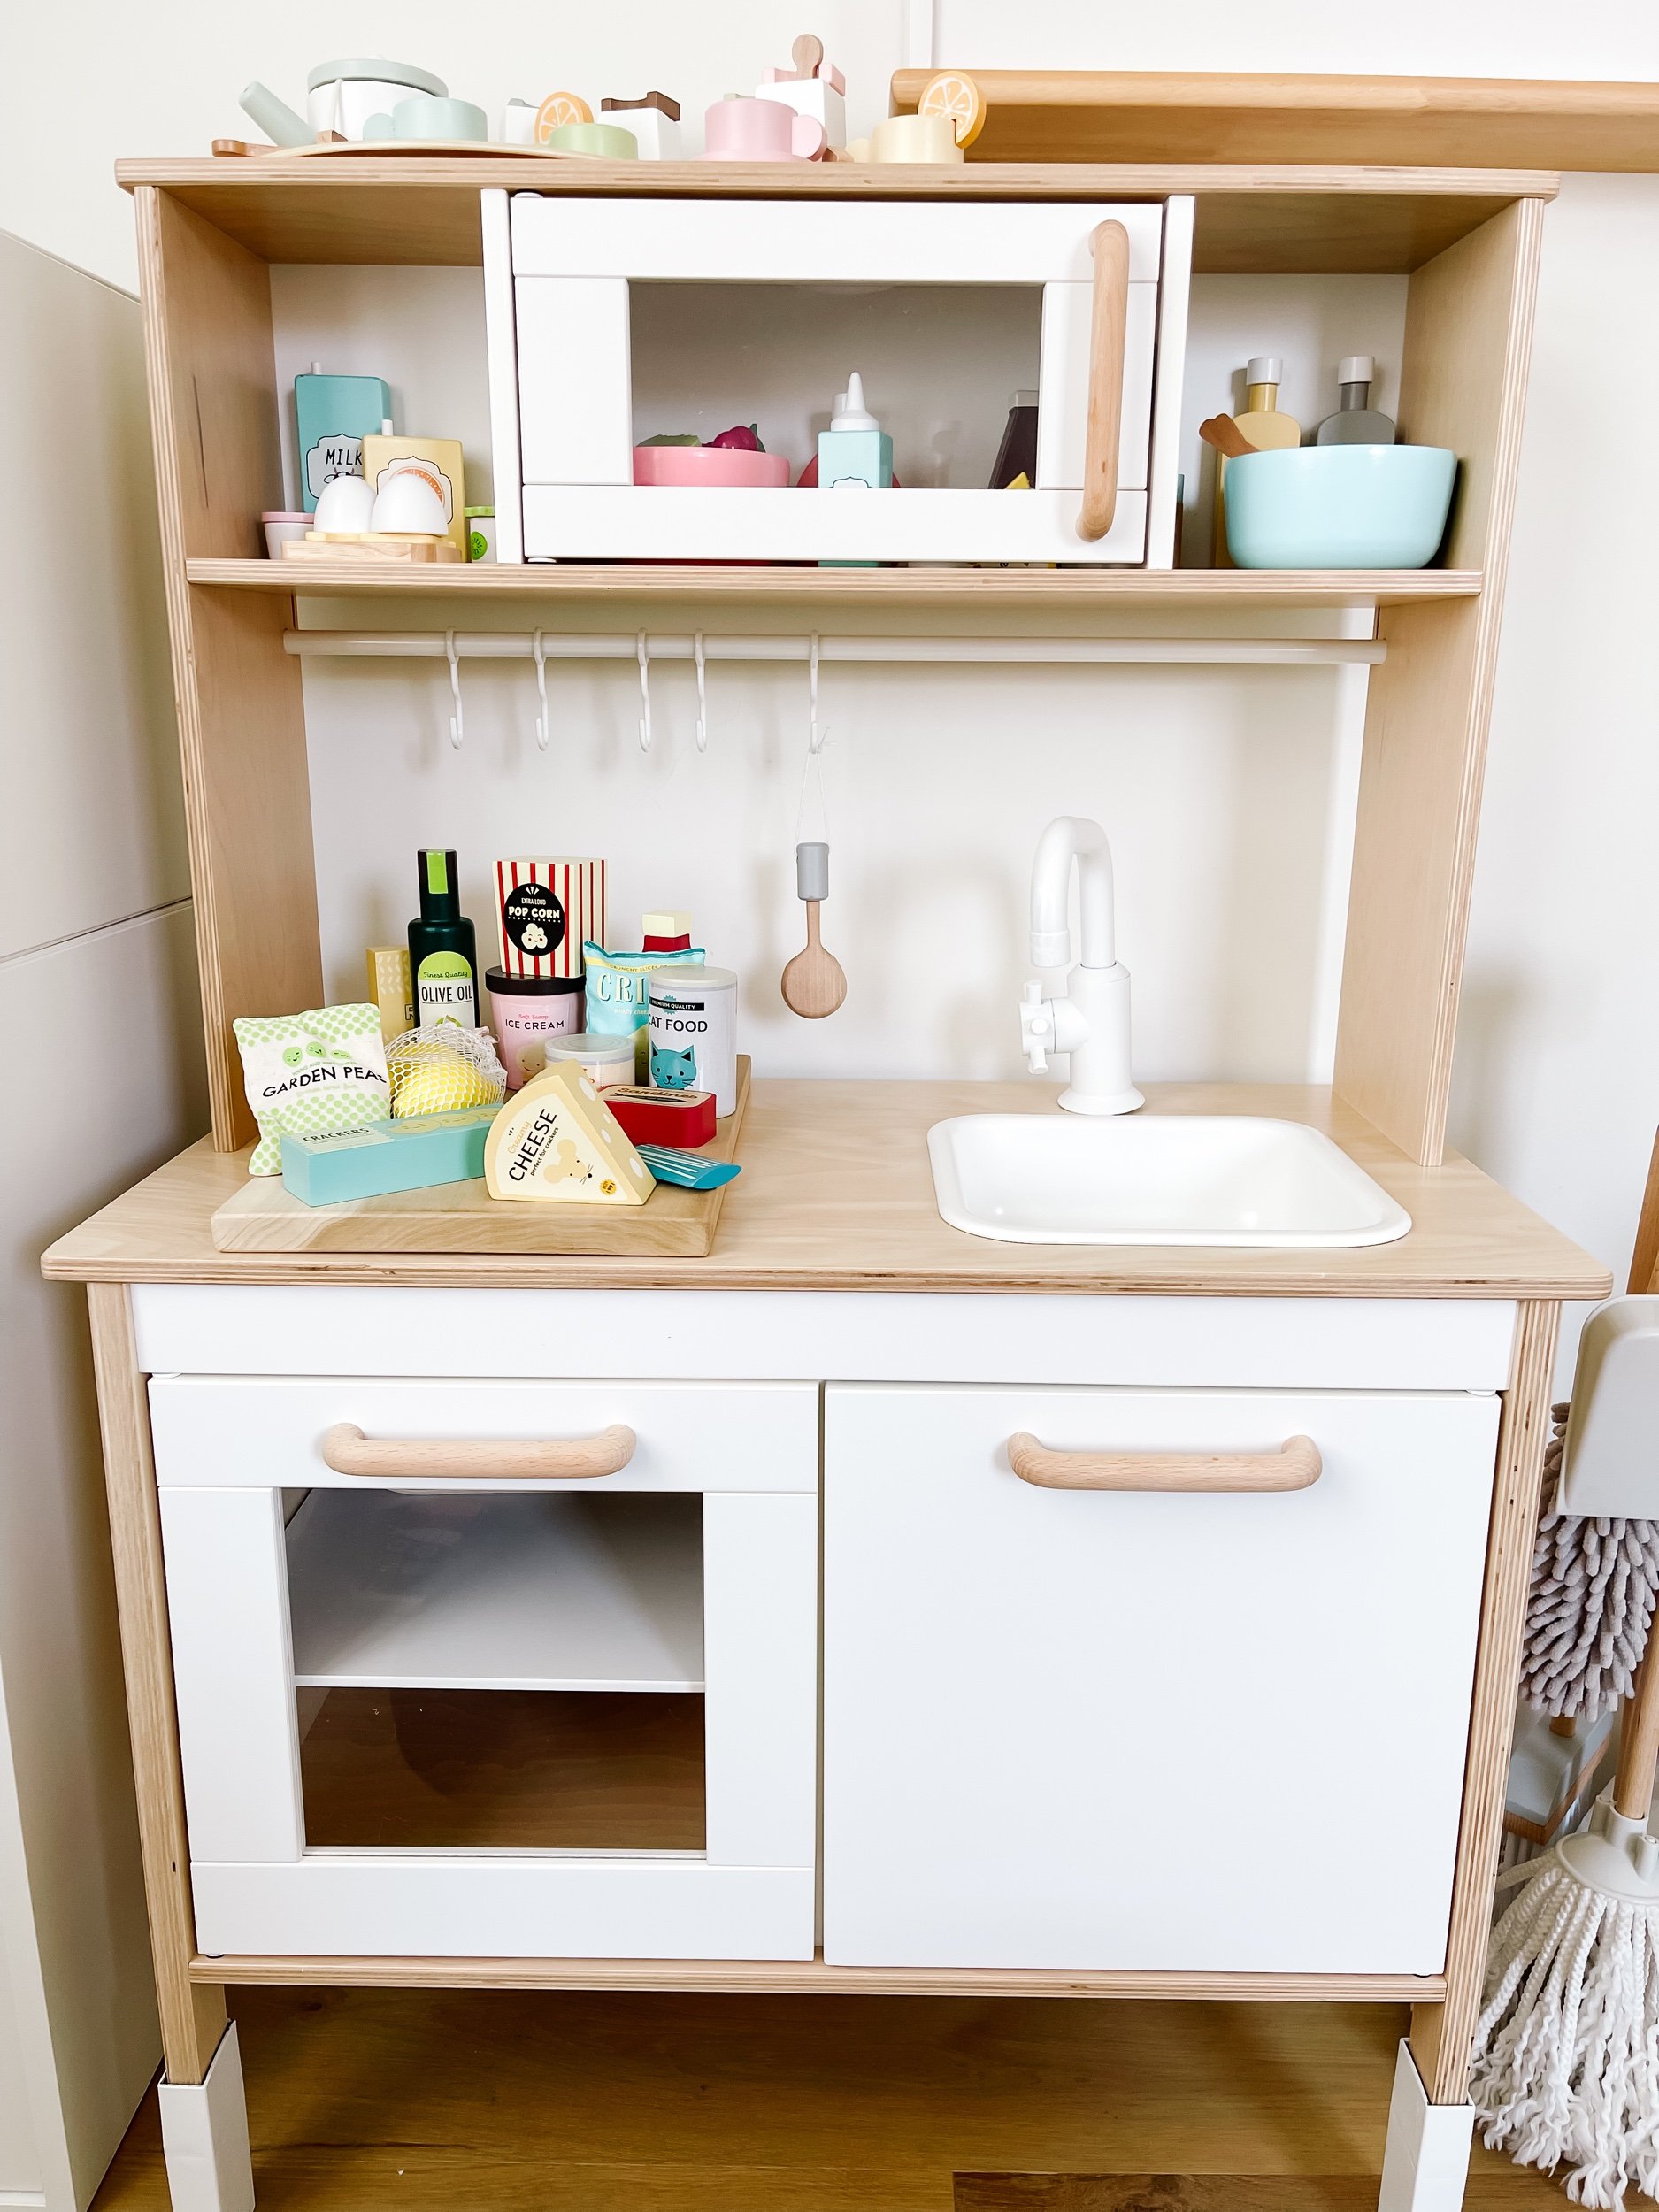
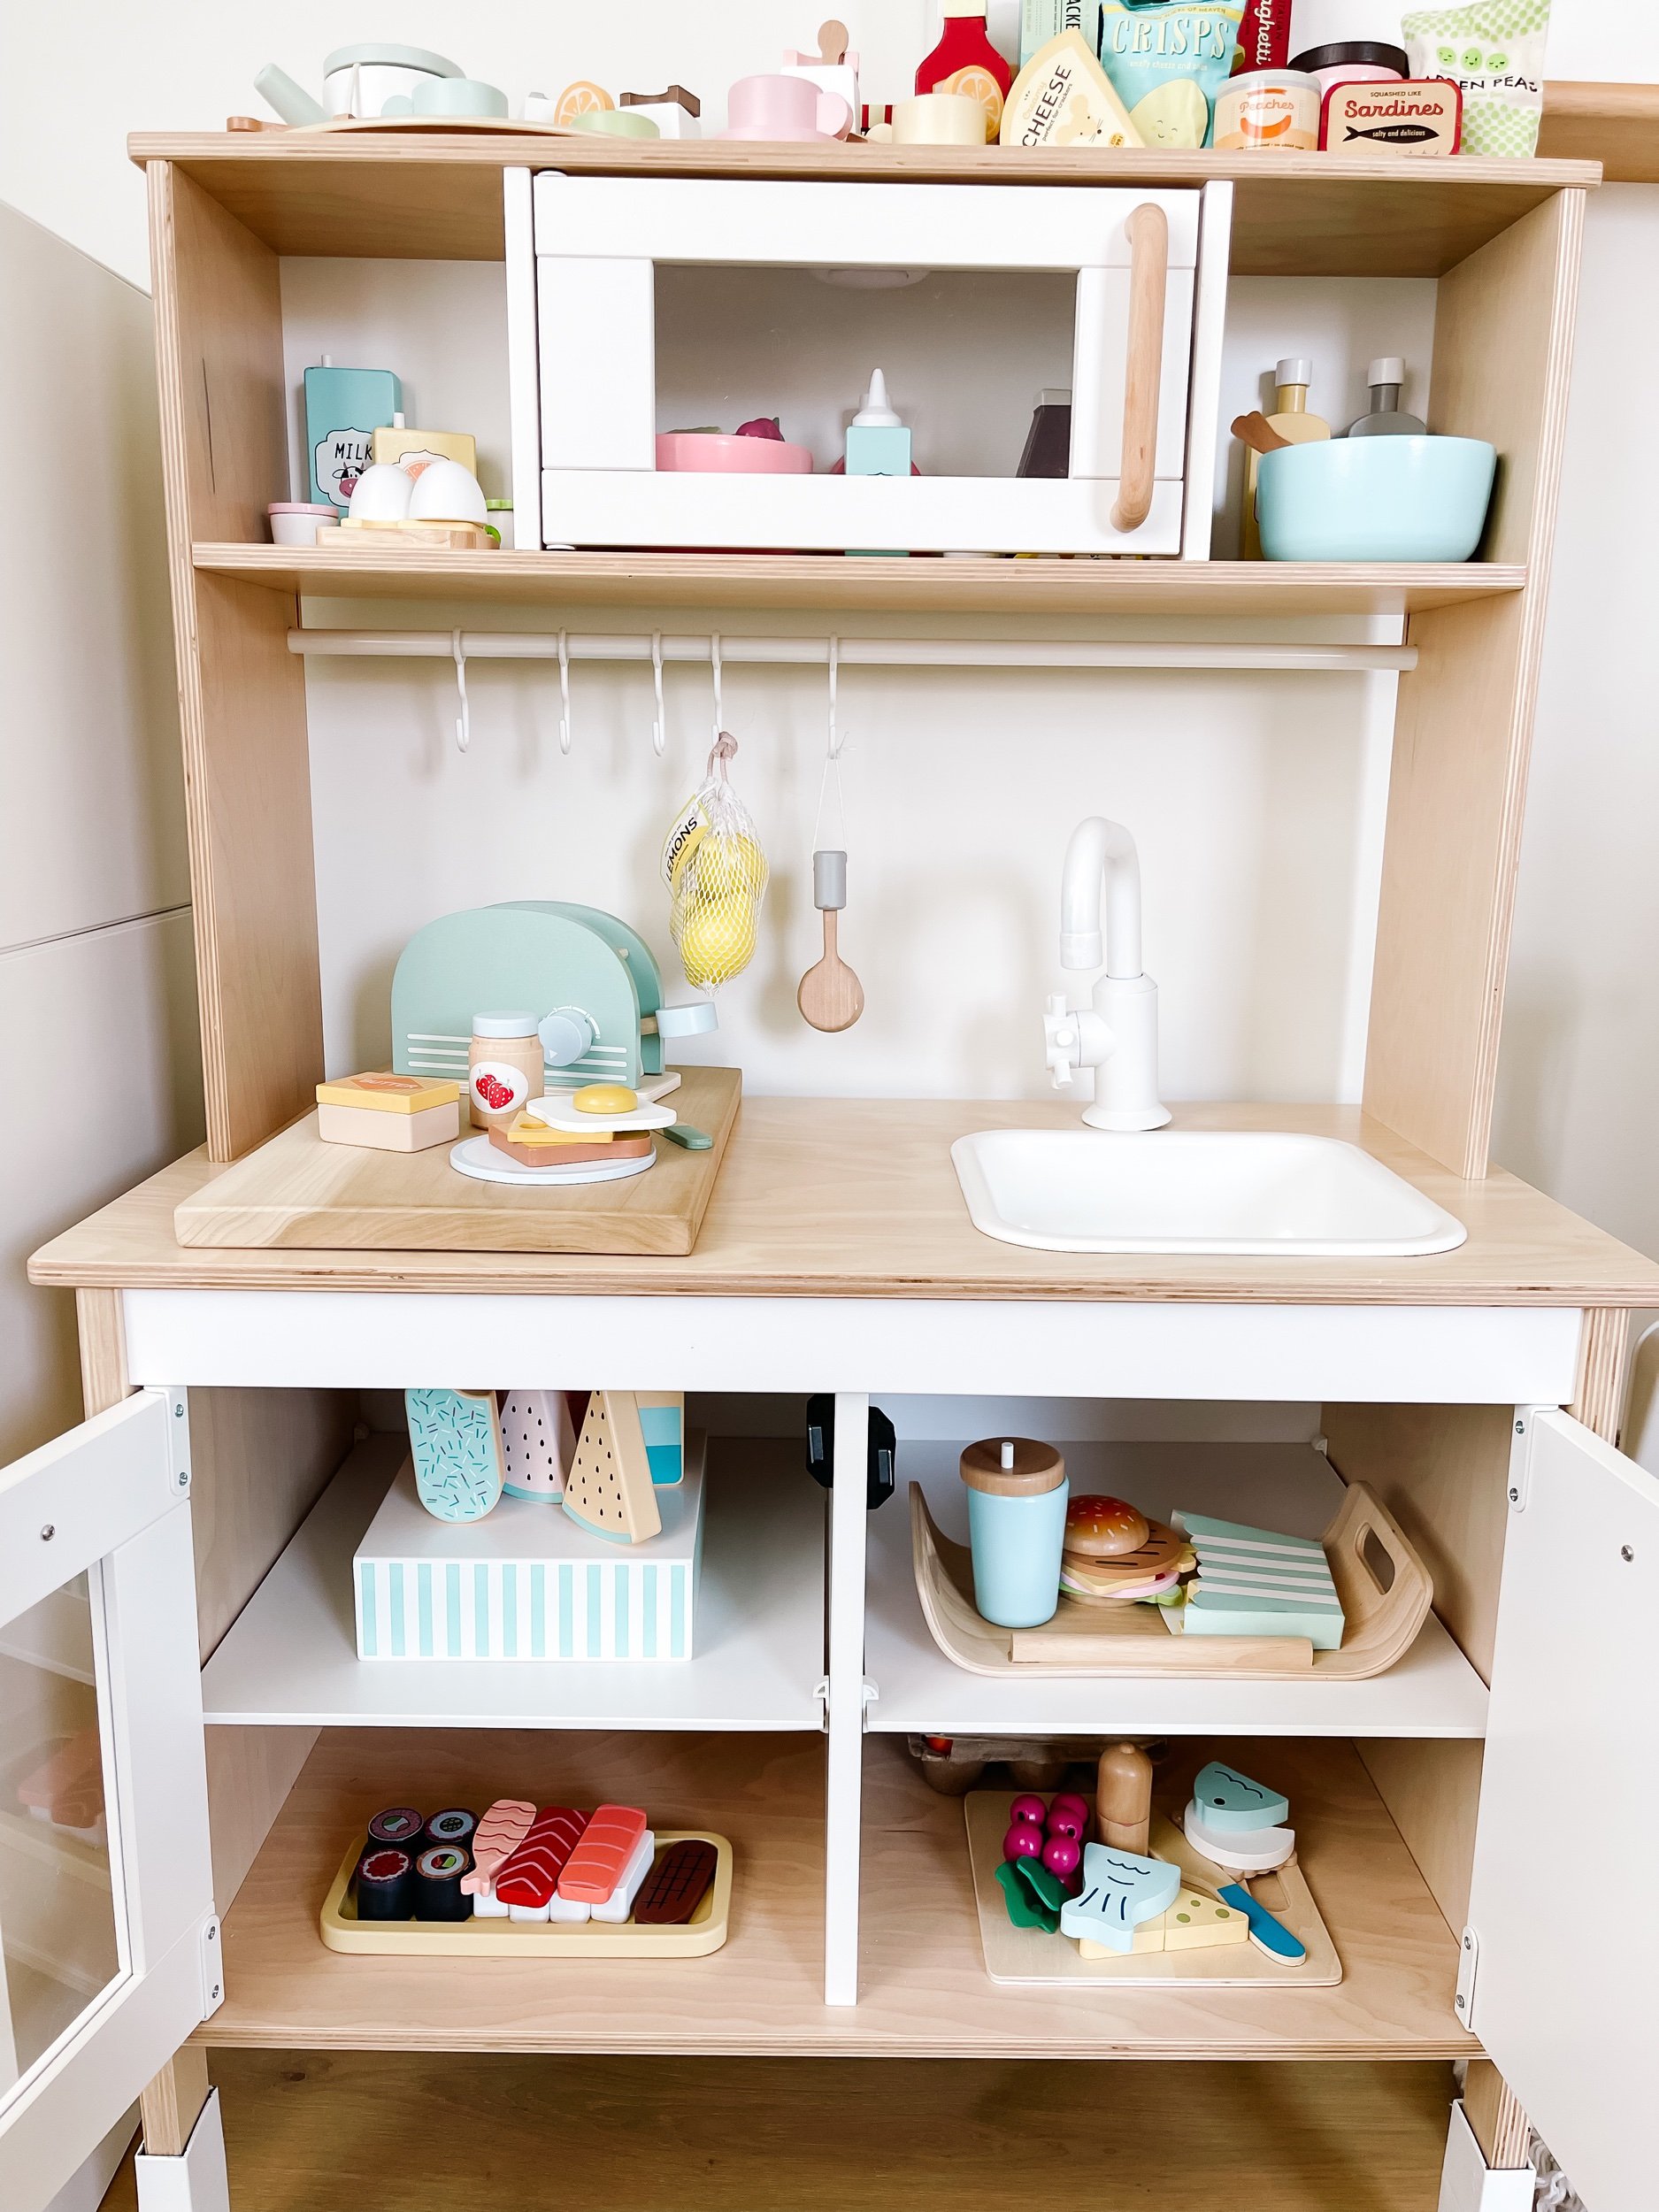
Stocking Sofia’s play kitchen with the most adorable play food was so much fun. I really wanted beautiful pastel colors and I was able to find a variety of options for very reasonable prices on Temu and a few on Amazon. Better yet, we were able to store about 10 different sets of play food all within the kitchen and our tier stacking shelves. I was surprised that everything fit! Sofie also got an adorable little kitchen appliances set for the holidays and everything matched perfectly together.
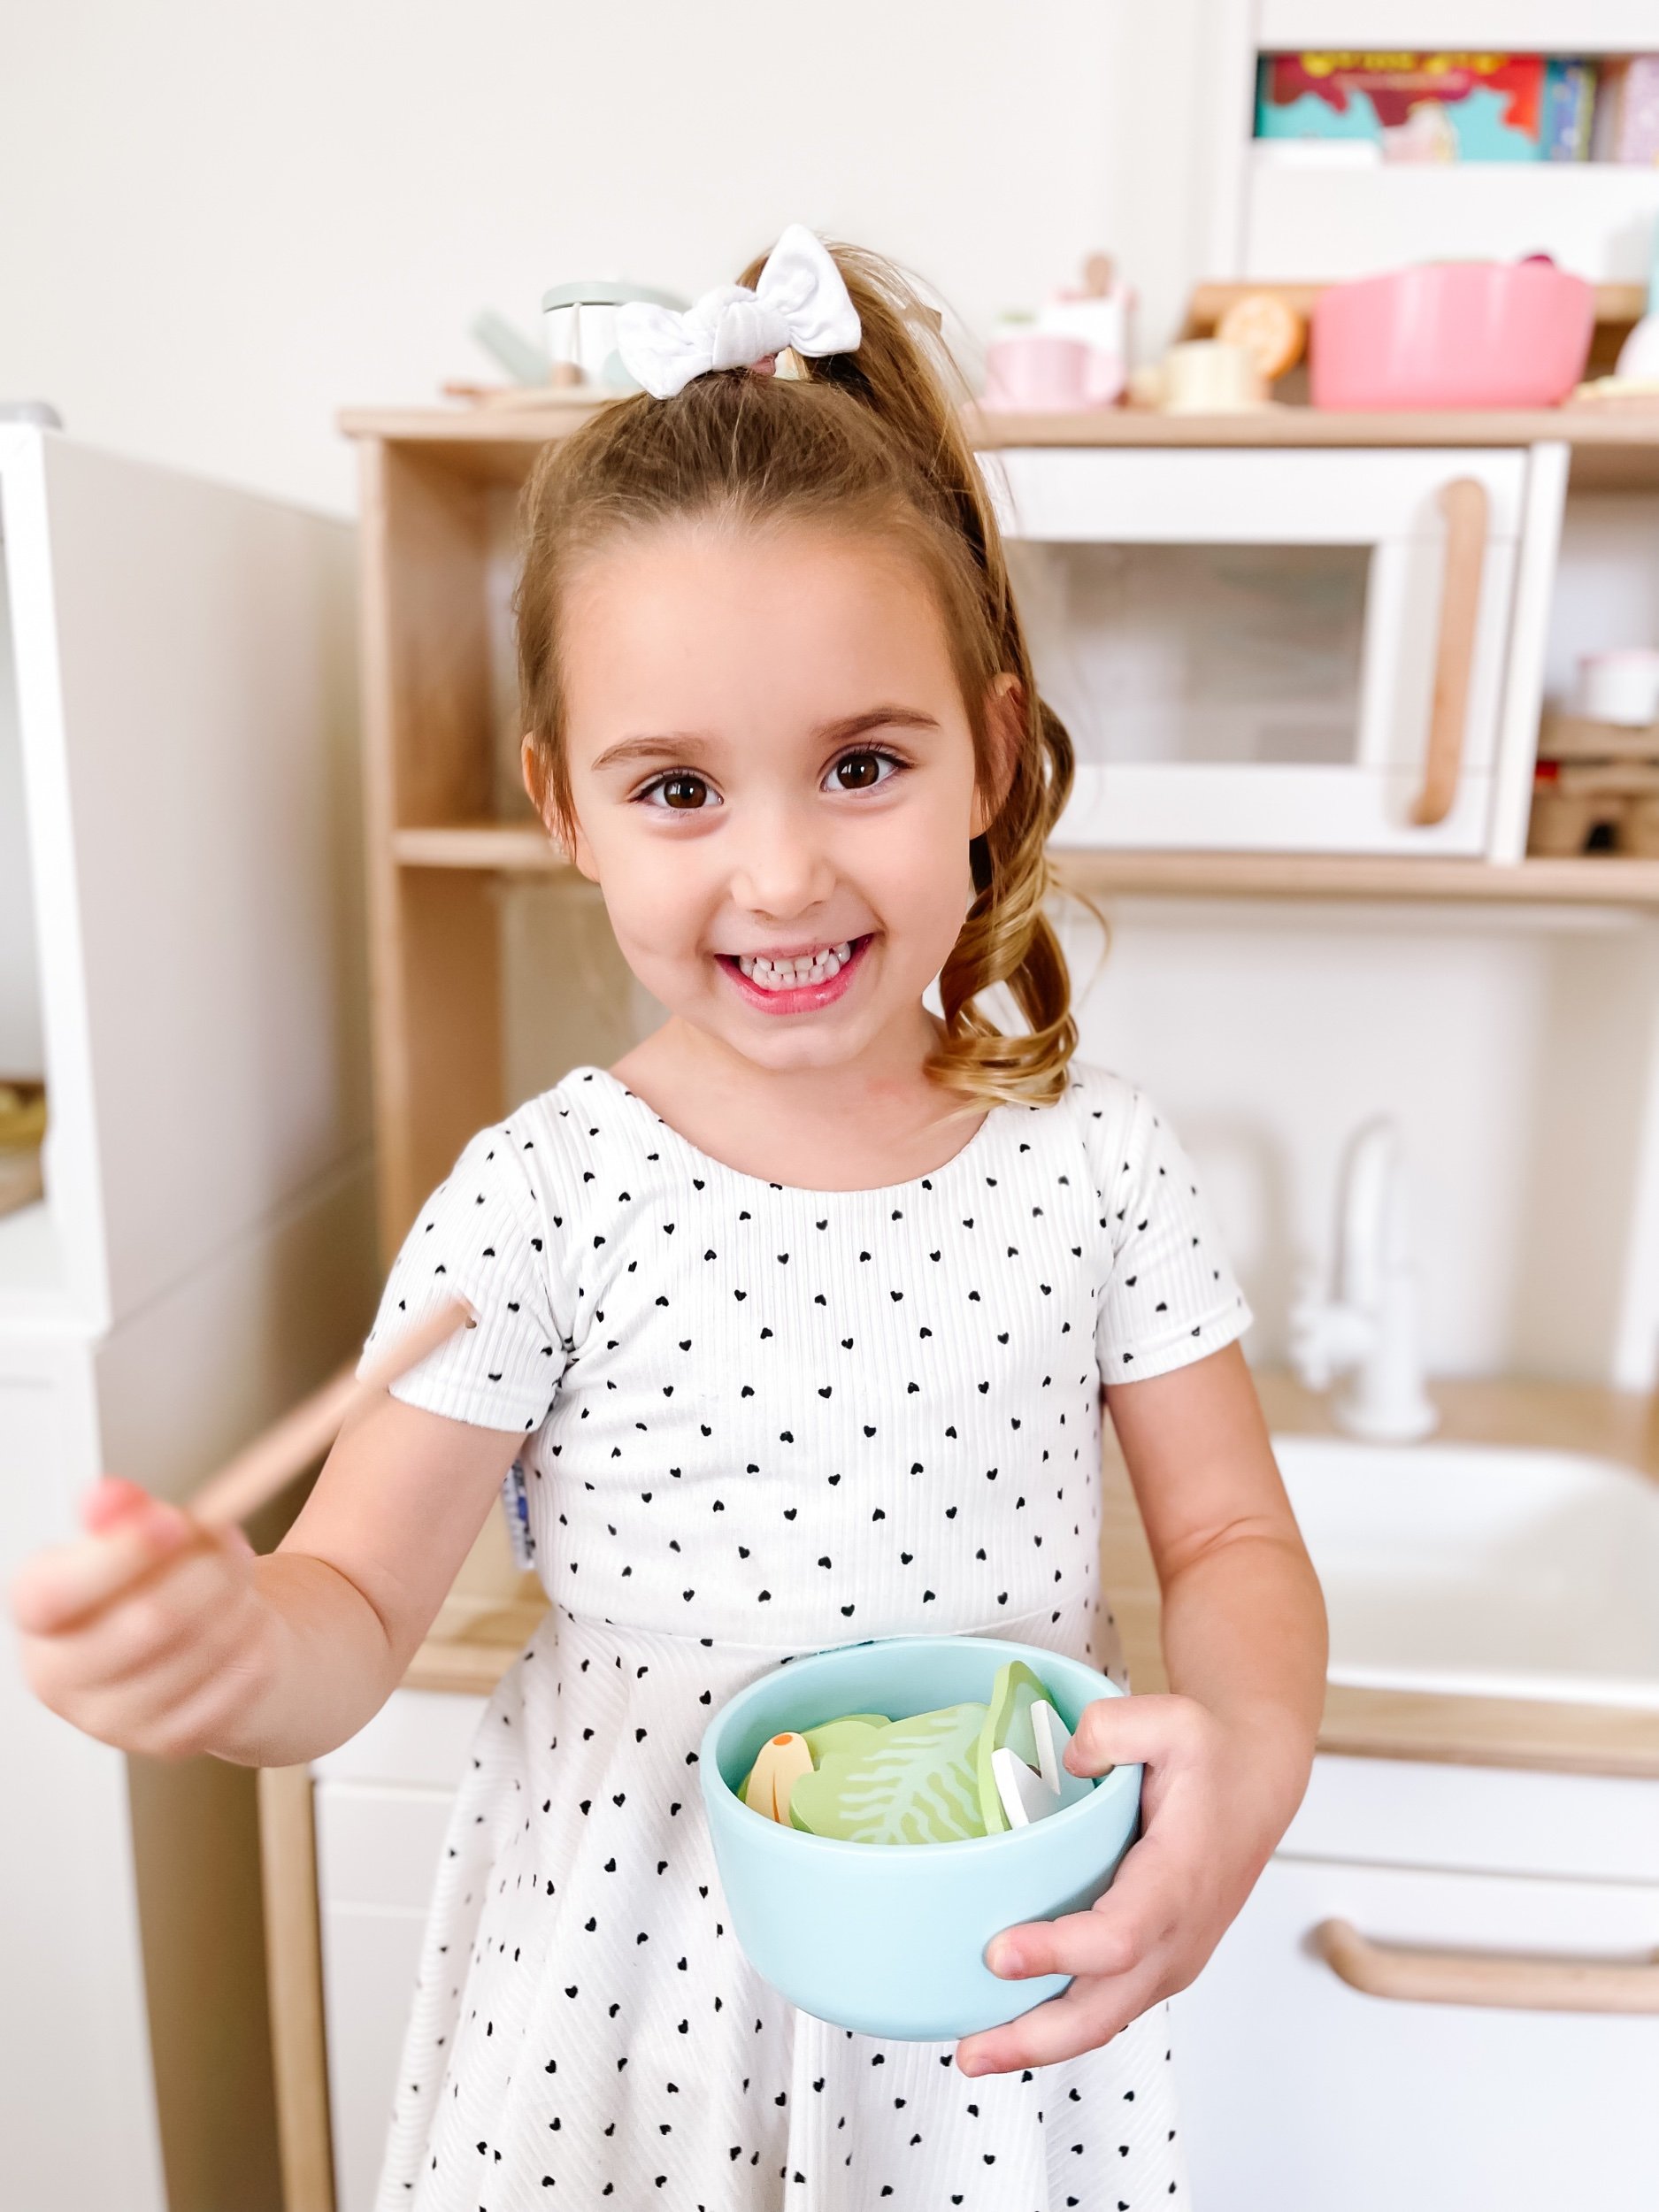


Pretend Salad Play Food
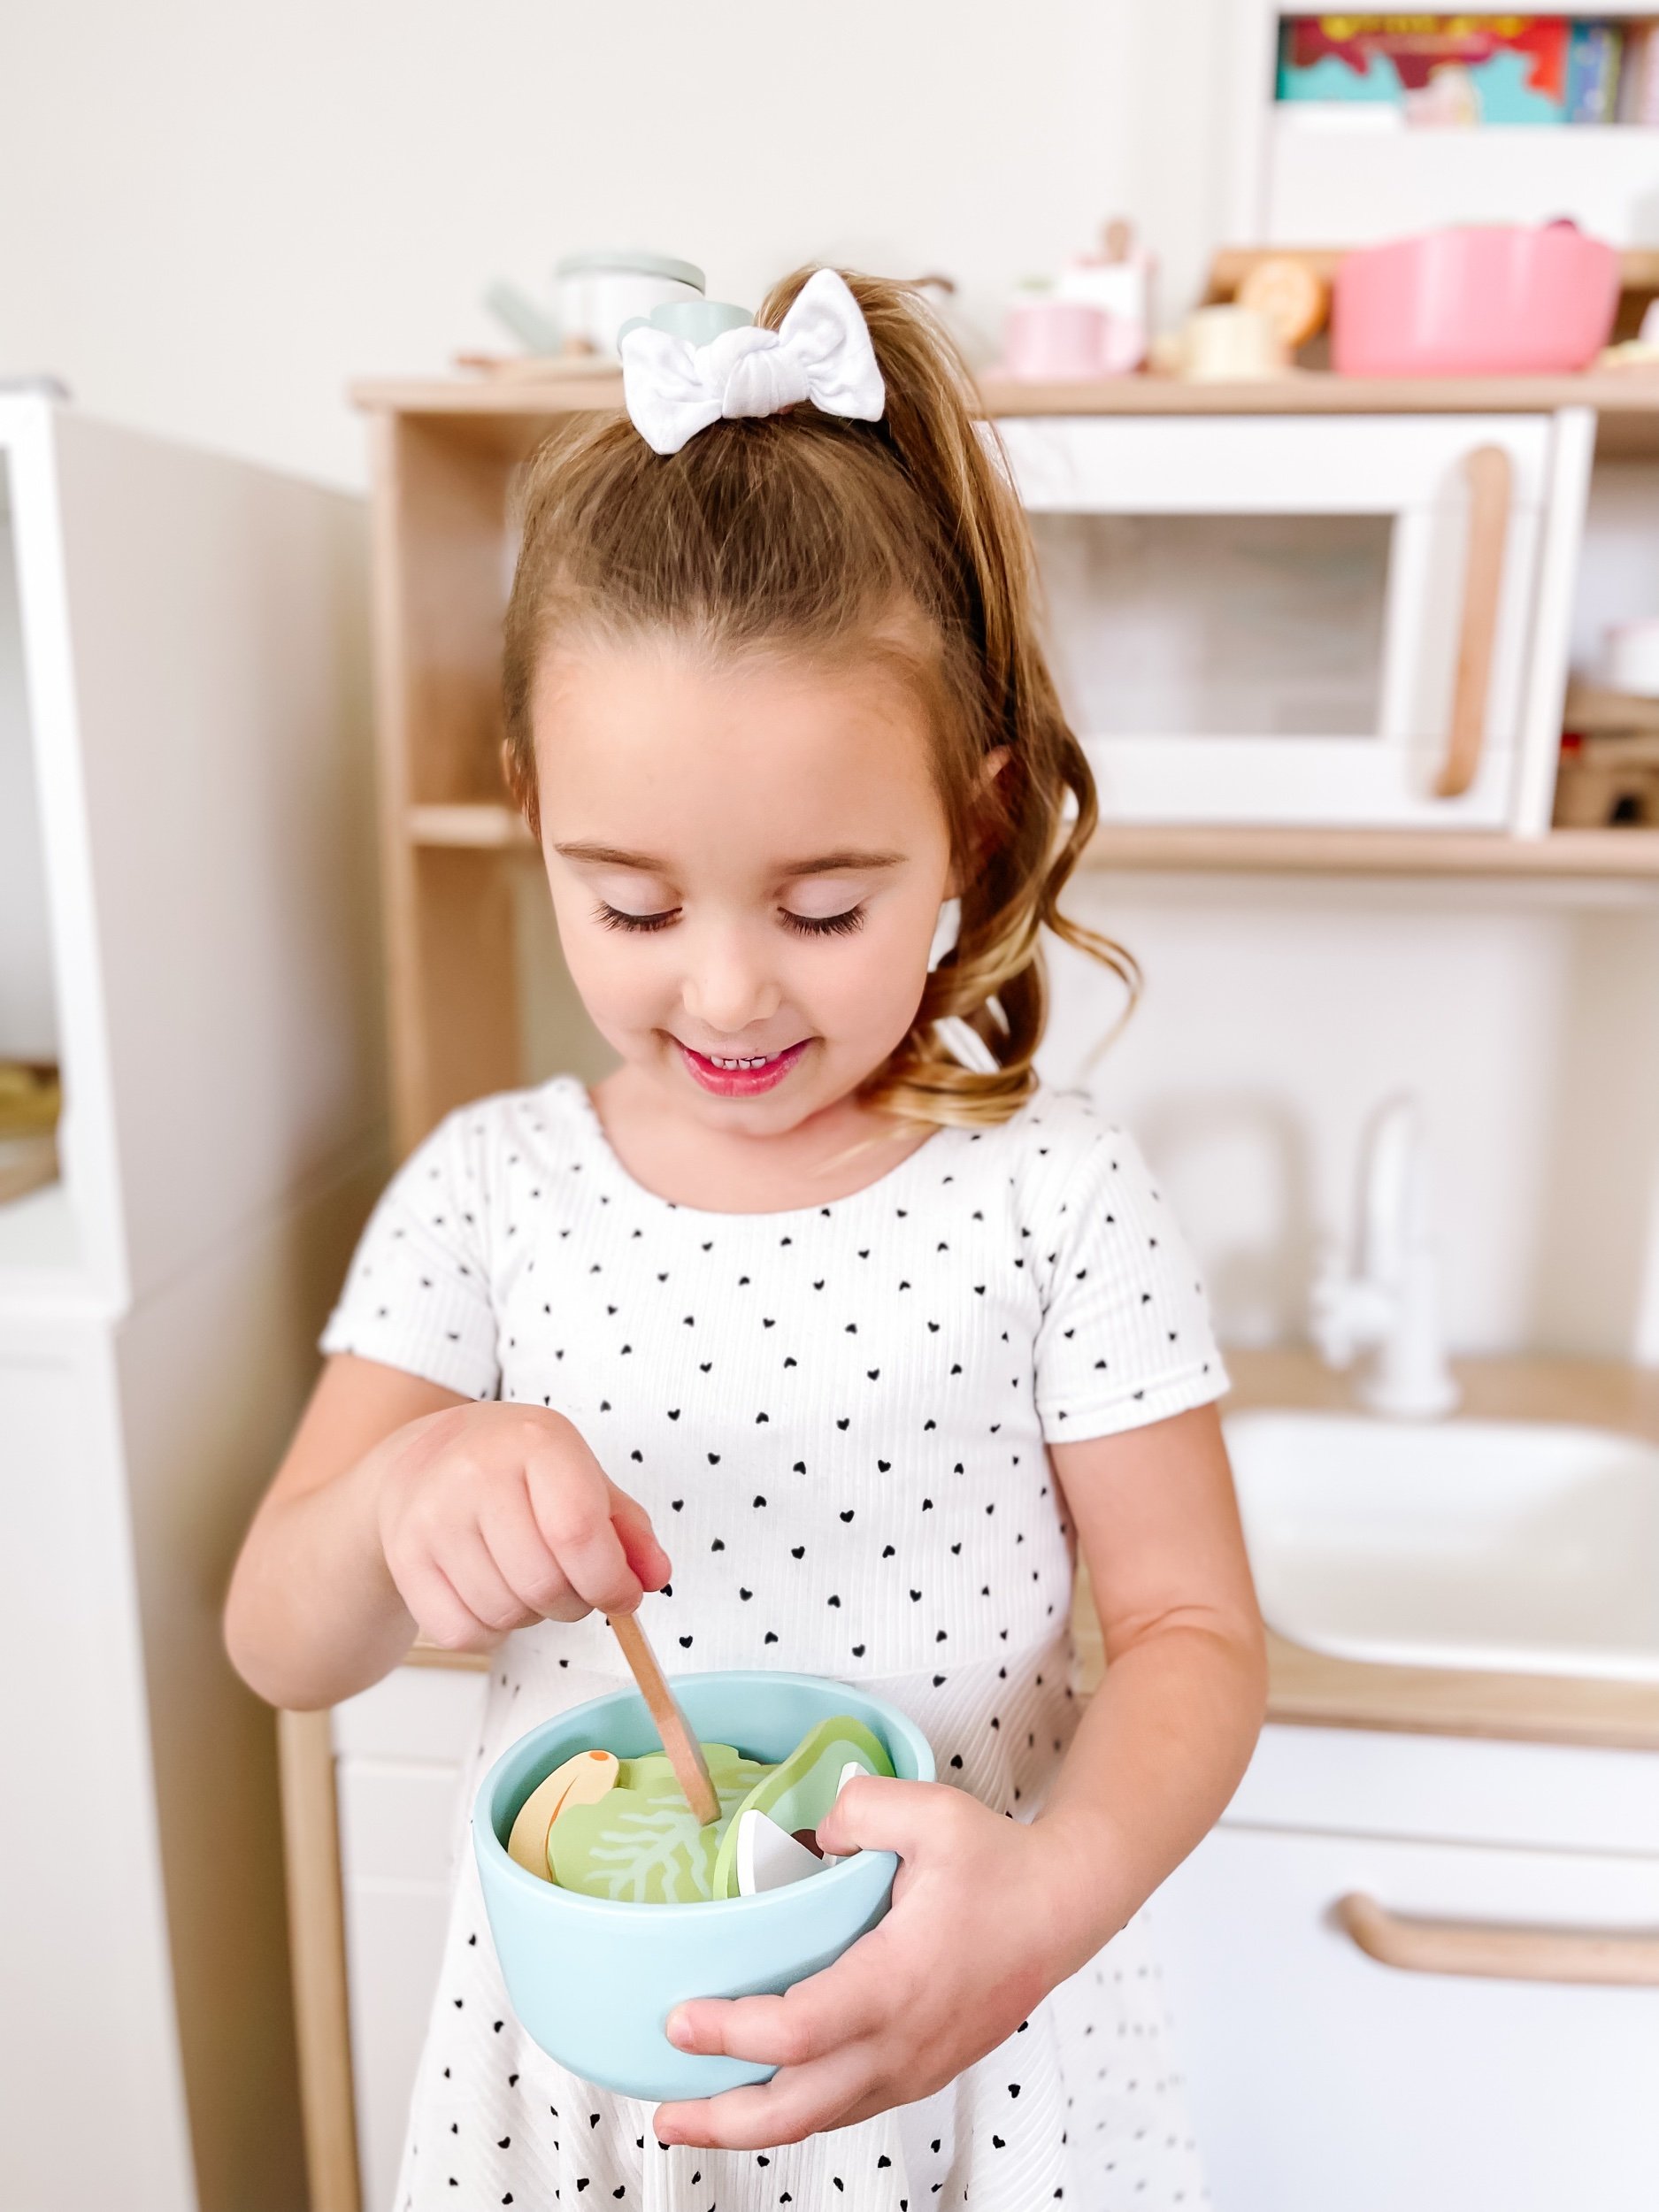
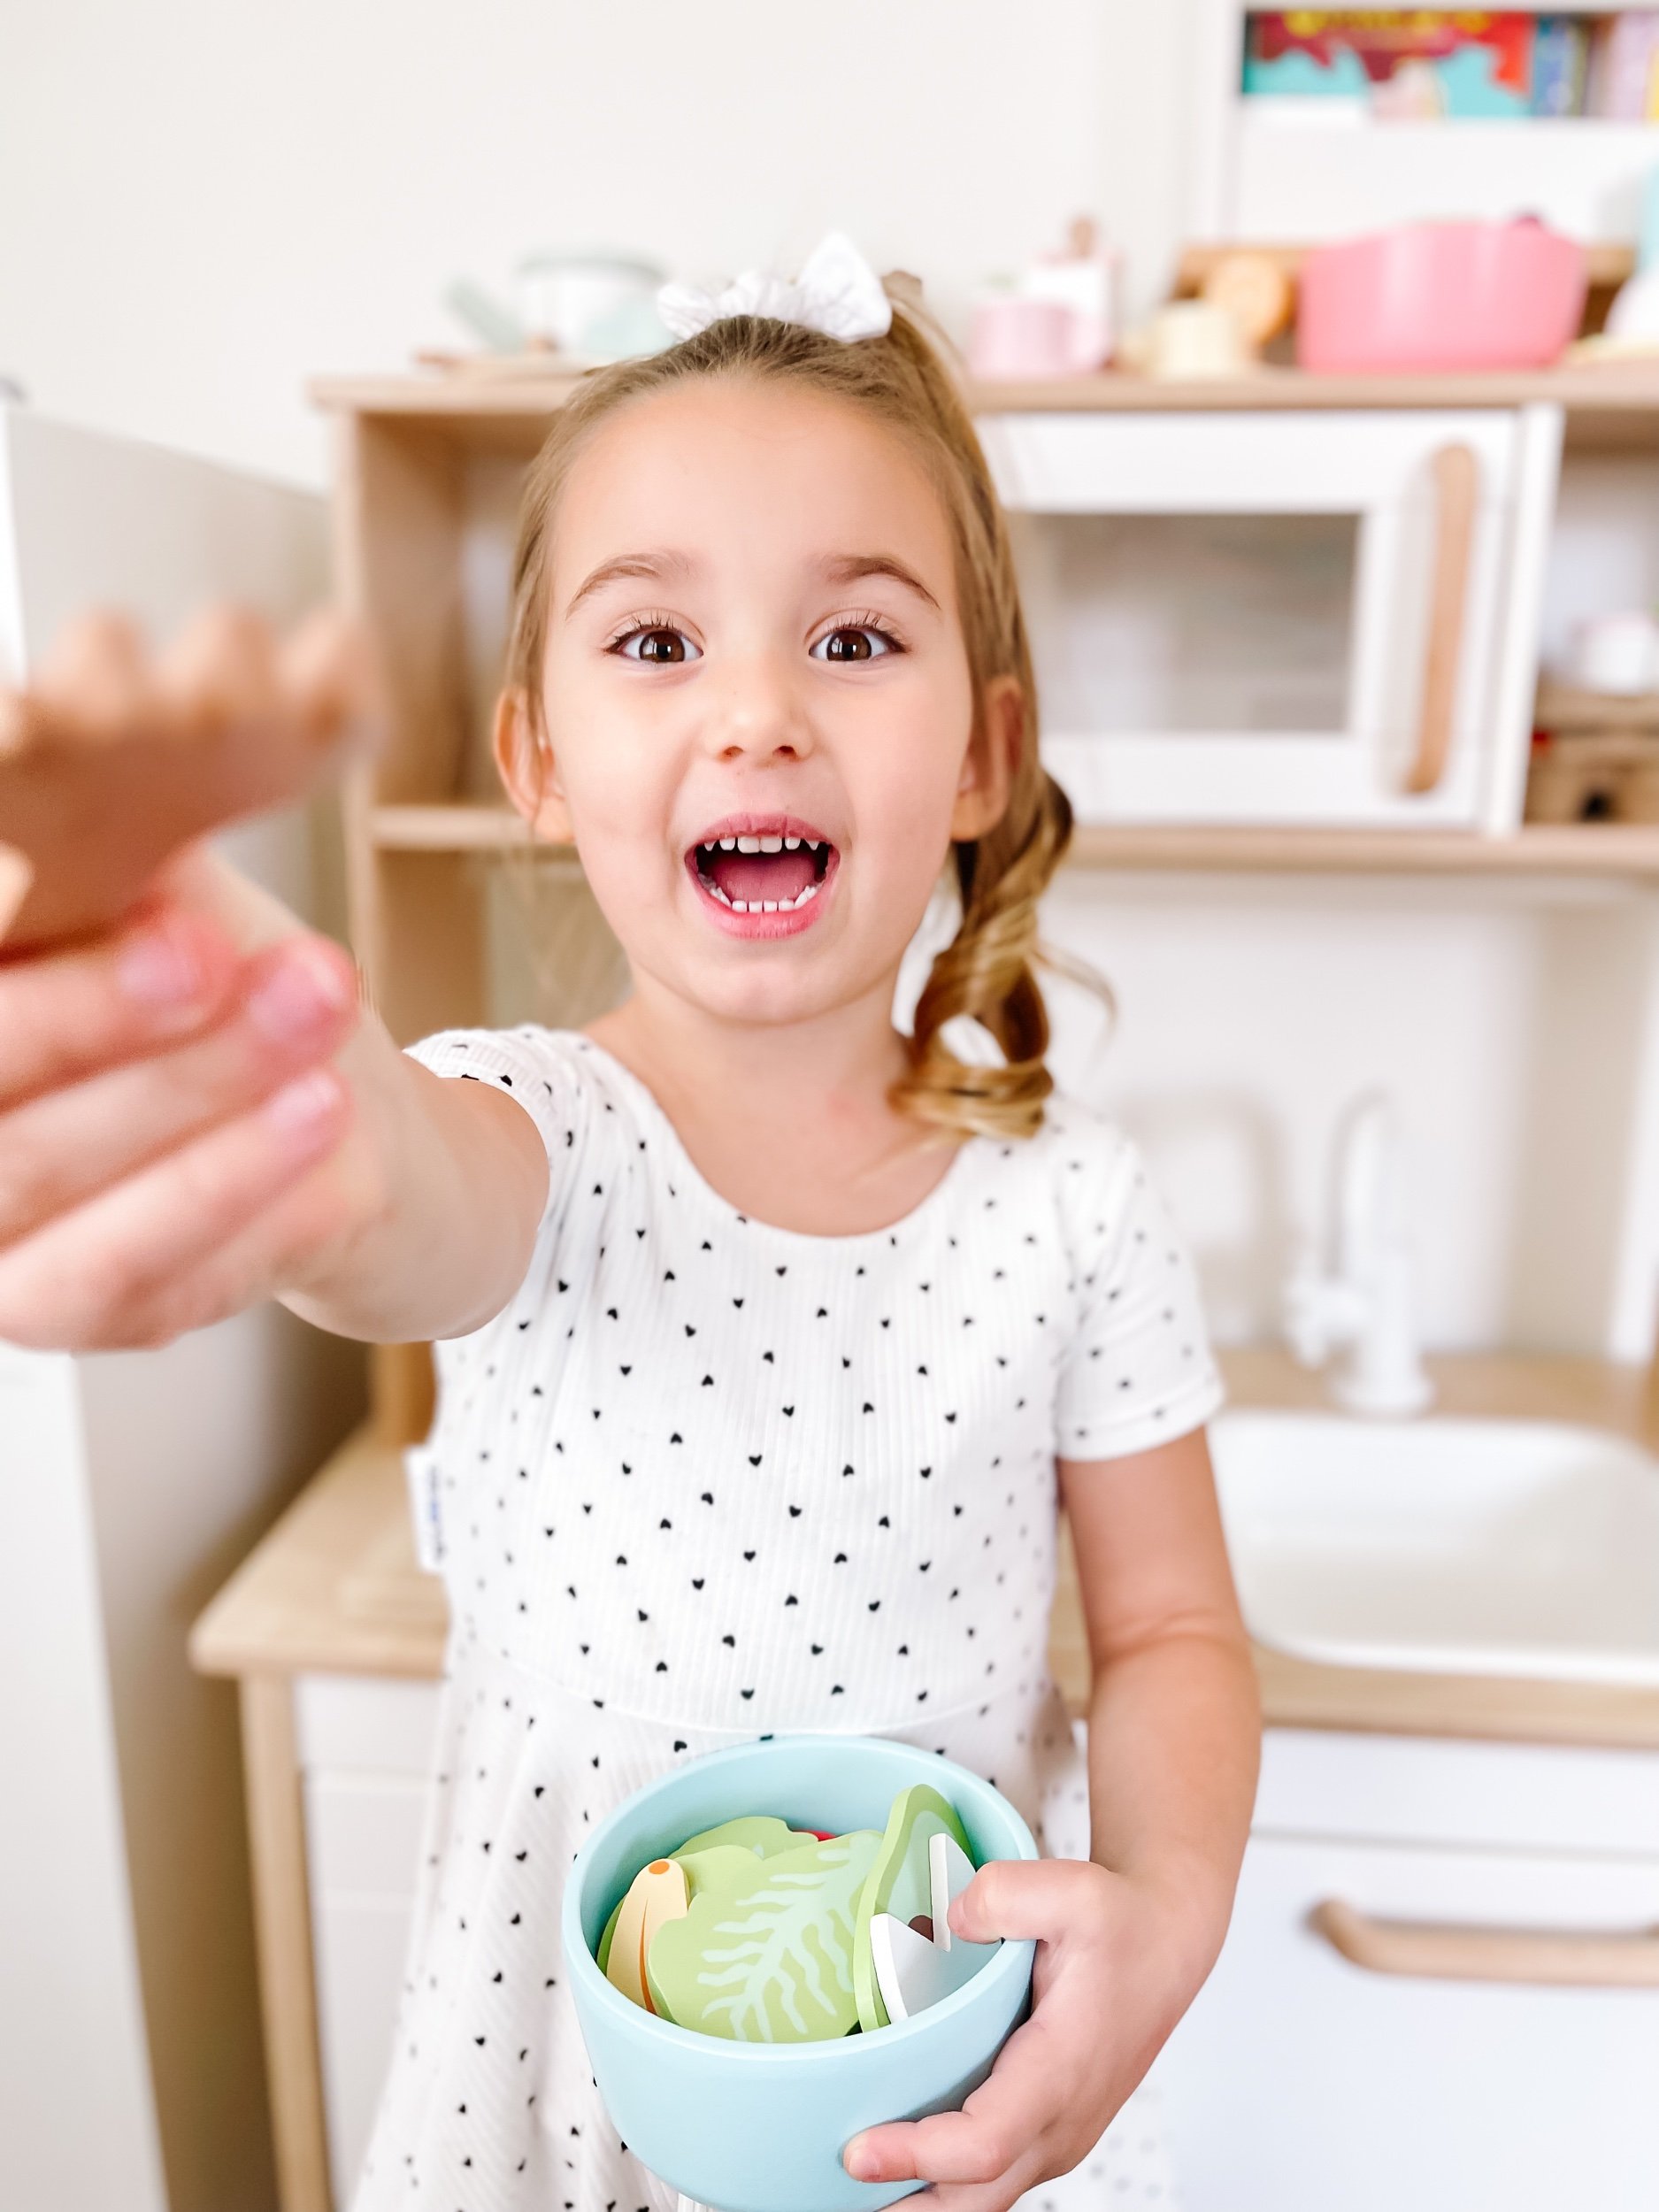
Sofia had a blast mixing up this adorable salad play food set. It sparked so many ideas for her about what flavor combinations would work well together, what the dressings would taste like and should she be adding salt and pepper? It was so much fun to watch her eyes light up and she mixed it together. I love this play food set because it has such soft and beautiful pastel colors and the food pieces all lay nice and flat in the bowl.

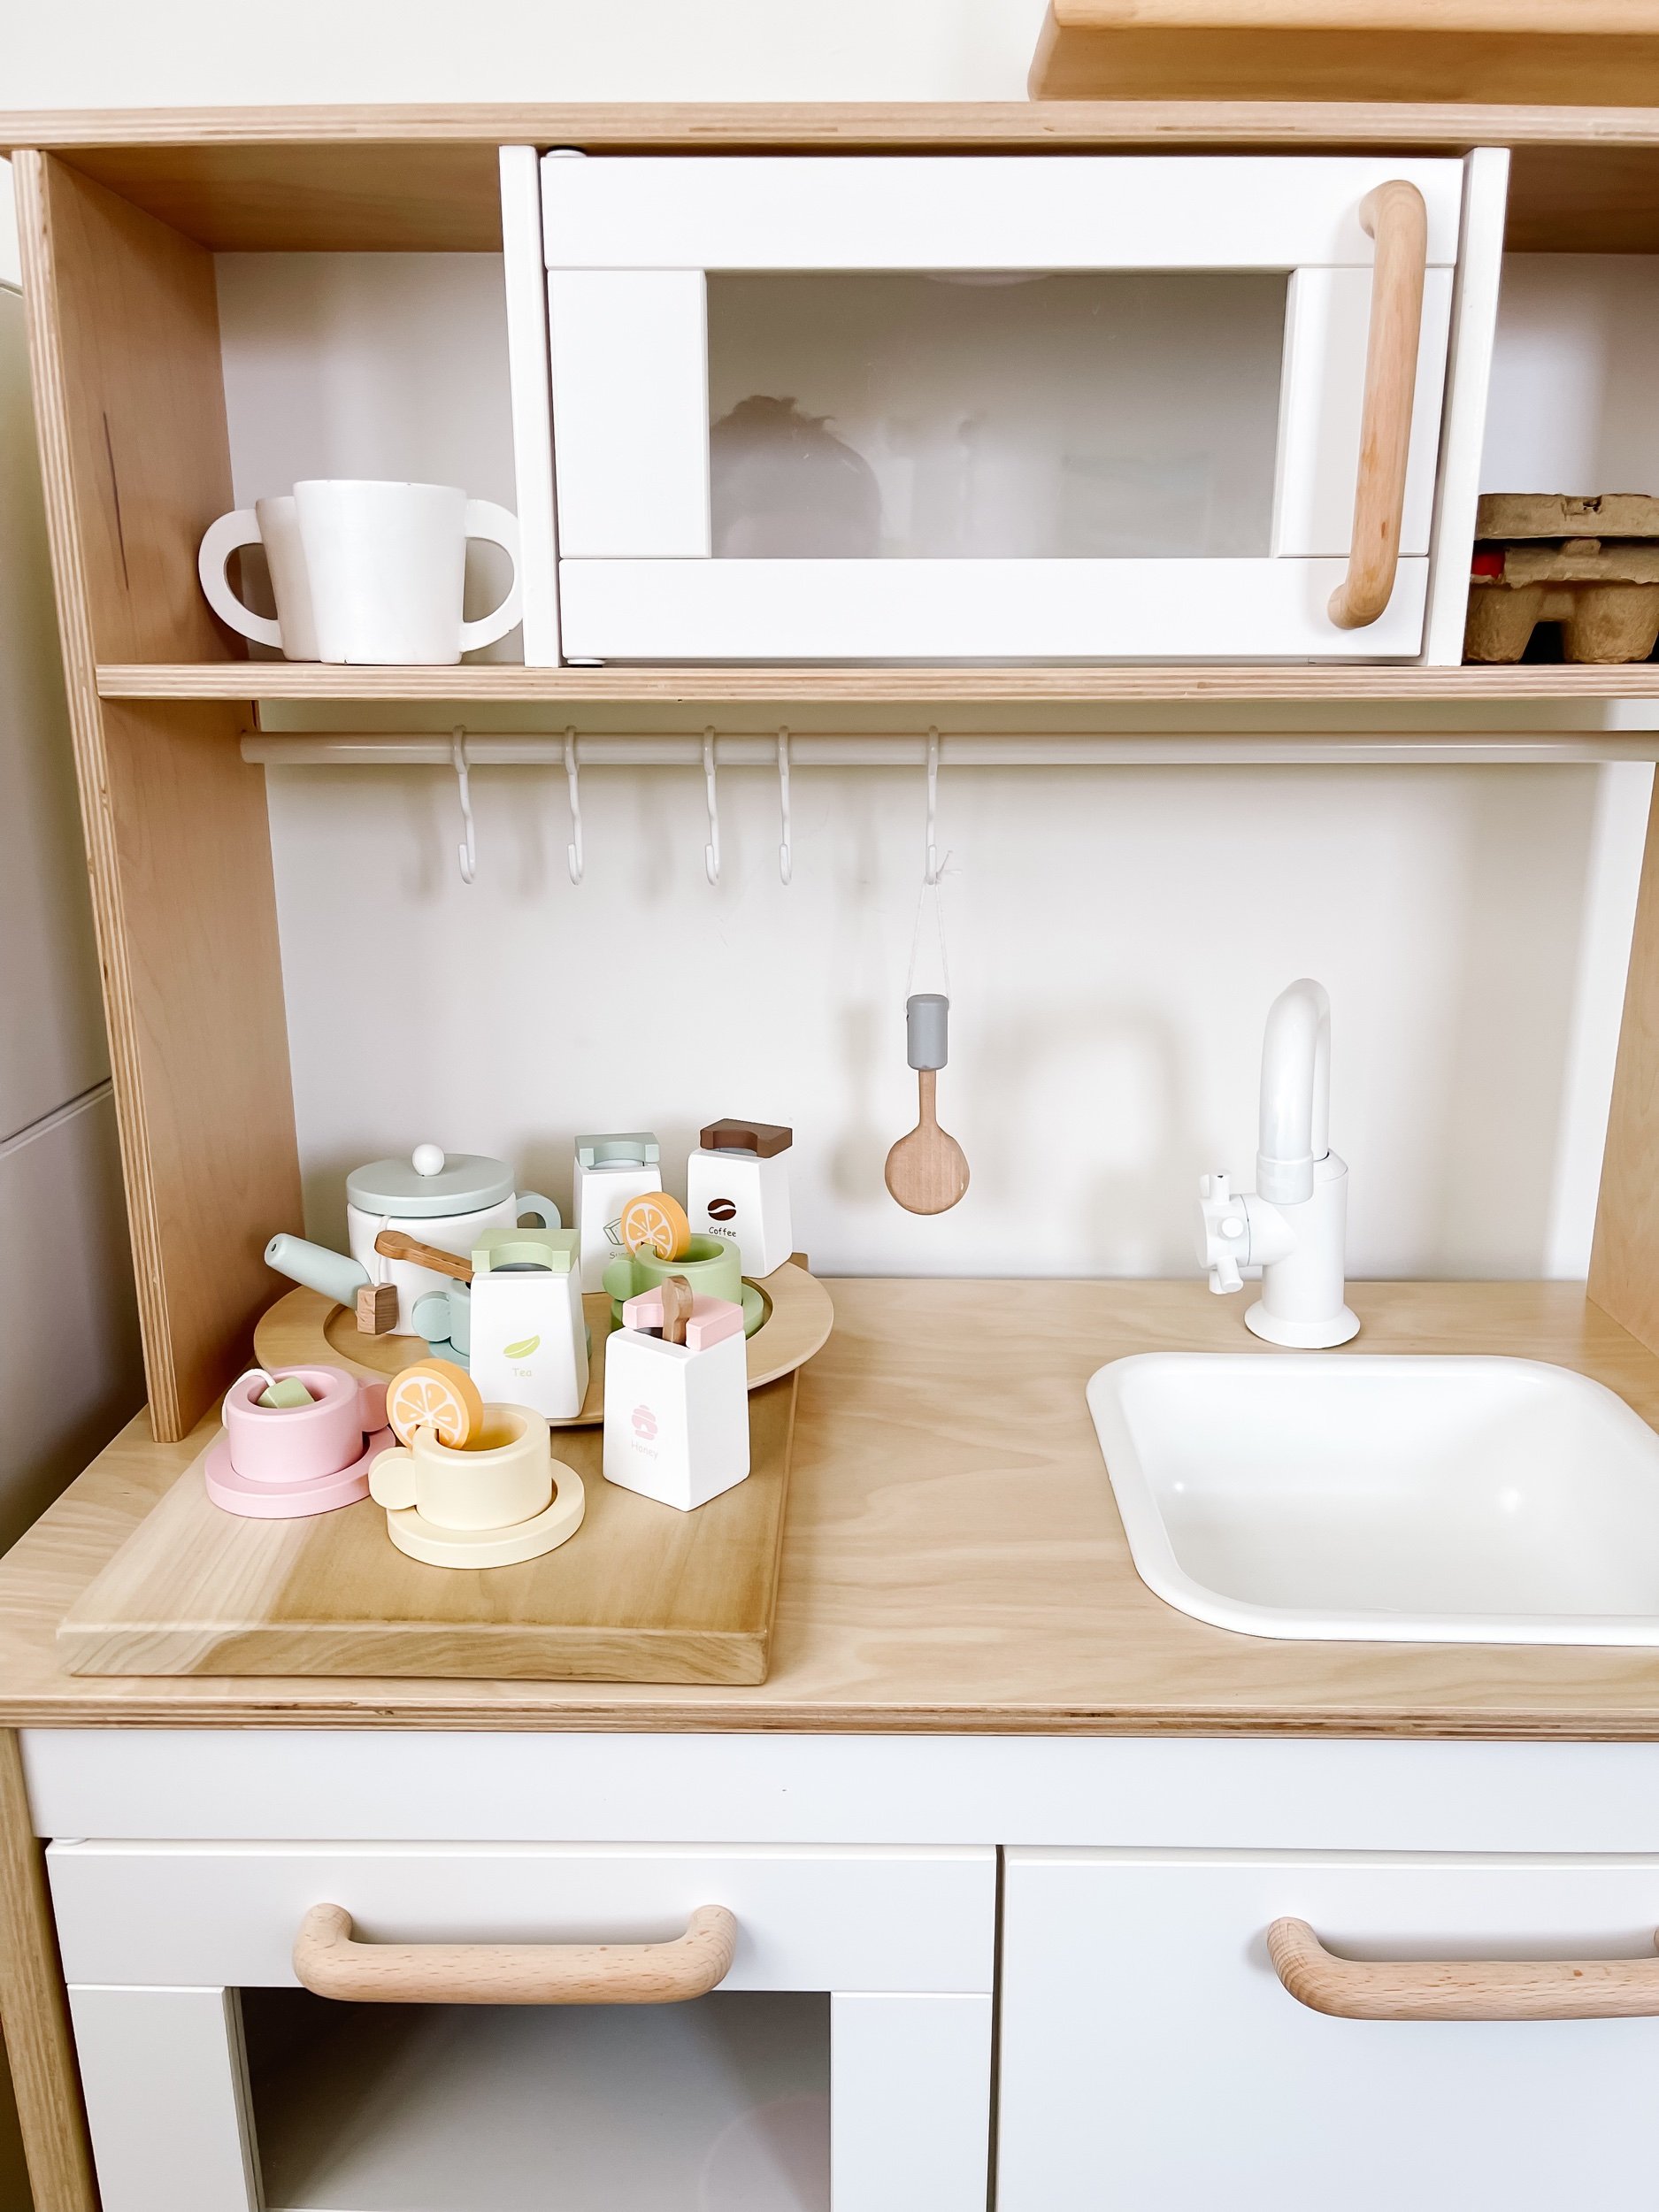
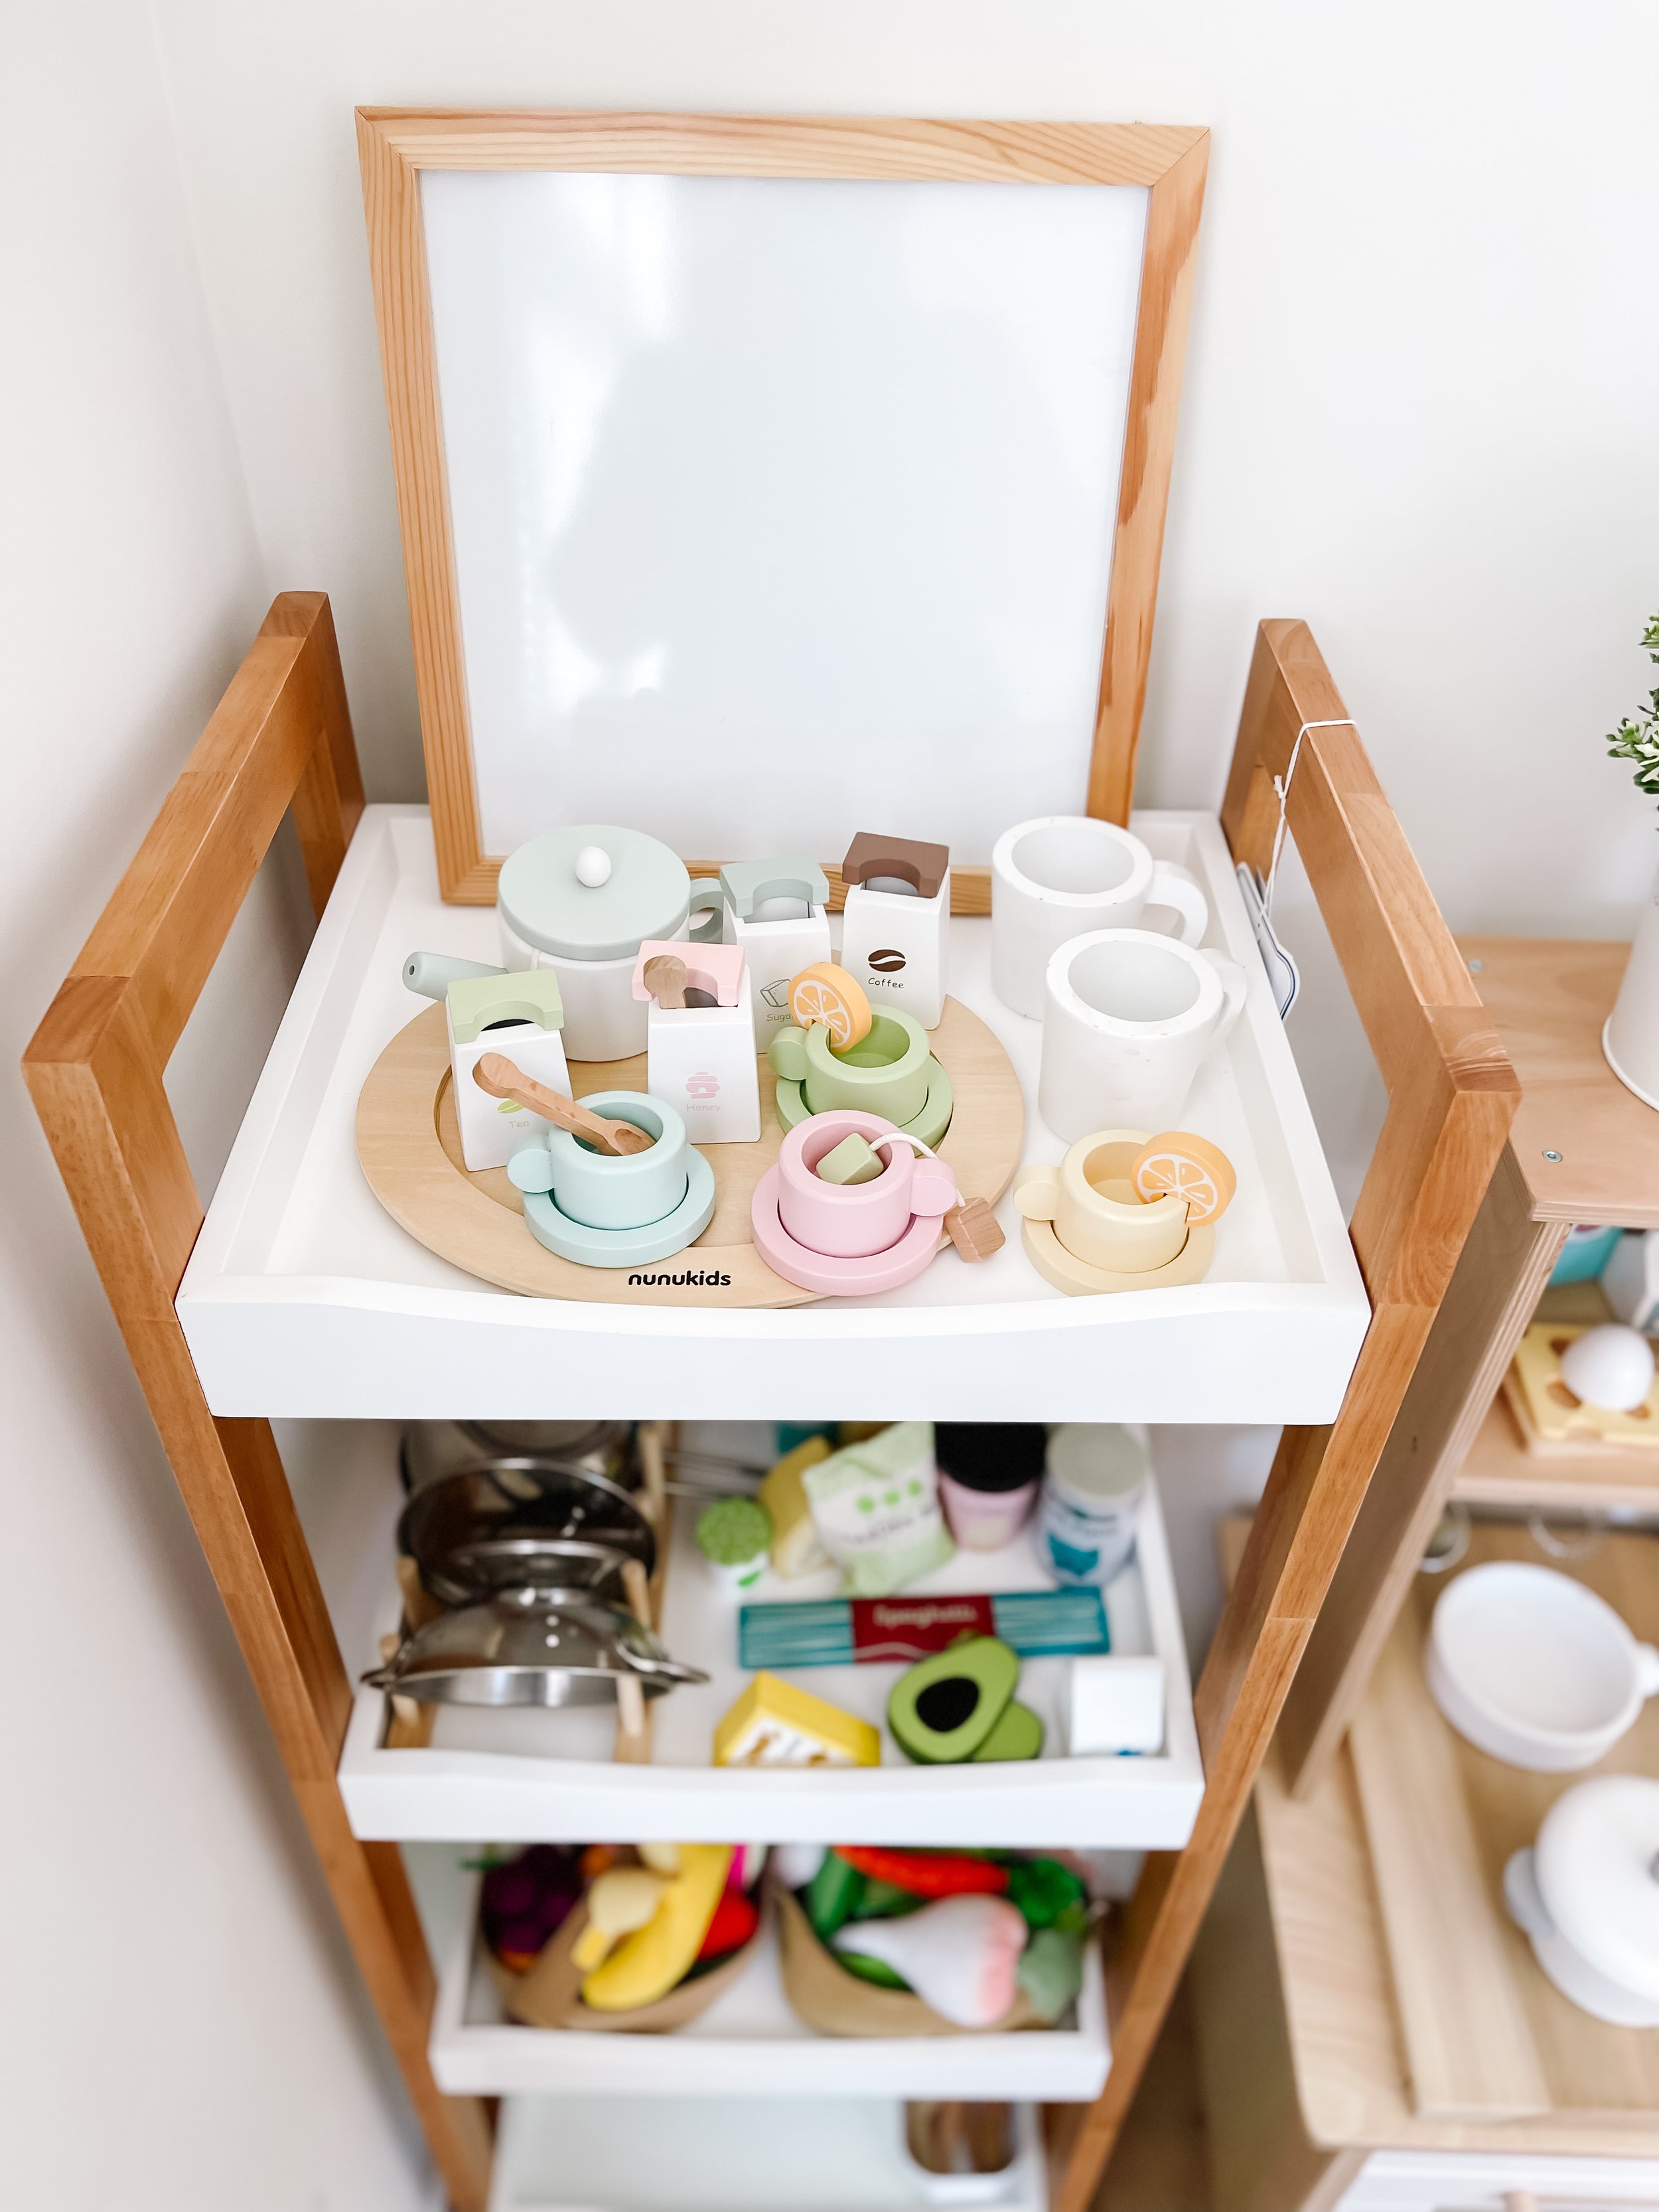
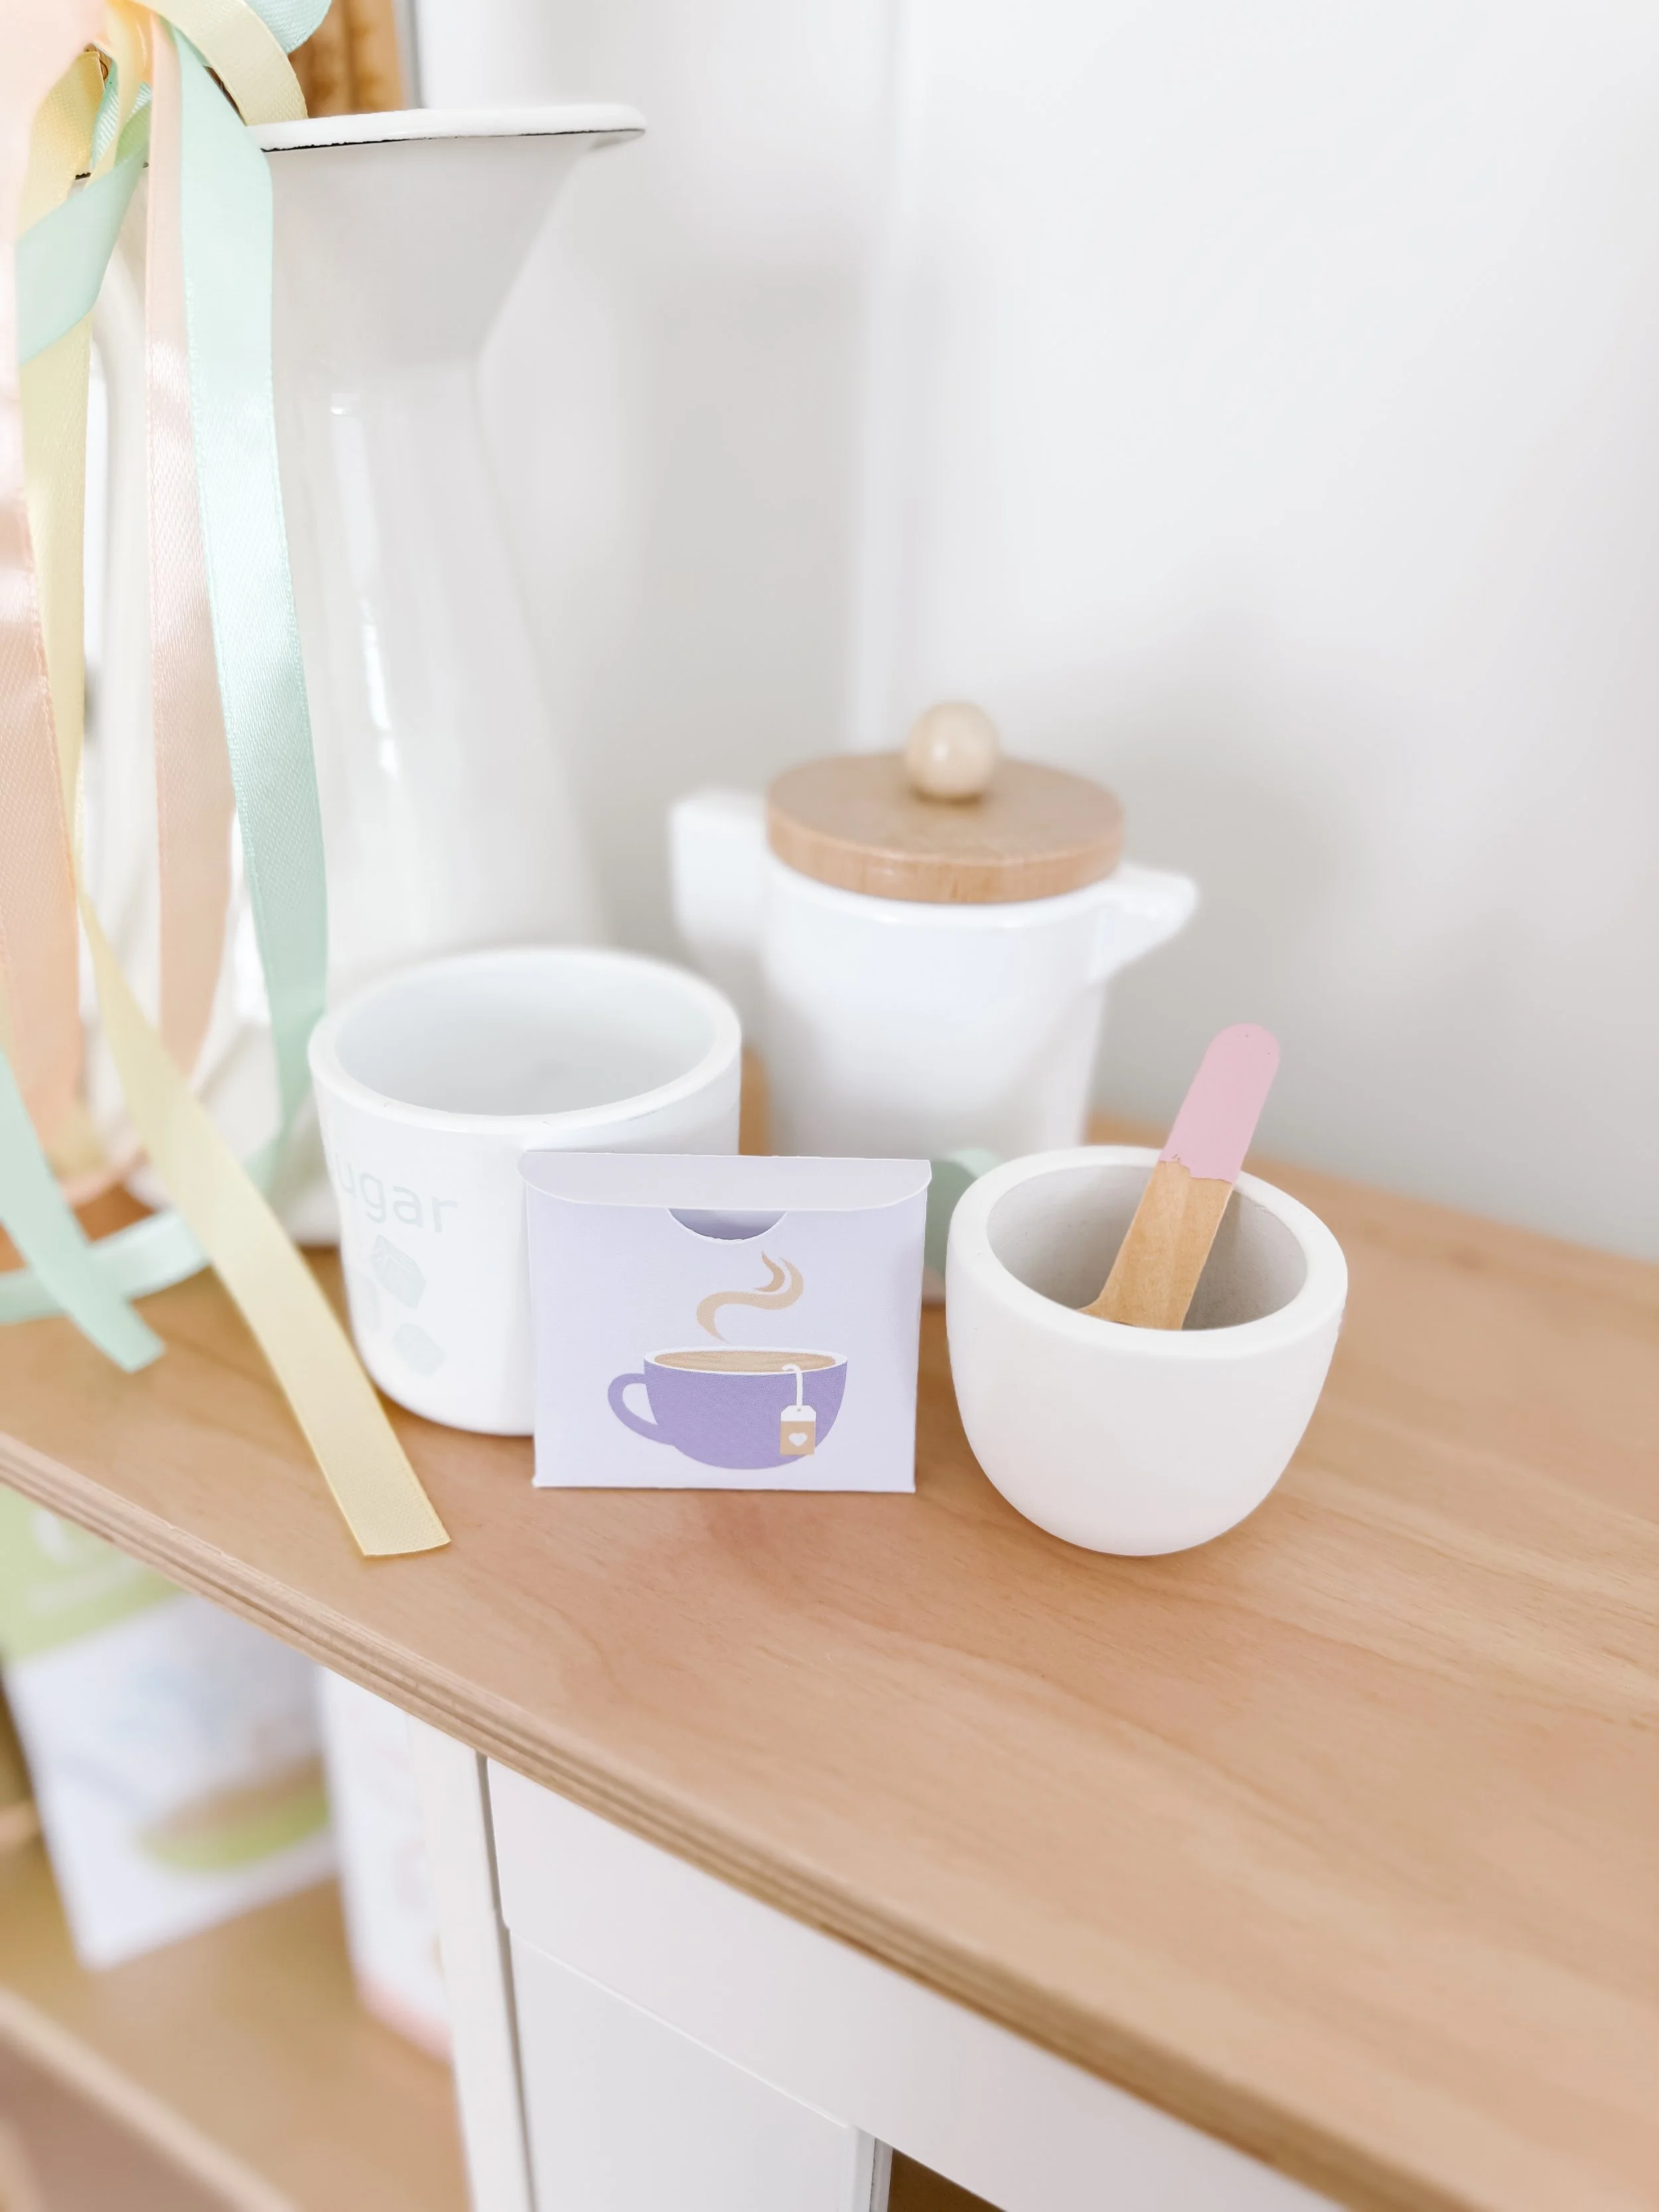
Time for a tea party
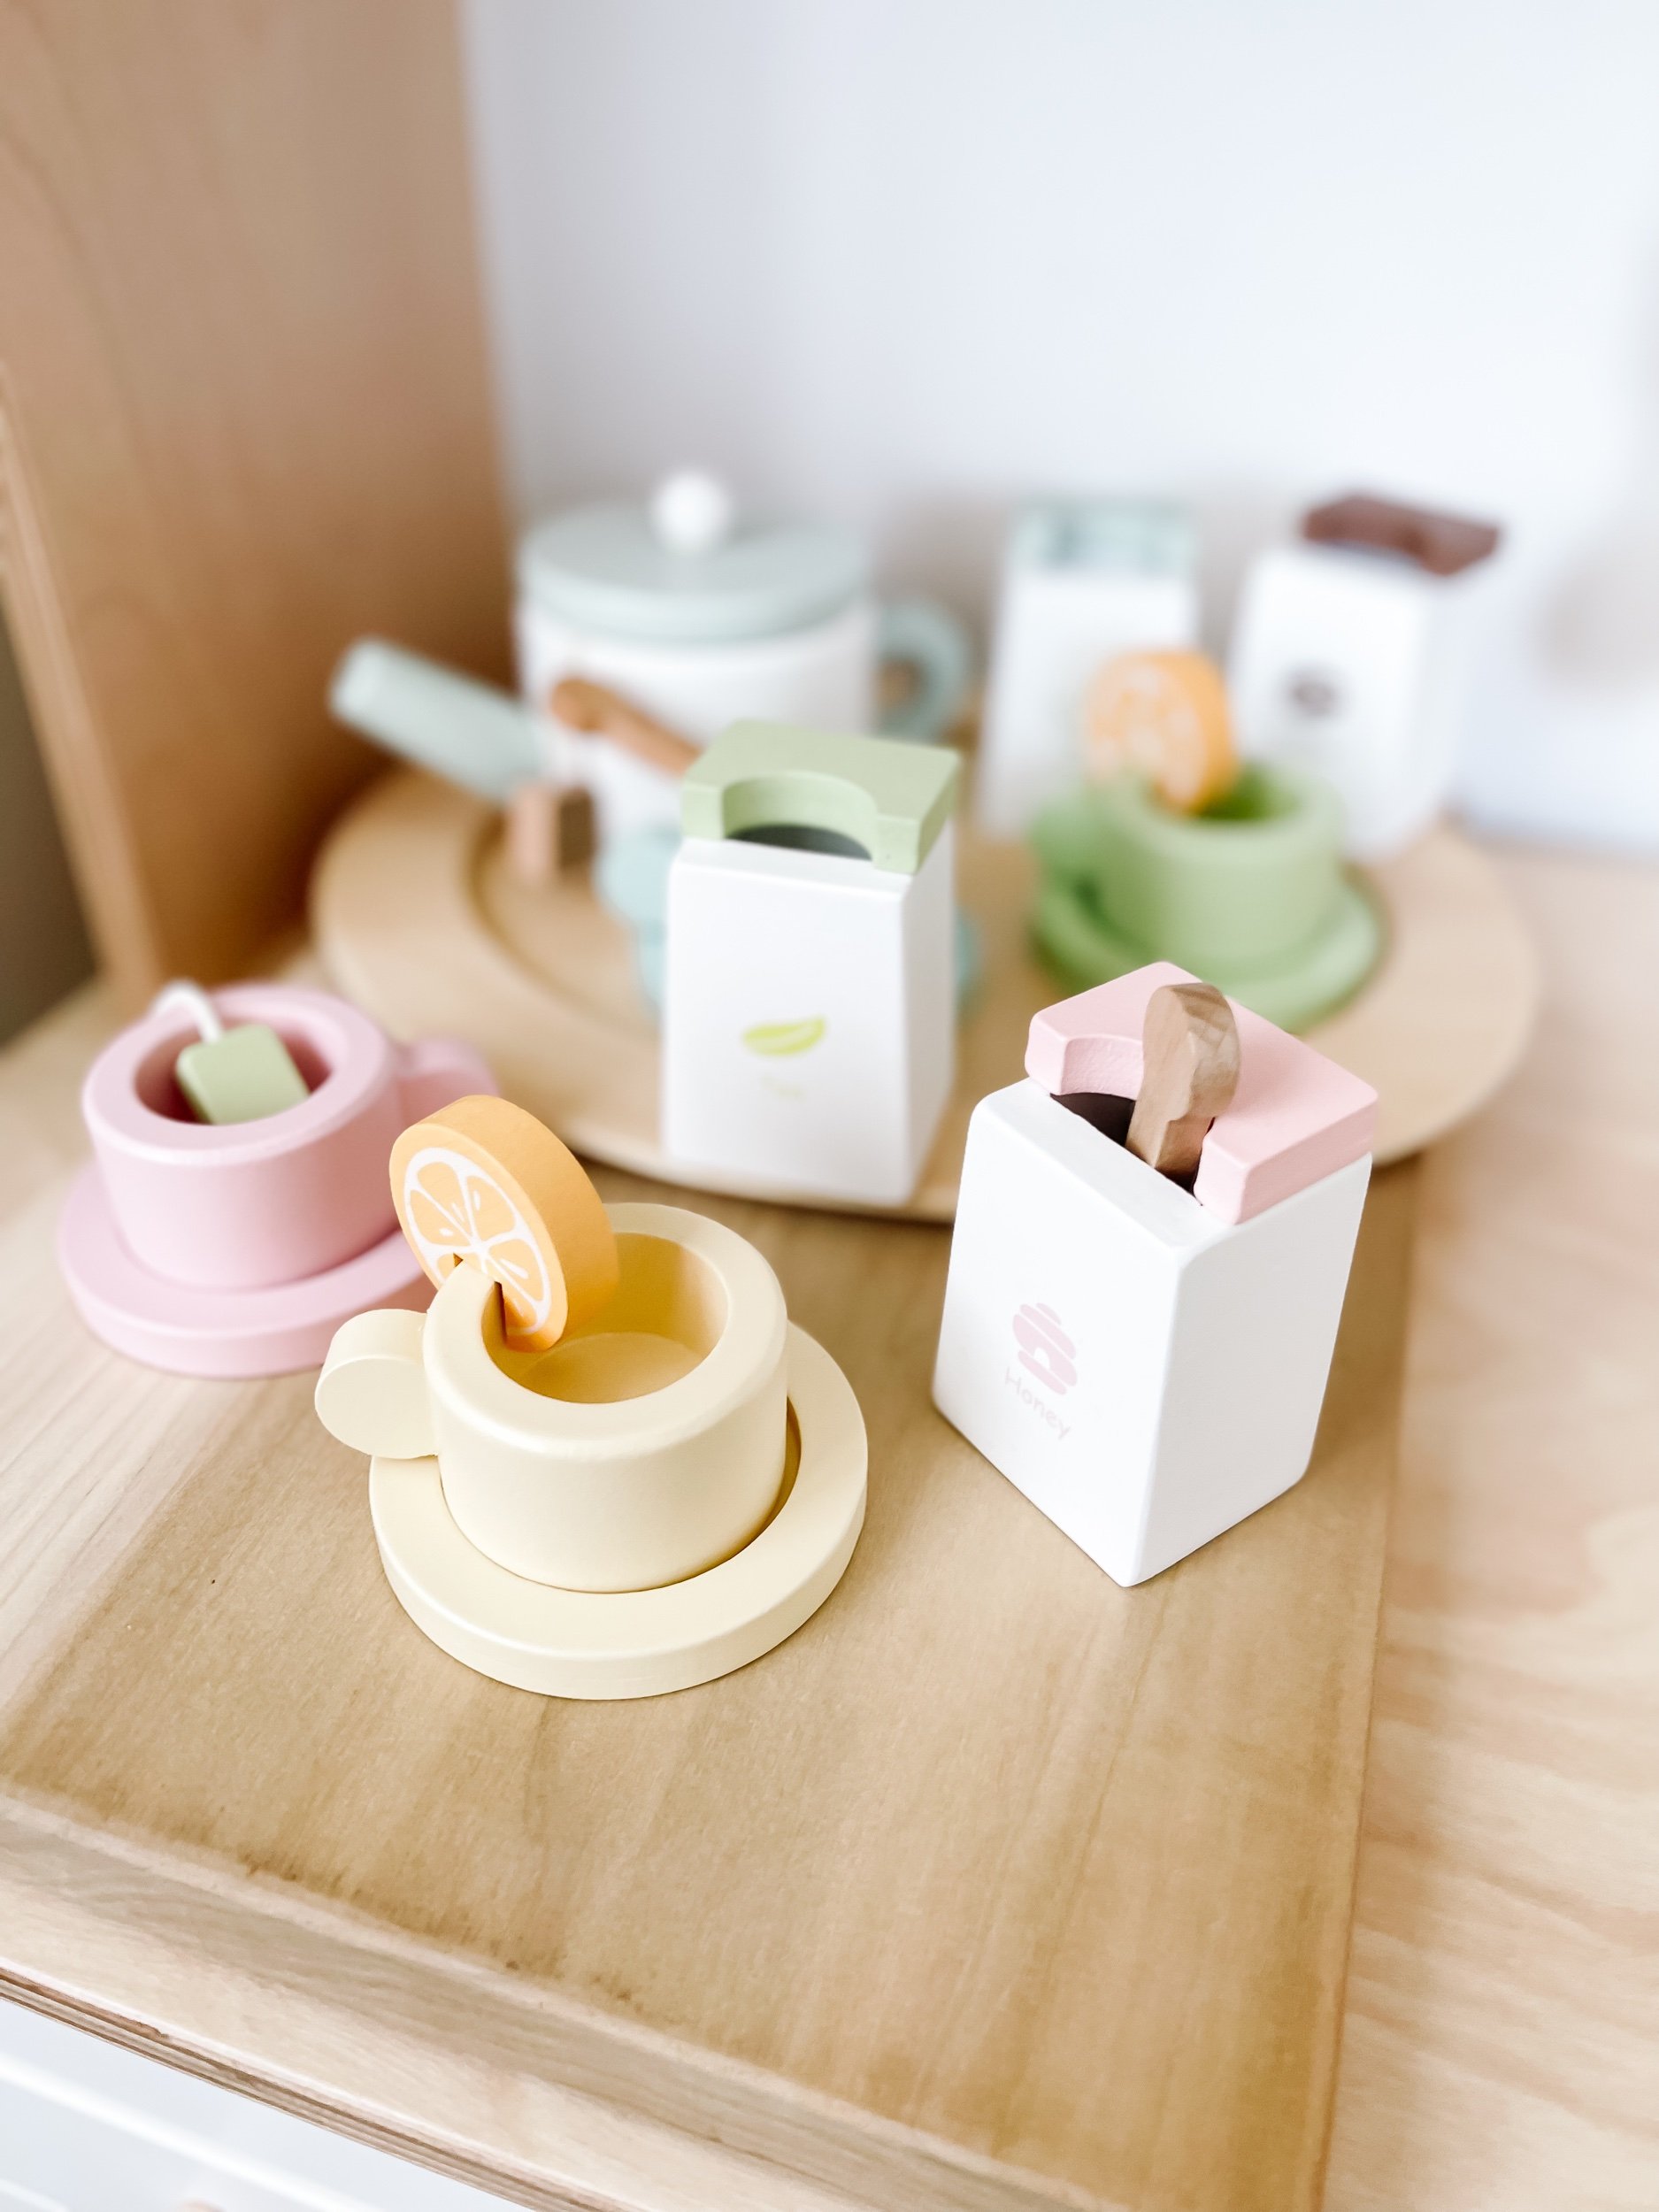
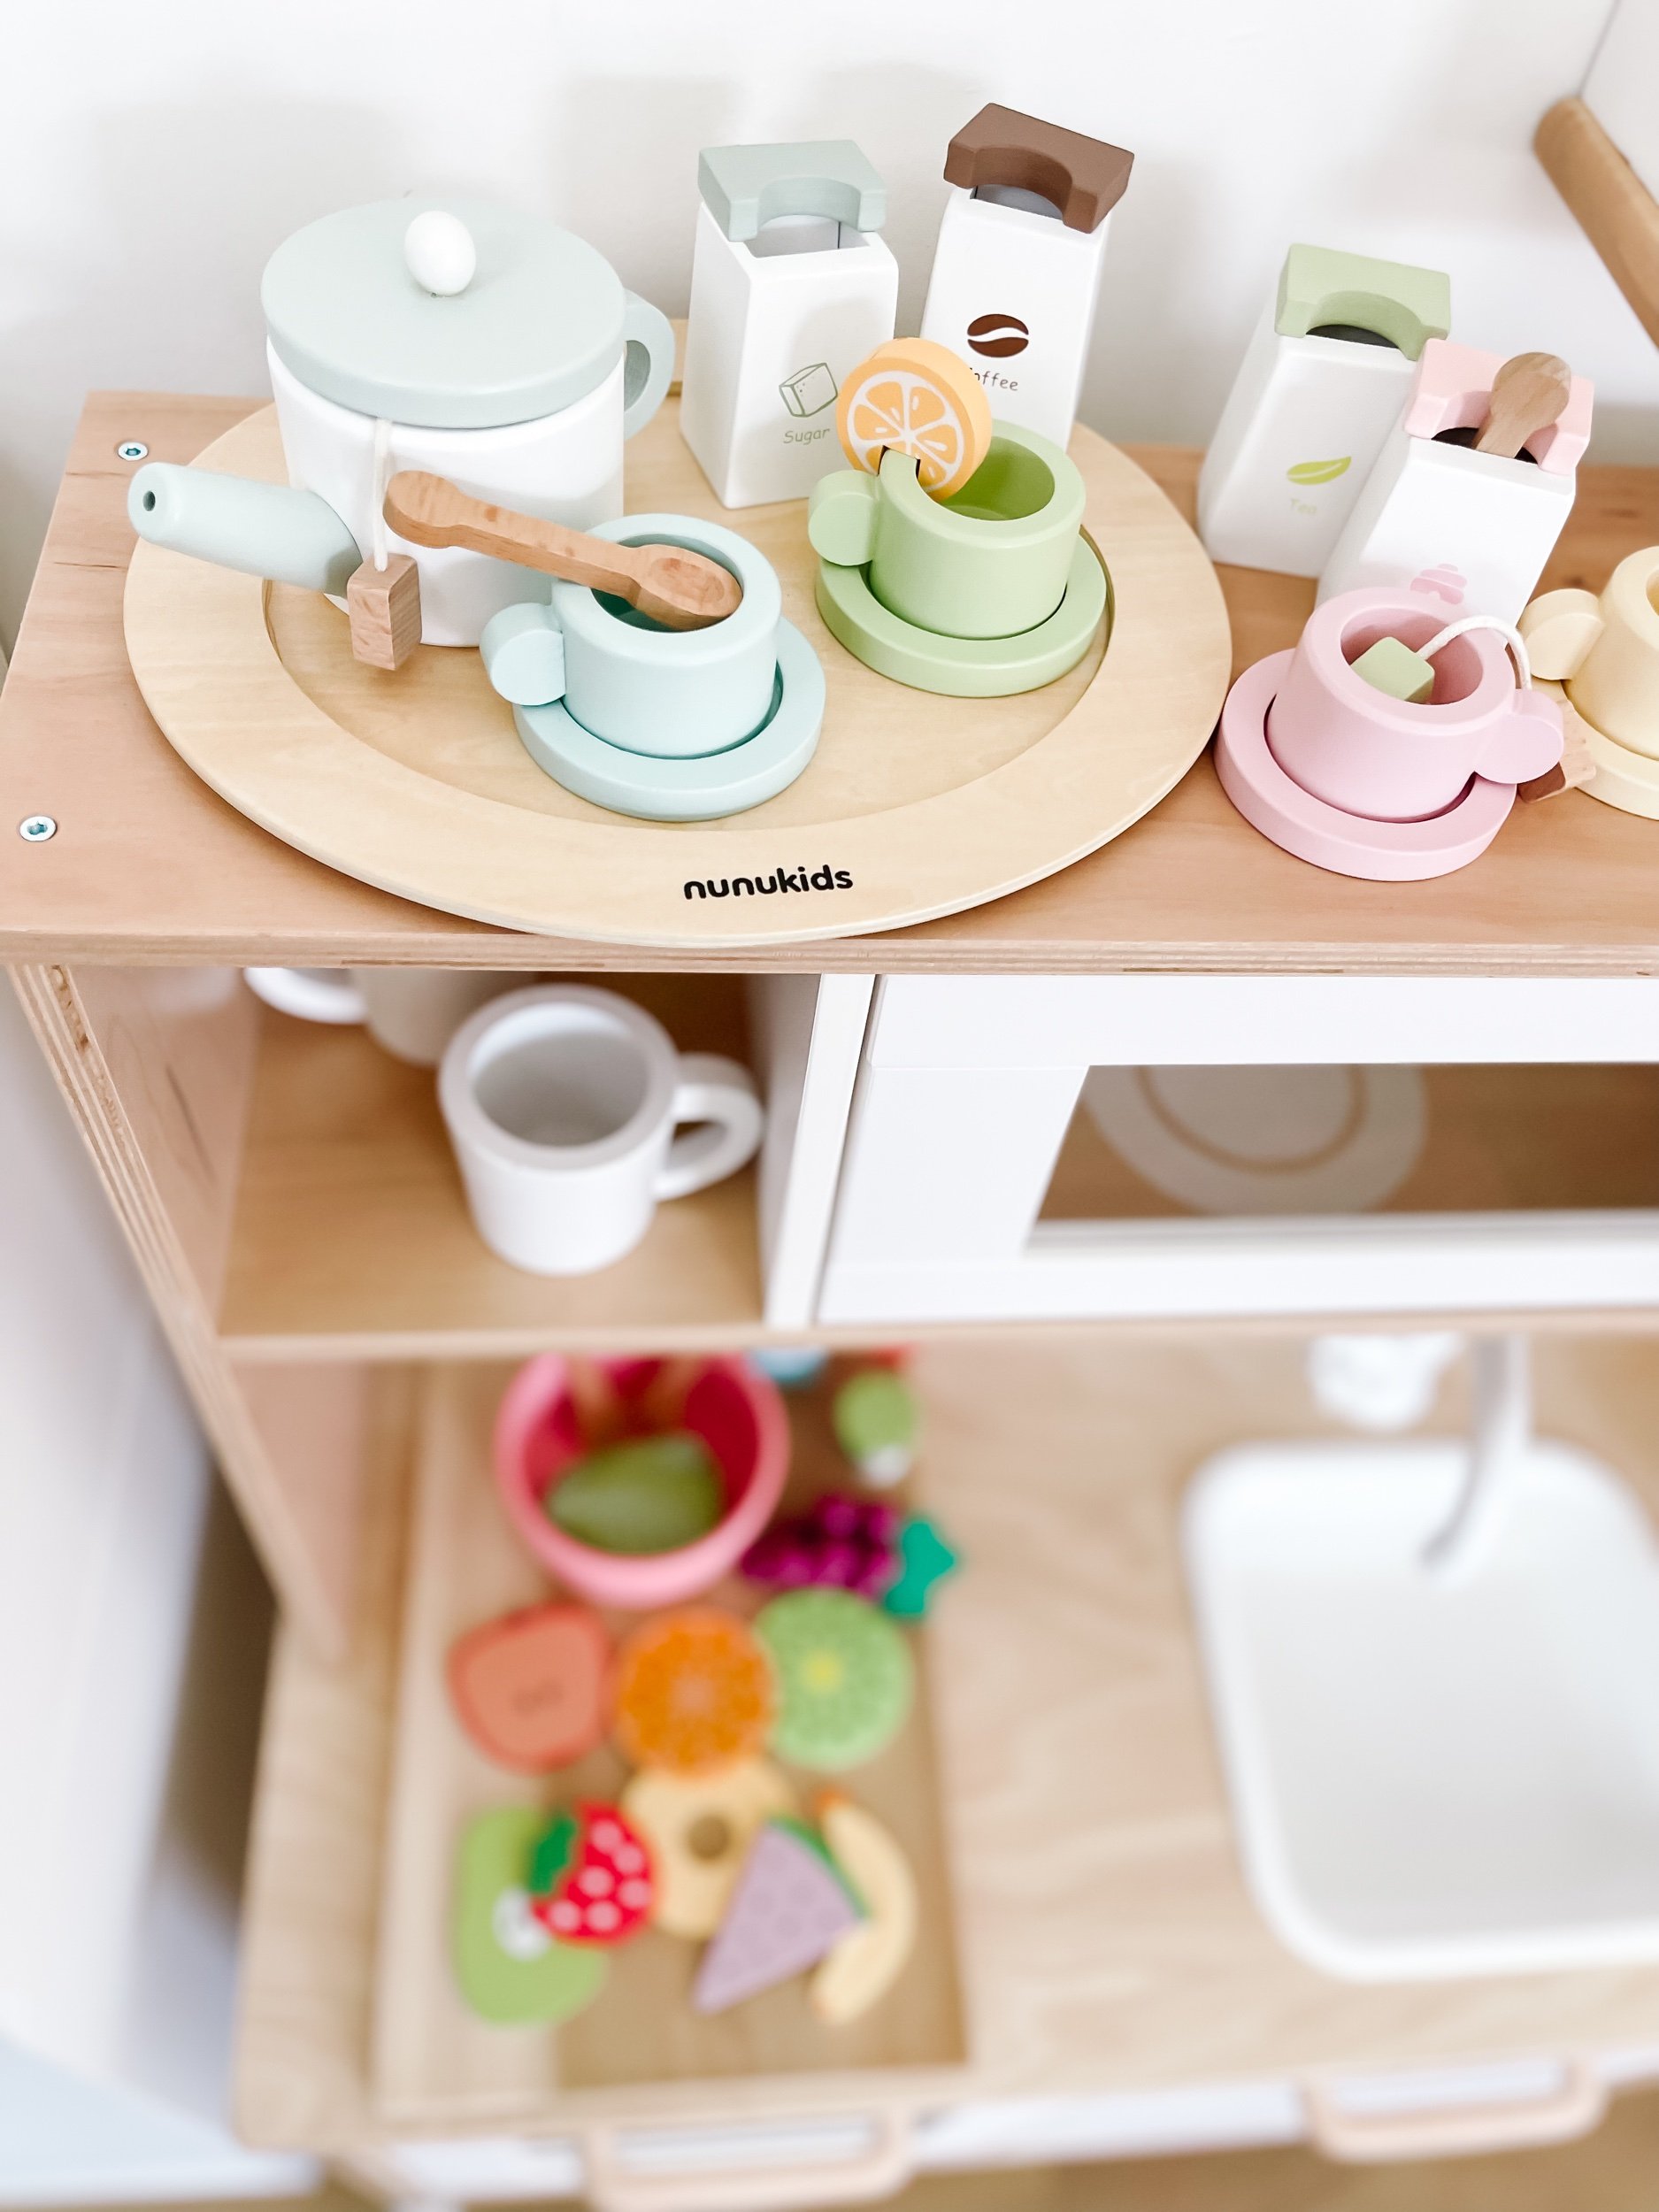
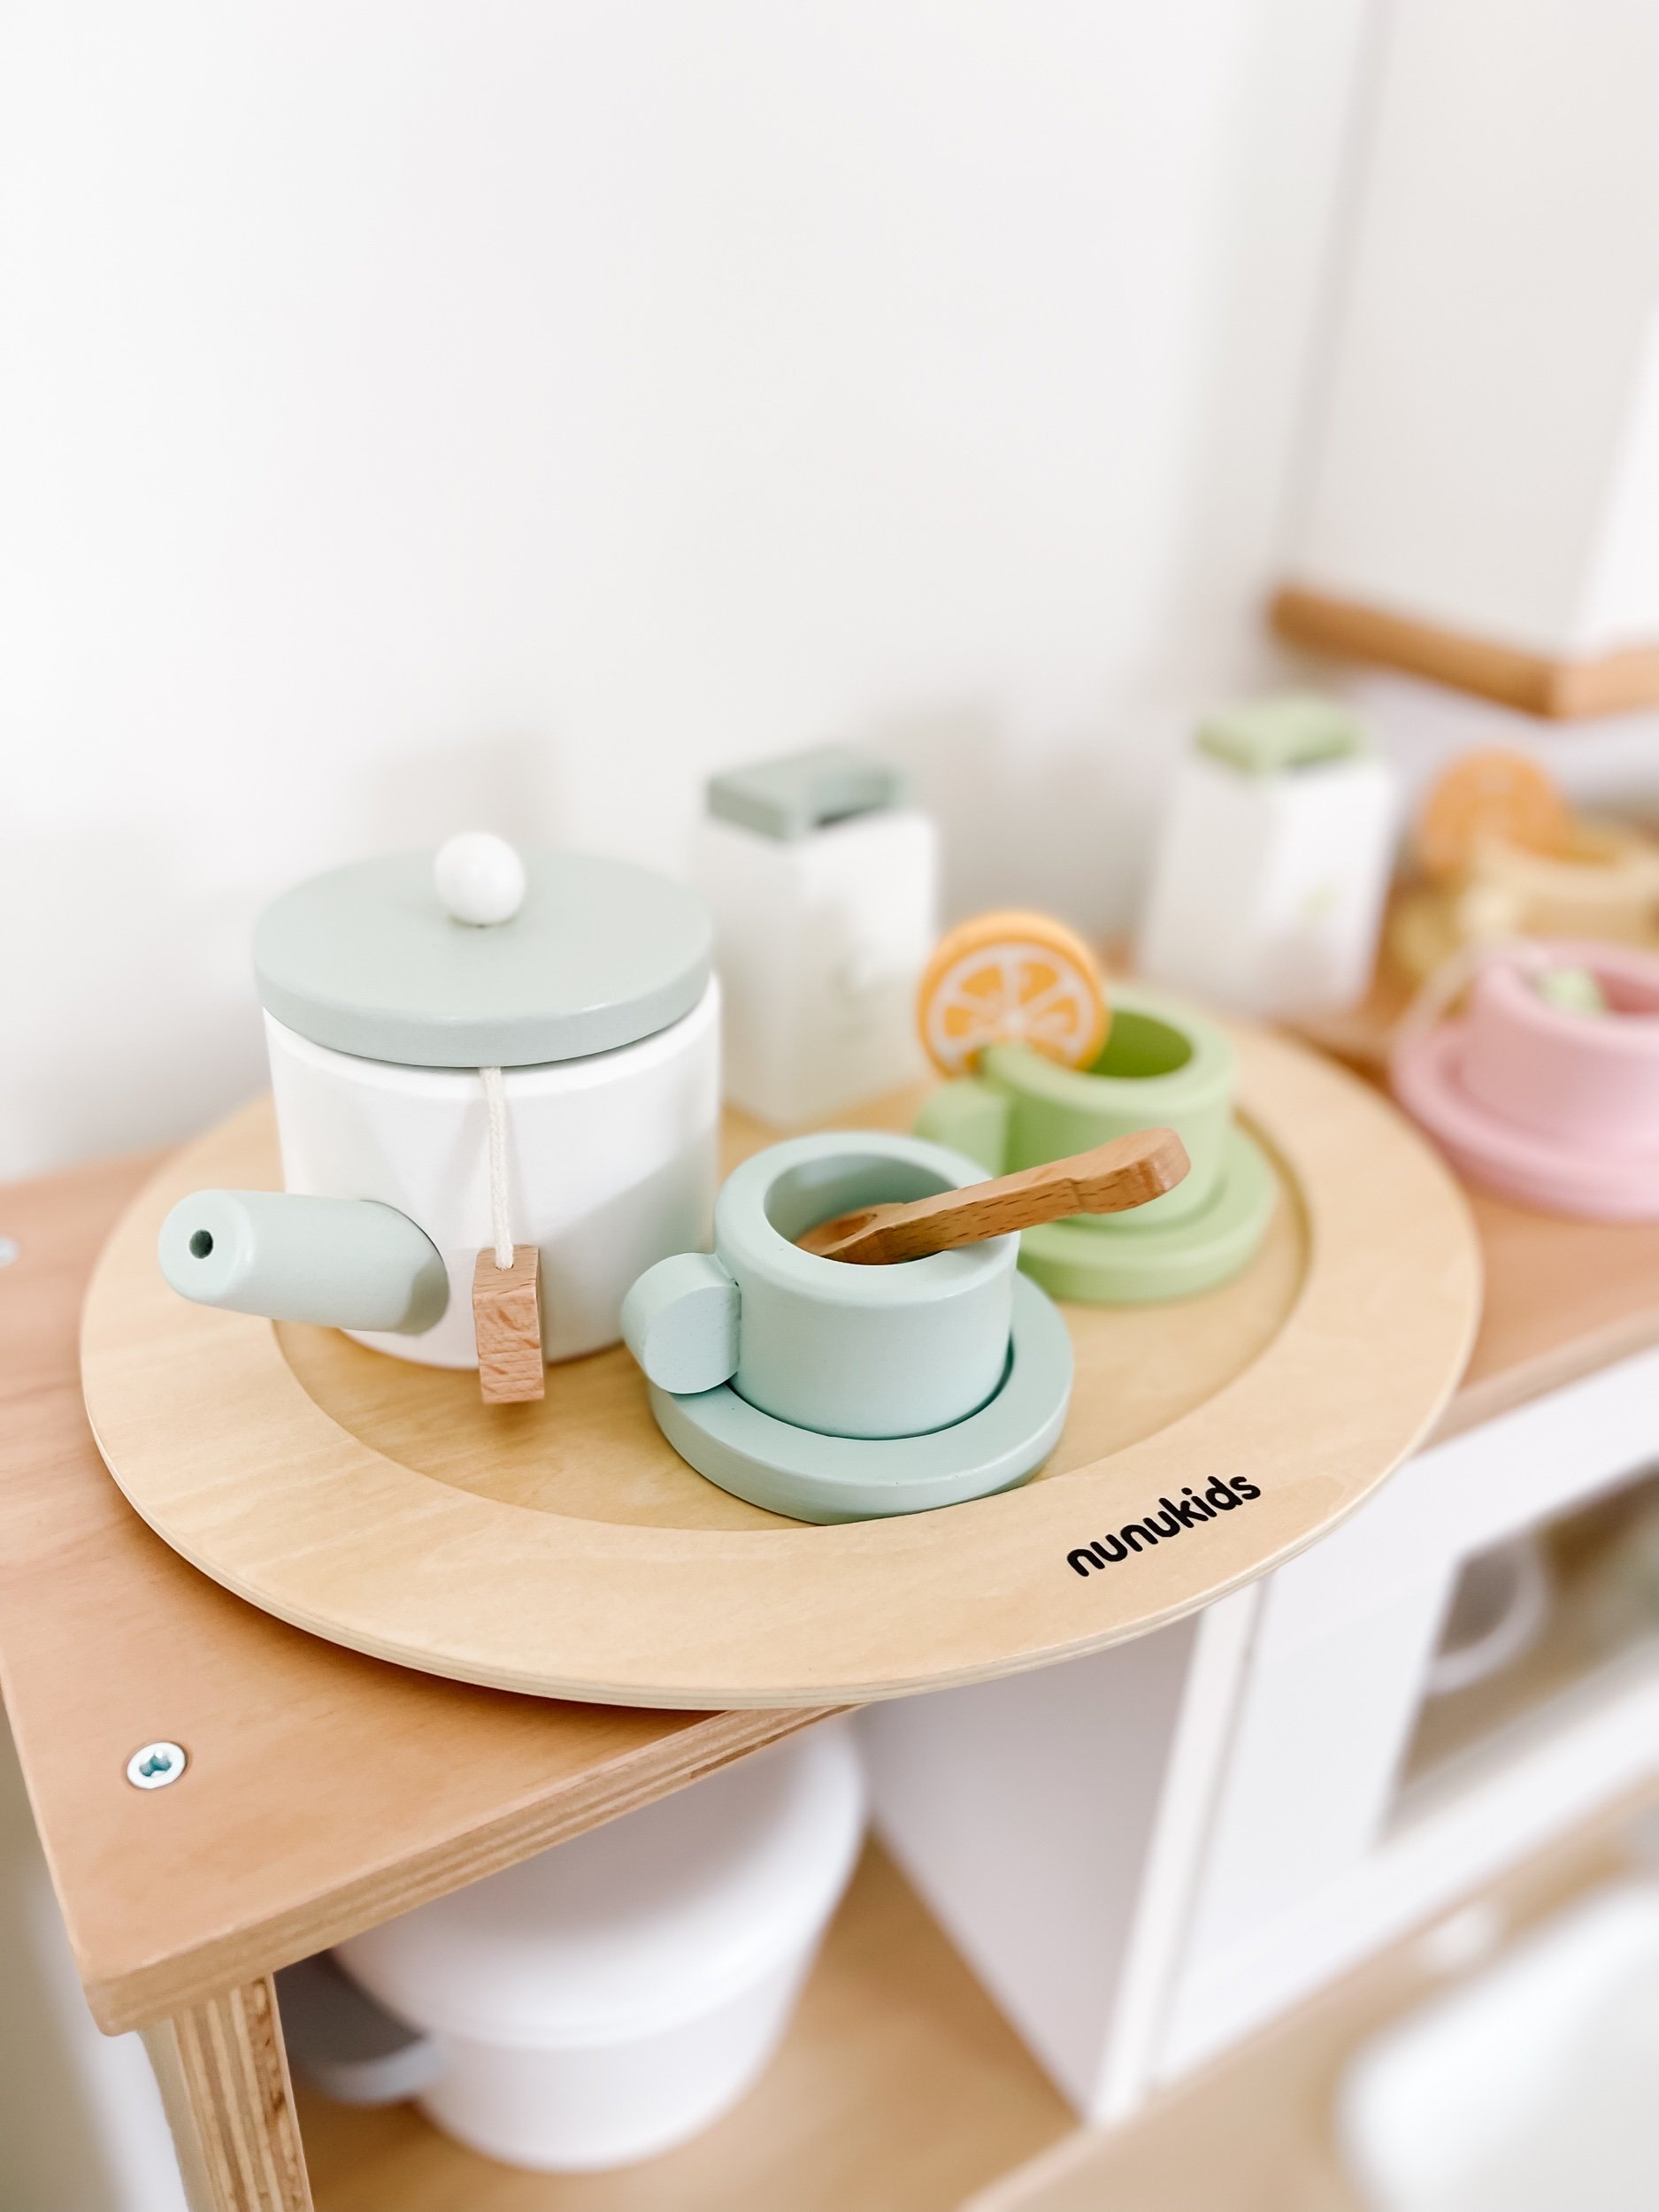
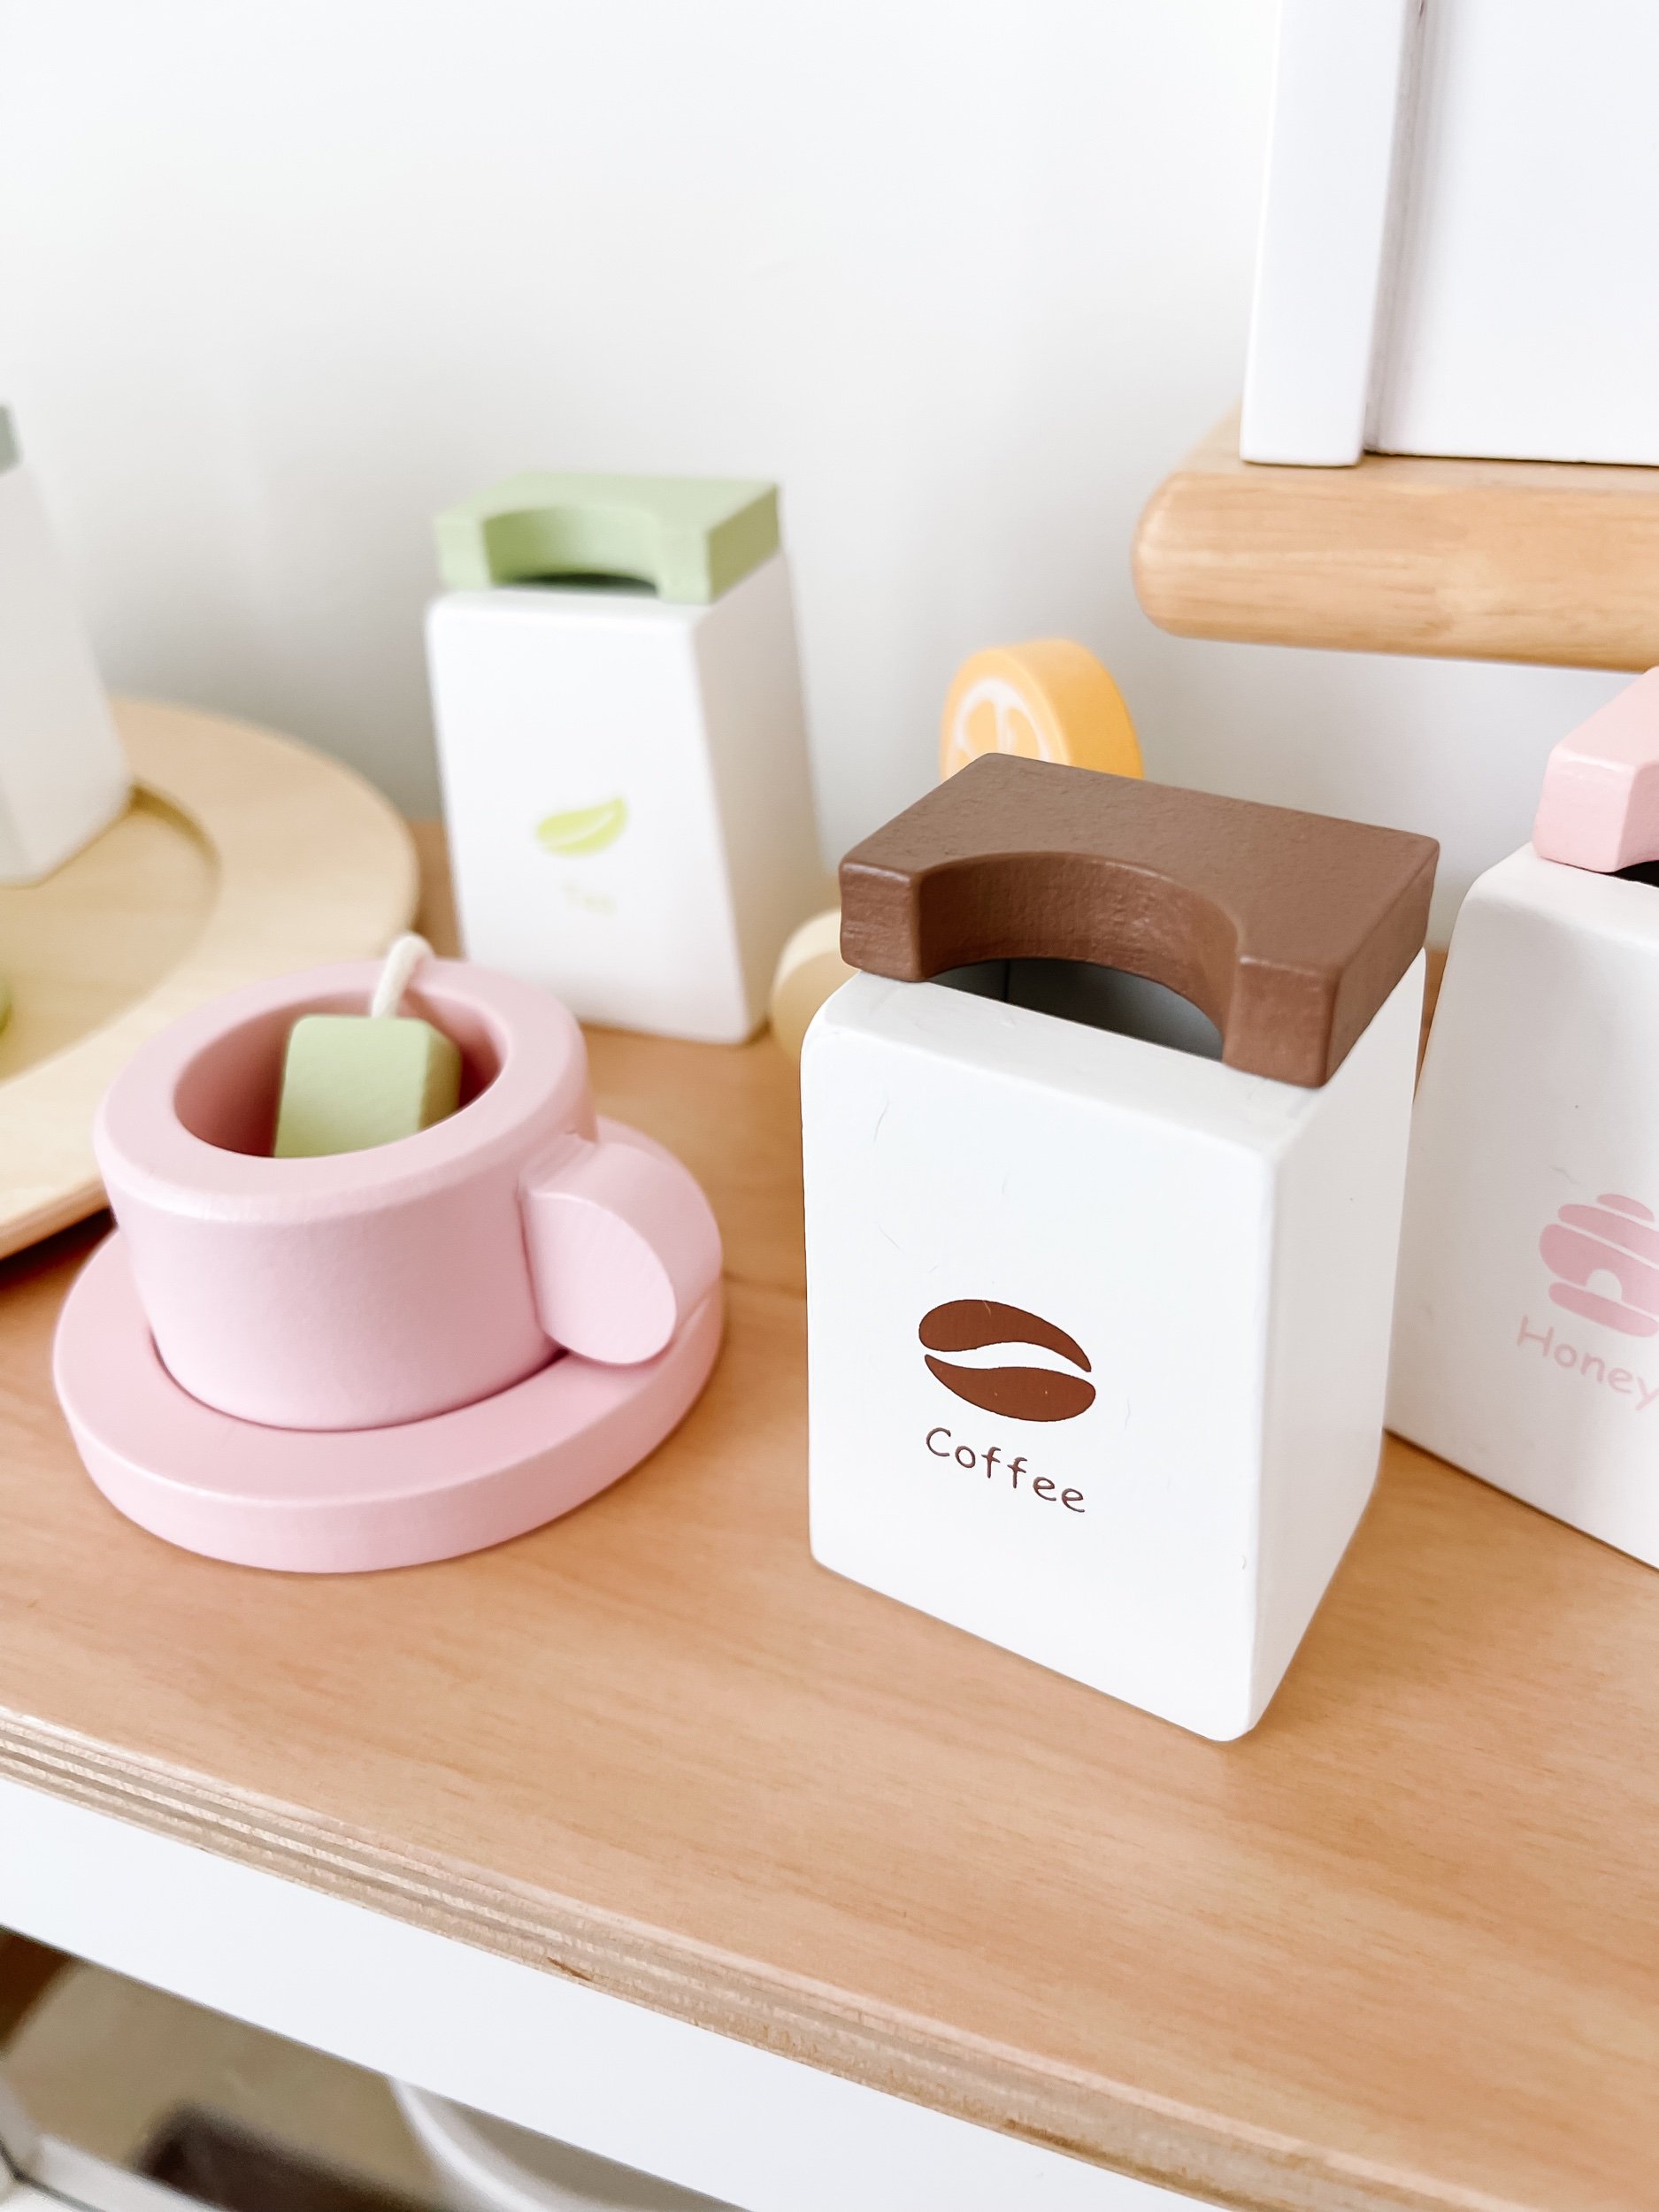
We absolutely loved this cute little tea party set by NunuKids. It comes on this adorable little tray — and while everything doesn’t quite fit on the tray (my only gripe), it’s such a cute little set with the little lemon slices and teaspoons and tea pots. I can’t wait to do an entire dramatic play setup for a tea party. It’ll be so much to have this set handy.
Let’s make breakfast!
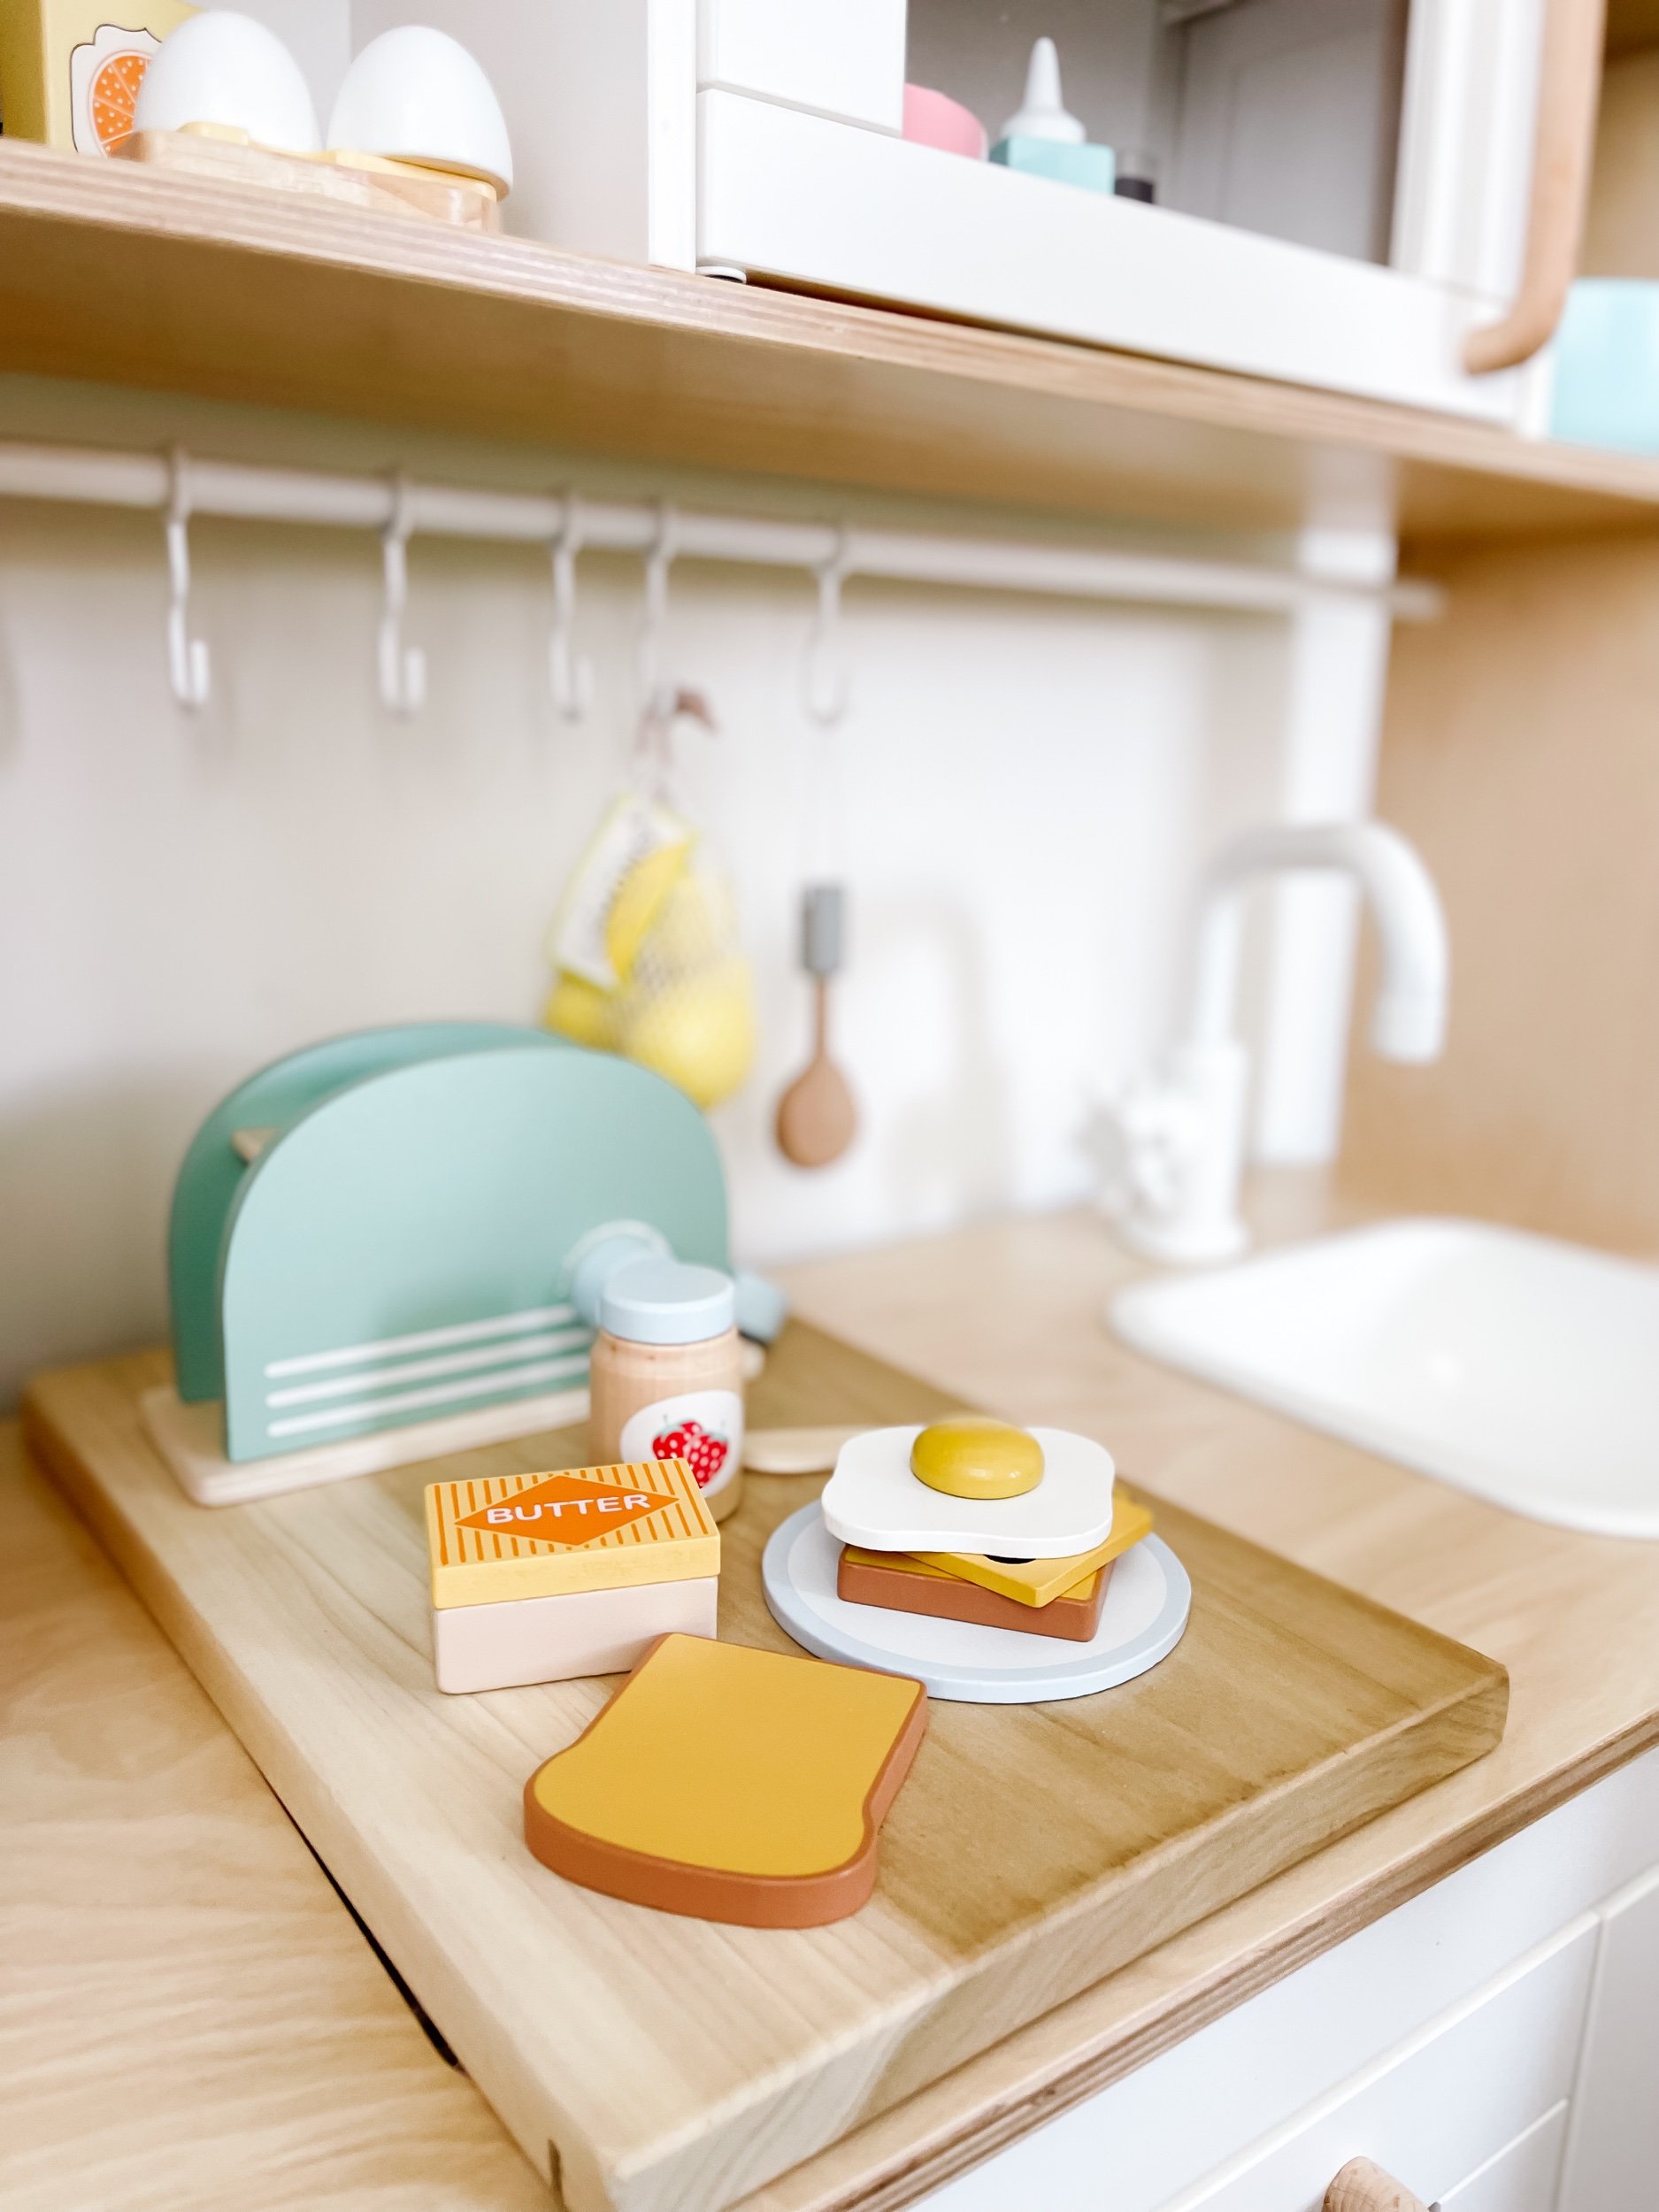
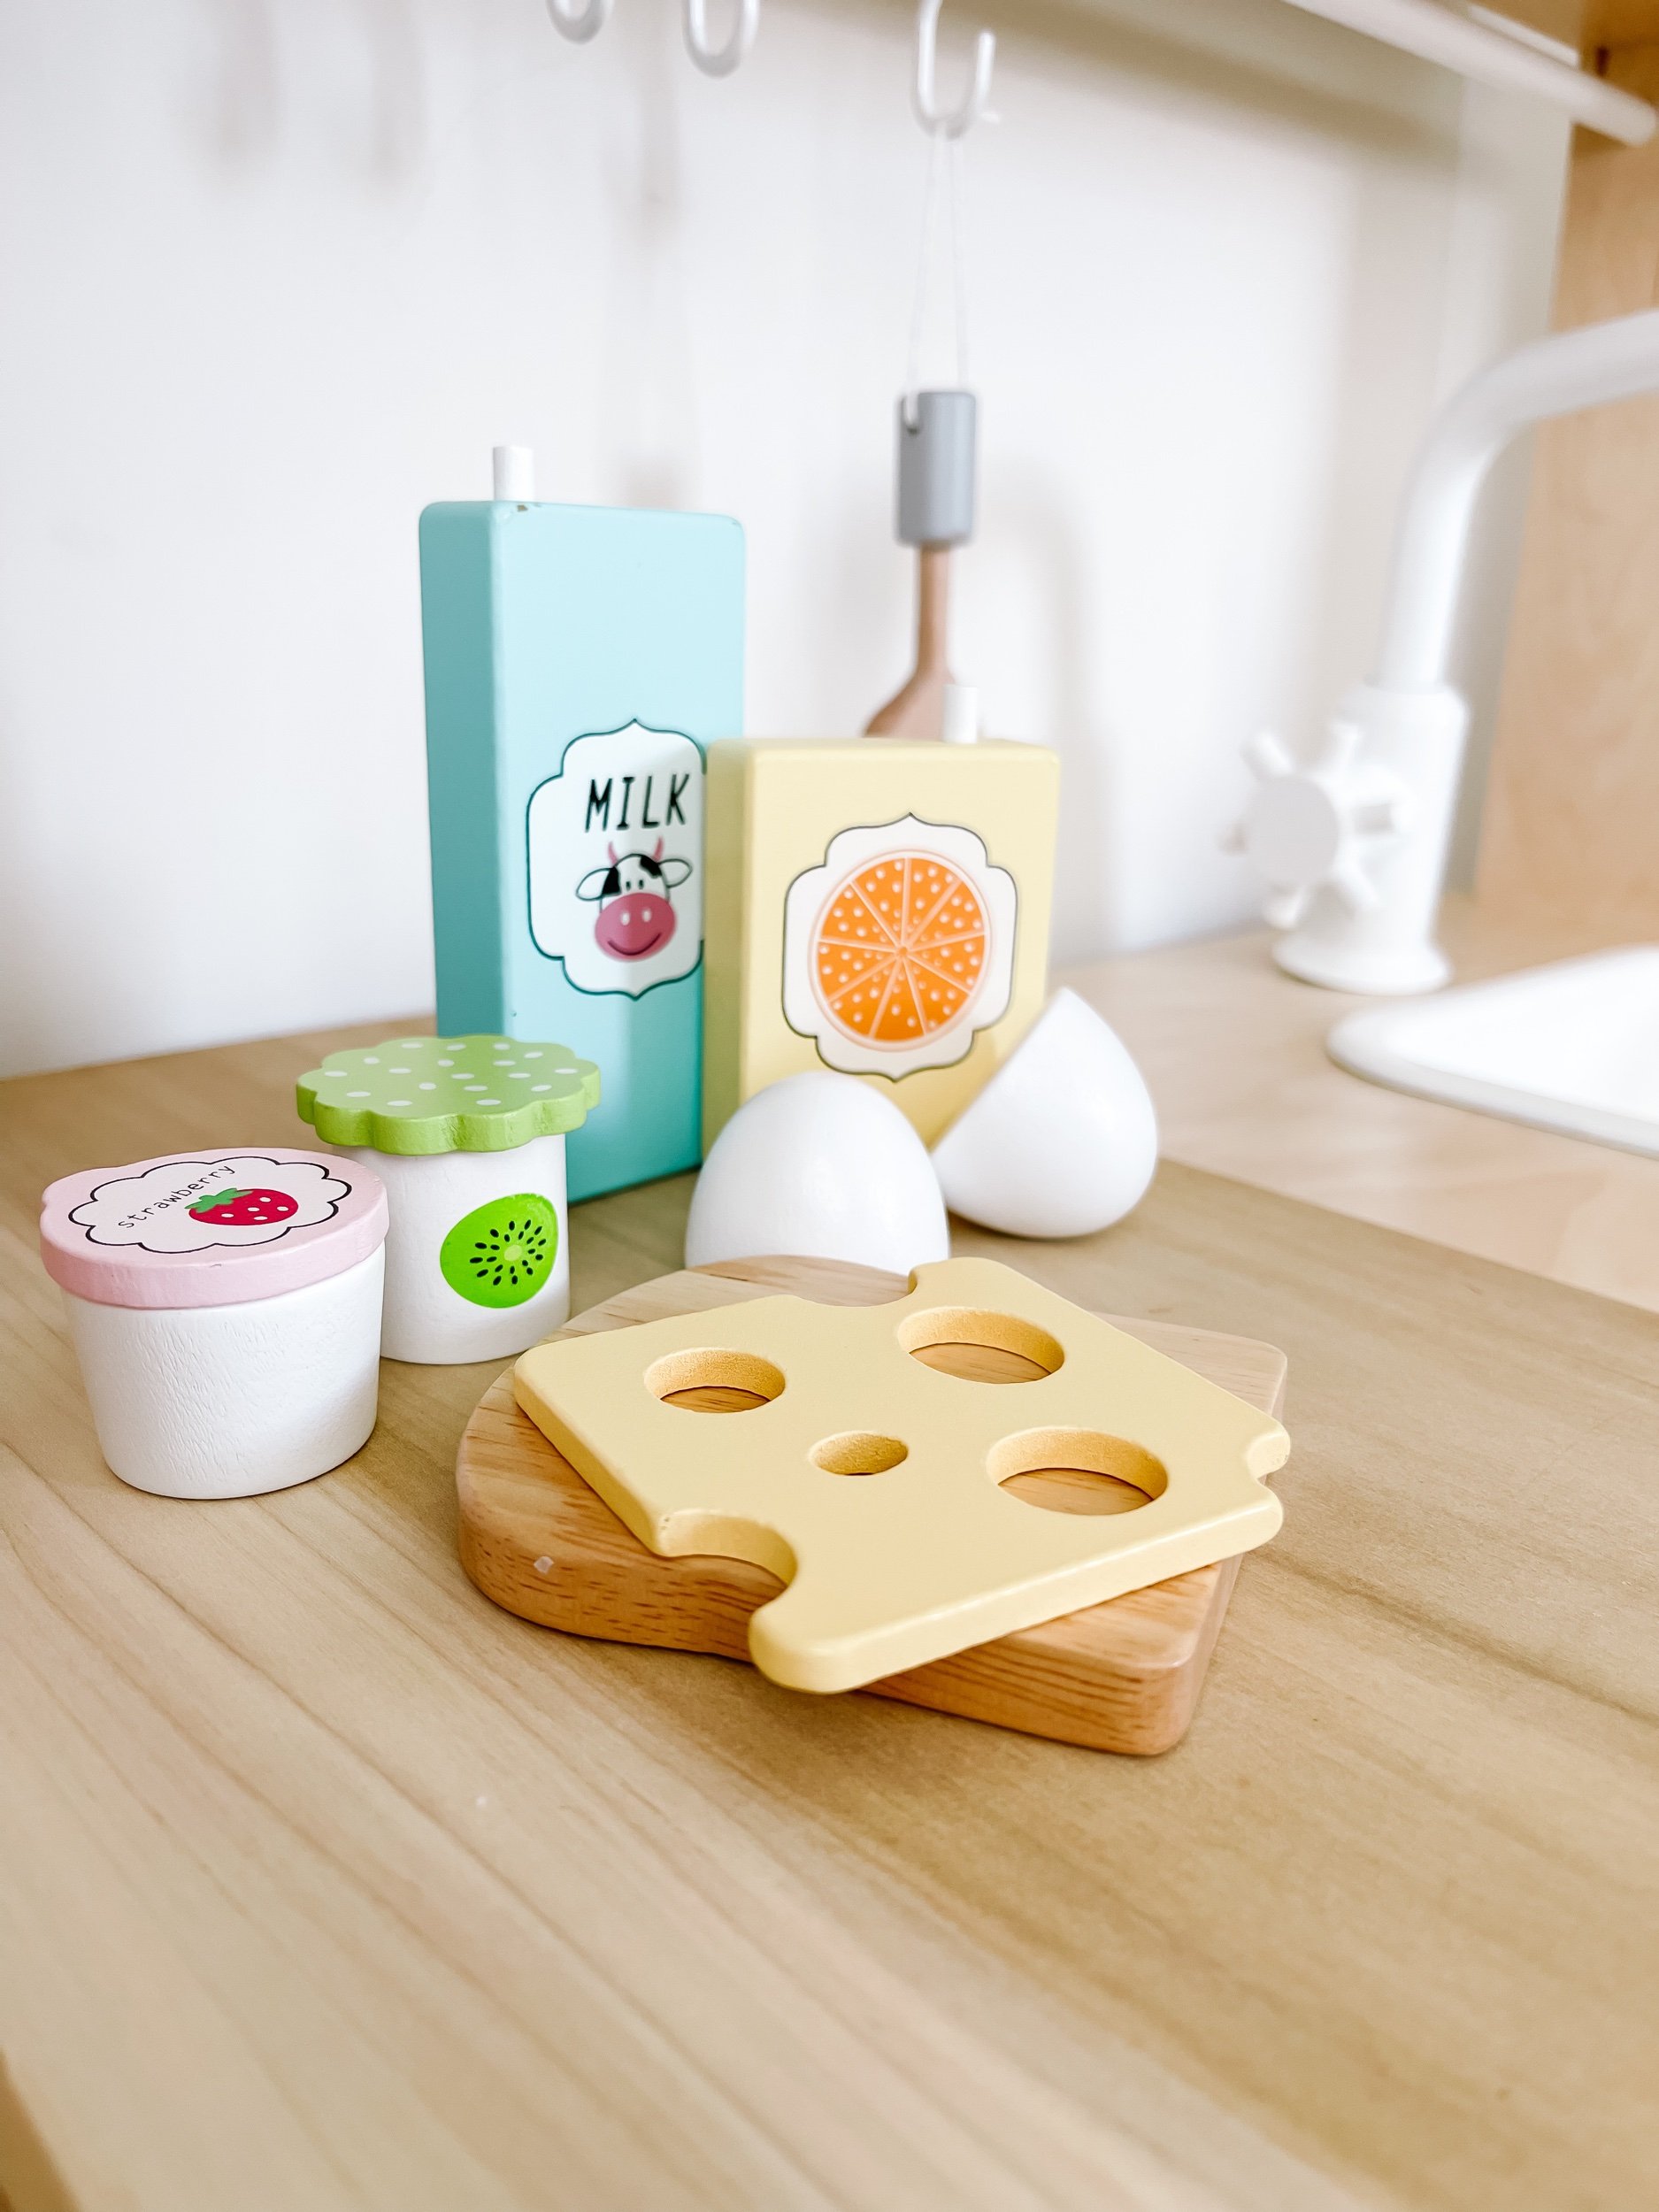
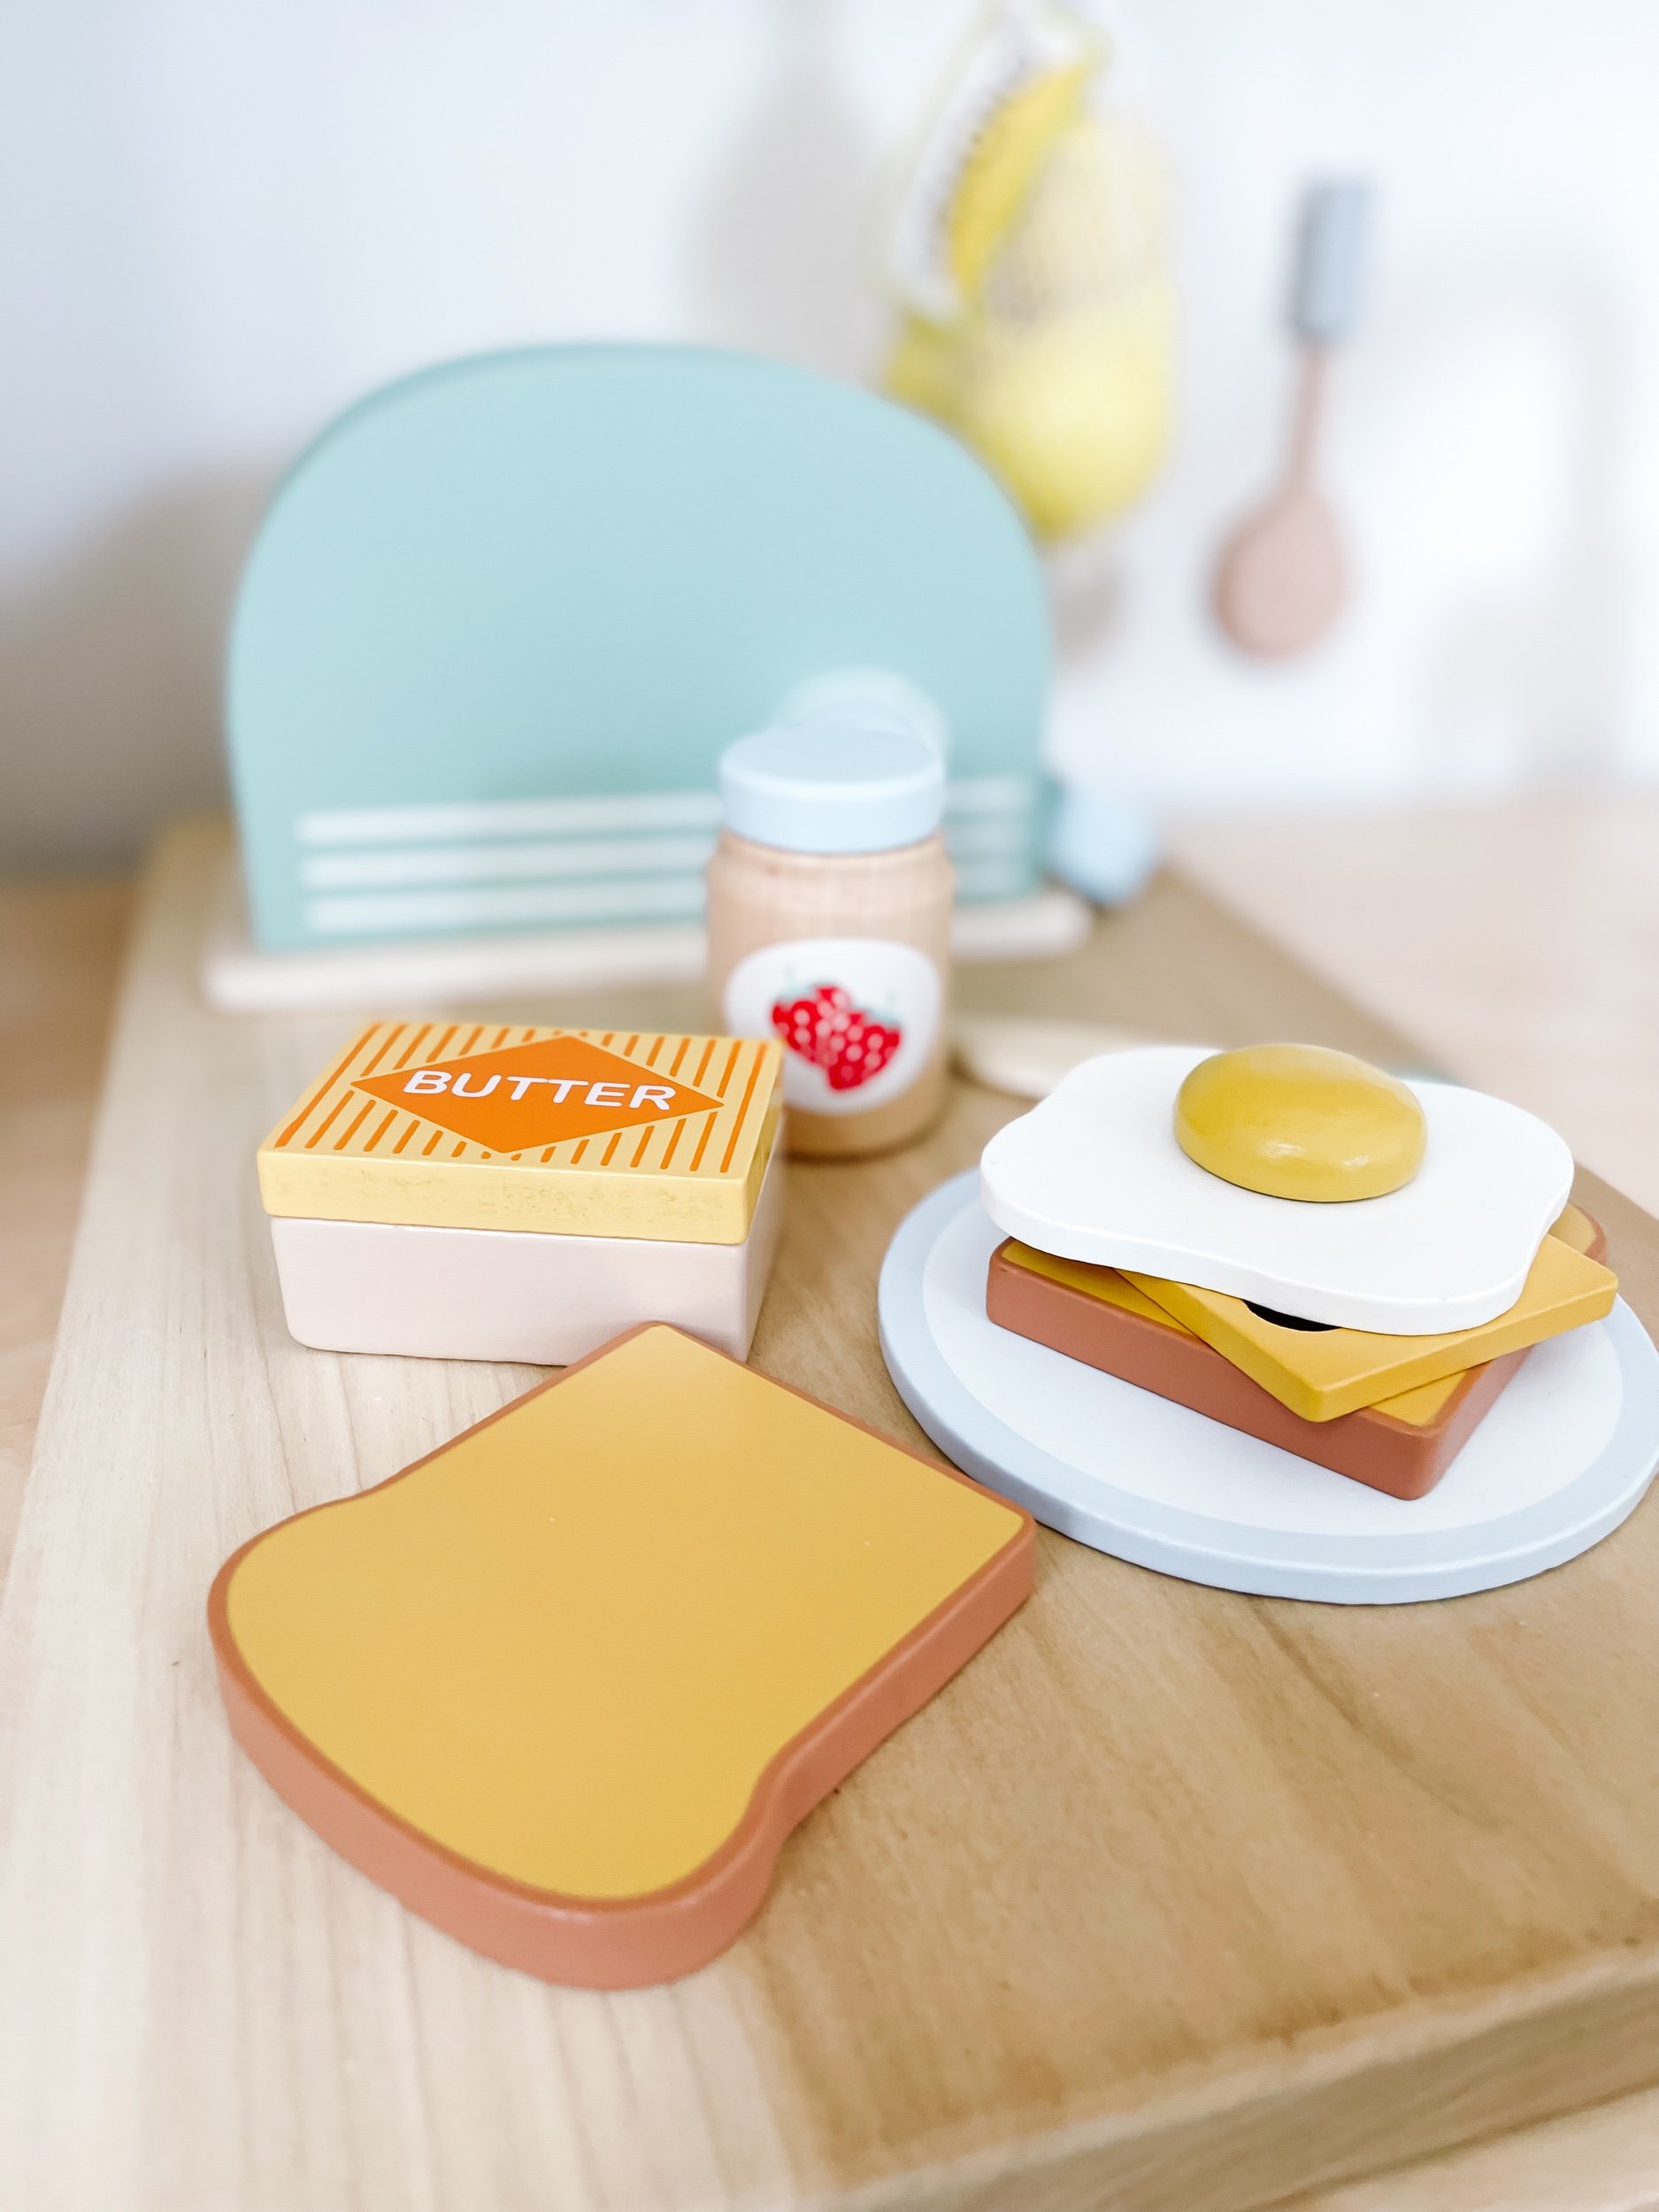
Okay breakfast is totally one of my favorite meals so I’m definitely a sucker for the breakfast play food. I got these two adorable sets of play food and they just look so cute together. They include eggs, cheese, butter, jam, bread, orange juice, milk, and of course the cutest little toaster. Sofie got an absolute kick out of the toaster because she can use the handle to pop up the bread and it goes flying around the play room.
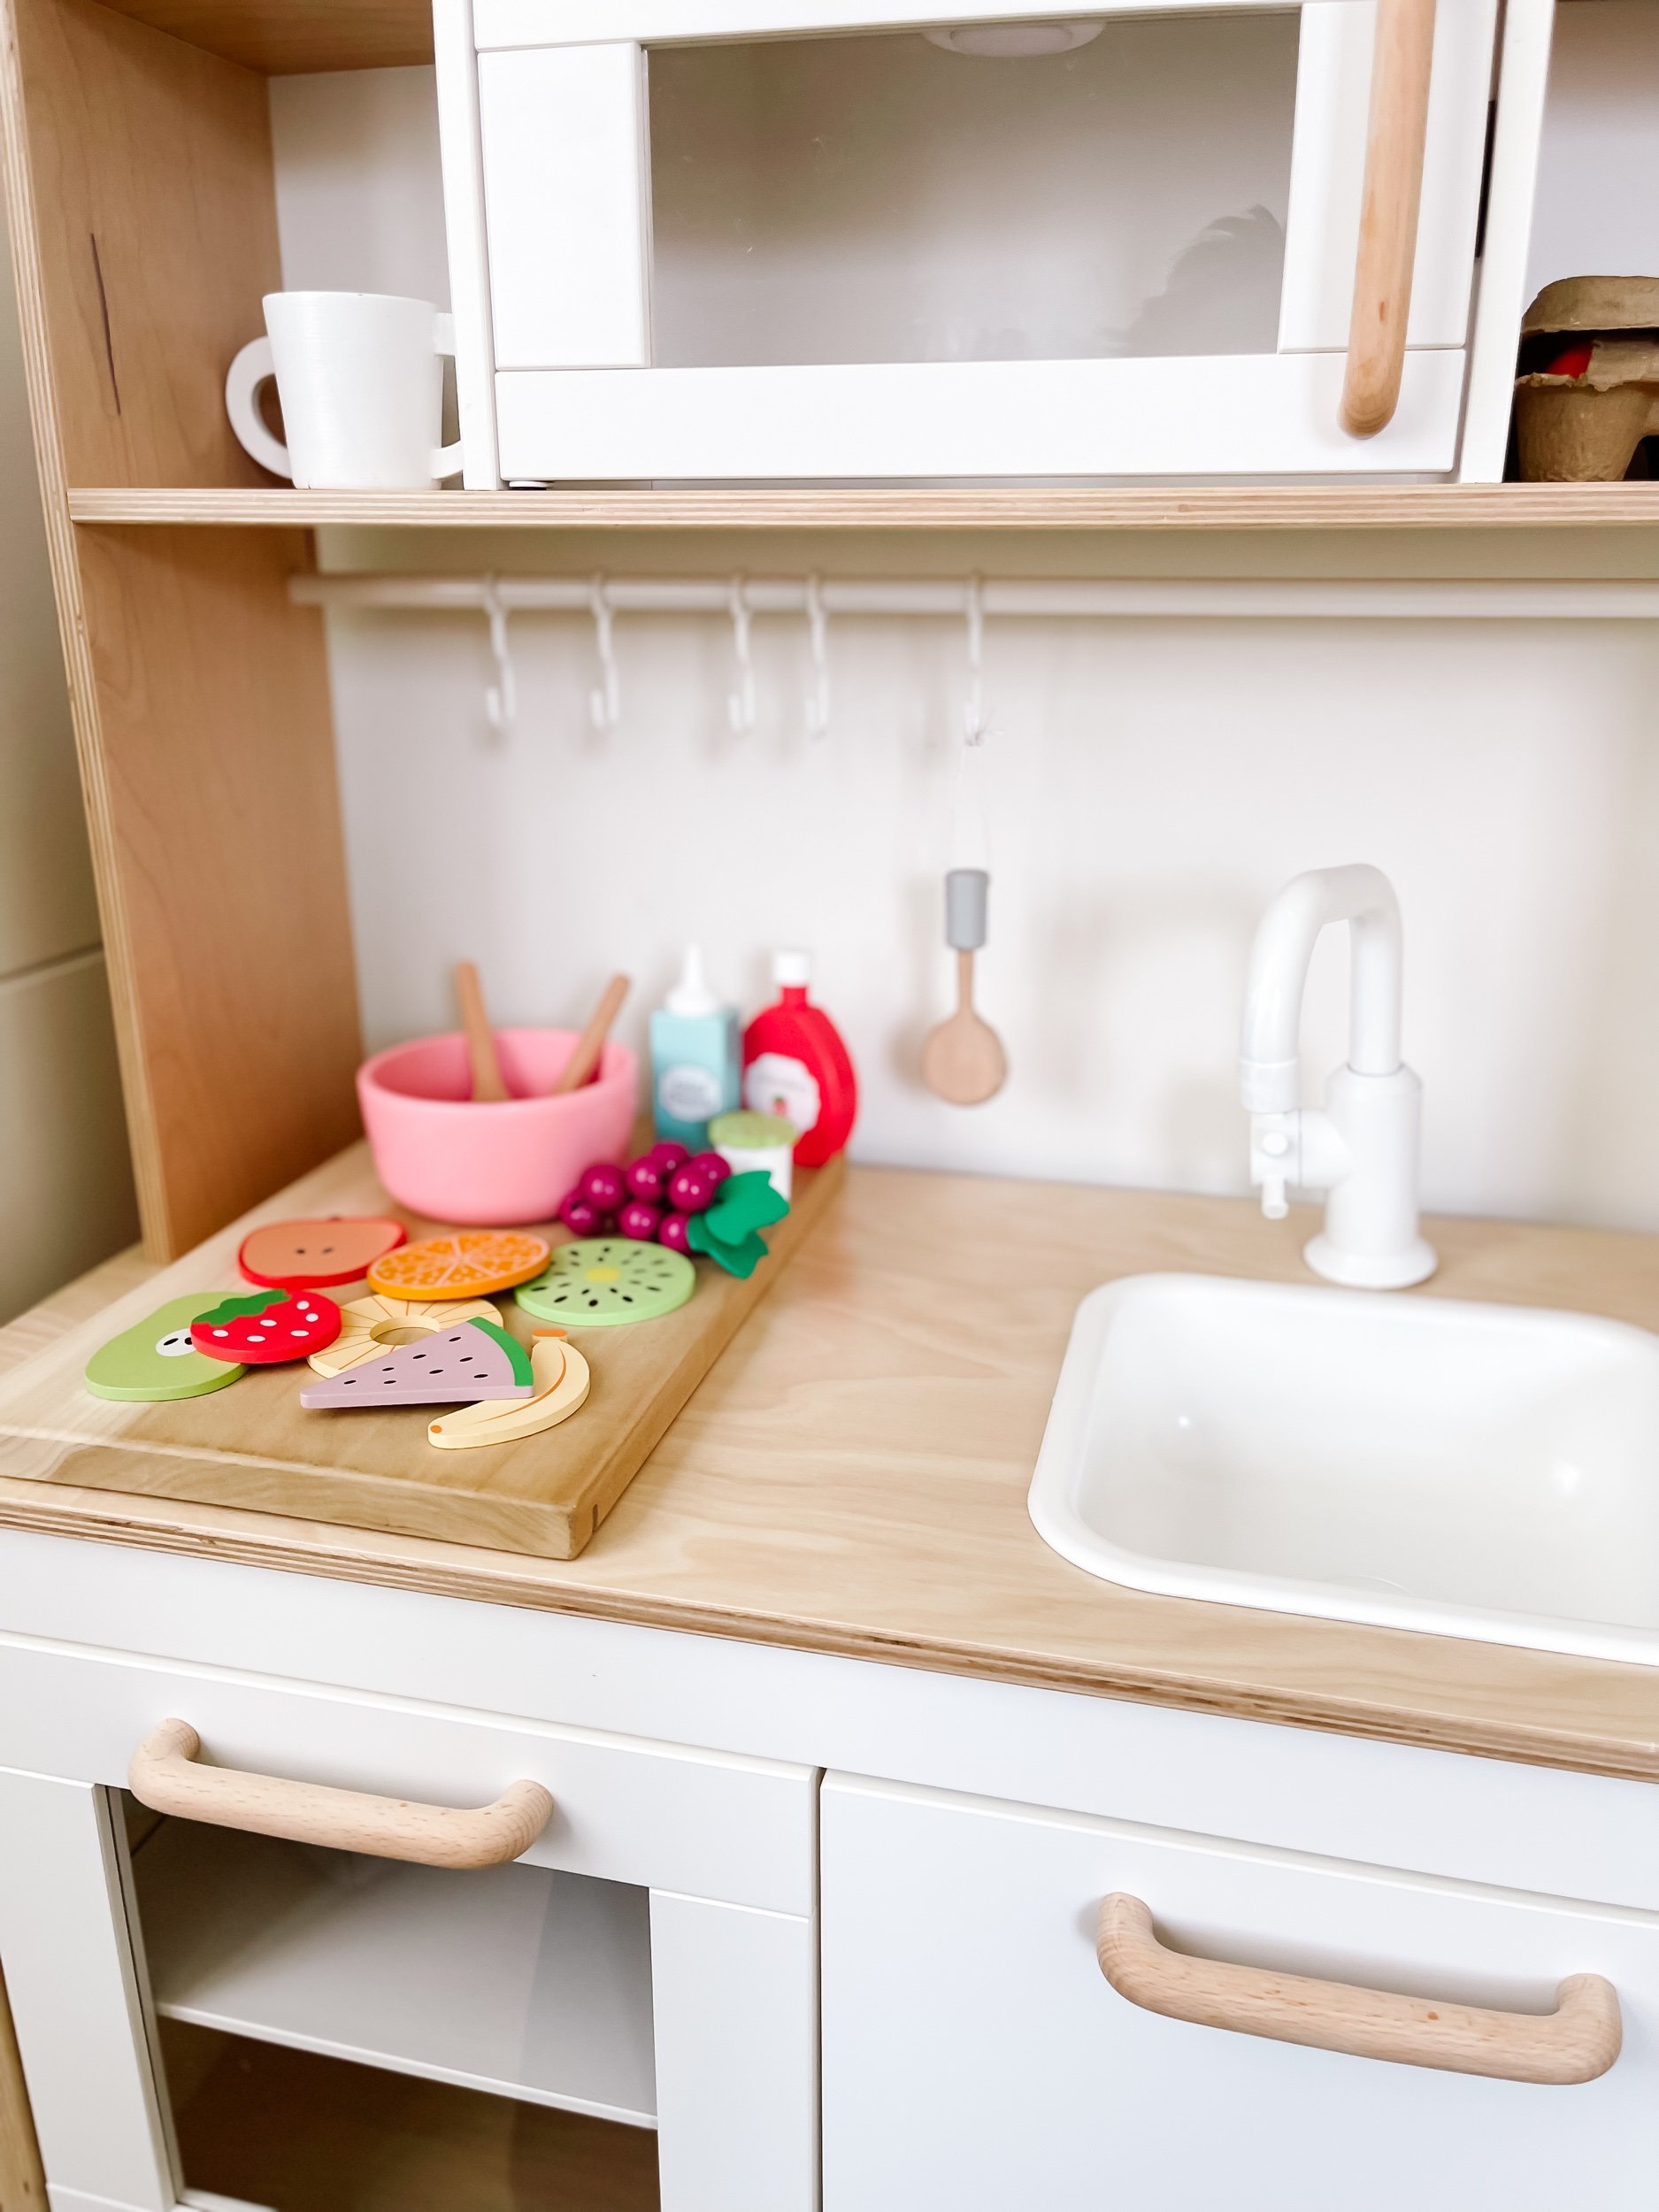
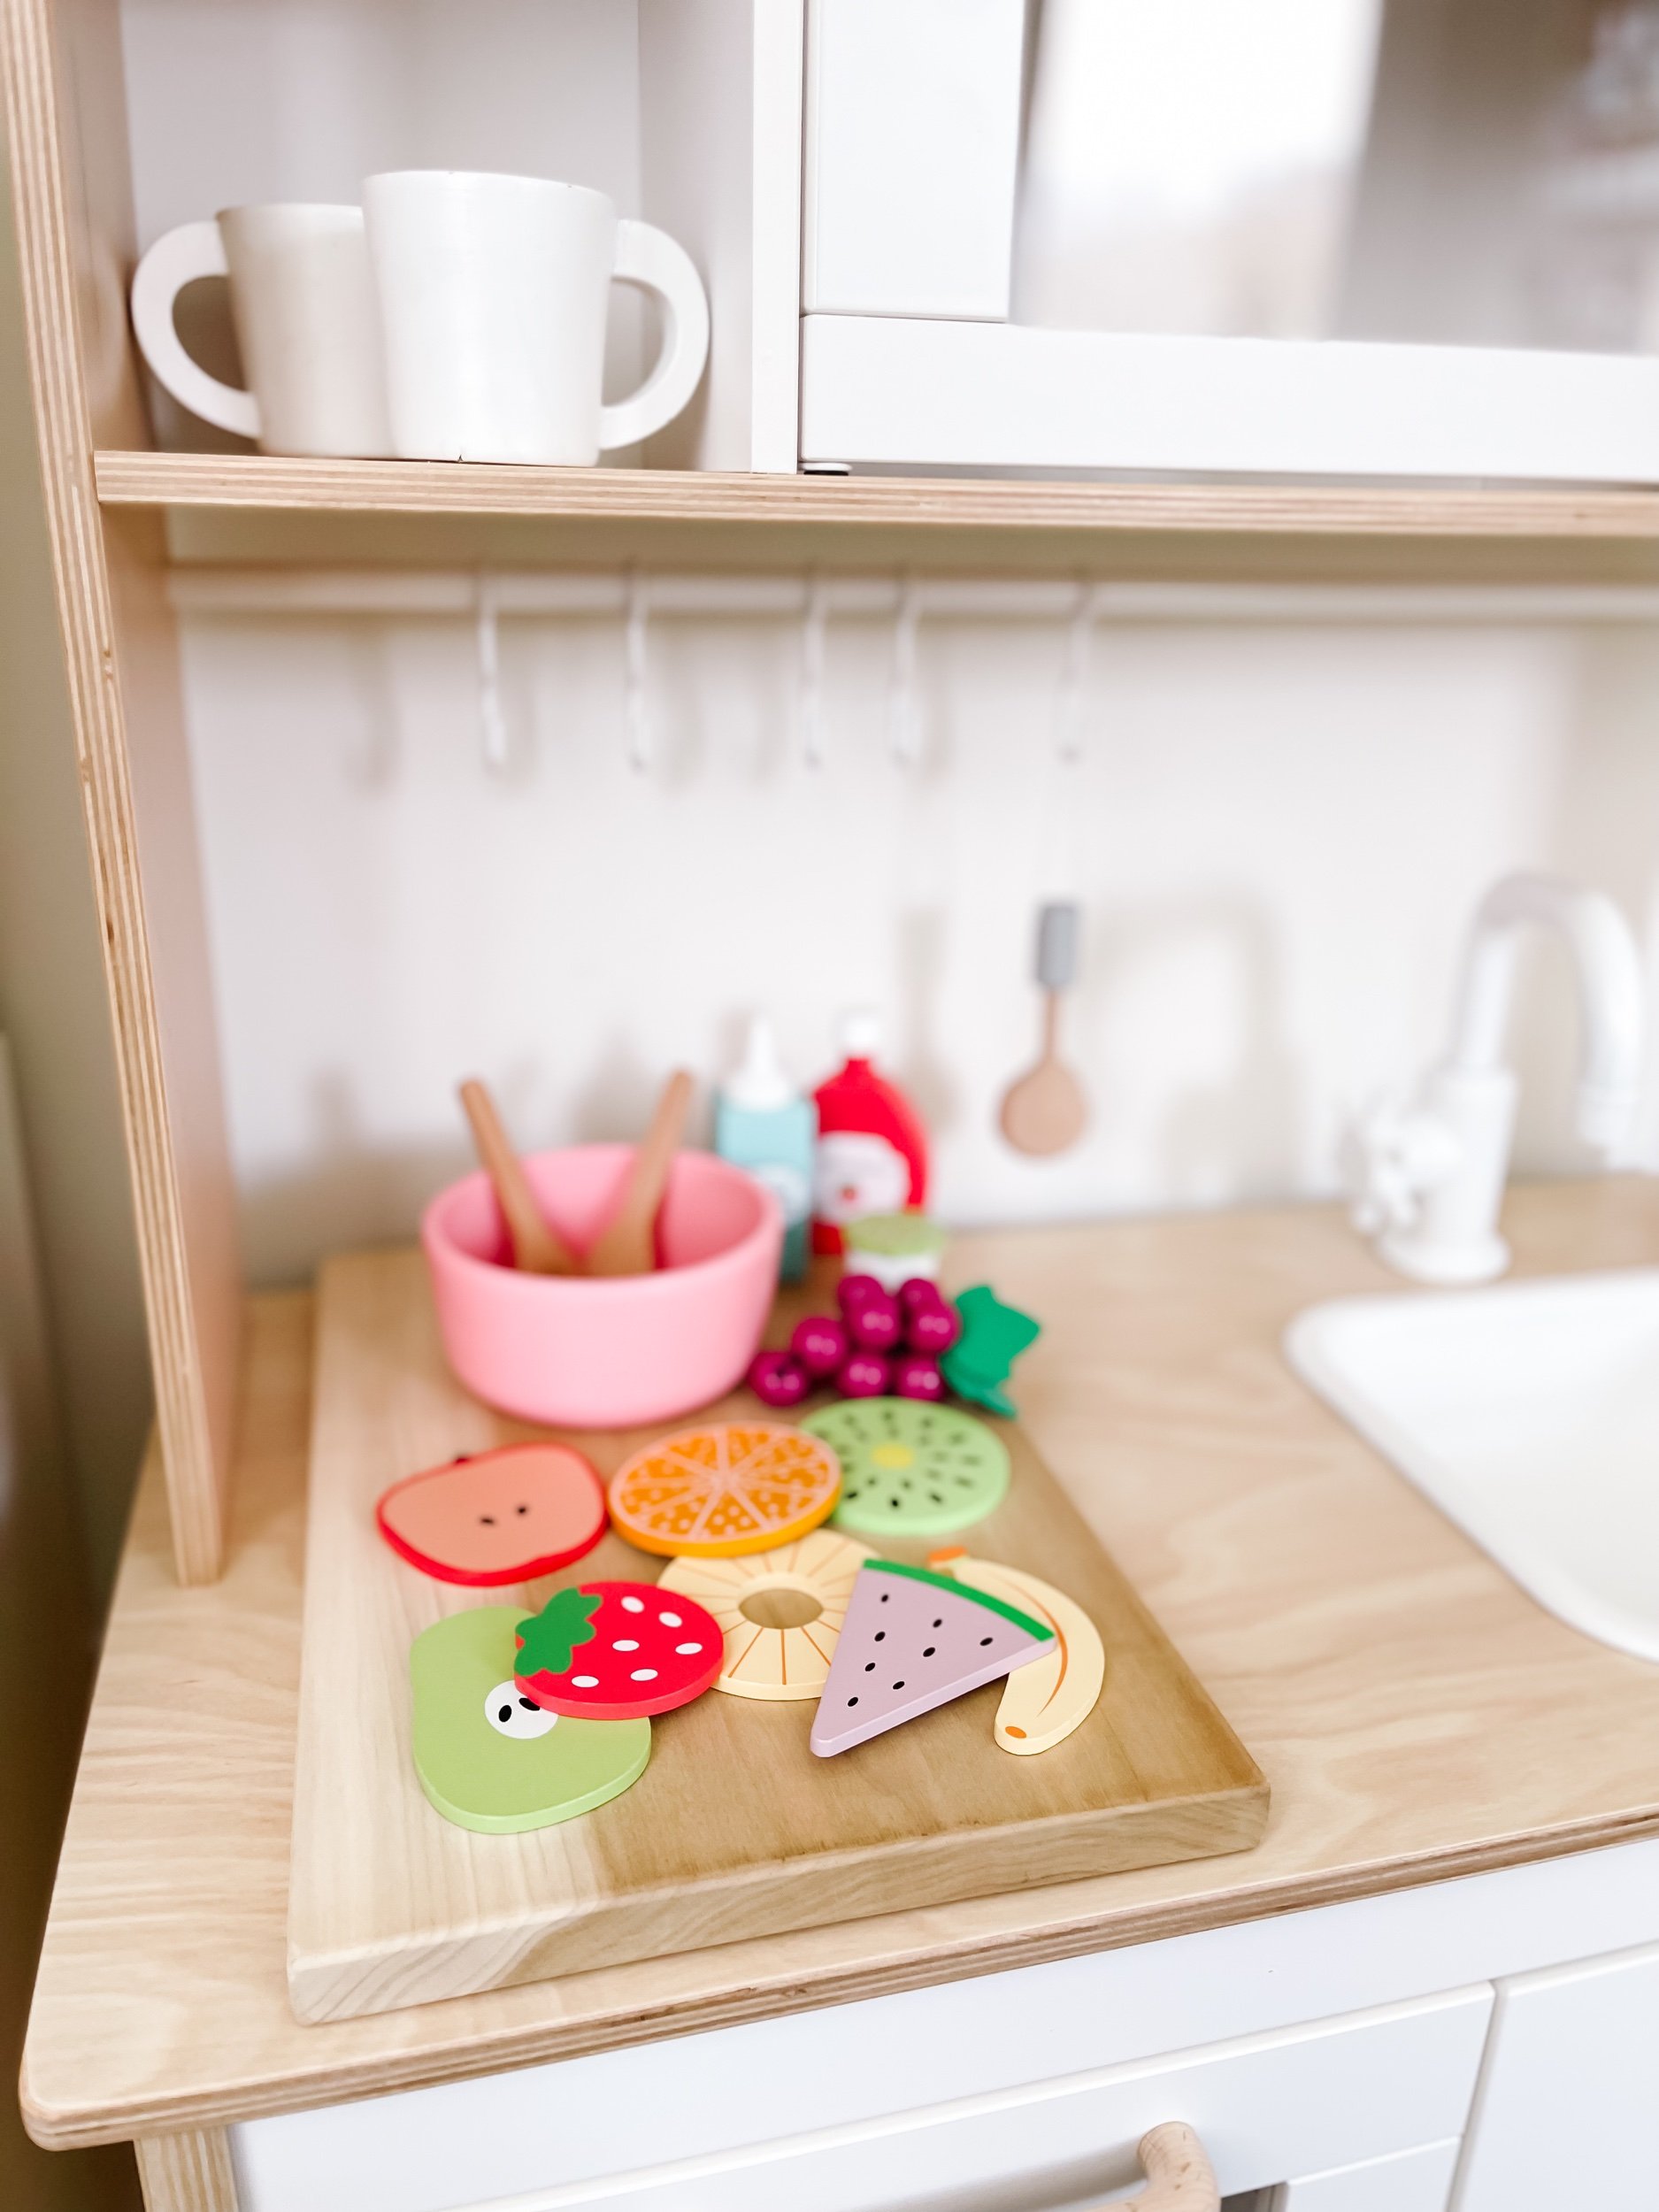
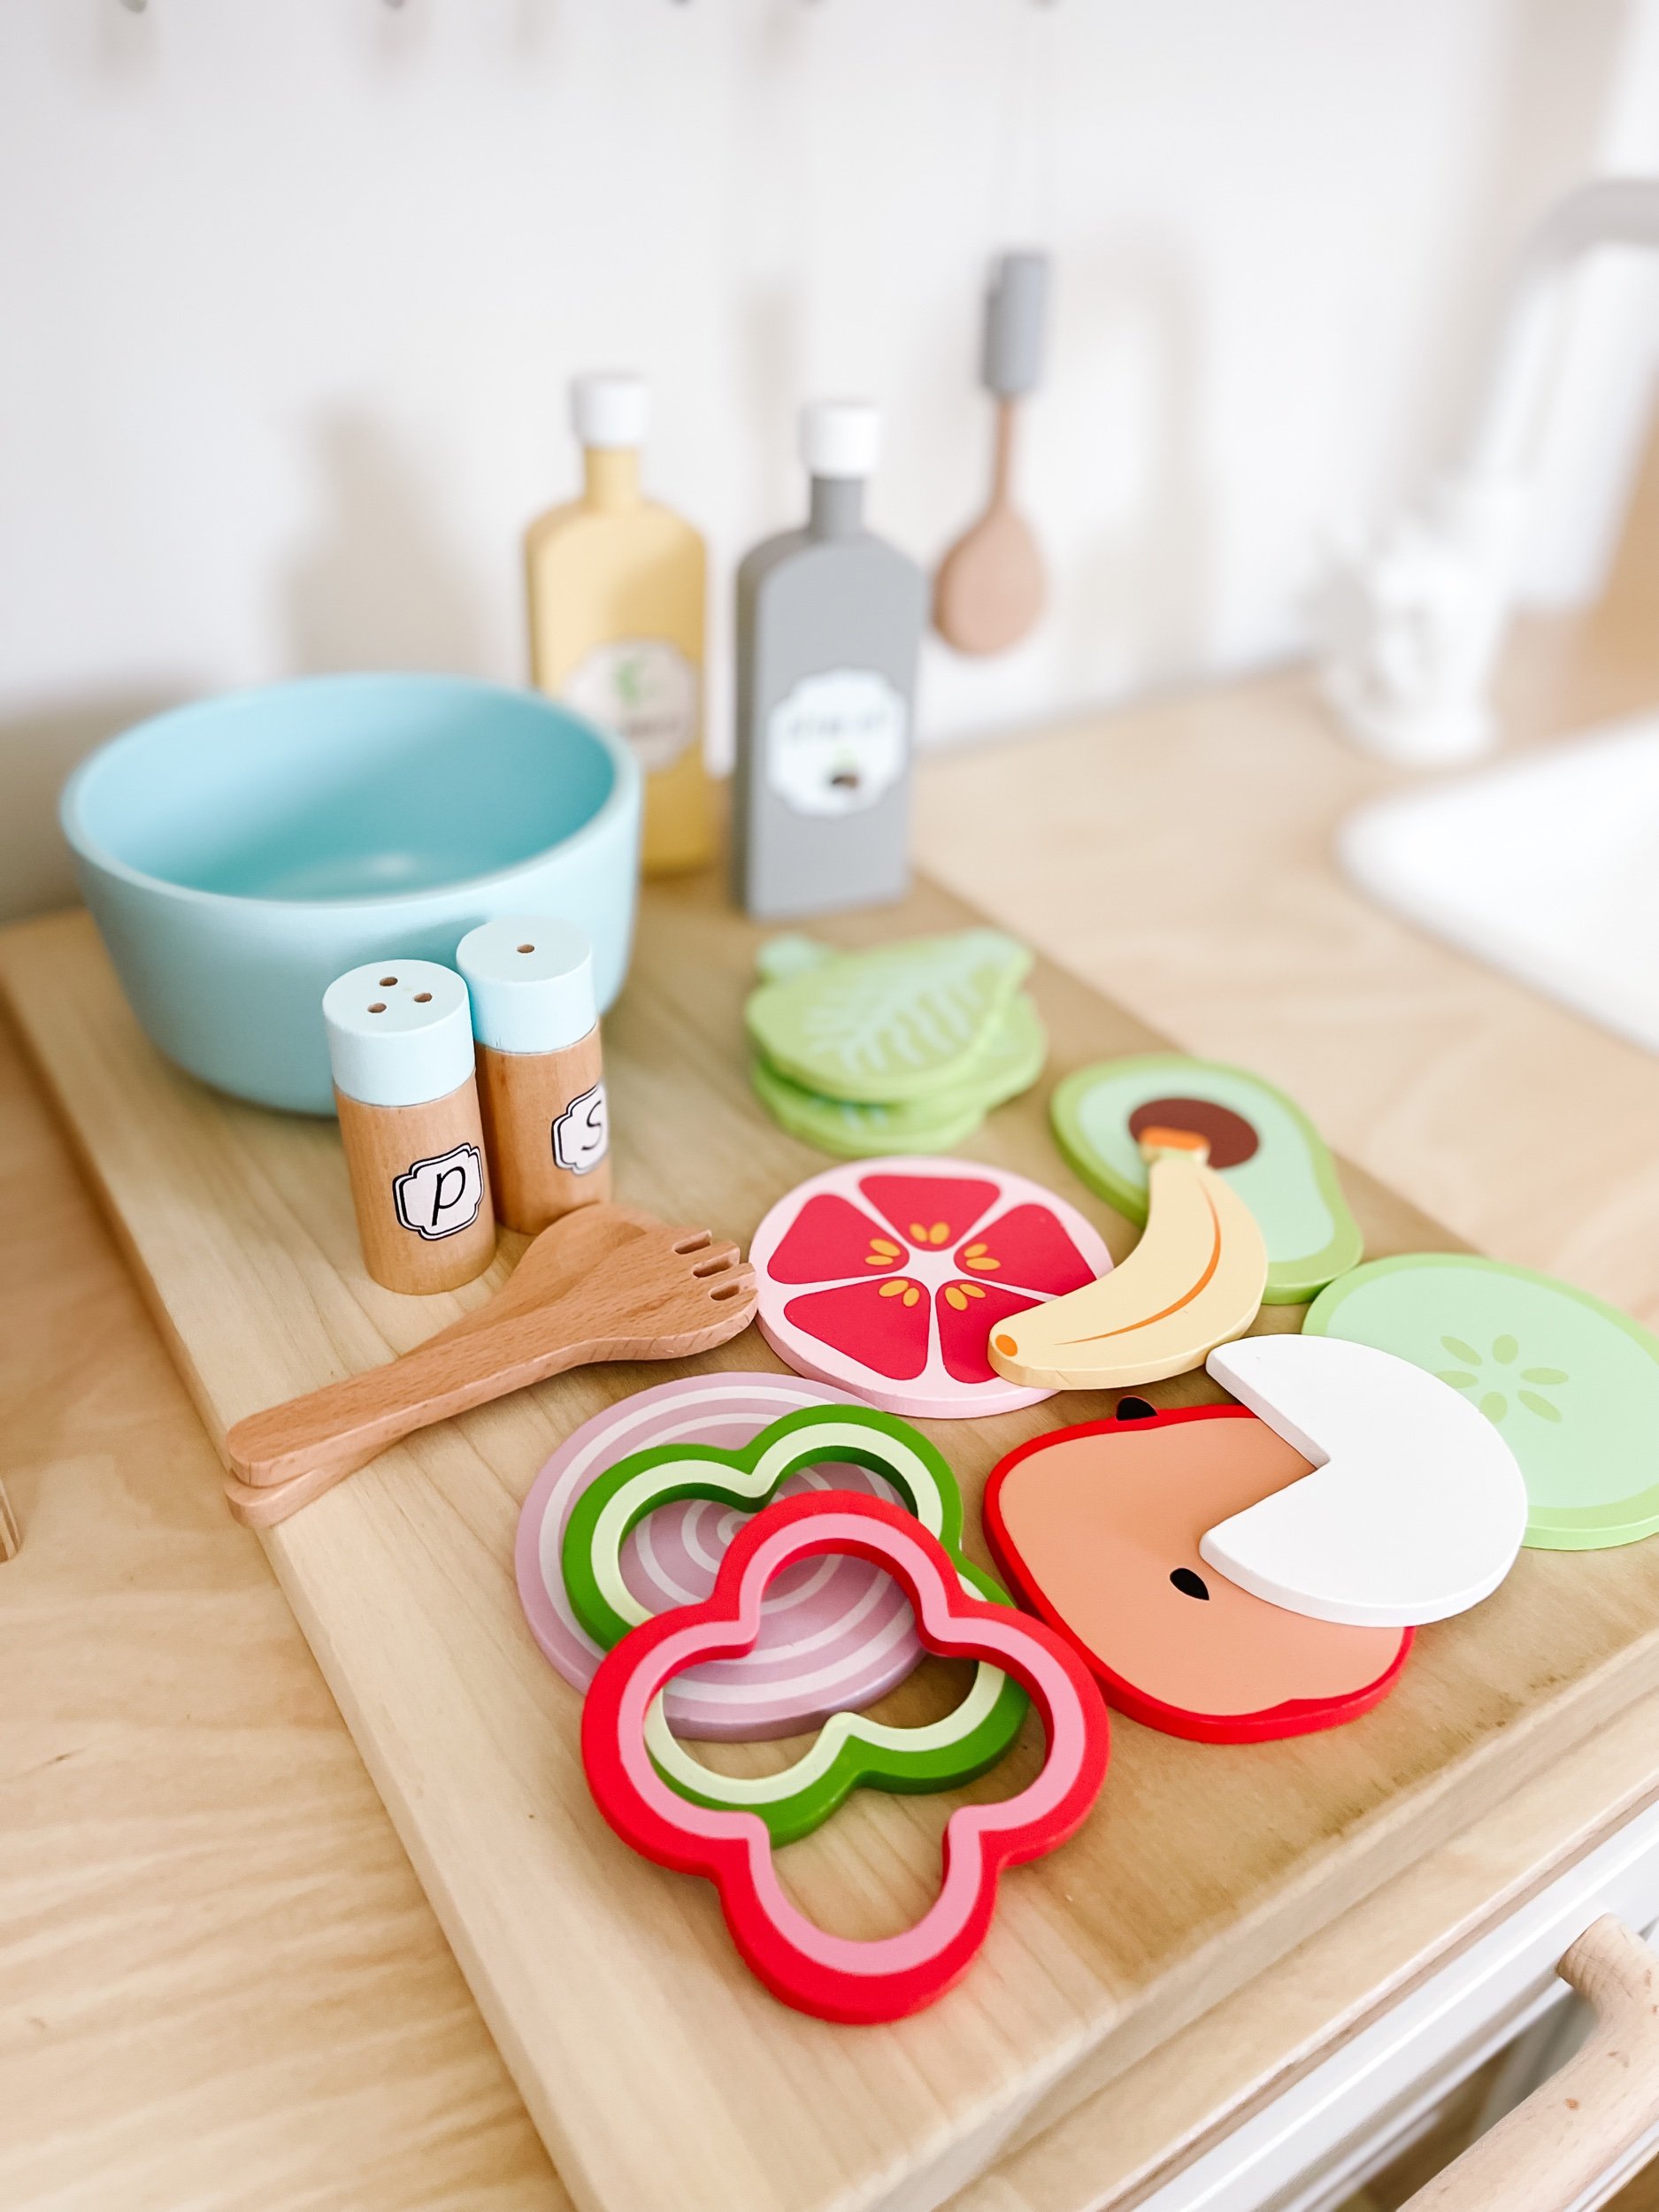
Making a fruit salad
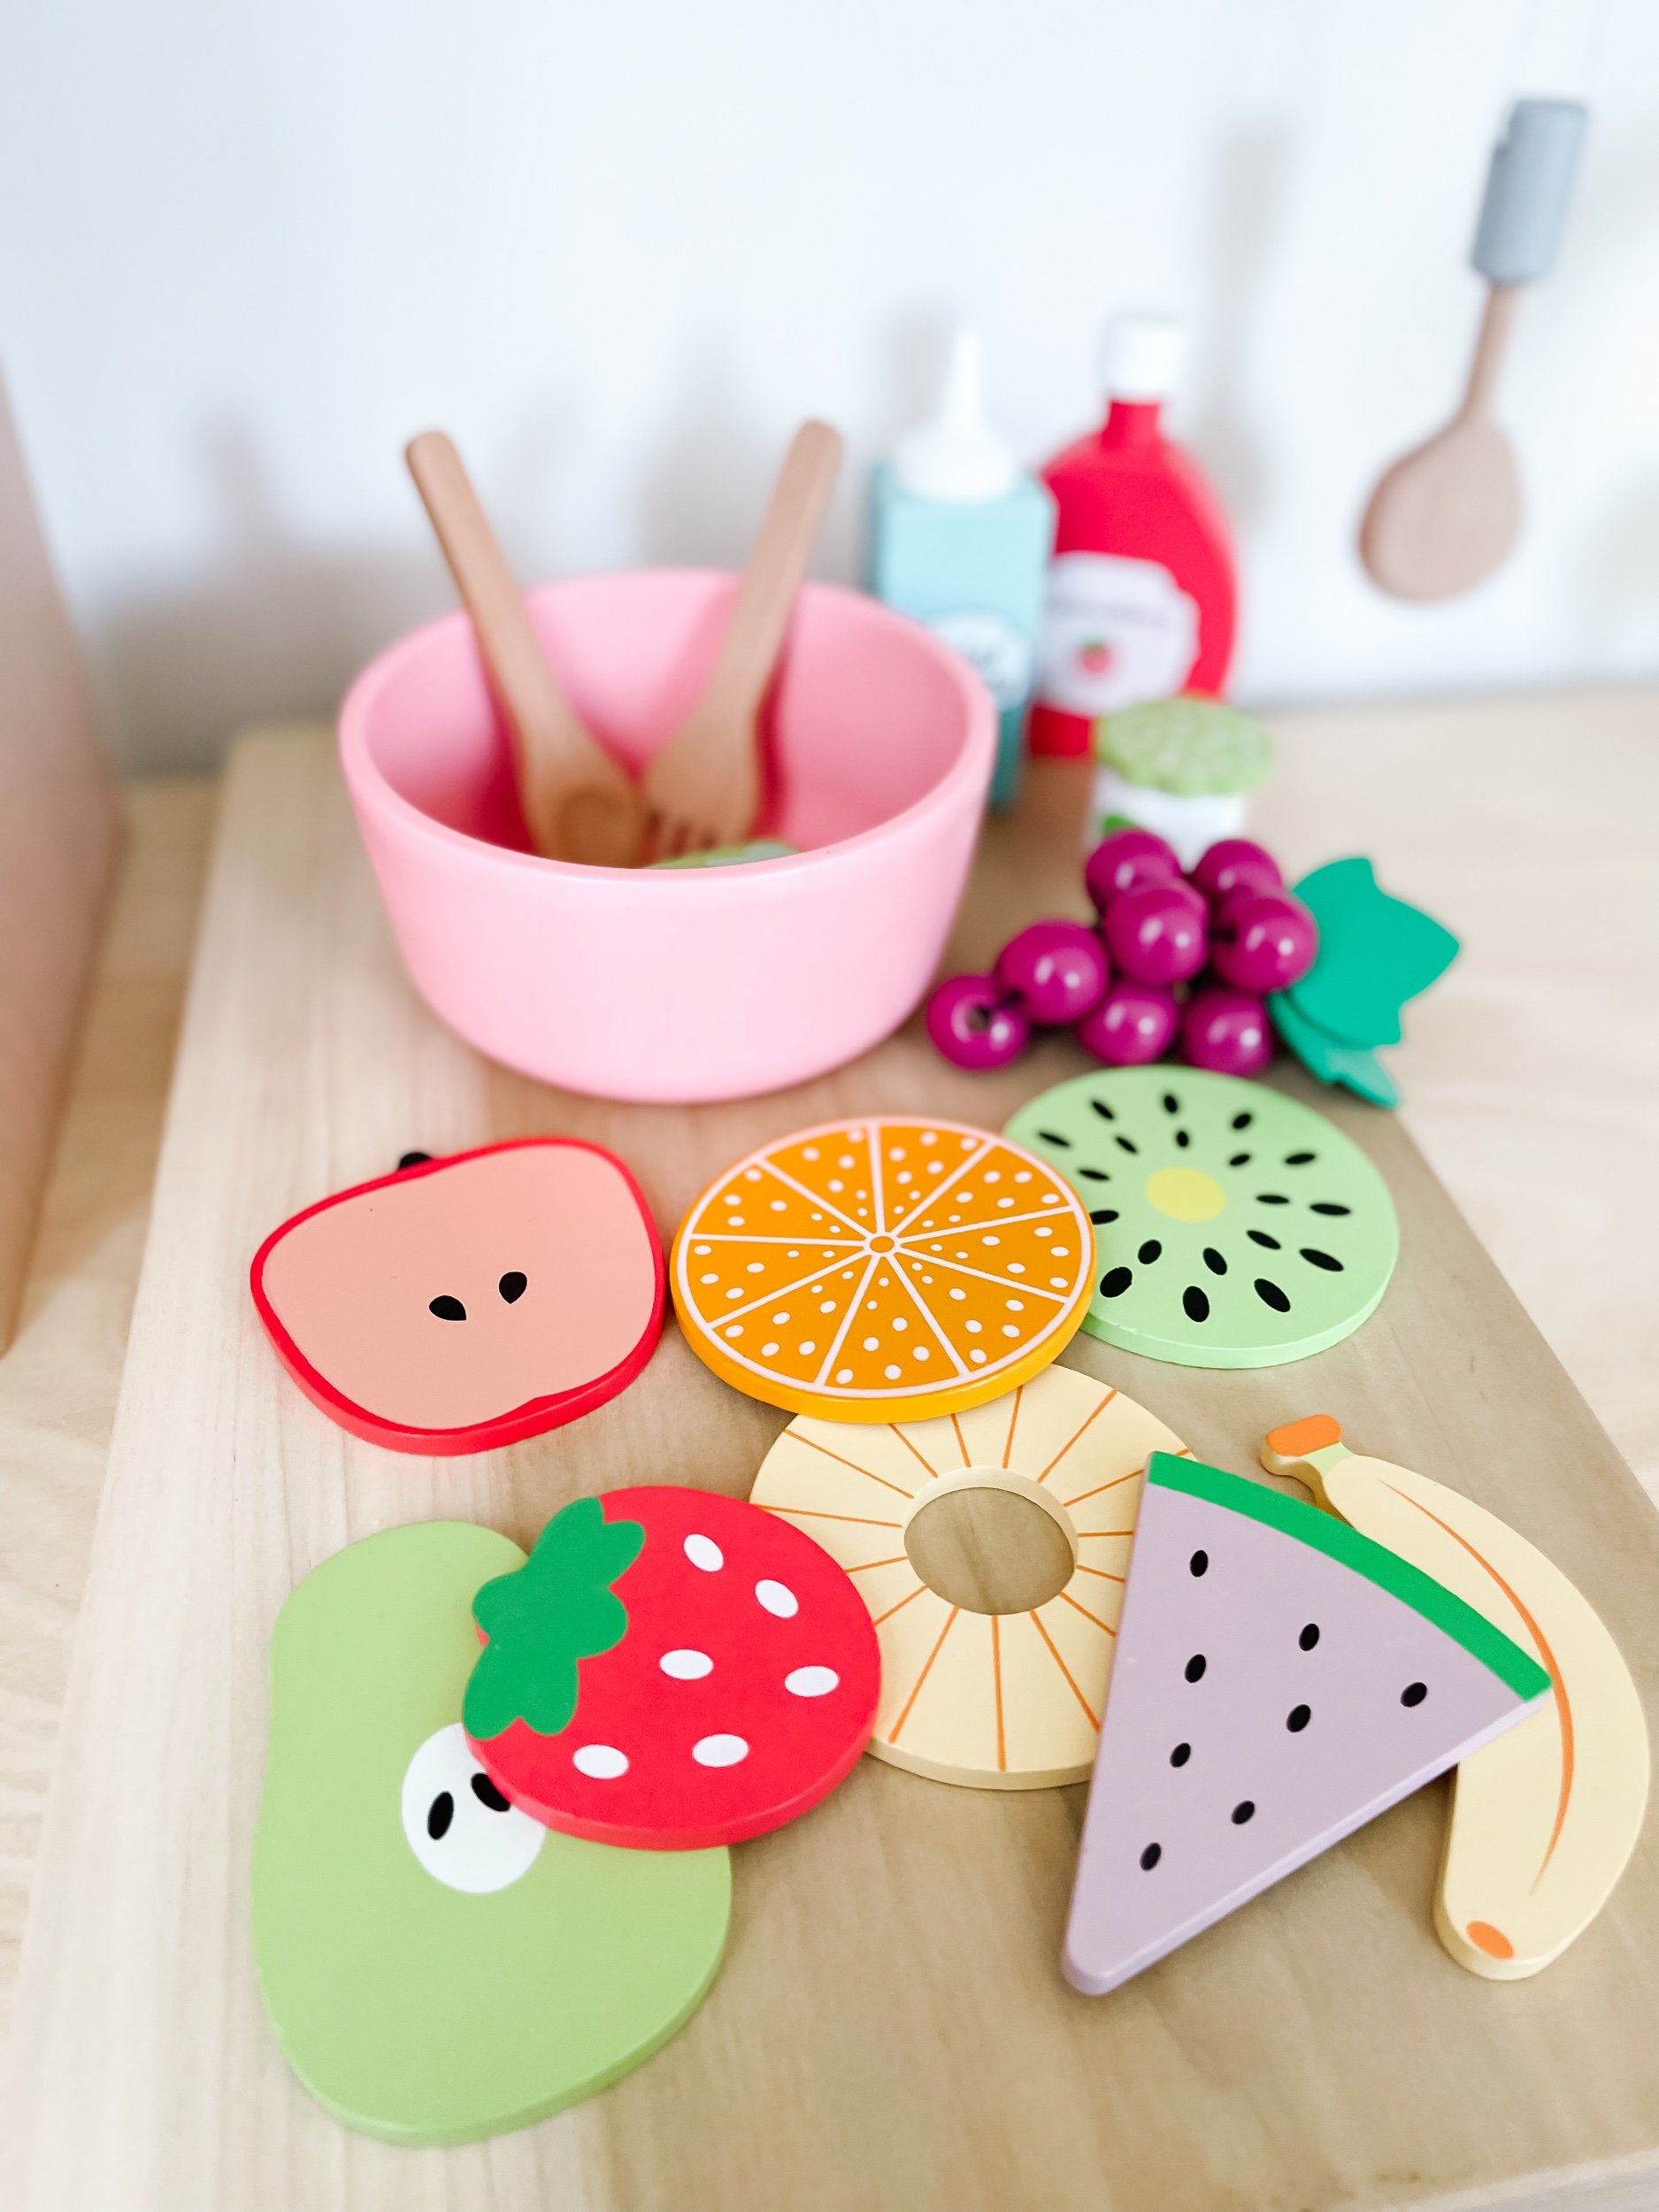
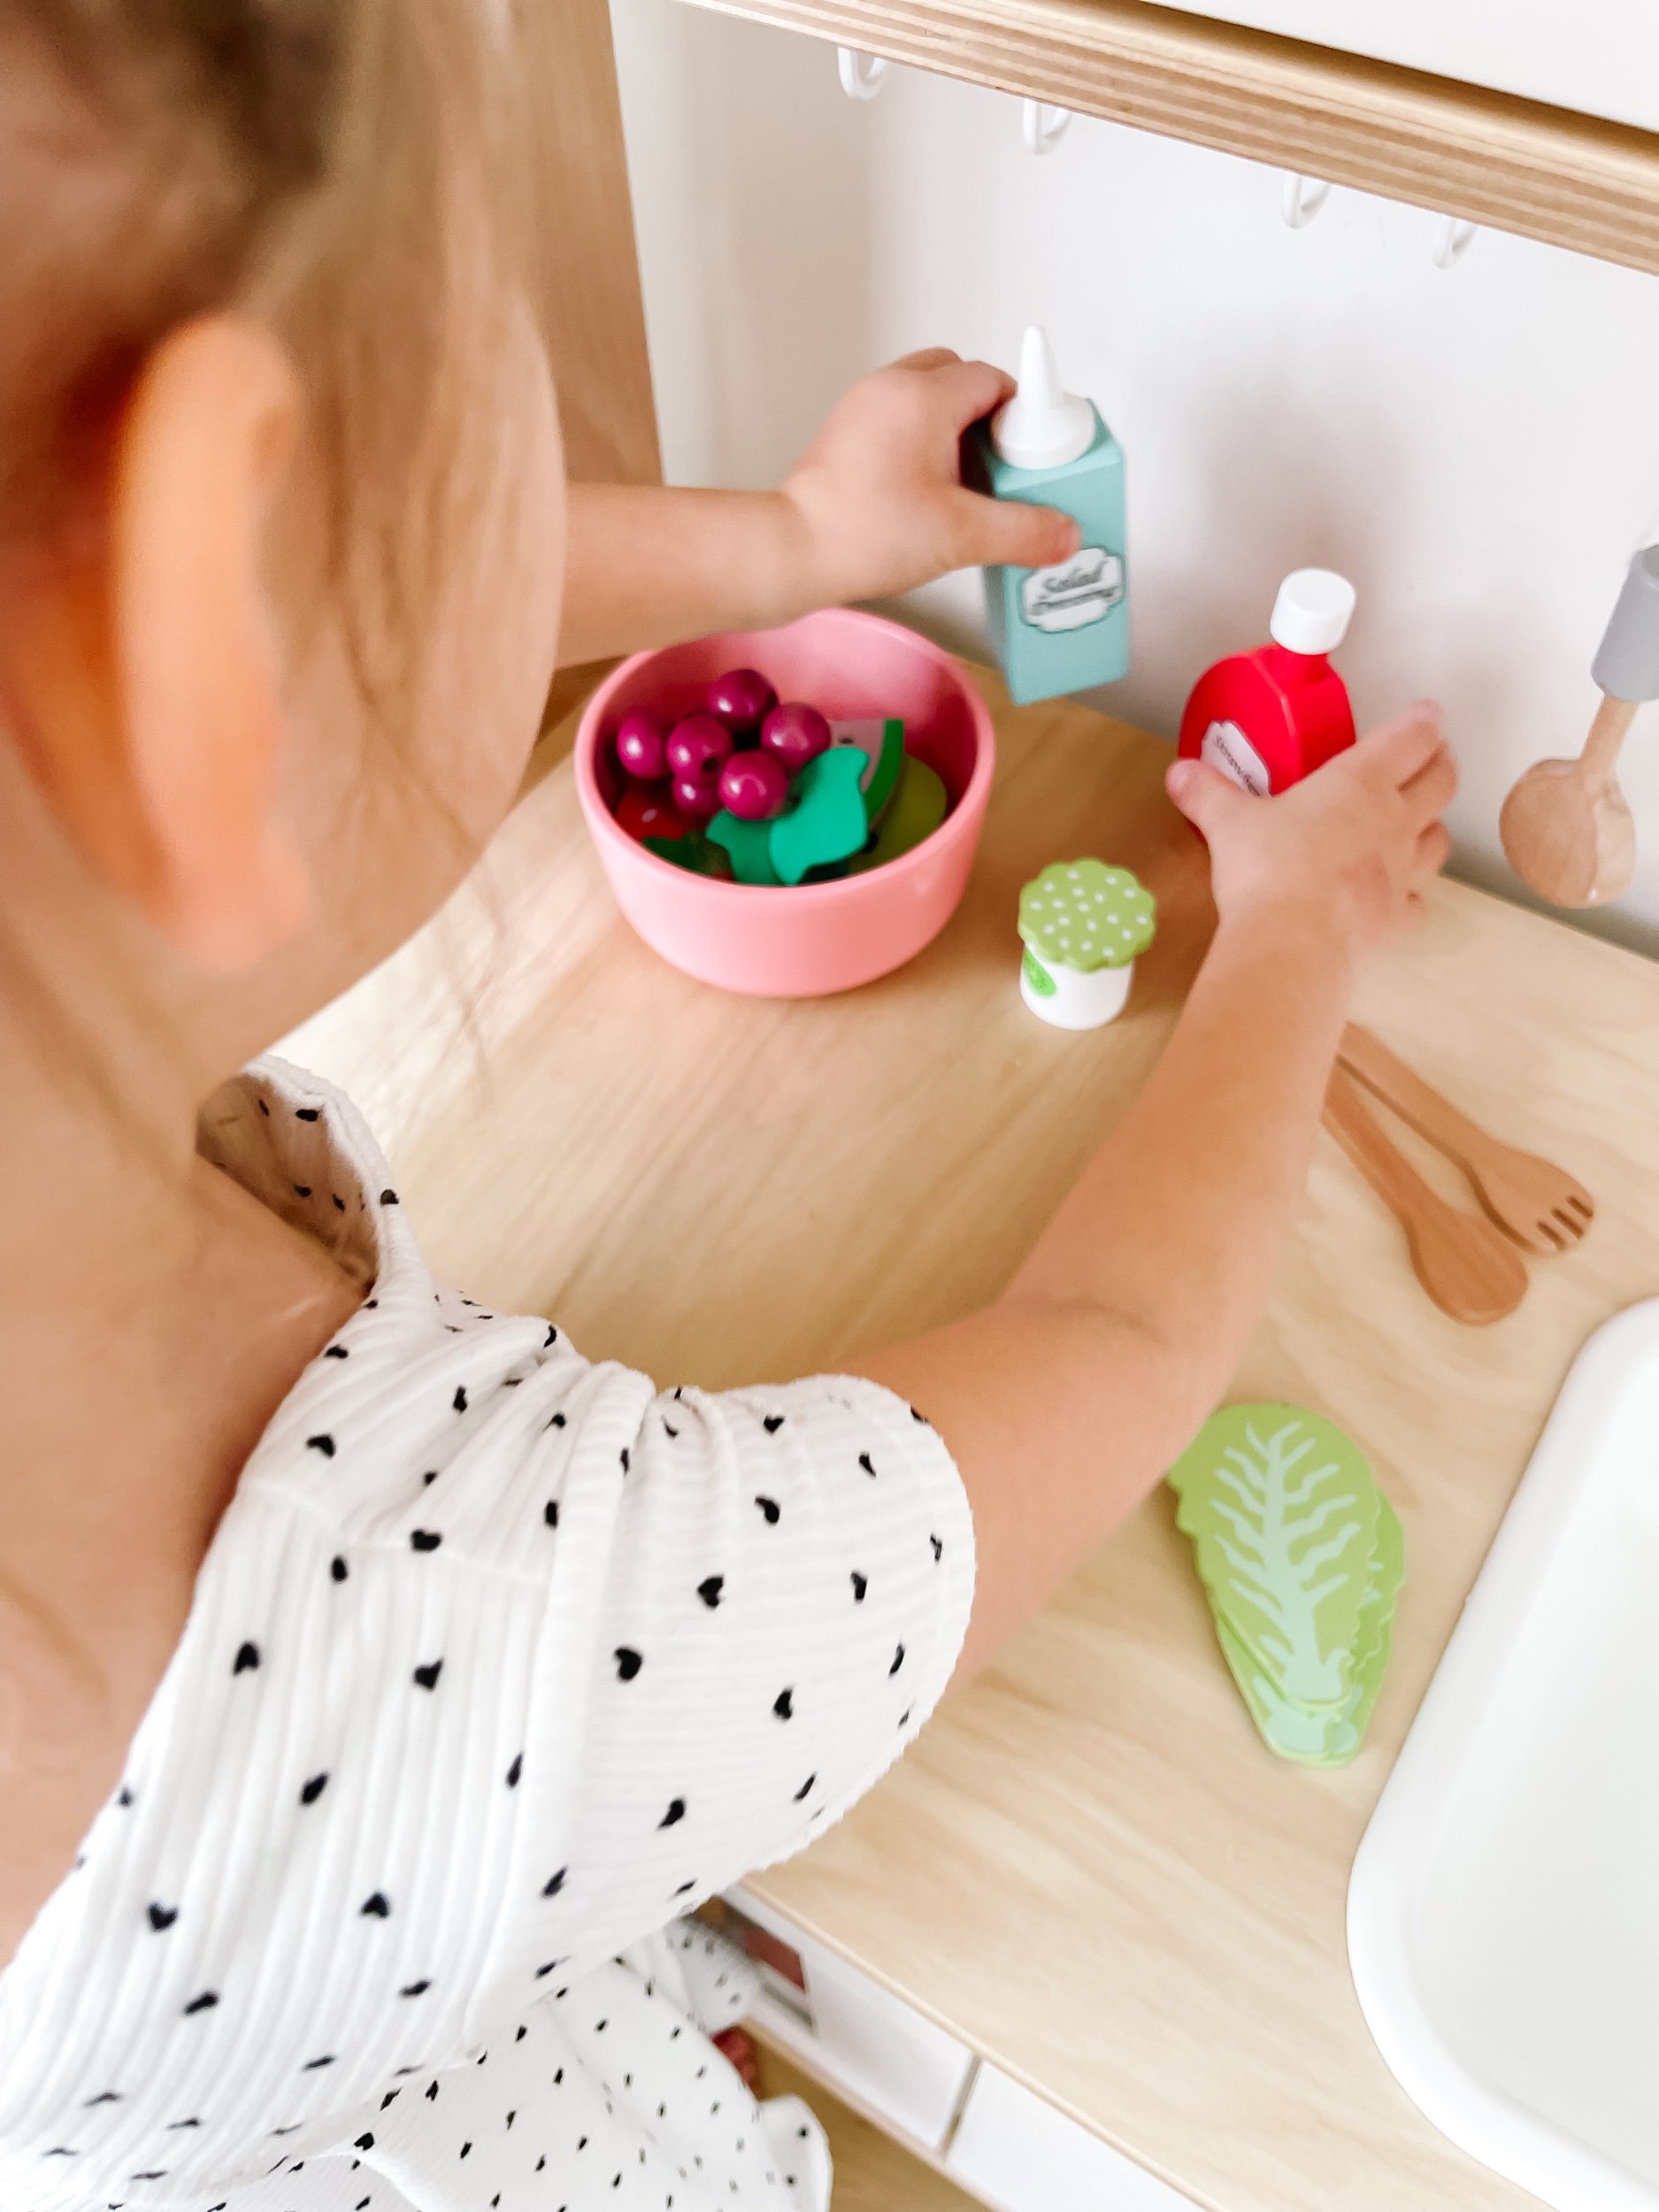
I couldn’t resist this cute fruit salad kit either! It comes with two dressings, fruit, salad utensils and the cutest little pink mixing bowl. This was the first one Sofie go to play with and her eyes lit up when she saw the bright colors. And of course the grapes are a fun sensory texture to enjoy. The salad gave us a great opportunity to talk about healthy fruits and how different types of carbohydrates effect our bodies differently — I’m always one to throw a little education into the fun.

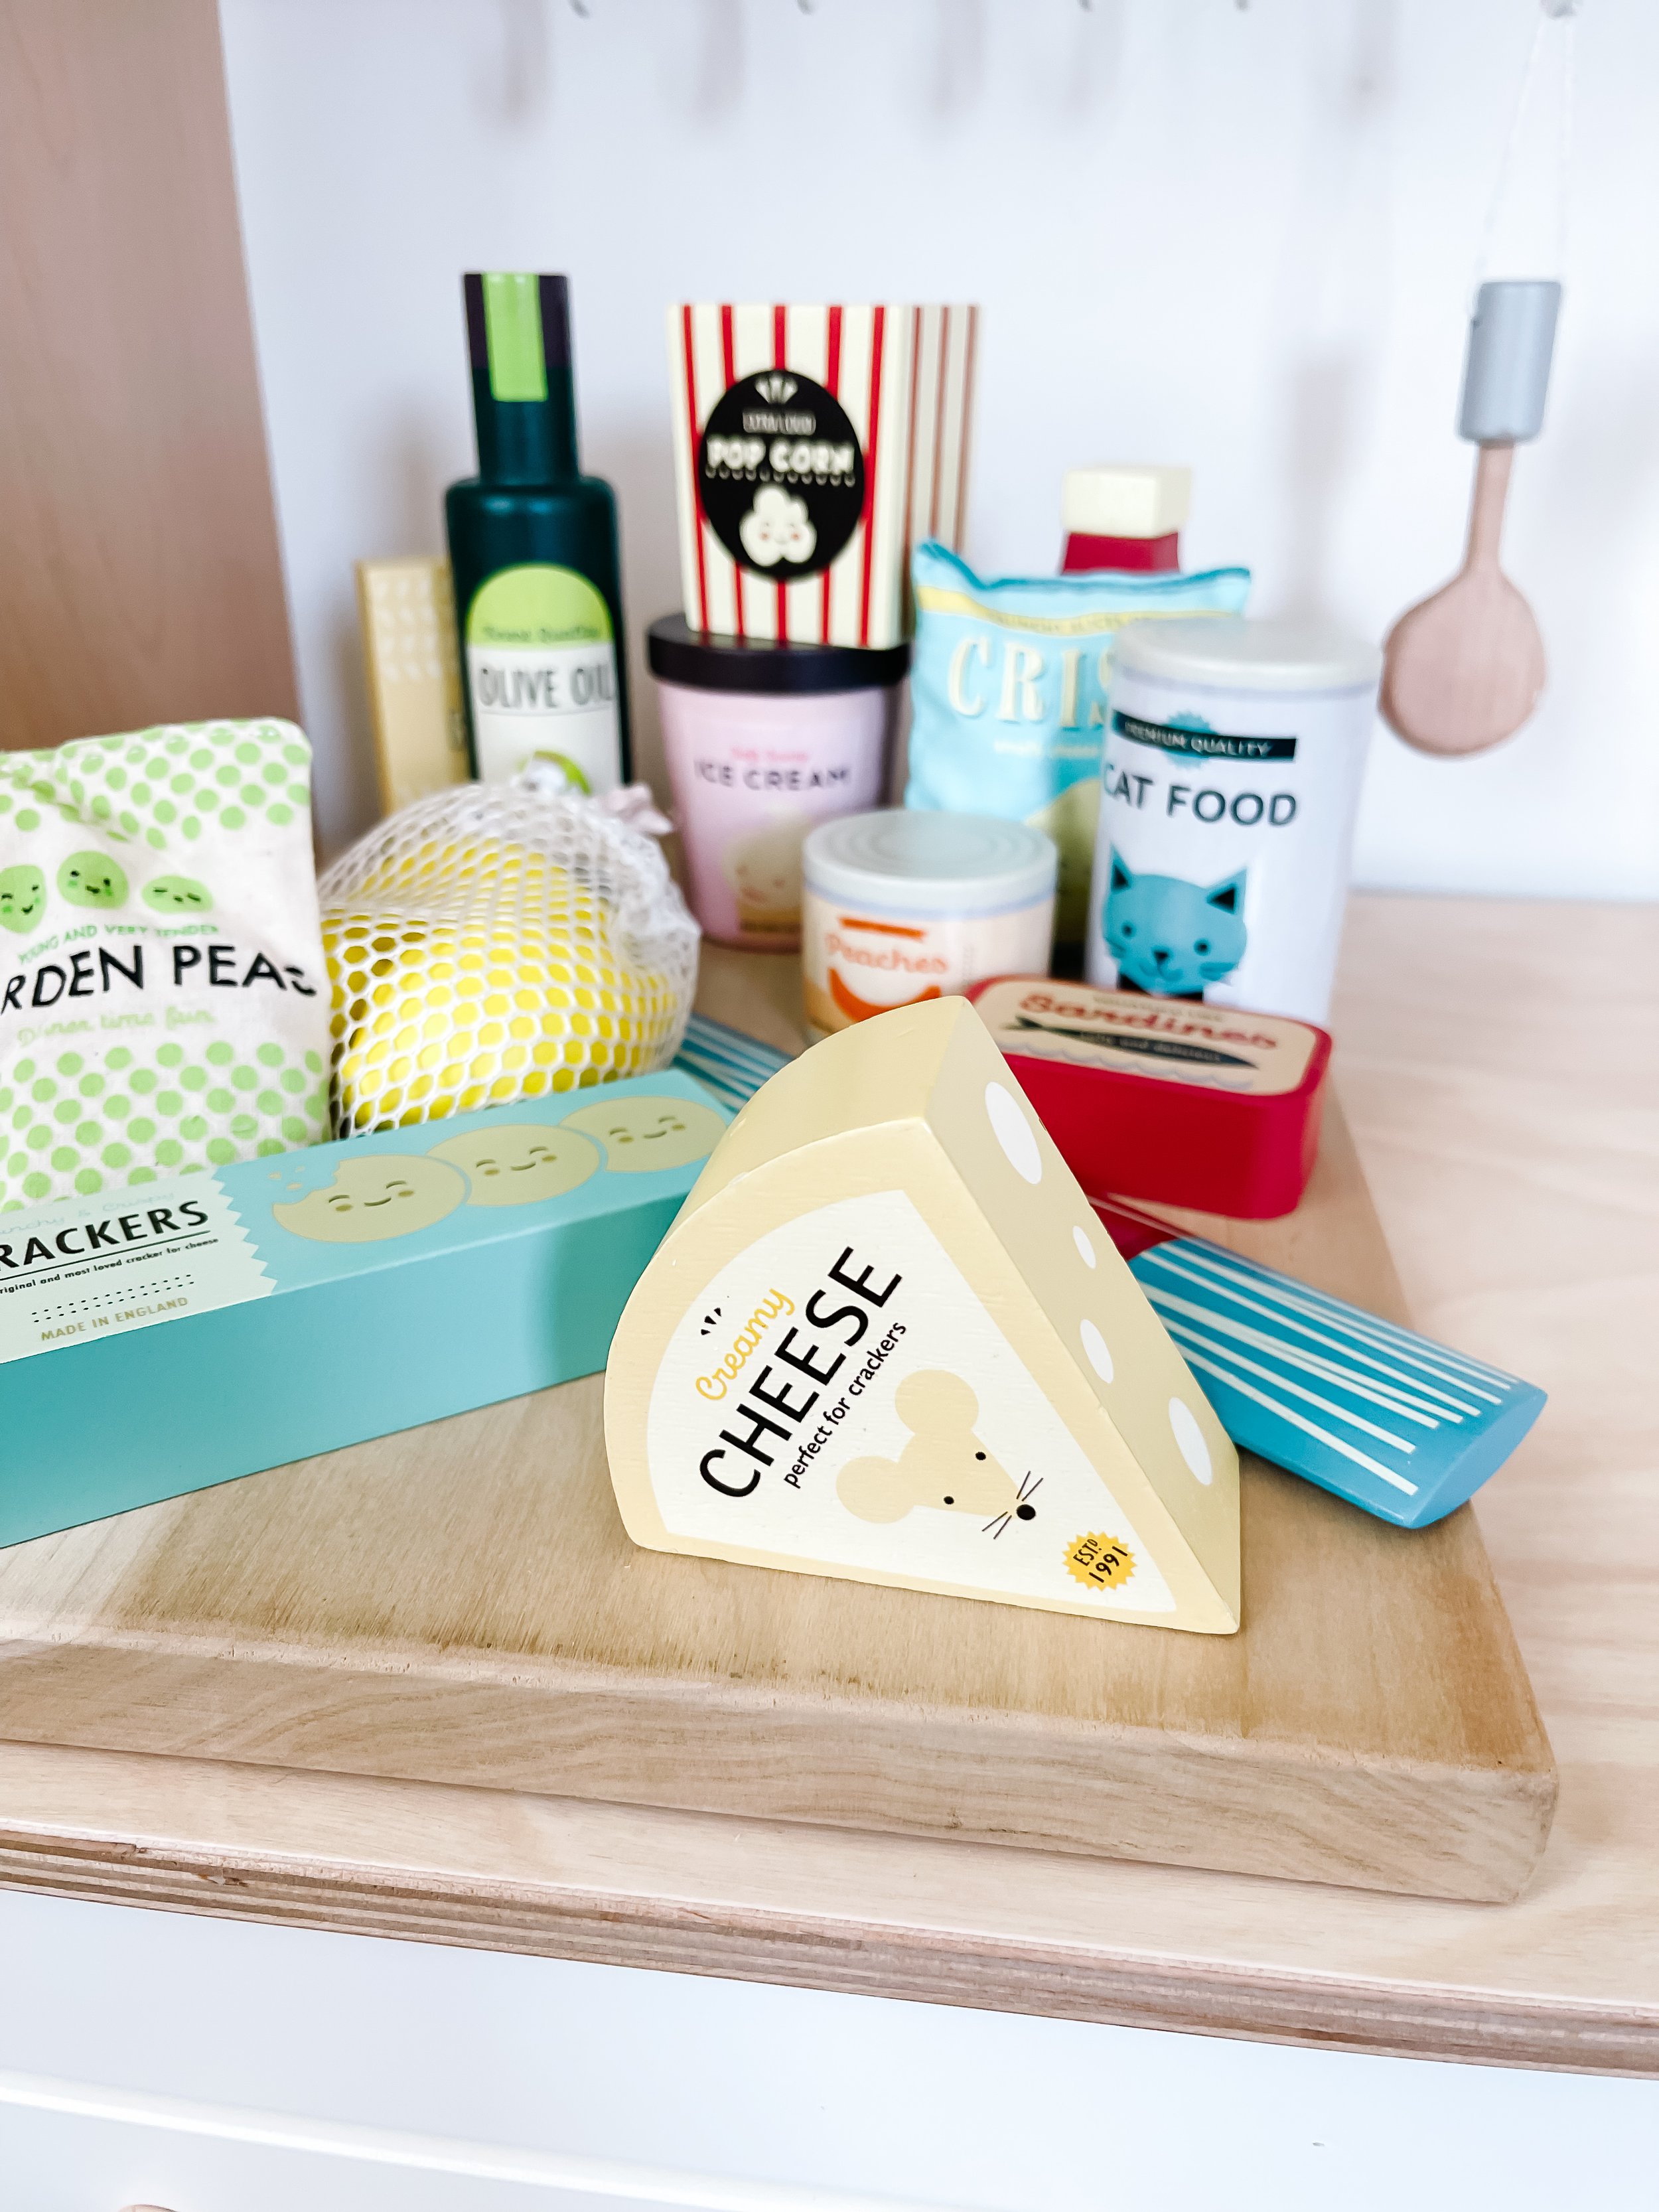
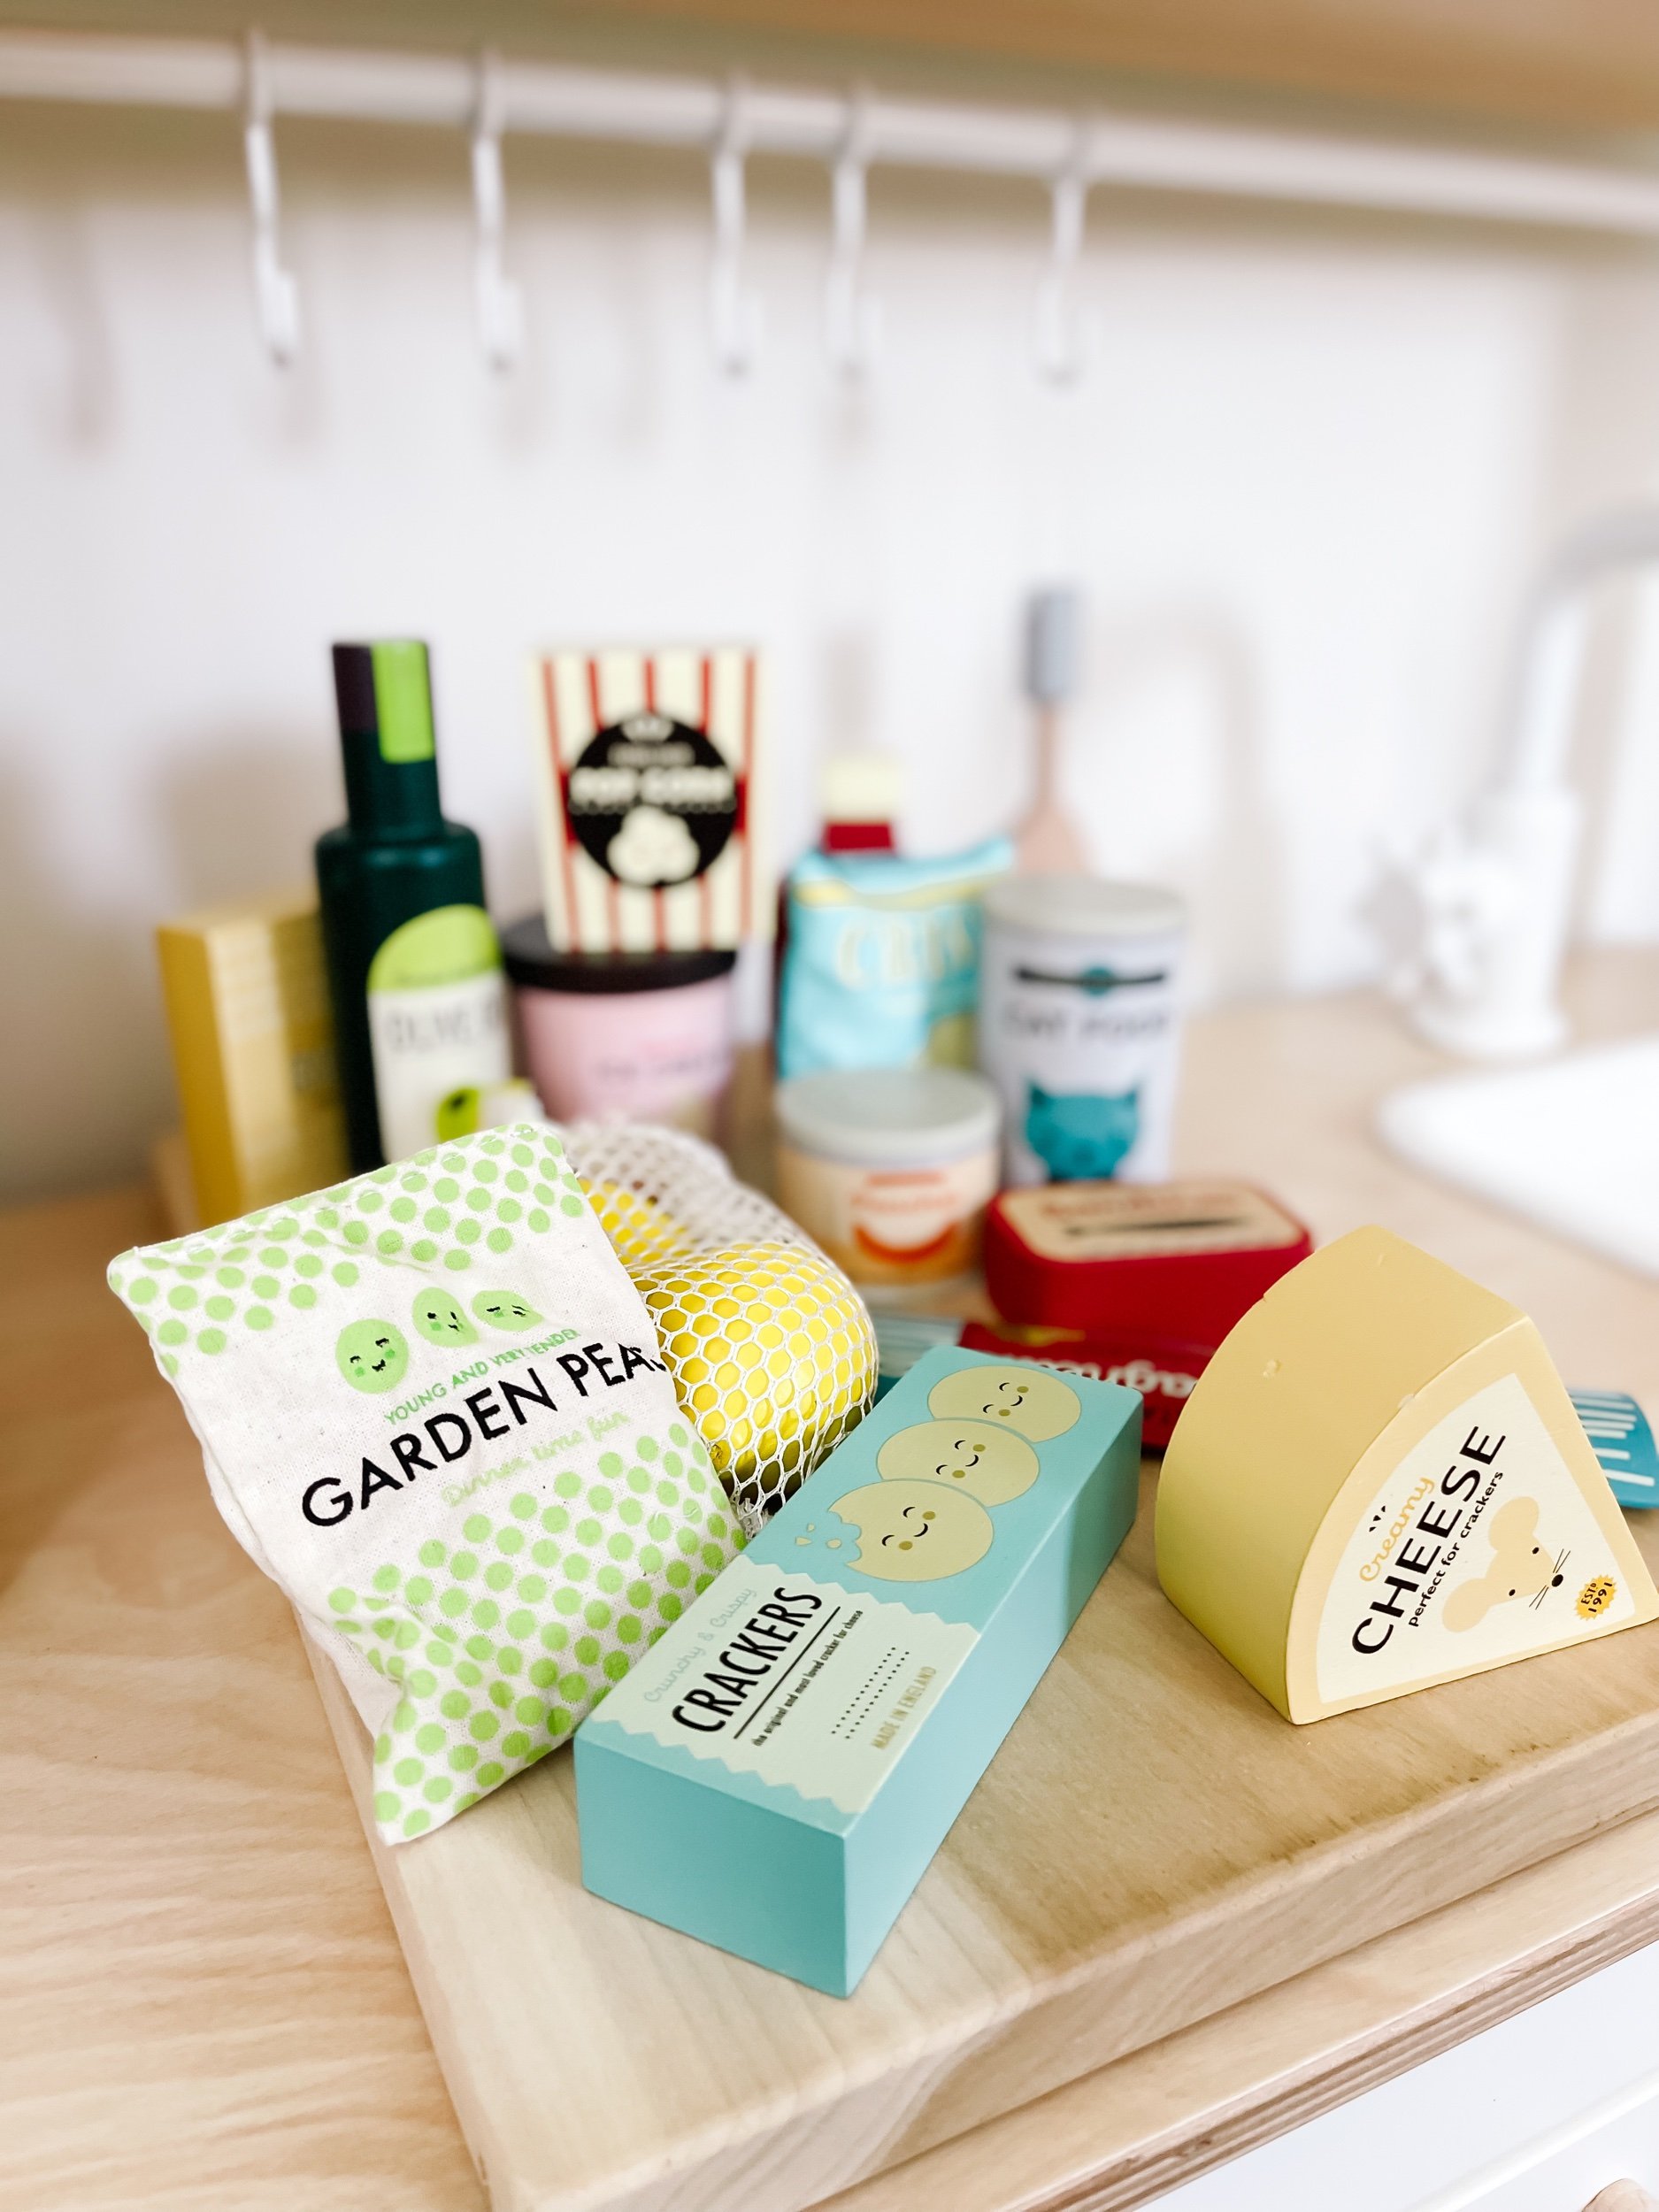
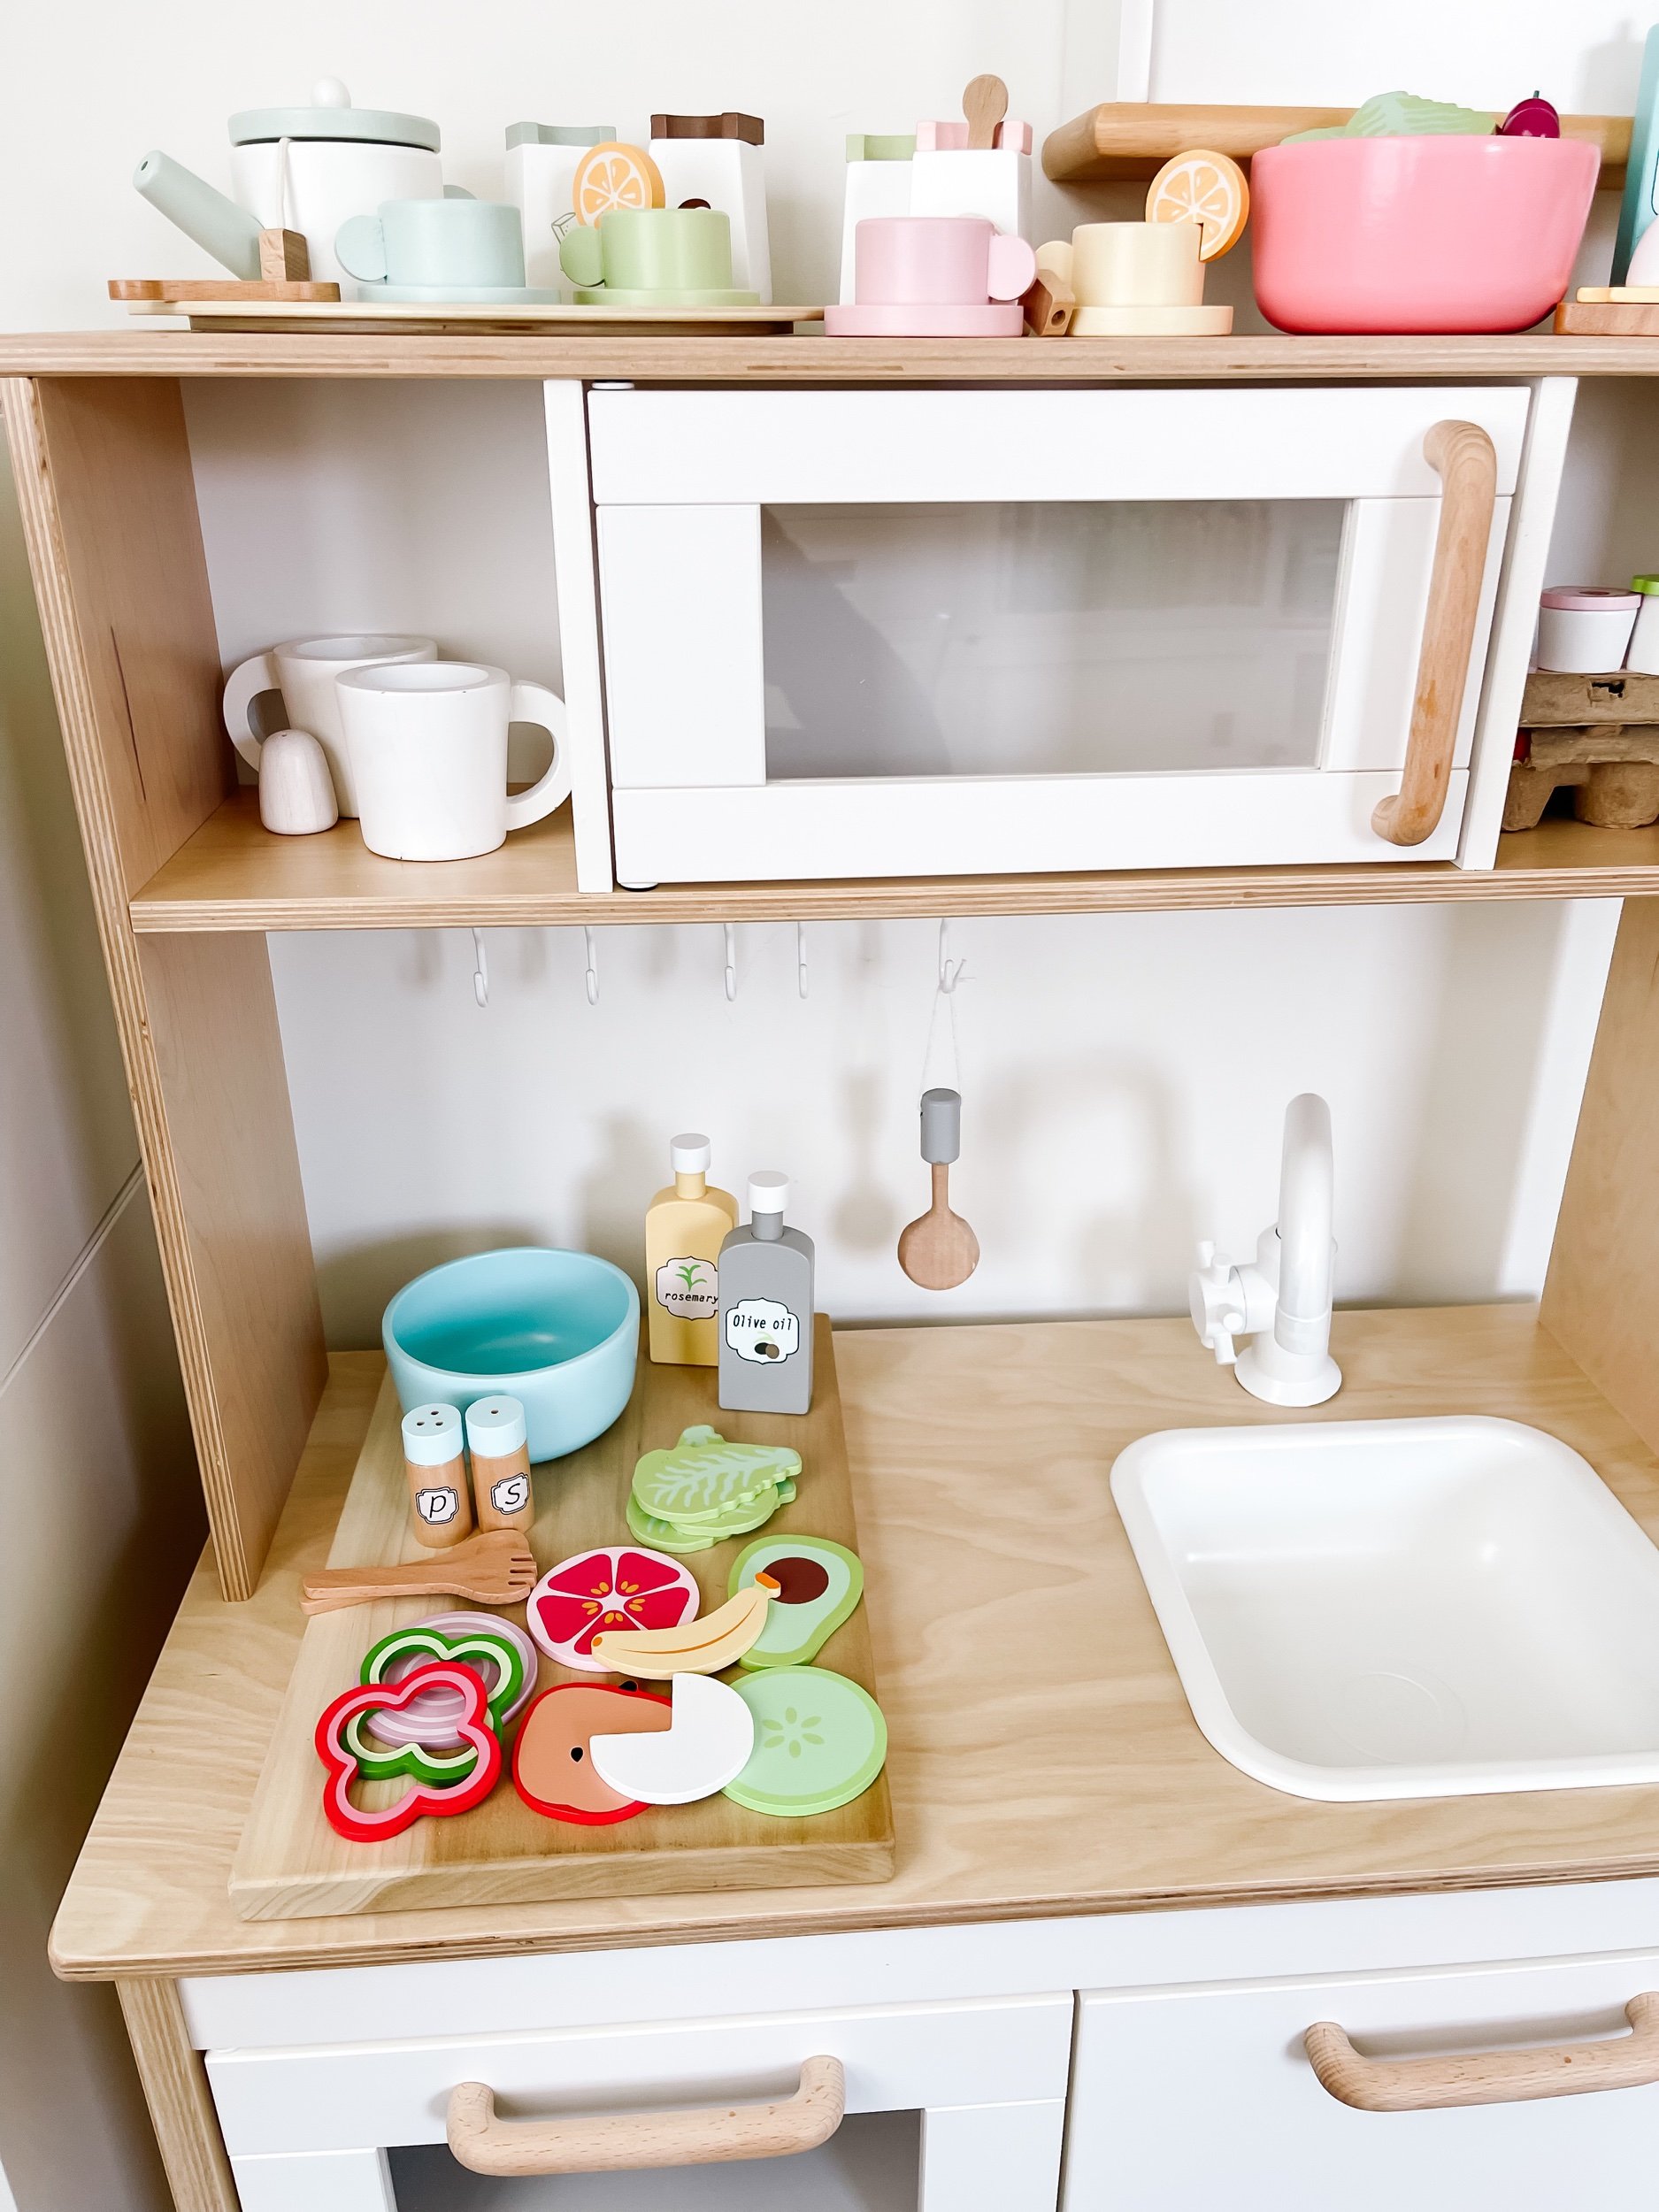
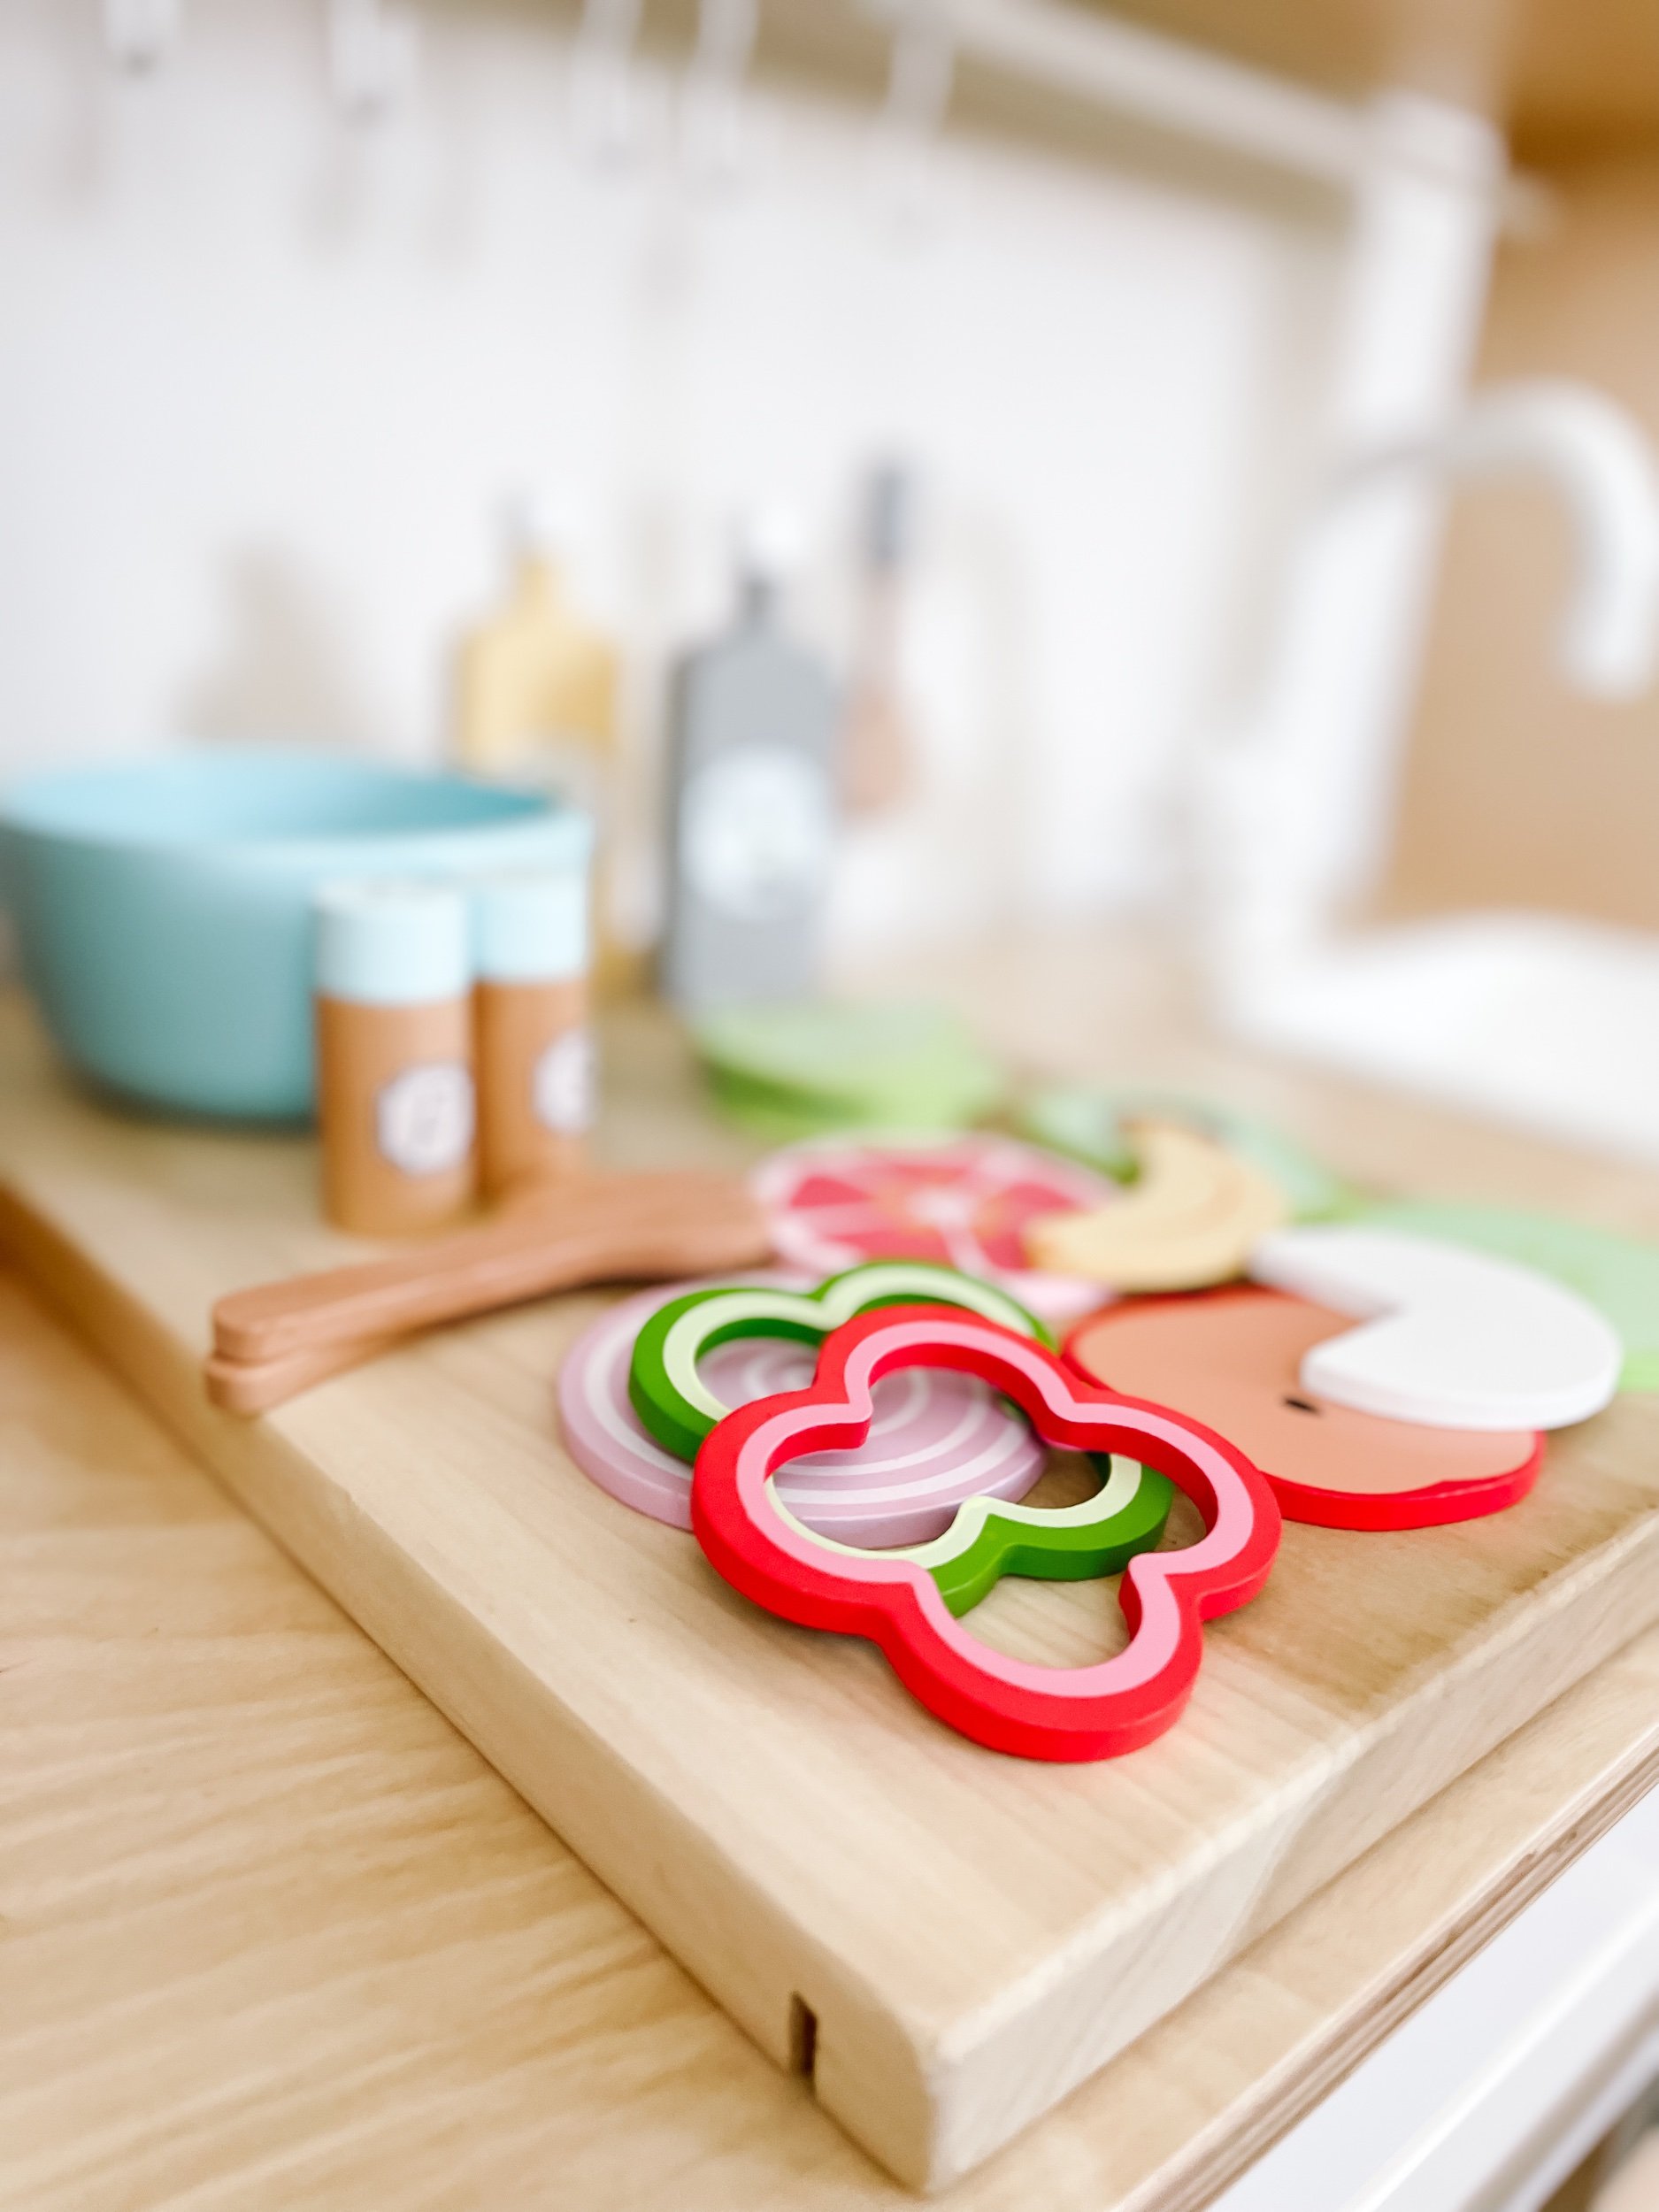
Pantry Items
I’ve been obsessed with these pantry items from Tender Leaf for a really long time now. So when I decided the take the plunge and buy the play kitchen, these were top of my list. I love the different textures of the bag of peas, the lemons, and of course the high quality of the play food itself. I knew these items would be a great addition to my Ikea play kitchen renovation.
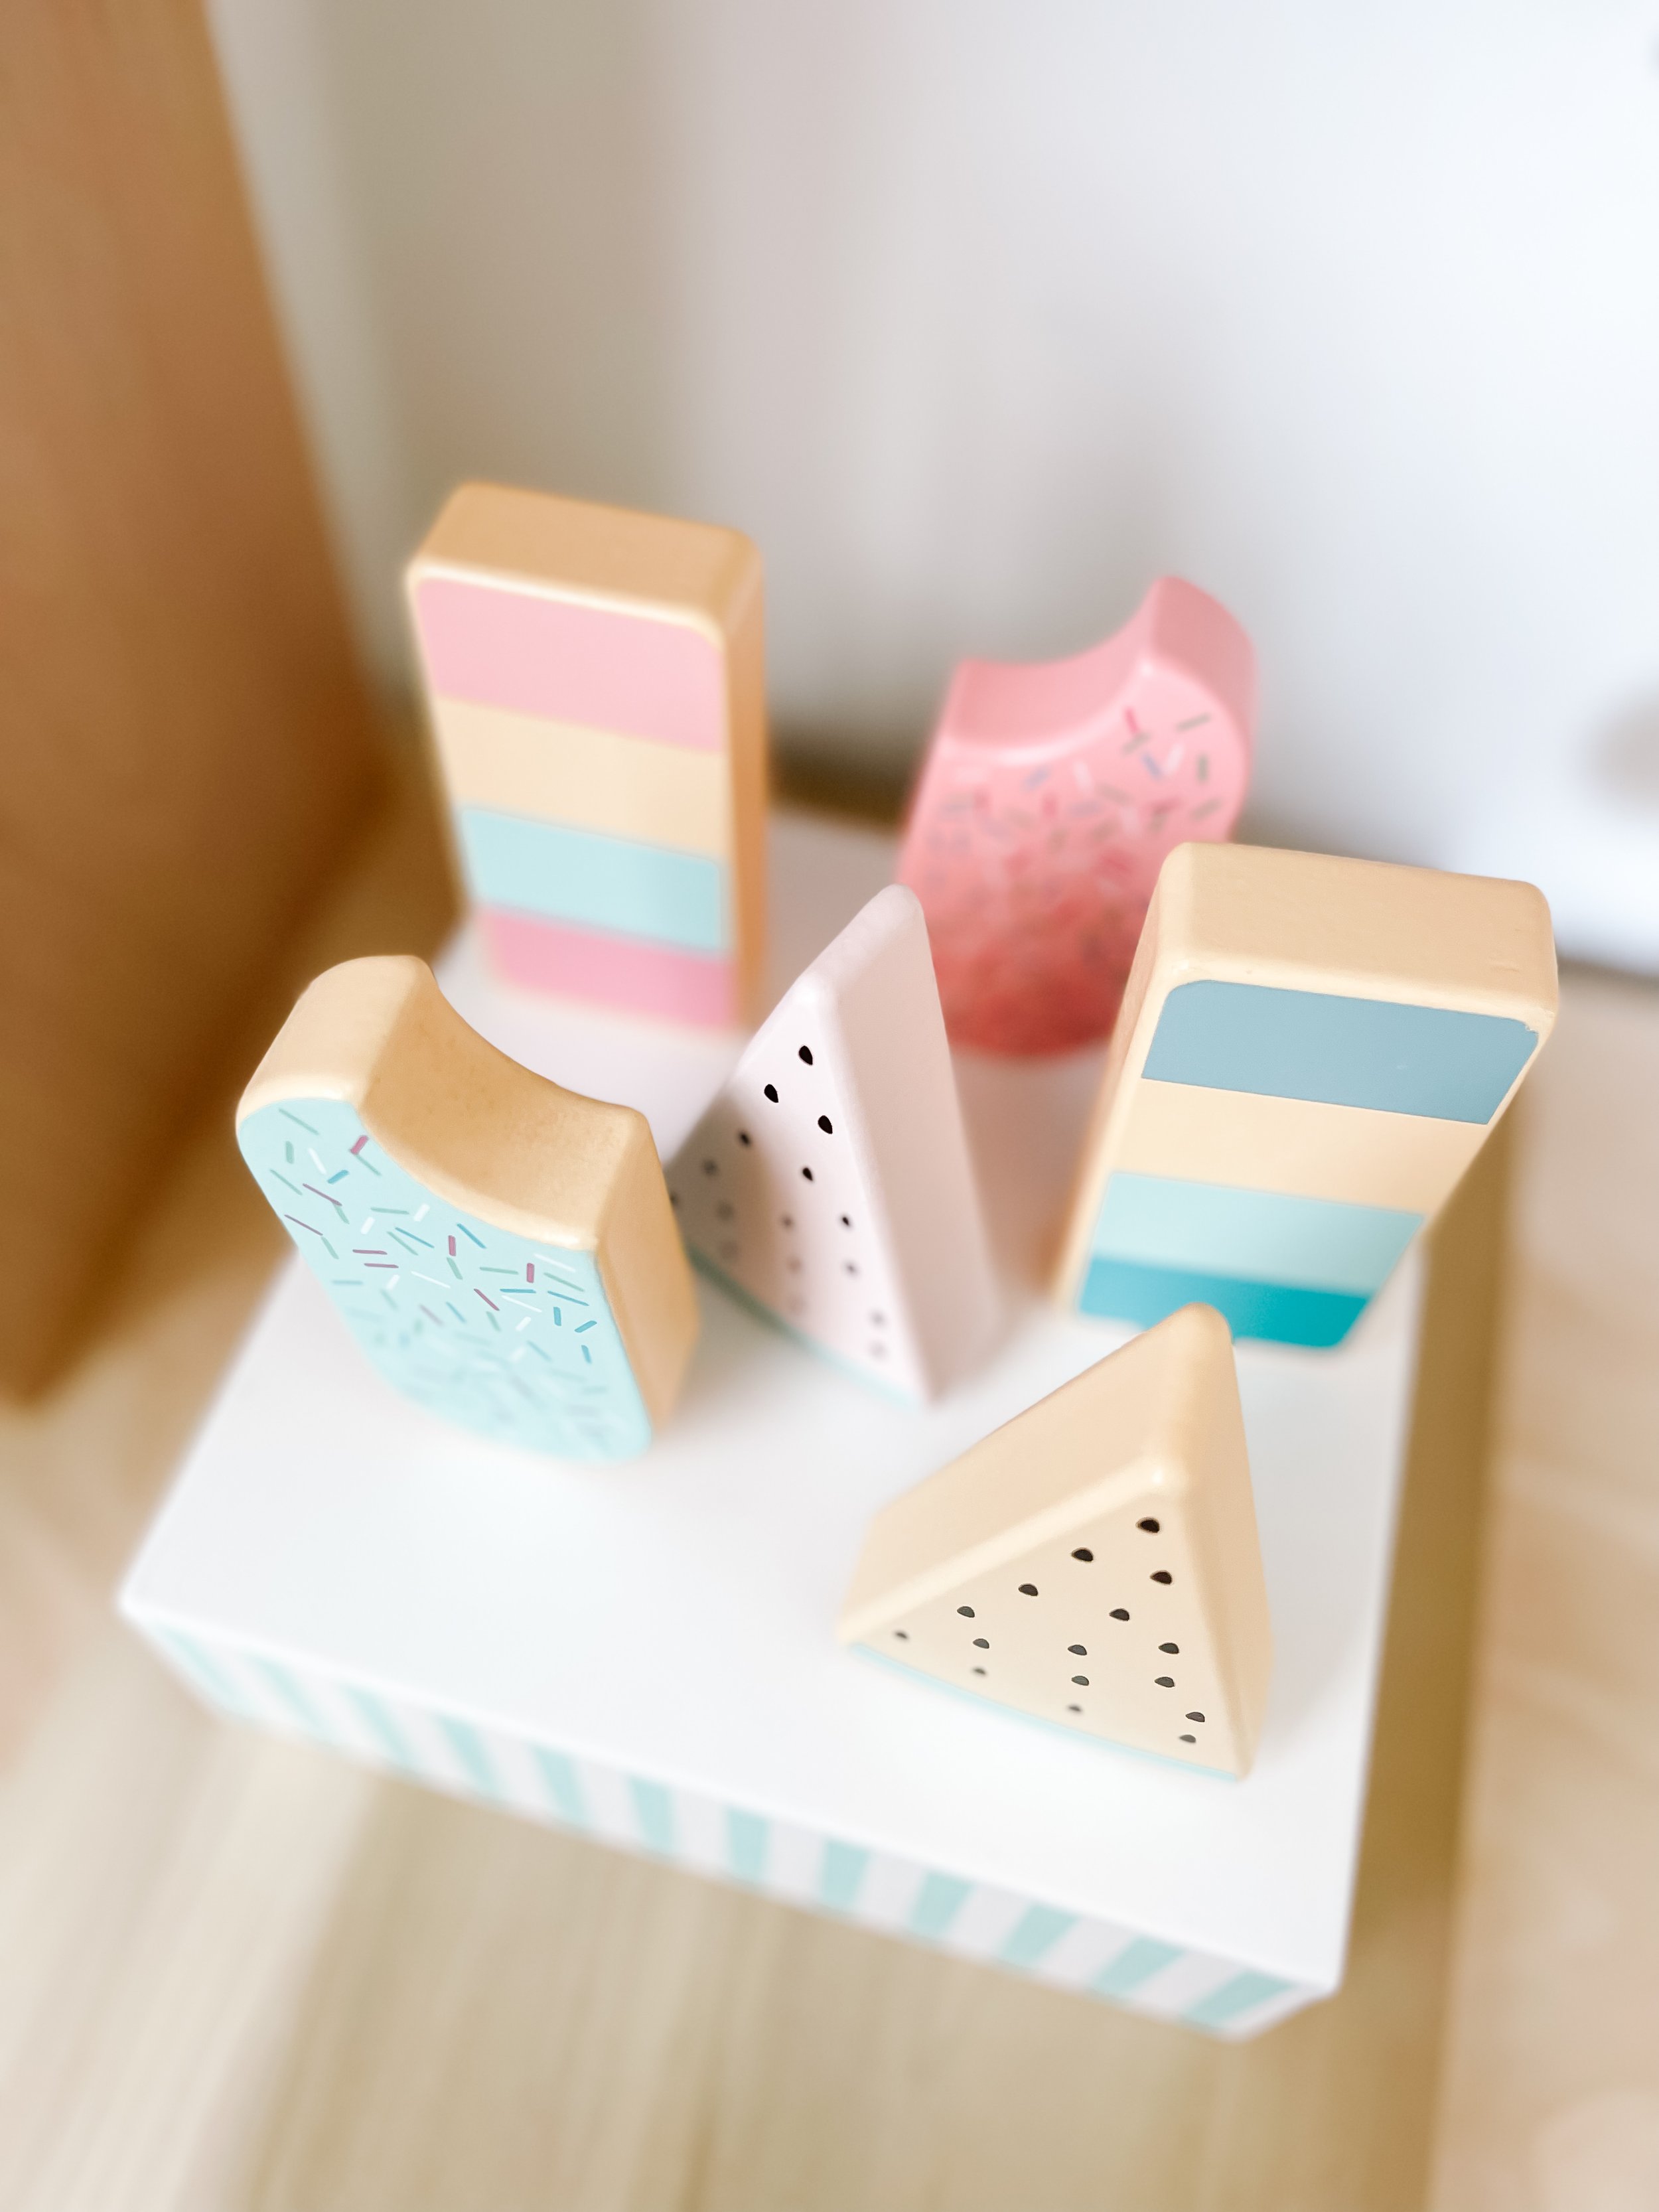
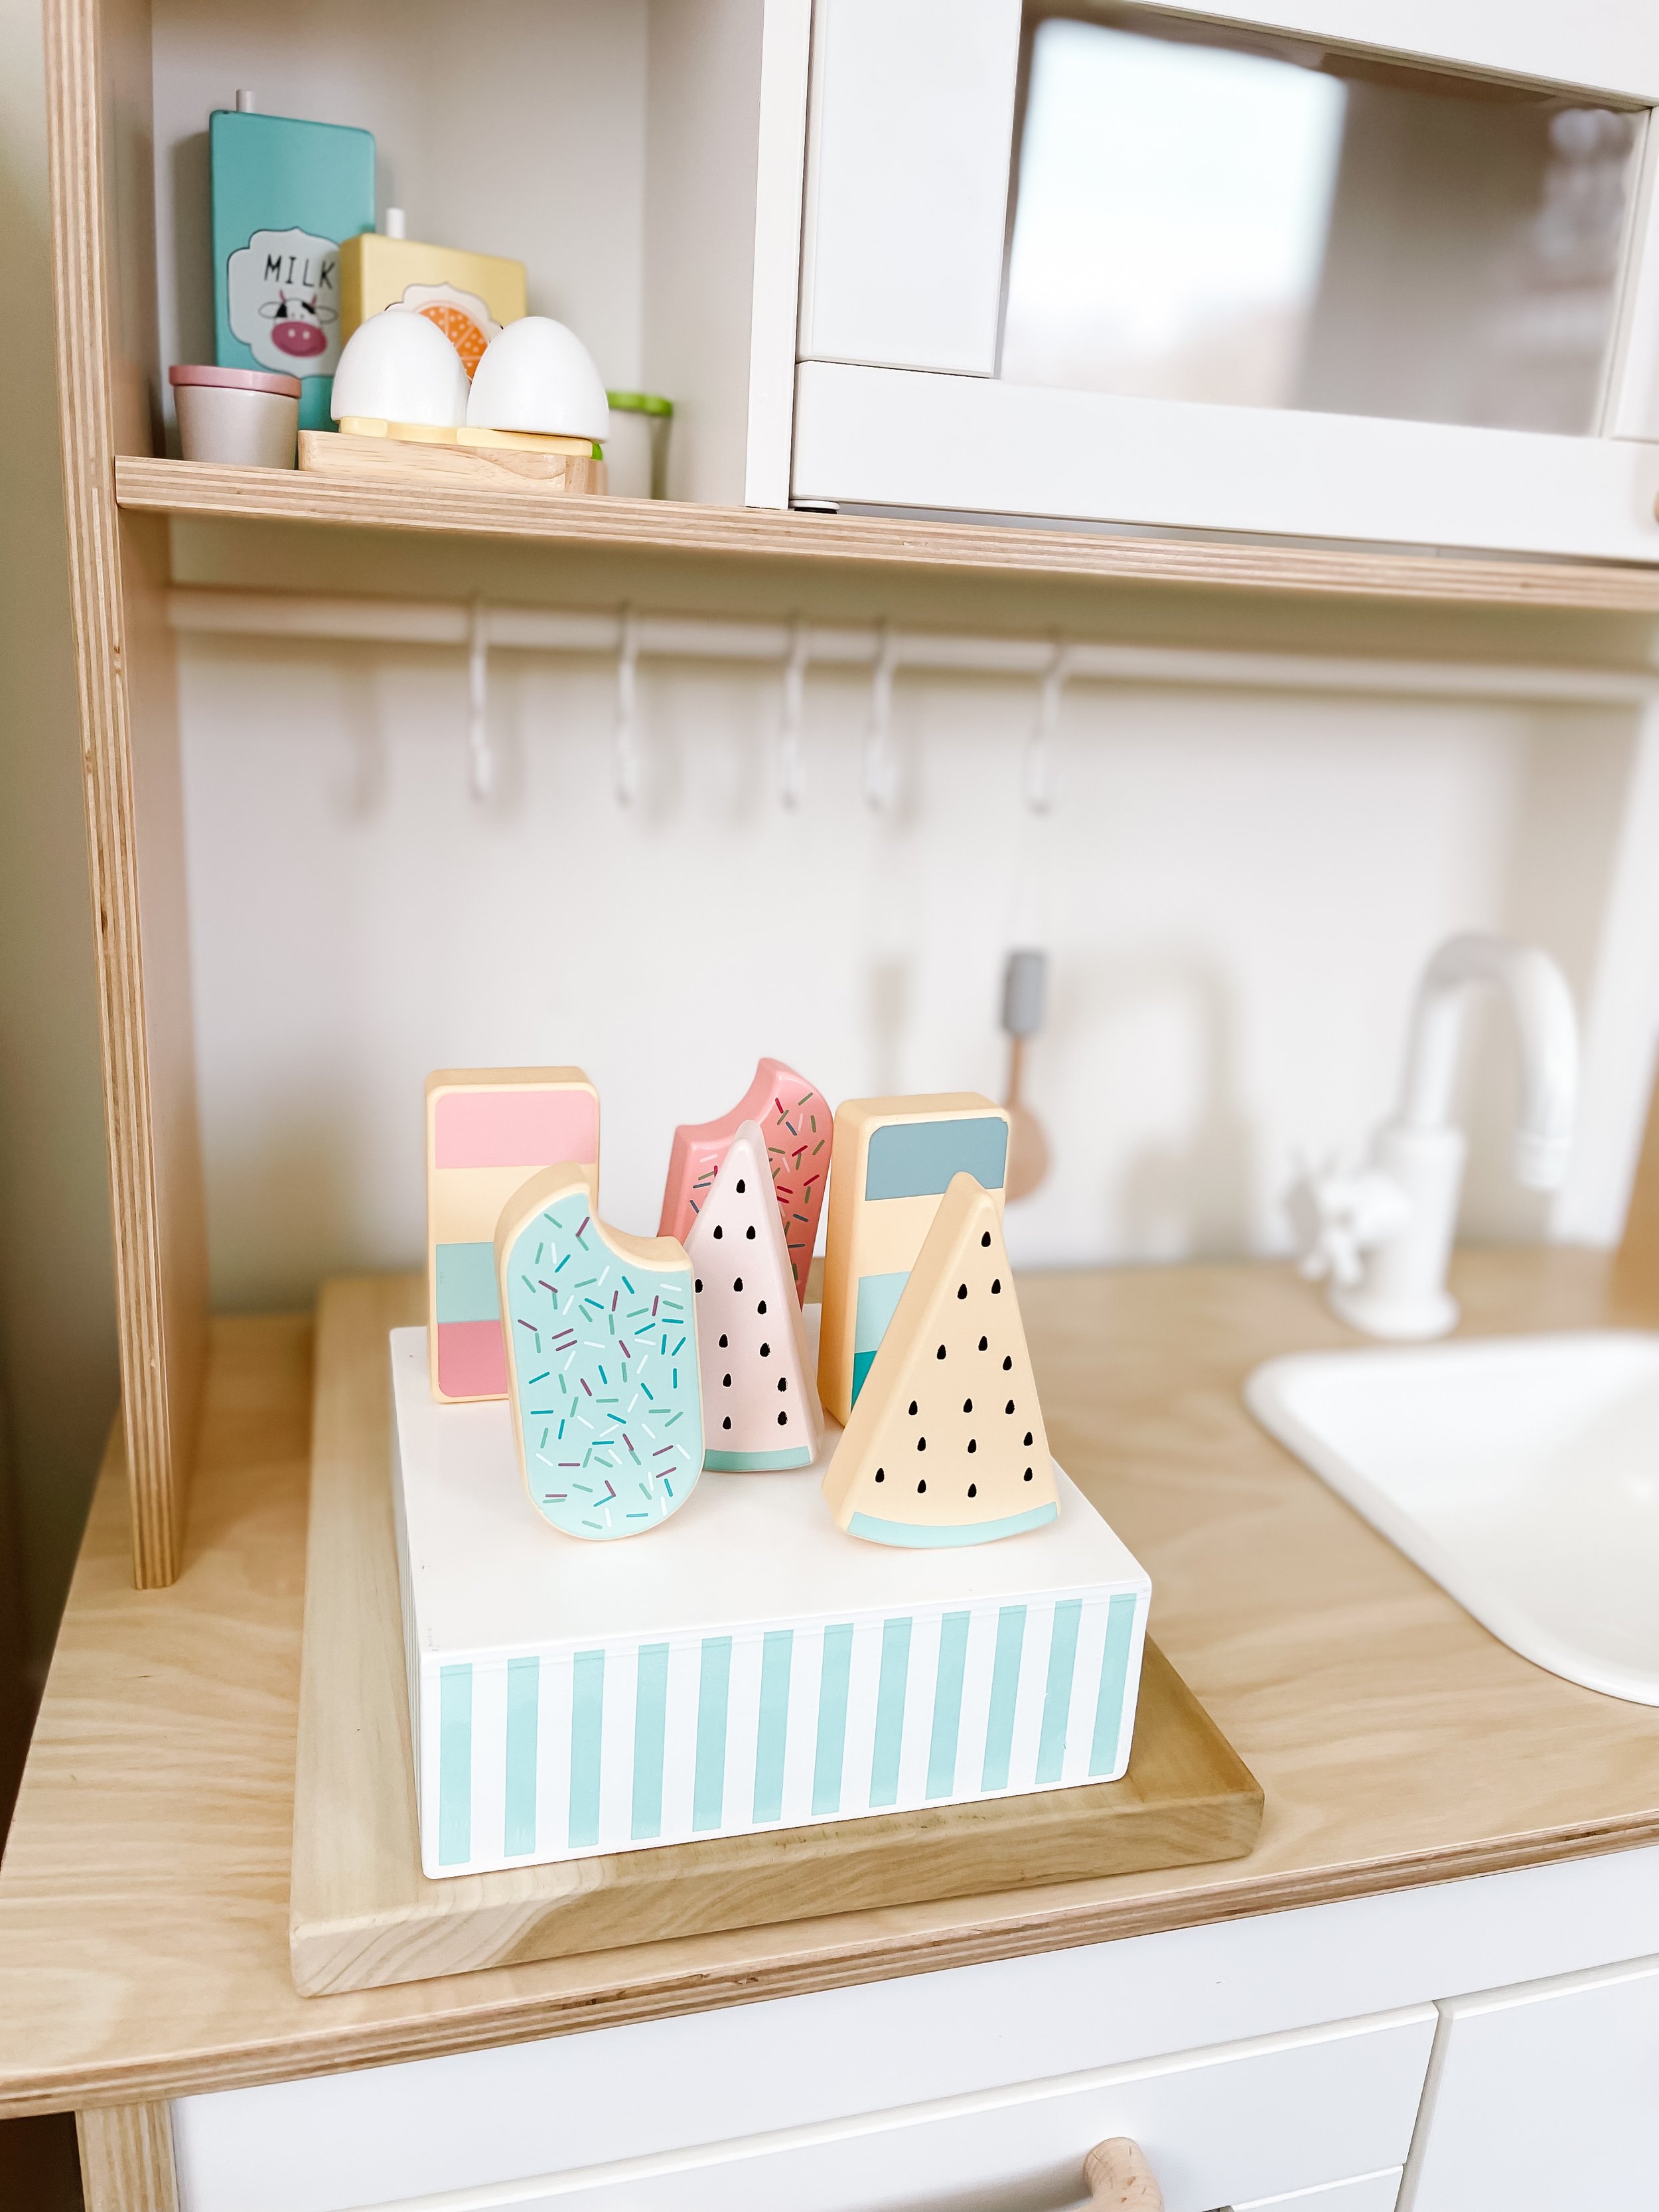
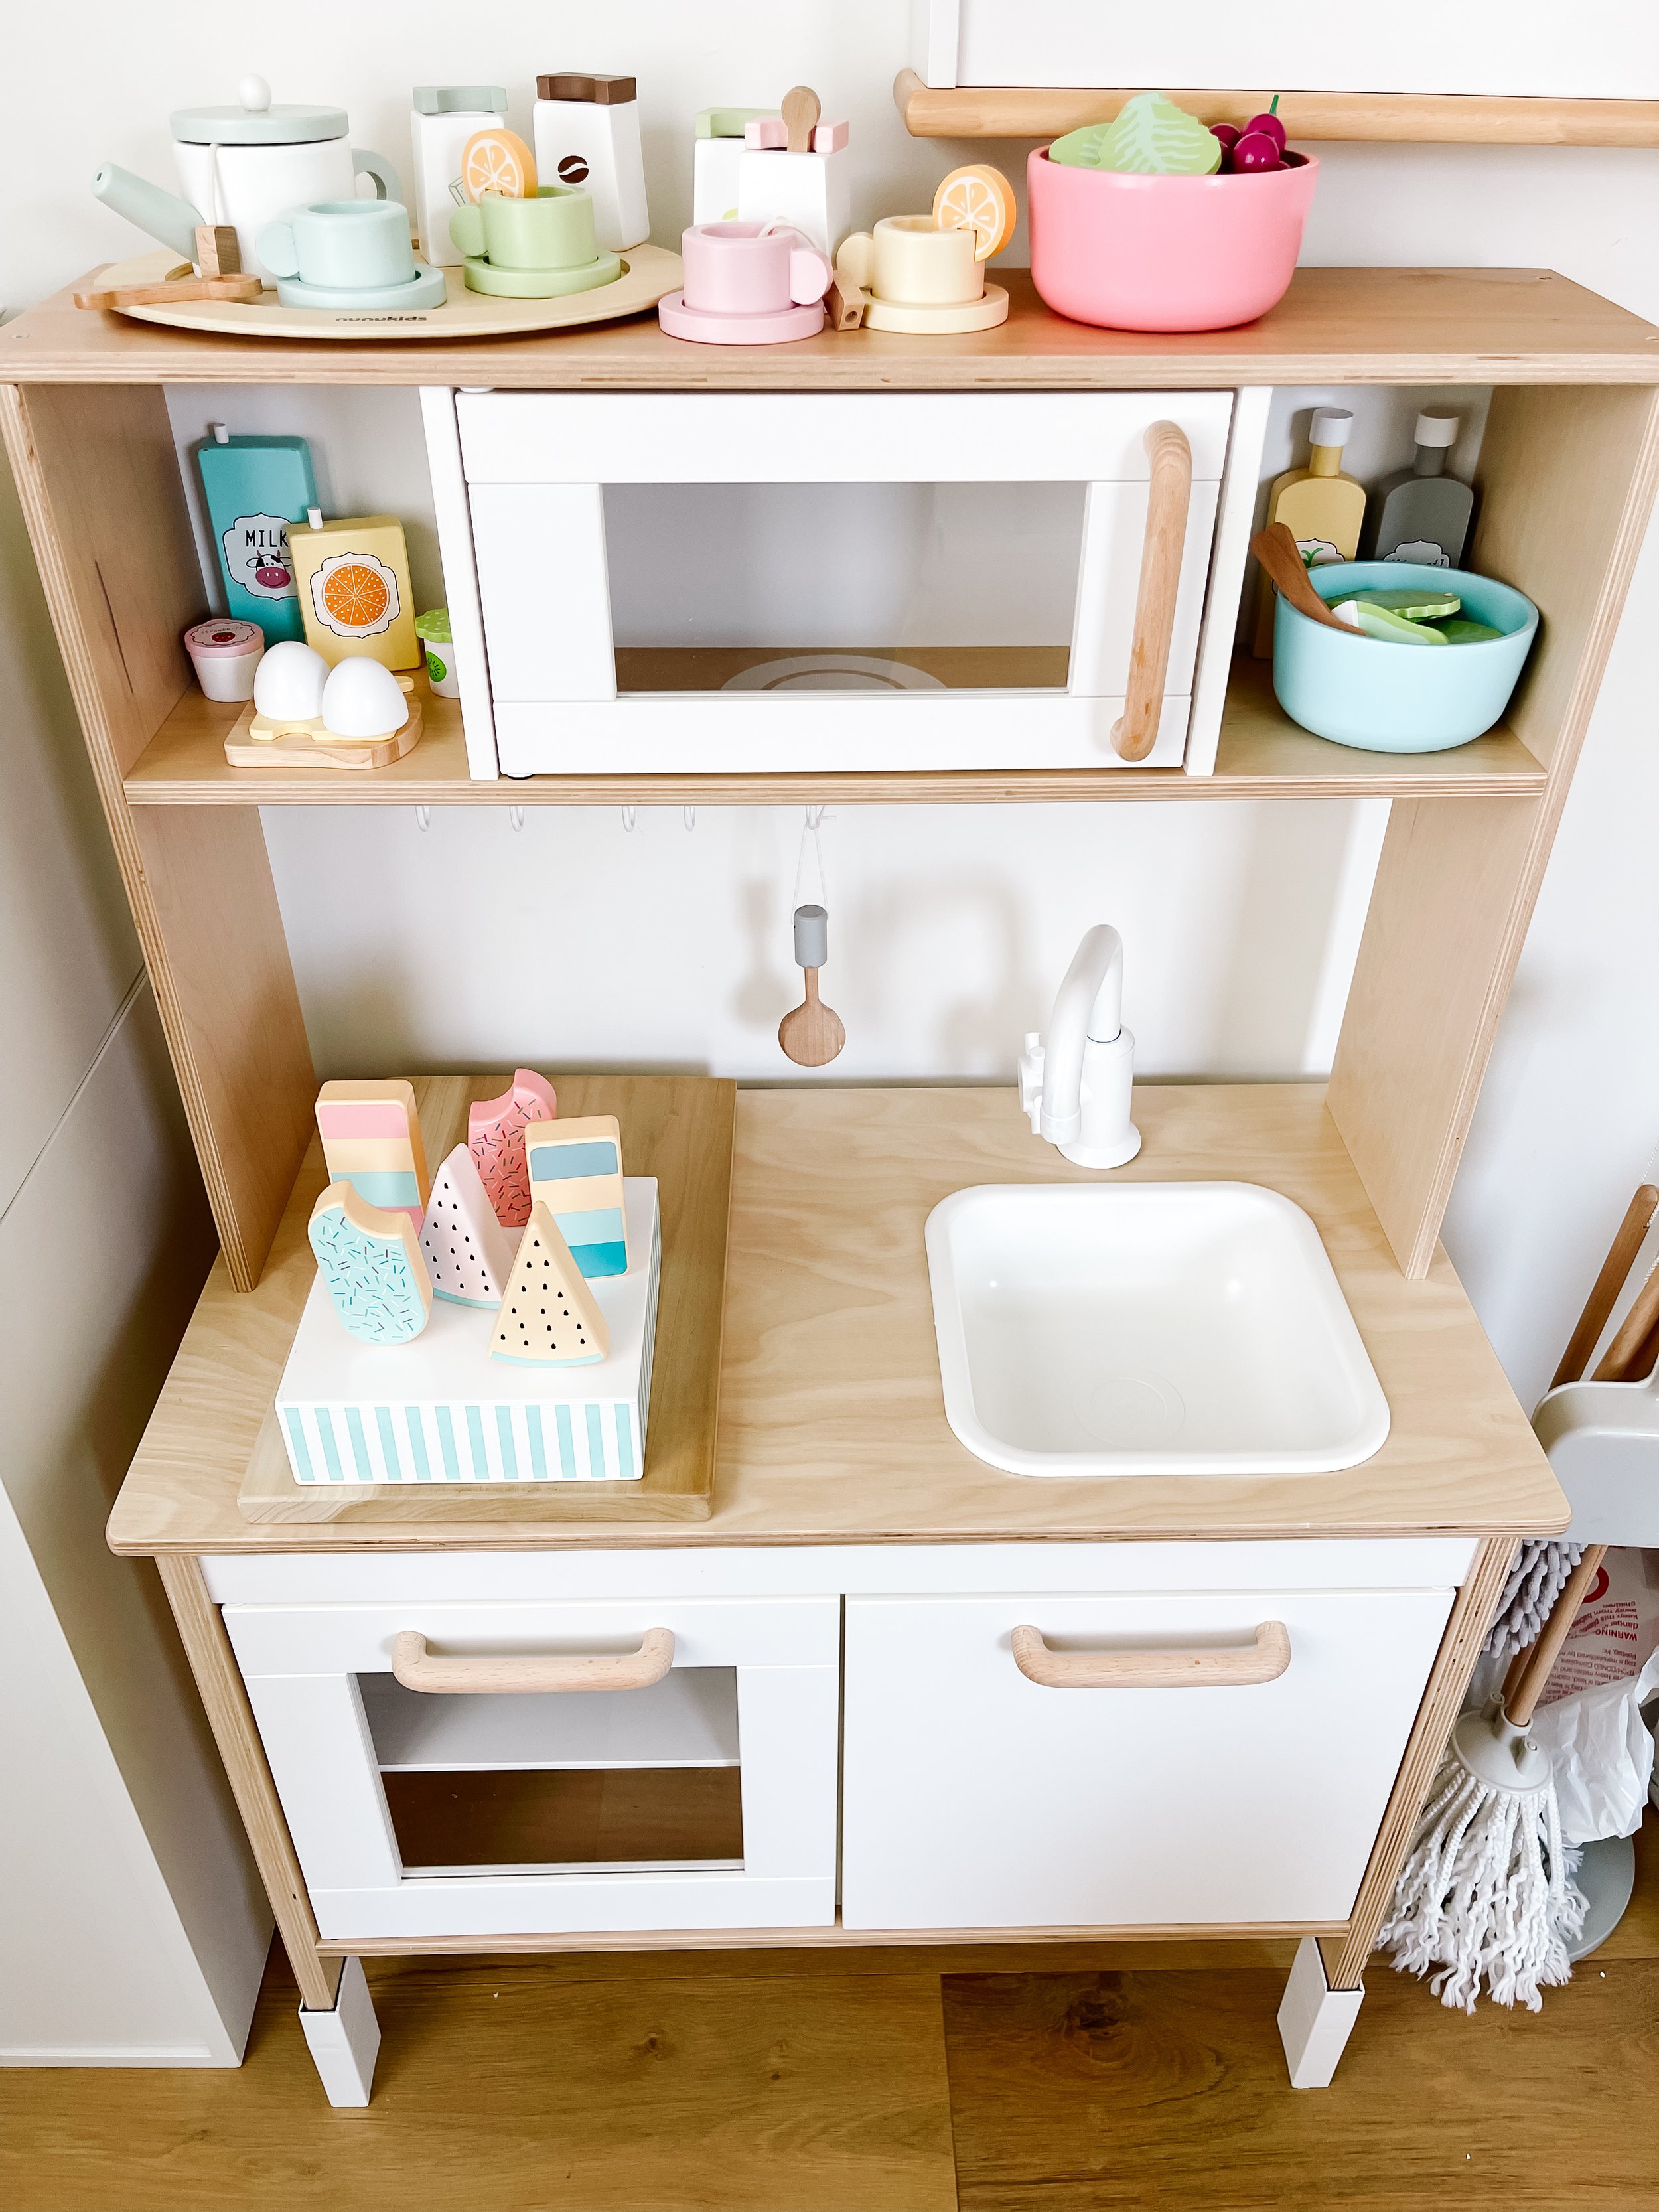
Popsicles play food
You can’t have a play kitchen without a few sweet treats! And I just loved the look of these pastel popsicles. They’re so perfect for summer play activities and Sofia loves giving them out.
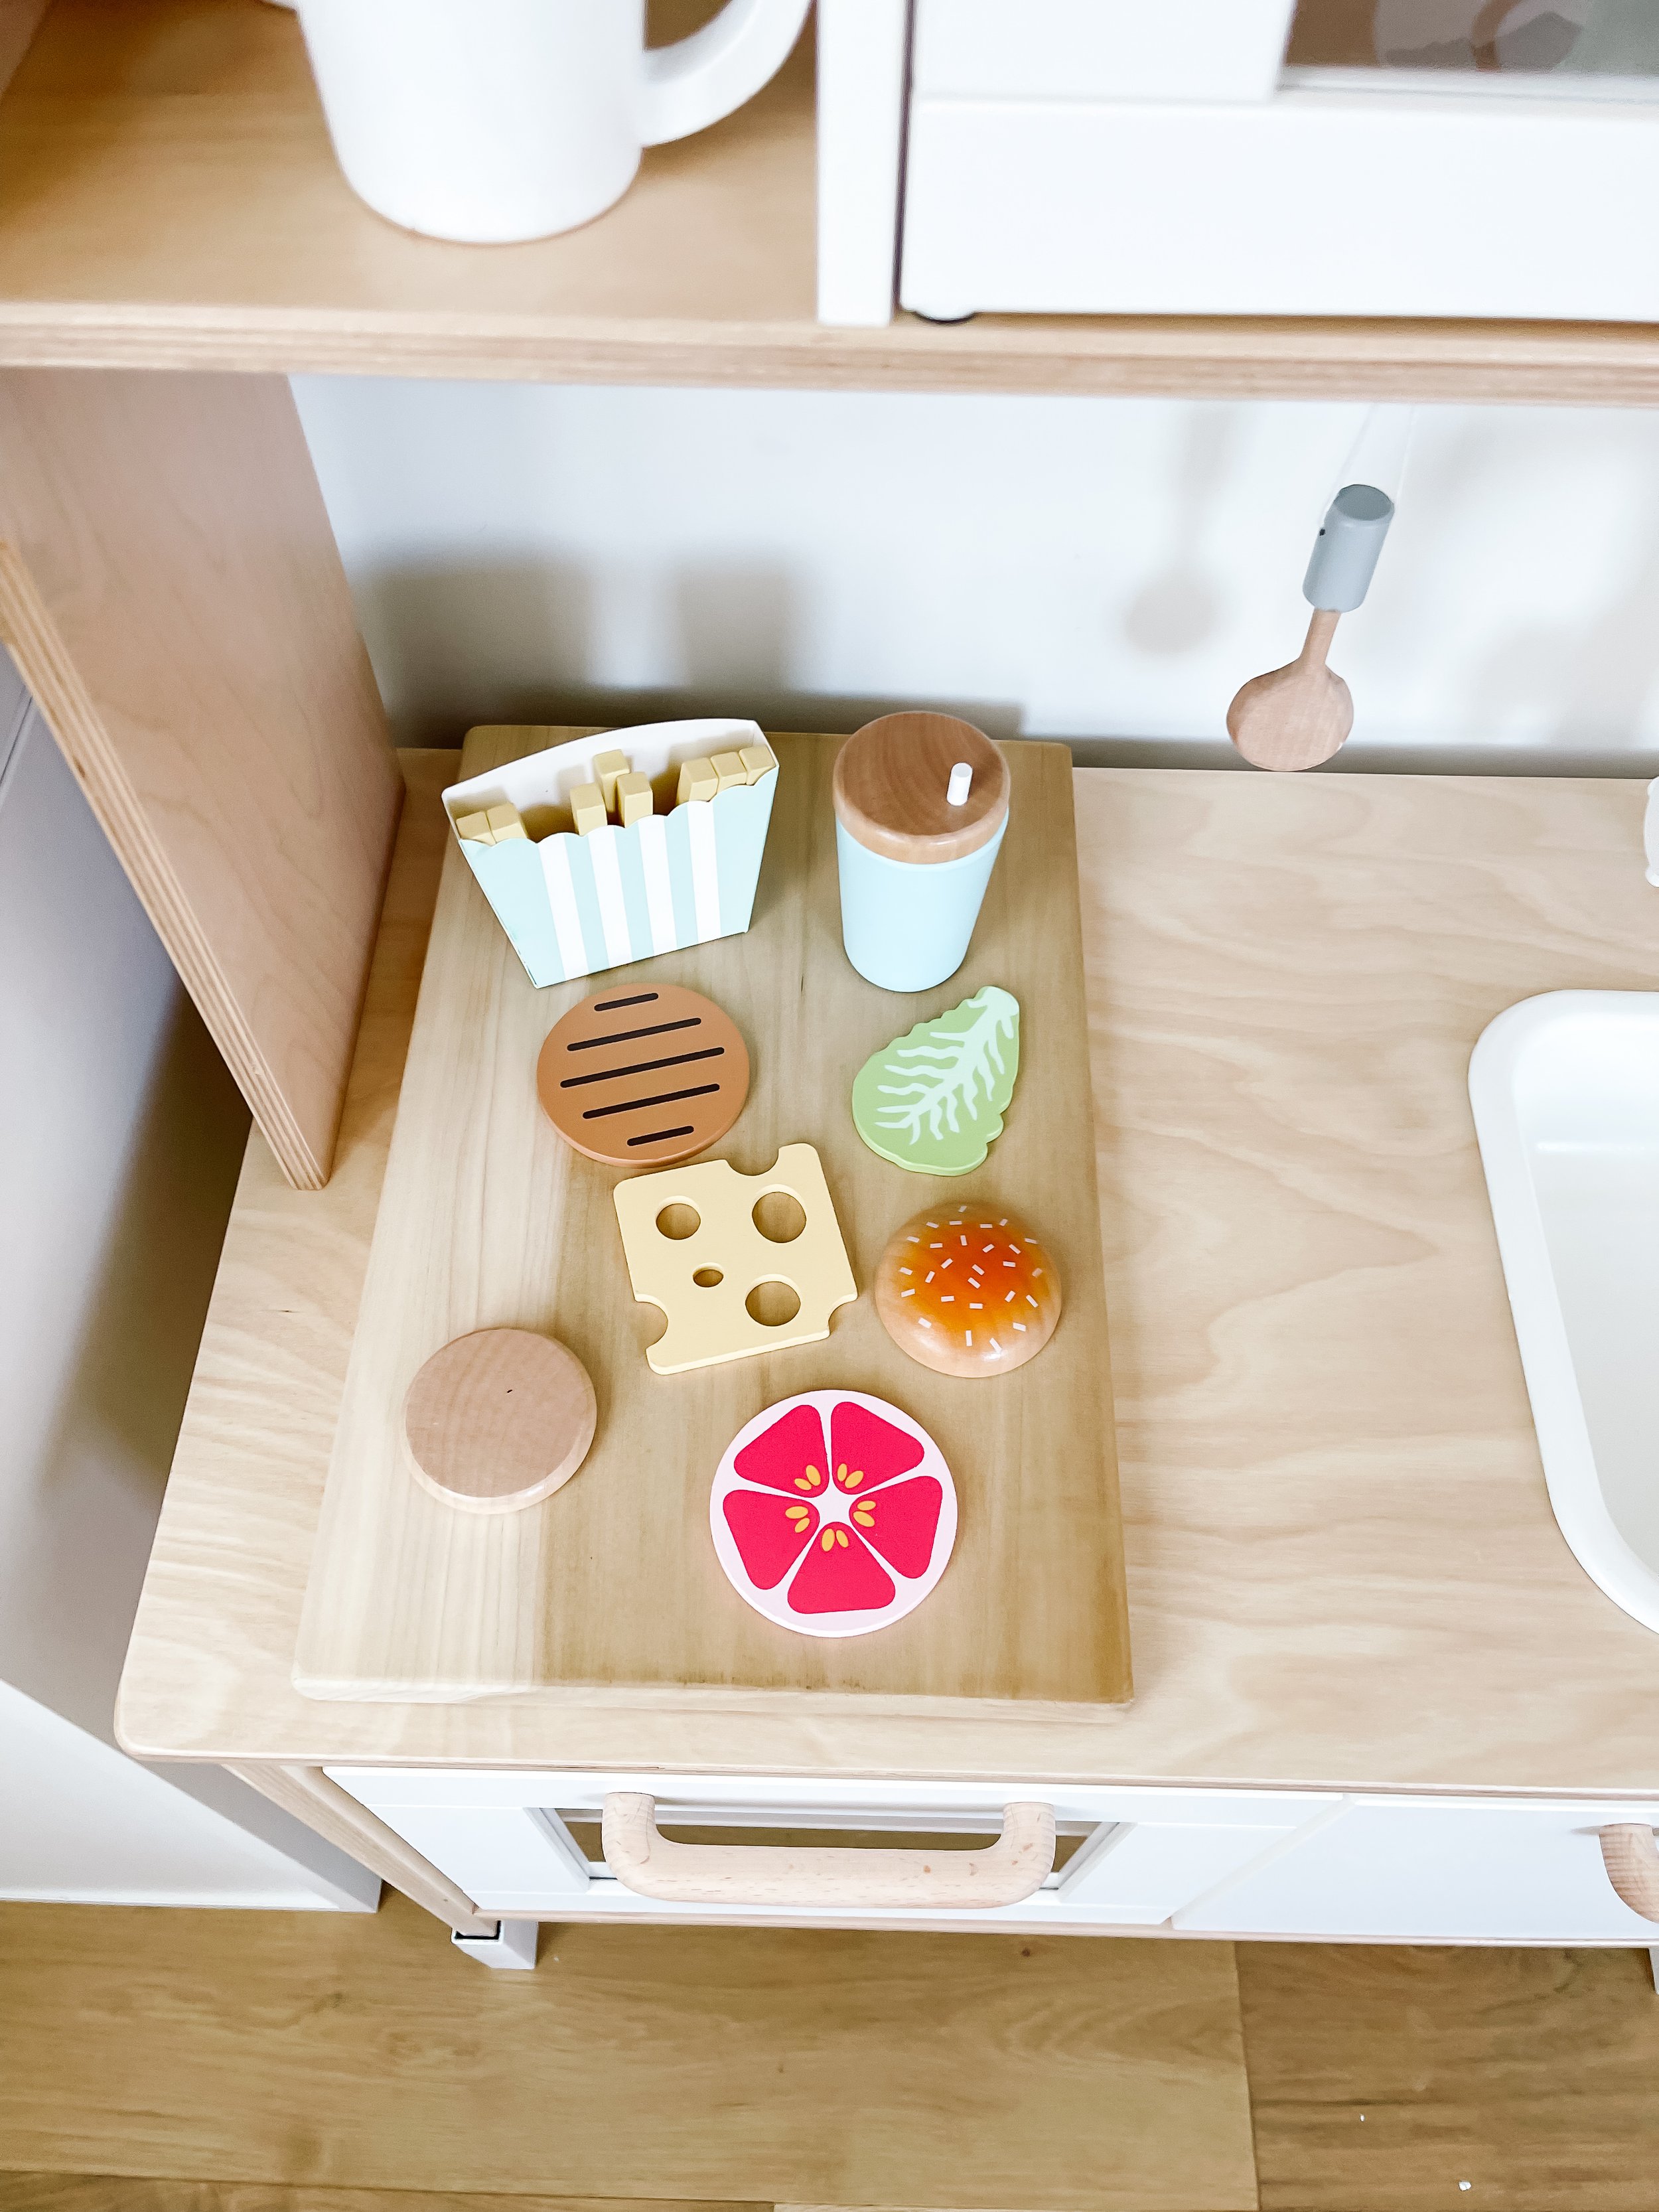
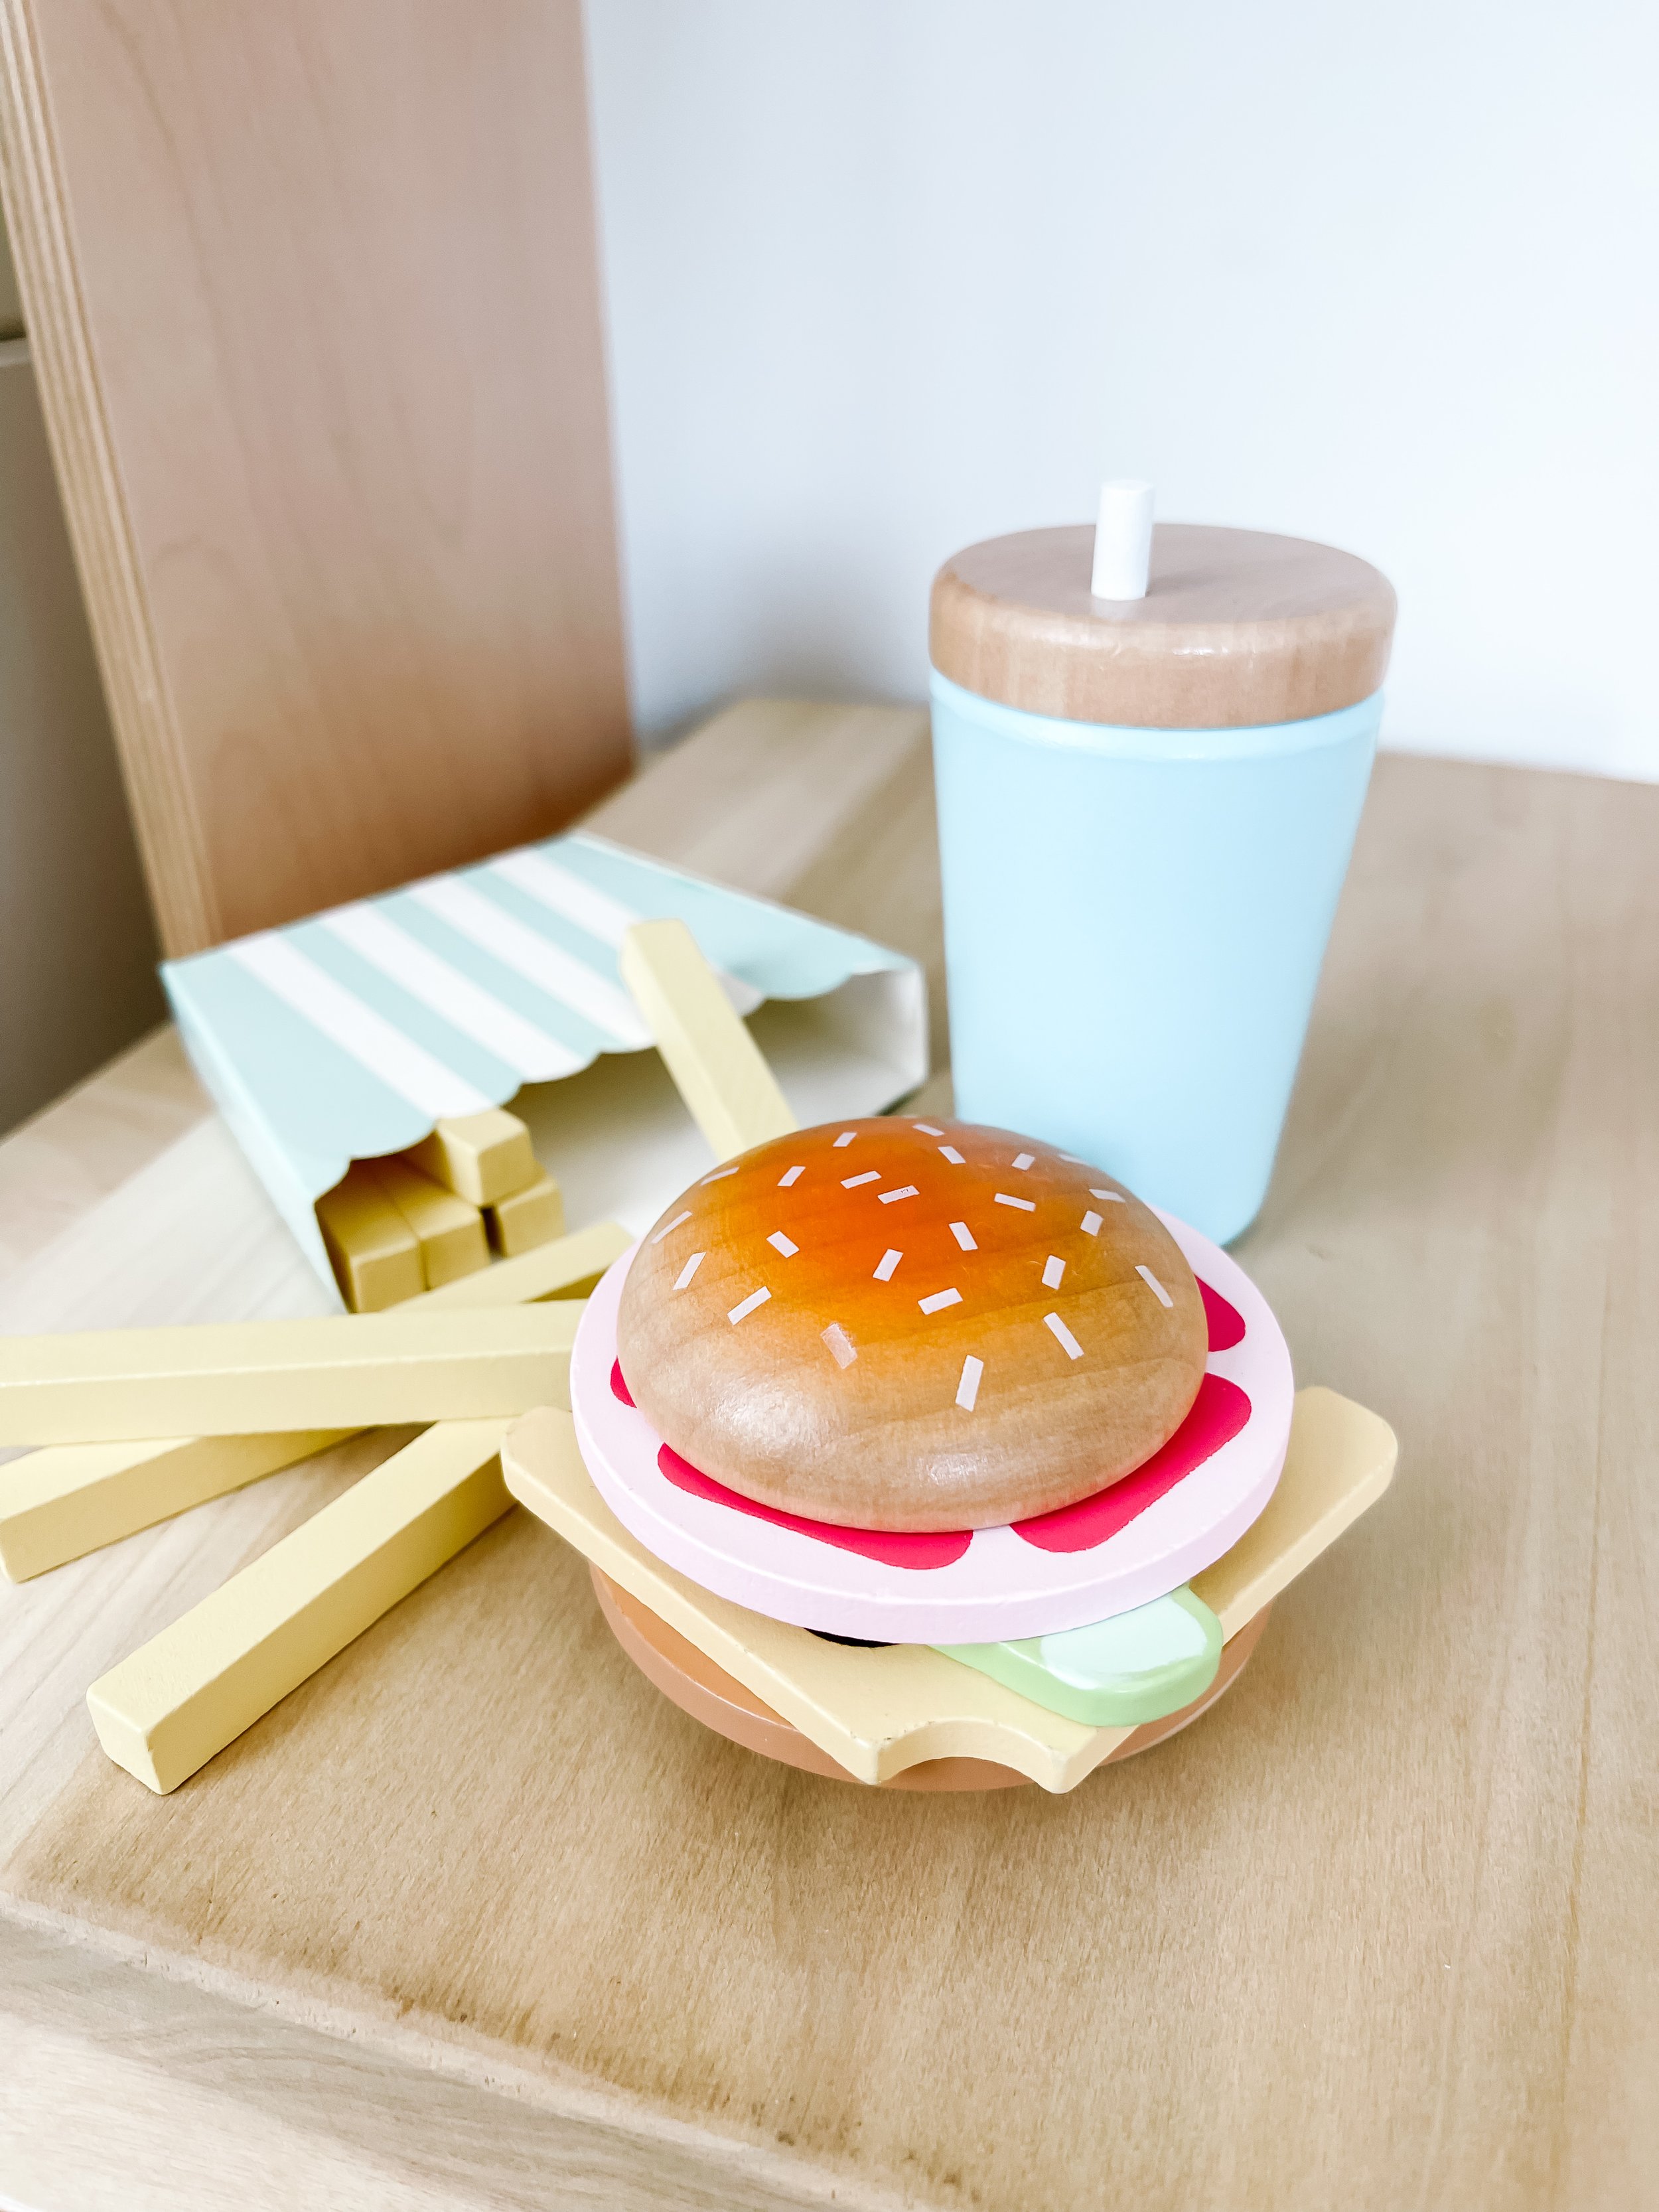
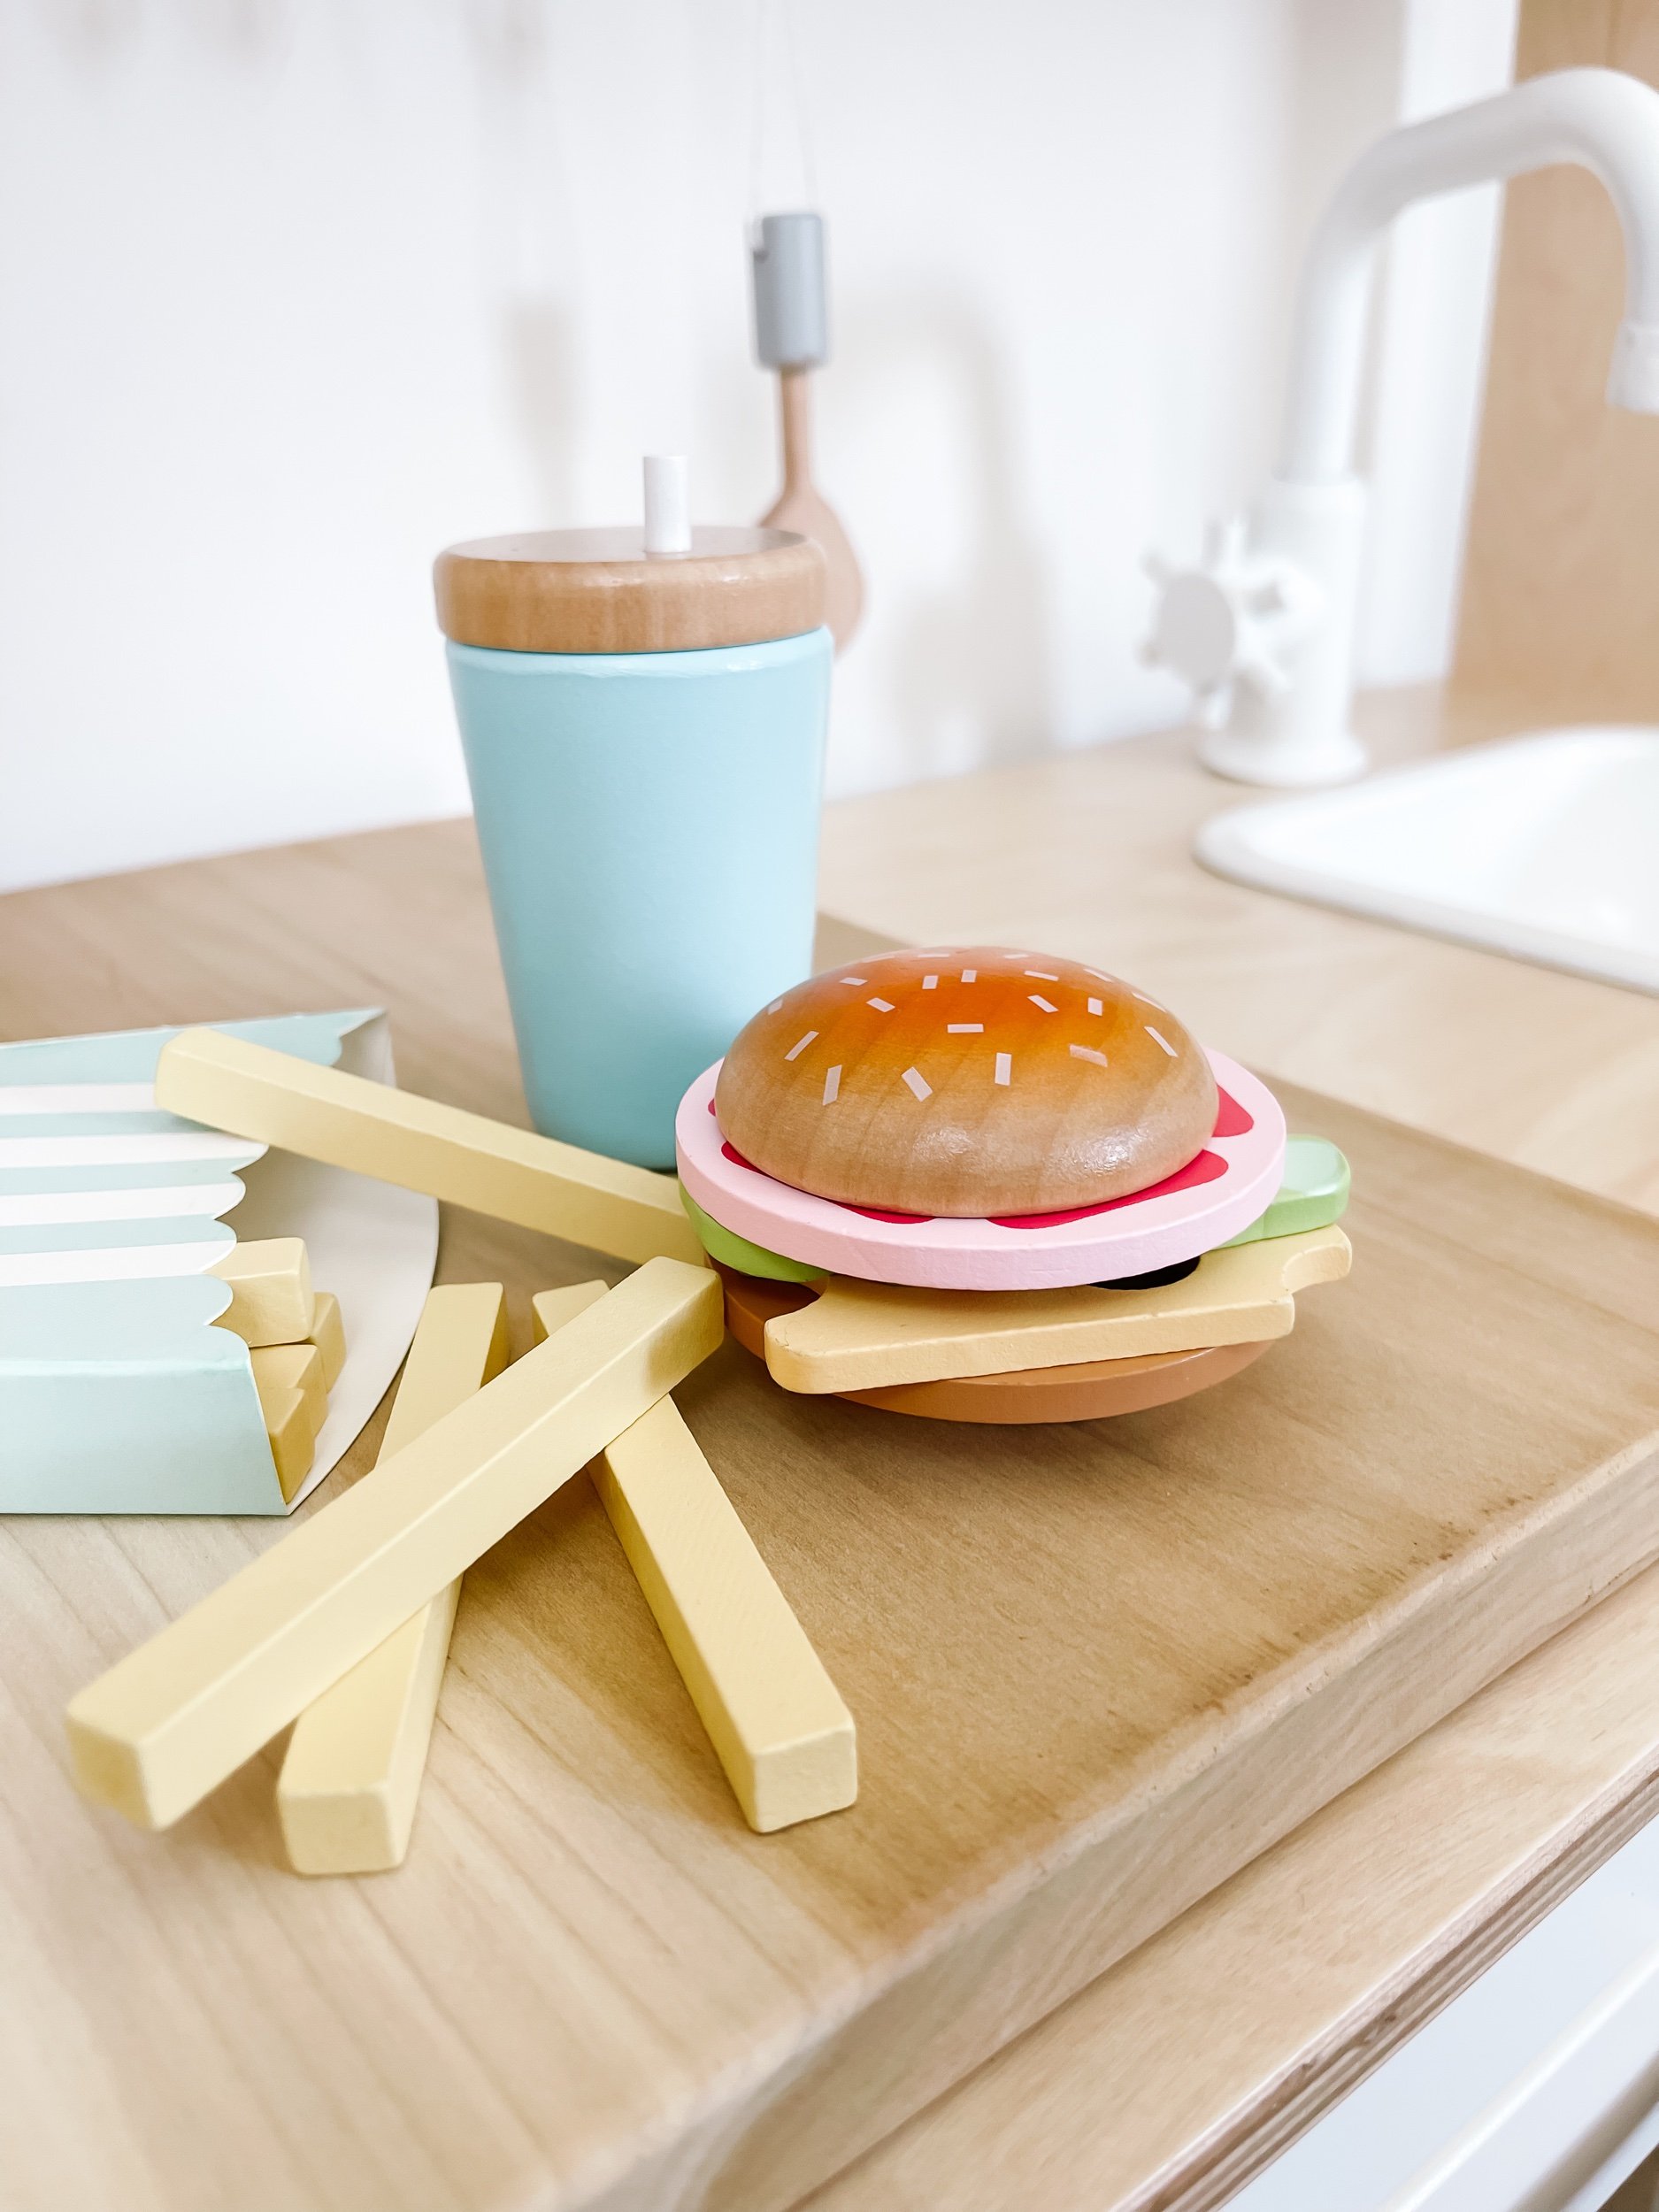
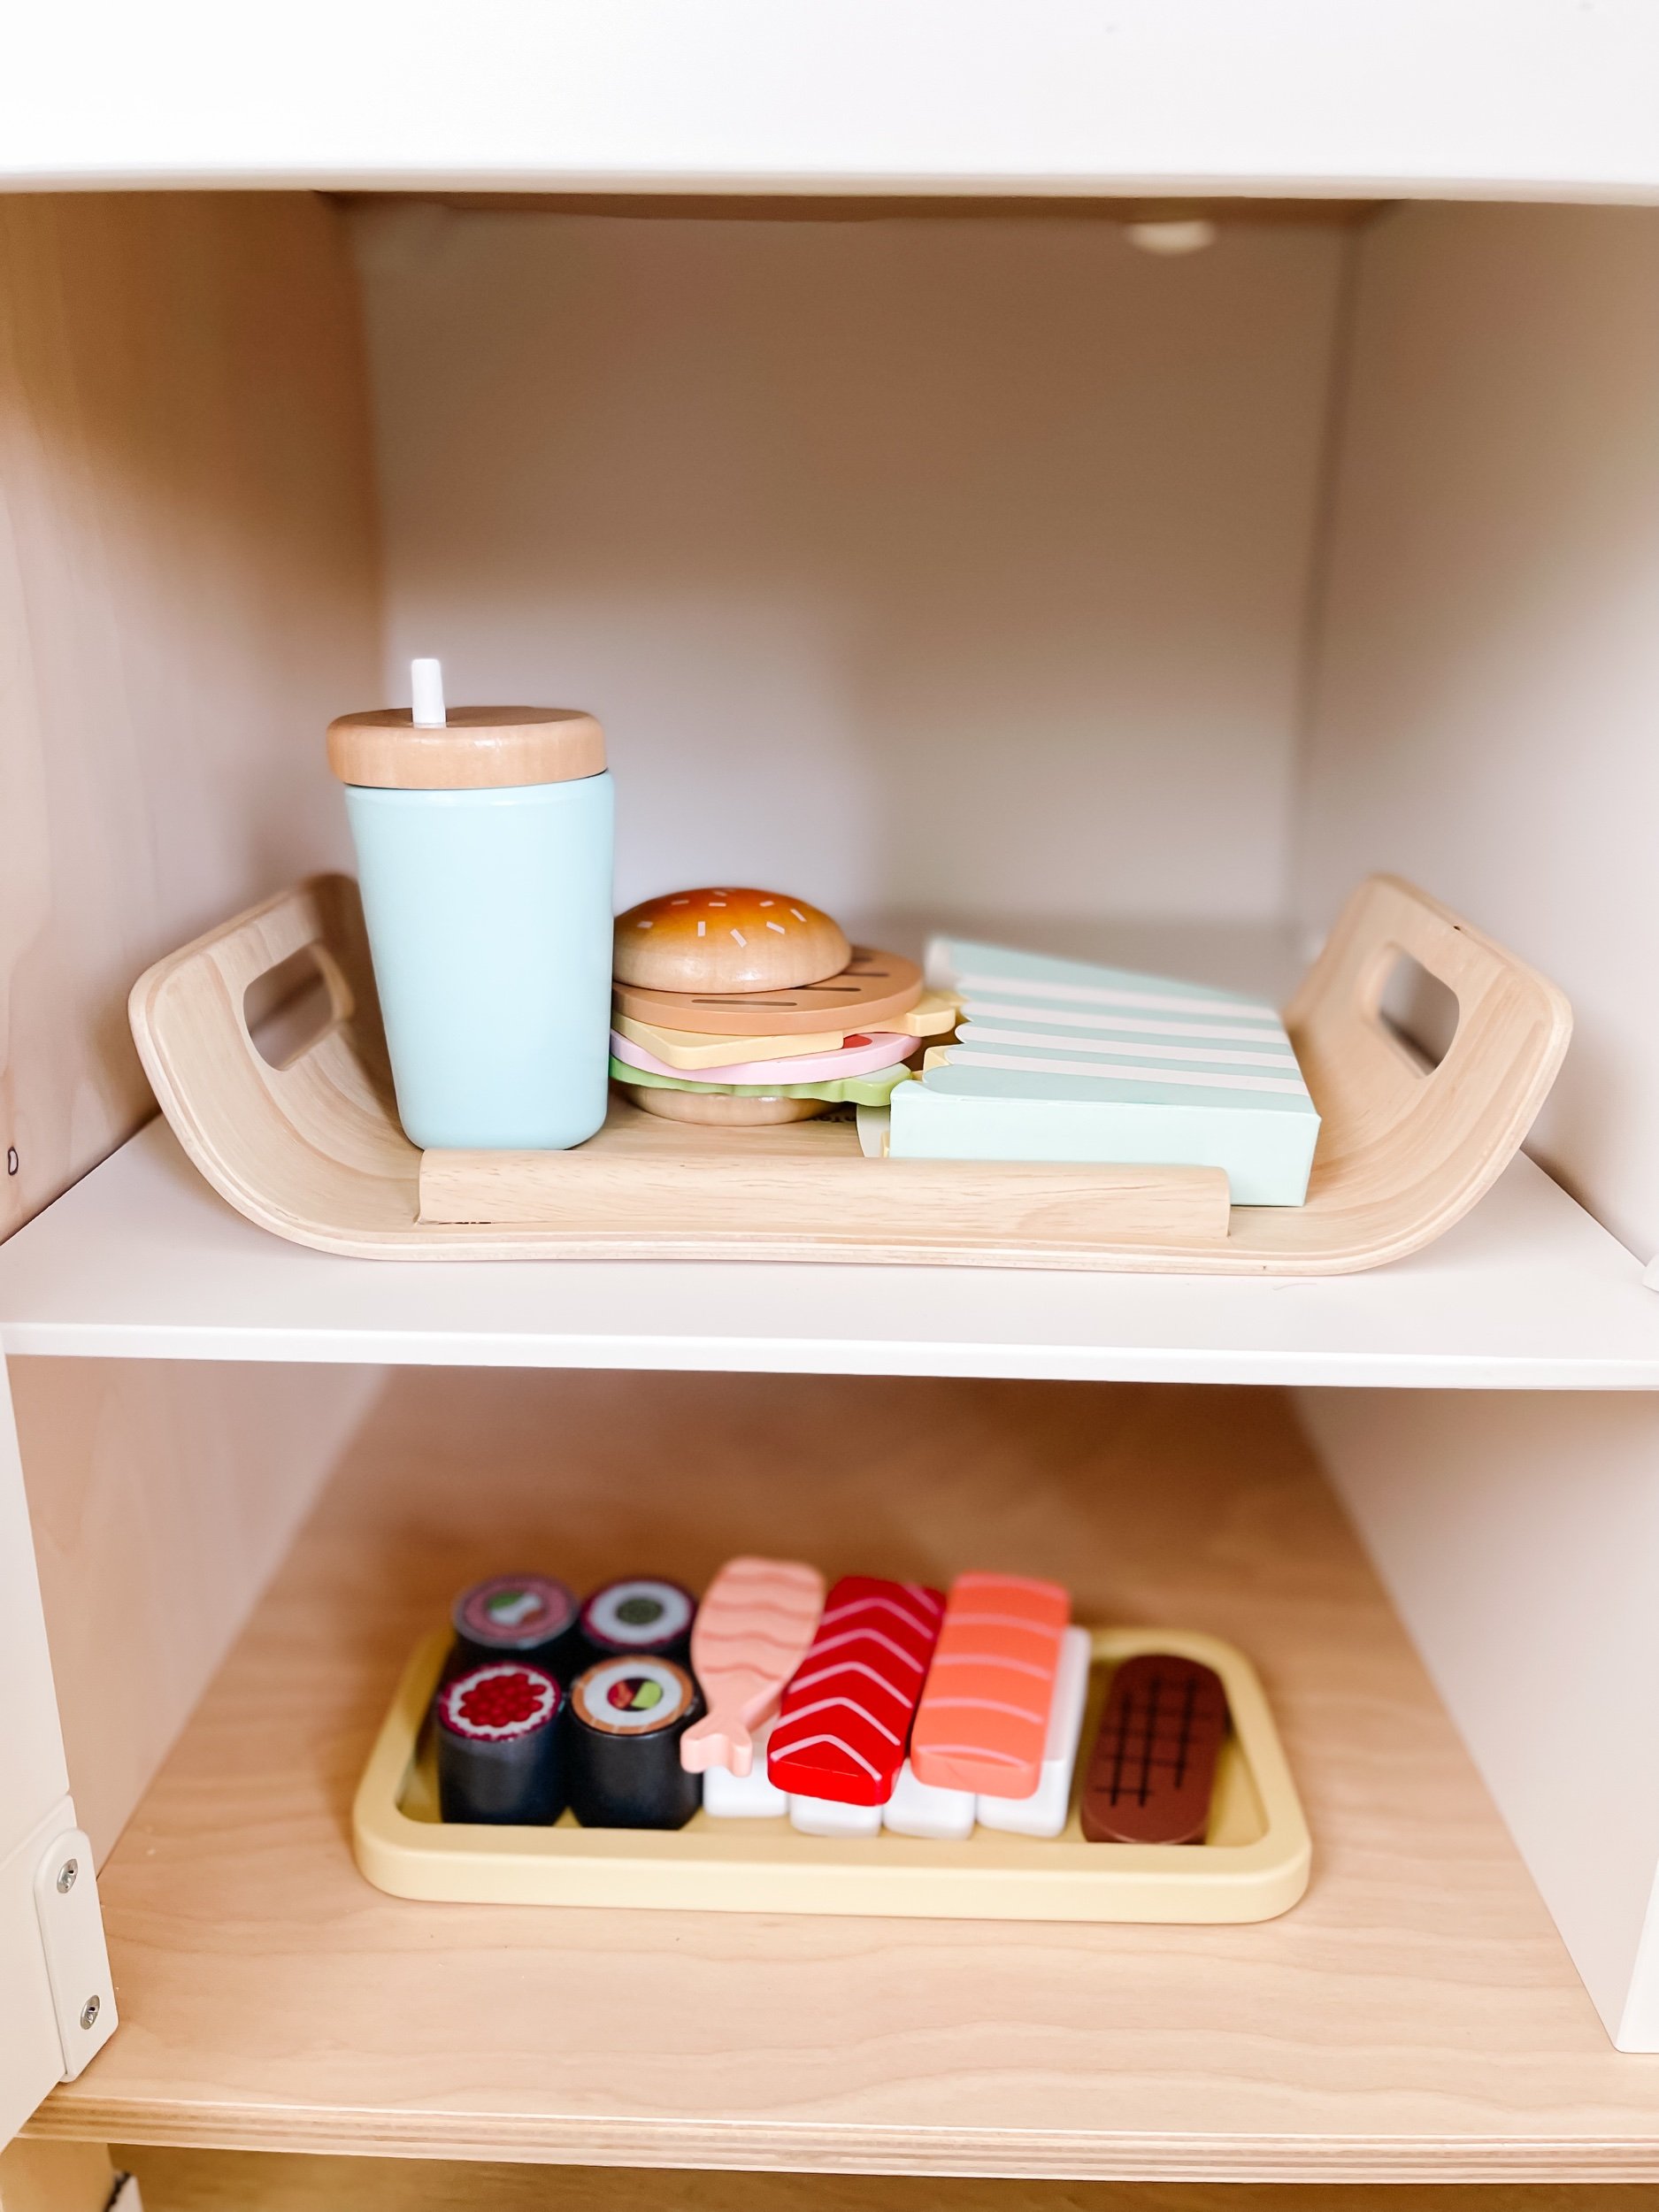
Burger Time PLAY FOOD
I’m so obsessed with this little cheese burger set. It’s so perfect for a fun fast food night.

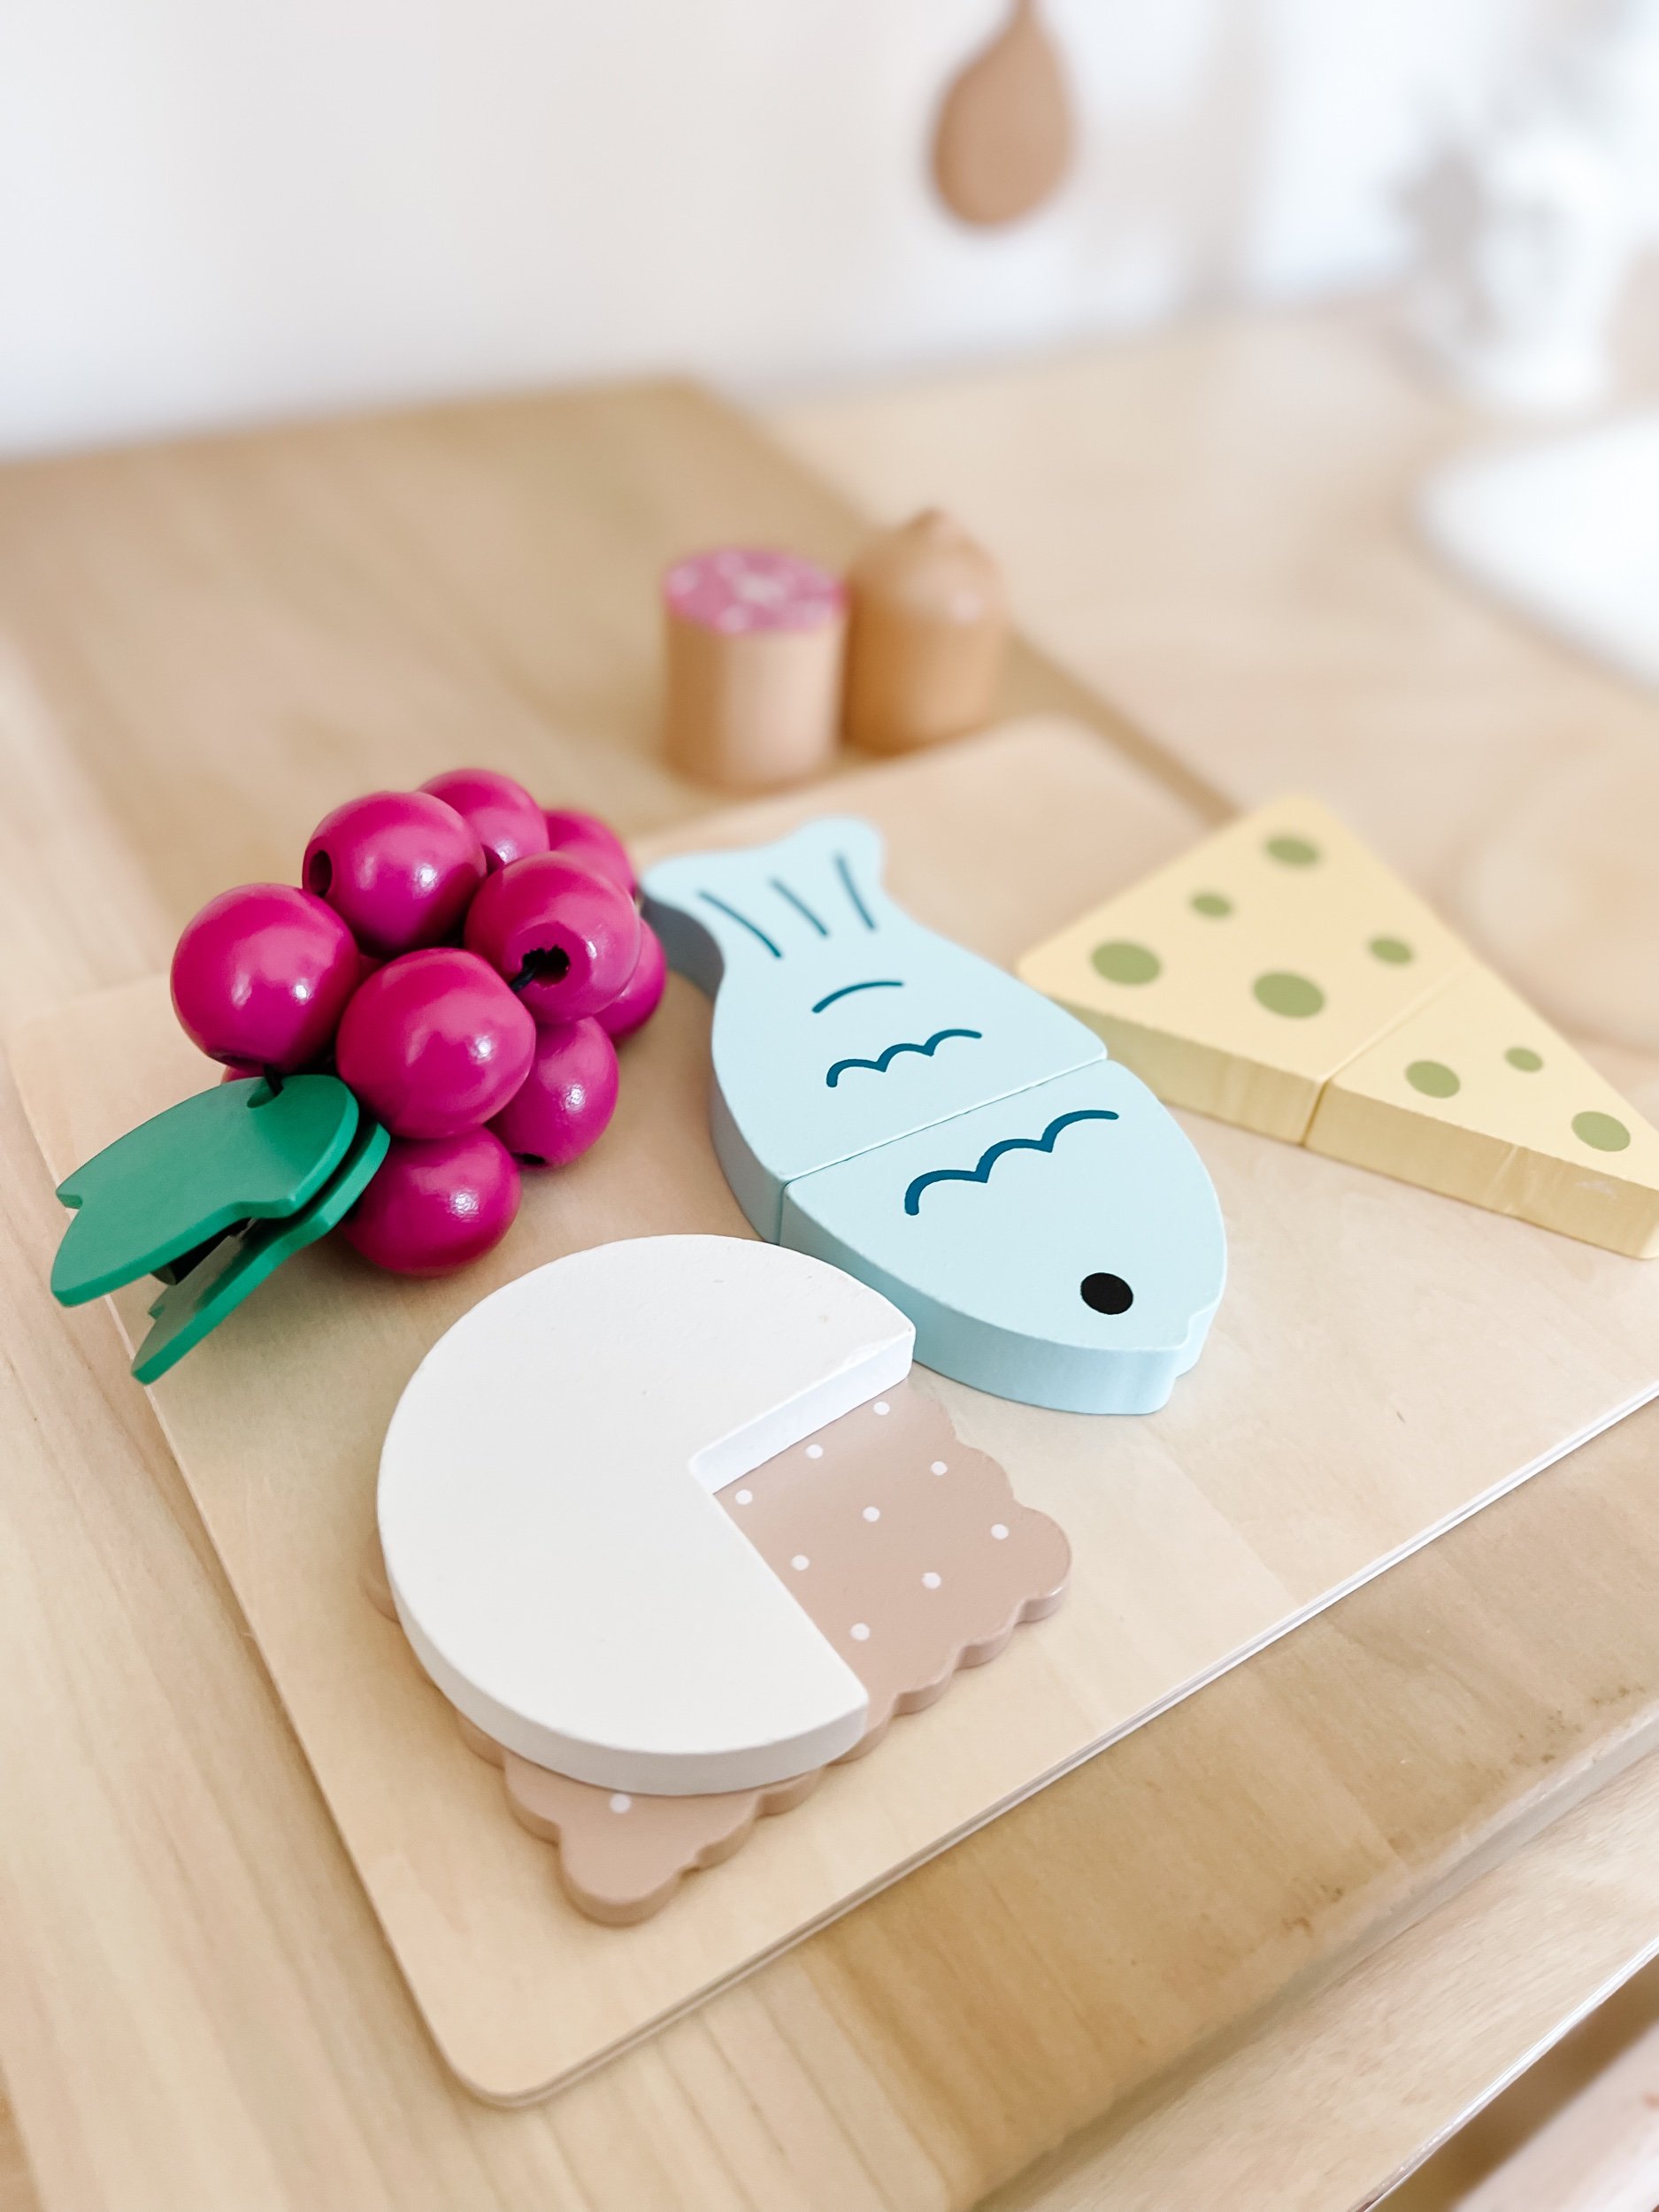
Charcuterie board play food
This little cheese board was too adorable to pass up! I just loved the little cheese plate and since we often have a cheese plate for our fancy dinner nights at home this was the perfect way for Sofia to make believe.
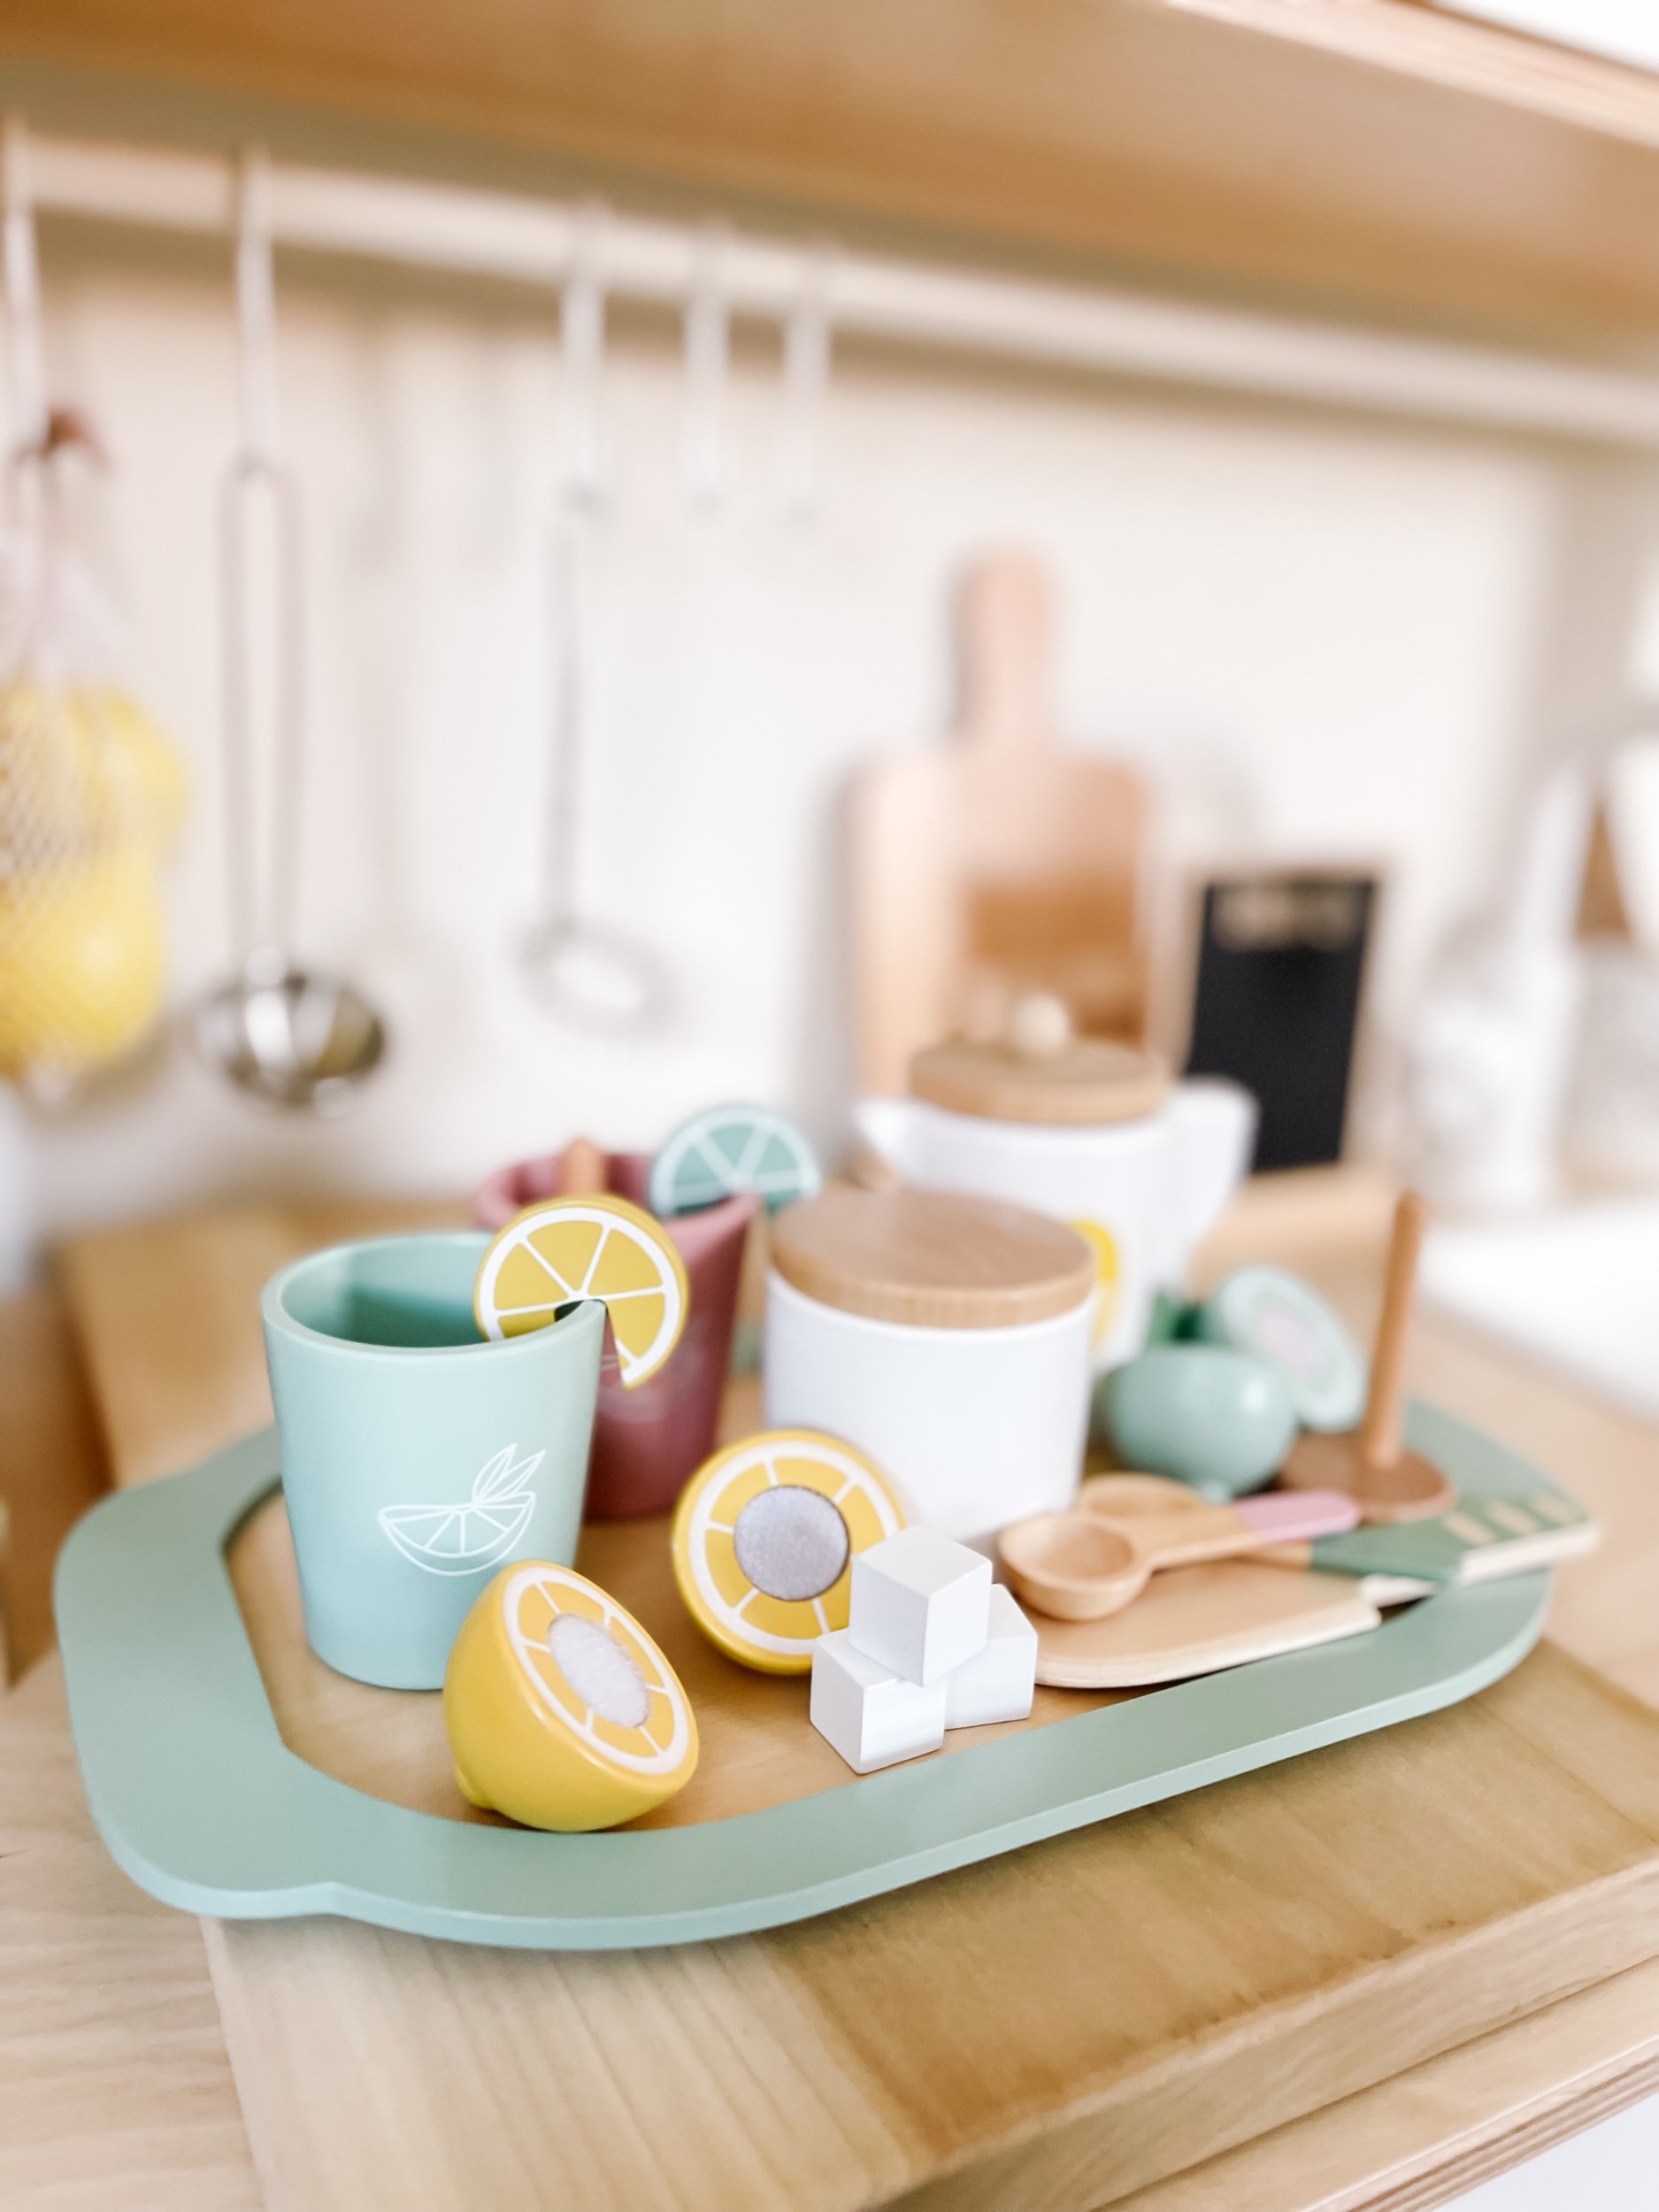
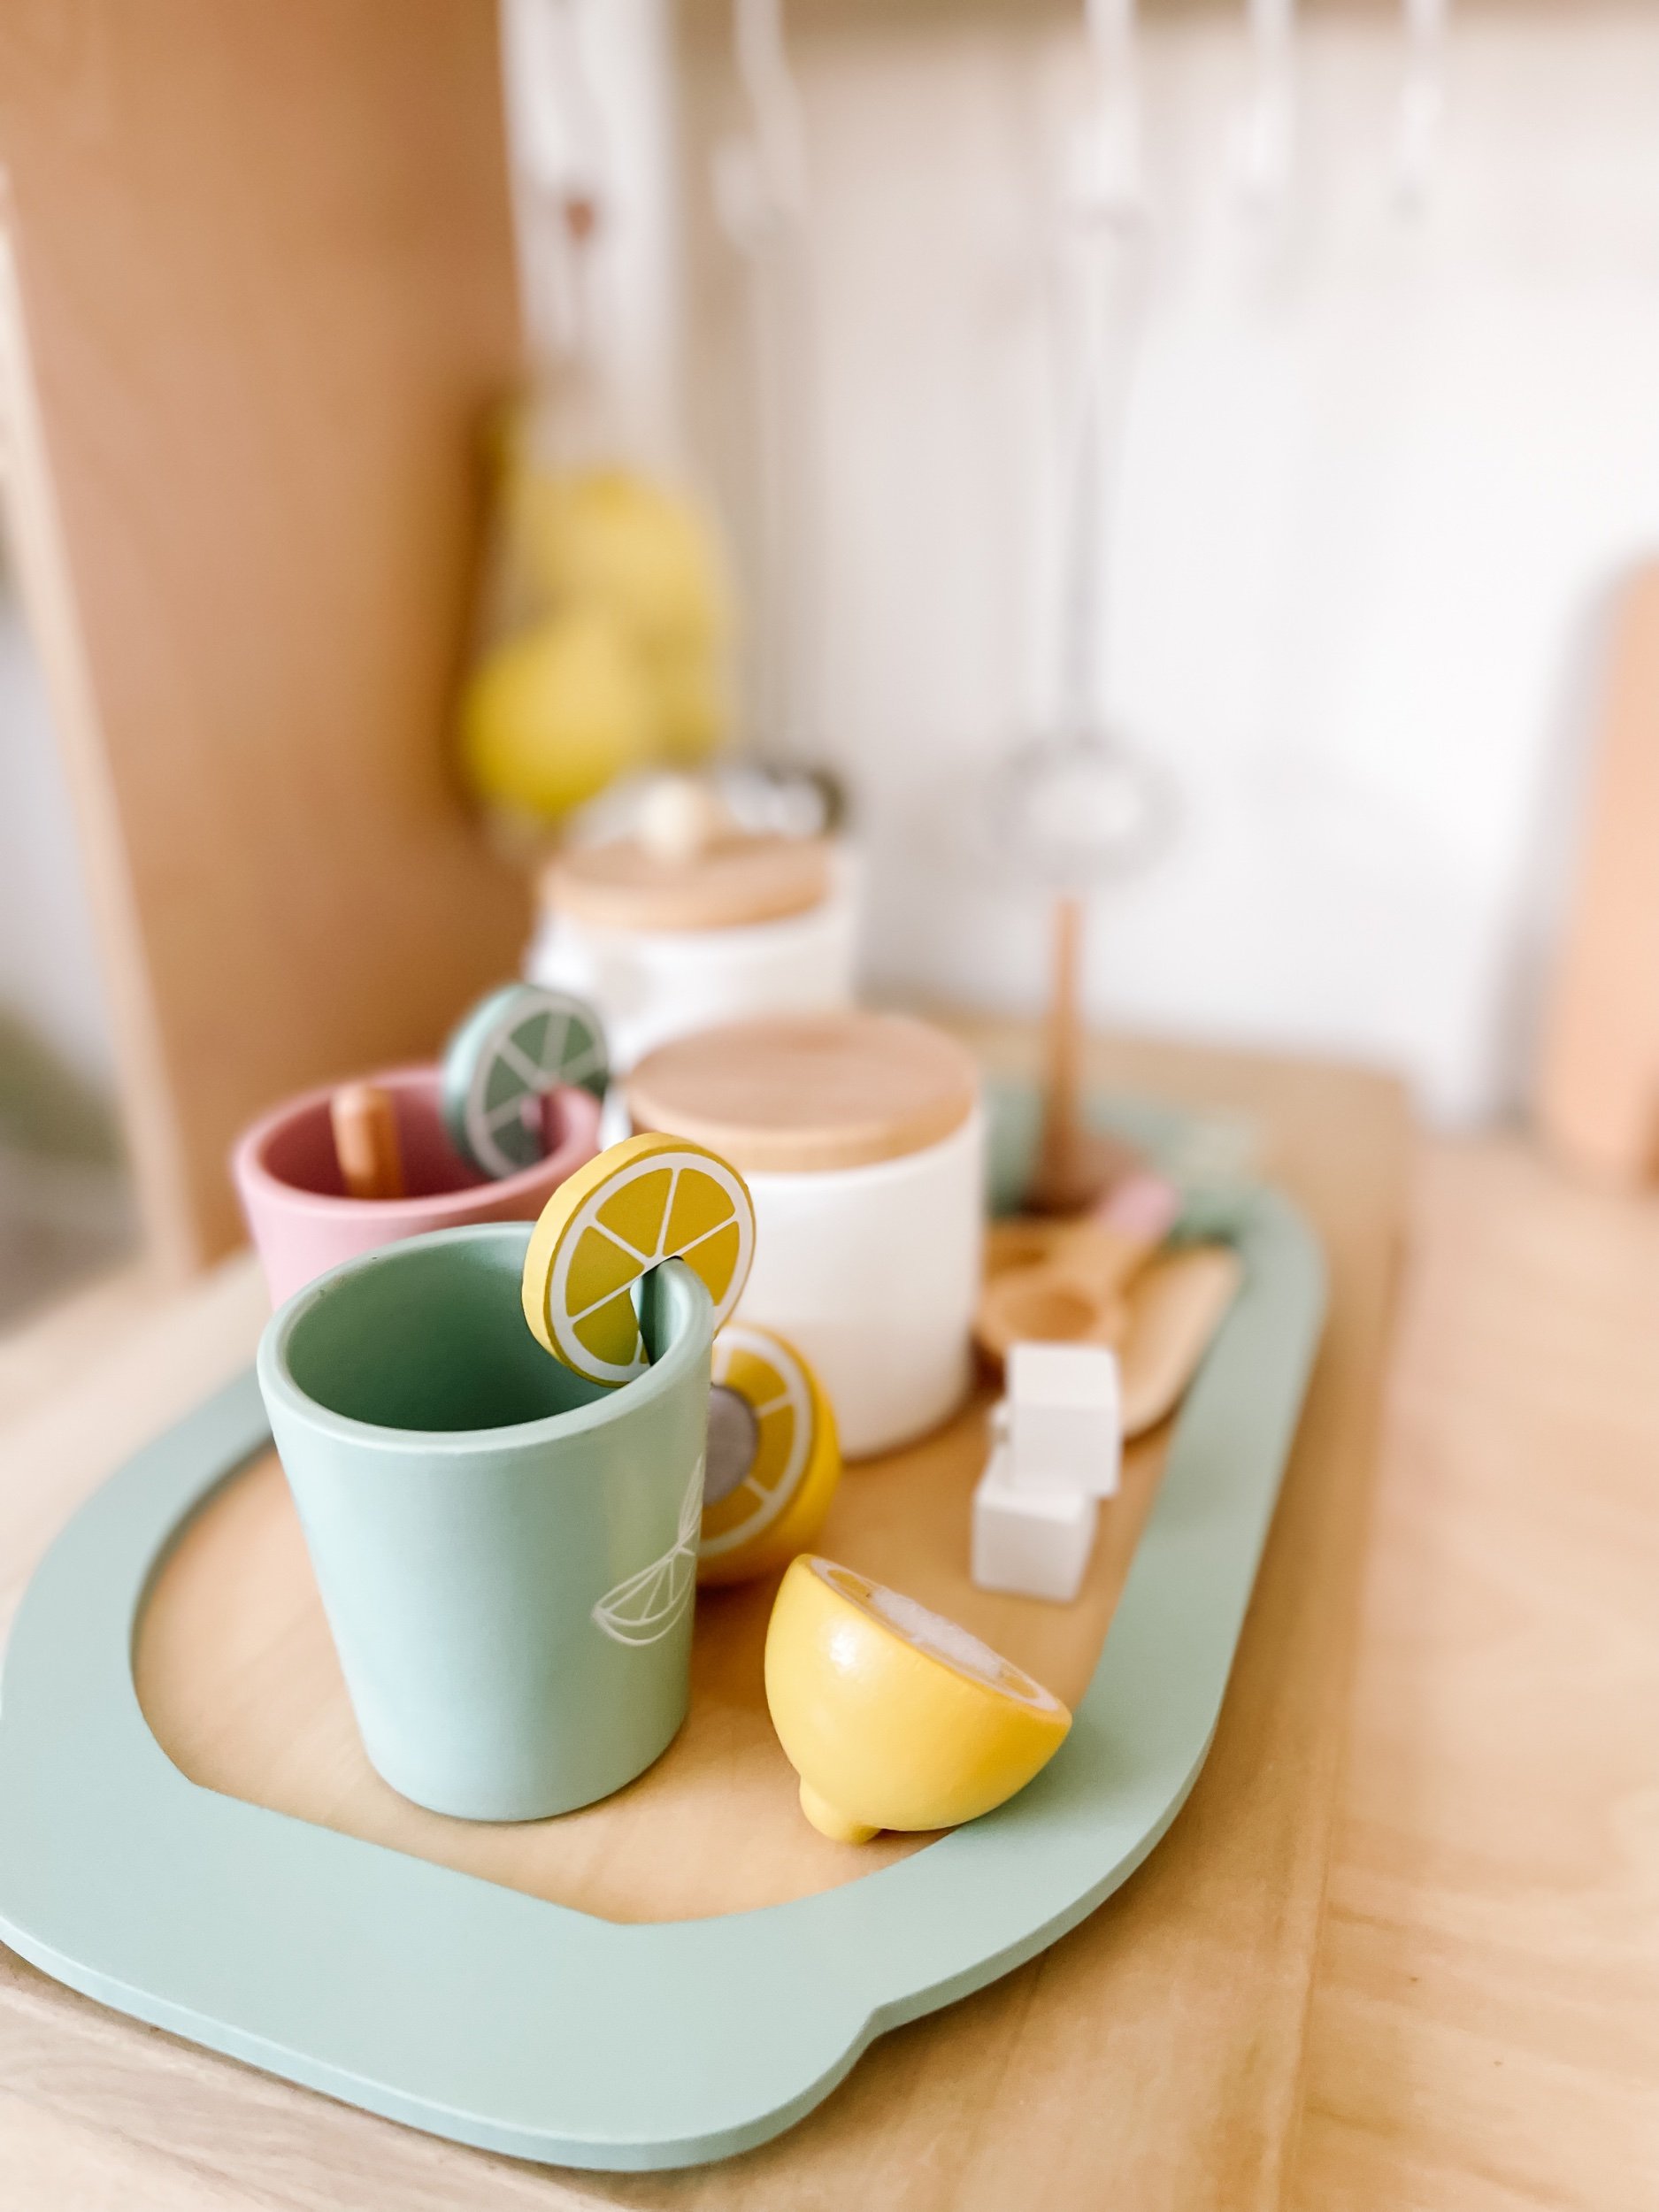
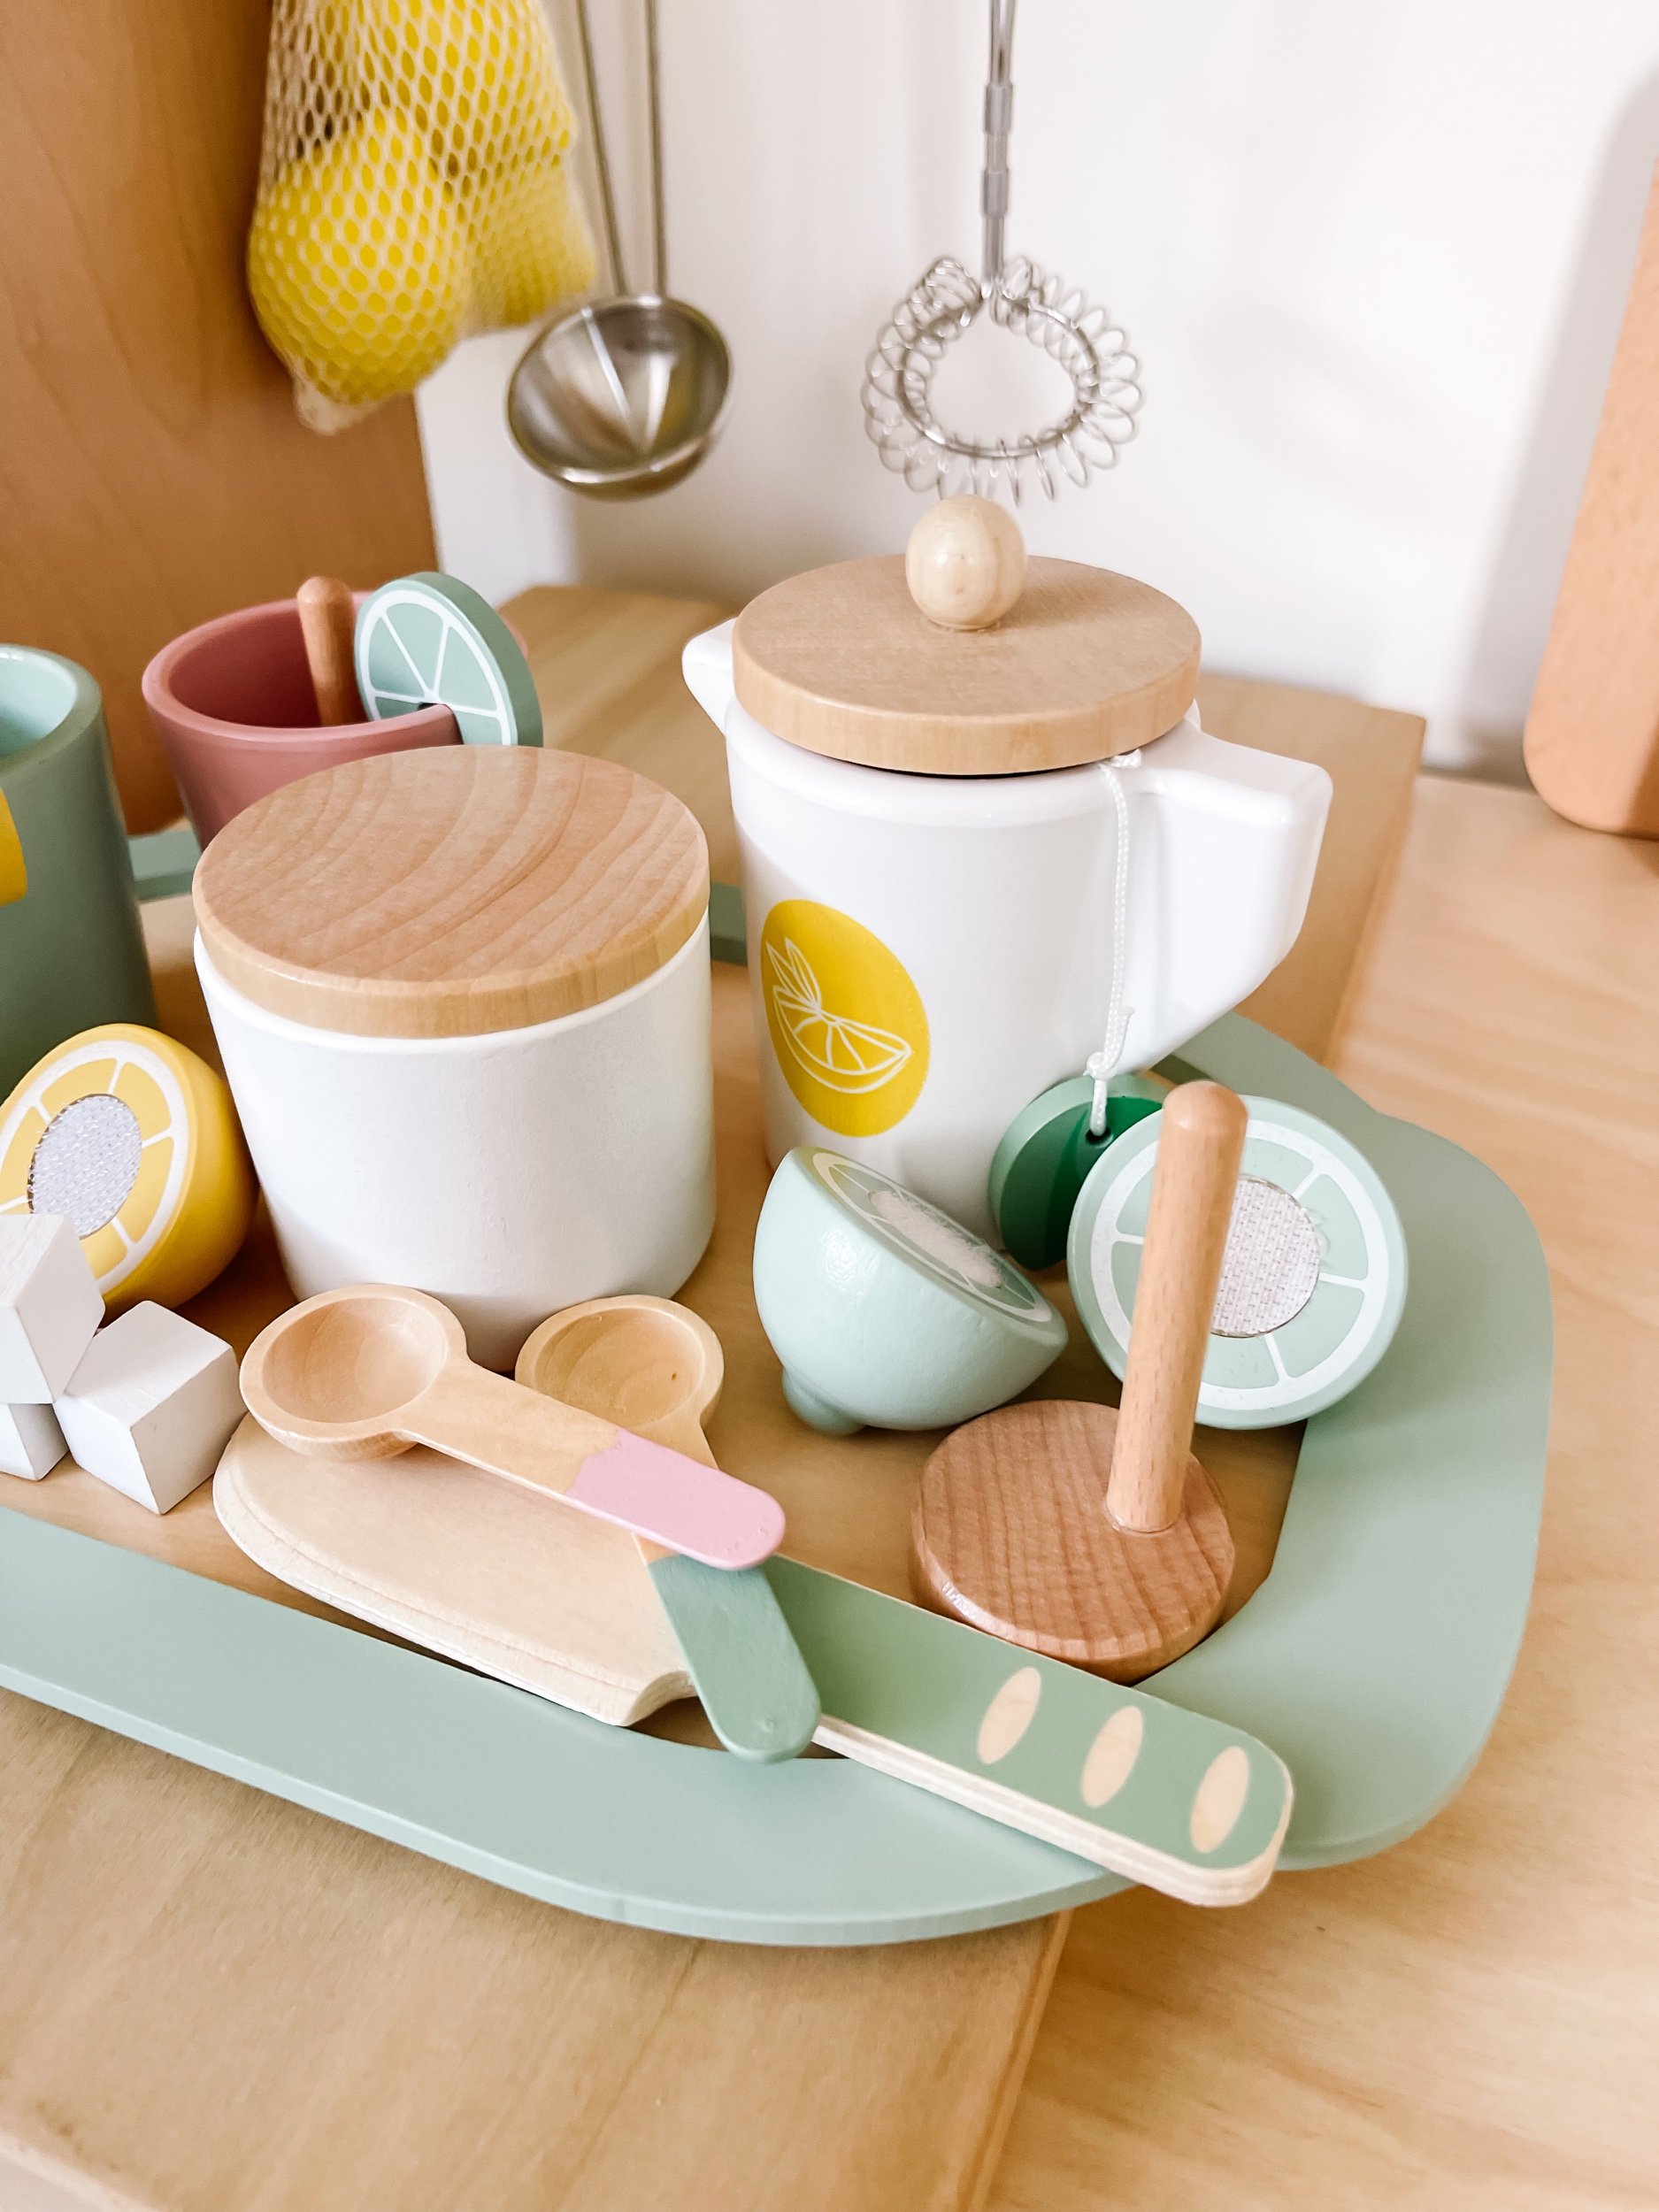
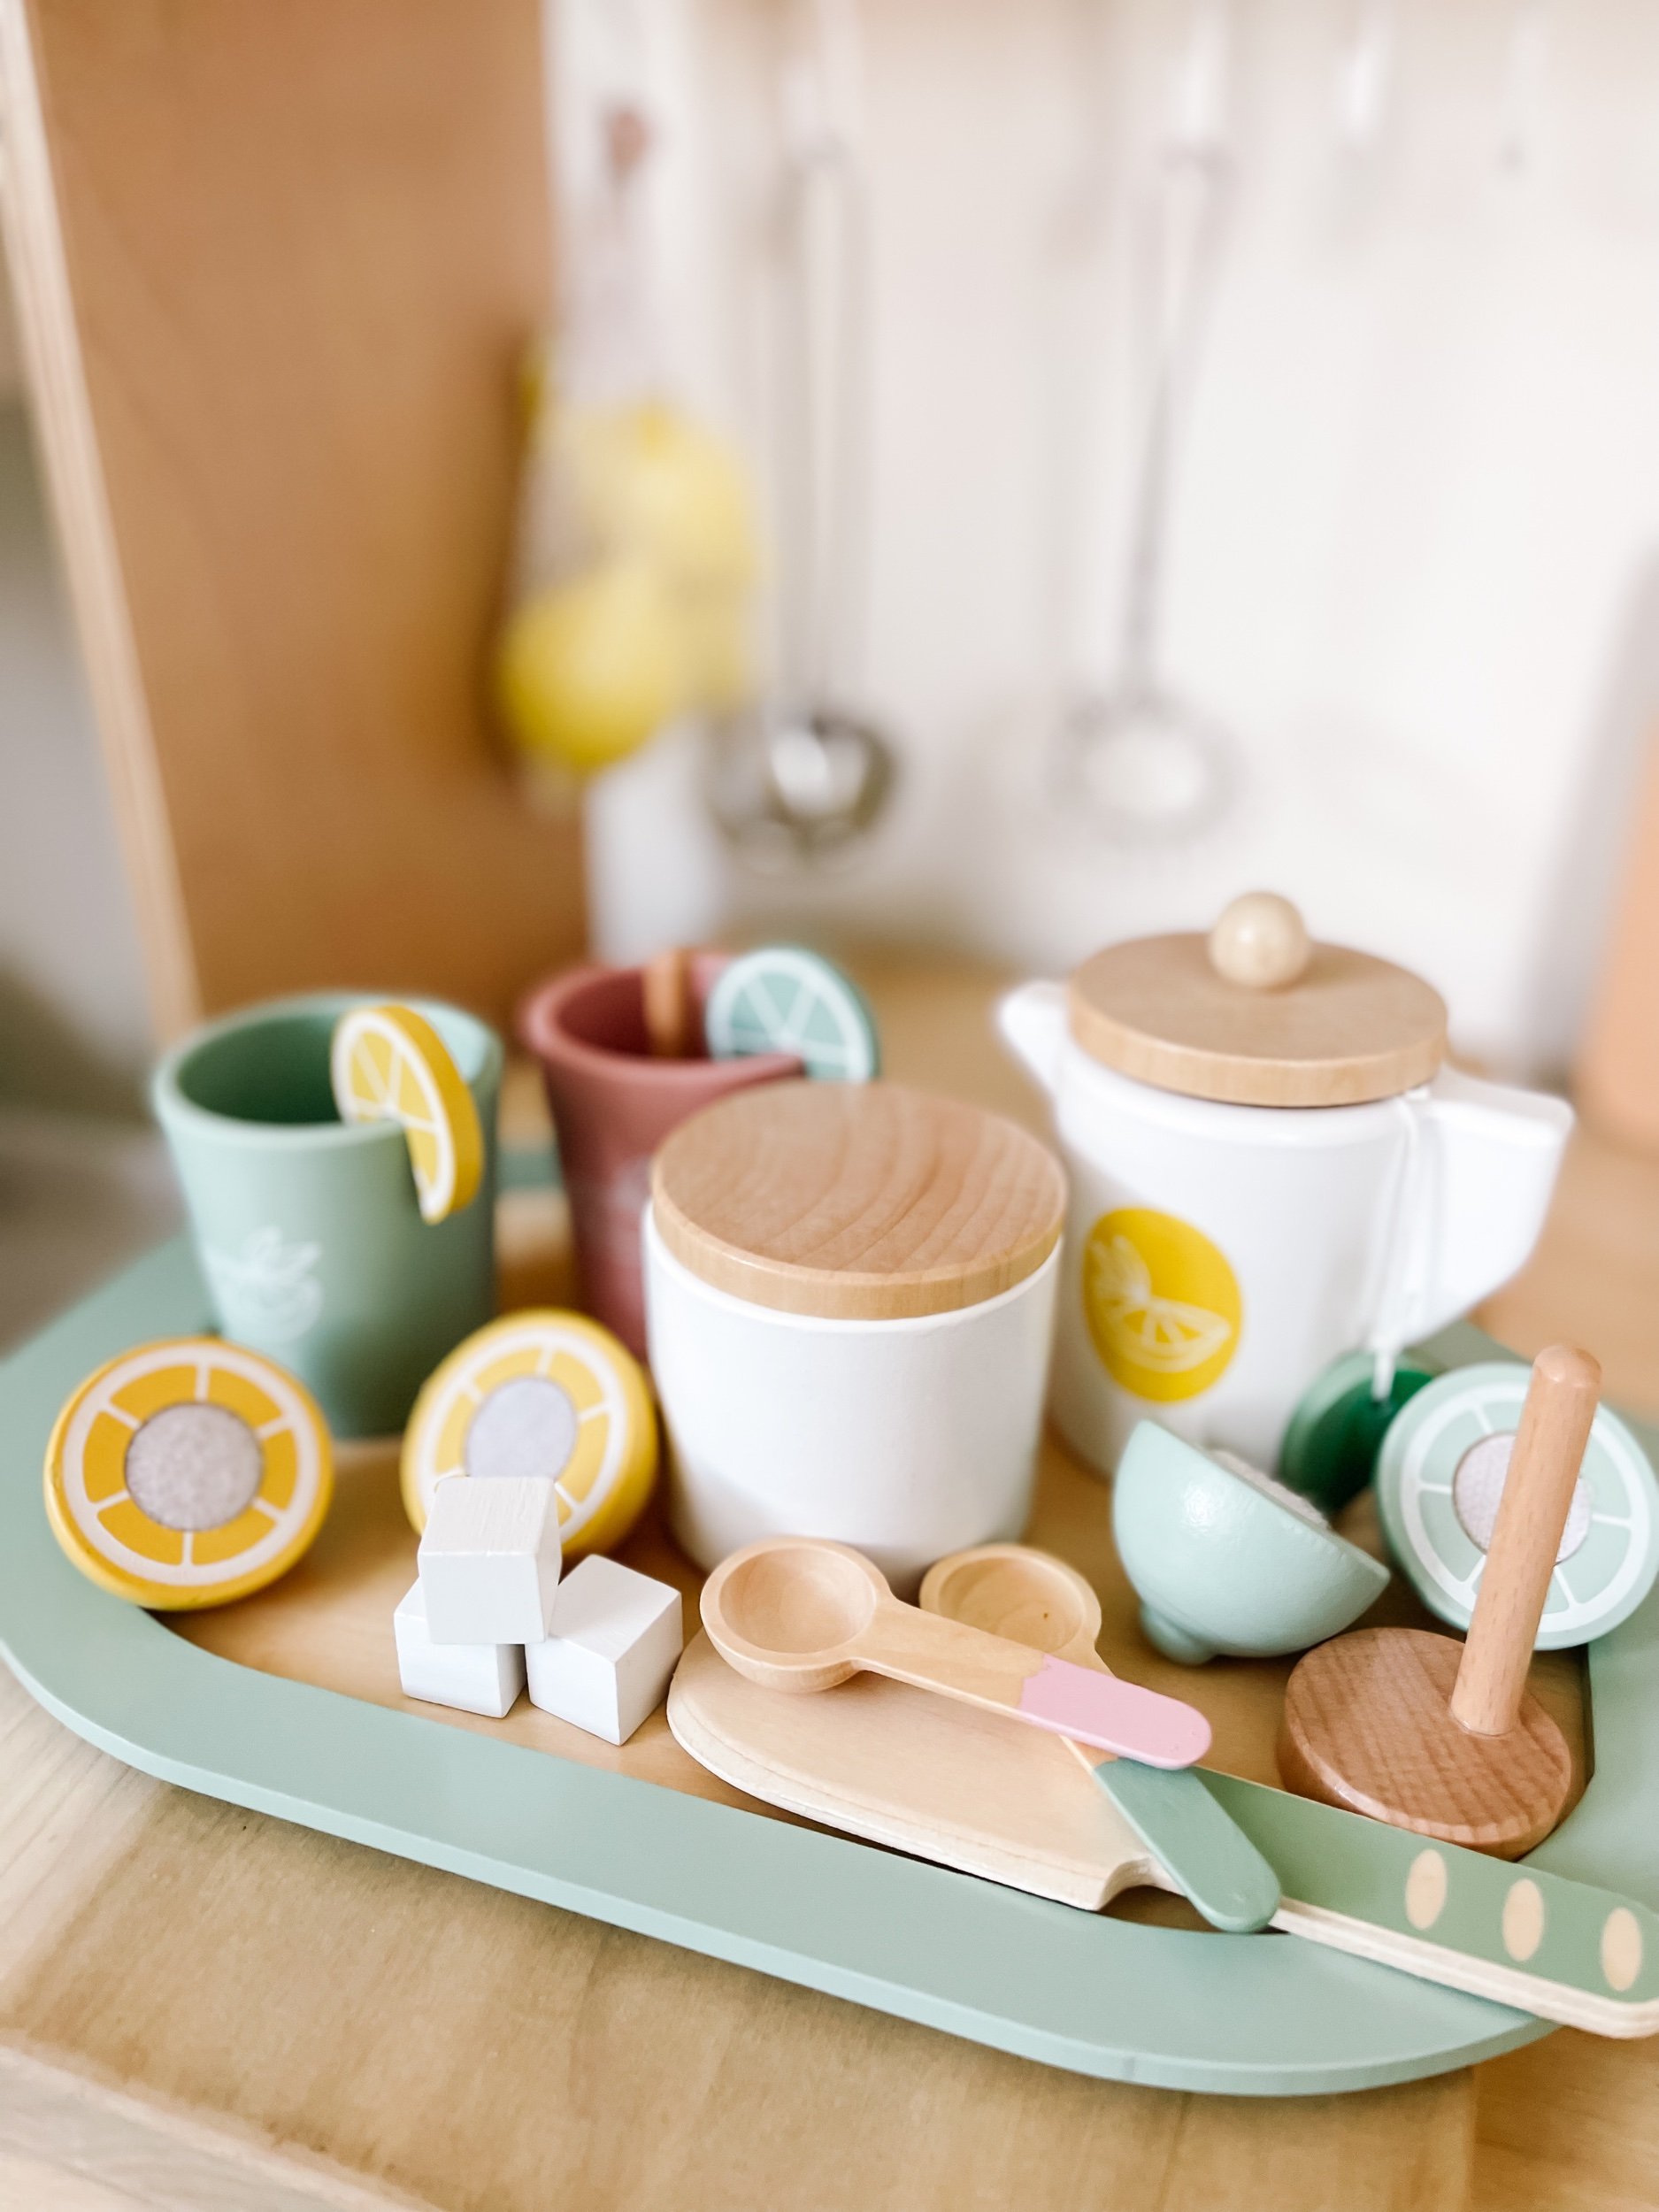

Cutest lemonade stand wooden play food
I couldn’t resist this adorable set. It’s such a cute way to make a sweet lemonade stand! And I want to repurpose this kit for my lemonade stand dramatic play setup.
The Cutest Wood Stove for IKEA DUKTIG
I had this stove custom designed by @WonderYearsPlay because I knew I needed to complete the white & wood look. Debbie did such an amazing job and I couldn’t wait to share it with all of you play kitchen lovers. You can purchase the Wood & white acrylic stove here and don’t forget to use code GOODNIGHTFOXFRIEND to save!


