• Our Story
  • Sticker Club
    • New Play Themes
    • By Age Group
    • By Season
    • By Fillers/Materials
    • Getting Started
  • Shop Now
  • Free Downloads
Menu

Goodnight Fox

Street Address
City, State, Zip
Phone Number
Dramatic & Sensory Play for Preschoolers

Your Custom Text Here

Goodnight Fox

  • Our Story
  • Sticker Club
  • Sensory Play
    • New Play Themes
    • By Age Group
    • By Season
    • By Fillers/Materials
    • Getting Started
  • Shop Now
  • Free Downloads

DIY Kids Robot Costume for Halloween: Step-by-Step Guide

September 27, 2024 Kylie Tuosto

DIY Kids Robot Costume for Halloween: Step-by-Step Guide

Looking for a fun and creative costume for your child this Halloween? A robot costume is an exciting, hands-on project that your child will love! I made this robot costume for my daughter when she was four, and she absolutely adored it. With some easy-to-find materials, a bit of imagination, and your crafting skills, you can create a magical robot outfit. Below is a detailed guide with all the materials and step-by-step instructions you’ll need to recreate this adorable robot costume!

Materials You’ll Need:

  • Cardboard boxes (for the body and head)

  • White Gorilla tape

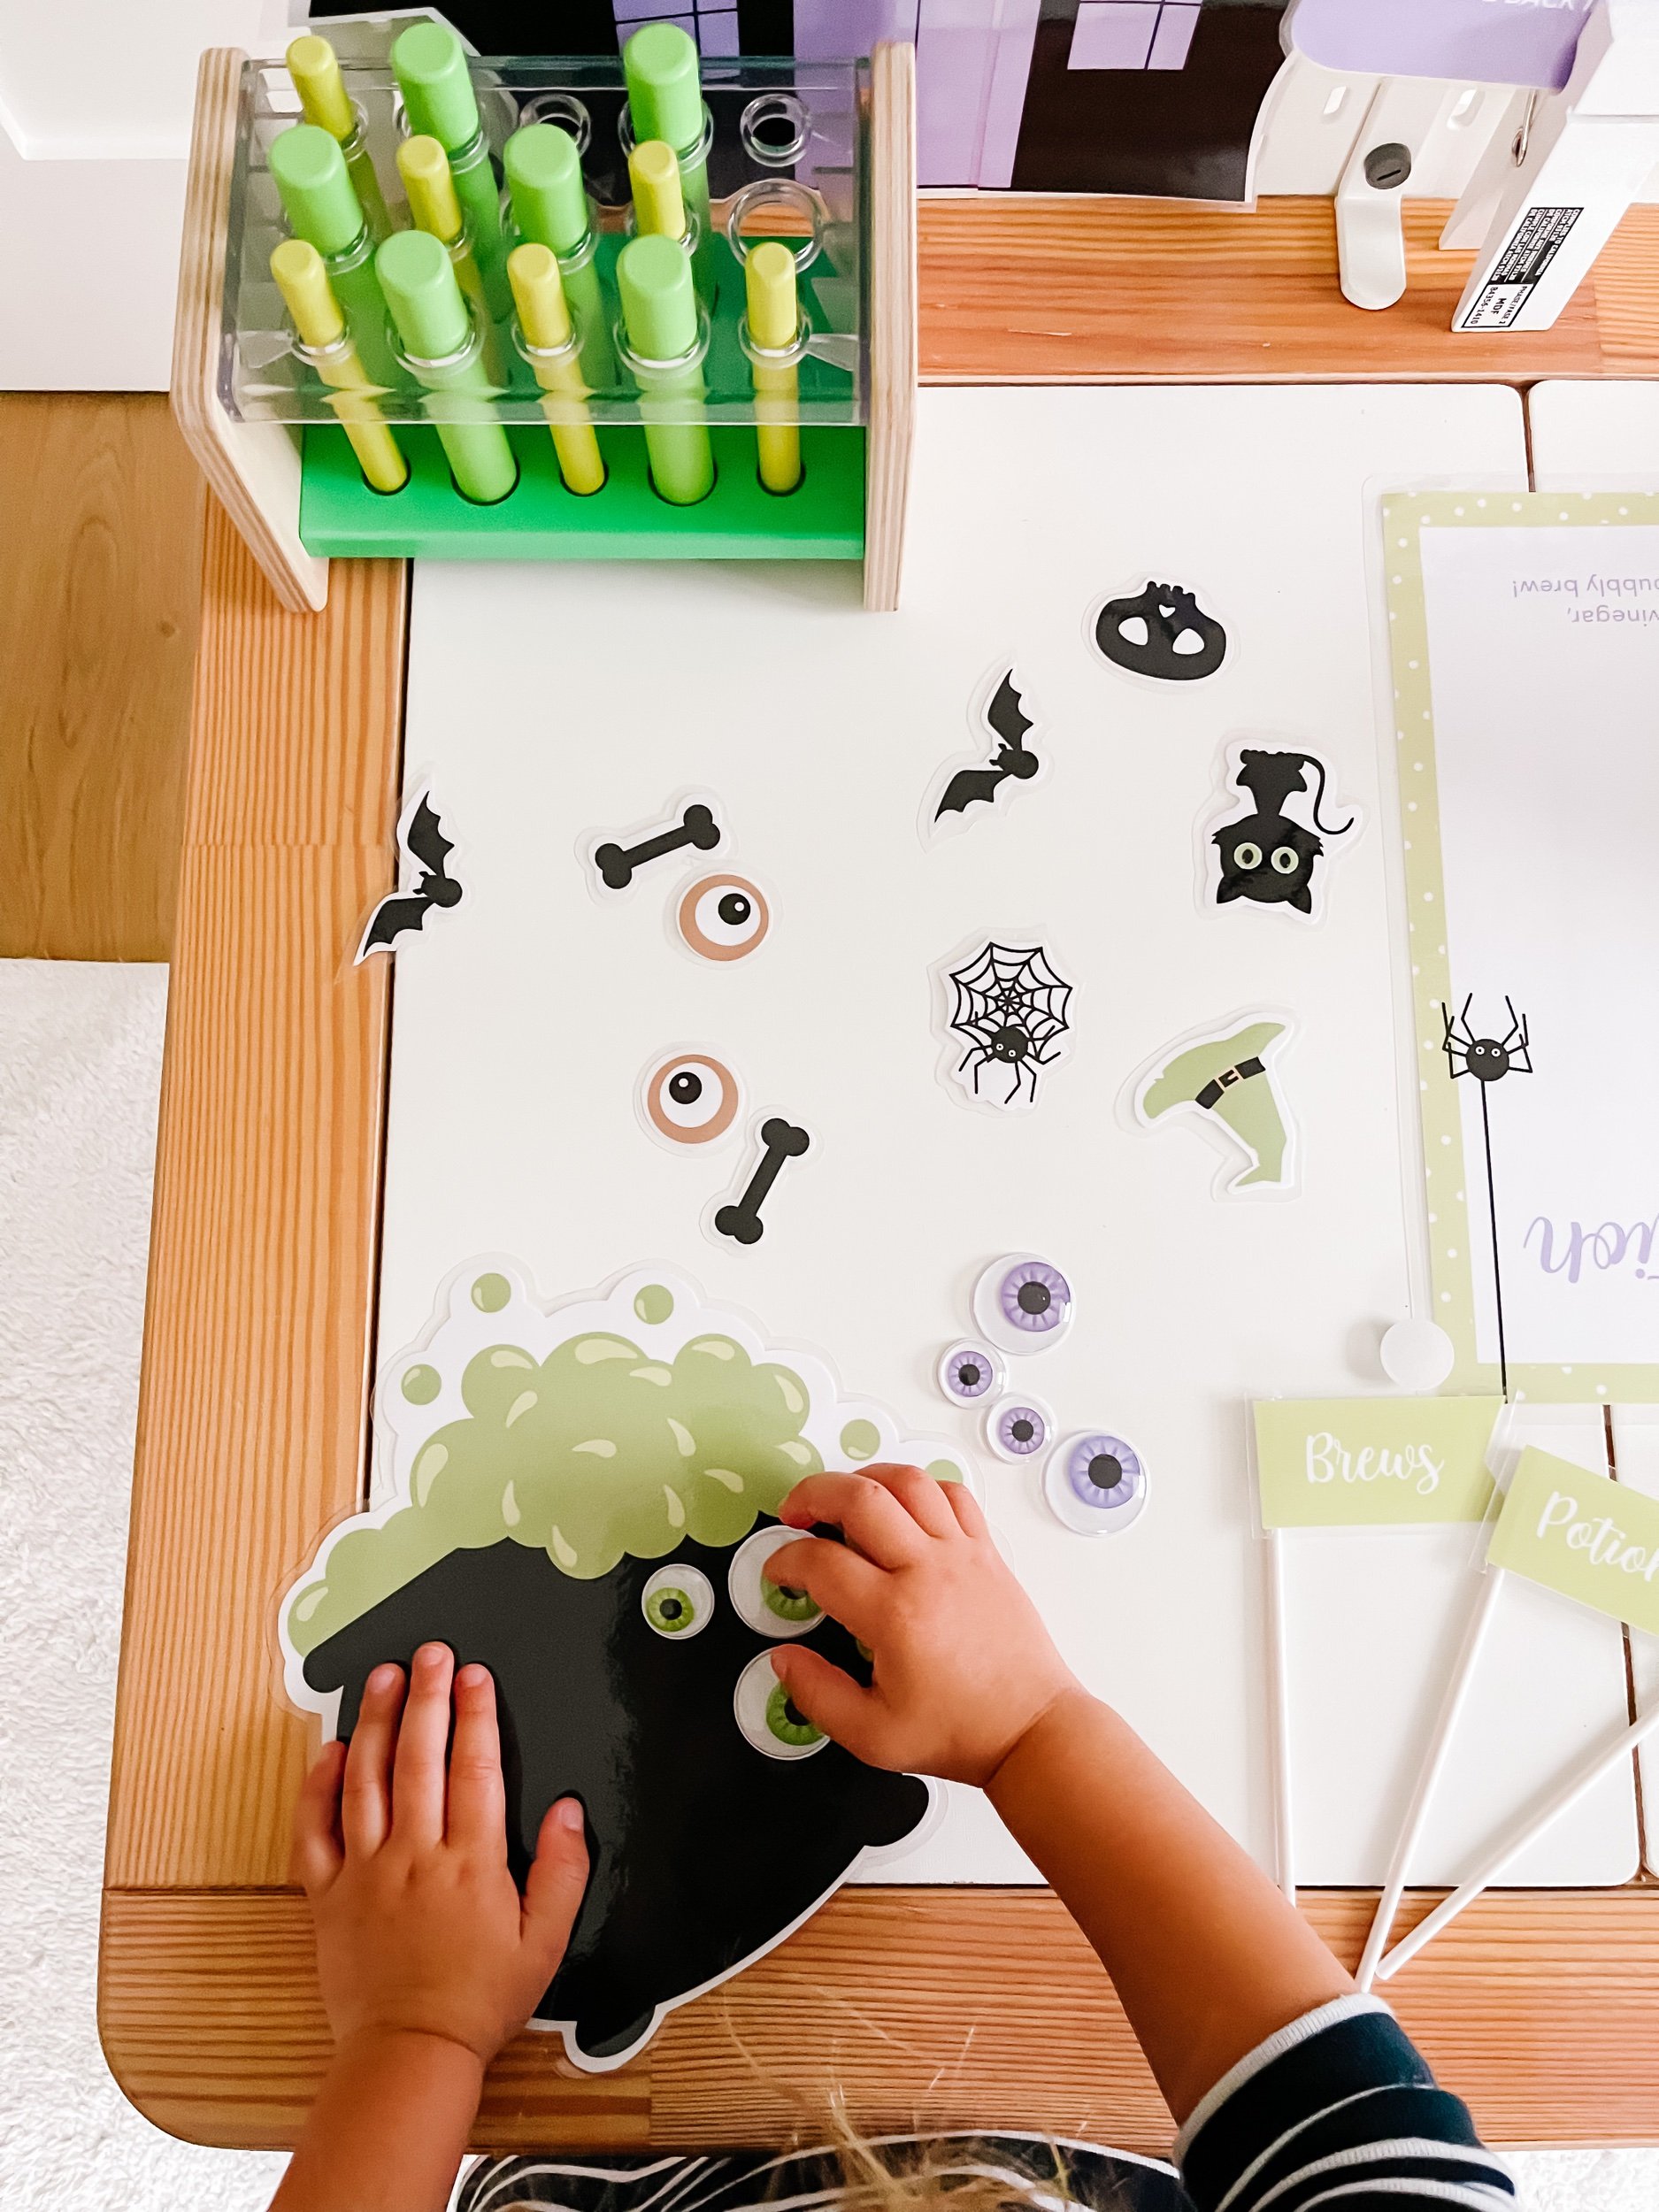
  • Star-shaped ball pit balls (for decoration and antenna)

  • Light-up string stars (for embedding around the bottom edge) https://a.co/d/cF8Addn

  • Aluminum ducting (for arms and legs, available at Home Depot)

  • Glow-in-the-dark fidget tubes (for cuffs and decoration) https://amzn.to/3XFUsh6

  • Pastel purple and teal tubes for antenna https://amzn.to/3XFUsh6

  • Small battery-powered lights (for illuminating the star antenna) https://amzn.to/3MVB3Ui

  • 4x6 wooden frame (painted pink for the faceplate) https://amzn.to/3TCKEmP

  • Heart-shaped box lid (to create the heart plate) https://amzn.to/3zzqqUb

  • Pipe cleaners (to make a heartbeat line on the heart plate) https://amzn.to/3TBqidp

  • Duplo sized Legos (for building the front control plate)

  • Glow-in-the-dark googly eyes (modified with a popsicle stick to create a meter) https://amzn.to/3BgeyHj

  • Paint (for decorating lines on the googly eyes and the robot’s face) https://amzn.to/3ZE7PRC

  • Push lights (for the ears) https://amzn.to/3MZXHuO

  • White 18” zipper https://amzn.to/3XYMXCb

  • Hot glue, scissors, box cutter or exactly knife, white spray paint

IMG_5063.jpg
IMG_5067.jpg
IMG_5067.jpg
IMG_5064.jpg
IMG_5088_jpg.jpg

Step-by-Step Instructions

1. Creating the Robot Body

  • Start with the cardboard boxes: Find two cardboard boxes—one for the body and one for the head. Ensure the head box is large enough for your child to wear comfortably while the body box reaches their waist.

  • Cut holes for the arms and head: Use a box cutter to cut out armholes on the side of the body box and a hole on top of the head box for your child’s head. Secure the edges of the boxes with White Gorilla tape to make the structure sturdy.

  • Decorate the body: Use the Light-up string stars and attach them to the bottom edge of the body box, securing the stars in place with more white Gorilla tape.

  • Lego front plate: Arrange Legos in a fun control panel design on the front of the body box. This will give your robot costume a high-tech look.

2. Adding the Arms and Legs

  • Use aluminum ducting for the arms and legs: Cut the ducting to your child’s arm and leg lengths. Attach them to the body using white Gorilla tape, leaving enough room for movement.

  • Glow-in-the-dark cuffs: Slide Glow-in-the-dark fidget tubes over the ducting at the wrists and ankles to create glowing cuffs. This adds a cool effect in the dark.

3. Constructing the Head and Faceplate

  • Assemble the faceplate: Paint a 4x6 wooden frame pink and attach it to the front of the head box to create a faceplate for your child.

  • Googly eye meter: Modify Glow-in-the-dark googly eyes by adding popsicle stick meter and drawing meter lines around the edges with paint. Secure this to the top of the faceplate for an extra robotic touch.

  • Push lights for ears: Stick round Push lights on either side of the head box for ears, which can double as lights.

  • Antenna with star balls: Attach Pastel purple and teal tubes for antenna to the top of the head box as antenna. Secure Star-shaped ball pit balls to the top of each tube and insert Small battery-powered lights to light them up for a glowing effect.

4. The Robot Heart

Heart plate with heartbeat line: Use a Heart-shaped box lid as the robot’s heart plate. Bend a Pipe cleaners into the shape of a heartbeat line and attach it to the lid. Hot glue the heart plate to the front of the body box, just above the Lego control panel.

5. Finishing Touches

  • Ensure everything is securely fastened with white Gorilla tape. Add extra tape where necessary to reinforce the connections.

  • Finally, have your child try on the costume and make any adjustments for comfort.

Why This Robot Costume Stands Out

This DIY robot costume combines creativity with a bit of light-up magic. The star-shaped decorations, light-up antenna, and glow-in-the-dark features make it especially dazzling at night. Plus, the use of fidget tubes and playful materials like Legos adds a whimsical, child-friendly touch.

Crafting a robot costume for Halloween is not only a fun way to spend time with your child, but it also encourages creativity and imaginative play. Whether you’re recreating this exact design or putting your own spin on it, your little one is sure to love their unique, light-up robot costume. Happy crafting and have a fun-filled Halloween!

Looking for more creative costume ideas or sensory play setups? Be sure to check out more DIY ideas and educational play kits on our blog.

Tags robot costume, halloween costume ideas for kids, cute girly robot costume, cardboard DIY costume, Kids costume, Pink and white costume, glow in the dark costume
3 Comments

Cat Adoption-Themed Sensory Play Setup for the IKEA Flisat Table

September 21, 2024 Kylie Tuosto

Looking for a purr-fect way to introduce your little ones to pet care while keeping them engaged with hands-on sensory play? Our new Cat Adoption Sensory Play Setup for the IKEA Flisat table is a fantastic way to combine imaginative play with fine motor skills and early literacy practice.

This setup invites kids to participate in a pretend cat adoption process, complete with adorable decor that sets the scene for hours of creative play.

Cat Sensory Play Kits

Sensory Play Decor

To enhance the immersive experience, the setup features:

  • Adoption Banner: A colorful banner that welcomes each child to the “Cat Adoption Center,” making the space feel inviting and official.

  • Adoption Certificates: Every new pet parent can “adopt” their favorite kitty and write up a personalized adoption certificate to commemorate the event.

  • Animal ID Cards: These ID cards let kids pretend to register their cats, adding an educational twist to the setup.

  • Cat Breed Flashcards: Learn about different types of cats with these flashcards, sparking curiosity about various breeds.

  • Busy Littles Resin Cat Set: A highlight of this setup is the amazing resin cat set from Busy Littles. This set includes five adorable, different-colored cats, a cat house, and a yarn ball. It’s perfect for adding more imaginative play as kids interact with their new pet cats in a playful, tactile way!

Now, let’s dive into the three sensory bins that will keep your little ones entertained and learning through play!

Download & Print
IMG_6092_jpg.JPEG
IMG_6108_jpg.JPEG
IMG_6116_jpg.JPEG

Bin 1: Goldfish Crackers – Feeding Time!

The first bin is filled with goldfish crackers—a favorite snack for both playtime and snack time! These crackers are perfect for a taste-safe sensory bin where kids can "feed" their pretend cats. This bin is excellent for crushing, scooping, and pouring play, all while reinforcing the concept of taking care of pets and their needs.

Pro Tip: You can use small bowls or cups to let kids scoop and serve the goldfish crackers to their pretend cats, adding an extra layer of interaction.

IMG_5751.JPEG
IMG_6091_jpg.JPEG
IMG_6105_jpg.JPEG

Bin 2: Fluffy Poms and Feathers – Cat Toys Galore

What’s a cat adoption center without some fun toys for the new feline friends? In this bin, you'll find **fluffy pom-poms** and **colorful feathers**, representing cat toys. This sensory bin encourages kids to “play” with their cats, stimulating their fine motor skills by grabbing, tossing, and arranging the poms and feathers.

Pro Tip: Add in some tongs or tweezers to give kids the extra challenge of picking up the toys, refining their hand-eye coordination.

IMG_5749.JPEG
IMG_6133_jpg.JPEG
IMG_5748.JPEG

Bin 3: Adoption Certificate Writing Station

The final bin features an **adoption certificate writing activity**. Kids can use pretend adoption forms and crayons or washable markers to fill out their own certificates after they “adopt” a cat. This bin adds a literacy component to the sensory setup, allowing children to practice writing and early language skills in a fun and meaningful way. You can even include some stickers or stamps to make the certificates more personalized and special!

IMG_5749.JPEG
IMG_5758_jpg.JPEG
IMG_5759_jpg.JPEG
IMG_5761.JPEG
IMG_6108_jpg.JPEG
IMG_5751.JPEG

Play Tips

  • Encourage imaginative play by letting your child pick a name and personality for their new cat.

  • Use the **cat breed flashcards** to teach new vocabulary words, like "Siamese" or "Persian," and discuss how each breed has different characteristics.

  • For added fun, pretend to be an “adoption agent” who helps match the kids with their ideal cat based on the animal ID cards.

  • Let the kids arrange the **Busy Littles resin cats** in the cat house and play with the yarn ball as they interact with their adopted pets.

Vocab Word List

  1. Adopt: To take into one’s home and care for a pet.

  2. Certificate: An official document to prove adoption.

  3. ID Card: A card that gives information about a cat.

  4. Breed: A specific type of cat with unique characteristics.

  5. Feather: Soft, lightweight structures cats love to play with.

  6. Goldfish: A type of snack food, perfect for feeding pretend cats!

  7. Resin: A durable material used to create realistic toy cats and accessories.

This cat adoption-themed sensory play setup is perfect for inspiring your child’s imagination while providing them with tactile learning experiences. It's an engaging way to introduce responsibility and empathy through pretend play.

Download & Print
Tags cat sensory play, pet adoption play, pet activities for kids, cat lover activities, kids cat sensory play, feathers & poms play
2 Comments

Witches Brew Apothecary Shop Sensory Play

September 20, 2024 Kylie Tuosto

Creating Magical Moments of Learning Through Play!

The spooky season is here, and it’s time to bring out the cauldrons, potions, and spells! Today, I’m sharing a magical sensory play setup that transforms your little ones into apprentice witches and wizards with a full apothecary shop setup. This setup includes three different sensory bins, each packed with engaging materials to support fine motor skills, sensory exploration, and imaginative play.

And of course, don’t forget to grab the free printable potion kit to add an extra layer of fun to the setup!

Download & Print
IMG_9939_jpg.jpeg
84EBEA2E-6F17-4FE1-8B3E-7AB10E4151D8.jpeg
IMG_9948.jpeg
IMG_9941.jpeg
IMG_9937_jpg.jpeg
IMG_9942.jpeg
0FA4D3E9-2B36-45AD-B31F-9BAFFFE5AD8B.jpeg
IMG_9945_jpg.jpeg
DBE82056-94E9-4B8B-A186-23A7E750FF12.jpeg
IMG_9936.jpeg
IMG_9950.jpeg
IMG_9938_jpg.jpeg
IMG_9940_jpg.jpeg
IMG_9943_jpg.jpeg
IMG_9944_jpg.jpeg
IMG_9946_jpg.jpeg
IMG_9947.jpeg
IMG_9953.jpeg
IMG_9955.jpeg
5F04020A-2A7C-4426-8CDE-E14266D8E2DB.jpeg
IMG_9939_jpg.jpeg 84EBEA2E-6F17-4FE1-8B3E-7AB10E4151D8.jpeg IMG_9948.jpeg IMG_9941.jpeg IMG_9937_jpg.jpeg IMG_9942.jpeg 0FA4D3E9-2B36-45AD-B31F-9BAFFFE5AD8B.jpeg IMG_9945_jpg.jpeg DBE82056-94E9-4B8B-A186-23A7E750FF12.jpeg IMG_9936.jpeg IMG_9950.jpeg IMG_9938_jpg.jpeg IMG_9940_jpg.jpeg IMG_9943_jpg.jpeg IMG_9944_jpg.jpeg IMG_9946_jpg.jpeg IMG_9947.jpeg IMG_9953.jpeg IMG_9955.jpeg 5F04020A-2A7C-4426-8CDE-E14266D8E2DB.jpeg

Sensory Bin 1: Quinoa, Dyed Rice, and Black Beans with Beaker Set

For this bin, I used quinoa dyed purple, green rice, and black beans to create a colorful and textured base. The Lovevery beaker set adds an extra science-lab vibe, making it perfect for little witches mixing their potions.

This bin is excellent for scooping, pouring, and sorting activities, which help develop fine motor skills and hand-eye coordination. Plus, the combination of quinoa and rice offers a sensory delight, with their different textures providing a tactile experience that keeps little ones engaged for extended play sessions.

What You'll Need:

  • - Quinoa (dyed purple)

  • - Green rice

  • - Black beans

  • - Lovevery beaker set or any small containers

Benefits:

  • - Fine motor development through scooping and pouring

  • - Hand-eye coordination practice

  • - Encourages imaginative play as kids pretend to mix potions


Sensory Bin 2: Purple Slime with Printable Potion Toppings

Our second sensory bin dives into the gooey world of slime! I made purple slime as the base for this bin and paired it with laminated cut-out toppings and mix-ins from the printable potion kit.

This bin offers hours of slimy fun, allowing kids to decorate and experiment with their potions by adding pretend magical ingredients like bat wings, toadstools, or moon dust (all part of the printable kit). Laminating the printables ensures they stay sturdy, even after hours of play.

What You'll Need:

  • - Purple slime (store-bought or homemade)

  • - Laminated cut-outs from the printable potion kit

  • - Mixing tools like spoons or scoops

Benefits:

  • - Boosts creativity and storytelling as kids pretend to brew potions

  • - Strengthens tactile and sensory exploration

  • - Improves fine motor skills through slime manipulation

IMG_9934.jpeg IMG_9866.jpeg IMG_9886.jpeg IMG_9914.jpeg IMG_9891.jpeg 0FA4D3E9-2B36-45AD-B31F-9BAFFFE5AD8B.jpeg IMG_9917.jpeg IMG_9930.jpeg IMG_9868_jpg.jpeg IMG_9865.jpeg IMG_9929.jpeg IMG_9938_jpg.jpeg IMG_9867.jpeg IMG_9869_jpg.jpeg IMG_9870.jpeg IMG_9872.jpeg IMG_9871_jpg.jpeg IMG_9887.jpeg IMG_9883.jpeg IMG_9896.jpeg IMG_9899.jpeg IMG_9911.jpeg IMG_9928.jpeg IMG_9931.jpeg IMG_9933.jpeg IMG_9935.jpeg IMG_9936.jpeg IMG_9937_jpg.jpeg IMG_9939_jpg.jpeg

Sensory Bin 3: Green Dyed Cooked Spaghetti with Squishy Eyeballs

For the final bin, we’re getting extra spooky! This bin features green-dyed cooked spaghetti, squishy eyeballs, candy bones, and plastic spiders for a creepy-crawly search-and-find activity. The soft texture of the spaghetti makes it irresistible for little hands, while the fun add-ins make this bin a sensory hit.

This setup encourages kids to search for specific items like eyeballs or bones, building their focus and concentration. It’s also great for encouraging conversations about what witches might put into their potions!

What You'll Need:

  • - Cooked spaghetti (dyed green)

  • - Squishy eyeballs

  • - Candy bones

  • - Plastic spiders or other Halloween-themed mix-ins

Benefits:

  • - Stimulates sensory exploration with slimy, squishy textures

  • - Enhances problem-solving skills with a search-and-find activity

  • - Supports language development as kids discuss their potions

IMG_9636.jpeg
IMG_9635.jpeg
IMG_9632.jpeg
IMG_9638.jpeg
IMG_9625.jpeg
IMG_9686.jpeg
IMG_9677.jpeg
IMG_9679.jpeg
IMG_9690.jpeg
IMG_9694.jpeg
IMG_9622.jpeg
IMG_9624.jpeg
IMG_9623.jpeg
IMG_9630.jpeg
IMG_9633.jpeg
IMG_9637.jpeg

Add to the Fun!

Don’t forget to grab my Witches Brew Potion Kit! The printables are perfect for adding mix-ins, labels, and potion ingredients to your sensory play. This apothecary shop setup can be used for solo play or group activities, and it’s ideal for keeping little ones entertained while learning through play.

What spooky potions will your little witches brew today? Be sure to share your setups with me by tagging @GoodnightFox! 🎃

I’m so excited to make this setup for Sofie’s Halloween Activities. Here’s the recipe for her Witch’s Potion.

  • 1/2 Cup Elmers Glue

  • 3 Cups Foam Shaving Cream

  • 1/2 tsp Baking Soda

  • Purple Food Coloring

  • 1 tbsp Saline Solution

Toppings:

  • Purple Water Beads

  • Plastic Spiders

  • Fake eyeballs

Download the Kit
Tags halloween, witch, potion, brew, apothecary, toddler, sensory, bin, sensory play

DIY Light Bulb Party Favors or Classroom Favors for Back to School: A Bright Idea for Kids!

August 31, 2024 Kylie Tuosto

Kick off the school year with a bang by giving out these clever DIY light bulb party favors! Whether you’re hosting a back-to-school bash or want to surprise students with a fun classroom gift, these favors are the perfect way to start the school year on a bright note. Using simple materials like clear plastic baubles and yellow Legos, these light bulb-inspired favors will be a hit with kids and add a creative touch to any celebration.

With the easy-to-follow instructions below, you can create these charming light bulb favors that are not only fun but also a great way to symbolize new ideas and learning as the school year begins.

Why These DIY Light Bulb Favors Are Perfect for Back to School

  • Symbolic and Fun: What better way to welcome kids back to school than with a favor that represents bright ideas and creativity?

  • Budget-Friendly: These favors are cost-effective and use minimal materials, making them ideal for creating in bulk.

  • Customizable: Add your own flair with different ribbon colors, tags, and even personalized messages for each student.

  • Interactive: Filled with yellow Legos, kids can actually play with the pieces inside, making this a fun and functional favor.

Supplies You’ll Need:

  • Clear plastic baubles (to resemble light bulbs)

  • Yellow Lego pieces

  • Printable collars from GoodnightFox

  • Hot glue gun and glue sticks

  • Ribbon for wrapping

Step-by-Step Instructions

1. Gather Your Materials

Before you begin, make sure you have all your supplies handy. You can get the printable collars from GoodnightFox, which will give your baubles the finished look of a real light bulb. The rest of the materials, such as clear plastic baubles and yellow Legos, can be found at your local craft or toy store.

2. Assemble the Bauble

  • Open up the clear plastic bauble.

  • Fill the inside with yellow Lego bricks to create the “light bulb” look. The yellow pieces mimic the appearance of a glowing bulb, adding a fun and playful element to the favor.

  • Don’t overfill the bauble—leave enough space for the pieces to move around a little, adding some interactivity for the kids.

3. Attach the Printable Collar

  • Once you’ve filled the bauble with yellow Legos, it’s time to add the light bulb collar. Print the light bulb collars from GoodnightFox and carefully cut them out.

  • Wrap the collar around the top of the bauble, right where the two halves meet. Use a little hot glue to secure it in place.

4. Add the Ribbon

  • For a finishing touch, wrap a ribbon around the top of the bauble where the collar meets the two halves. Choose a bright color like yellow or red to complement the theme.

  • Tie a neat bow and trim any excess ribbon for a polished, professional look.

5. Gift or Display!

  • Your DIY light bulb party favors are now ready to shine! These make wonderful classroom gifts or can be displayed as fun decorations at your back-to-school event. Hand them out to students as a reminder of all the bright ideas and learning that await in the new school year.

Tips for Crafting the Perfect Light Bulb Favors

  • Add a Personal Touch: Consider attaching small name tags to each favor so kids feel extra special.

  • Incorporate a Message: You can add a short, inspirational note to each favor, such as “Shine Bright This School Year!” or “You’re Full of Bright Ideas!”

  • Experiment with Different Fillers: While yellow Legos are a playful touch, you can also use other yellow objects like beads, pom-poms, or small candies for a different twist.

Why These Light Bulb Favors Will Brighten Any Event

  • Symbolic of Learning: These favors are a fun way to remind kids that school is all about new ideas and creativity. They make a great gift for the start of a school year, especially as classroom favors.

  • Interactive: The yellow Lego pieces inside aren’t just for show – kids can take them apart and play with them, giving these favors an added layer of fun.

  • Simple and Cost-Effective: These DIY favors are affordable and easy to make in large quantities, making them perfect for teachers or parents hosting back-to-school parties.

  • Memorable Keepsakes: Unlike typical party favors, these light bulb baubles are something kids can keep and enjoy, long after the event is over.

Light Up the School Year with DIY Light Bulb Favors

With just a few simple supplies, you can create DIY light bulb party favors that are sure to brighten any back-to-school event. These creative and fun favors are not only budget-friendly but also a great way to celebrate the start of a new school year. Whether you’re a teacher looking for classroom favors or a parent throwing a back-to-school party, these light bulb baubles are sure to impress.

Head over to GoodnightFox to grab your printable collars and start creating these bright, fun-filled favors today. Your students or party guests will love this thoughtful, interactive gift as they head into a new school year full of bright ideas and exciting learning adventures!

Tags back to school, classroom favors, party favors, back to school crafts for kids, light bulb craft, science activity, you're so bright, ideas for kids, fun activities for kids
2 Comments

Cute Back-to-School Supplies: Sofie’s Pastel Rainbow Vibe

August 31, 2024 Kylie Tuosto

As the back-to-school season approaches, creating a welcoming and motivating environment for your little ones can make all the difference. Whether it’s your child’s first day of kindergarten or they’re returning for another school year, setting them up with adorable and functional supplies can help them start the year on the right foot.

This year, Sofie’s back-to-school basket is all about that pastel rainbow vibe, combining style with substance. Let’s dive into her basket and highlight some fantastic products from both big-name stores and small businesses that are perfect for your own back-to-school preparations!

Basket from IKEA

Start with a versatile and affordable storage option like this basket from @ikeausa. It’s spacious enough to hold all the essentials while keeping everything organized.

Folder and Notebook from Target

Target never disappoints when it comes to cute and practical school supplies. Sofie’s folder and notebook from @target perfectly complement the pastel theme while providing the necessary tools for staying on top of schoolwork.

Pouch and Pastel Sharpies from Target

These pastel Sharpies and matching pouch, also from @target, are essential for any school year. The soft colors add a fun twist to the usual school supplies, making note-taking a bit more enjoyable.

Back-to-School Sign by Frankie and Betty Co.

A beautiful back-to-school sign by @frankieandbettyco adds a personalized touch to Sofie’s basket. It’s a great way to commemorate the start of a new school year and makes for a memorable photo prop.

Girl Boss Pennant by Frankie and Betty Co.

Empower your child with this inspiring Girl Boss pennant from @frankieandbettyco. It’s a cute and motivational addition to any study space.

Garland by Little Books and Nooks

The pastel garland from @littlebooksandnooks adds a dash of whimsy and color to Sofie’s setup, making her study area more inviting and fun.

Personalized Pencil Clip by Evie Pearl Handmade

Personalized touches make all the difference, and this pencil clip by @eviepearlhandmade ensures that Sofie’s pencils are not only organized but also uniquely hers.

Rainbow Palette by Oak and Co.

A rainbow palette from @oak.and.co brings creativity into the mix. It’s not just a functional item but a reminder that learning can be colorful and fun.

Note Pad by We Are Ooly

This note pad from @weareooly is perfect for jotting down ideas, assignments, or even doodles. It’s another example of how pastel tones can make school supplies feel more personalized and enjoyable.

Mindfulness Cards by Goodnight Fox

At GoodnightFox.com, we’re all about helping toddlers enjoy learning through play. Our **Mindfulness Flashcards** are a fantastic addition to Sofie’s basket. These cards encourage kids to take a moment for themselves, helping them manage their emotions and focus better during the school day.

Affirmations Flashcards by Goodnight Fox

Our **Affirmations Flashcards** are another great tool for boosting your child’s confidence. Each card features a positive affirmation that helps kids start their day with a positive mindset. These cards are a small but powerful addition to any back-to-school setup.

Back-to-School Flashcards by Goodnight Fox

Finally, our Back-to-School Flashcards are perfect for helping kids transition into the new school year. These cards are designed to make the start of school exciting and less stressful, offering fun prompts and activities that kids can look forward to each day.

Shopping for back-to-school supplies can be a fun and creative process, especially when you mix and match items from both well-known retailers and small shops. Supporting small businesses not only gives you access to unique, high-quality products but also helps nurture a community of creators and entrepreneurs.

Whether you’re putting together a pastel rainbow-themed basket like Sofie’s or crafting your own unique setup, remember that the little details can make a big difference in setting a positive tone for the school year ahead. Happy shopping!

Tags back to school, school basket, occasions baskets, back to school activities, back to school gift ideas, rainbow back to school
2 Comments

Fun with Laundry Mat Sensory Dramatic Play: Free Printable Kits and Activities

August 26, 2024 Kylie Tuosto

Laundry day has never been this exciting! Our laundry mat sensory dramatic play setup is designed to engage children in imaginative play while teaching them about household chores. Perfect for toddlers, these activities help instill a routine of helpfulness and responsibility. In this blog post, we'll explore three interactive sensory activities that will make laundry time fun for your little ones.

Download & Print
IMG_2758.JPEG IMG_2764_jpg.JPEG IMG_2770_jpg.JPEG

Clothes Pins and Clothes Cut-Outs

Our first sensory bin features clothes pins and cut-outs of clothes that can be pinned onto a ribbon or string. This activity encourages fine motor skills and hand-eye coordination as children pin up their "laundry."

Materials Needed:

  • Clothes pins

  • Cut-outs of clothes

  • Ribbon or string

  • Sensory bin

Activity Instructions:

  1. Set up a sensory bin with clothes pins and cut-outs of clothes.

  2. Attach a ribbon or string between two points (e.g., chairs or walls) to create a clothesline.

  3. Encourage your child to use the clothes pins to pin the cut-outs onto the ribbon or string, pretending to hang up laundry.

  4. Discuss the different types of clothes and the importance of drying them properly.

IMG_2822.JPEG IMG_2828_jpg.JPEG IMG_2767_jpg.JPEG

Dryer Balls for Laundry Sorting

Next, we have a bin full of wool dryer balls for a fun and tactile laundry sorting activity. This activity helps children learn about sorting and organizing while providing a sensory experience with the soft texture of the wool balls.

Materials Needed:

  • Wool dryer balls in various colors

  • Sensory bin

Activity Instructions:

  1. 1Fill a sensory bin with wool dryer balls.

  2. Encourage your child to sort the dryer balls by color, size, or texture.

  3. Discuss how dryer balls are used in the laundry to help clothes dry faster and reduce static.

IMG_2815.JPEG IMG_2812.JPEG IMG_2772_jpg.JPEG IMG_2768_jpg.JPEG

Washer and Dryer Dramatic Play

Our third activity transforms the play area into a mini laundry mat using decor to make the doors of a washer and dryer. Children can sort "wet" and dry clothes into laundry bags, mimicking the real-life process of doing laundry.

Materials Needed:

  • Decor to create washer and dryer doors

  • Cut-out clothes (wet and dry)

  • Laundry bags

Activity Instructions:

  1. Use decor to create the doors of a washer and dryer on a wall or large cardboard boxes.

  2. Provide cut-out clothes labeled as "wet" and "dry."

  3. Encourage your child to sort the wet and dry clothes into separate laundry bags, pretending to load the washer and dryer.

  4. Discuss the steps involved in doing laundry, including washing, drying, and folding clothes.

Laundry mat sensory dramatic play is a fantastic way to engage children in imaginative play while teaching them valuable life skills. With our free printable kits and the detailed activities above, your little ones are sure to have a blast while learning about household chores. Dive into these fun laundry-themed activities and watch your child's helpfulness and responsibility grow!

IMG_2768_jpg.JPEG IMG_2771_jpg.JPEG IMG_2773.JPEG IMG_2823.JPEG IMG_2824.JPEG IMG_2829_jpg.JPEG

Laundry Mat Play Vocabulary List

  1. 1. Laundry

  2. 2. Clothes Pin

  3. 3. Dryer Ball

  4. 4. Washer

  5. 5. Dryer

  6. 6. Clothesline

  7. 7. Wet

  8. 8. Dry

  9. 9. Sort

  10. 10. Fold

  11. 11. Tumble

  12. 12. Wash

  13. 13. Spin

  14. 14. Detergent

  15. 15. Fabric Softener

  16. 16. Load

  17. 17. Unload

  18. 18. Iron

  19. 19. Starch

  20. 20. Hang

  21. 21. Rinse

  22. 22. Cycle

  23. 23. Basket

  24. 24. Routine

  25. 25. Chores

Explore the magic of sensory play with these laundry mat-themed activities and help your child develop a sense of responsibility and helpfulness. Don't forget to download our free printable kits for even more fun and engaging play!

By incorporating these sensory activities into your playtime, you'll provide endless entertainment and developmental benefits for your children. Happy playing and happy laundry day!

2 Comments

Delightful Donut Shop Sensory Play: Printable Kits and Activities

August 10, 2024 Kylie Tuosto

Step into the sweetest sensory play experience with our donut shop-themed activities! Perfect for imaginative and tactile exploration, our free printable kits and dramatic play setups are designed to keep little ones engaged and learning. In this blog post, we'll dive into three fun and delightful sensory activities that your children will love.

Download & Print

Felt Donuts Sensory Bin

Our first sensory bin features soft, colorful felt donuts that are perfect for imaginative play and fine motor skill development. This activity encourages creativity as children pretend to bake and serve their own felt donuts.

Materials Needed:

  • Felt donuts

  • Sensory bin

Activity Instructions:

  1. Fill a sensory bin with felt donuts in various colors and designs.

  2. Encourage your child to pretend to bake, decorate, and serve the donuts.

  3. Use this opportunity to discuss different types of donuts and flavors.

IMG_2834.JPEG IMG_2863_jpg.JPEG IMG_2836_jpg.JPEG IMG_2839_jpg.JPEG

Donut Shop Dramatic Play

Next, we have a donut shop dramatic play setup, which transforms your play area into a bustling donut shop. This activity fosters imaginative play and social skills as children role-play as bakers, cashiers, and customers.

Materials Needed:

  • Donut shop play setup (cash register, play money, menu, etc.)

  • Pretend donuts (felt, plastic, or homemade)

  • Sensory bin

Activity Instructions:

  1. Set up a donut shop play area with a cash register, play money, and a menu.

  2. Provide pretend donuts for your child to sell.

  3. Encourage your child to take on different roles such as baker, cashier, and customer.

  4. Engage in role-play scenarios to enhance social interaction and imaginative play.

IMG_2835.JPEG IMG_2850_jpg.JPEG IMG_2838_jpg.JPEG IMG_2840_jpg.JPEG IMG_2841_jpg.JPEG IMG_2858_jpg.JPEG

Pool Noodle Donuts with Shaving Cream Frosting and Sprinkles

Our third activity involves creating pool noodle donuts with shaving cream frosting and sprinkles. This activity combines sensory exploration with creative fun, allowing children to decorate their own donuts.

Materials Needed:

  • Pool noodles (cut into donut shapes)

  • Shaving cream

  • Sprinkles (real or craft)

  • Sensory bin

Activity Instructions:

  1. Cut pool noodles into donut shapes and place them in a sensory bin.

  2. Provide shaving cream and sprinkles for your child to use as frosting and decorations.

  3. Encourage your child to decorate the pool noodle donuts, exploring the textures of the shaving cream and sprinkles.

  4. Discuss the different ways to decorate donuts and the sensory experience of the materials.

IMG_2842_jpg.JPEG IMG_2843_jpg.JPEG IMG_2845_jpg.JPEG IMG_2846_jpg.JPEG IMG_2850_jpg.JPEG

Donut shop sensory play is a delightful way to engage children in imaginative play while developing fine motor skills and creativity. With our free printable kits and the detailed activities above, your little ones are sure to have a blast while learning and playing. Dive into these sweet sensory activities and watch their creativity soar!

25 Words Donut Shop Play Vocabulary List

  1. 1. Donut

  2. 2. Bake

  3. 3. Frosting

  4. 4. Sprinkle

  5. 5. Shop

  6. 6. Customer

  7. 7. Baker

  8. 8. Cashier

  9. 9. Menu

  10. 10. Flavor

  11. 11. Decorate

  12. 12. Serve

  13. 13. Purchase

  14. 14. Pretend

  15. 15. Sweet

  16. 16. Glaze

  17. 17. Dough

  18. 18. Fill

  19. 19. Topping

  20. 20. Display

  21. 21. Order

  22. 22. Ring

  23. 23. Hole

  24. 24. Soft

  25. 25. Create

Explore the magic of sensory play with these donut shop-themed activities and let your child's imagination take flight. Don't forget to download our free printable kits for even more fun and engaging play!

IMG_2868_jpg.JPEG
IMG_2875_jpg.JPEG
IMG_2878_jpg.JPEG
IMG_2890_jpg.JPEG
IMG_2893_jpg.JPEG
IMG_2897_jpg.JPEG

By incorporating these sensory activities into your playtime, you'll provide endless entertainment and developmental benefits for your children. Happy playing and happy baking!

Tags donut shop, donut shaving cream activity, donut sensory play, donut themed activity ideas, kids ideas for donut activities, donut play, dramatic play printables, free printable activities for kids
2 Comments

Cool Down with Snow Cone Shave Ice Sensory Play: Free Printable Kits and Activities

August 5, 2024 Kylie Tuosto

Beat the heat this summer with our snow cone shave ice sensory play setup! Perfect for imaginative and tactile exploration, our free printable kits and dramatic play setups are designed to keep little ones engaged and learning. In this blog post, we'll dive into three fun and refreshing sensory activities that your children will love.

Download & Print
IMG_2342_jpg.jpg IMG_2343_jpg.jpg IMG_2337.jpg

Stackable Colorful Shave Ice Conical Cups

Our first sensory activity features a bin with stackable colorful shave ice conical cups. This activity encourages creativity and fine motor skills as children stack and play with the vibrant cups, imagining their own snow cone creations.

Materials Needed:

  • Stackable colorful shave ice conical cups

  • Sensory bin

Activity Instructions:

  1. Fill a sensory bin with the colorful conical cups.

  2. Encourage your child to stack the cups, mix and match colors, and pretend to serve snow cones.

  3. Add to the fun by incorporating pretend play scenarios, such as running a snow cone stand or serving friends and family.

IMG_2346_jpg.jpg IMG_2368_jpg.jpg IMG_2367.jpg IMG_2357_jpg.jpg IMG_2358_jpg.jpg

Ice Cube Sensory Bin

Next, we have a sensory bin filled with ice cubes for a truly refreshing play experience. This activity provides a unique tactile experience as children explore the cold, slippery texture of the ice cubes.

Materials Needed:

  • - Ice cubes

  • - Sensory bin

Activity Instructions:

  1. Fill a sensory bin with ice cubes.

  2. Allow your child to explore the ice cubes, feeling the cold and slippery texture.

  3. Enhance the experience by adding small tools or toys to manipulate the ice cubes, such as tongs, scoops, or small figurines.

IMG_2385.jpg IMG_2372_jpg.jpg IMG_2383_jpg.jpg IMG_2370_jpg.jpg IMG_2388_jpg.jpg IMG_2390_jpg.jpg

Hawaiian Shave Ice Machine with Rainbow Syrup Flavors

Our third activity brings the joy of a Hawaiian shave ice machine to your home. Using rainbow syrup flavors for toppings, this activity combines sensory play with imaginative fun, allowing children to create their own delicious shave ice treats.

Materials Needed:

  • Hawaiian shave ice machine

  • Rainbow syrup flavors

  • Cups or bowls for serving

Activity Instructions:

  1. Set up the Hawaiian shave ice machine according to the instructions.

  2. Provide cups or bowls for your child to fill with shaved ice.

  3. Allow your child to choose from the rainbow syrup flavors to create their own unique shave ice treats.

  4. Encourage imaginative play by setting up a pretend shave ice stand and inviting family members or friends to join in the fun.

Snow cone shave ice sensory play is a fantastic way to keep children cool and entertained while encouraging creativity and fine motor skill development. With our free printable kits and the detailed activities above, your little ones are sure to have a blast while learning and playing. Dive into these refreshing sensory activities and watch their creativity soar!

IMG_2395_jpg.jpg IMG_2399_jpg.jpg IMG_2401_jpg.jpg IMG_2408_jpg.jpg IMG_2410_jpg.jpg IMG_2412_jpg.jpg IMG_2418_jpg.jpg IMG_2420_jpg.jpg

Snow Cone Shave Ice Play Vocabulary List

  1. 1. Shave Ice

  2. 2. Snow Cone

  3. 3. Syrup

  4. 4. Flavor

  5. 5. Ice Cube

  6. 6. Conical Cup

  7. 7. Stack

  8. 8. Cold

  9. 9. Refreshing

  10. 10. Sweet

  11. 11. Machine

  12. 12. Rainbow

  13. 13. Serve

  14. 14. Mix

  15. 15. Colorful

  16. 16. Scoop

  17. 17. Texture

  18. 18. Freeze

  19. 19. Melt

  20. 20. Topping

  21. 21. Crunchy

  22. 22. Smooth

  23. 23. Chill

  24. 24. Delight

  25. 25. Create

Explore the magic of sensory play with these snow cone shave ice-themed activities and let your child's imagination take flight. Don't forget to download our free printable kits for even more cool and refreshing fun!

By incorporating these sensory activities into your playtime, you'll provide endless entertainment and developmental benefits for your children. Happy playing!

Tags summer kids activity, snow cone shop, snow cone printable play, snow cone flavor menu, shave ice flavors, sensory play for kids, ice sensory play, kids snow cone shop
2 Comments

From Etsy to Shopify: Growing GoodnightFox.com with Email Marketing

July 28, 2024 Kylie Tuosto

My Journey from Etsy to Shopify + Mailchimp

Starting a small business is a journey filled with excitement, challenges, and growth. My adventure began on Etsy, where I launched GoodnightFox.com, a shop dedicated to helping toddlers enjoy learning through play. As the business grew, I realized that to reach more families and create a stronger brand presence, I needed to expand beyond Etsy. This led me to the powerful combination of Shopify and Mailchimp, enabling me to grow my brand through email marketing.

The GoodnightFox.com Mission

At GoodnightFox.com, our mission is simple: to make learning fun for toddlers through engaging and creative play. We offer a variety of sensory play kits, dramatic play setups, and other educational resources designed to stimulate young minds and foster a love for learning. Every product is crafted with care and thoughtfulness, ensuring that each play experience is both enjoyable and educational.

The Etsy Experience

Etsy was a fantastic starting point for GoodnightFox.com. It provided a platform to reach customers who were already interested in handmade and unique items. Sales were steady, and the feedback from parents was overwhelmingly positive. However, as the business grew, I realized that Etsy's limitations were holding me back. I needed more control over my branding, better analytics, and, most importantly, a way to directly communicate with my customers through email marketing.

Making the Leap to Shopify and Mailchimp

The decision to move from Etsy to Shopify was driven by the need for growth and scalability. Shopify offered the flexibility and tools necessary to build a robust online store that reflected the GoodnightFox brand. Integrating Mailchimp allowed me to leverage email marketing to engage with customers, share new products, and offer exclusive promotions.

Setting Up Shopify for Your Shop

1. Choose the Right Plan:

Start with a plan that fits your budget and business size. Shopify offers various plans, so pick one that allows room for growth. I started with the cheapest plan so that I could get a feel for it and I haven’t had to upgrade since. I have added a few add-ons and plug ins — Mailchimp has been the most critical to growing my shop. I’ve also tried a loyalty app and an SMS app.

2. Customize Your Store:

Use Shopify’s customizable themes to create a unique look for your store. Ensure it’s visually appealing and easy to navigate. You can also purchase a bunch of pre-made themes for your shop. But I wanted to get my shop up and running quickly, so I made very minimal customizations just to get it looking like my brand.

Pro Tip: You might find that it’s odd that you can’t show a catalogue view on the homepage. I’m not sure why that is, but setting up your catalogue collections is critical so that you can highlight the right products on your homepage.

3. Add Products, Collections, & Navigation:

Organize your products with clear descriptions, high-quality images, and appropriate categories. You can automatically bring your Etsy listings into Shopify using their import feature. But just know that you might want to rewrite your descriptions because the formatting doesn’t come over perfectly. It’s no big deal, just get your shop up and running and start driving traffic to it and you can slowly go back and edit and clean up your listing.

You’ll want to make sure that you tag your listings as you go with the appropriate “Collection”. Collections is how Shopify lets you show certain types of products on your homepage and in your navigation. There are two ways to do collections — you can either have them work automatically based on key words — for example, for my shop, I have “Donut Shop Dramatic Play Kit” and my “Dramatic Play Kit” collection is set to find those words in each listing. Or you can check each product to be in each collection manually — you’ll just want to make sure every time you add a new product, you don’t forget to check that it’s part of that collection.

There are many different ways to use collections — here are a few examples:

  • Product type collections: Dramatic Play, Sensory Kits, Flashcards, Play Rounds

  • Seasonal collections: Fall Collection, Spring Collection, Winter Collection, Summer Collection

  • Discount collections: Bundle & Save, 20% off, BOGO

  • Learning Theme: Montessori Basics, Body Parts, Math, Reading, Writing

4. Set Up Payment and Shipping:

Configure payment gateways and shipping options that work best for your business and customers. I enabled both ShopPay and PayPal for my shop.

5. Launch Your Store:

Once everything is set up, launch your store and start promoting it through social media and other channels. Of course, you’ll want to slowly start letting your audience know that you’re not just on Etsy, that you’re on Shopify too! Don’t forget to add a testimonials section to highlight your positive reviews! Shopify doesn’t have reviews built into their basic play, so you’ll want to capture those yourself or search their app store for a ratings and reviews plug in.


Integrating Mailchimp with Shopify

1. Create a Mailchimp Account:

Sign up for a Mailchimp account if you don’t already have one. Because Etsy is a Marketplace, you’re not able to capture all of your loyal buyers as email subscribers, which makes it very hard to reach back out to turn them into repeat buyers. With Shopify + Mailchimp you’ll be able to turn all of your one-time purchasers into repeat buyers with Customer Journey Builder which creates automated drip series.

2. SETUP SUBSCRIBER POPUPS:

The other benefit is that you can start capturing subscriber traffic on your blog or social media sites by offering a lead magnet. A lead magnet is a freebie or discount that you can offer to your followers for subscribing to your email newsletter. I have two different lead magnets for my shop.

  • Free Downloads: Because I offer printables in my shop, I have a free download section of my Shopify site where I send subscribers coming from my blog site.

  • 15% off First Order: For my Shopify site, I offer 15% off discount for new buyers. The traffic to my Shopify site is more primed to purchase, so I offer a bigger discount.

3. Connect Mailchimp to Shopify:

Use the Mailchimp app for Shopify to connect the two platforms. This allows you to sync customer data and automate email campaigns. Once you’ve setup the integration, your Shopify data and customer purchase behavior will automatically flow over to Mailchimp. Here are a few of the many benefits of the integration:

  1. Customer Profiles: In Mailchimp, you get a full profile view of each of your customers and a timeline based activity feed including how they’ve engaged with emails as well as purchases they’ve made in Shopify.

  2. Customer Journeys: See more below for the triggers you can use from Shopify!

  3. Audience Segments: See more below for the attributes that you can use from Shopify!

4. Design Your Emails:

Use Mailchimp’s templates to create engaging newsletters and promotional emails. Make sure to include a call-to-action and links to your products. I recommend setting up a few basic templates that you can reuse over and over again. Here are a few that are relevant for shops like mine:

  1. Discount Email Template: I use this template whenever I’m having a sale. I spent some time formatting the discount offers to be bold and eye-catching. You’ll want to optimize this email for click through rate.

  2. Newsletter Email Template: This is the template that I use most because I send out a weekly newsletter as well as some dynamic content newsletters. This one will pay dividends so spend a little bit of time optimizing the format and making sure you have strong CTAs that drive action to your site.

  3. New Product Launch Email Template: Don’t make it a hassle every time you launch a new product! You can create one template for all of your product launches and reuse it over and over again.

  4. Educational Email Template: Include in this template all of the good nuggets of information about how to use your products, This could include text, step by step instructions, video content, images and tutorials. Once you have this email, you’ll have this content ready to go for any journey or email where you need to plug it in.

5. Segment Your Audience:

Segment your email list based on customer behavior and preferences. This ensures that your messages are relevant and personalized.

Automatic Segments: Mailchimp will automatically build segments based off of your customers’ buying behavior in Shopify. So if you want to be able to target customers who have purchased more than once, you can easily create a “Loyal Customers” segment using Shopify attributes inside of Mailchimp. Here are some example ideas for segments you can build:

  • VIP Customers (purchased over $200 in my shop): Building loyalty amongst your following is critical to getting your shoppers to promote your brand. Reward loyal customers with big discounts, special promotions, early access to new launches. I offer a gift

  • Loyal Customers (purchased > 3 times in my shop): Purchasing multiple times is a great signal of loyalty. Continue to reward loyal purchasers — you can even create a unique discount code once they’ve unlocked a certain number of purchases. How awesome is it to make them feel like a special member of your community.

  • Local Customers (within a 25mi radius of my location): I used this segment when I did local tradeshows and events at nearby shops. This was a great way to connect with my local buyer community. You can also start to personalize your content based on the weather, local events, etc.

  • Hasn’t purchased ABC Flaschards (hasn’t yet purchased my flag ship product): Having this segment for your flag ship products and other offerings is key. This lets you target your customers specifically with product you know they’ll love.

  • Teachers, Moms, Content Creators: If you know you have specific audiences that visit your shop, try to use key signals (such as the emails they open or pages on your shop they view to tag them by audience. This can help you send more personalized emails to them.

6. Automate Your Campaigns:

Set up automated emails for abandoned carts, welcome series, and product recommendations to keep your customers engaged.

Customer Journeys: In Mailchimp, you can use events and behaviors from Shopify such as “page viewed” “added to cart” “abandoned cart” to trigger emails directly to your customers. Here are a few that I have turned on:

  1. Welcome Email: Welcome all of your new subscribers with a welcome series. You can make this series plug and play. Start by reinforcing your brand with a “Welcome & About Us” email. Then follow it up with a unique discount to thank them for subscribing (I do 70% off my printable flashcards). This warms them up to quickly make their first purchase to take advantage of an awesome deal. Continue to share meaningful content that provides value in their lives related to your niche. And don’t forget the reminders to countdown until the offer expires.

  2. Abandoned Cart Email: Remind customers that you’ve saved what’s in their cart so that they can come back to your site and continue shopping. Mailchimp makes this easy with a dynamic content block that automatically pulls this information in from Shopify.

  3. Repeat Buyer Email: Turn one time buyers into loyal repeat purchasers with this pre-built journey. This journey helps you follow up after that first purchase and land the second purchase through a series of targeted emails.

  4. Order Notification Email: Send out customized and beautiful branded order notifications so that buyers know when your product has shipped.

Tips and Tricks for Success with Shopify + Mailchimp

  • Focus on Branding: Consistent branding across your website and emails helps build trust and recognition.

  • Analyze Your Data: Use Shopify and Mailchimp analytics to track performance and make data-driven decisions.

  • Engage with Your Customers: Encourage customers to leave reviews and share their experiences on social media.

  • Offer Incentives: Use discounts and exclusive offers to encourage email sign-ups and repeat purchases.

  • Stay Consistent: Regularly update your blog and social media with fresh content to keep your audience engaged.

Getting Started with Mailchimp

1. Sign Up and Set Up Your Profile:

Start by creating a Mailchimp account and setting up your profile with your business information.

2. Import Your Contacts:

Import your existing contacts from other platforms or spreadsheets.

3. Create Your First Campaign:

Design your first email campaign using Mailchimp’s drag-and-drop editor.

4. Set Up Automations:

Use automation tools to create workflows for welcome emails, follow-ups, and more.

5. Monitor and Adjust:

Keep an eye on your campaign performance and make adjustments as needed to improve engagement and conversions.

Transitioning from Etsy to Shopify and integrating Mailchimp was a pivotal move for GoodnightFox.com. It allowed me to take control of my brand, directly engage with my customers, and grow my business in ways I couldn’t have on Etsy alone. With the right tools and strategies, you can also make this transition smoothly and successfully, setting your business up for long-term success.

Tags shopify, etsy, mailchimp, marketing a small shop, small business tips and tricks, software for etsy shops, marketing for etsy shops, email marketing for etsy
2 Comments

Discover the Magic of Desert Animals with Our Sensory Play Setup!

July 24, 2024 Kylie Tuosto

Looking for engaging and educational summer activities for kids? Our Desert Animal Sensory Bins are perfect for small world play and exploring the fascinating world of desert animals! Sensory play is a fantastic way for toddlers to learn through hands-on experiences, and this setup is designed to ignite their curiosity and creativity.

Download & Print
IMG_6935_jpg.JPEG IMG_6938.JPEG IMG_6939_jpg.JPEG

Desert Animal Pattern Matching and Flashcards Matching

This bin is all about visual recognition and cognitive development. We've included a variety of desert animal flashcards and pattern matching cards. Your little one can match the animal patterns and learn to identify different desert creatures. This activity enhances memory skills and promotes attention to detail.

IMG_6958_jpg.JPEG IMG_6916_jpg.JPEG IMG_6954.JPEG IMG_6944.JPEG IMG_6914_jpg.JPEG IMG_6917_jpg.JPEG IMG_6918.JPEG IMG_6948_jpg.JPEG IMG_6955_jpg.JPEG IMG_6960_jpg.JPEG IMG_6961.JPEG IMG_6970.JPEG IMG_6971_jpg.JPEG

Small World Play with Pasta Noodles and Resin Cactus Pieces

Bring the desert to life with our small world play bin! We've painted pasta noodles green to mimic cacti and stuck them in white slime sand. Alongside these, you'll find die-cut animals and resin cactus pieces from @creatingadventuresco. This setup encourages imaginative play, fine motor skills, and sensory exploration.

IMG_6912.JPEG IMG_6913.JPEG IMG_6971_jpg.JPEG IMG_6974_jpg.JPEG IMG_6993.JPEG

Wooden Desert Animals Bin with Matching Magnetic Letters

For a tactile and educational experience, our wooden desert animals bin is paired with matching magnetic letters for name recognition. This activity supports letter recognition, early literacy skills, and fine motor development. Kids will love matching the animals to their corresponding letters while learning new words.

IMG_6918.JPEG IMG_6914_jpg.JPEG IMG_6932_jpg.JPEG

25 Desert Animal Vocabulary Words to Learn

  1. 1. Desert

  2. 2. Cactus

  3. 3. Lizard

  4. 4. Snake

  5. 5. Camel

  6. 6. Sand

  7. 7. Sun

  8. 8. Heat

  9. 9. Dry

  10. 10. Scorpion

  11. 11. Owl

  12. 12. Fox

  13. 13. Eagle

  14. 14. Plant

  15. 15. Dune

  16. 16. Horizon

  17. 17. Nocturnal

  18. 18. Adaptation

  19. 19. Mirage

  20. 20. Oasis

  21. 21. Rock

  22. 22. Burrow

  23. 23. Habitat

  24. 24. Prey

  25. 25. Predator

The Benefits of Sensory Play for Kids

Sensory play is crucial for children's development. Here are some of the benefits:

  1. Cognitive Growth: Sensory activities stimulate the brain, helping kids develop problem-solving and decision-making skills.

  2. Fine Motor Skills: Manipulating small objects and textures strengthens hand muscles and improves coordination.

  3. Language Development: As children describe their sensory experiences, they learn new vocabulary and enhance their communication skills.

  4. Social Interaction: Sensory play

Tags desert animals, summer play, summer activity for kids, cactus sensory play, flamingo sensory play, summer sensory play, Flisat table ideas
← Newer Posts Older Posts →

Get Featured

Have a shop that specializes in baby gifts? I'd love to feature your shop and products in one of my weekly roundups. Email me at goodnightfoxstudio@gmail.com.

Have a small shop?

Check out GoodnightFox wholesale we’d love to have you carry the GoodnightFox brand.

Download Printables

Follow along with the activities


Free Printable Activities

Check out our free printable library of resources. From activity books, dramatic play kits, memory games, flashcards and more, you can try the entire goodnightFox collection free.

Download & Print