
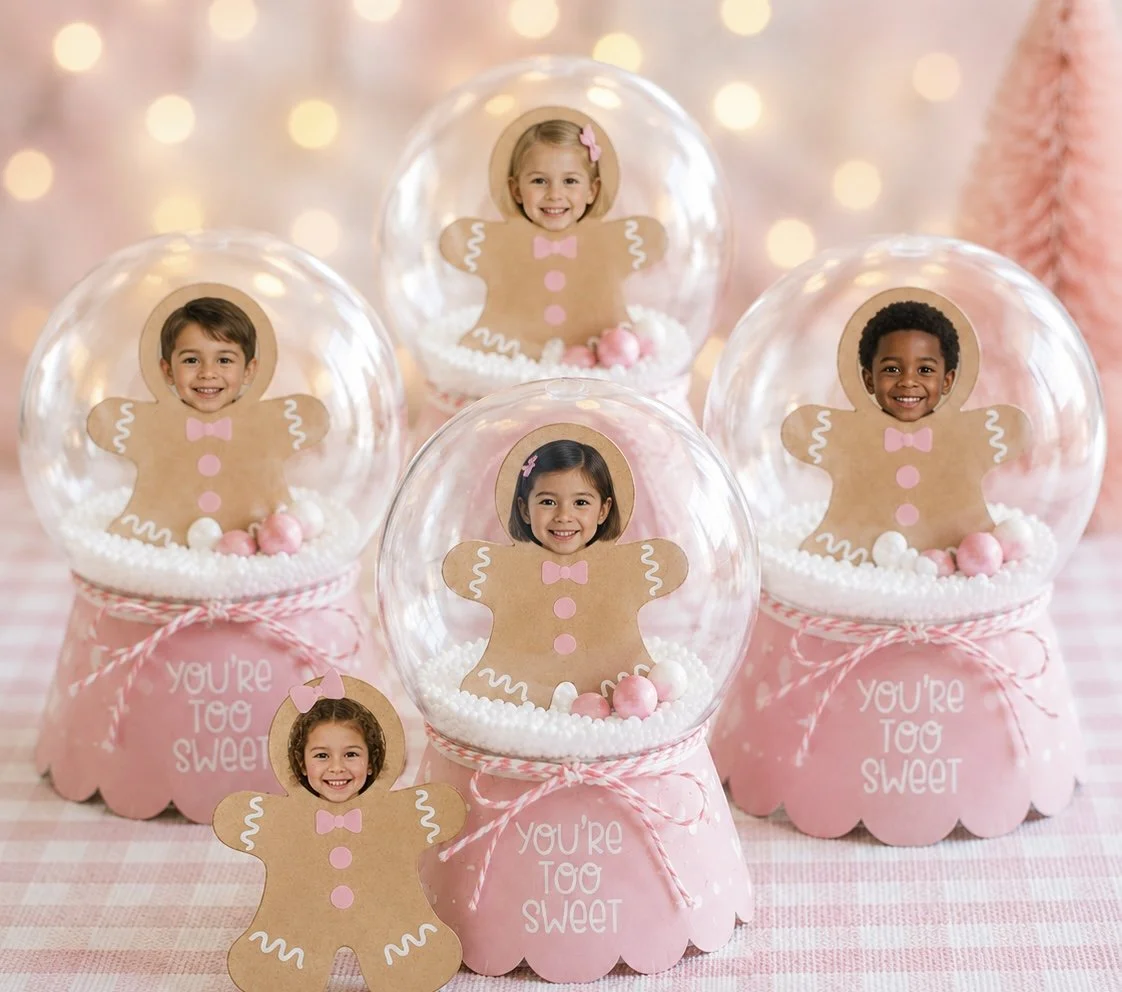
Gingerbread Snow Globe Ornaments for Kids (Easy Photo Christmas Craft)
These gingerbread snow globe ornaments might be the sweetest Christmas craft we've ever made — each one holds a child's photo inside a pink gingerbread character, tucked into a clear ornament with faux snow. They take minutes per ornament, they cost very little, and parents absolutely melt over them. When my daughter was little, the photo crafts were always the ones that survived the annual clean-out.
This is the gingerbread design from our photo snow globe ornament collection — it also comes in reindeer & Santa and arctic animals. All three work the same way, so once you've made one batch, you can make them all.
What You'll Need
- Printable gingerbread snow globe kit (also on Etsy) — 12 gingerbread photo cutouts plus "You're Too Sweet" collar wraps
- Clear plastic fillable ornaments, 3–4 inch (the two halves snap apart)
- Faux snow, white foam beads, or mini pom-poms in white and pink
- Small printed photos of each child (about 2x2 inches — school photos trim down perfectly)
- Ribbon for the bow
- Scissors and clear tape
Step 1: Print the Kit
Print the gingerbread snow globe PDF — page 1 has 12 gingerbread photo cutouts, pages 2–3 have the pink "You're Too Sweet" collar wraps. Cardstock makes sturdier characters, but regular paper works fine. Print one cutout sheet per 12 kids, and one collar sheet per 4 ornaments.
Step 2: Cut Out the Gingerbread Characters
Cut out each gingerbread character along the outline. Older kids can do their own cutting (great scissor practice); for preschoolers, pre-cut and let them do the fun parts.
Step 3: Add Each Child's Photo
Trim each photo to fit behind the face cutout and tape it in place from the back. This is the moment the craft turns into a keepsake — kids love seeing their own smile pop through the gingerbread.
Step 4: Fill the Ornament with "Snow"
Open a clear ornament and spoon in faux snow, foam beads, or mini pom-poms — about a third full. Don't overfill; you want the snow to shake around when it's lifted. White and pink poms look especially sweet with the Pinkmas gingerbread.
Step 5: Tuck the Gingerbread Inside
Slide the gingerbread character into the ornament so it stands in the snow, then snap the two halves closed. If it tips, a tiny piece of tape on the back holds it upright.
Step 6: Wrap the Collar and Tie the Ribbon
Cut out a "You're Too Sweet" collar wrap and curl it around the base of the ornament where the two halves meet — it hides the seam and makes it look finished. Tie a ribbon bow over the collar. Done!
Tips for Classroom Batches
- Assembly-line it. One station for cutting, one for photos, one for snow-filling — a class of 24 can finish in under an hour.
- Pre-cut for little ones. Preschoolers do best with the photo-taping and snow-filling steps.
- Photo shortcut: ask parents to send a headshot, or use last year's school photos trimmed down.
- Cardstock matters if the ornaments will be handled a lot — the characters stand up straighter.
- Make extras. Teachers always wish they'd made one for the classroom tree.
Get the Printable Kit
The gingerbread snow globe kit is $5 and includes all 12 photo cutouts plus the collar wraps — print as many as you need for your whole class. Get it in the Goodnight Fox shop or on Etsy. Want all three designs? See the full snow globe collection here.
Made them with your class? Tag @goodnightfox — we'd love to see your little gingerbreads! 💛
Shop the Materials
Some links are affiliate links. We only share things we actually use.
- Clear plastic fillable ornaments — View on Amazon
- White pom-poms (faux snow filler) — View on Amazon
- Foam beads — View on Amazon
- Snowflake sprinkles — View on Amazon
- Ribbon for wrapping — View on Amazon