• Activity ideas by age
    • Seasonal activities
    • Materials & fillers
    • Getting Started
    • Taste Safe
    • All activity ideas
  • Shop
  • Freebies
  • About
Menu

Goodnight Fox

1974 San Luis Ave
Mountain View
16502243796
Dramatic & Sensory Play for Early Learners

Your Custom Text Here

Goodnight Fox

  • Activities
    • Activity ideas by age
    • Seasonal activities
    • Materials & fillers
    • Getting Started
    • Taste Safe
    • All activity ideas
  • Shop
  • Freebies
  • About

Creating a Magical Christmas Tradition with Santa's Letters

November 18, 2024 Kylie Tuosto
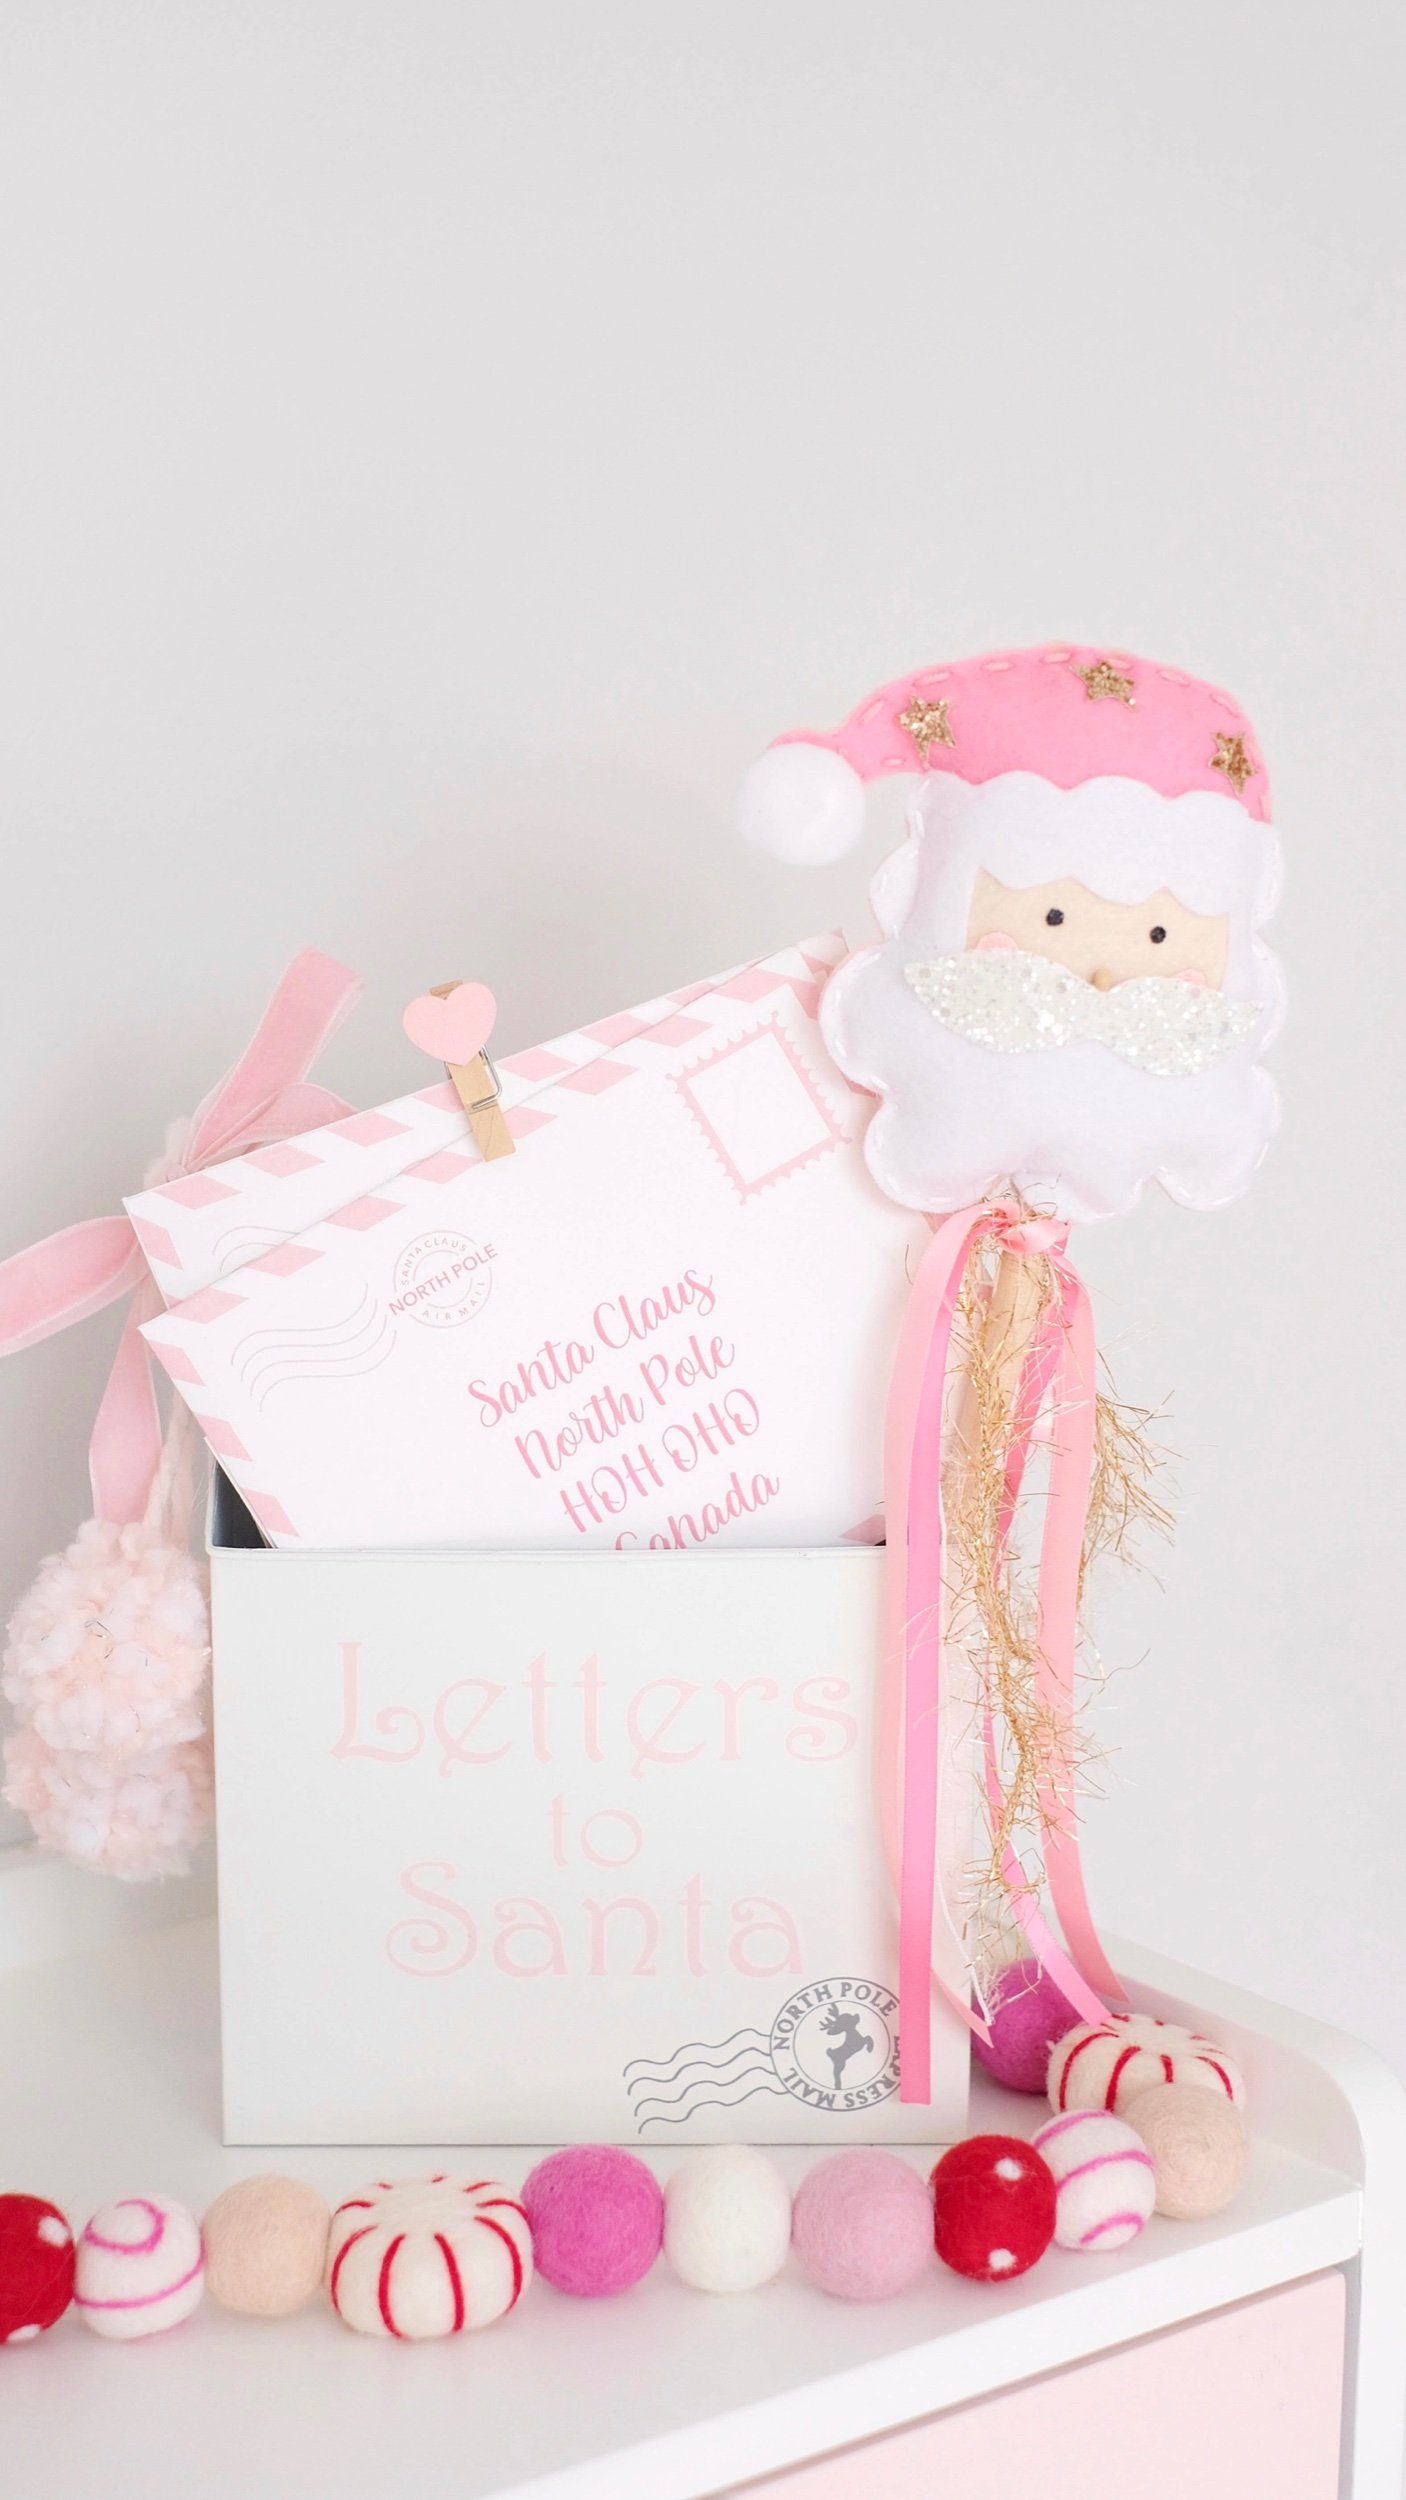
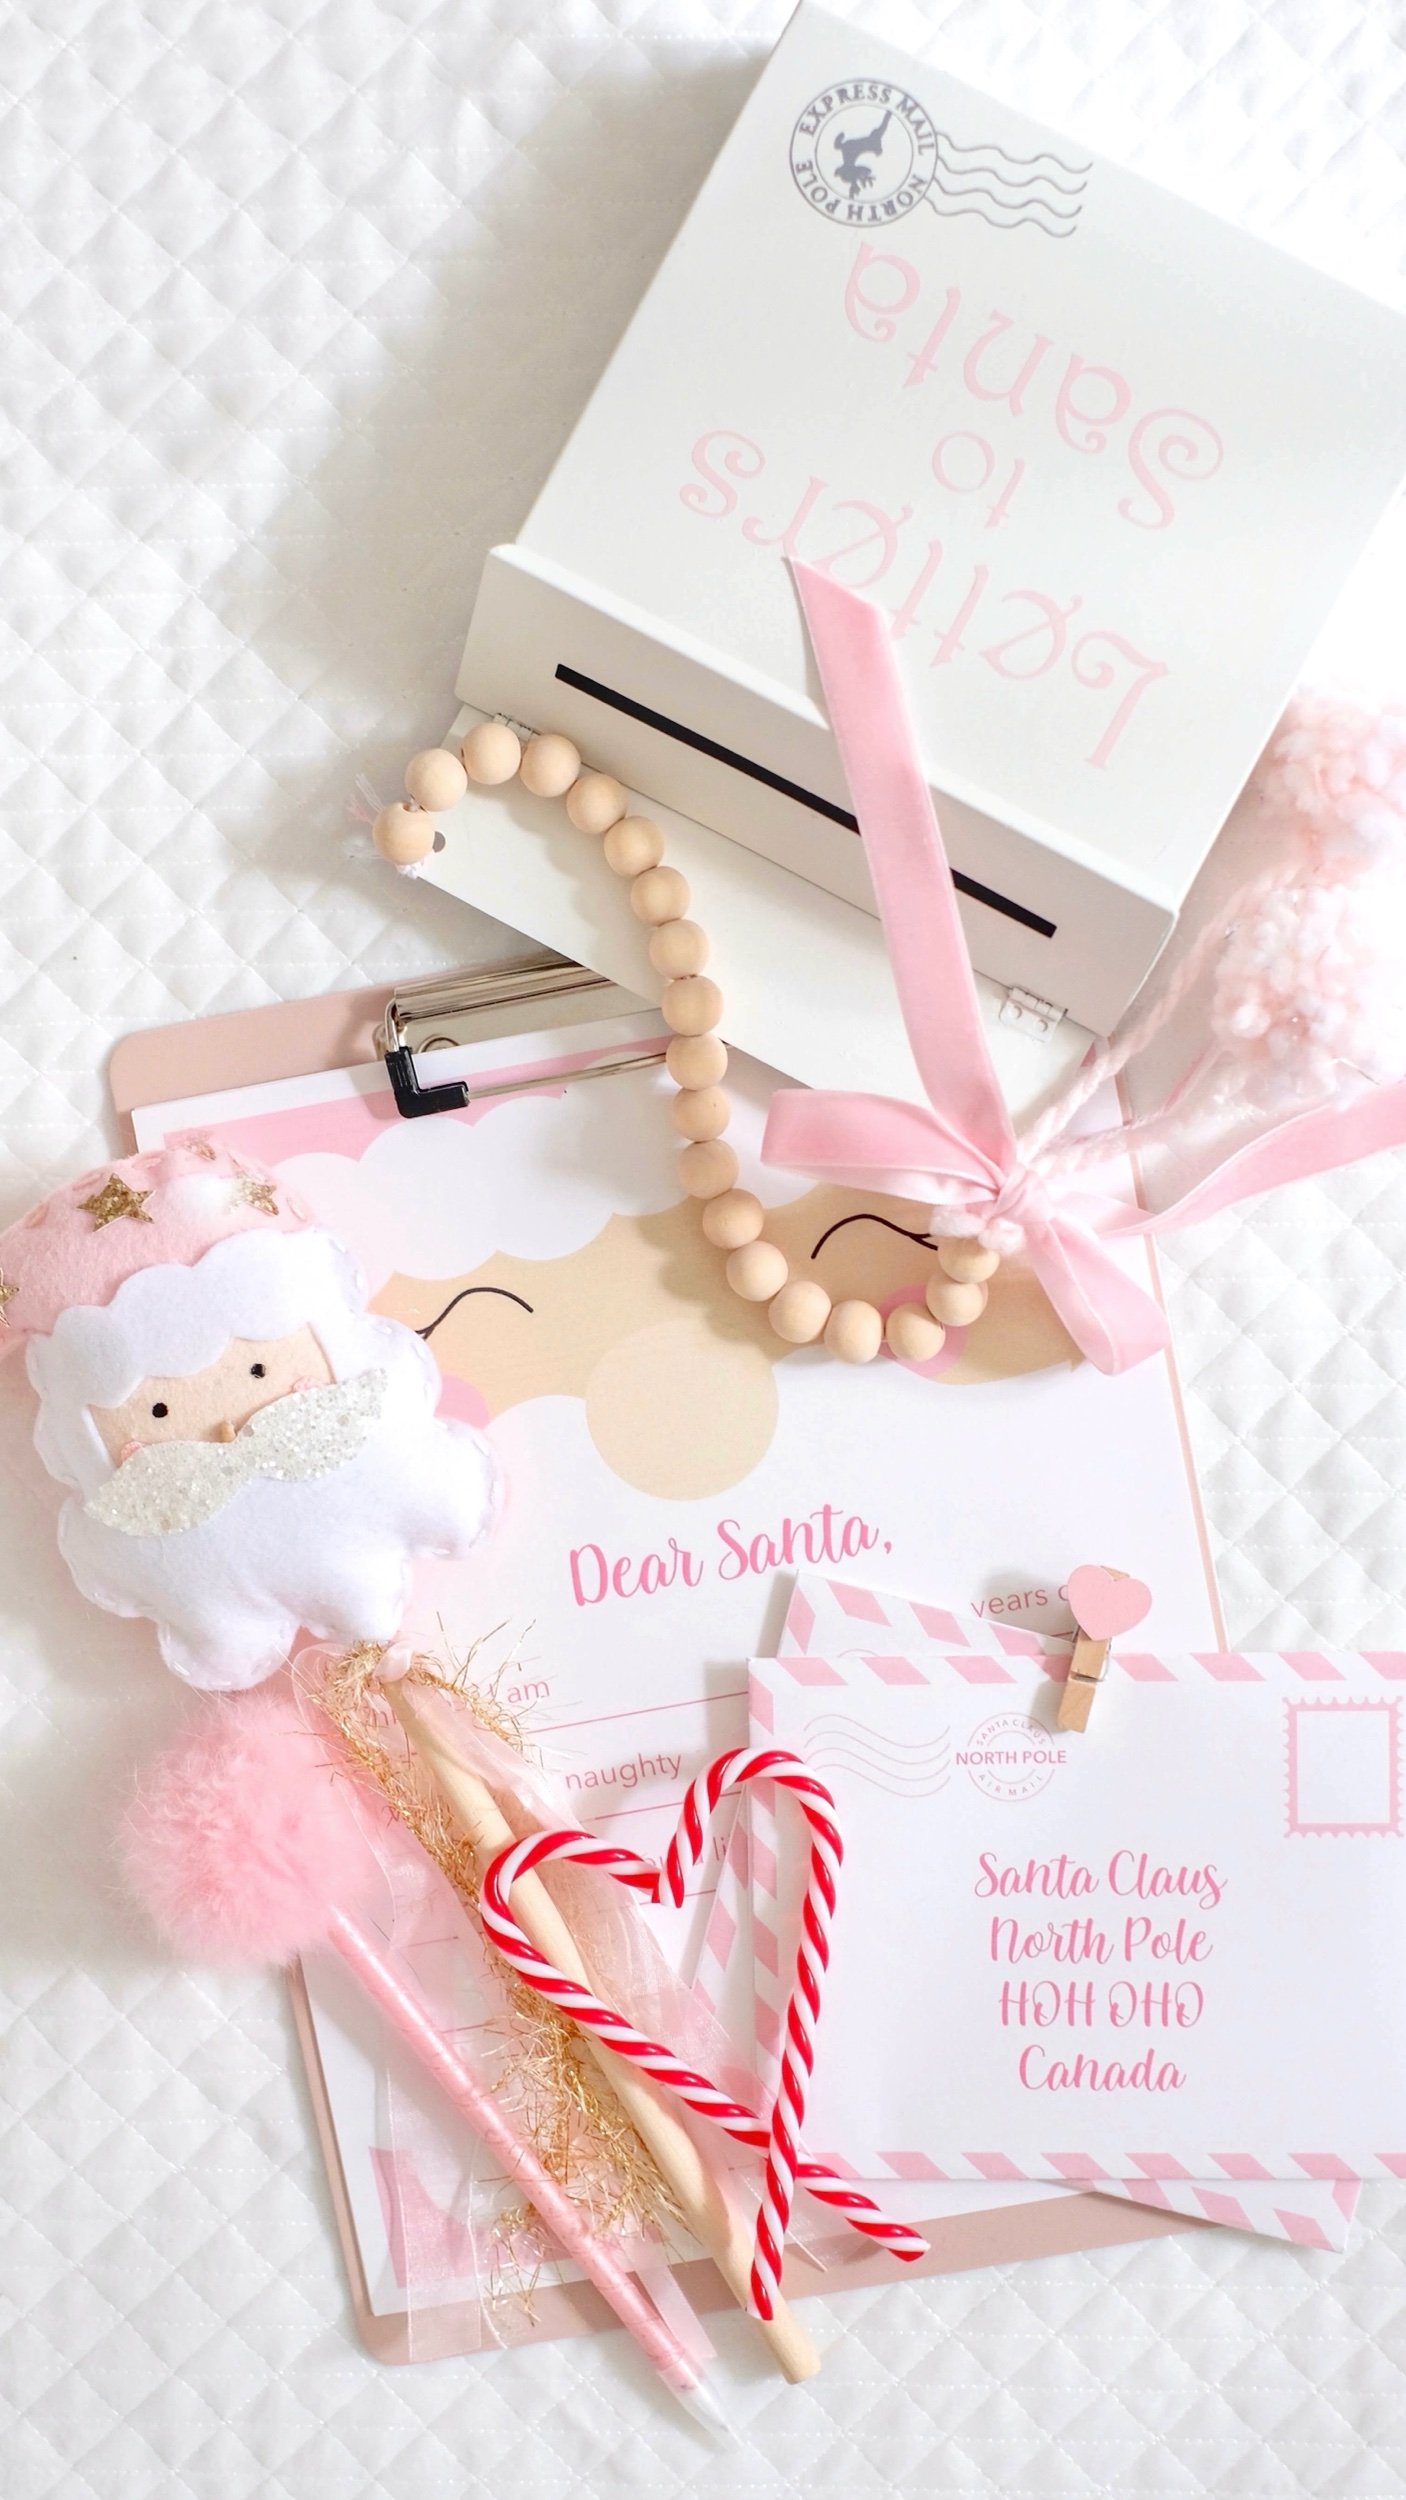
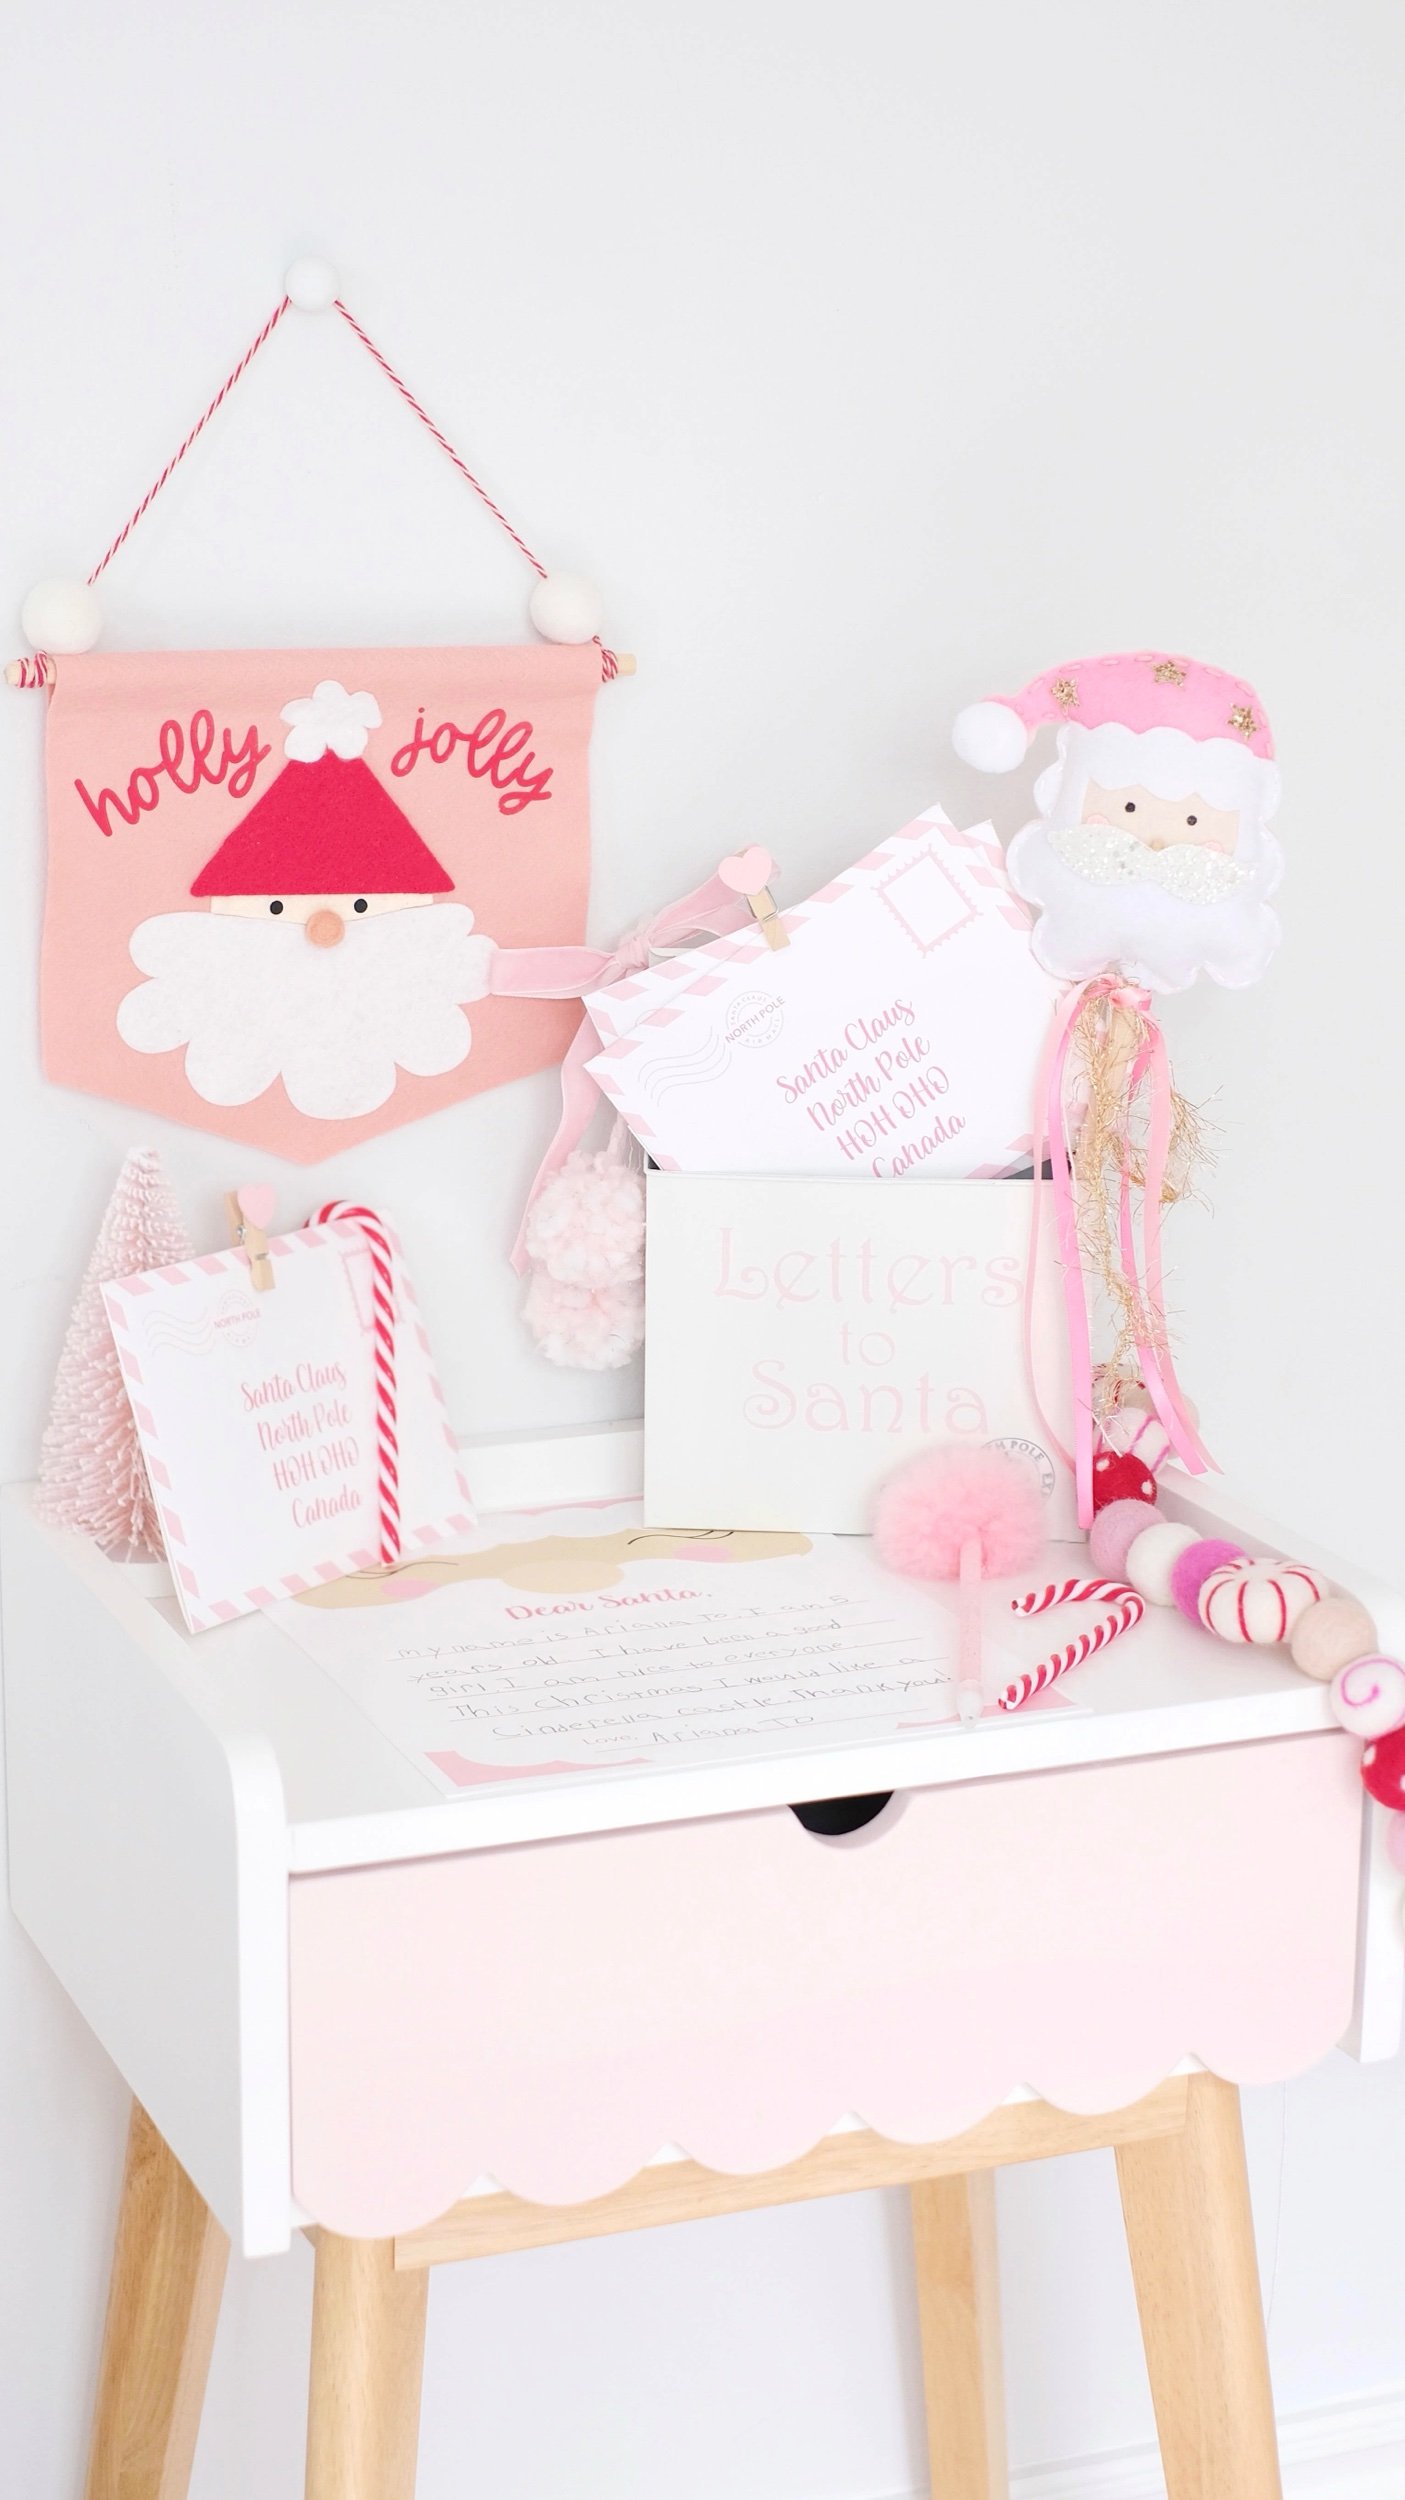
Printable Letter To Santa Holiday Tradition North Pole
Download & Print

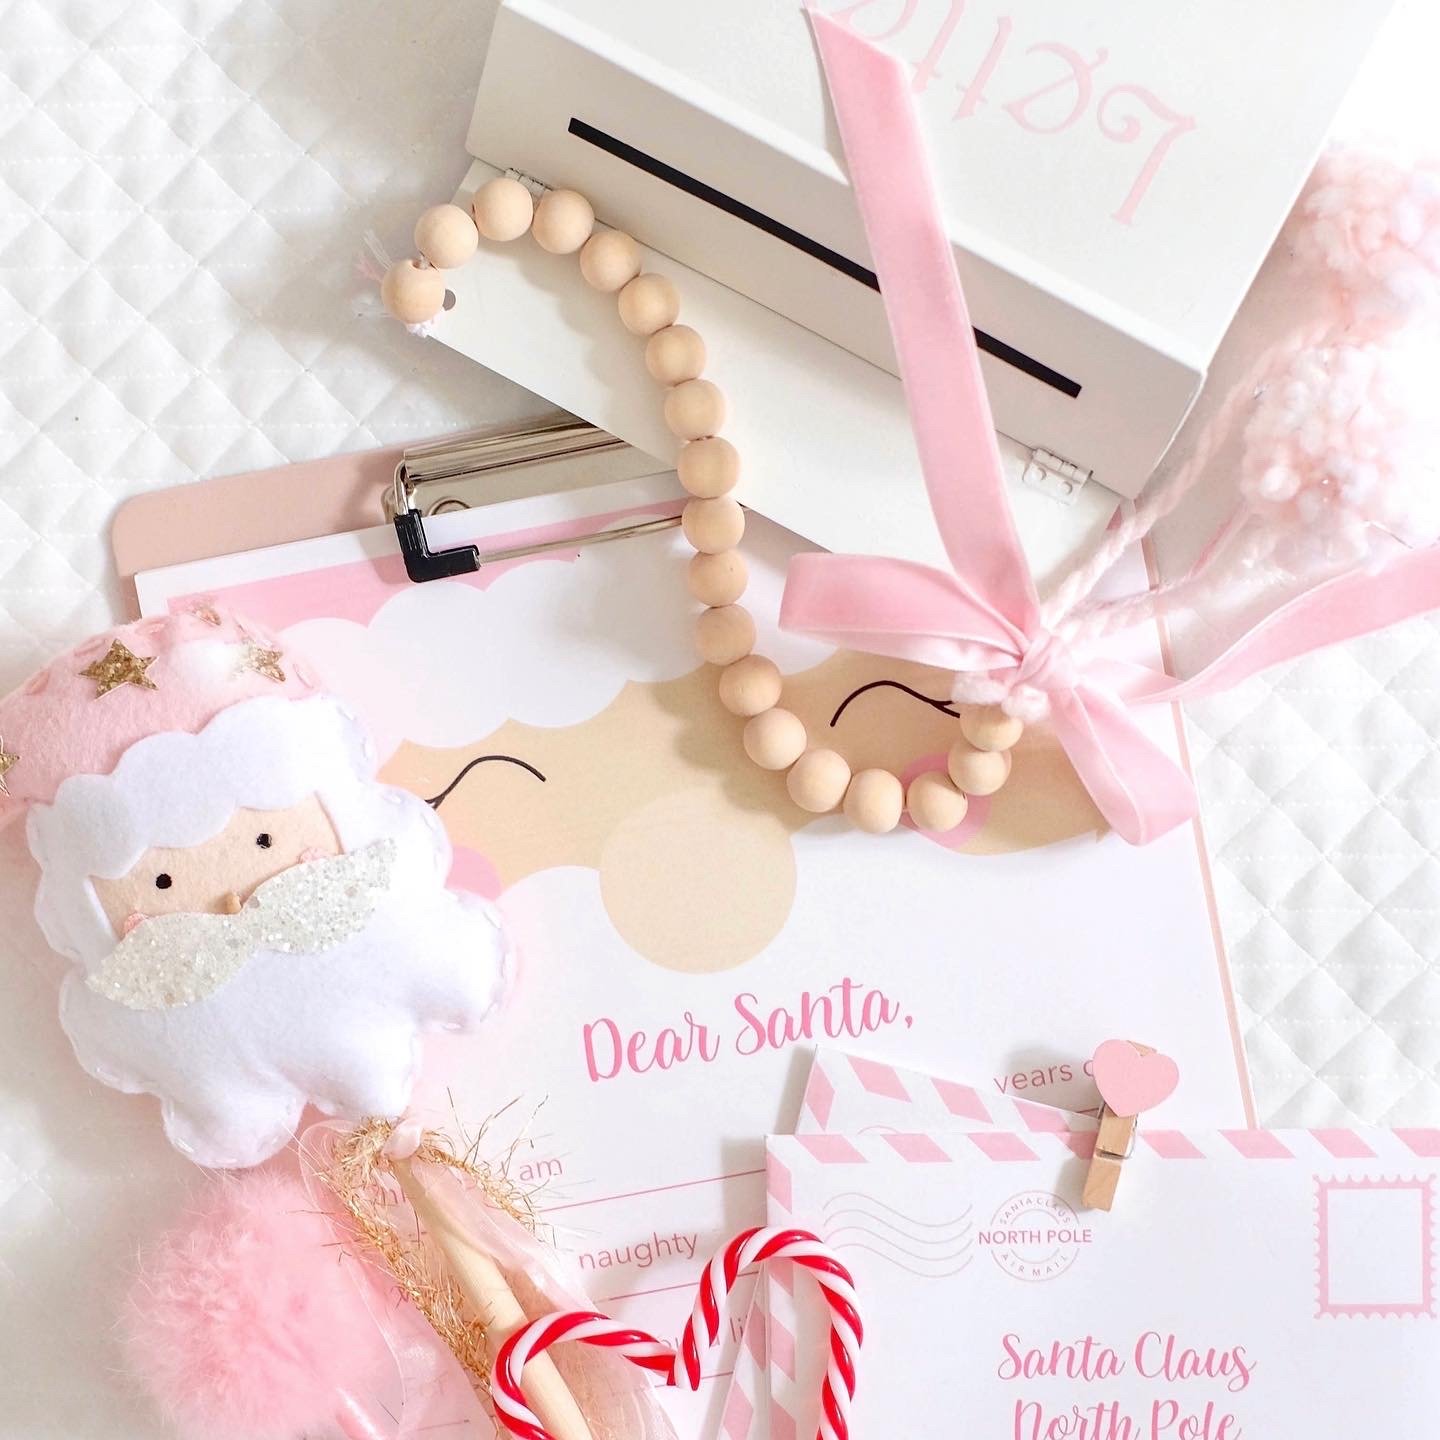
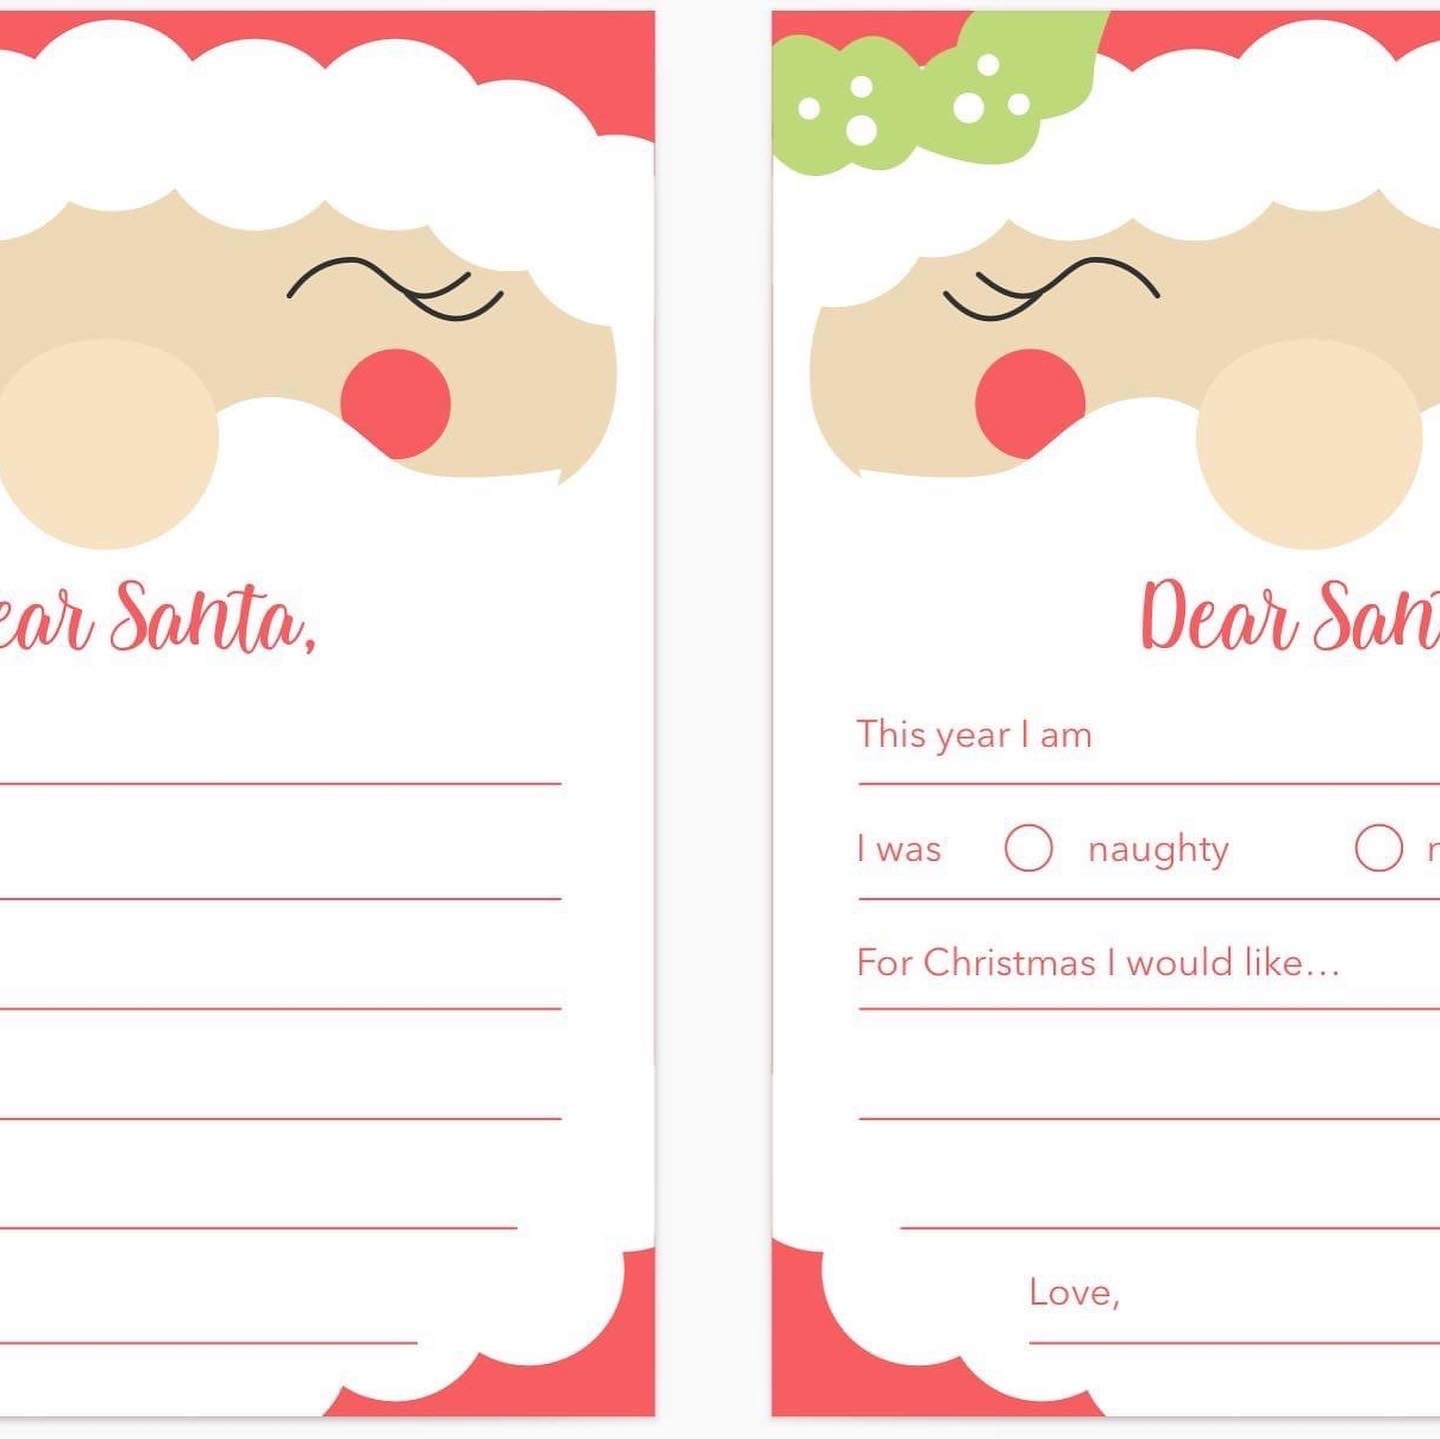
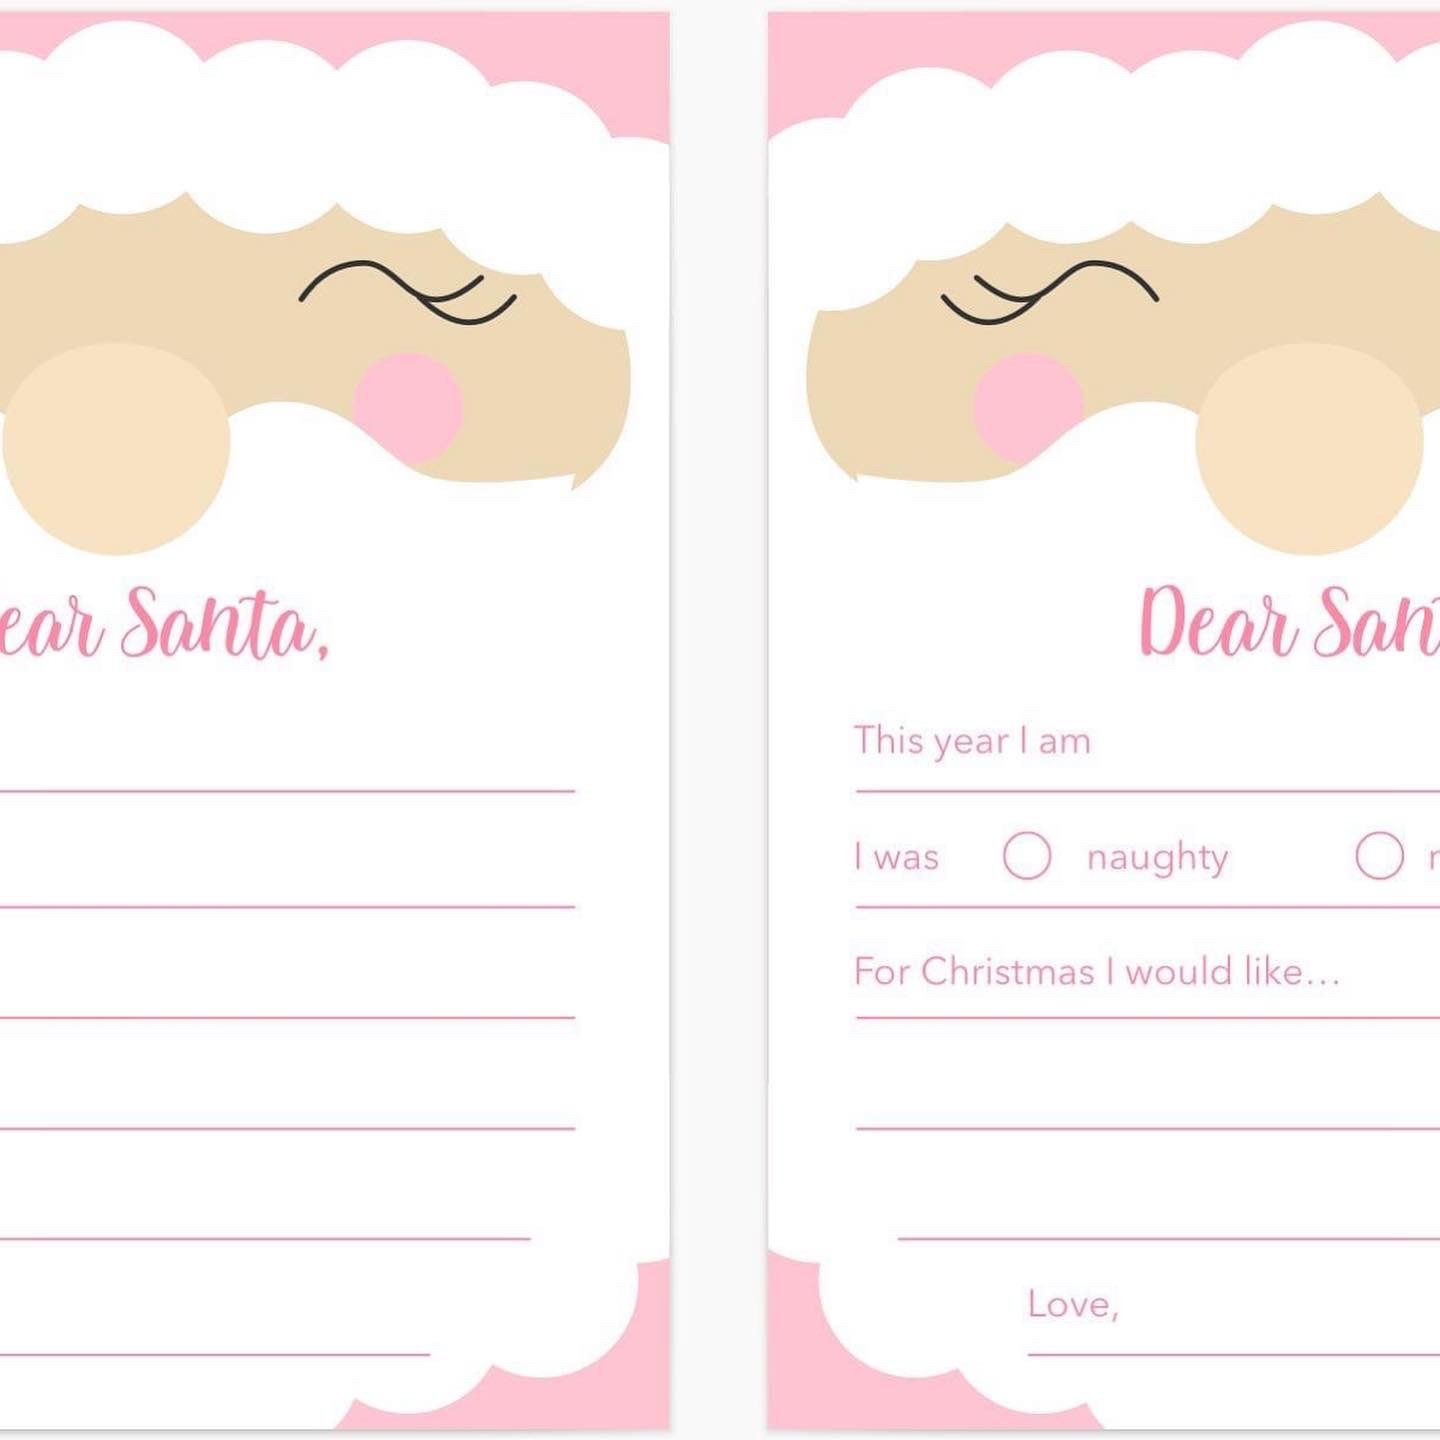
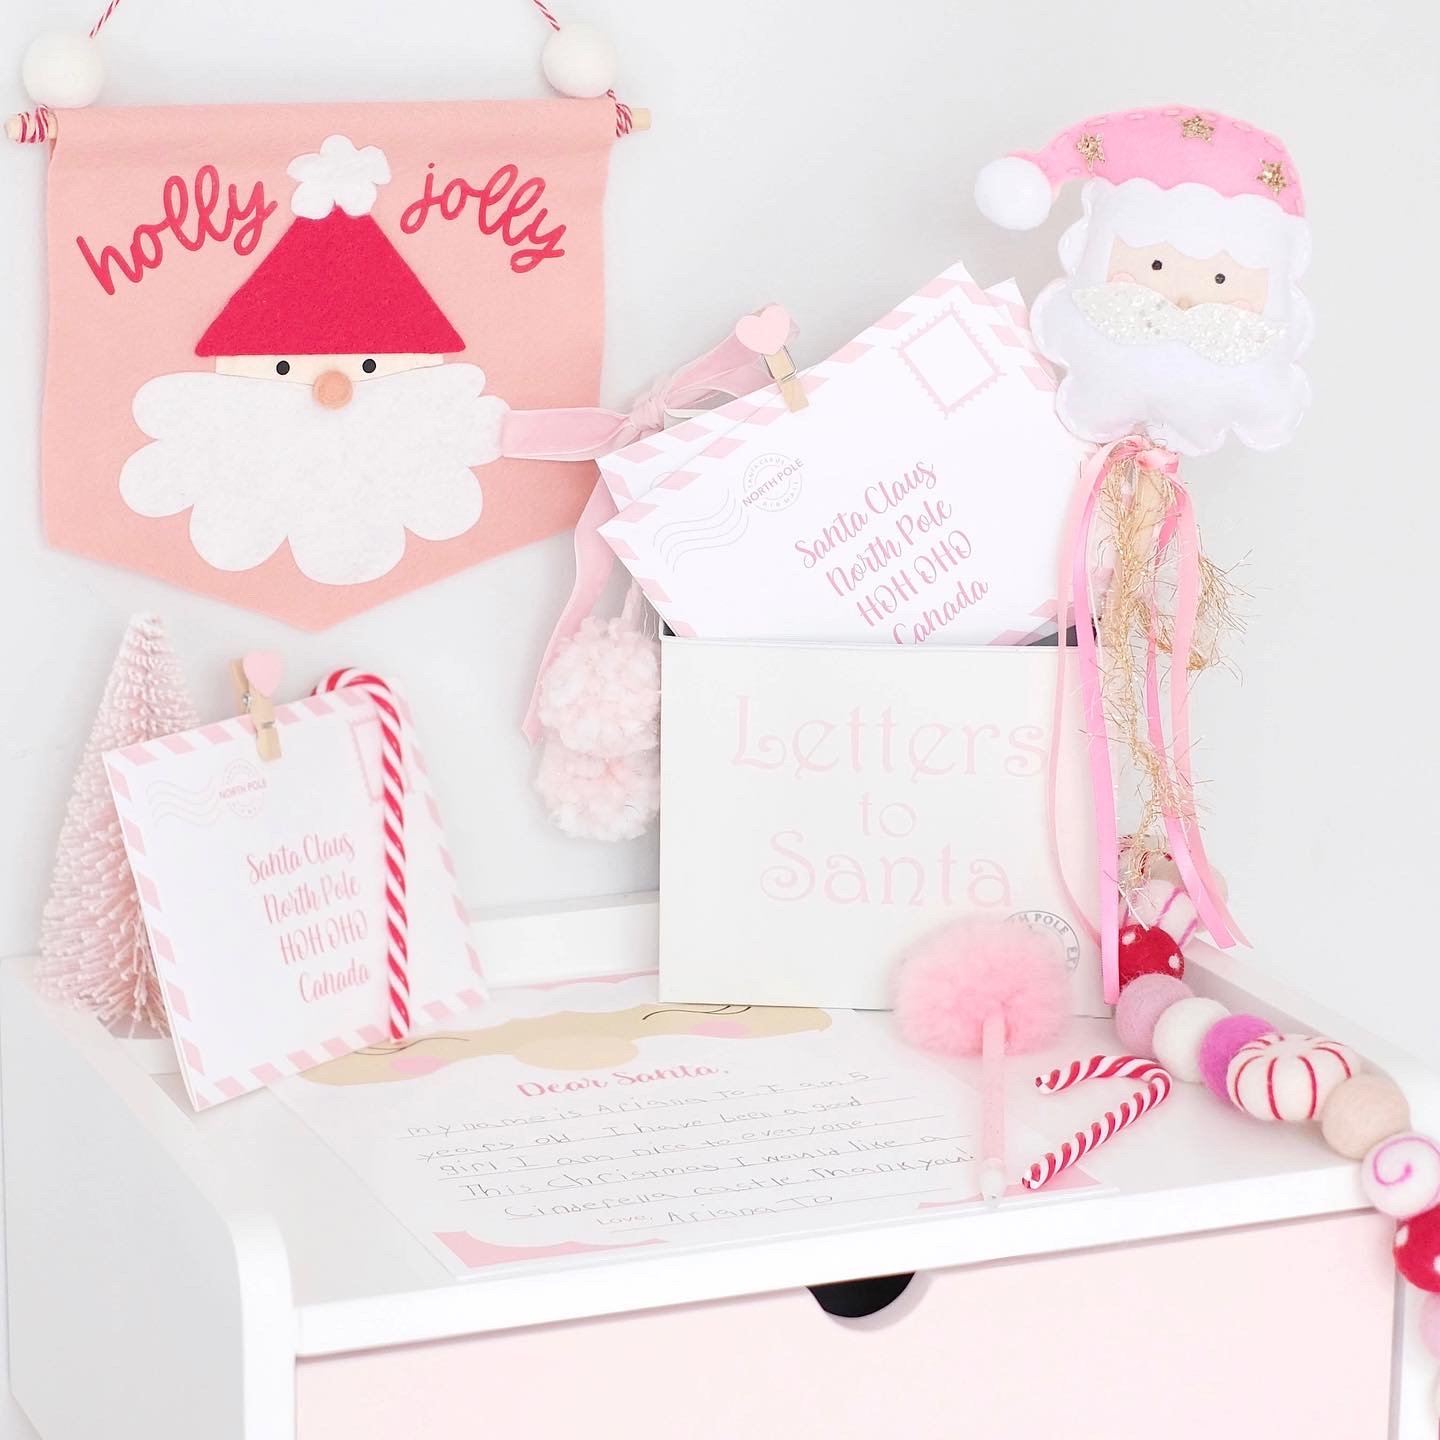
The holiday season is a magical time, especially for kids who eagerly anticipate the arrival of Santa Claus. One heartwarming tradition that can truly make the season special is sending a letter to Santa. With the right touches, you can create a memorable experience that your little ones will cherish for years to come. In this blog post, we'll explore how to make this tradition extra special, complete with practical tips and tricks for making the holiday spirit come to life. Plus, we'll introduce you to a wonderful $1 Printable Letter to Santa Kit, available in both traditional and pinkmas color schemes, with versions suitable for kids of all ages.

1. Download the printable Letter to Santa kit

Creating the holiday magic for kids starts with the perfect holiday theme. Choose a color scheme for your Christmas this year and to set the stage for all of the fun. Are you going Pinkmas? Traditional red, white and green? Maybe a snowflake blue theme? Or even a modern black and white? Whatever you choose, your theme, decor, and wrapping paper can all coordinate around the theme. Choose whether you want the Pinkmas Letter to Santa Kit or the Red & White Letter to Santa Kit. Download the kit and print it out. I recommend 80lb cardstock for durability, but regular computer paper works too. Cut out the envelope and fold it up and tape or glue to secure the edges.

Download the Printable

2. Writing the Perfect Letter to Santa

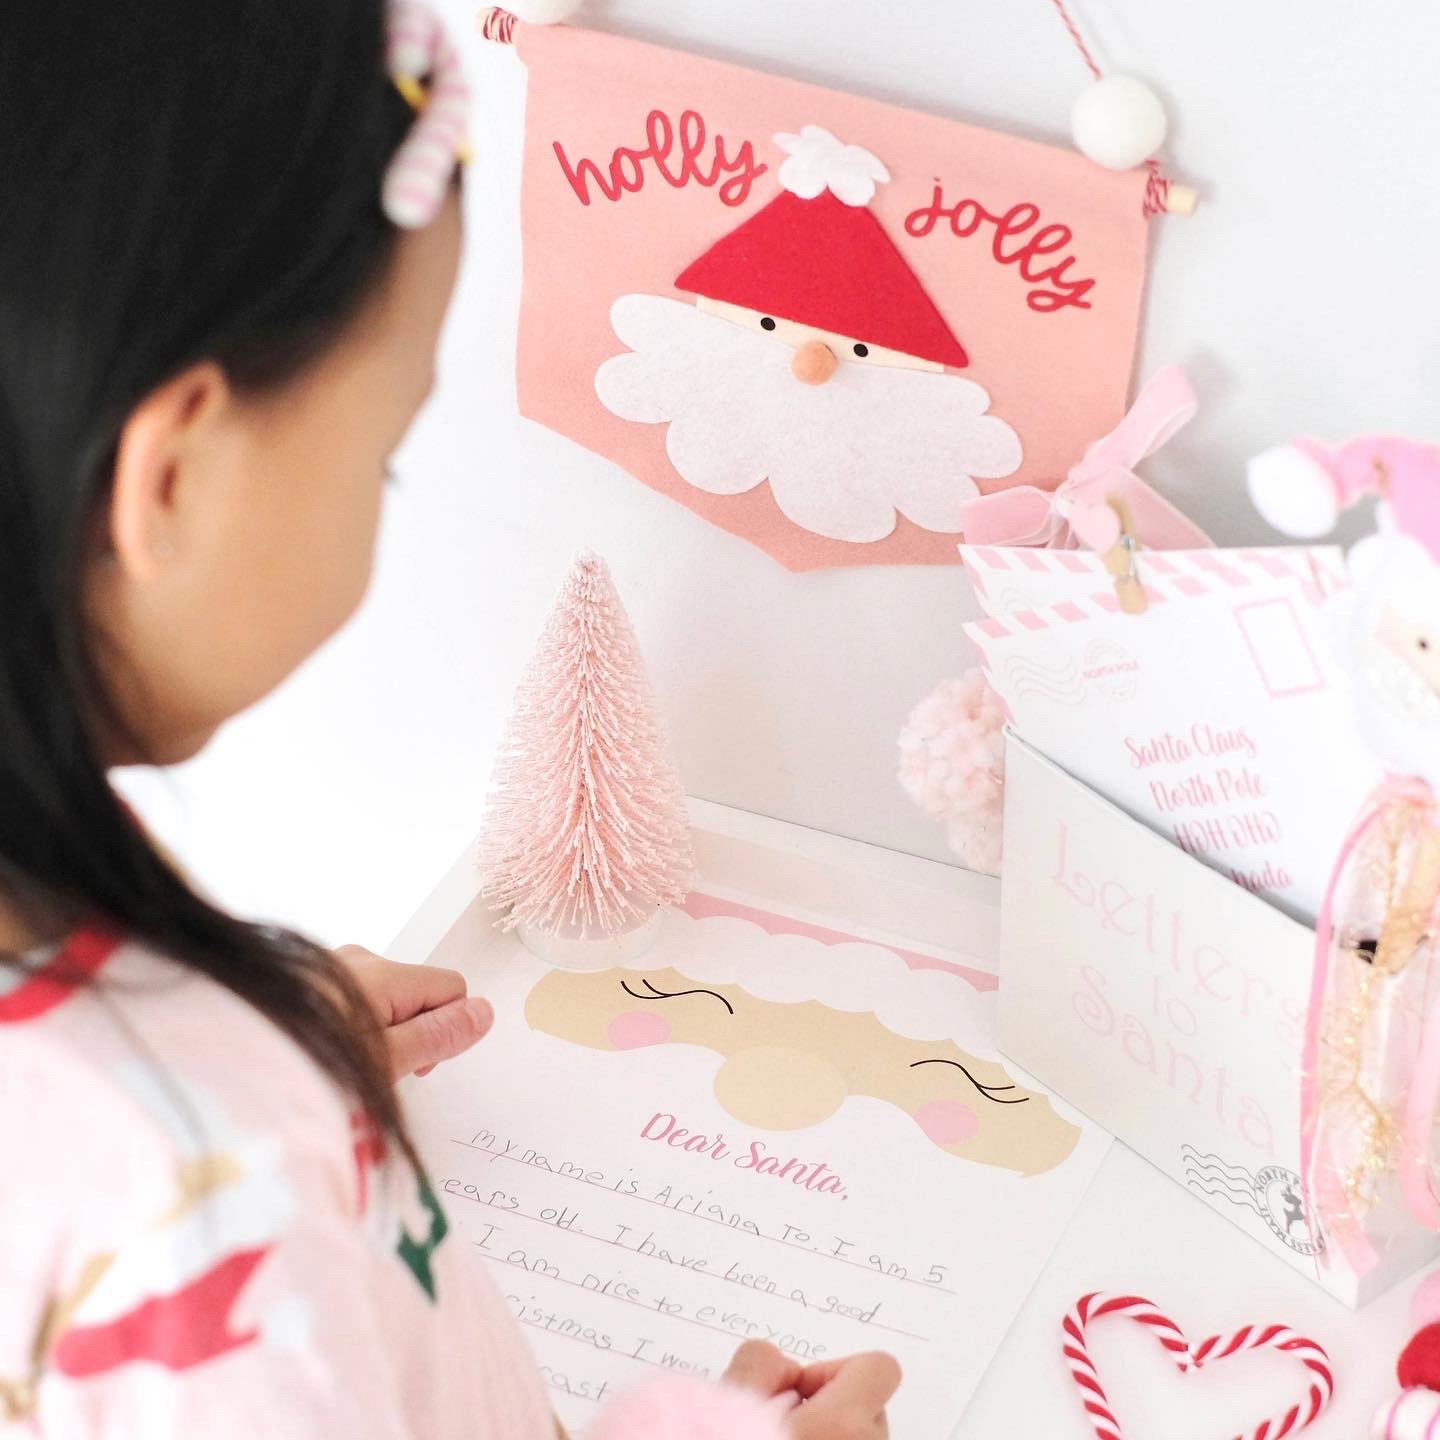
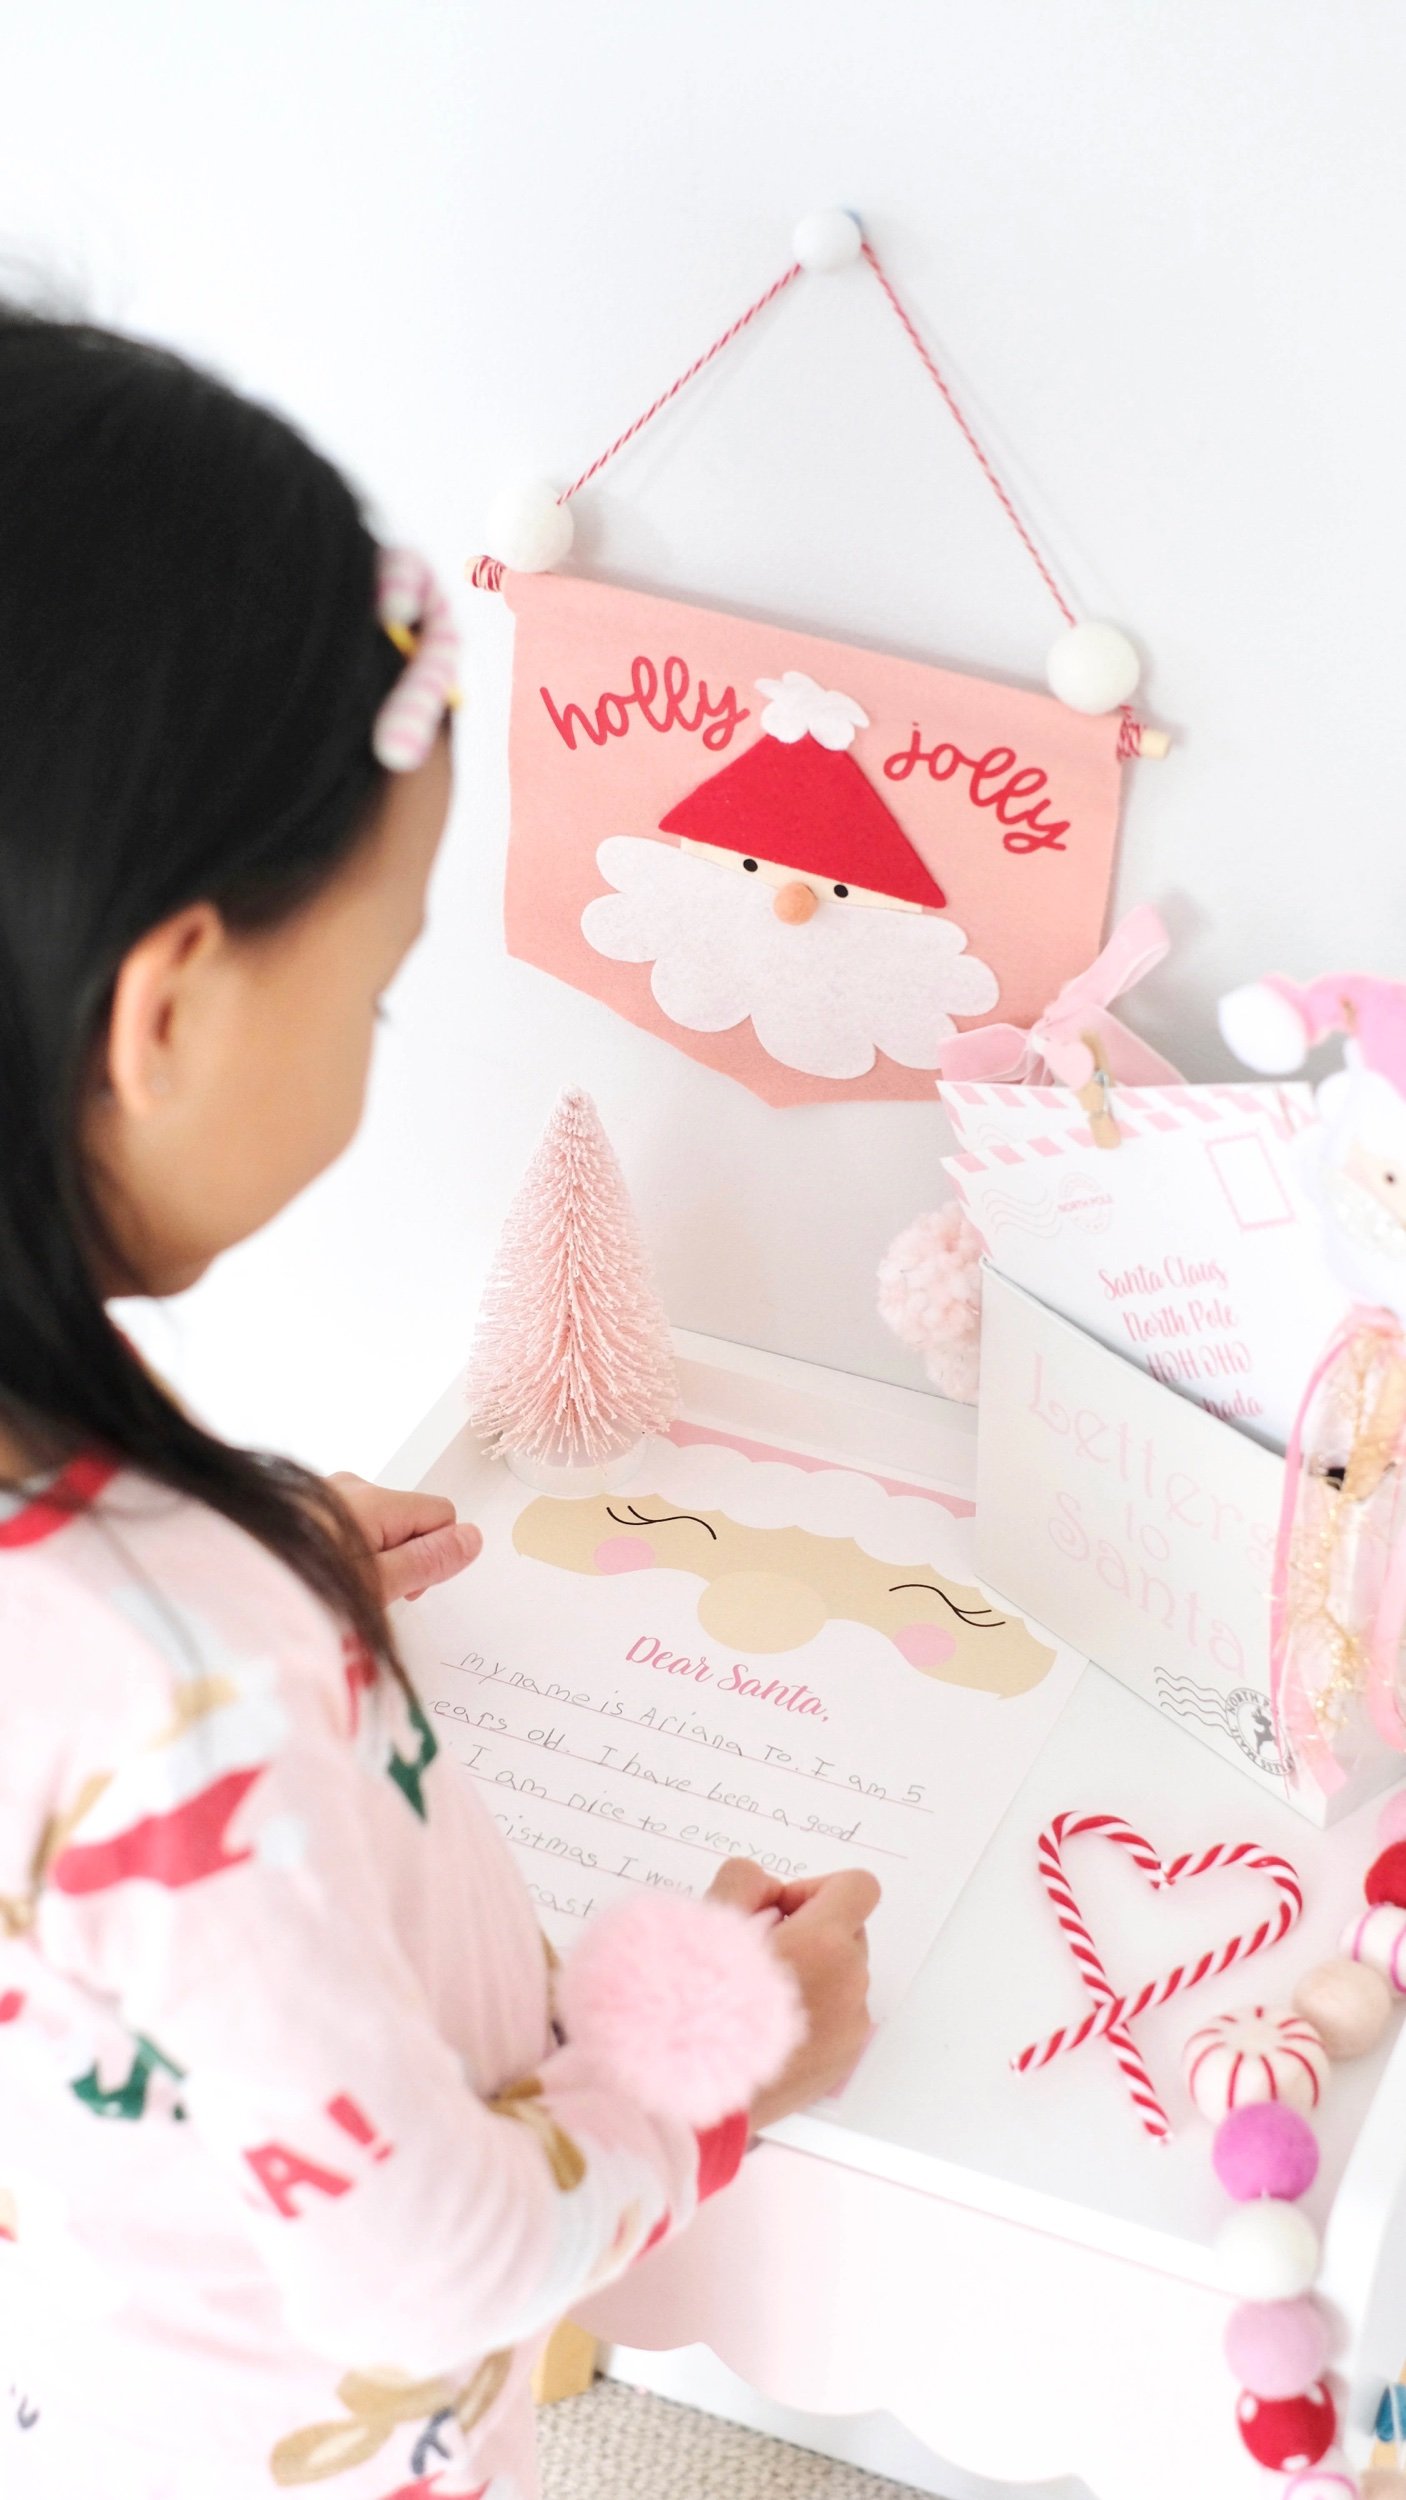
Before you can send a letter to Santa, your kids need to compose one! Encourage them to express their wishes, dreams, and the joy they feel during the holiday season. For younger kids, a Mad Lib version can make it a fun and creative exercise, while older kids might prefer a blank lines version to write in their own words. Once your kiddo knows what they want to say, they’ll be ready to send the letter to Santa!

2. Santa's Address and Preparing the Letter

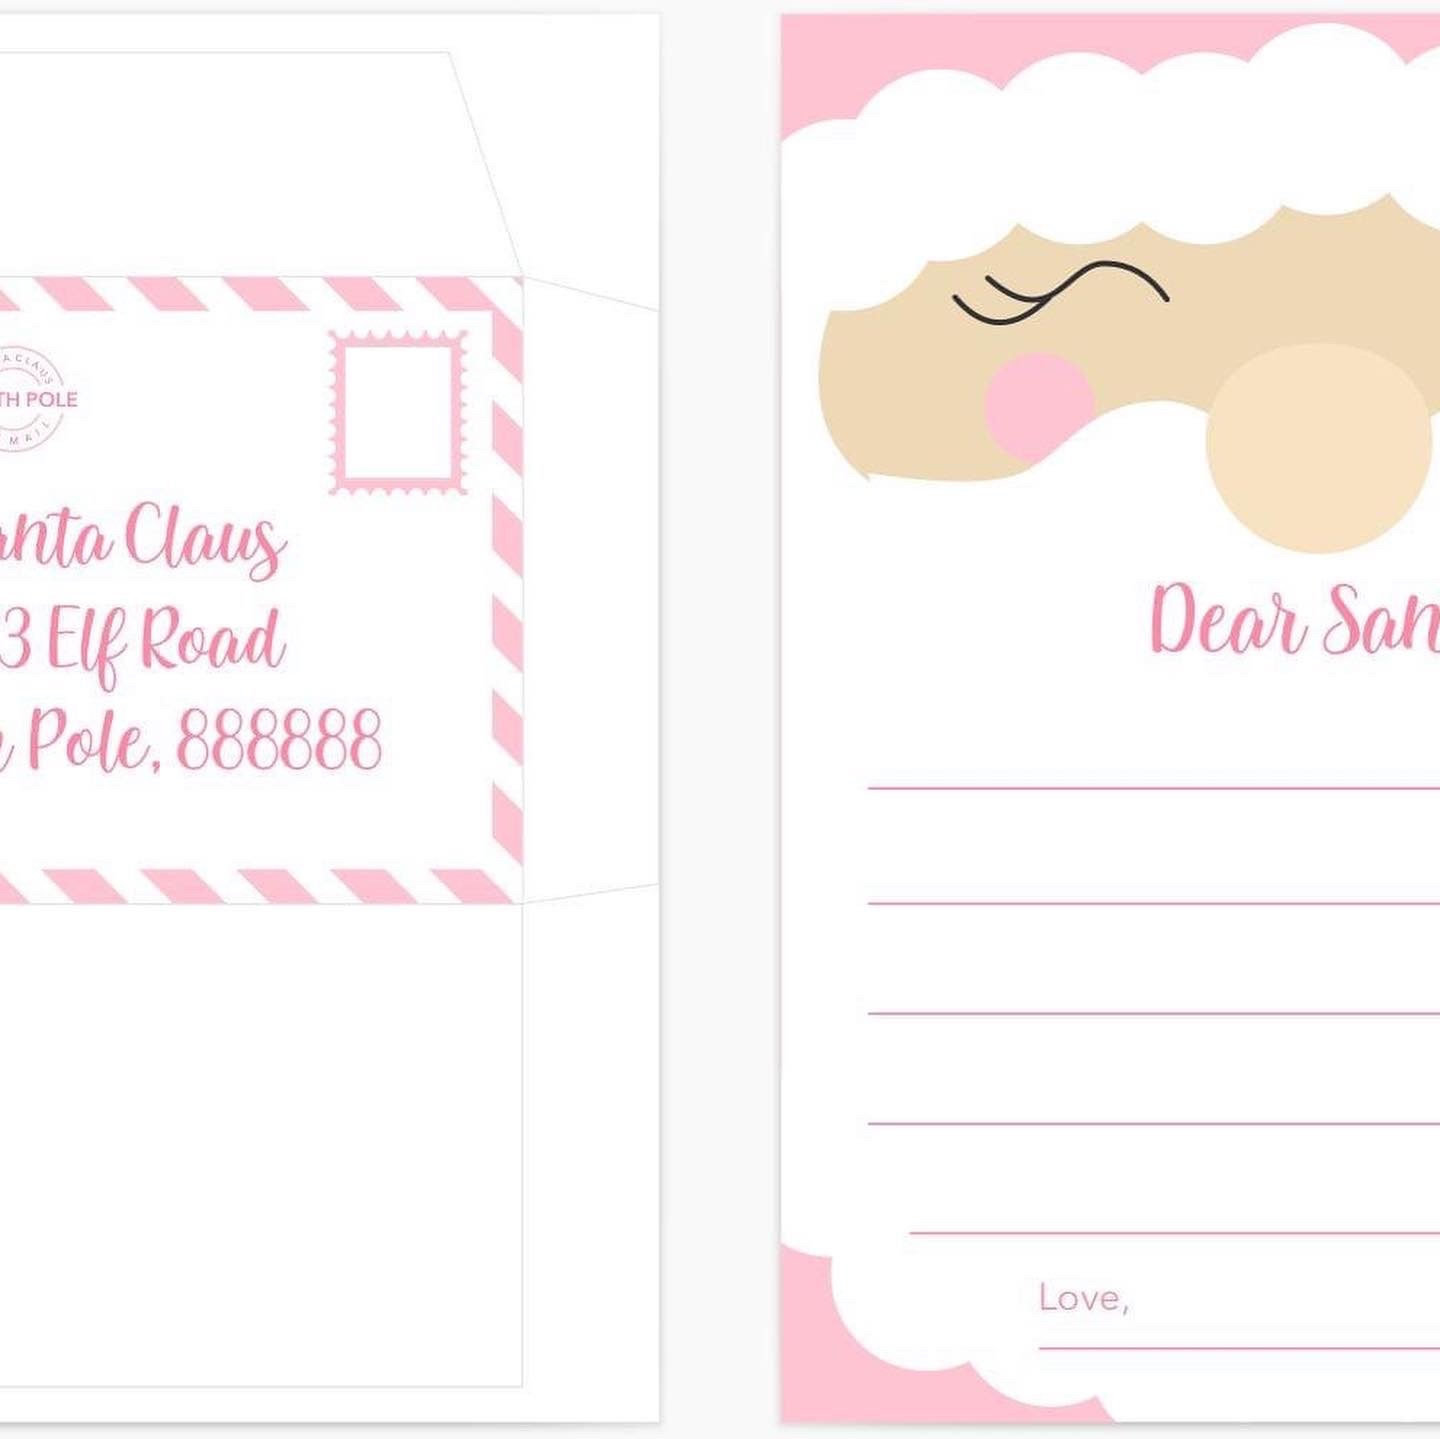
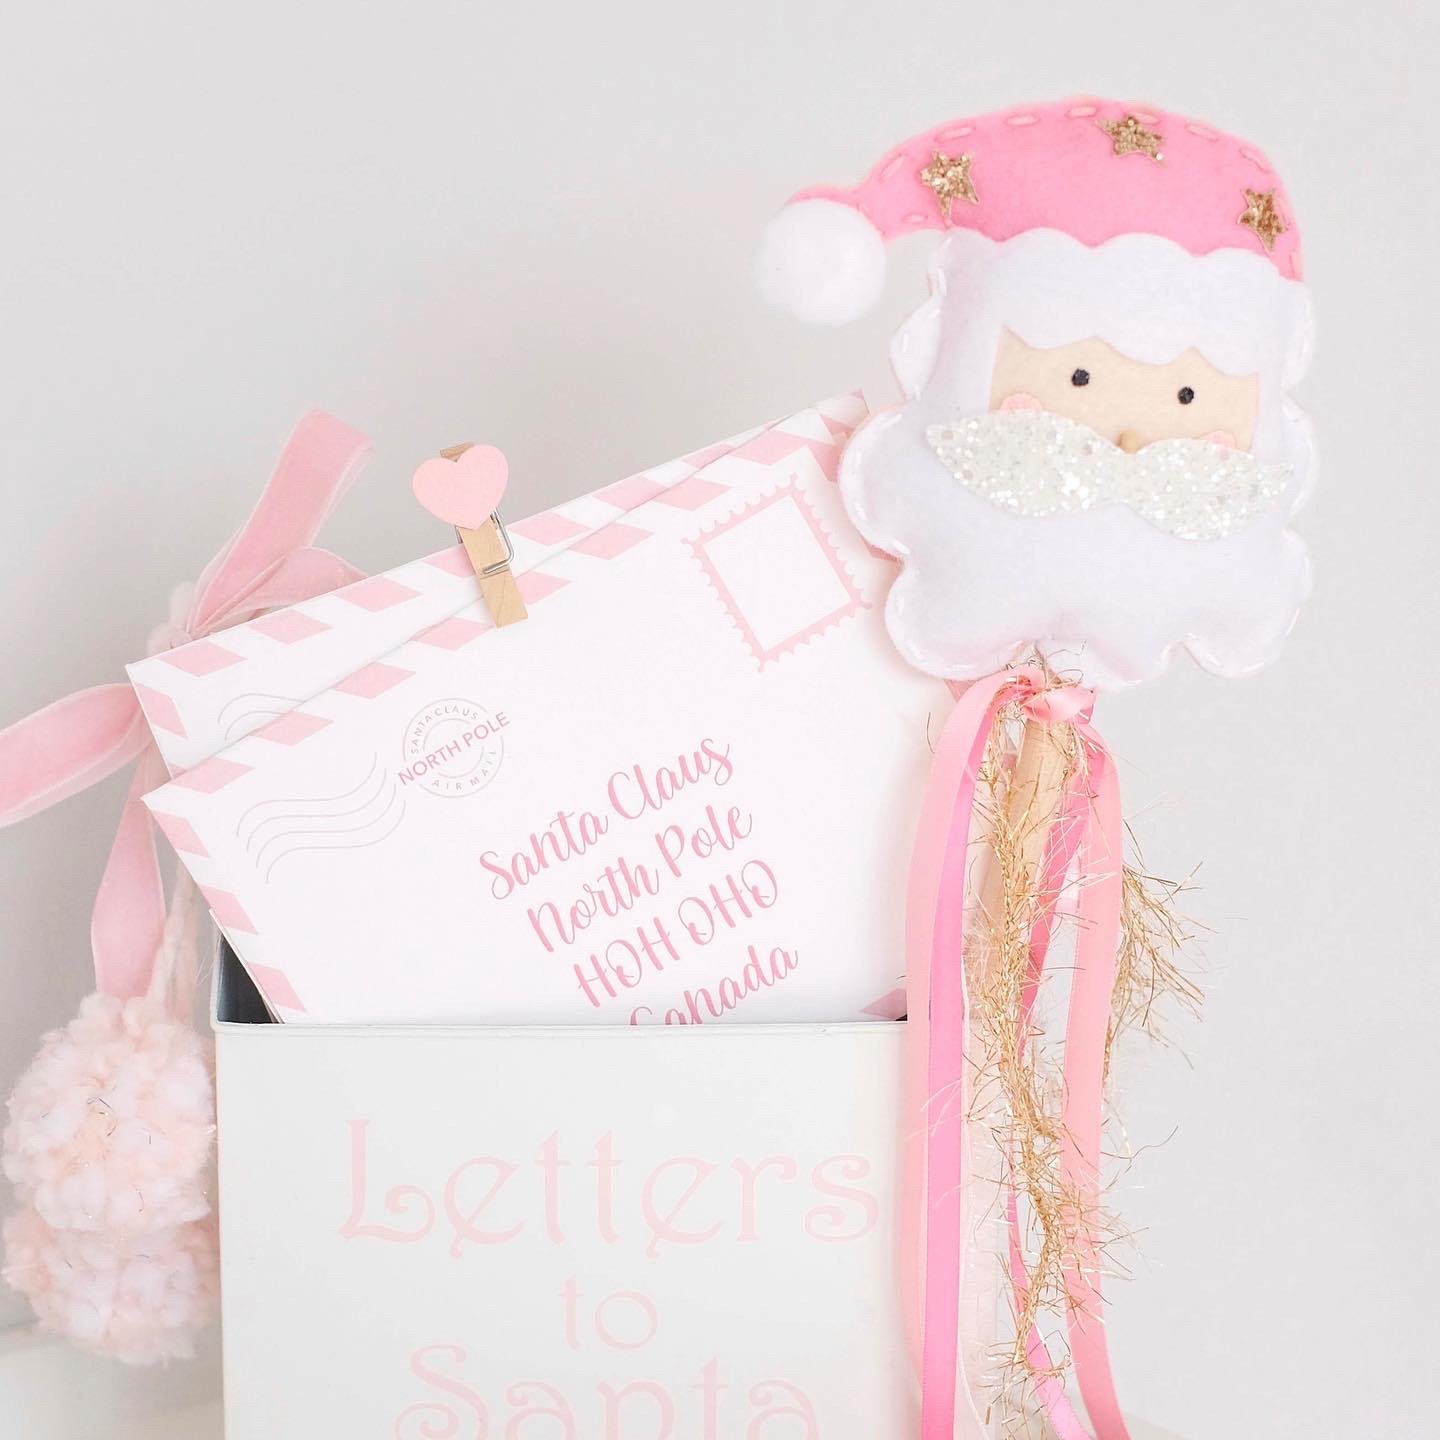
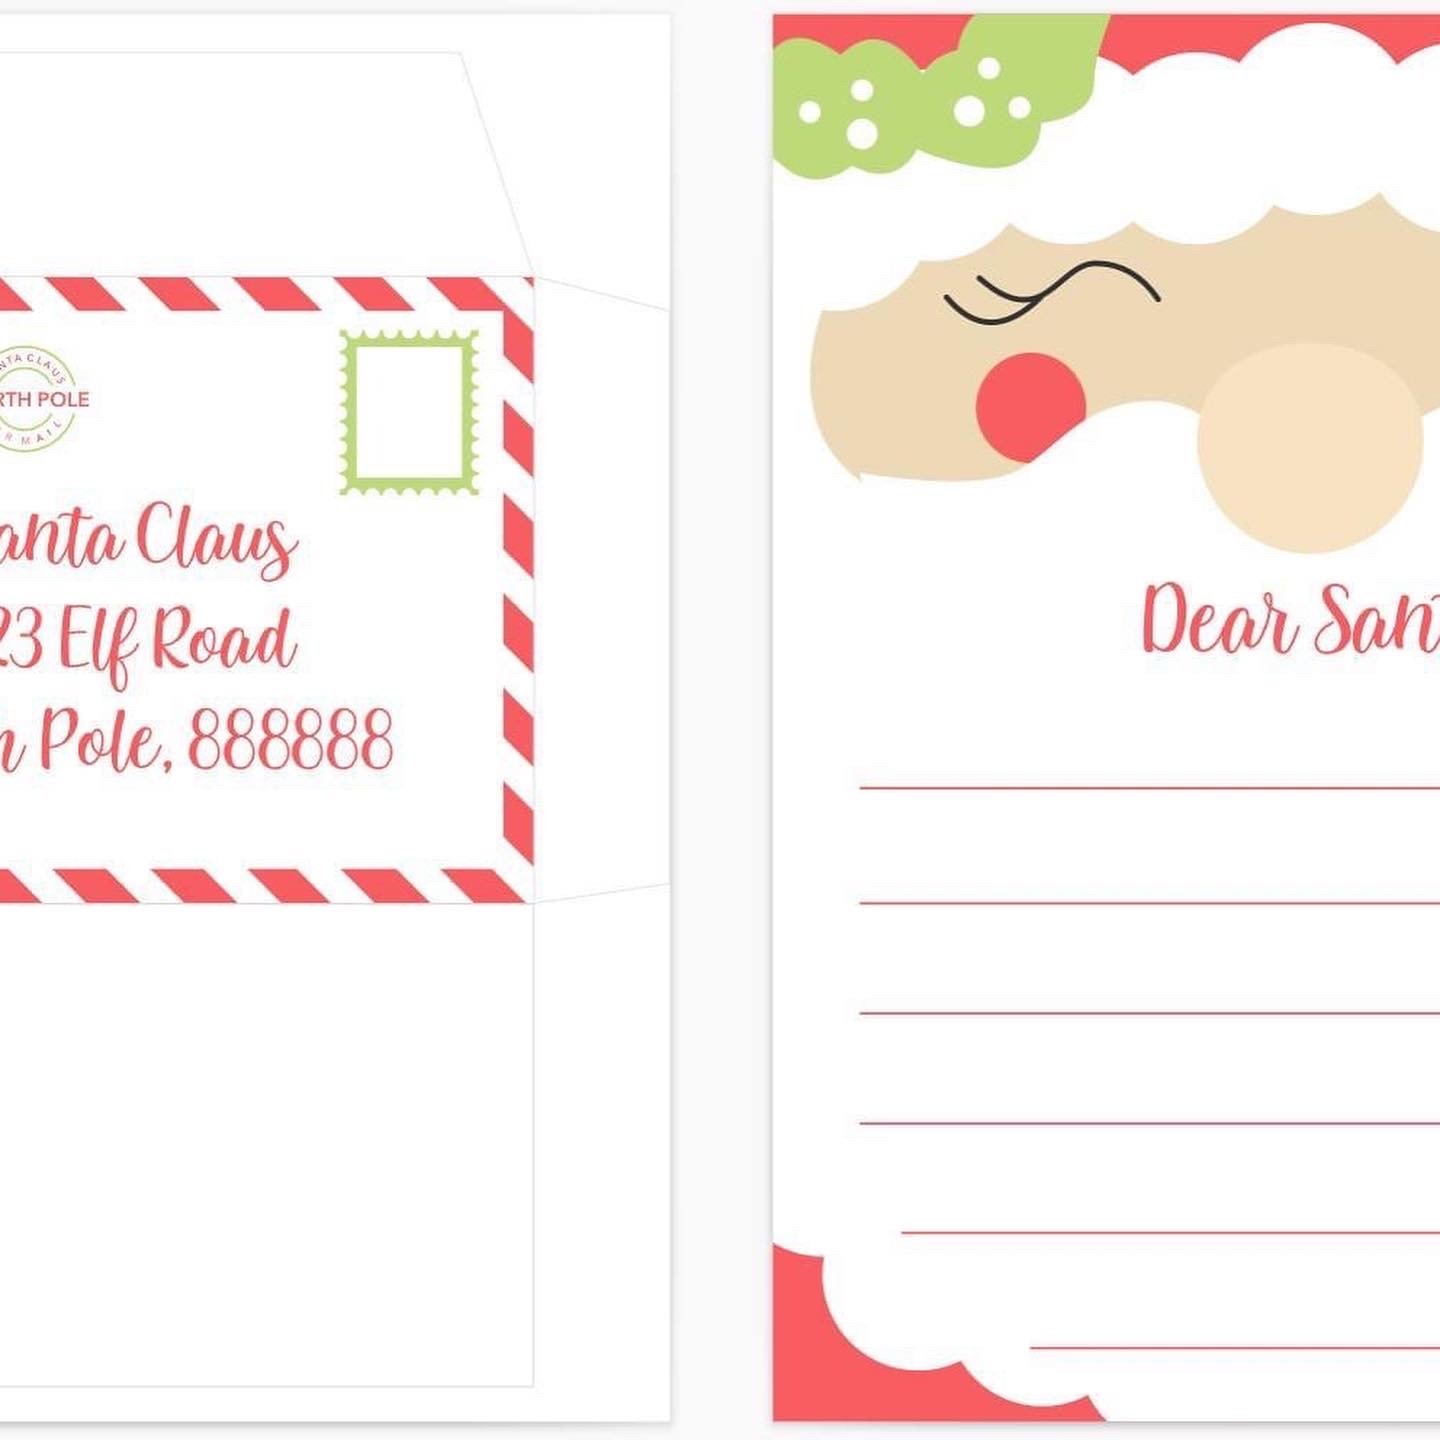
One of the exciting elements of sending a letter to Santa is addressing it properly. This is where our $1 Printable Letter to Santa Kit comes in handy. It includes both Canada and United States addresses for Santa, so no matter where you are, your kids can send their letters to the North Pole with confidence. Be sure to let them customize their letters with the matching envelope that's part of the kit.

Where do I mail my letter to Santa?

Canada

Santa Claus

North Pole

HOHOHO, Canada

United States

Santa Claus

123 Elf Road

North Pole, 888888


Print & Send

3. Mailing the Letter to Santa

Sending the letter is a crucial step in the process. Make a day of it! Take your kids to the local post office or mailbox, and let them drop their letters in the mail. It's a great opportunity to teach them about how the postal system works and share in their excitement.

4. GETTING A RETURN LETTER FROM SANTA

To make the tradition even more magical, you can arrange for a return letter from Santa himself. Many websites and services offer personalized Santa letters for your children, often for a small fee. This delightful surprise will leave your kids awestruck. For USPS, you can use this website to get a return letter from Santa.

5. Keeping the Magic Alive

Throughout the holiday season, keep the magic of Santa alive by reading Christmas stories, decorating the house, and baking festive treats. Create a cozy atmosphere with fairy lights, holiday music, and cherished family traditions. For a great list of family oriented Christmas traditions, I recommend checking out Family Focus Blog Christmas Traditions for Kids.

For more detailed instructions on mailing letters to Santa, visit the official USPS Operation Santa website or the Canada Post's guide for Santa mail.

Additionally, you can enhance the holiday spirit with crafts, recipes, and activities from trusted sources like Better Homes & Gardens, Martha Stewart, and The Spruce.

Download & Print

10 Christmas Holiday Traditions You Should Try

  • Create a unique family recipe

  • Go ice skating

  • Drive around to see holiday lights

  • Write a letter to Santa

  • Donate time to a local shelter

  • Make an advent Christmas countdown calendar

  • Build a toy train around the tree

  • Go to a tree farm to pick a tree

  • Make a hot cocoa board

  • Go caroling in your neighborhood

  • 12 Days of Festivities

  • 12 Days of Christmas Activities

  • Make a Santa Sack

Create cherished memories this holiday season with the tradition of sending letters to Santa. With a personalized touch and the right resources, you can make the magic of Christmas come to life for your children. Don't forget to check out our $1 Printable Letter to Santa Kit to make this tradition even more special. Happy holidays!
Download & Print
Printable Letter To Santa Holiday Tradition North Pole
Printable Letter To Santa Holiday Madlib
How to mail a letter to santa
Send the cutest letter to santa
How to send a letter to the north pole
North pole address in Canada

Are you ready to make this holiday season extra special for your little ones? Look no further! We've got the cutest, most enchanting free printable Letter to Santa kit that will add a touch of magic to your Christmas preparations. In this blog post, we'll introduce you to our unique kit and share why it's the perfect choice for kids of all ages, with two delightful designs, pre-addressed options for both the US and Canada, and two charming color schemes.

Download & Print

Why Our Letter to Santa Kit Stands Out

To stand out in the crowded world of free printable Letter to Santa kits, we've gone the extra mile to make ours unique and irresistible. Here's how we've made our kit a standout choice:

1. Two Adorable Designs:

Our kit features not one, but two delightful designs. We've created a "Mad Lib" style template for younger kids, making it easier for them to fill out and express their Christmas wishes. For the older kids, we offer an open lines template, allowing them to write their own heartfelt messages to Santa. We've got all age groups covered!

2. Pre-Addressed for Your Convenience:

We know that parents are busy during the holiday season, so we've made it even easier for you. Our Letter to Santa kit comes pre-addressed to Santa Claus for both the United States and Canada. No need to look up addresses – just print and send!

3. Charming Color Schemes:

The aesthetics matter too! Our kit is available in two beautiful color schemes – pink and red, and red and green. You can choose the one that perfectly matches your holiday decor or your child's personal preferences.

This holiday season, make your child's Christmas wishes come true with our enchanting and uniquely designed Letter to Santa kit. With two adorable templates, pre-addressed options, and charming color schemes, our kit is the perfect choice to add a sprinkle of magic to your festivities. Get ready for a memorable Christmas, and watch your children's eyes light up with joy as they send their letters to Santa. Make this season truly special – download our $1 Letter to Santa kit today!

Download & Print
DSCF8526.jpeg
DSCF8522.jpeg
DSCF8530.jpeg
DSCF8513.jpeg
Download & Print

#northpole #lettertosantaclous #christmasmagic #curseofstrahd #claus #lettertosantastocking #christmas2022 #christmashouse #christmasallyearlong #christmasmood #couplescosplay #lettertosanta🎅🌲💌 #lettertosanta🎅 #🎄🎅 #lettertosanta🎅🏼 #santa #santassleigh #christmasinspiration #merrymerry #christmasdecorations #lettertosantaposted #chrismaslights #snaefellsnes #wonderfultimeoftheyear

Santa letter tradition
Christmas letter to Santa
Send letter to Santa
Printable Letter to Santa Kit
Creating holiday magic for kids
North Pole address for Santa
Return letter from Santa
Magical Christmas traditions
Tags santa letter tradition, christmas letter to santa, send letter to santa, printable letter to santa kit, creating holiday magic for kids, north pole address for santa, return letter from santa, magical christmas traditions

10 Winter Christmas Holiday Sensory Play Ideas for Flisat Table

November 15, 2024 Kylie Tuosto
Top 10 Winter Themed Sensory Play Table Ideas

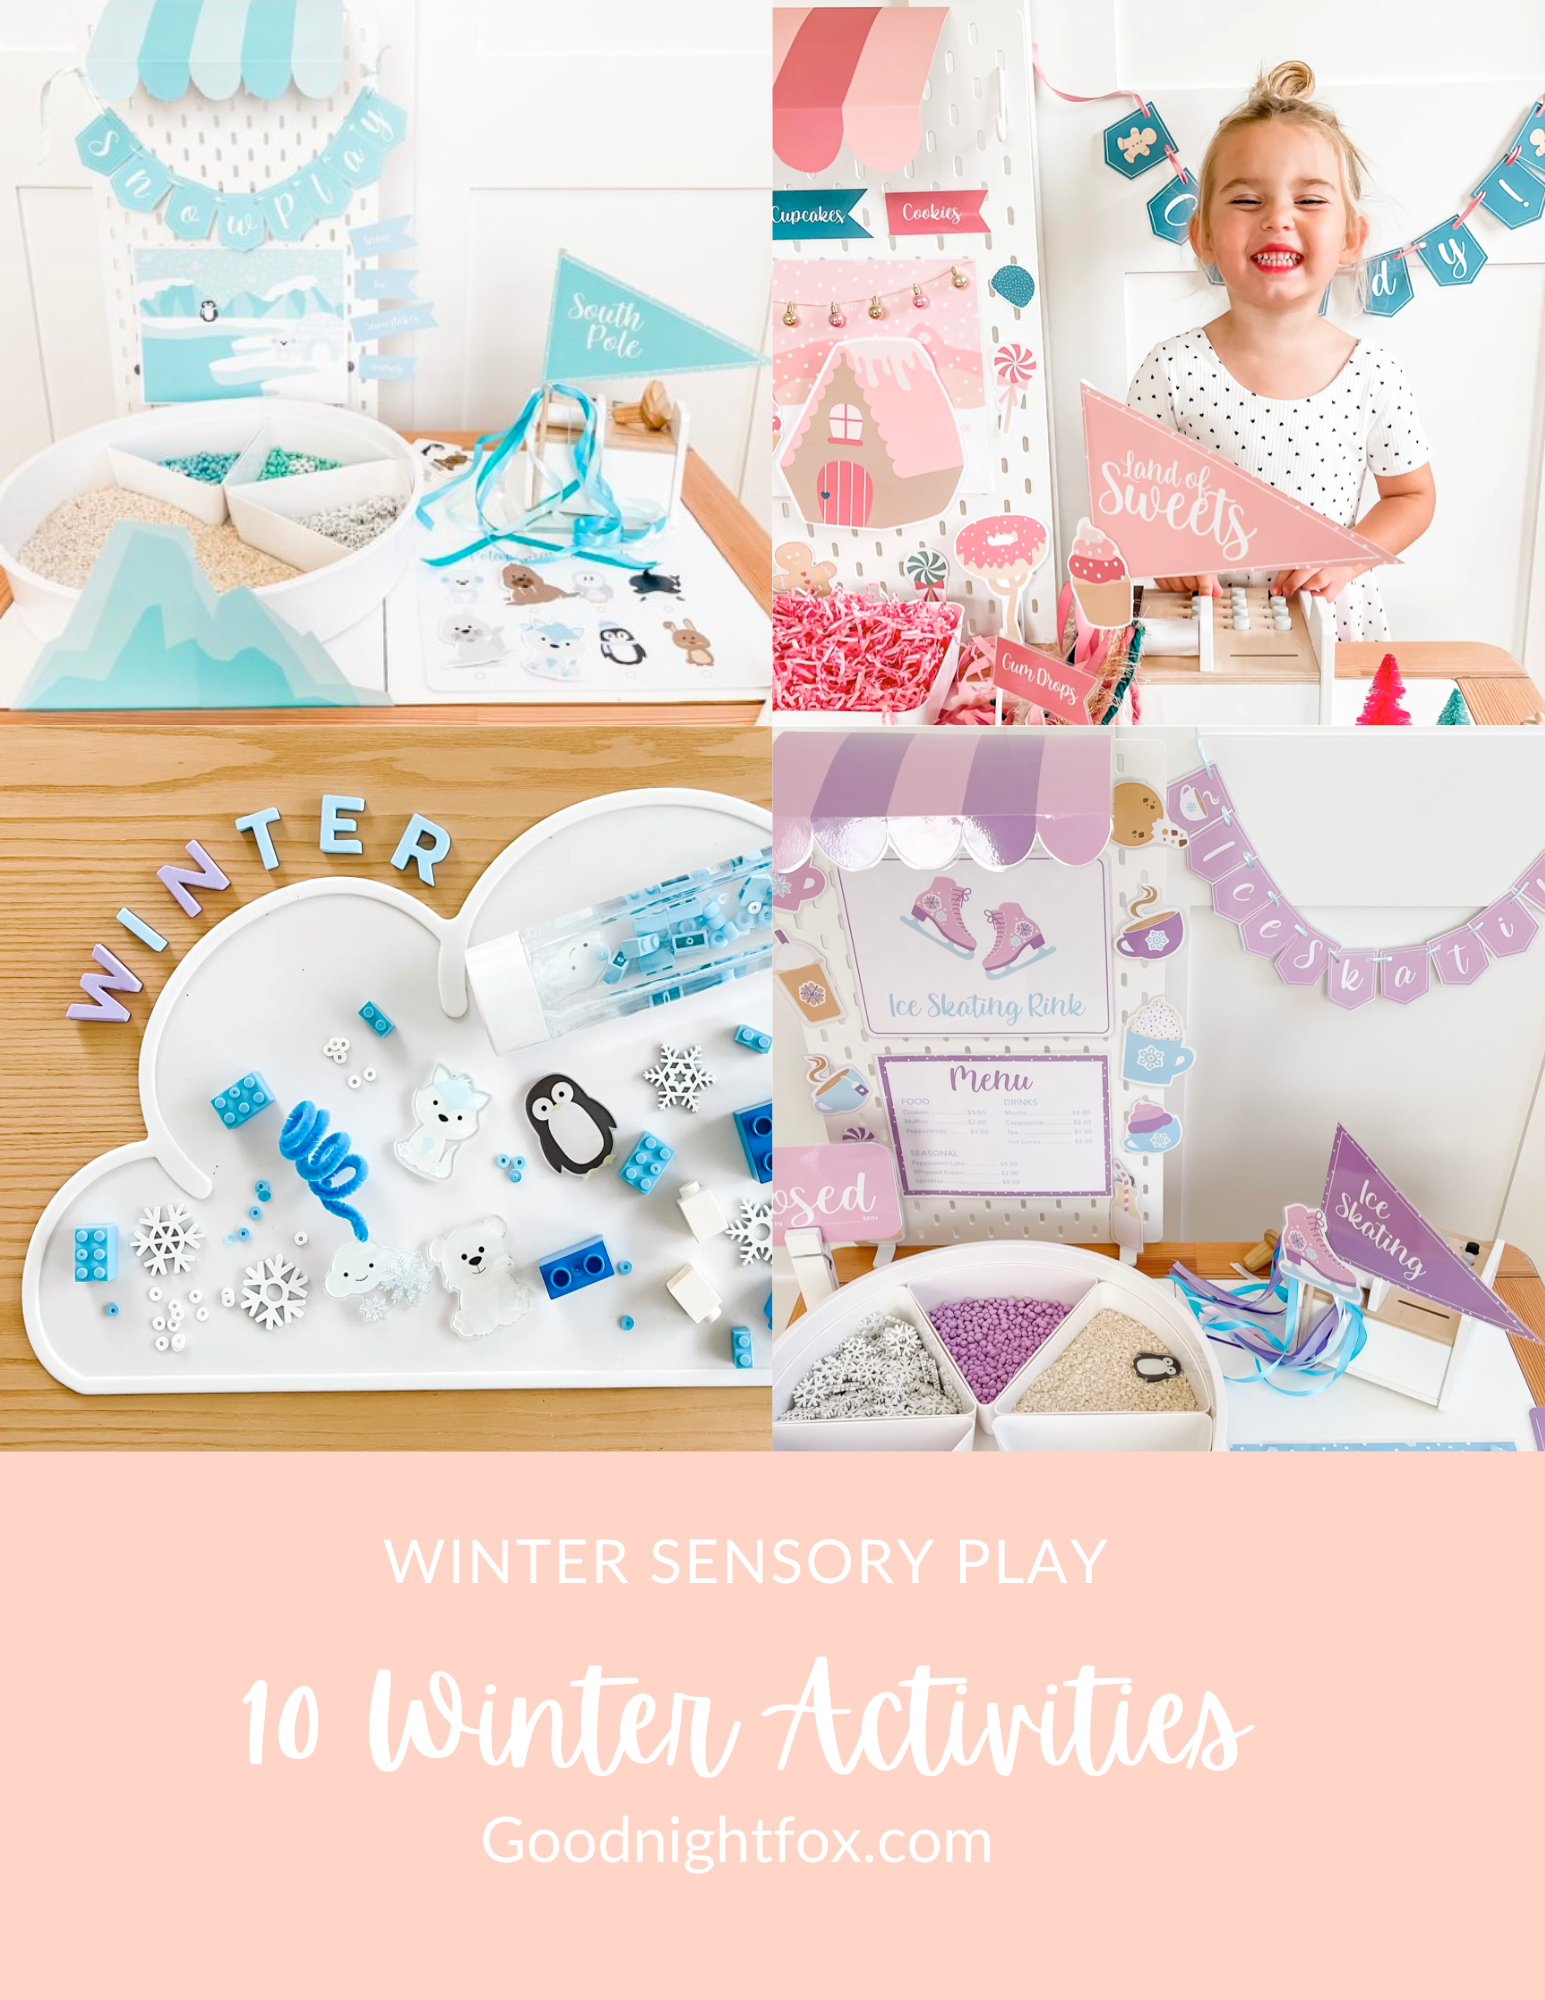
Winter is a magical time of the year, and Christmas holidays bring joy and excitement to both children and adults. Whether it's a snow-covered wonderland or a cozy indoors celebration, creating sensory play experiences can add an extra touch of fun and learning. The Flisat table from IKEA, with its sturdy design and detachable top, offers a perfect platform for engaging sensory activities for kids. In this blog post, we will explore 10 Winter Christmas holiday sensory play ideas that you can implement on your Flisat table.

Ice Skating Rink Dramatic Play Printable Kit

1. Sparkling Winter Ice Skating Magic:
Prepare a batch of shimmering snow playdough using silver glitter and essential oils like peppermint or lavender. Provide various winter-themed cookie cutters, small figurines, and toys for children to mold, create snow scenes or make snowballs. Use the Inspire My Play tray to divide up sensory fillers like chickpeas, colored rice, and colored sand. Print the Ice Skating Dramatic Play kit to turn your Flisat table into a sparkly winter skating rink.

Download & Print

2. Festive Sensory Bins:
Fill colorful sensory bins with fake snow, festive pom-poms, jingle bells, plastic snowflakes, and small Christmas-themed objects. Allow children to scoop, pour, and explore the textures, colors, and sounds while stimulating their senses.

Arctic Animal Ice Dig Sensory Play Indoor Winter Activity For Kids

3. Arctic Ice Dig:
Freeze small toys, plastic animals, or buttons in water or ice cube trays. Place these frozen treasures on the Flisat table and provide children with salt, spray bottles, and droppers filled with warm water to melt the ice and excavate their goodies.

Download the Printable


4. Scented Sensations:
Engage the sense of smell by providing fragrant materials such as cinnamon sticks, cloves, orange peels, and evergreen branches on the Flisat table. Encourage children to touch, smell, and explore nature's enticing aromas while talking about their Christmas associations.


5. Snowy Writing Tray:
Fill a shallow tray with a thin layer of salt or sugar. Invite children to practice their writing or drawing skills by making marks in the "snowy" surface using their fingers or tools like paintbrushes or cotton swabs. This activity enhances fine motor skills and provides a tactile experience.

6. Hot Cocoa Sensory Play:
Set up a hot cocoa sensory bin by filling it with cocoa powder, mini marshmallows, spoons, and empty mugs. Let children scoop, pour, and mix the ingredients, stimulating their sense of touch and exploring concepts of measurement and cause and effect. If you want to opt for less mess, cocoa puff cereal, black beans, and coffee beans are great alternatives to cocoa powder. Or if you’re feeling risky, you can always try it with chocolate chips! This is one of my favorite activities because it’s great taste safe sensory play for toddlers but can be done with non-editable materials for older kiddos as well.

Download & Print
Winter Sensory Bottle Oil Water Calming Kit


7. Winter Wonderland Sensory Bottles:
Create sensory bottles by filling clear plastic containers (make sure to get a wide enough mouth to fill with larger objects) with water, food coloring, and various glitter or confetti. Add small winter-themed objects like mini penguins, polar bears, snowflakes, or legos. Children can shake, twist, and observe the mesmerizing winter scenes. For filler, combine water and baby oil to allow the objects to fall slowly. Or as an alternative, use fake snow or white rice for a snowy winter scene.

Shop this kit

8. Jingle Bell Counting:
Place jingle bells of different sizes and colors in an empty container on the Flisat table. Encourage children to sort, count, and match the bells. This activity enhances math skills, hand-eye coordination, and auditory discrimination.

Download & Print


9. Melting Snowman Experiment:
Build miniature snowmen using snow clay or playdough. Set up a tray for children to observe and record the melting process using a timer. Discuss the science behind melting snow, exposing children to scientific concepts in a fun and interactive manner.

Nutcracker Winter Themed Sensory Play for Toddlers

10. Nutcracker Land Activity:
Create Nutcracker Themed Kids in Toyland setup using Christmas-themed sensory texture boards by gluing different materials like velvet, foil, felt, or sandpaper onto sturdy pieces of cardboard. Let children explore the textures and talk about the sensations they feel, fostering sensory awareness and vocabulary expansion. You can also allow older kids to paint a cute wooden Nutcracker ornament to match the theme.

Download & Print


The Flisat table is a versatile and practical tool that allows children to engage in sensory play experiences during the winter Christmas holiday. These ten ideas provide opportunities for children to explore various textures, smells, sounds, and sights associated with this magical time of the year. Incorporating sensory play into your child's winter routine not only fosters development but also creates memories that will last a lifetime. So, roll up your sleeves, gather some materials, and have fun embracing the wonders of winter on your Flisat table!

Tags winter activities, fun winter activities, indoor winter activities, snowy winter activities, winter sensory play, taste safe winter sensory play, unique winter activities for kids, cheap winter activities, cozy winter activities, flisat table play ideas
3 Comments

Dive into Five: Sofia’s Magical Mermaid-Themed Birthday Party

November 10, 2024 Kylie Tuosto
Mermaid Birthday Party Dive into Five

There’s no better way to celebrate a fifth birthday than to dive into an ocean of fun and magic! For my daughter Sofia’s fifth birthday, we transformed our space into an undersea wonderland with coral, peach, and pink hues, creating an unforgettable “Dive into Five” mermaid-themed party. From stunning decor to creative activities and delicious treats, here’s how we brought this dreamy theme to life.

Enchanting Under-the-Sea Decor

To set the perfect mermaid vibe, we went all out with whimsical decor elements designed to transport little guests under the sea.

IMG_9811_jpg.jpg
IMG_9827.jpg
IMG_9822_jpg.jpg
IMG_9880_jpg.jpg
IMG_9783_jpg.jpg
IMG_9887_jpg.jpg
IMG_0049.jpg
IMG_0051_jpg.jpg
IMG_0180_jpg.jpg
IMG_0381_jpg.jpg
IMG_0386_jpg.jpg
IMG_0435_jpg.jpg
  • Balloon Garland & Fish Net Backdrop: A dreamy coral, peach, and pink balloon garland made for a bubbly entrance, paired with a delicate fish net backdrop for that oceanic feel.

  • Hanging Bubble Backdrop: Floating “bubbles” created a magical ambiance and were perfect for fun photo ops.

  • GoodnightFox Custom Decor: We added a beautiful mermaid banner and festive “Let’s Shellebrate” pennant flags designed by GoodnightFox, which tied the theme together.

  • Collaborations with Small Shops: Felt Happy Sewing crafted adorable shell felt wands, while MyMindsEye’s shell banner added charm and elegance. The tables were adorned with enchanting coral reef decor by Evergreen Collab and KailoChic, making each detail feel straight out of an undersea fairy tale.

    • Sea Shell Felt Wands by @Felthappysewing

    • Shell Banner by @MyMindsEye

    • Coral reef sorting trays by @EvergreenCollab

    • Coral reef prop by @KailoChic


Screen Shot 2025-07-05 at 7.11.51 PM.png
Screen Shot 2025-07-05 at 7.11.43 PM.png
Screen Shot 2025-07-05 at 7.11.22 PM.png
Screen Shot 2025-07-05 at 7.11.13 PM.png

Looking for the cutest Dive into Five Mermaid Themed Party Invitation? This design is fully editable directly in Canva. You can even order invitation prints directly from Canva after you make your customizations.

Customize This Invitation for your party

Mermaid-Themed Activities for Underwater Fun

What’s a birthday party without some engaging crafts? Here are three ocean-inspired activities that kept the kids entertained while adding a touch of creativity to the party.

IMG_0385_jpg.jpg
IMG_0220_jpg.jpg
IMG_0351.jpg
IMG_0238_jpg.jpg
IMG_0234_jpg.jpg
IMG_0675_jpg.jpg
  • Felt Wand Decorating: Each child decorated their own sea star and clamshell felt wand from Felt Happy Sewing. It was the perfect memento for them to take home.

  • Mermaid Face Painting: Sparkly scales, vibrant tails, and magical designs brought each child’s inner mermaid to life with face painting.

  • Mermaid Slime and Play-Doh Station: The kids enjoyed creating sparkly, ocean-colored slime, while the mermaid Play-Doh from Capptivating Play and shell and mermaid cutters from TCPlay allowed for even more creativity. This activity was a hit, letting the kids shape, mold, and play in their own underwater worlds.

    • Play doh by @CapptivatingPlay

    • Mermaid doh cutters by @T.C.play


Delicious Sea-Inspired Snacks & Refreshments

We created a selection of mermaid-inspired snacks that were as fun to look at as they were to eat:

IMG_0178.jpg
IMG_0202_jpg.jpg
IMG_0042.jpg
  • Shell Mac and Cheese: Kid-friendly and ocean-themed, this dish was a crowd-pleaser.

  • Crab Croissant Sandwiches: Adorable croissant sandwiches complete with googly eyes made for a playful twist.

  • Sparkly Pink Mermaid Lemonade: This refreshing drink sparkled with pink and served as the perfect undersea thirst-quencher.

  • Mermaid Fruit & Cheese Plate: We cut up watermelon, pink apples, colby jack cheese, cantalope to make mermaid tails fruit and cheese spread. Then we added shaved cucumber for a seaweed look!


Dessert Table: A Sweet Underwater Fantasy

No mermaid party is complete without a show-stopping dessert table. We loaded ours with treats that delighted kids and adults alike:

IMG_0442_jpg.jpg
IMG_0383_jpg.jpg
IMG_9887_jpg.jpg
IMG_9877_jpg.jpg
IMG_9894_jpg.jpg
IMG_9911_jpg.jpg
  • Cupcakes with GoodnightFox Toppers: These themed cupcake toppers added a special touch, making each treat party-ready.

  • Cake & Cake Pops by The Cake Shop: The Cake Shop created a beautiful centerpiece cake complete with a fondant mermaid topper and tasty cake pops that matched the theme perfectly.

  • Mermaid and Seahorse Cookies by Playing With Dough: These beautifully decorated royal icing cookies were almost too pretty to eat!

  • Homemade Clam Shell Macarons: A unique touch, these sweet clam shell macarons were an instant hit and added a whimsical vibe to the dessert spread.

  • Pink Ocean Pudding Cups: Layers of cracker crust and creamy pudding topped with chocolate mermaid tails were a colorful treat!


Bubbles of Fun

A party wouldn’t be a party without some amazing backyard fun. For this shellebration we got a huge oyster shell pool floaty and a pink kiddie pool shaped like a shell from Sunnylife. The girls had such a blast playing with the floaty toys and of course bouncing around in our @smol bounce house.

IMG_9984.jpg
IMG_9993_jpg.jpg
IMG_9975.jpg

Bring the Magic Home

To make this “Dive into Five” party unforgettable, each child went home with their decorated felt wand, a small bag of mermaid slime, and ocean-themed treats. It was a special day filled with laughter, creativity, and a little bit of magic from the sea.

IMG_9857_jpg.jpg
IMG_9959_jpg.jpg
IMG_9777.jpg

Printable Checklist for Your Own Mermaid Party: Planning a mermaid-themed party? Grab our free printable checklist to help you organize everything from decor to activities and party favors!

Loved This Theme? Share Your Own! What part of this “Dive into Five” party would your little one love most? Let us know in the comments, and don’t forget to tag us on Instagram to share your own mermaid parties using #GoodnightFoxMermaidMagic!

Tags mermaid party, five year old birthday party, cute mermaid party, coral birthday, pink birthday girls, dive into five, under the sea birthday
2 Comments

Campfire Fun: A Dramatic Play Setup for Kids

October 21, 2024 Kylie Tuosto
Download the Kit

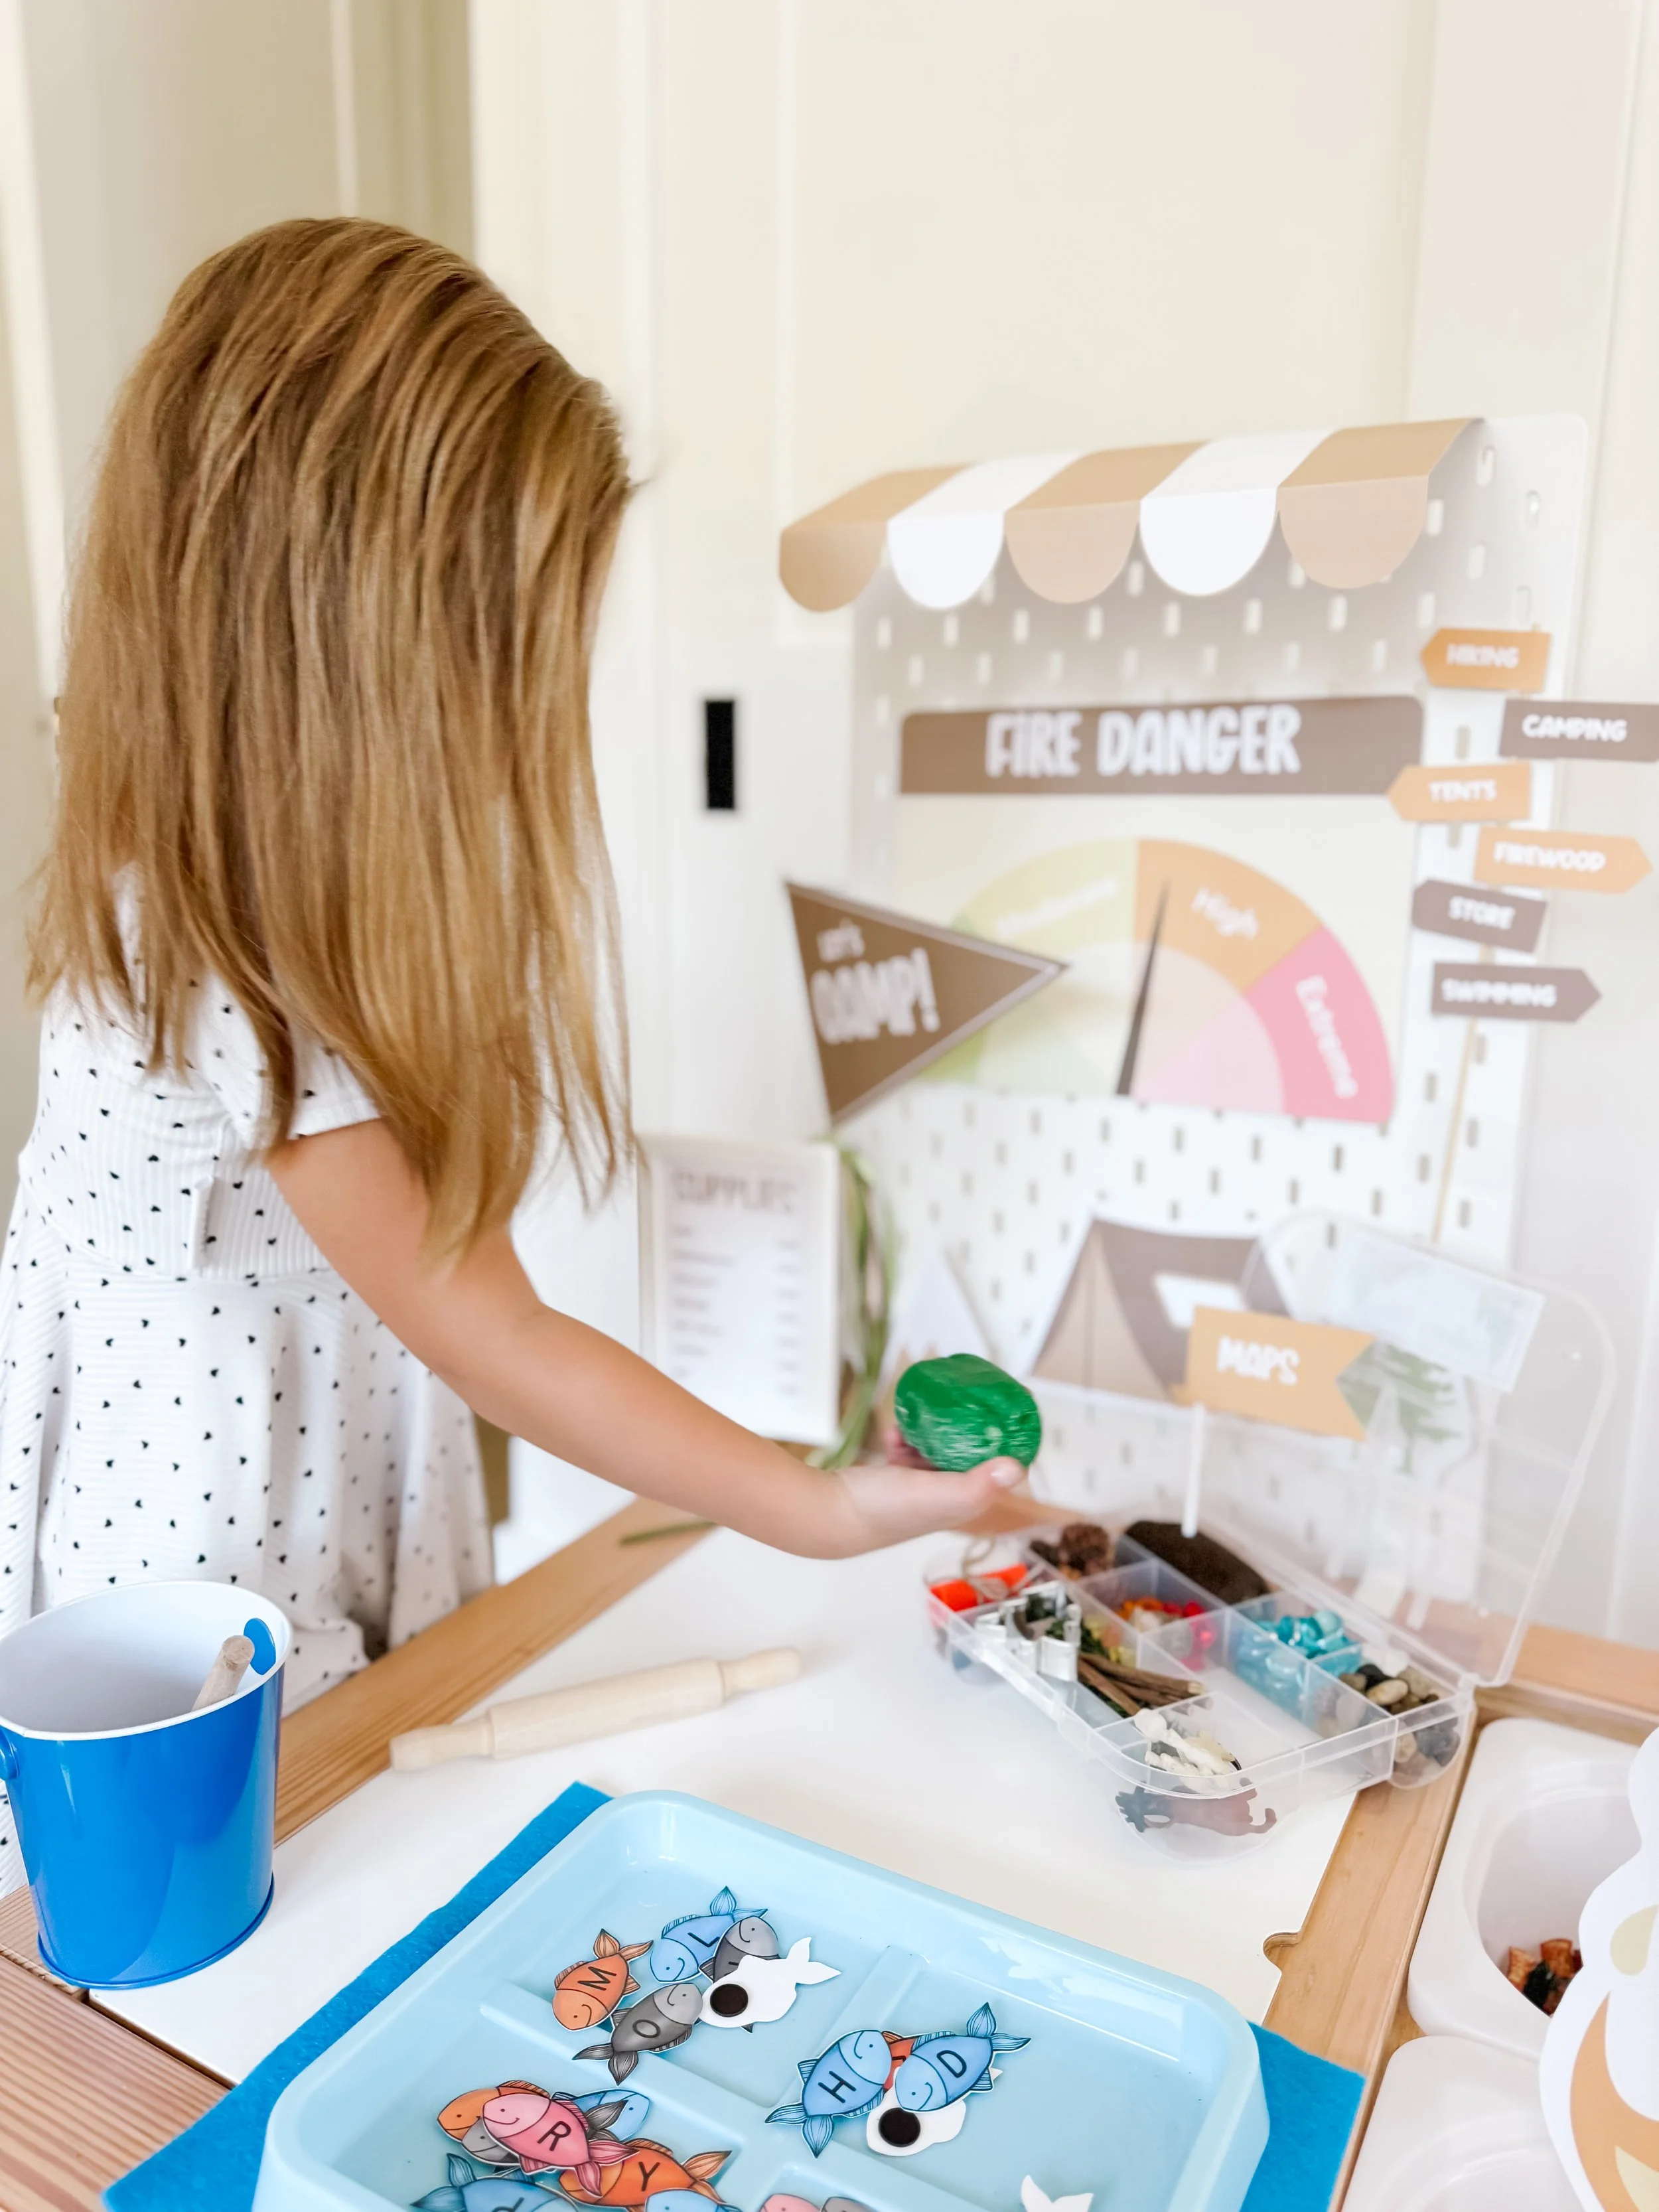
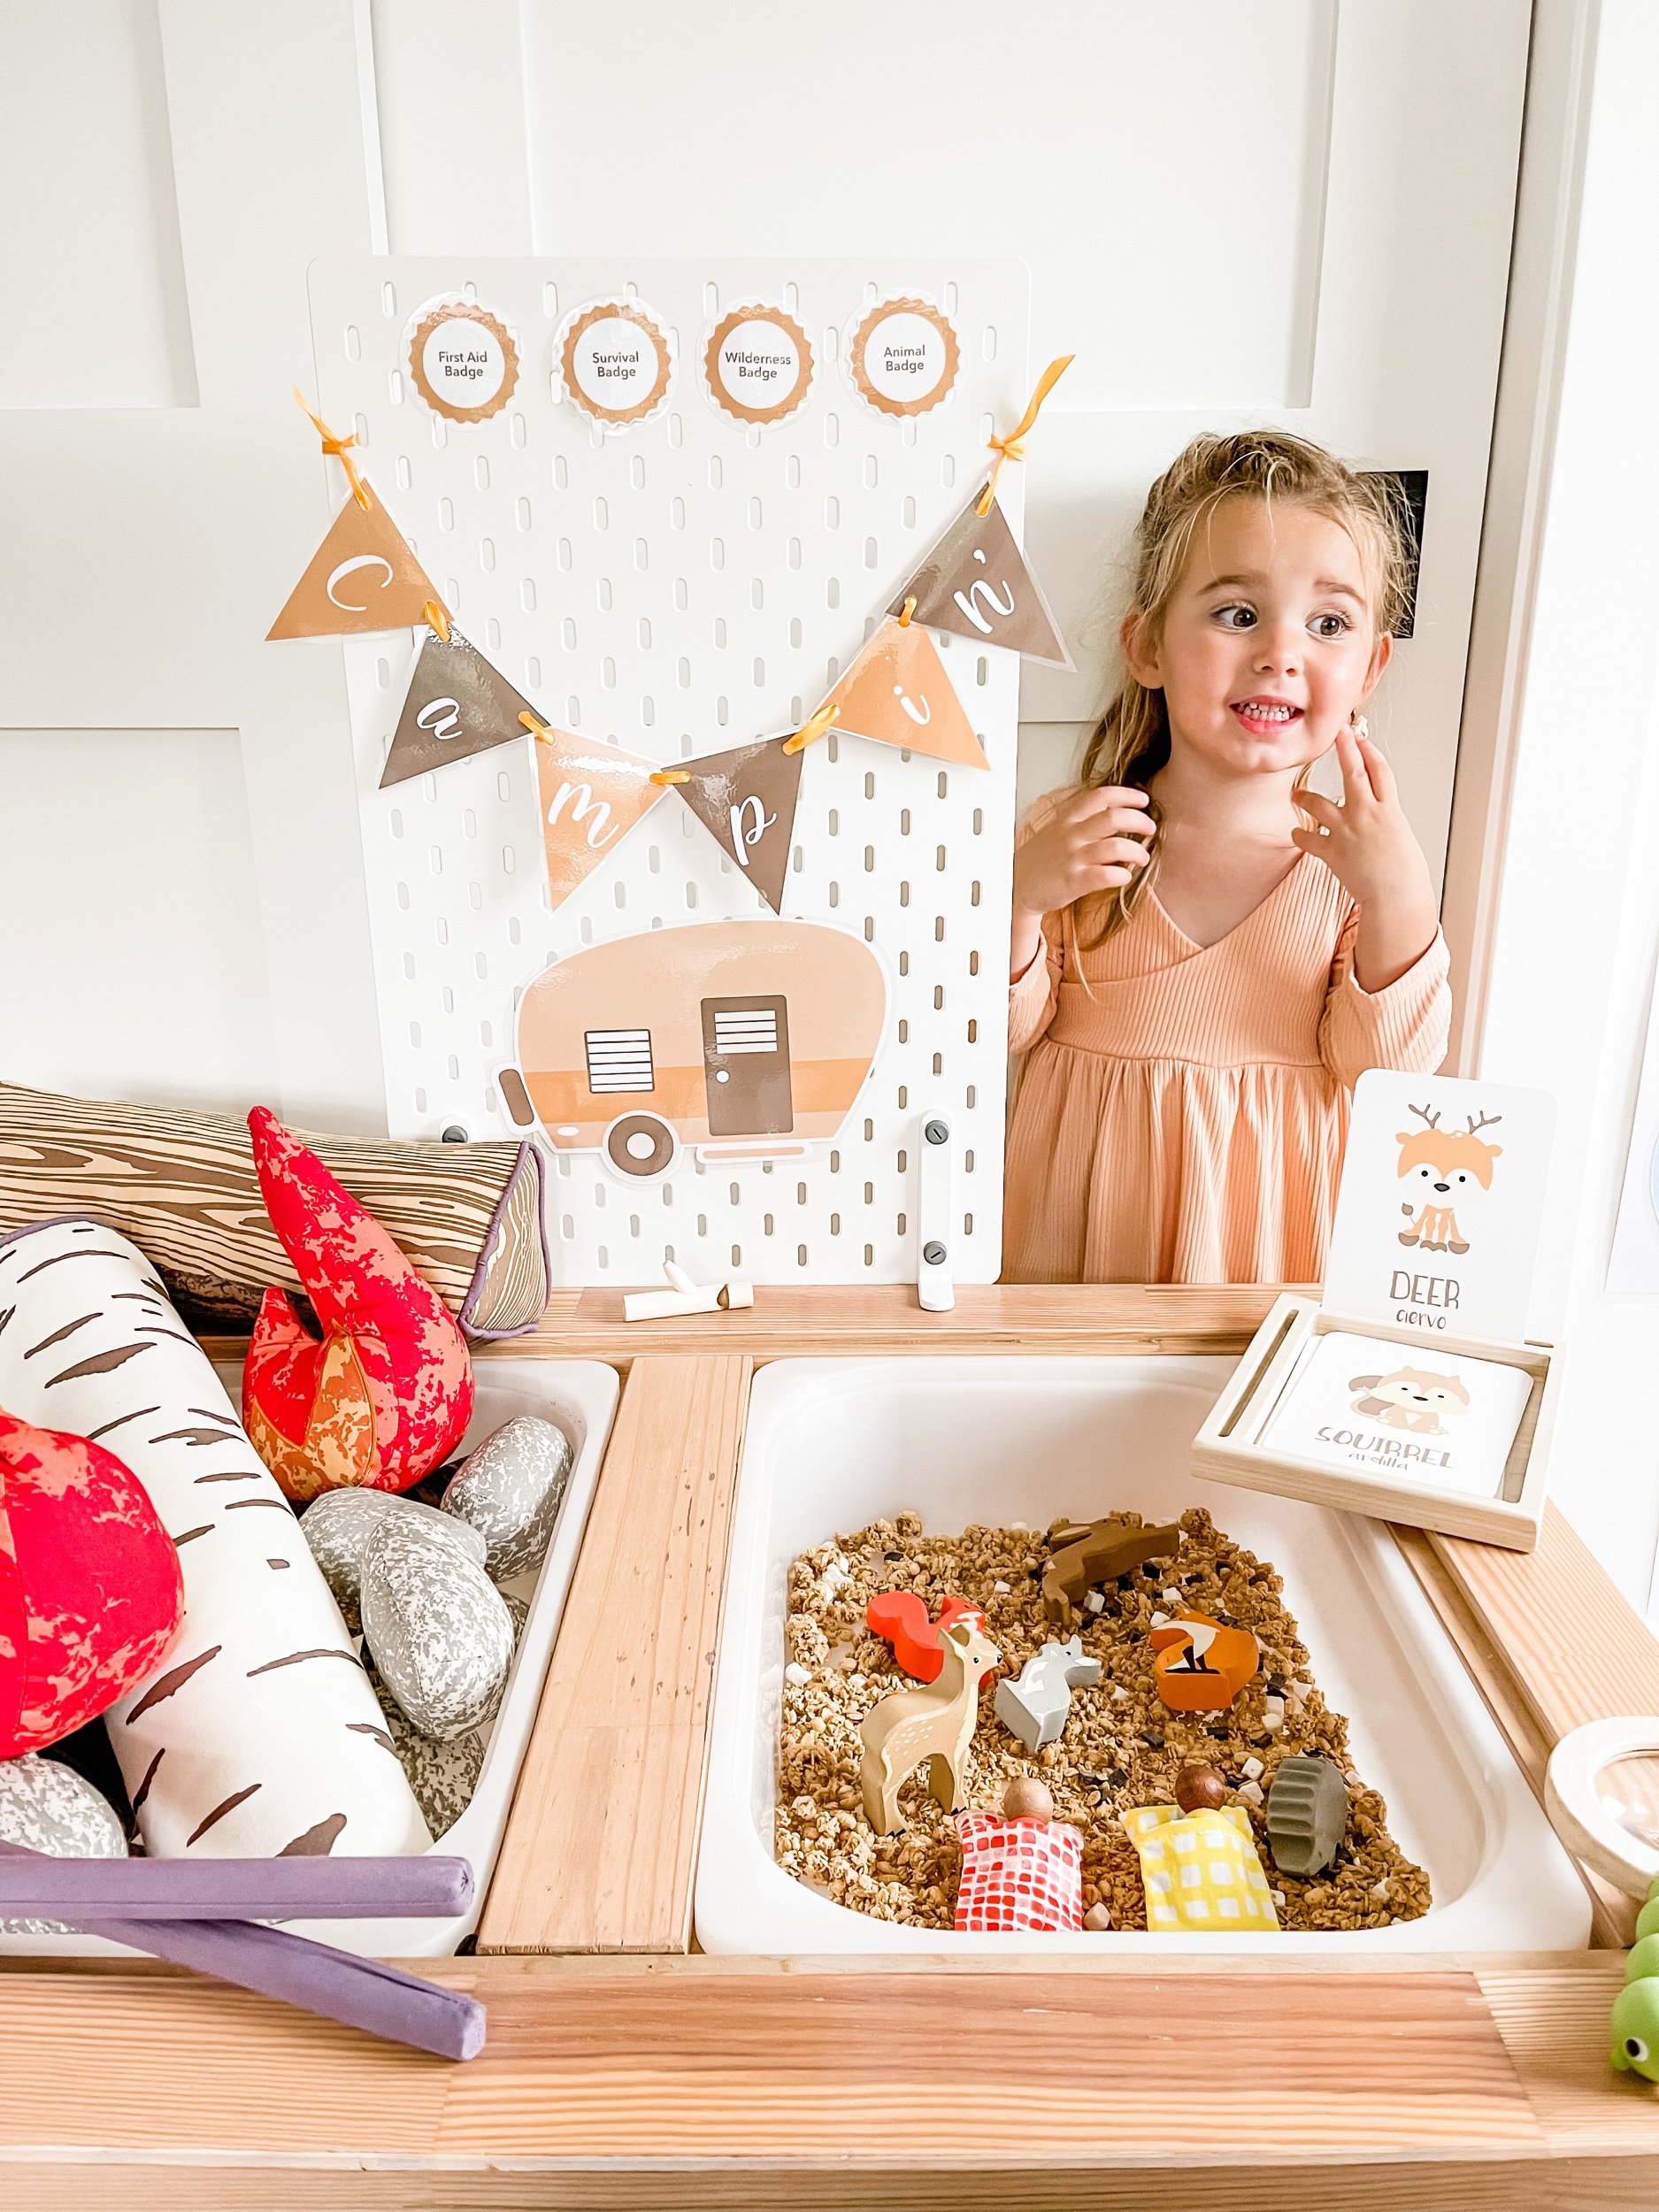
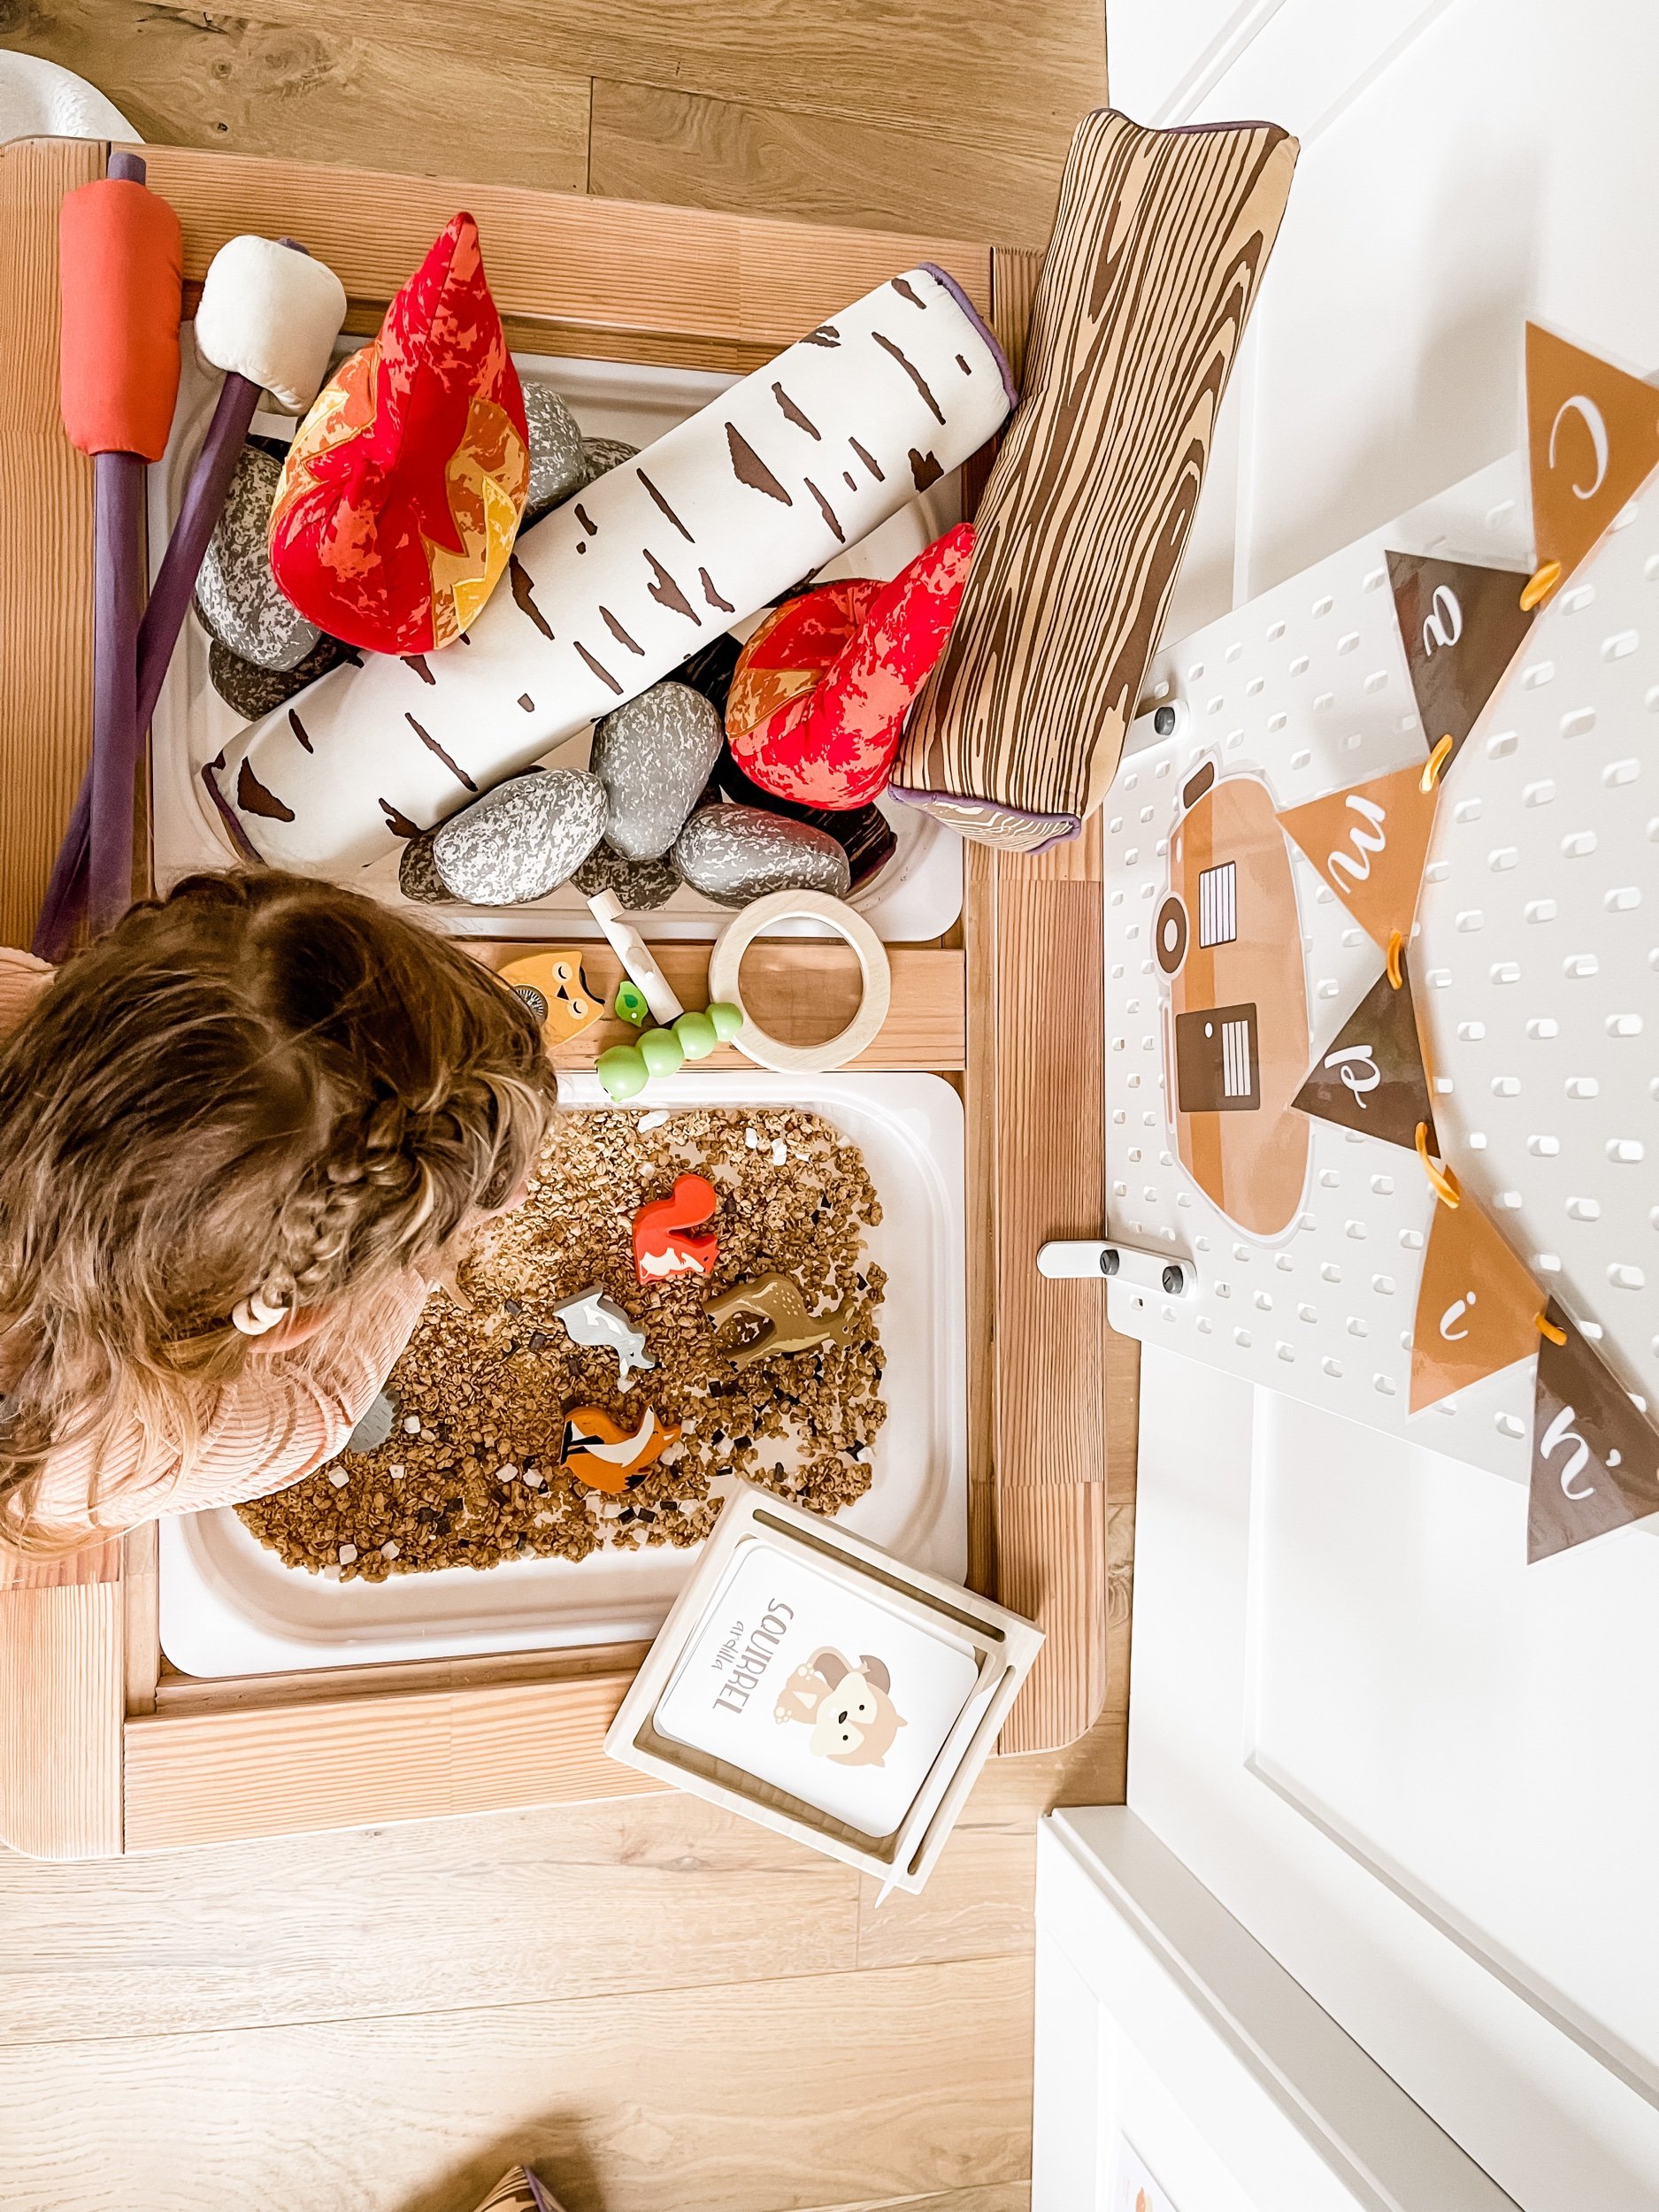
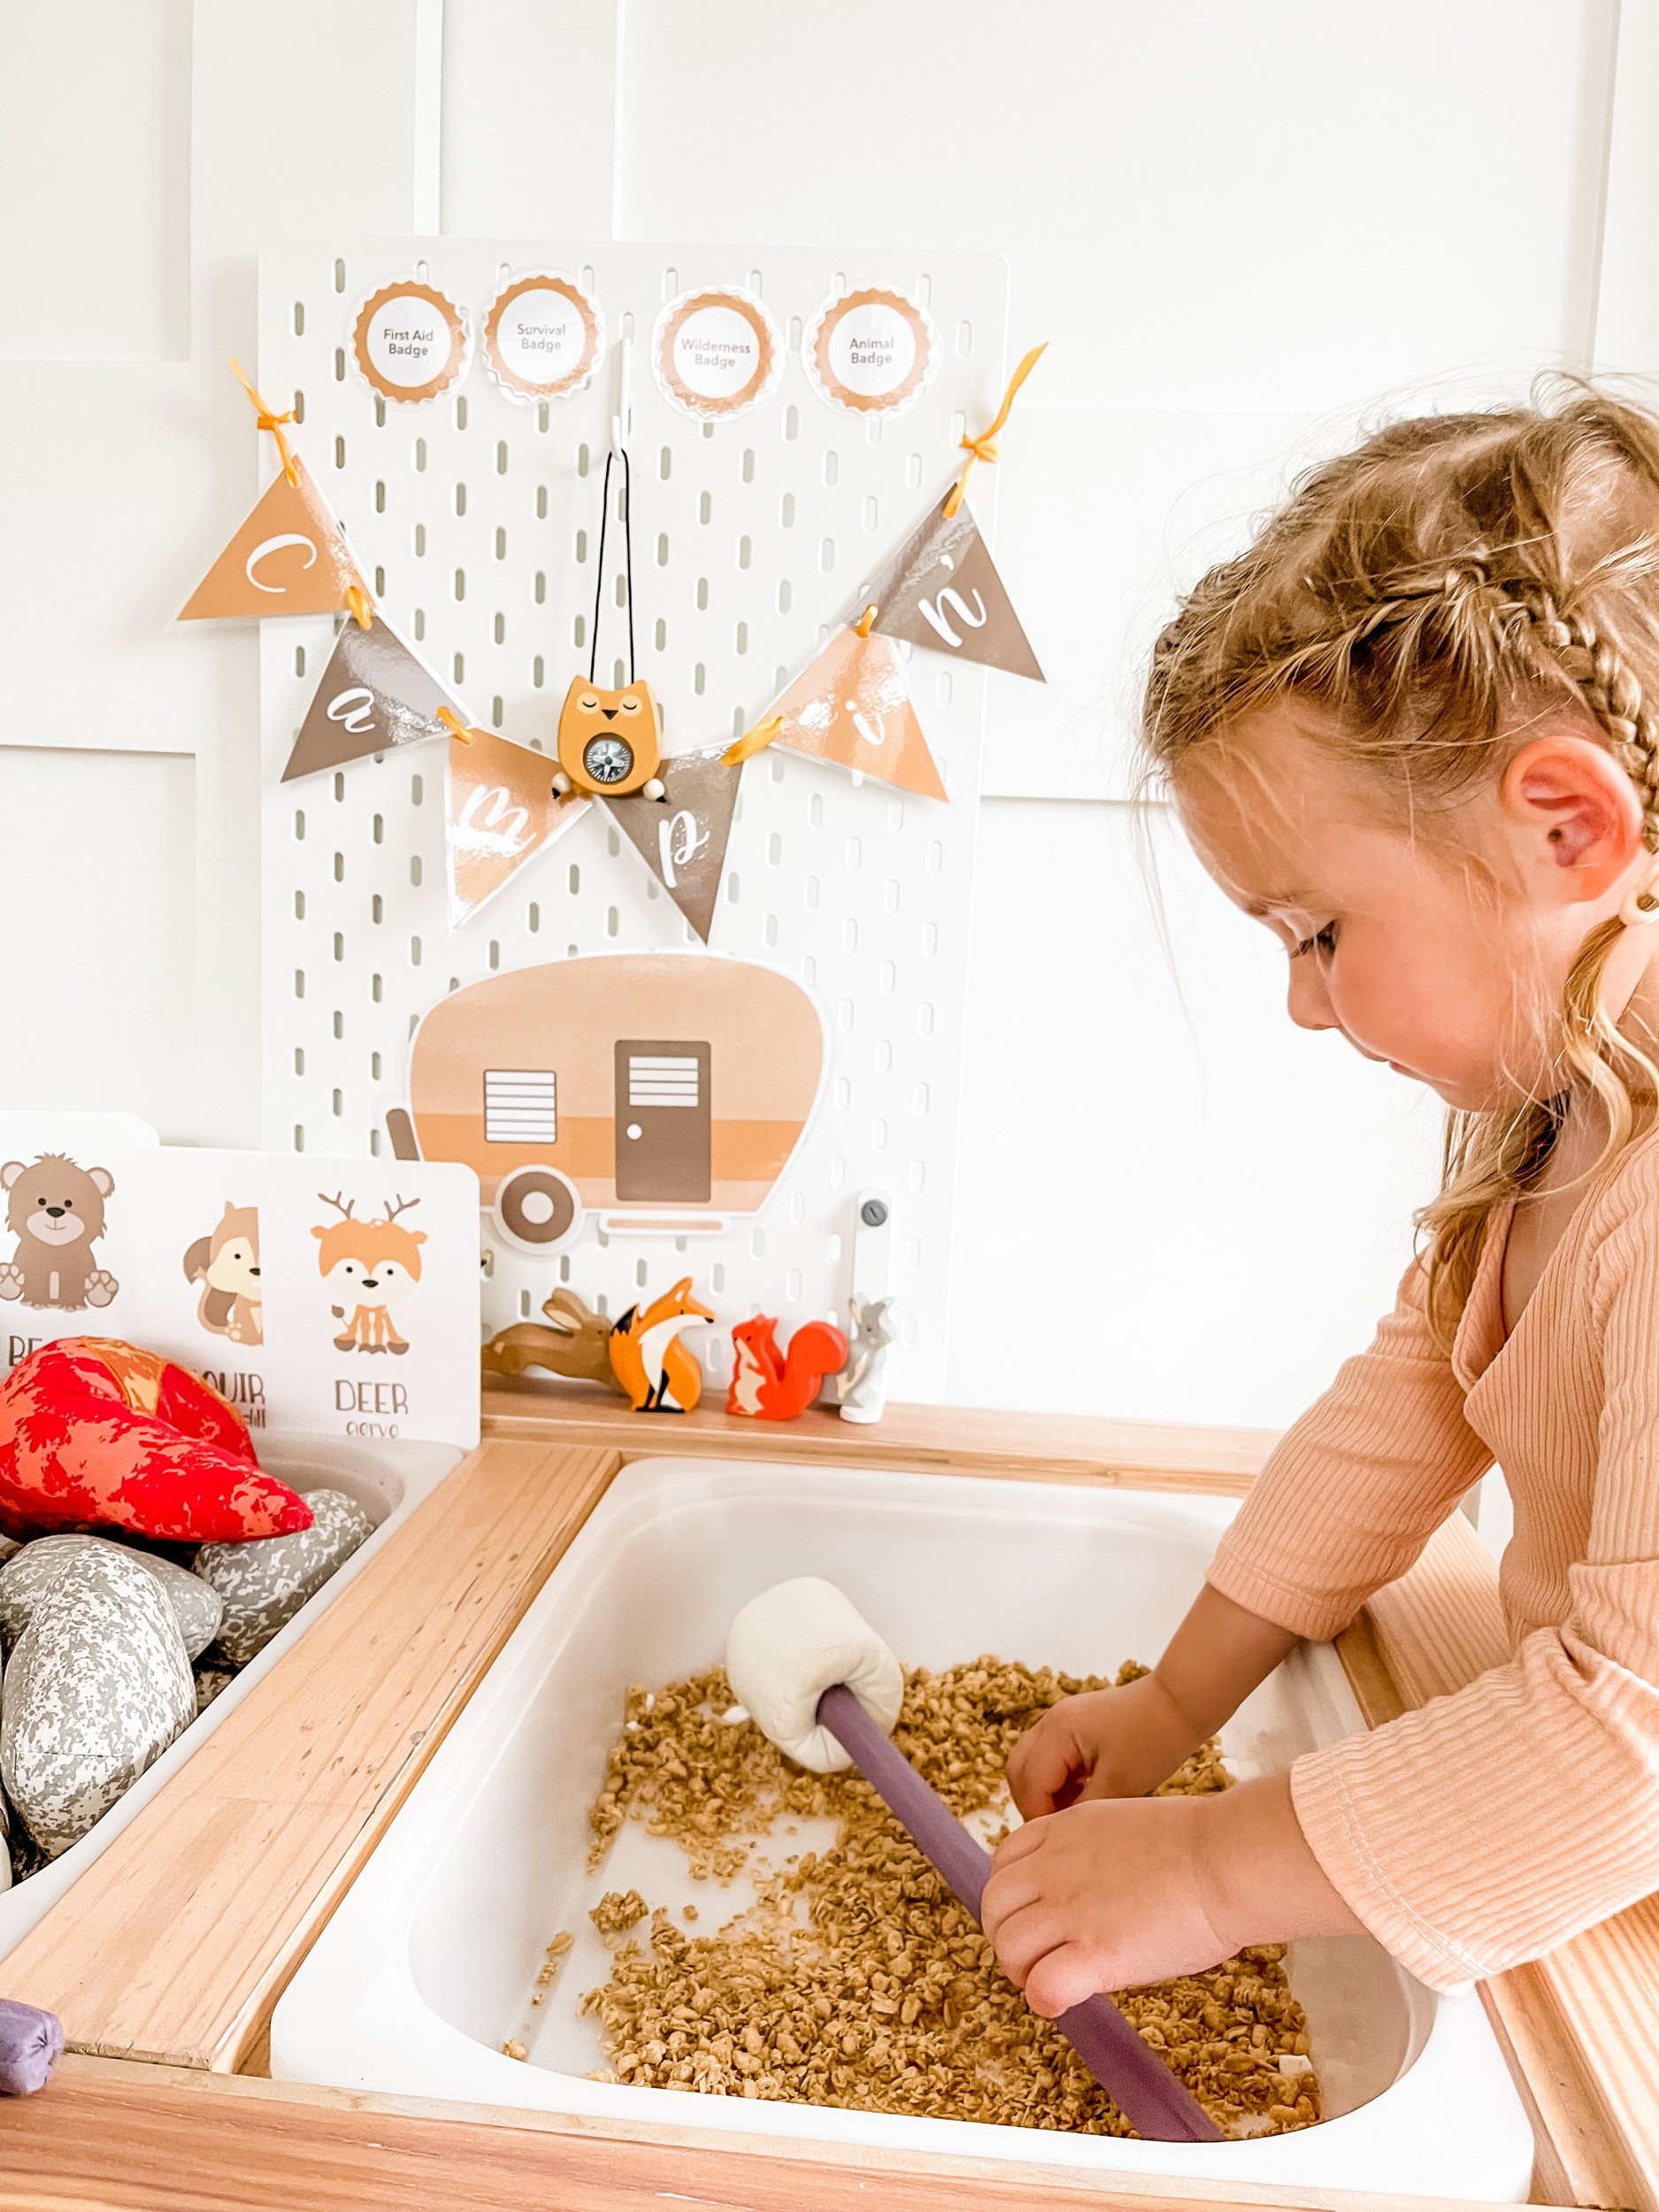
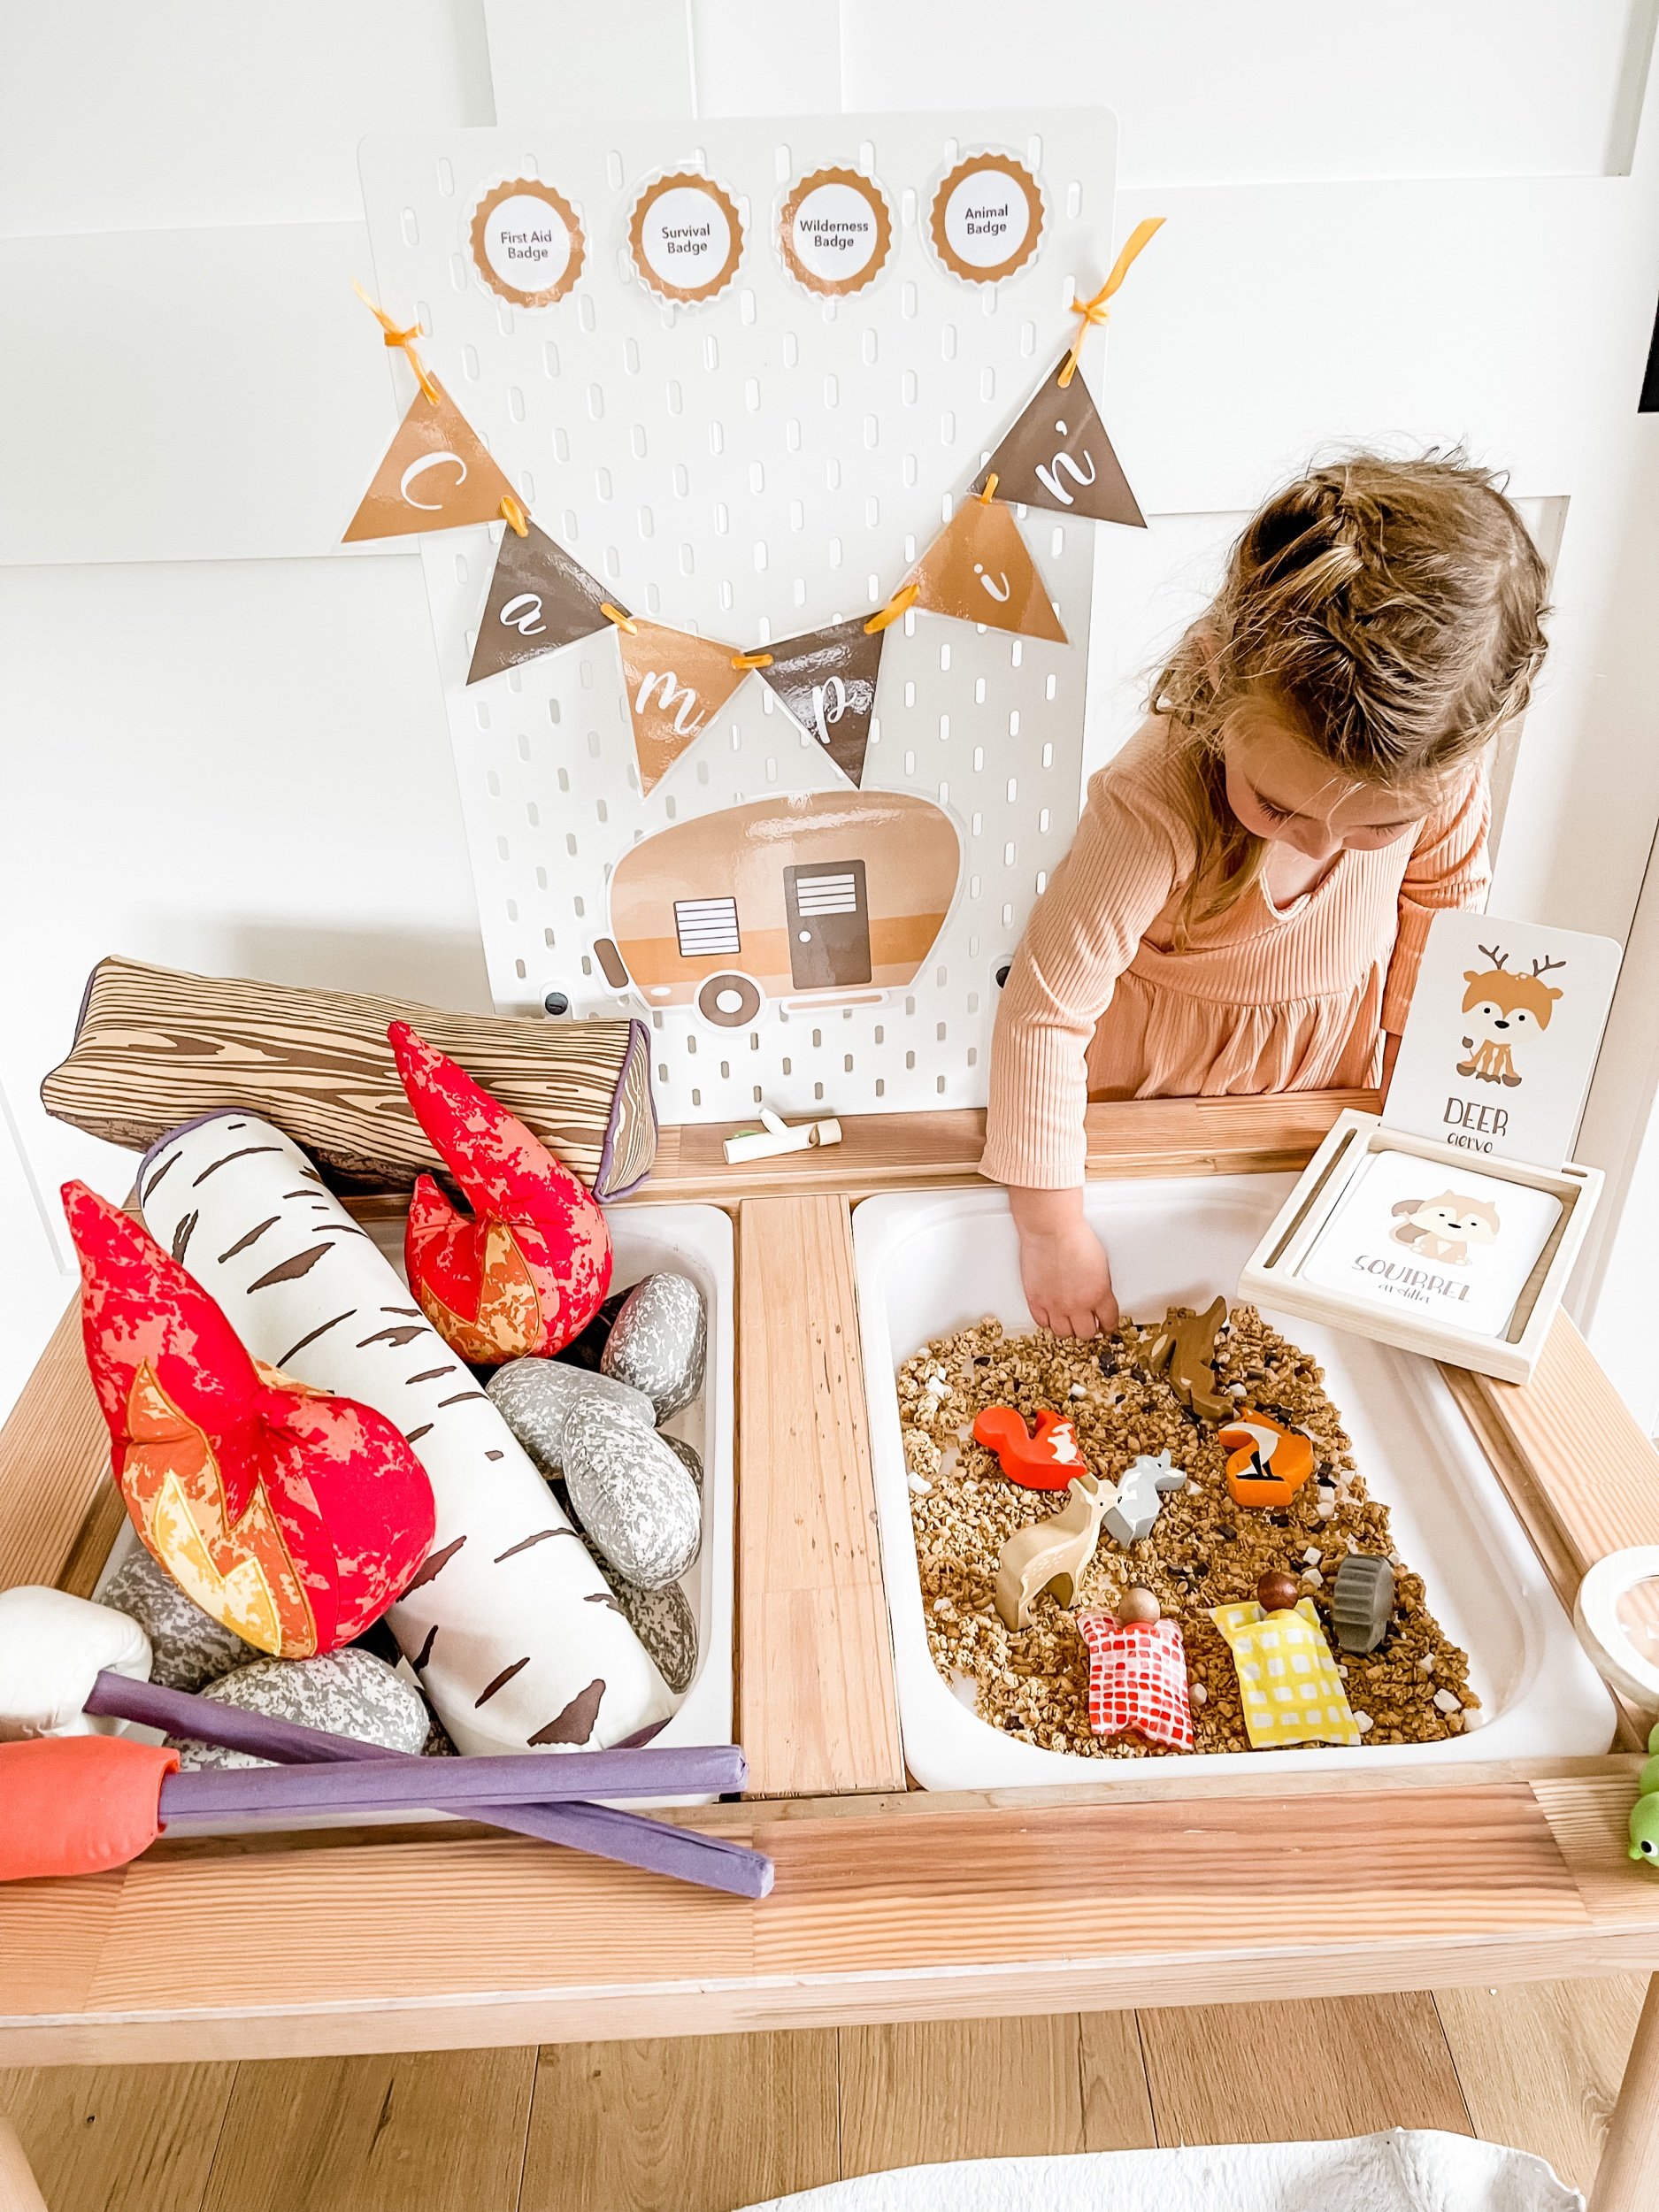
Looking for a way to bring the great outdoors to your little one’s playtime? Our Campfire Dramatic Play Setup is here to spark creativity and adventure! This setup is not just about fun—it’s packed with opportunities for sensory exploration, fine motor skill development, and imaginative play. Let’s dive into what makes this setup so special, including amazing kits from Jack and Jill’s Kits for Kids.

IMG_6990.JPEG
IMG_6969_jpg.JPEG
IMG_7002.JPEG
IMG_7011_jpg.JPEG

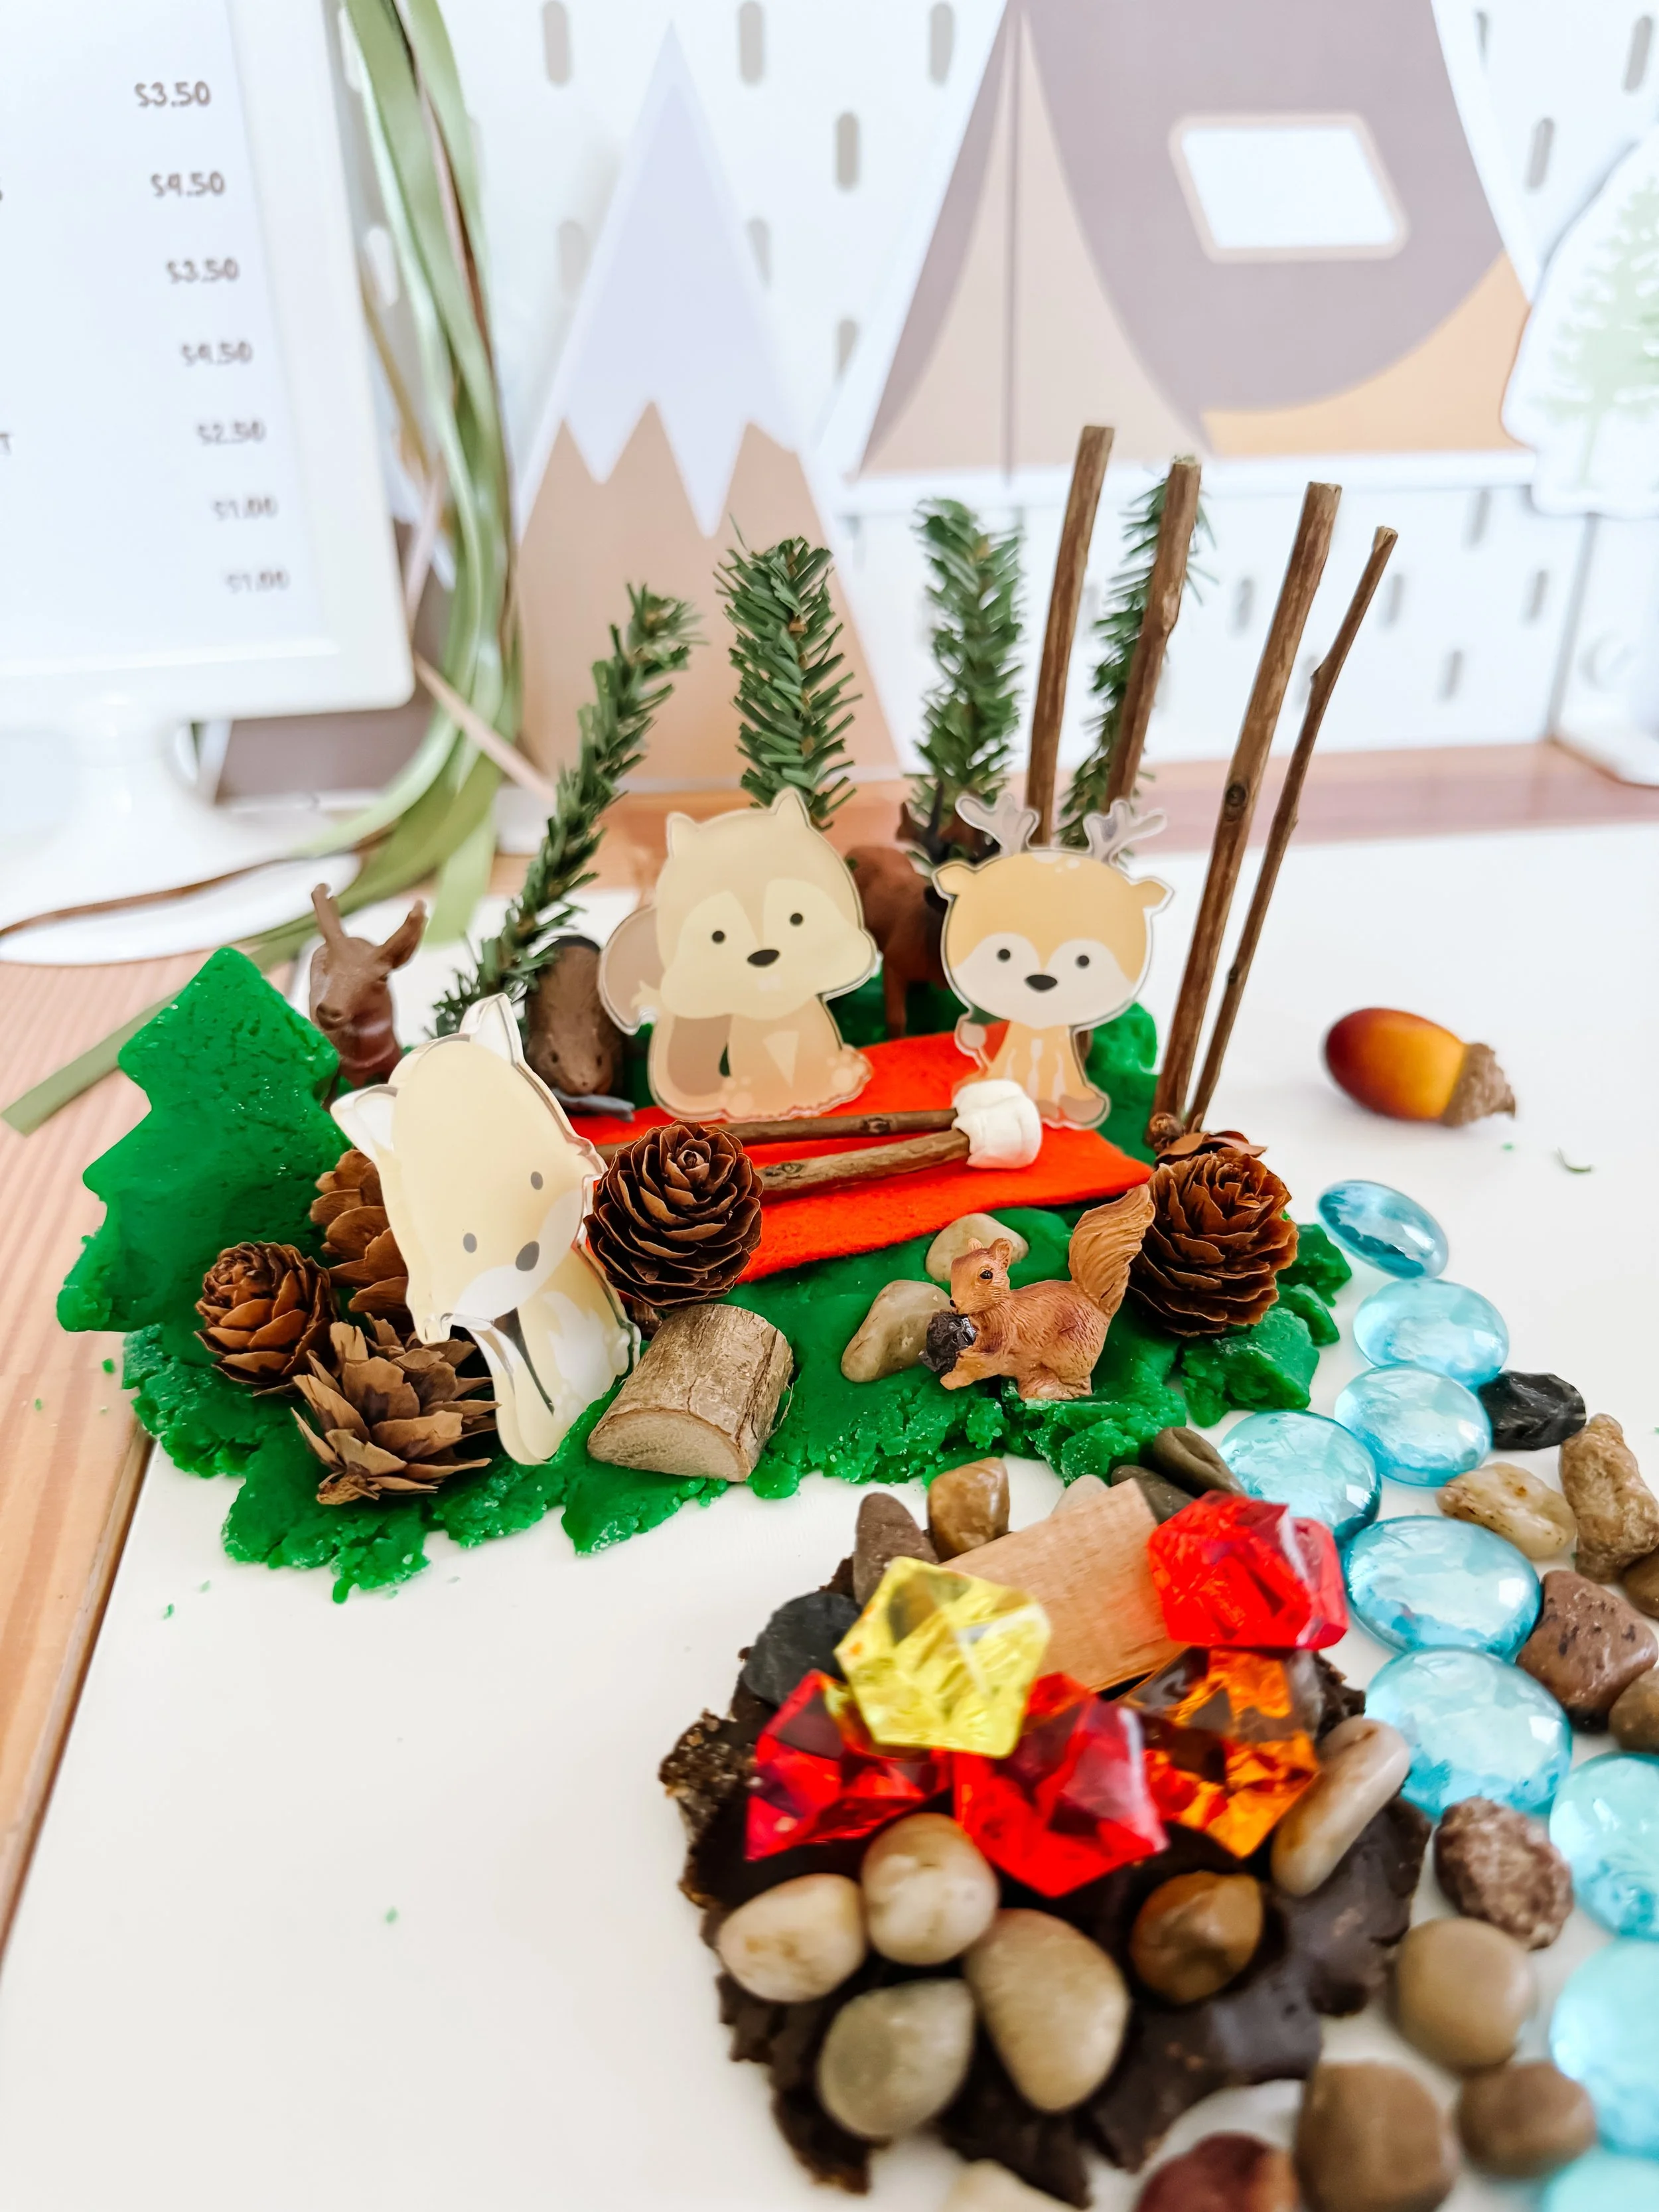
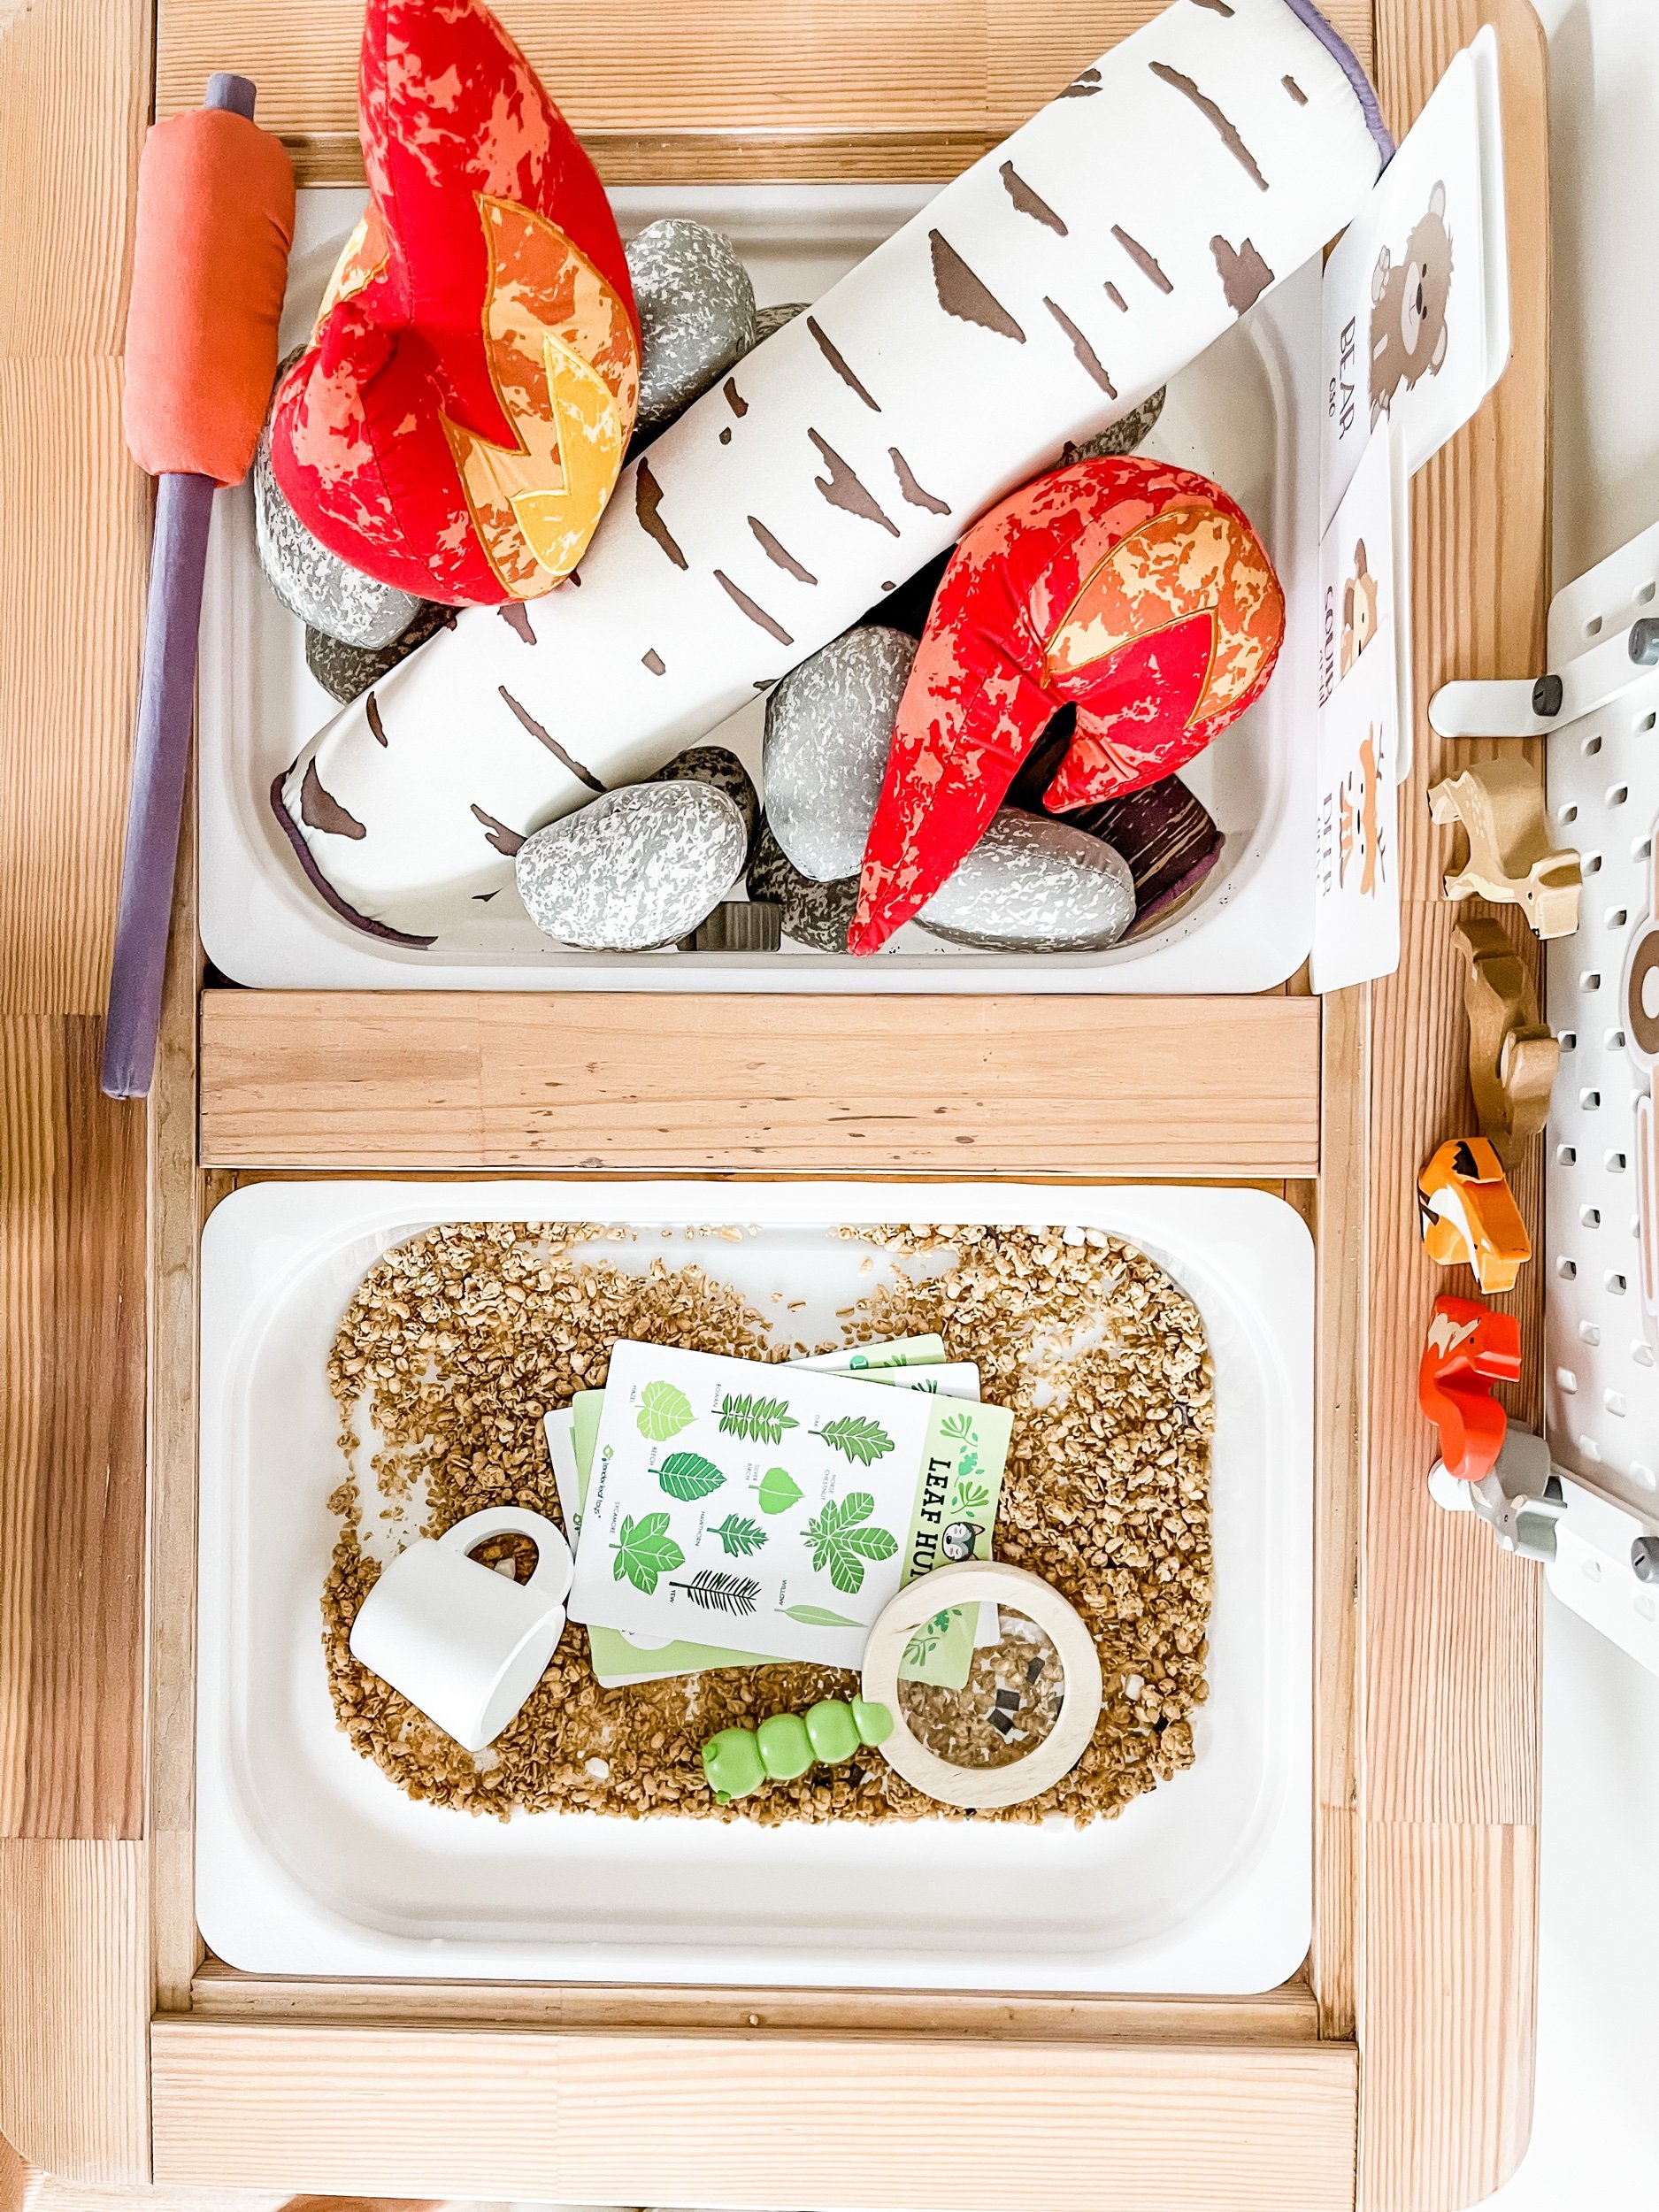
Bin 1: Small World Campfire Adventure

The heart of this campfire-themed play setup features Jack and Jill’s Kits for Kids’ Play-Doh Campfire Kit. This kit is a sensory dream, offering brown and green Play-Doh for crafting the forest floor and bushes, along with blue stone rocks to represent a stream or lake. Kids can create their own campfire scene with the included small pieces of wood and campfire rocks, and bring their miniature world to life with animal figurines, sticks, trees, and a picnic blanket.

Not only does this setup encourage imaginative play, but it also provides hands-on learning as children engage with different textures and shapes. This sensory experience strengthens fine motor skills, creativity, and storytelling, helping kids understand the world around them in a fun and interactive way.

Materials Needed:

  • Brown and green Play-Doh

  • Blue stone rocks for water

  • Campfire rocks

  • Small pieces of wood

  • Animal figurines

  • Sticks and trees

  • Picnic blanket

Get the play doh kit

IMG_7016_jpg.JPEG
IMG_7014_jpg.JPEG
IMG_7015_jpg.JPEG
IMG_6942_jpg.JPEG

Bin 2: Fishing Fun

Next up, we have Jack and Jill’s Fishing Play Kit—a fantastic addition to the campfire scene! Kids can grab their magnetic fishing pole and fish for colorful magnetic fish. Once caught, they can either place the fish in the blue bucket or match them onto alphabet letter cards, turning playtime into an educational activity.

This setup is perfect for practicing hand-eye coordination and early literacy skills. As kids match the fish with letters, they reinforce letter recognition while developing focus and patience. Plus, the act of fishing is just plain fun, adding an extra layer of excitement to their small-world adventure!

Materials Needed:

  • Magnetic fish

  • Fishing pole

  • Blue bucket

  • Alphabet letter cards

IMG_6937_jpg.JPEG
IMG_6967_jpg.JPEG
IMG_6948.JPEG
IMG_6940_jpg (1).JPEG

Bin 3: Marshmallows & Campfire Charades

No campfire is complete without marshmallows! In our final bin, kids can use two or three marshmallows for pretend roasting, bringing the camping experience to life. For an extra element of fun, try adding Campfire Charades. Use cards with simple camping-related actions like “roasting marshmallows” or “setting up a tent,” and watch your little ones act them out around their pretend fire.

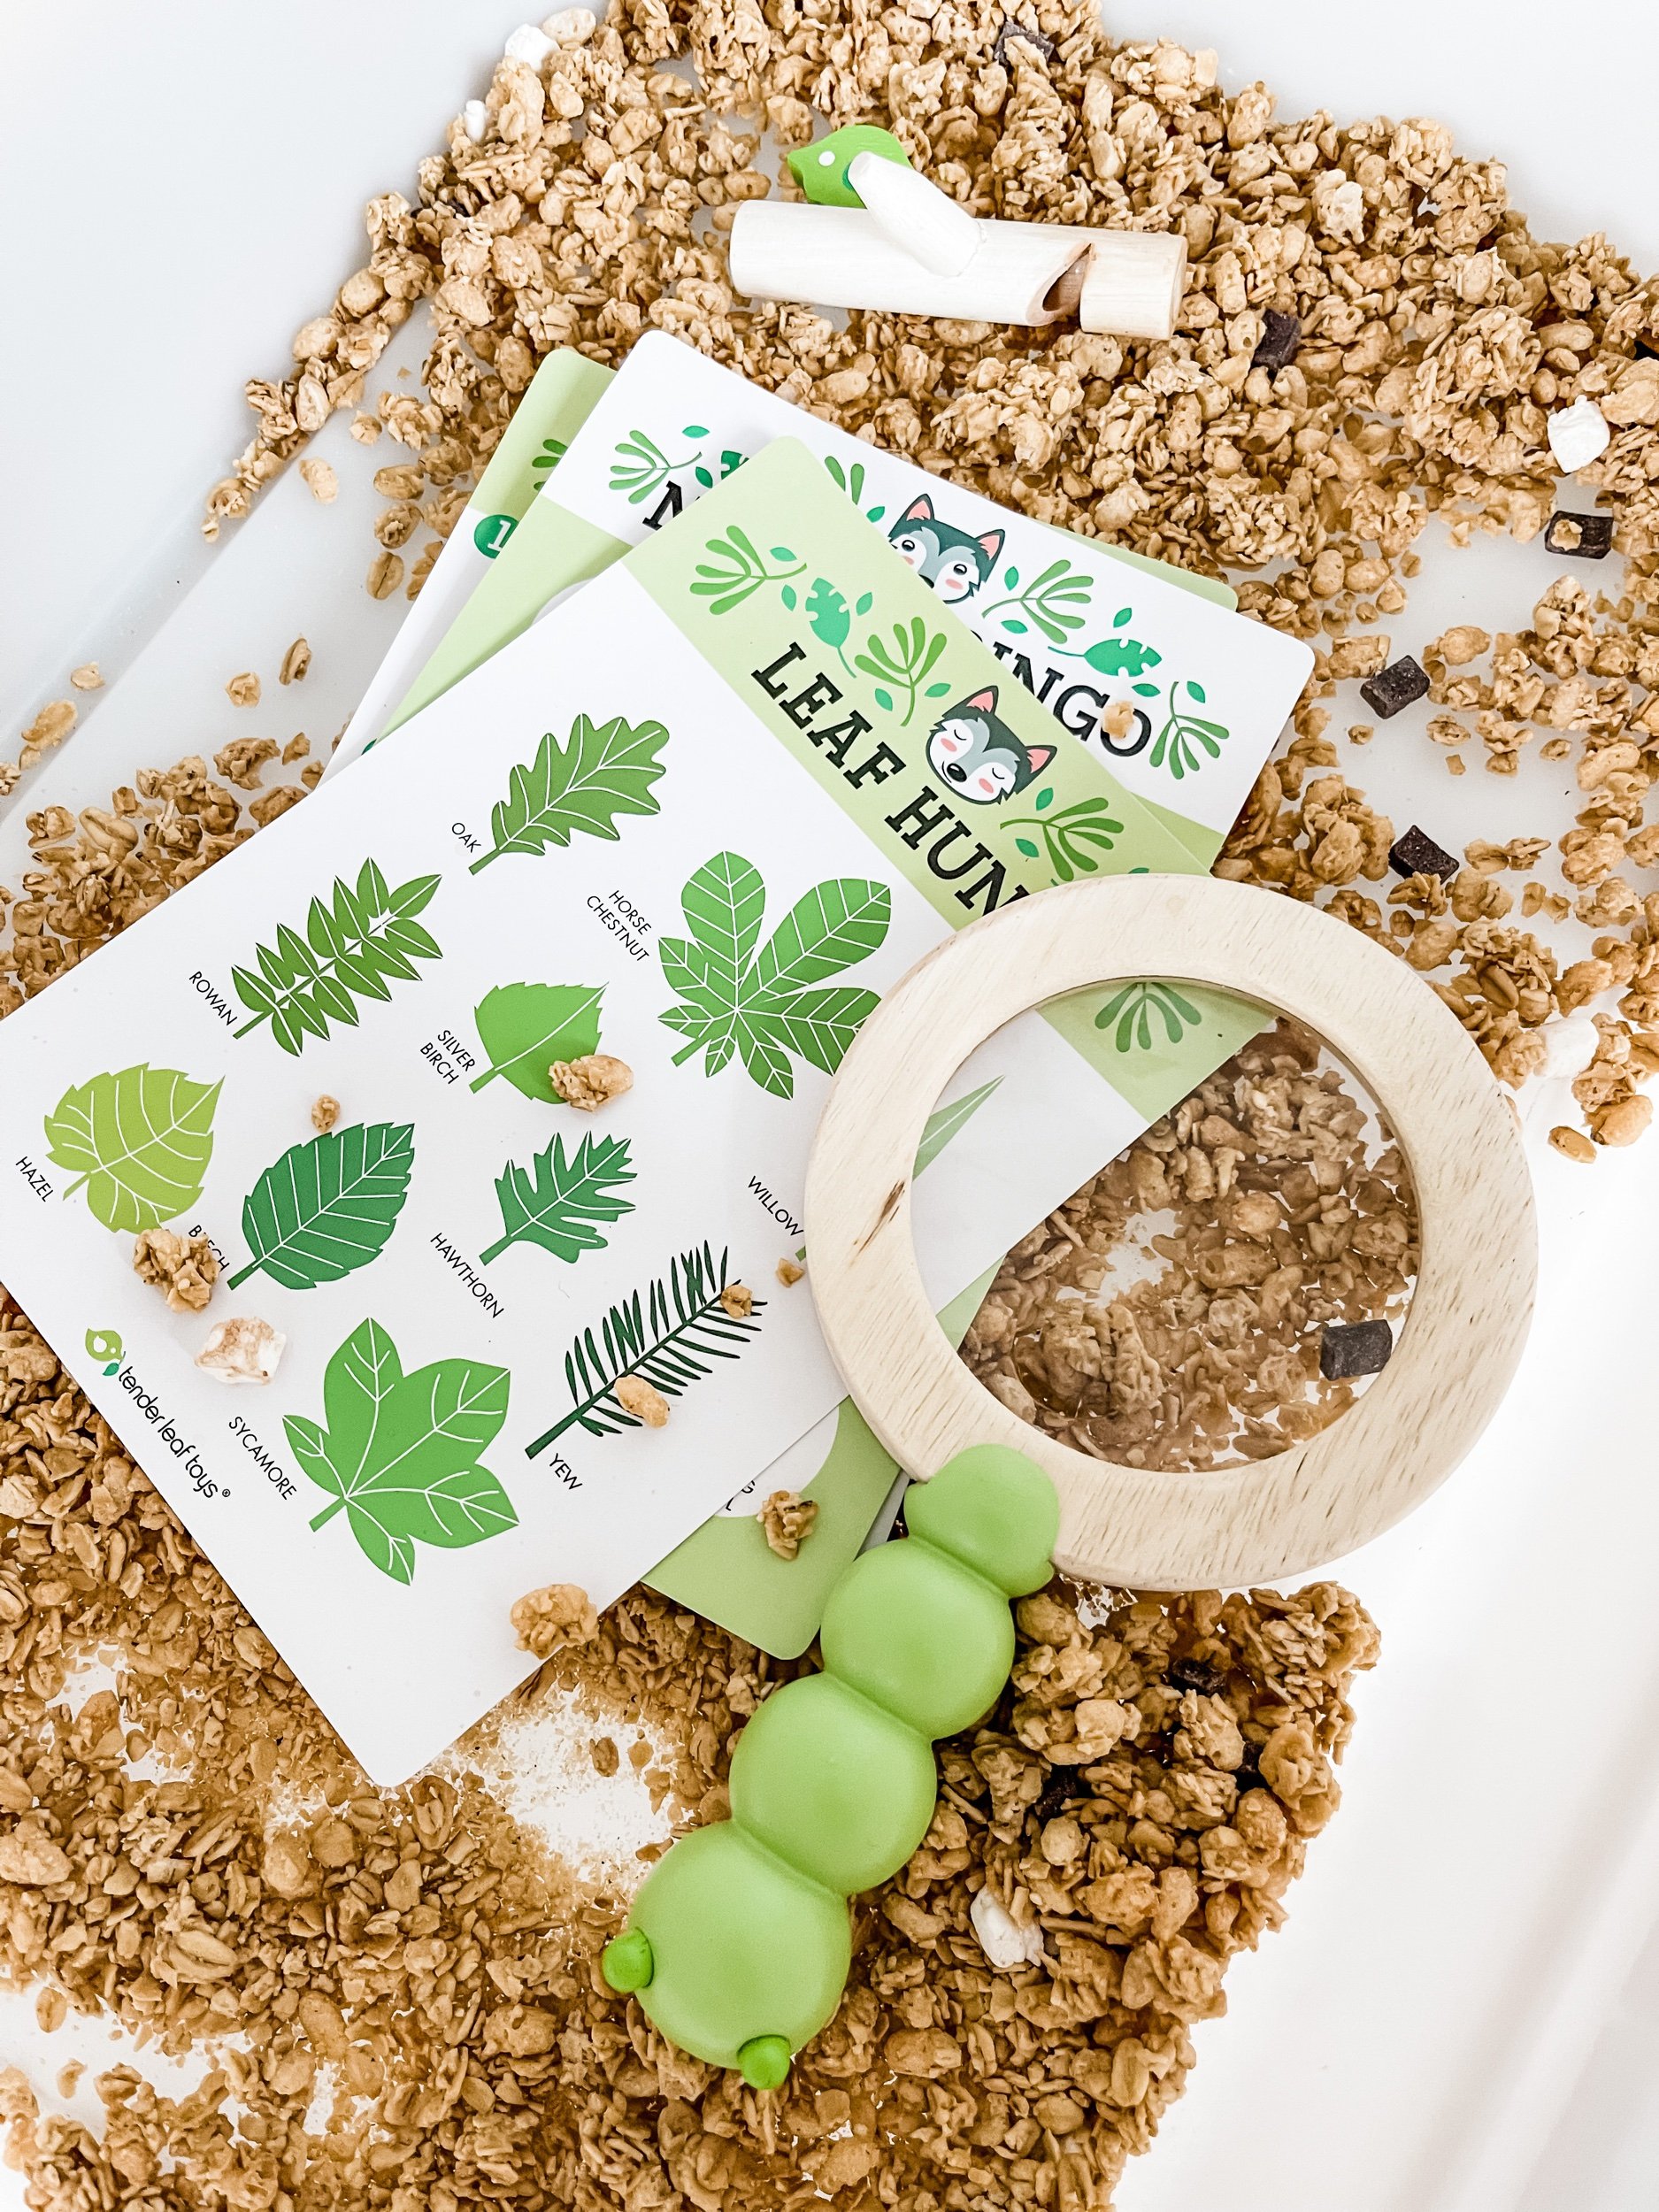
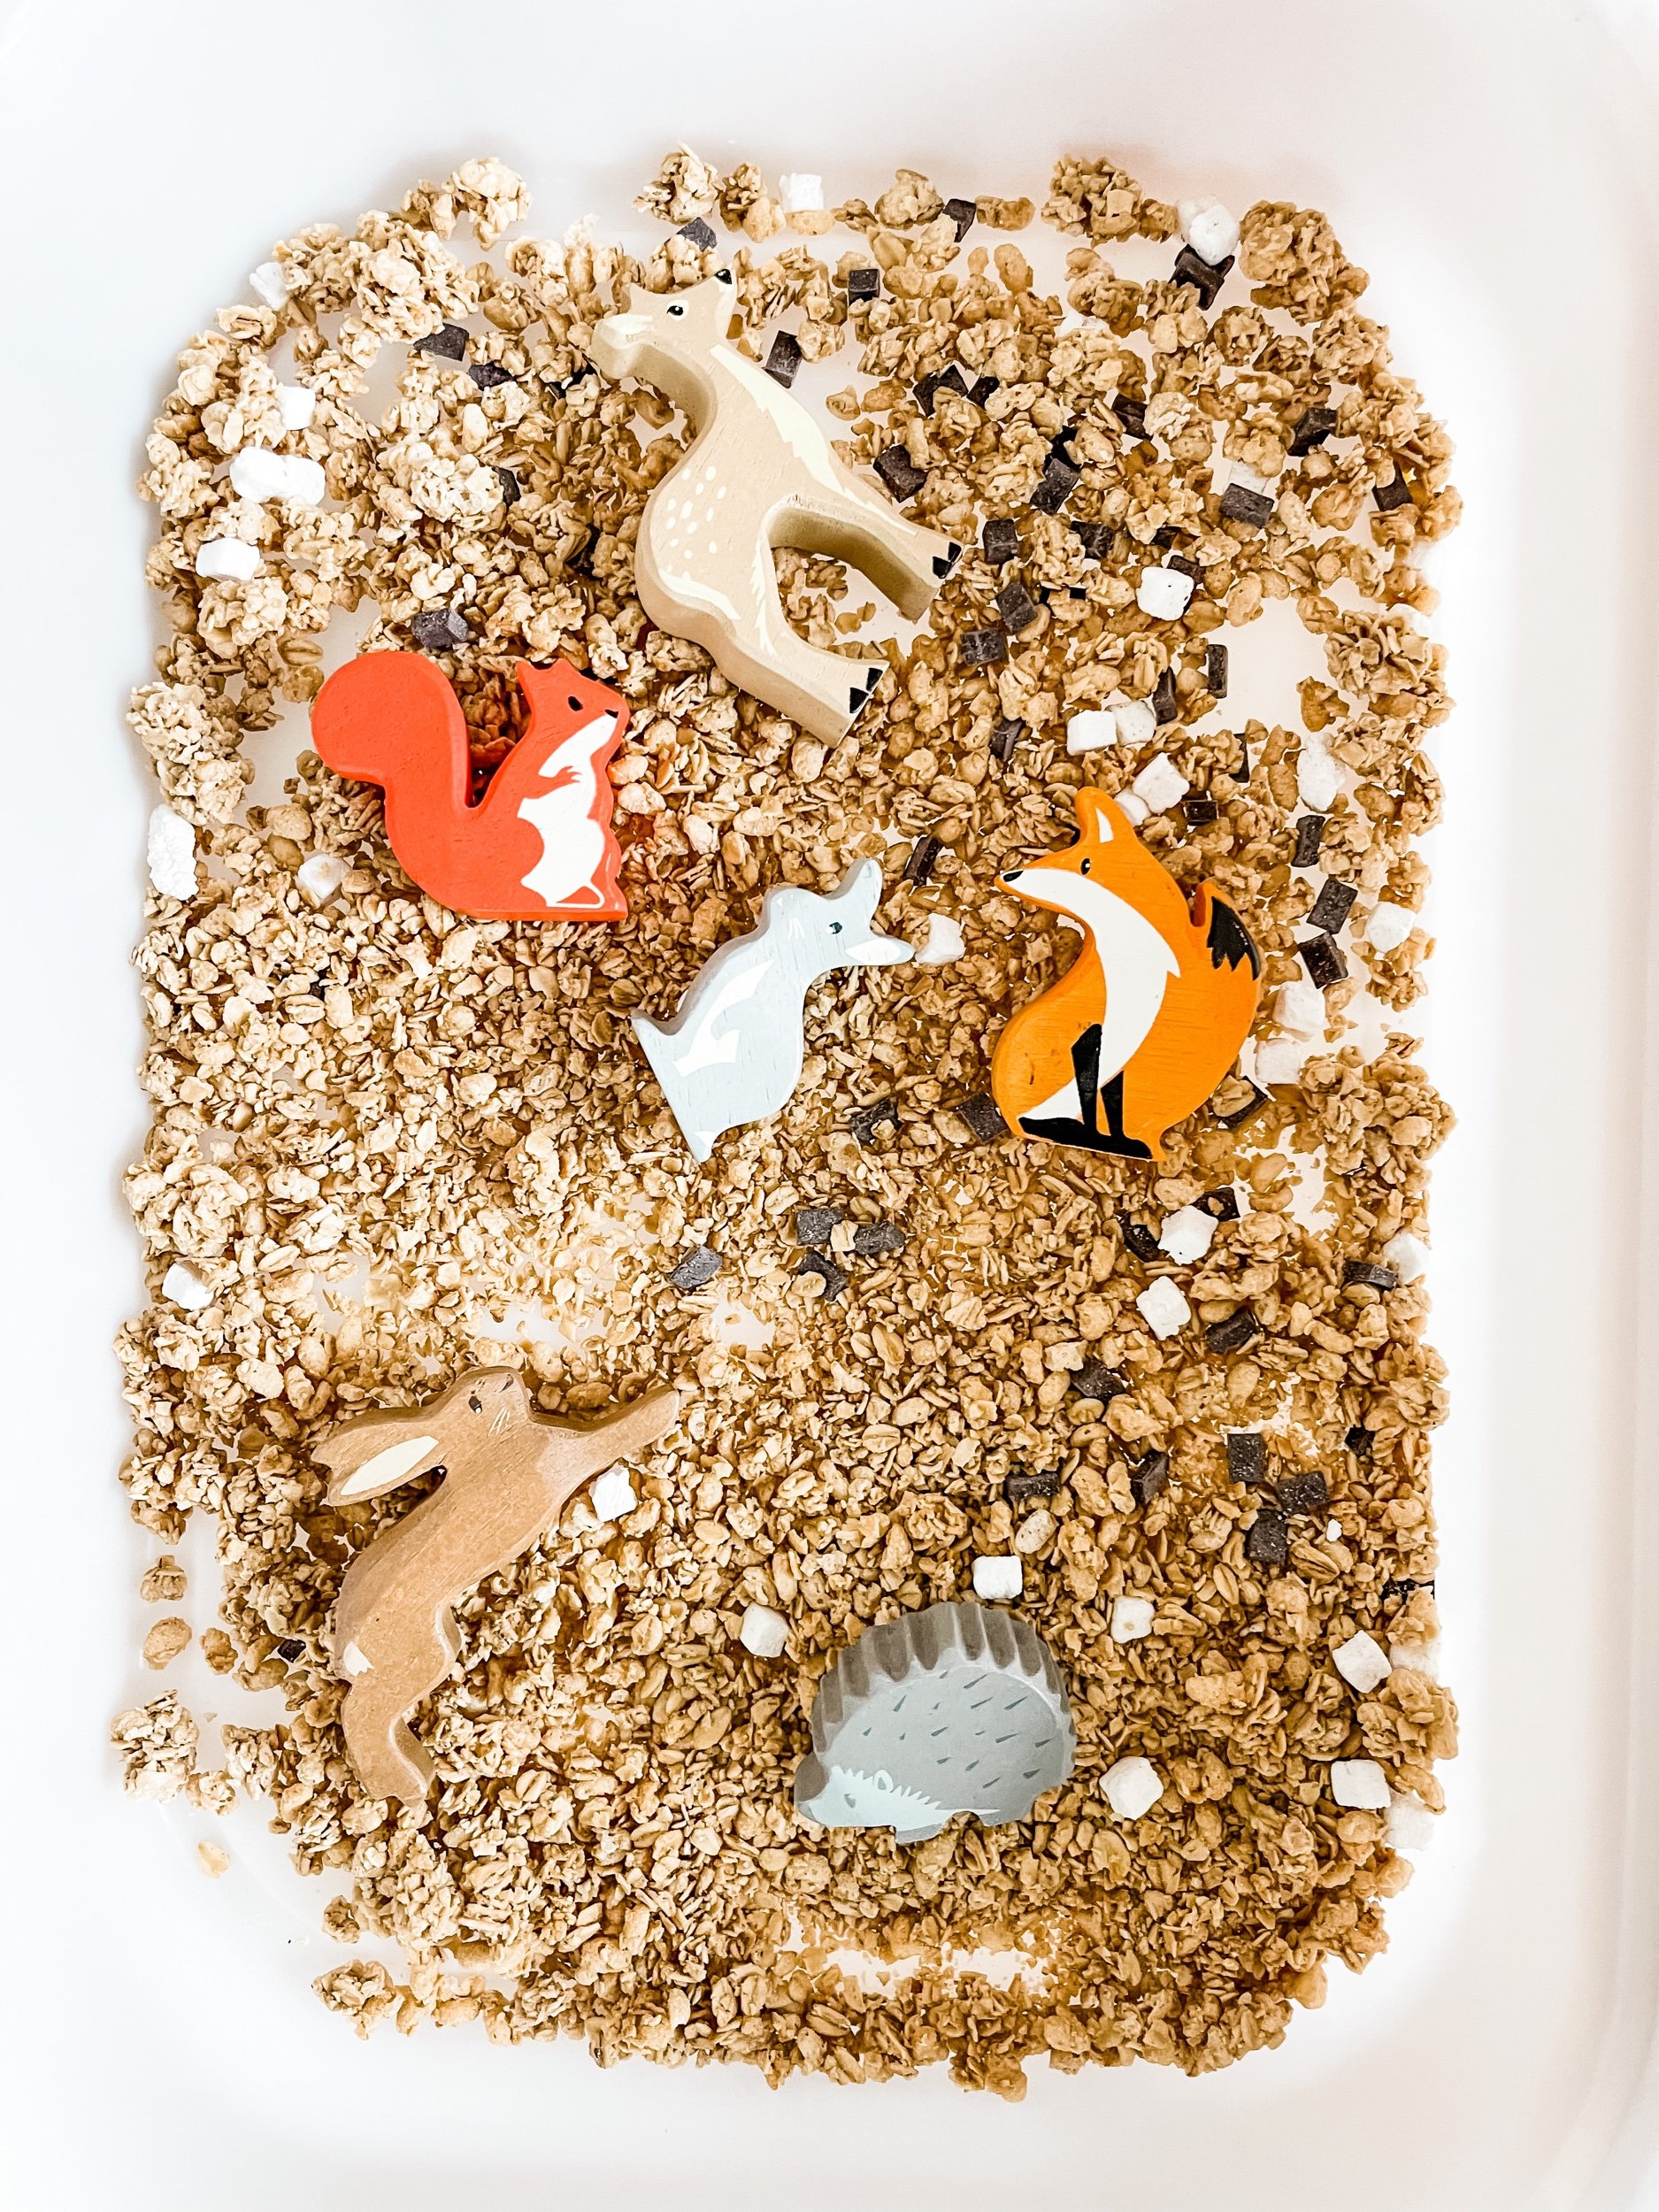
The bin is filled with a fall-themed sensory filler by @wherekidsplay, adding vibrant seasonal colors and textures for kids to explore as they play. Sensory fillers like these help develop tactile discrimination, offering another layer of engagement as kids sort through the materials.

Materials Needed:

  • Marshmallows (real or pretend)

  • Campfire charades cards

  • Fall-themed sensory filler (e.g., leaves, acorns, or colored rice)

Why Sensory Play?

Sensory play is a cornerstone of early childhood development. Through hands-on exploration, kids engage multiple senses, which supports cognitive growth, language development, and social skills. Each of these bins taps into different aspects of sensory learning:

  • Bin 1 encourages tactile exploration and fine motor practice with Play-Doh and natural materials.

  • Bin 2 fosters hand-eye coordination and early literacy skills with fishing and letter matching.

  • Bin 3 builds imaginative thinking and gross motor skills with charades and marshmallow play

So grab your camp gear and set the scene for a day of outdoor adventure—right from the comfort of your home! This Campfire Dramatic Play Setup is sure to light up your child’s imagination while providing endless educational benefits.

Let the camping fun begin!


Camping Vocabulary Words

These vocabulary words will help children learn and explore the camping theme through play, allowing them to expand their language skills while having fun.
1. Tent
2. Sleeping bag
3. Campfire
4. Marshmallow
5. Flashlight
6. Backpack
7. Compass
8. Map
9. Binoculars
10. Hiking boots
11. Campsite
12. Nature
13. Wildlife
14. Picnic
15. Fishing
16. Trail
17. Lantern
18. Camp stove
19. S'mores
20. Forest
21. Adventure
22. Campground
23. Stars
24. Adventure
25. Campfire songs

IMG_8944.jpeg
IMG_8893.jpeg
IMG_8881.jpeg
IMG_8898.jpeg
IMG_8942.jpeg
IMG_8929.jpeg
IMG_8888.jpeg
IMG_8920.jpeg
IMG_8940.jpeg
IMG_8941.jpeg
IMG_8943.jpeg
IMG_8945.jpeg
Tags camping crafts for kids, camping activites, summer camping, woodland animals, camping play, forest animals, camping activities, camping for kids, camping dramatic play, fishing dramatic play, alphabet fishing, letters fishing

How to Throw a Ghouls Boo Party: Simple DIY Halloween Fun

October 21, 2024 Kylie Tuosto

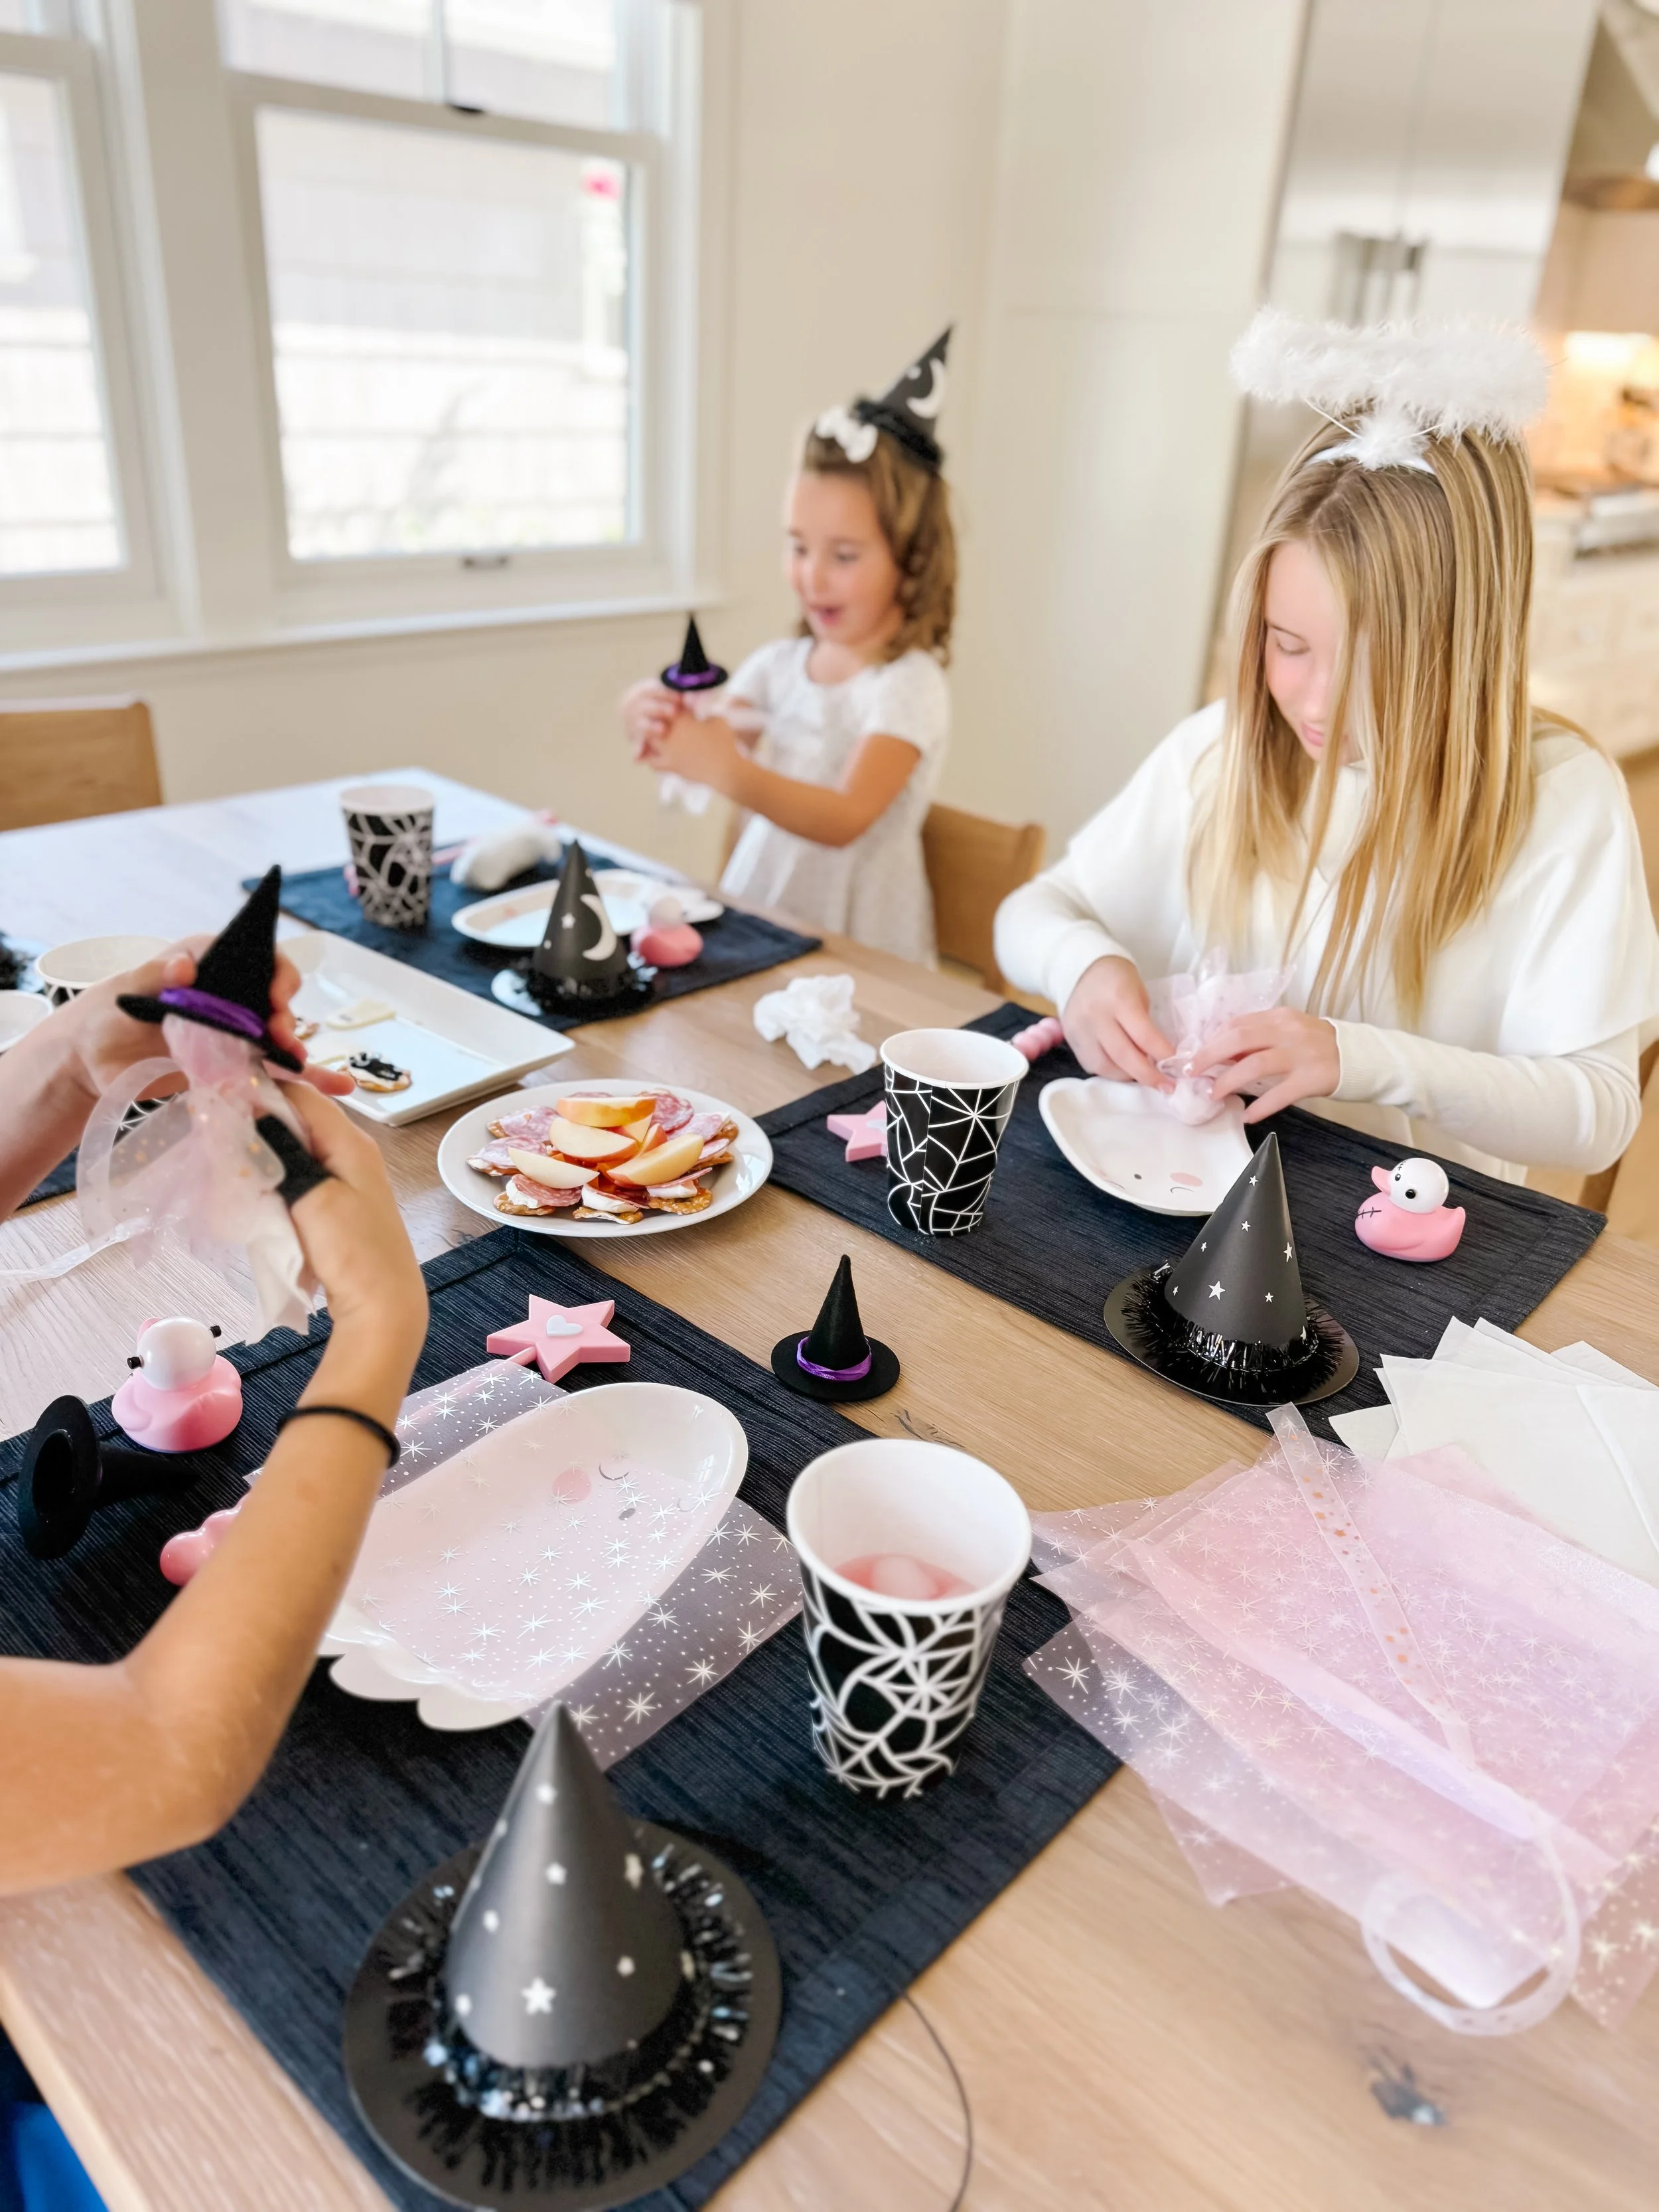
This year, I hosted a fun-filled Ghouls Boo Party for three little girls, and it turned out to be the perfect blend of spooky and sweet. From whimsical decor to engaging Halloween crafts, the party was full of laughter, creativity, and festive treats. If you’re looking for inspiration to plan your own simple DIY Halloween party, this post is packed with decor ideas, craft activities, and party favor tips. Keep reading to see how we created a memorable, kid-friendly celebration!

IMG_8751_jpg.jpg
IMG_8747_jpg.jpg
IMG_8753_jpg.jpg

Spook-tacular Decor to Set the Scene

To create the perfect Halloween atmosphere, we blended classic spooky touches with playful elements.

  • Balloon Garland: A cascading garland of pastel and black balloons greeted the guests, adding height and color to the space.

  • Bats on the Wall: Flying black bat silhouettes gave our walls an eerie charm, instantly making the room feel Halloween-ready.

  • Ghost Garland: From @mymindseye, the playful ghost garland gave our decor a whimsical touch. The happy ghosts added light-heartedness to the spooky theme.

  • Witch Flag: A witch flag by GoodnightFox hung proudly, complementing the witchy crafts we had planned.

  • Ghost Plates: The cutest ghost-shaped plates from @mymindseyeindseye.com/ made snack time feel extra festive.

The result was a party space that felt cozy, kid-friendly, and festive without being too scary—perfect for a young crowd!

Boo-tiful Party Favors

Every child left with a delightful pink Halloween rubber duckie and a pink light-up wand from the Target dollar spot, which doubled as fun props for the games. We also gifted each guest a witch hat from @mymindseye, perfect for pretending to cast spells during the party.

Fun-Filled Activities and Crafts

Crafts are the heart of any great children’s party, and this one was no exception. Here’s what we did:

IMG_8750_jpg.jpg
IMG_8676.jpg
IMG_8679_jpg.jpg

1. Light-Up Crystal Balls

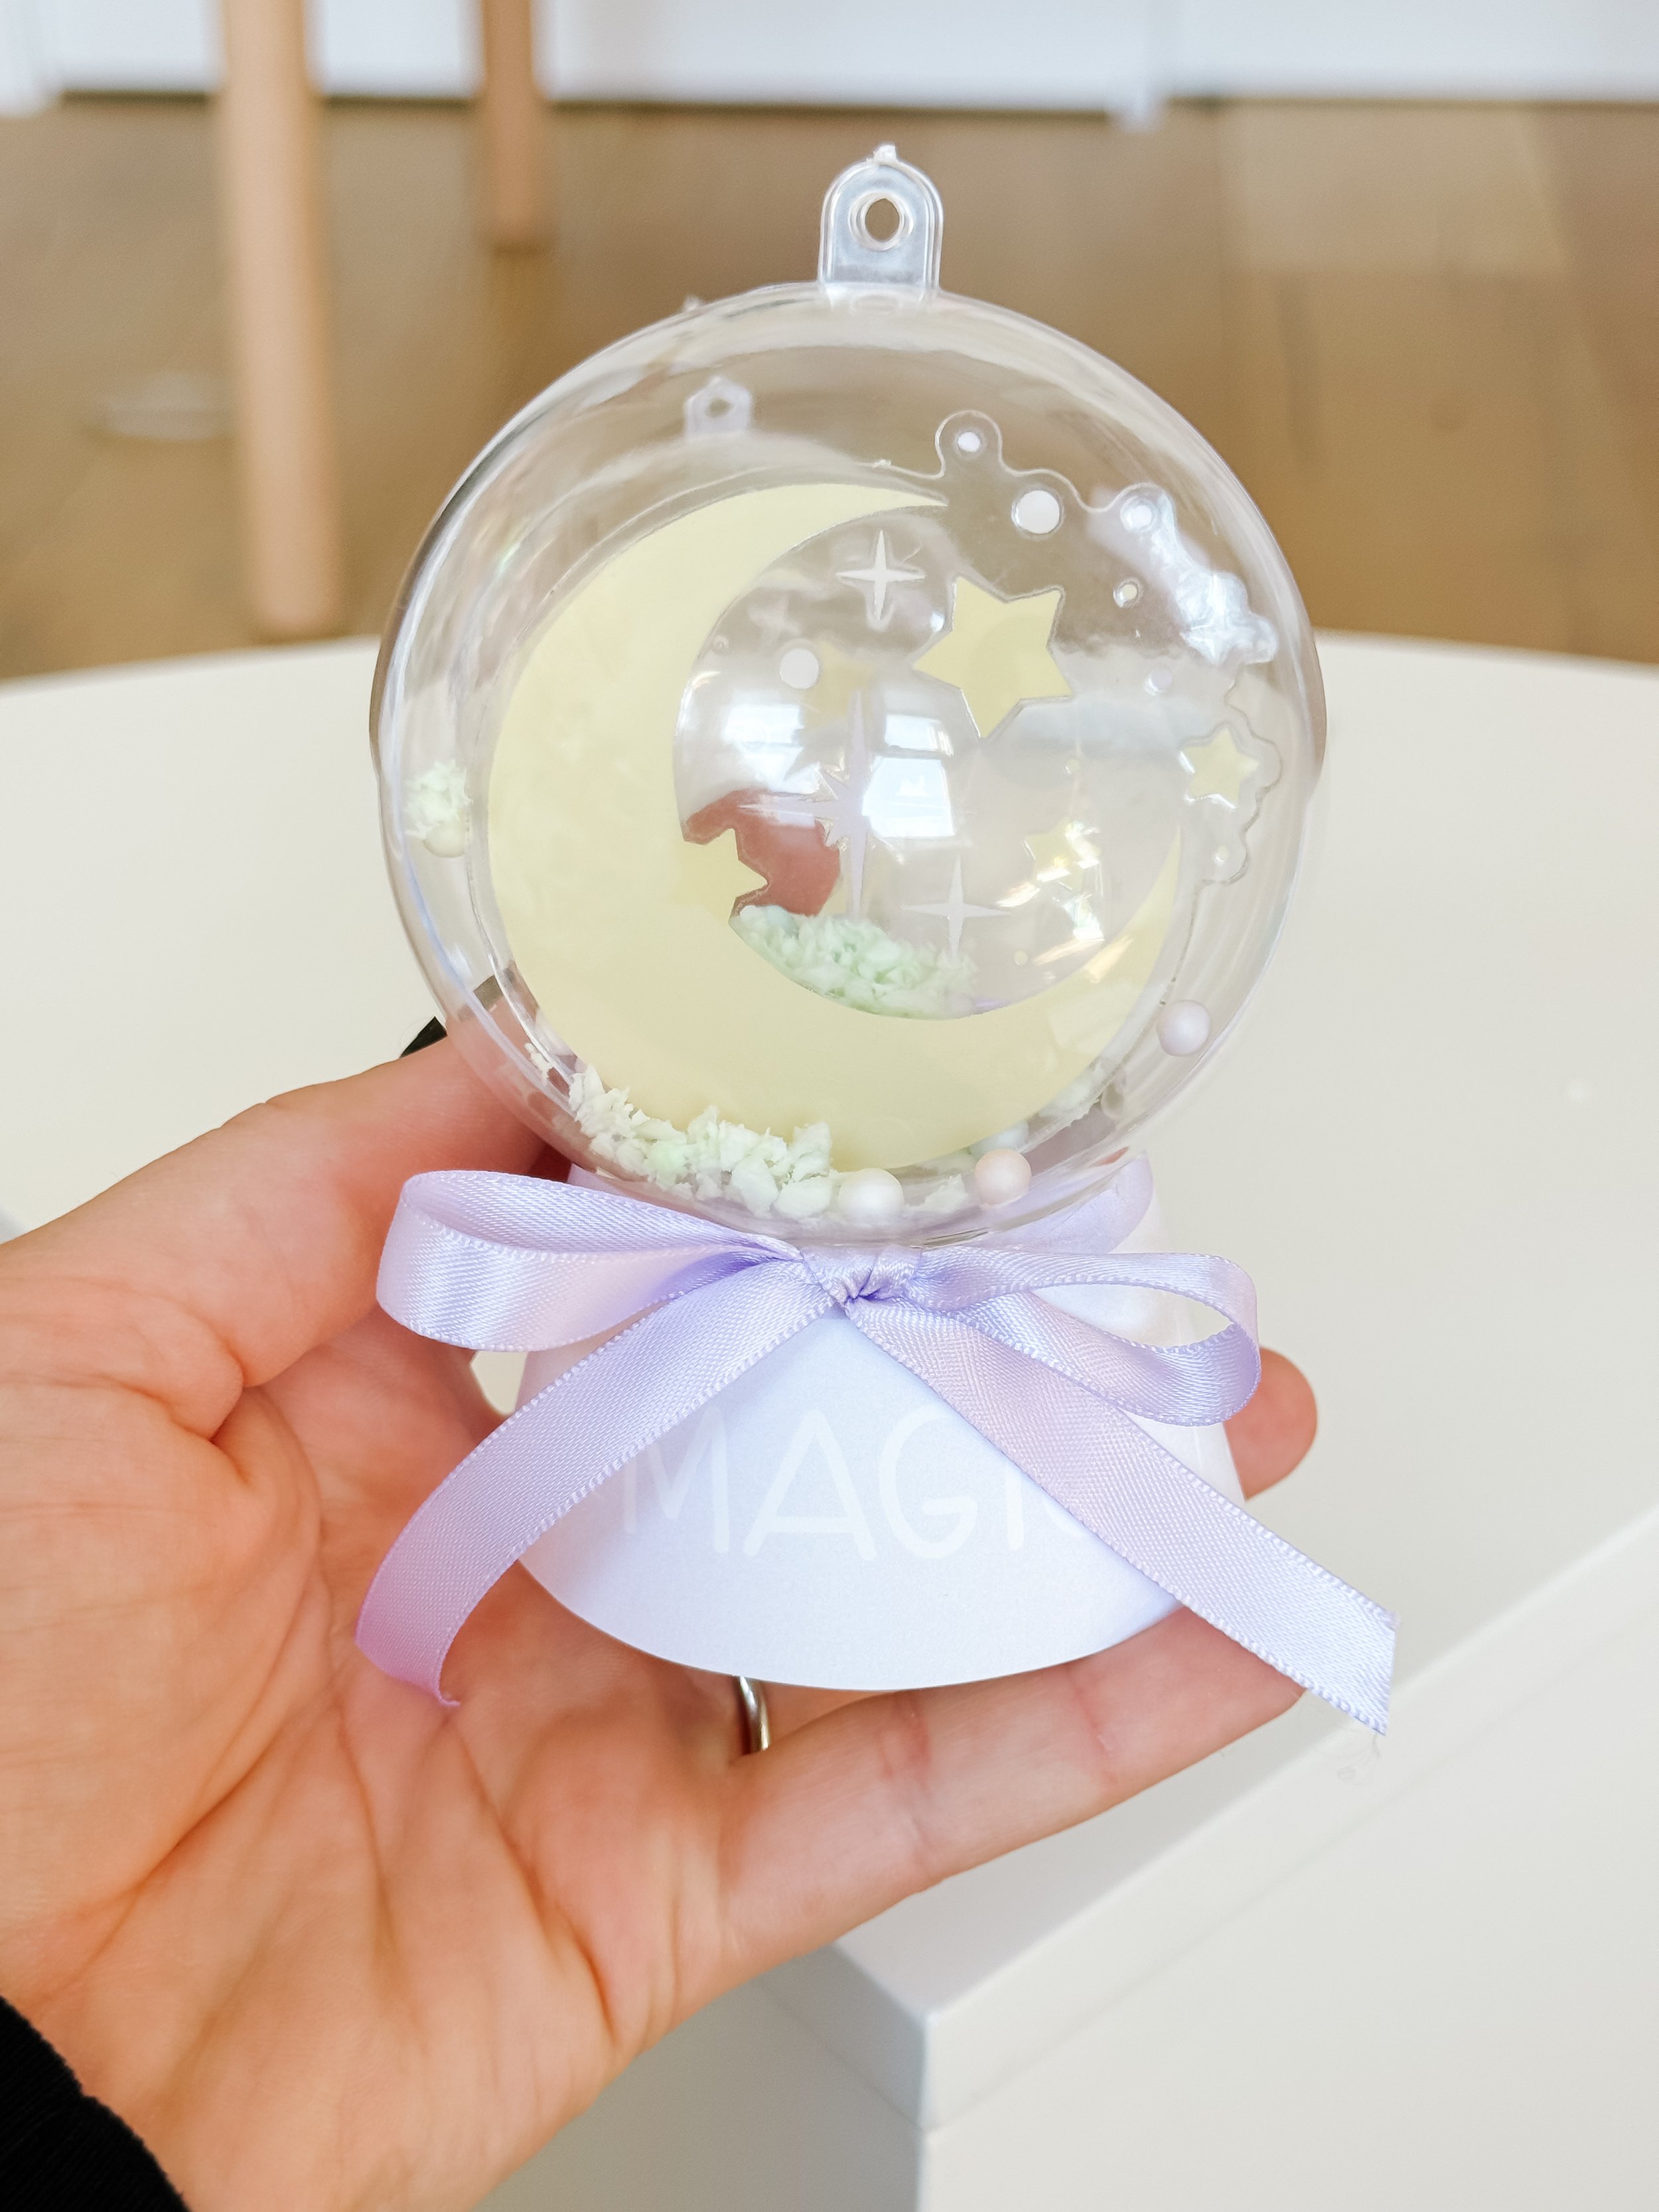
We kicked off the fun with a magical craft: light-up crystal balls. The girls assembled clear plastic baubles, filling them with glow-in-the-dark pluffle, glitter, and small LED lights. This easy DIY activity was not only a hit but also made for enchanting take-home souvenirs. You can find detailed instructions on how to make these crystal balls here.

2. Witch’s Potions

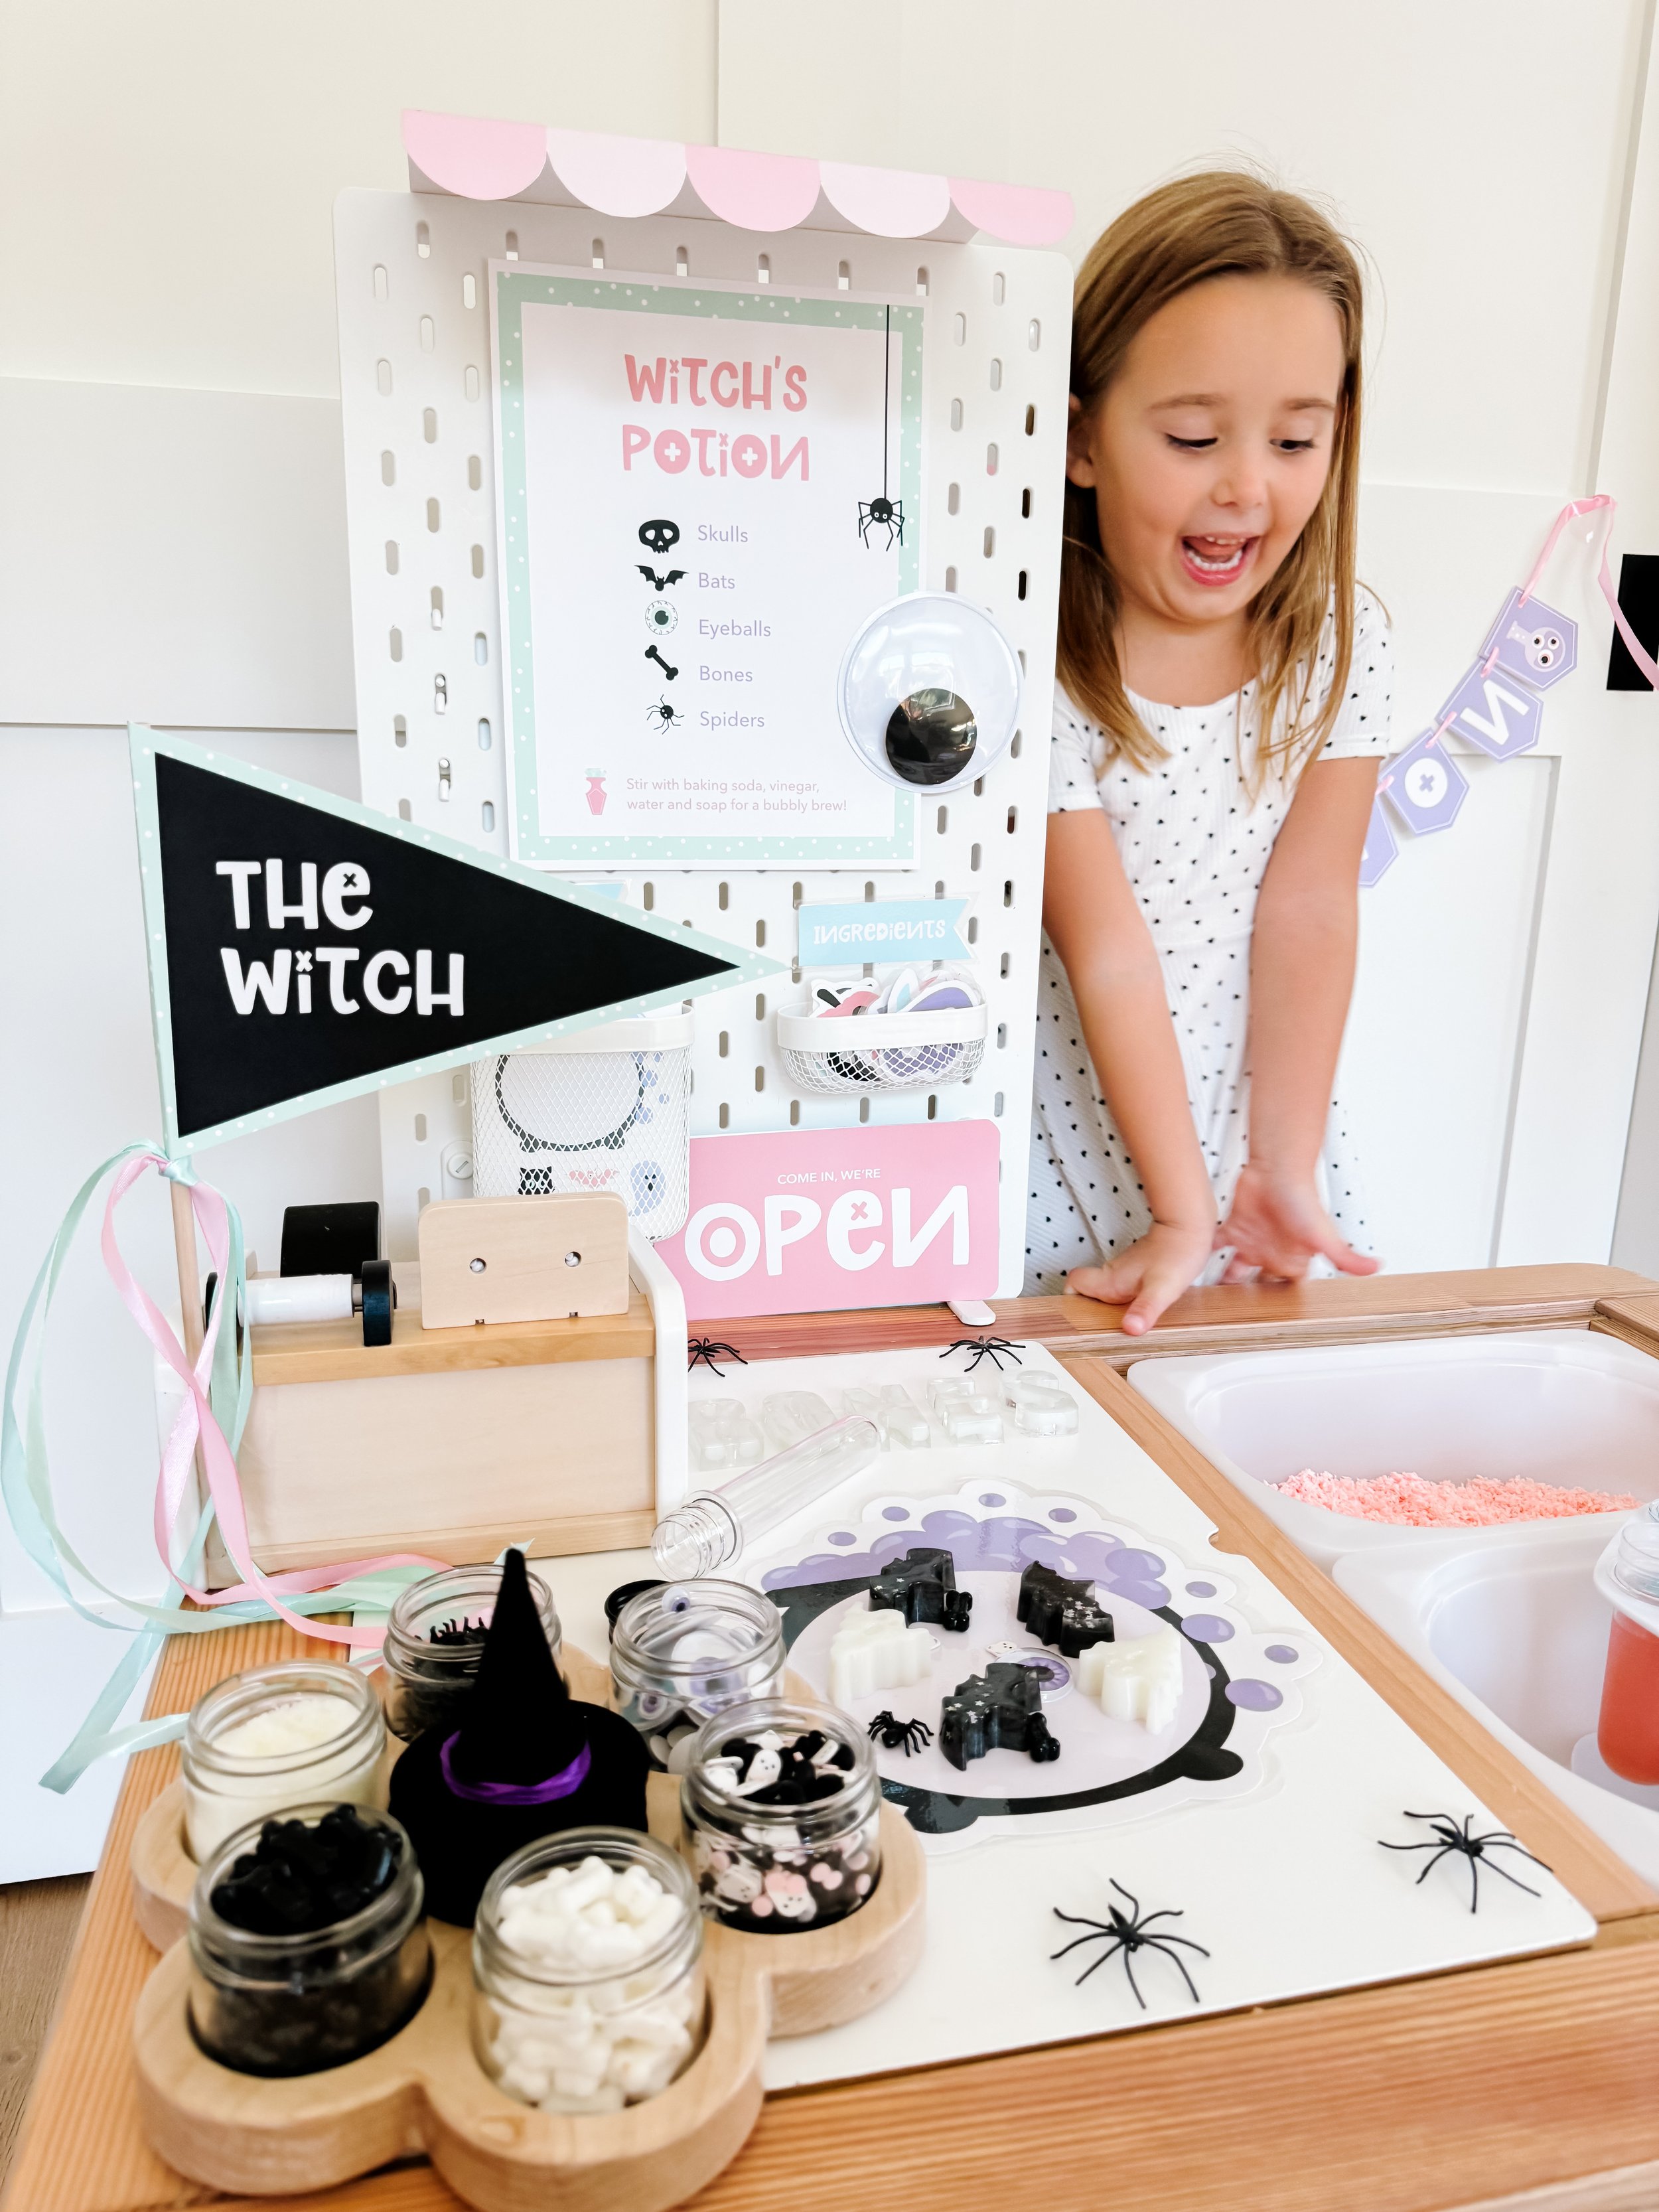
Next, we had the kids mix their own witch’s potions. Using small jars, glitter, food coloring, and toy spiders, each child created a bubbling potion masterpiece. This hands-on activity was perfect for imaginative play, and the kids loved pretending to be little witches brewing magic! Check out the step-by-step tutorial here.

IMG_8633.jpg
IMG_8658.jpg
IMG_8662.jpg
IMG_8665_jpg.jpg
IMG_8668.jpg
IMG_8669_jpg.jpg
IMG_8672_jpg.jpg
IMG_8681_jpg.jpg
IMG_8688_jpg.jpg
IMG_8691_jpg.jpg
IMG_8695.jpg
IMG_8700.jpg
IMG_8702.jpg

3. Decorating Monster Rice Krispy Treats

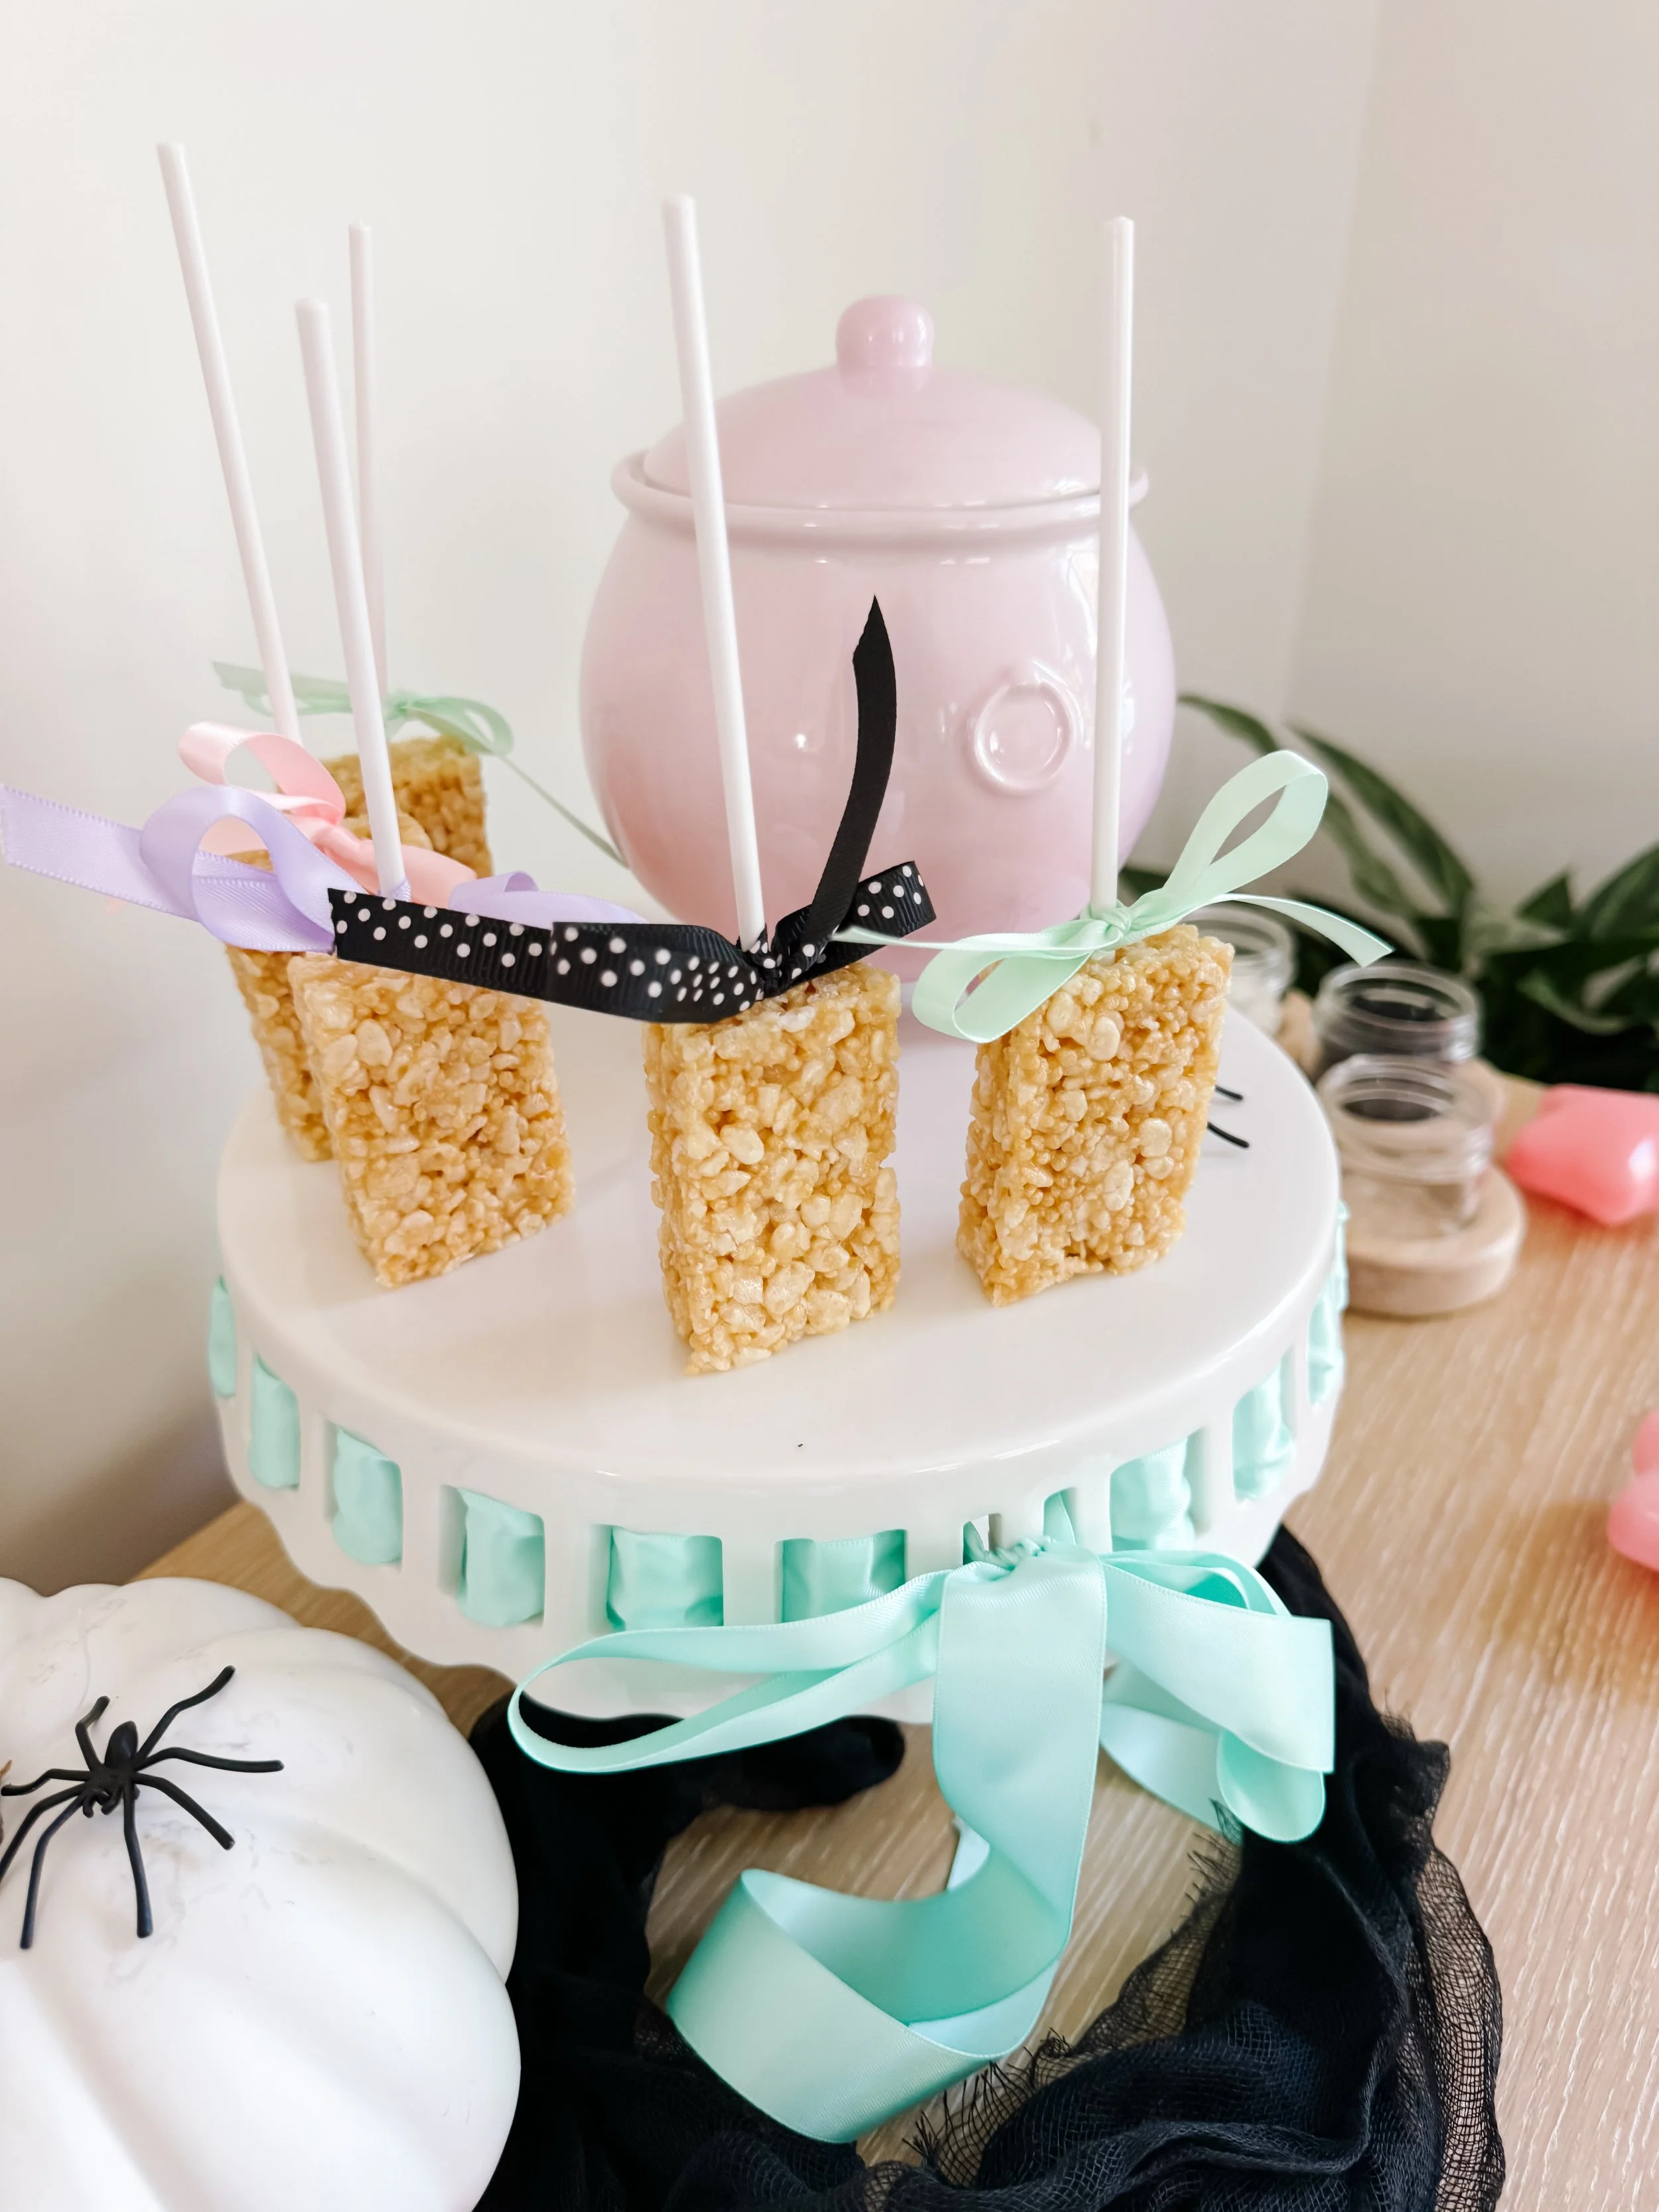
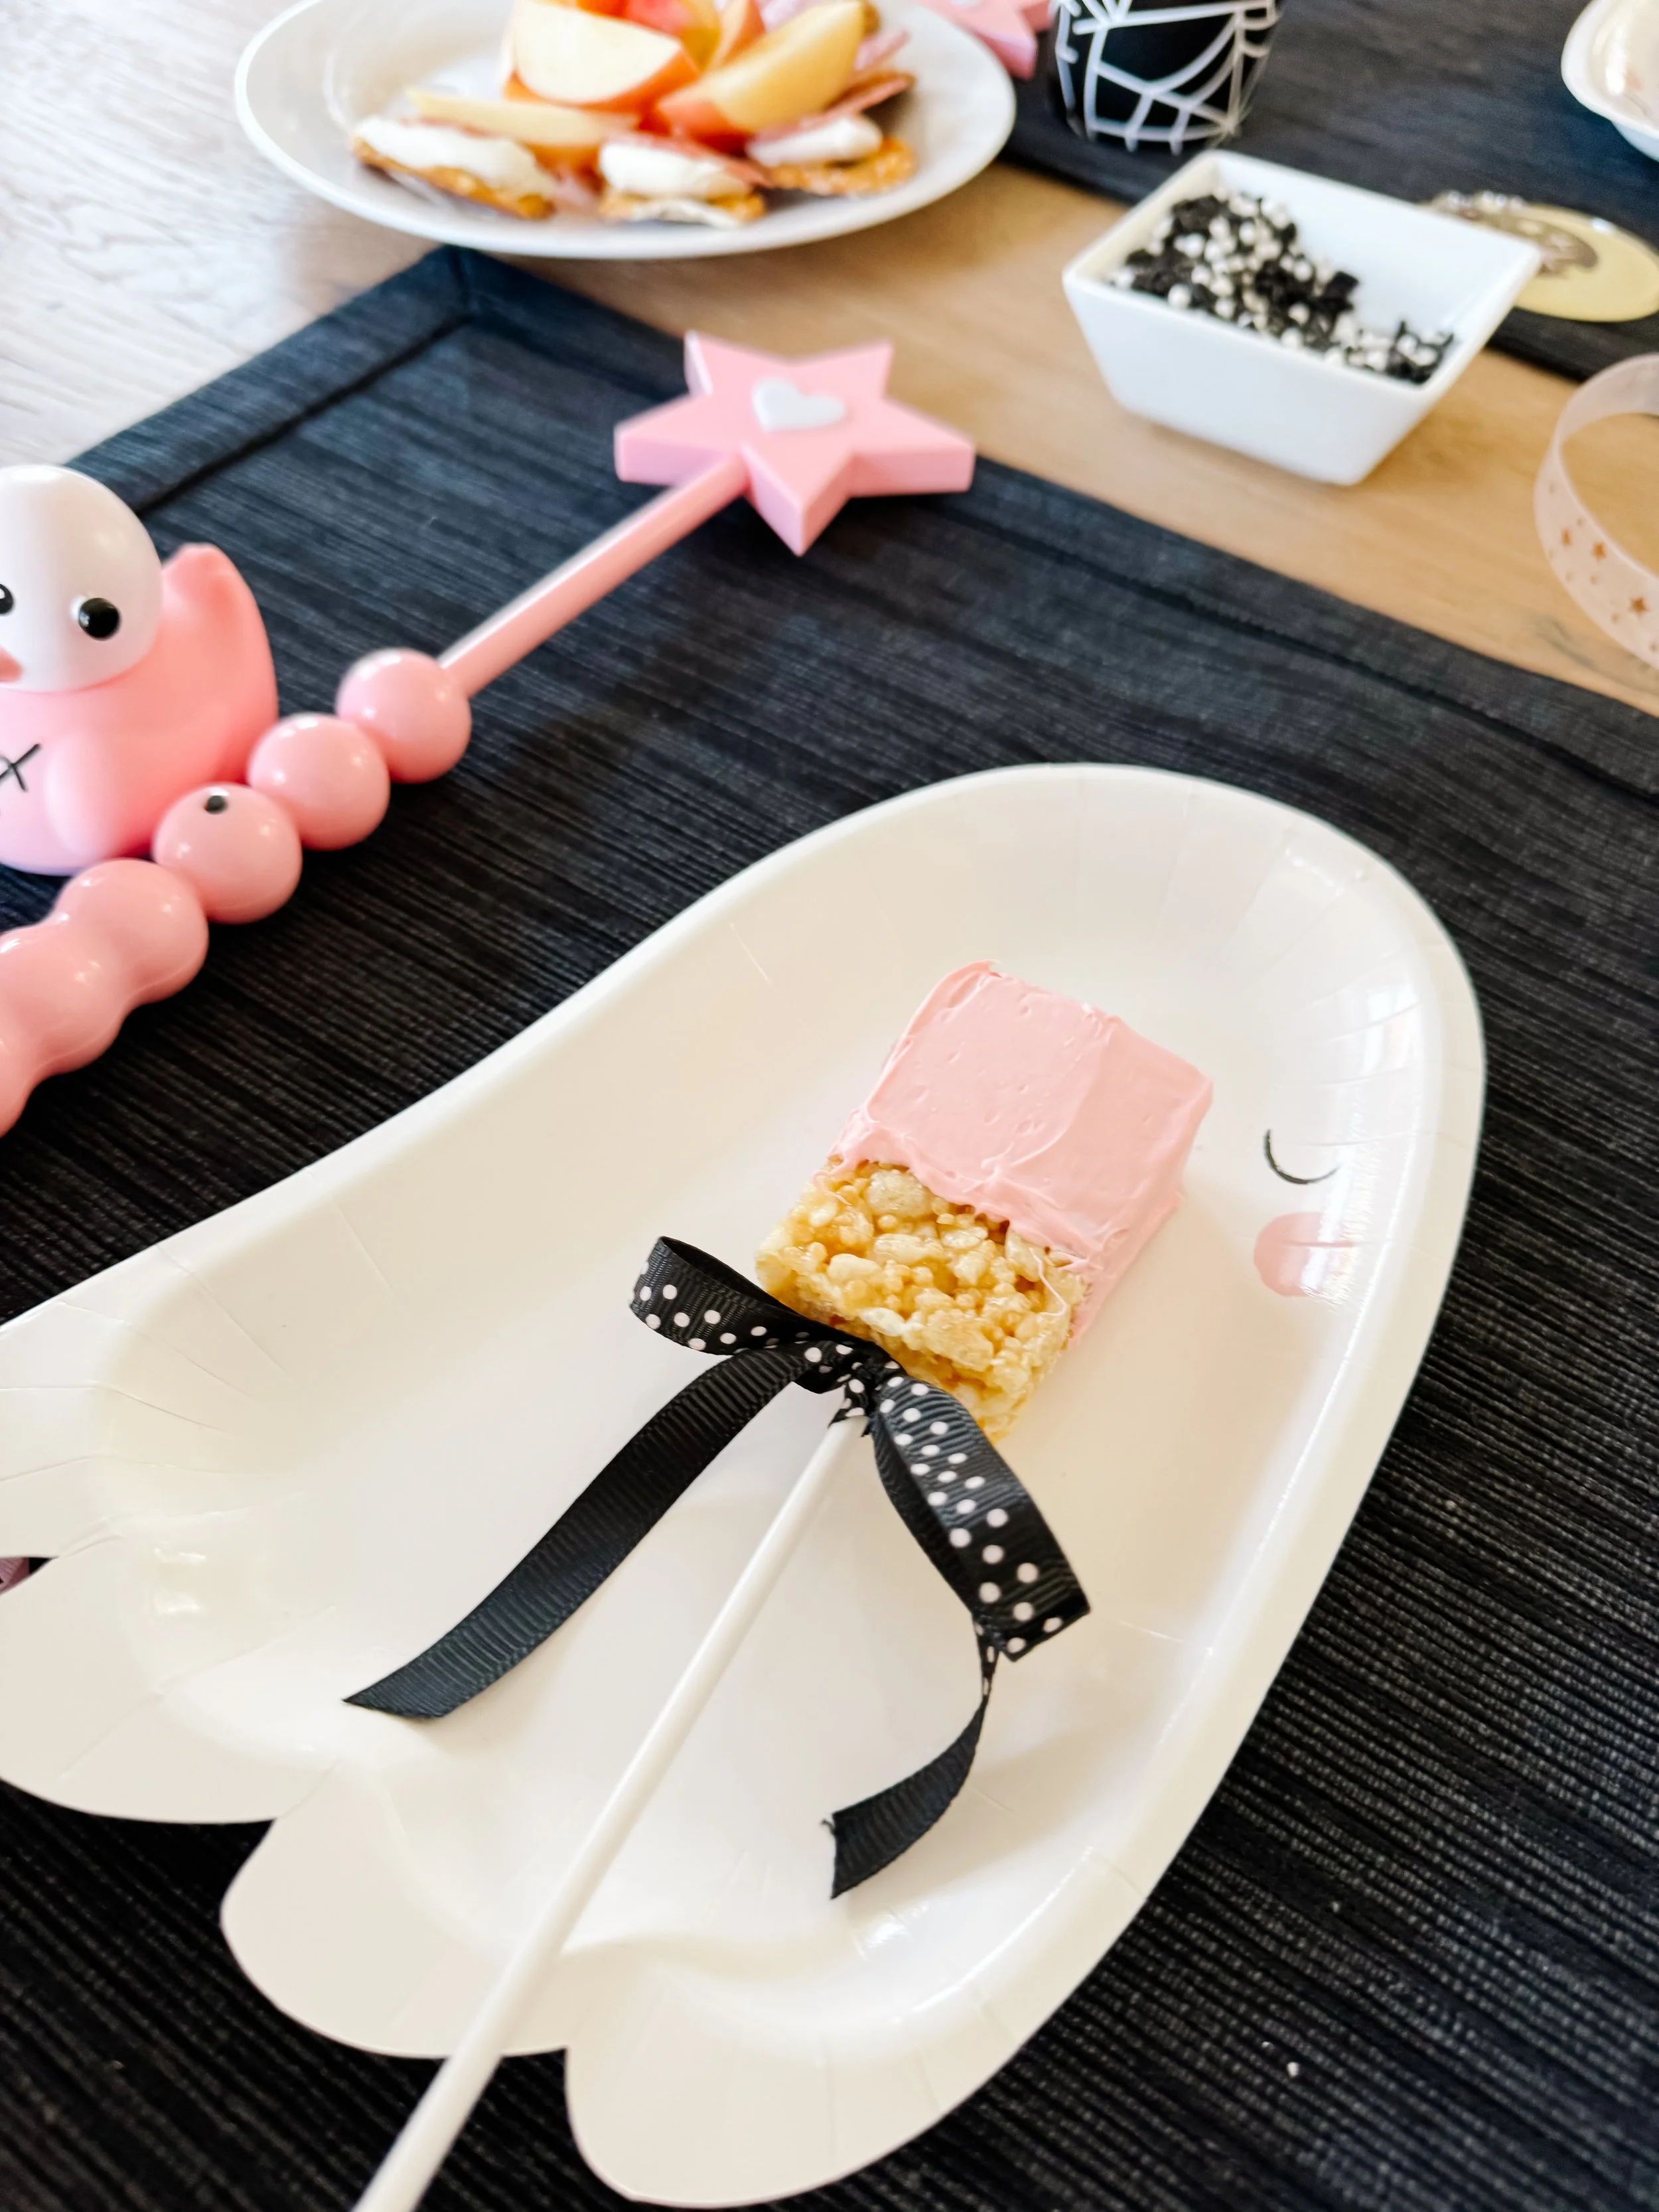
For snack time, we had the girls decorate Rice Krispy treats like monsters. Using frosting, candy eyes, and sprinkles, they crafted goofy, spooky, and silly faces. This activity was messy but so much fun—and a delicious way to break up the crafts.

IMG_8636_jpg.jpg
IMG_8638_jpg.jpg
IMG_8645_jpg.jpg
IMG_8649_jpg.jpg

4. Making Lollipop Witches

We wrapped up the activities with a simple but charming craft: lollipop witches. With tissue paper, markers, and ribbon, the kids transformed ordinary lollipops into adorable little witches to take home. It was the perfect way to end the party on a sweet note. If you’d like to try this at your next party, the full instructions are available here.

IMG_8750_jpg.jpg
IMG_8741.jpg
IMG_8745_jpg.jpg
IMG_8749_jpg.jpg

Simple Snacks for Little Ghouls

We kept snacks light and festive with a mix of easy, kid-friendly options. Alongside the decorated Rice Krispy treats, we served popcorn with candy corn, fruit skewers, and juice boxes decorated with Halloween stickers. It was just enough to keep everyone happy without taking too much time away from the fun crafts and games.

Why a Ghouls Boo Party is the Perfect DIY Halloween Idea

Planning a simple DIY Halloween party doesn’t have to be complicated. With a little creativity and some thoughtful activities, you can create a magical experience your little ones will love. Here are a few reasons why this type of party works so well:

  • Budget-Friendly: Using affordable decor from places like the Target dollar spot keeps costs down.

  • Creative Engagement: Hands-on activities like the witches’ potions and lollipop witches keep kids entertained and off screens.

  • Memorable Moments: Party favors like the light-up wands and personalized crafts make the event unforgettable.

Ready to Plan Your Own Boo-tiful Bash?

With just a few decorations, some simple snacks, and creative activities, you can host a party that kids will love and parents will appreciate. I hope this post has given you all the inspiration you need to throw your own simple DIY Halloween party. Don’t forget to explore the linked posts for detailed instructions on each craft we did—you’ll be amazed at how easy and fun these activities are to recreate.

Happy haunting, and have a spook-tacular Halloween!

This post is optimized for anyone looking to throw a simple DIY Halloween party. Feel free to share your own party ideas in the comments—I’d love to hear what spooky fun you have planned!

Tags boo party, ghouls party, ghoul gang, boo-tiful party favors, witches halloween party, kids halloween craft party, diy halloween crafts
2 Comments

Unlocking the Magic of Early Reading: Our Journey to Literacy & How to teach your child to read

October 14, 2024 Kylie Tuosto

Every child's journey into literacy is a marvel, a unique path painted with milestones and moments that weave into a story of discovery and growth. In this article, we delve into our experience teaching Sofia how to read and more importantly love reading, at the age of two. From letter recognition to mastering digraphs, her progression through three fundamental stages of literacy became a testament to the power of early learning.

Stage 1: Letter Recognition and Letter Sounds

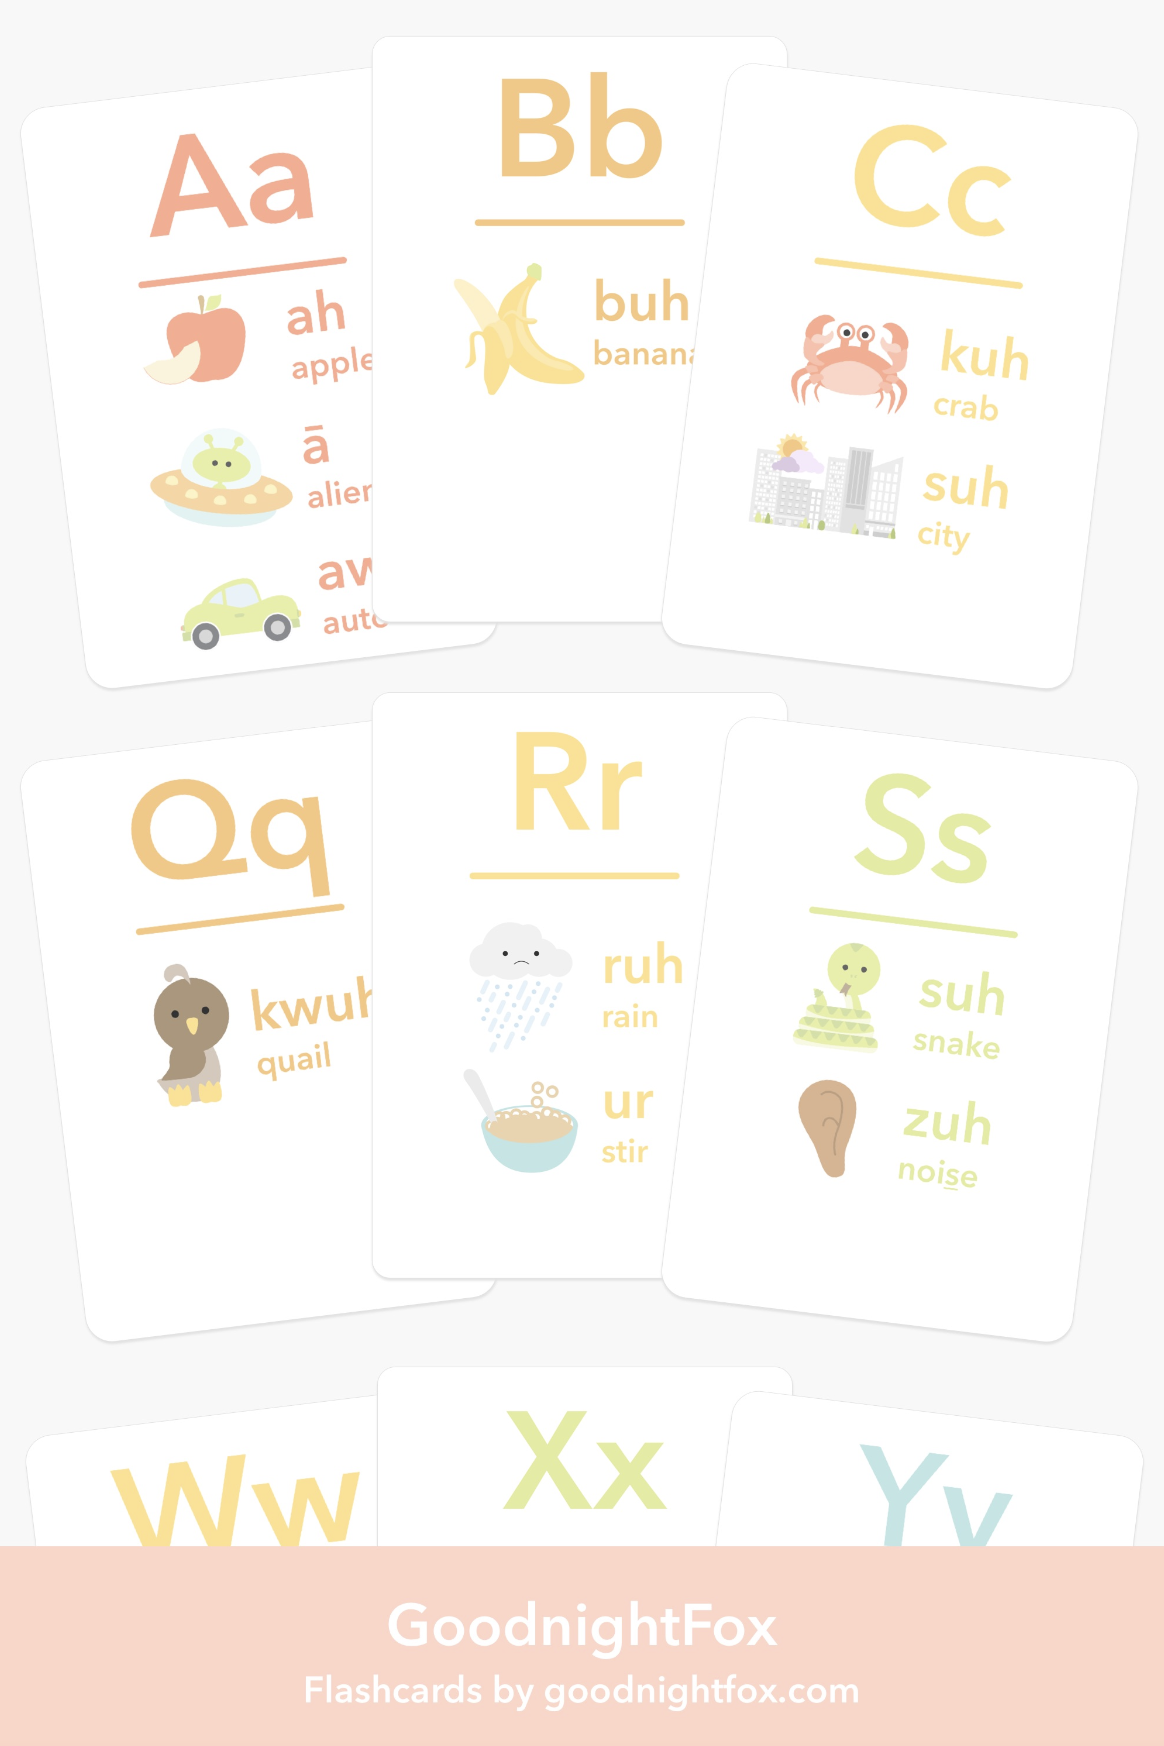
Sofia's initiation into reading commenced with the foundation of letter recognition and their corresponding sounds. The utilization of interactive tools like 'My Letter Sounds Flashcards' became our guiding star in this stage. Through engaging exercises and playful interactions, Sofia swiftly embraced the alphabet and its phonetic sounds, laying the groundwork for her literacy journey.

  • Letter Sounds Flashcards for sound practice

  • Upper & Lowercase Letters Flashcards for letter recognition practice

Studies by the National Reading Panel indicate that early exposure to letter recognition and phonics significantly contributes to a child's reading proficiency later in life. (Source: National Institute of Child Health and Human Development). It’s important to always show Upper & Lowercase letters together when practicing recognition and sounds. Even young toddlers are capable of retain both letter forms from an early age and this will reduce confusion later on.


Stage 2: Blending Letter Sounds

The journey into reading progressed as Sofia mastered the art of blending letter sounds. Our family rituals, especially during our car rides and cozy evenings by the fireplace, became moments of shared learning. The verbal practice with letter flashcards and the magnetic letter board transformed into joyful sessions where Sofia's eagerness to learn flourished. On car rides to and from preschool, I would say “M” “O” “M” and Sofia would say “Mom!”. Or she would say “C” “A” “T” and I would say “Cat!” We started with two letter sounds together like “At” and “To” and then moved up to three letters. By making it an engaging and interactive game, we made very quick practice and we even reducing many meltdown moments by tapping into her logic brain.

  • Lego Bricks & Letter Kit for building letters

  • Magnetic Letter Board & Letters for building 1-3 letter words

  • Rhyming Flashcards for practicing reading short words

Early literacy skills not only foster a love for reading but also enhance cognitive abilities, language development, and creativity in young children. (Source: American Academy of Pediatrics). Practicing with rhyming flashcards was HUGE because it built up Sofia’s confidence right away. Once she understand the sound of each letter, reading a page of rhyming words allowed her to go really fast through the words which gave her a huge boost of confidence.

Sofia is a quick learner, but she’s also very quick to be hard on herself if she doesn’t get a new skill or concept right away. So this stage was especially difficult and took likes for time and practice in low pressure situations where we could be playful and have fun with letter sounds. Building up confidence is so key when it comes to reading because it’s a very challenging skill when there are so many words that don’t follow the conventional rules.


Stage 3: Digraph Practice

The final leg of Sofia's reading odyssey led us to digraphs, where 'My Digraph Match Game Cards' played a pivotal role. With patience and encouragement, Sofia conquered this stage, solidifying her understanding of combined letter sounds and paving the way for independent reading. Digraphs are simply two letters that when put together make a unique sound like “CH” or “PH” or “TH”. These can be very tricky for early readers because they can’t instantly sound these out. It’s great to play games with digraphs so that your little reader can familiarize themselves with all of these two letter sound combinations.

  • Digraphs Memory Game for practicing advanced combo sounds

Our family's commitment to consistent practice and nurturing Sofia's curiosity became an integral part of our daily routine, turning learning into cherished moments of bonding and growth.


The Benefits of Early Reading

The advantages of early reading are profound and far-reaching. Beyond the academic realm, Sofia's early literacy journey enriched her imagination, honed her communication skills, and laid a robust foundation for lifelong learning. It's a journey that not only shapes a child's academic prowess but also nurtures their holistic development.

Sofia's journey to reading exemplifies the magic that unfolds when a child is provided with the tools, guidance, and nurturing environment to explore the world of letters and words. Through stages of discovery and shared family moments, her path to literacy was illuminated, proving that the seeds of reading sown early in life bloom into a lifelong love for learning.

Remember, every child's reading journey is unique. Embrace the process, celebrate the milestones, and cherish the moments.


6 fun ways to use your flashcards to get kids moving, thinking, and learning:


1️⃣ Jump to the Letter
Lay the cards on the floor and call out a letter (or its sound)! Kids can jump to the correct card, building letter recognition and phonics skills.

2️⃣ Build Words
Use the individual letter cards to build words directly on the floor. Start with simple 3-letter words, then grow as their skills improve!

3️⃣ Build with LEGOs
Pick a card and build that letter using LEGOs or DUPLO blocks. It’s a great hands-on activity to reinforce letter shapes and strengthen fine motor skills.

4️⃣ Body Letters
Get kids moving by challenging them to form letter shapes with their bodies! A “T” is fun to make by standing tall with arms stretched out, or try an “X” by lying down on the floor.

5️⃣ Write with Your Toes
Lying on the ground, kids can “write” a letter in the air using their feet. It’s silly, fun, and builds gross motor coordination!

6️⃣ Letter Hopscotch
Lay the cards on the floor in the shape of a hopscotch board! Kids can jump on one foot or two feet as they bounce through the “board,” calling out the letters or sounds as they go.

Bonus Activity:
Hide the letter cards around the room for a Letter Hunt! Once all the letters are found, have kids arrange them to spell a word on the floor.

The possibilities are endless with these flashcards, and we can’t wait to see how you use them! 🎉 Share your creative ideas in the comments below or tag us in your photos—your idea might inspire another family to play and learn!

🛒 Grab your set of Alphabet Flashcards now and make learning an adventure!

Tags how to teach my toddler to read, how to teach my child to read at home, teach toddler to read step-by-step, tips for teaching kids to read, early reading strategies for toddlers, learn to read activities for toddlers, fun ways to teach reading to kids, phonics activities for toddlers, reading games for toddlers, how to build reading skills at home, sight words for toddlers, easy reading lessons for toddlers, what age should i teach my child to read?, how to make reading fun for toddlers, best books to teach toddlers to read, how to help my toddler recognize ltters, how to develop pre-reading skills in toddlers, teaching reading through play, how to teach reading without pressure, toddler reading milestones, reading flashcards for kids, interactive reading activities for toddlers
2 Comments

Spooky Halloween Sensory Play for Kids: Easy and Engaging Ideas

October 14, 2024 Kylie Tuosto

Halloween is the perfect time to engage kids in sensory play that combines fun and learning with a spooky twist! Here’s a Halloween-themed sensory bin setup that is sure to spark excitement and creativity in young minds. Sensory bins not only help kids develop fine motor skills but also encourage imaginative play.

IMG_7402_jpg.JPEG
IMG_7403_jpg.JPEG
IMG_7405_jpg.JPEG

Materials:

  • Lovevery Beaker Set

  • Alka-seltzer tablets

  • Glow-in-the-dark Pluffle

  • Resin Bats & Ghosts from @LittleOctoberHouse

  • Flower pedal potion tray from @kinderspiel_nc

  • Witches brew recipe cards from @goodnightfox

  • Plastic spiders

  • Googley eyes

  • Edible Glitter

IMG_7406_jpg.JPEG
IMG_7433_jpg.JPEG
IMG_7459.JPEG
IMG_7482.JPEG

Bin 1: Potion Play

In our first bin, kids can create their own bubbling potions! Using food coloring, water, and edible glitter, they’ll have fun mixing ingredients like plastic spiders, toy bones, and skeletons. To make it extra magical, add an Alka-seltzer tablets to see their concoctions fizz and bubble. This sensory activity is both visually and tactilely stimulating and offers a fun science experiment twist. We used the Lovevery beaker set, which is perfect for pouring and mixing, allowing little ones to explore concepts like cause and effect.

IMG_7448.JPEG
IMG_7450.JPEG
IMG_7452.JPEG
IMG_7446.JPEG

Bin 2: Glow-in-the-Dark Witches’ Brew

Our second bin takes sensory fun to a new level with Glow-in-the-dark Pluffle! Kids will love hiding and finding recipe cards for their witches’ brew setup. This tactile activity is great for nighttime play, offering a sensory experience in the dark. As children search for the hidden cards, they’ll practice fine motor skills while engaging in imaginative role play as little witches or wizards. You can extend the theme by adding other glow-in-the-dark items like mini ghosts or glow-in-the-dark spiders.

IMG_7430_jpg.JPEG
IMG_7425_jpg.JPEG
IMG_7426.JPEG
IMG_7427.JPEG
IMG_7428_jpg.JPEG
IMG_7407_jpg.JPEG

Bin 3: Witches’ Brew with Recipe Cards

In this final bin, we created a witches’ brew sensory experience with printables from GoodnightFox. We used cut-out ingredients like bones, skeleton heads, witch hats, and ghosts. Small trinkets like googly eyes and plastic spiders were added to enhance the spooky feel. All the ingredients were arranged in a flower pedal tray from @kinderspiel_nc, making it easy for kids to add them to their brew following the instructions on the ingredient cards. This bin encourages pretend play while also incorporating an element of instruction-following, perfect for group play or solo fun!

IMG_7133_jpg.JPEG
IMG_7138.JPEG
IMG_7141_jpg.JPEG

Bin 4: PLay DOH PLAY

What could be more fun than sticking all of our favorite witches brew ingredients into som glittery amazing play doh from Capptivating play! If you’re looking for the all time best play doh, you have to check out this shop.

IMG_7402_jpg.JPEG
IMG_7406_jpg.JPEG
IMG_7408_jpg.JPEG
IMG_7409_jpg.JPEG
IMG_7424_jpg.JPEG
IMG_7459.JPEG

Why Sensory Play for Halloween?

Sensory bins are incredibly versatile, providing opportunities for kids to explore different textures and engage multiple senses. For Halloween, sensory play is a wonderful way to incorporate the spooky fun of the holiday while supporting children’s cognitive development. Activities like potion making or creating witches’ brew tap into imaginative play, allowing kids to experiment with materials, explore cause and effect, and engage in role play.

By using these sensory bins, you’ll create a Halloween experience that’s both spooky and beneficial to young learners. Happy Halloween, and let the sensory play begin!

Tags spooky sensory bin, sensory play for kids, halloween sensory play, witches potion sensory activity, toddler sensory play ideas, preschool sensory bin ideas, fall sensory play, halloween fun for preschoolers, potion-making play for kids, halloween activities for toddlers, mess-free sensory play, small world play ideas, STEM halloween activities, fine motor skills Halloween activities, DIY sensory bins for kids
2 Comments

DIY Crystal Ball Party Favors or Classroom Favors for Kids: A Magical Halloween Craft

October 6, 2024 Kylie Tuosto

Looking for the perfect Halloween party or classroom favor for kids? These DIY crystal ball favors are not only enchanting but also easy to make! With glowing pluffle, starry charms, and a magical LED light that brings the whole thing to life, they are sure to impress at any Halloween gathering. Whether you’re hosting a party or want a spooky-yet-fun classroom gift, these crystal balls will be a hit with children and parents alike!

Download & Print

Crafted using simple materials like clear plastic baubles, glow-in-the-dark pluffle, and acrylic charms, this DIY project is a fun and creative way to celebrate the spookiest season of the year.

Why These DIY Crystal Balls Are the Best Halloween Favors

  • Glowing Magic: With glow-in-the-dark pluffle and a tiny LED light, these crystal balls come alive in the dark, adding an extra layer of Halloween magic.

  • Easy to Make: You don’t need a ton of materials, and the steps are simple, making this a great craft to do with kids.

  • Customizable: Add different charms, glitter, and ribbons to match your Halloween theme, whether it’s cute and spooky or all-out magical.

  • Affordable: These party favors are budget-friendly and can be made in bulk for classroom parties or large Halloween events.

Supplies You’ll Need:

  • Clear plastic baubles

  • Glow-in-the-dark pluffle

  • Acrylic moon and star charms from GoodnightFox

  • Printable collars from GoodnightFox

  • Hot glue gun and glue sticks

  • Glitter (optional)

  • Small LED lights (battery-powered)

  • Ribbon

Download & Print

IMG_7398_jpg.JPEG

Step-by-Step Instructions

1. Gather Your Supplies

To get started, make sure you have all the necessary materials. You can grab the acrylic moon and star charms and the printable collars from GoodnightFox. The glow-in-the-dark pluffle, plastic baubles, and other materials can be found at your local craft store.

2. Prepare the Bauble

  • Start by opening the clear plastic bauble.

  • Select a moon or star acrylic charm from GoodnightFox as the magical centerpiece of your crystal ball.

  • Using a hot glue gun, carefully attach the charm to the inside bottom of the bauble. Let it dry fully before moving on to the next step.

3. Add the Glow-in-the-Dark Pluffle

  • Now it’s time to add the mystical glow! Fill the bauble with glow-in-the-dark pluffle, enough to surround the charm but leaving space for movement. This soft, glowing material creates the perfect illusion of swirling mist inside the crystal ball.

  • For an extra touch of sparkle, sprinkle a bit of glitter into the bauble before sealing it. The glitter will catch the light, adding to the magical effect.

4. Insert the LED Light

  • To make your crystal ball glow at night, add a small battery-powered LED light to the bottom of the bauble. Choose a light that fits snugly underneath the base of the bauble for the best effect.

  • The LED light will illuminate the acrylic charms and the glow-in-the-dark pluffle, making the crystal ball shine with magical energy.

5. Secure with the Printable Collar

  • Close the bauble, ensuring it’s securely sealed, and add a printable collar from GoodnightFox around the top for a finished look.

  • You can glue the collar in place to keep everything secure, and it adds a professional touch that really completes the Halloween aesthetic.

6. Wrap with Ribbon

  • For a final decorative touch, wrap a ribbon around the top of the bauble where the collar meets the two halves. A black, purple, or silver ribbon will complement the spooky vibe of Halloween.

  • Tie a neat bow and trim the ends for a clean, polished look.

7. Display or Gift!

  • Your DIY crystal ball favor is ready to impress! Whether it’s handed out to trick-or-treaters, placed as a party favor, or given out in the classroom, these glowing crystal balls will be a magical hit.

Download & Print

Tips for Crafting the Perfect Crystal Ball Favor

  • Extra Sparkle: Adding a touch of glitter can really make the crystal ball shimmer, especially when the LED light is turned on.

  • Personalize It: Add small name tags or Halloween-themed labels to each favor to make them extra special for the recipient.

  • Experiment with Colors: If you’re feeling adventurous, you can switch up the color of the glow-in-the-dark pluffle or use multicolored LED lights for a truly magical effect.


Why These Crystal Ball Favors Will Be a Hit

  • Interactive and Fun: These aren’t just decorations – they glow in the dark! Kids will love playing with their glowing crystal balls and showing them off to friends.

  • Perfect for Halloween: The moon and star charms, combined with the glow-in-the-dark effect, create the perfect eerie atmosphere for a spooky Halloween celebration.

  • Unique and Memorable: Unlike traditional party favors, these DIY crystal balls are unique keepsakes that kids can enjoy long after Halloween is over.

  • Affordable for Bulk Crafting: Whether you’re making a handful for a small party or dozens for a classroom, these favors are affordable and easy to scale.


Create Spooky Magic with DIY Crystal Ball Favors

With just a few materials and a bit of creativity, you can craft enchanting DIY crystal ball favors that will add a magical touch to any Halloween celebration. Perfect for parties or classrooms, these glowing crystal balls are fun, affordable, and customizable, making them the ultimate favor for kids this Halloween.

Head over to GoodnightFox to grab your moon and star acrylic charms, printable collars, and start crafting today. With glow-in-the-dark pluffle, LED lights, and a sprinkle of glitter, these DIY crystal balls will shine as the highlight of your Halloween festivities.

Tags crystal ball, light up crystal ball, halloween activity for kids, sparkly activity, magic for kids, printable activities for kids
2 Comments

Ramen Noodle Shop Sensory & Dramatic Play Setup: Taste-Safe Sensory Play for Toddlers

September 30, 2024 Kylie Tuosto

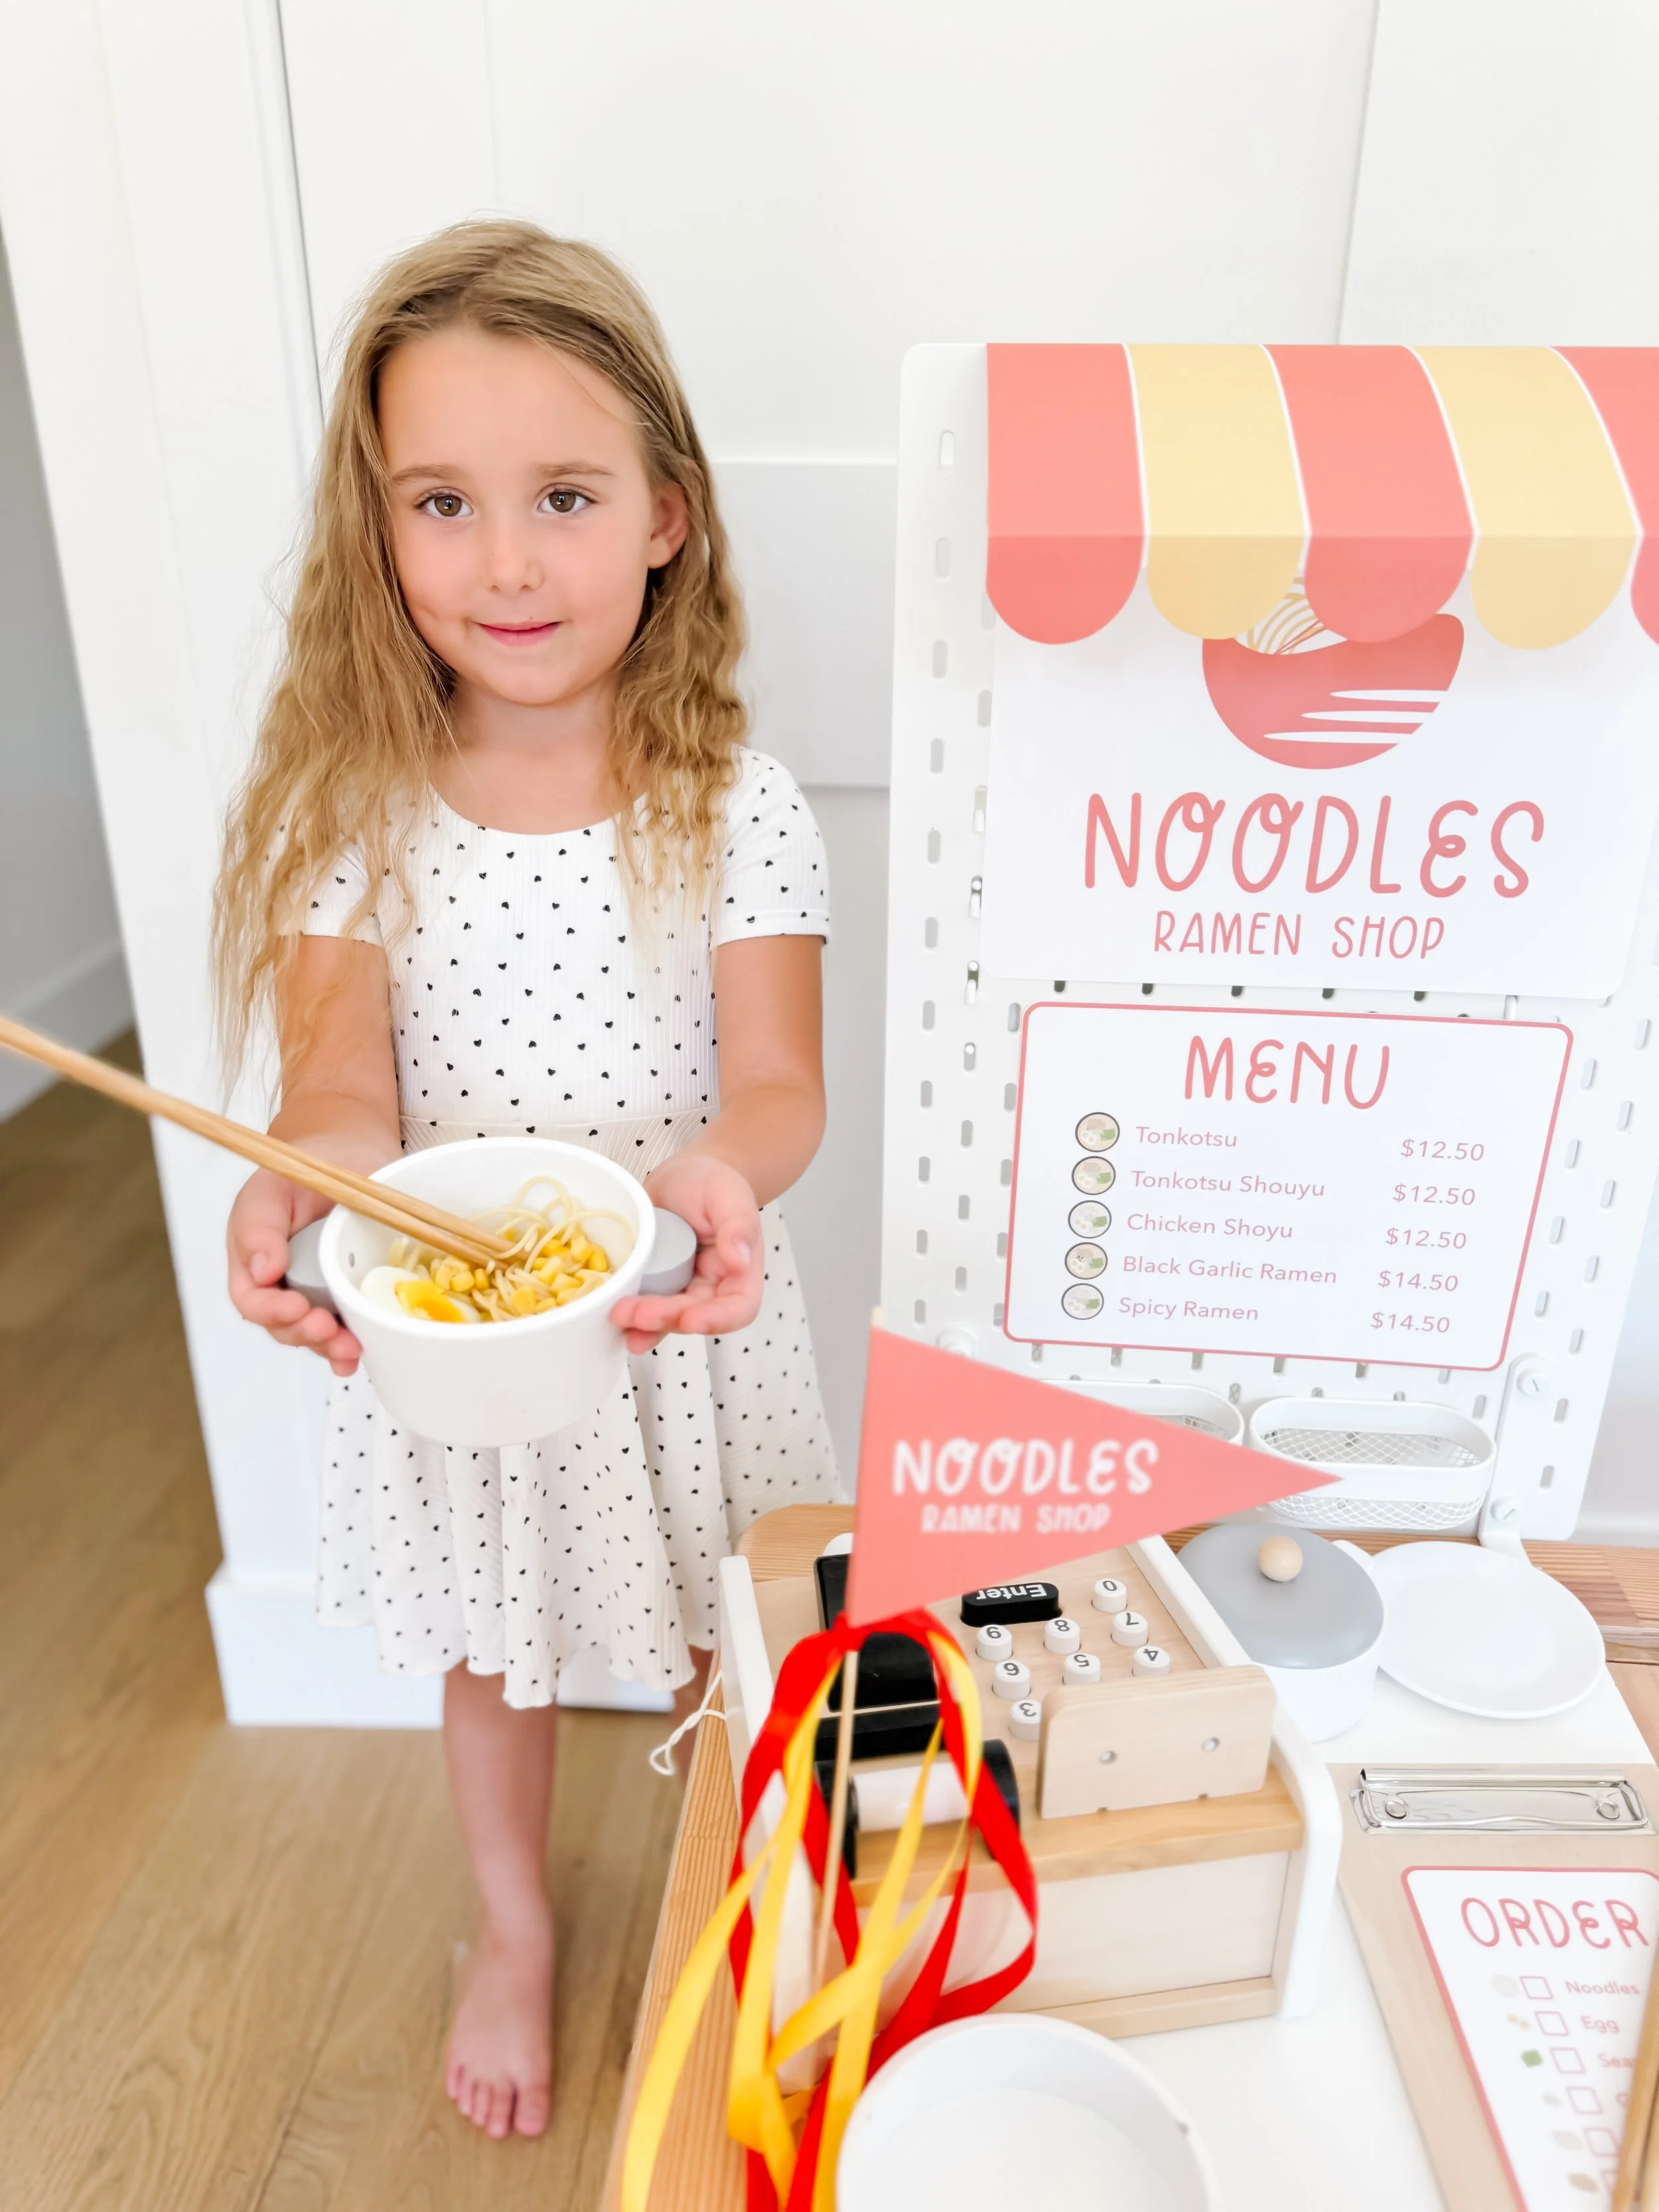
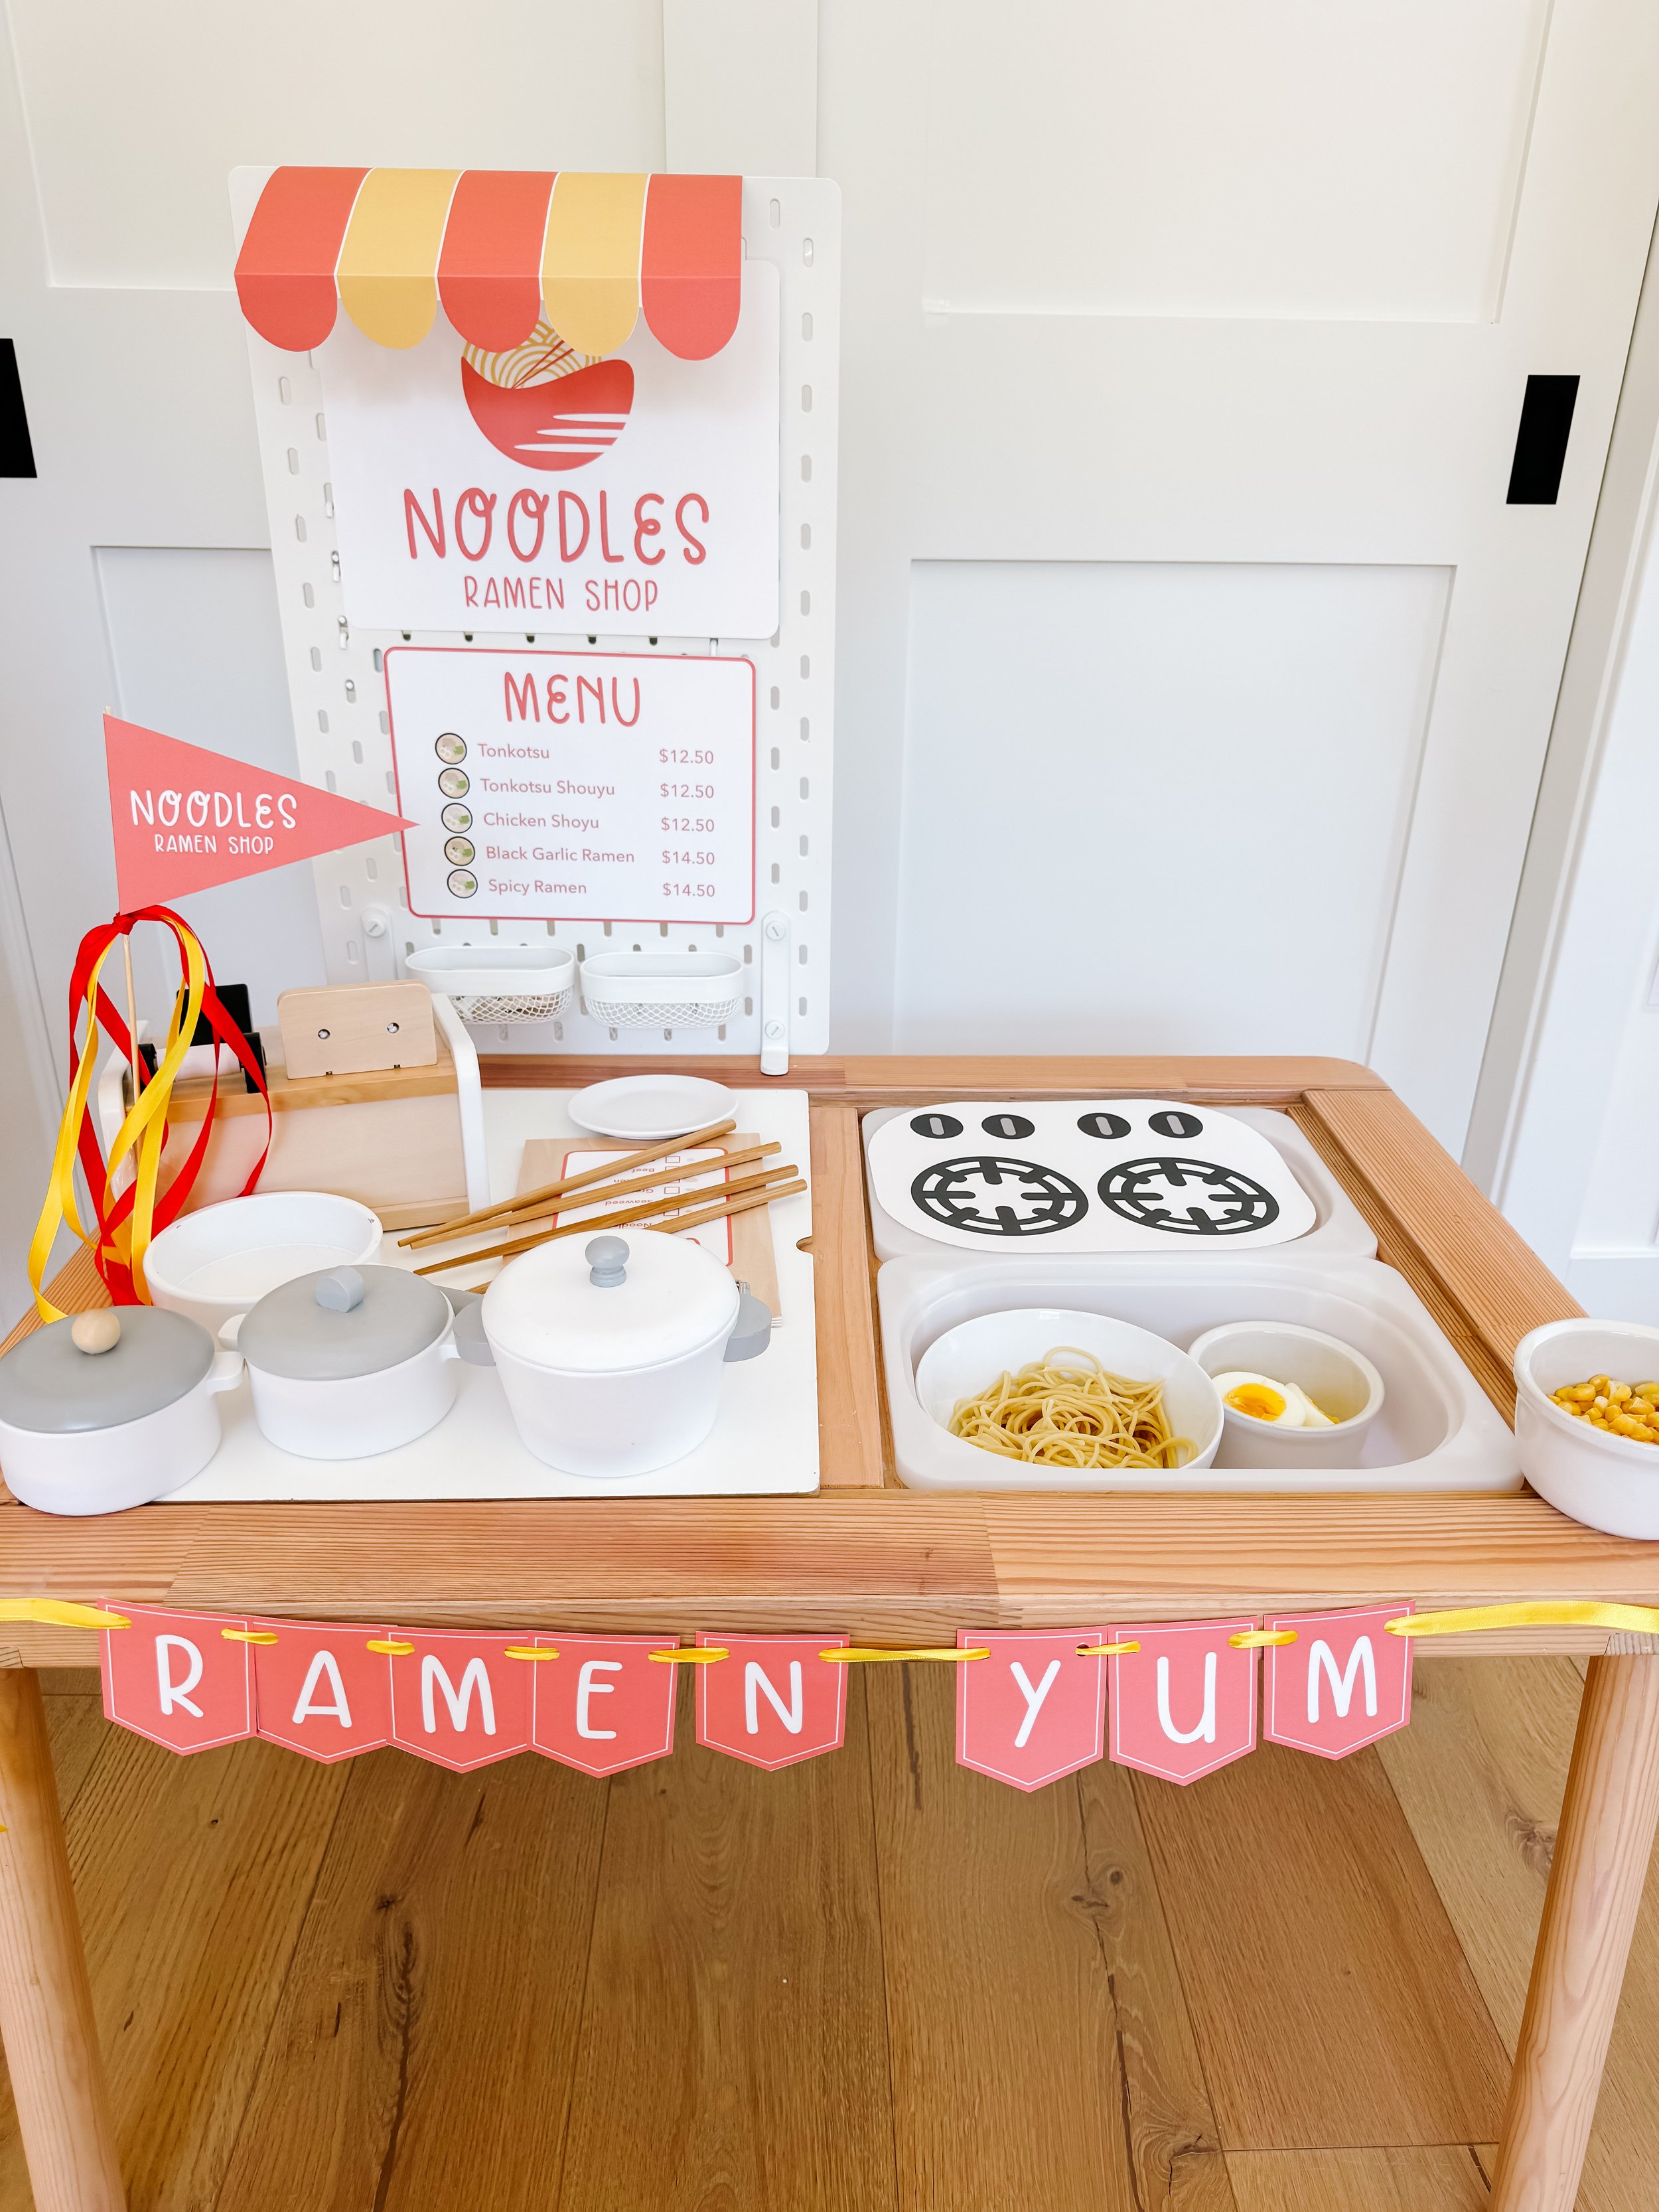
Step into a world of imagination and hands-on learning with my Ramen Noodle Shop sensory and dramatic play setup! This ramen shop experience combines taste-safe sensory play with dramatic play elements, giving your little one the opportunity to explore textures, practice fine motor skills, and engage in pretend play. Let's take a look at the setup, step-by-step instructions for each sensory bin, and the learning benefits of this fun and interactive activity.

Ramen Shop Printable Play
IMG_3714_jpg.JPEG
IMG_3738.JPEG
IMG_3763_jpg.JPEG

Ramen Shop Printable Decor

To bring the ramen shop to life, I’ve designed a set of printable decor, perfect for your play space. These printables are great for setting the scene and encouraging imaginative play.

  • Ramen Shop Flag & Banner: Hang the flag and banner to mark the entrance to your ramen shop, inviting little chefs and customers inside.

  • Shop Sign: The shop sign adds a personal touch, labeling your ramen stand as the best noodle shop in town!

  • Awning: Add the printable awning over your setup for an authentic ramen shop feel.

  • Menu: Display the ramen shop menu, listing the ingredients and ramen types your child can “prepare” in their noodle bowls.

Now, let's dive into the sensory play stations!

Download & Print
IMG_3765_jpg.JPEG
IMG_3774_jpg.JPEG
IMG_3768_jpg.JPEG

Sensory Bin 1: Make Your Own Bowl of Ramen

Materials:

  • Cooked spaghetti (as ramen noodles)

  • Hard-boiled eggs (cut in half)

  • Frozen corn (thawed)

  • Small bowls and utensils

Instructions:

  1. Place the cooked spaghetti in the bin and separate the hard-boiled eggs and corn into smaller bowls.

  2. Provide small bowls and utensils for your child to scoop noodles, eggs, and corn to create their ramen dish.

  3. Encourage your child to add each ingredient to their bowl, exploring the different textures and practicing fine motor skills.

Learning Benefits:

Fine Motor Skills: Picking up noodles, scooping corn, and placing eggs require coordination and strength in small hand muscles.

Sensory Exploration: Children get to experience the texture of soft noodles, firm eggs, and cold corn, stimulating their sense of touch.

Imaginative Play: By pretending to make their own bowl of ramen, children engage in creative play, fostering cognitive development.

Ramen Shop Printable Play
IMG_3757_jpg.JPEG
IMG_3746_jpg.JPEG
IMG_3753_jpg.JPEG

Sensory Bin 2: Cook the Ramen Soup on a Printable Stove

Materials:

  • Printable stove cover (available in the ramen shop printable kit)

  • Pots, pans, and ladles

  • Water or a clear liquid substitute for “soup”

Instructions:

  1. Place the printable stove cover over one of the small Trofast bins to create a pretend stovetop.

  2. Fill pots and pans with water or a clear liquid substitute, and provide ladles for stirring.

  3. Encourage your child to “cook” the ramen noodles and prepare a delicious soup by stirring the ingredients in the pots and pans.

Learning Benefits:

Problem-Solving Skills: Children learn how to simulate cooking, developing early reasoning as they navigate the process of preparing a meal.

Role Play: Pretending to cook fosters language development as children mimic real-life scenarios they observe in their own kitchens.

Coordination & Balance: Stirring the soup and transferring ingredients from the pot to the bowl challenges balance and hand-eye coordination.

Download & Print
IMG_3742_jpg.JPEG
IMG_3736_jpg.JPEG
IMG_3721_jpg.JPEG

Sensory Bin 3: Be the Ramen Shop Owner

Materials:

  • Play cash register

  • Play money

  • Ramen bowls and utensils

Instructions:

  1. Set up a small bin with a cash register and play money for your child to pretend to be the ramen shop owner.

  2. Once a customer (you or another child) has created their bowl of ramen, they can take it to the register to pay for their meal.

  3. Have your child practice counting out money and giving the correct change.

Learning Benefits:

Math Skills: Handling play money introduces basic math concepts like counting, addition, and subtraction.

Social Skills: Role-playing as the shop owner helps children practice communication, turn-taking, and customer service.

Imaginative Play: Running a ramen shop encourages creative thinking and helps children understand real-world roles and responsibilities.

Ramen Shop Printable Play

Learning Through Taste-Safe Sensory Play

This ramen shop sensory play setup is a great way to introduce young children to new textures, role-playing, and early math skills in a fun and safe environment. Using taste-safe ingredients ensures that even if your little one decides to explore with their mouths, you can feel confident in the safety of the materials.

Download & Print

Vocabulary Words for Ramen Noodle Shop Play

Enhance your child’s language development by incorporating these vocabulary words into your ramen noodle shop play:

  1. 1. Noodle

  2. 2. Ramen

  3. 3. Soup

  4. 4. Bowl

  5. 5. Spoon

  6. 6. Ladle

  7. 7. Corn

  8. 8. Egg

  9. 9. Shop

  10. 10. Cash register

  11. 11. Money

  12. 12. Menu

  13. 13. Order

  14. 14. Customer

  15. 15. Owner

  16. 16. Stove

  17. 17. Pot

  18. 18. Pan

  19. 19. Boil

  20. 20. Steam

  21. 21. Chopsticks

  22. 22. Ingredients

  23. 23. Broth

  24. 24. Chef

  25. 25. Receipt

Ramen Shop Printable Play

With these engaging sensory bins and dramatic play elements, your child will have a blast pretending to run their own ramen noodle shop while practicing essential skills. From sensory exploration to role-playing and math, this setup encourages children to learn through play in a safe and stimulating environment. Don't forget to download the printable decor to complete your ramen shop experience!

By incorporating taste-safe sensory play, you provide toddlers with a hands-on learning experience that fosters curiosity, creativity, and cognitive growth. Happy ramen-making!

Tags ramen shop sensory play, ramen noodles play, sensory play, taste safe, taste-safe play for baby toddler
2 Comments

DIY Kids Robot Costume for Halloween: Step-by-Step Guide

September 27, 2024 Kylie Tuosto

DIY Kids Robot Costume for Halloween: Step-by-Step Guide

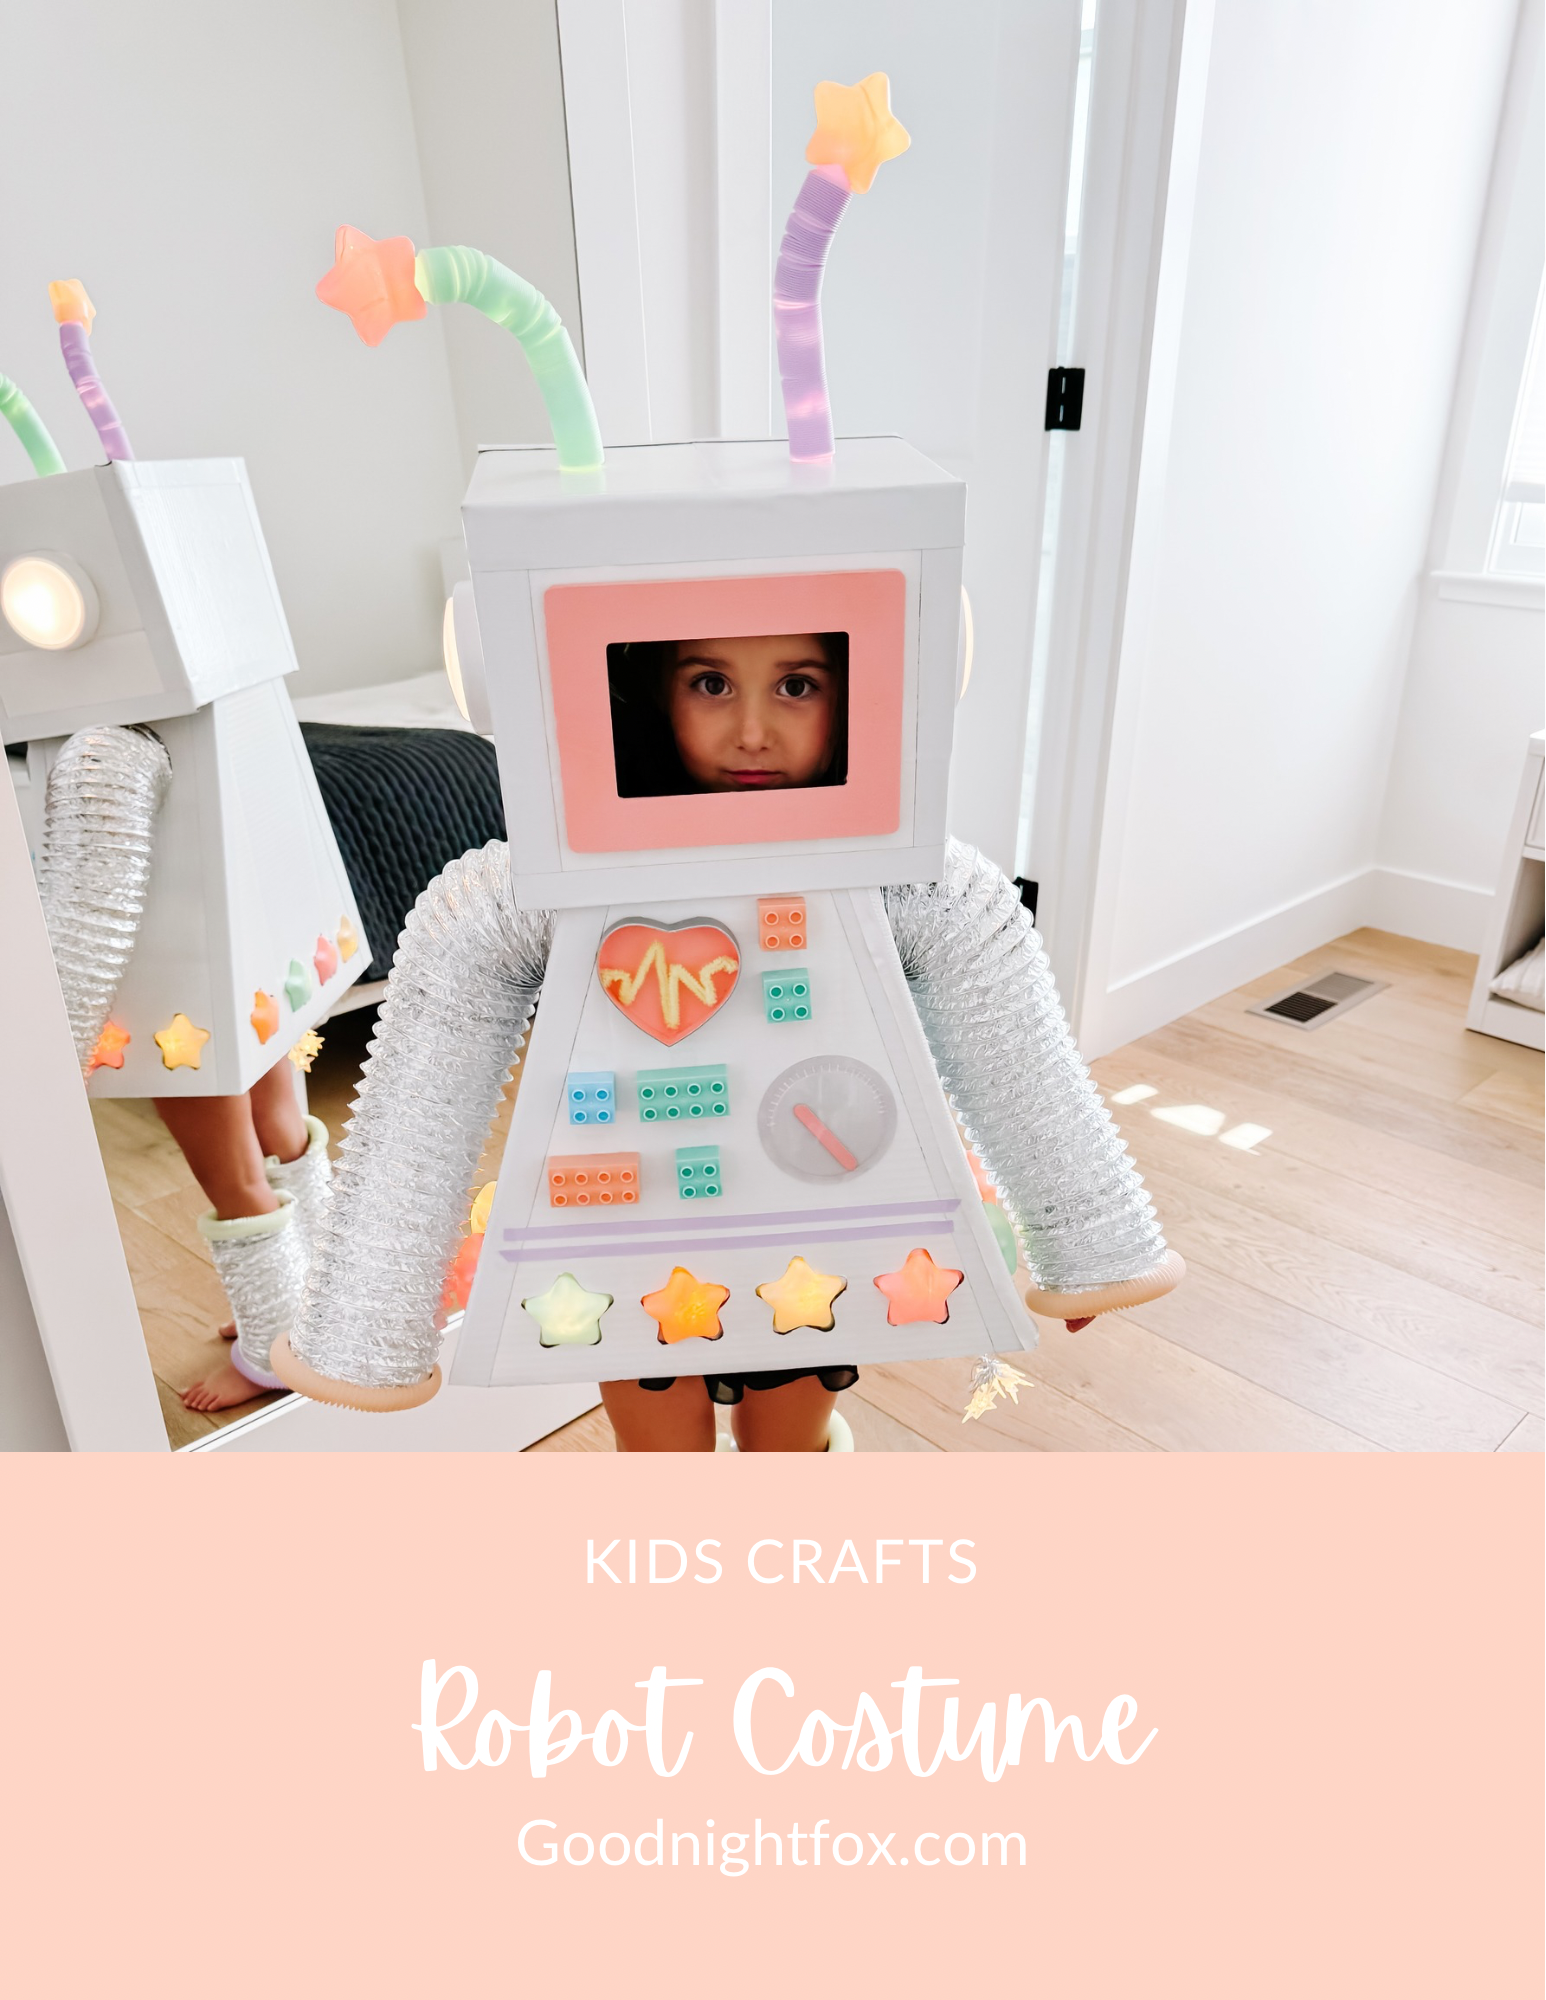
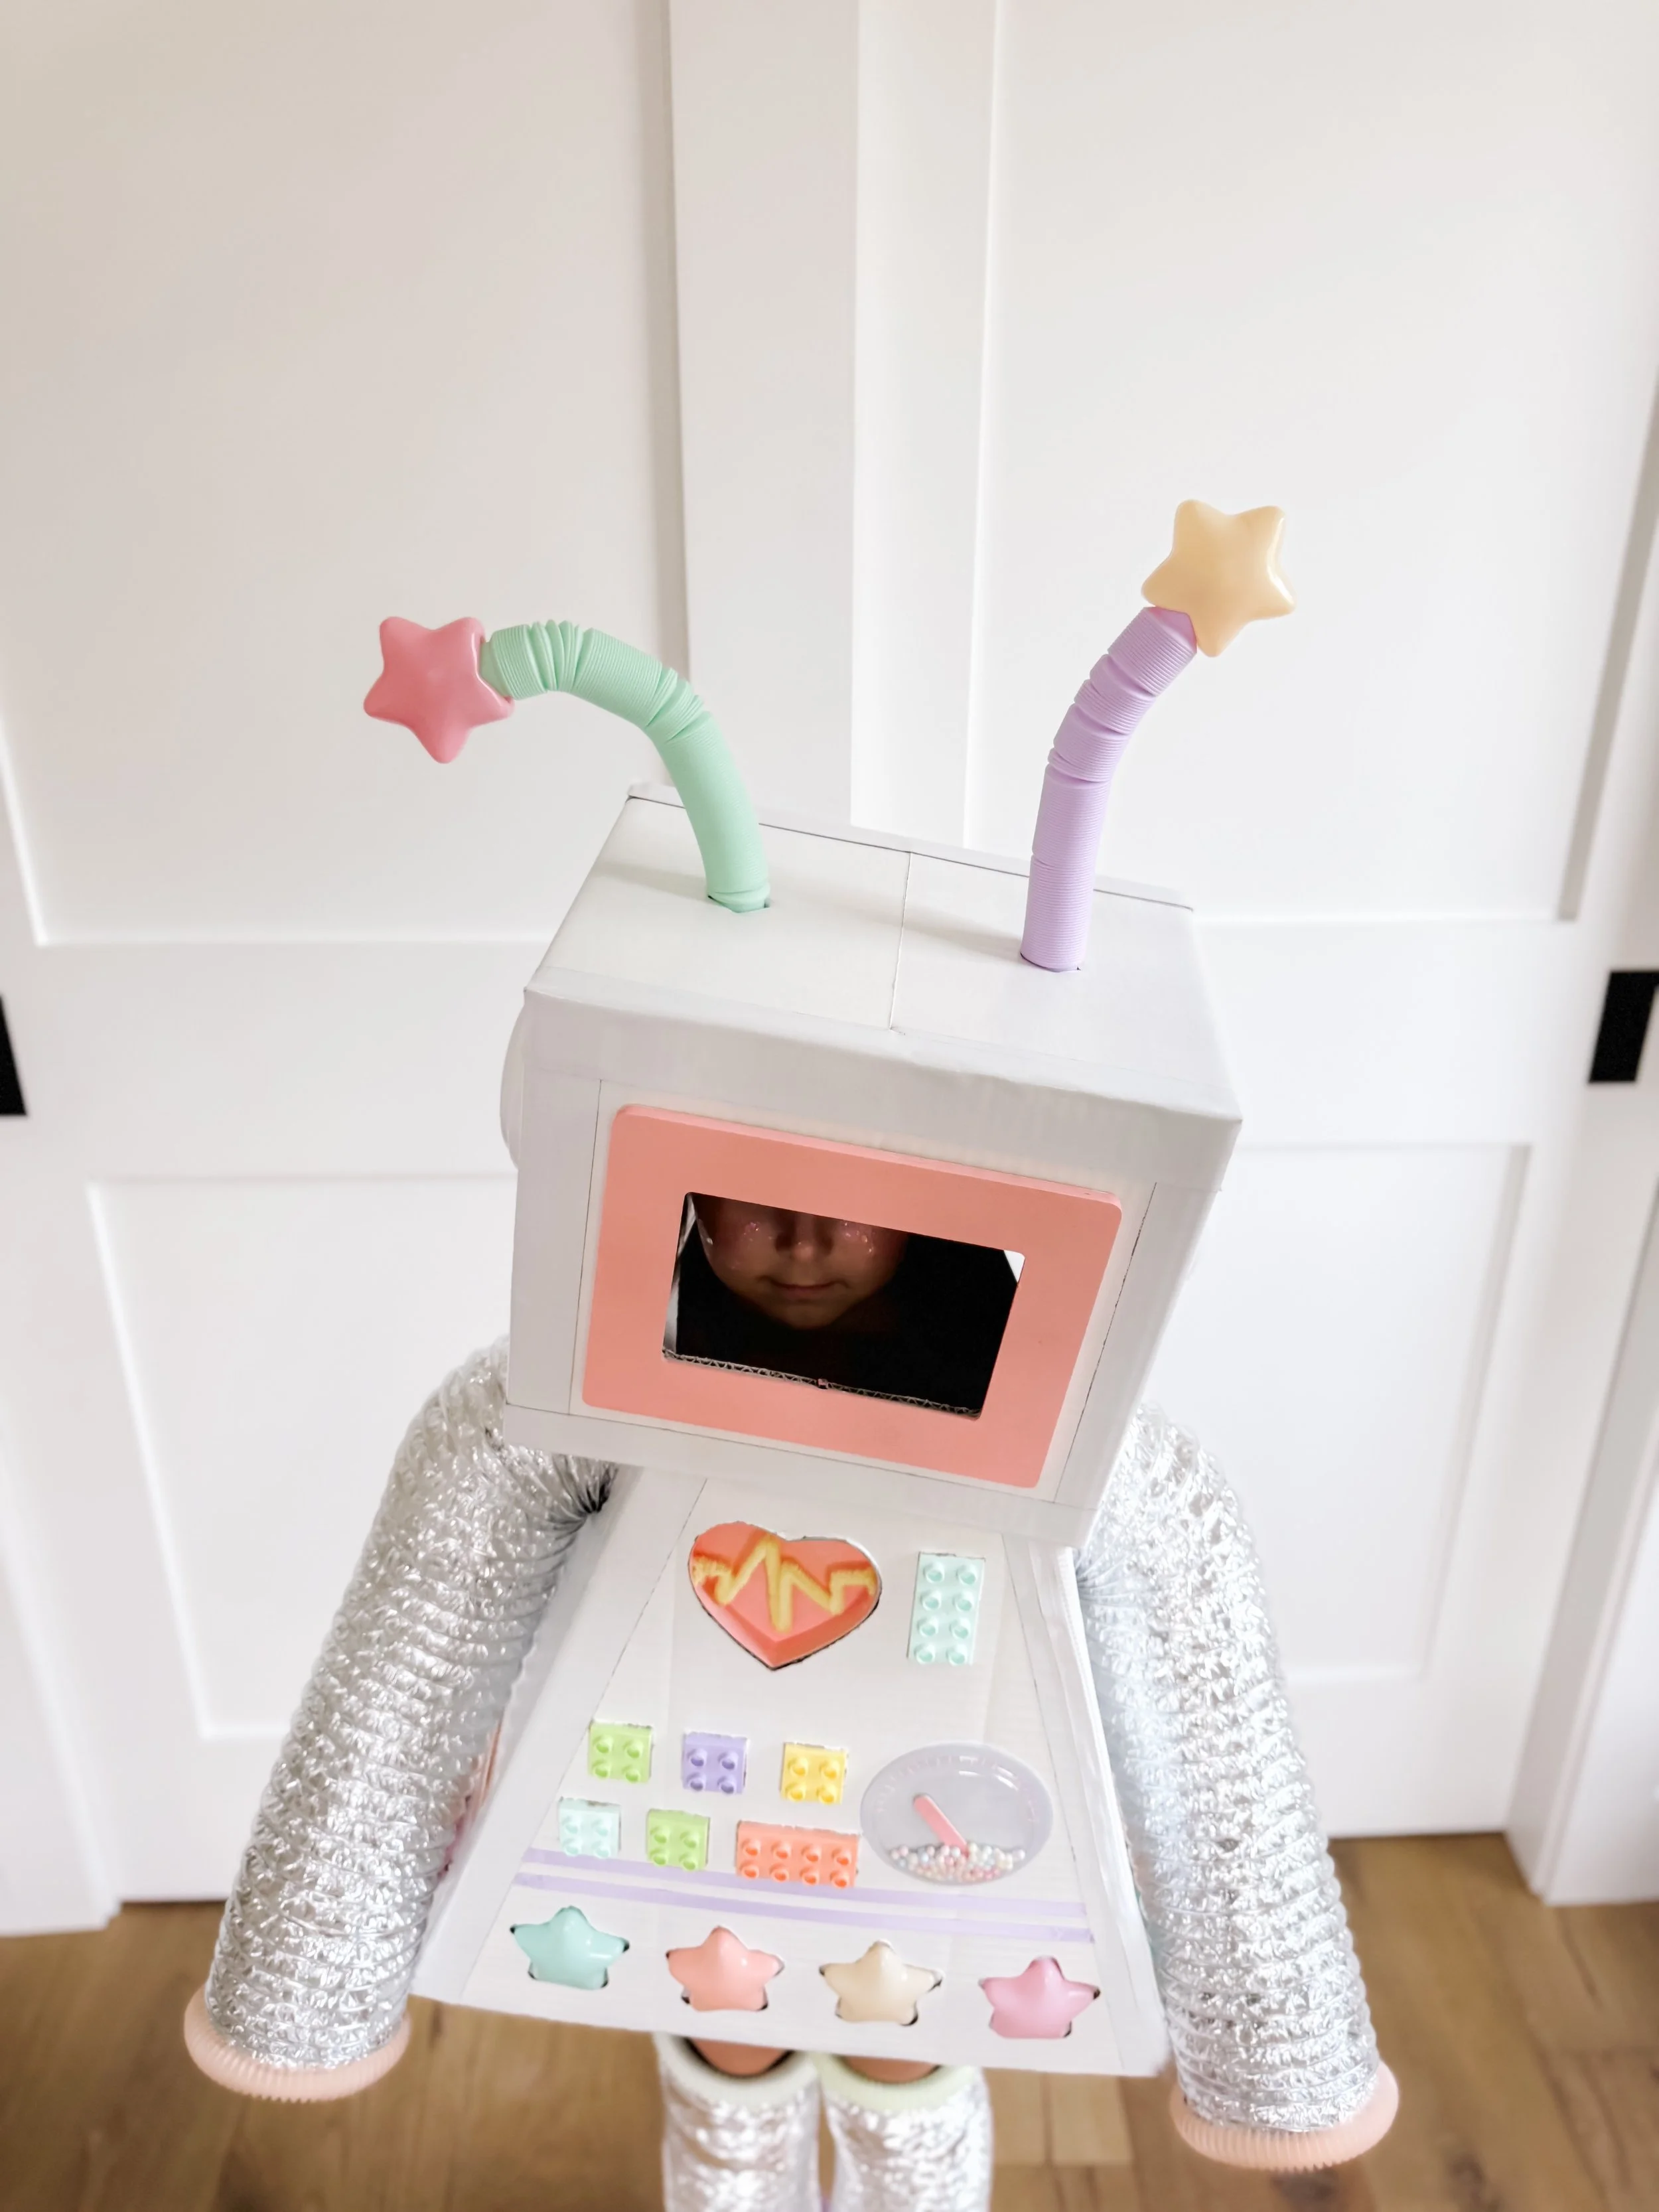
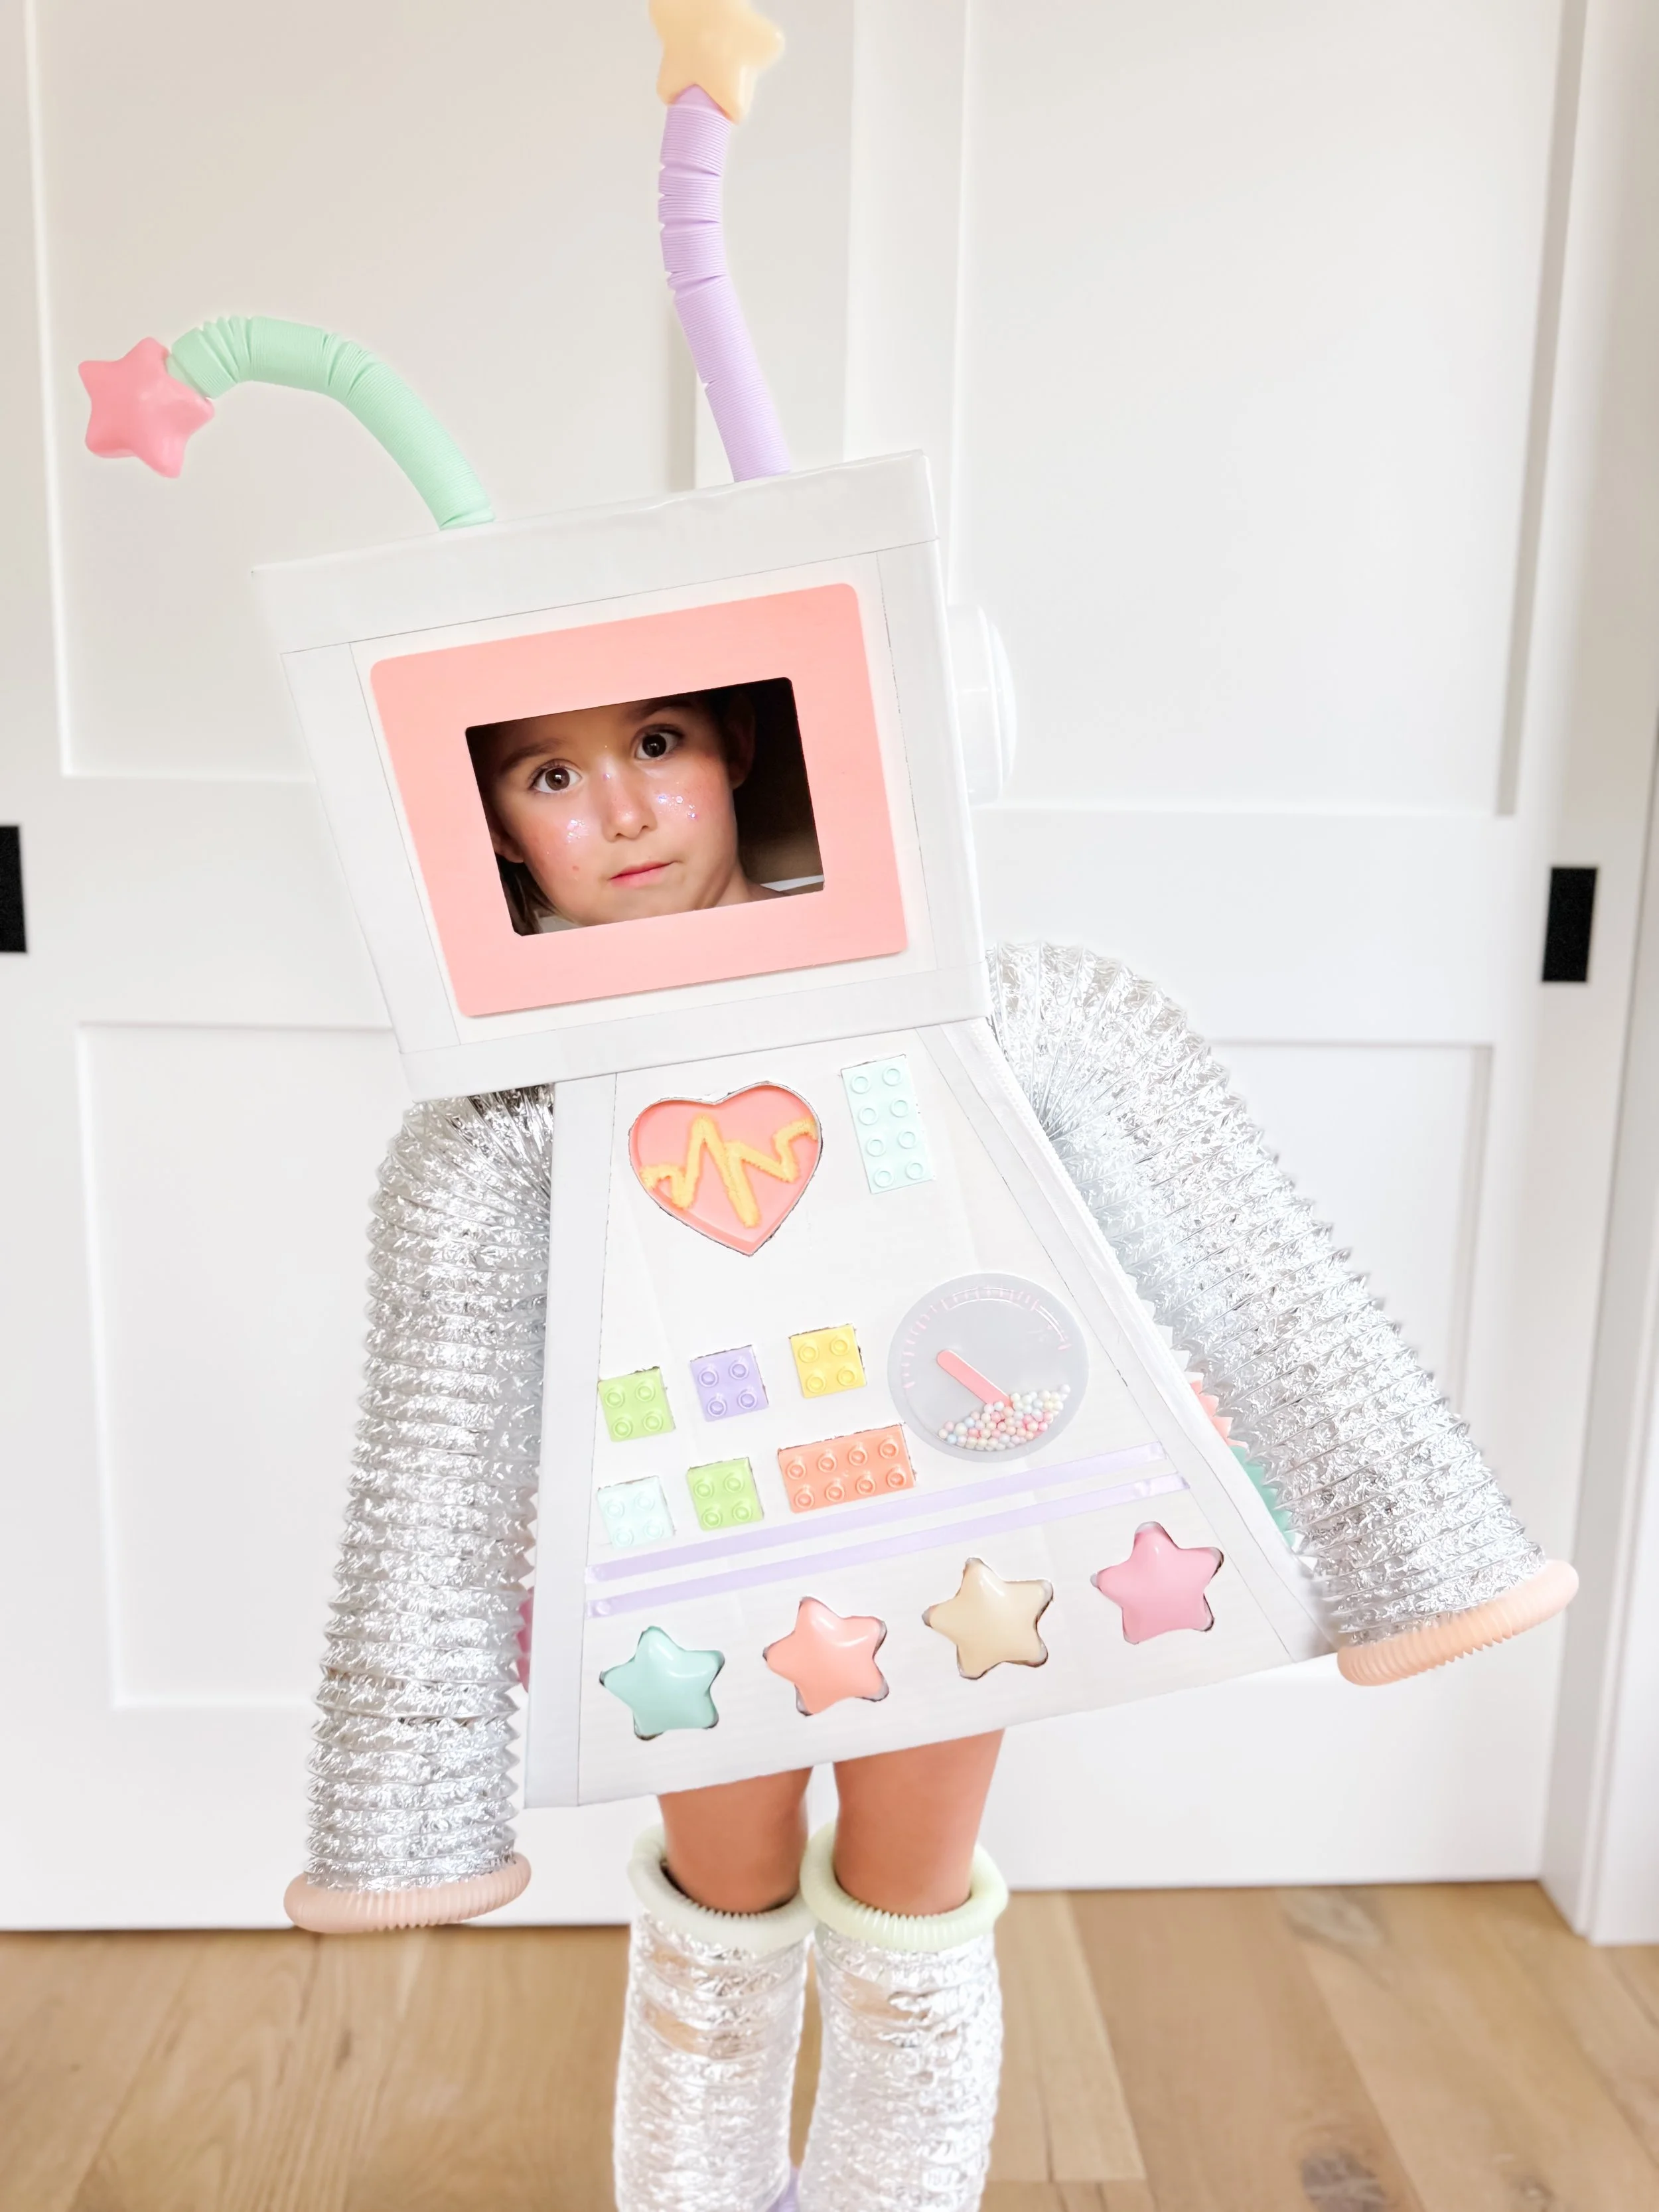
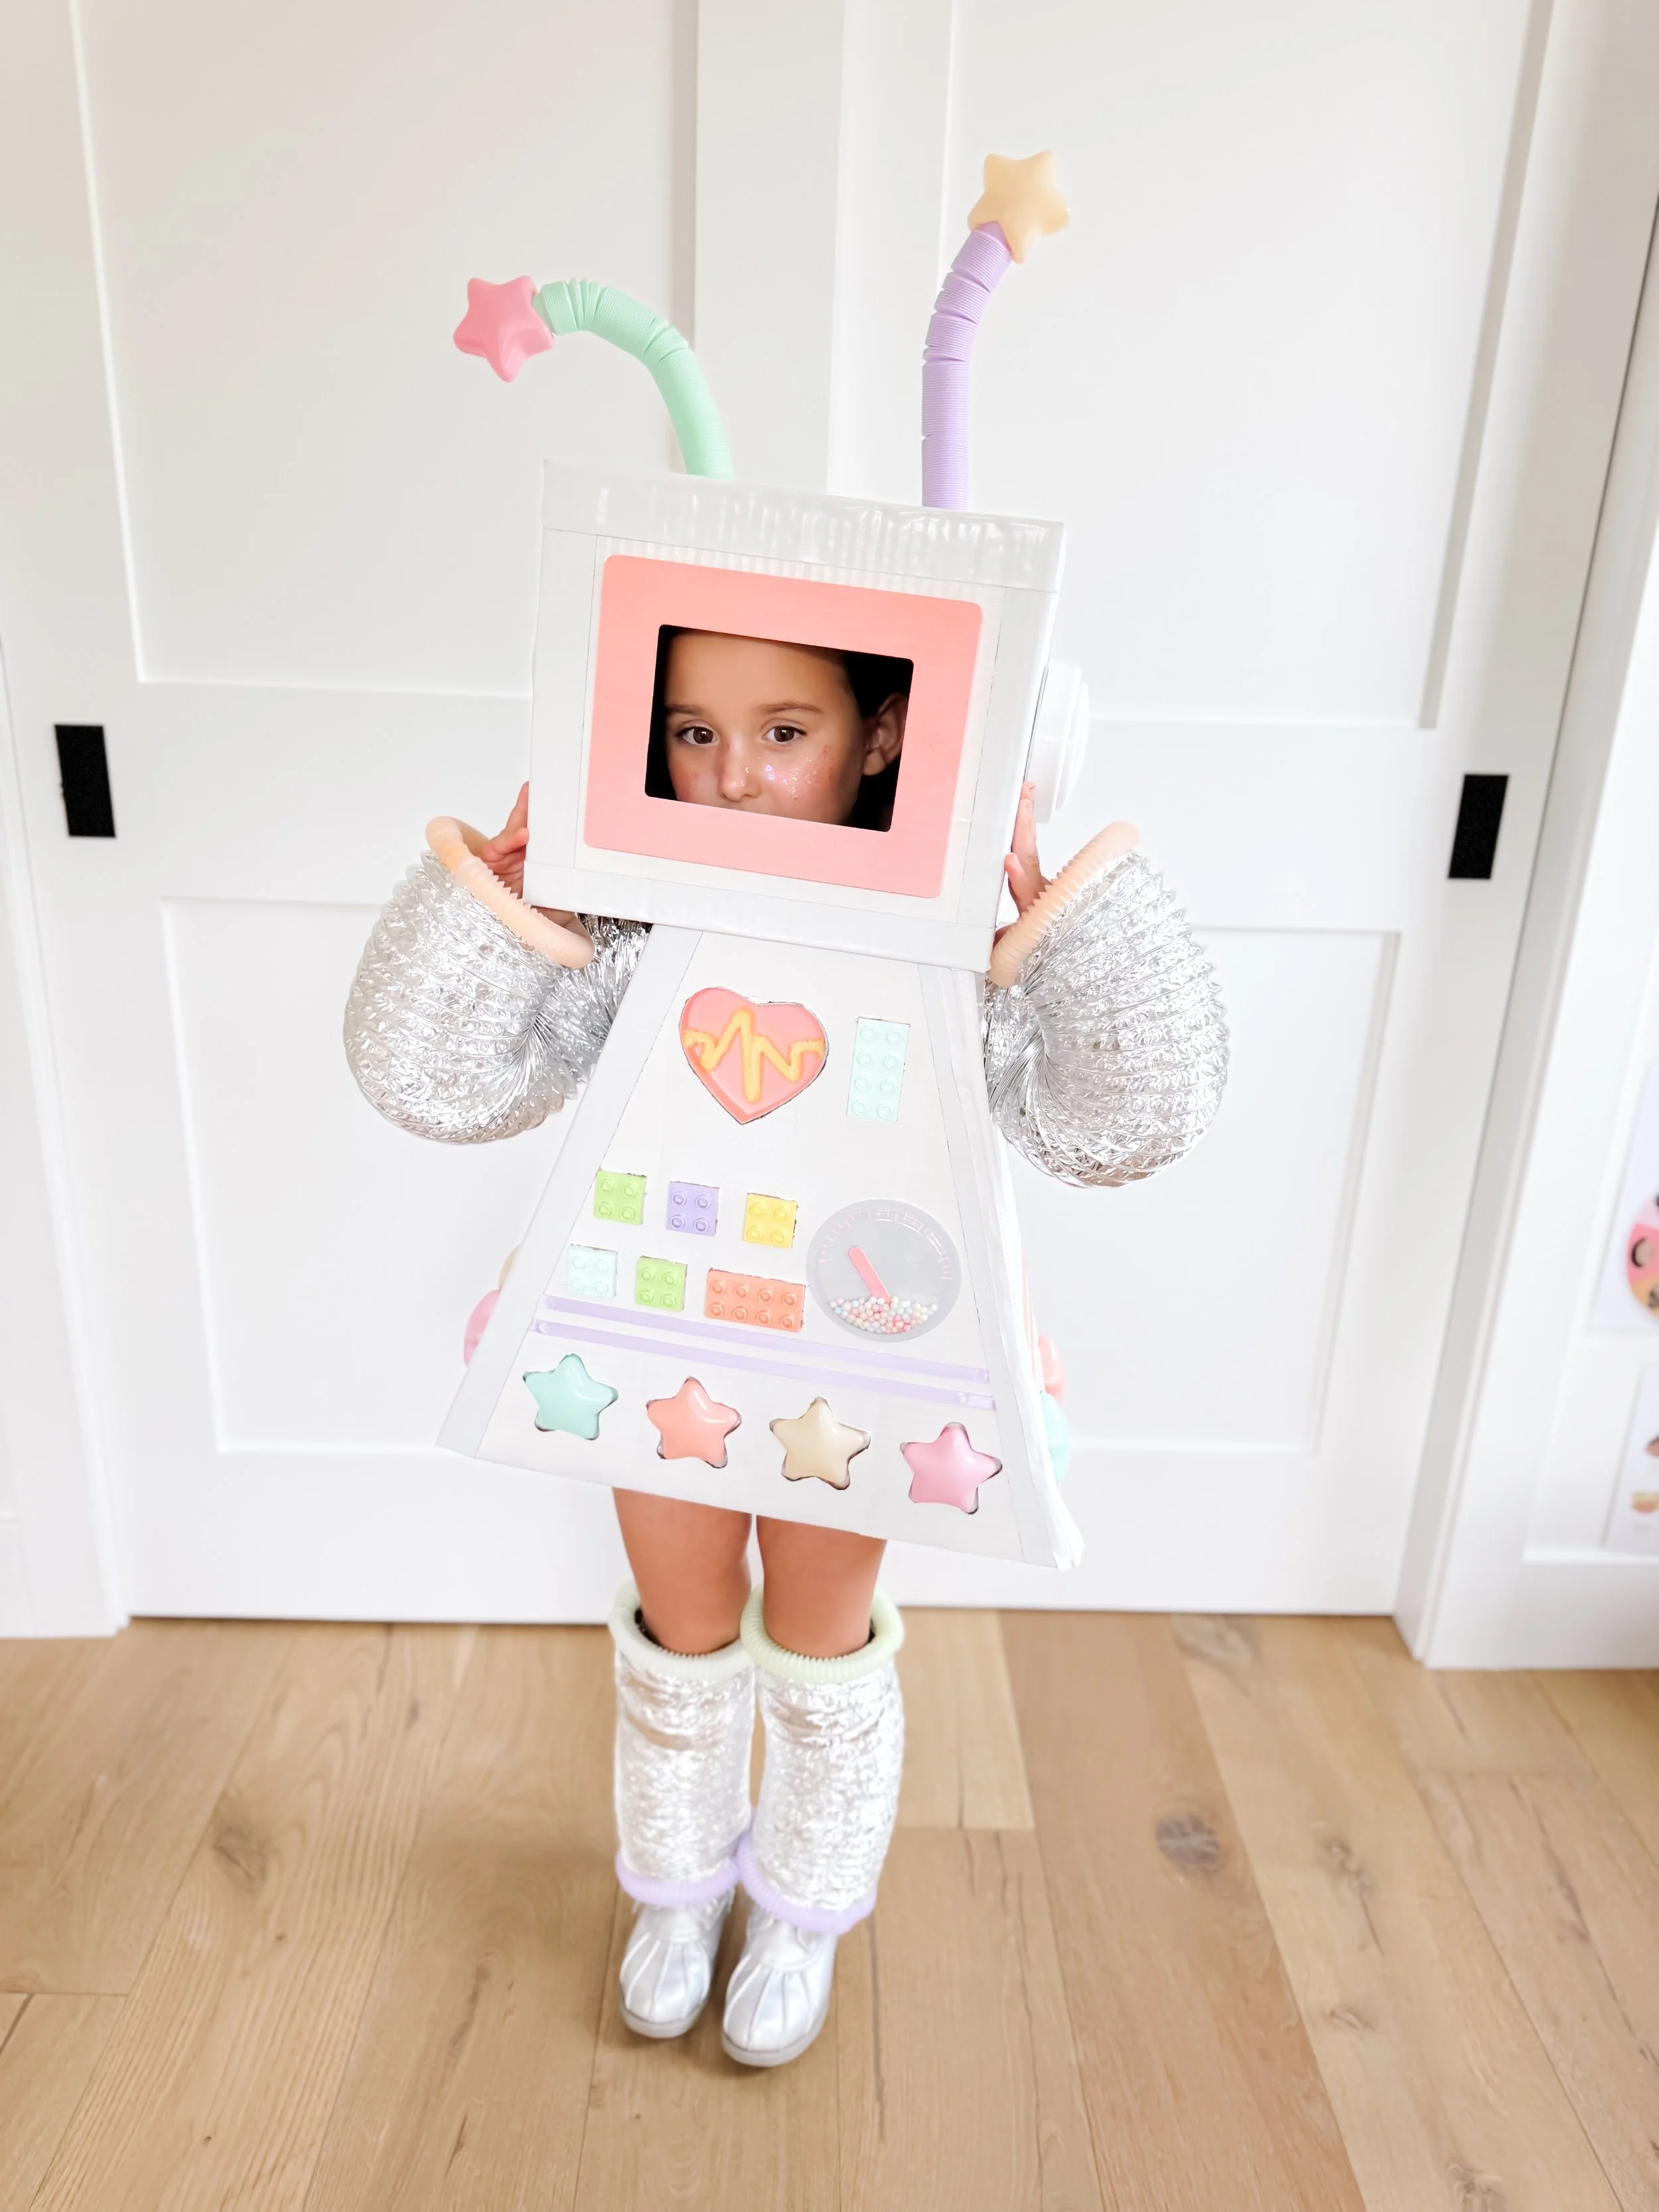
Looking for a fun and creative costume for your child this Halloween? A robot costume is an exciting, hands-on project that your child will love! I made this robot costume for my daughter when she was four, and she absolutely adored it. With some easy-to-find materials, a bit of imagination, and your crafting skills, you can create a magical robot outfit. Below is a detailed guide with all the materials and step-by-step instructions you’ll need to recreate this adorable robot costume!

Materials You’ll Need:

  • Cardboard boxes (for the body and head)

  • White Gorilla tape

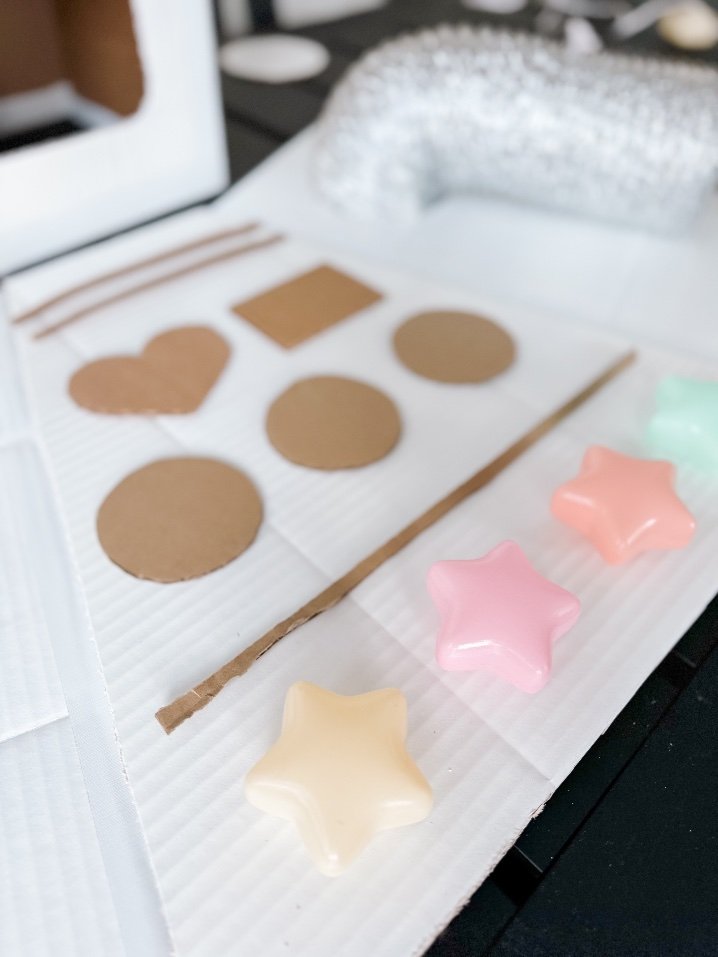
  • Star-shaped ball pit balls (for decoration and antenna)

  • Light-up string stars (for embedding around the bottom edge)

  • Aluminum ducting (for arms and legs, available at Home Depot)

  • Glow-in-the-dark fidget tubes (for cuffs and decoration)

  • Pastel purple and teal tubes for antenna

  • Small battery-powered lights (for illuminating the star antenna)

  • 4x6 wooden frame (painted pink for the faceplate)

  • Heart-shaped box lid (to create the heart plate)

  • Pipe cleaners (to make a heartbeat line on the heart plate)

  • Duplo sized Legos (for building the front control plate)

  • Glow-in-the-dark googly eyes (modified with a popsicle stick to create a meter)

  • Paint (for decorating lines on the googly eyes and the robot’s face)

  • Push lights (for the ears)

  • White 18” zipper

  • Hot glue, scissors, box cutter or exactly knife, white spray paint

Full Shopping List on Amazon
 

Free Starter Activity Pack


Join thousands of parents who get printable activities, sensory play ideas, and play-based learning inspiration delivered to their inbox. Start with a free printable starter activity pack you can use today.  

Download the Starter Activity Pack
IMG_5063.jpg
IMG_5067.jpg
IMG_5067.jpg
IMG_5064.jpg
IMG_5088_jpg.jpg

Step-by-Step Instructions

1. Creating the Robot Body

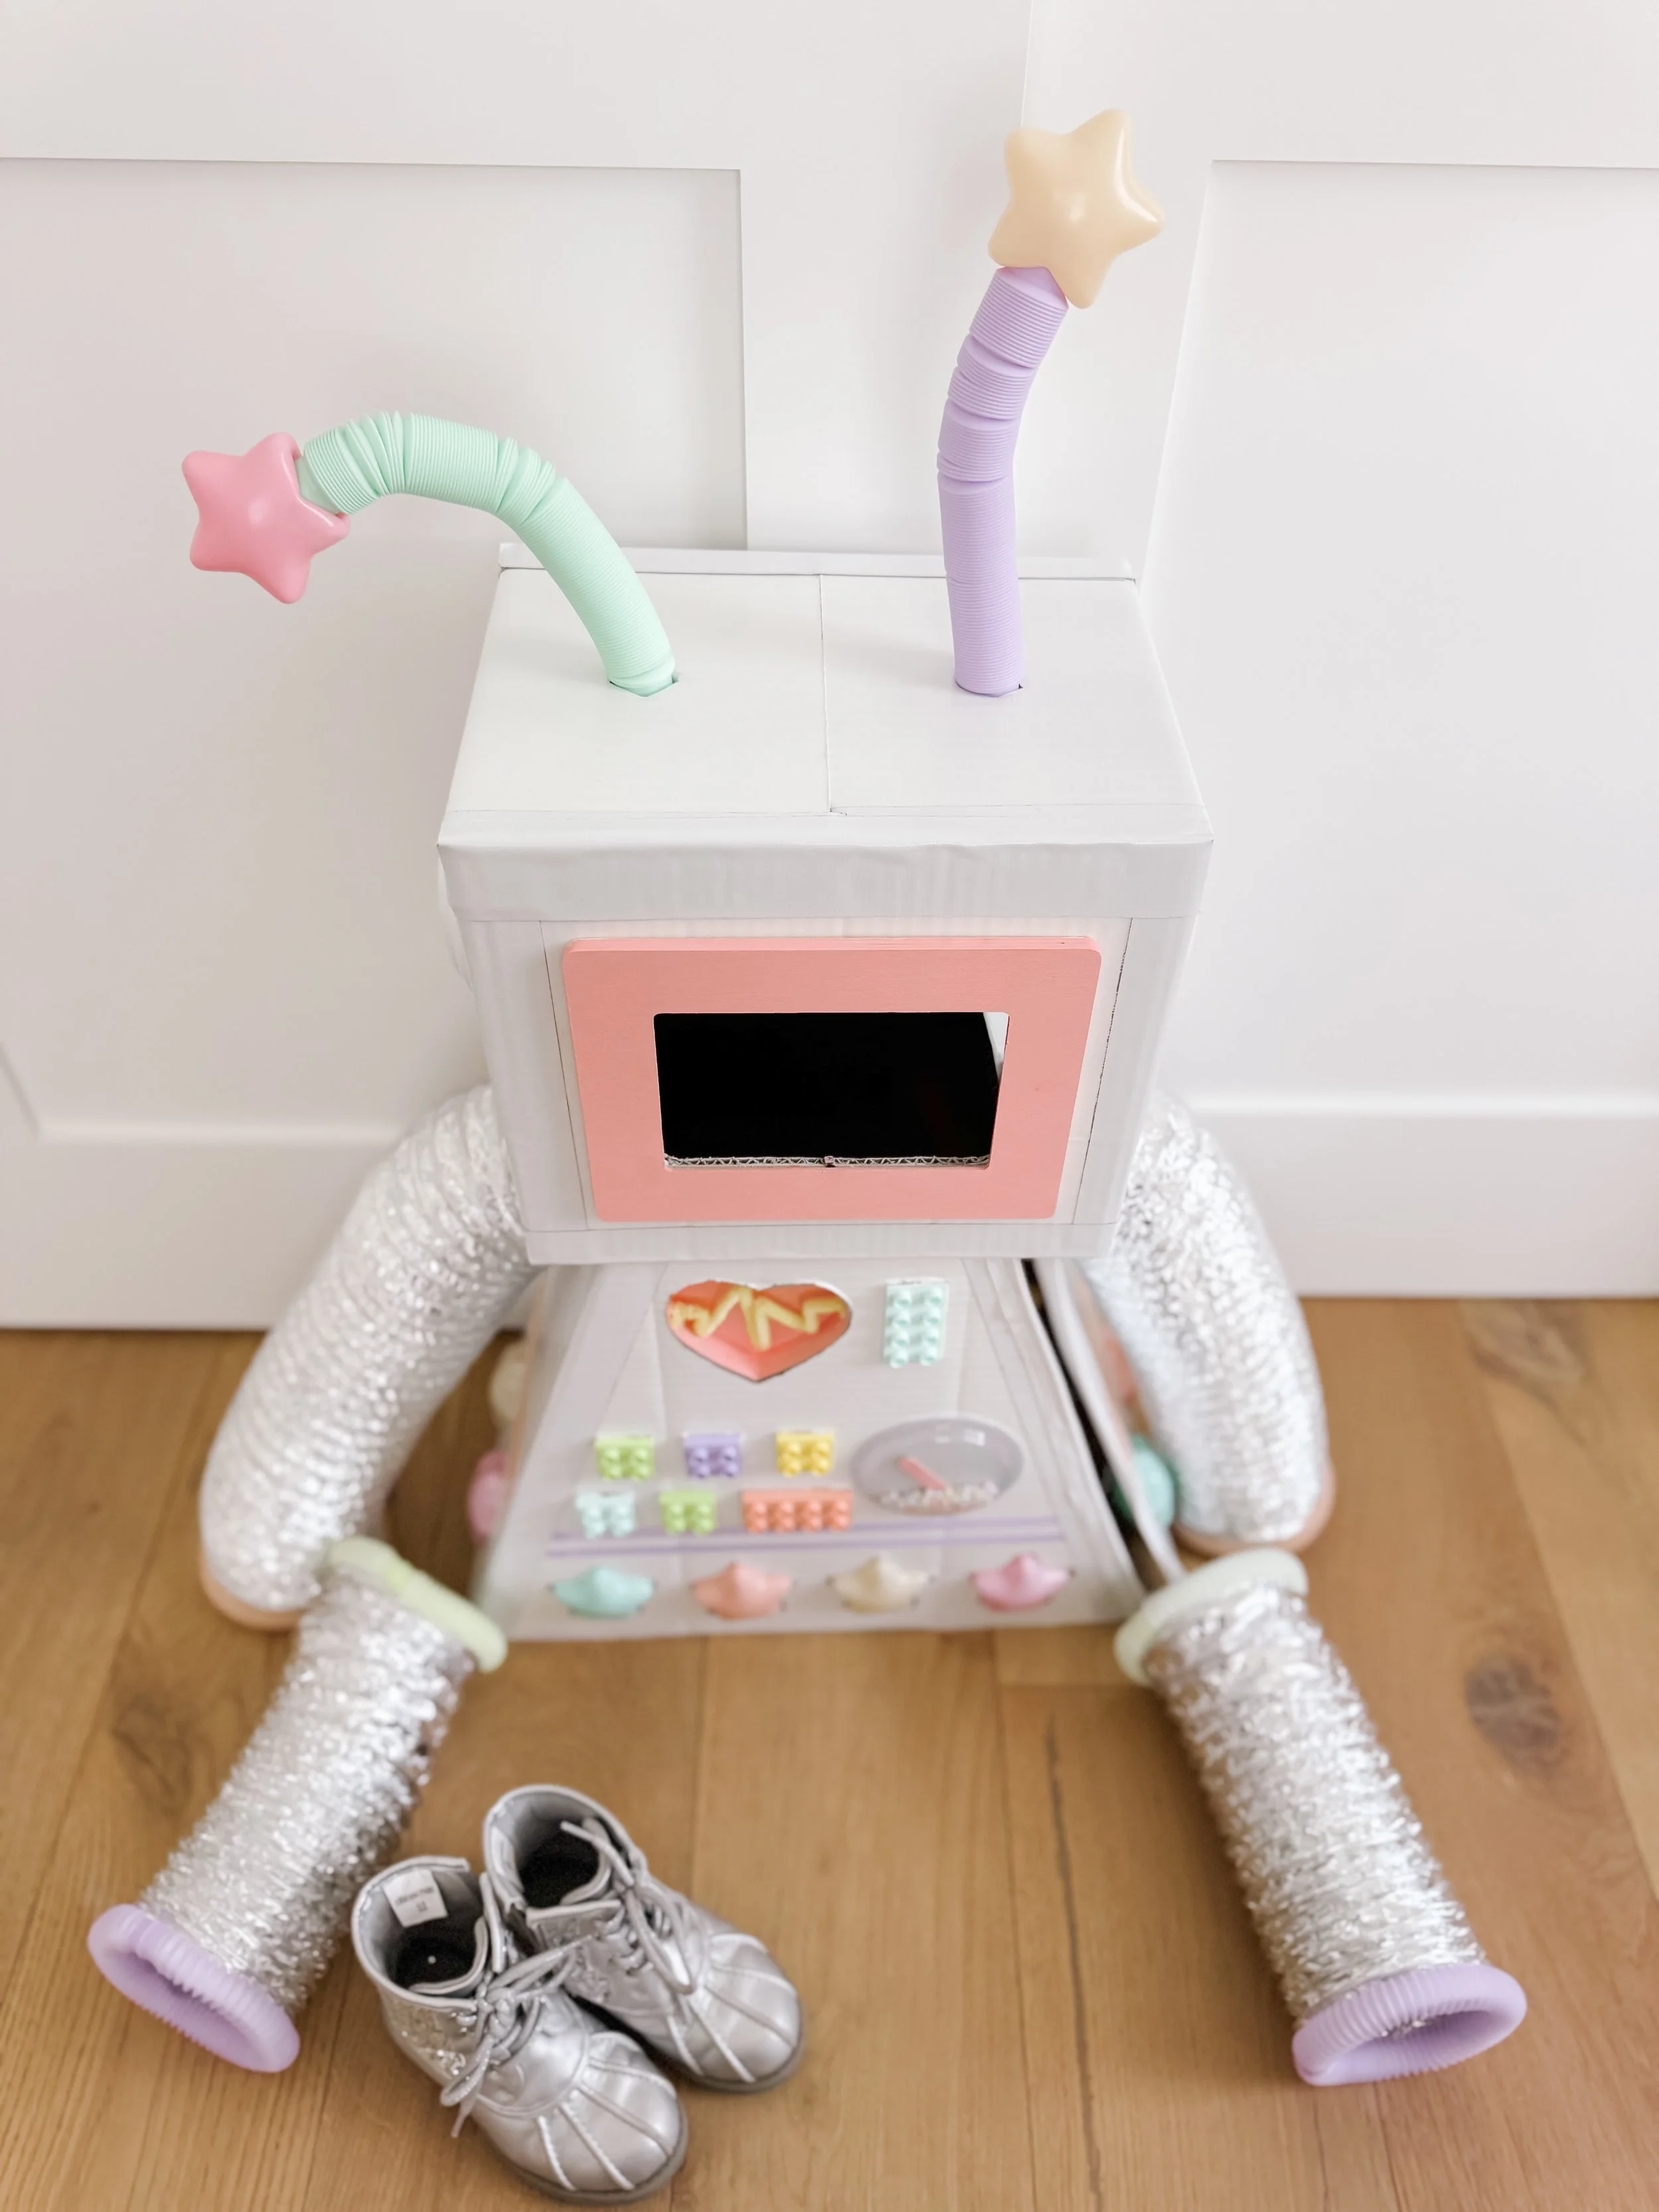
  • Start with the cardboard boxes: Find two cardboard boxes—one for the body and one for the head. Ensure the head box is large enough for your child to wear comfortably while the body box reaches their waist.

  • Cut holes for the arms and head: Use a box cutter to cut out armholes on the side of the body box and a hole on top of the head box for your child’s head. Secure the edges of the boxes with White Gorilla tape to make the structure sturdy.

  • Decorate the body: Use the Light-up string stars and attach them to the bottom edge of the body box, securing the stars in place with more white Gorilla tape.

  • Lego front plate: Arrange Legos in a fun control panel design on the front of the body box. This will give your robot costume a high-tech look.

2. Adding the Arms and Legs

  • Use aluminum ducting for the arms and legs: Cut the ducting to your child’s arm and leg lengths. Attach them to the body using white Gorilla tape, leaving enough room for movement.

  • Glow-in-the-dark cuffs: Slide Glow-in-the-dark fidget tubes over the ducting at the wrists and ankles to create glowing cuffs. This adds a cool effect in the dark.

3. Constructing the Head and Faceplate

  • Assemble the faceplate: Paint a 4x6 wooden frame pink and attach it to the front of the head box to create a faceplate for your child.

  • Googly eye meter: Modify Glow-in-the-dark googly eyes by adding popsicle stick meter and drawing meter lines around the edges with paint. Secure this to the top of the faceplate for an extra robotic touch.

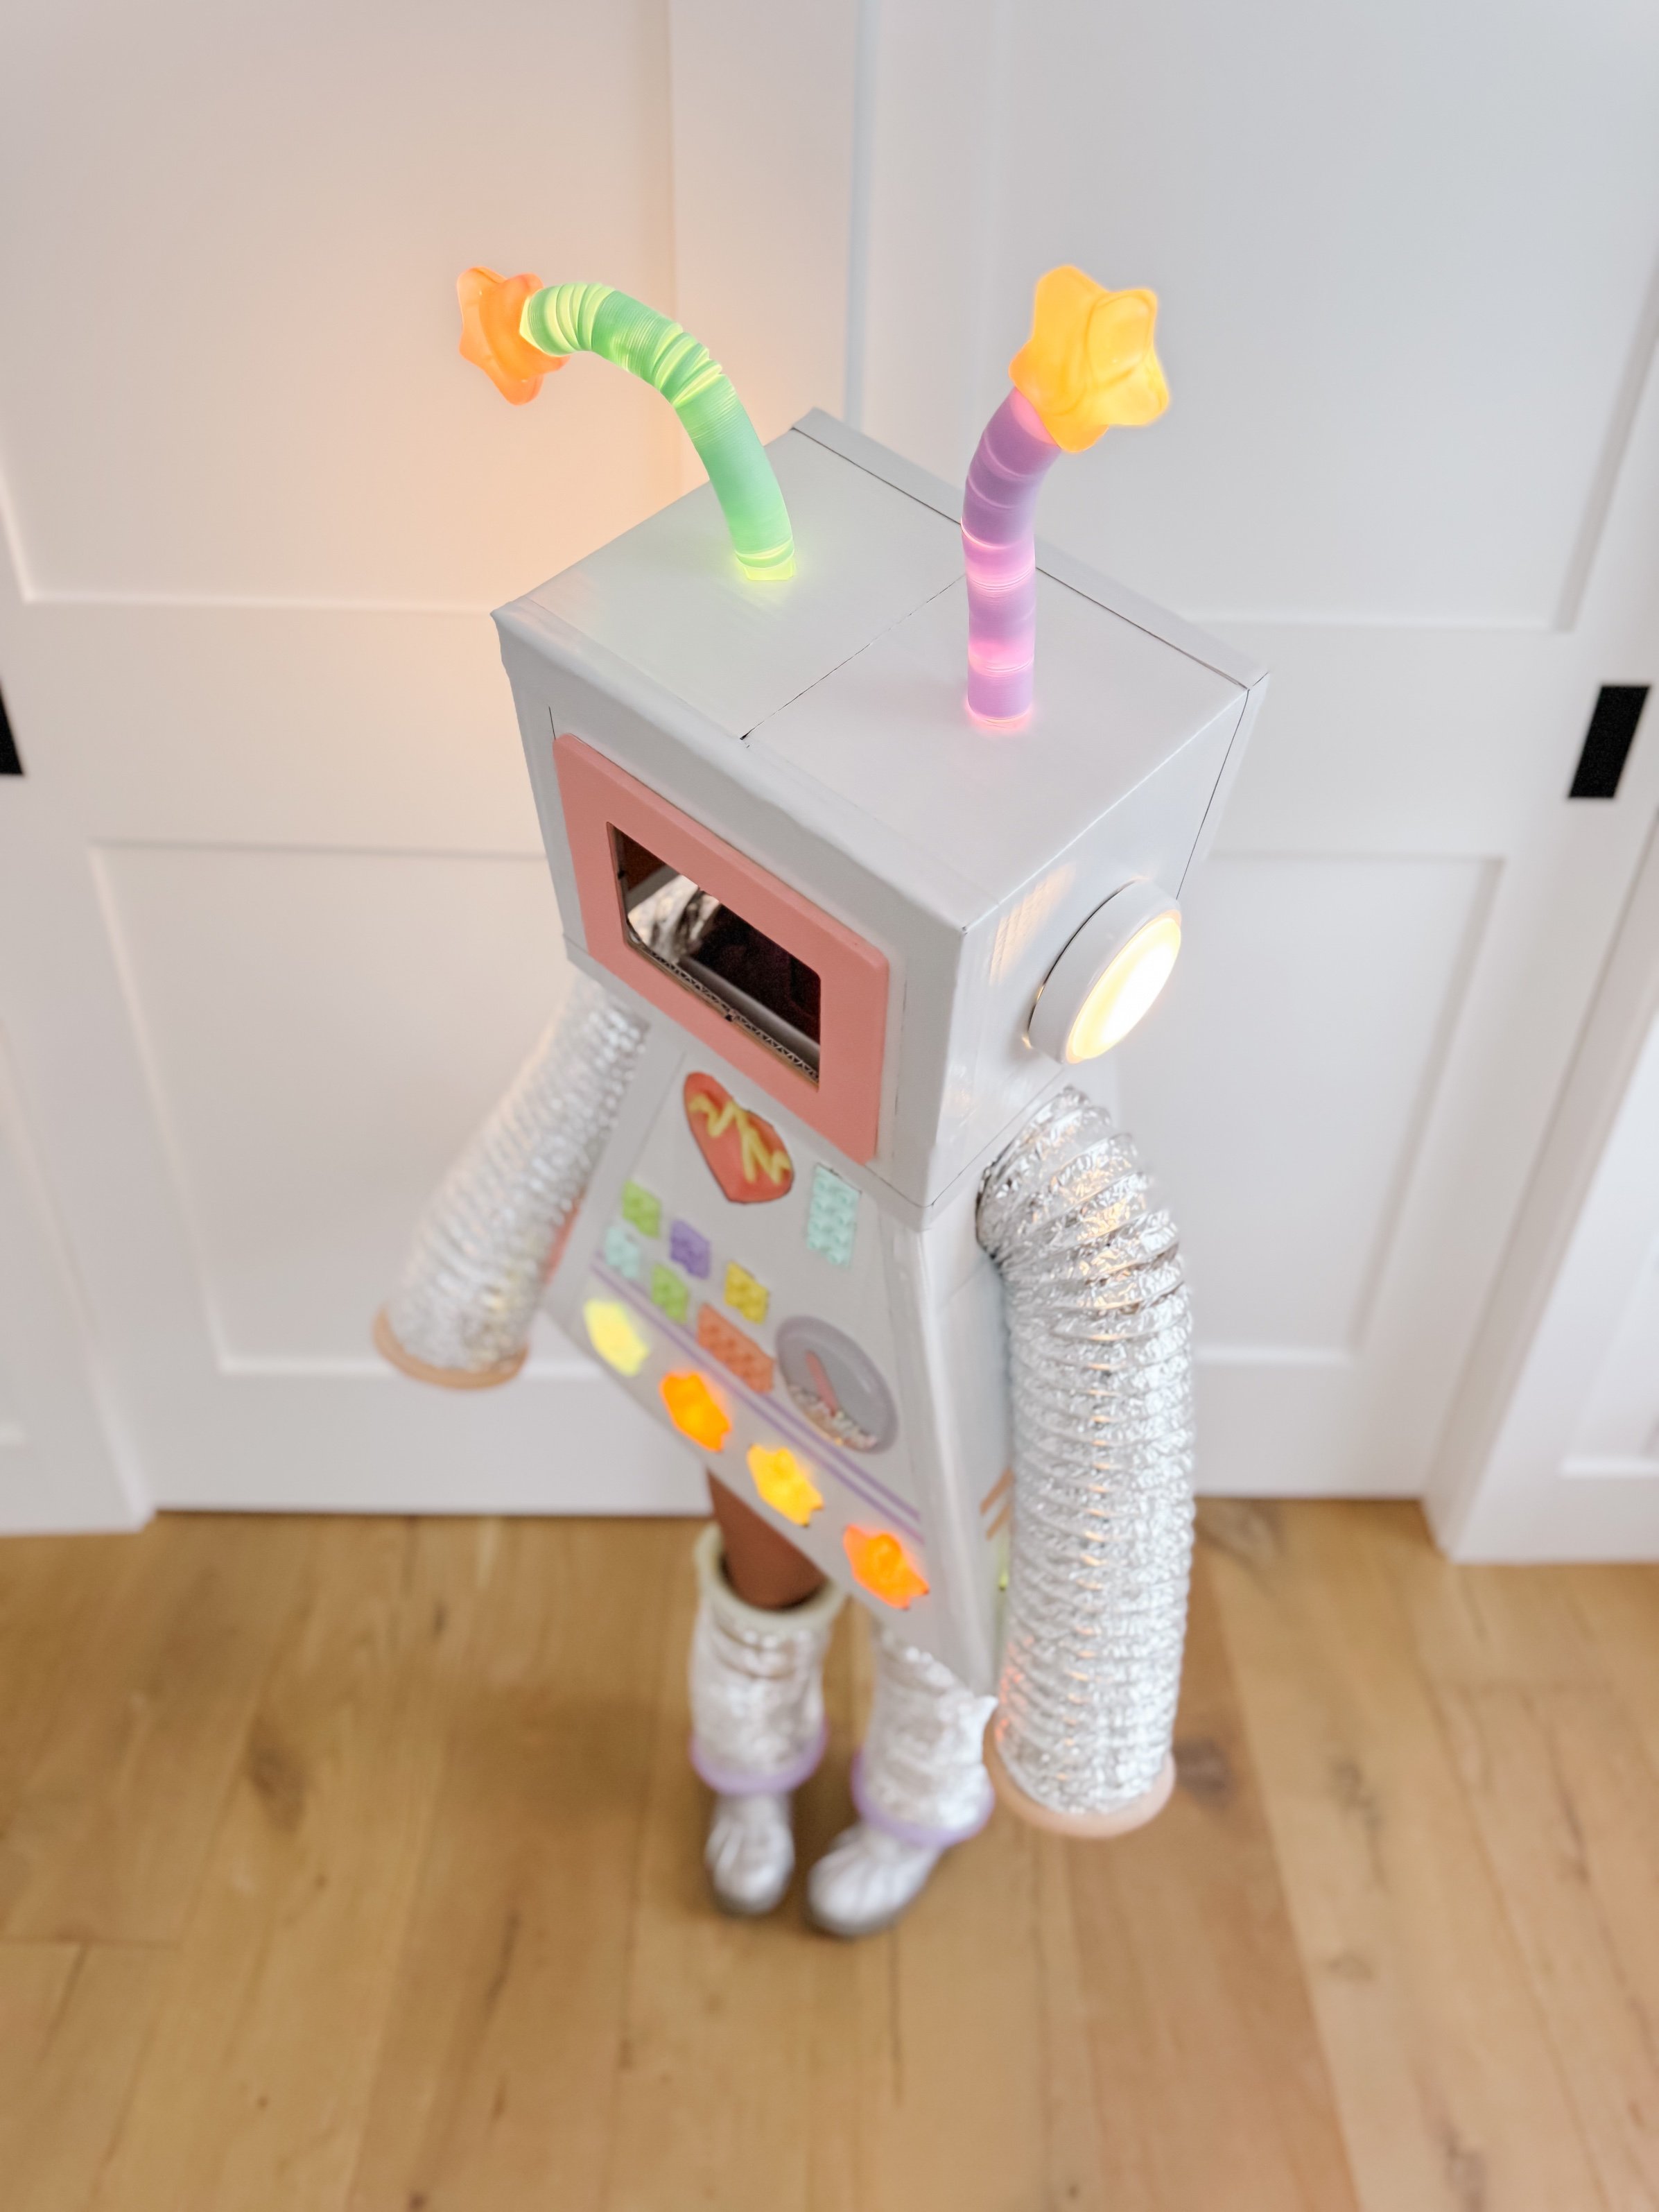
  • Push lights for ears: Stick round Push lights on either side of the head box for ears, which can double as lights.

  • Antenna with star balls: Attach Pastel purple and teal tubes for antenna to the top of the head box as antenna. Secure Star-shaped ball pit balls to the top of each tube and insert Small battery-powered lights to light them up for a glowing effect.

4. The Robot Heart

Heart plate with heartbeat line: Use a Heart-shaped box lid as the robot’s heart plate. Bend a Pipe cleaners into the shape of a heartbeat line and attach it to the lid. Hot glue the heart plate to the front of the body box, just above the Lego control panel.

5. Finishing Touches

  • Ensure everything is securely fastened with white Gorilla tape. Add extra tape where necessary to reinforce the connections.

  • Finally, have your child try on the costume and make any adjustments for comfort.

Why This Robot Costume Stands Out

This DIY robot costume combines creativity with a bit of light-up magic. The star-shaped decorations, light-up antenna, and glow-in-the-dark features make it especially dazzling at night. Plus, the use of fidget tubes and playful materials like Legos adds a whimsical, child-friendly touch.

Crafting a robot costume for Halloween is not only a fun way to spend time with your child, but it also encourages creativity and imaginative play. Whether you’re recreating this exact design or putting your own spin on it, your little one is sure to love their unique, light-up robot costume. Happy crafting and have a fun-filled Halloween!


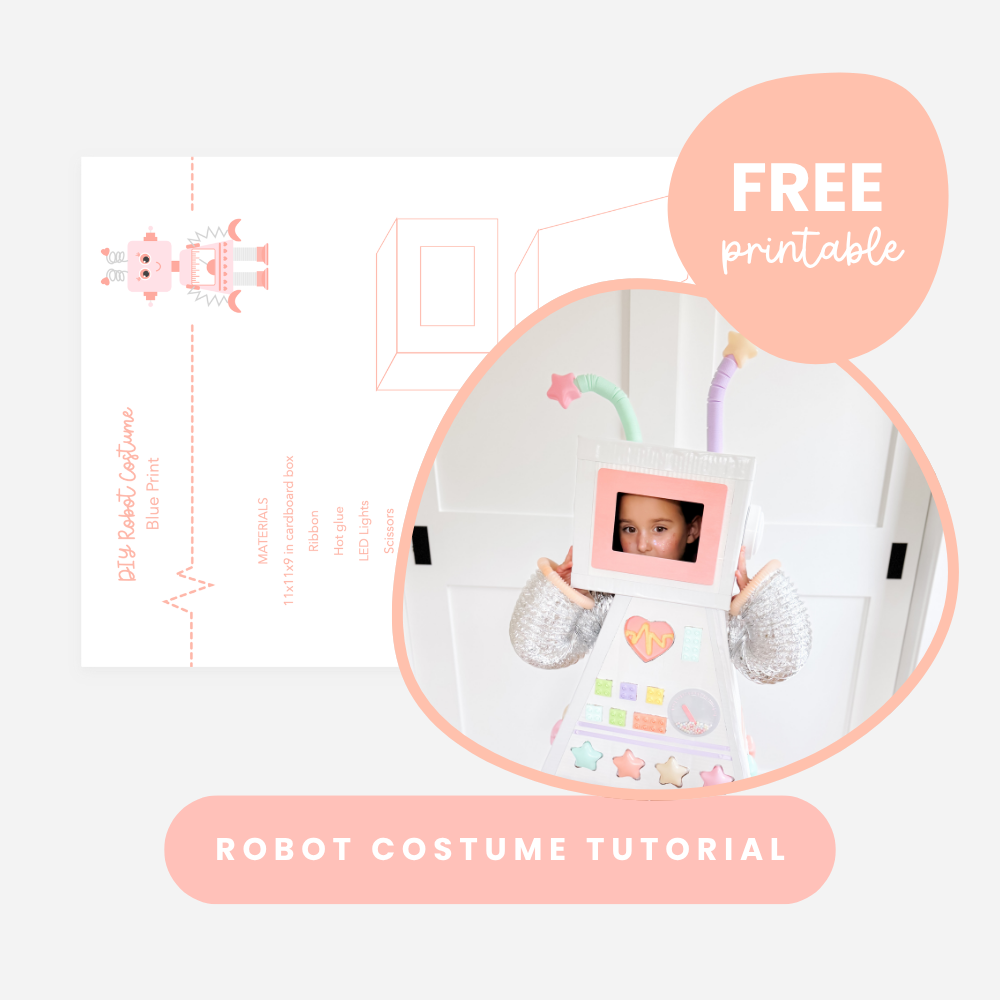
Free Rocket Ship Cardboard Template

Body Copy

Want to make this robot costume even easier?
Download my free Rocket Ship cardboard pattern — it includes a kid-friendly shape, simple cutting guides, and sizing tips so you don’t have to guess.

This printable works great for:

  • Robot costumes

  • Astronaut costumes

  • Space-themed dramatic play

  • Cardboard builds for rainy days

Designed for parents who want creative fun without overthinking it. For ways to display this craft, check out my Rocket Ship Blog Post.

➡️ Get the Free Rocket Ship Template


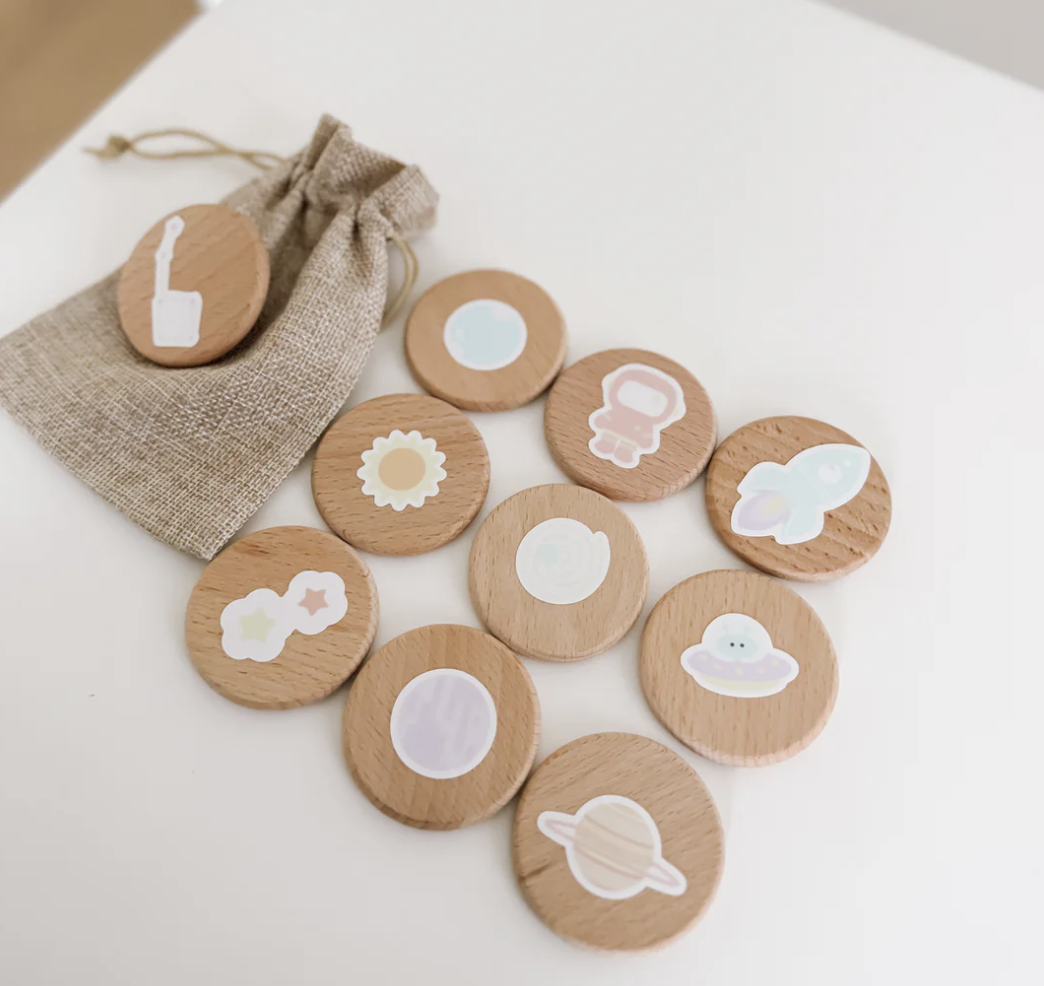
Wooden play rounds space themed for kids sensory play
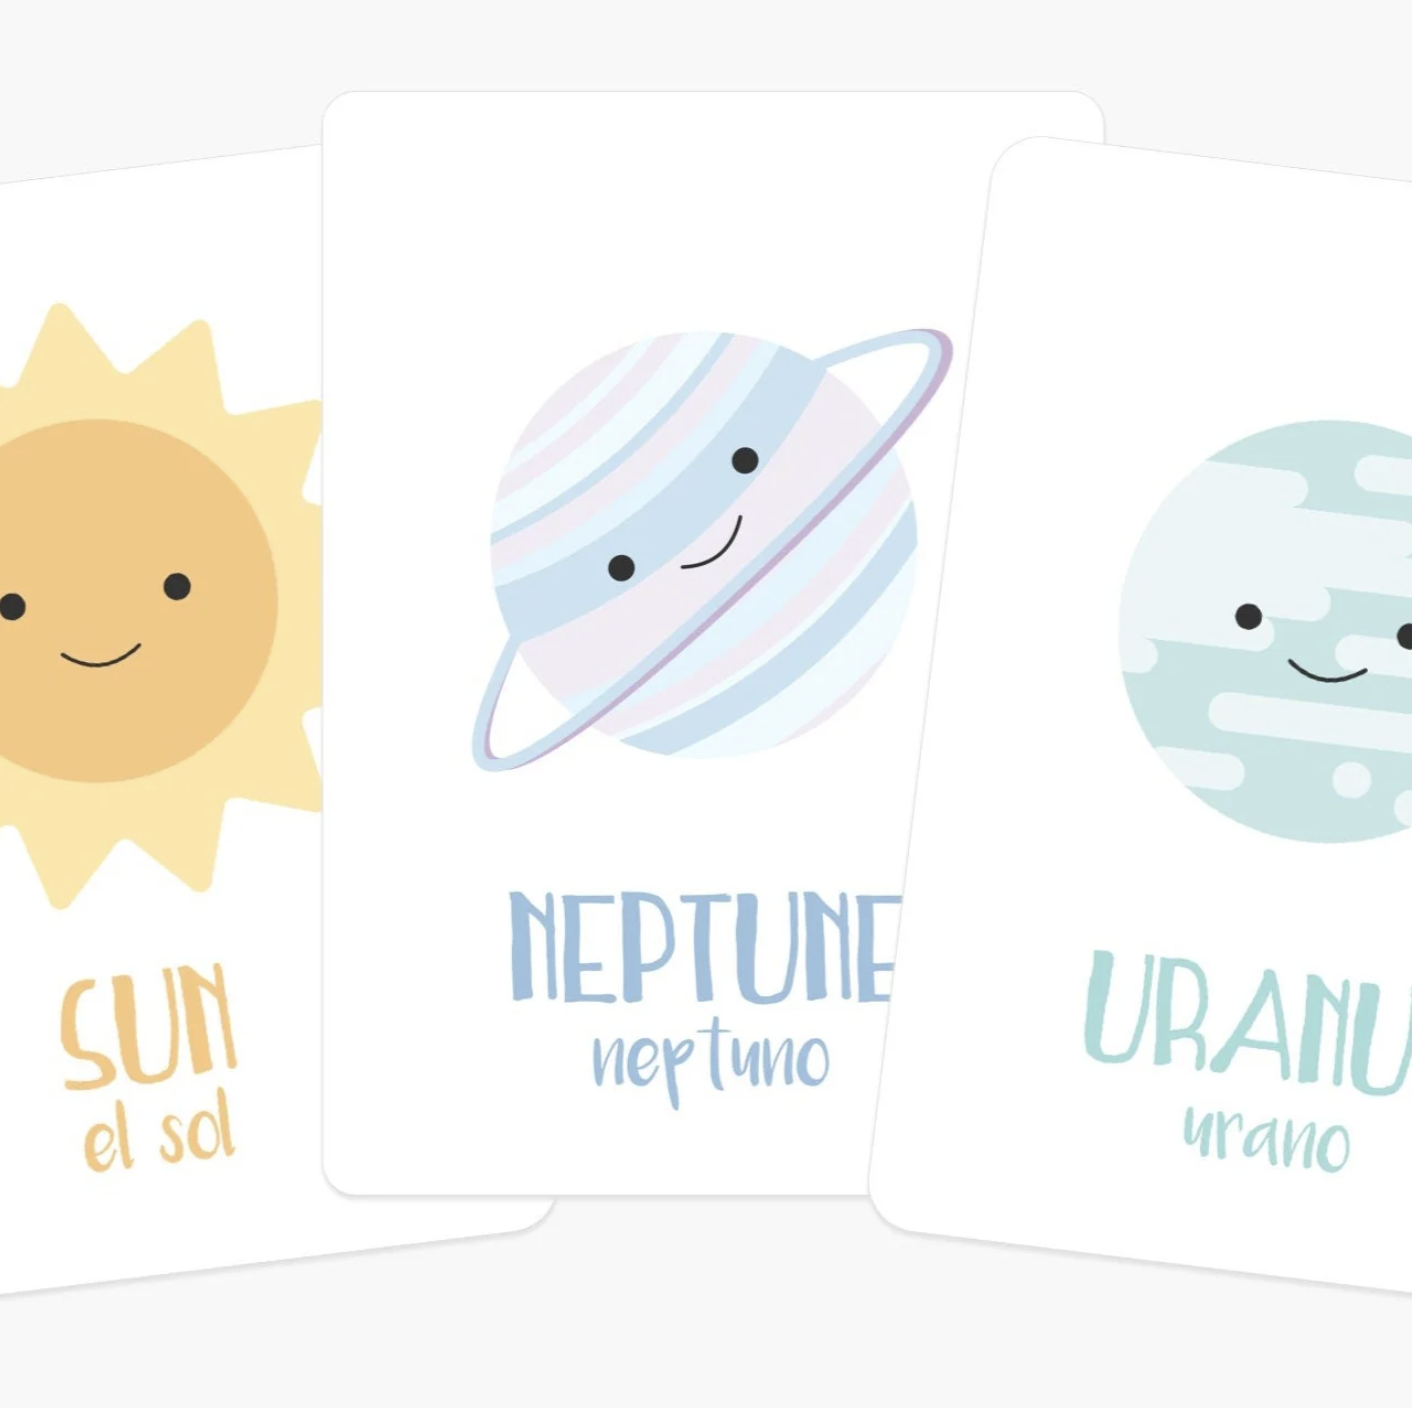
Flashcards for babies and toddlers who love learning about space
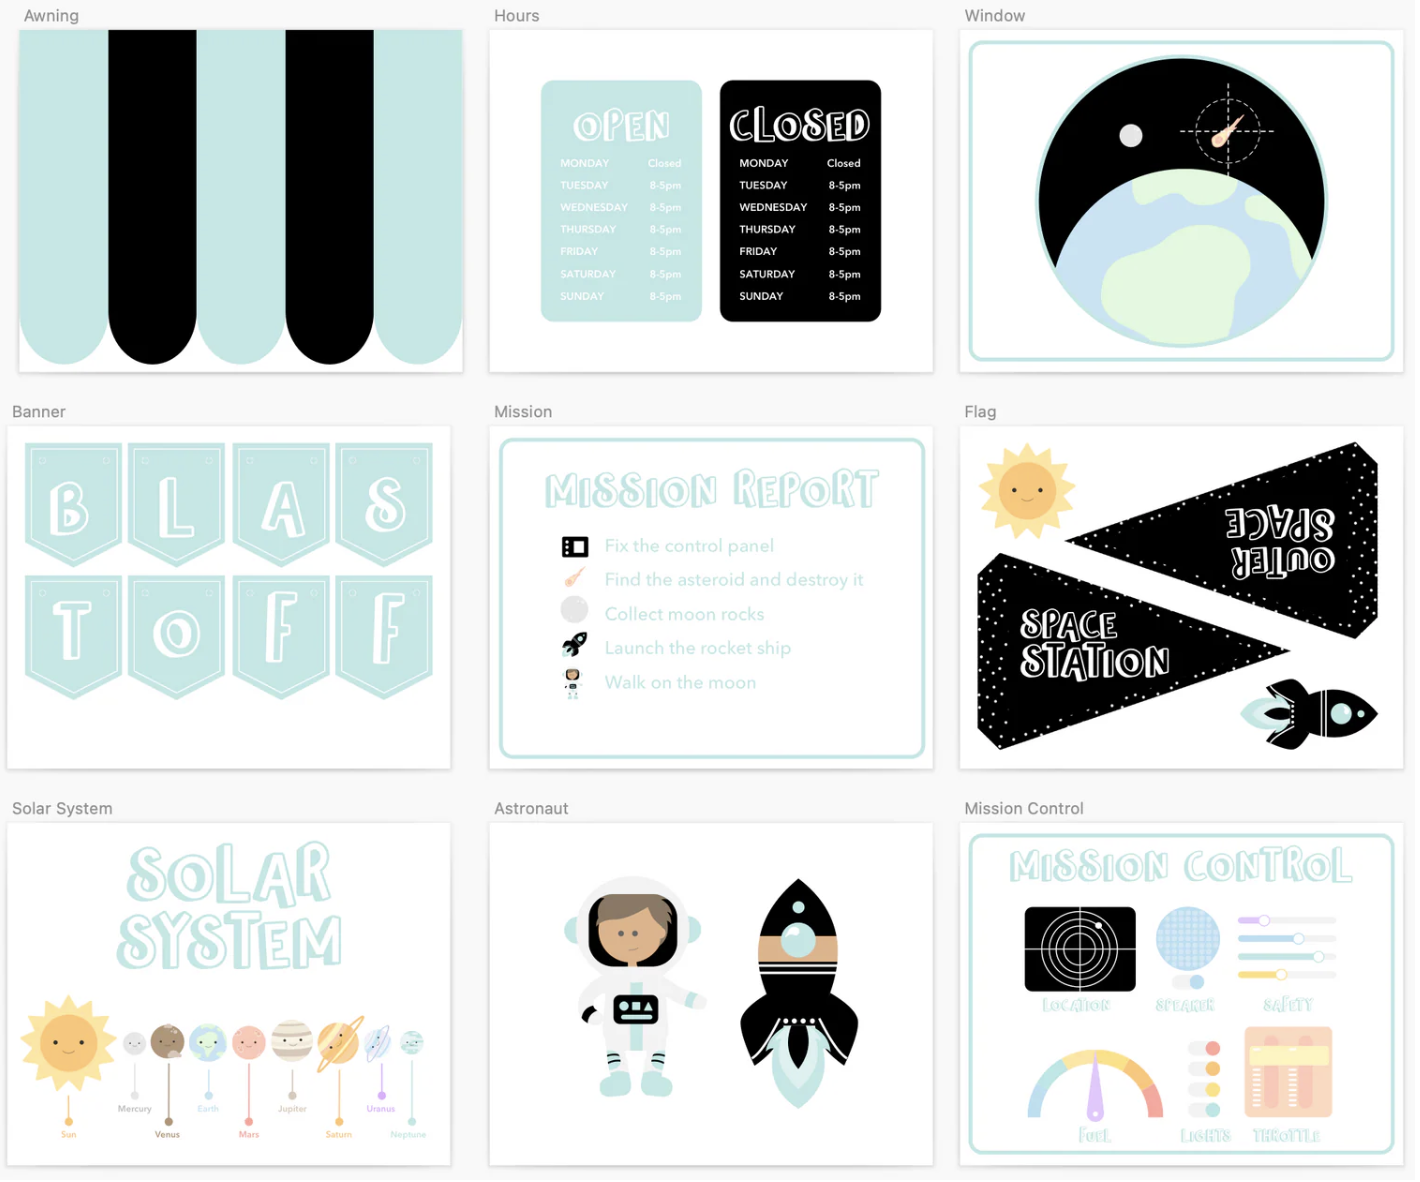
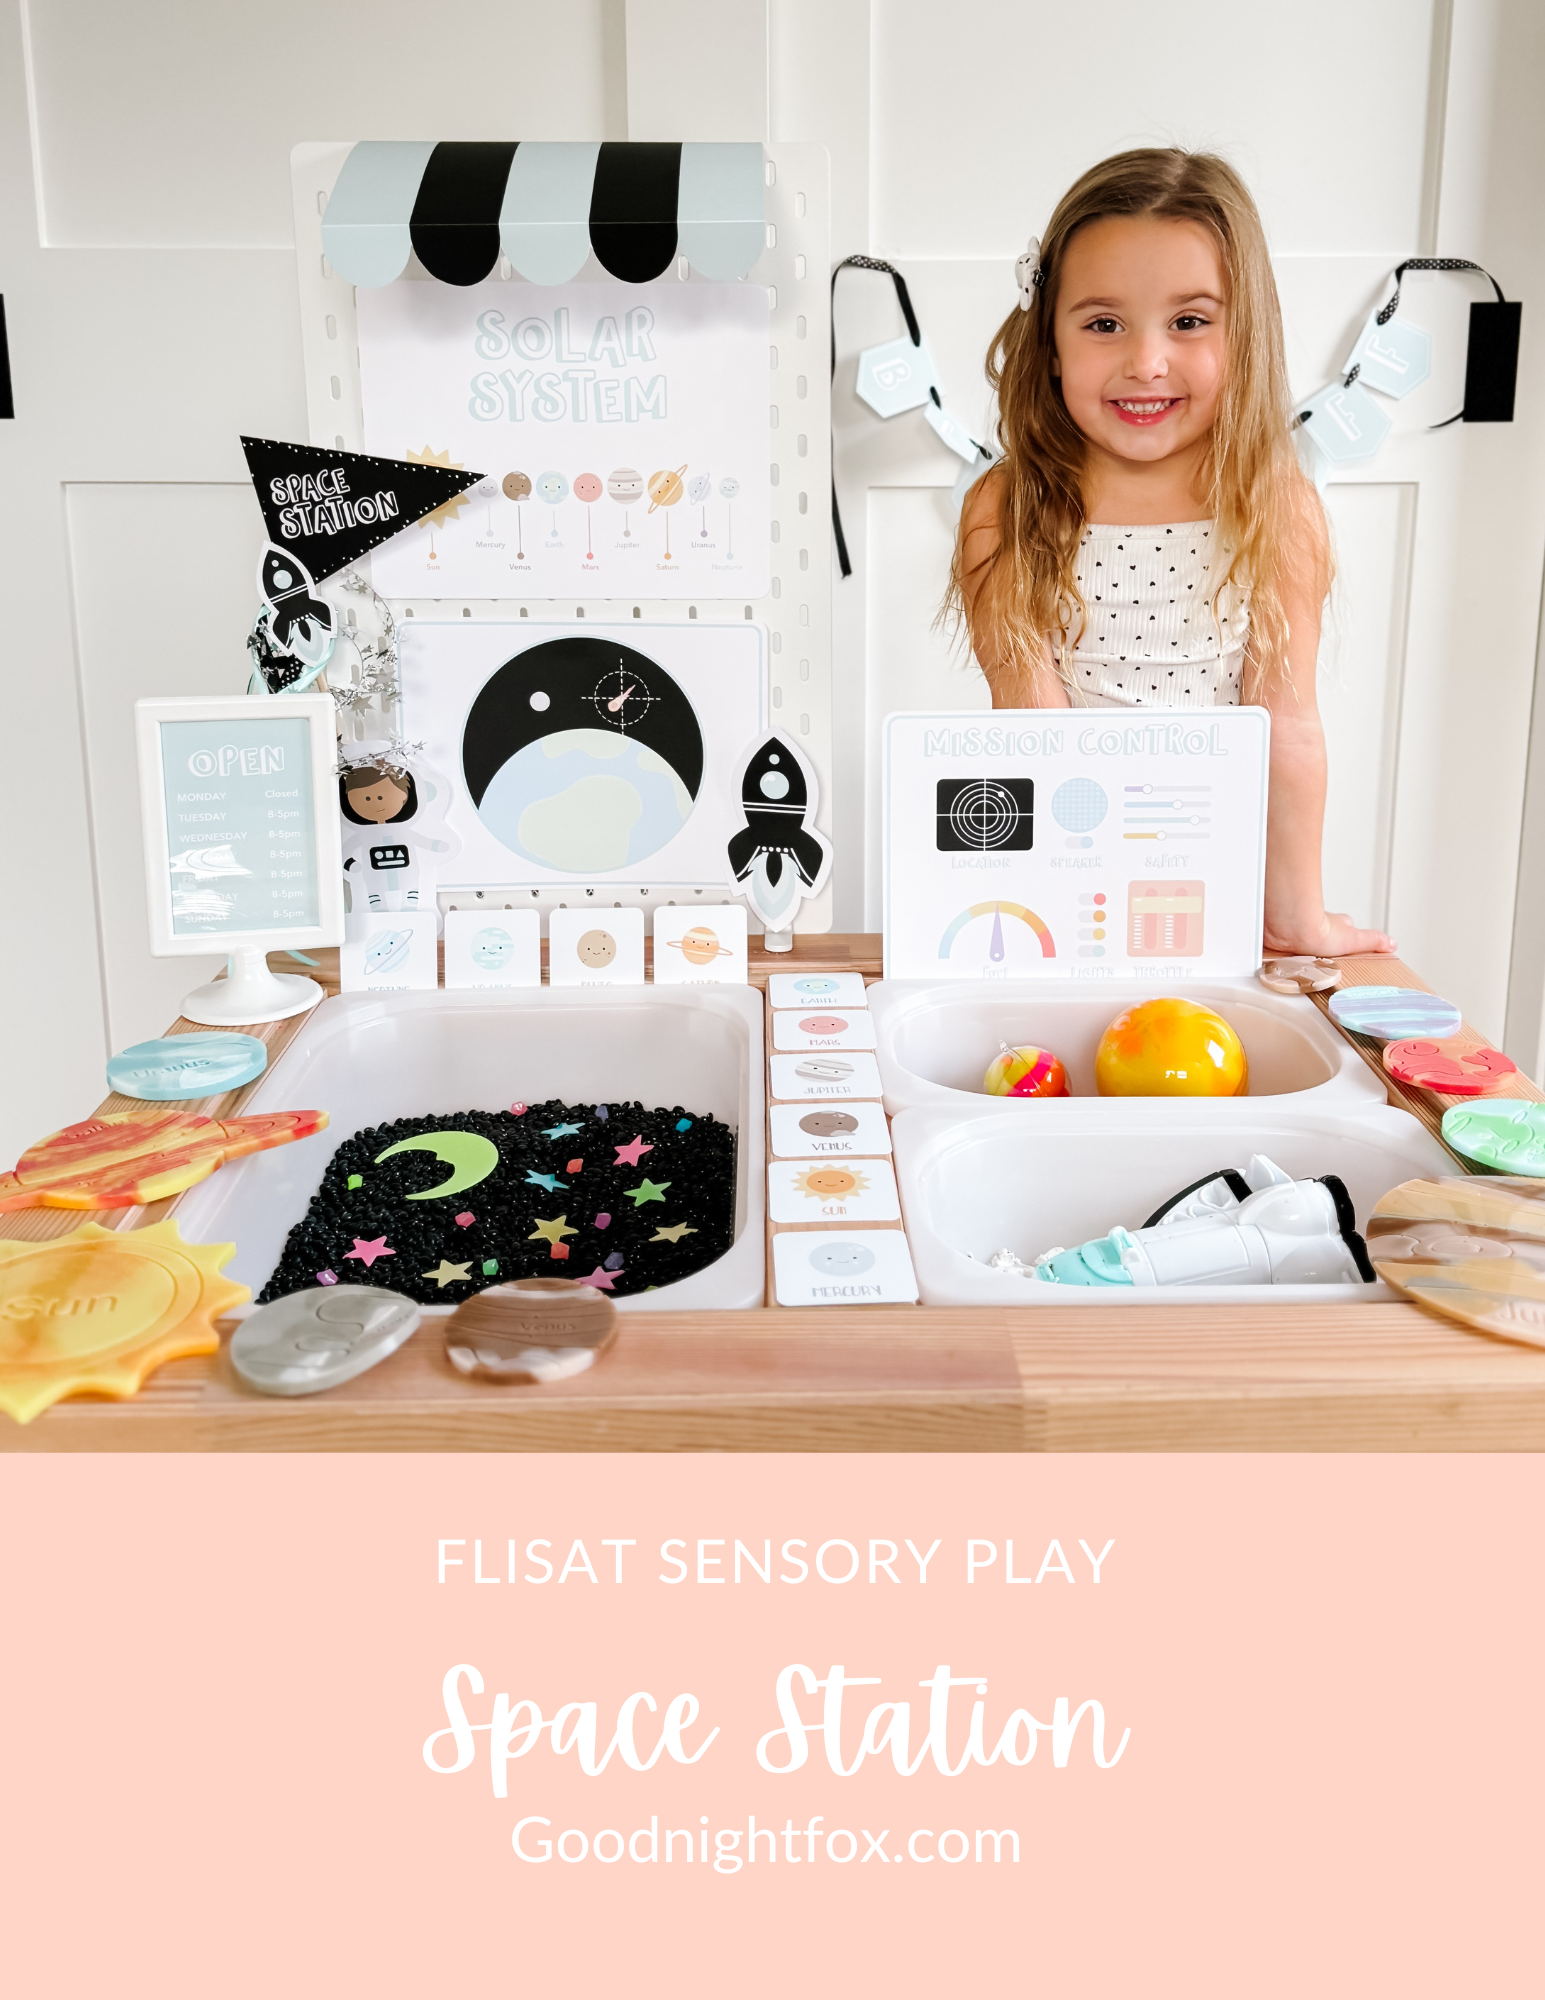
Printable space themed decor for the flisat sensory play table
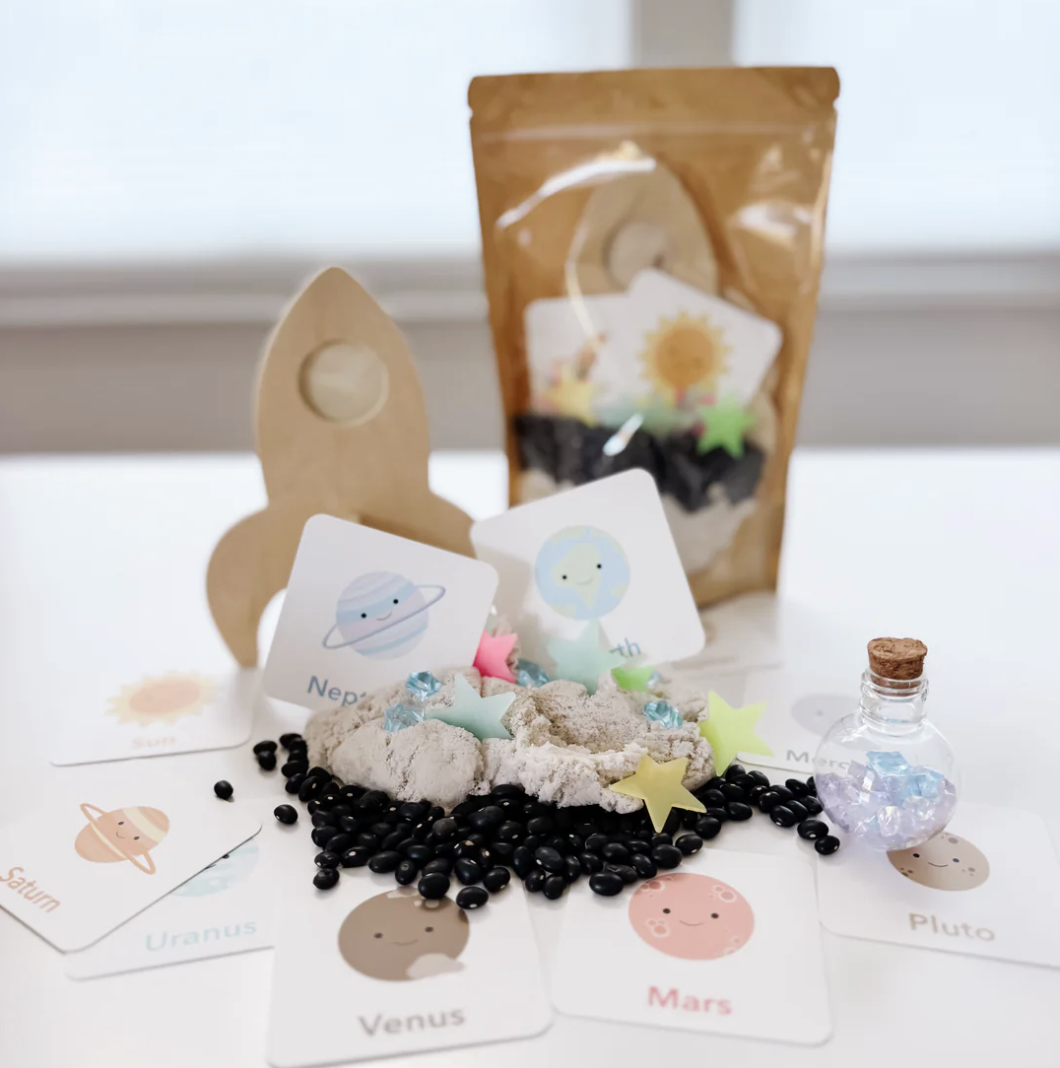
Space themed sensory play kit with moon sand, black beans, glow in the dark stars, planets match game cards and a wooden rocket ship.

Extend the Play with Space-Themed Sensory Fun

Once the costume is finished, the fun doesn’t have to stop ✨
My Space-Themed Sensory Play Printables and Space Sensory Kits turn this costume into a full learning experience.

Inside the printable set:

  • Space-station decor to turn your flisat table into full imaginative play experience

  • Fine motor activities for little hands

  • Simple learning extensions for toddlers & preschoolers

  • Designed to pair with household sensory fillers (black beans, kinetic sand)

Perfect for kids who love building, pretending, and exploring space.

🚀 Shop the Space Sensory Printables and the Space Sensory Kits


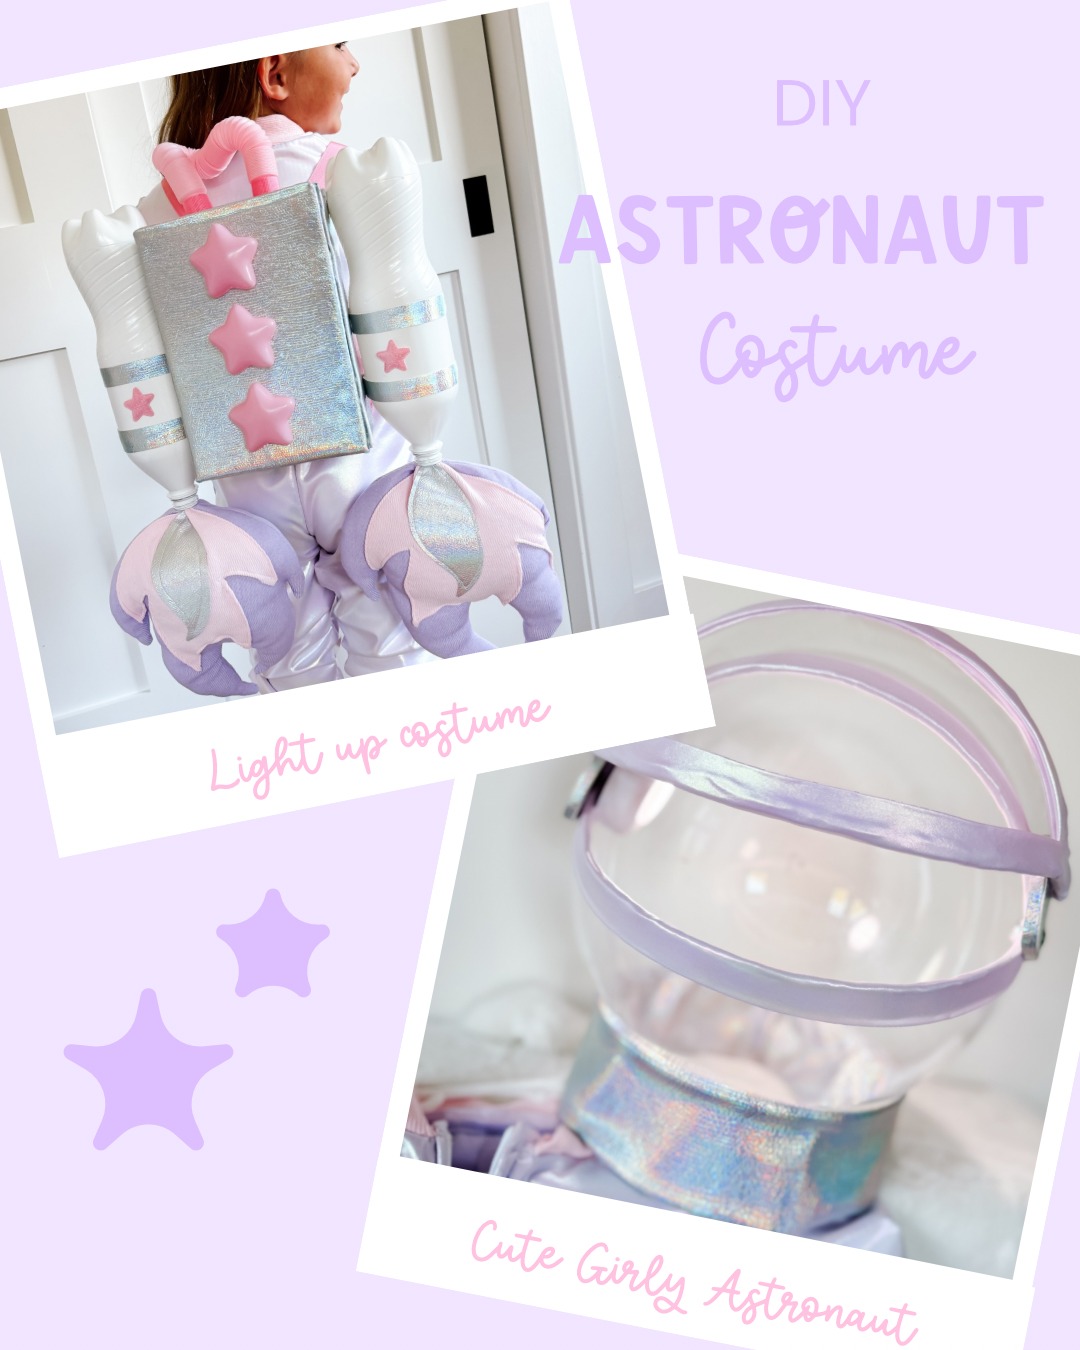
girly_astronaut_costume.webp
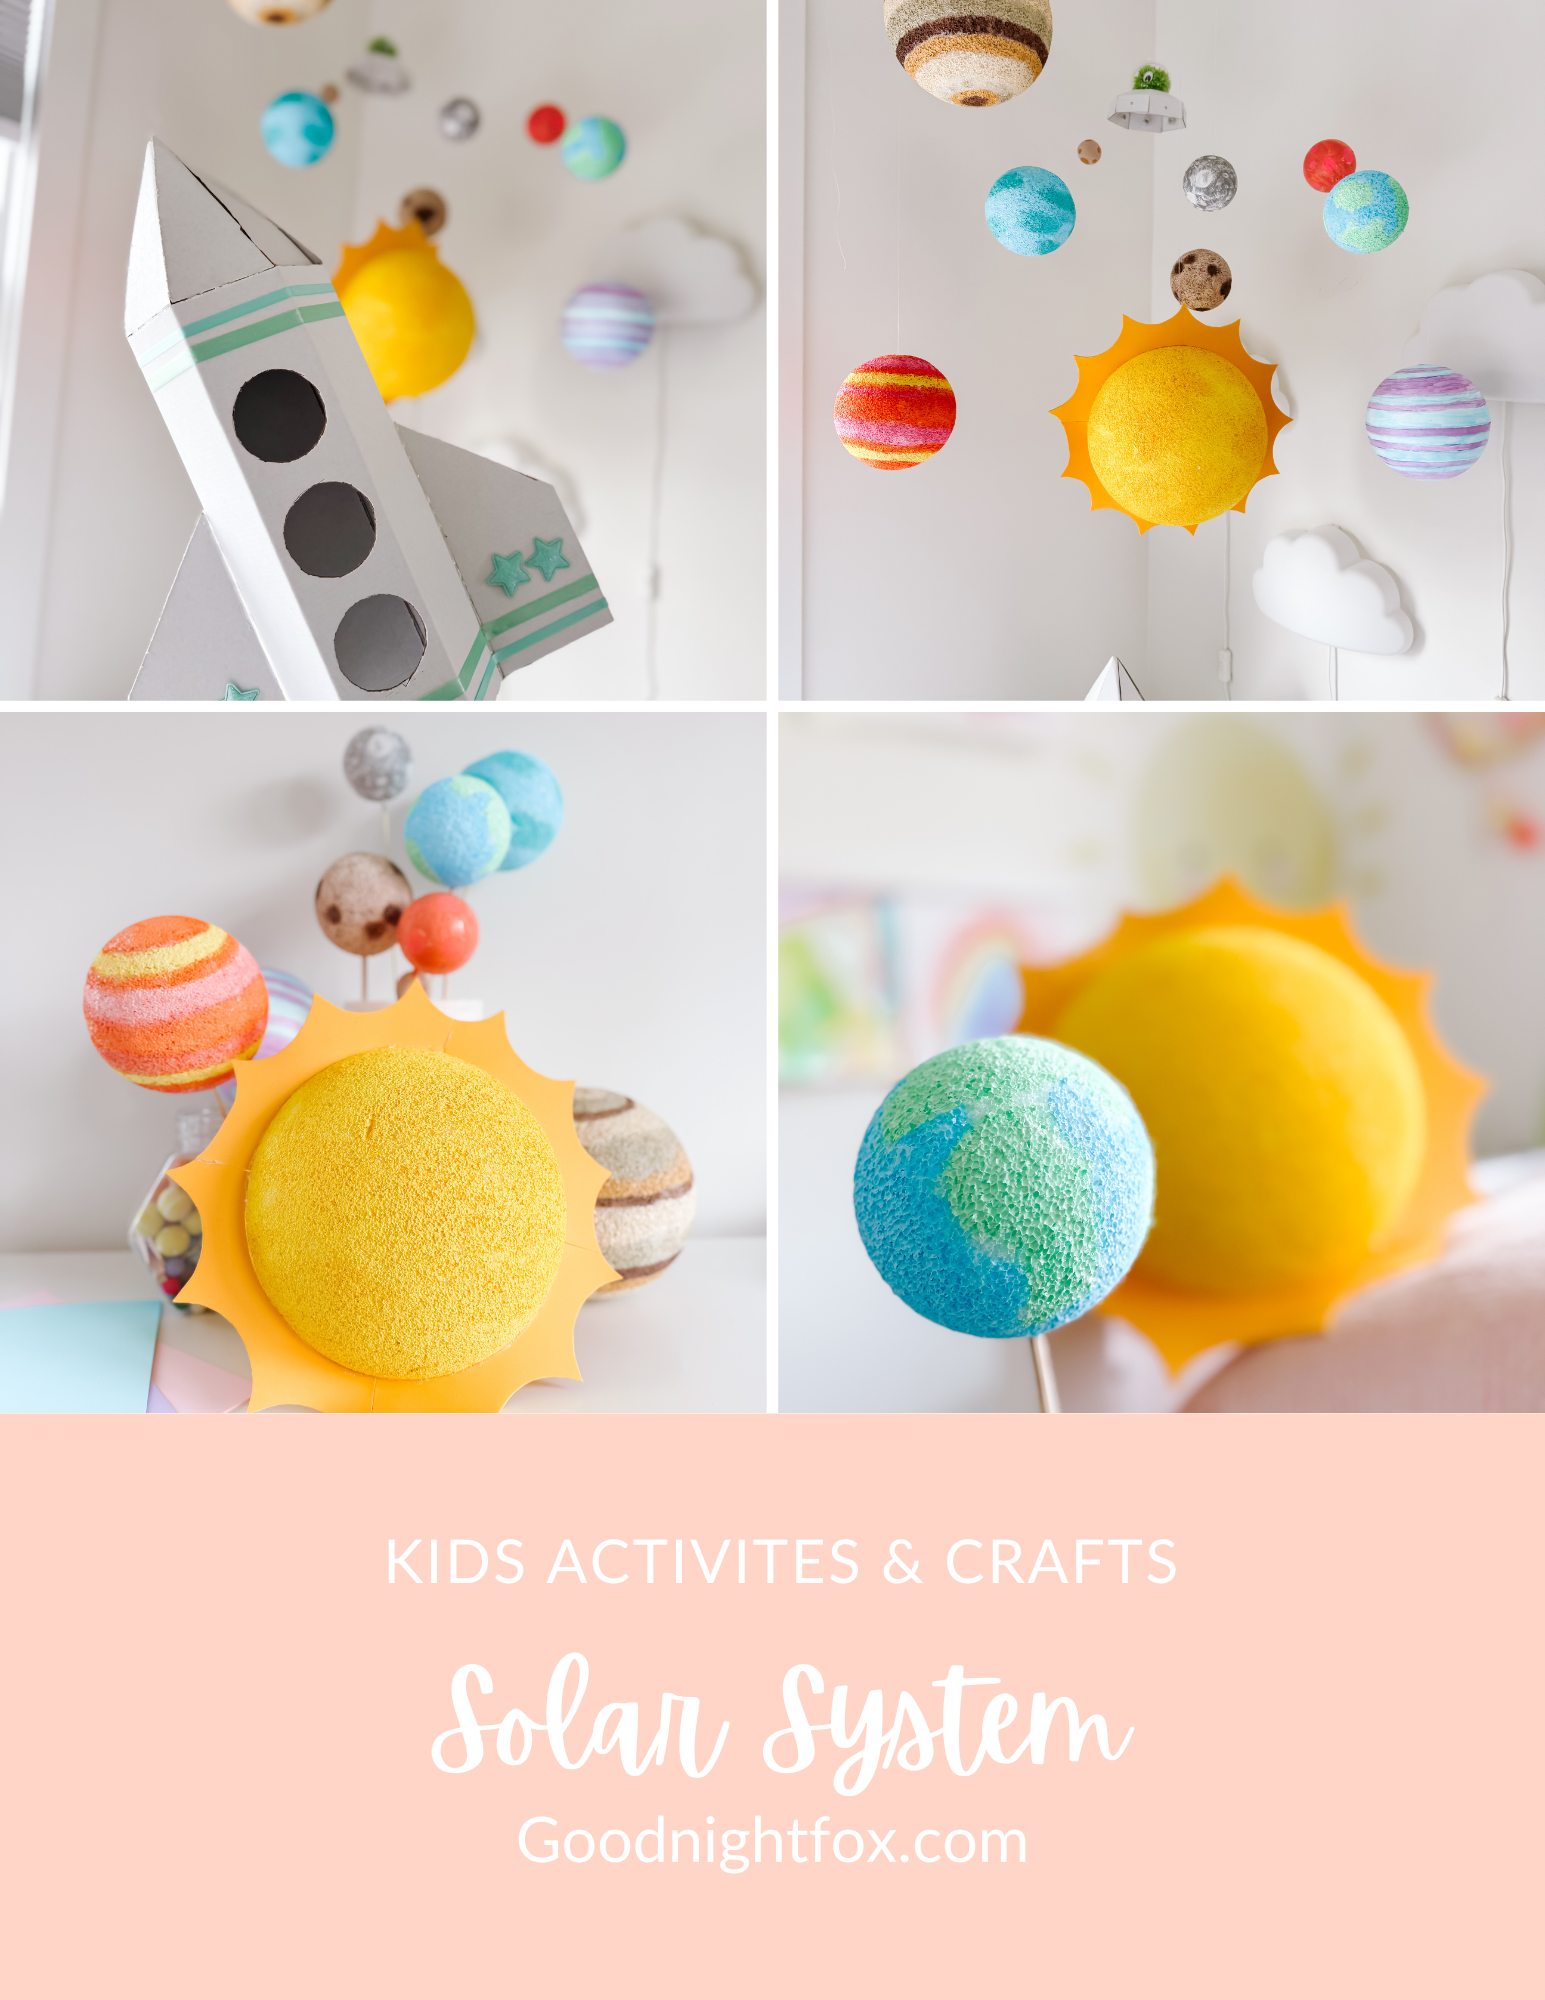
Solar_System_DIY.webp
Space_Station_Sensory_Play.webp

More Space Activities Your Kids Will Love

If your child is loving this robot build, try these space-themed activities next:

  • 🎨 How to Paint Your Own Solar System Diorama A hands-on art + science project that’s perfect for preschool and early elementary kids.

  • 🧑‍🚀 Space-themed sensory play ideas Easy setups using rice, beans, scoops, and small world figures.

These activities are great for extending learning through play — especially after a big creative build like this one.


Screenshot 2025-12-22 at 20.06.19.png
Screenshot 2025-12-22 at 20.06.33.png
Screenshot 2025-12-22 at 20.06.48.png

Planning More Fall & Halloween Play?

If you’re already in creative mode, I also have fall & Halloween sensory printables that pair perfectly with costume season.

These are great for:

  • Halloween party play tables

  • Toddler & preschool sensory bins

  • Low-prep activities during busy weeks

  • Teachers and homeschool families

All designed in the same simple, kid-friendly style you see here.

🎃 Browse Fall & Halloween Sensory Printables


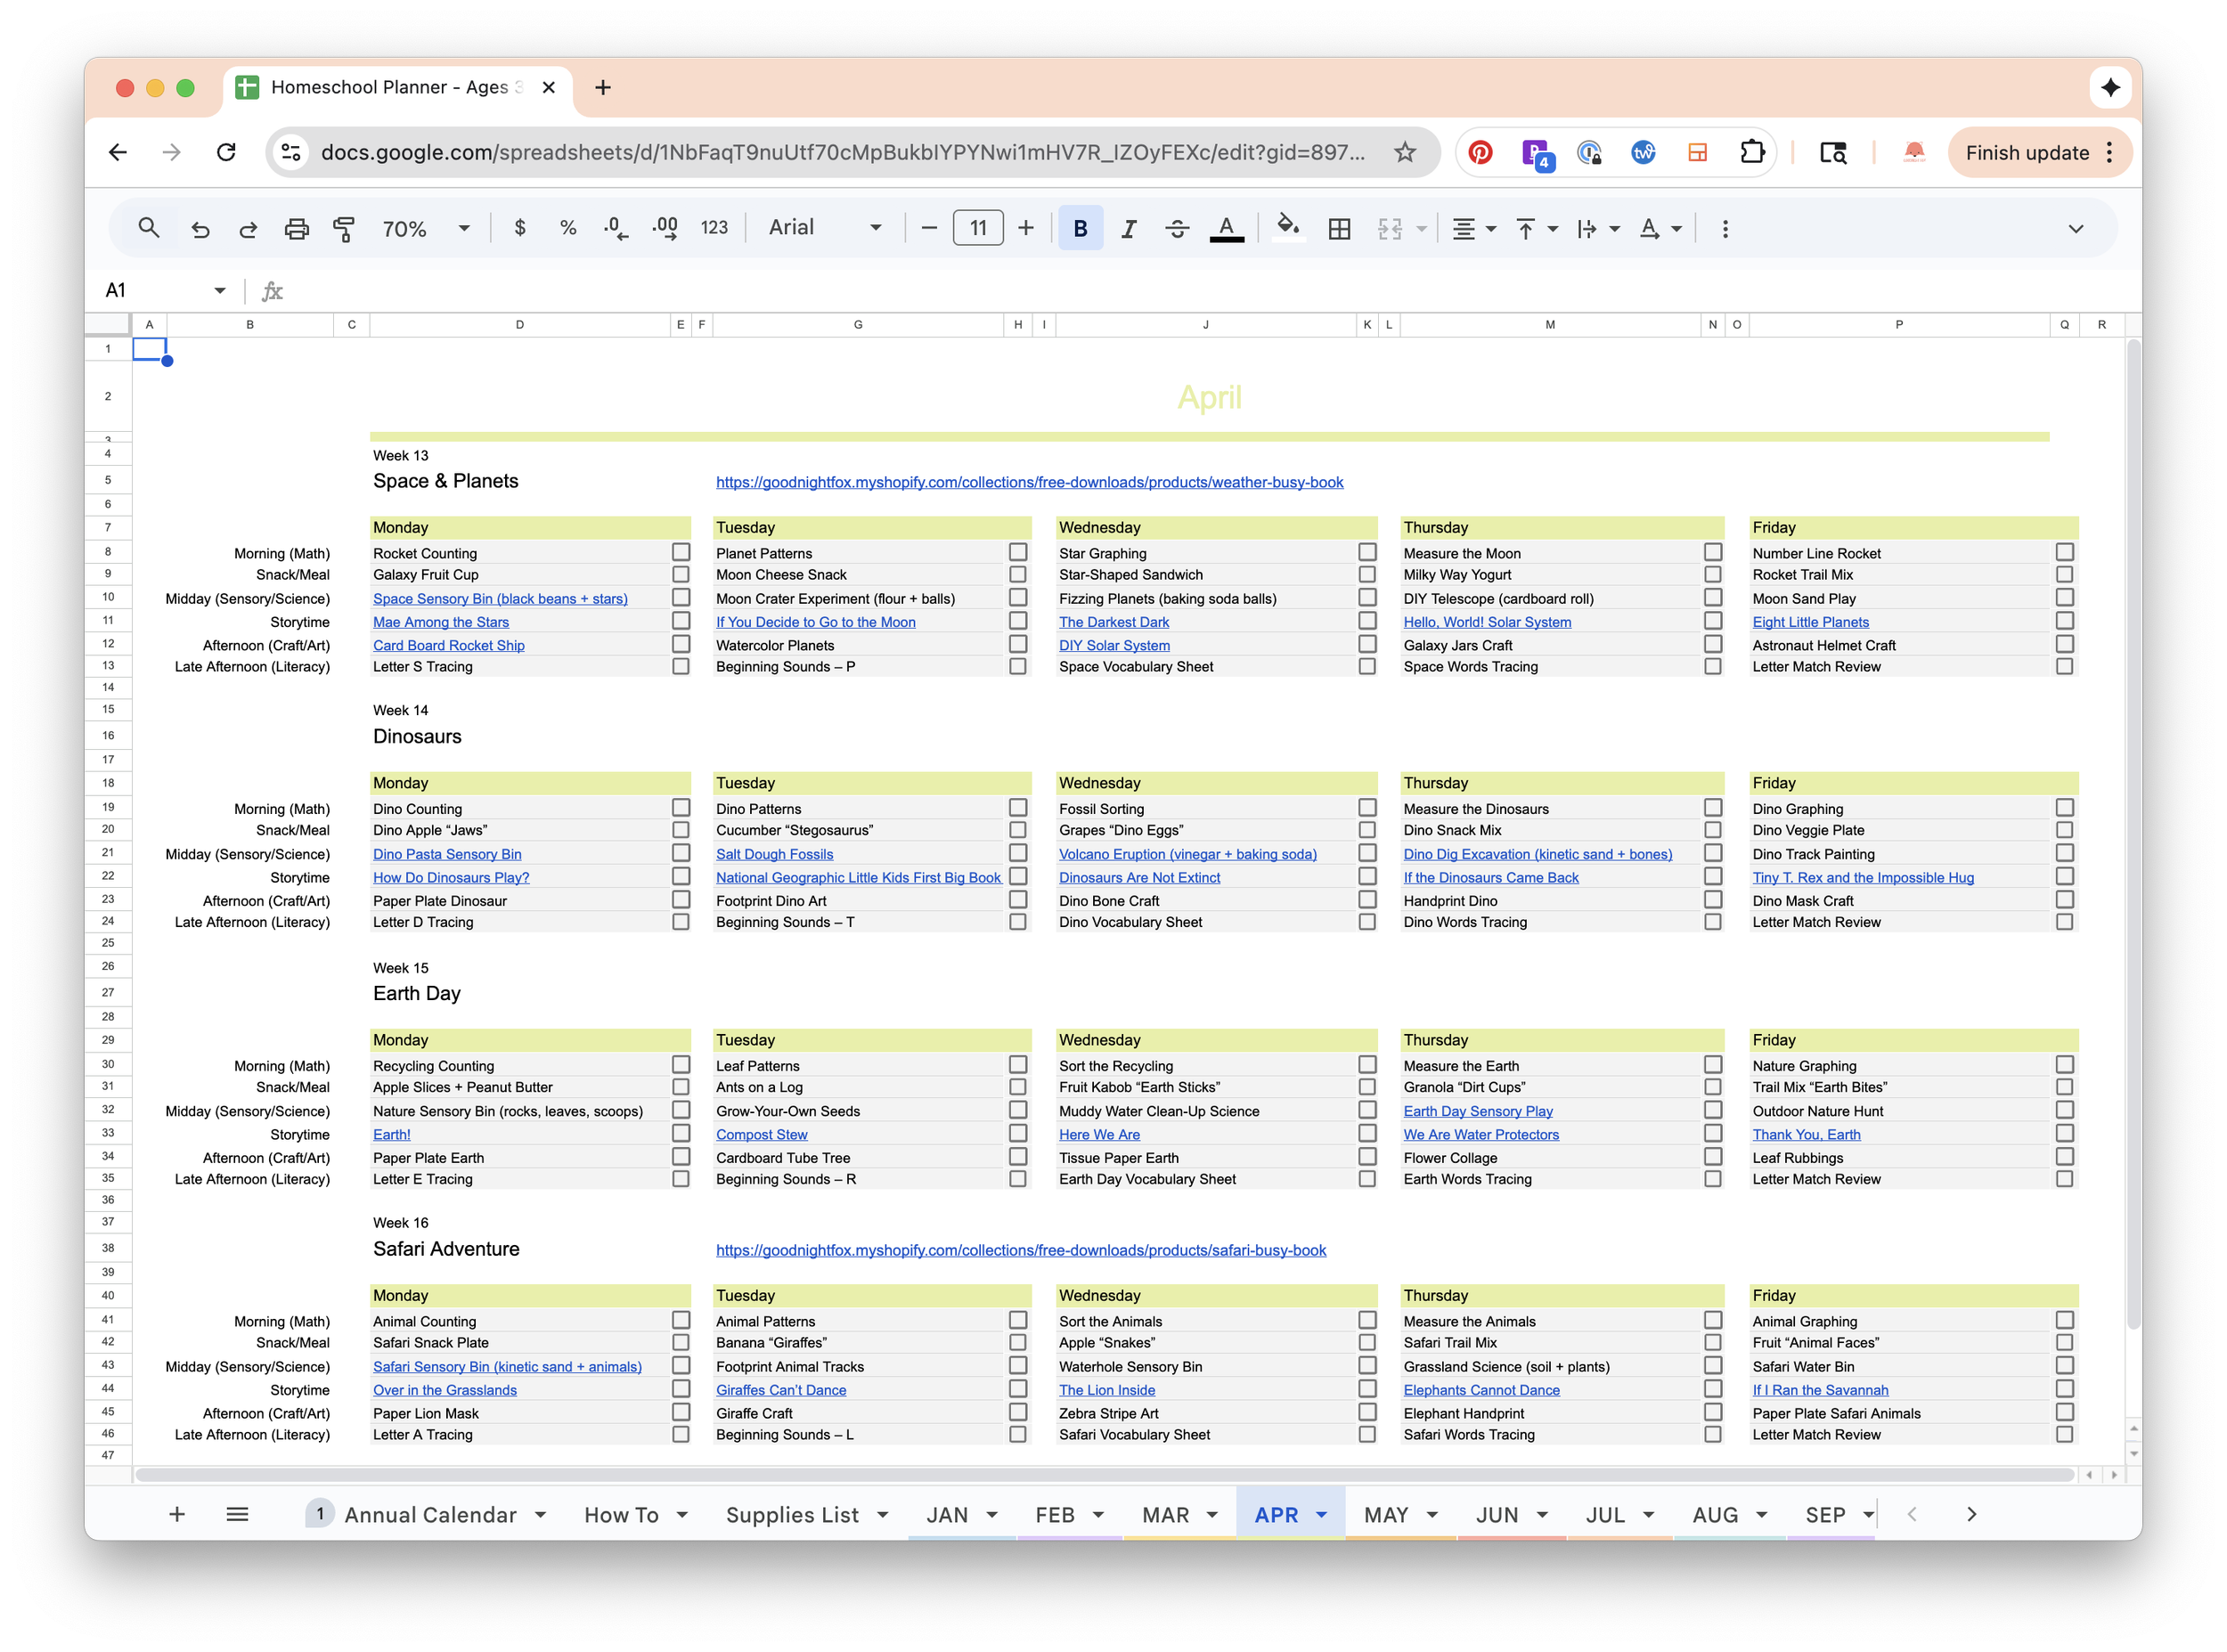
Detailed outline of the April homeschool planner schedule 5 days a week with 5 blocks of activities including math, snacks, sensory, science, storytime, crafts, and literacy.

Turn This Costume into a Full Space Week of Learning

If your child is excited about robots and space, this is the perfect time to turn that interest into a full week of learning through play.

Inside my Homeschool Planner, Space Week includes:

  • Daily themed activities (sensory play, crafts, reading, and simple academics)

  • Hands-on projects that pair beautifully with this robot costume

  • Low-prep ideas designed for toddlers, preschoolers, and early elementary kids

  • A flexible layout so you can do as little or as much as your day allows

It’s ideal for parents who want structure without pressure.
Explore Space Week in the Homeschool Planner

Tags robot costume, halloween costume ideas for kids, cute girly robot costume, cardboard DIY costume, Kids costume, Pink and white costume, glow in the dark costume
21 Comments
← Newer Posts Older Posts →

Get Featured

Have a shop that specializes in baby gifts? I'd love to feature your shop and products in one of my weekly roundups. Email me at goodnightfoxstudio@gmail.com.

Have a small shop?

Check out GoodnightFox wholesale we’d love to have you carry the GoodnightFox brand.

Free Letter of the Week Guide

Sign up with your email address to get a weekly Letter Guide A-Z for 26 weeks of sensory play inspiration.

You’ll also get access to free printables, new products and promotions.

Thank you! Check your email for your free 26-Letter of the Week activity guide printable poster.


Free Printable Activities

Check out our free printable library of resources. From activity books, dramatic play kits, memory games, flashcards and more, you can try the entire goodnightFox collection free.


GOODNIGHTFOX

Play-based learning resources that help toddlers learn through play. Sensory play ideas, free printables, and hands-on learning tools designed for busy parents and curious little learners.

Get Free Printables →

EXPLORE

  • Start Here

  • Toddler Activities by Age

  • Seasonal Toddler Activities

  • Sensory Play Ideas

All Activity Ideas →

SHOP

  • Flashcards

  • Learning Kits

  • Memory Games

  • Dramatic Play

  • Playschool Planner

Shop All →

ABOUT

  • Our Story

  • Contact

  • FAQ

  • Privacy Policy

  • Terms & Conditions

  • Wholesale

  • Newsletter

© 2026 GoodnightFox
Play-Based Learning for Toddlers