Add a touch of WHIM to your kid's spaces!

An Interview with Amanda Johnston or Project Whim

I’m so excited to share with you all an interview I just did with Amanda who shares her amazing everyday mom stories on her blog Project Whim. If you’re designing a kid’s space or just looking to liven up your do a DIY redesign of your kid’s bedroom, read on for some great tips! Plus, you’ll get to hear all about how she designed her daughters’ galaxy themed bedroom, her son’s Scandinavian themed bedroom, and

1.png

Tell us a little bit about your background, what you do, and how you got started?

Hi, I’m Amanda and I’m the Mom of 3 behind Project Whim and I share how to Add WHIM to the Everyday.  Project Whim first started 3 years ago after I had my second daughter.  I loved being a stay at home mom to my 2 girls, but I really wanted a hobby or something to work on separate from the kids while I was at home.  I decided to open my own Etsy shop designing and handmaking children’s décor and pillows.  I was extremely successful in growing my business and when I became pregnant with my son, I decided to close the shop down when he was born so I could really focus all my energy on my kids.  When my son turned one in October I was yearning for that online connection I had built with my amazing following on Instagram so I began jumping back on and sharing about our lives, décor and home projects we were up to.  Now I have my blog where I share all the fun ideas that I do with my kids and with our home.  It has become a wonderful creative outlet for me, and I’ve built amazing connections with so many awesome moms.  

Tell us a little bit more about the spaces you’ve designed for your kids.

From an incredibly young age my oldest daughter, Evie wanted to share a room with her sister. When Tessa turned 2 we put the girls in the same room and it’s been the greatest blessing.  Evie was extremely into space at the time.  I loved creating a space room for the girls because when you typically think of a space theme its usually for boys.  It was fun to think outside the box and create the ultimate Girl’s Galaxy Room.  When I found out I was pregnant the third time with my son I was so excited to create a room for a little boy. I am very drawn to a minimalistic, midcentury modern décor so I knew I wanted to make his nursery in that theme. 

I absolutely love your space themed girls room. What inspired you?

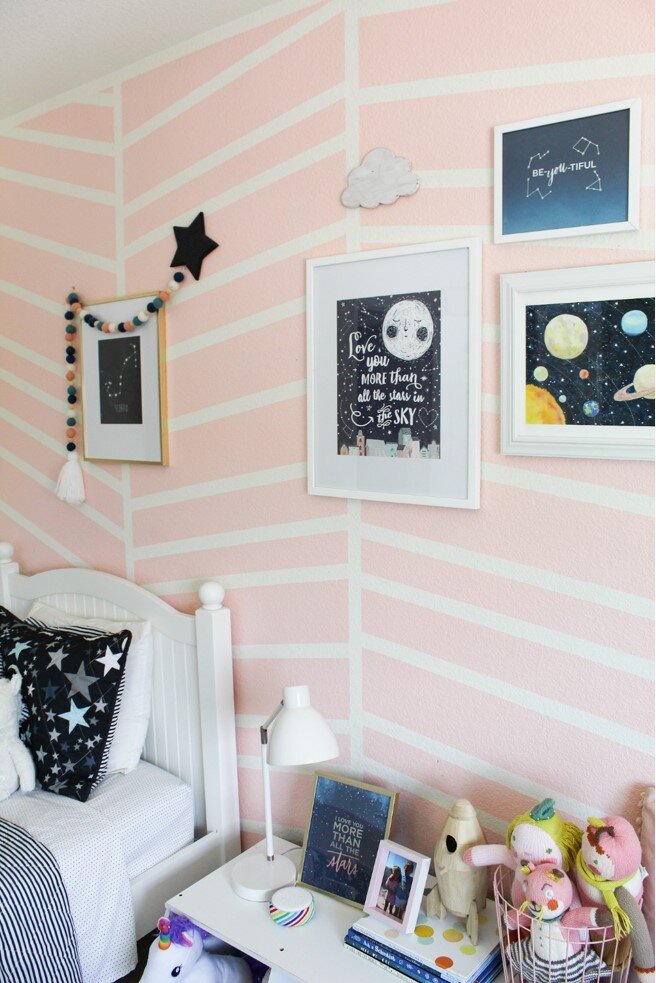
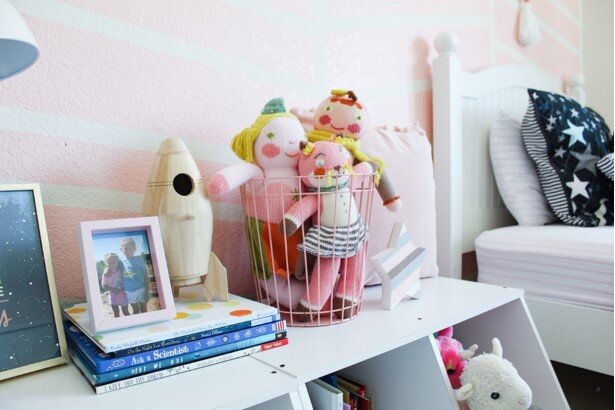
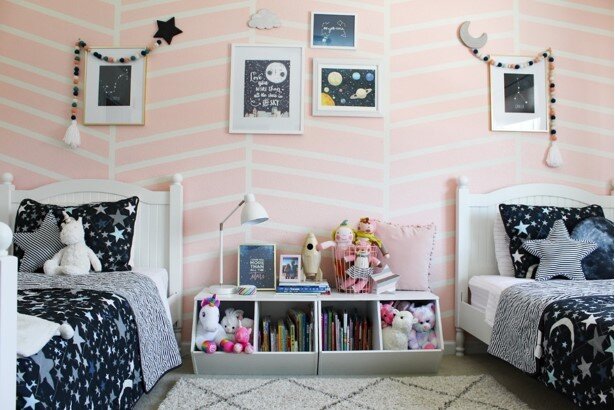
My oldest daughter Evie was the main inspiration with her love for planets and space.  I had painted her modern pink accent wall and when I found the dark blue star bedding, I loved how it popped against the wall.  I added a lot of pops of dark blue throughout the room to tone down and anchor the bright pink.  I wanted the room to be girly but not overly frilly.  One of my favorite features in their room is I hung constellation prints of their zodiac sign above their beds.  For a closer look into more “Out of this World” details, head to my blog post Girl’s Galaxy Bedroom.   

2.png

What tips do you have for designing shared spaces for two kids?

Storage, storage, storage!  With two beds taking up most of the space in the girl’s room, I had to get creative on where to store all their clothes and favorite items.  My first rule was no toys allowed in the room except for all their books and their stuffed animals.  I found THESE stackable storage bins and put 2 side by side to create a long nightstand/storage solution for between the beds.  They each have a bin with 2 compartments that they put all stuffed animals in and all their books.  I love how I can then use the top of it for their lamp and some fun décor items. At one time we made it into a little bench where they could sit and read.  This storage solution is great because it’s simple and allows them to clean up on their own.  For clothes they share the closet and I use hanging canvas storage bins like THESE to store folded items like pajamas, shorts, undies, swimsuits and t shirts.  This give us organization like a dresser but without having a big bulky piece of furniture.  I labeled the bins so the girls can easily find what they need.

Let’s talk about your son’s bedroom. Tell us how you went about designing it.

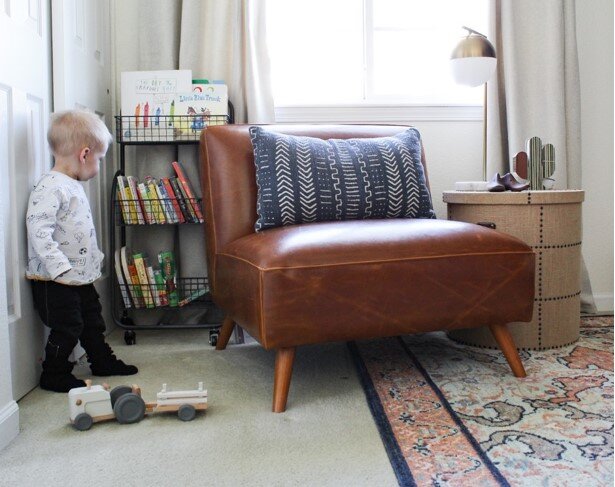
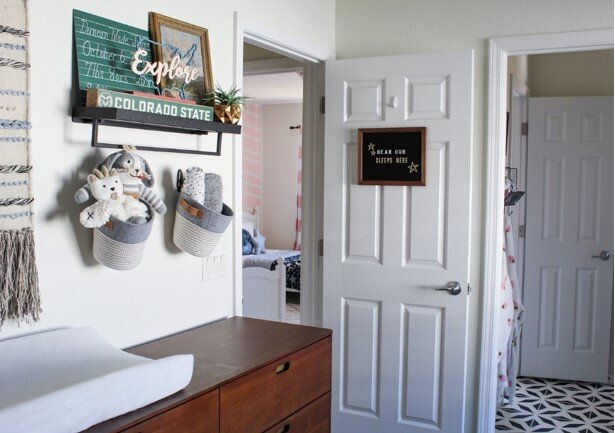
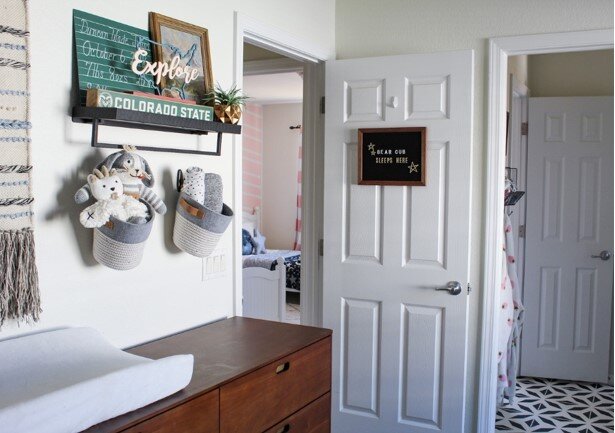
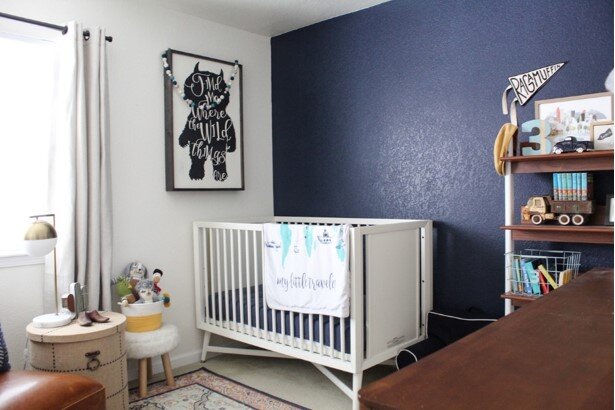
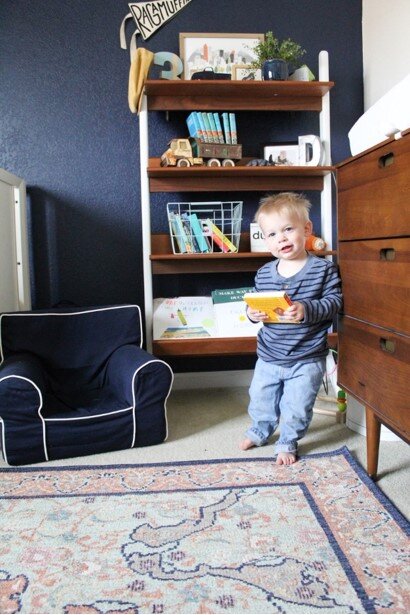
I wanted a minimalist, Scandinavian, mid century vibe for Duncan’s nursery.  I really did not want the room to be “babyish”.  I wanted it to be more of a grown up boy theme and something he could grow into as he got older.  There are a lot of Mid Century features like his dresser/changing table, the bookshelf and the large faux leather chair.  These are all items we will be able to use for a very long time.  I used a lot of storage solutions for him too.  I hung 2 small woven baskets about the changing table to hold diaper changing essentials and burp cloths so they would be easily accessible while changing a little one and not having to dig through a drawer.  His bookshelf is one of my favorite pieces.  It holds some old Hardy Boy Books in a vintage dump truck, a minimalist sketch of the City of Denver, a galvanized “D” for his name and the bottom shelf is for books.  I kept the walls really simple by painting one accent wall a solid navy blue.  And then hung 1 large piece of art (The Wild Things Sign) and a “Ragamuffin” Pennant Flag. I love his large faux leather chair.  It’s the perfect spot for all the kids to pile up and read a bedtime story.

What tips do you have for mommas who love Scandinavian themed design?

Keep it simple.  Clean lines and simple color scheme help create that Scandinavian look.  I love incorporating natural wood in the design for texture and to give off that Scandi Vibe.  

I love a good play space — how did you design yours? With everyone working / playing from home, can you suggest any tips for learn and play environments?

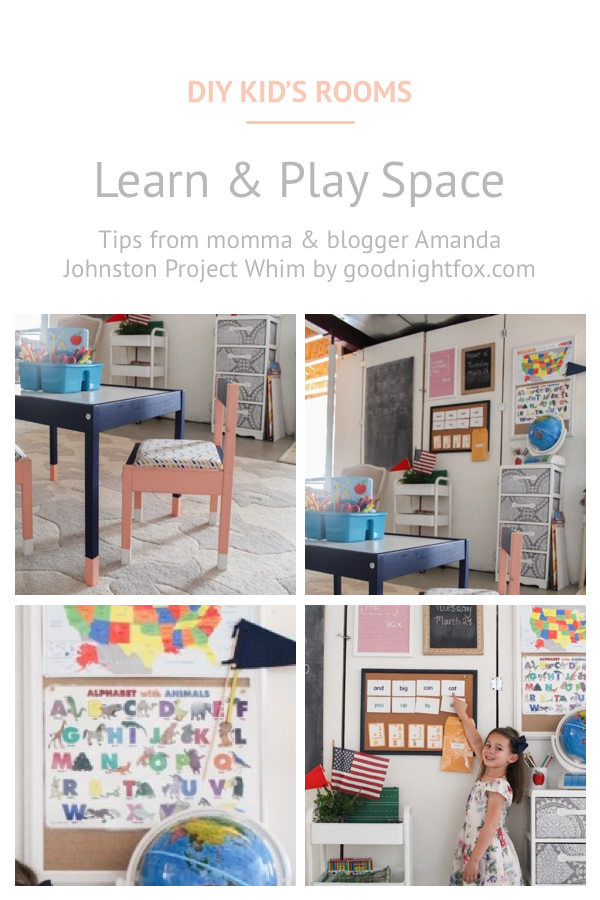
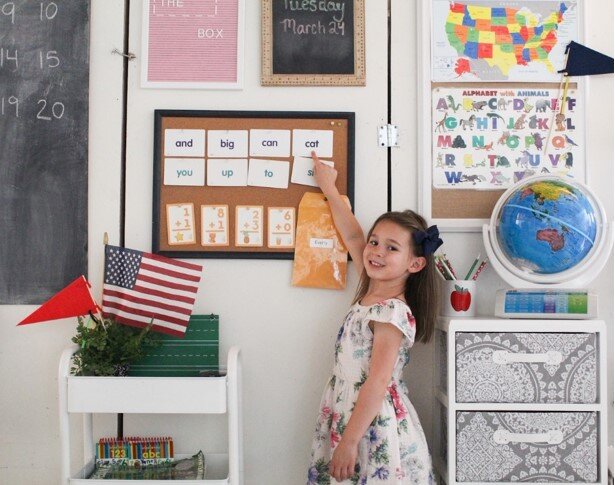
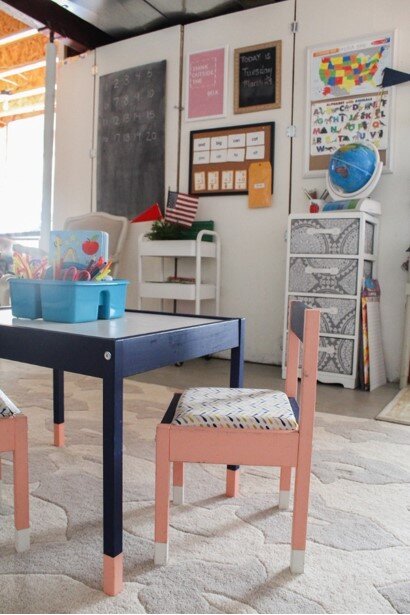
Since I mentioned before that the kids don’t really keep toys in their room, I keep all their toys in their play room in the basement.  I use lots of storage bins to hold all the littler toys.  I have it set up in sections for easy play and independent clean up.  All the kitchen and food items are in a corner, all the color books and colors are by the table and chairs, all the babies toys are in his own section.  With the recent remote learning going on at home I turned part of their play area into a “school” for the girls.  A designated spot for us to do school work has really helped keep them excited about school and helped me stay organized in teaching the lessons from their teachers.  I hung ABC charts and site words in this area and also put their globe and large chalk board to make it look like a classroom.  I also had to add an American Flag so we could say the pledge of allegiance for the start of our school time each day.  The girls really get a kick out of that.  Take a peek into our DIY “classroom” set up on my Blog Post, Remote Learning Set Up.

Now for the big one! Toy storage and organization is always a big headache for moms. How do you go about keeping everything tidy?

My biggest tip for storage for kids is to separate the toys and store them in the room you use them in.  For example, in the kids rooms we store all their books and stuffed animals because that is where we read and cuddle.  In the living room is where we store all our games and puzzles.  That is usually where we hang out as a family and play games.  All other toys are stored in the playroom.  I have bins to help separate toys, so barbies go in their own bin, cars go in another, blocks go in another.  This does not always stay organized when the kids clean up themselves, but it’s an easy system that we can reorganize when we need to. For more organization ideas for kids you can check out my blog post on Organization Ideas for Kids.

You’ve written about adding seasonal decor to your kid’s spaces, with the holidays not too far away, what tips do you have for seasonal decor?

Yes, I love decorating the kid’s rooms for the holidays.  I like to keep it simple so it’s not overwhelming when it’s time to take it down.  I like to add little touches to their spaces to make it more festive.  A little Christmas Tree, an advent calendar, switching out some of their books for holiday themed books.  One of my favorite tips is to swap out any faux plants for a seasonal one, little winter tree/winter berries.  Swap out their blankets for a more holiday themed one to make it feel different and magical.  And of course, twinkle lights. We add twinkle lights all throughout the house around Christmas and its so magical!

What advice do you have for moms doing DIY kids spaces on a budget?

My biggest tip is Keep it Simple.  A kid’s space does not need a lot of stuff.  Make items multi-purpose like the storage bins in my girls room.  I’m a big fan of using paint to transform a room because it’s inexpensive and the possibilities are endless.  Whether you paint the wall a solid color, a mural or a fun modern design, even add DIY Ship Lap it makes a huge impact to a space.  Get crafty and make your own décor.  I loved the way the pom garlands looked in kids spaces so I bought my own felt pom poms and made them myself.  Sew your own pillows or blankets or make your own yarn wall hanging.   Its more sentimental knowing you made it yourself and can save some money too.

Anything else you’d like to share?

Thanks for letting me share my story and some of my favorite tips for designing and organizing kids spaces.  For more inspiration and ideas please visit my blog Project Whim and for an inside peek into our daily lives head over to Instagram and let’s be friends!

xoxo, Amanda Johnston, Project Whim | Adding WHIM to the Everyday


There you have it! Some amazing tips for DIY kid’s rooms from designer, blogger, and mom of 3, Amanda Johnston! Check out her awesome blog for more great design tips and kid’s activities. And if you’re designing your own galaxy or space themed bedroom, be sure to check out this Solar System art print set by yours truly!

Nursery Design 101

Tips from Interior Designer Elena Brooking

Congrats on your new (or coming soon) bundle of joy!! There’s nothing more exciting than those 6-9 months of planning for your little one to arrive. And with everything going on in the world right now, I’m sure throwing yourself into a DIY home nursery project is just the virtual escape you need to brighten your mood. That’s why I’m interviewing professional Interior Designer and Feng Shui Consultant Elena Brooking on how to get started with your babe’s DIY nursery.

nursery-design.png

Tell me a little bit about your background, what you do, and how you got started?

My name is Elena Brooking, I am a qualified interior designer + Feng Shui consultant. I am a mama of 2 little girls (Olivia 4 & Sienna 2) and a former motherhood empowerment coach.

I started my interior design diploma when pregnant with my first and finished my studies 2 weeks before my second was born. I went through post partum depression with Olivia and interior design helped me push through and make it out on my own so I could make my dream come true!

I am currently focusing on kids’ design and I help mamas out there raise confident & inspired children by creating long-lasting spaces that support their passions & personality!

Let’s talk nurseries! What’re your design principles for creating an awesome nursery?

Designing a nursery can be so much fun because anything you decide to include is entirely up to you while your baby doesn’t have a voice in it just yet! There are a few things to keep in mind when getting started:

  • Choose a specific style or theme. Although it's not absolutely necessary to limit yourself to a single concept, settling on a specific idea will help you to narrow your focus and create a more cohesive design.

  • Choose textile before paint: there is nothing worst than choosing the perfect curtains or bedding only to find out it clashes with the paint color.

  • Identify a focal point, most nurseries are centered on the crib, but there are many other options to choose from. A large window or alcove or even a signature piece, such as an over-sized toy or a painted dresser, can also draw focus.

  • Leave room to grow, when choosing furniture think long term: baby's small bassinet-style crib may look darling now, but have you left enough room to exchange it for a toddler-sized bed later?

  • Don’t neglect your windows. Properly dressing your windows is not a design choice—it's a safety concern. Always install blackout curtains or heavy blinds in the nursery. This will help the baby to sleep longer and more comfortably. More importantly, it will prevent the room from getting too hot during the day, dramatically decreasing your baby's risk of SIDS.

How should mommas who are waiting to find out their babes gender plan their nursery decor?

Neutral soft hues are always best, especially for the foundation of the room set up. Once the gender is revealed you can always add little pieces in pink or blue to give it more personality. There isn’t a right or wrong here, you can always pick a combination of colours you like whether it’s a girl or a boy!

What are your favorite on trend nursery themes for boys?

What I love about boys nurseries is the fact that there is so much you can play with. I love the brave little prints with animals hanging on the walls. Fur mats and cosy throws to create some hygge are a must.

2.png

What about for girls?

With everything going on at the moment I have noticed rainbows are going very big and it is definitely a very nice element to be adding, it’s also long lasting (who doesn’t like a rainbow?) 

2.png

For even more great nursery themes, check out my curated Pinterest board arranged by theme!

How can mommas design a nursery that will grow with their baby into toddlerhood and beyond?

I know a lot of mums struggle with this and specifically in knowing, when is the right time to upgrade my child’s room? While every kid is different there are a few signs to look out when considering introducing a toddler bed or a Montessori closet. It’s important to keep in mind which pieces are you introducing that your little one won’t grow out of or a while? For example, when you don’t have room for both a stand-alone changing table and a dresser. You'll get more use out of the dresser in the long run. Thinking ahead will ensure you get the most out of your money and your space. If you are on a budget, what’s really necessary in a nursery and what’s fluff? 

What are your top 3 pieces of advice for designing a nursery?

  • Consider going green, eco-friendly products can be beneficial for your baby and the environment.

  • Do decorate the ceiling, babies spend much time on their back and it can be stimulating for them.

  • Create a nursing station for you to relax in and make your journey into motherhood stress-free.

For the shoppers out there, what are your top 3 product must haves for a great nursery?

As a mother myself and as a designer I recommend:

  • An adjustable crib so you can have the flexibility to shift it’s functionality as baby grows. The Graco Benton cribs are very good for this, they are convertible and can turn into a toddler bed or a day bed.

  • A good dresser for organized storage space. Here you can get creative, I personally love the Harriet Bee style, minimalistic and classy.

  • A crib mobile. You are going to need all the breaks you can get and this is a great tool for keeping your baby busy while laying on his back. Usually the cut out animal ones with a little sound can do wonders!


Thank you Elena Brooking for all of your great tips and tricks on designing a DIY nursery! If you’re looking for more personalized advice, please reach out to Elena directly or join her Facebook Group for even more nursery collaboration. And of course, check out our printable nursery art & closet organizers!

Montessori Playroom: 5 Easy Steps to a Calmer Play Space

Montessori Playroom: 5 Easy Steps to a Calmer Play Space

Fewer toys, calmer colors, more independent play — here's how to give your play space the Montessori treatment in one weekend.

Best forAges 1–6
TimeOne weekend
CostFree to start
SkillsIndependent play + focus

A Montessori-inspired play area encourages children to use their imagination through active play with open-ended toys. And if you love a calm, minimalist aesthetic, the idea of focusing on one toy at a time can really help declutter and organize your space. Here are 5 easy steps toward a brighter, calmer play space.

Montessori-inspired playroom with purple accents

Step 1: Remove passive toys

It can be hard for you, let alone your kiddos, to part with beloved toys. But focus on removing passive toys (usually the plastic ones with flashing lights and sounds) because they encourage toddlers to sit back and watch.

In step 3, we'll replace these with engaging active toys that inspire imaginative, interactive play.

Decluttered toy shelf with a few wooden toys

Step 2: Choose a color palette

Most playrooms use a bright rainbow palette, which is super fun and upbeat. If you want something a little more soothing, try a refined palette of just a few soft pastel colors. Cool colors (like blues and purples) have a calming effect; warm colors (like oranges and yellows) feel energizing. Steer clear of really bright saturated colors — they can be overwhelming and overstimulating.

Check out my Pinterest boards for more color palette inspiration!

Playroom with soft mint color palette

Step 3: Refresh toys

Now that you have a color scheme in mind, it's time to refresh those toys. Tip: a neutral backdrop (grey walls, white shelves) lets you swap the color palette as your kiddos get older, so you're never stuck with one theme.

The toys (and wall art) bring the color and vibrancy. If you already have wooden toys and you're up for a DIY challenge, repaint them! Otherwise, look for open-ended wooden toys in muted tones — blocks, stackers, and simple vehicles get played with far longer than anything with batteries.

Our own Goodnight Fox flashcards earn their shelf space too: the routines and emotions cards double as playroom wall art and actually get used every day.

Playroom shelf with navy accents and wooden toys

Step 4: Organize and display toys

Now it's time to artfully display each toy on the shelf. Beware of overcrowding! We want toddlers to focus and explore one object at a time, so consider displaying one toy per shelf. You'll have more toys than shelves, of course — group the rest and store them in tasteful bins or drawers, then rotate every week or two. Rotation makes old toys feel brand new.

Low, open shelving works best — an IKEA Kallax or any simple cube shelf at toddler height lets little ones see everything and put it all back.

Organized playroom shelf with yellow accents

Step 5: Accessorize (minimally!)

To pull the space together, you need more than the book and toy shelf (though that's a great start!). Based on your color palette, choose a few key accents. One or two from each category is plenty:

  • Accent piece: a pouf or small chair in one of your room colors
  • Wall art: playroom prints or posters that tie the colors together — our calming corner posters pull double duty here
  • A rug: defines the play space's boundaries and adds an instant pop of color
  • A cozy corner: even a small calm-down nook with a cushion and a few books gives big feelings somewhere to land — see our calming corner setup
Finished Montessori playroom with minimal accessories

Tips & tricks

Get started without buying anything new

  • Hide the loud stuff: if your toddler adores a noisy toy, don't banish it — make it a special-occasion toy that appears for short bursts.
  • Organize books by color: pick the books whose bindings match your palette and arrange lightest to darkest. Hide the rest for instant cohesion.
  • Add a blanket: a throw in your theme color, draped over a chair or folded on a low shelf, brings a quick pop of color.
  • Rotate, don't purge: box up half the toys and swap them monthly. Less out at once means deeper play — and "new" toys for free.

What is a Montessori playroom?

A play space set up around Montessori principles: child-sized, uncluttered, with open-ended toys displayed simply so kids can choose, focus, and play independently.

How many toys should be out at once?

Fewer than you think — one toy per shelf, with the rest stored and rotated. If your child flits between toys without settling, that's your sign to put more away.

Do I need to buy all new furniture?

No. Start by decluttering and rearranging what you have. A low shelf or cube unit at toddler height is the single most useful piece if you buy one thing.