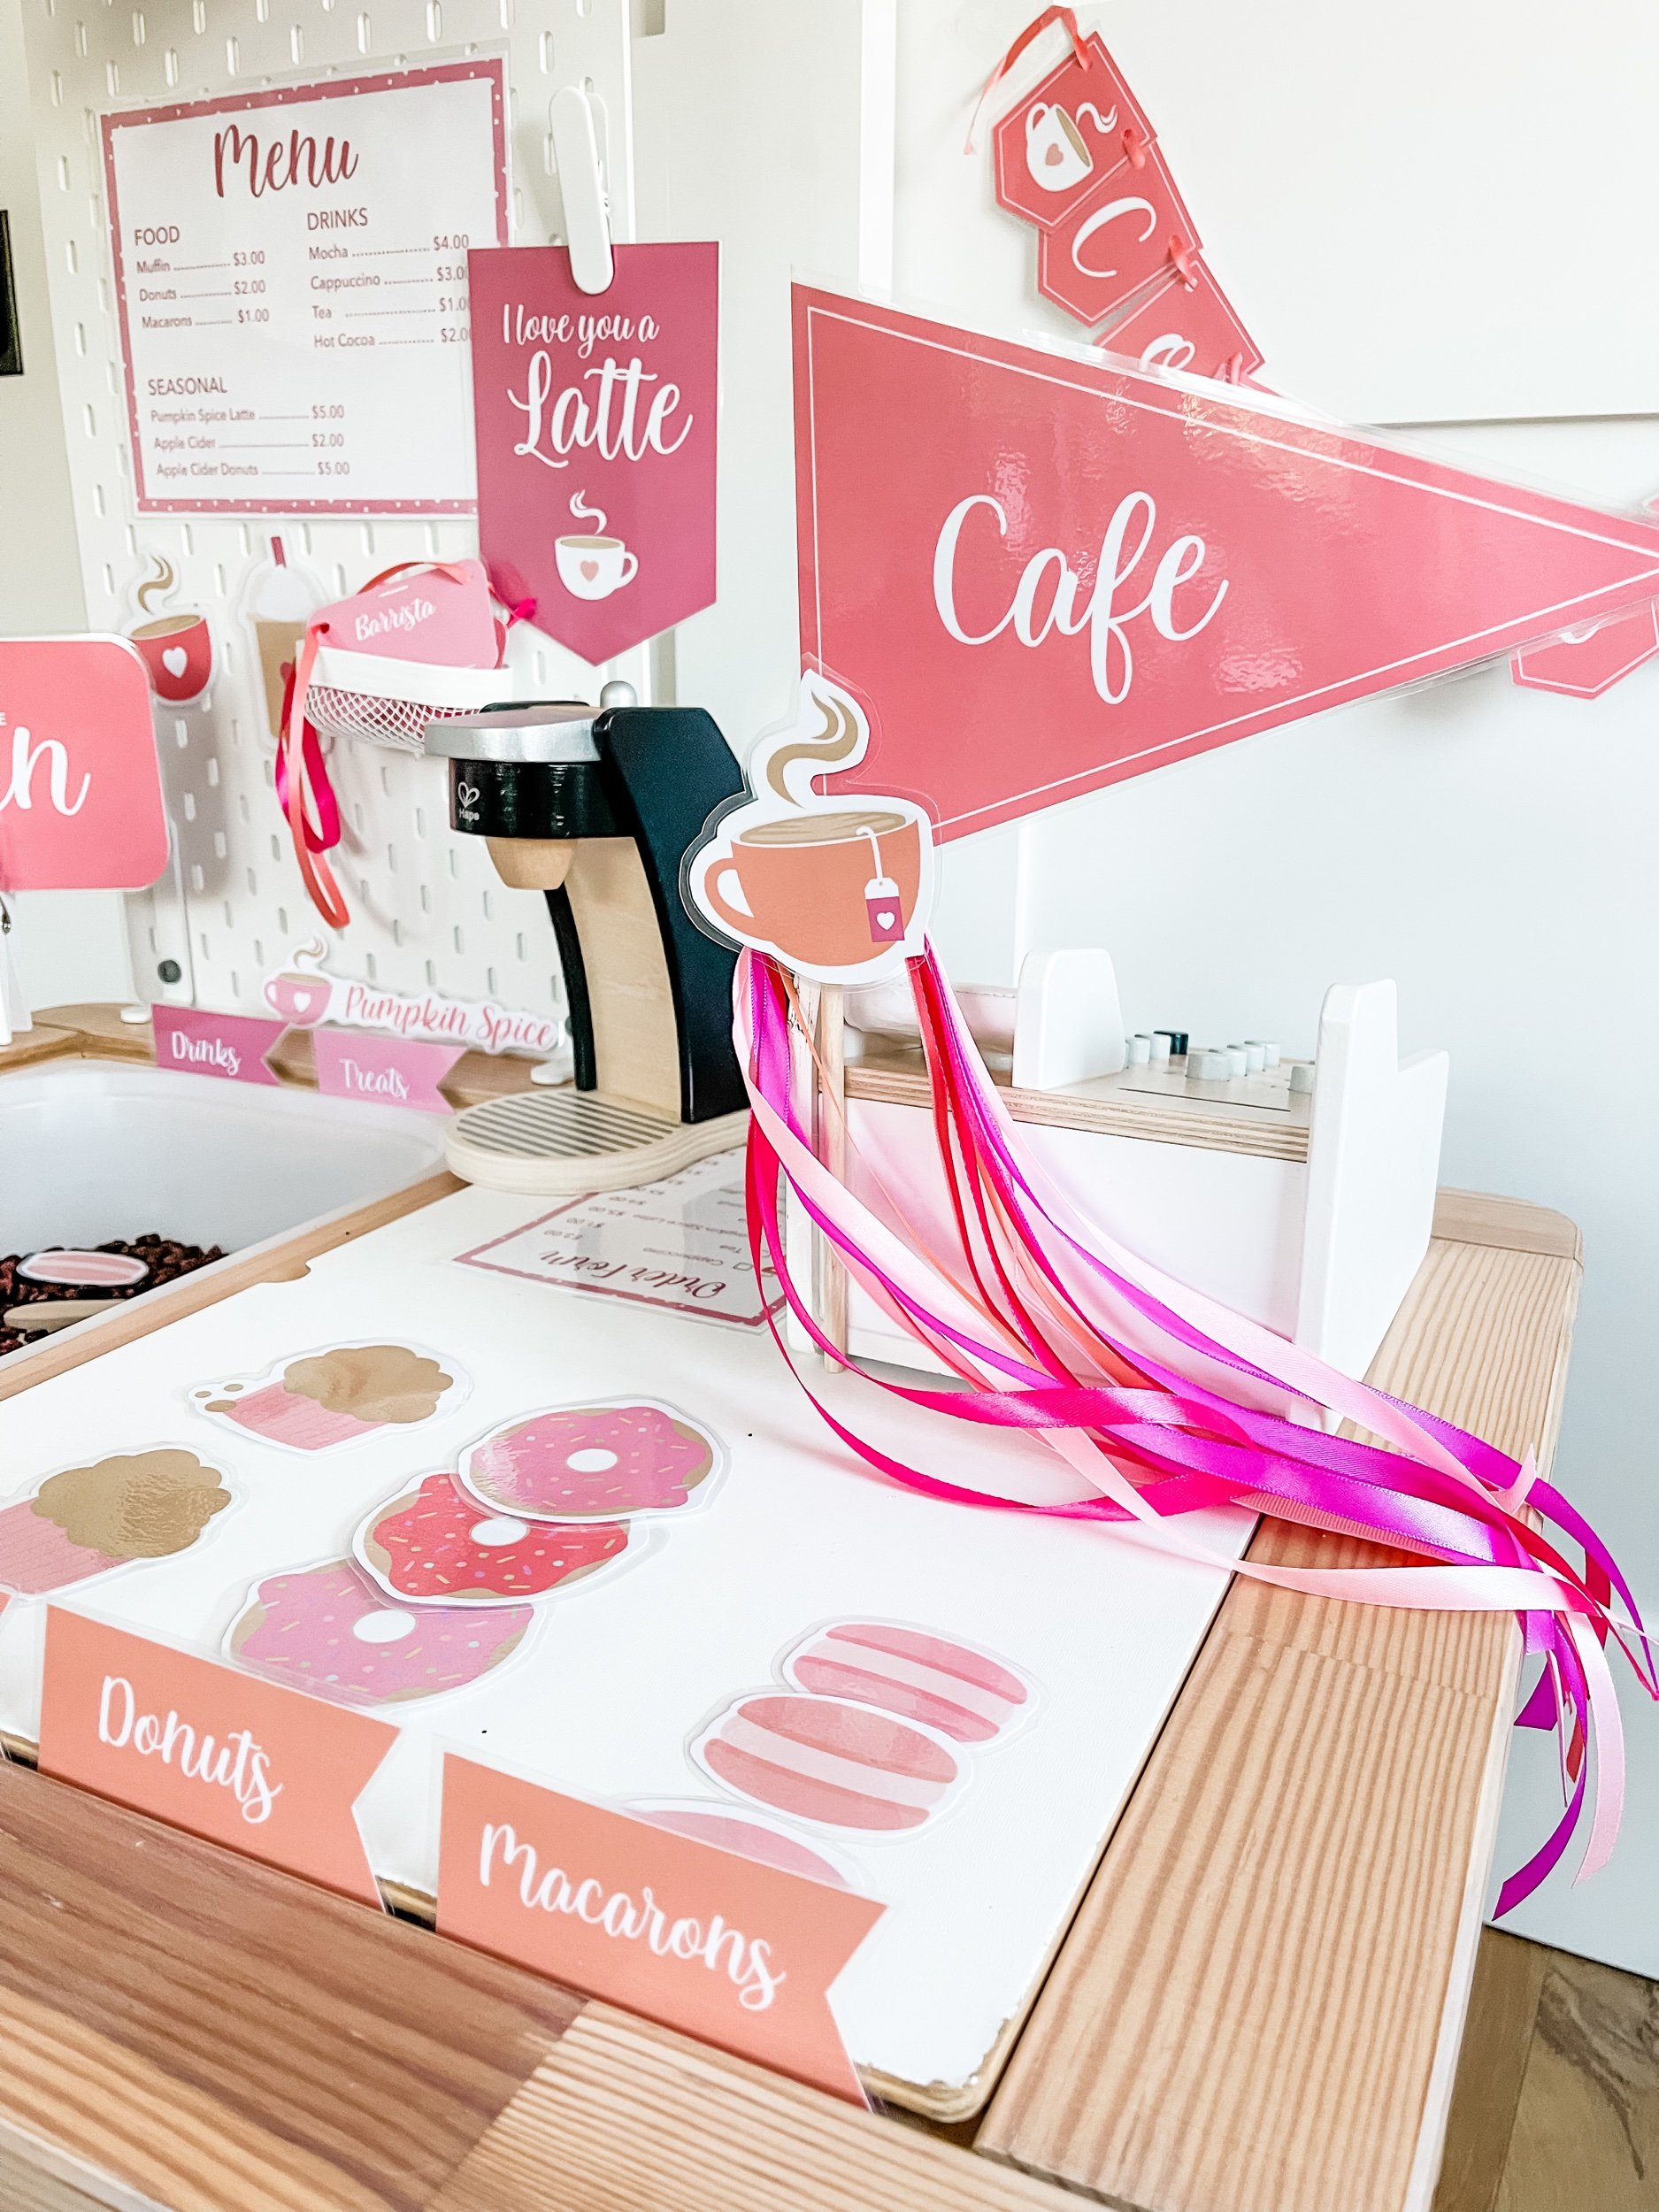
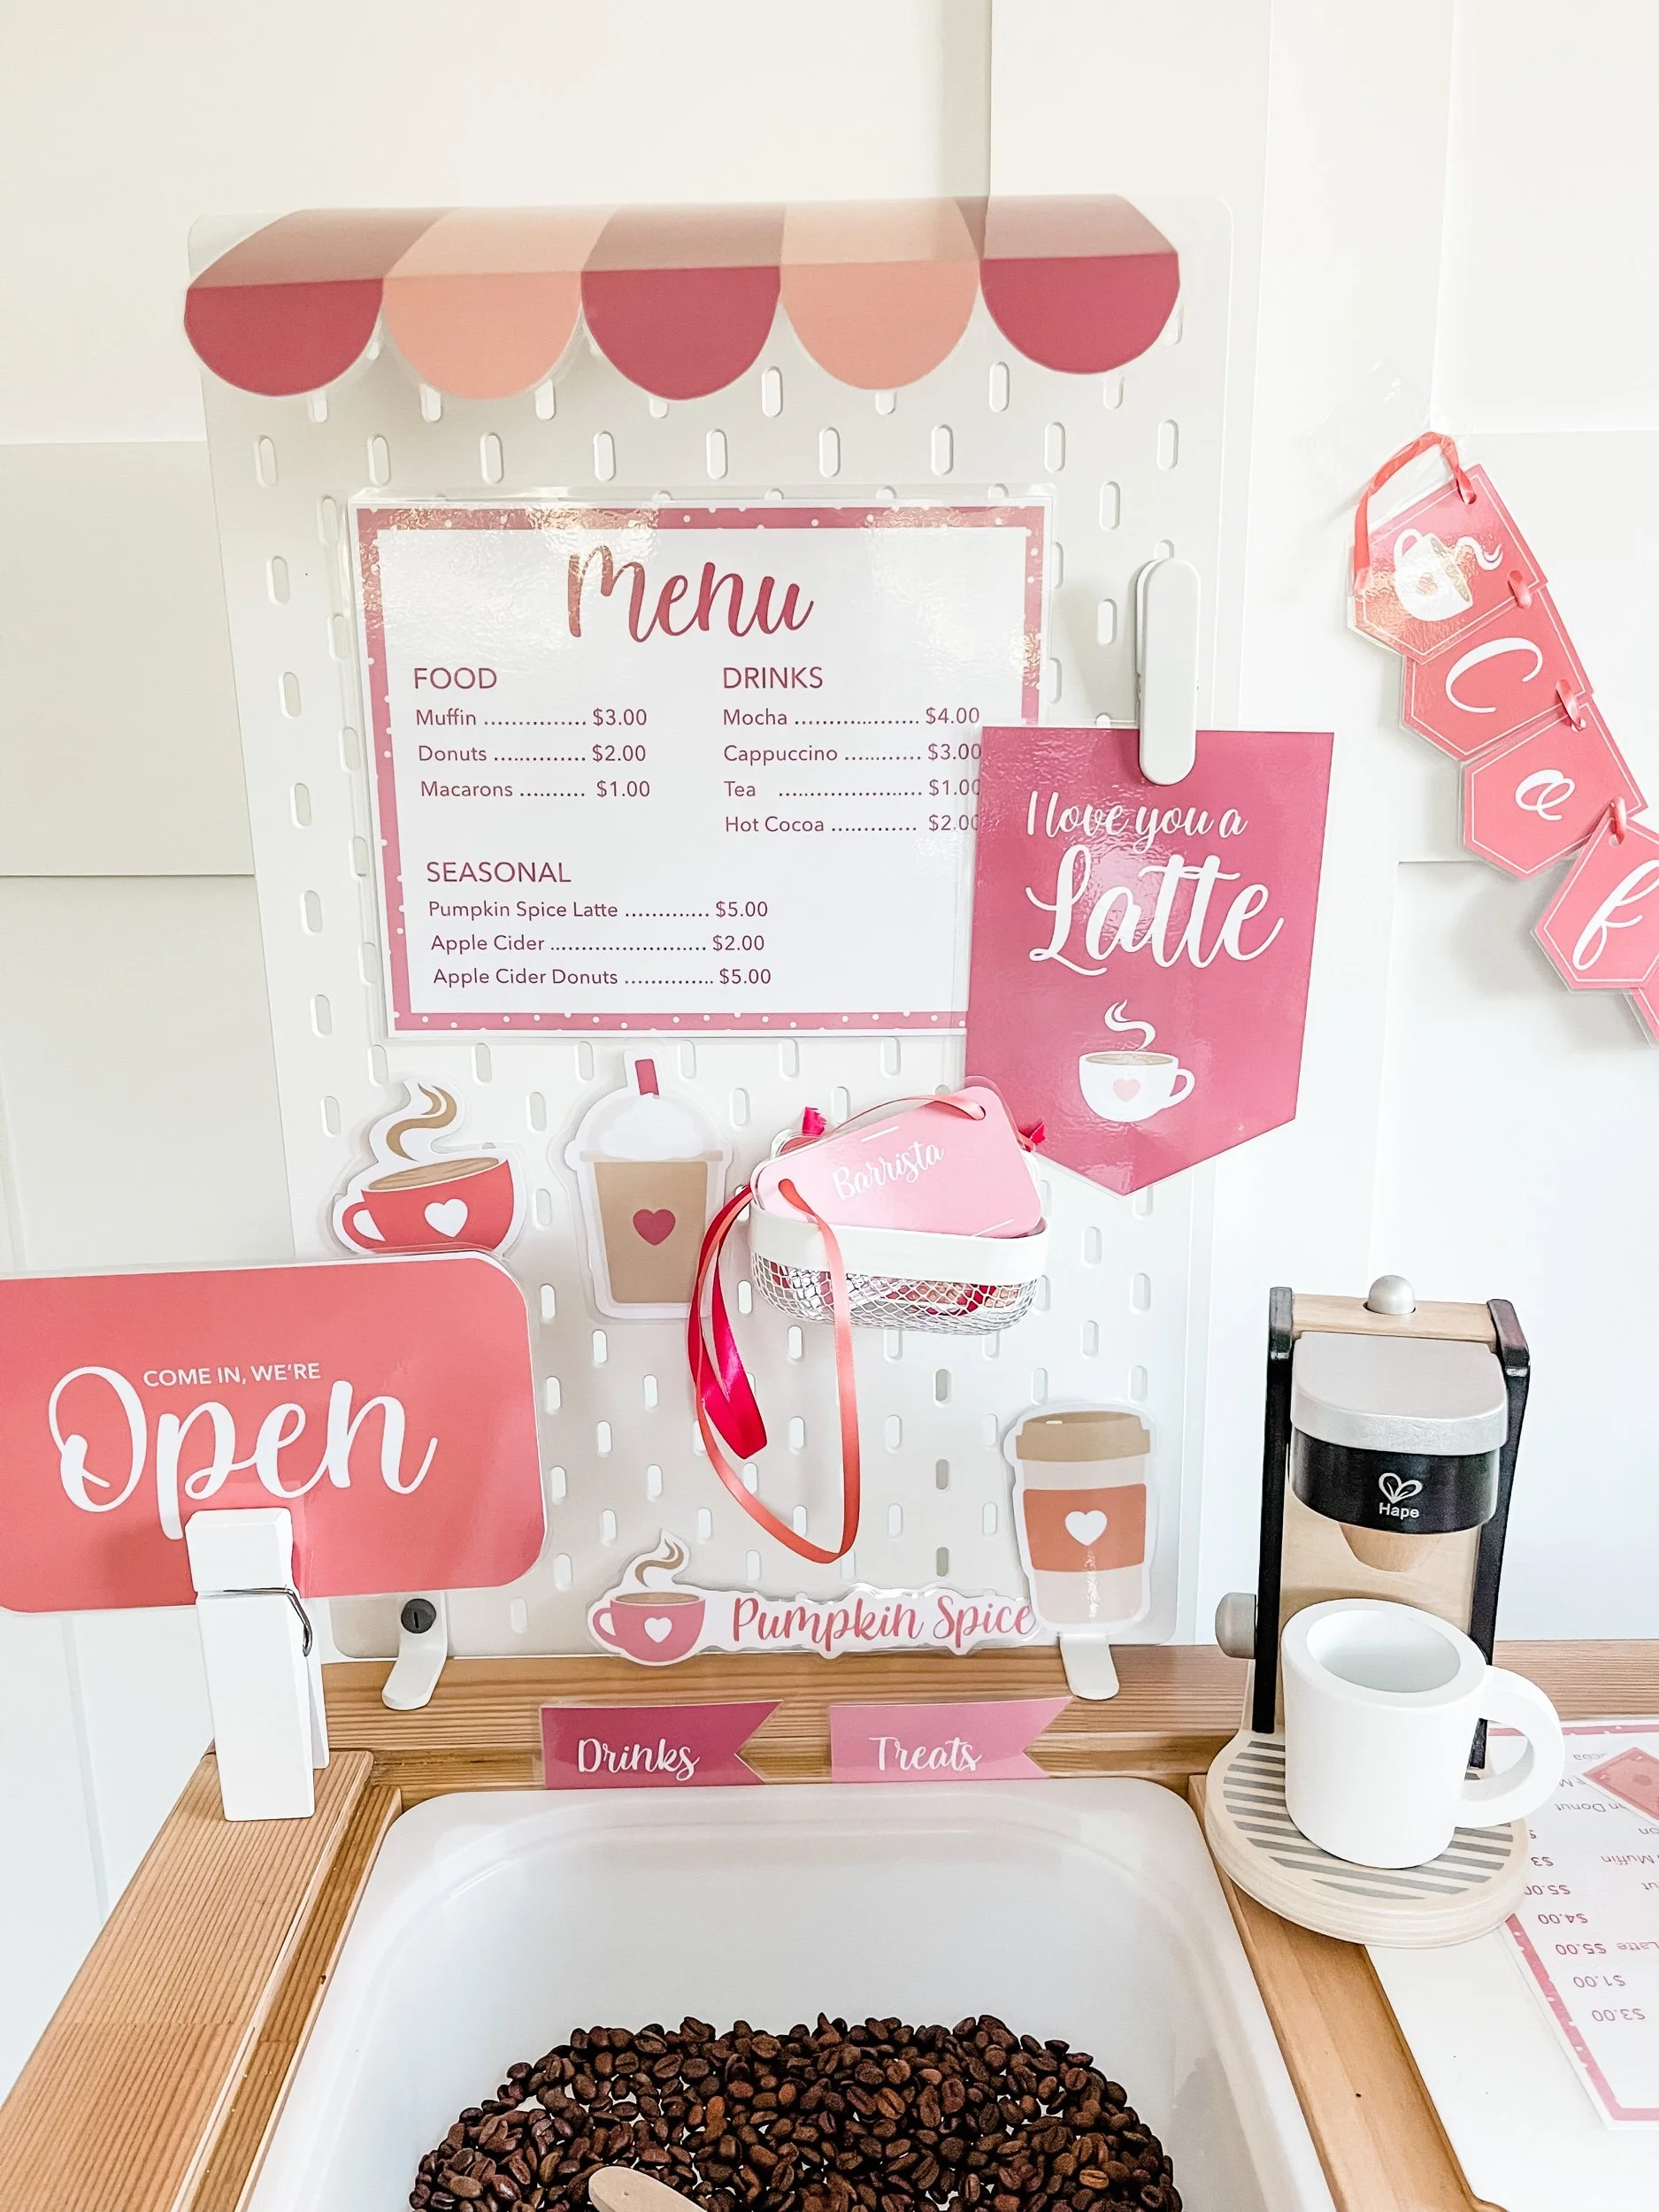
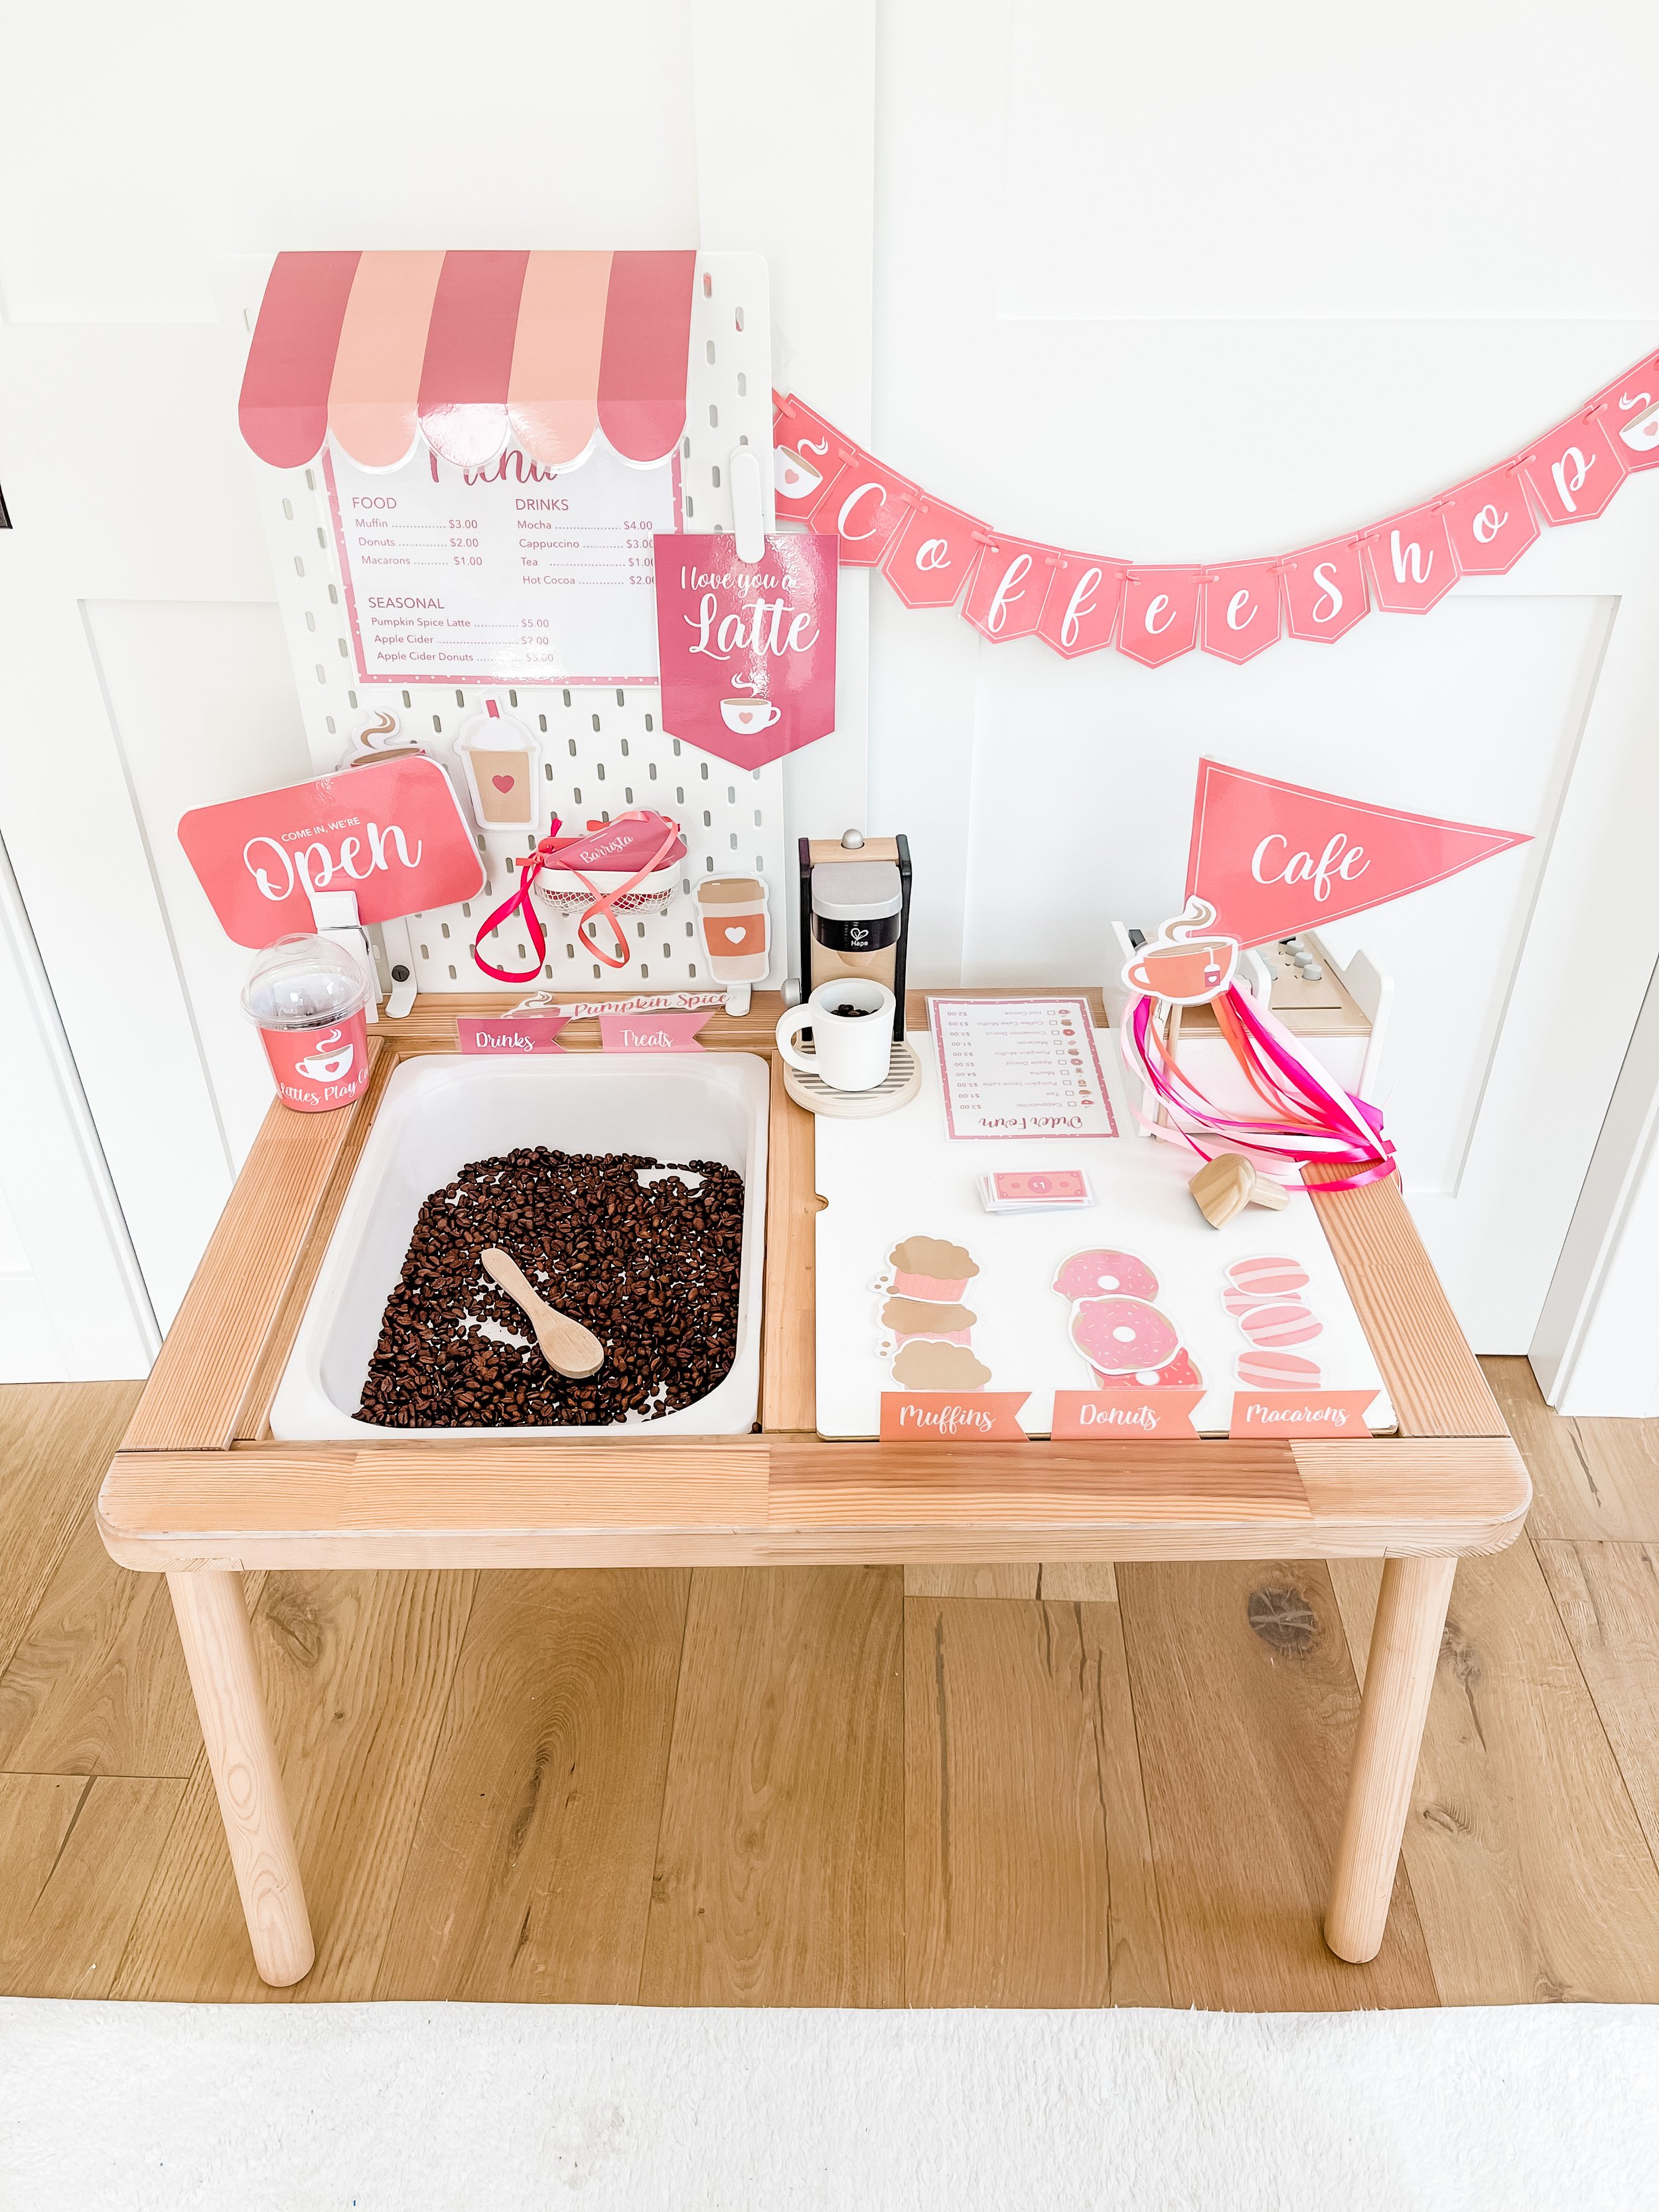
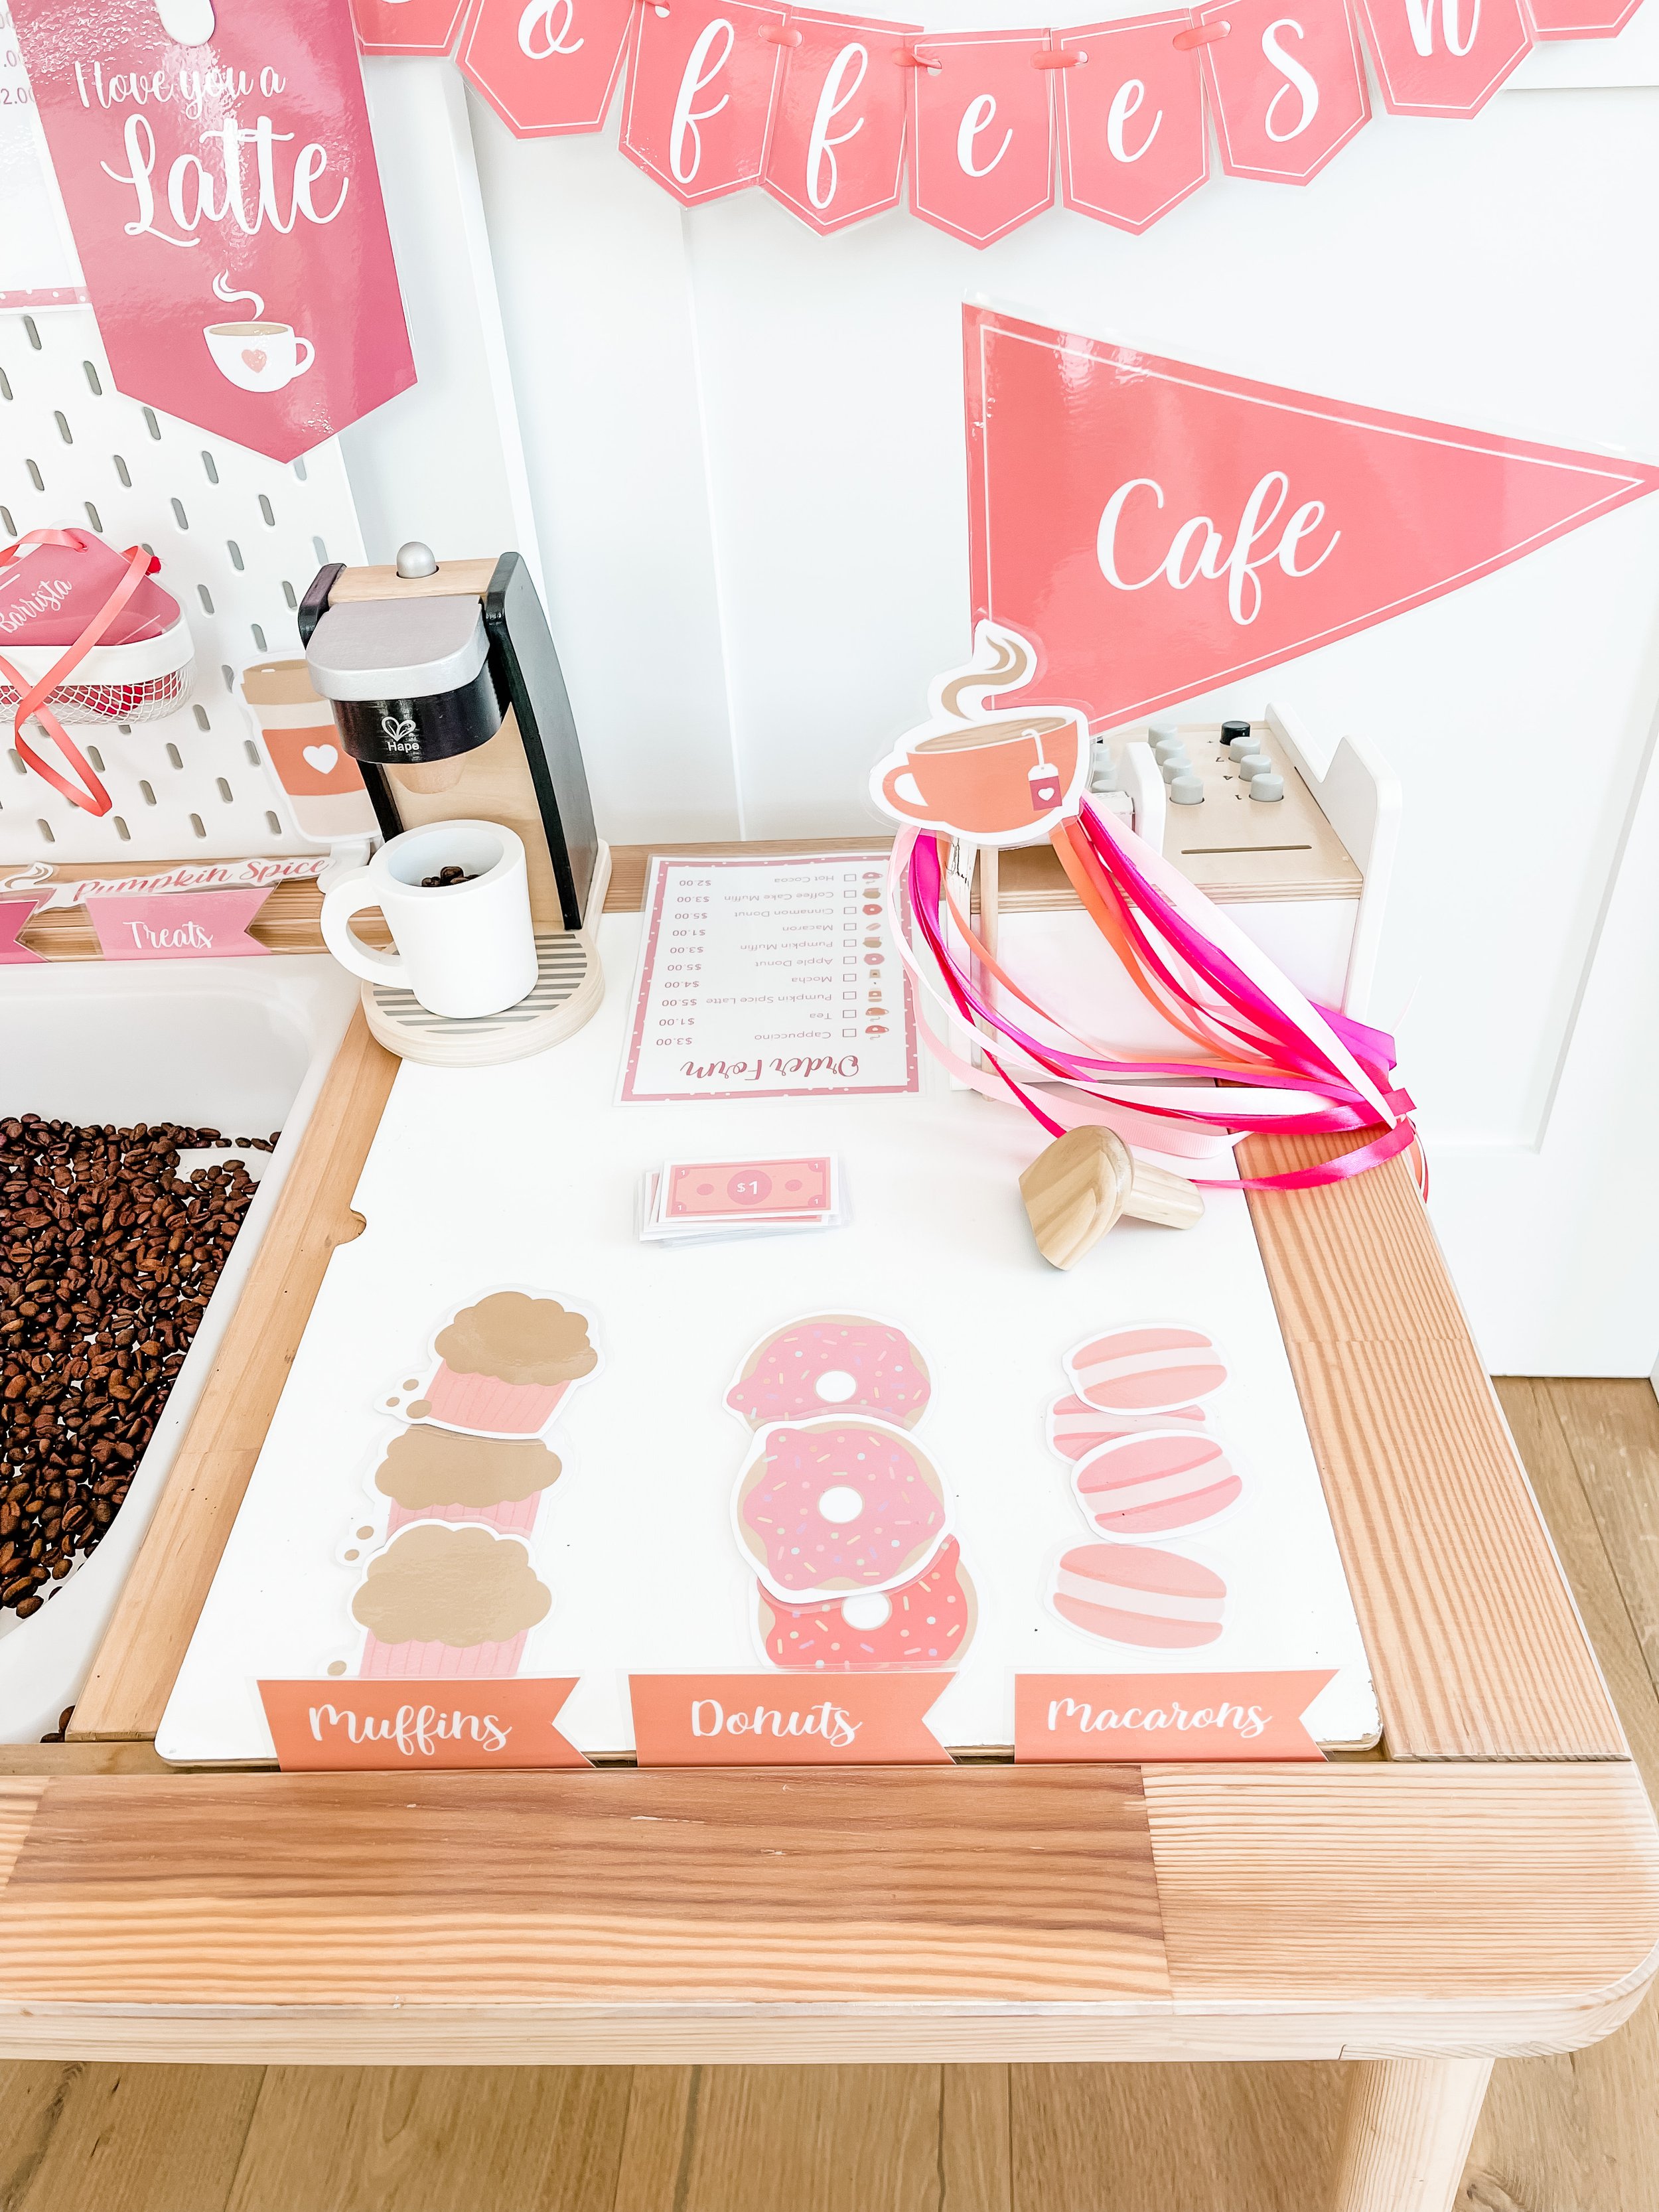
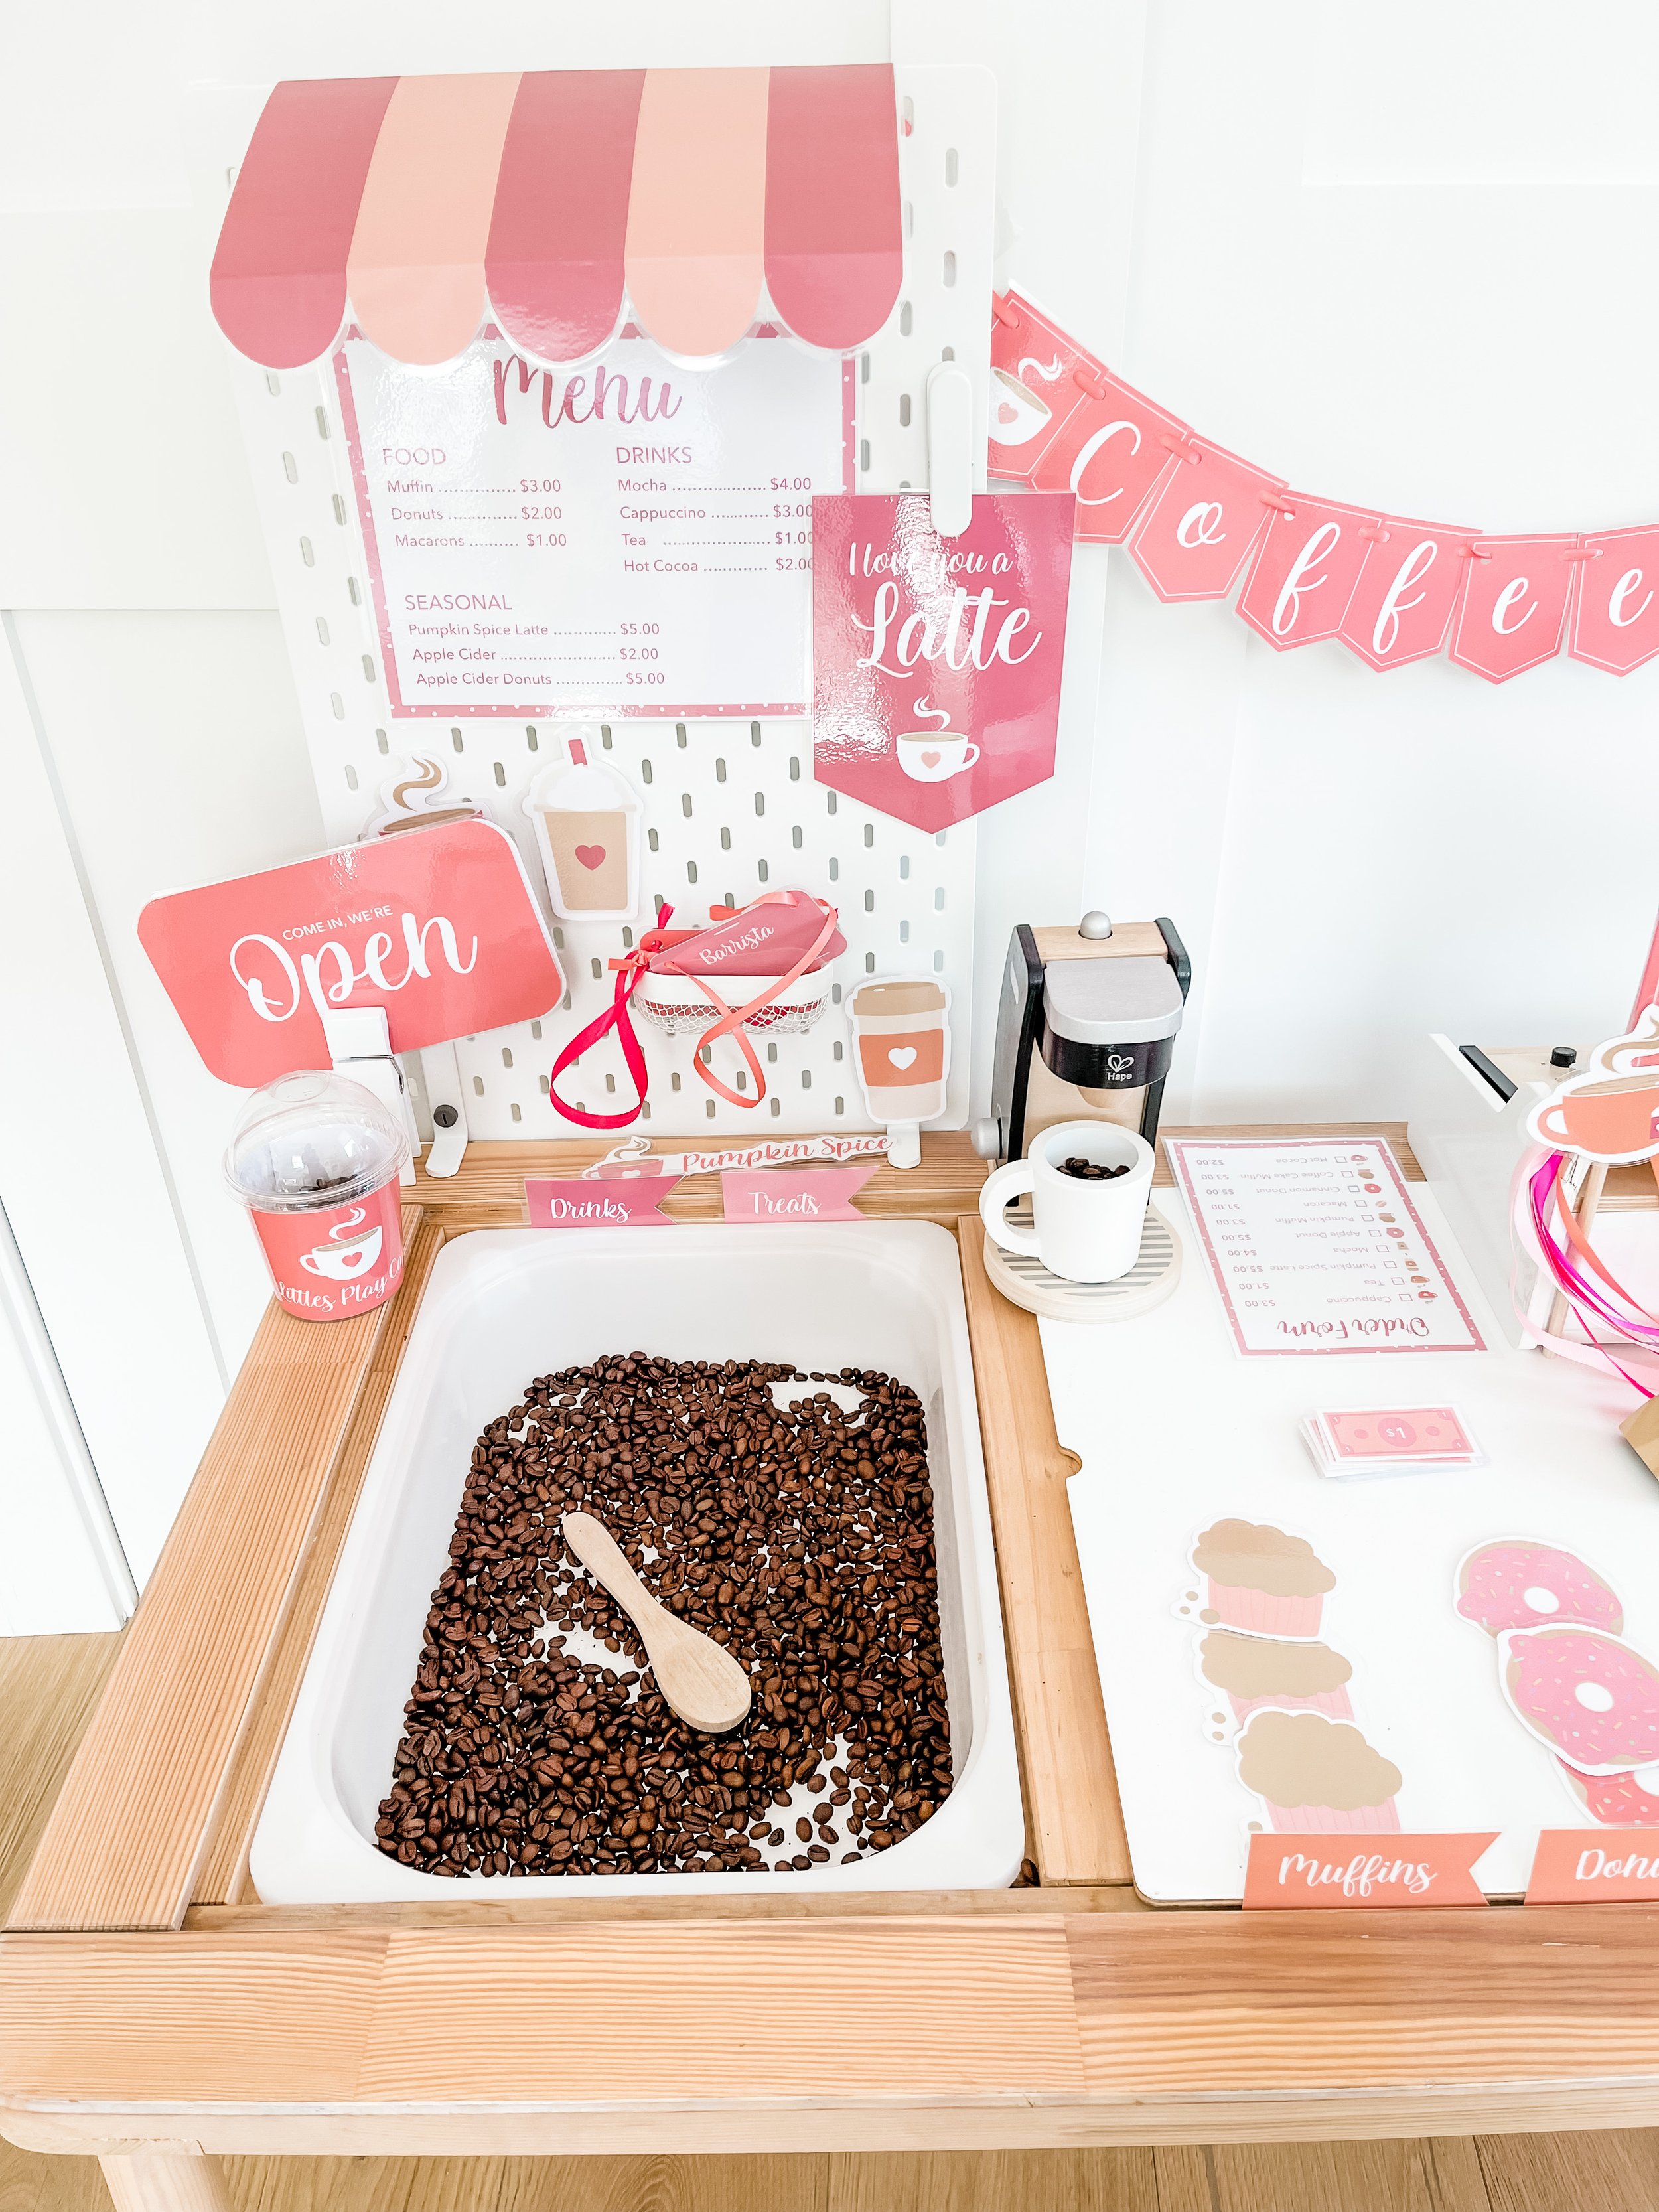
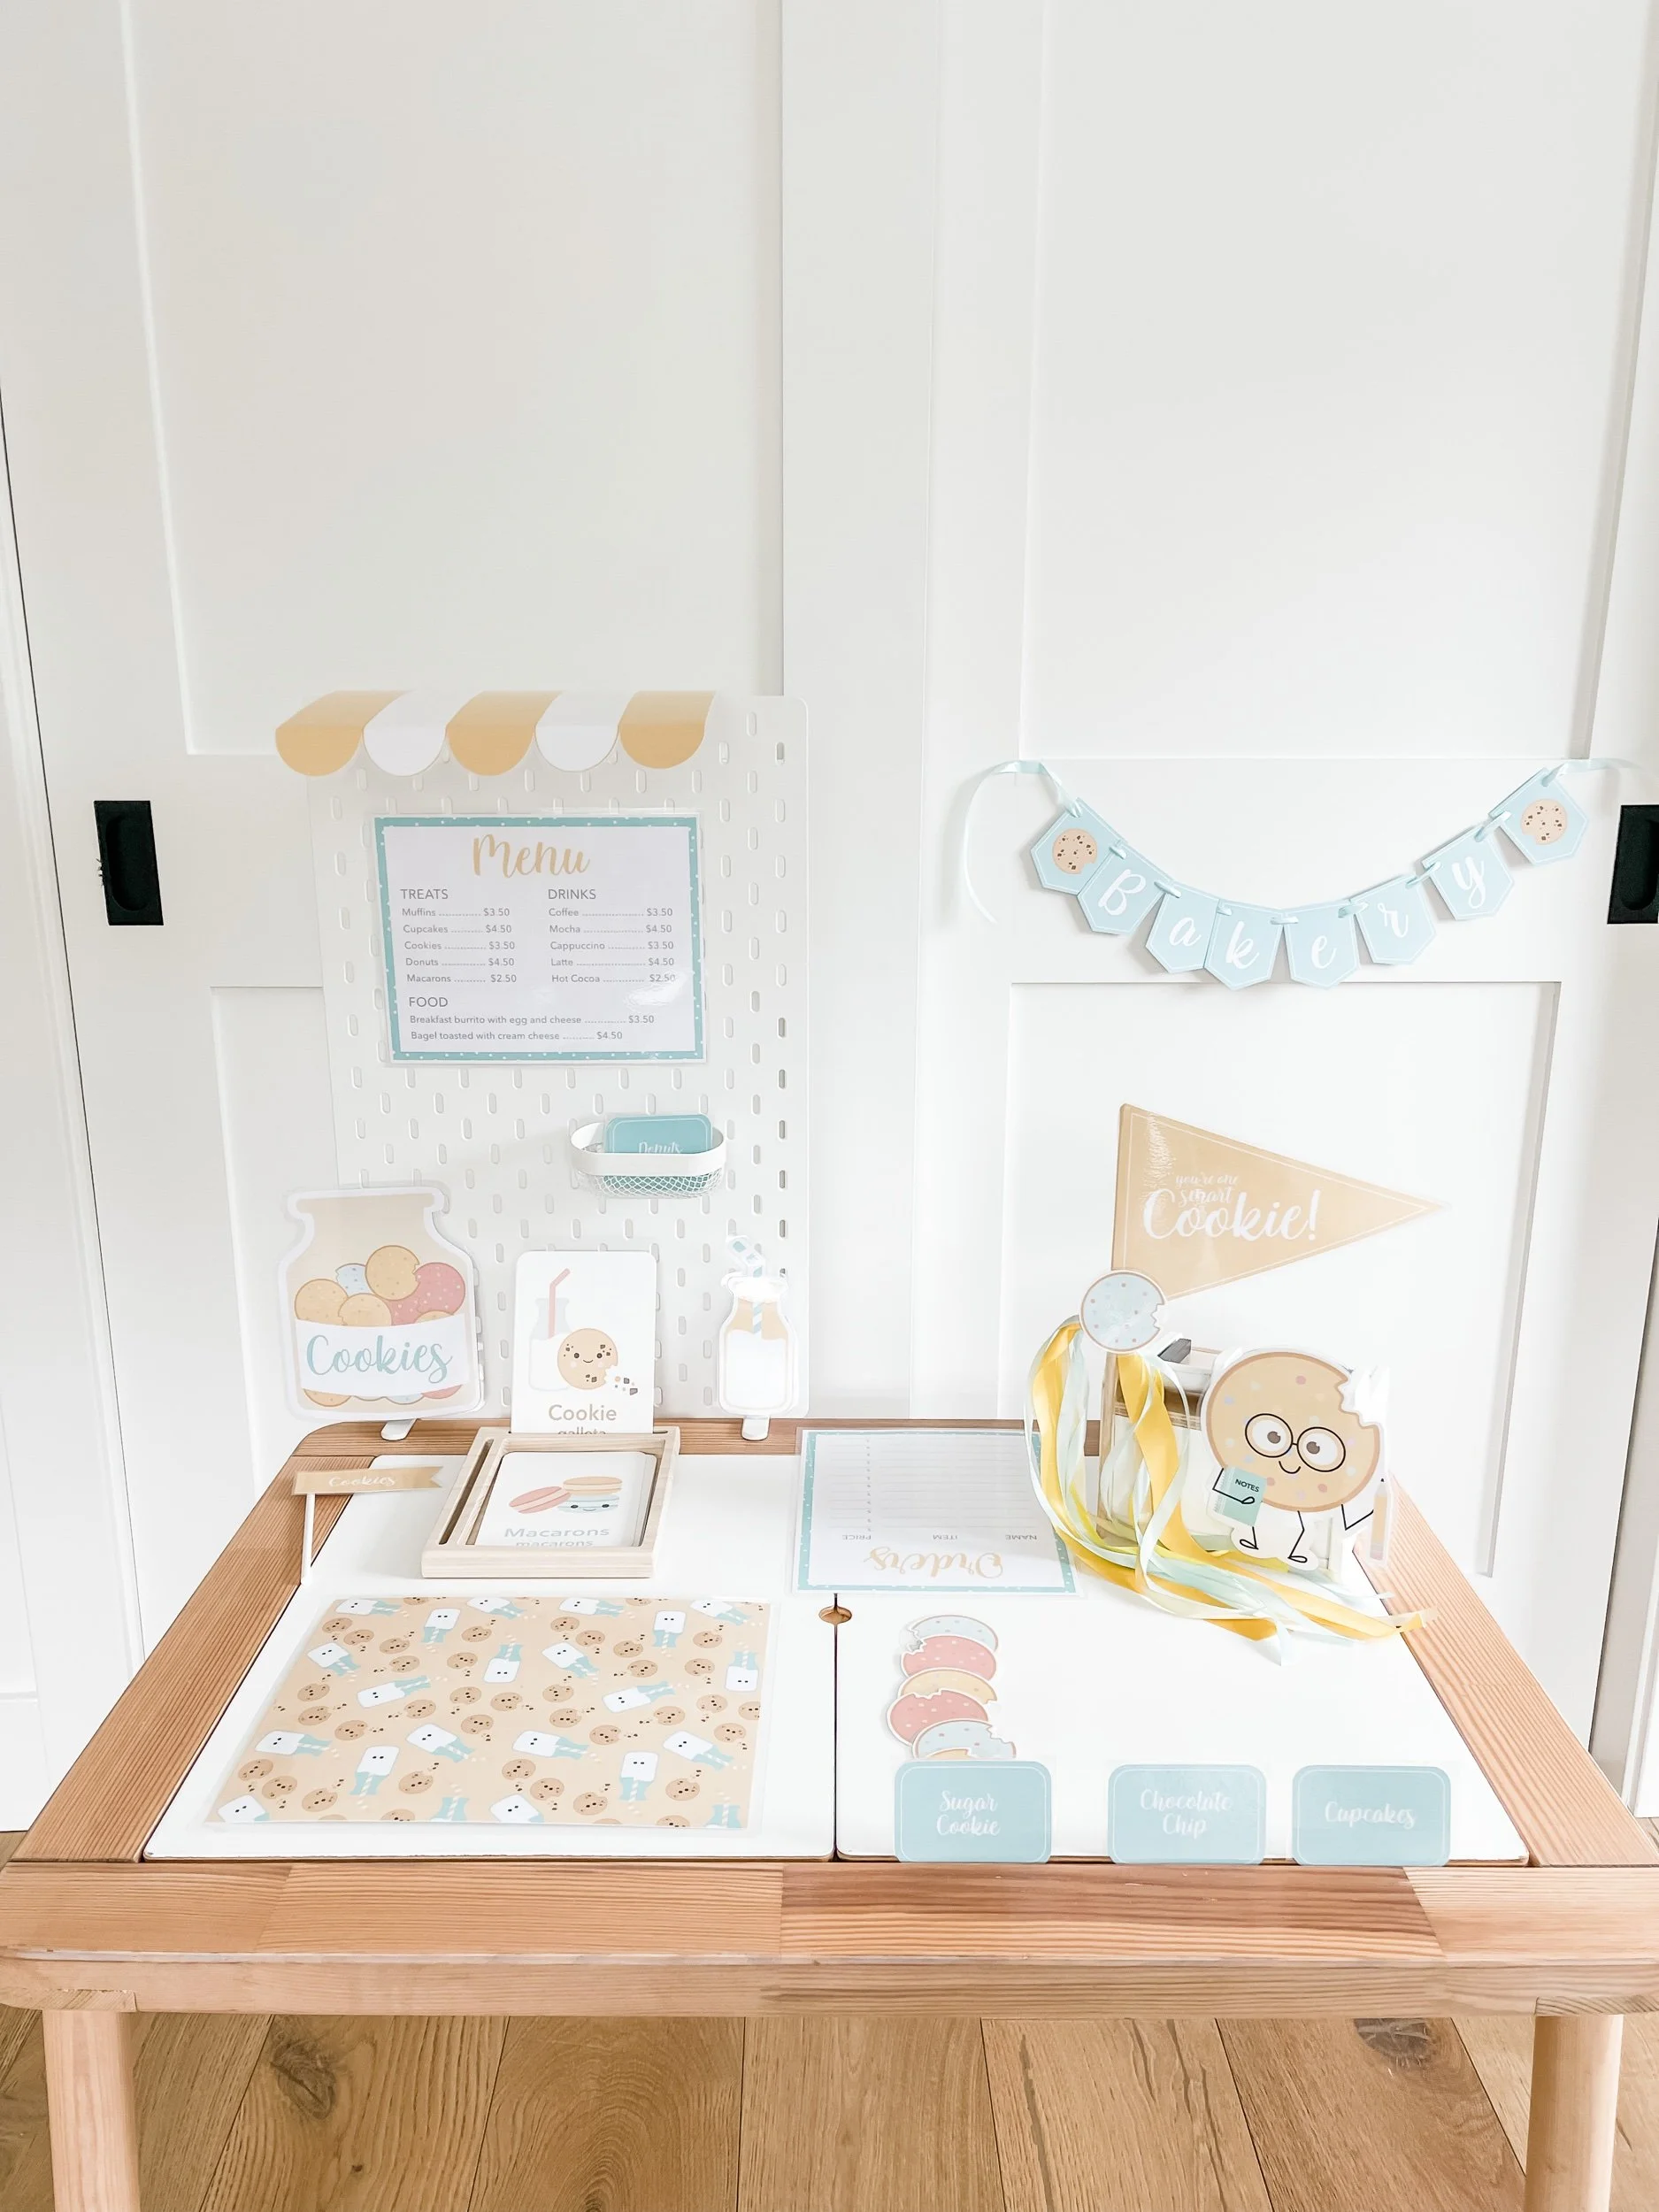
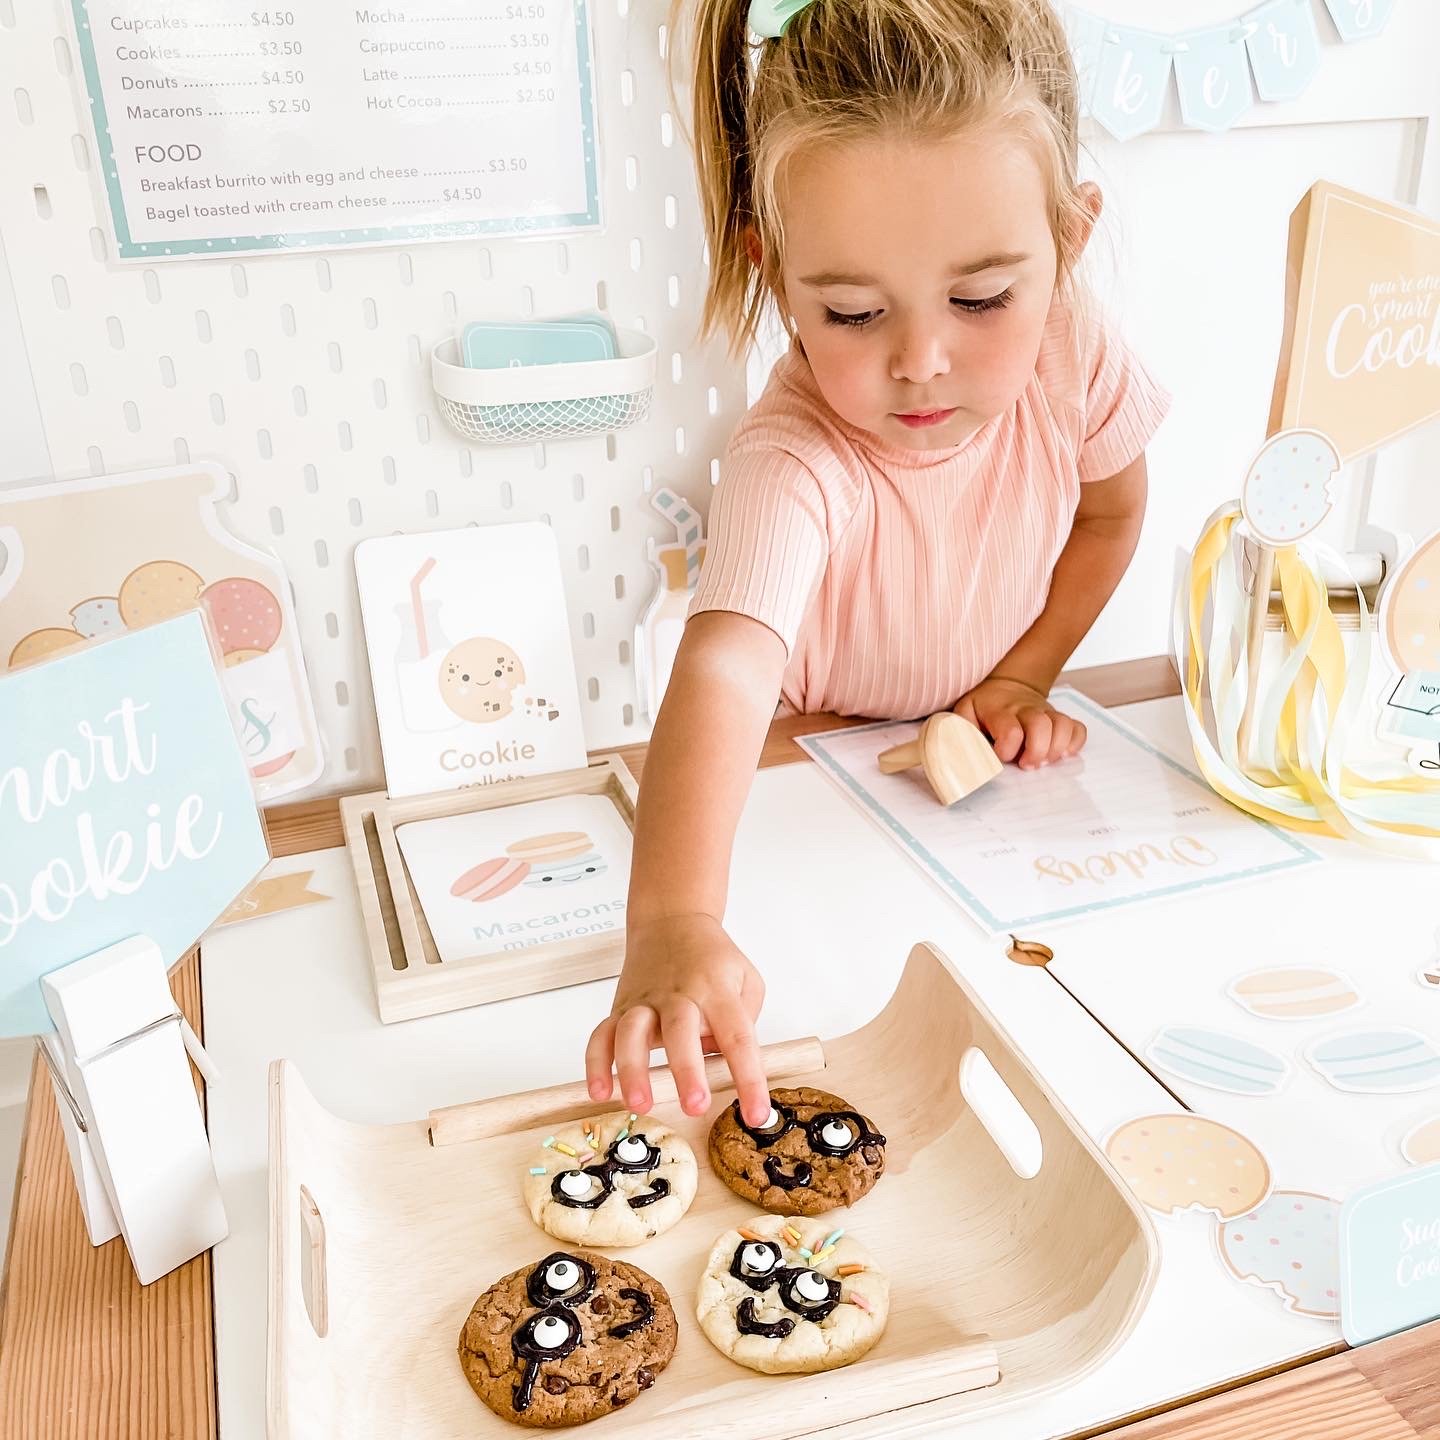
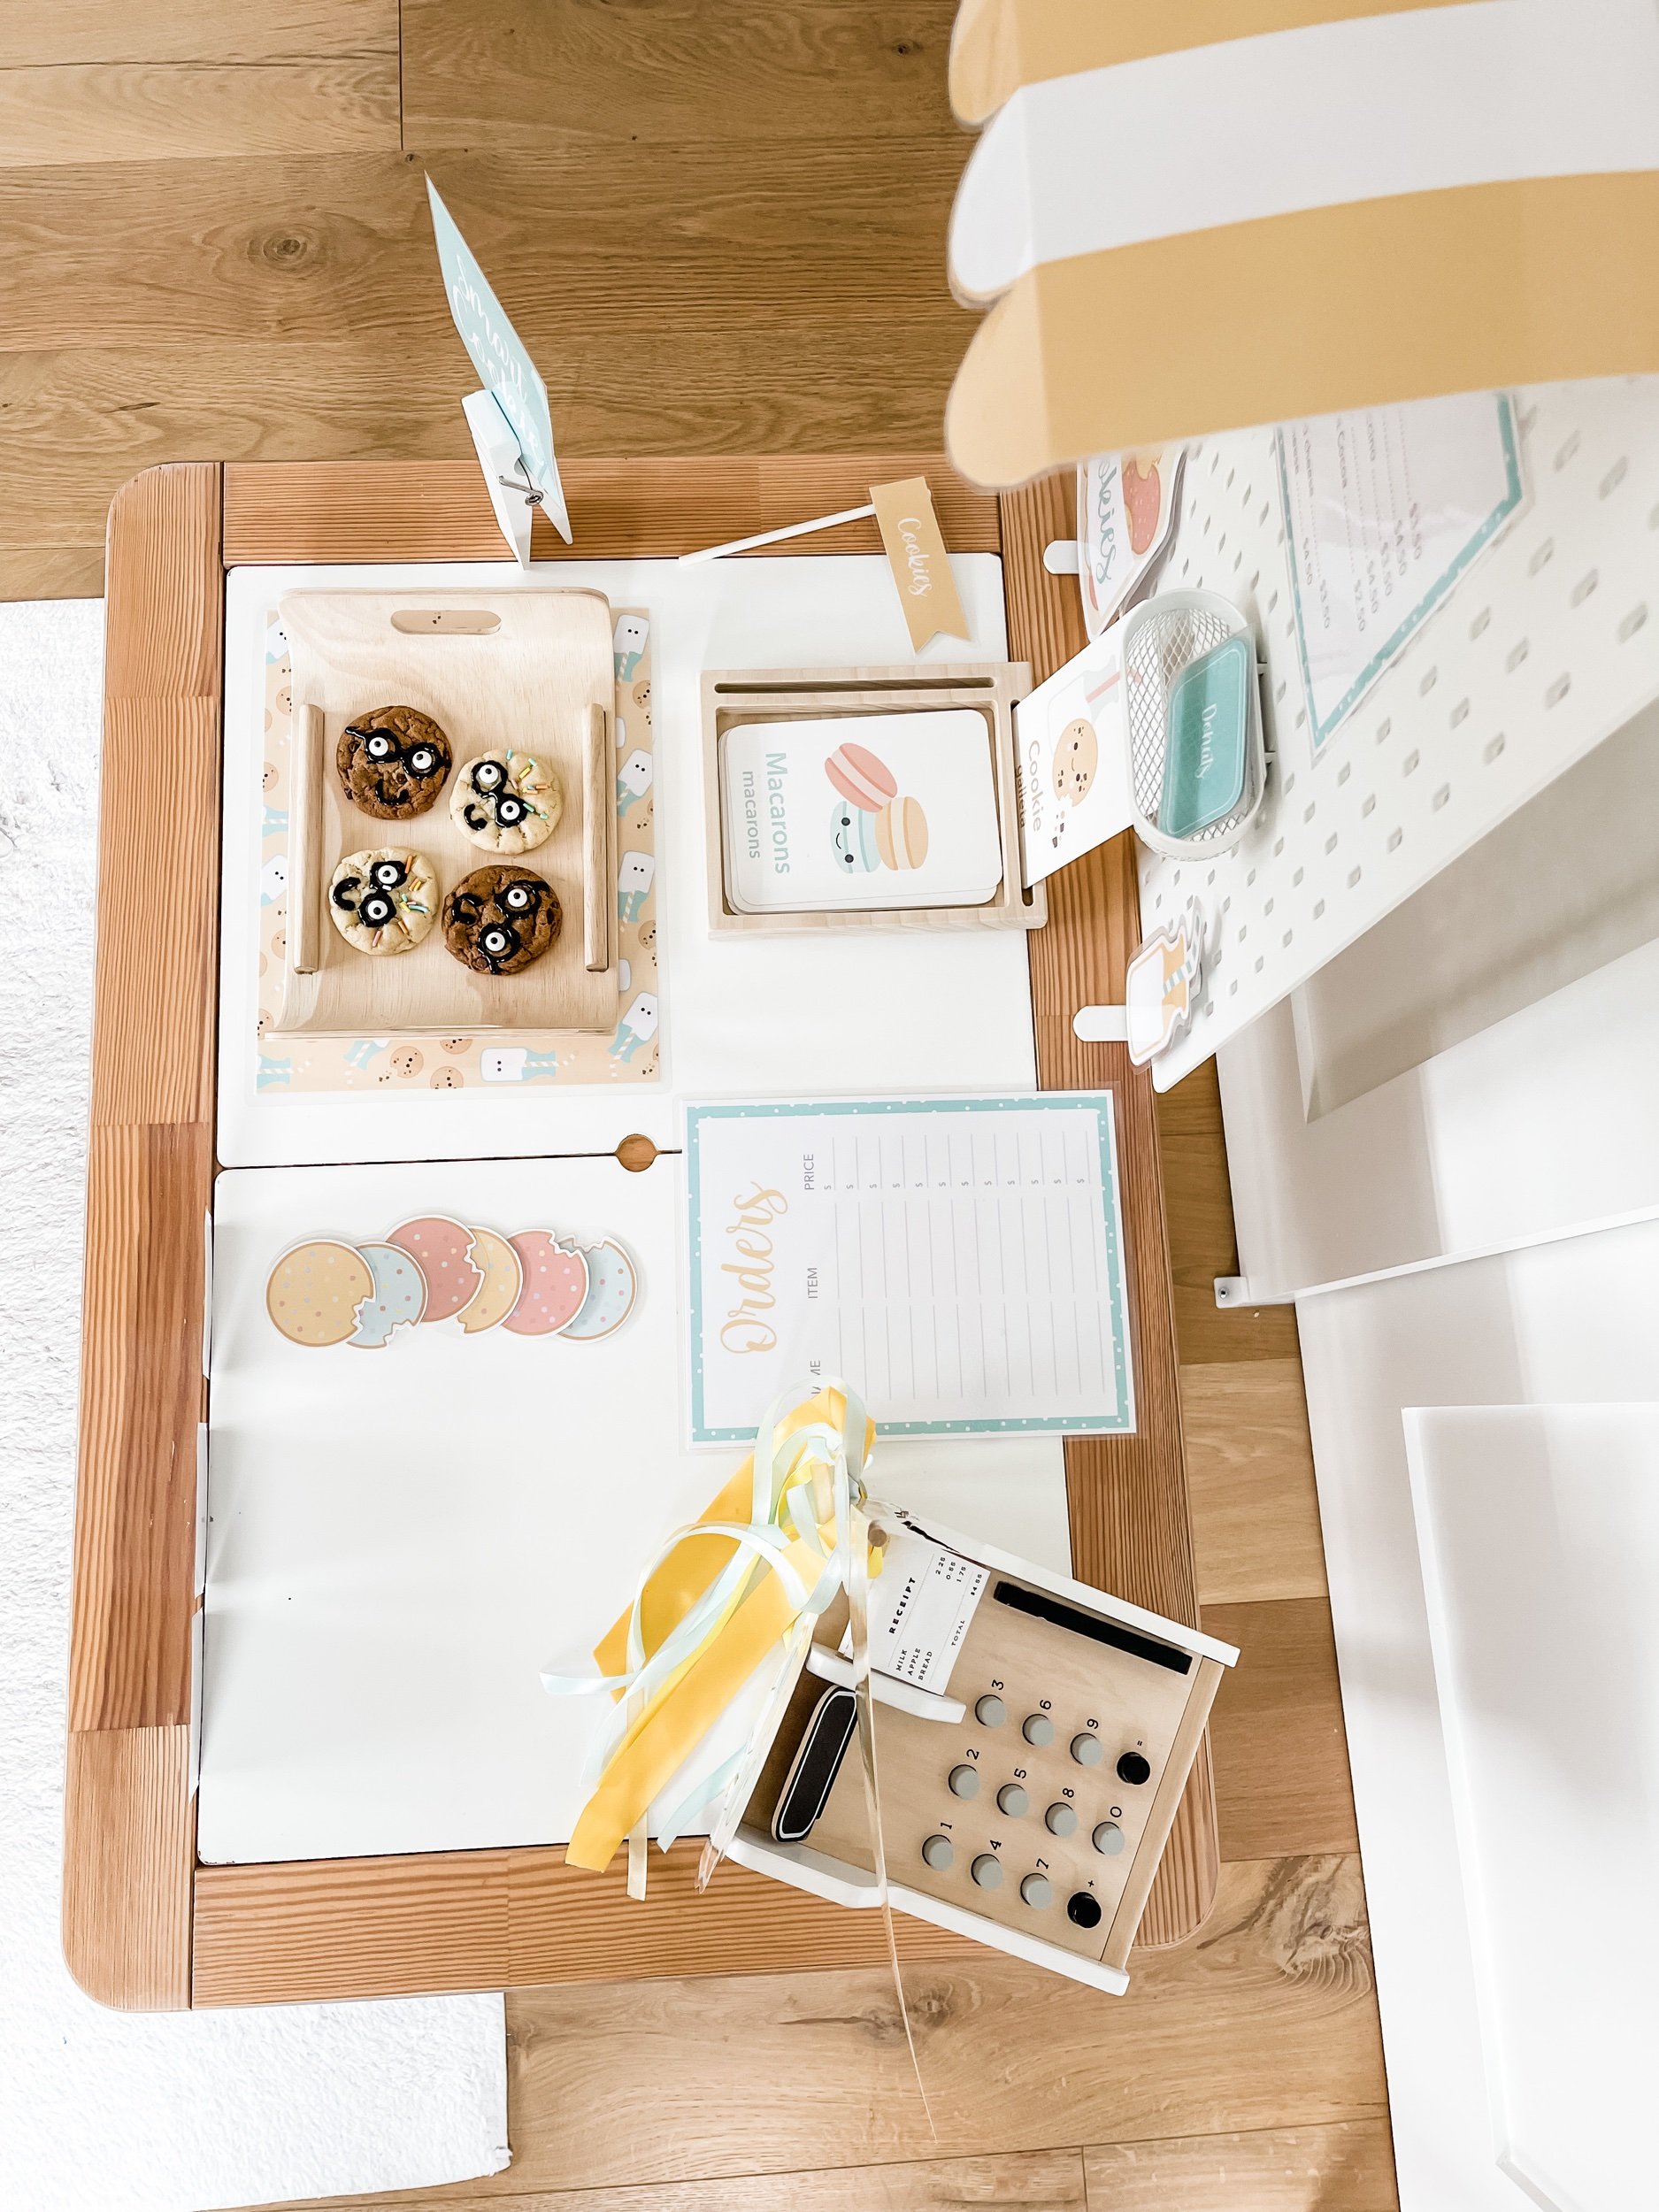
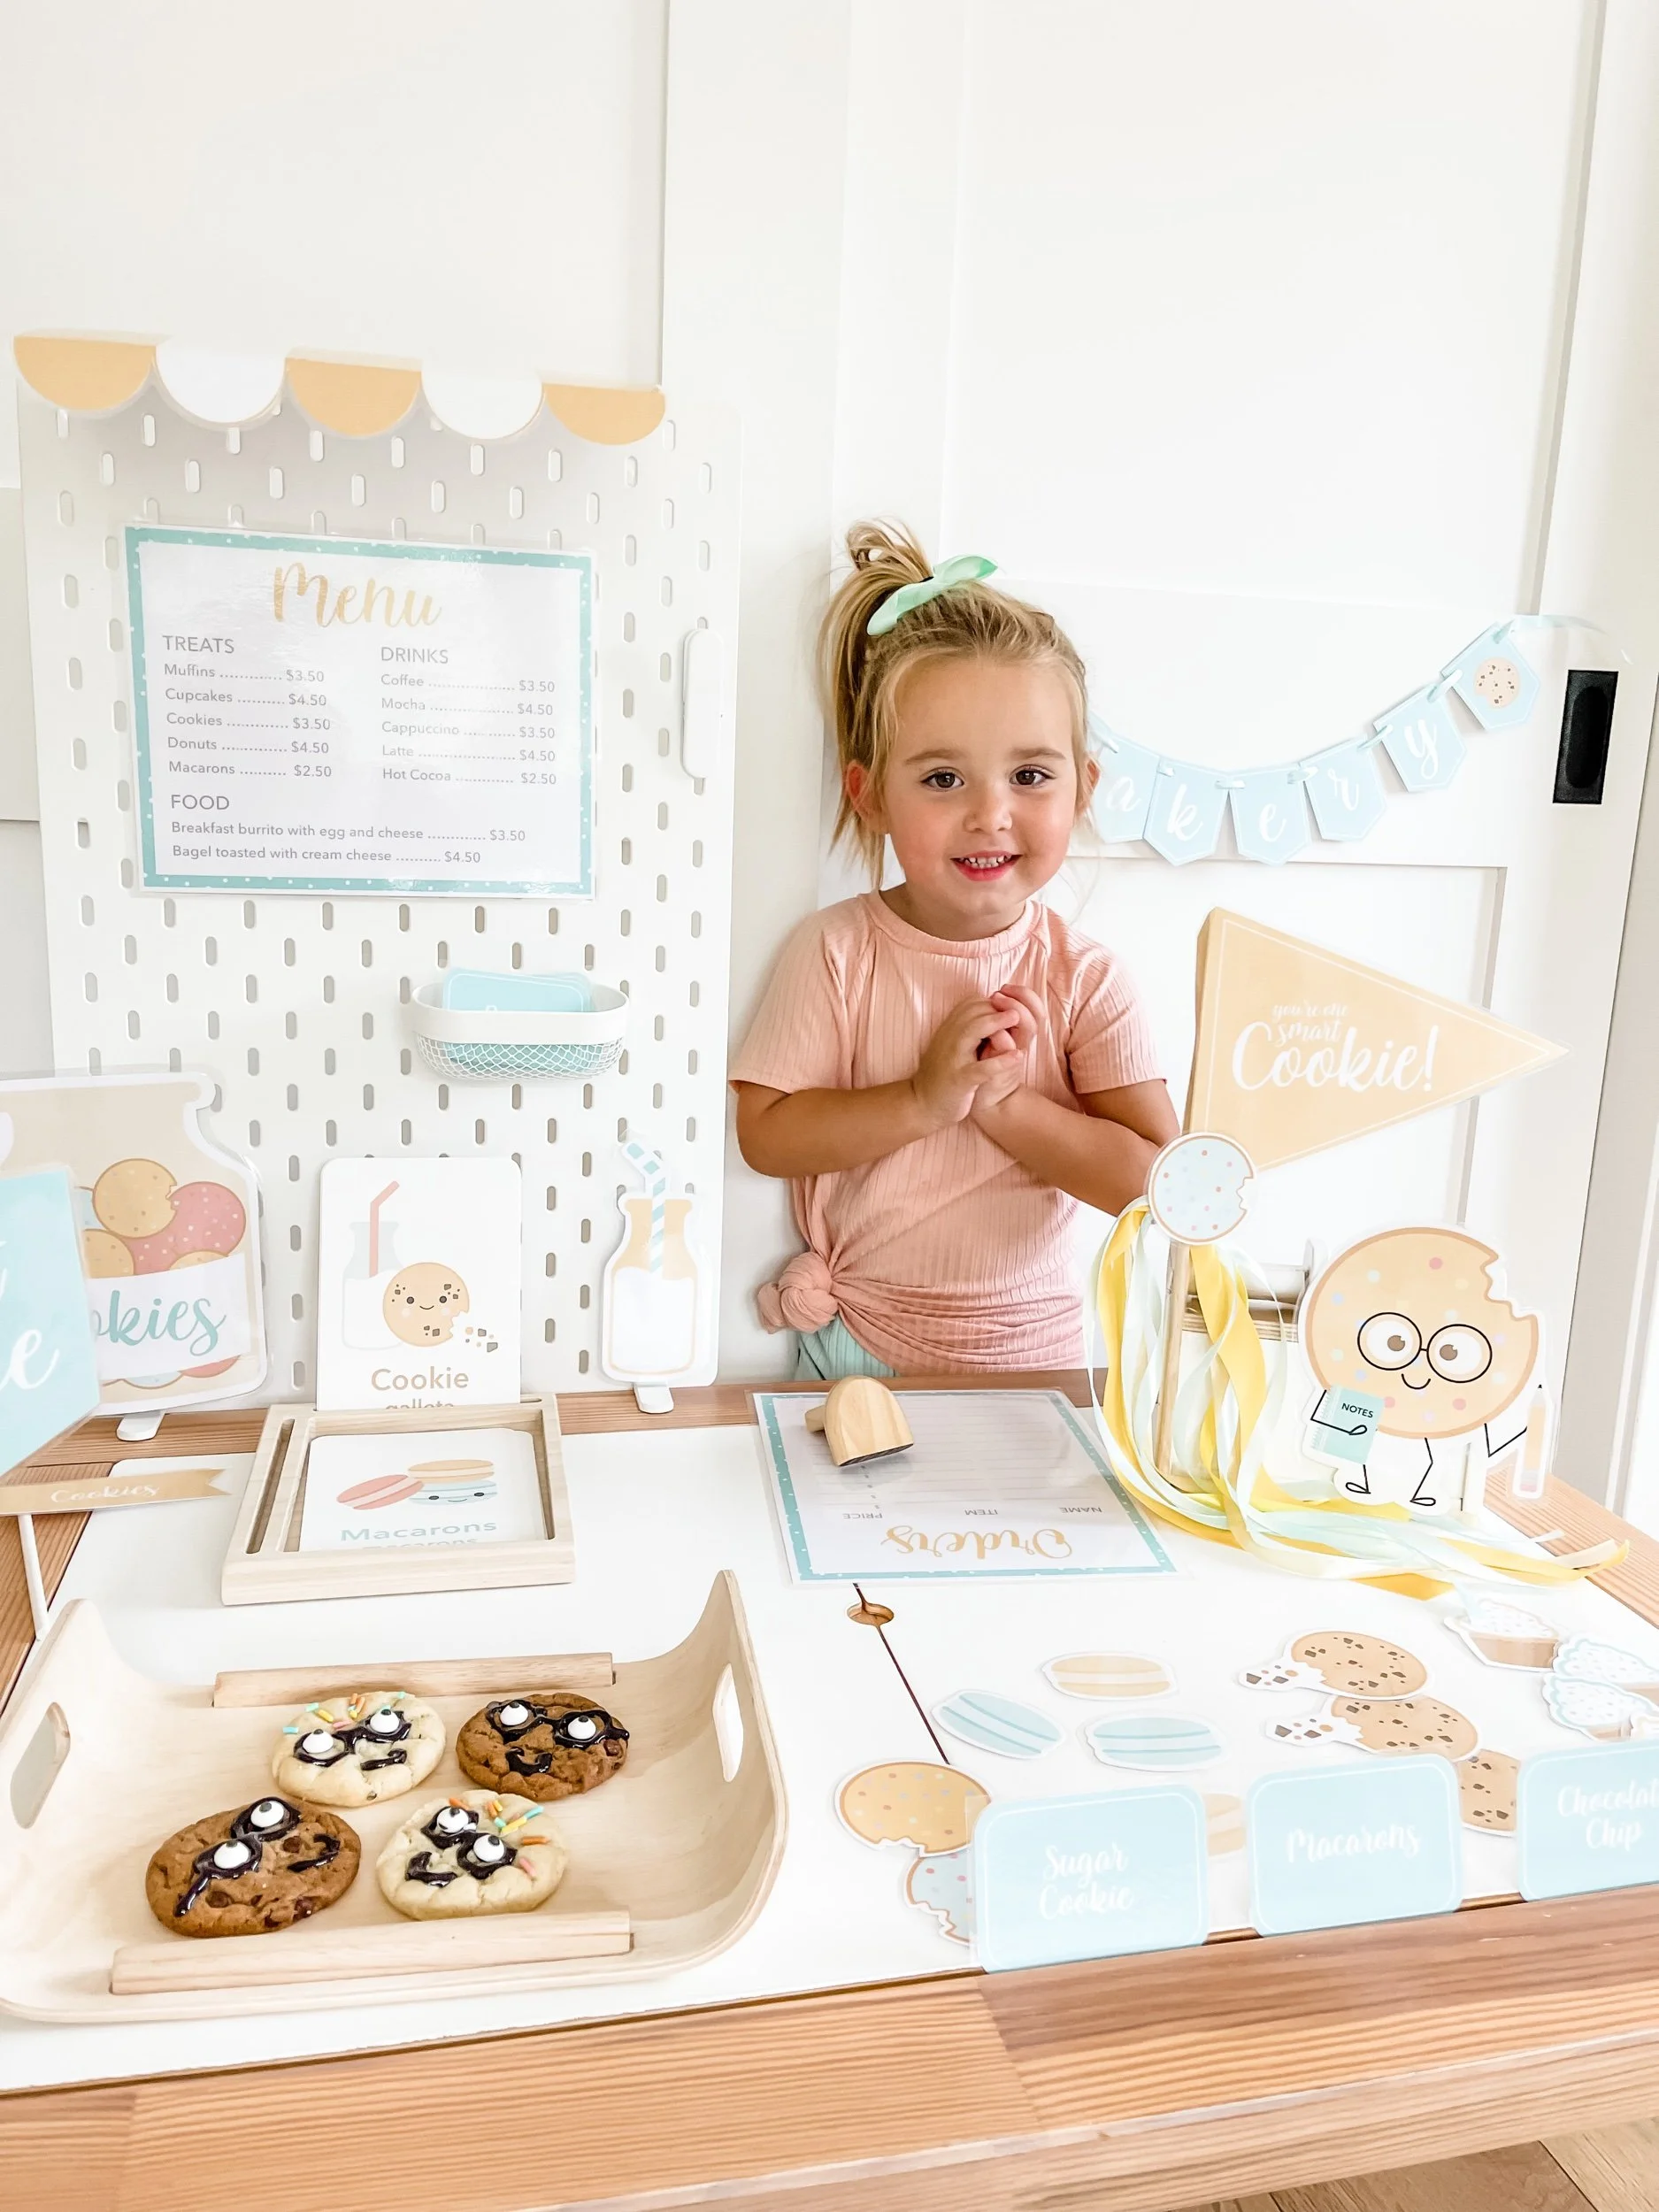
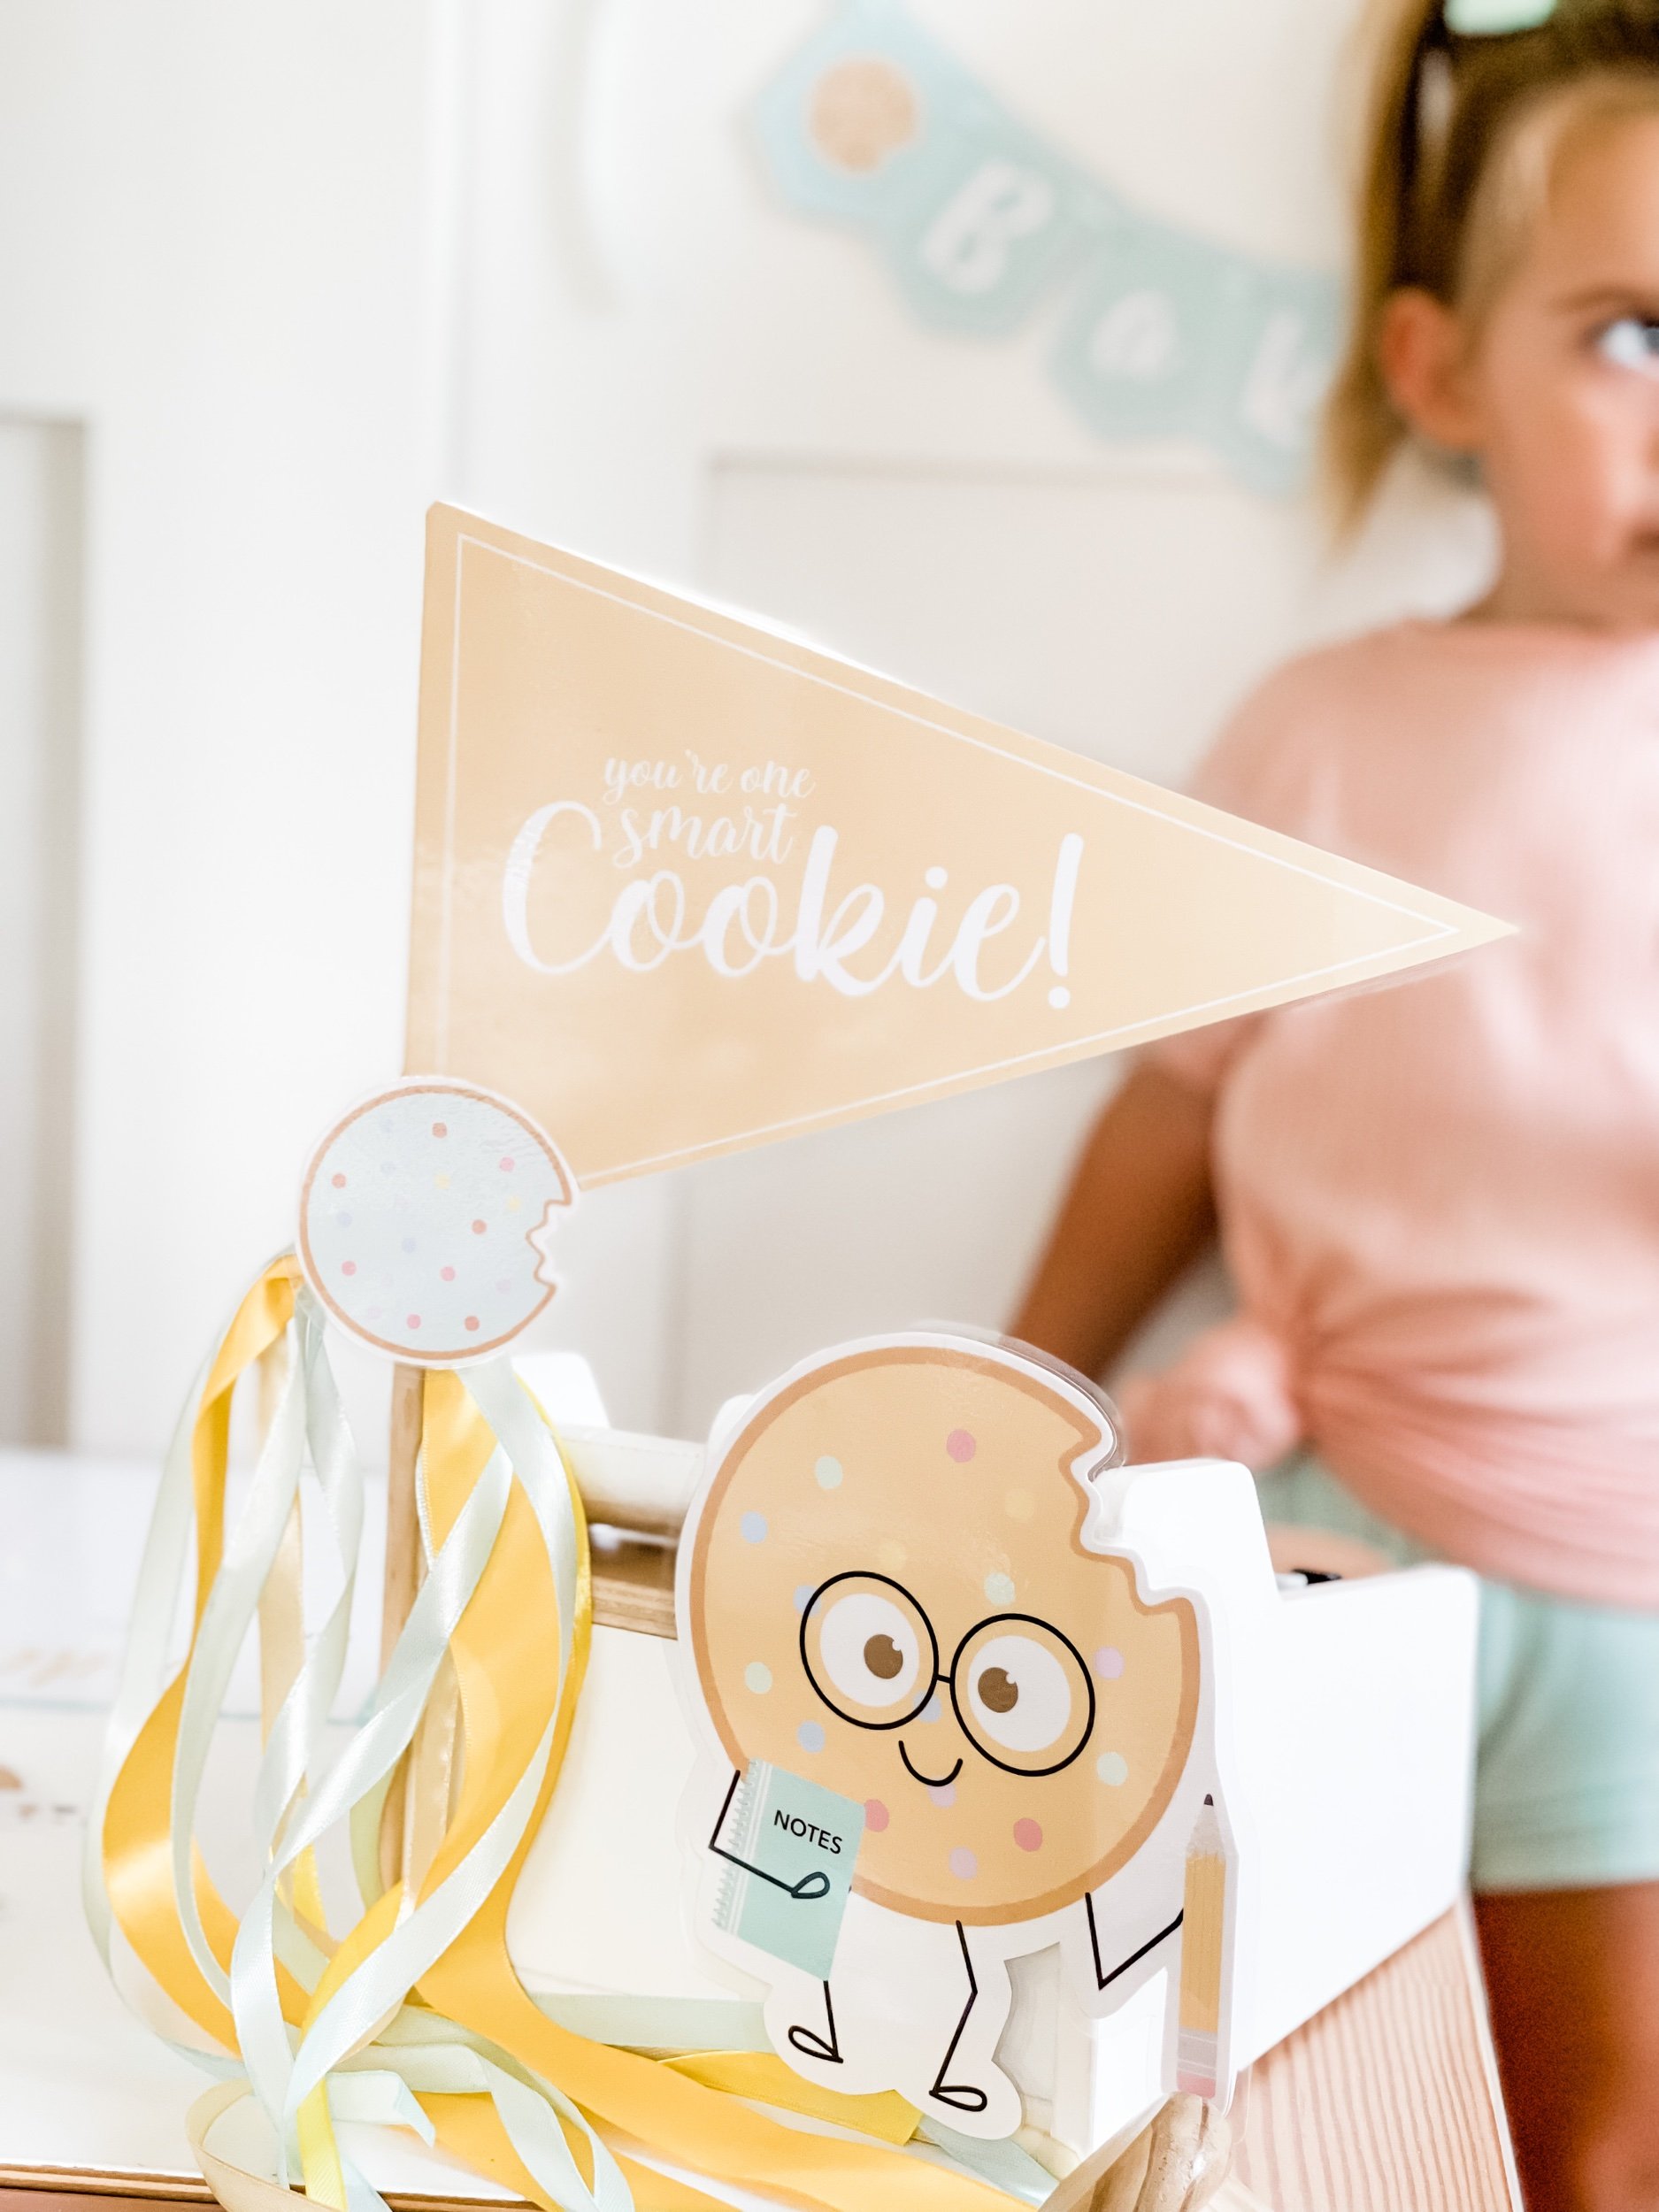
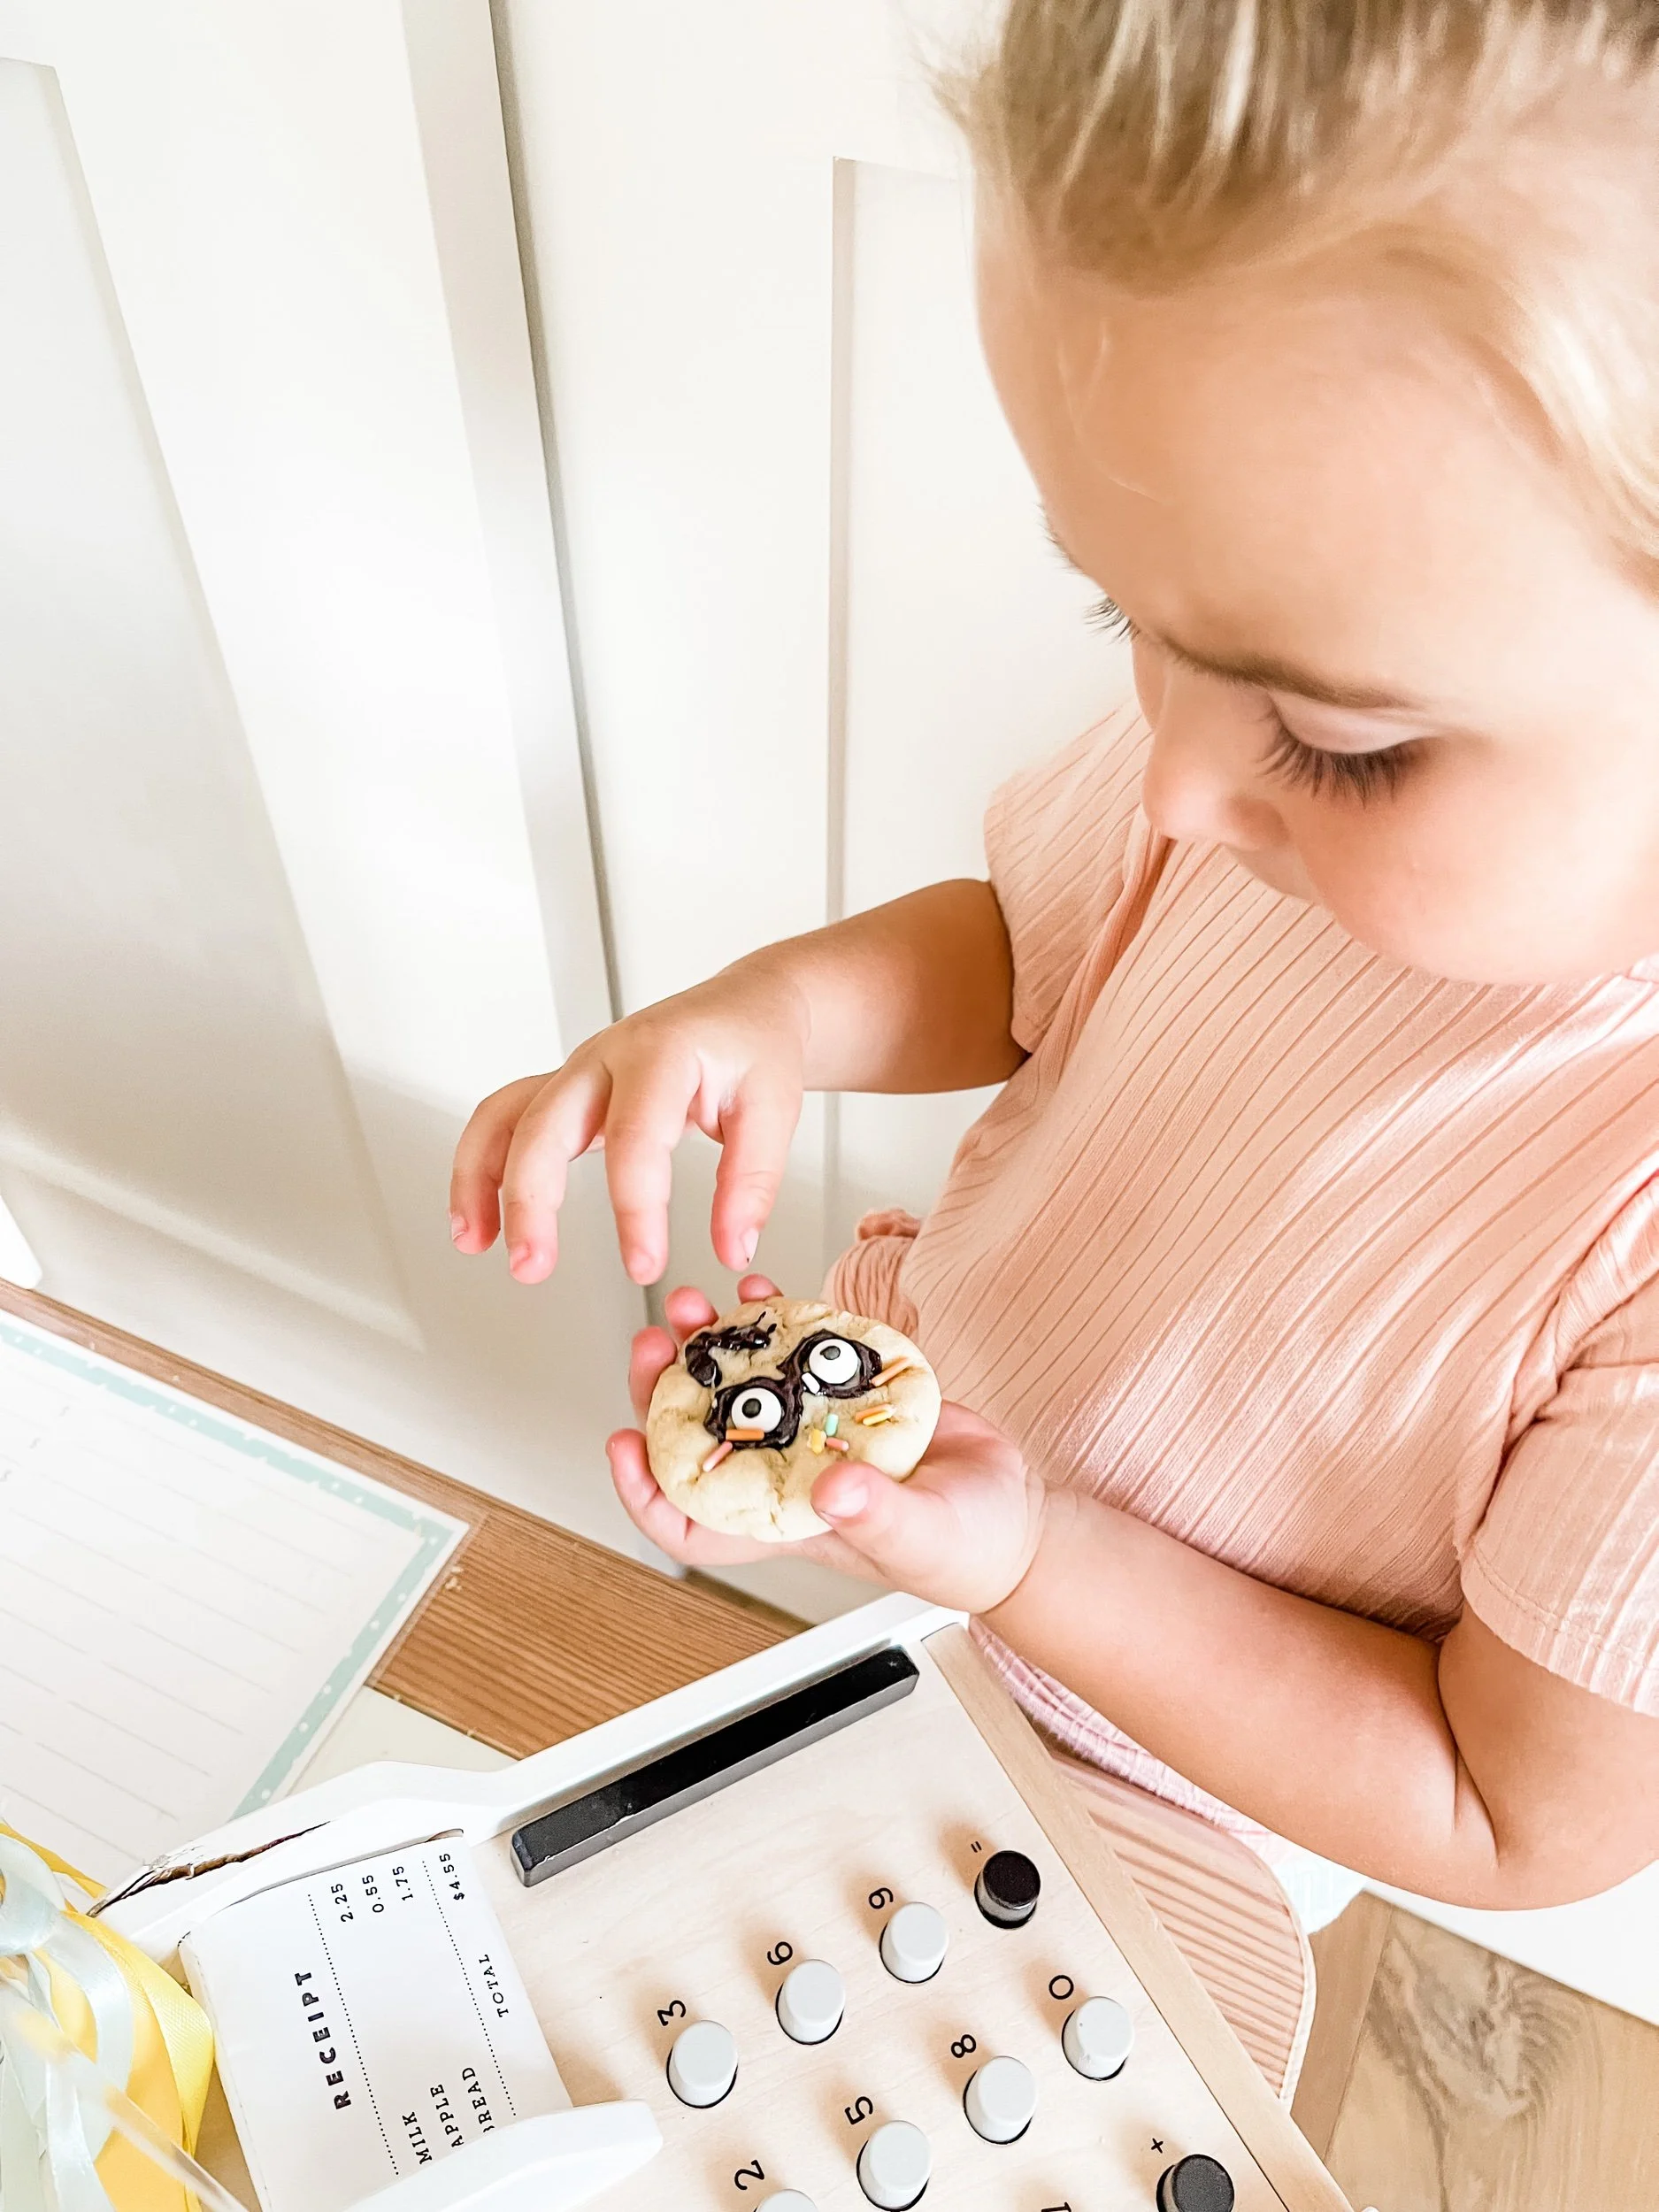
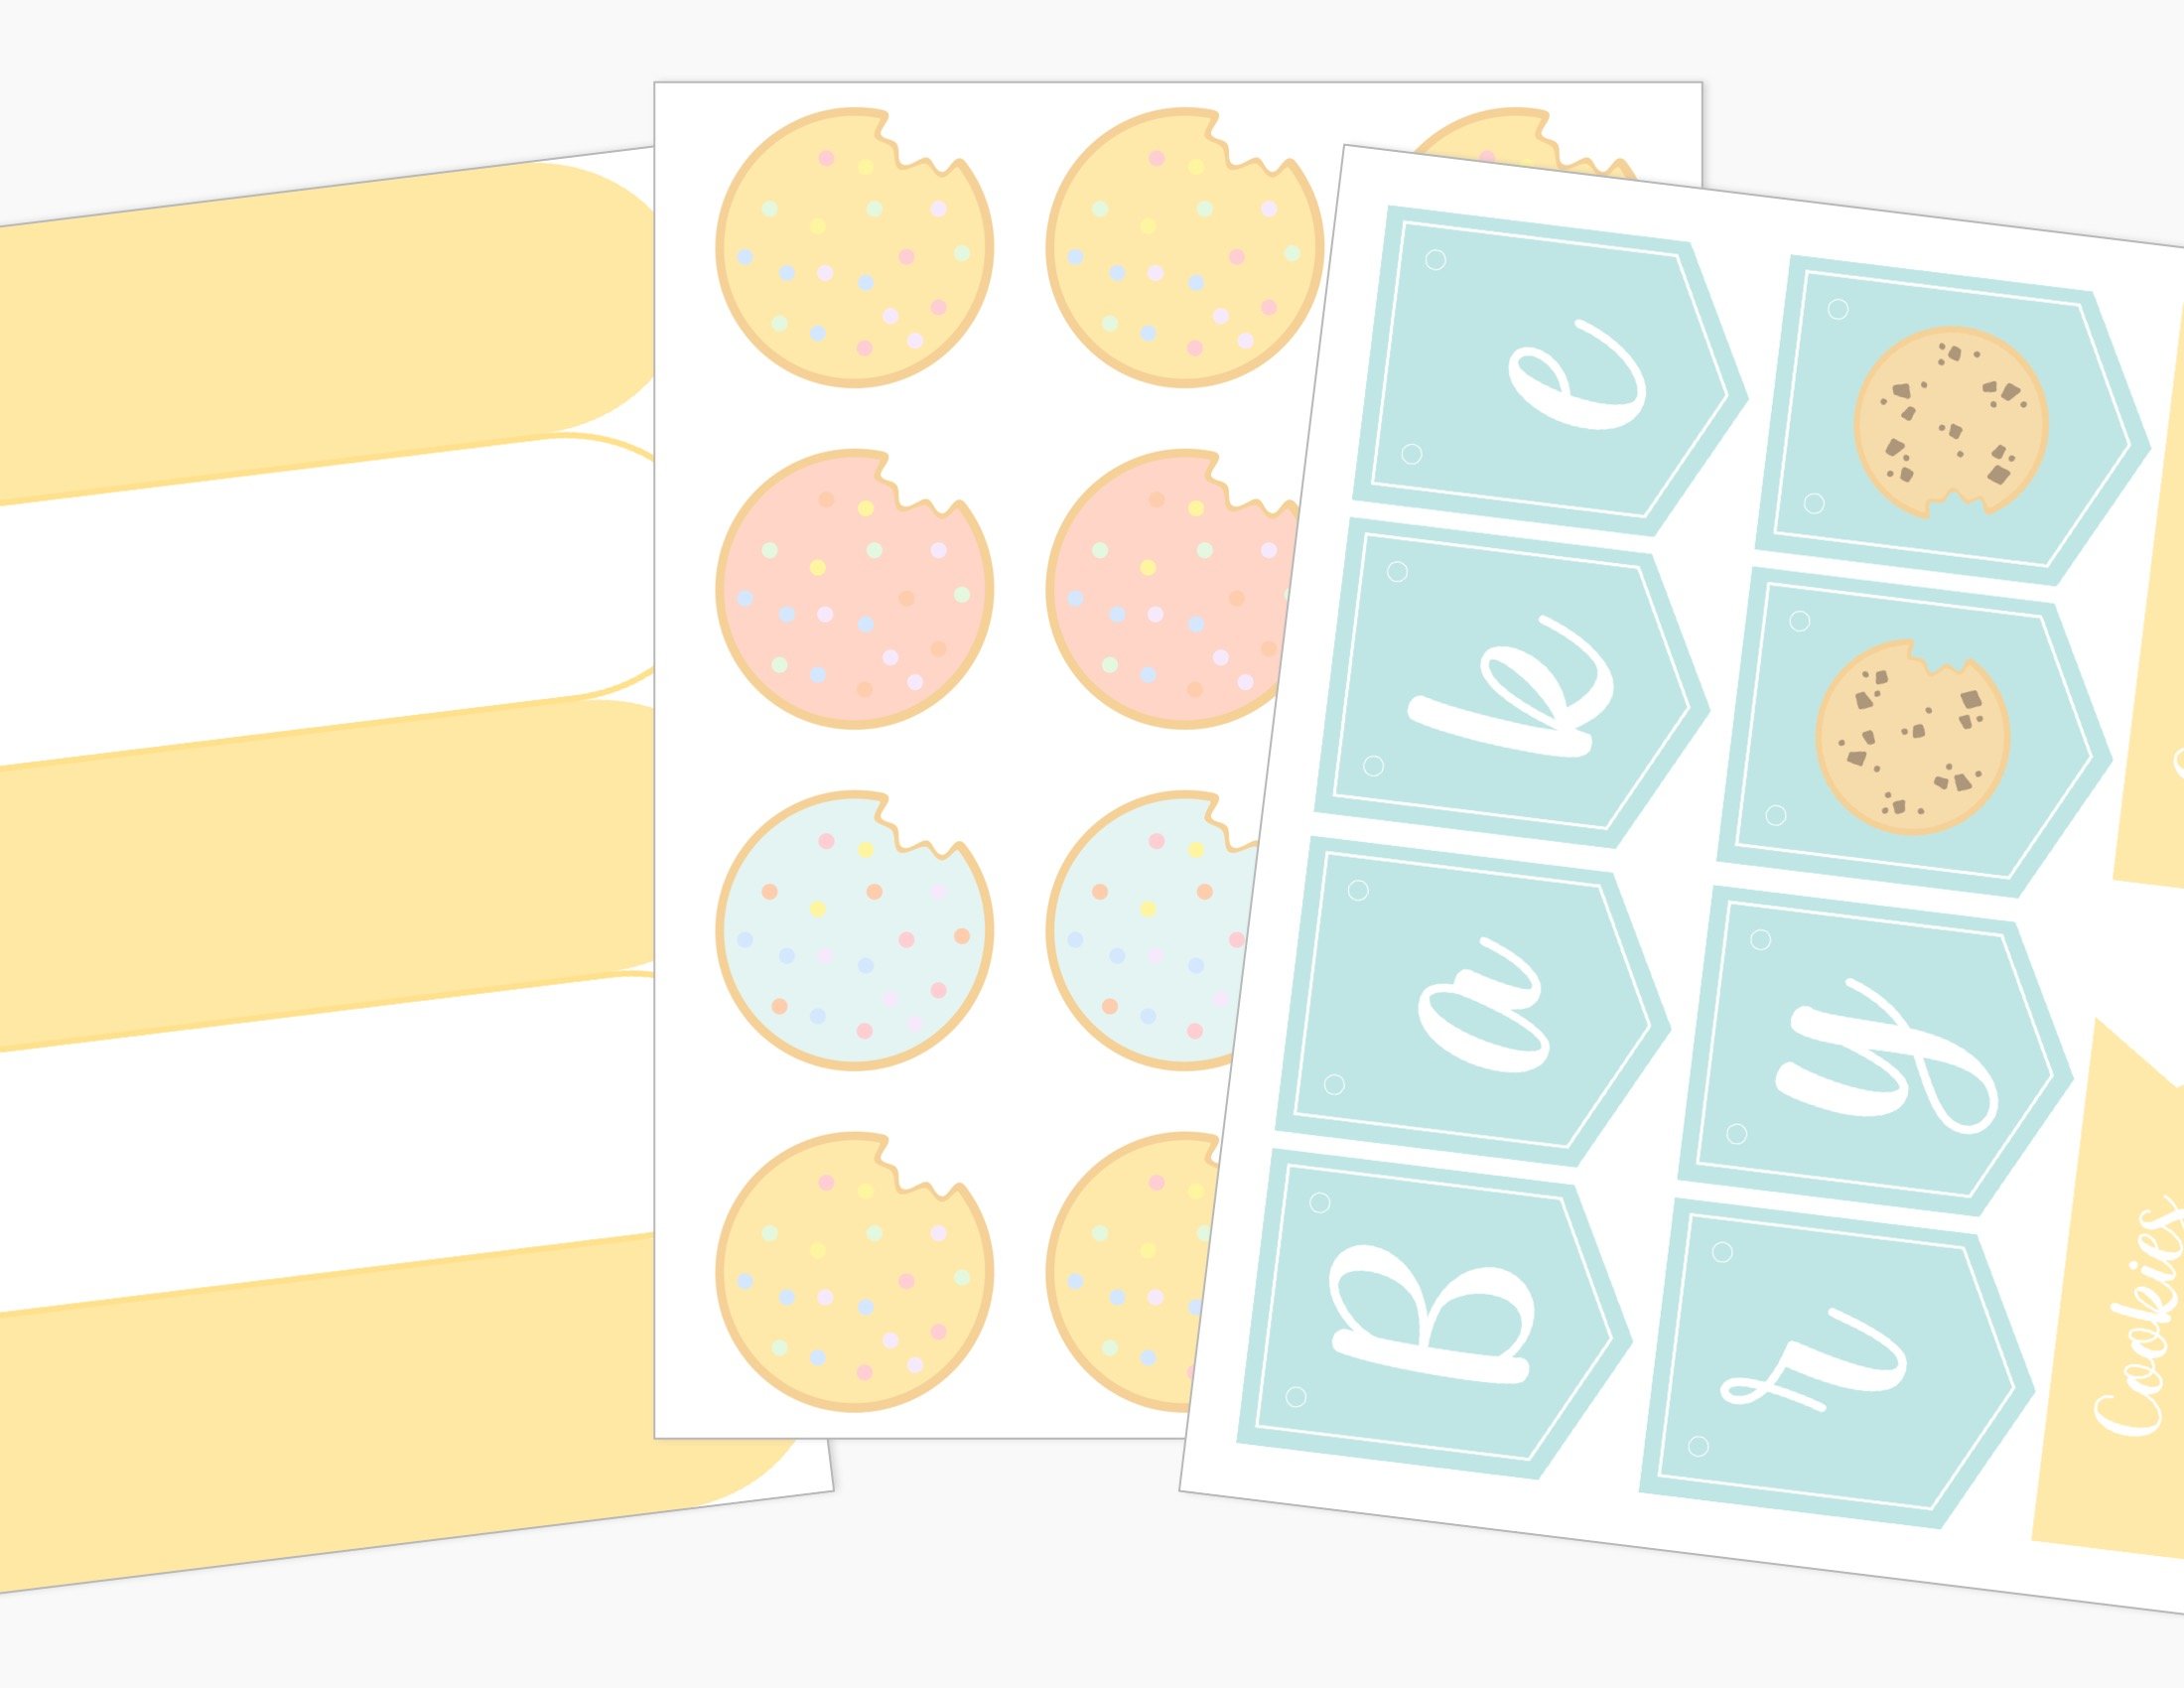
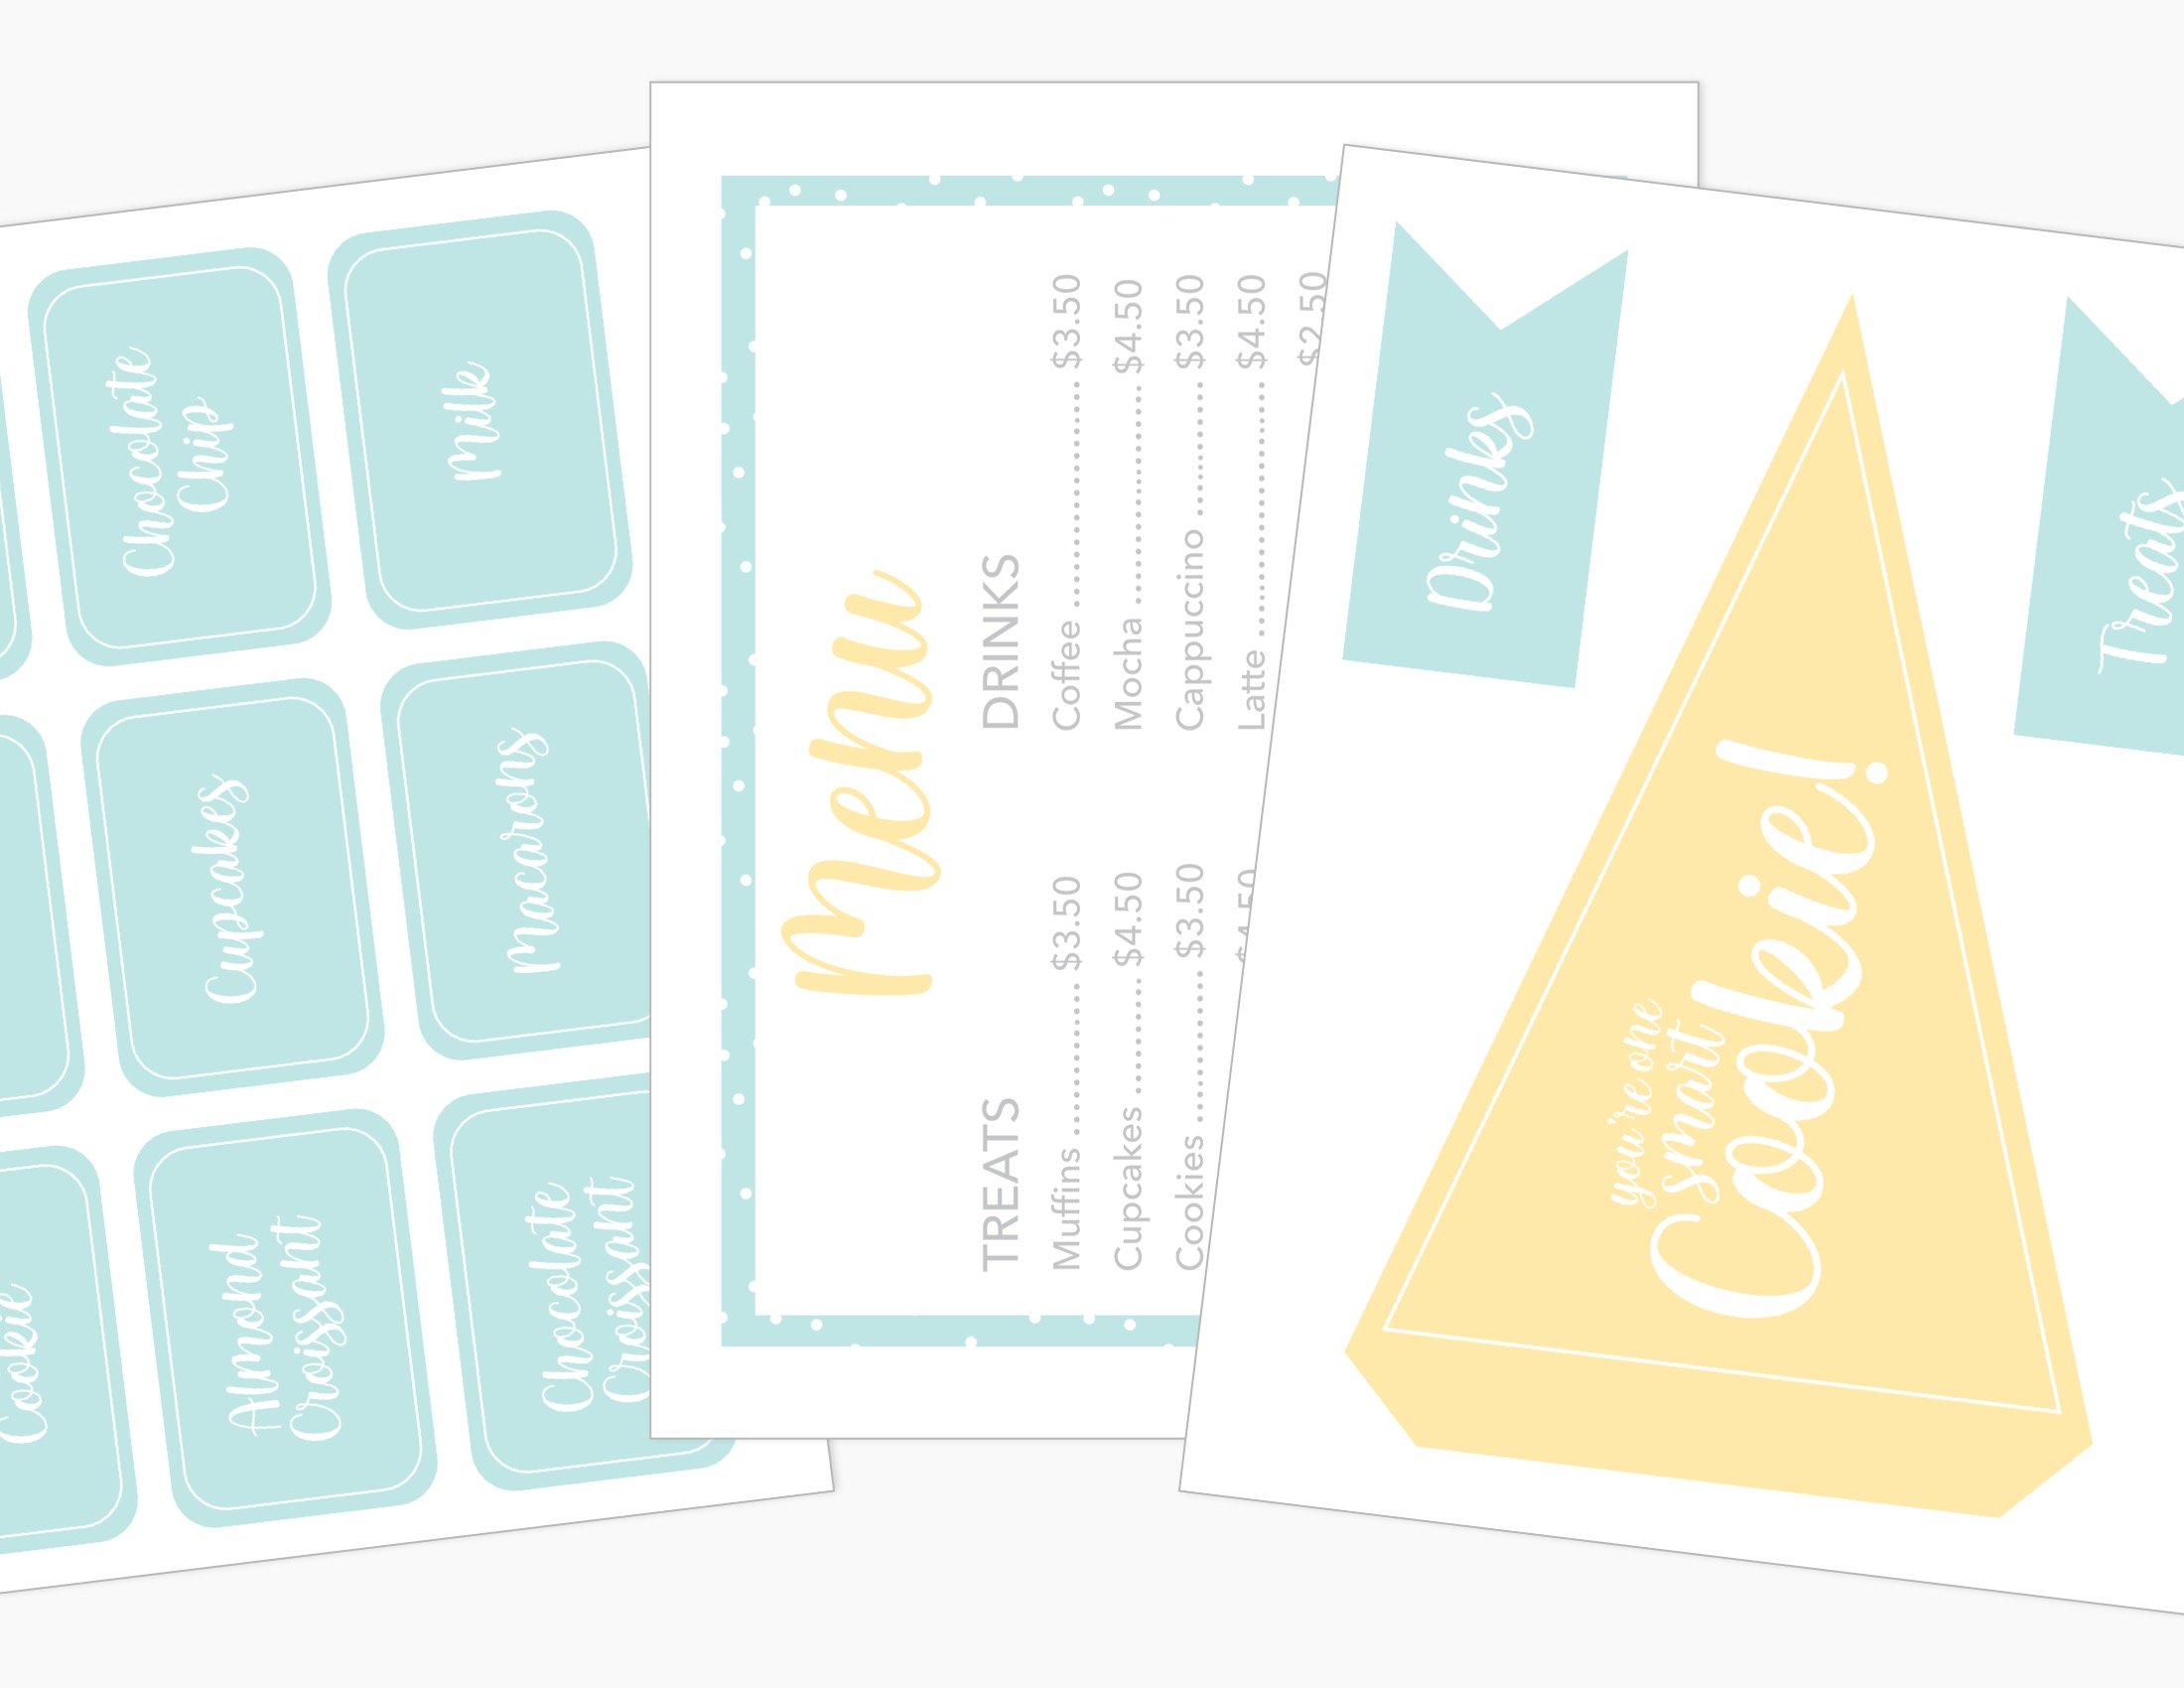
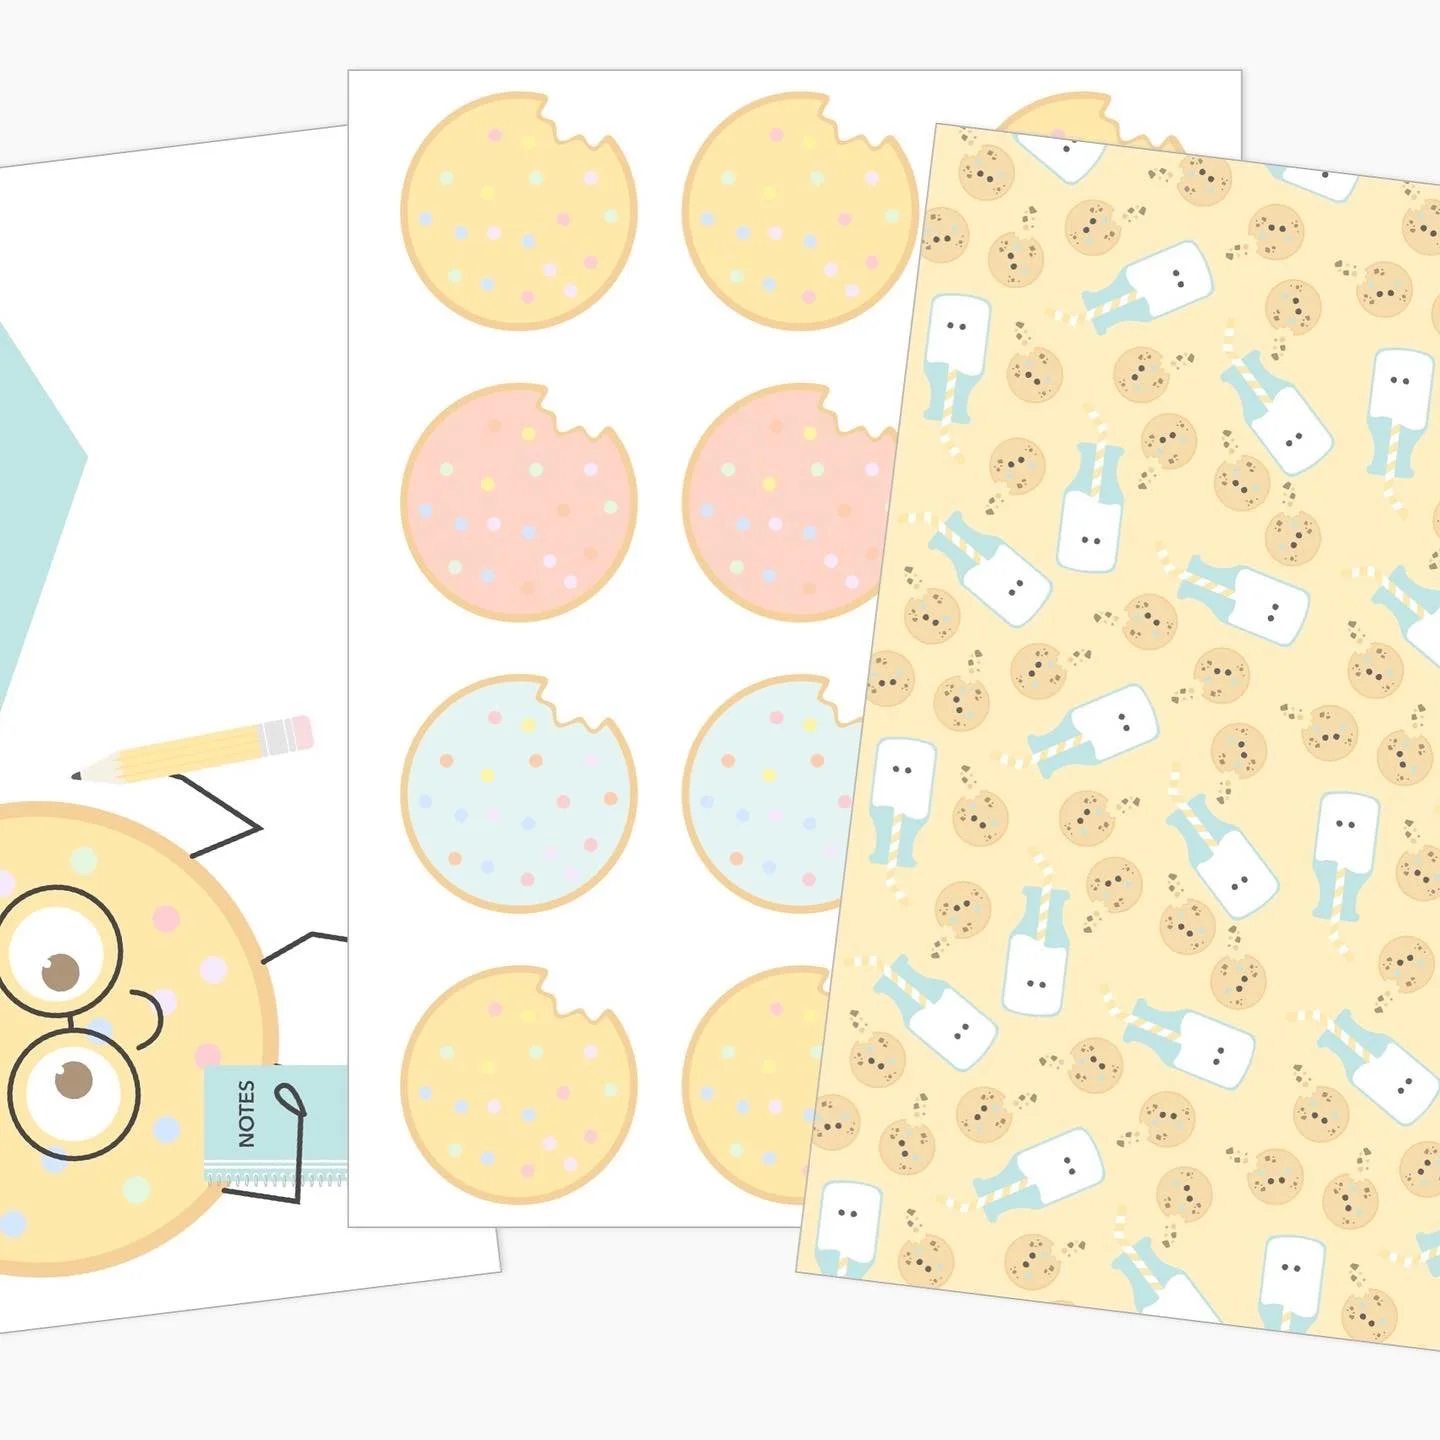
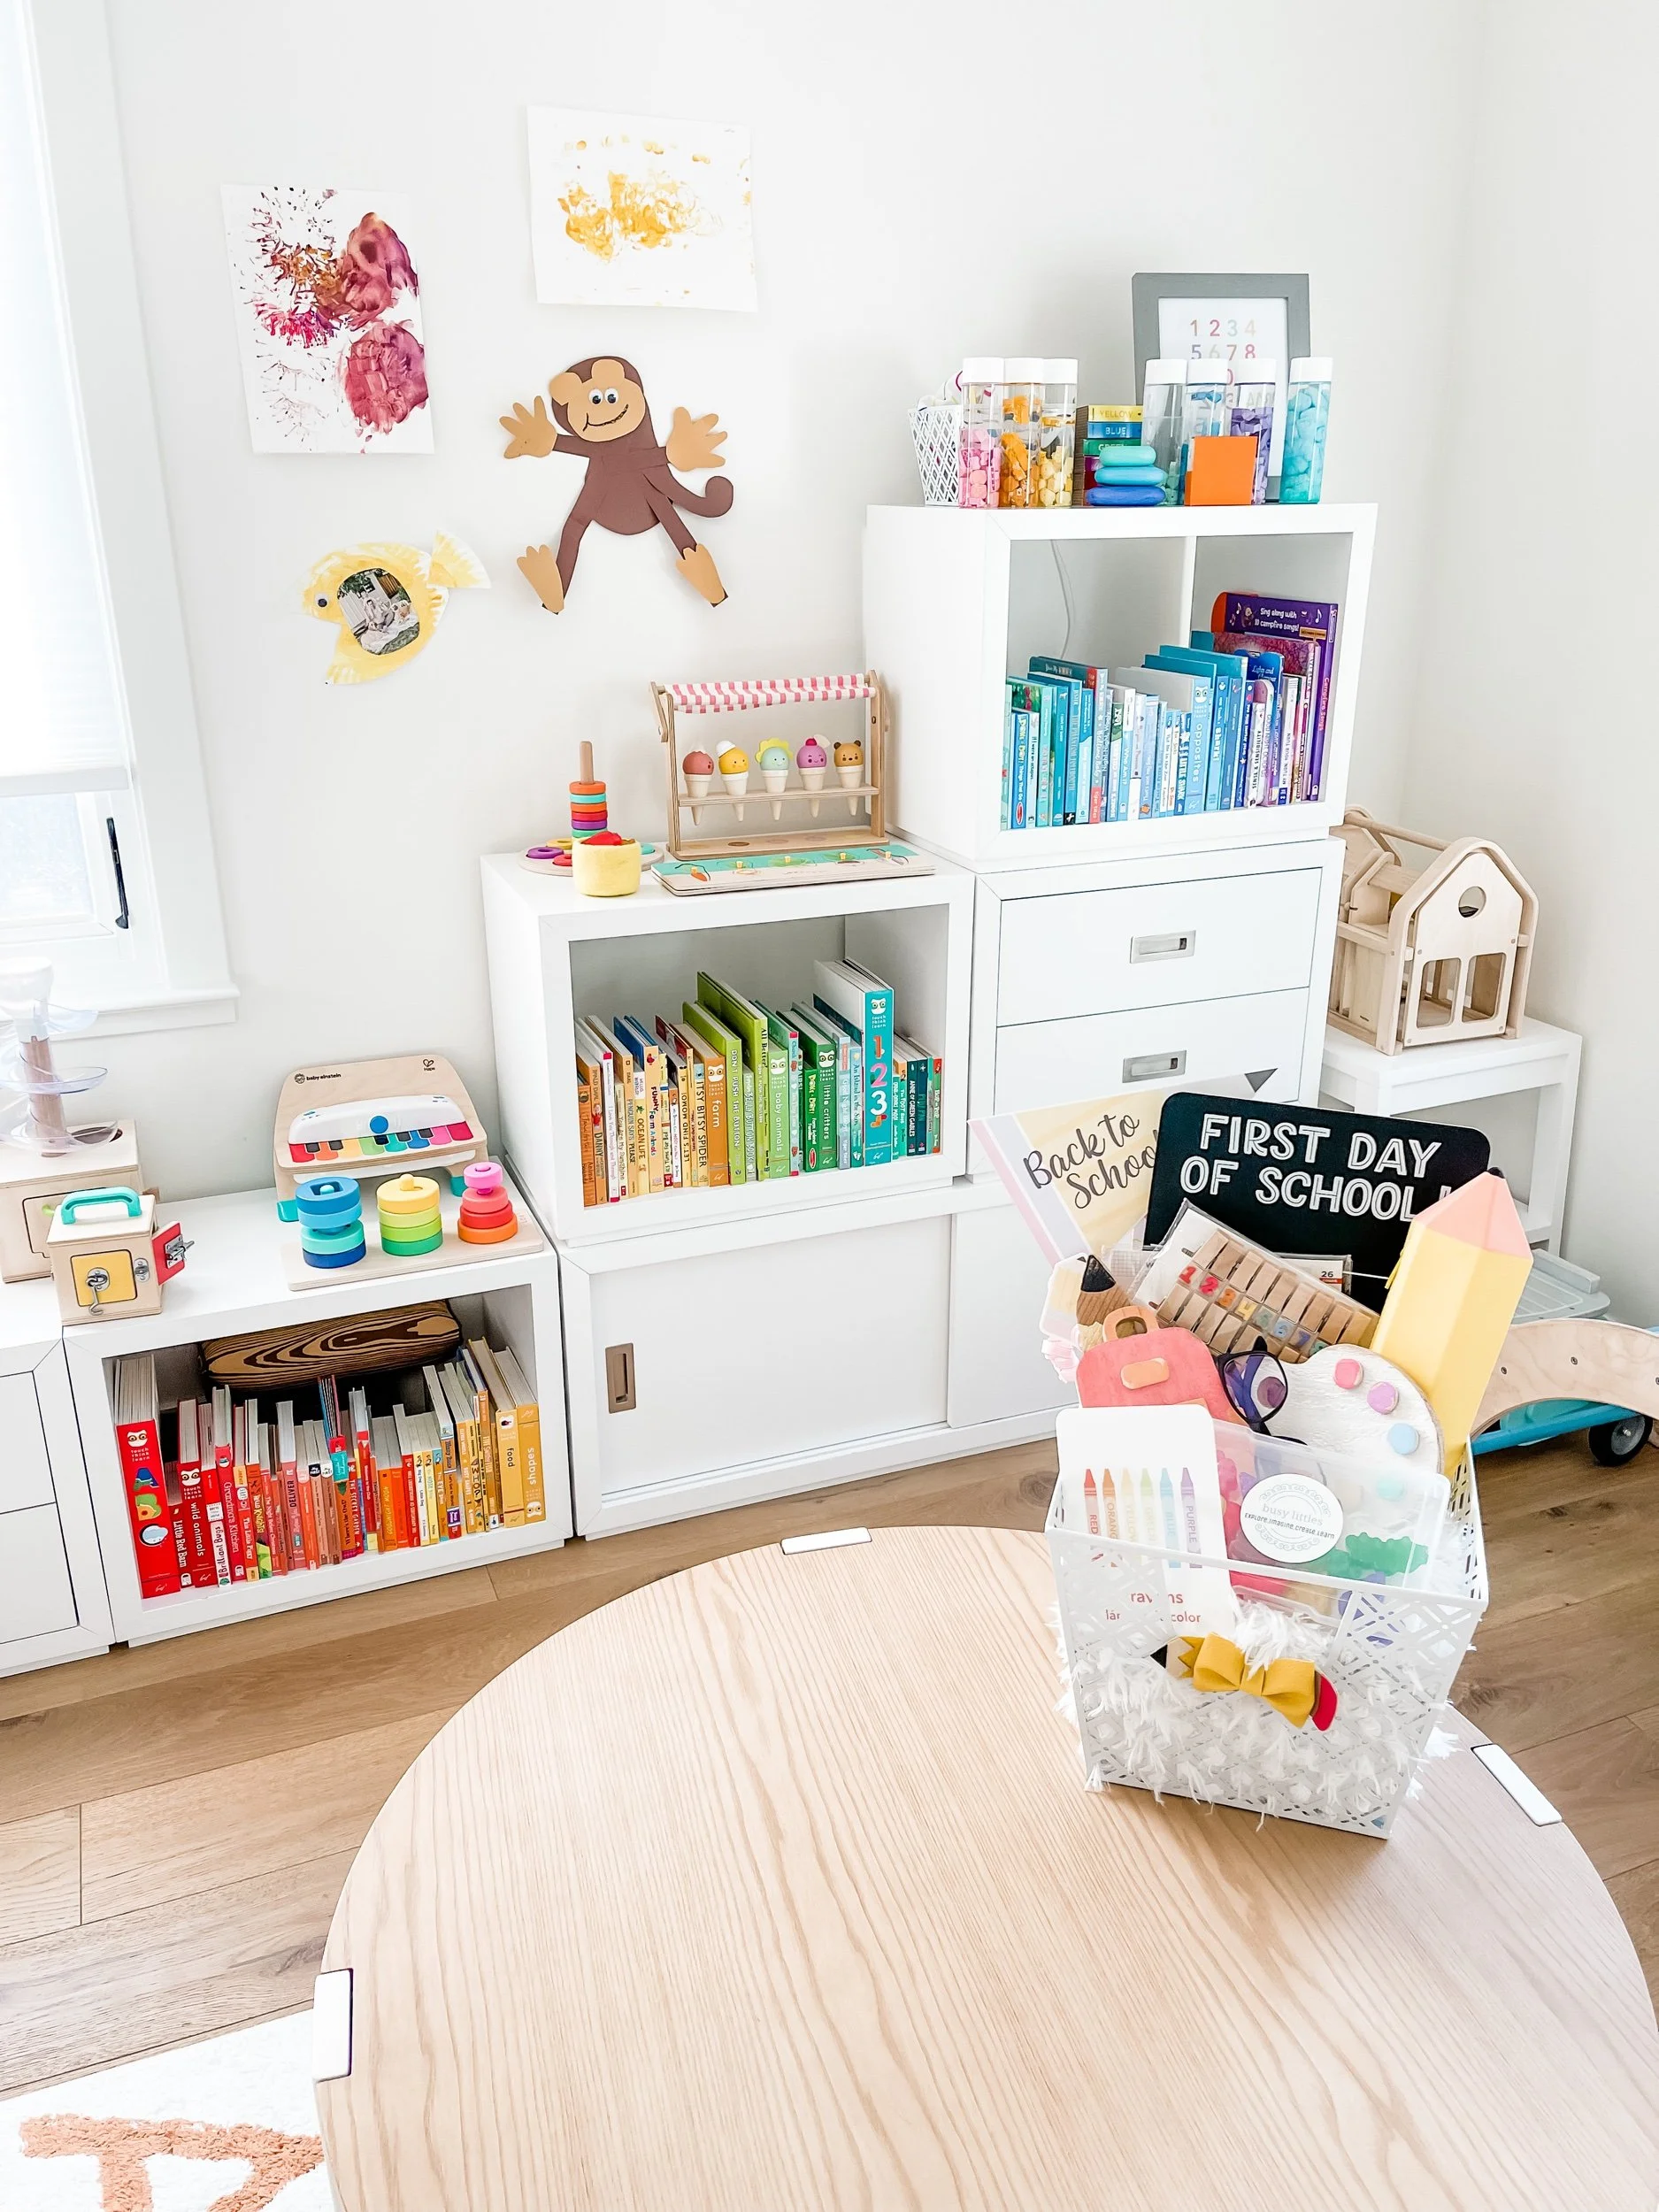
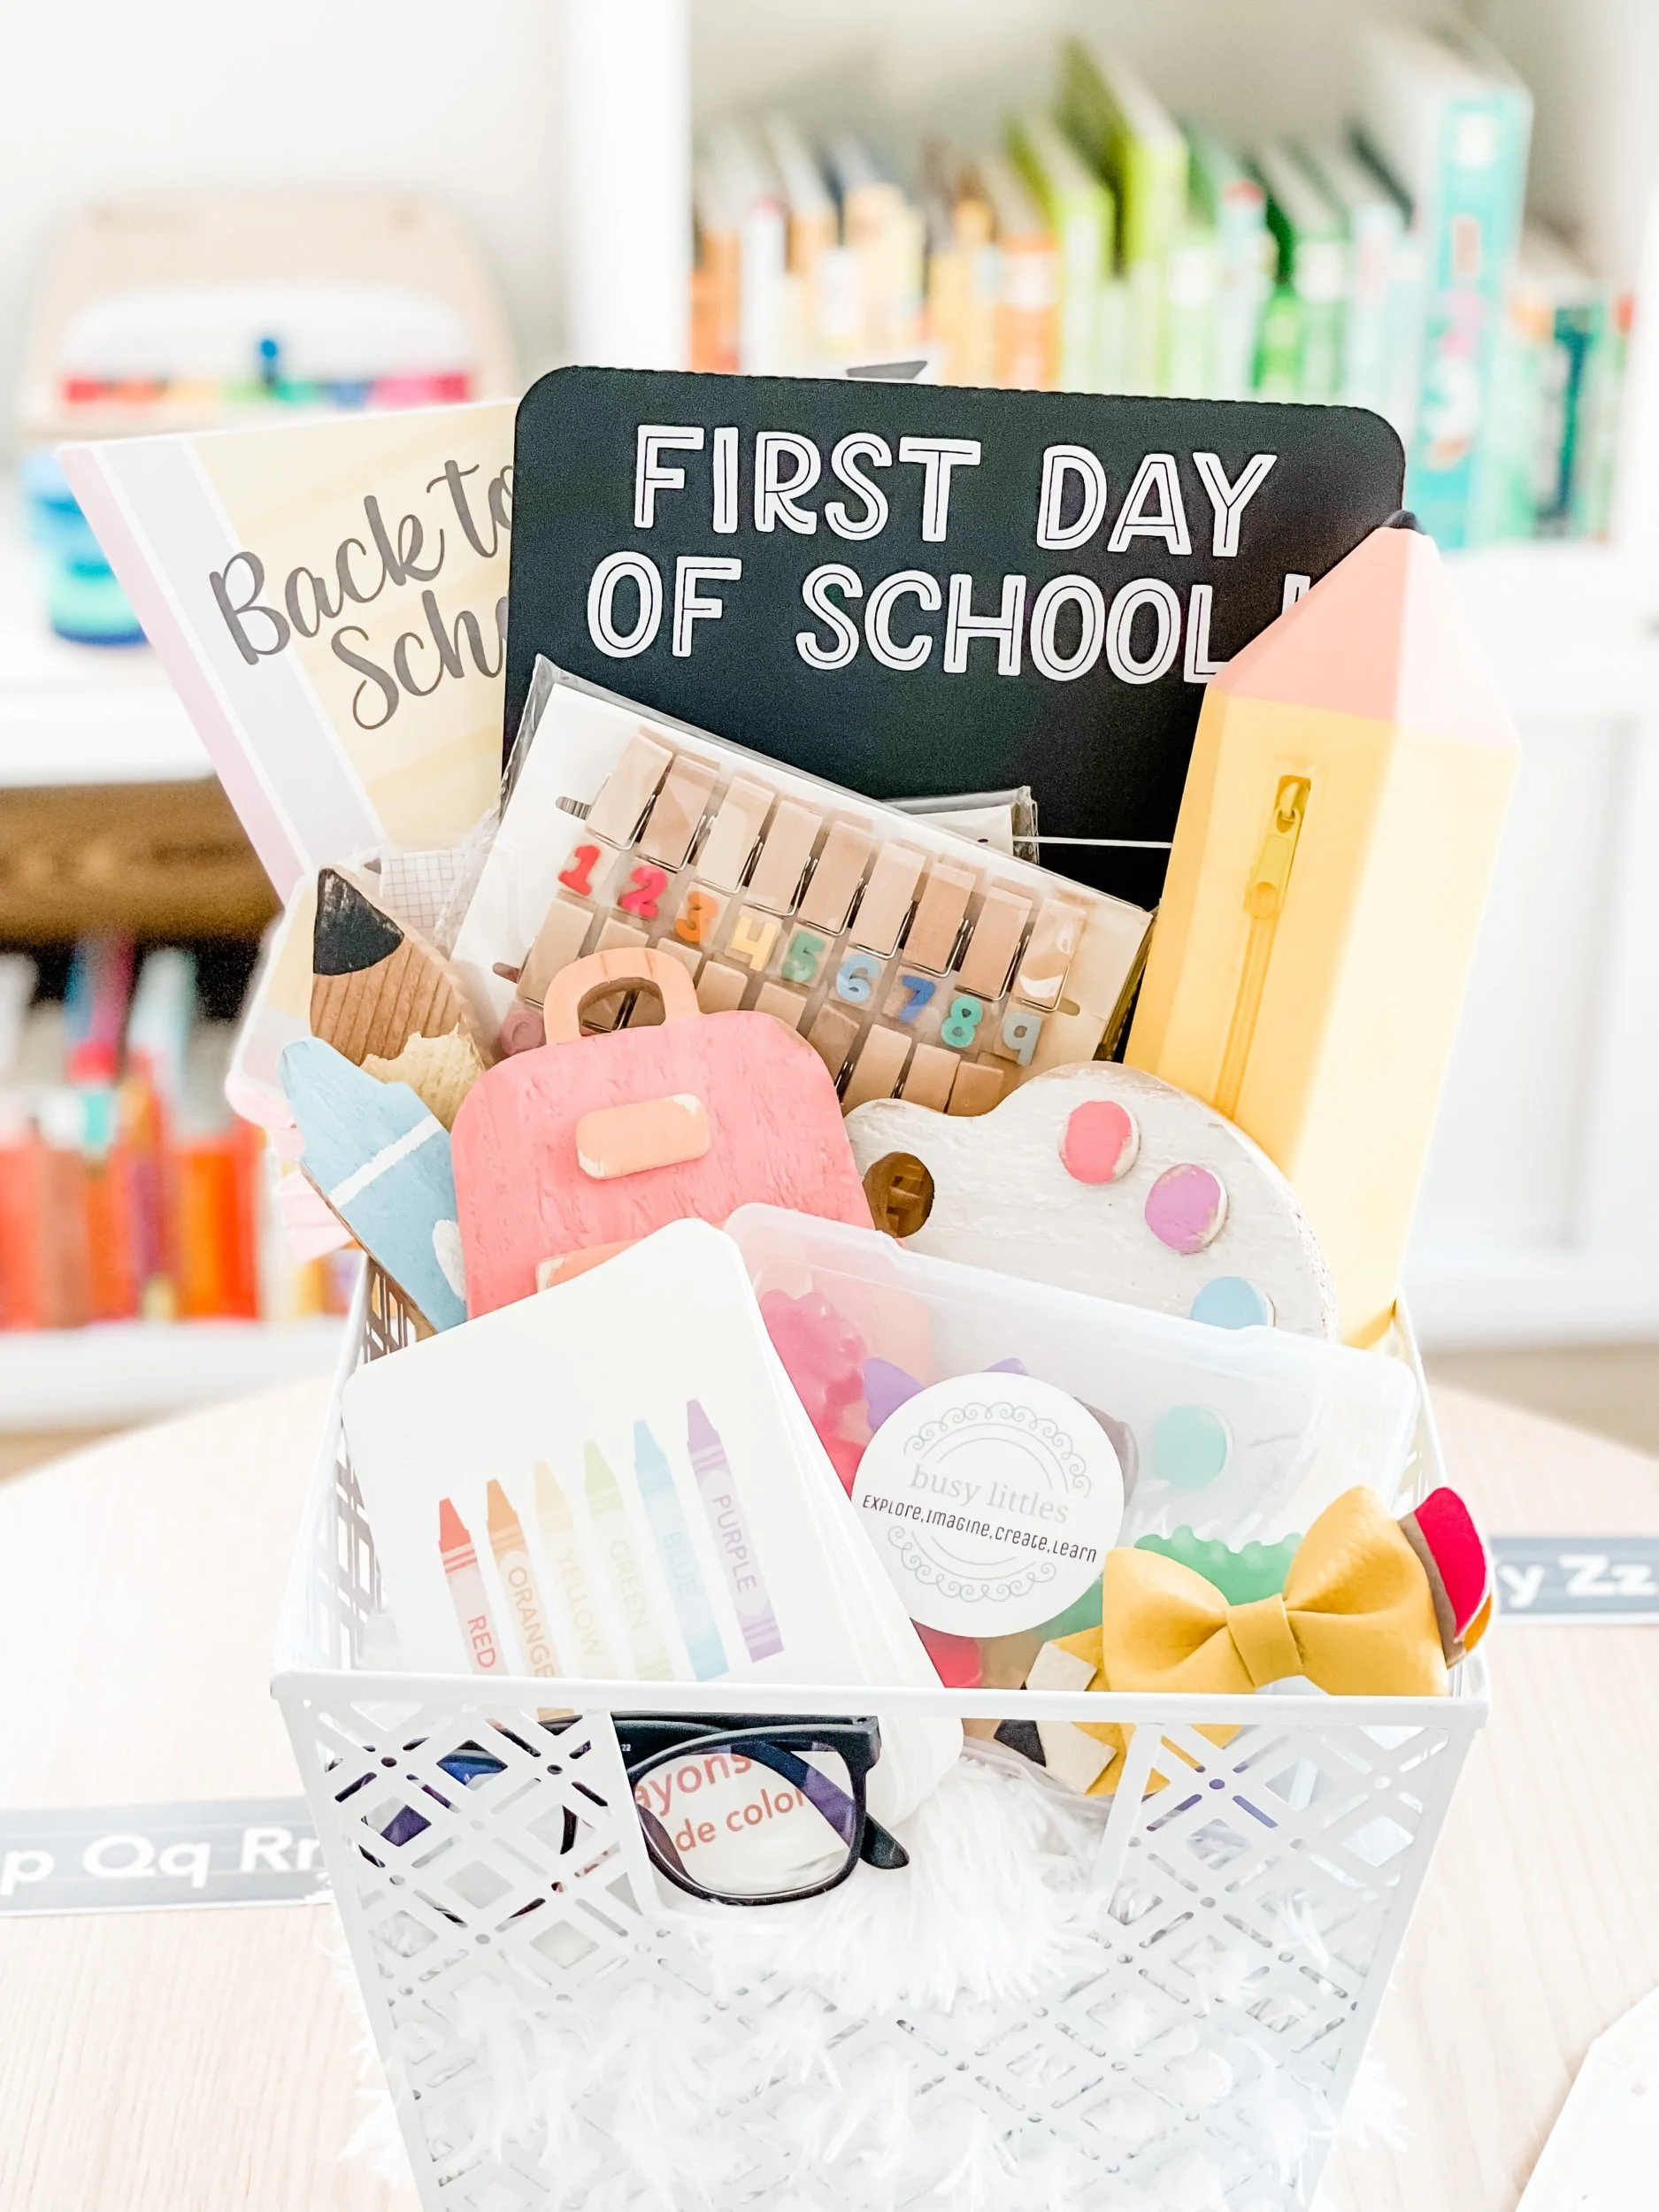
Sofie had a blast with this fall themed Cafe dramatic play kit! We’re getting into the fall season with this pumpkin spice themed cafe and coffee shop. These printables made it super easy to make this adorable little shop. Along with some coffee beans, cash register from @crateandkids and espresso machine from @hapetoys this setup truly was the most adorable to date. Sofie loved practicing serving her customers, scooping coffee beans, and filling up the cups. She even served decaf which is mommas favorite! We practiced taking orders checking off items with the order form and writing her name on the little barista badge. Imaginative okay offers so many opportunities to learn new words and engage in new ways. We practiced phrases like “come again soon” and “thanks for the tip!” And of course counting money and providing change. There are so many fun ways to learn in the pretend environment that prepare her for the same real life environment. I can’t wait to keep making more setups and facilitating her early preschool learning skills.
Smart Cookie Dramatic Play Setup: A Sweet Back-to-School Sensory Experience
Kick off the back-to-school season with a fun and educational sensory play setup! Our Smart Cookie Dramatic Play inspires creativity, fine motor skills, and pretend play while getting toddlers excited about learning. Designed with three sensory bins and dramatic play elements, this setup encourages hands-on exploration, imaginative thinking, and early literacy skills.
List of Materials Needed
Sugar cookie dough or Play-Doh
Cookie cutters, rolling pins, and baking trays
Cheerios, Panda Puffs, or similar cereal
Bakery-themed dramatic play printables (cash register, menus, and signage)
Pretend money
Measuring cups, spoons, and tongs
Toy cookies, cupcakes, or resin bakery goods
Aprons and chef hats
Overview of Learning Objectives by Age Group
Age 0-6mo: Tactile exploration (supervised with taste-safe materials)
Age 6mo-12mo: Scooping, grasping, and exploring textures
Age 12mo-2yr: Pretend play and color sorting
Age 3yr-4yr: Fine motor skill development through rolling, cutting, and pattern-making
Age 4yr-6yr: Role-playing bakery scenarios, counting, and literacy skills
Sensory Bin 1: Making Sugar Cookies
Materials List:
Homemade or store-bought sugar cookie dough
Cookie cutters and rolling pins
Small baking trays or plates
Sprinkles (real or pretend)
Activity Instructions:
Children can roll out dough, cut shapes using cookie cutters, and decorate their “cookies” with sprinkles. Older children can use wooden knives to practice safe cutting techniques, and toddlers can focus on squishing and rolling to build fine motor strength.
Sensory Bin 2: Cheerios and Panda Puffs Pencil Craft
Materials List:
Cheerios and Panda Puffs cereals
A laminated “pencil outline” template
Small containers or bowls
Tweezers, tongs, or scoops
Activity Instructions:
Fill a bin with Cheerios and Panda Puffs, and provide pencil-shaped templates for children to outline with cereal. Older kids can use tongs to carefully place each piece, while younger ones can scoop and pour the cereal into the shape. This activity is great for improving pincer grip and early geometry skills.
Sensory Bin 3: Bakery Shop Owner Pretend Play
Materials List:
Pretend baked goods (toy cookies, cupcakes, etc.)
Cash register and play money
Measuring cups, spoons, and tongs
Aprons and chef hats
Activity Instructions:
Children can take turns being the bakery shop owner and customers. They’ll practice counting pretend money, using dramatic play printables to “take orders,” and serving up baked goods. Add tools like measuring cups and spoons for children to “mix” their own creations.
Additional Creative Sensory Bin Ideas
Looking to extend the Smart Cookie theme? Try these fun alternatives:
Sensory Bin 4: Chocolate Chip Cookie Sorting
Filler Ideas:
Chocolate chip cereal or small chocolate pebbles
Beige-colored dried beans for “dough”
Activity:
Have children use tongs to pick out the “chocolate chips” and sort them into bowls. For extra fun, provide muffin tins to create “mini cookies.”
Sensory Bin 5: Edible Cookie Dough Party
Filler Ideas:
Taste-safe edible cookie dough
Colorful sprinkles and mini chocolate chips
Activity:
Toddlers can squish and mold the edible dough while decorating with mix-ins. Encourage creative shapes like stars or hearts!
Sensory Bin 6: Cookie Icing Station
Filler Ideas:
Shaving cream or whipped soap (non-toxic alternatives)
Small craft spatulas
Activity:
Children can “ice” paper cookie cutouts, adding pretend sprinkles and stickers to decorate their creations.
Sensory Bin 7: Alphabet Cookie Match
Filler Ideas:
Small magnetic letters or alphabet beads
Kinetic sand as “cookie dough”
Activity:
Hide letters in the sand and have kids “bake” cookies by matching the letters to a baking tray or cookie outline printable.
Benefits of Sensory Play
Fine Motor Skills: Scooping, rolling, and cutting activities strengthen little hands.
Early Math & Literacy: Counting, sorting, and role-play encourage early academic skills.
Creativity: Designing and decorating cookies inspires imagination.
Social Skills: Pretend play builds teamwork, communication, and cooperation.
Week-Long Lesson Plan: Smart Cookie Dramatic Play Theme
Week-Long Lesson Plan: Smart Cookie Dramatic Play ThemeEach day includes eight structured activities designed to engage toddlers and preschoolers with sensory play, fine motor skills, literacy, math, and creative exploration. These activities are perfect for homeschool moms looking to fill their days with educational fun inspired by the Smart Cookie theme.
Monday: Sugar Cookie Dough Exploration
Morning Sensory Play: Sugar cookie dough sensory bin with rolling pins and cookie cutters.
Math Activity: Count and sort pretend cookies by size and shape.
Literacy Activity: Practice writing letters in flattened dough with fingers or craft sticks.
Creative Art: Make a “cookie collage” by decorating paper cutouts of cookies with crayons and stickers.
Storytime: Read If You Give a Mouse a Cookie and discuss what happens in the story.
Cooking Activity: Pretend to follow a recipe using measuring cups and spoons.
Physical Activity: Bake-themed movement game (e.g., “Roll like a rolling pin,” “Jump like popcorn”).
Quiet Time: Practice tracing cookie-themed printables or coloring pages.
Tuesday: Cheerios Pencil Craft
Morning Sensory Play: Create pencil shapes using Cheerios and Panda Puffs.
Math Activity: Count the pieces of cereal needed to outline the pencil.
Literacy Activity: Trace letters or numbers inside the cereal outline using washable markers.
Fine Motor Practice: Use tweezers or tongs to move cereal into pencil shapes.
Science Activity: Explore textures and compare the crunchiness of Cheerios and Panda Puffs.
Creative Art: Paint a giant cardboard “pencil” to hang as a decoration.
Storytime: Read The Pencil by Allan Ahlberg and discuss how pencils are used.
Cooking Activity: Make a simple snack mix using Cheerios, Panda Puffs, and dried fruit.
Wednesday: Bakery Shop Pretend Play
Morning Sensory Play: Bakery shop setup with pretend money and play baked goods.
Math Activity: Count play money and “purchase” cookies using price tags.
Literacy Activity: Write a bakery menu or create order cards with simple words and drawings.
Role-Playing Activity: Take turns being the baker and customers.
Fine Motor Practice: Use tongs to serve cookies and cupcakes to “customers.”
Art Activity: Design and decorate paper cookies using crayons, glitter, and stickers.
Physical Activity: Play “Baker Says,” a themed version of Simon Says.
Quiet Time: Listen to a baking-themed audiobook or relaxing baking sounds.
Thursday: Cookie Sorting & Patterns
Morning Sensory Play: Sort “chocolate chips” (brown pom-poms or cereal) from a cookie dough filler (dried beans or sand).
Math Activity: Create patterns with cookies (e.g., big-small-big or circle-square-circle).
Science Activity: Compare different sensory fillers by weight, texture, and color.
Literacy Activity: Practice spelling simple words like “cookie” or “bake” using magnetic letters.
Creative Art: Make a “cookie jar” craft with paper and markers.
Cooking Activity: Measure ingredients to create no-bake energy balls as “cookies.”
Fine Motor Practice: Use tongs to move “chocolate chips” into muffin tins.
Storytime: Read Mr. Cookie Baker by Monica Wellington and discuss the role of bakers.
Friday: Cookie Icing Station
Morning Sensory Play: Decorate paper cookie cutouts with pretend icing (shaving cream or whipped soap).
Fine Motor Practice: Use small spatulas to “spread” the pretend icing.
Math Activity: Count how many “sprinkles” (pom-poms or beads) go on each cookie.
Literacy Activity: Write short “orders” for cookies using simple words or stamps.
Creative Art: Paint or color a cookie bakery sign for your pretend play station.
Science Activity: Mix food coloring into shaving cream and observe color changes.
Physical Activity: Set up a scavenger hunt to find hidden cookie cutouts around the house.
Cooking Activity: Bake real cookies together, focusing on measuring and mixing.
Saturday: Full Setup Sensory Play Day
Morning Sensory Play: Engage with all three sensory bins: sugar cookie dough, Cheerios pencil craft, and bakery pretend play.
Math Activity: Count how many cookies can fit on a pretend baking tray.
Fine Motor Practice: Sort pretend sprinkles by color using tweezers or fingers.
Creative Art: Design your dream bakery on a large piece of paper.
Role-Playing Activity: Host a cookie shop where family members can order and “buy” cookies.
Science Activity: Compare hot and cold materials while touching different baking tools.
Physical Activity: Play “Cookie Relay” by racing to deliver cookies across the room.
Quiet Time: Listen to a baking-themed story or relaxing music.
Sunday: Reflect & Reinforce
Morning Sensory Play: Revisit your favorite bin from the week and add new tools (e.g., cookie molds or additional fillers).
Math Activity: Sort cookies by type or size and tally them.
Creative Art: Draw a picture of your favorite cookie and write a short story about it.
Science Activity: Observe how different baking tools feel when placed in water or sand.
Fine Motor Practice: Build a cookie stack tower using Play-Doh or stacking toys.
Cooking Activity: Decorate pre-baked cookies with icing and sprinkles.
Role-Playing Activity: Pretend to deliver cookies to friends or family members.
Storytime: Read The Cookie Fiasco by Dan Santat and discuss the characters’ problem-solving.
This detailed plan ensures a full day of Smart Cookie activities, keeping homeschool moms organized while inspiring fun and learning!
Each day includes eight structured activities designed to engage toddlers and preschoolers with sensory play, fine motor skills, literacy, math, and creative exploration. These activities are perfect for homeschool moms looking to fill their days with educational fun inspired by the Smart Cookie theme.
Vocabulary Words for the Theme
1. Dough
2. Cookie
3. Bake
4. Sprinkle
5. Dough roller
6. Chef
7. Recipe
8. Mix
9. Measure
10. Tray
11. Icing
12. Shape
13. Oven
14. Bakery
15. Ingredient
16. Money
17. Pretend
18. Shop
19. Sell
20. Play
Ready to bake up some fun? Explore our Smart Cookie Dramatic Play printables on GoodnightFox.com, and don’t forget to share your setups using #learningthroughplaytrays!
Back To School Basket
This year it was so much fun to gather goodies for Sofie’s Back to School basket because she was actually going to school! We found so many fun little surprises and learning materials she absolutely loved it.
Black Board from @target
Wood Pencil, Paint Palette, Backpack from @oak.and.co
Pencil Bow
Back to School Flag from @goodnightfox
Alphabet Clothes Pins from @target
Number Clothes Pins from @target
Letters & Numbers Erasers from @target
Resin Bugs Kit from @_busy littles
Sunshine Chalk from @target
Blue Light Glasses from @target
School Supplies flashcards from @goodnightfox
Fall Woodland Animal Play
Grab some pumpkins and join us for this simple play setup featuring our woodland animals sensory kit.
Mindfulness Sensory Setup With Play Foam
Playing with play foam is a fun and engaging activity for toddlers, but it also has many benefits beyond just entertainment. One of the most important benefits is the relaxation and mindfulness that it can provide for little ones.
As toddlers grow and develop, they can often become overwhelmed by the world around them. Play foam can provide a calming and soothing experience that can help them to relax and focus on the present moment. The tactile sensation of squeezing and shaping the foam can be particularly soothing for children who may be anxious or easily agitated.
Additionally, playing with play foam can help to improve a child's fine motor skills and hand-eye coordination. Squeezing, shaping, and cutting the foam all require the use of small muscles in the hands and fingers, which can help to strengthen and develop these skills.
Another benefit of play foam is that it is a great tool for teaching mindfulness and self-regulation. Mindfulness is the ability to focus on the present moment without judgment, and it is an important skill for children to learn at a young age. When playing with play foam, children can learn to focus on the sensation of squeezing and shaping the foam, which can help them to develop mindfulness skills.
To further enhance the benefits of play foam for your child, consider incorporating mindfulness flashcards for toddlers into your playtime routine. These flashcards feature fun and engaging illustrations and prompts that can help children to focus on the present moment and practice mindfulness. They are an excellent way to encourage children to take a break from screens and engage in more hands-on activities.
In conclusion, play foam is a fun and engaging activity for toddlers that offers many benefits. It can provide a relaxing and calming experience, improve fine motor skills and hand-eye coordination, and teach mindfulness and self-regulation. Consider incorporating mindfulness flashcards for toddlers into your playtime routine to further enhance the benefits of play foam for your child.
Lesson Plan: Mindfulness for Preschoolers
Monday: Introduction to Mindfulness
Introduce the concept of mindfulness to the class by explaining that it is the ability to focus on the present moment and be aware of our thoughts and feelings.
Have the children sit in a circle and guide them through a simple breathing exercise, such as counting to five while inhaling and exhaling.
Encourage the children to notice how their body feels after the exercise and discuss any observations they have.
Tuesday: Mindful Listening
Have the children sit in a circle and play soft background music.
Ask the children to close their eyes and listen to the music, encouraging them to focus on the different instruments and sounds they can hear.
After a few minutes, ask the children to share any observations they have made about the music.
Wednesday: Mindful Eating
Have the children bring in a piece of fruit or a snack.
Encourage the children to take a moment to look at and smell their food before taking a bite.
Ask the children to pay attention to the taste, texture, and sensation of eating the food and to take small bites.
Discuss any observations the children have made about their food.
Thursday: Mindful Movement
Have the children sit in a circle and guide them through a simple yoga flow, such as "tree pose" or "downward-facing dog."
Encourage the children to focus on their breath and the sensation of their body moving.
After the yoga flow, have the children sit in silence for a few minutes and encourage them to notice how their body feels.
Friday: Mindful Reflection
Have the children sit in a circle and ask them to think back on the week and reflect on any mindfulness practices they enjoyed or found challenging.
Encourage the children to share their reflections with the class and discuss ways they can incorporate mindfulness into their daily lives.
Note: It is important to keep in mind that preschoolers have a short attention span, so keep the activities short and simple. Also, make sure to adapt the activities to the children's level and abilities.
For even more great mindfulness activities ideas, checkout out this post.
Alphabet lego kit
If you’re in the alphabet learning stages or even just the early building phases, this Lego Alphabet Kit is an absolute must have. And with the holiday season coming up, your kiddos are sure to love unwrapping this one. This set comes in both standard lego sizes for ages 5-8 and duplo size (2 times the size bricks) for your littler ones 1-4 who still like to mouth small objects. You can pair these up with base plates and build at your Flisat table, or you can take them on the go with the on-the-go kit. We took this set with us on the long flight to Pittsburgh and it kept Sofie in her chair, entertained for 30min.
Enjoy building and learning at the same time with this awesome kit!
DIY Sensory Stress Balls for Toddlers (Calming Play at Home)
Sensory stress balls are a simple, low-prep sensory activity that supports calm, focus, and fine motor development in young children. Made with everyday household materials, these squishy balls are especially helpful for toddlers who benefit from tactile input during quiet play, emotional regulation moments, or calming corner routines.
This easy DIY project is budget-friendly, customizable, and fits naturally into a sensory-rich home or homeschool environment.
What Are Sensory Stress Balls?
Sensory stress balls are soft, squeezable objects filled with different materials that provide tactile feedback through touch and pressure. For toddlers and preschoolers, this type of sensory input can be grounding and calming, especially during moments of frustration, overstimulation, or transition.
Unlike store-bought versions, DIY stress balls allow you to control the texture, firmness, and size to match your child’s developmental stage and sensory preferences.
Why Sensory Stress Balls Are Helpful for Toddlers
Sensory play is a foundational way young children learn about the world. Stress balls support several key areas of development:
Emotional Regulation
Squeezing and manipulating a stress ball gives children a physical outlet for big feelings. This repetitive motion can help them slow down and reset, making stress balls a useful tool in calming corners or quiet play spaces.
Fine Motor Development
The act of squeezing strengthens hand and finger muscles, which are important for later skills like writing, cutting, and self-help tasks.
Sensory Exploration
Different fillers create different tactile experiences. Comparing textures helps children build sensory awareness and descriptive language.
Focus and Attention
Tactile input can help some children remain engaged during storytime, transitions, or seated activities.
Recommended Ages and Safety Notes
This activity is best for toddlers ages 18 months and up with close supervision.
Younger toddlers benefit from softer fillers and adult-made stress balls.
Preschool-age children can help pour and explore textures with guidance.
Always double-layer balloons and supervise play to prevent breakage.
Materials Needed
You likely already have everything you need at home:
Sensory fillers such as:
Salt
Flour
Rice (including sushi rice)
Oatmeal
Optional: markers or stickers for labeling or decorating
Using different fillers allows you to create a full set of stress balls with varied textures and weights.
How to Make Sensory Stress Balls
Set up your workspace with a tray or towel to catch spills.
Stretch a balloon over the funnel or bottle opening.
Slowly pour in the chosen filler. Thicker fillers may need gentle tapping or a spoon to help them through.
Remove the balloon and tie it securely.
For durability, place the filled balloon inside a second balloon and tie again.
Repeat with different fillers to create a variety of sensory experiences.
Sensory Play and Learning Extensions
Once your stress balls are made, there are many ways to extend the activity:
Compare textures by touch and talk about how each ball feels.
Line them up from softest to firmest.
Use descriptive language such as soft, squishy, heavy, grainy, or smooth.
Add stress balls to a sensory tray alongside other tactile materials.
Include them in a calming corner with books, soft seating, and quiet activities.
Stress balls also pair well with sensory bins and fillers found here.
Using Stress Balls in a Calming Corner
Calming corners give children a safe, supportive place to regulate emotions. Stress balls work especially well in these spaces because they are portable, quiet, and intuitive to use.
If you’re building or refreshing a calming corner at home, you may also find this helpful.
For children who benefit from emotional language and mindfulness tools, affirmations and calm-focused activities can complement sensory tools.
Free Resources to Extend Sensory Play
If you’re looking to build a collection of easy, intentional activities for toddlers, you can explore the GoodnightFox free printable library. It includes sensory play ideas, dramatic play kits, and learning tools designed for early childhood.
Final Thoughts
DIY sensory stress balls are a practical, low-cost way to support emotional regulation, fine motor development, and sensory exploration at home. With just a few materials, you can create a versatile calming tool that fits naturally into daily routines, play trays, or calming spaces.
This project is simple to make, easy to adapt, and a meaningful addition to any sensory-rich learning environment.
Calm and Soothe: The Magic of Sensory Bottles for Kids
As a mom of a toddler, I understand the daily challenges of helping kids navigate through overwhelming feelings. In my journey, I've found sensory bottles to be a game-changer. Not only do they provide a calming effect, but they also offer a myriad of developmental benefits for little ones. In this post, I'll share the wonders of sensory bottles, how they assist kids with sensory issues, and provide a step-by-step guide on creating your own sensory bottles at home.
Here’s what you’ll need to create them yourself.
Understanding the Magic of Sensory Bottles
Sensory bottles, also known as calm-down or discovery bottles, are transparent containers filled with materials that engage the senses. The mesmerizing effect of watching colorful items float and swirl inside the bottle can effectively capture a child's attention, bringing a sense of tranquility and focus. These magical bottles are particularly beneficial for children with sensory processing challenges as they provide a safe and controlled sensory experience, promoting self-regulation and emotional well-being.
Benefits of Sensory Bottles for Kids with Sensory Issues
1. Calming Effect: Sensory bottles serve as a visual sensory tool helping children to self-soothe and regulate overwhelming emotions. The gentle movement and intriguing colors can provide a sense of relaxation during anxious moments.
2. Sensory Exploration: By creating and exploring sensory bottles, children engage in tactile, visual, and auditory experiences that can aid in sensory integration, assisting them in processing sensory information more effectively.
3. Encourages Focus and Attention: The captivating nature of sensory bottles captivates children's attention, making them an excellent tool for promoting concentration and minimizing distractions, especially for kids with attention difficulties.
Incorporating Other Calming Techniques
In addition to sensory bottles, various calming techniques can be incorporated to create a supportive environment for kids with sensory sensitivities. These techniques include deep pressure activities, sensory-friendly play spaces, and breathing exercises that encourage relaxation and self-regulation.
Let's Make Your Own Sensory Bottles!
Materials Needed:
Clear plastic bottles with secure lids
Clear baby oil, glue or glycerin
Water
Food coloring
Glitter, sequins, beads, or small toys
Step-by-Step Instructions:
1. Begin by selecting a few plastic bottles with secure lids to prevent leaks and spills.
2. Fill the bottles halfway with warm water.
3. Add clear glue or glycerin to the water. They help slow down the movement of the items inside the bottle.
4. Drop a few drops of food coloring into the bottle. Choose colors that your child finds soothing.
5. Next, add glitter, sequins, beads, or small toys to the bottle. These items will create an exciting visual effect when the bottle is shaken. I used teething beads, colorful legos, and resin sprinkles.
6. Once all the components are in the bottle, seal the lid tightly and secure it with hot glue if necessary.
Enjoy the Calming Magic
Shake and tilt the sensory bottle gently and observe the mesmerizing dance of colors and objects within. If your child is feeling overwhelmed, encourage them to focus on the bottle's movements, taking deep breaths as they watch the sensory magic unfold.
In conclusion, the benefits of sensory bottles for children, especially those with sensory issues, are vast. They not only provide a calming effect but also offer opportunities for sensory exploration and focus enhancement. By incorporating sensory bottles and other calming techniques into your child's routine, you can create a supportive environment that nurtures their emotional well-being and sensory development.
Remember, every child is unique, so have fun experimenting with different materials and colors to create sensory bottles that resonate with your little one's individual preferences and needs. Enjoy the journey of creating these enchanting tools and witnessing the calming magic they bring to your child's world.
Wishing you and your little ones moments of peace and tranquility,
xoxo,
Kylie
3 Steps to a Relaxing Calming Corner
I’m super excited to finally have finished Sofia’s calming corner. It’s been months in the making, but I could never get around to pulling all of the pieces together. So I though I’d just take a minute to share the final setup!
Step 1: Make Emotions Posters
If you don’t want to draw then yourself, there are tons available online or you can download these ones directly from my shop. I find it helpful to have both the Emotions Wheel, and the Calming Tools which gives Sofie a way to identify her emotions and also techniques for calming down.
Step 2: ADD SENSORY SUPPLIES
Creating a Calming Tools kit is super simple! I made a few things from scratch because it get us an extra activity to do, but you can also easily purchase a few key items that will give your passionate toddler something to focus on while they’re frustrated or upset. For Sofie, we’re working really hard on how to deal with frustration and that it’s okay to be upset, but it’s not okay to hit or spit.
Calming basket supplies:
Feathers
Books
Drawing supplies
Step 3: Make it personal
One of my favorite parts of creating this calming space for Sofie was giving her time to practice drawing and coloring and associating colors with emotions. I think it really helped her grasp the concept well. For this activity, I grabbed some art supplies and our Scribble Art book to make some fun and unique art for her calming corner based on colors and emotions.
Supplies:
Drawing Note Pad - I prefer the ones that are spiral bound so that it keeps all of her artwork neat and together.
Color Spots by Diane Alber - You don’t have to have the book, but I found that Sofie really gravitated toward the pictures to help her learn and associate the feelings. The book includes these awesome stickers to make faces on your scribbles, but you can also buy them separately here. I bought the extra pack of stickers since we do this so often.
Color Crayons - After trying many different versions of coloring supplies (even Crayola Color Wonder Markers), I found that these Acrylic Paint sets and these Reusable Crayon Pens were the best. We use our art supplies practically every day.
A calming corner is not only a great idea for kids, but it can also help you and your partner role model good self-calming techniques. We all know big emotions are just as stressful on the parents as it is on the kids and our emotions and come out in big ways. If you’re struggling with yours and your partners emotions — check out this awesome article with great tips on how to stop fighting with your spouse over parenting.
Doctors office dramatic play kit
Sofia loves pretend play so I knew this doctors office dramatic play setup would be a huge hit. This time I laminated all of the materials so that they would last longer and I’m glad I did because Sofia loved pretending to be a doctor. Dramatic play is so great for expanding toddler’s minds and exposing them to new words, phrases, and objects. Here’s a little more about what’s included in this kit:
Transform Your Play Space with a Doctor-Themed Dramatic Play Setup
Creating a doctor-themed dramatic play setup can be an engaging and educational experience for children. Using our printable doctor dramatic play materials, you can set up an immersive and fun play area that encourages learning and creativity. Here’s how you can create three exciting bins to enhance the experience:
Bin 3: Doctor Supplies
Here’s everything you need to setup your doctor supplies bin! This one is great for dramatic play — pretend to be the doctor and patient with the printable intake form. Use the cotton swabs and tongue depressors to treat minor illnesses!
Cotton balls
Swabs
Tongue depressors
Bandaids
Instructions:
Collect Supplies: Gather all the doctor supplies and organize them in a bin.
Set Up Stations: Create different stations for each type of supply, encouraging kids to use them in their pretend play.
Role Play: Children can use cotton balls for cleaning wounds, swabs for checking ears and throats, tongue depressors for oral exams, and bandaids for treating pretend injuries.
Bin 2: Blood and Guts
Here’s everything you’ll need to create a blood and guts sensory plan bin. This one is perfect for little ones who like to get their hands dirty! Especially perfect because it’s taste safe — and dare I say yummy!
Instructions:
Cook the Noodles: Boil the egg noodles according to the package instructions until they are fully cooked.
Add Color: Drain the noodles and mix in red food coloring until the noodles are evenly coated.
Set Up the Bin: Place the red-colored noodles in a sensory bin.
Pretend Surgery: Kids can use the noodles to simulate blood and guts, practicing their surgical skills in a fun and safe environment.
Bin 3: Frozen Organs
Here’s everything you need to make this frozen organs sensory activity bin.
Instructions:
Prepare the Jello: Follow the instructions on the Jello mix to prepare the solution.
Pour into Molds: Pour the Jello into the human organ silicone molds and let it set in the refrigerator.
Create the Frozen Body Tray: Once the Jello organs are set, place them in a human body tray filled with ice.
Freeze: Place the entire tray in the freezer until the organs and ice are completely frozen.
Play Time: Let kids explore the frozen organs, encouraging them to identify and "operate" on the different body parts.
25 Doctor Themed Vocabulary Words for Preschoolers
Expand your child's vocabulary with these doctor-themed words:
1. Stethoscope
2. Thermometer
3. Syringe
4. Patient
5. Bandage
6. Prescription
7. Diagnosis
8. Heartbeat
9. Checkup
10. Nurse
11. Medicine
12. Hospital
13. Exam
14. Treatment
15. Cure
16. Infection
17. Virus
18. Vaccine
19. Pulse
20. X-ray
21. Surgeon
22. Emergency
23. Cast
24. Chart
25. Clinic
Creating a doctor-themed dramatic play setup with these bins is a fantastic way to combine fun and learning. Don’t forget to download our printable doctor dramatic play materials to complete your setup. Visit the link in our bio to get started!
Benefits of Doctor Themed Sensory Play
Engaging in sensory play, especially with themed setups like our doctor dramatic play, provides numerous benefits for children:
Fine Motor Skills: Handling small items like cotton balls and swabs helps improve dexterity and hand-eye coordination.
Imaginative Play: Pretend play scenarios foster creativity and imagination, allowing children to explore different roles and scenarios.
Language Development: Using themed vocabulary during play helps expand a child’s language skills and comprehension.
Social Skills: Playing in a group setting encourages teamwork, communication, and sharing.
Cognitive Growth: Sensory play stimulates brain development by engaging multiple senses at once.
First off, these Body Parts Flashcards and Human Organs Flashcards were a great introduction to everything inside and outside of the body. These are super basic human anatomy, but Sofia loved pointing them out on her own body. And internal organs are challenging because she can’t see them, but we used phrases like “this is a stomach, like when your tummy is saying it’s hungry” and that really helped her imagine where they were.
The dramatic play all starts with the waiting room. Sofie put on the nurse badge and nurse hat and asked us to wait in the waiting room while she prepped the doctors office. She loved tidying up and getting everything ready. Then when we came in, she started by asking about my pain level using her pain level chart. This was a great way for us to discuss when it’s okay to be really upset vs when a boo boo is no big deal.
After assessing my pain level, Sofie proceeded with the patient exam. She started by getting my name and birthdate and all of the details and then filled out the form. She asked me where it hurt and today I told her my eyes were itchy and throat itchy from allergies. So she marked that down on her form and got to practice identifying her body parts.
After asking her up front exam questions, Sofie proceeded to checking all of my vital signs. She started with the blood pressure monitor which she loved wrapping around my arm. Then she moved on to her stethoscope (which she’s always afraid of at the doctor) and she used it to listen to my lungs.
Then she moved on to her diagnosis and of course wanted to use everything in her doctors toolkit to remedy my allergies. She started by giving me a shot in my arm (which she also hates at the doctor) so it was nice for her to get to be the one to administer the shot. Then she gave me a bandaid to cover up my shot, just like they do at the doctors.
After that she decided I should probably take some medicine to make me feel better and she gave me the little tray of pills and the pill bottle. Then she remembered she forgot to take my temperature so she used her thermometer to do that. She loves the real thermometer we have at home so it was great to see her interacting with the fake one.
