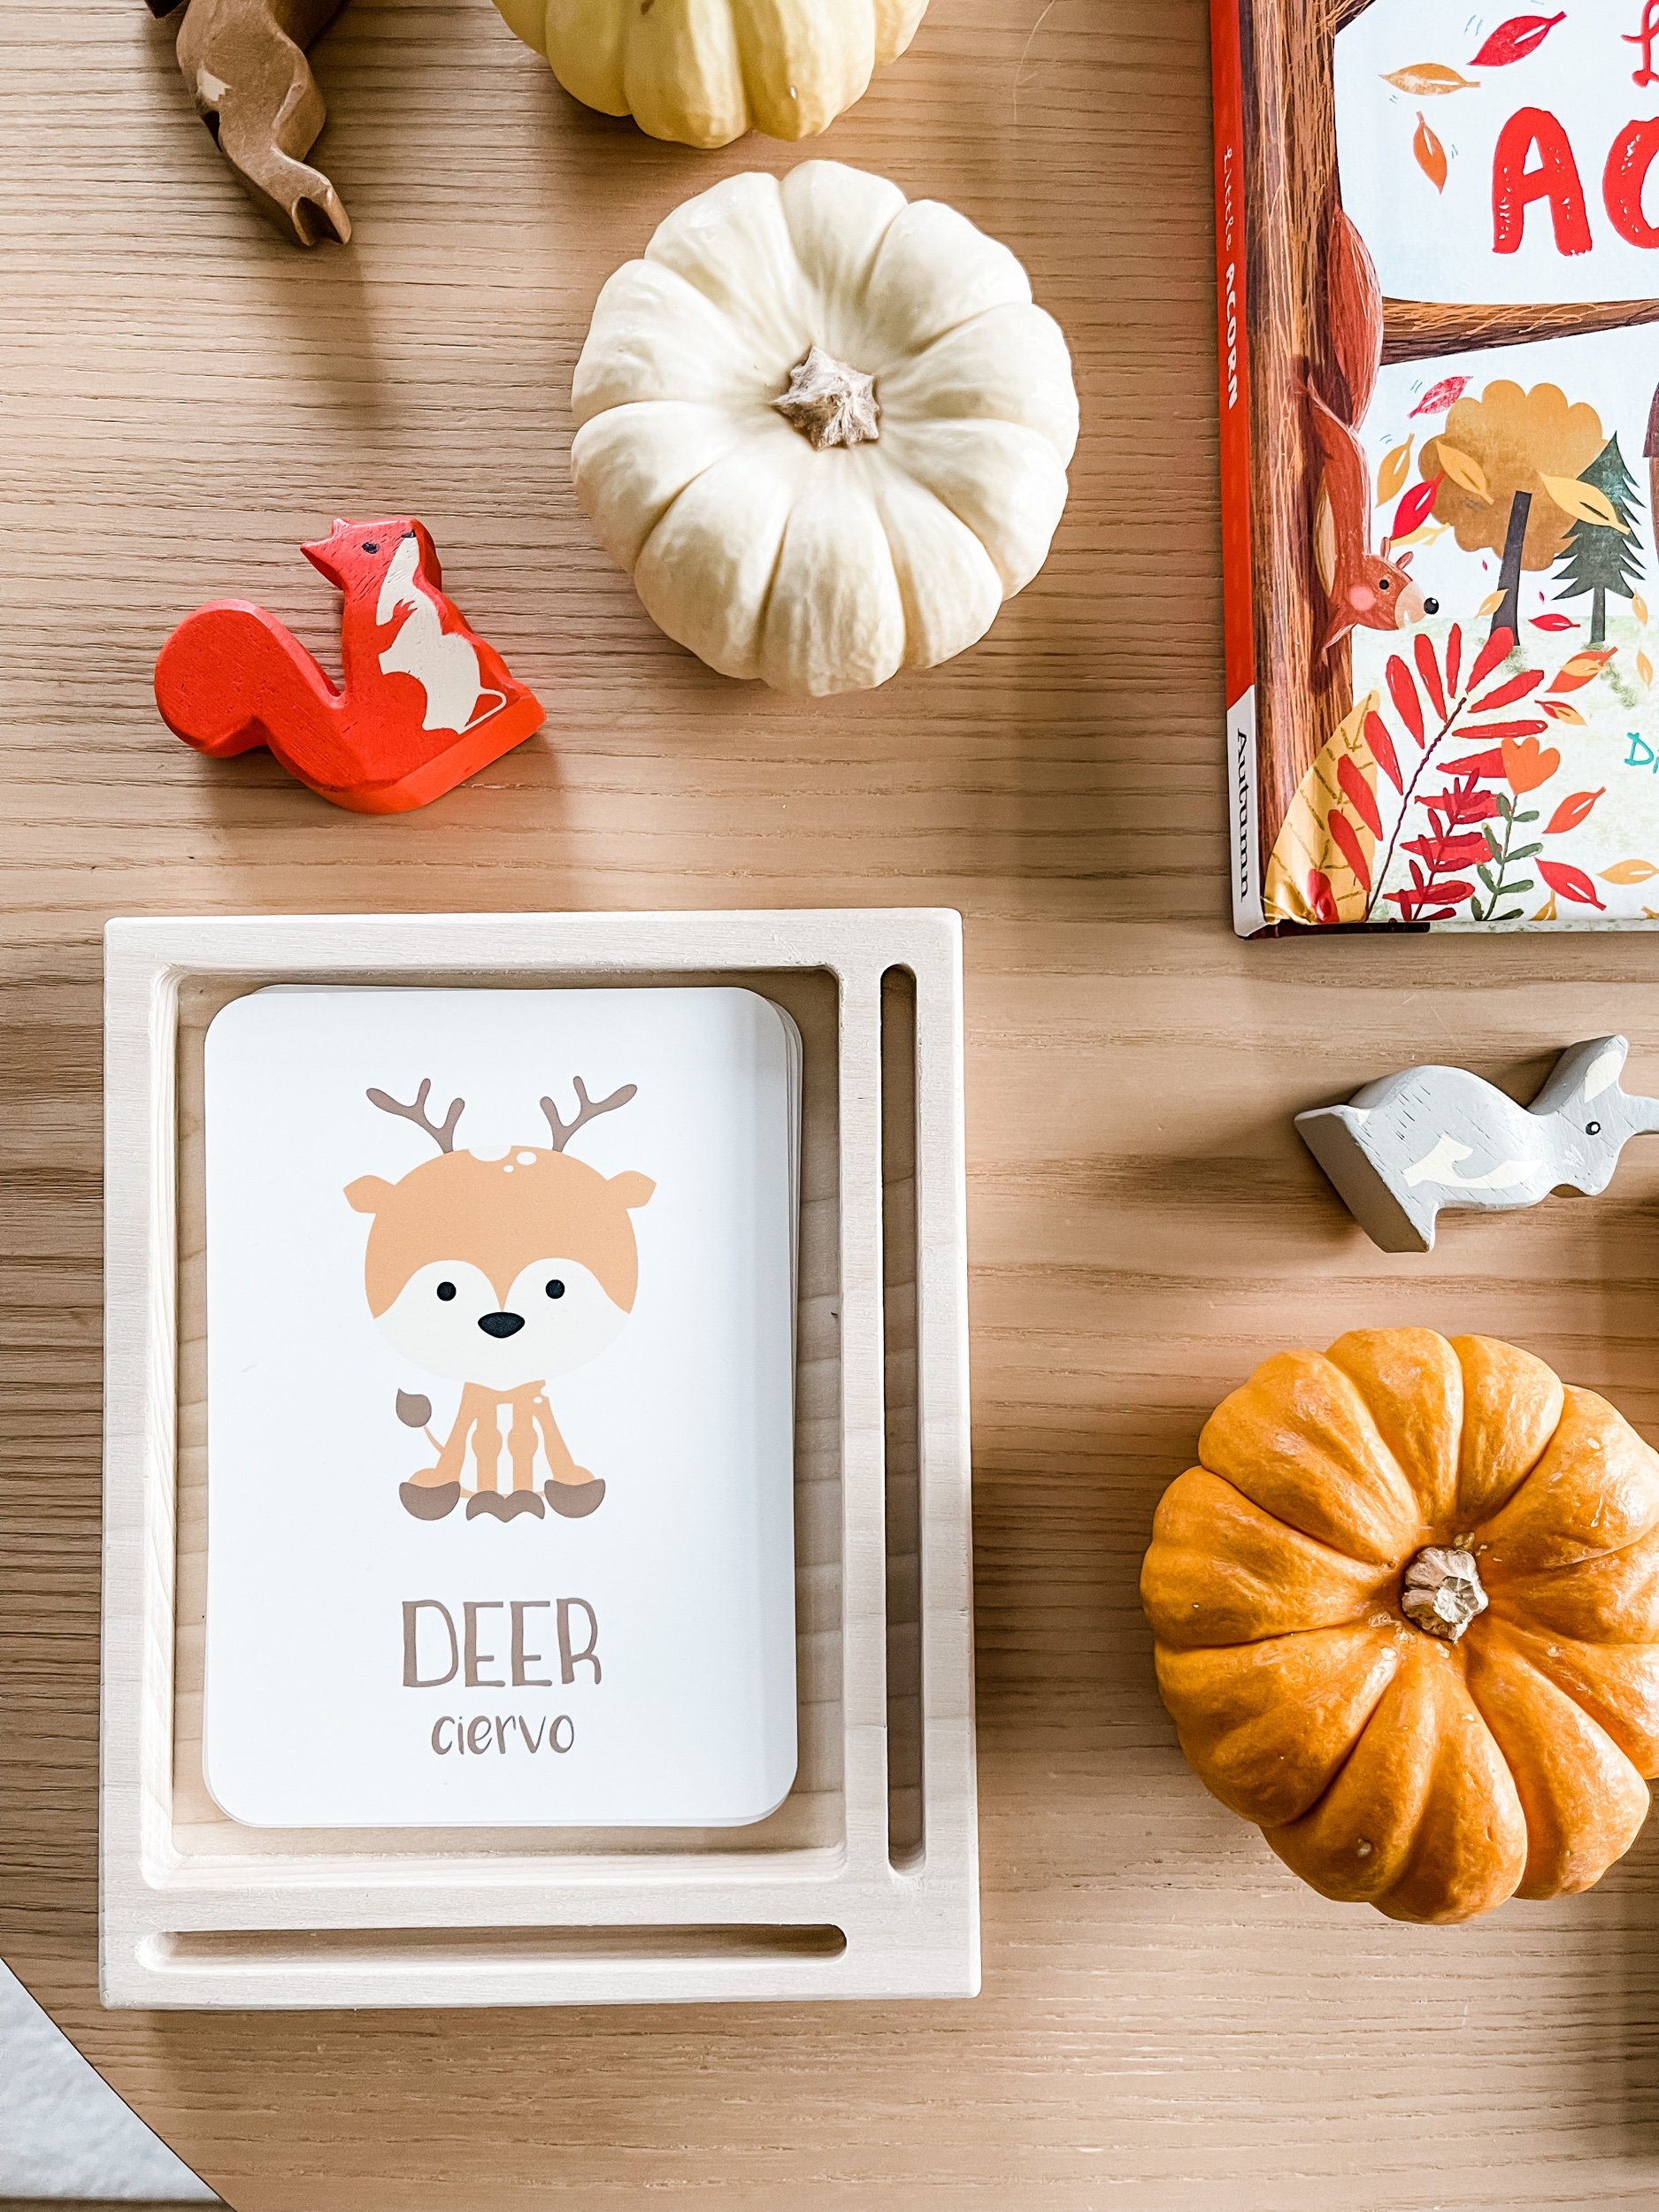
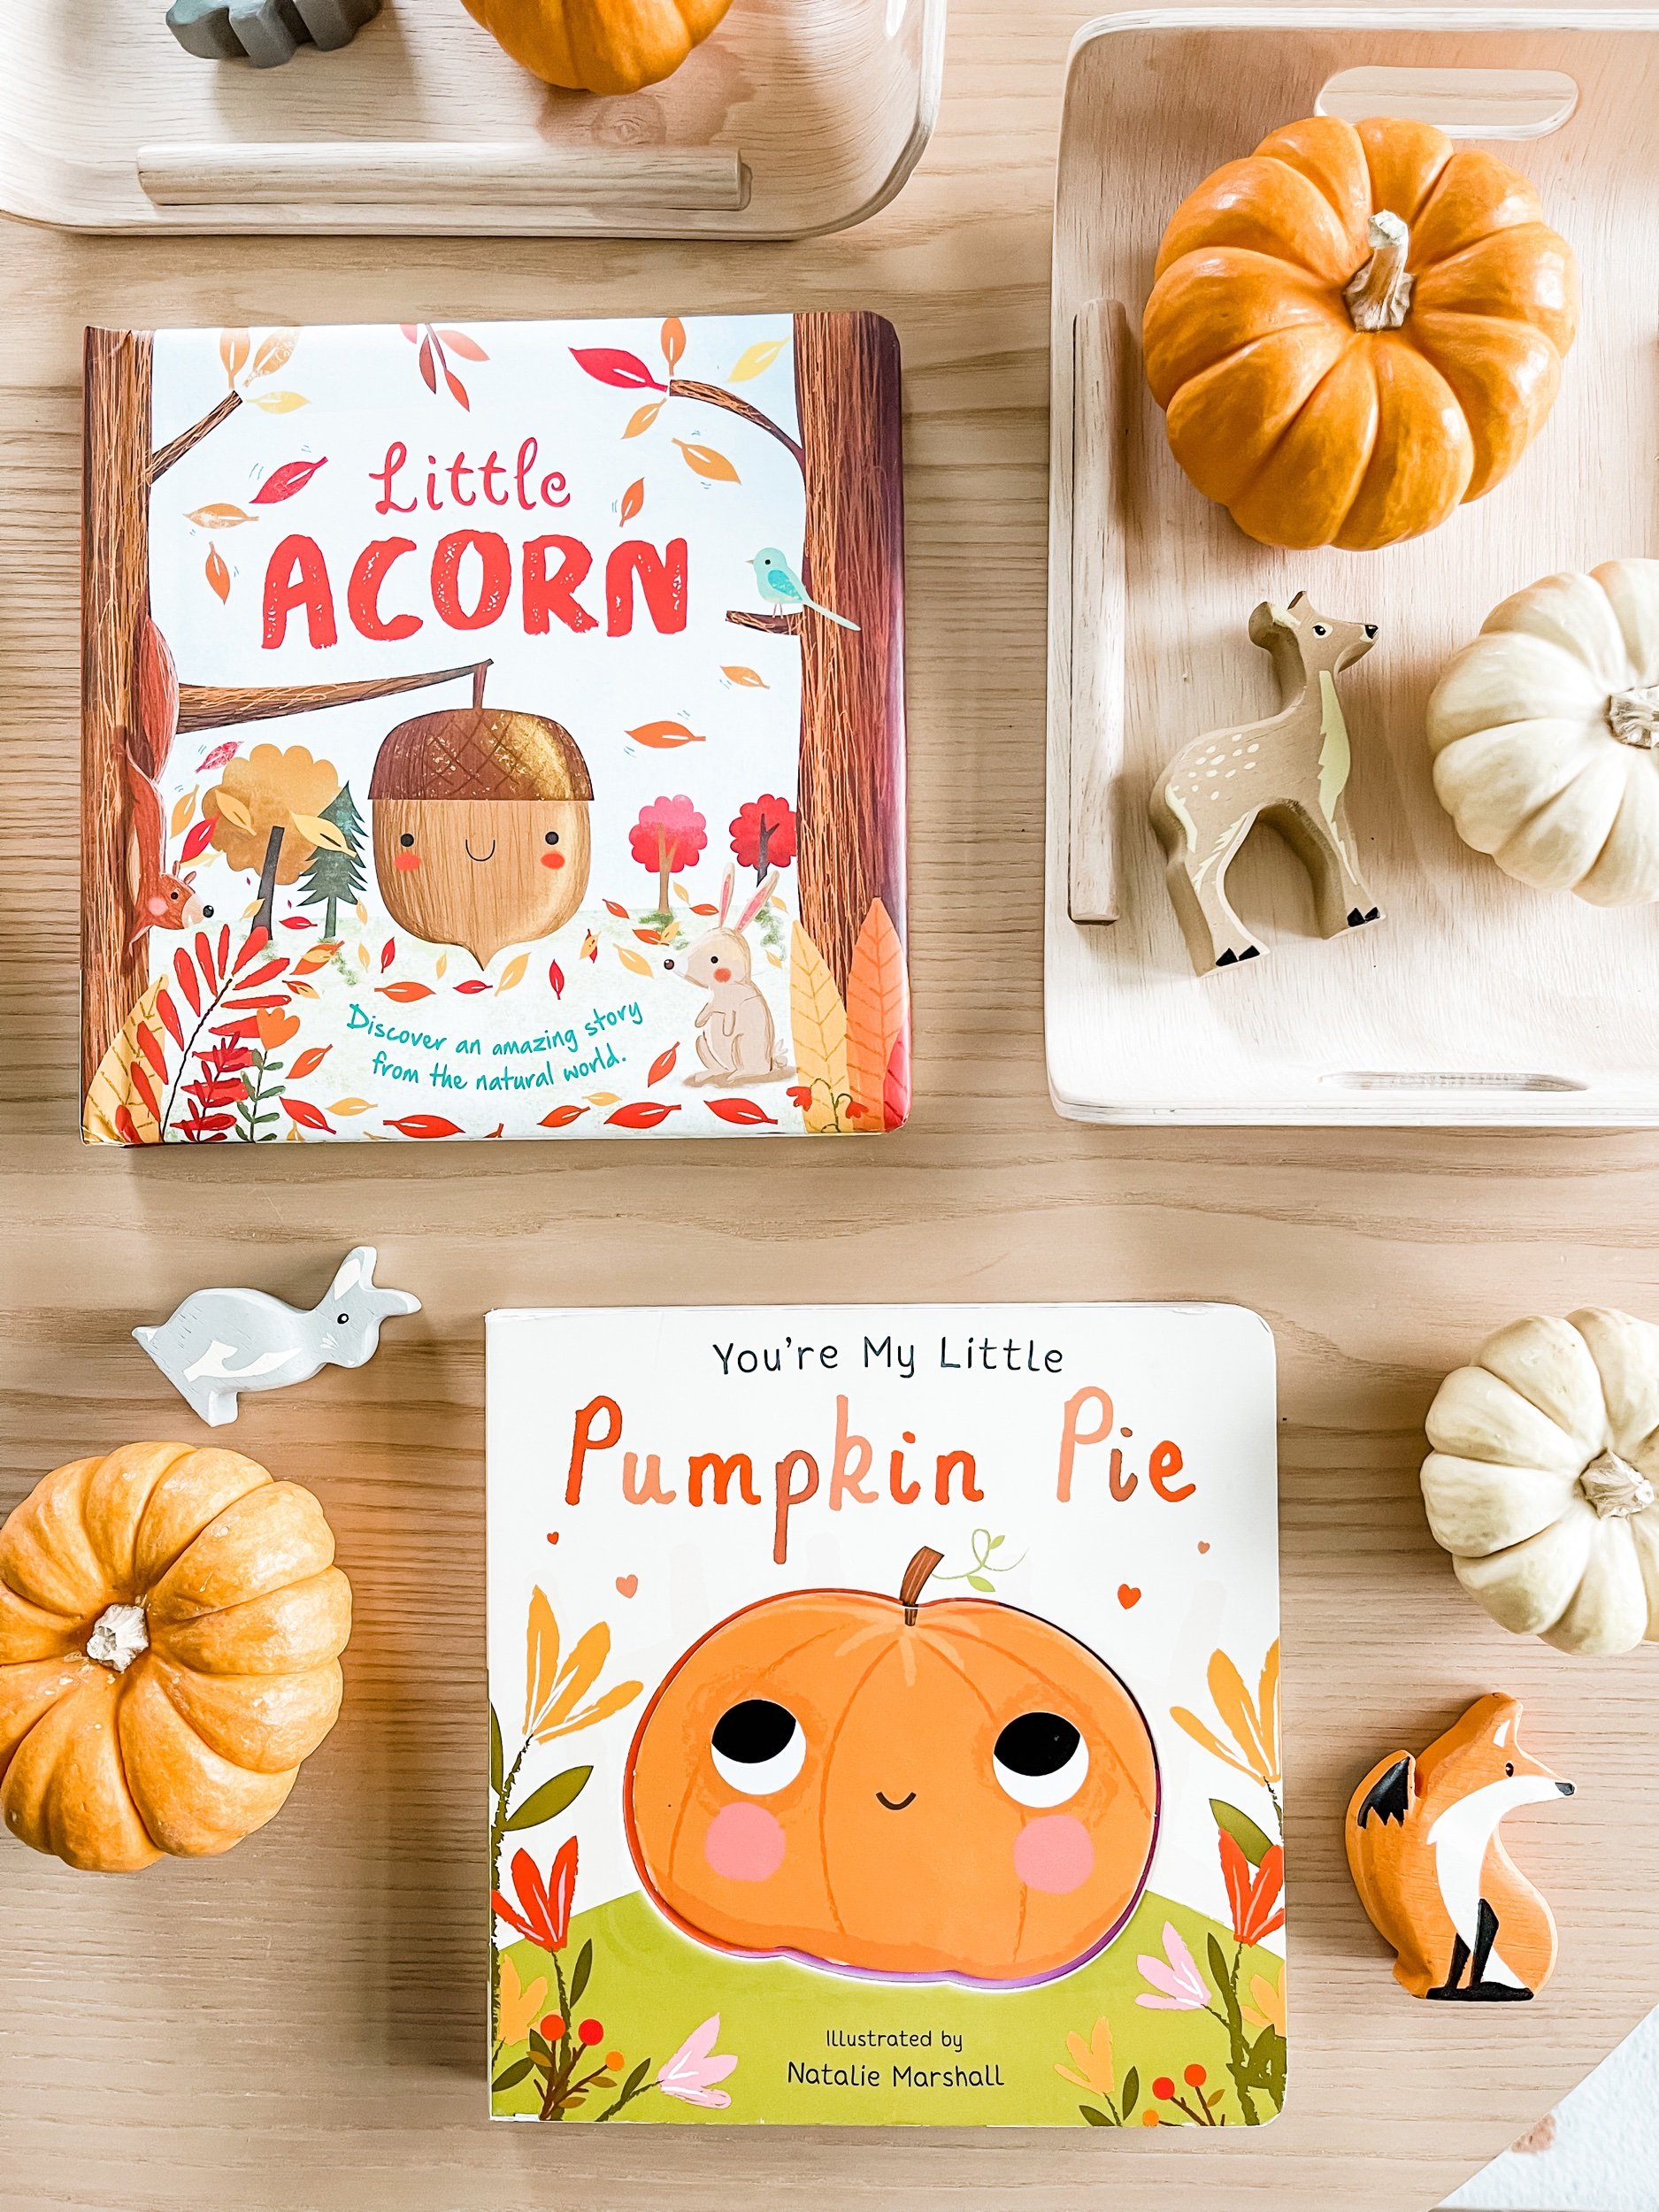
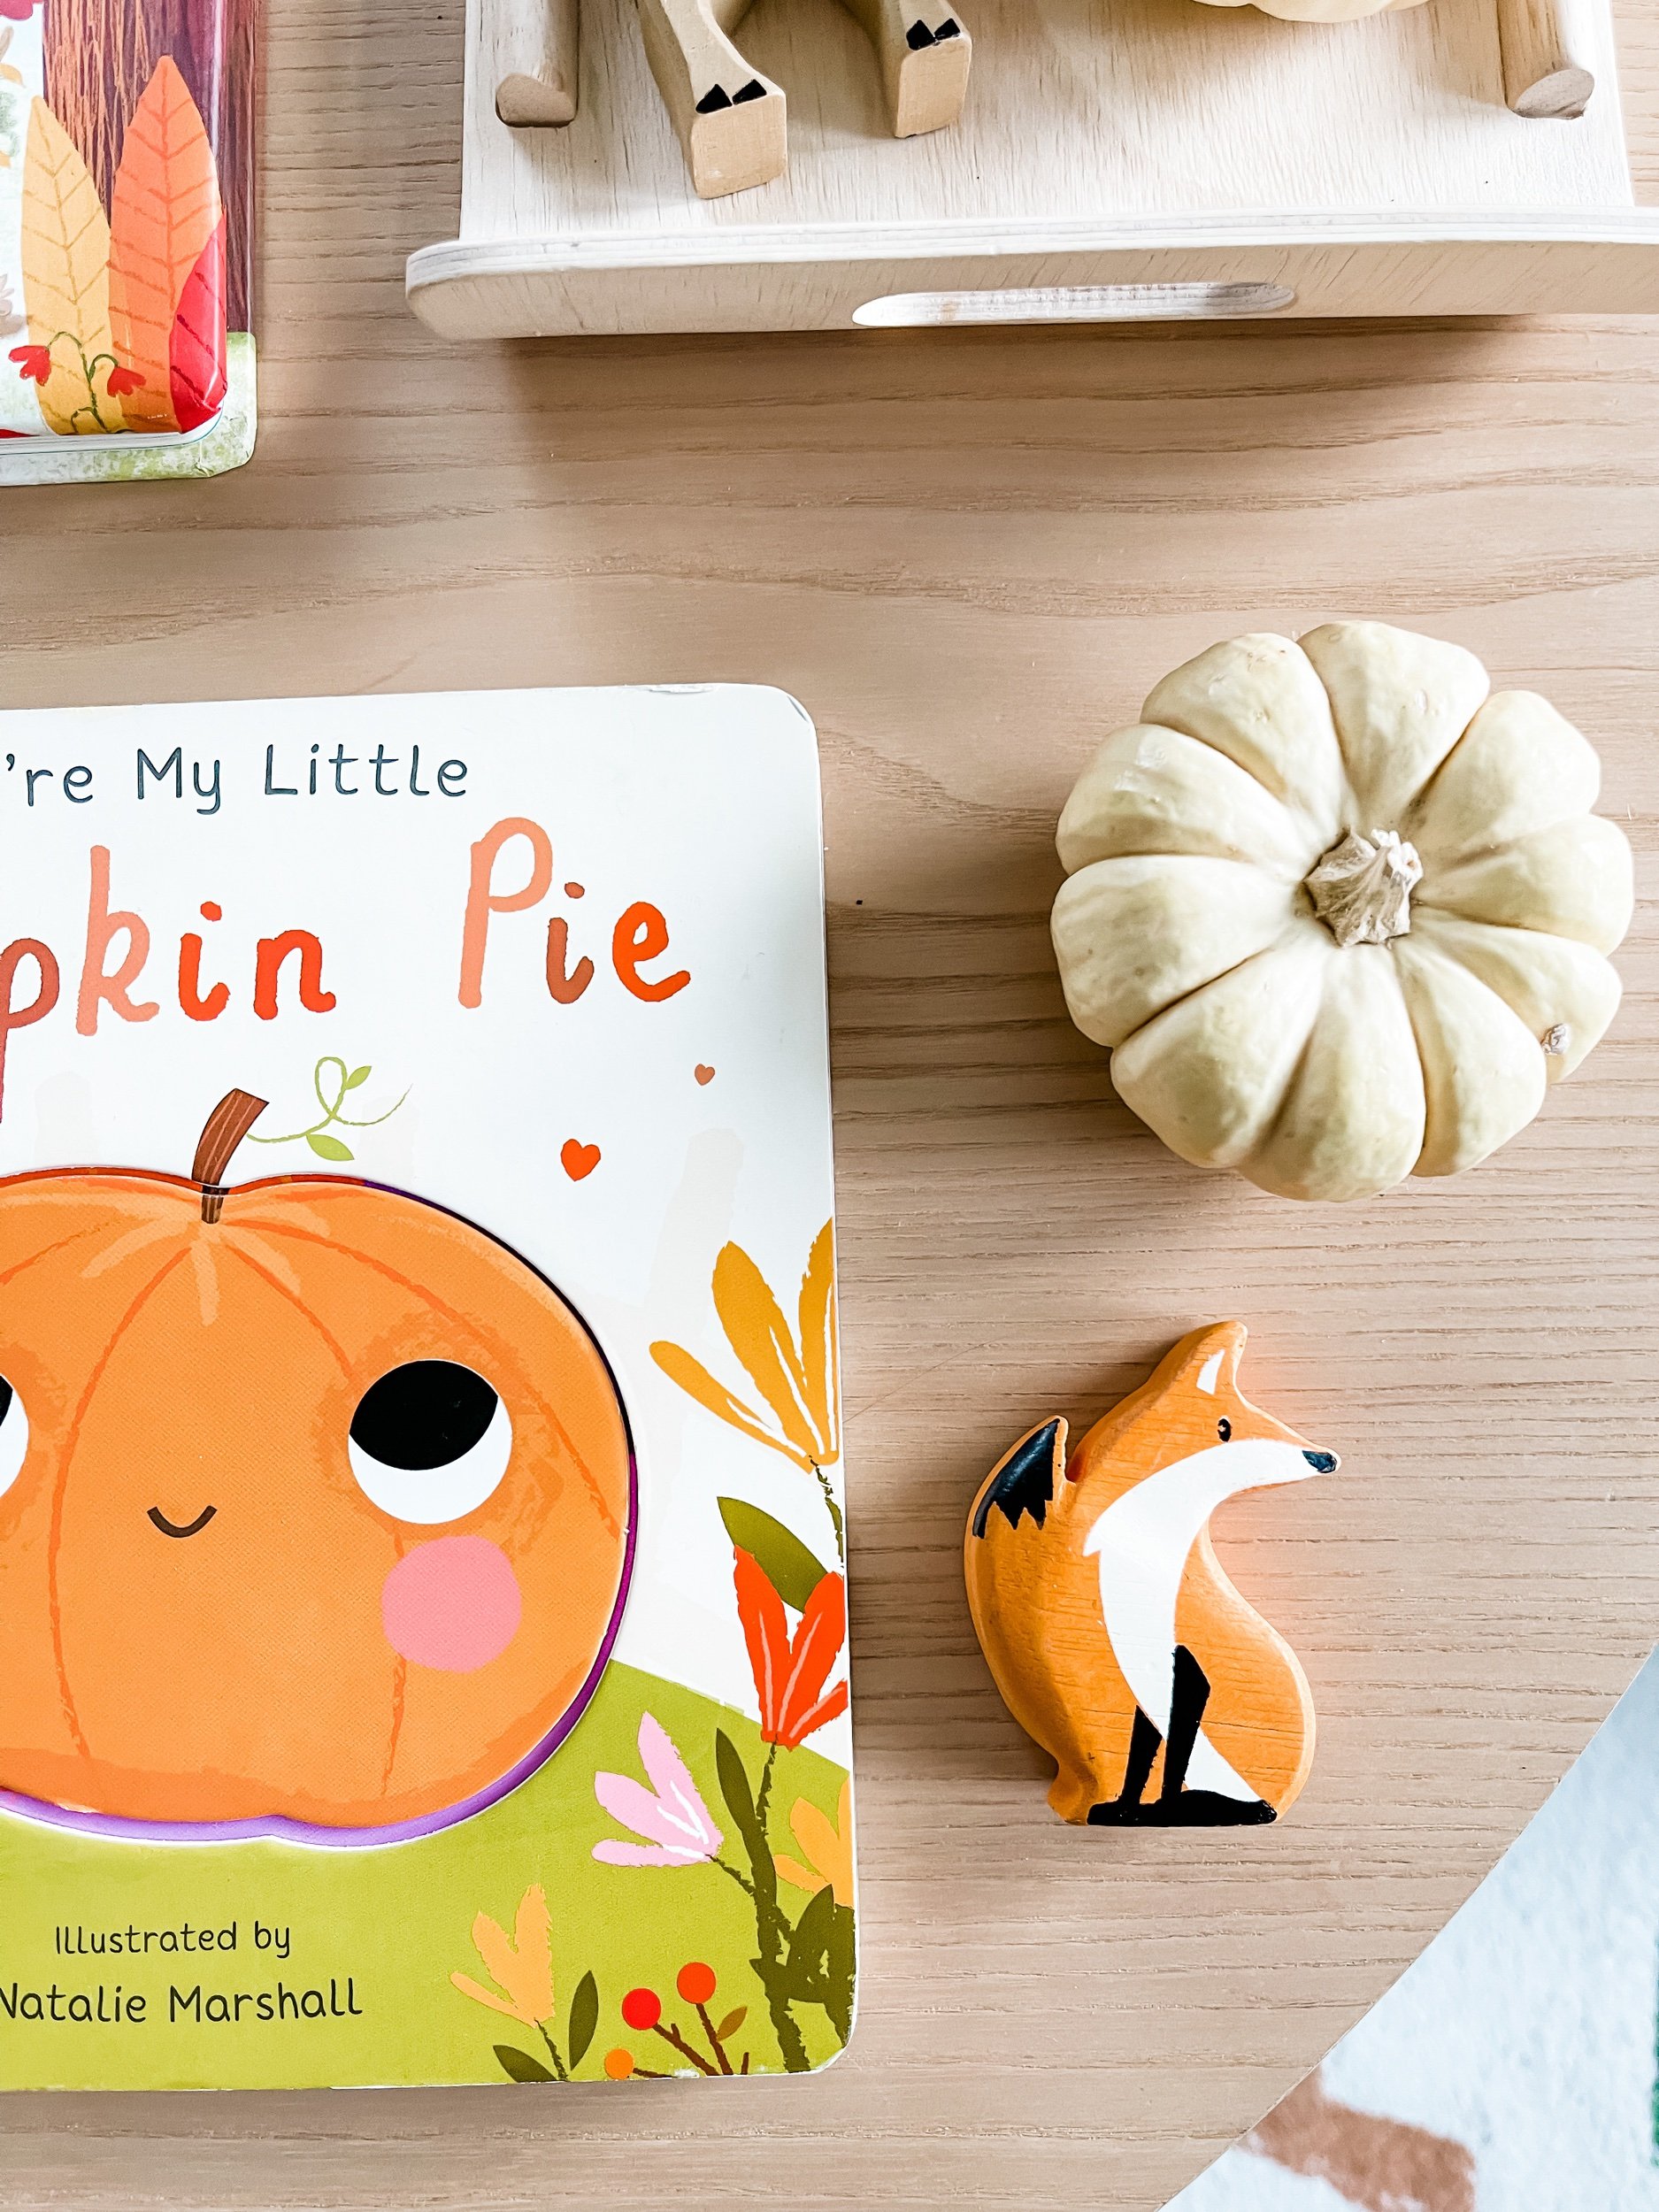
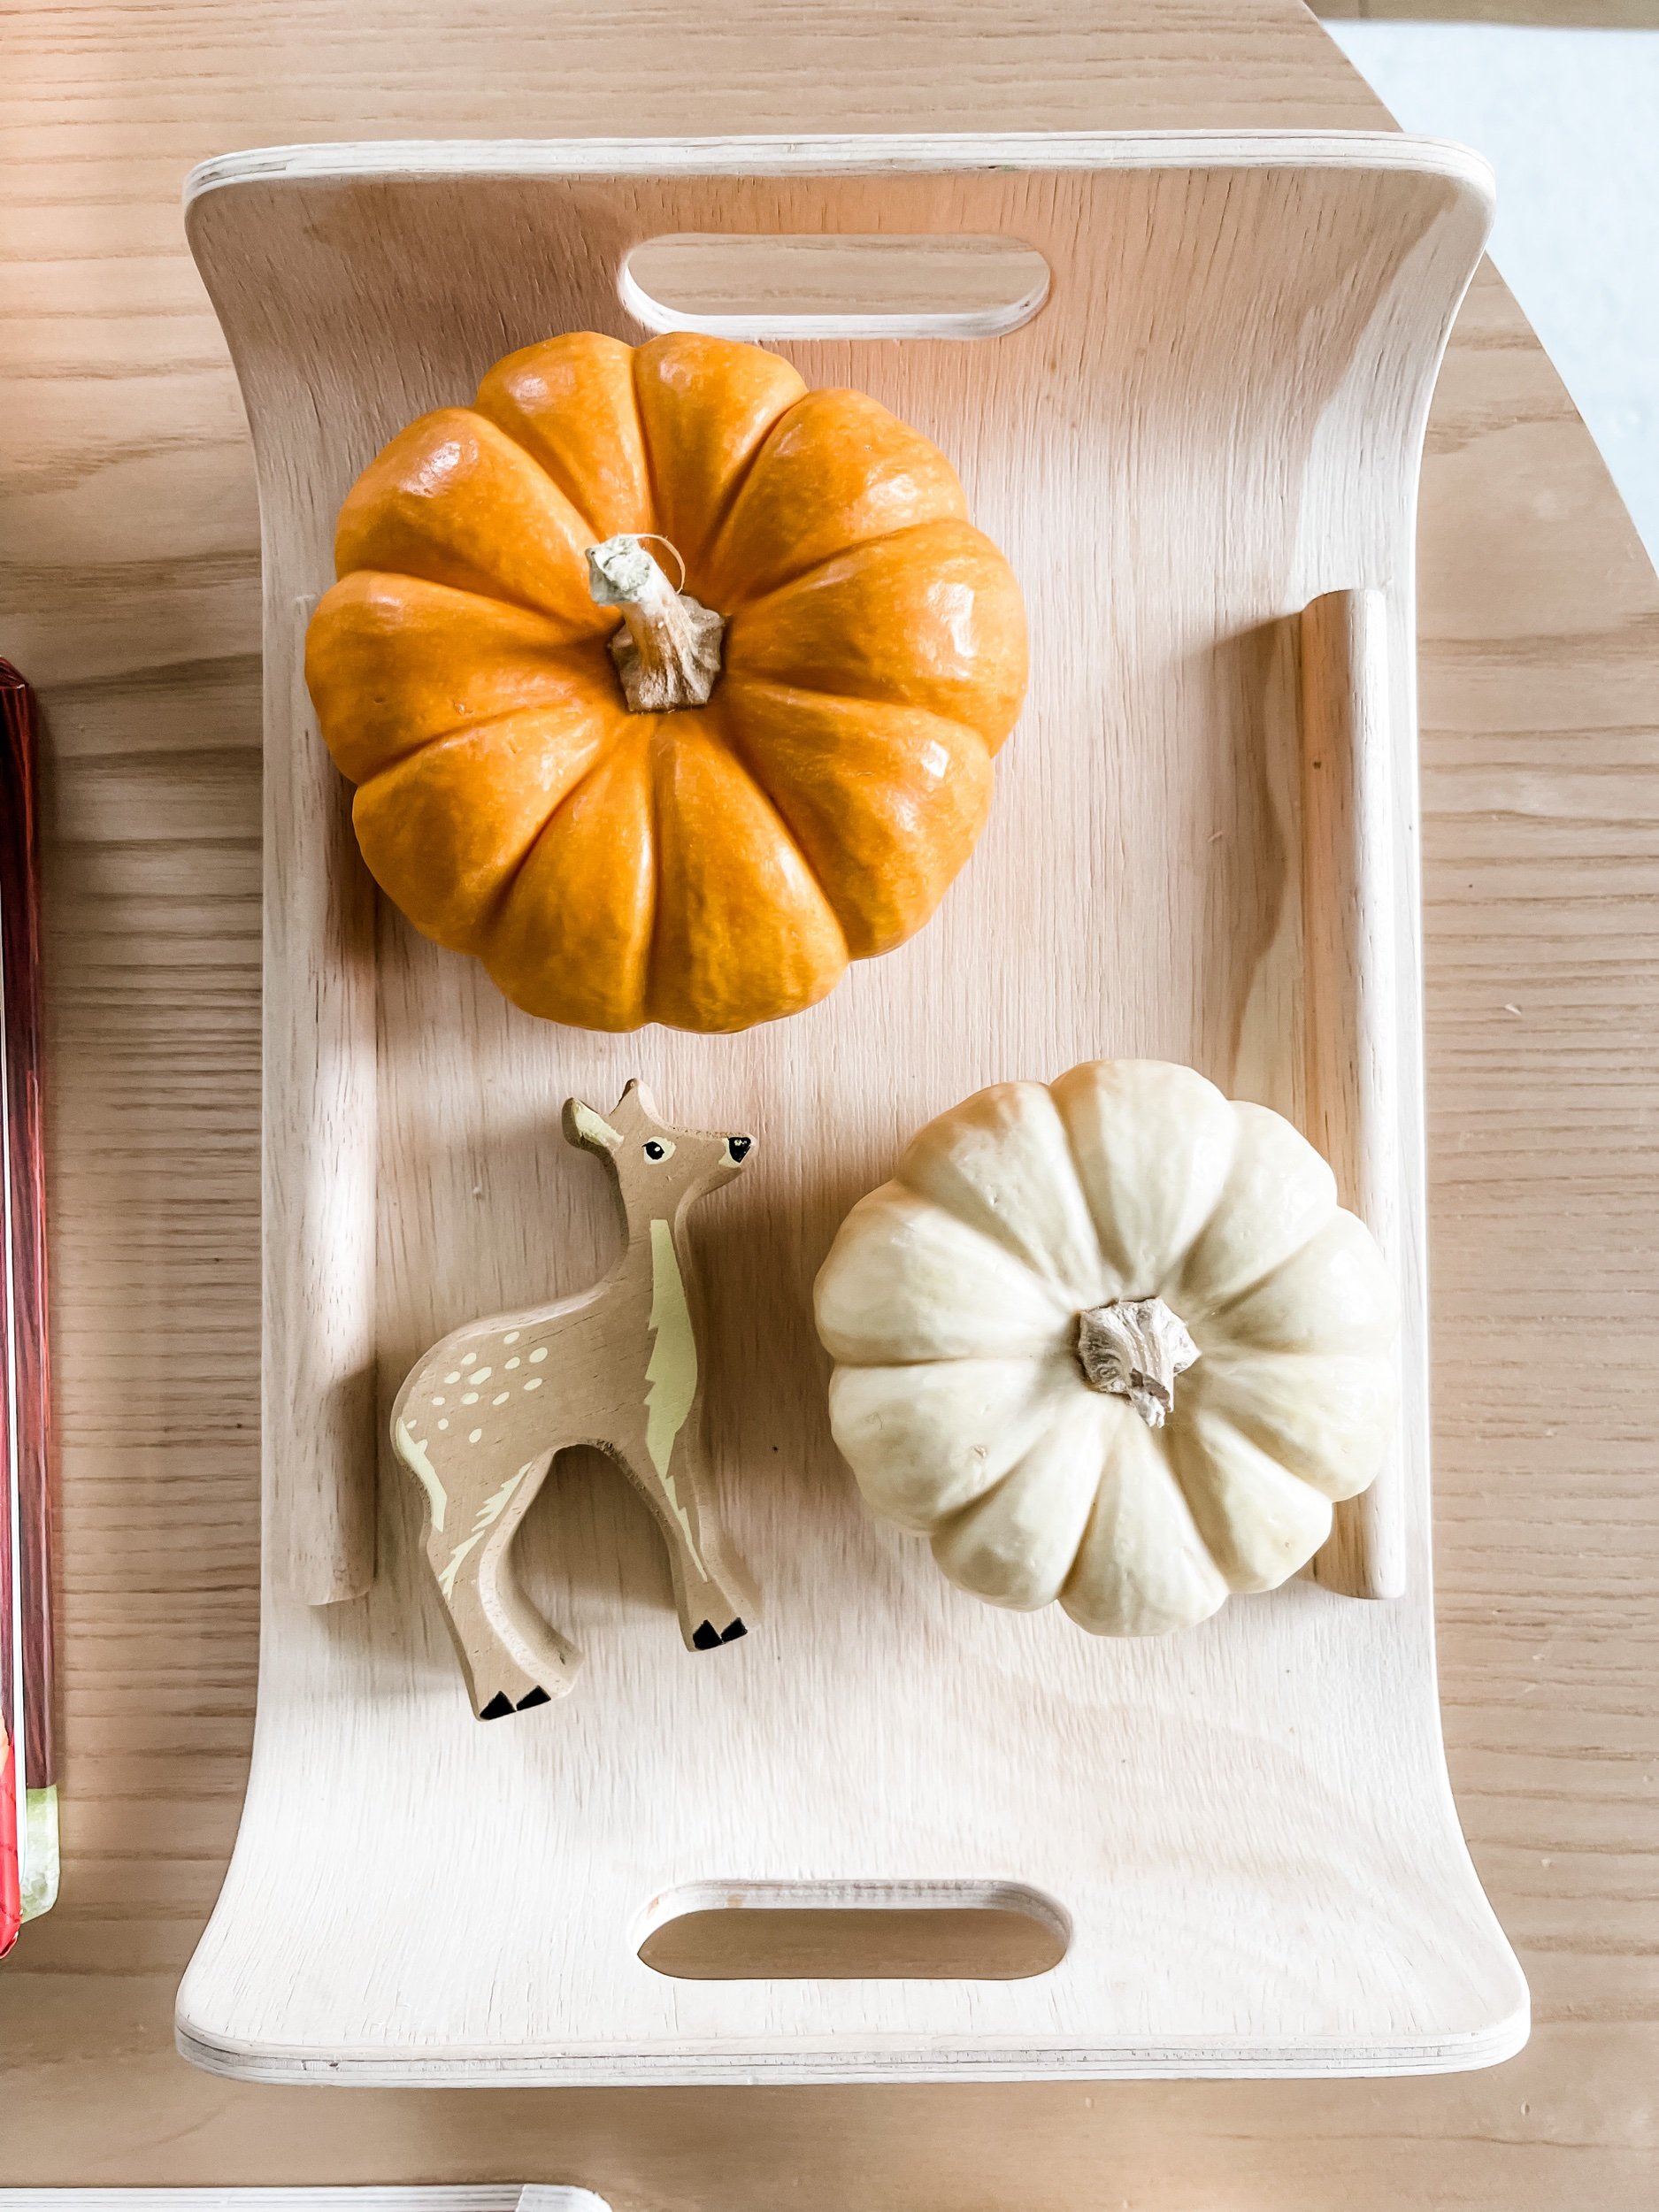
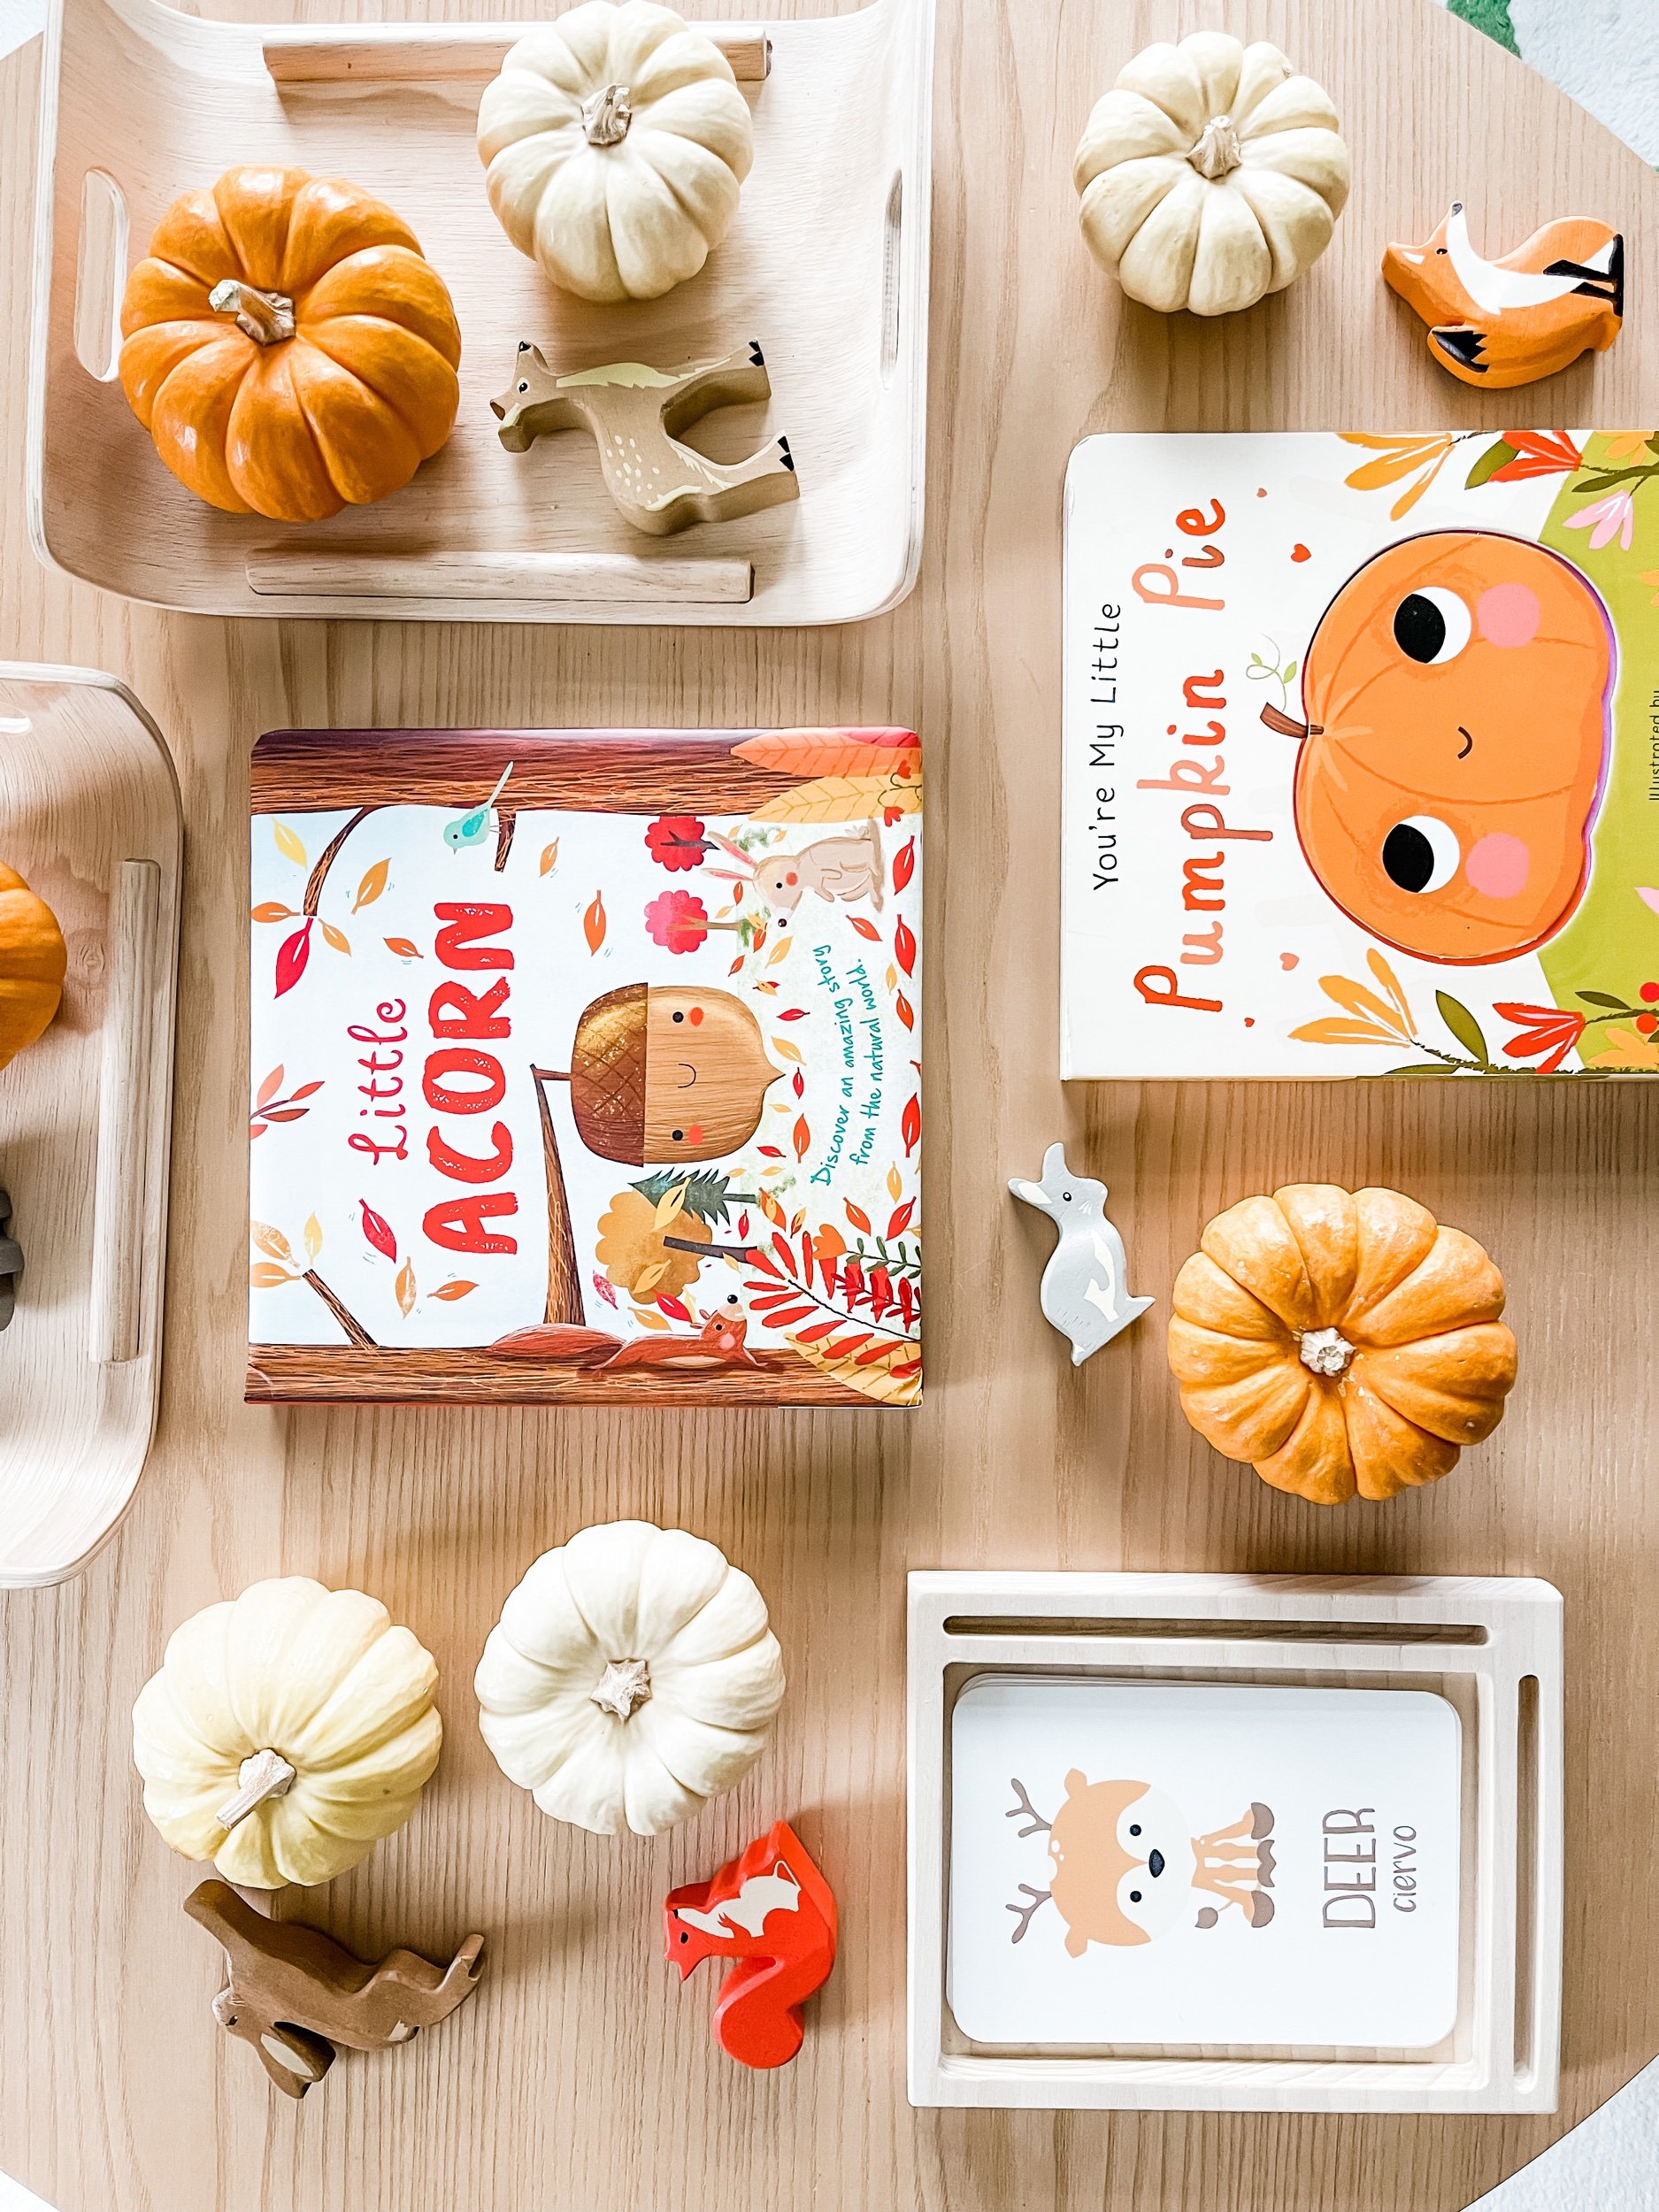
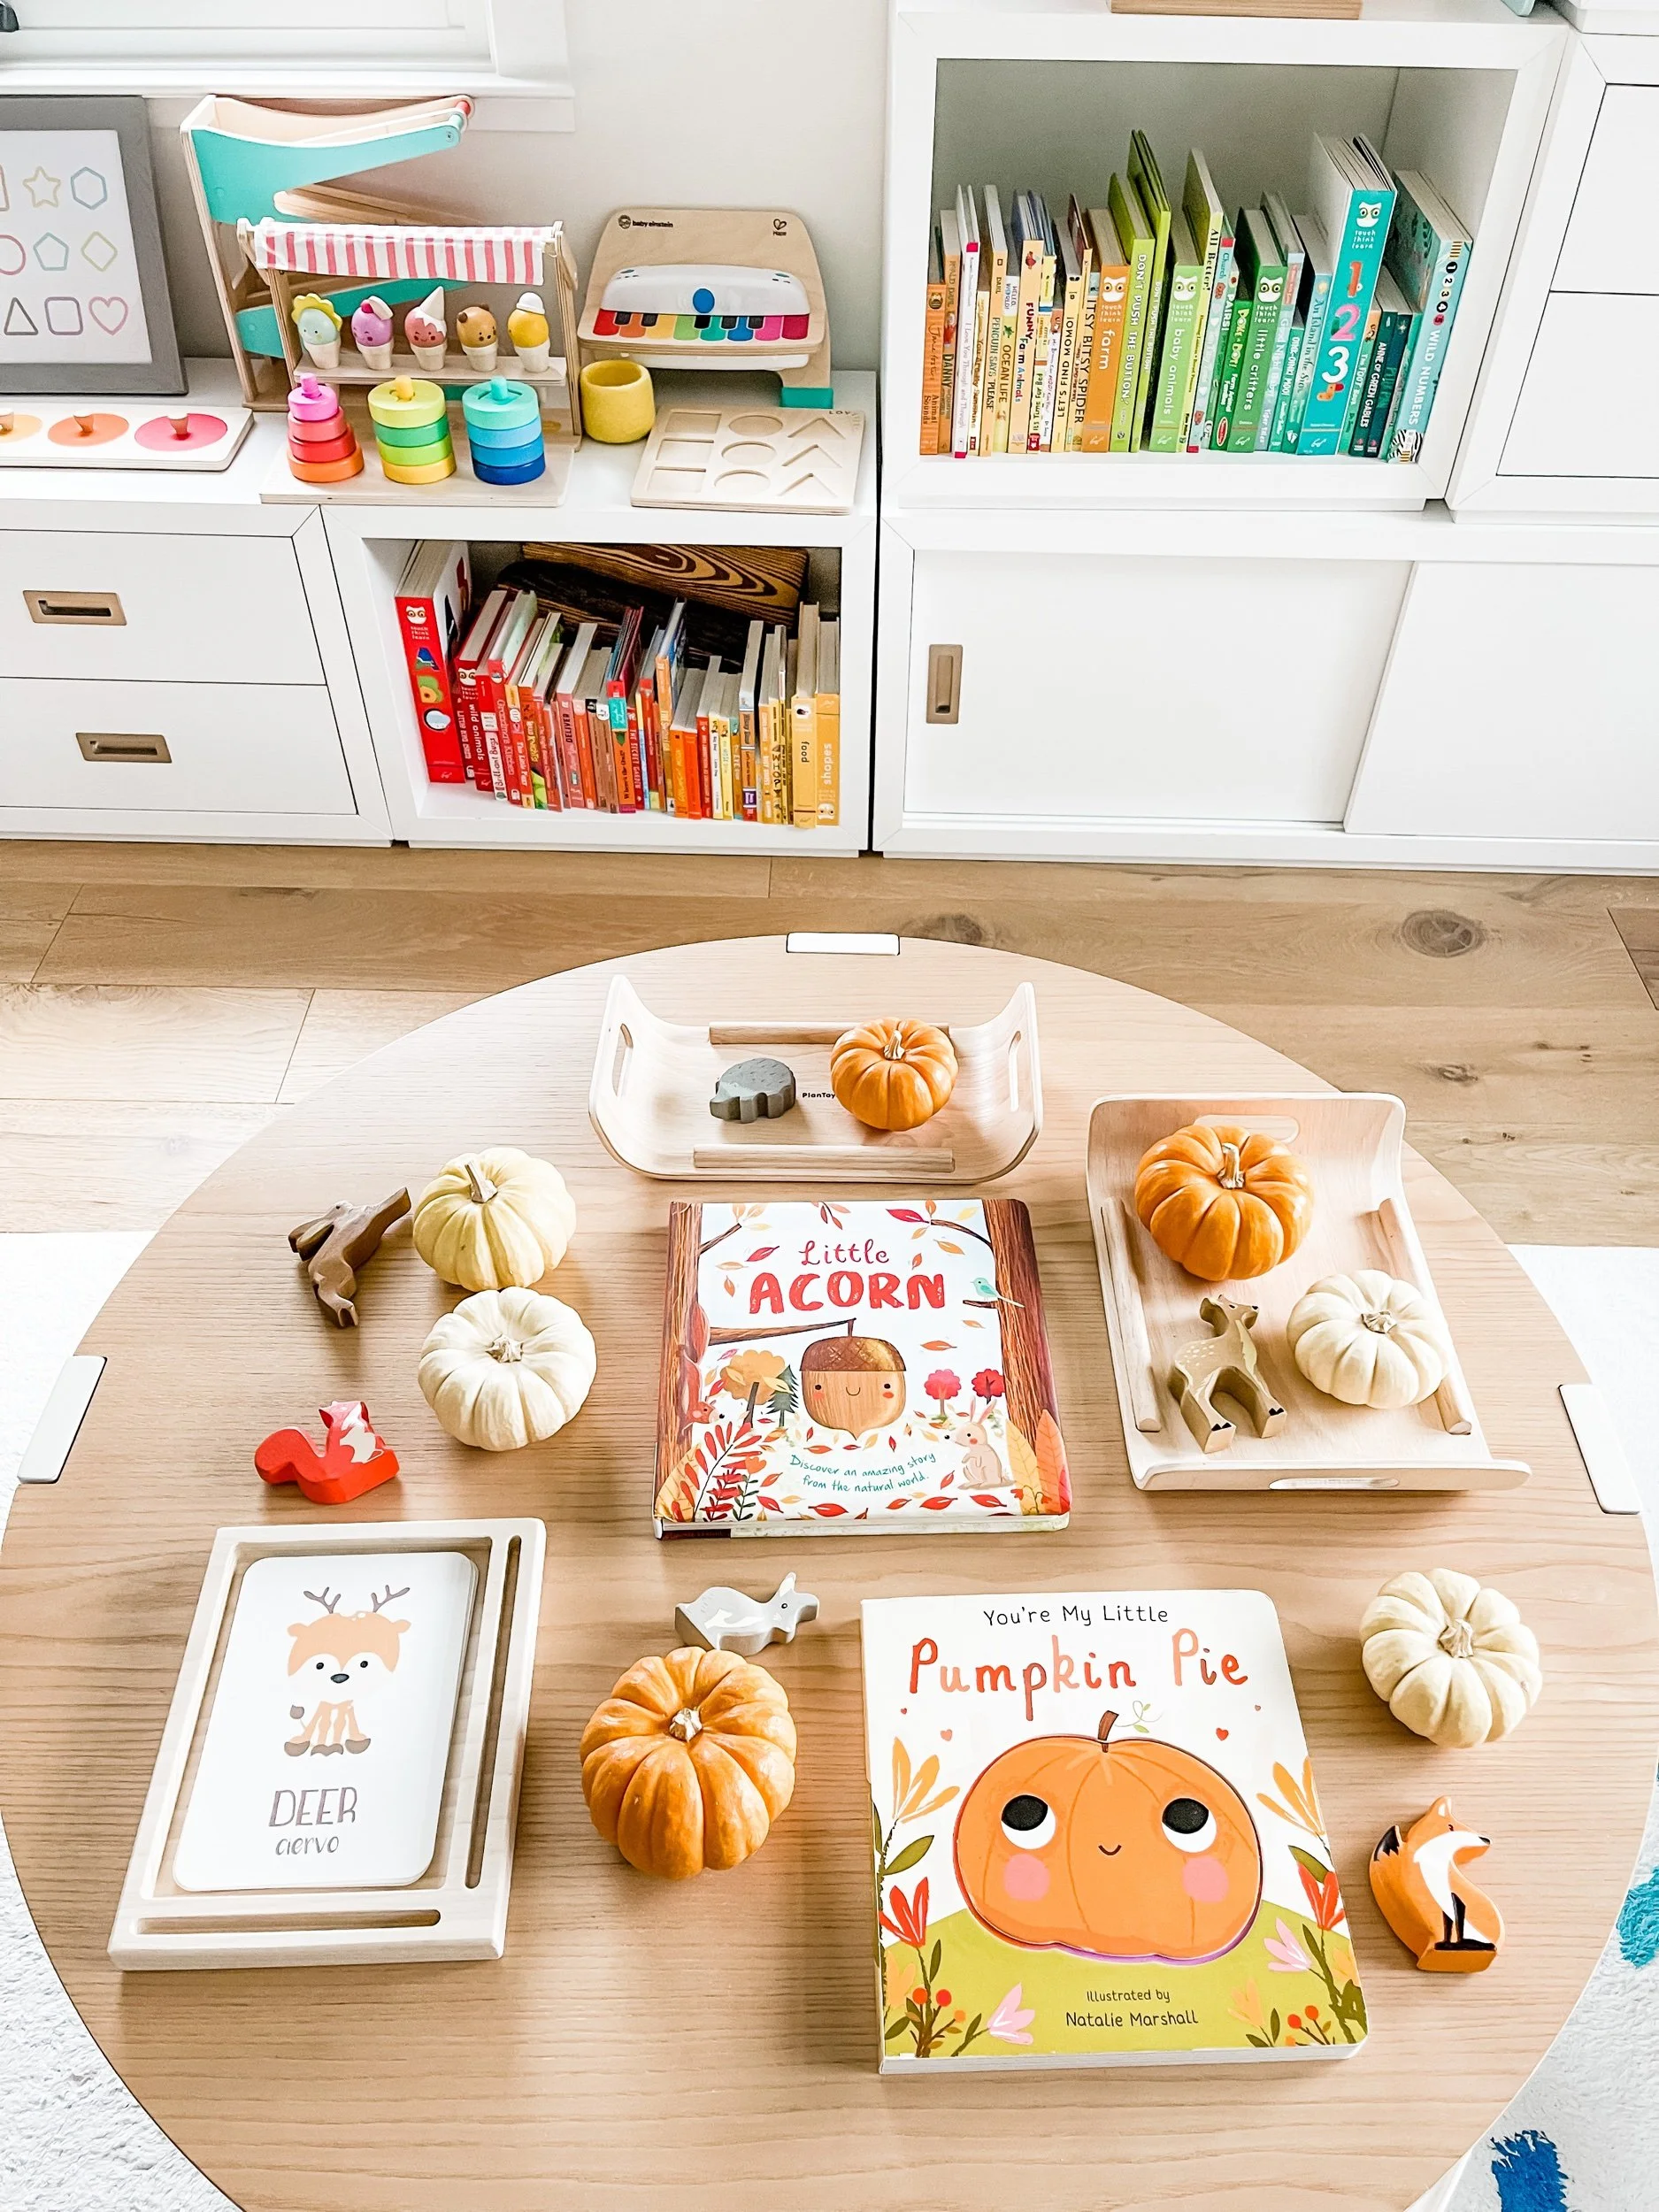
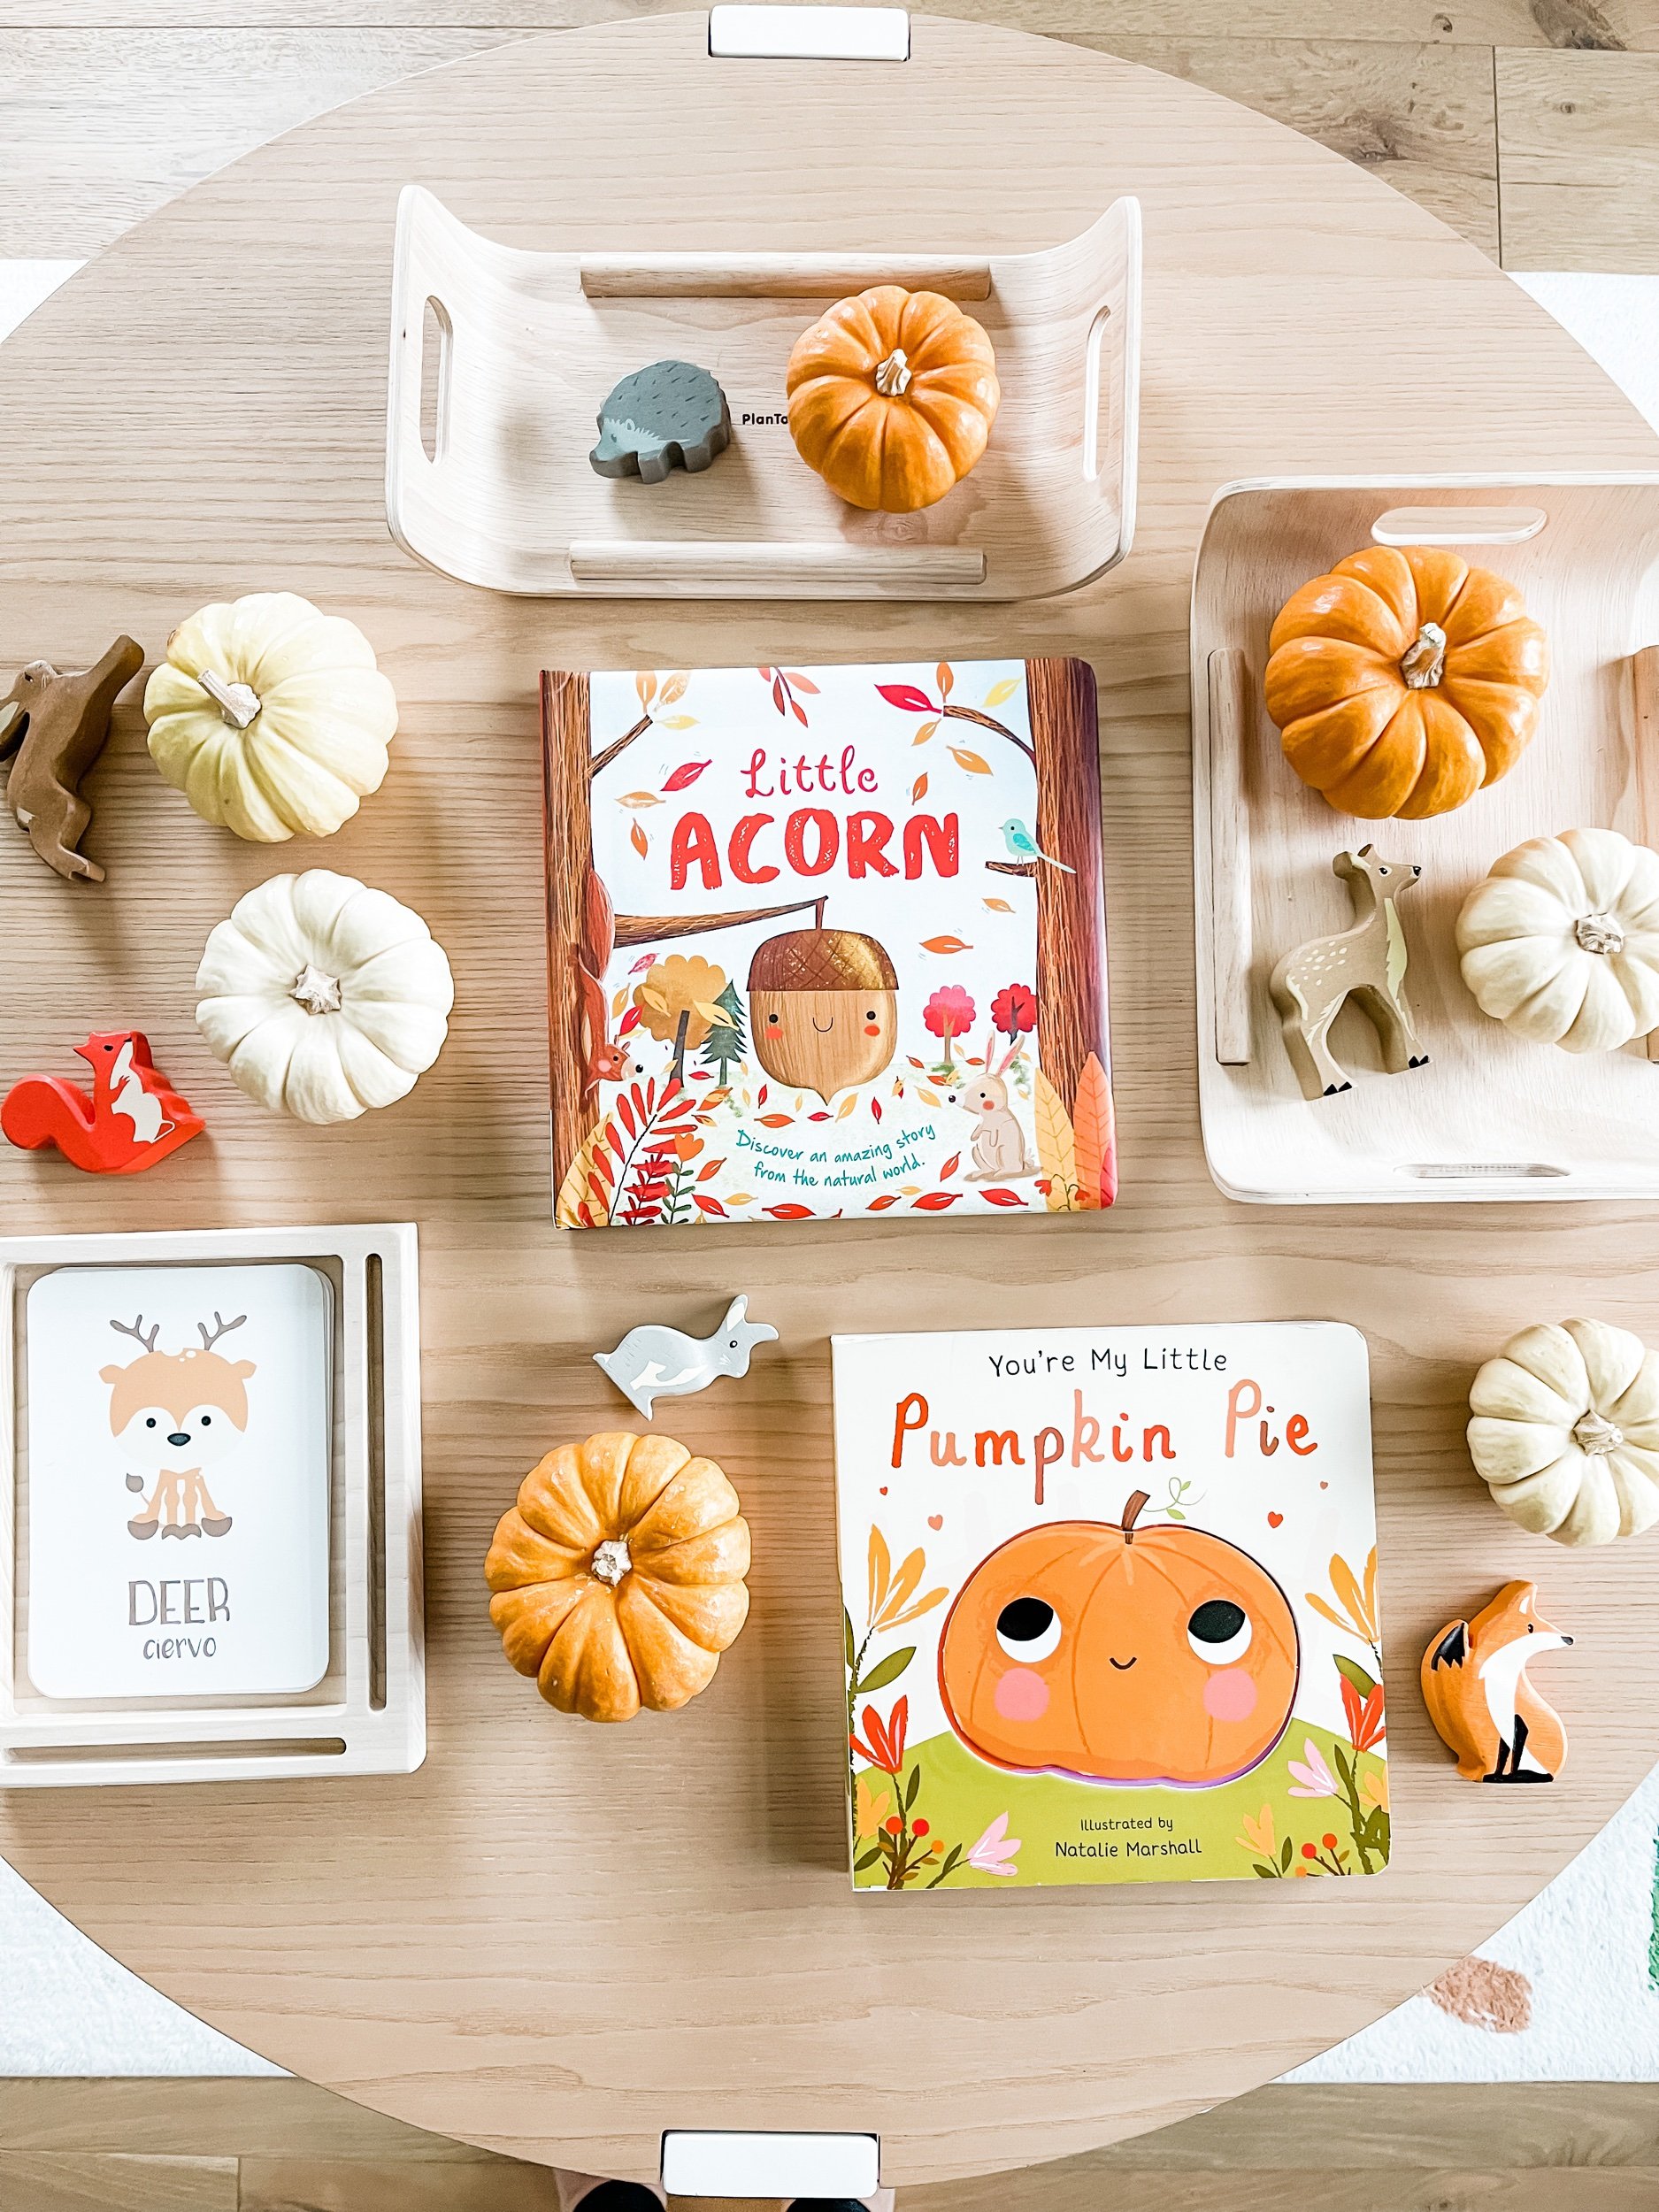
Grab some pumpkins and join us for this simple play setup featuring our woodland animals sensory kit.
Your Custom Text Here
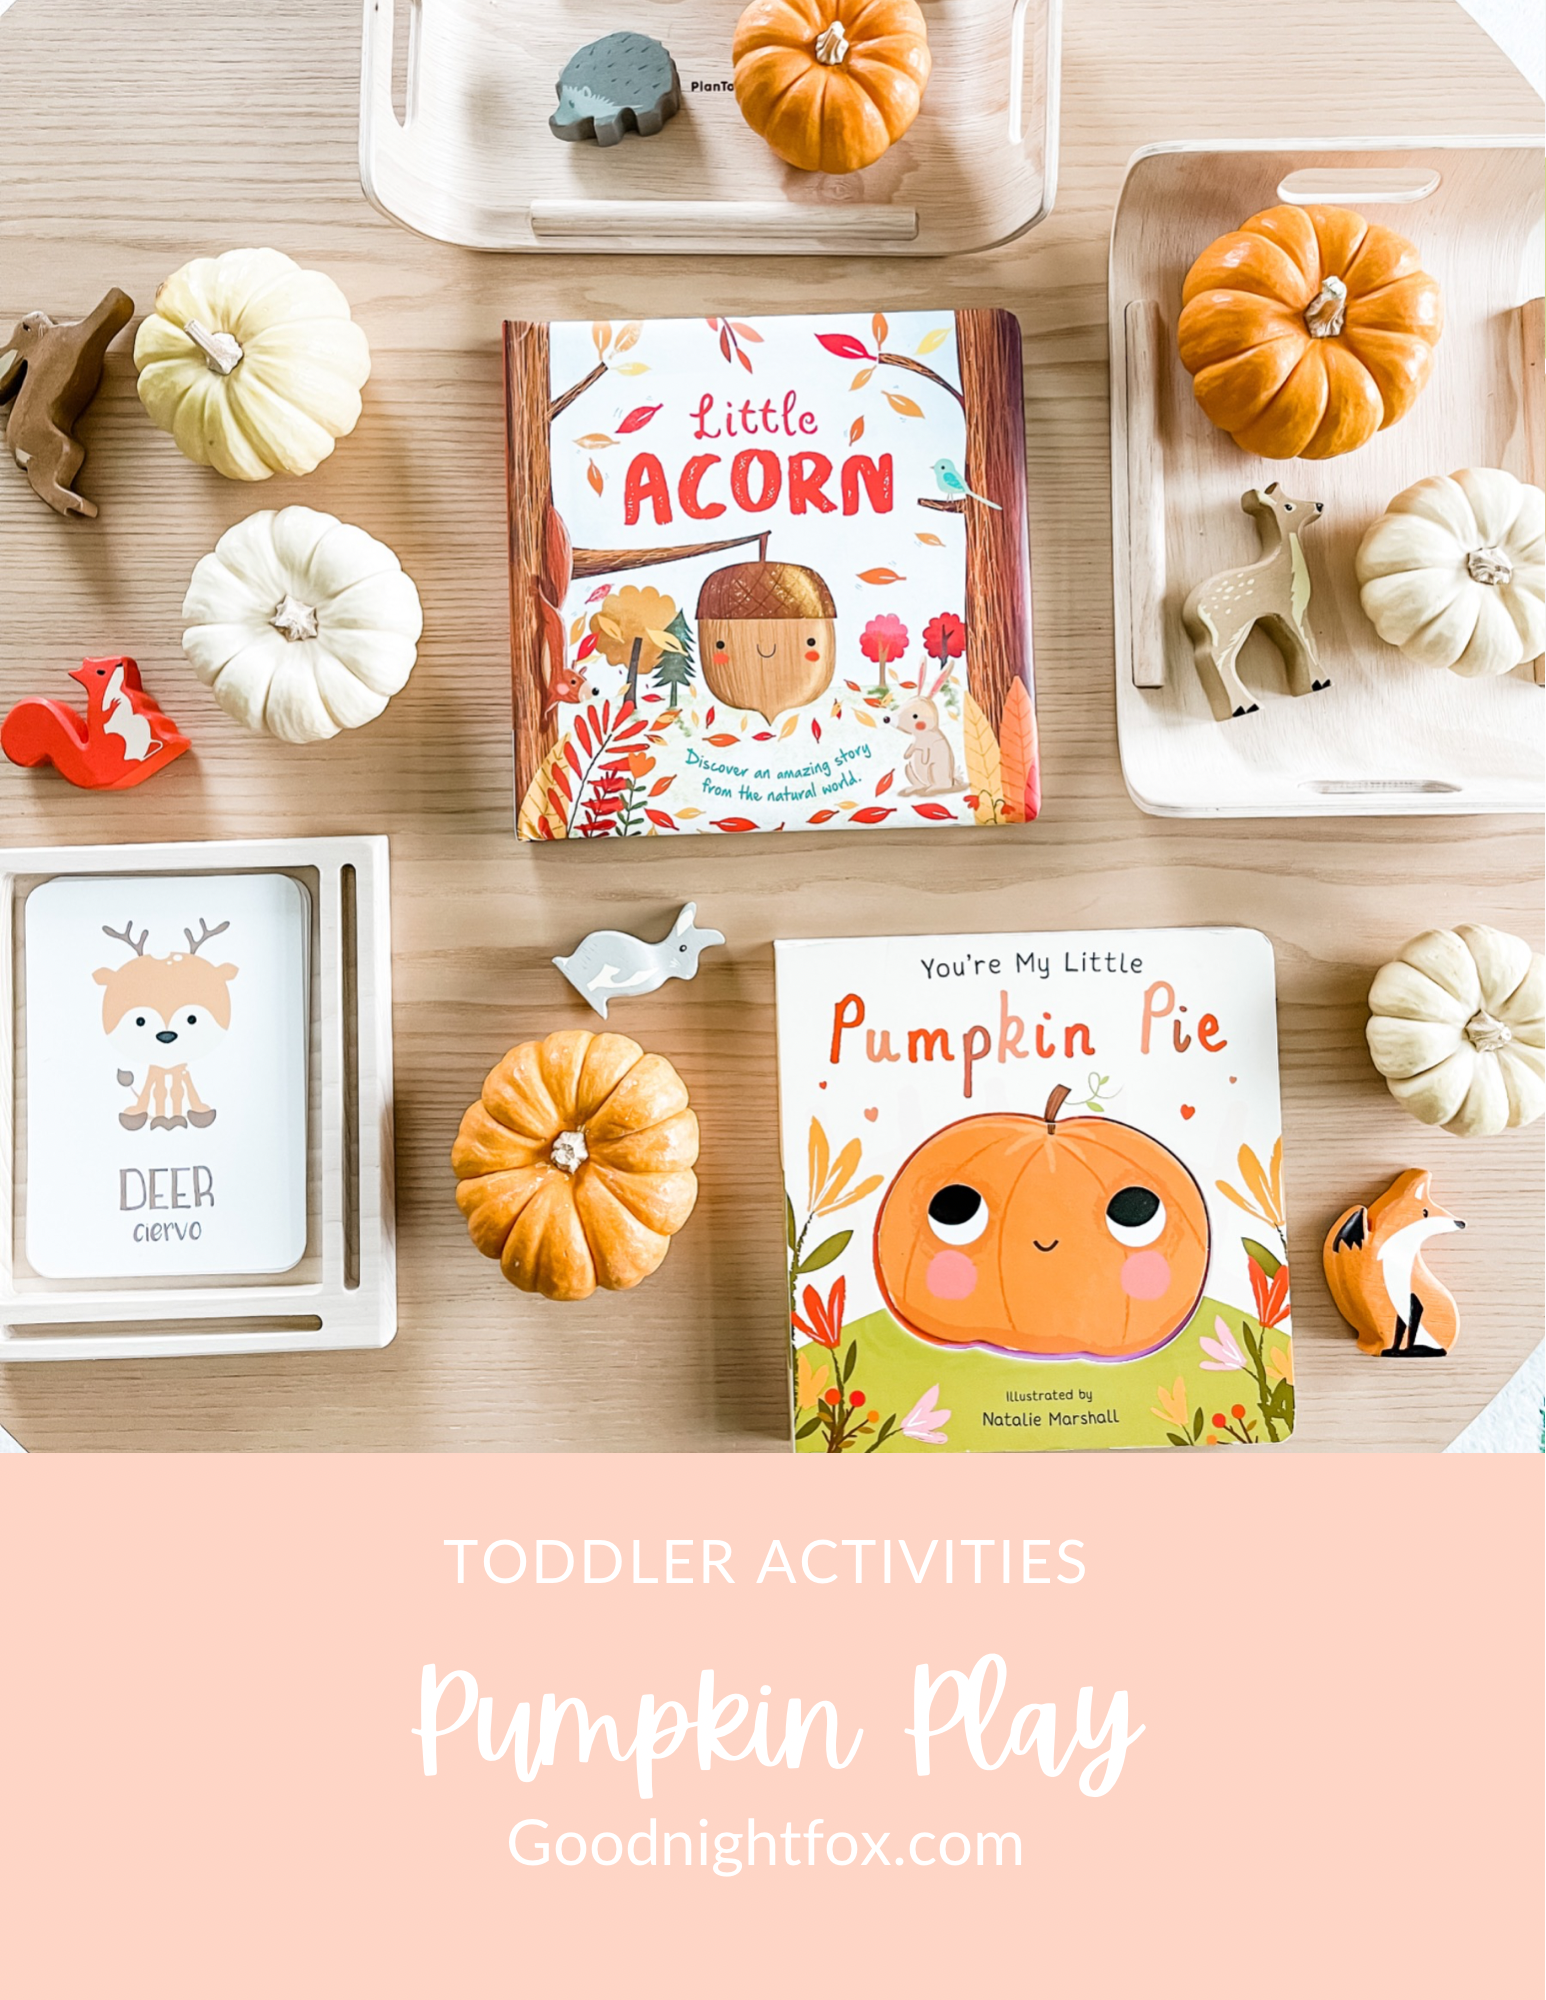
Grab some pumpkins and join us for this simple play setup featuring our woodland animals sensory kit.
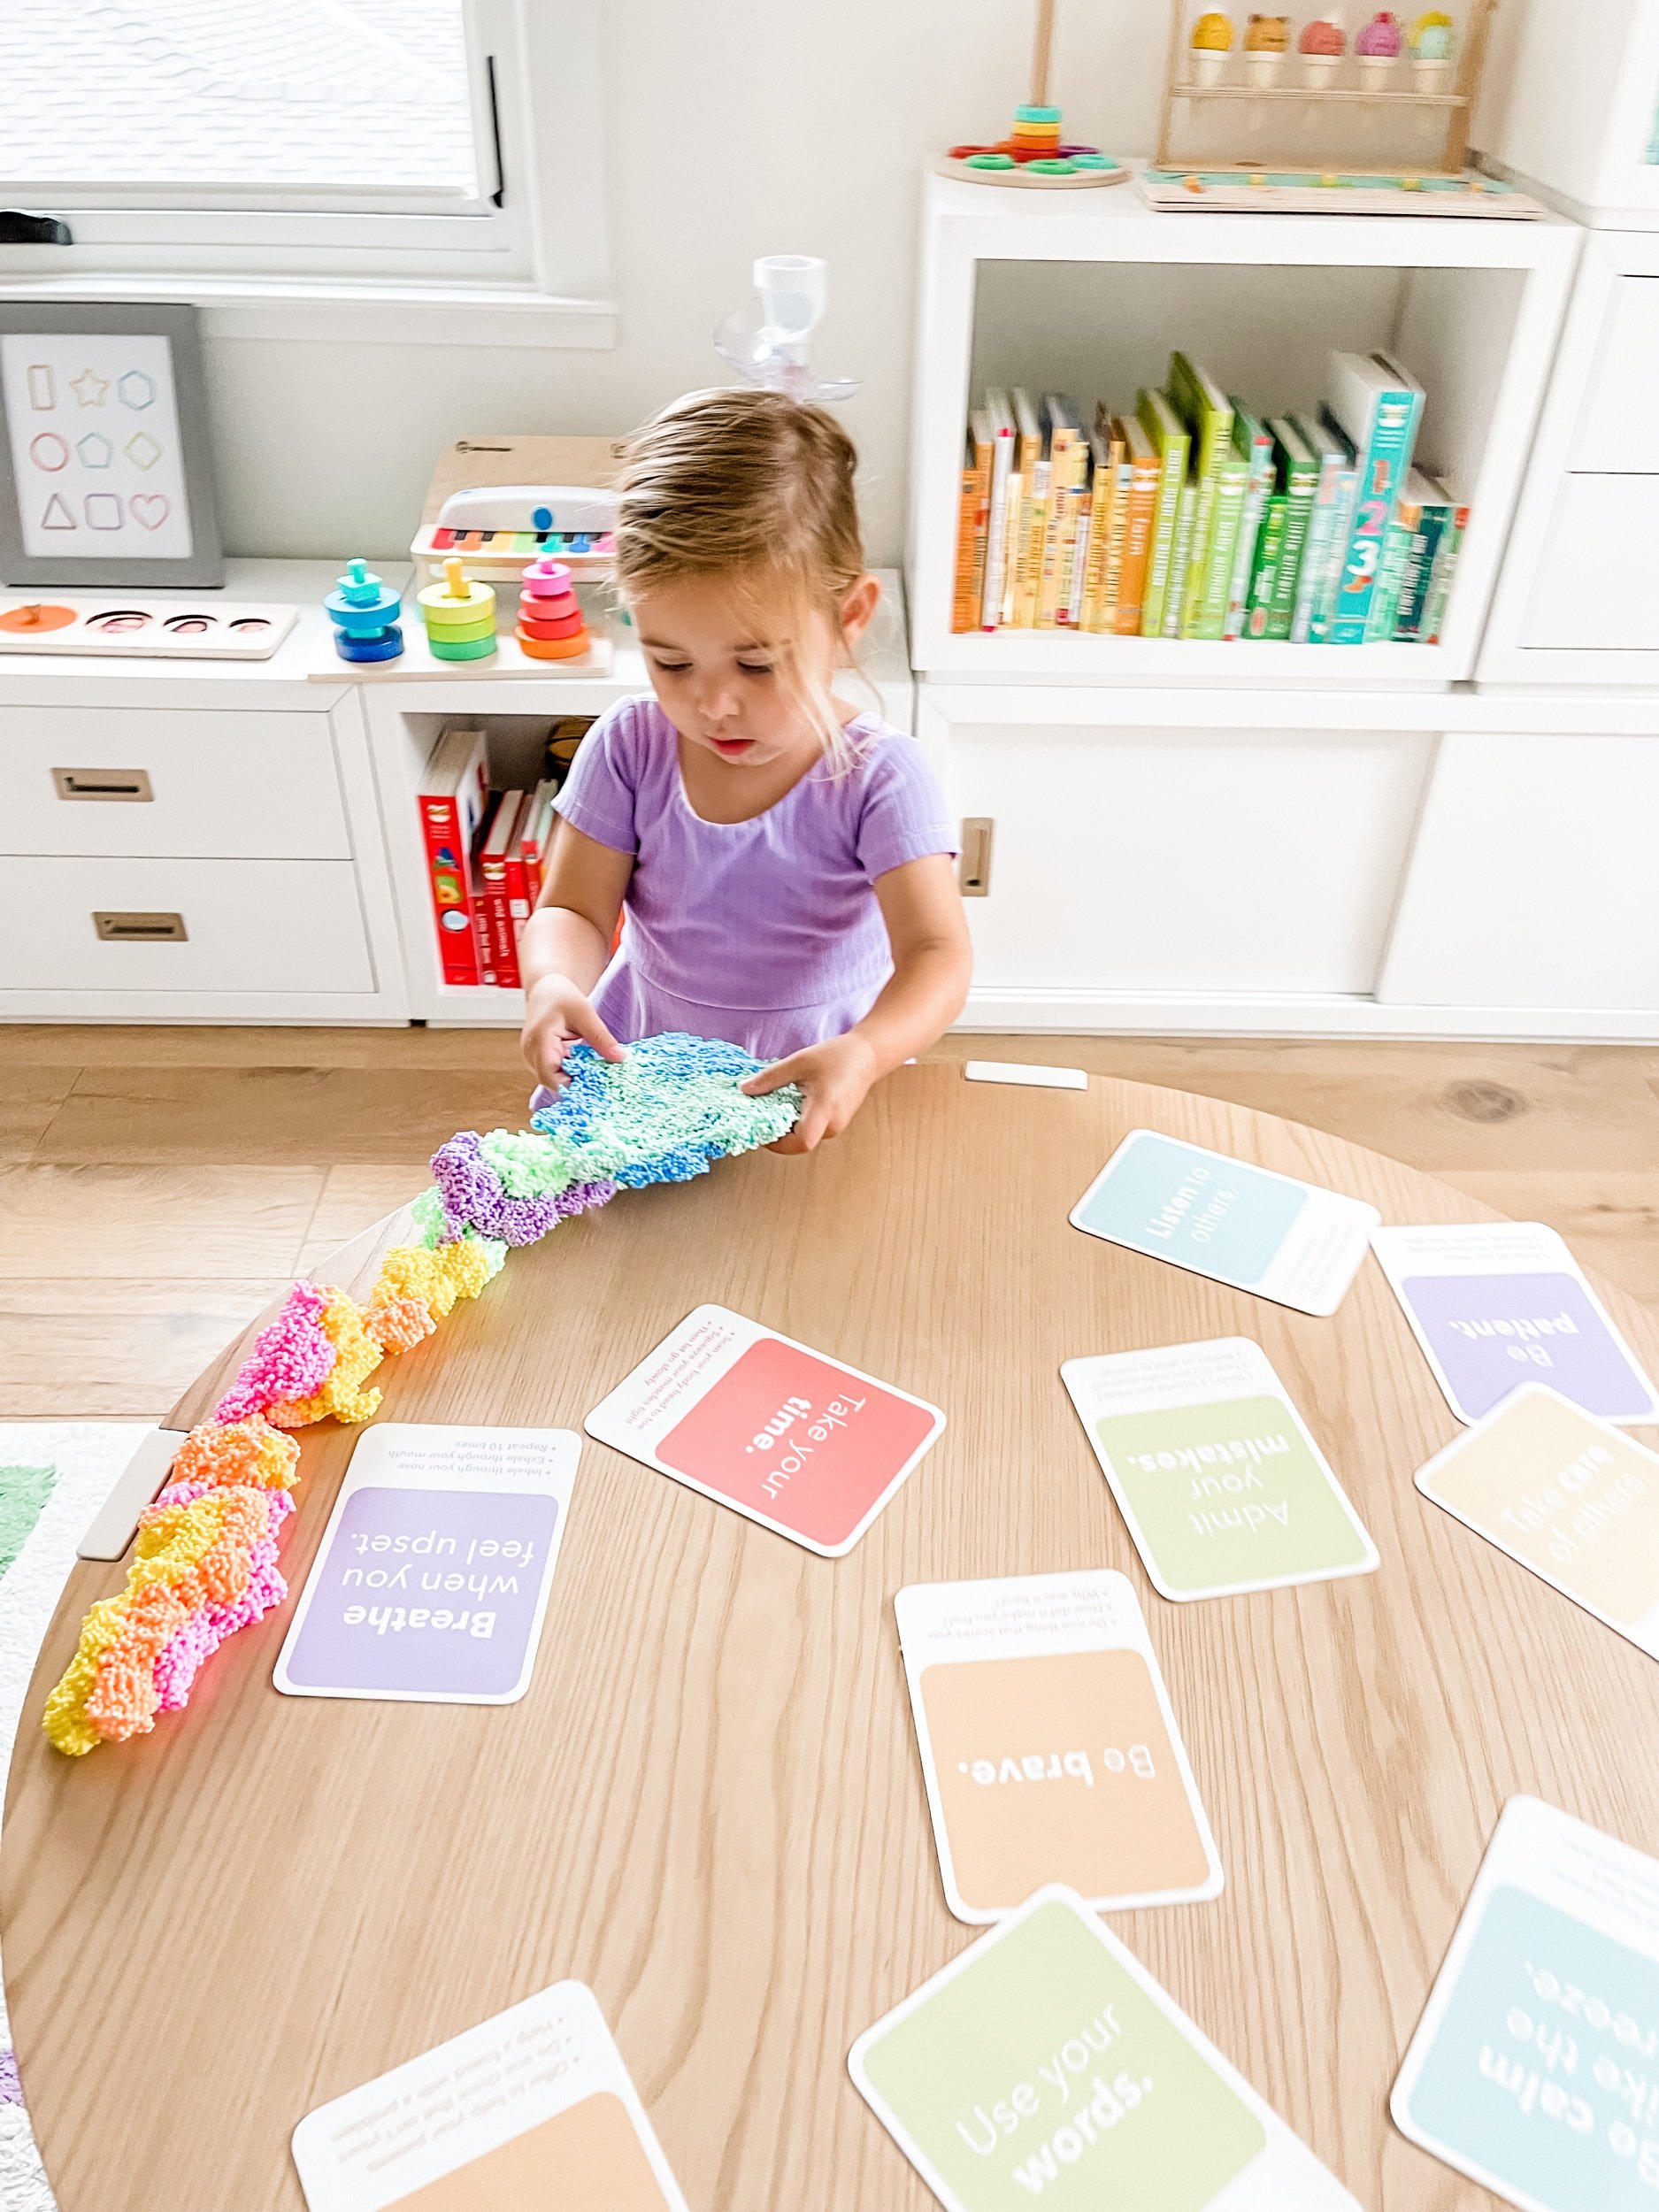
Playing with play foam is a fun and engaging activity for toddlers, but it also has many benefits beyond just entertainment. One of the most important benefits is the relaxation and mindfulness that it can provide for little ones.
As toddlers grow and develop, they can often become overwhelmed by the world around them. Play foam can provide a calming and soothing experience that can help them to relax and focus on the present moment. The tactile sensation of squeezing and shaping the foam can be particularly soothing for children who may be anxious or easily agitated.
Additionally, playing with play foam can help to improve a child's fine motor skills and hand-eye coordination. Squeezing, shaping, and cutting the foam all require the use of small muscles in the hands and fingers, which can help to strengthen and develop these skills.
Another benefit of play foam is that it is a great tool for teaching mindfulness and self-regulation. Mindfulness is the ability to focus on the present moment without judgment, and it is an important skill for children to learn at a young age. When playing with play foam, children can learn to focus on the sensation of squeezing and shaping the foam, which can help them to develop mindfulness skills.
To further enhance the benefits of play foam for your child, consider incorporating mindfulness flashcards for toddlers into your playtime routine. These flashcards feature fun and engaging illustrations and prompts that can help children to focus on the present moment and practice mindfulness. They are an excellent way to encourage children to take a break from screens and engage in more hands-on activities.
In conclusion, play foam is a fun and engaging activity for toddlers that offers many benefits. It can provide a relaxing and calming experience, improve fine motor skills and hand-eye coordination, and teach mindfulness and self-regulation. Consider incorporating mindfulness flashcards for toddlers into your playtime routine to further enhance the benefits of play foam for your child.


Monday: Introduction to Mindfulness
Introduce the concept of mindfulness to the class by explaining that it is the ability to focus on the present moment and be aware of our thoughts and feelings.
Have the children sit in a circle and guide them through a simple breathing exercise, such as counting to five while inhaling and exhaling.
Encourage the children to notice how their body feels after the exercise and discuss any observations they have.
Tuesday: Mindful Listening
Have the children sit in a circle and play soft background music.
Ask the children to close their eyes and listen to the music, encouraging them to focus on the different instruments and sounds they can hear.
After a few minutes, ask the children to share any observations they have made about the music.
Wednesday: Mindful Eating
Have the children bring in a piece of fruit or a snack.
Encourage the children to take a moment to look at and smell their food before taking a bite.
Ask the children to pay attention to the taste, texture, and sensation of eating the food and to take small bites.
Discuss any observations the children have made about their food.
Thursday: Mindful Movement
Have the children sit in a circle and guide them through a simple yoga flow, such as "tree pose" or "downward-facing dog."
Encourage the children to focus on their breath and the sensation of their body moving.
After the yoga flow, have the children sit in silence for a few minutes and encourage them to notice how their body feels.
Friday: Mindful Reflection
Have the children sit in a circle and ask them to think back on the week and reflect on any mindfulness practices they enjoyed or found challenging.
Encourage the children to share their reflections with the class and discuss ways they can incorporate mindfulness into their daily lives.
Note: It is important to keep in mind that preschoolers have a short attention span, so keep the activities short and simple. Also, make sure to adapt the activities to the children's level and abilities.
For even more great mindfulness activities ideas, checkout out this post.

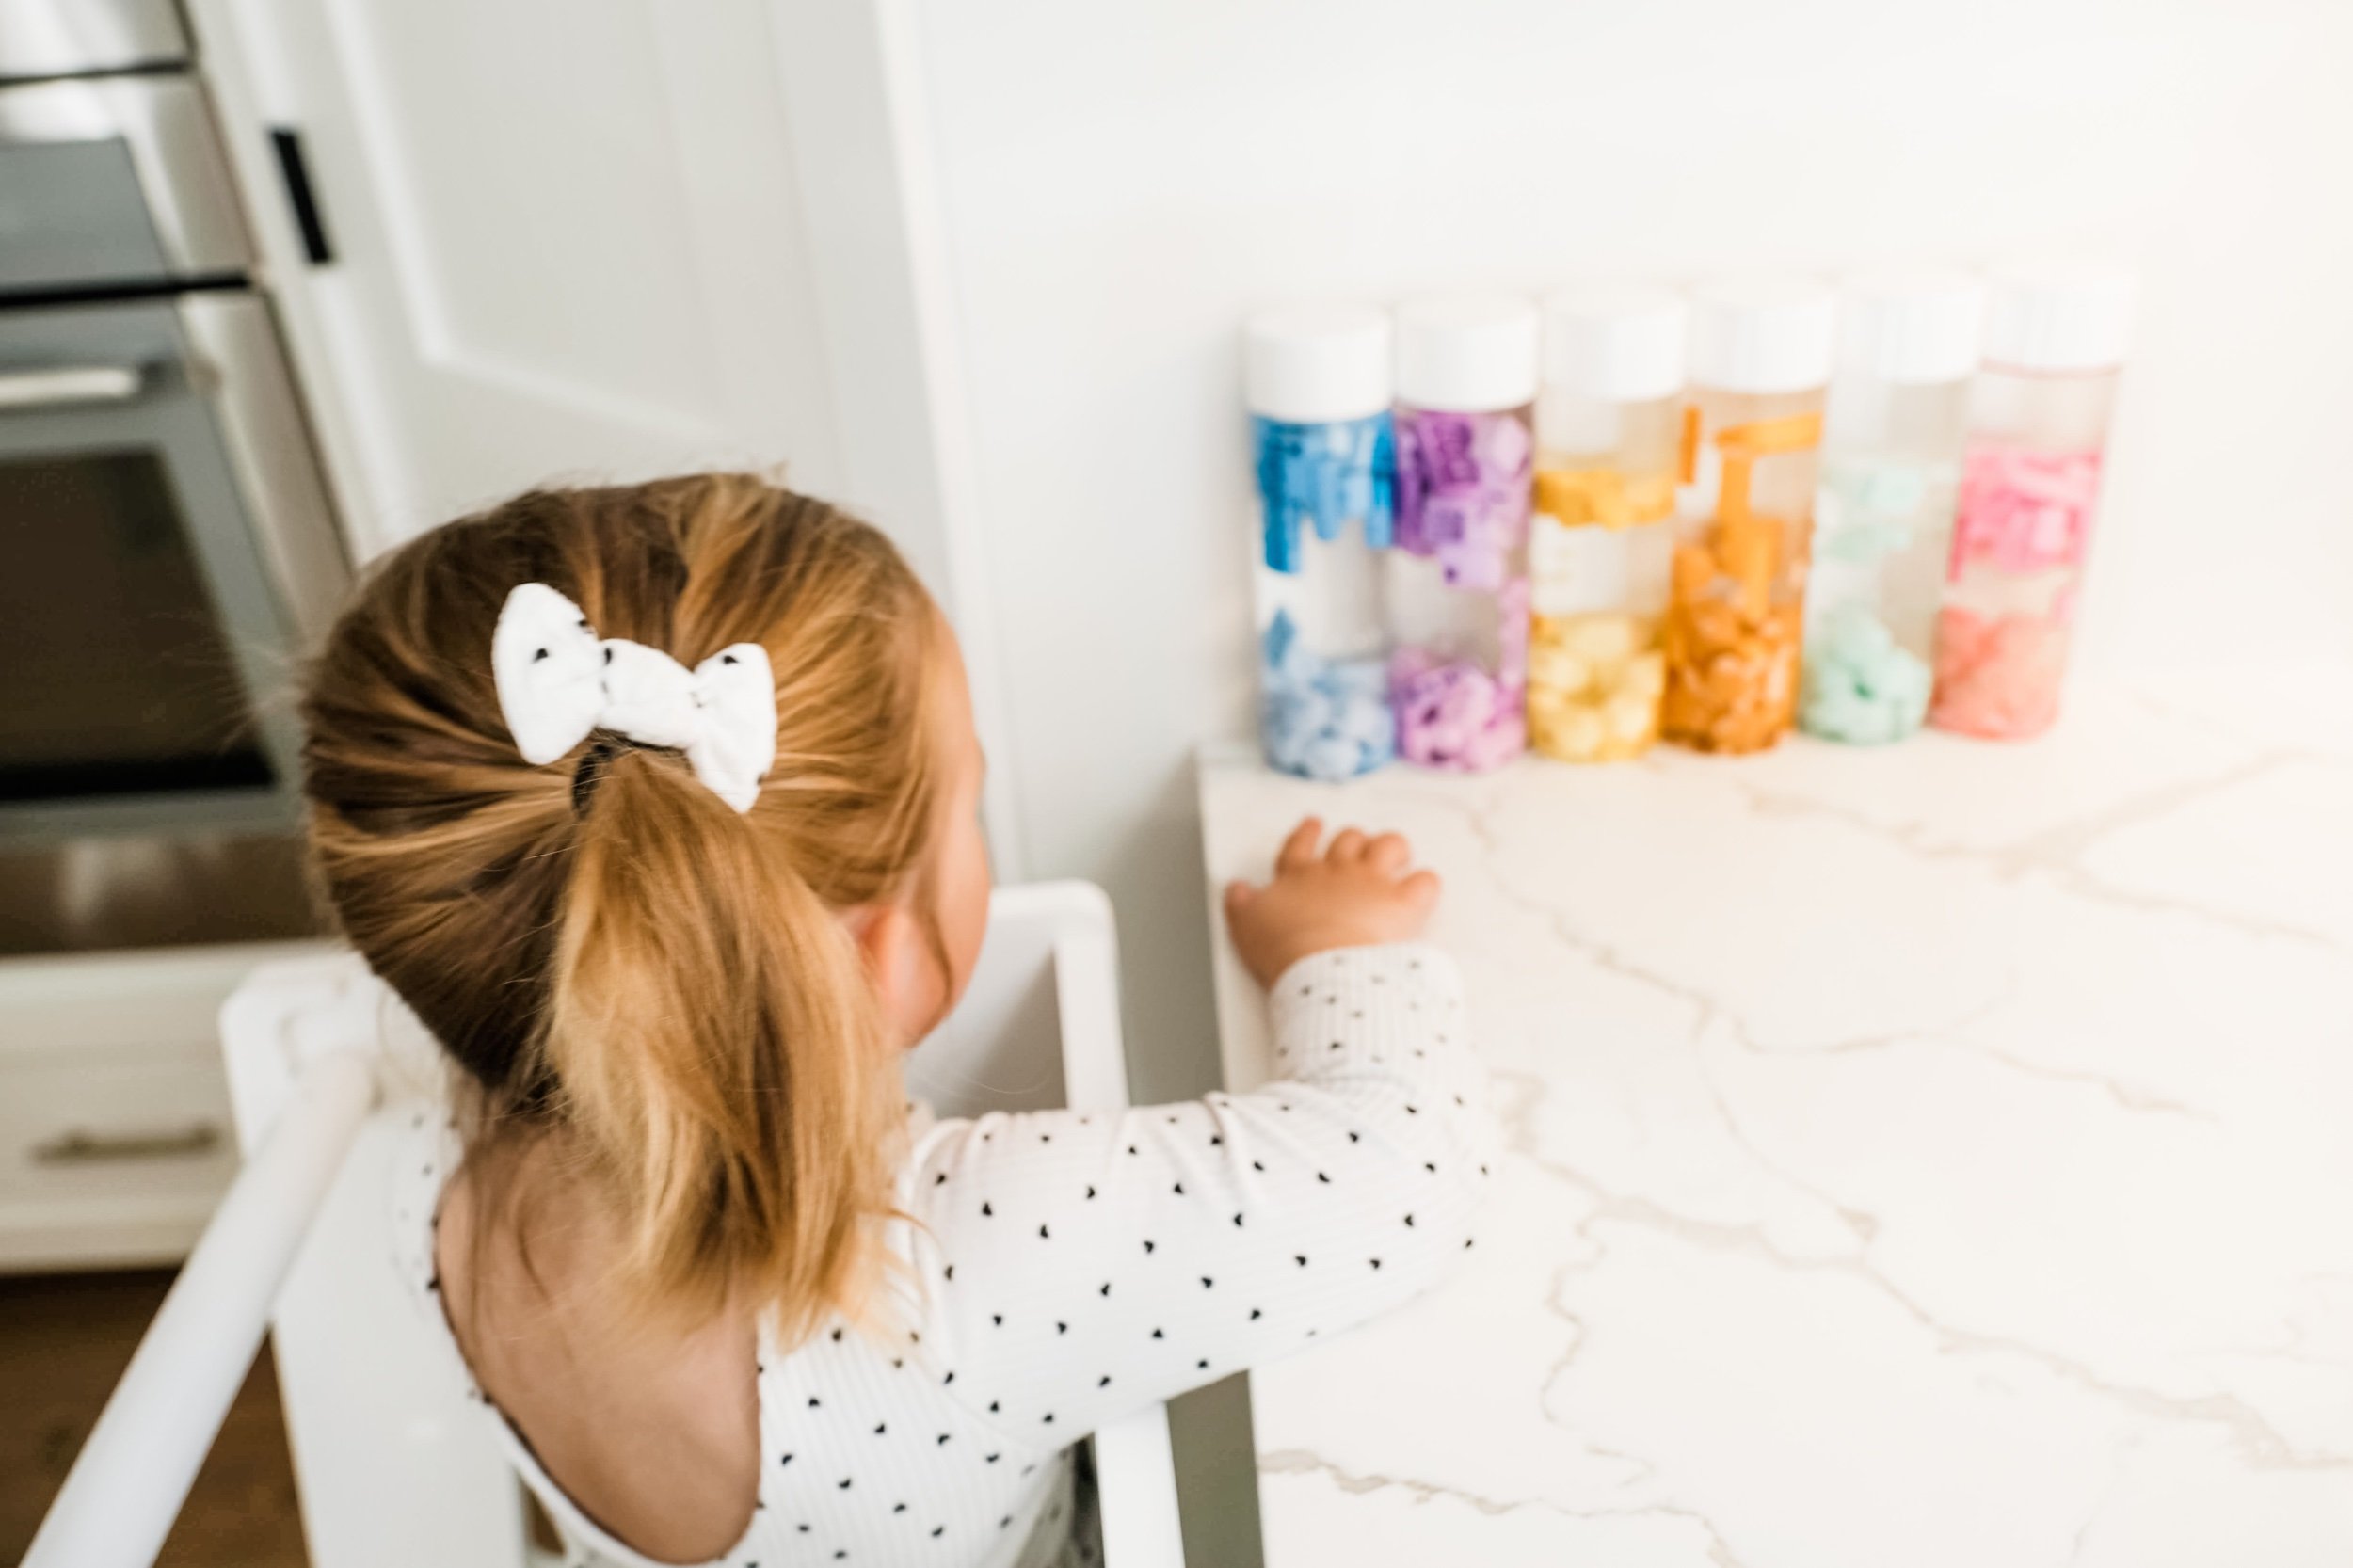
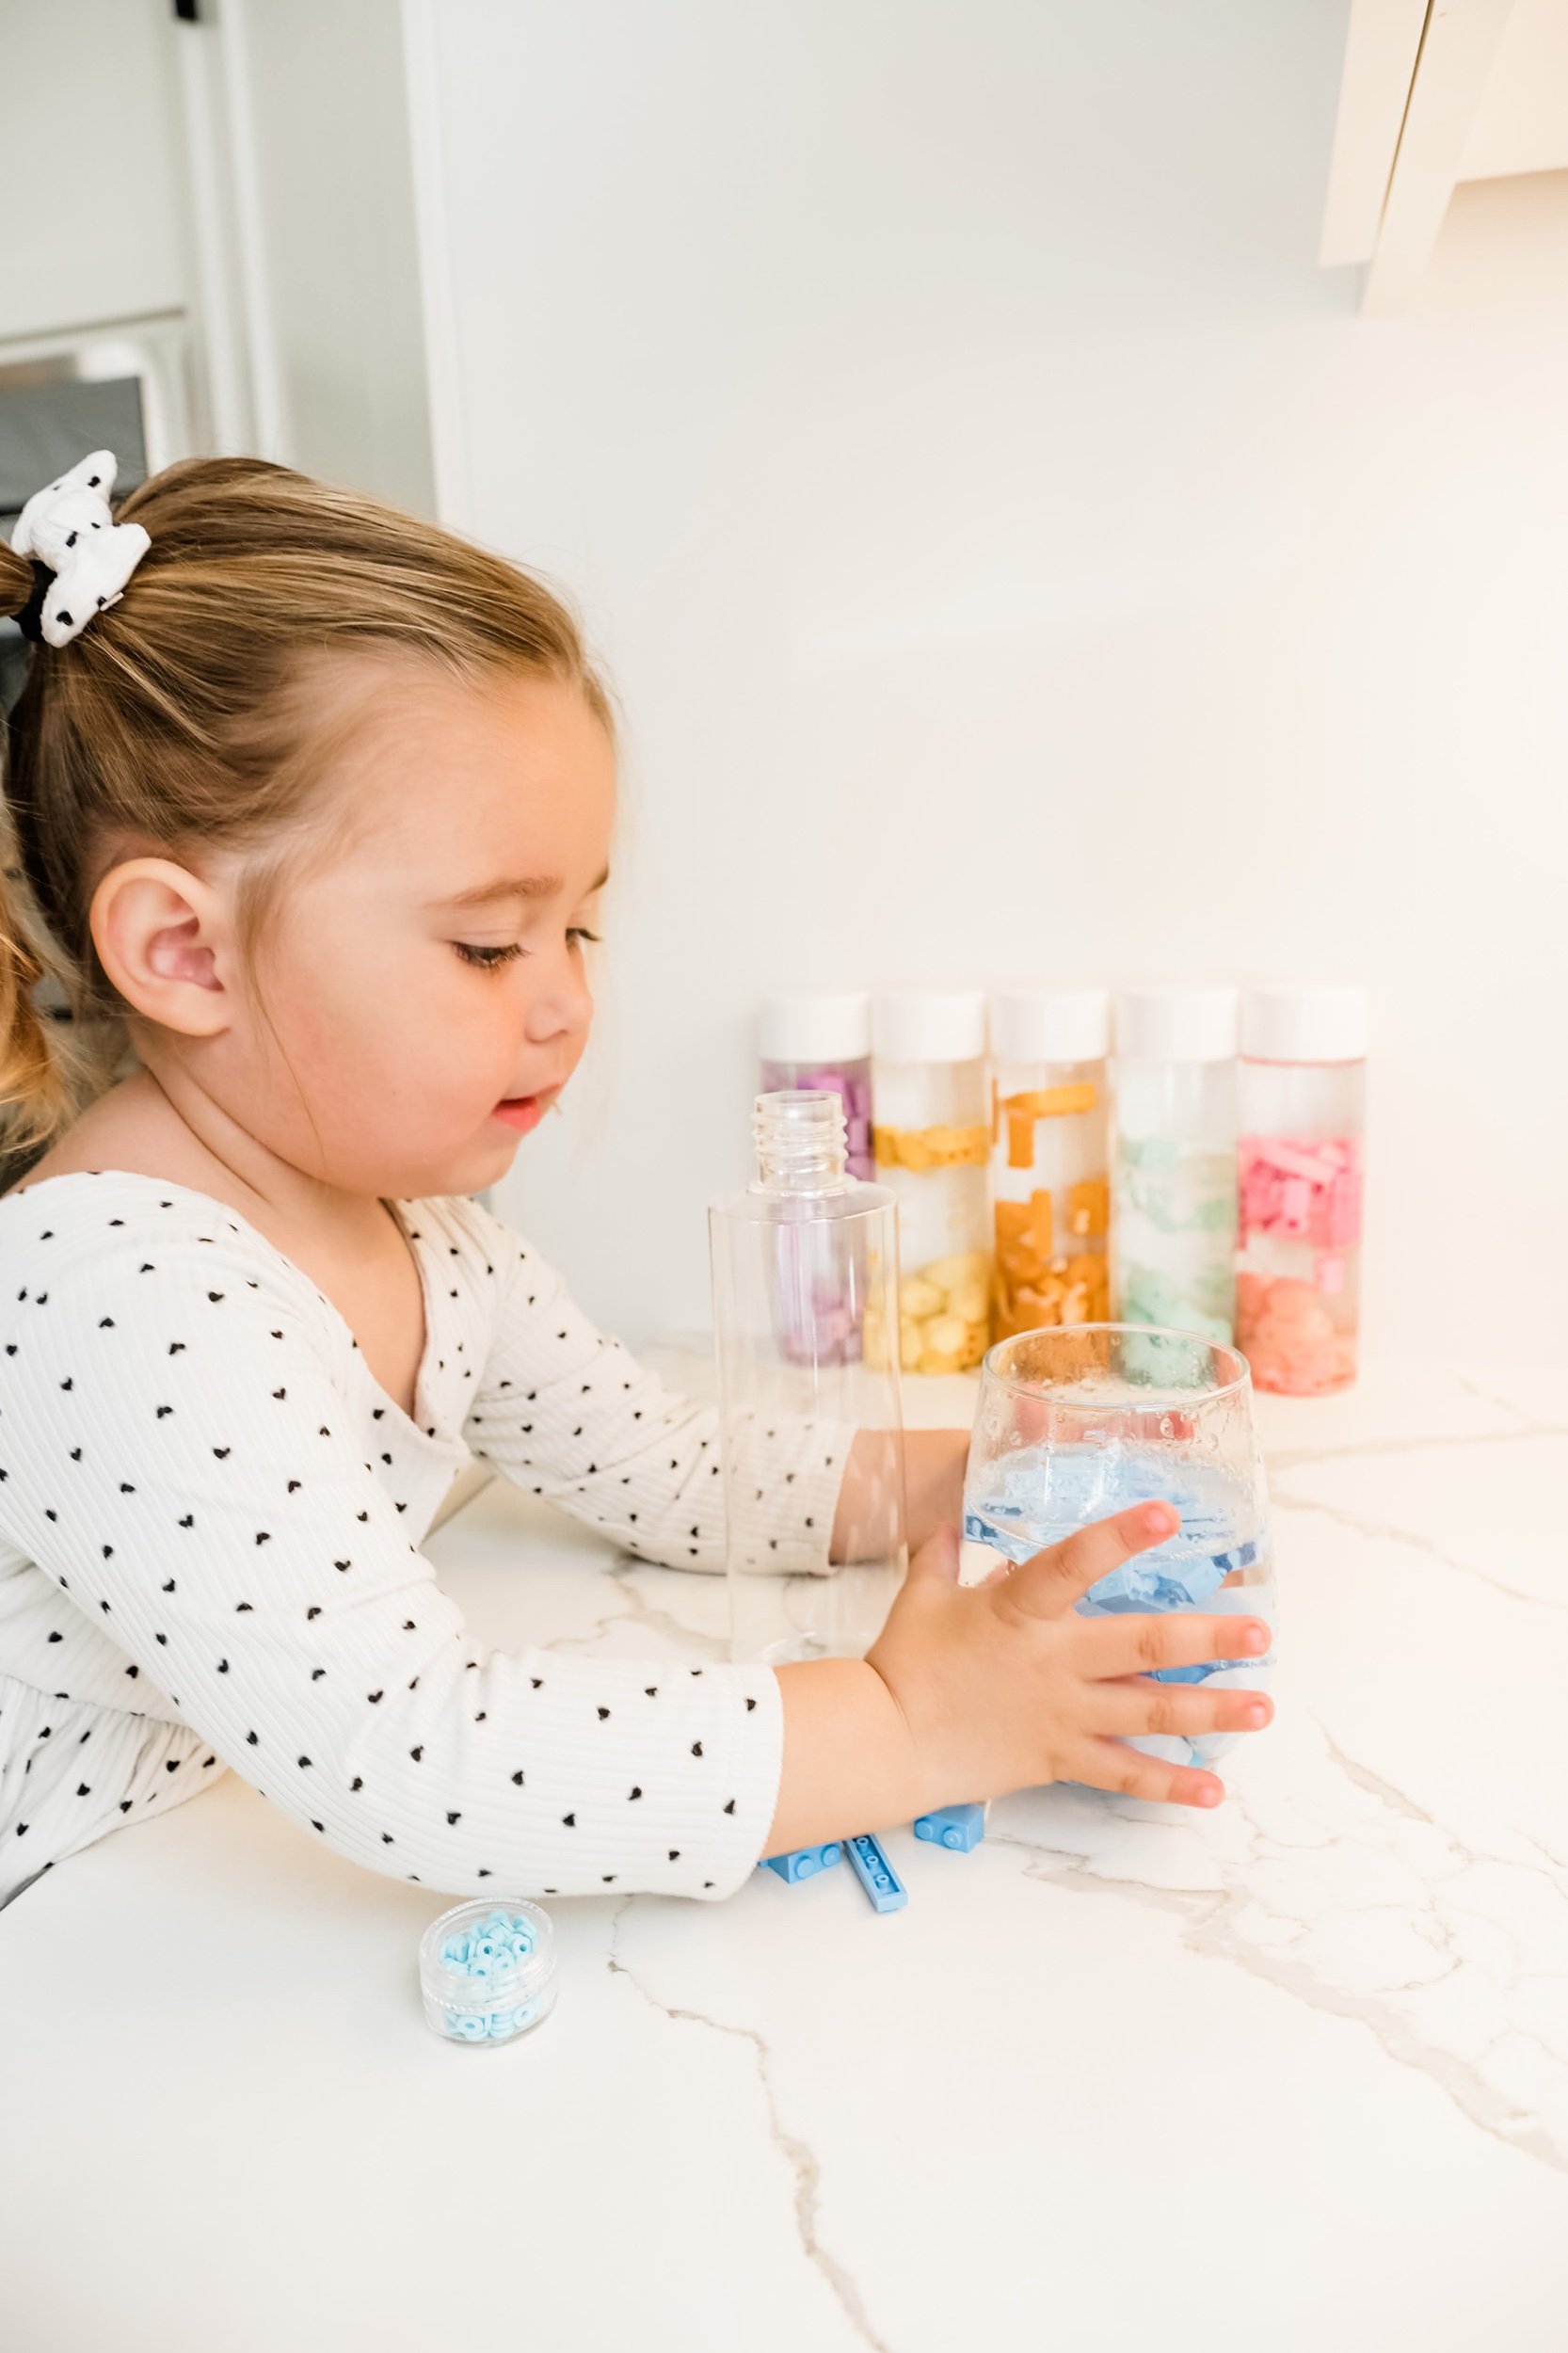
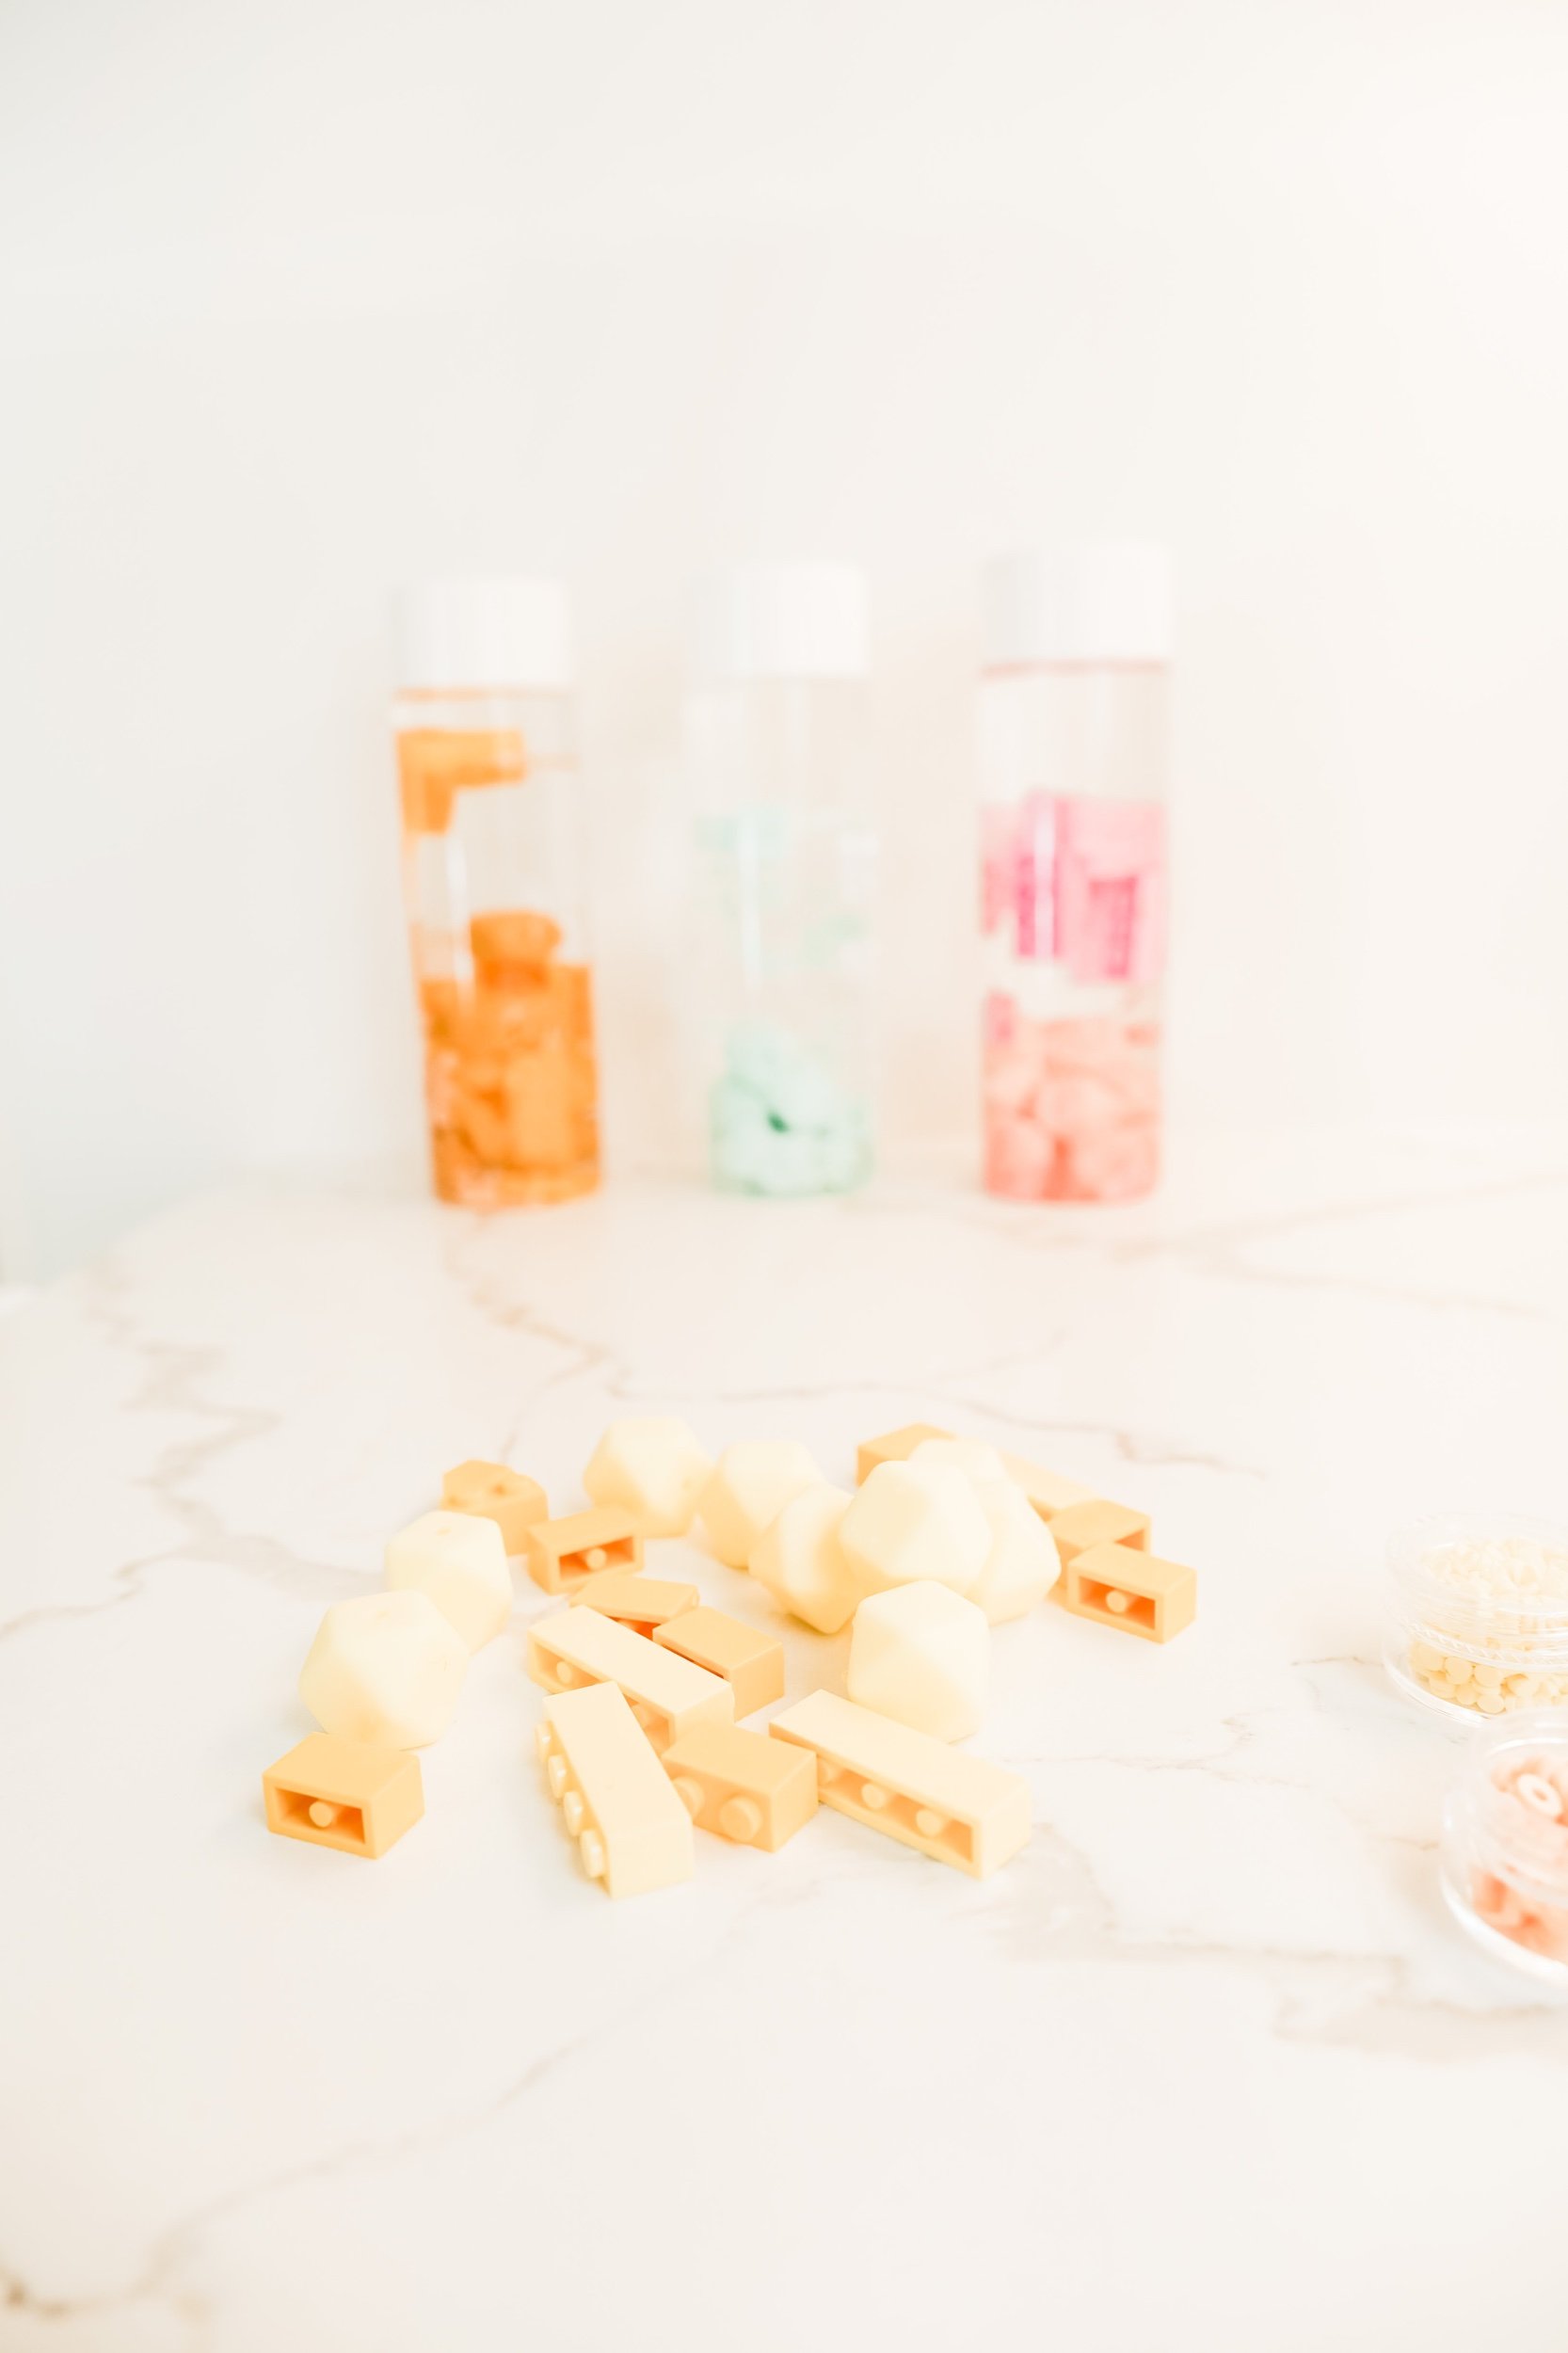
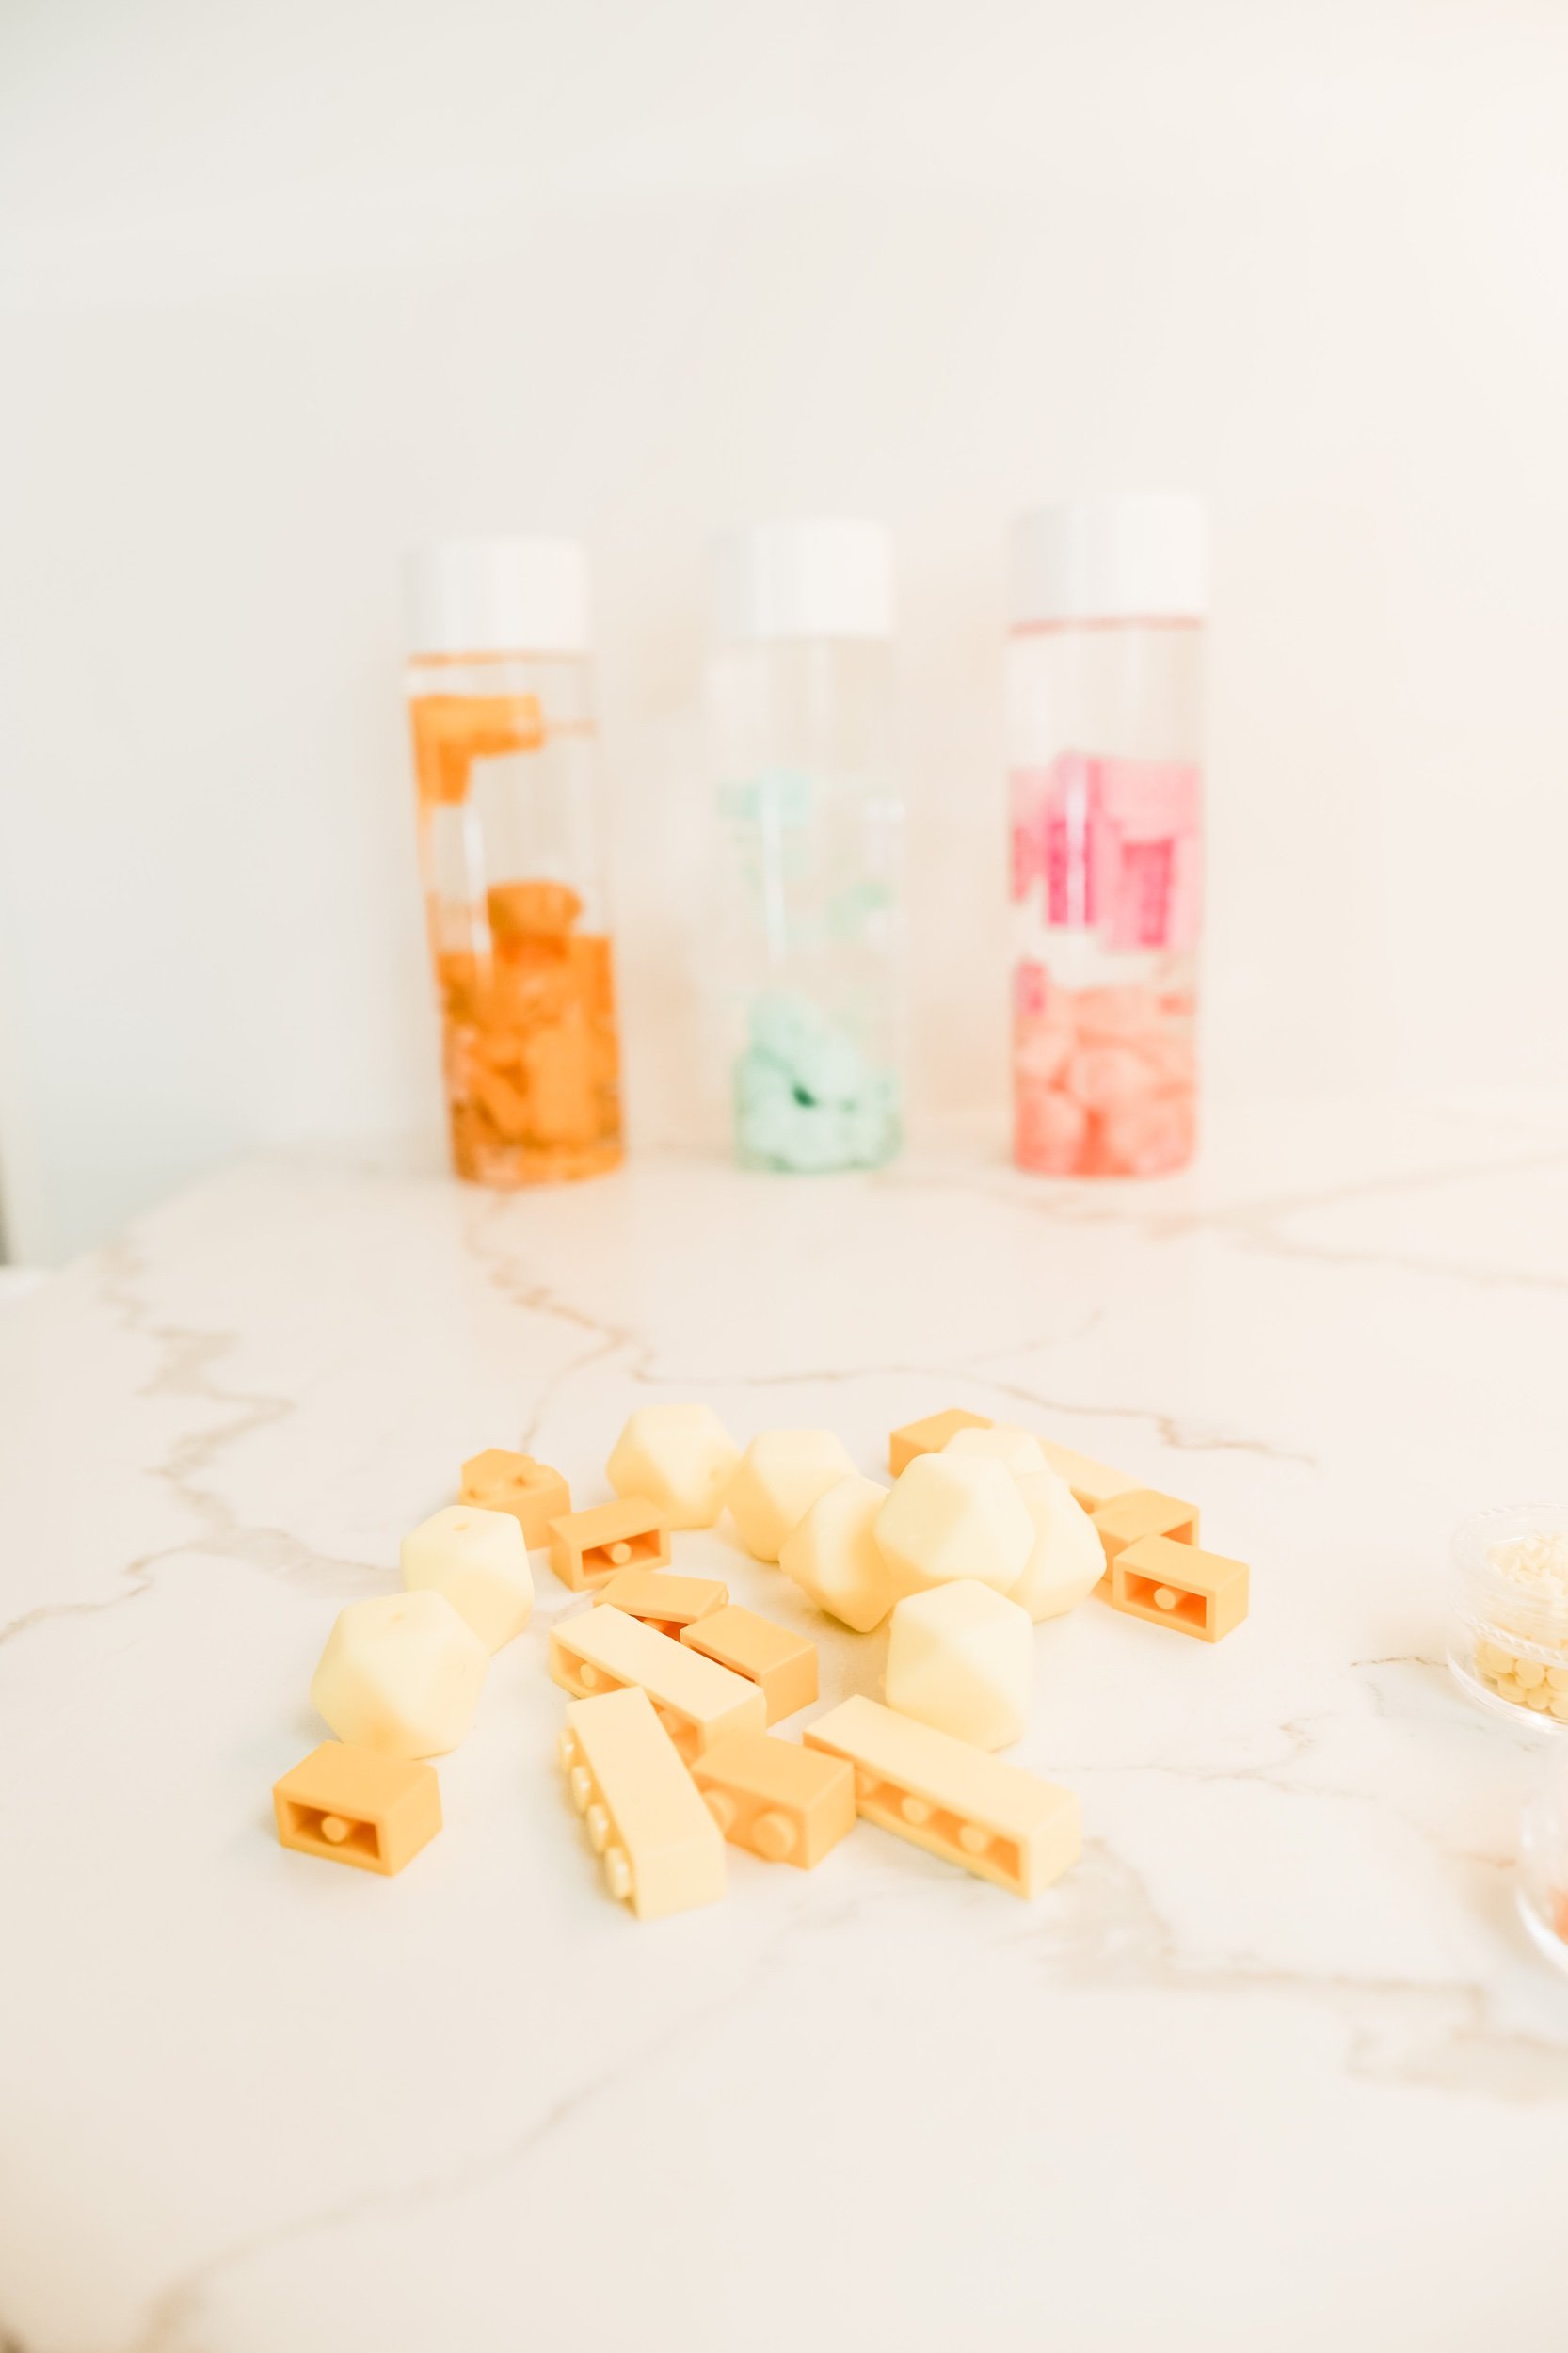
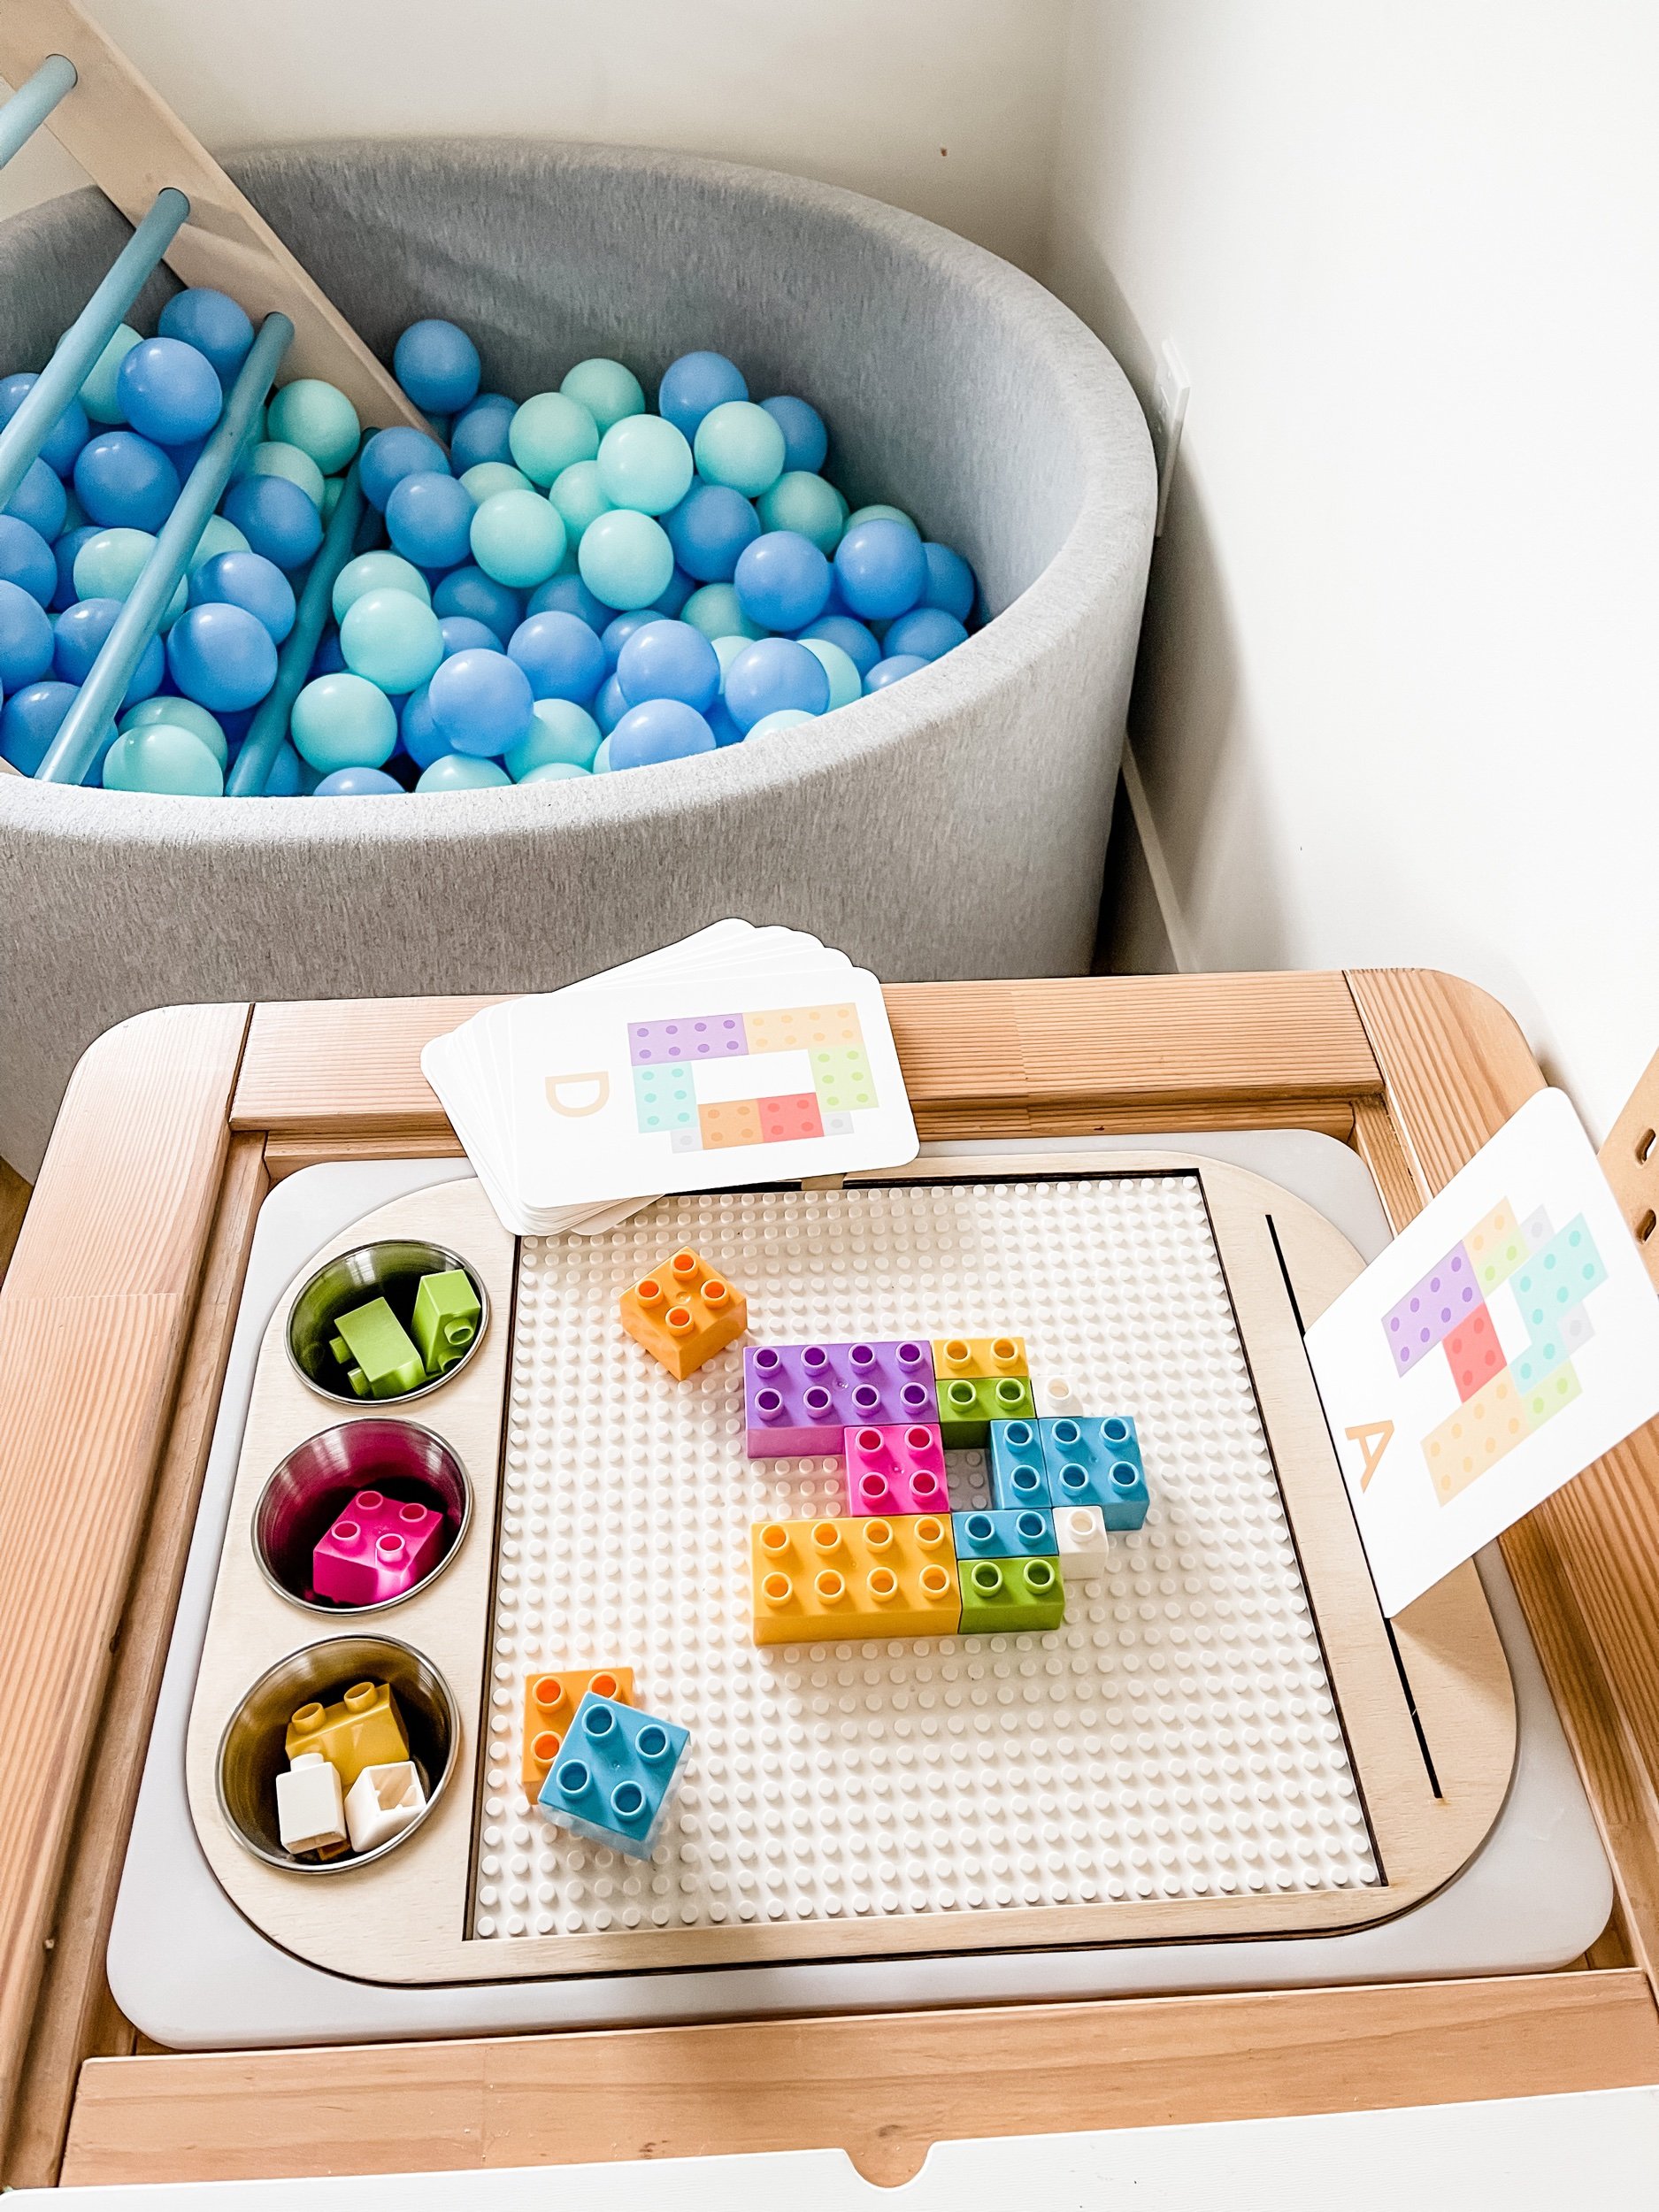
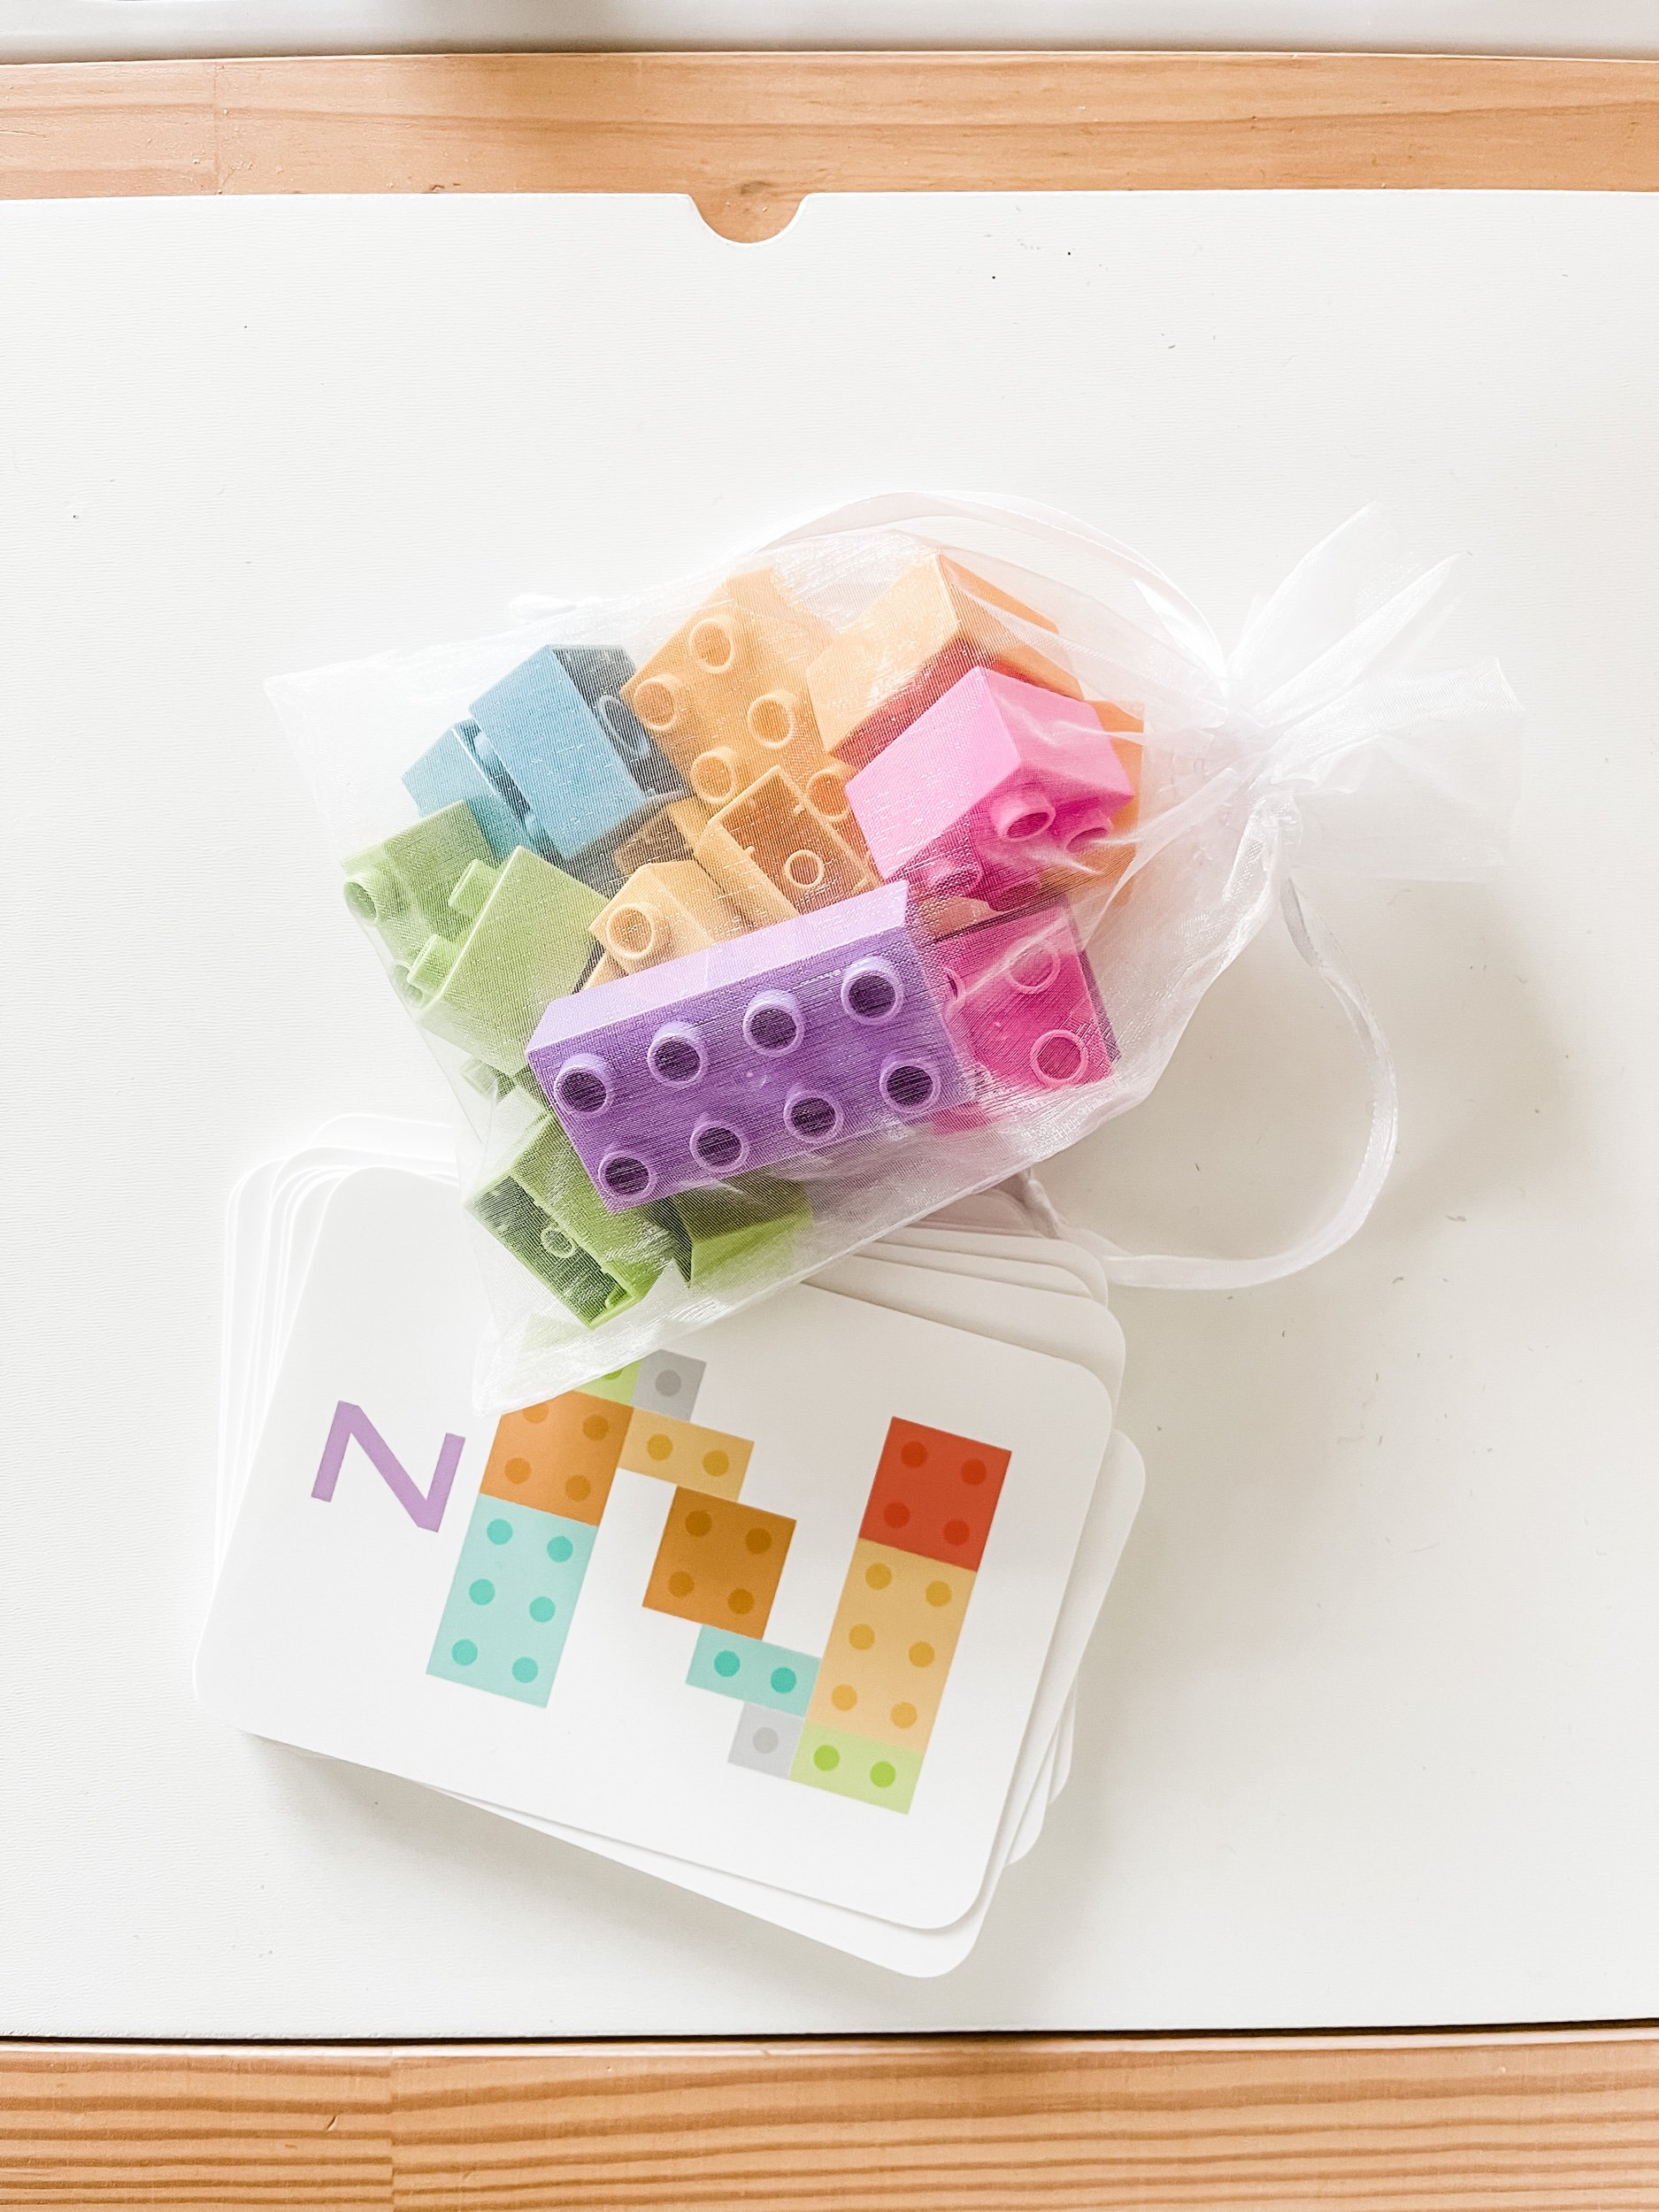
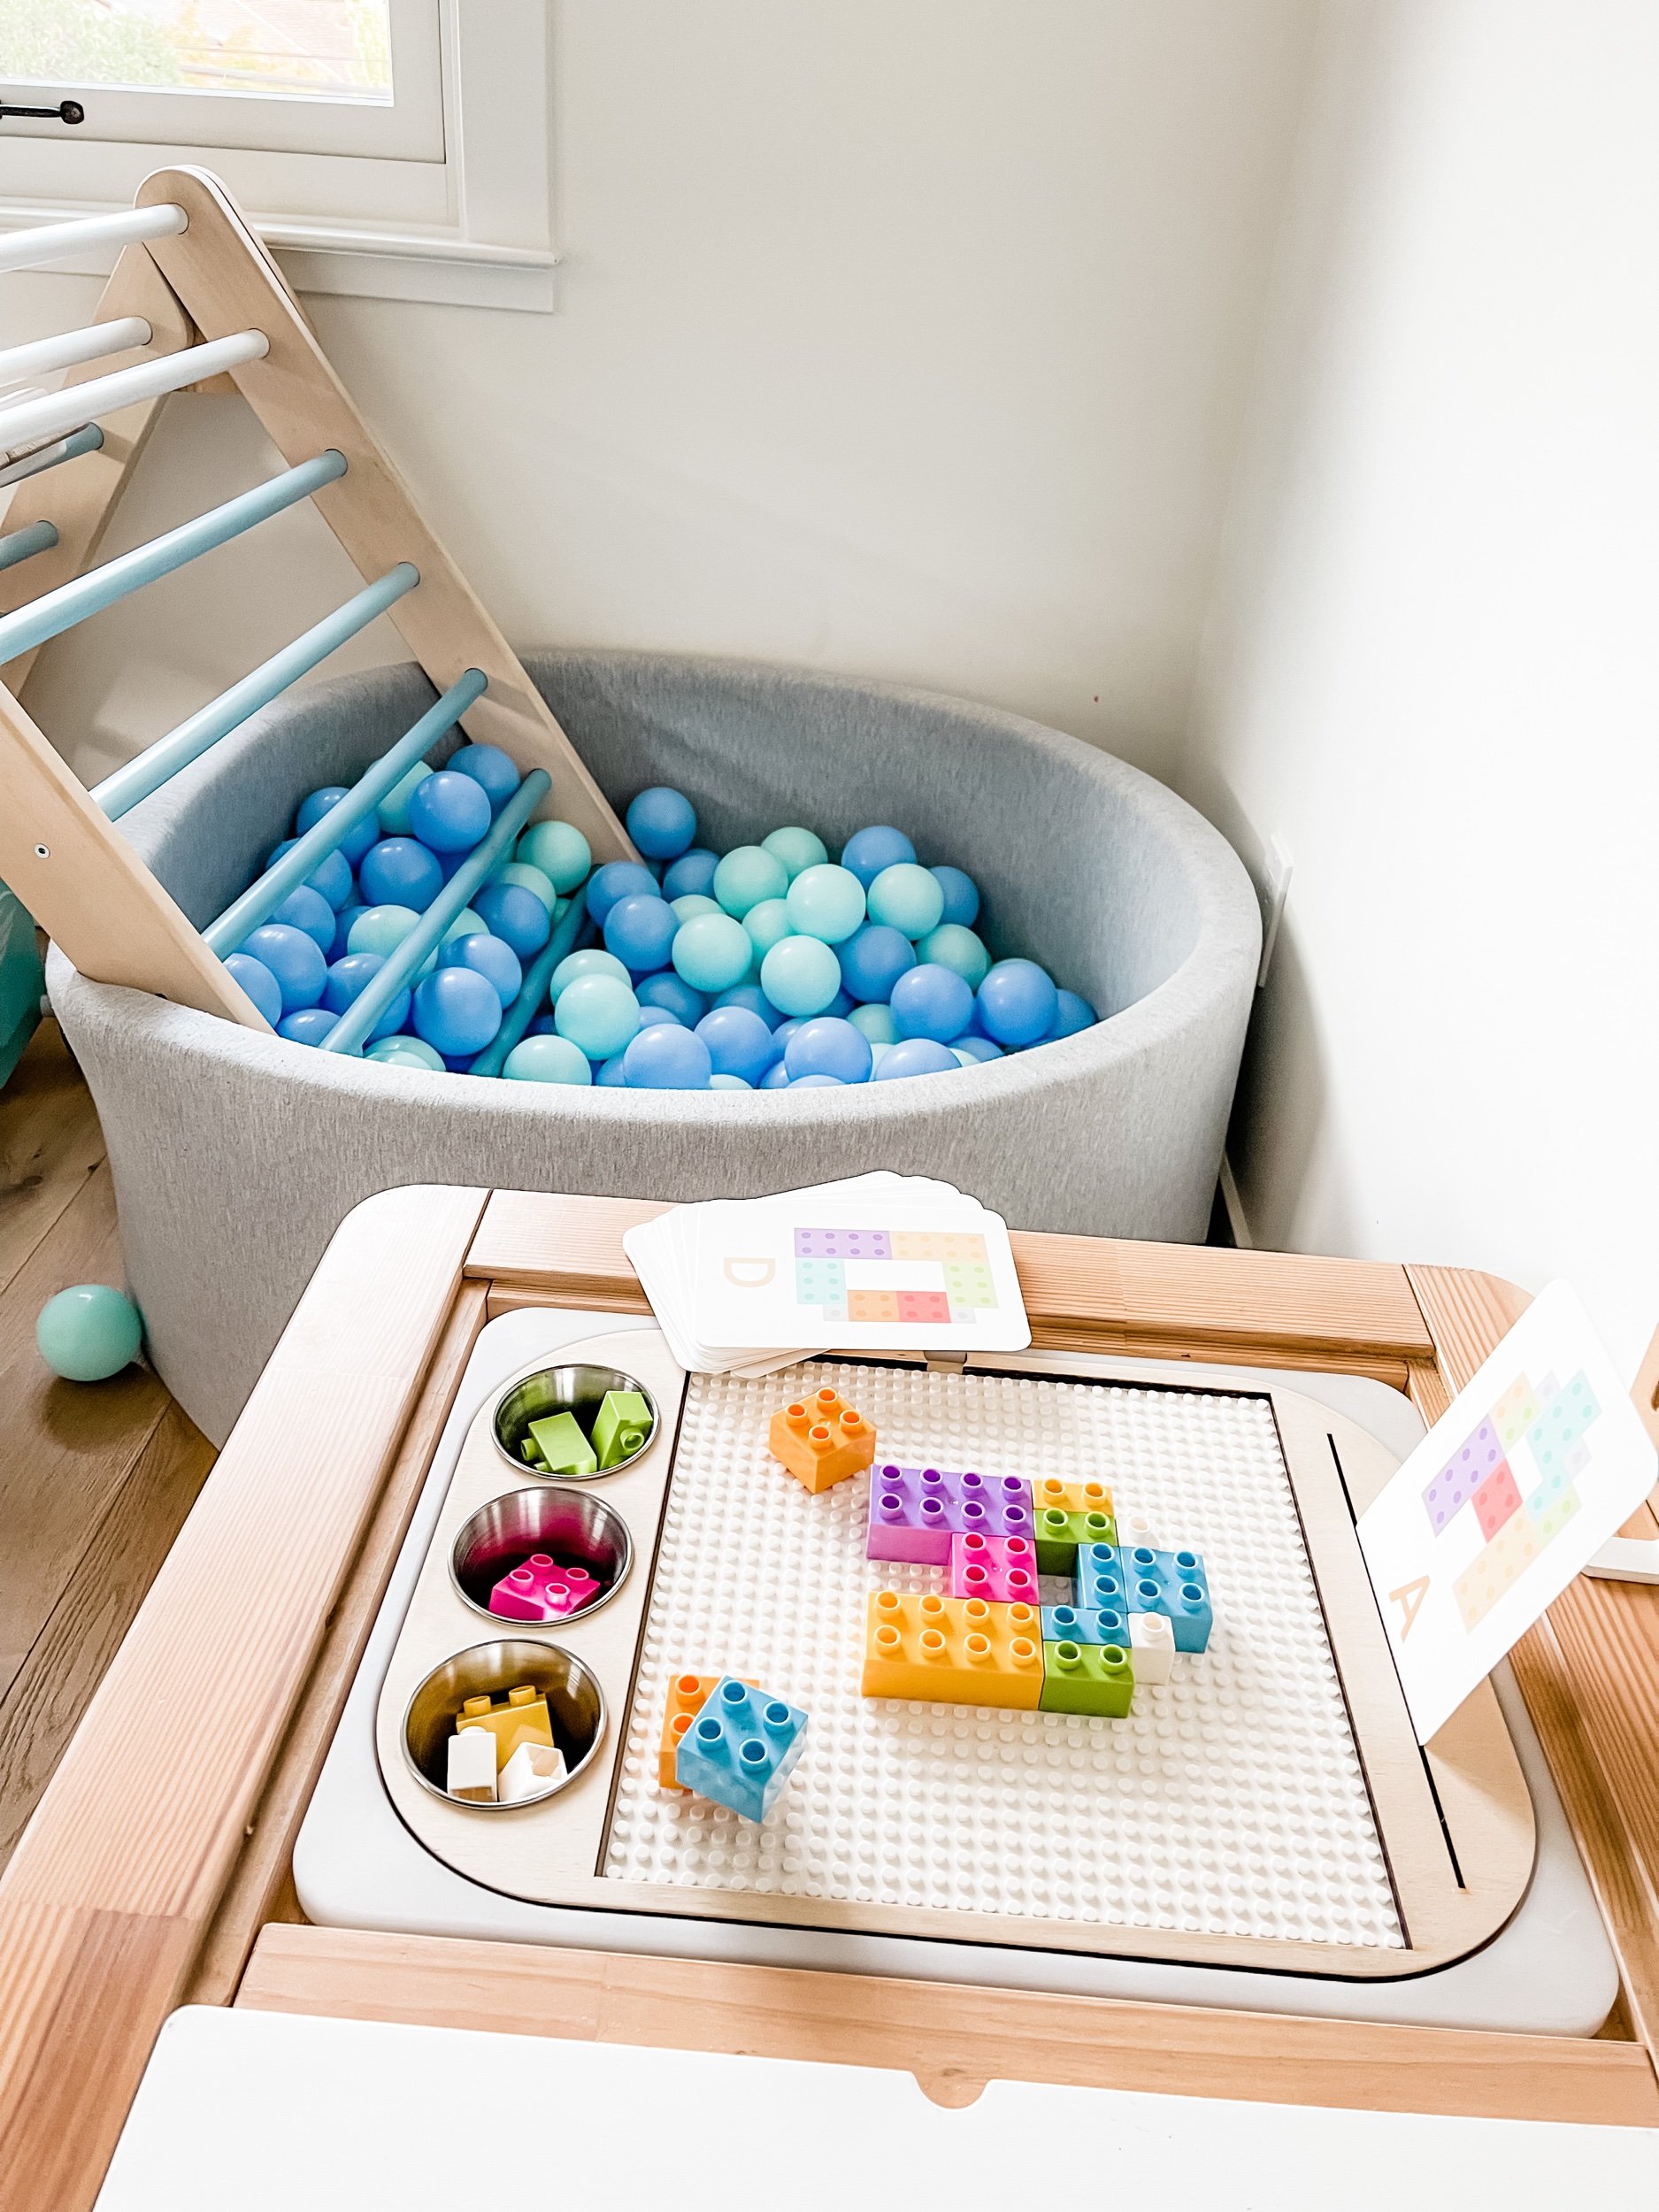
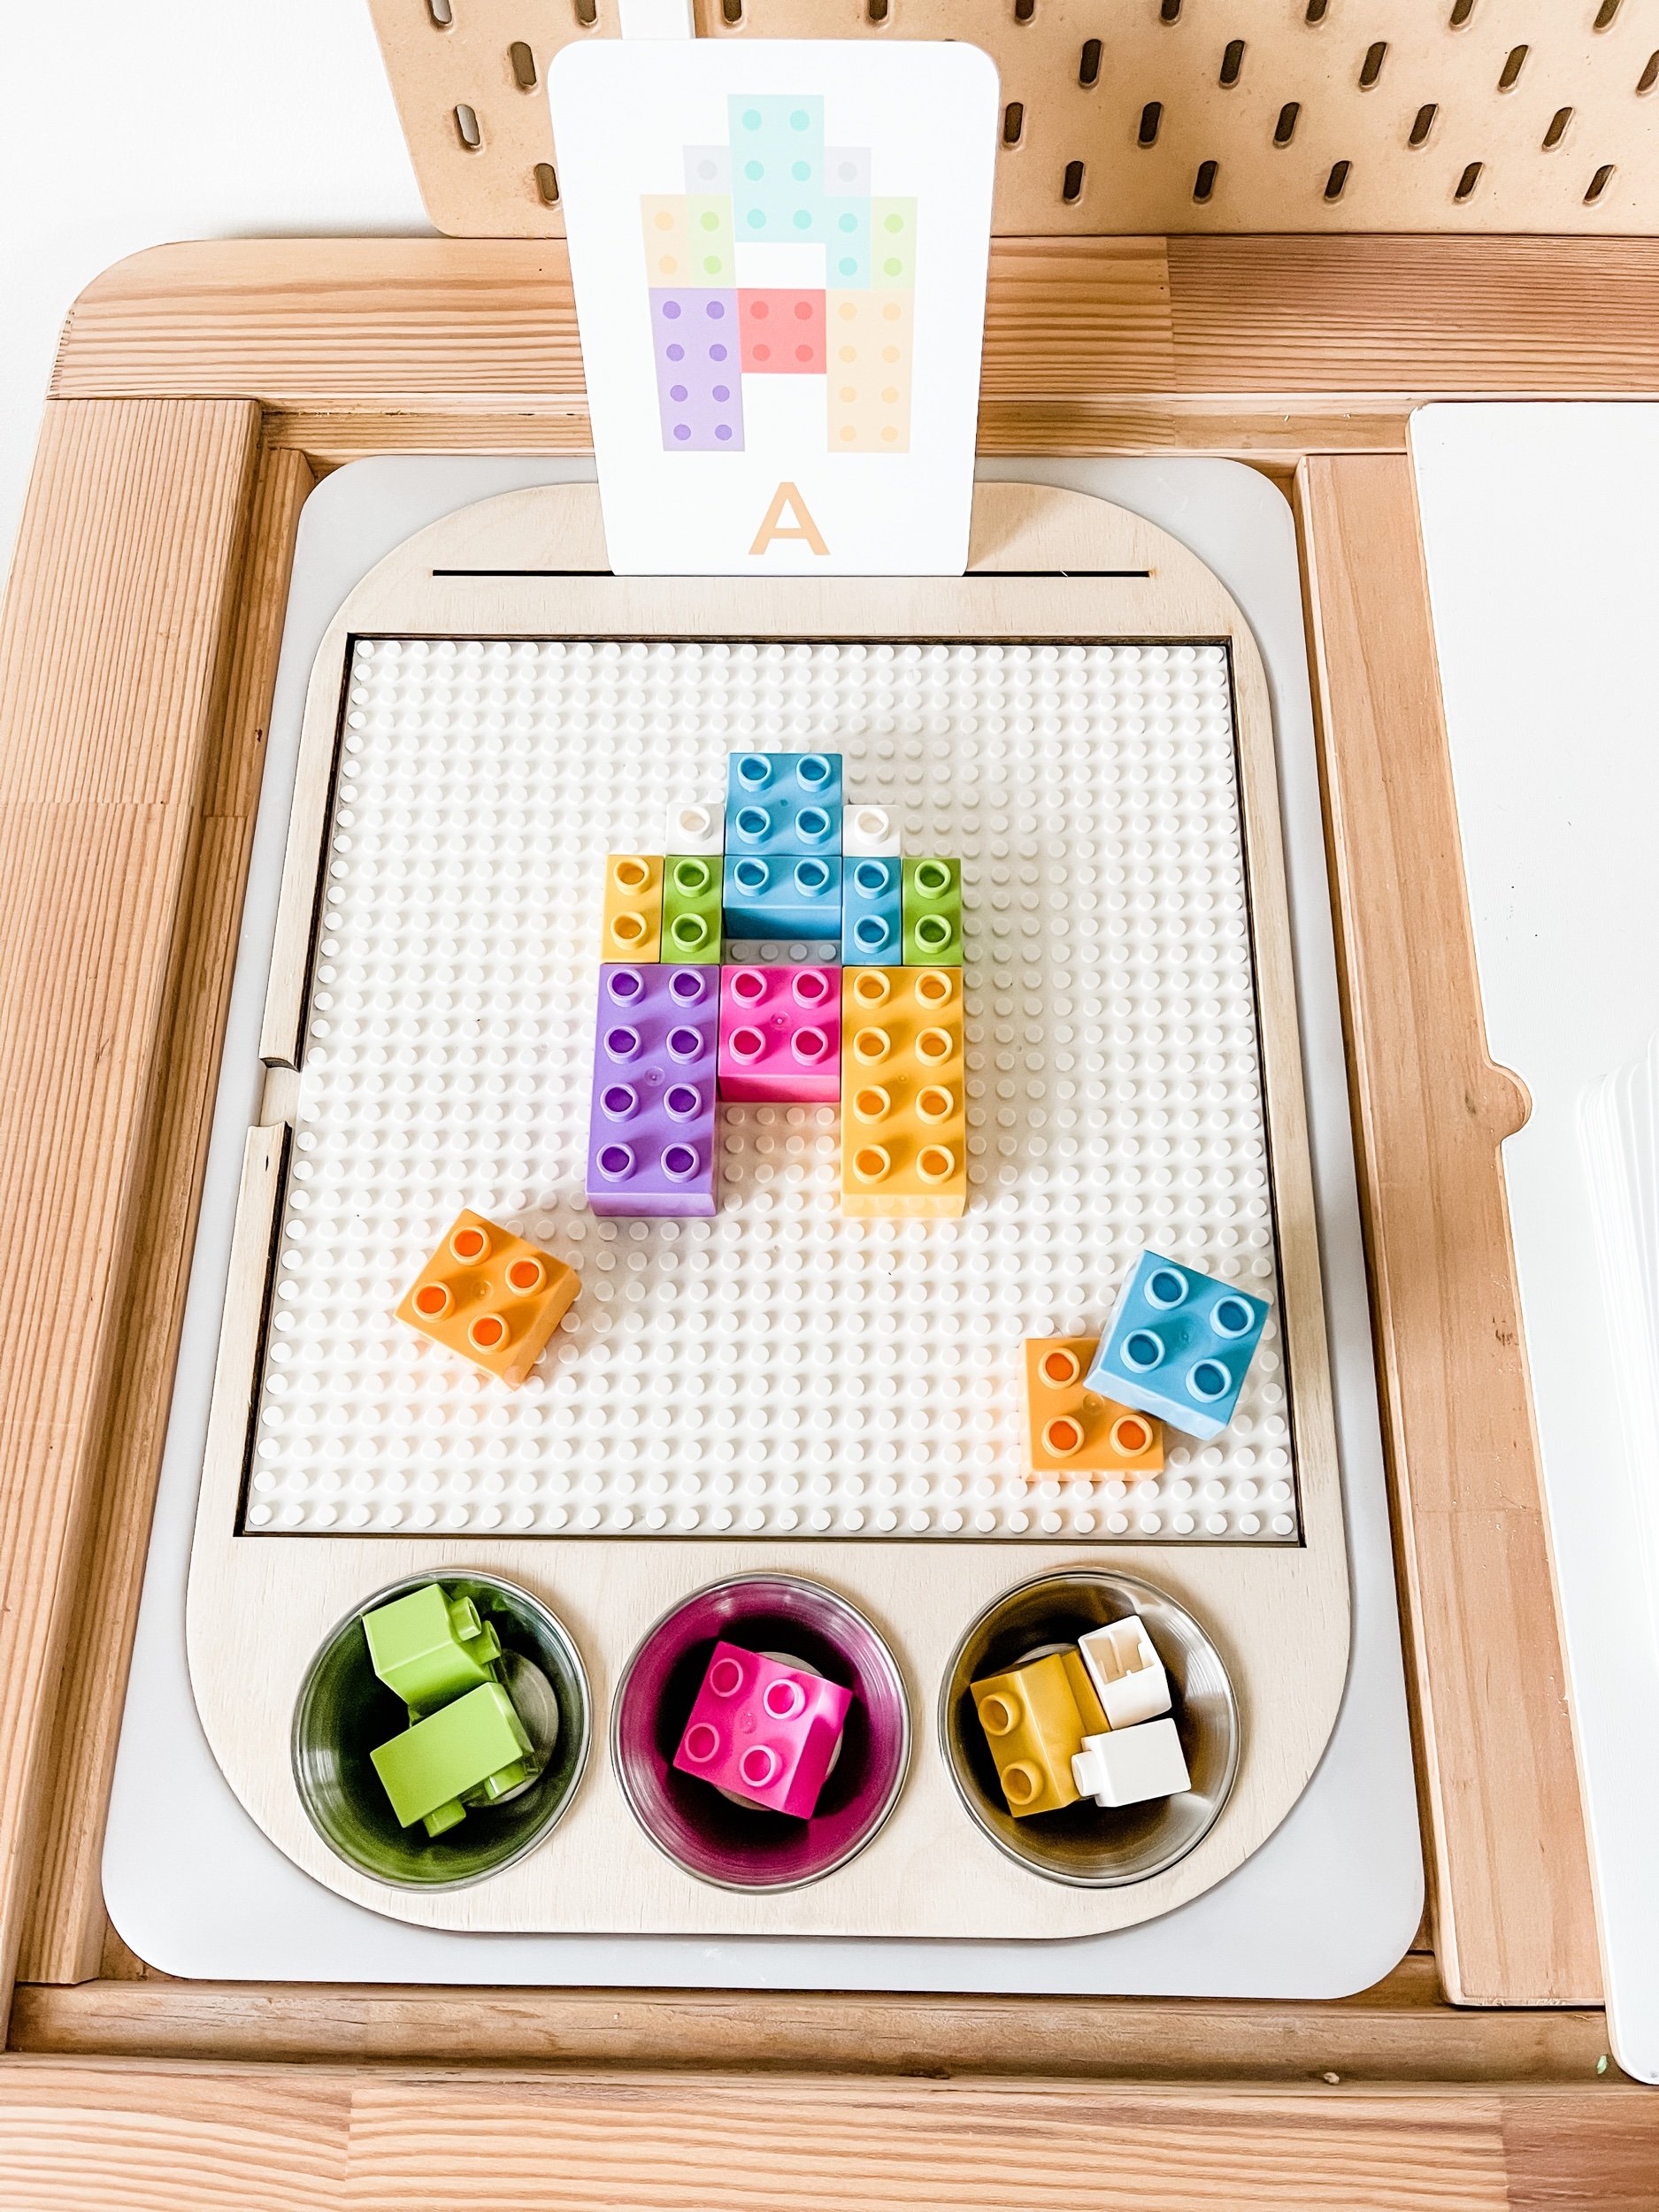
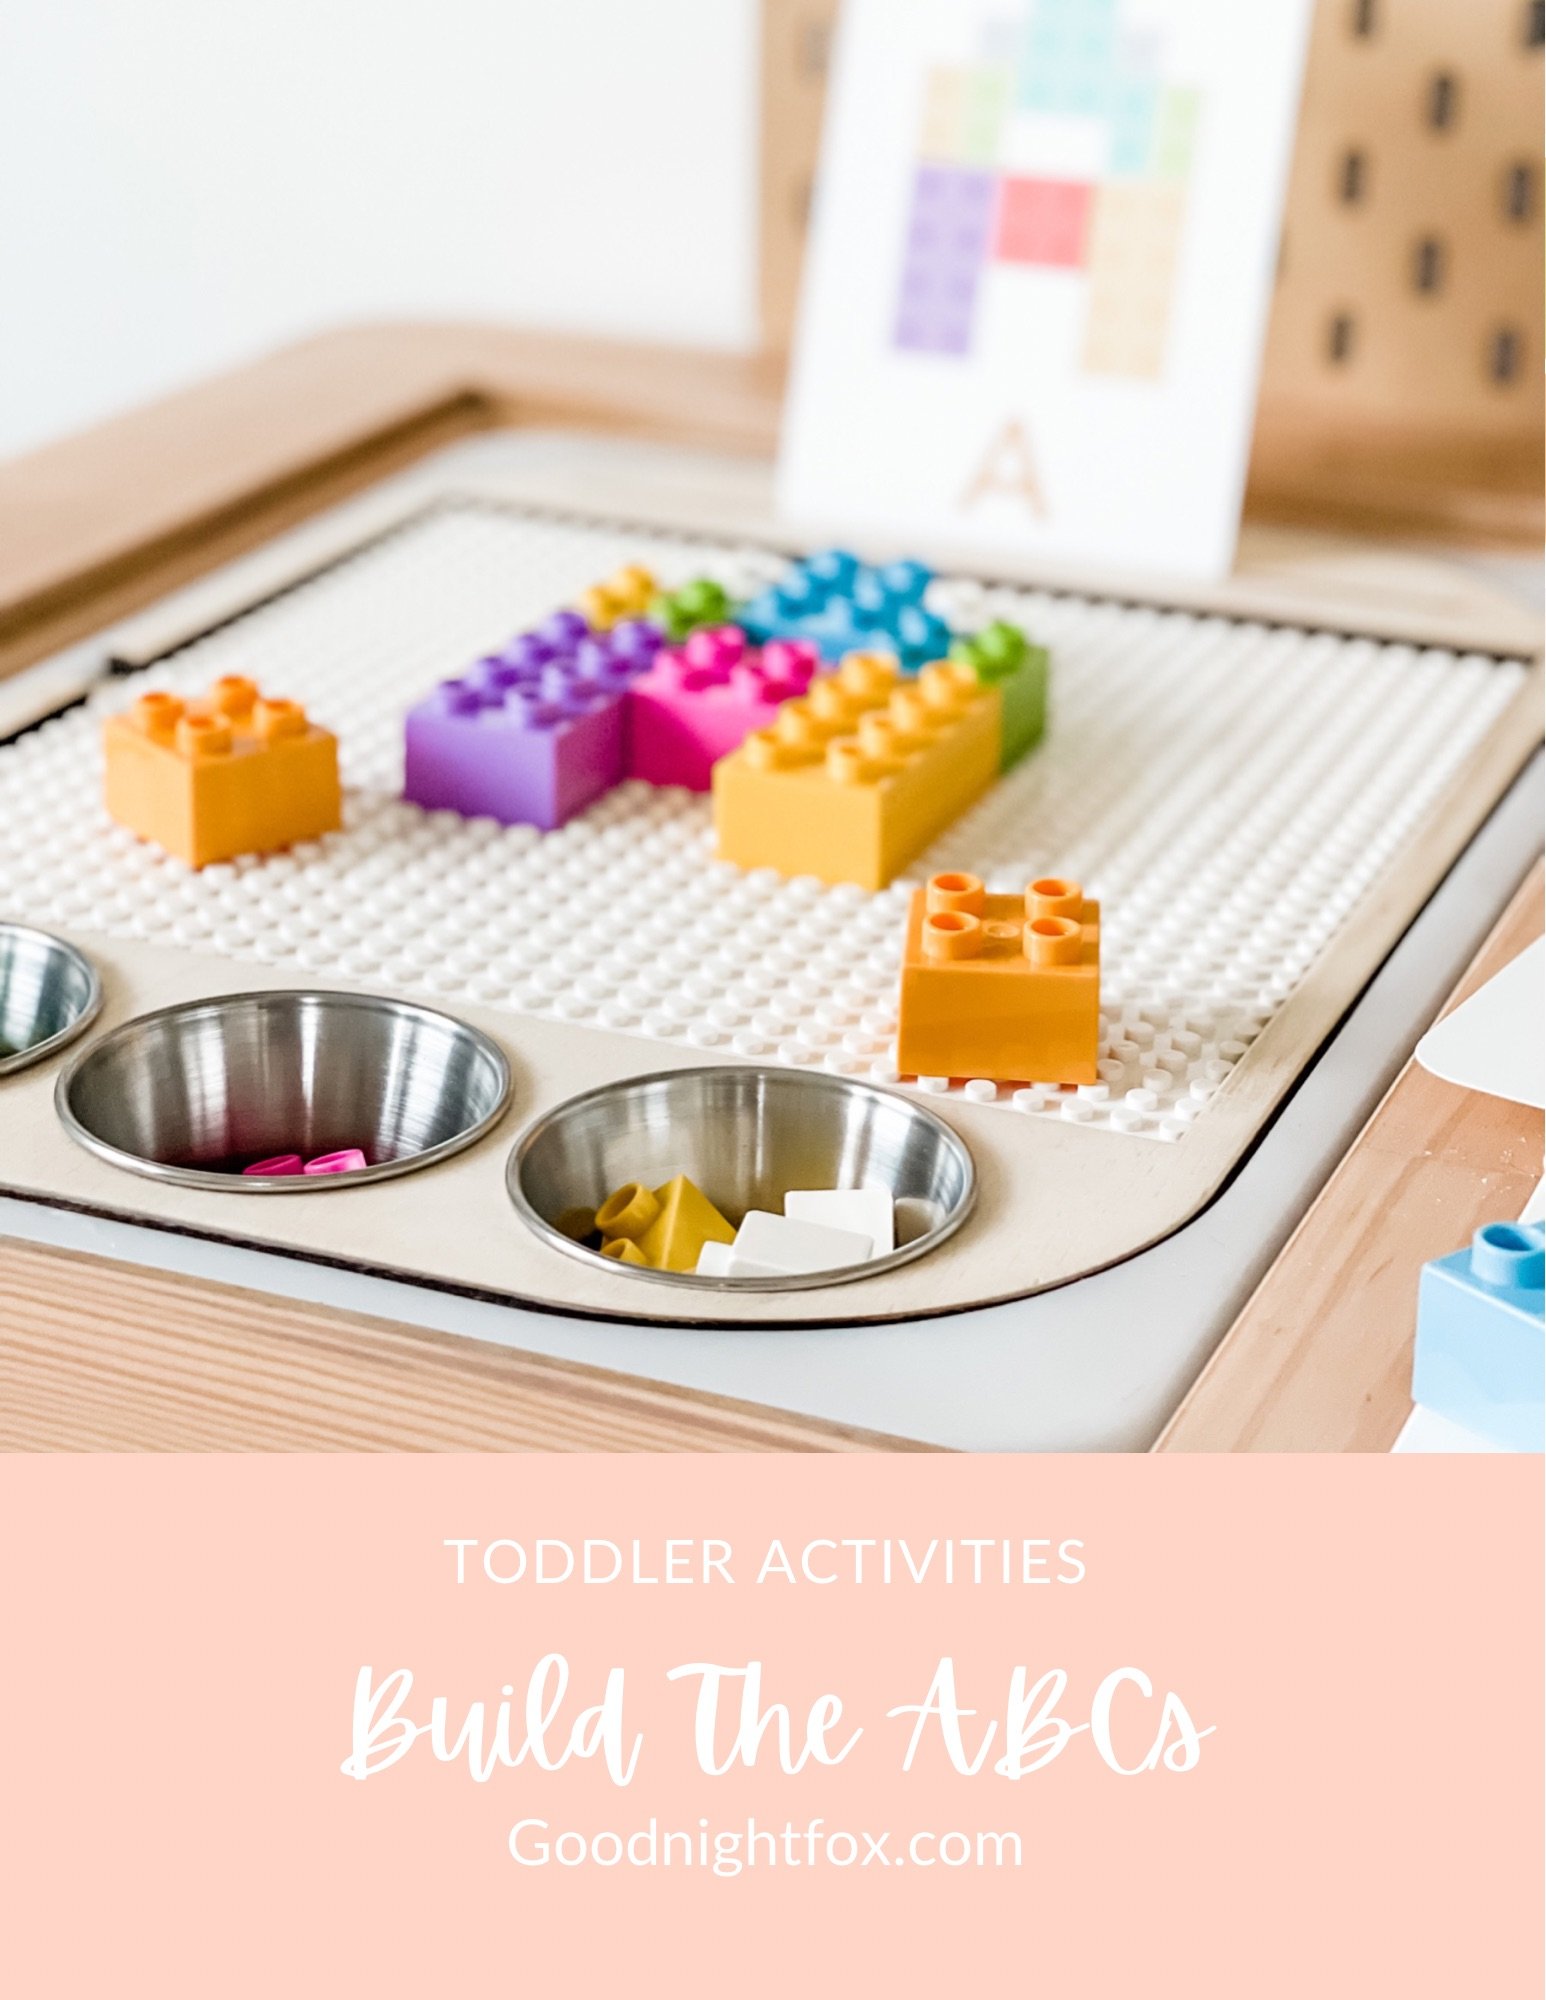
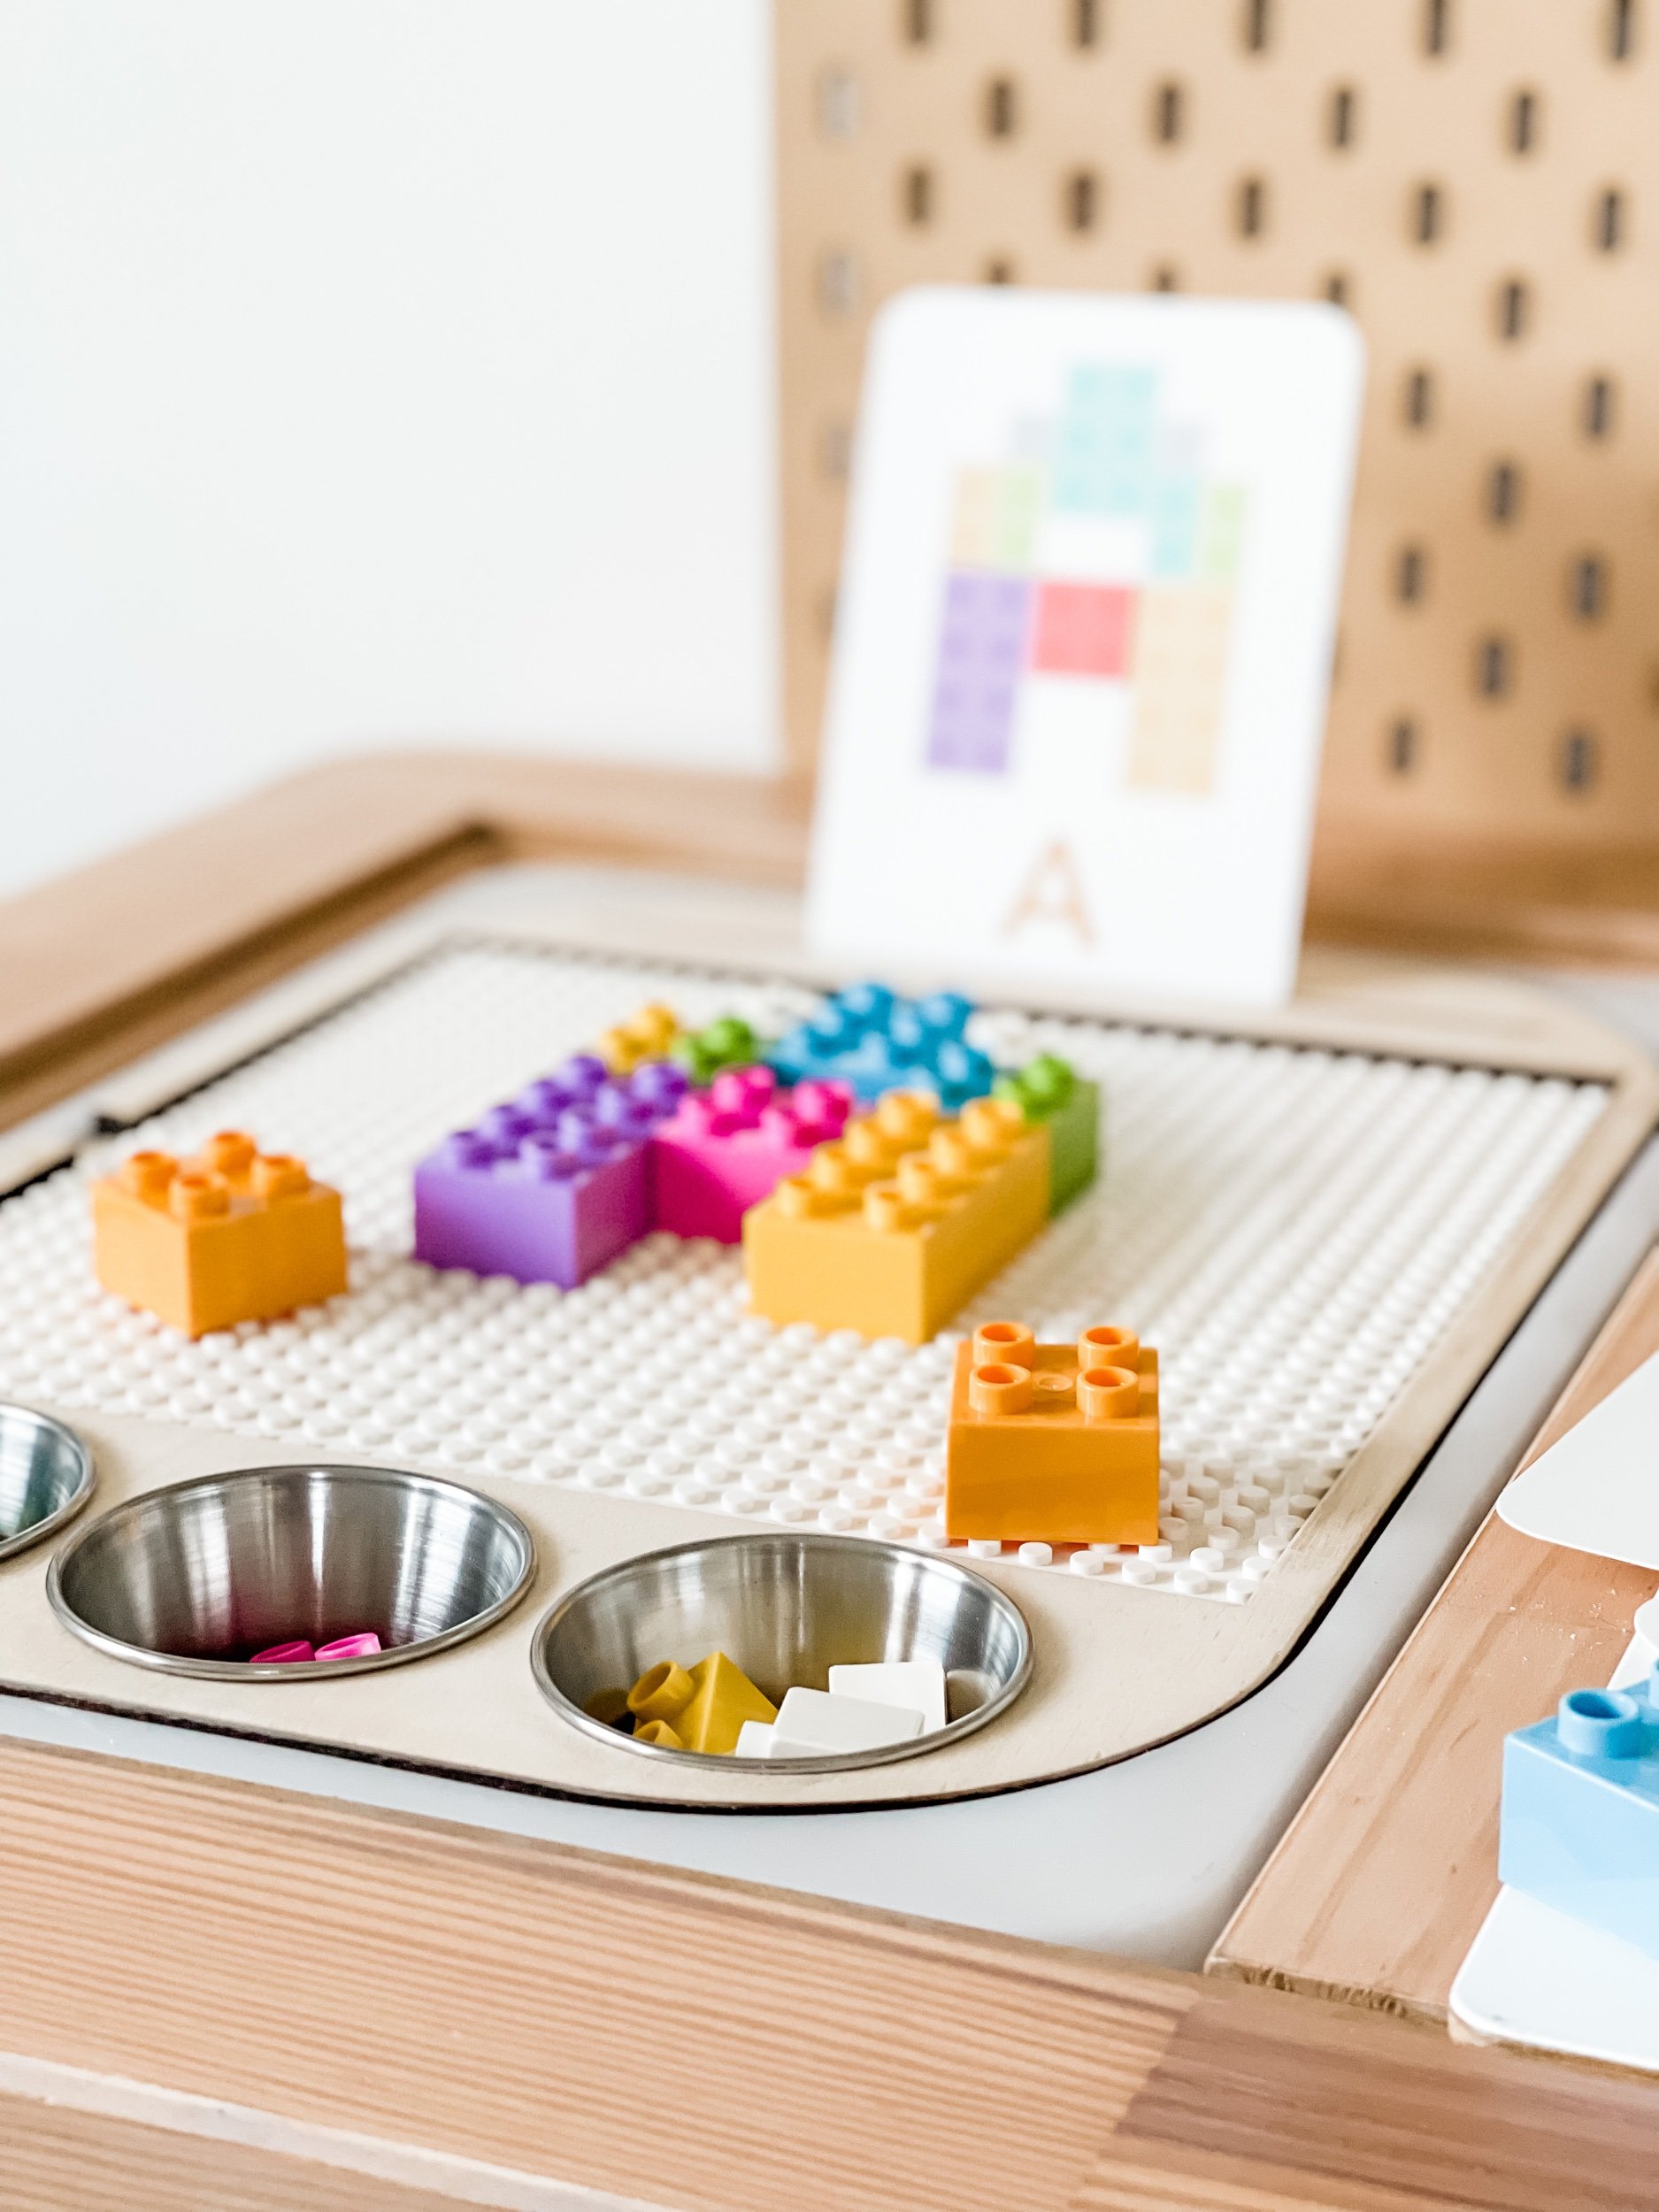
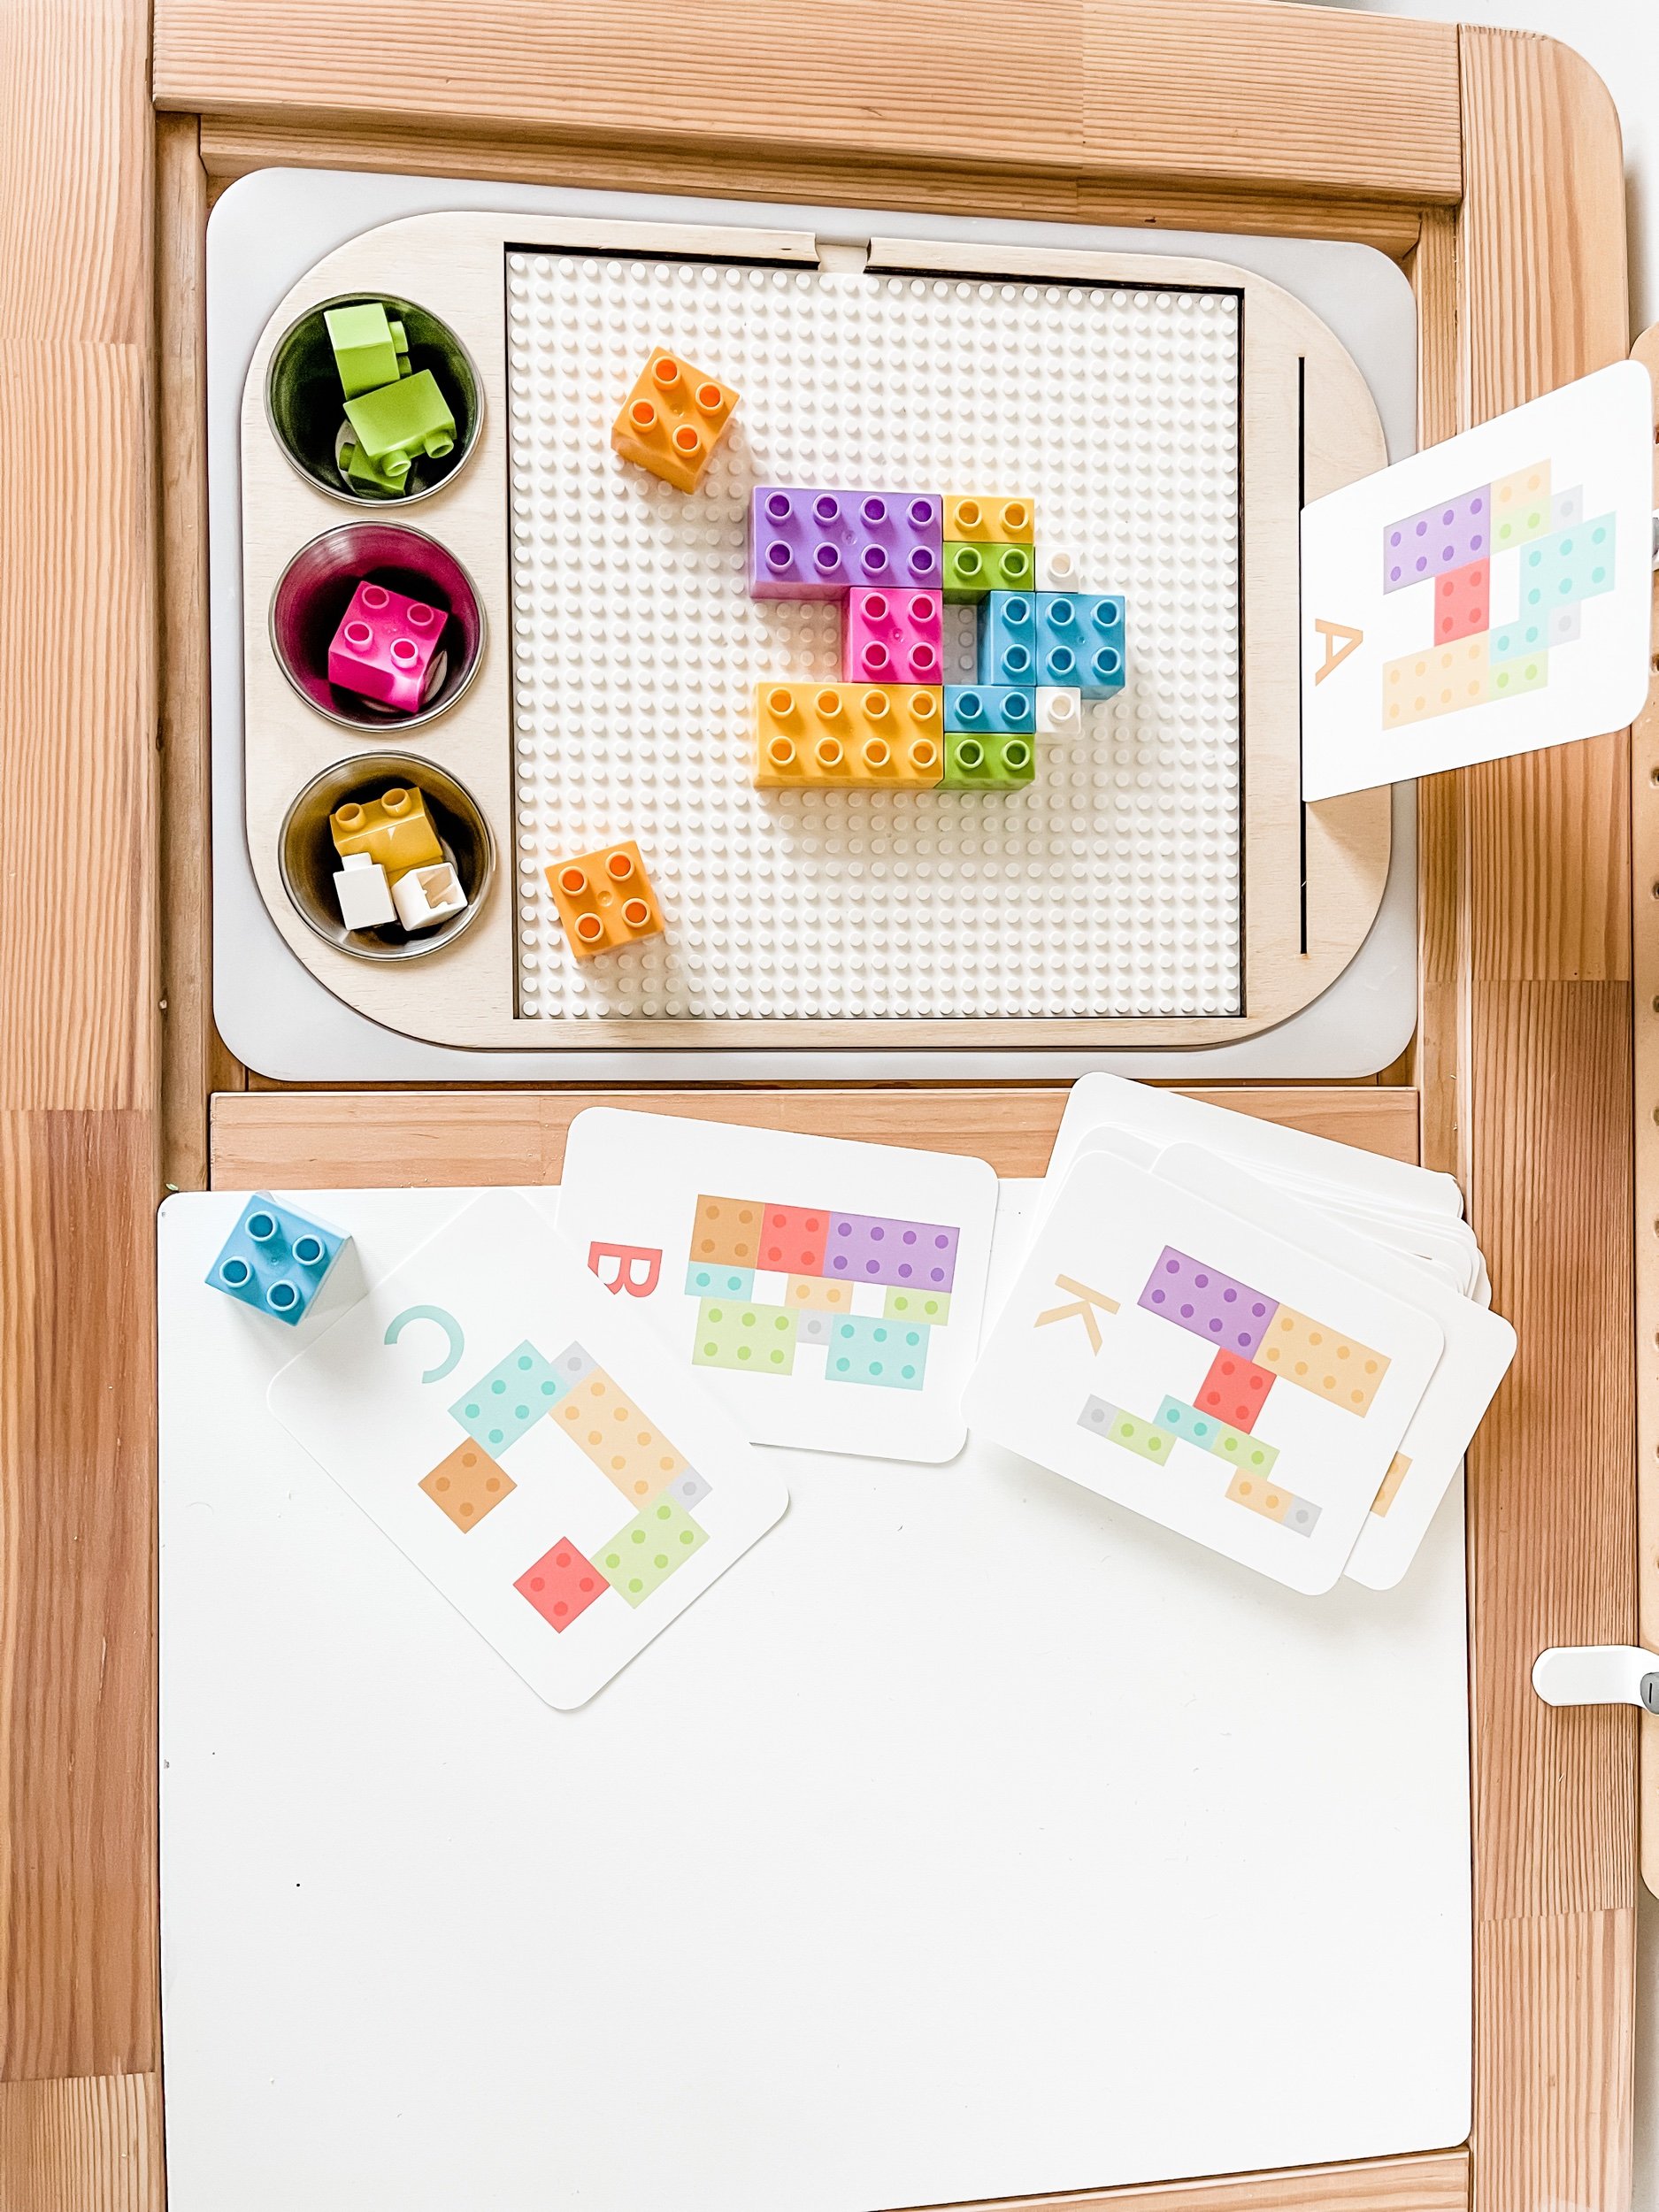
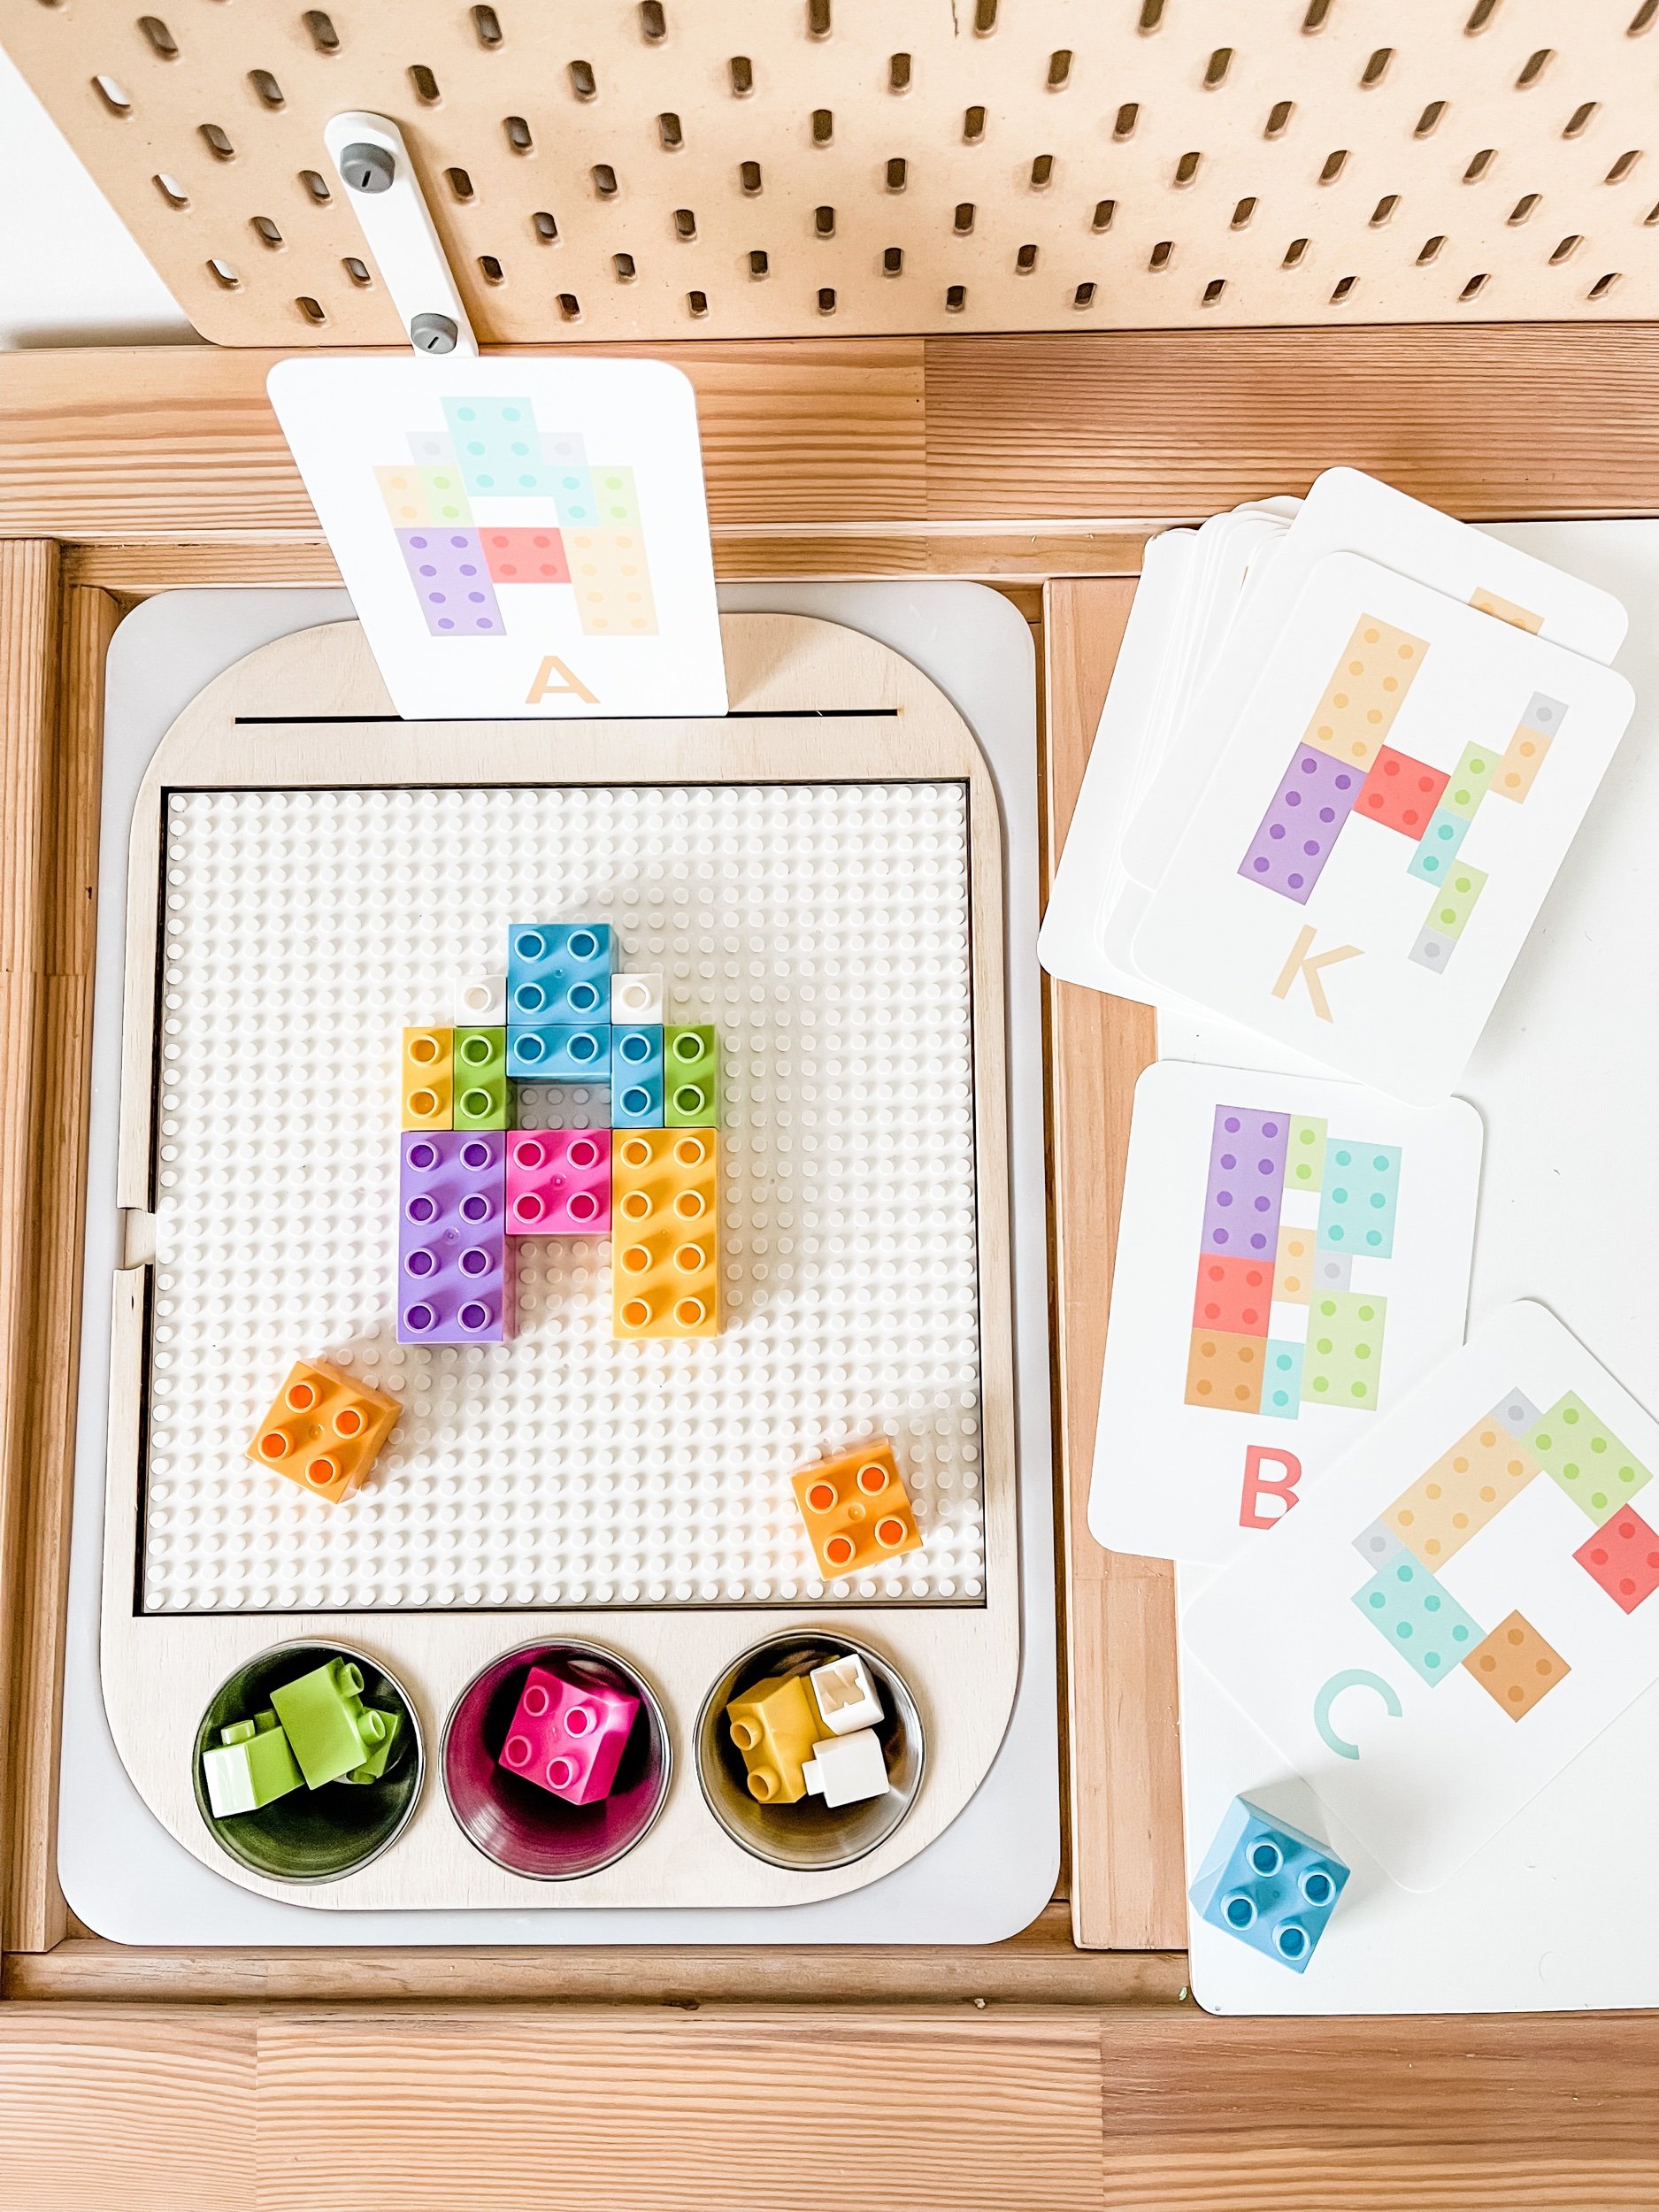
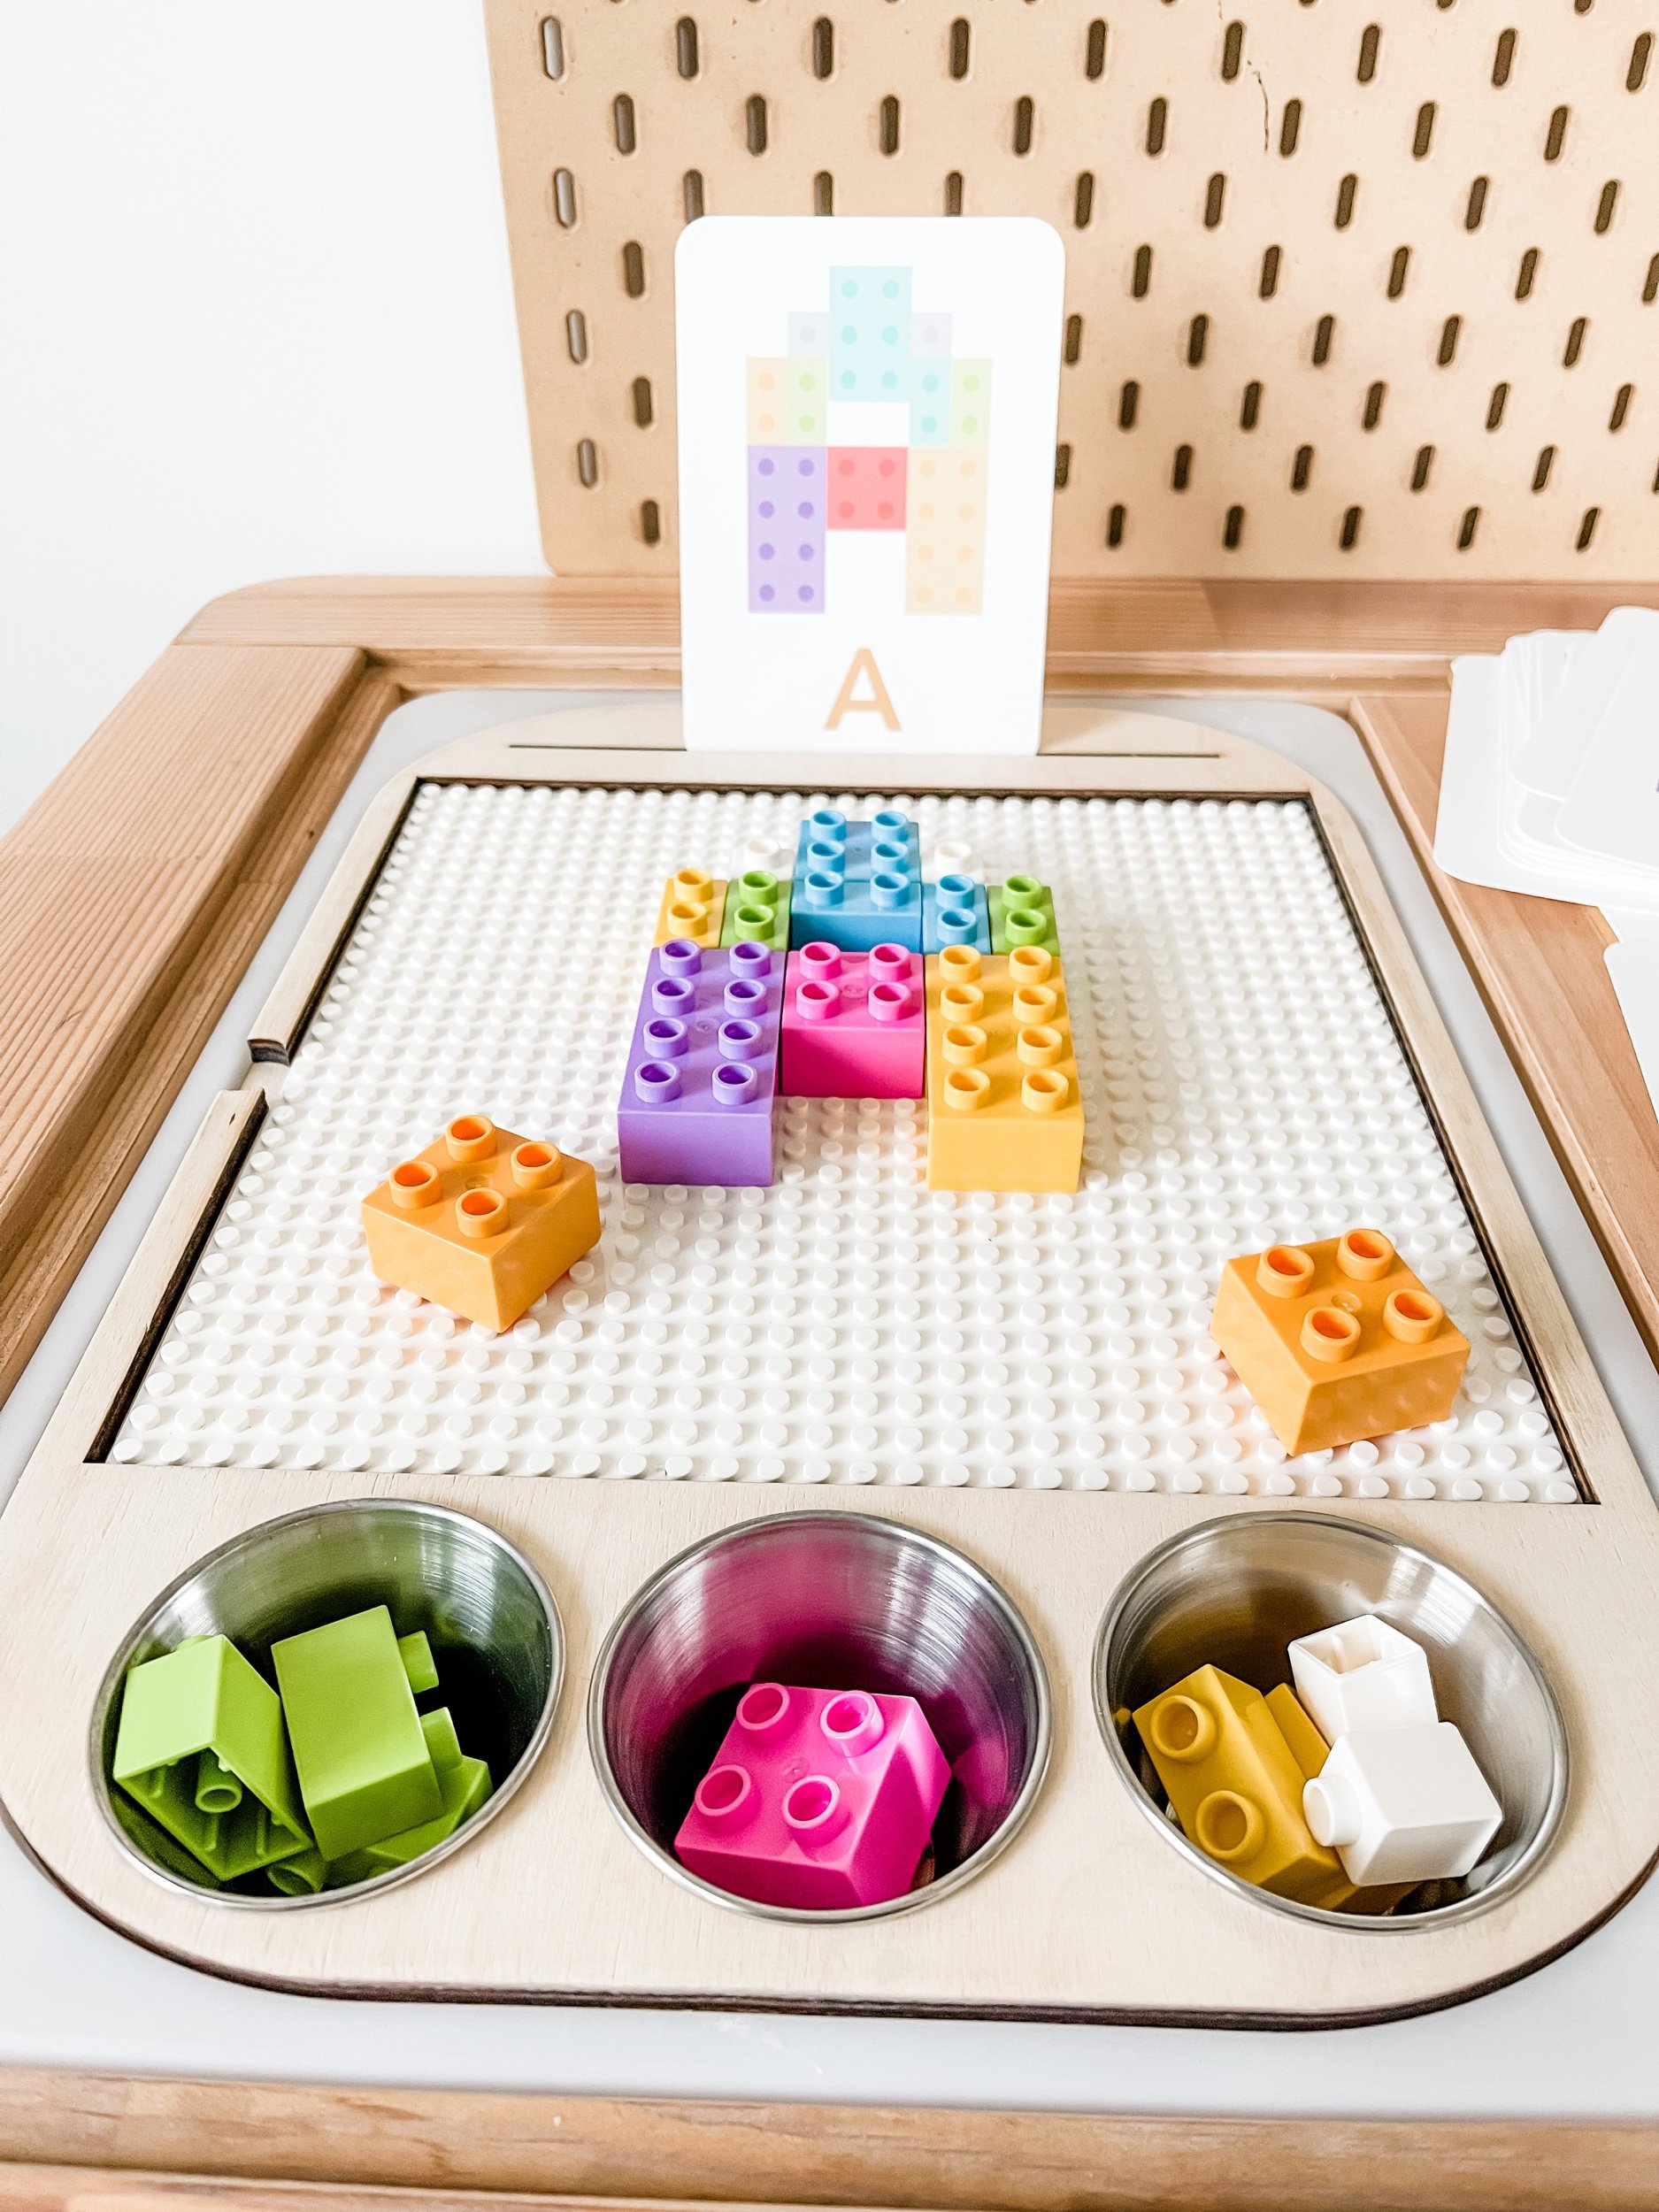
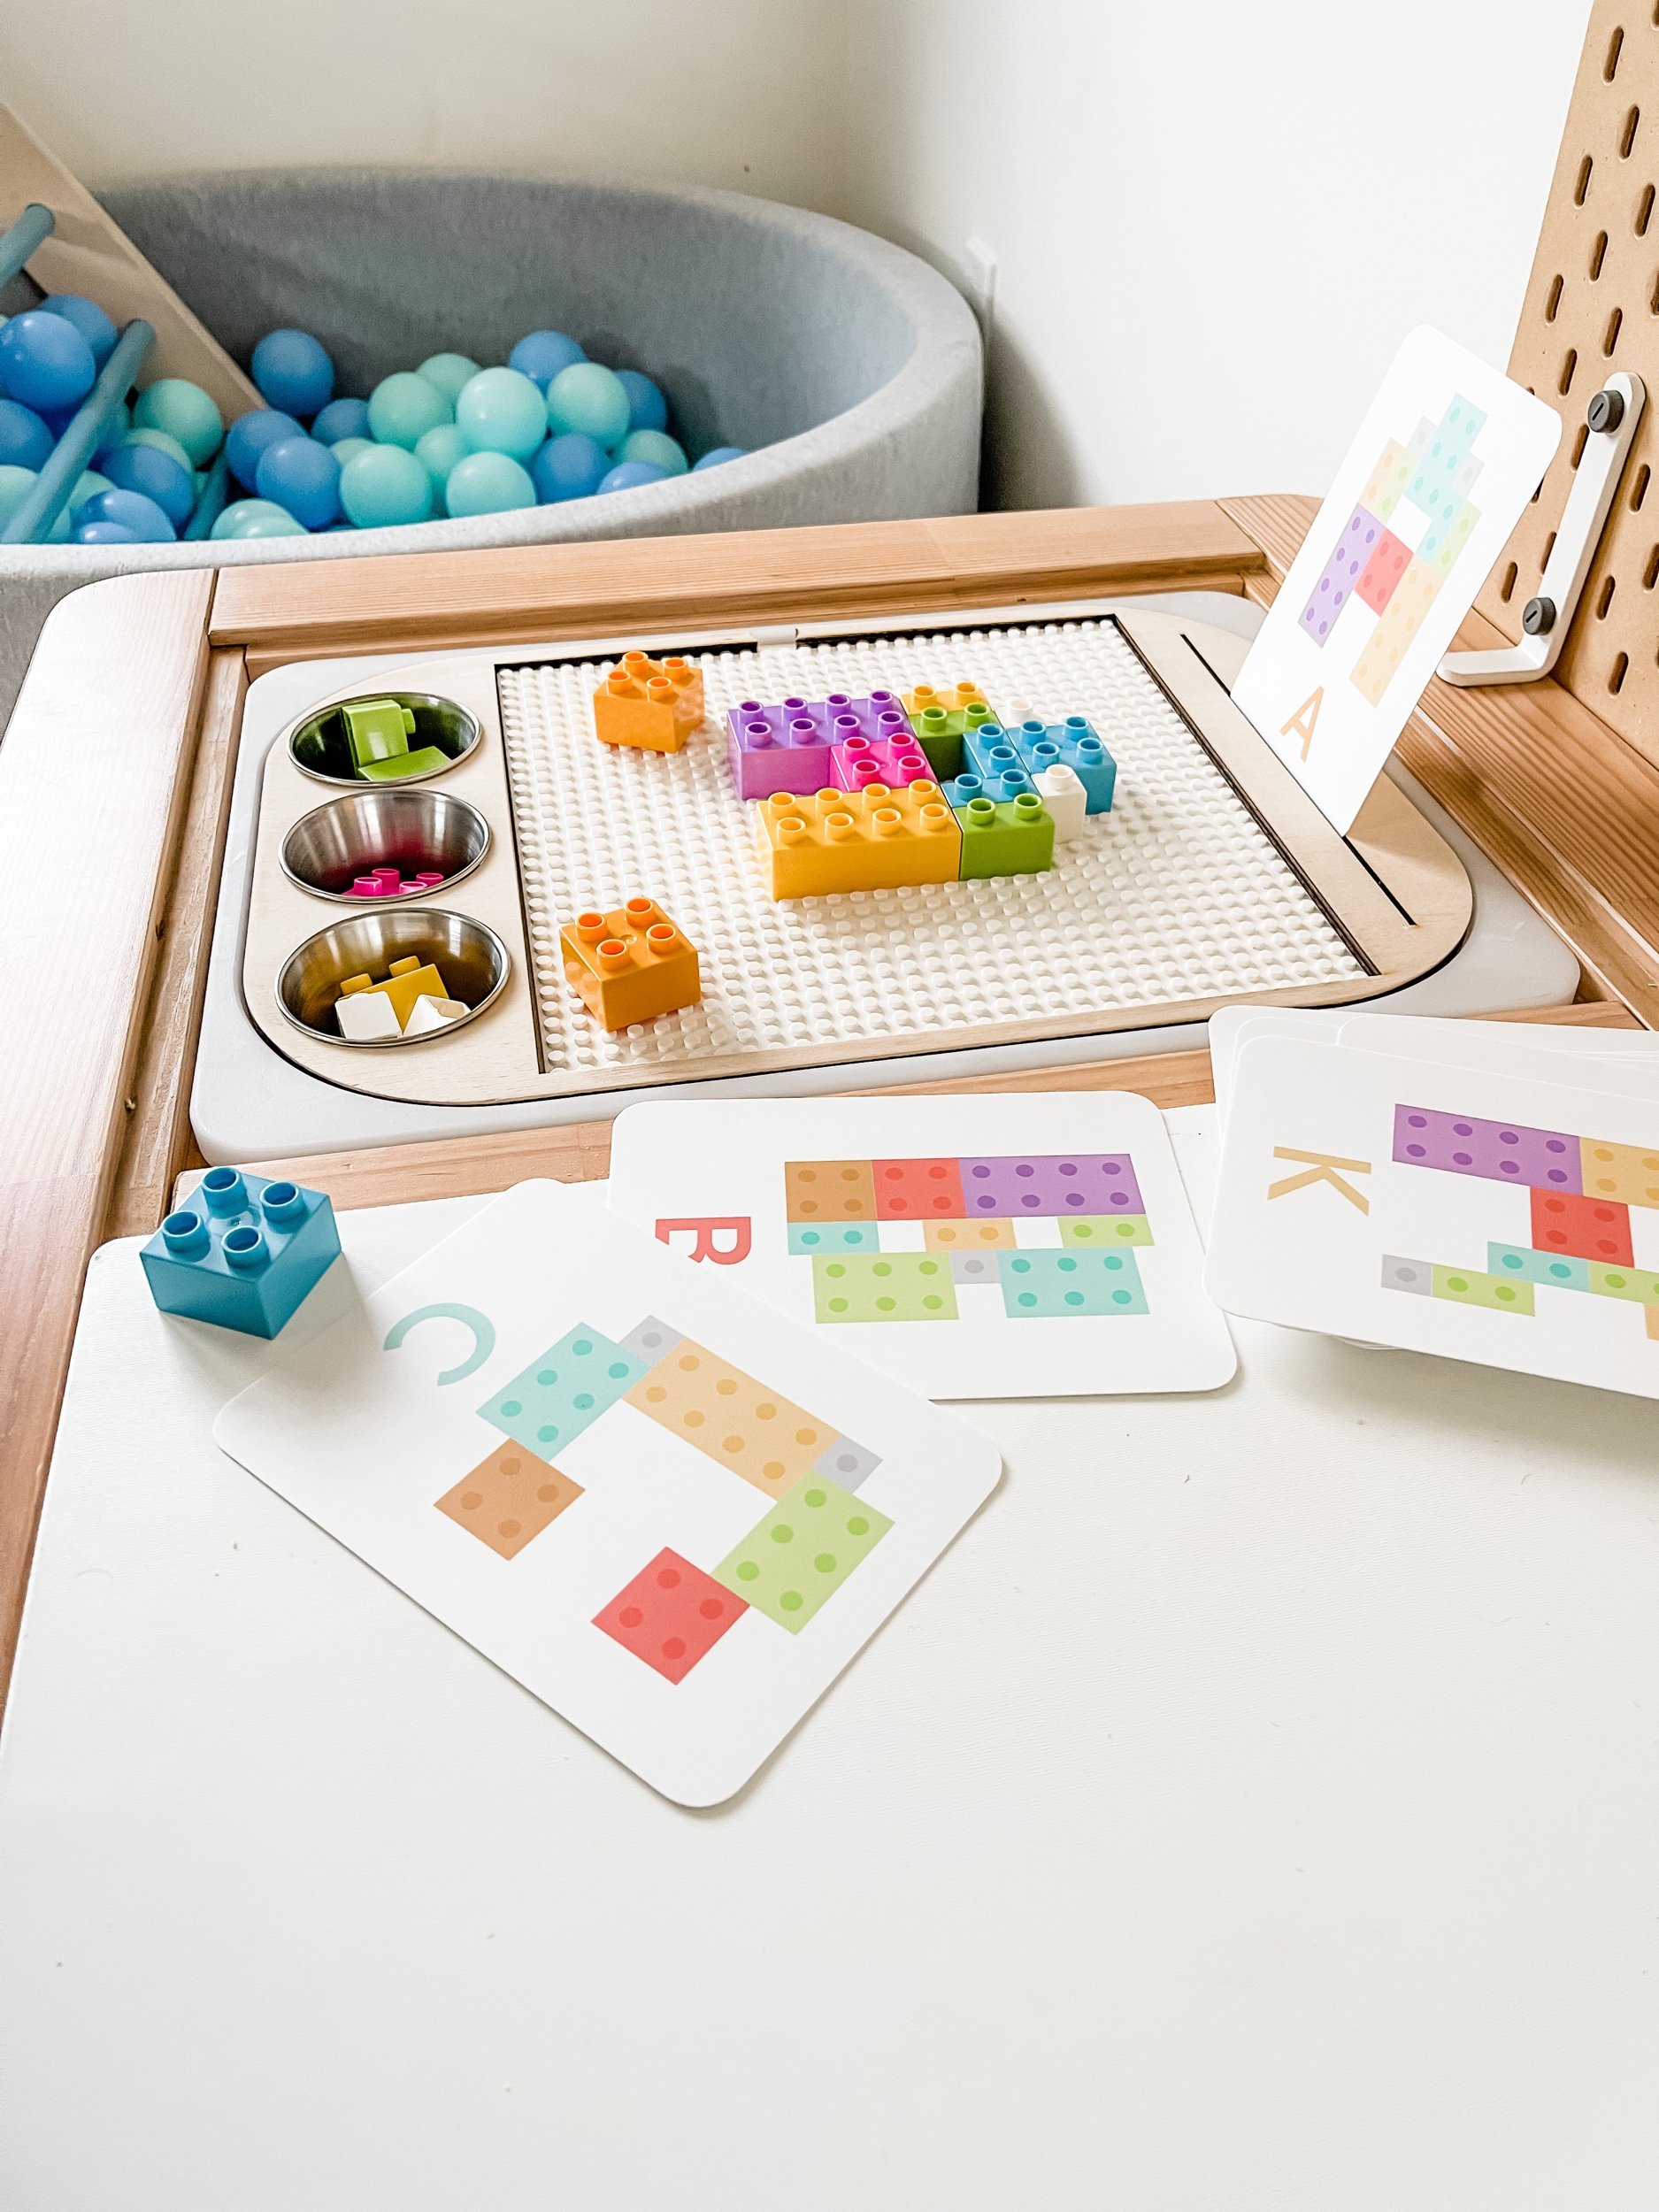
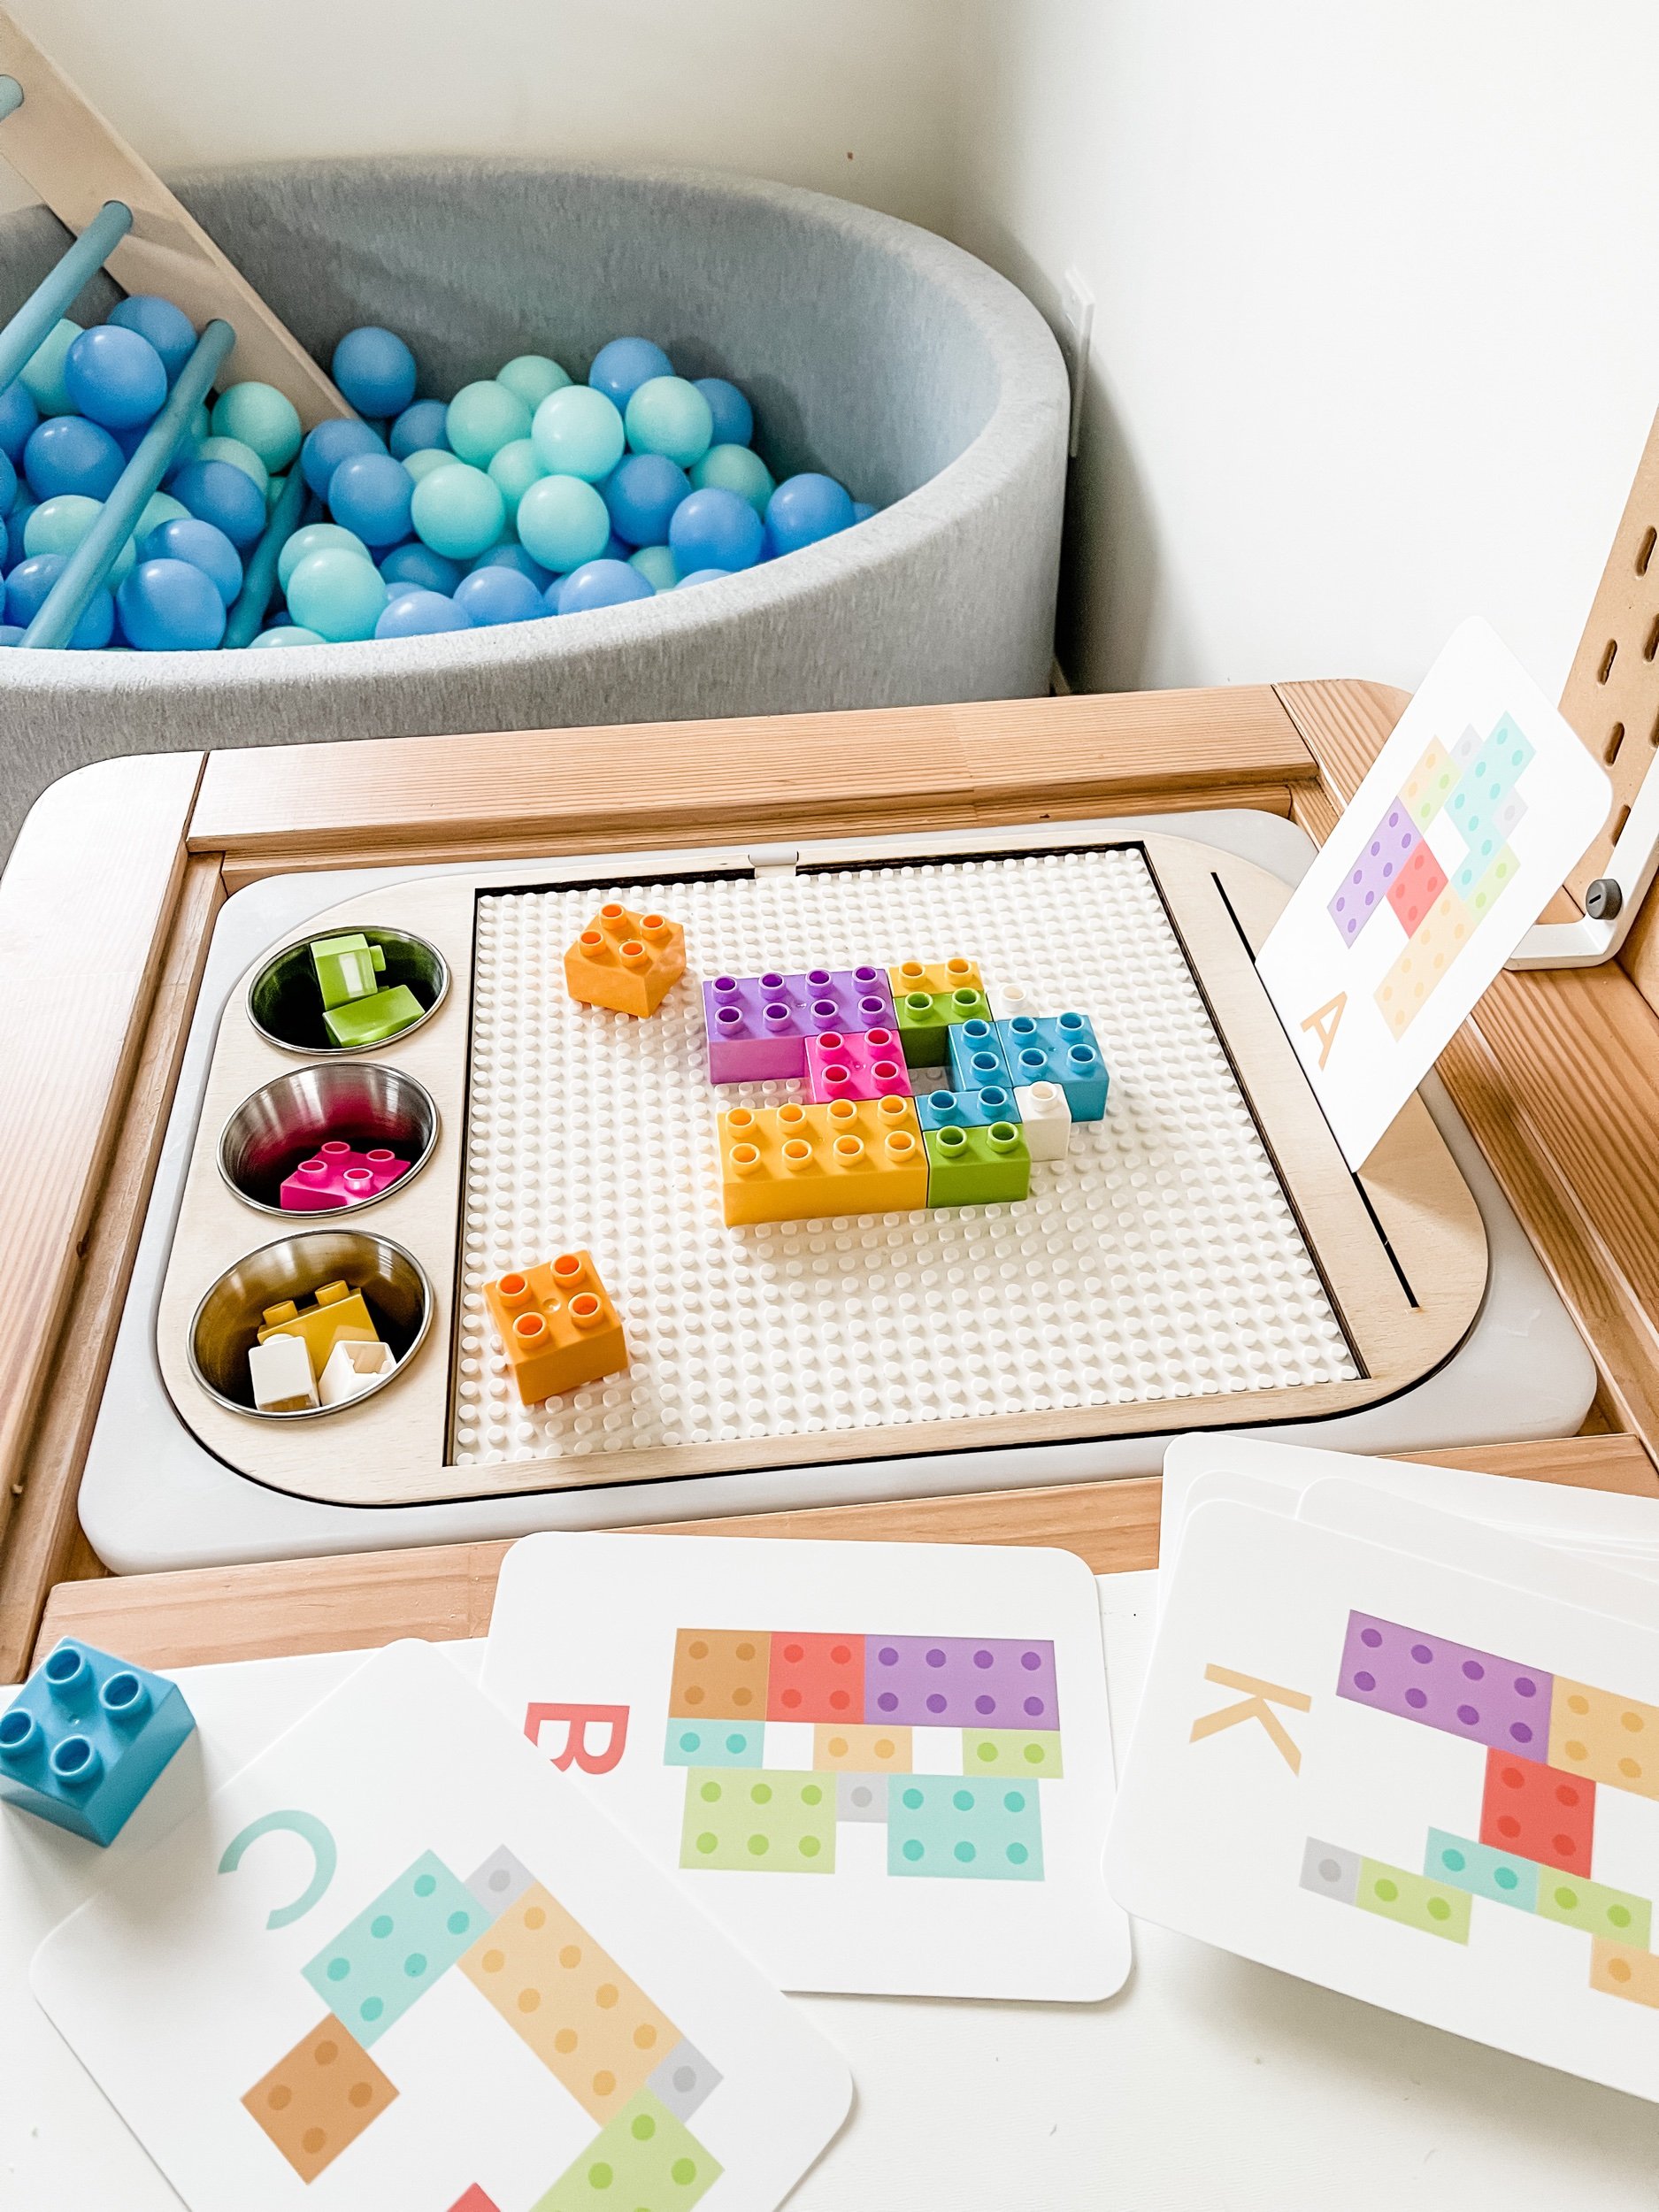
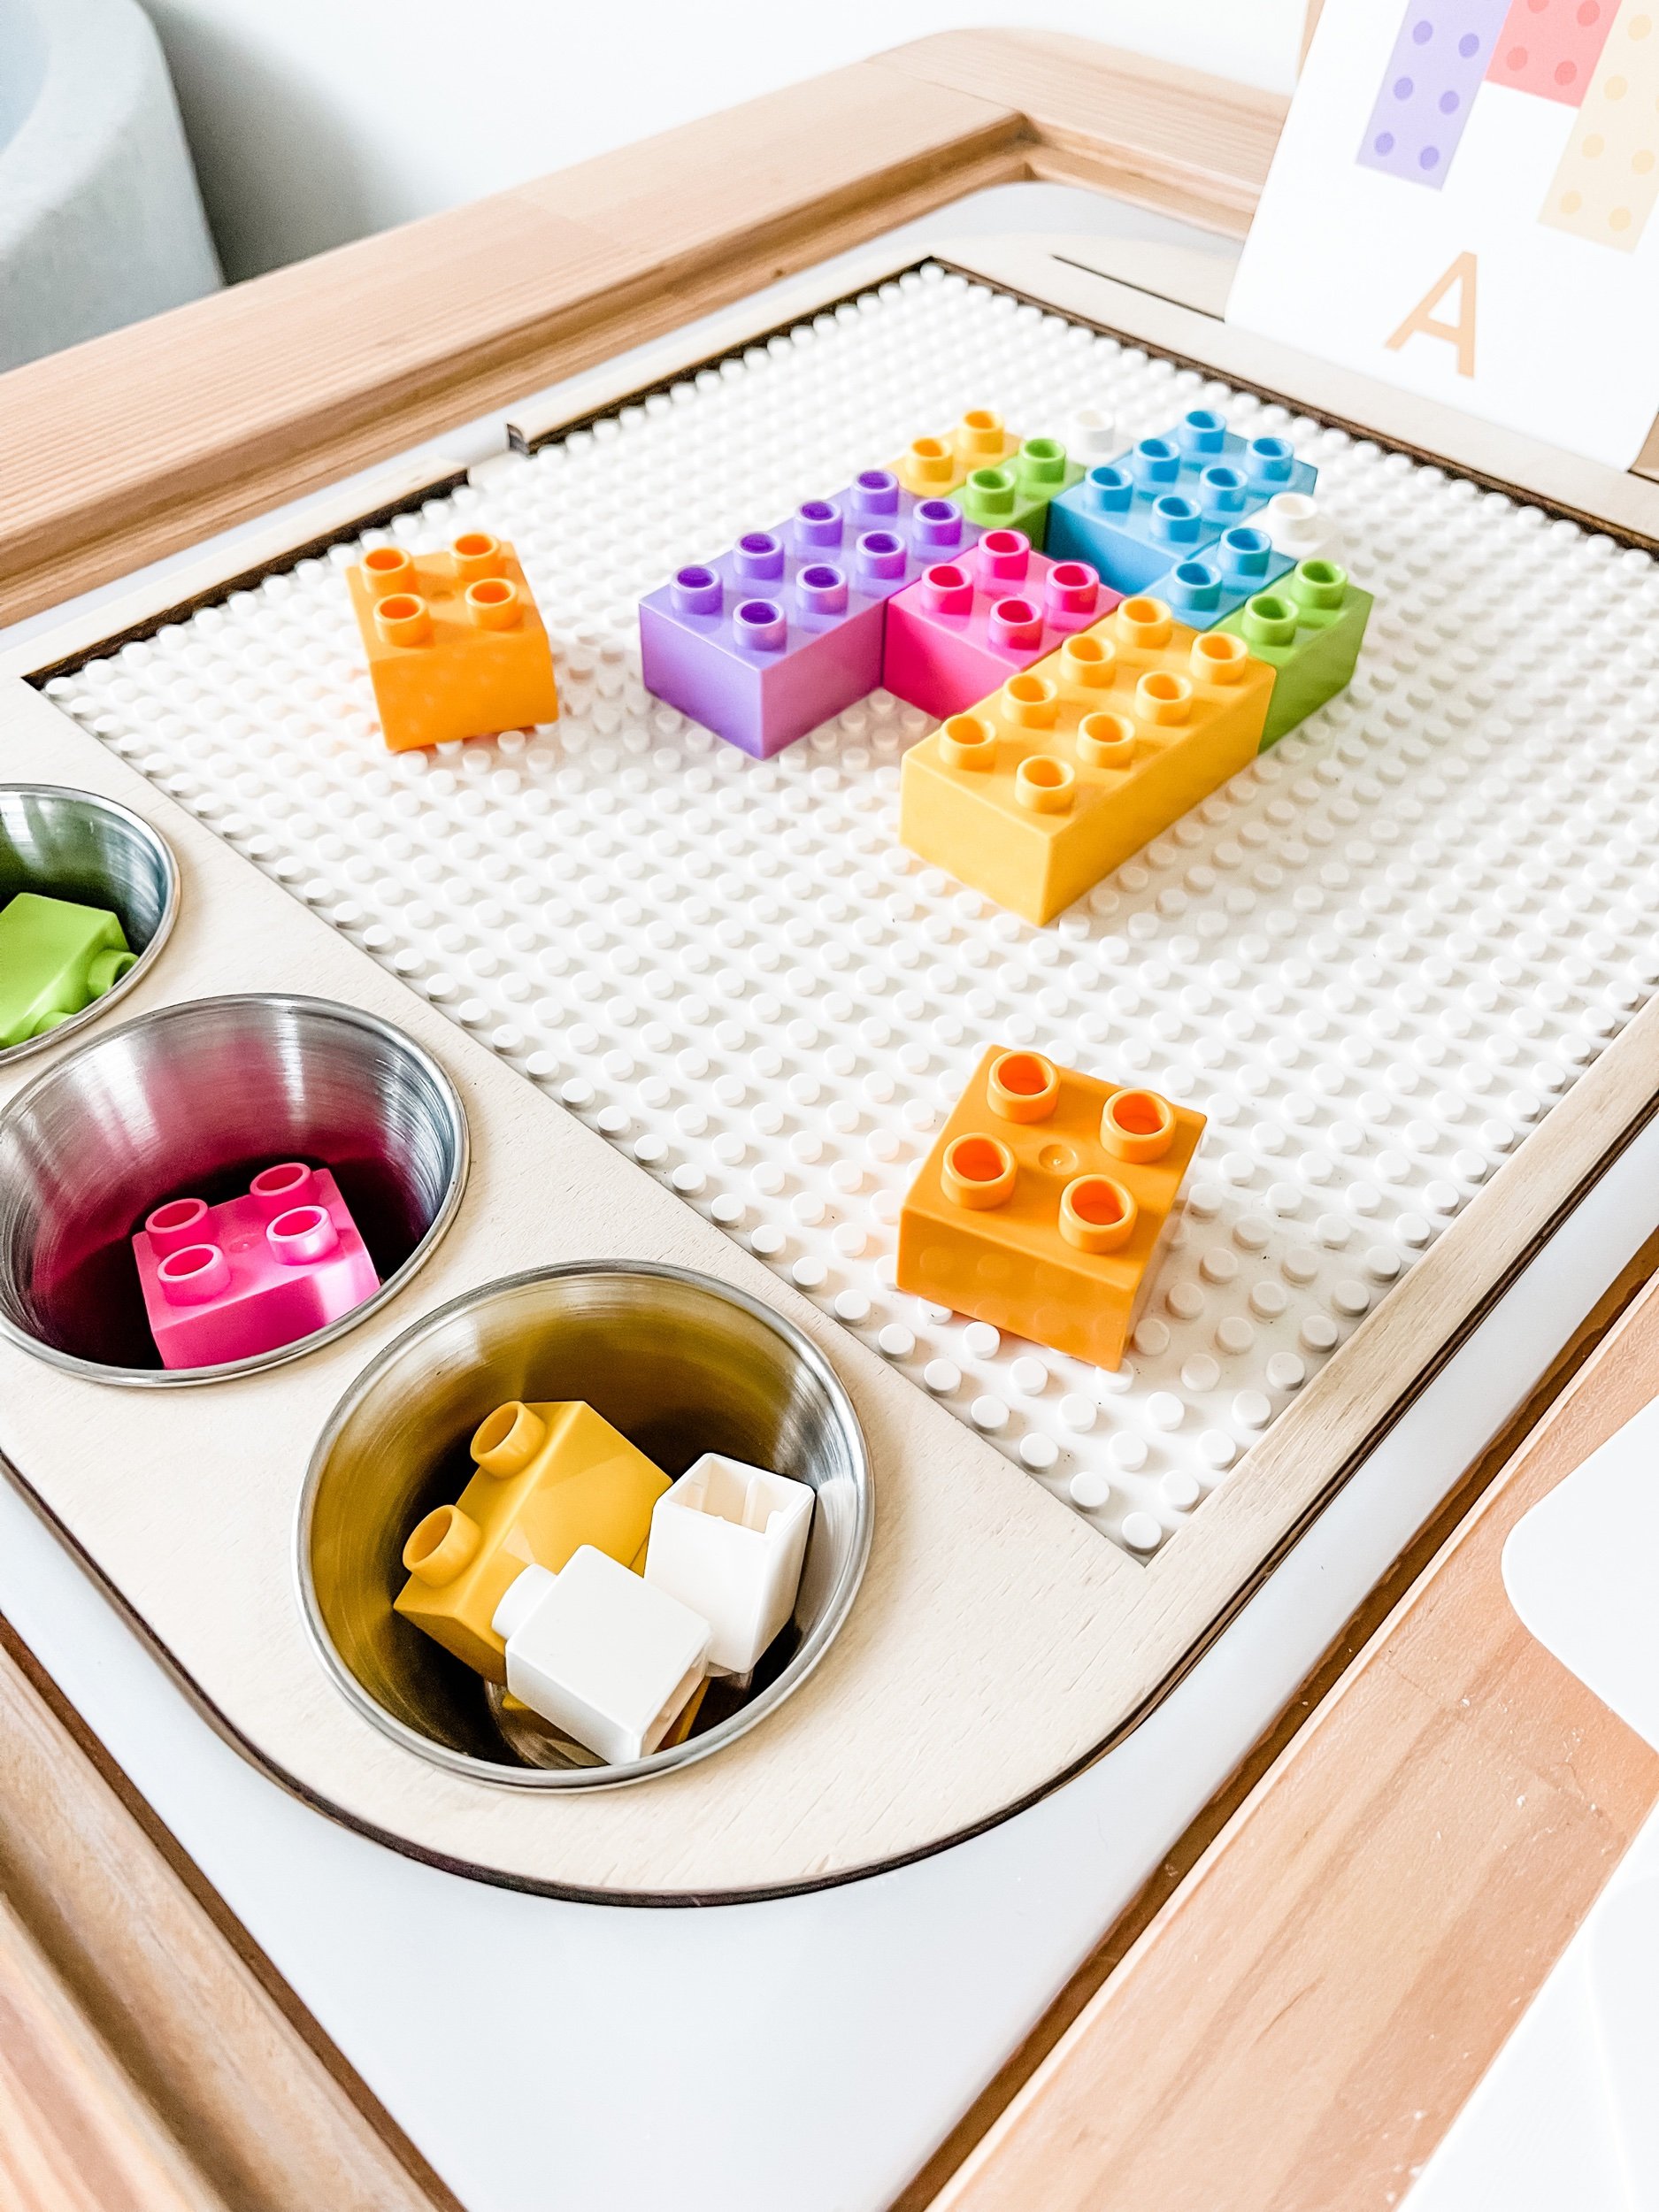
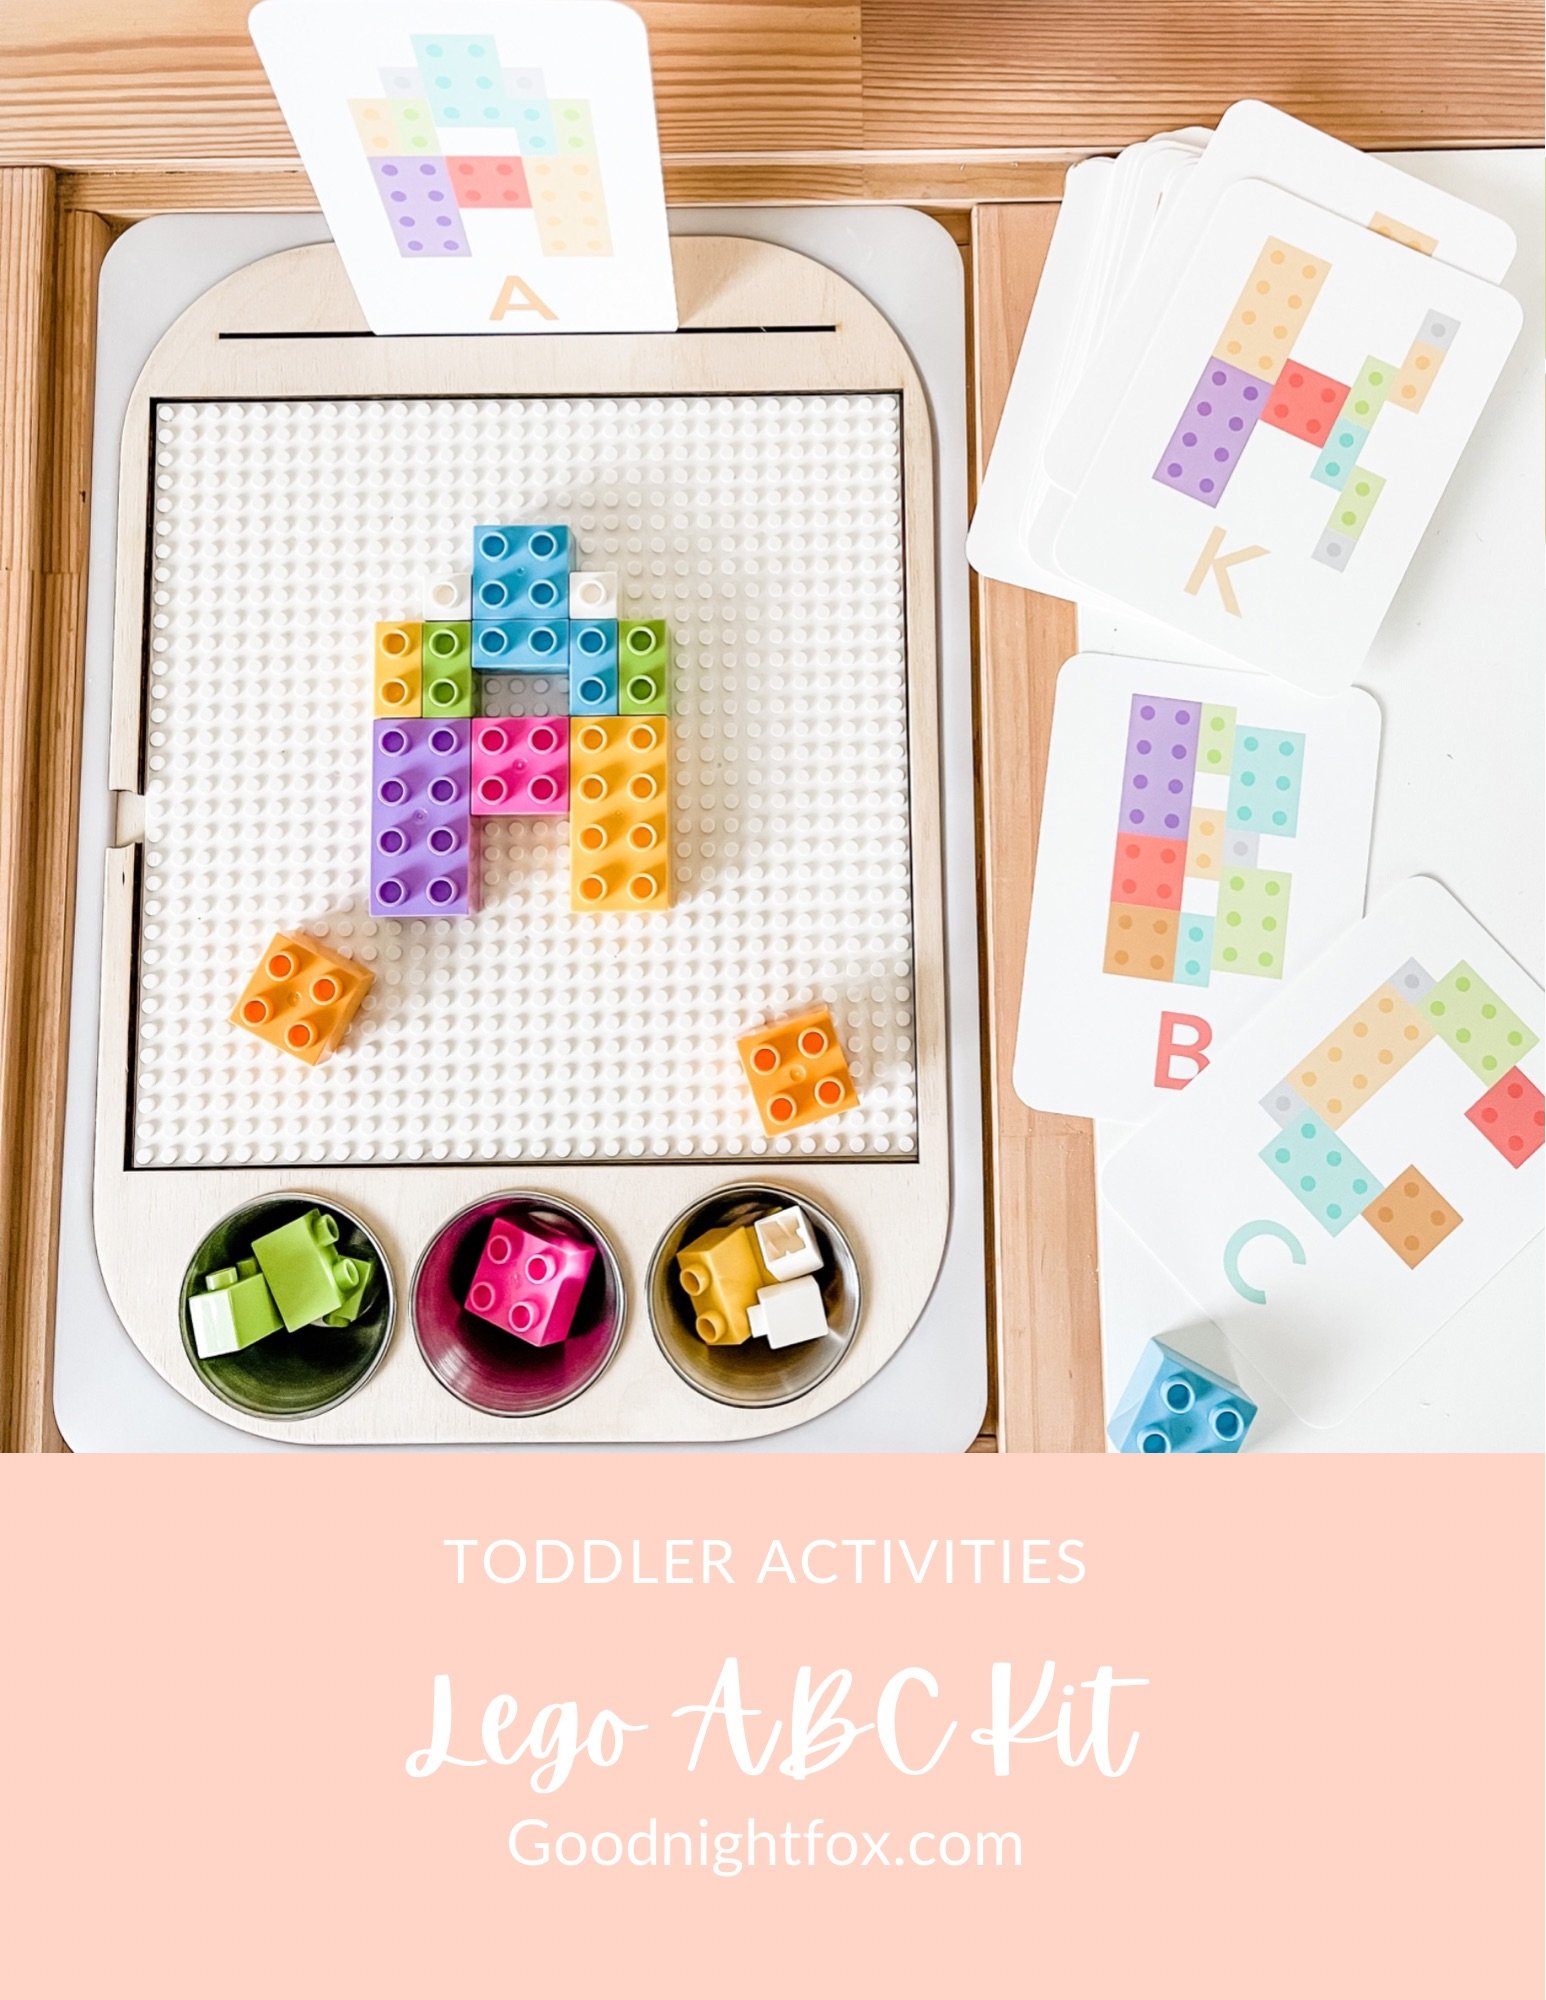
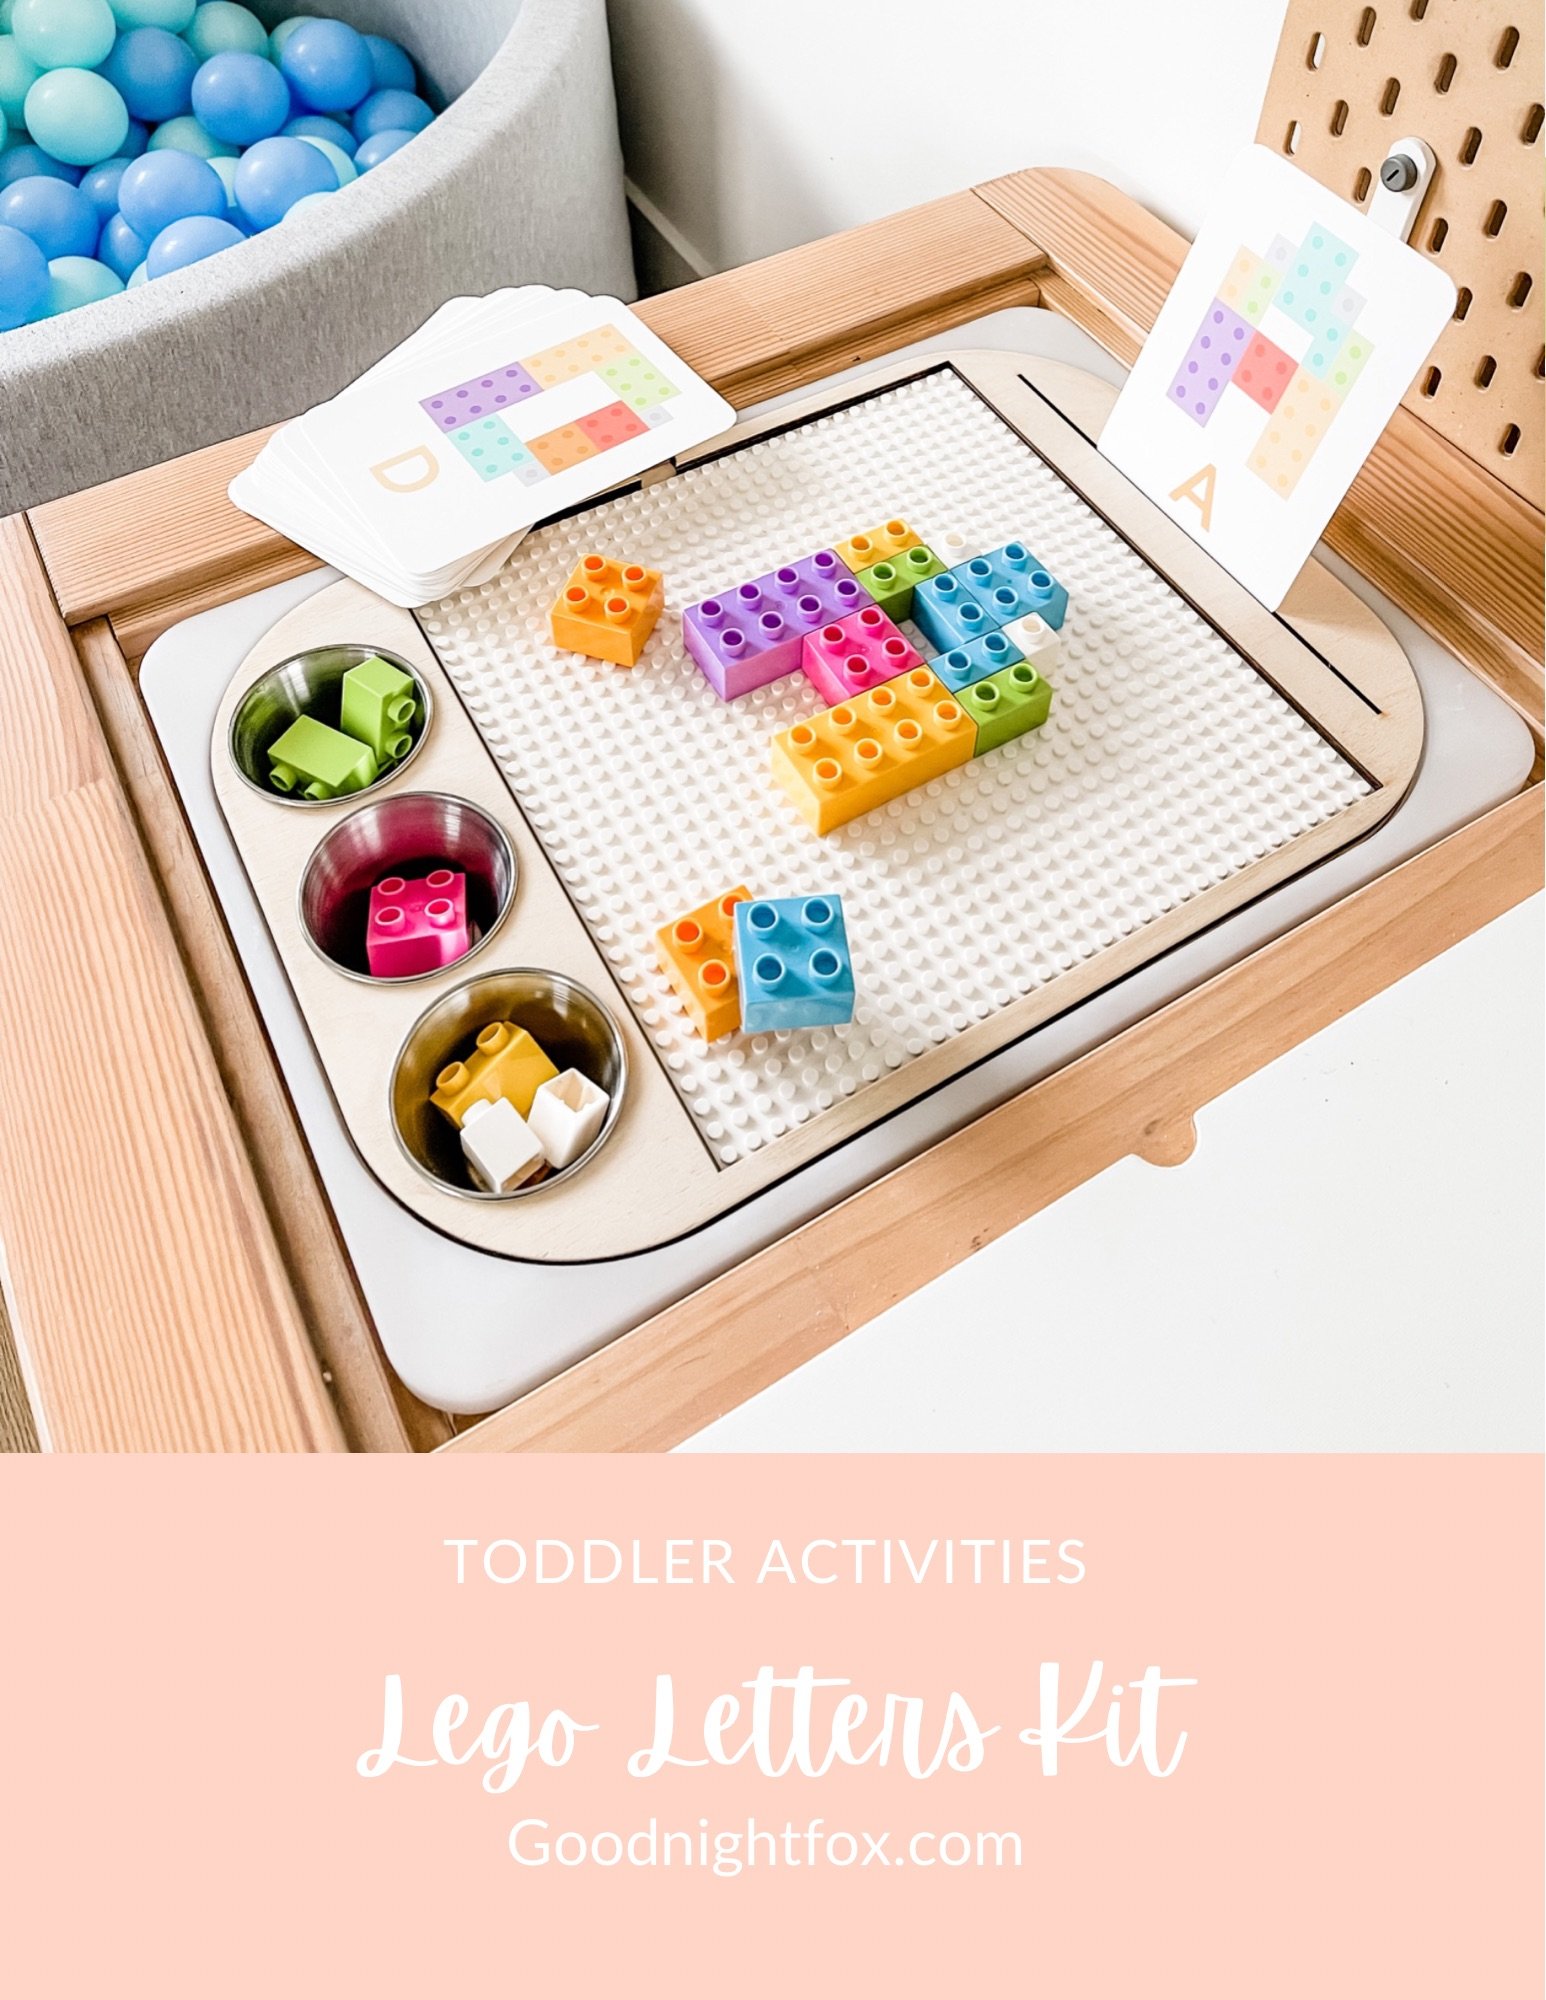
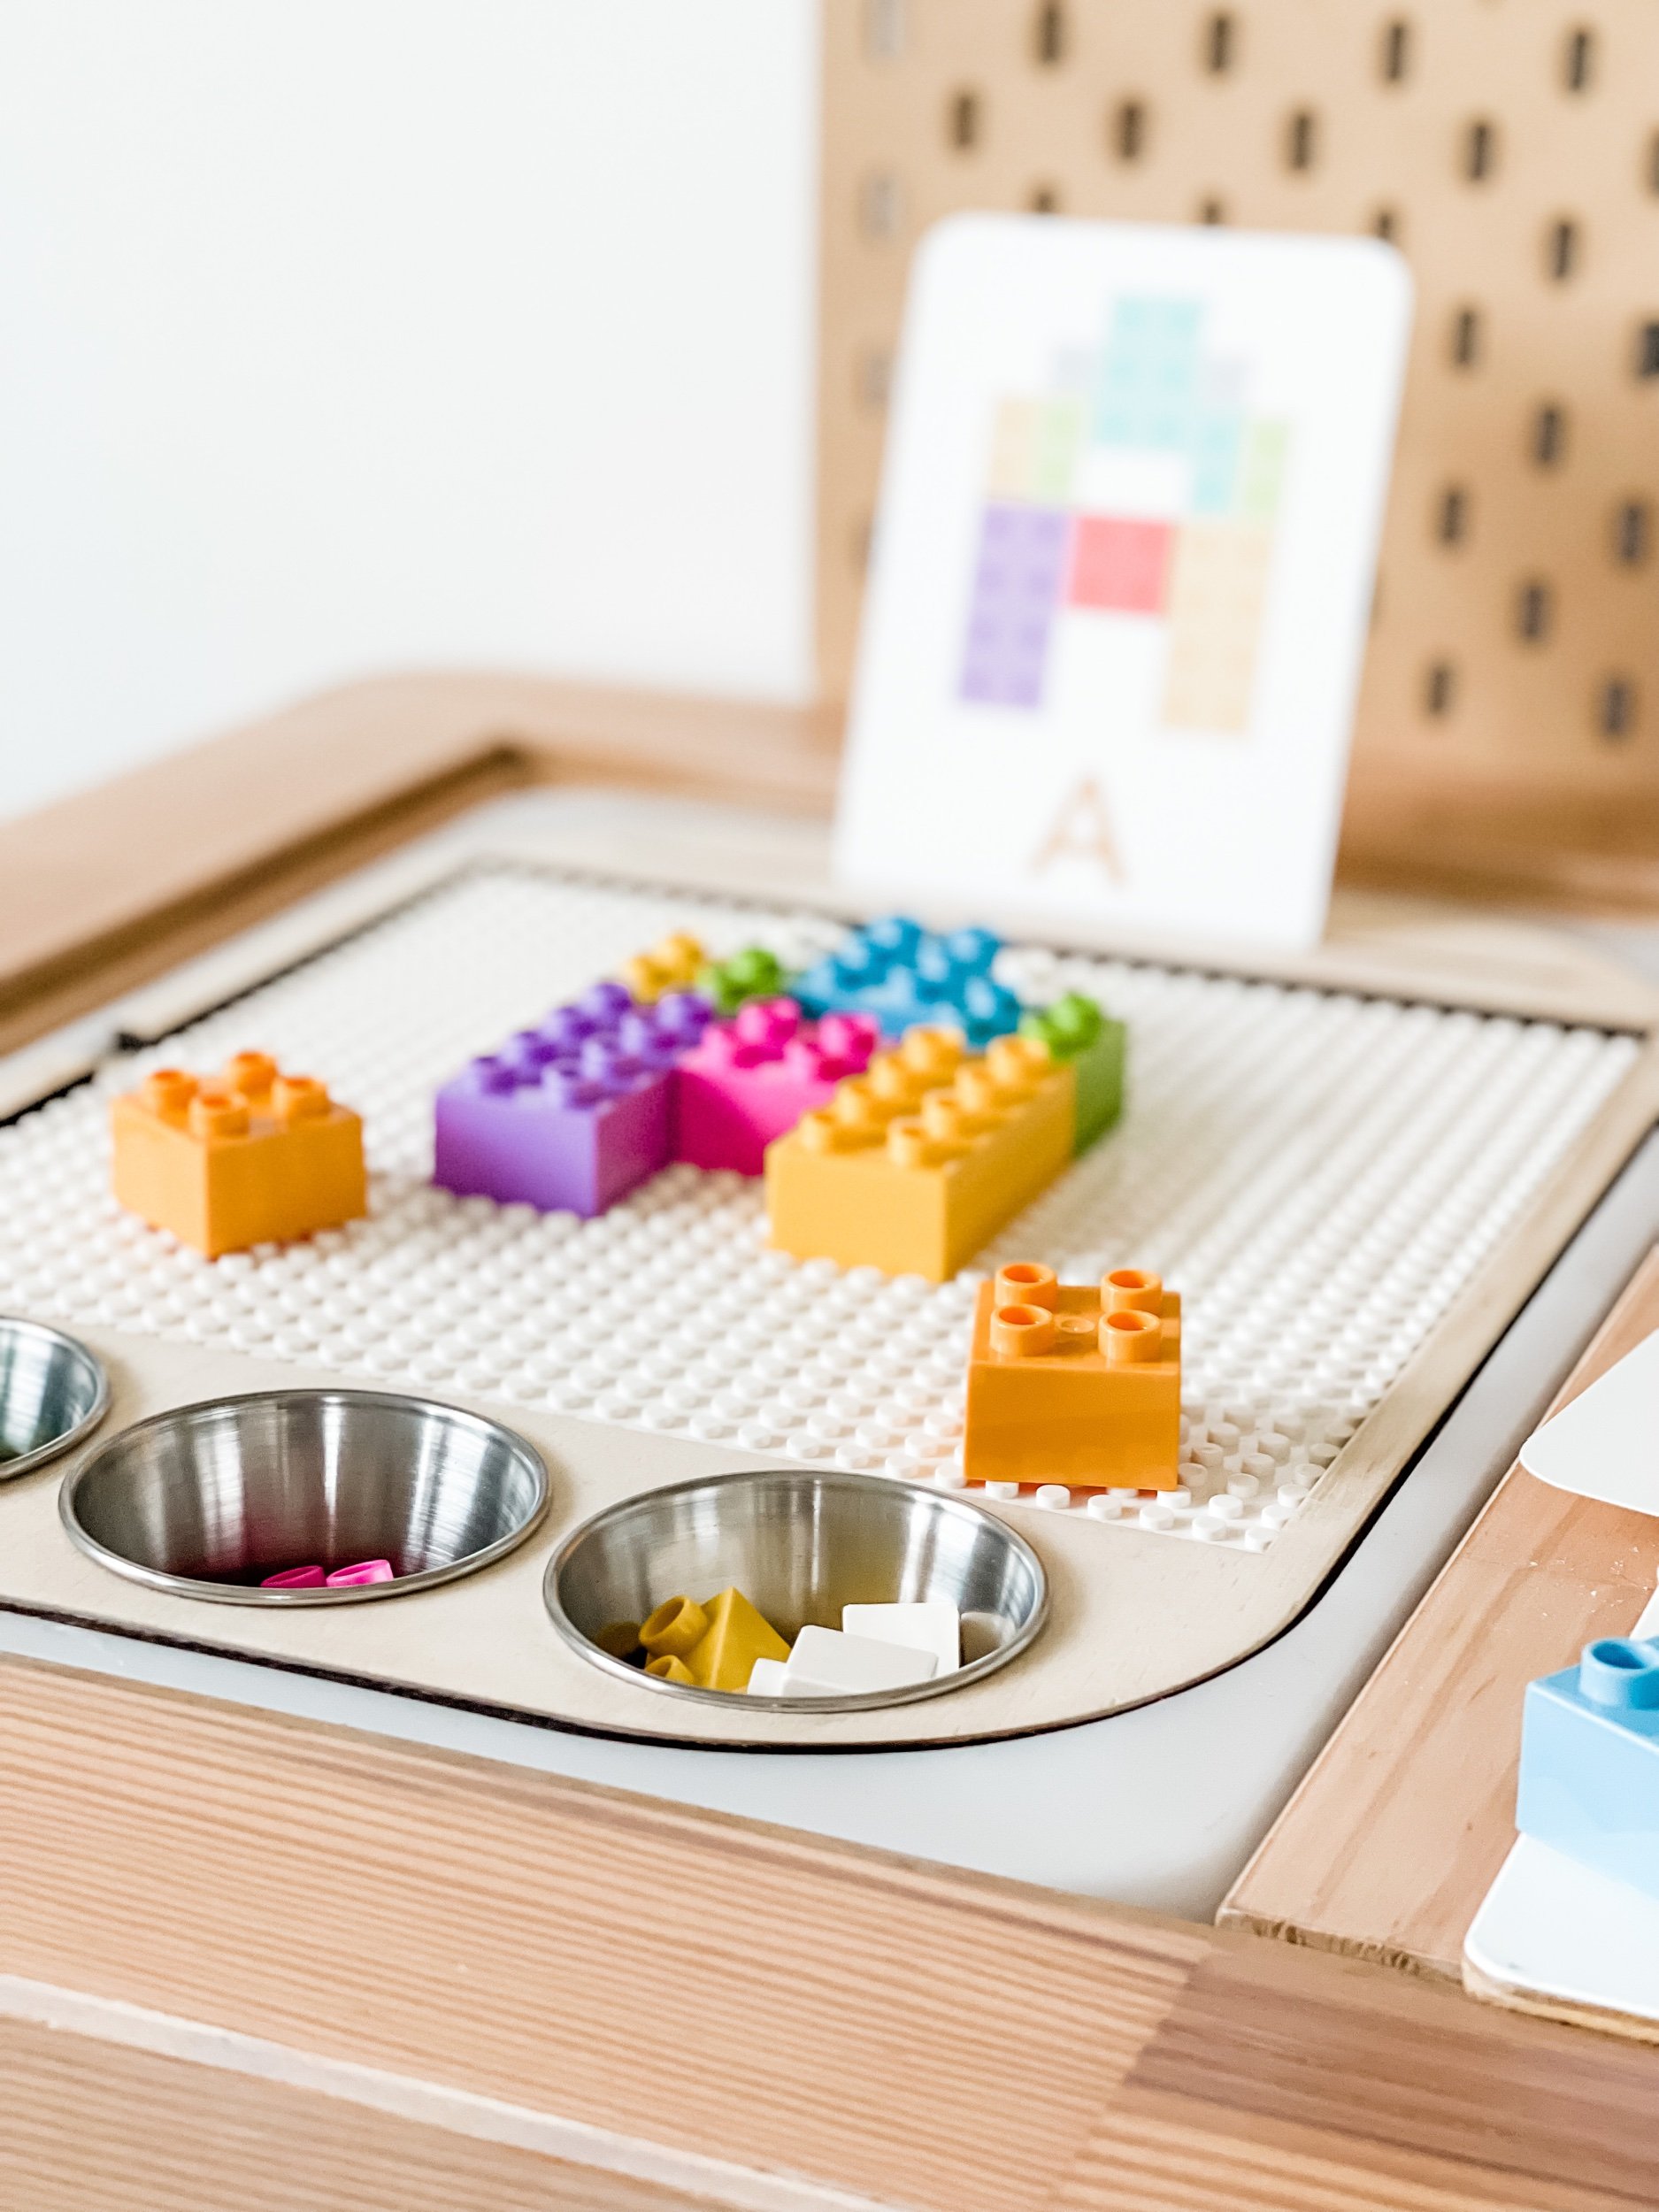
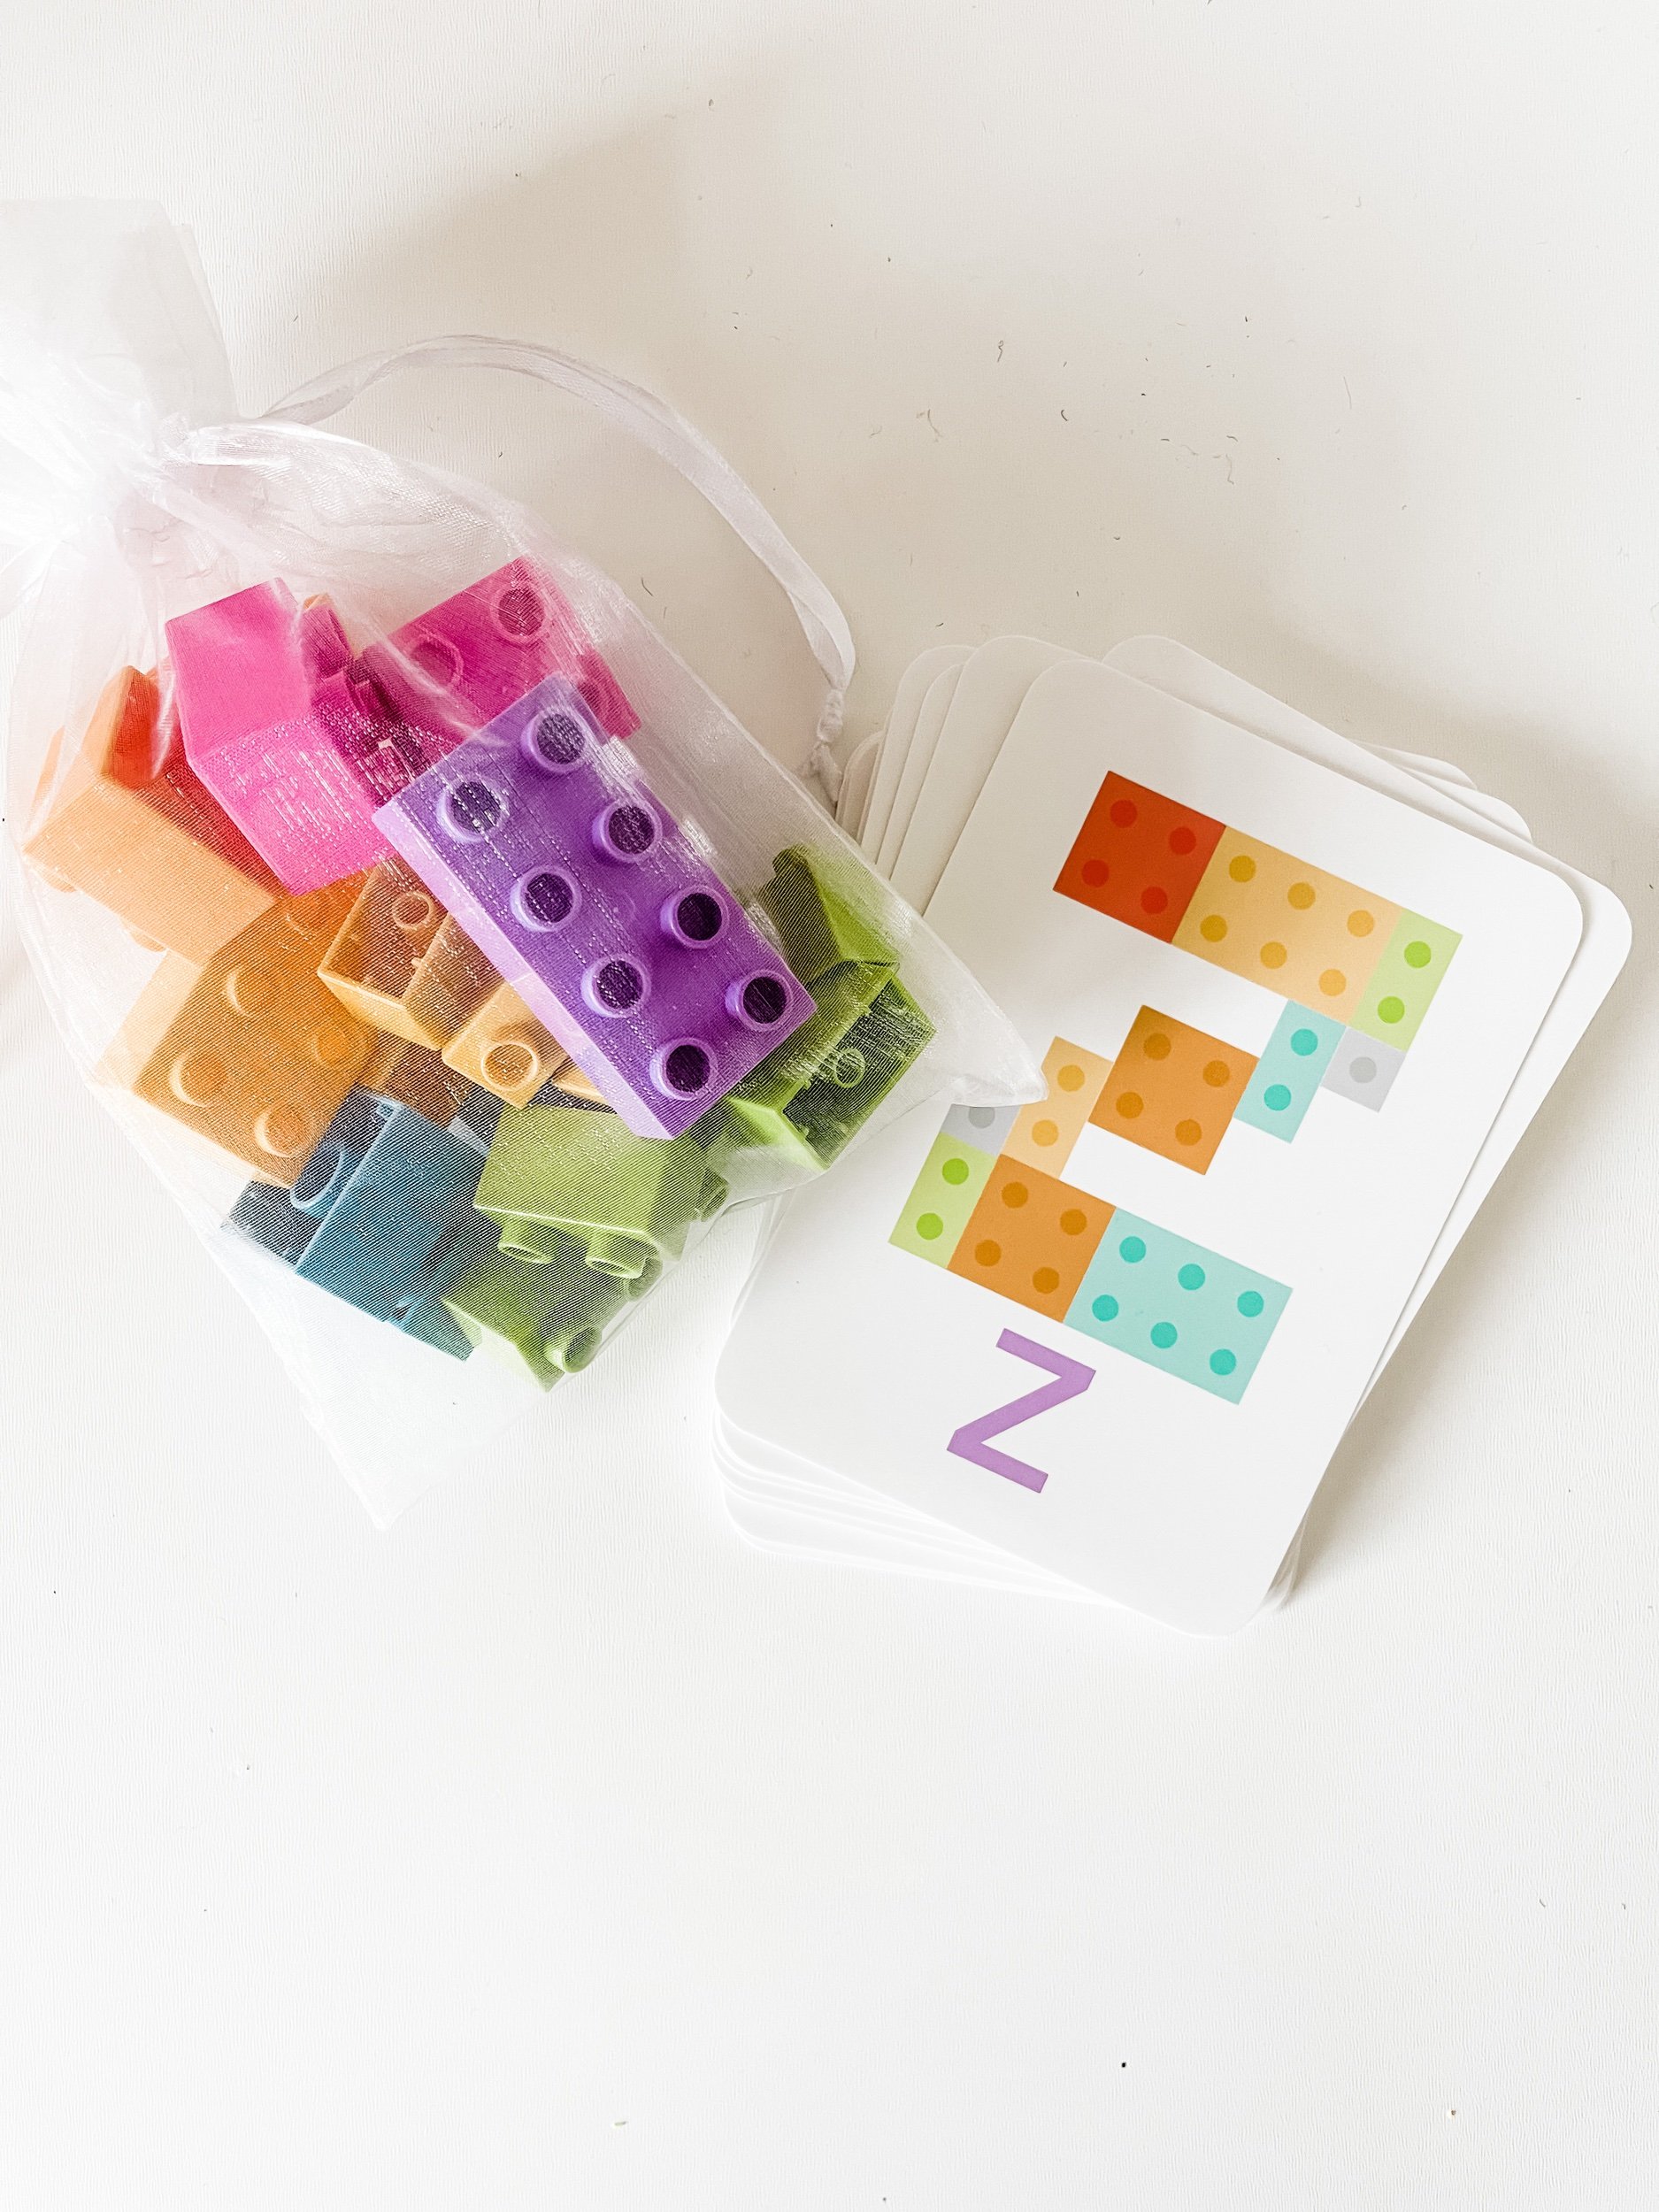
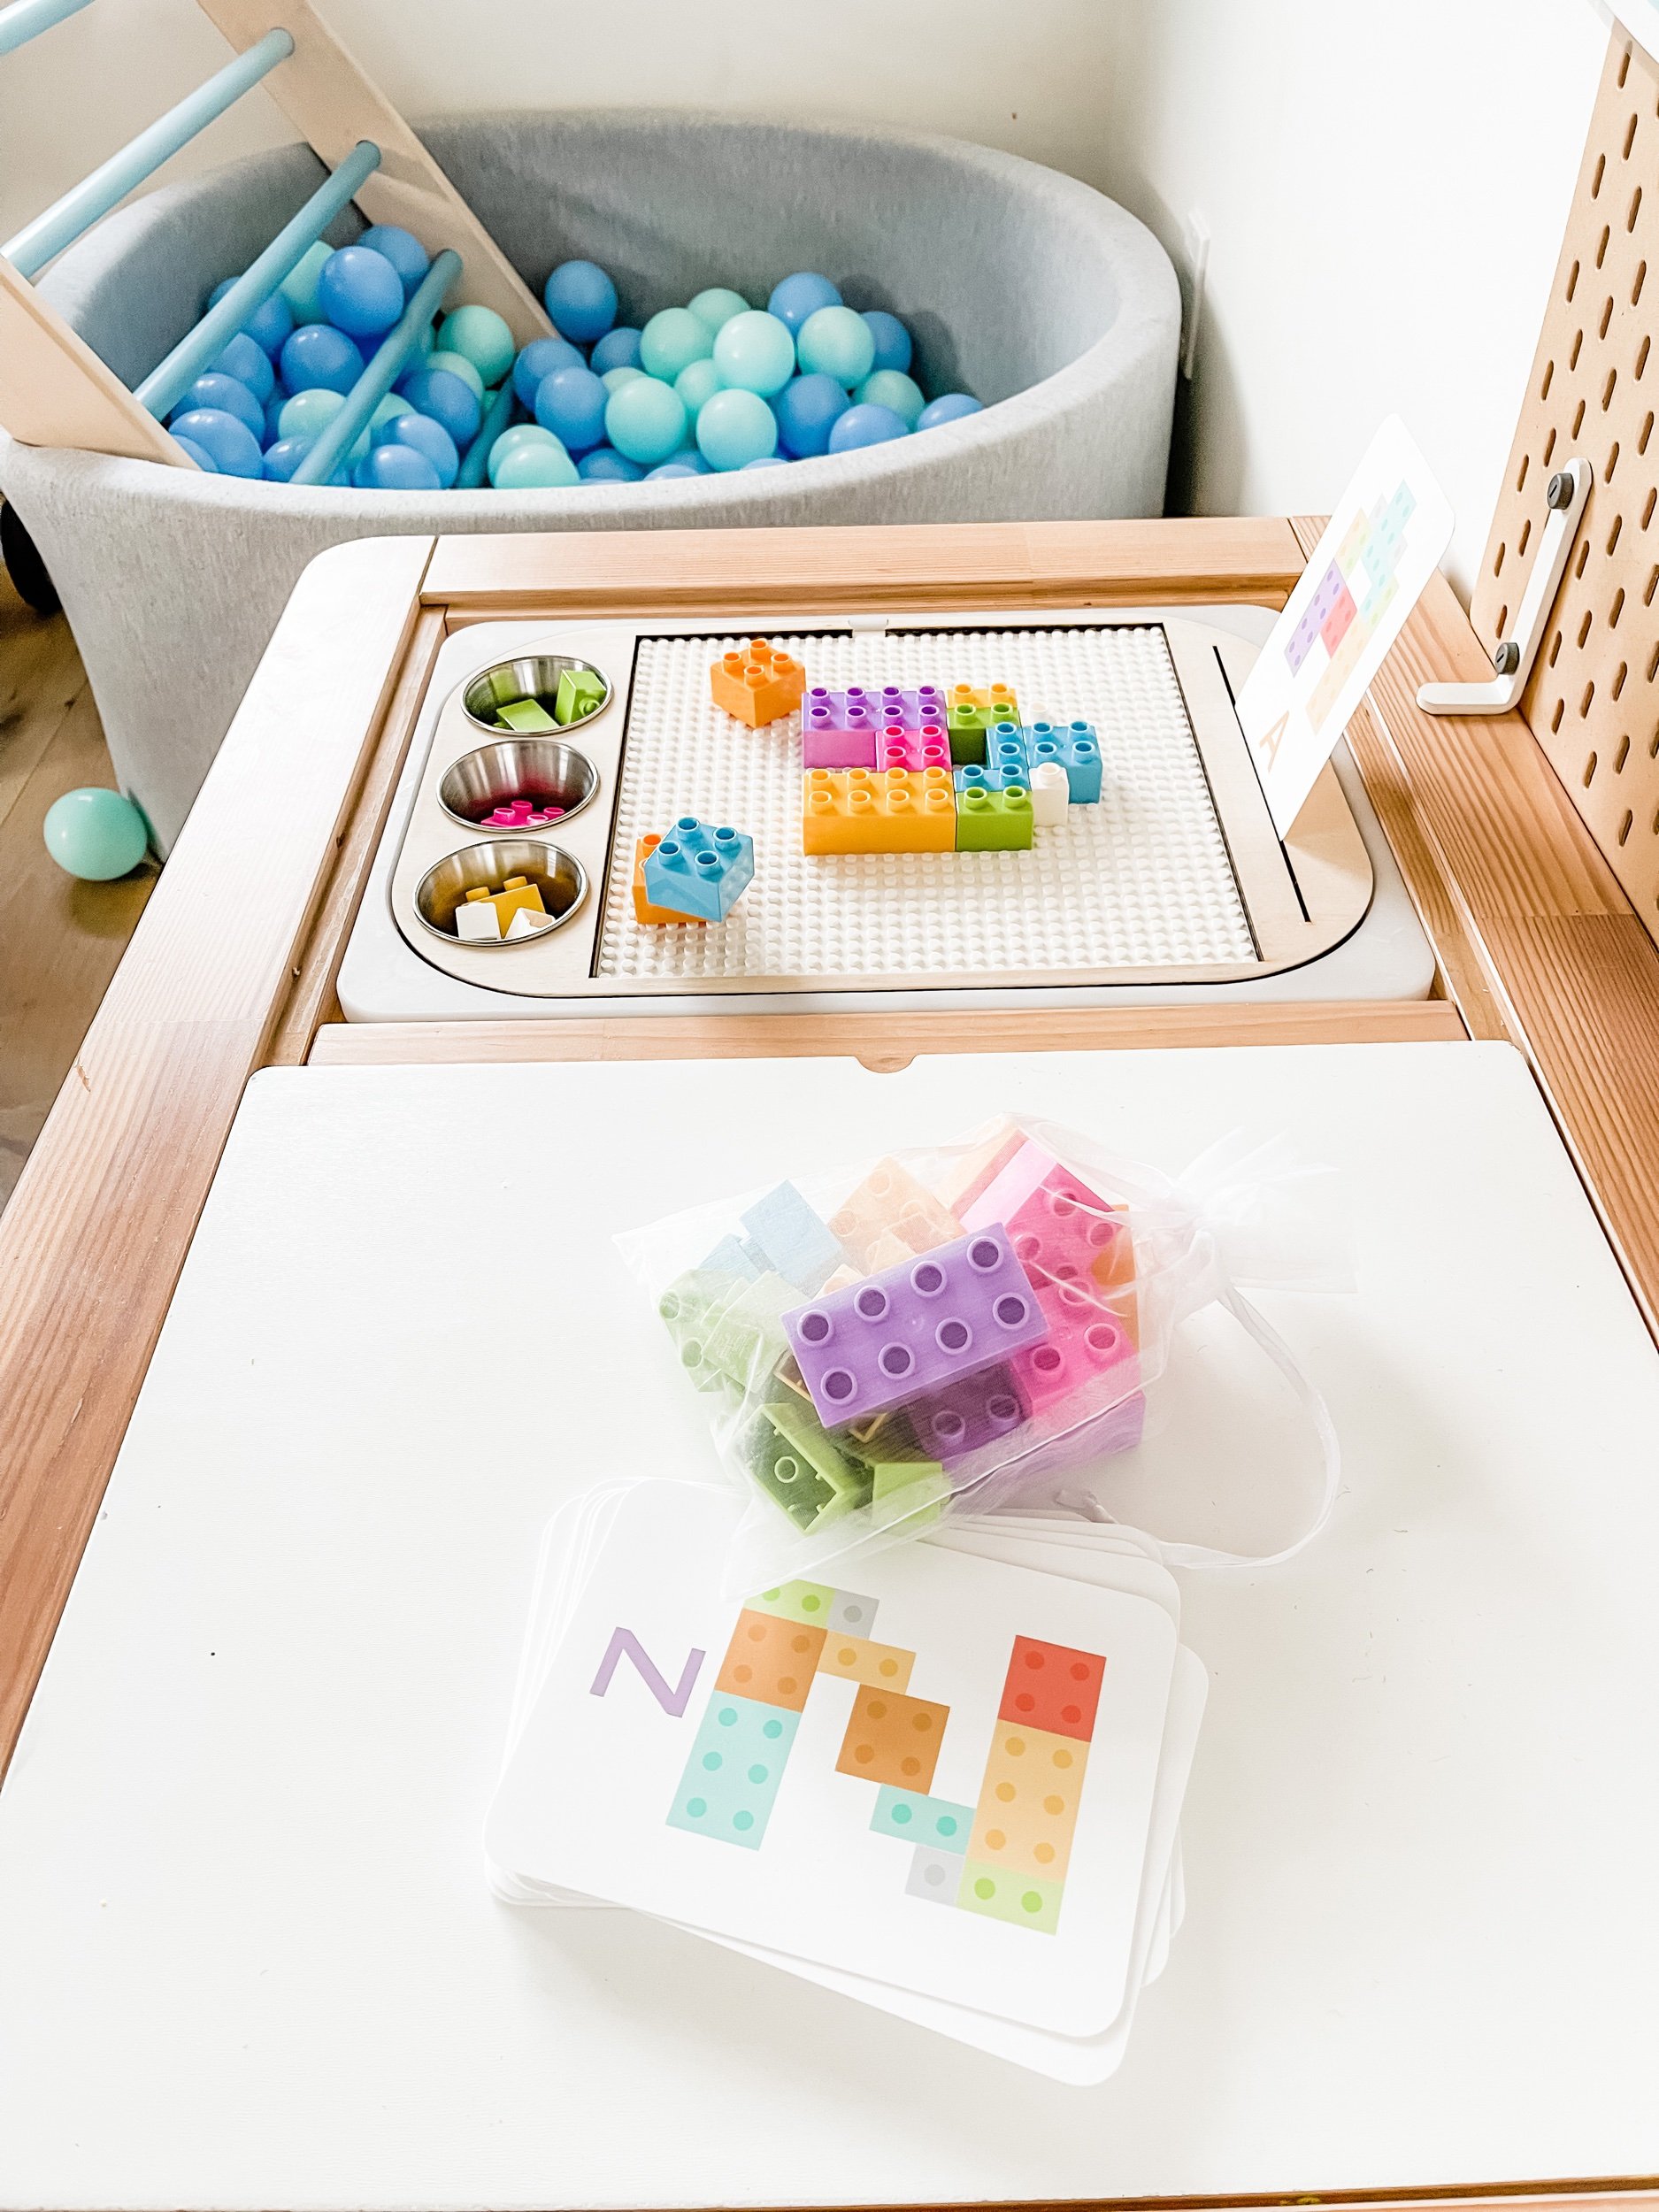
If you’re in the alphabet learning stages or even just the early building phases, this Lego Alphabet Kit is an absolute must have. And with the holiday season coming up, your kiddos are sure to love unwrapping this one. This set comes in both standard lego sizes for ages 5-8 and duplo size (2 times the size bricks) for your littler ones 1-4 who still like to mouth small objects. You can pair these up with base plates and build at your Flisat table, or you can take them on the go with the on-the-go kit. We took this set with us on the long flight to Pittsburgh and it kept Sofie in her chair, entertained for 30min.
Enjoy building and learning at the same time with this awesome kit!


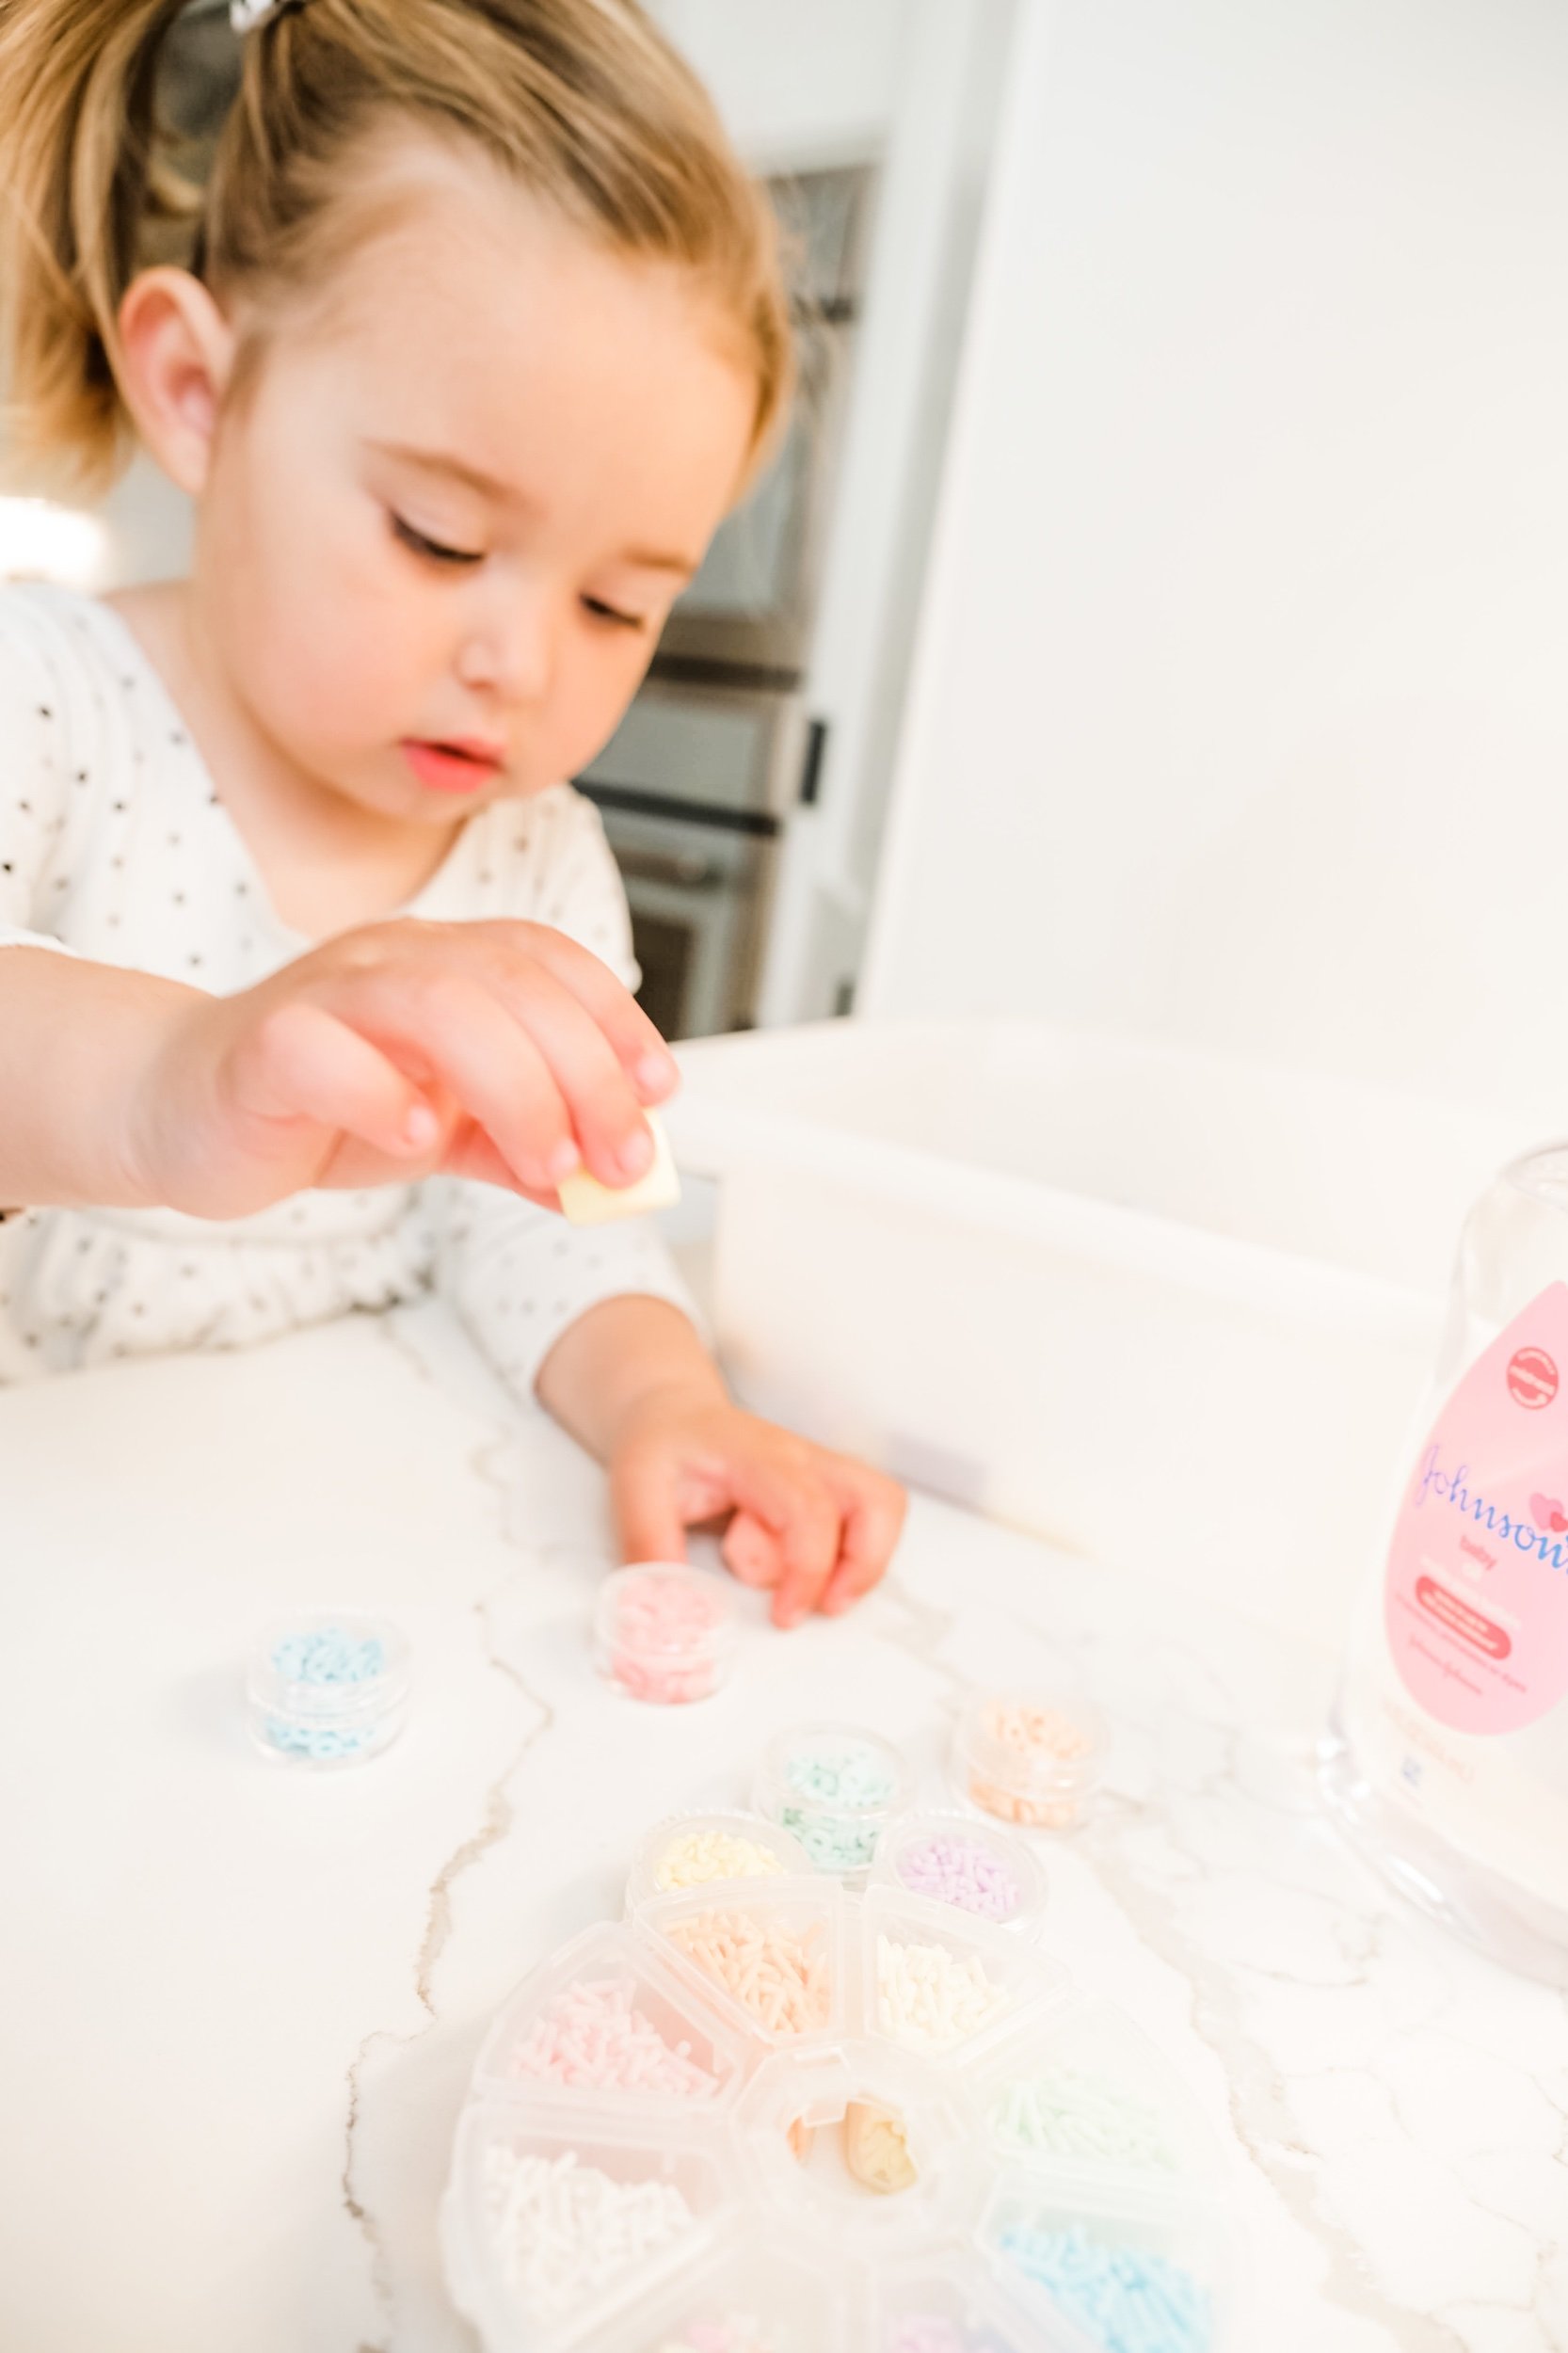
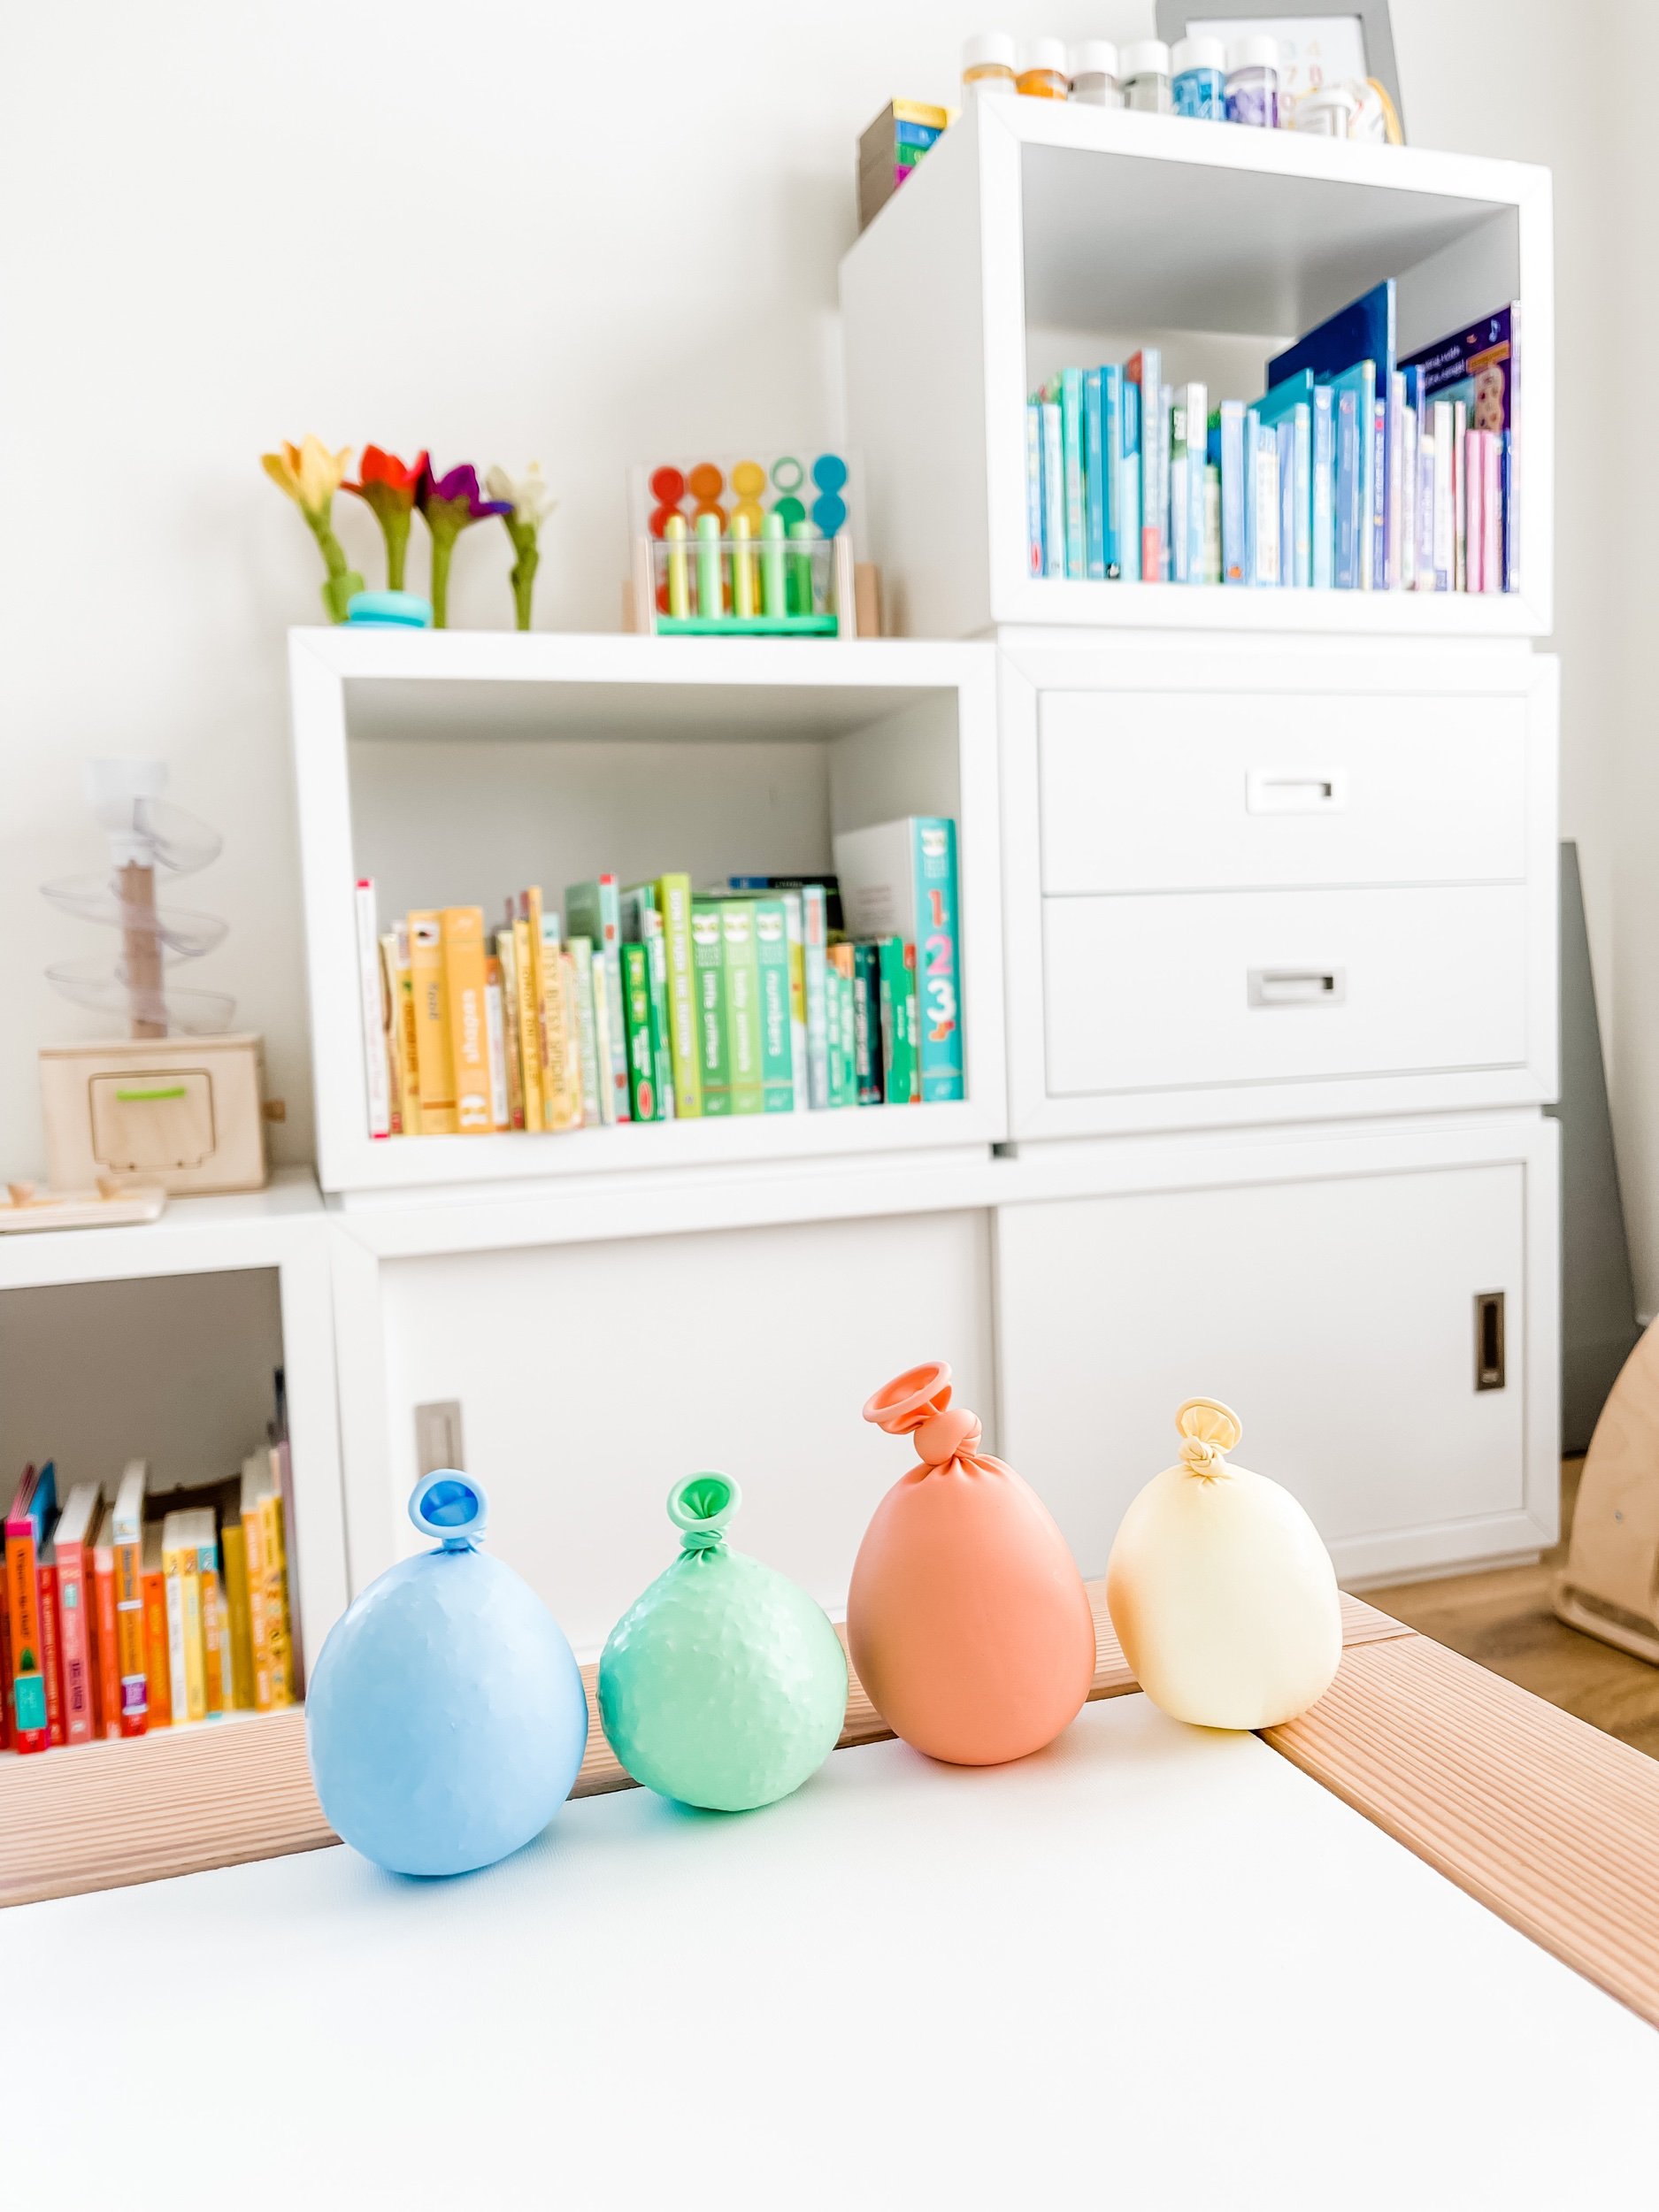
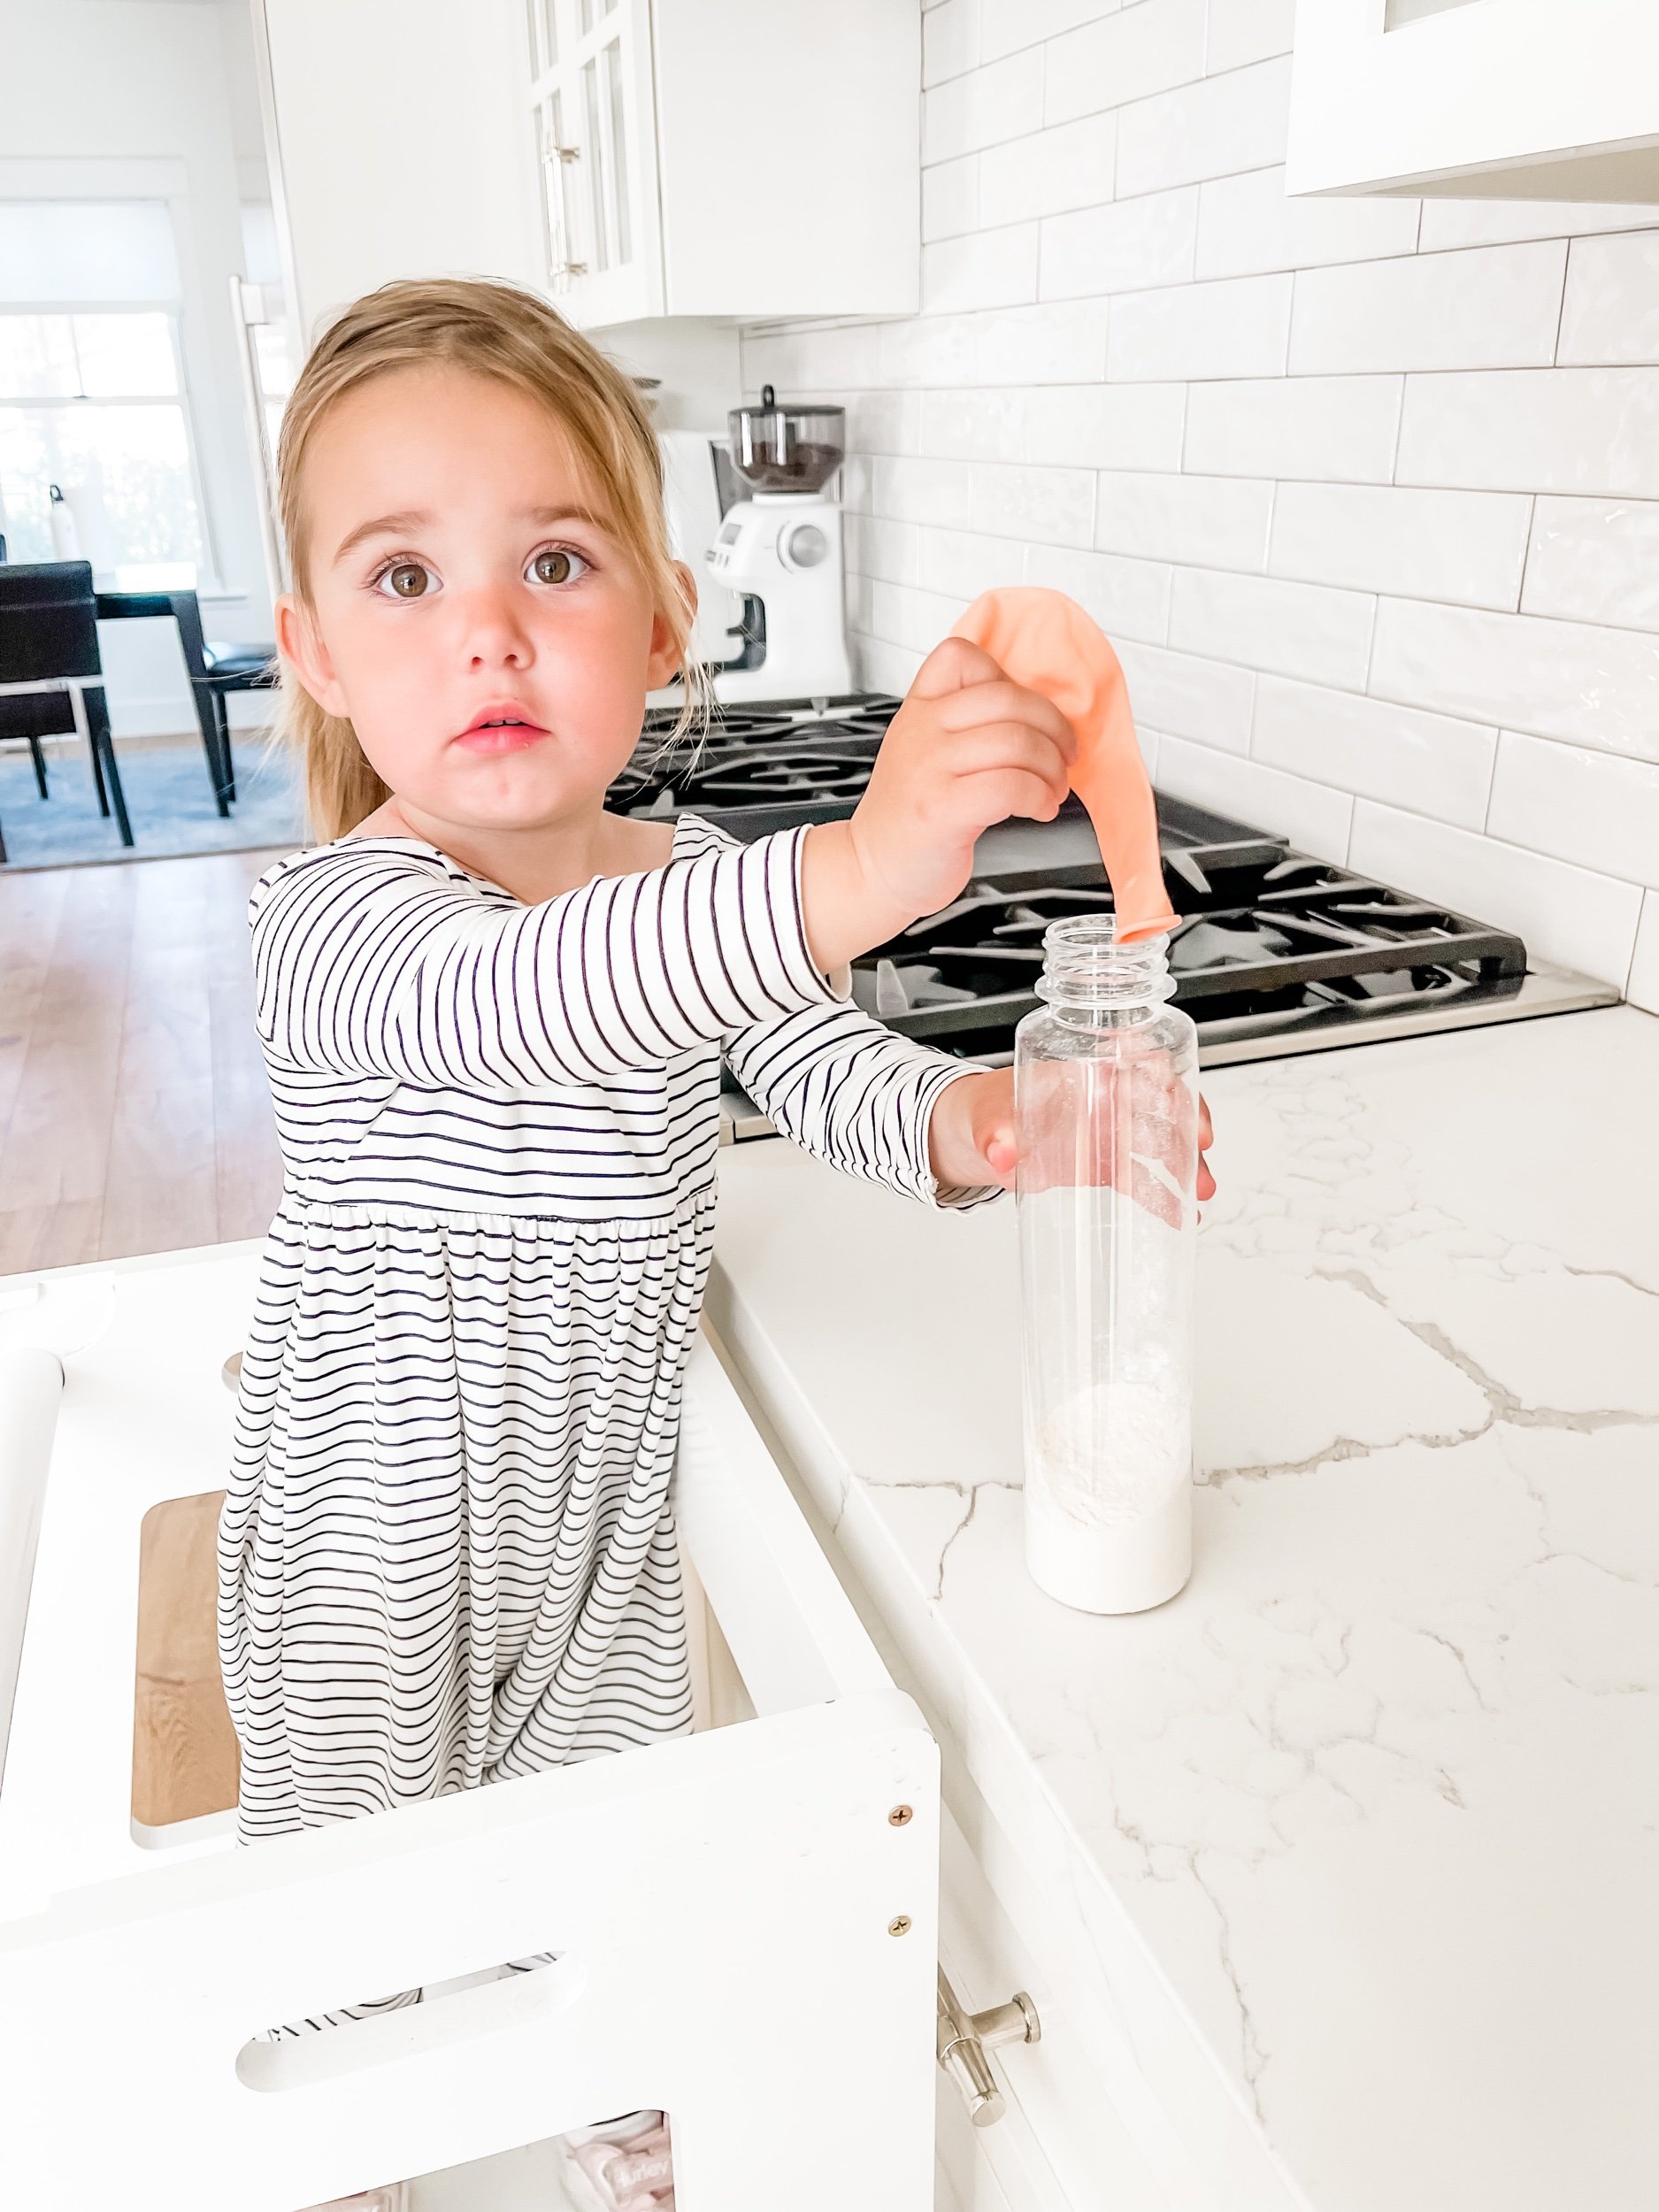
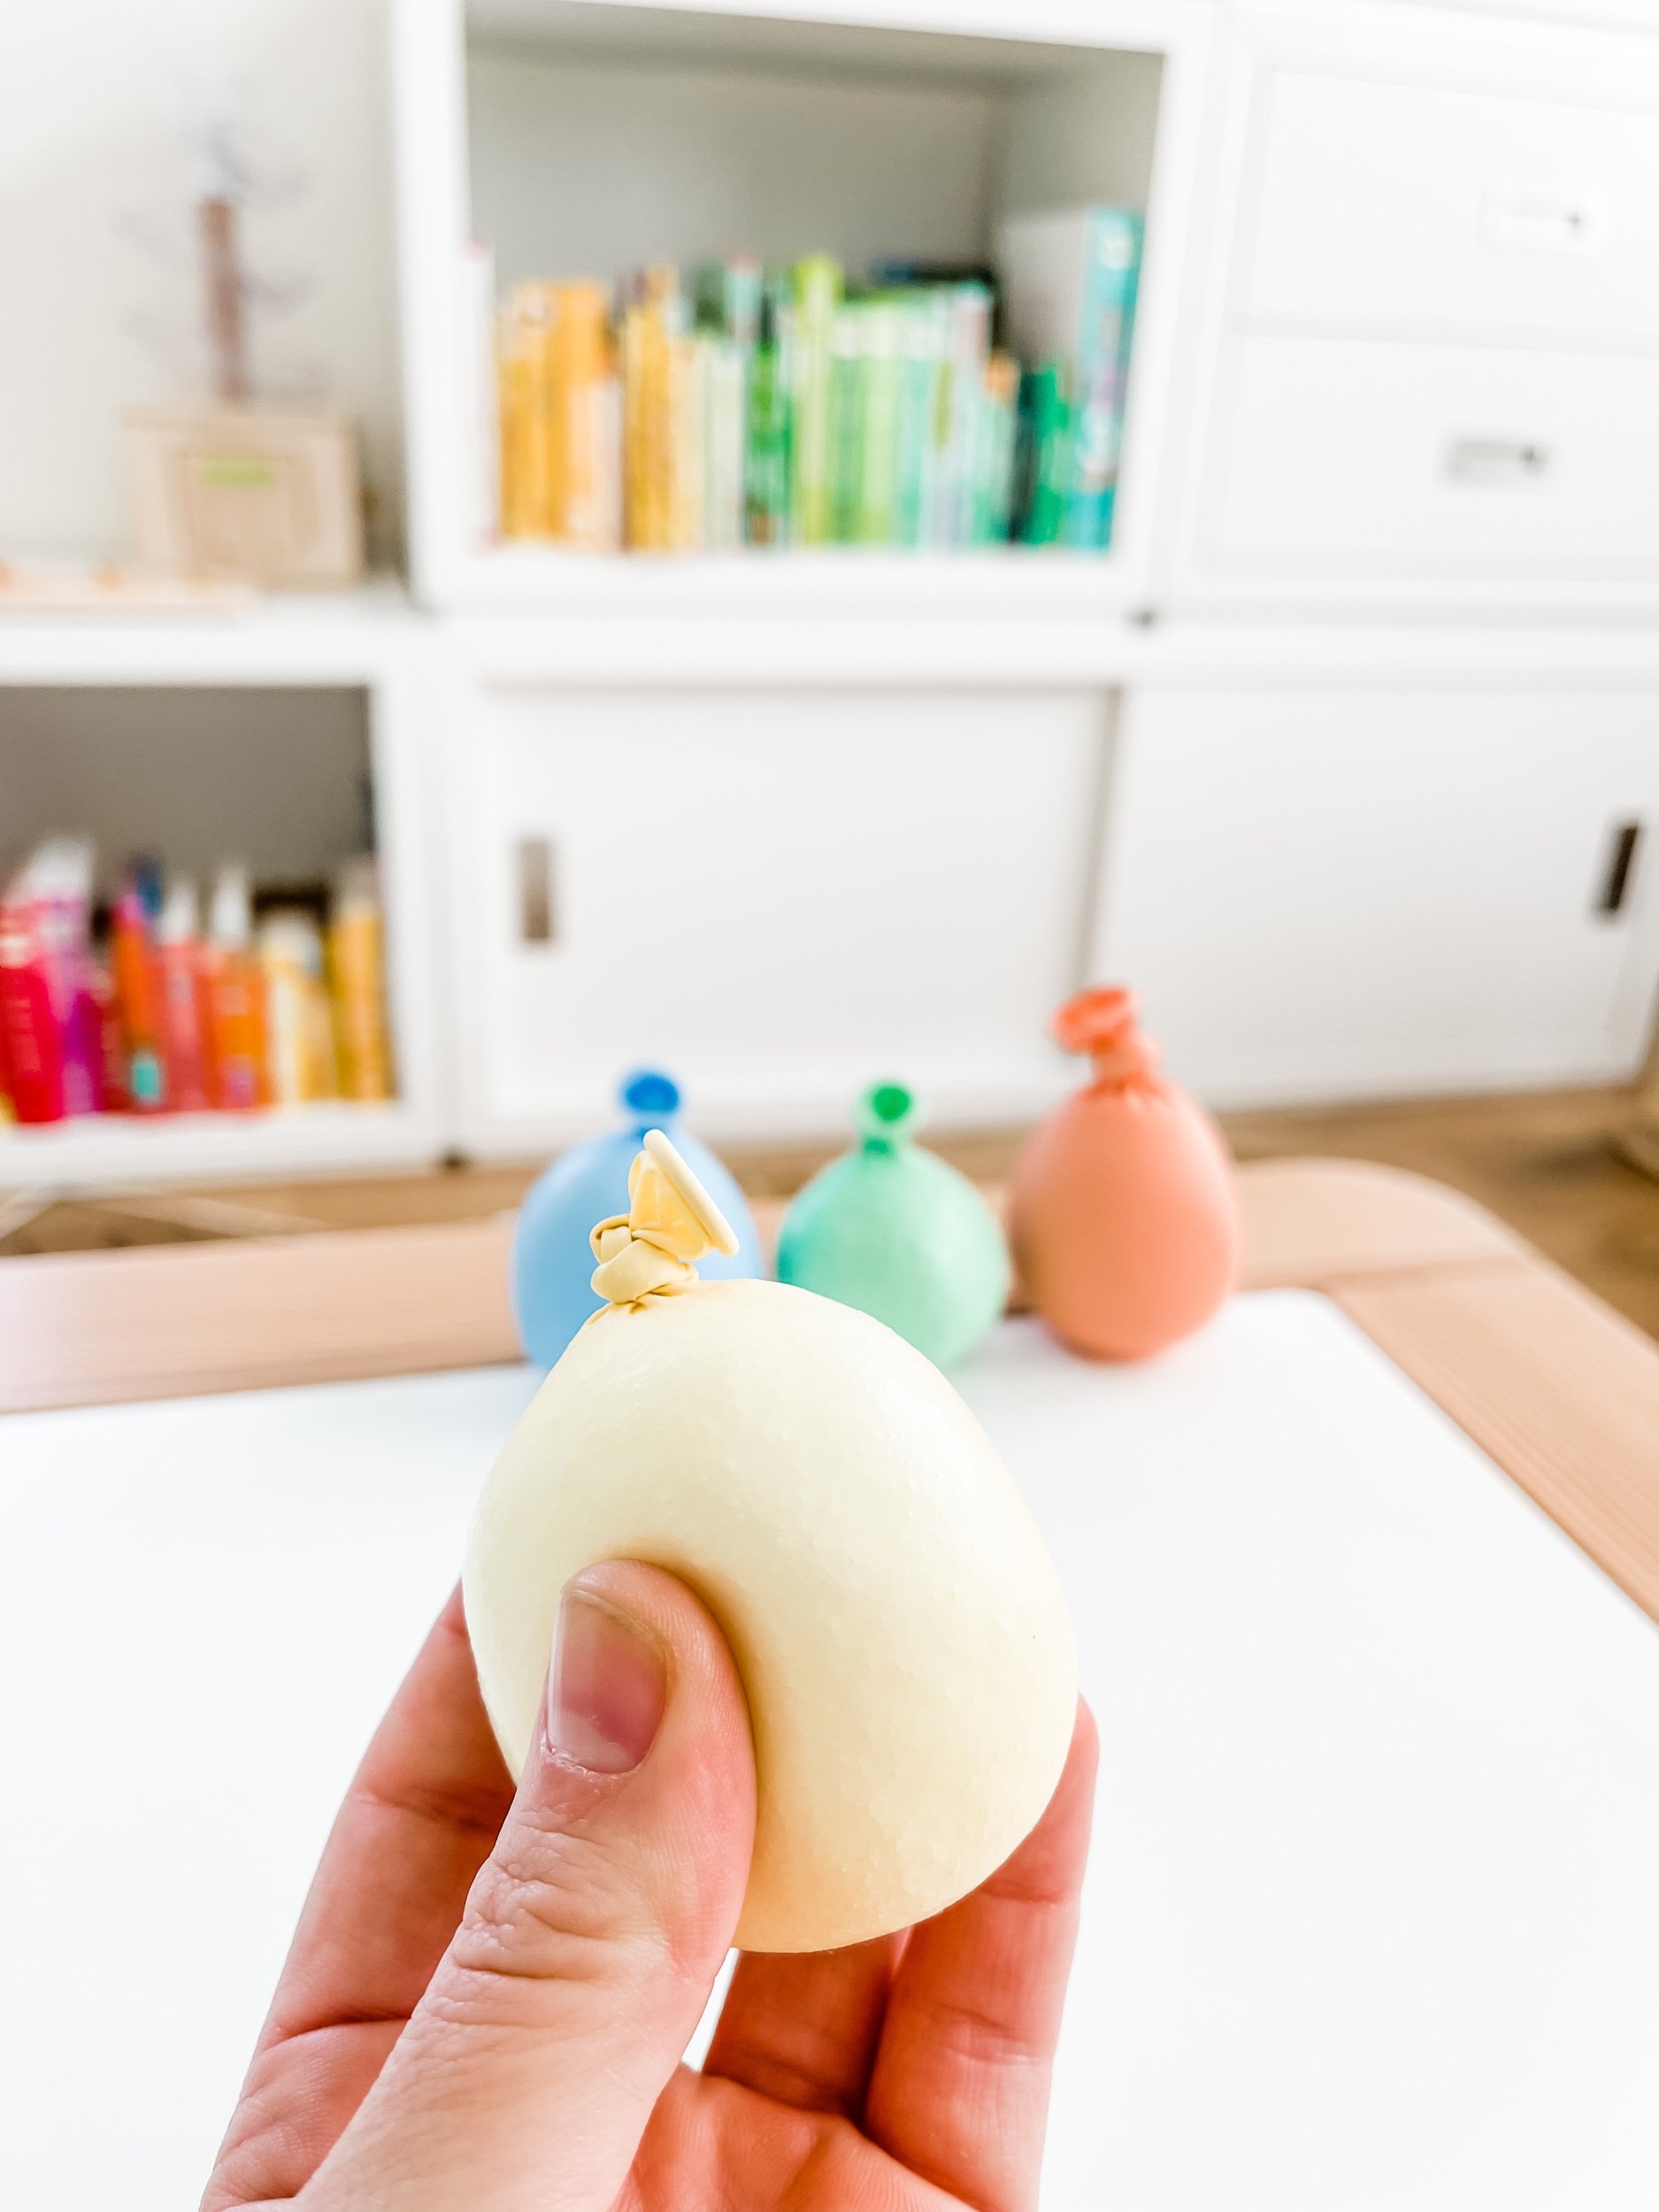
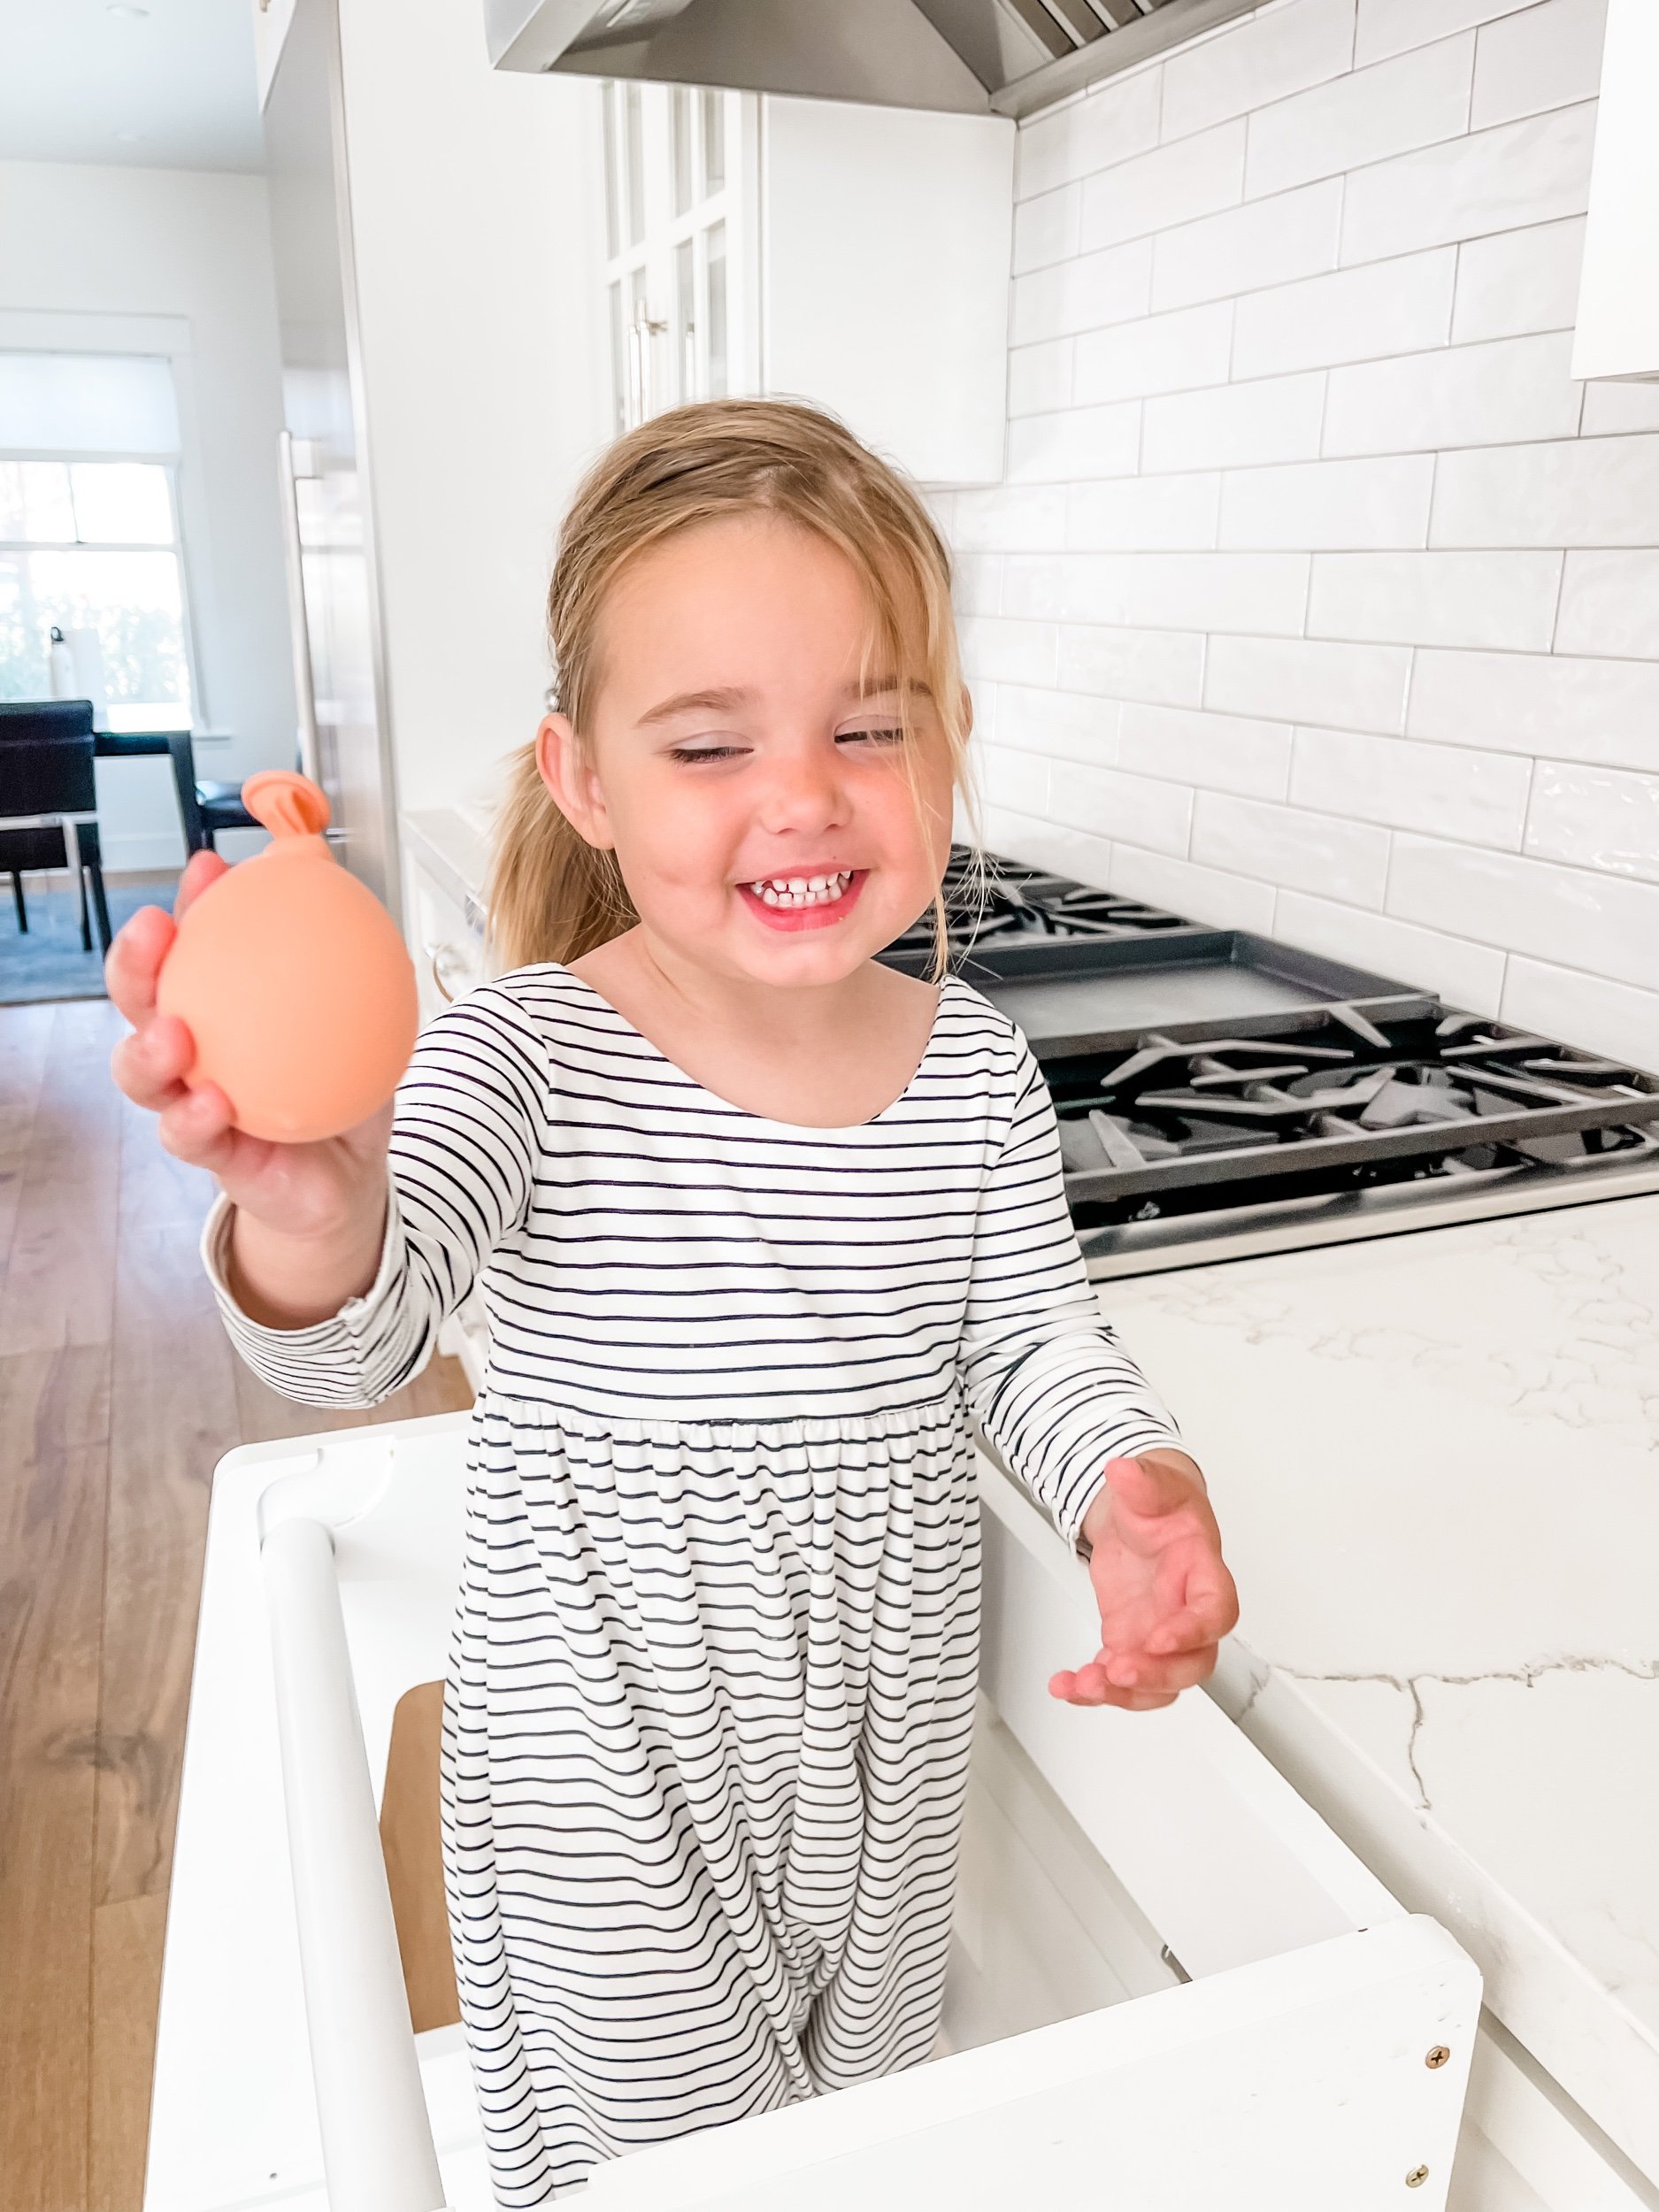
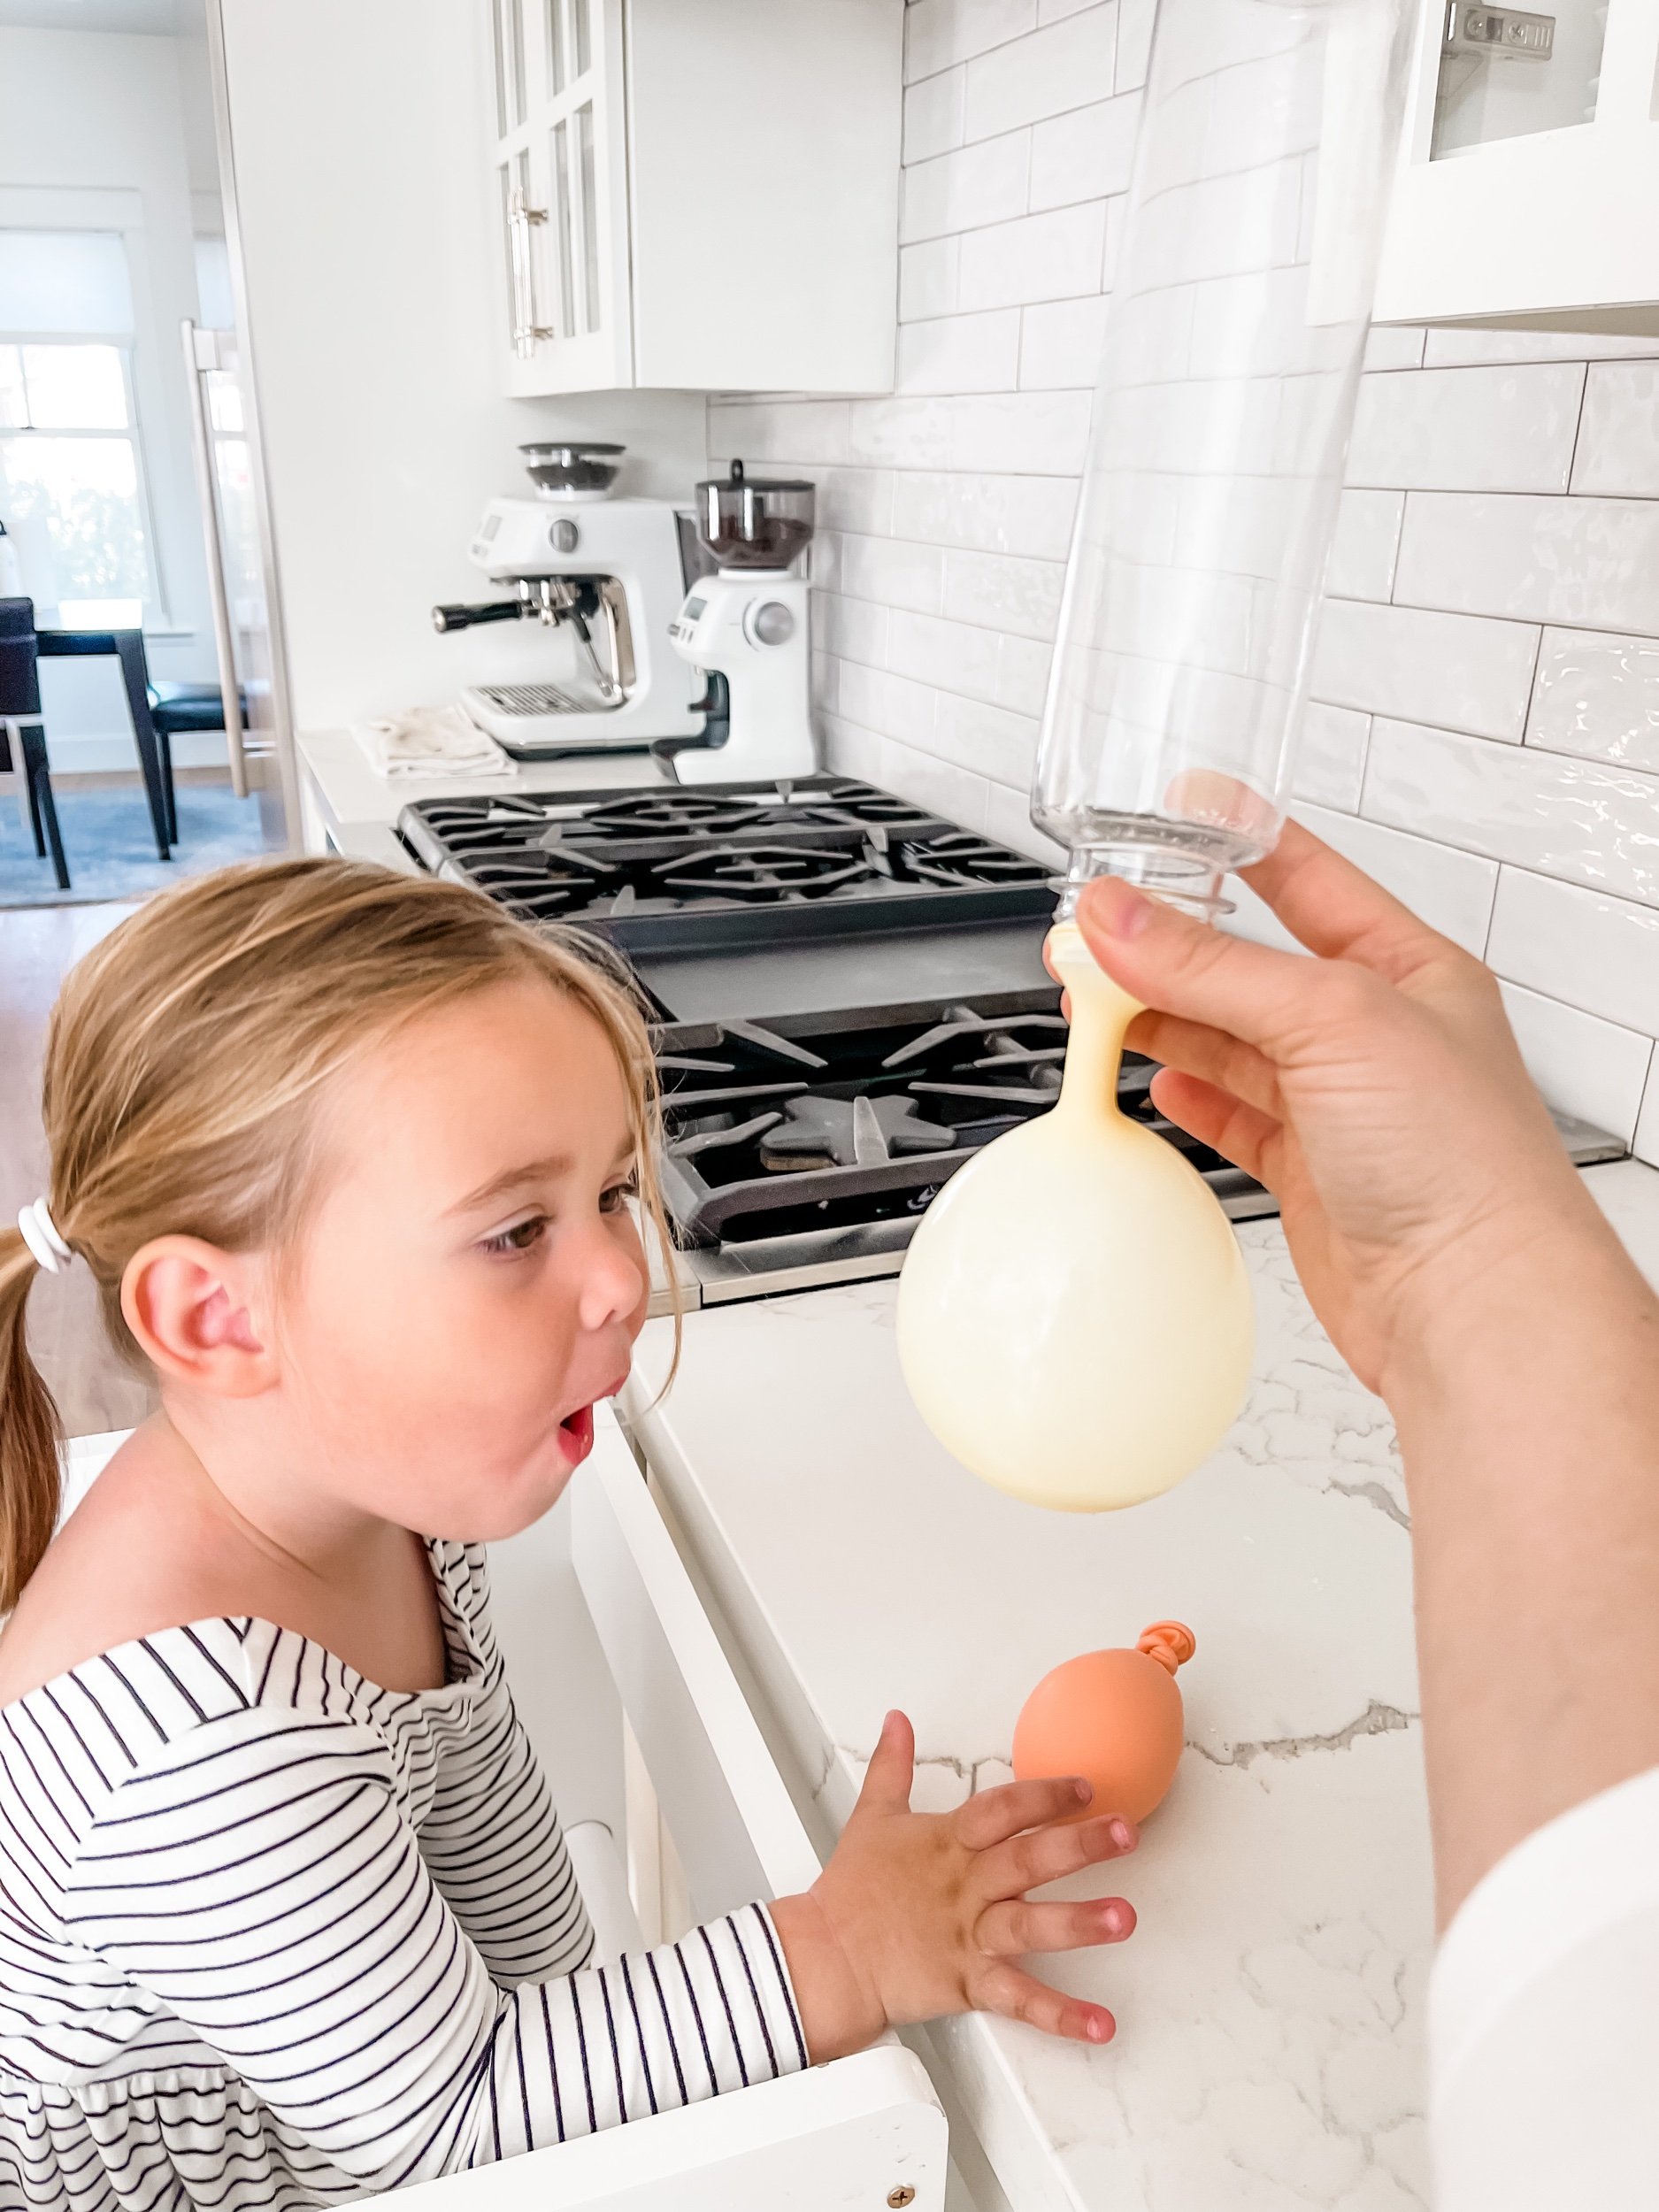
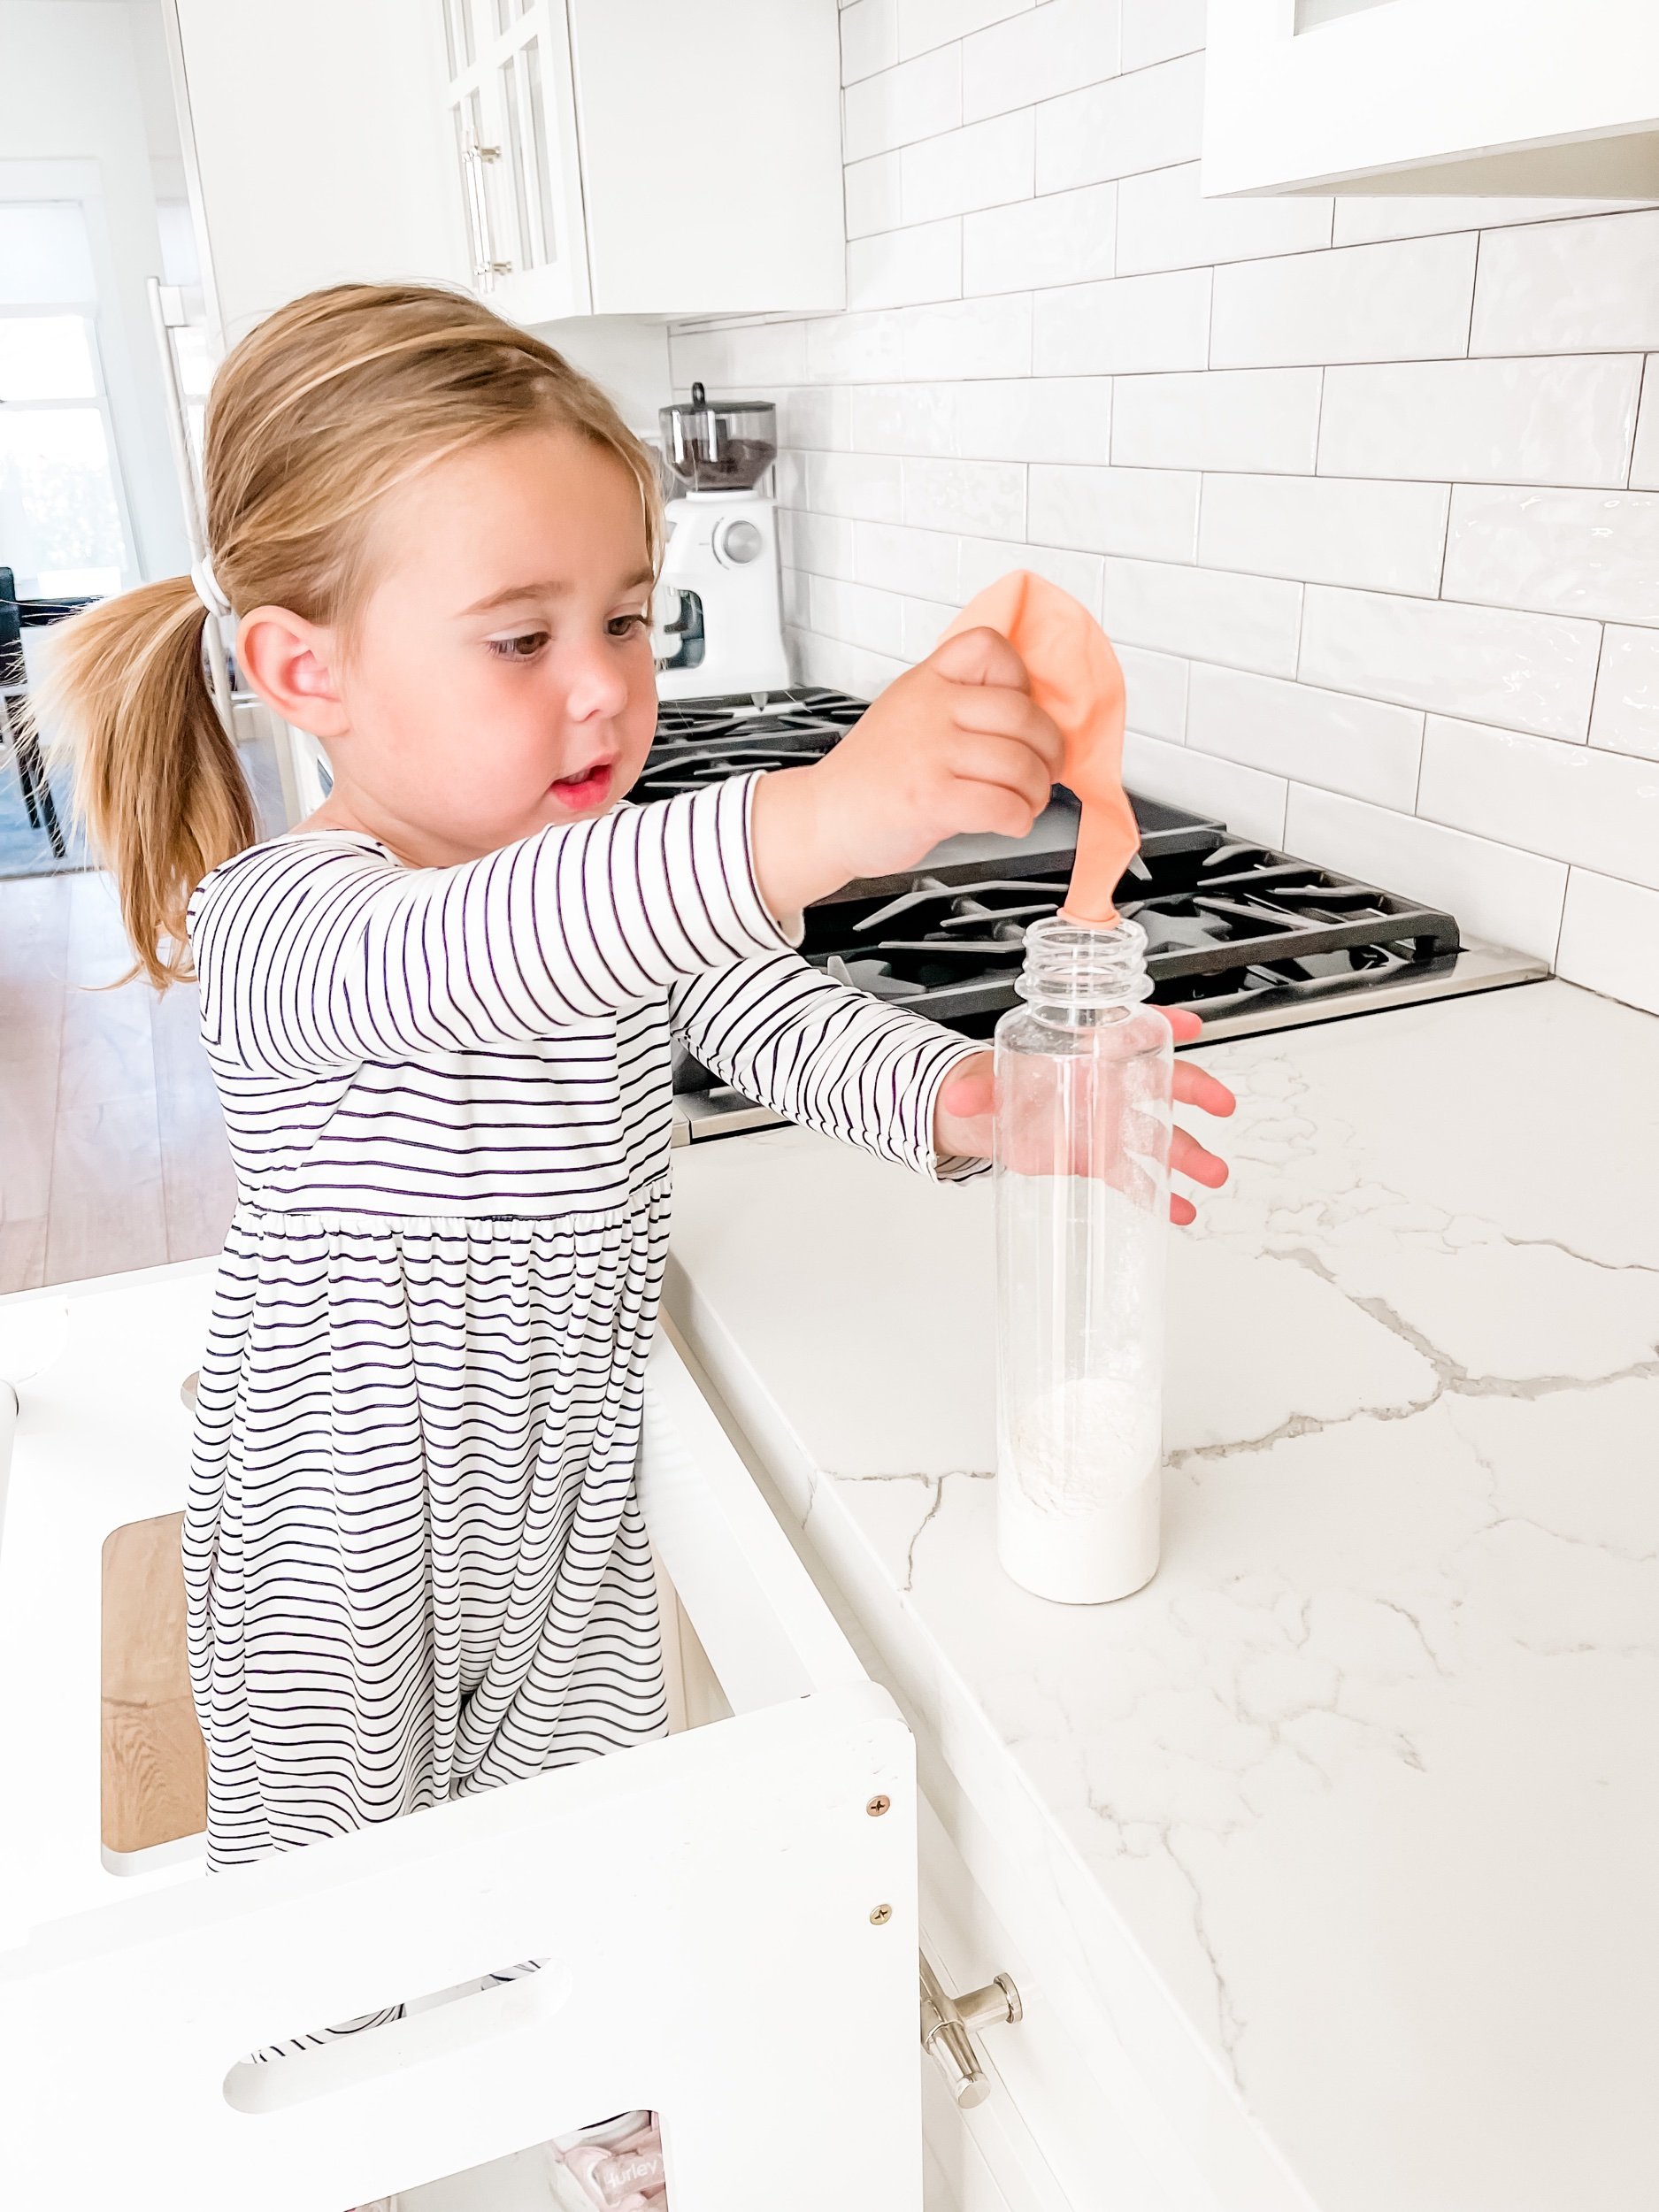
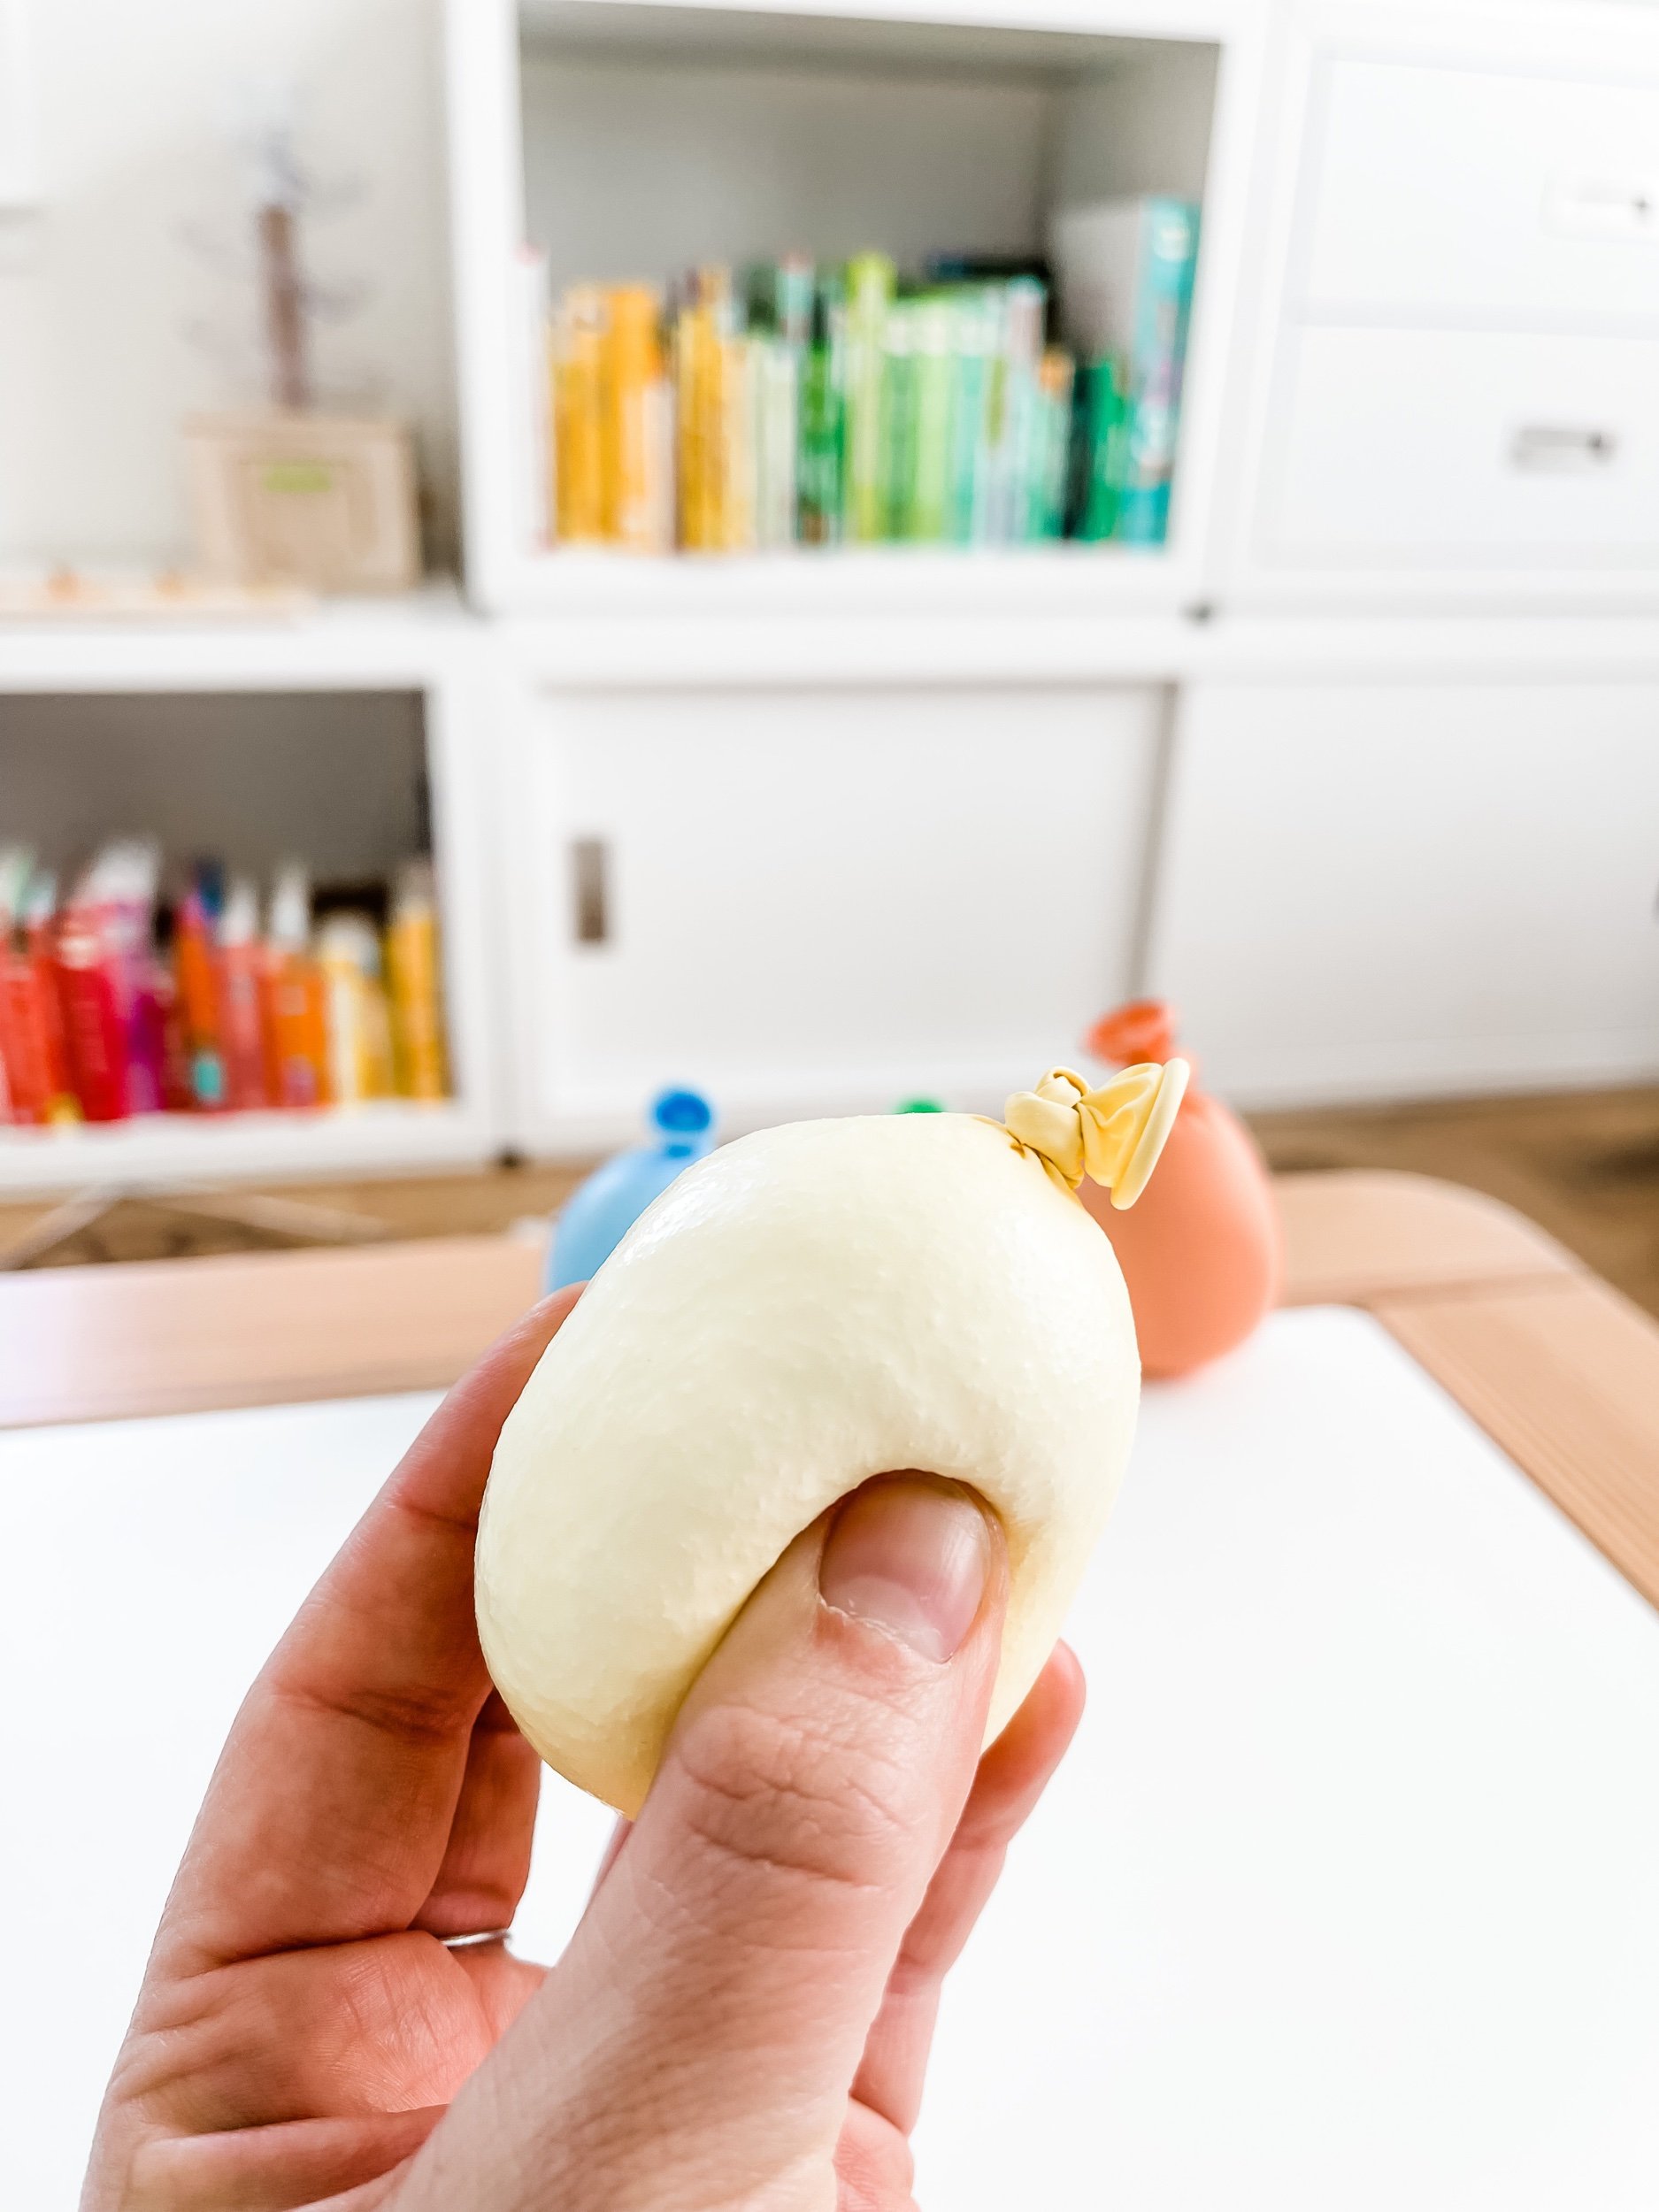
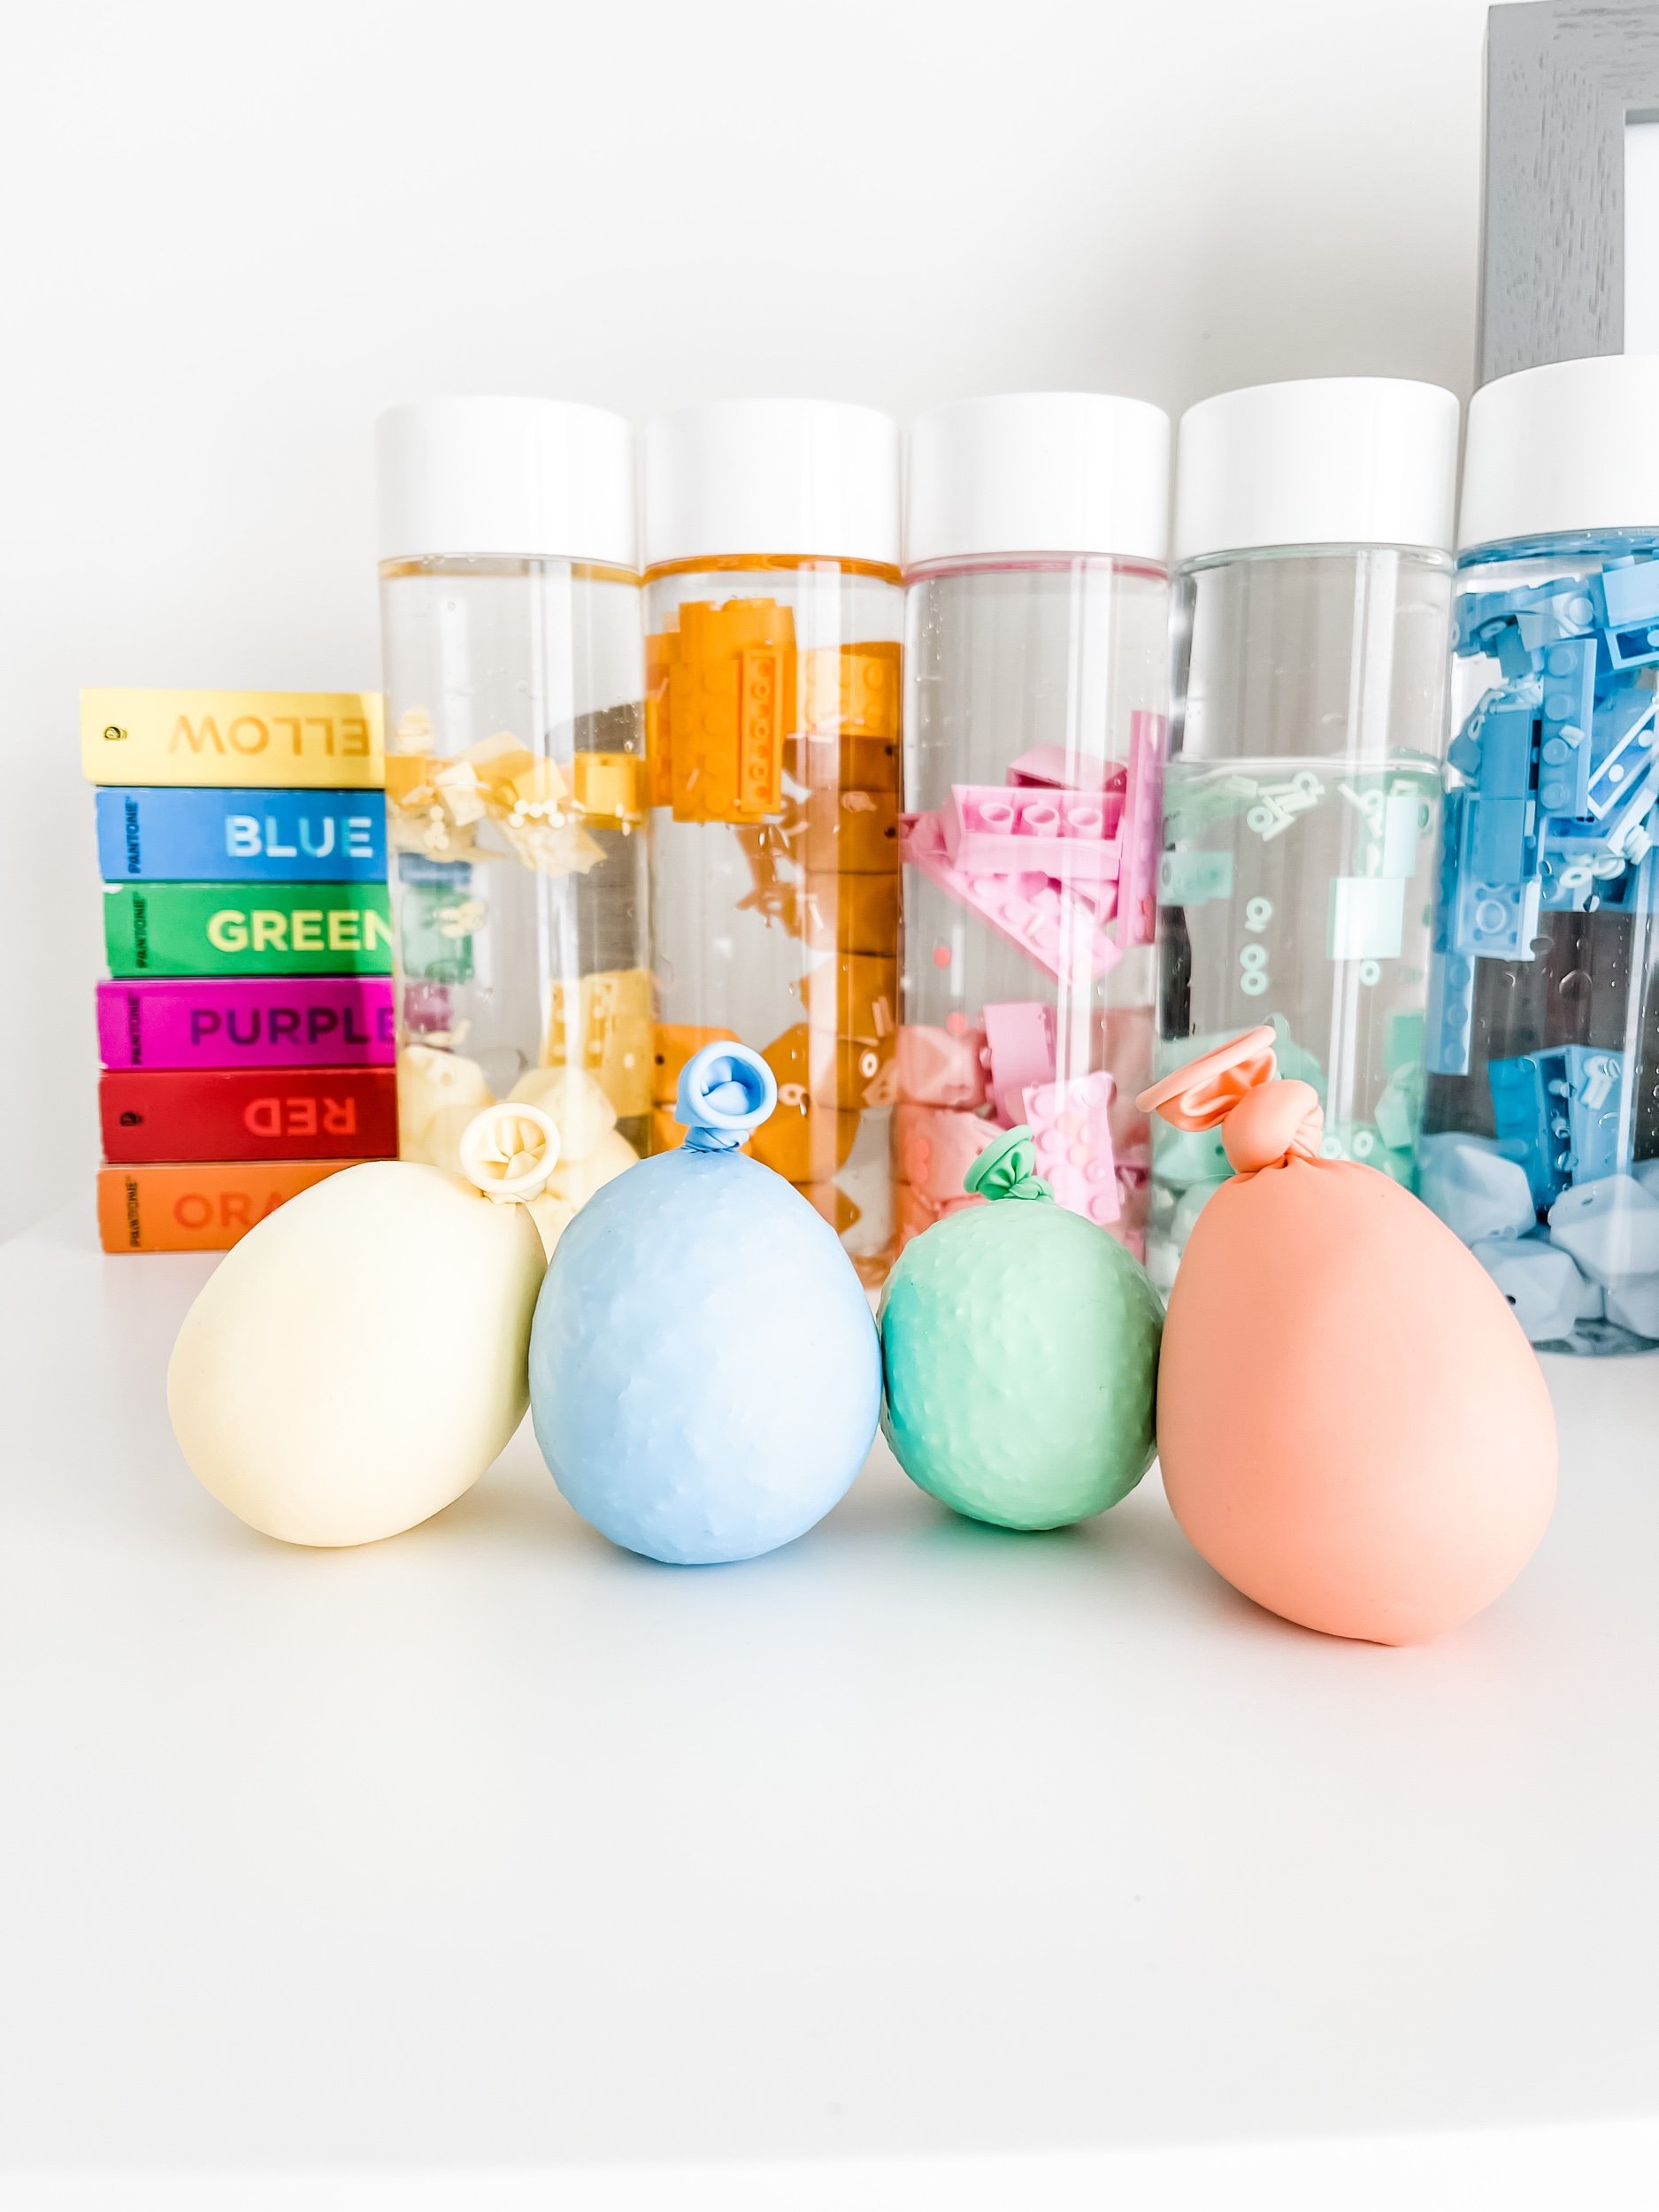
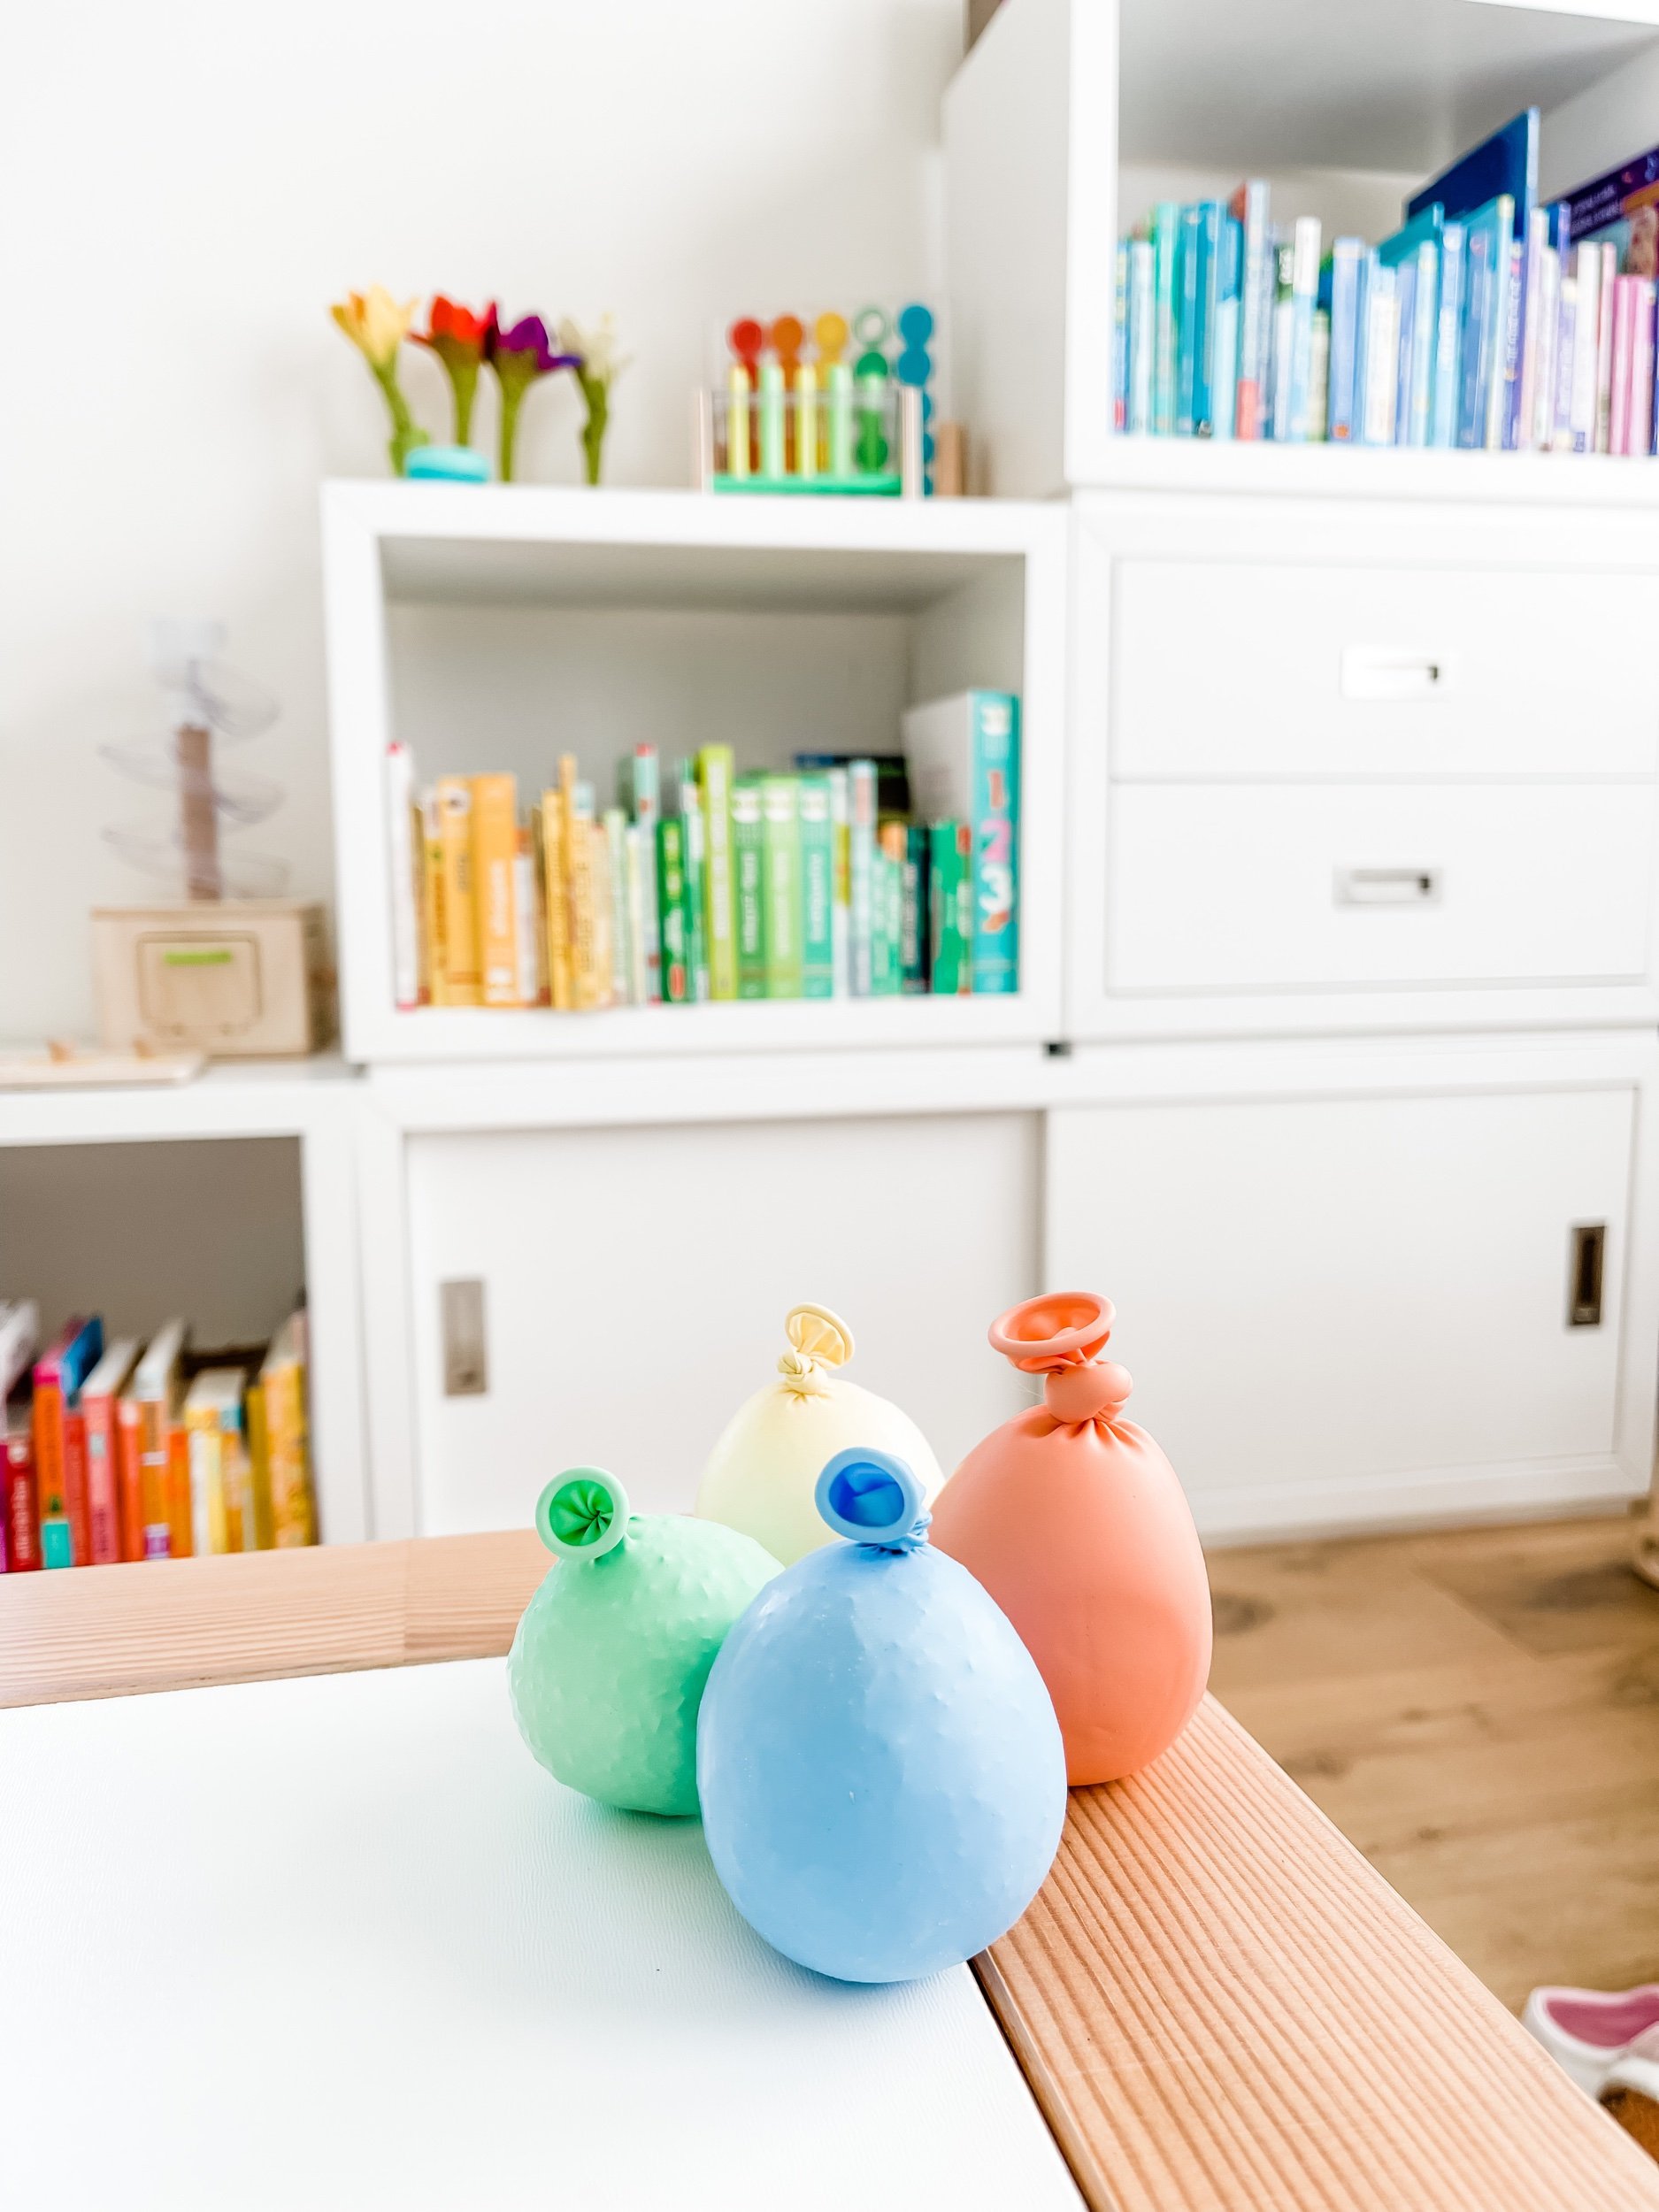
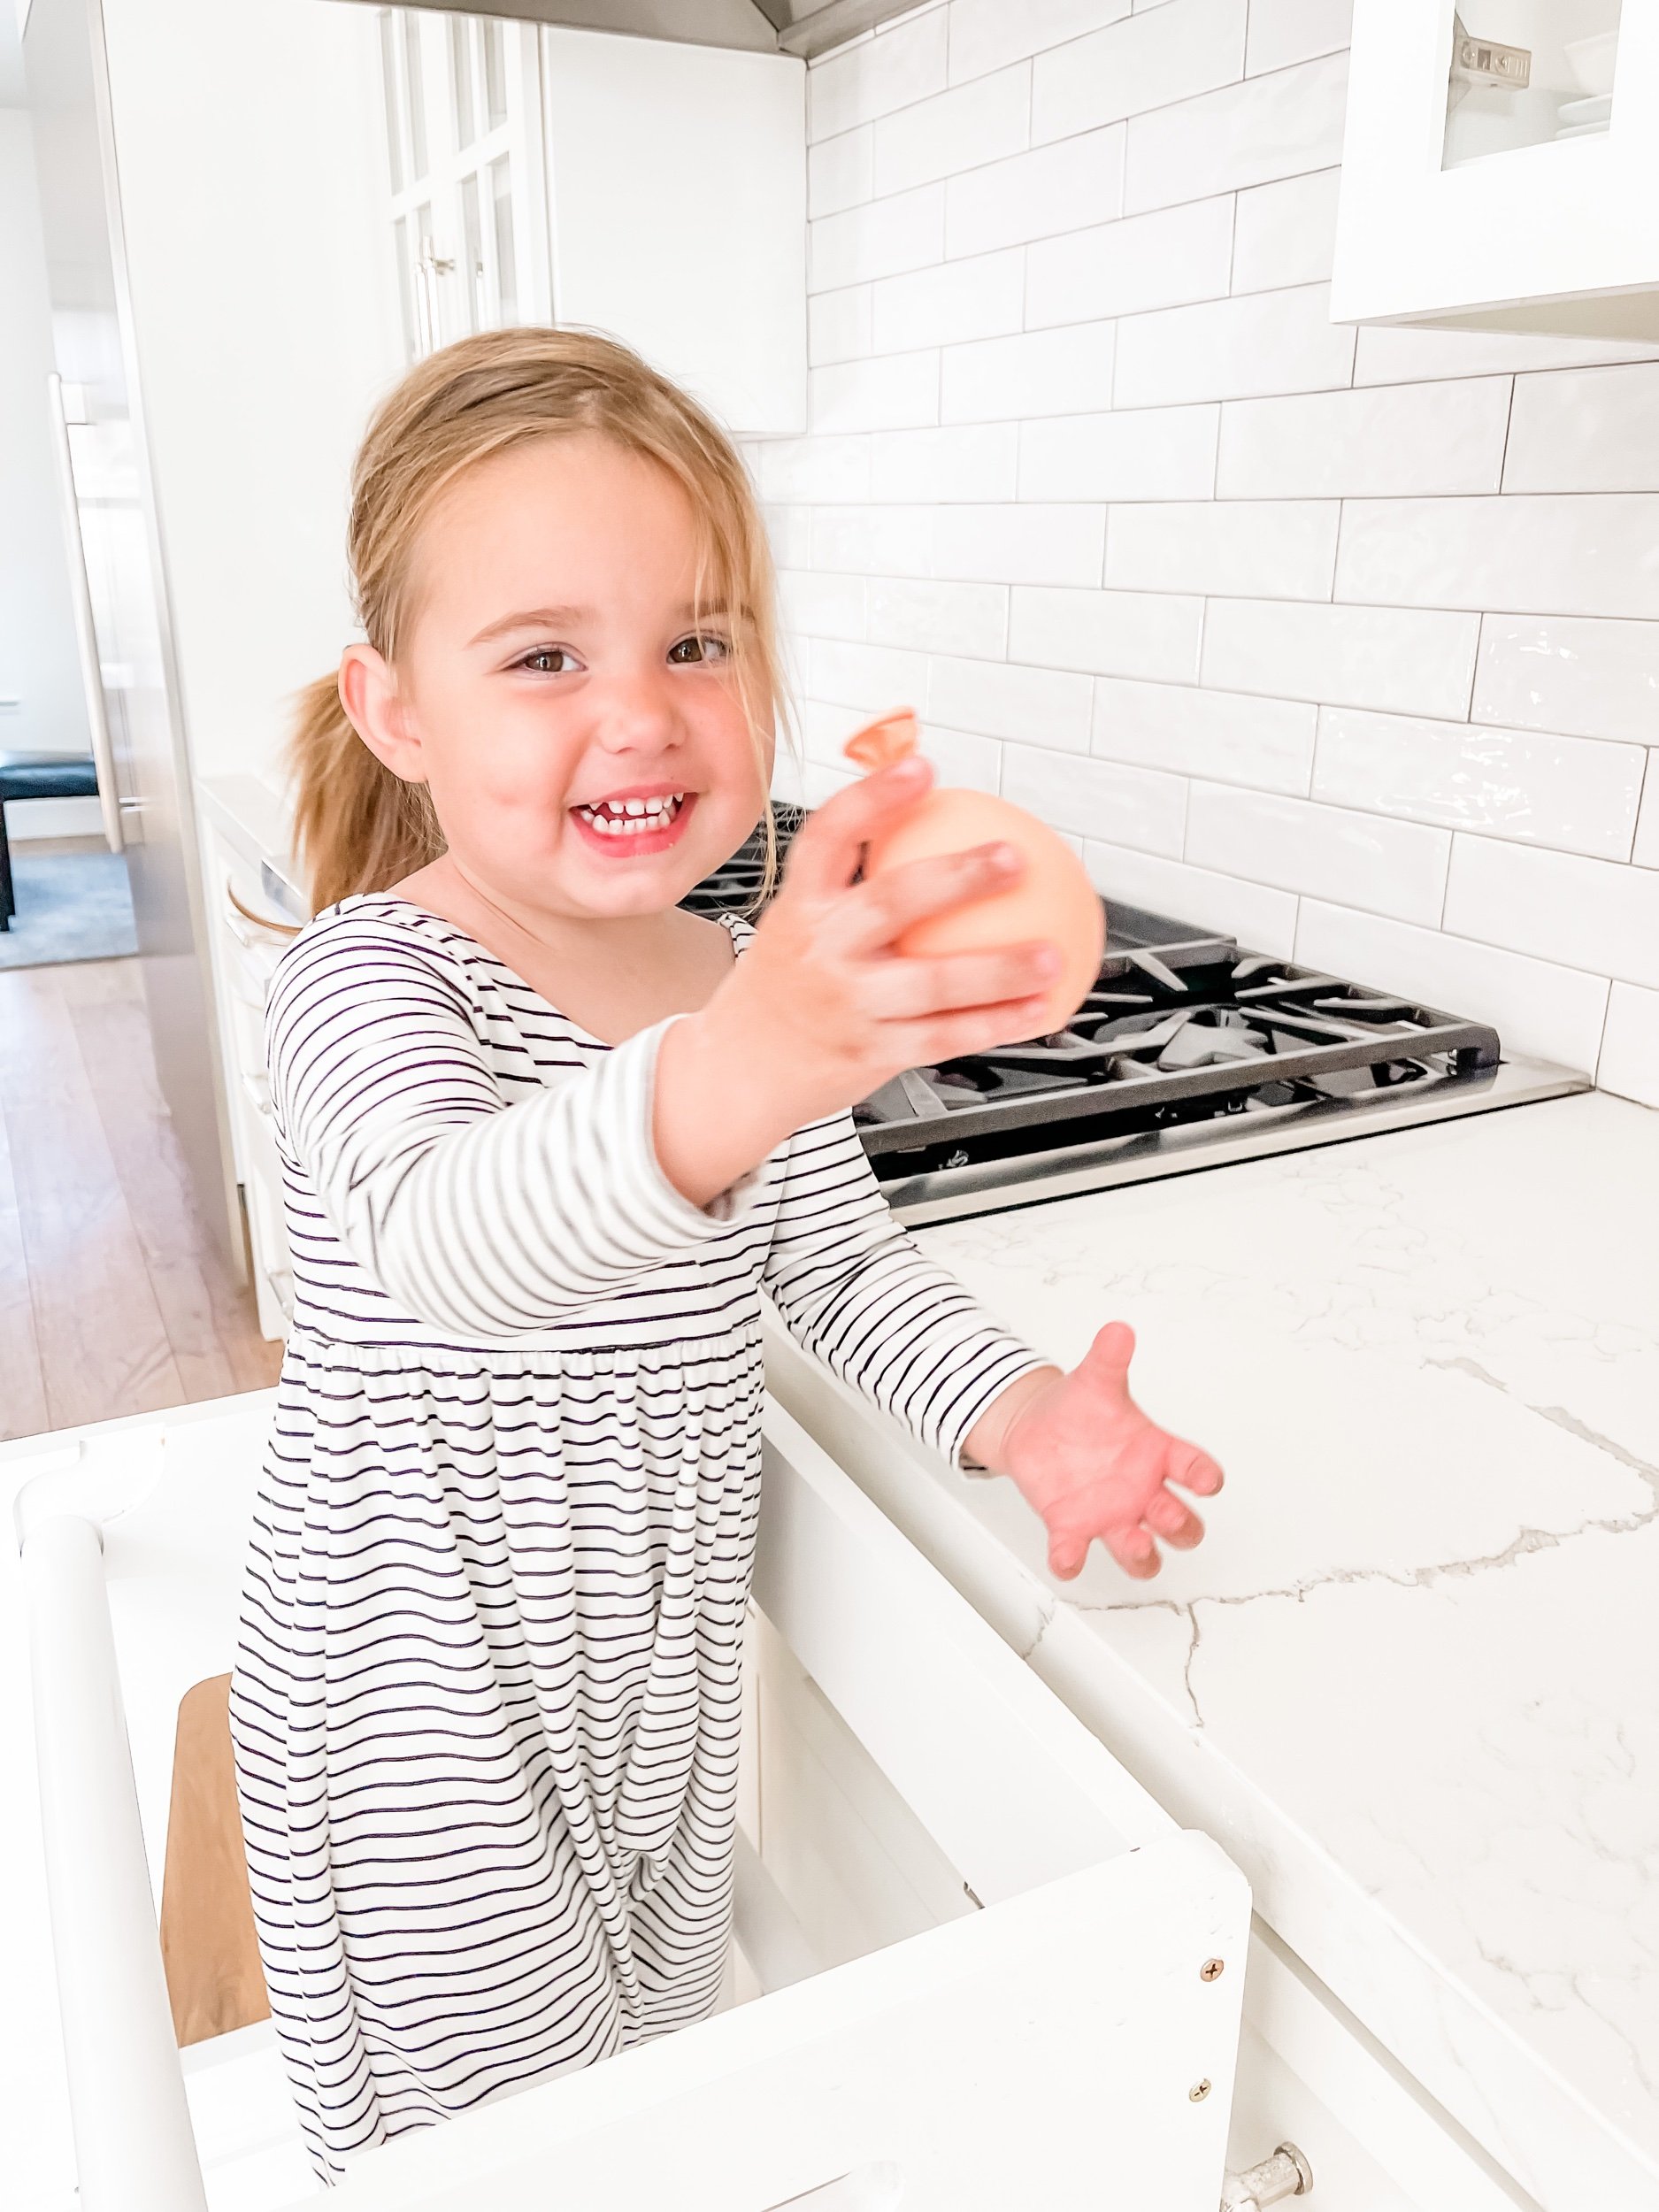
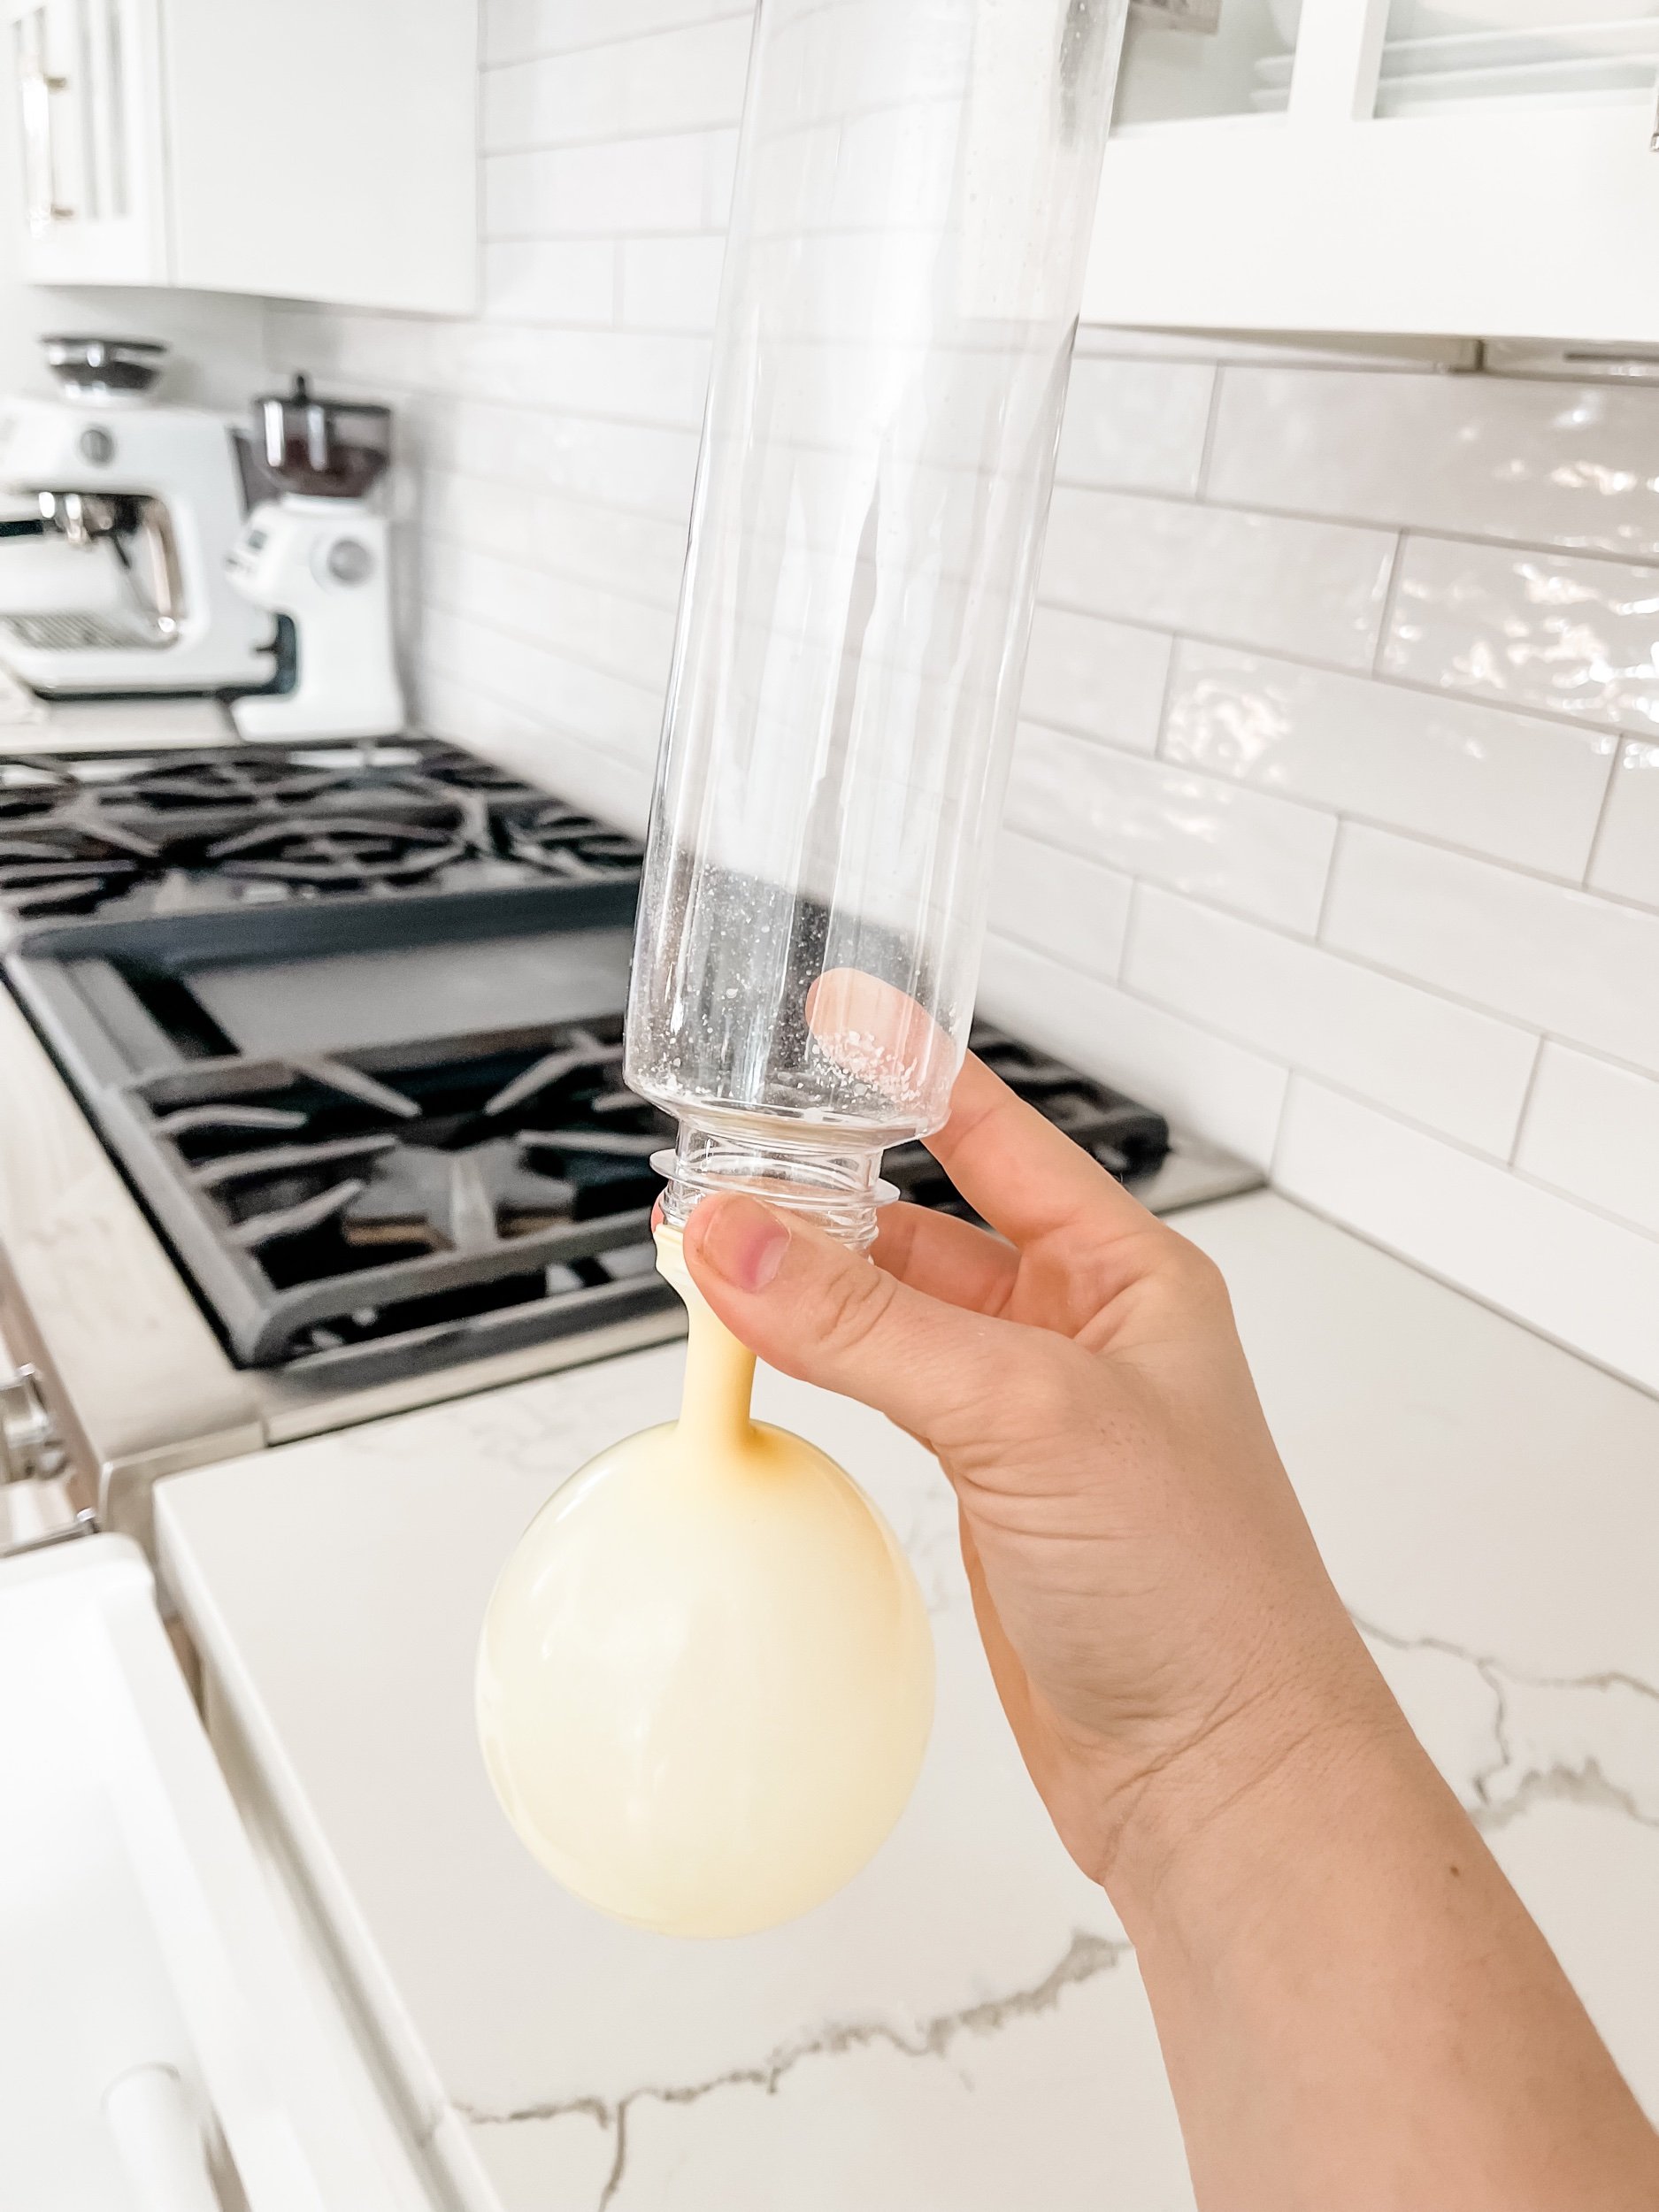
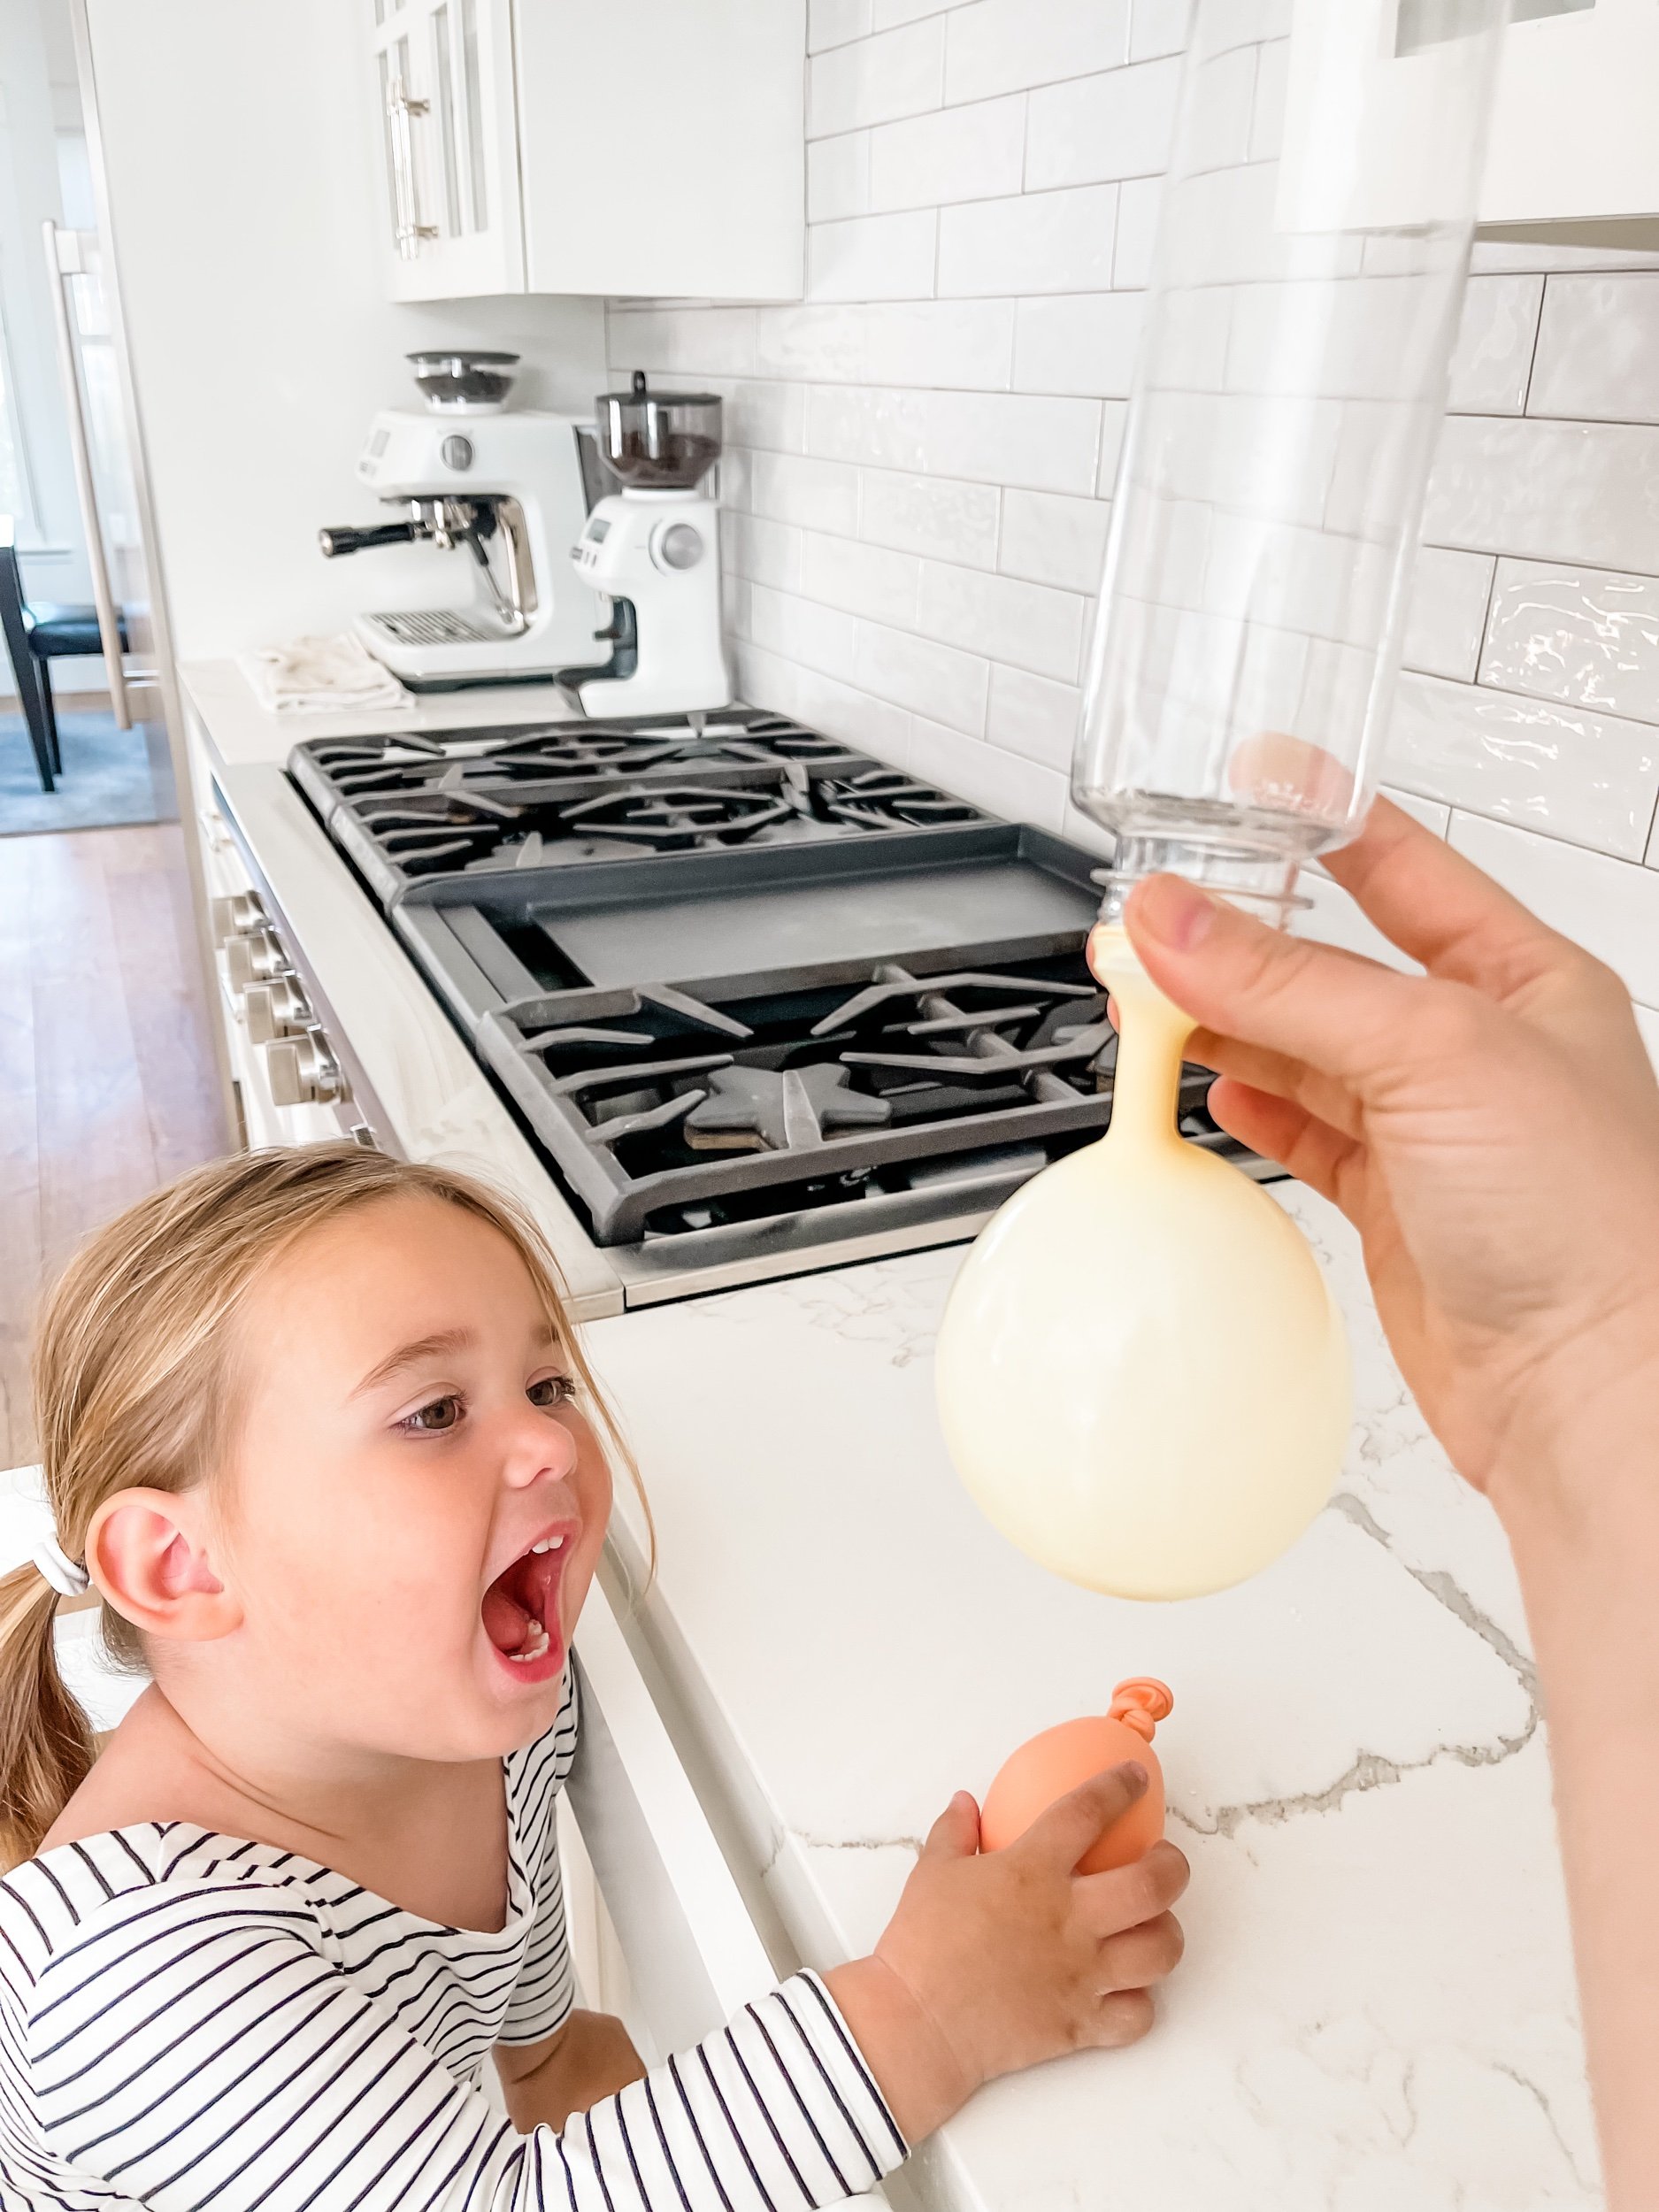
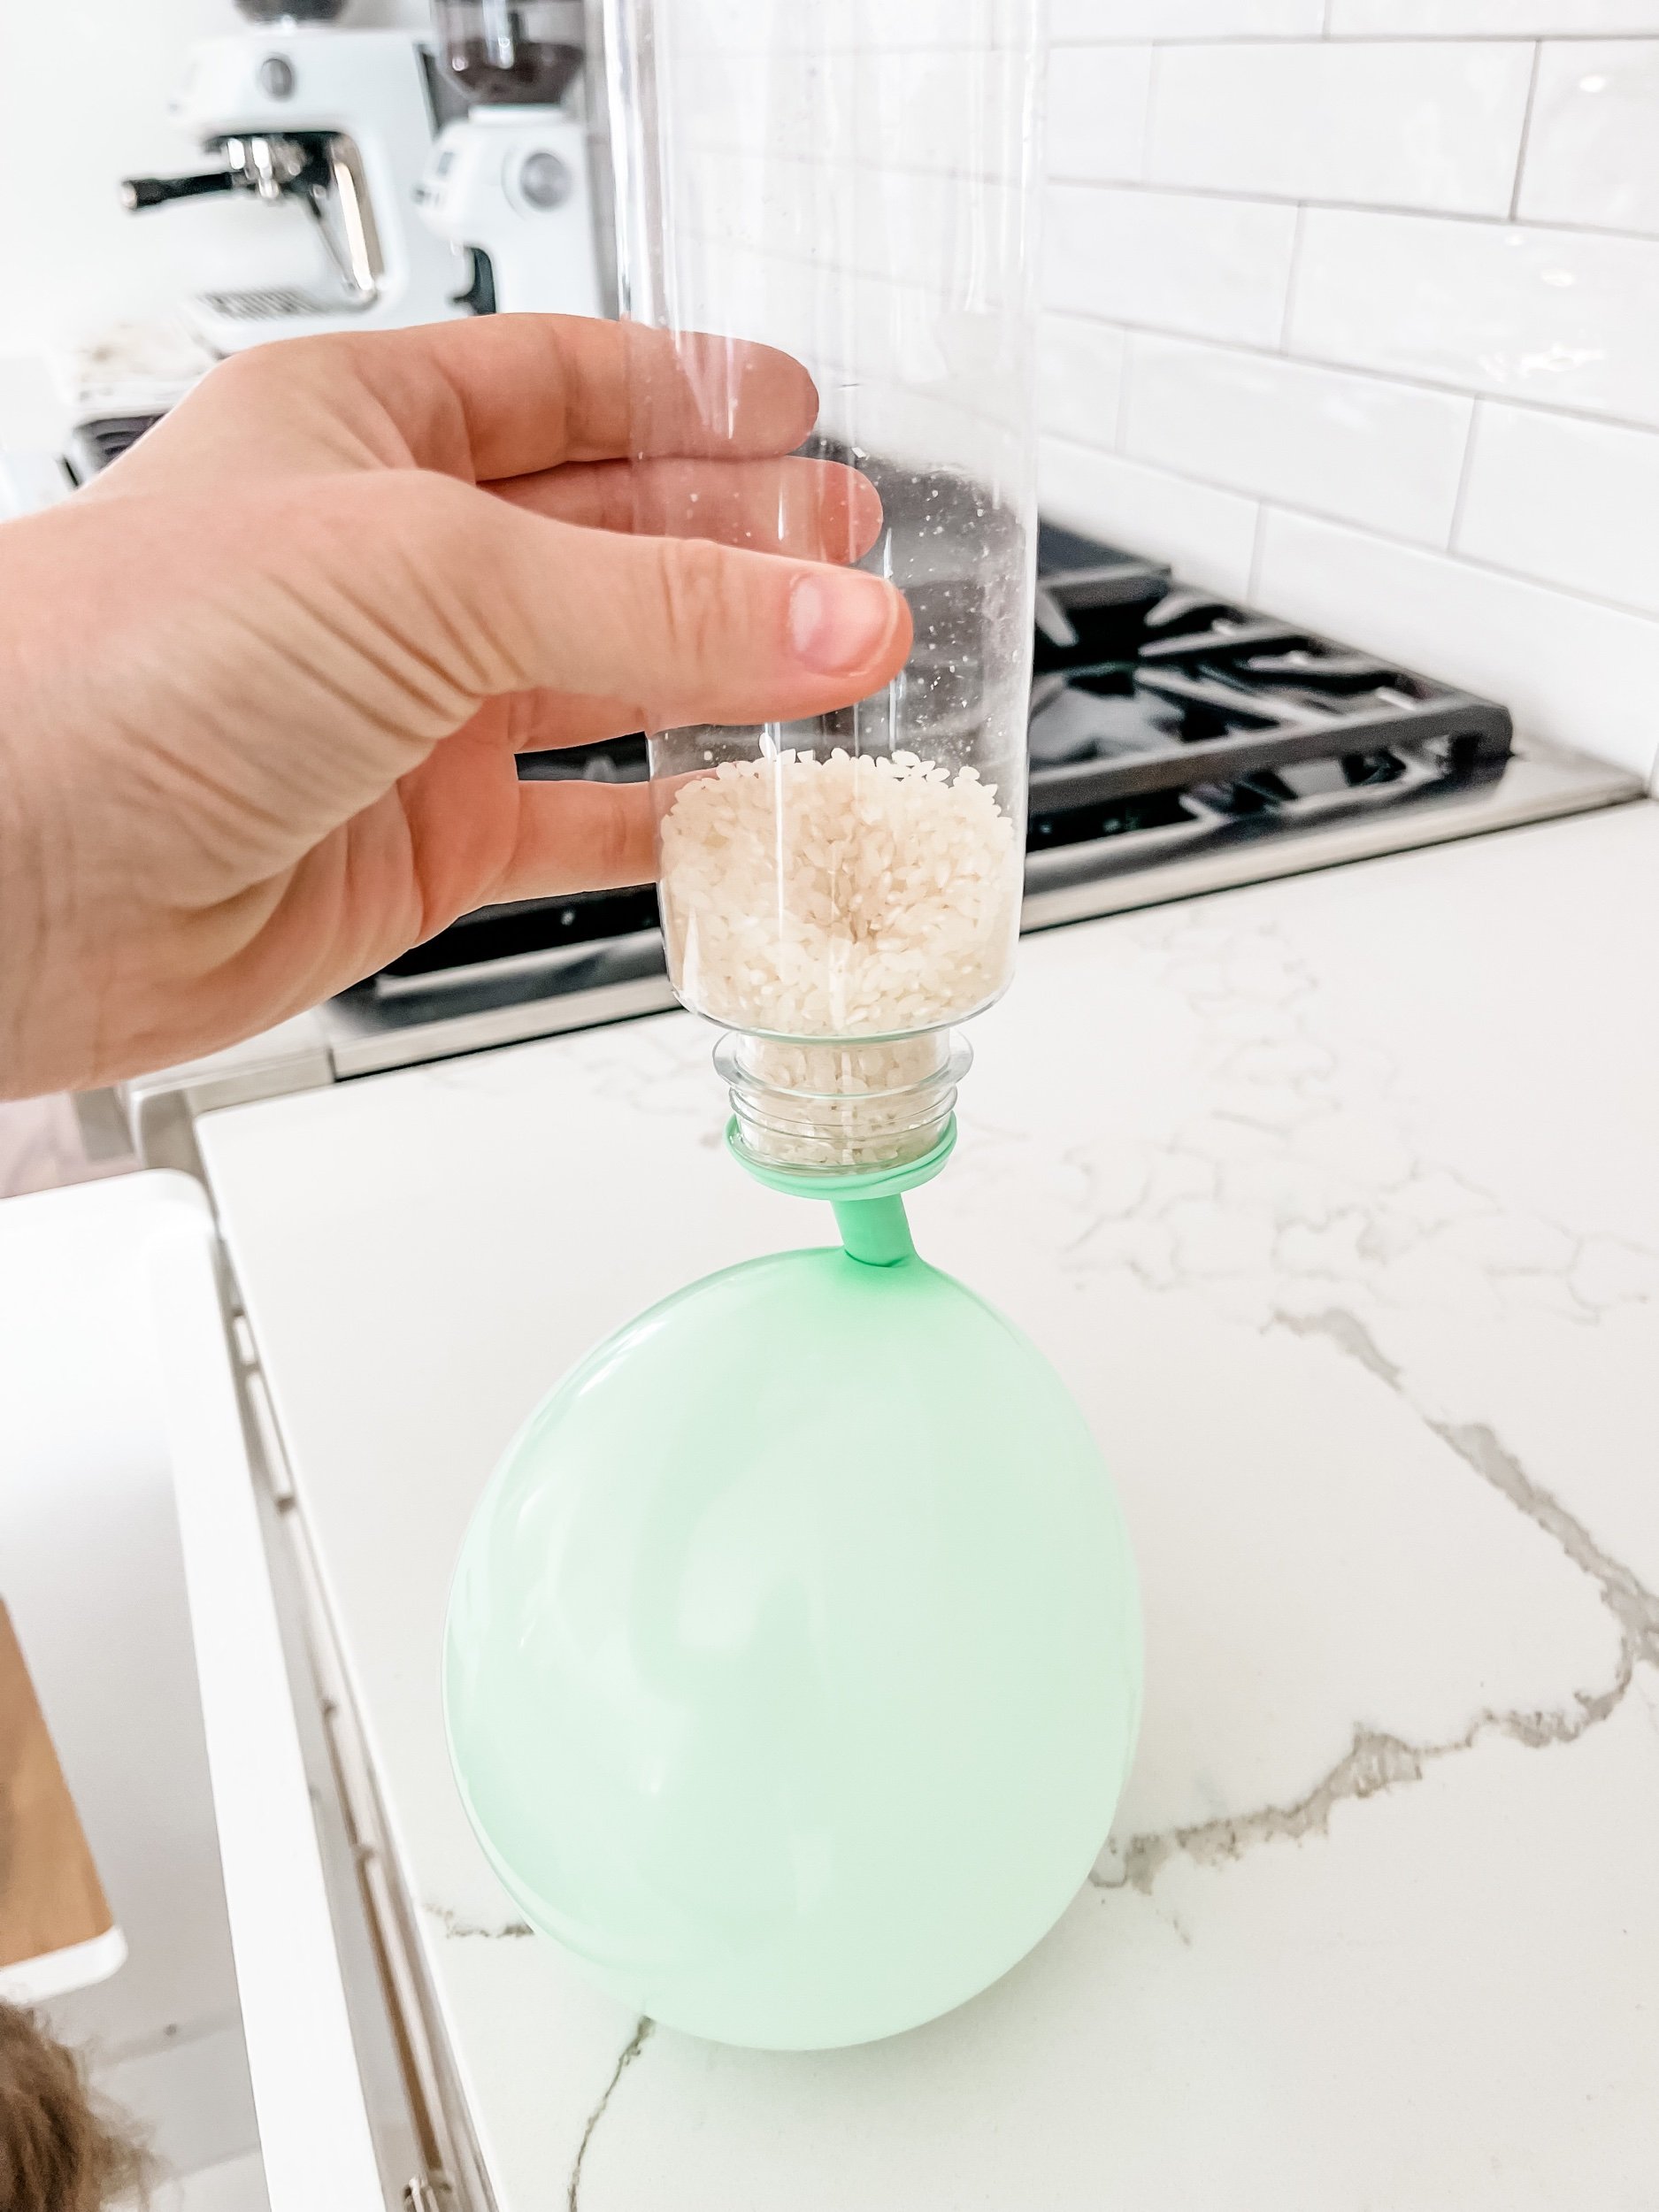
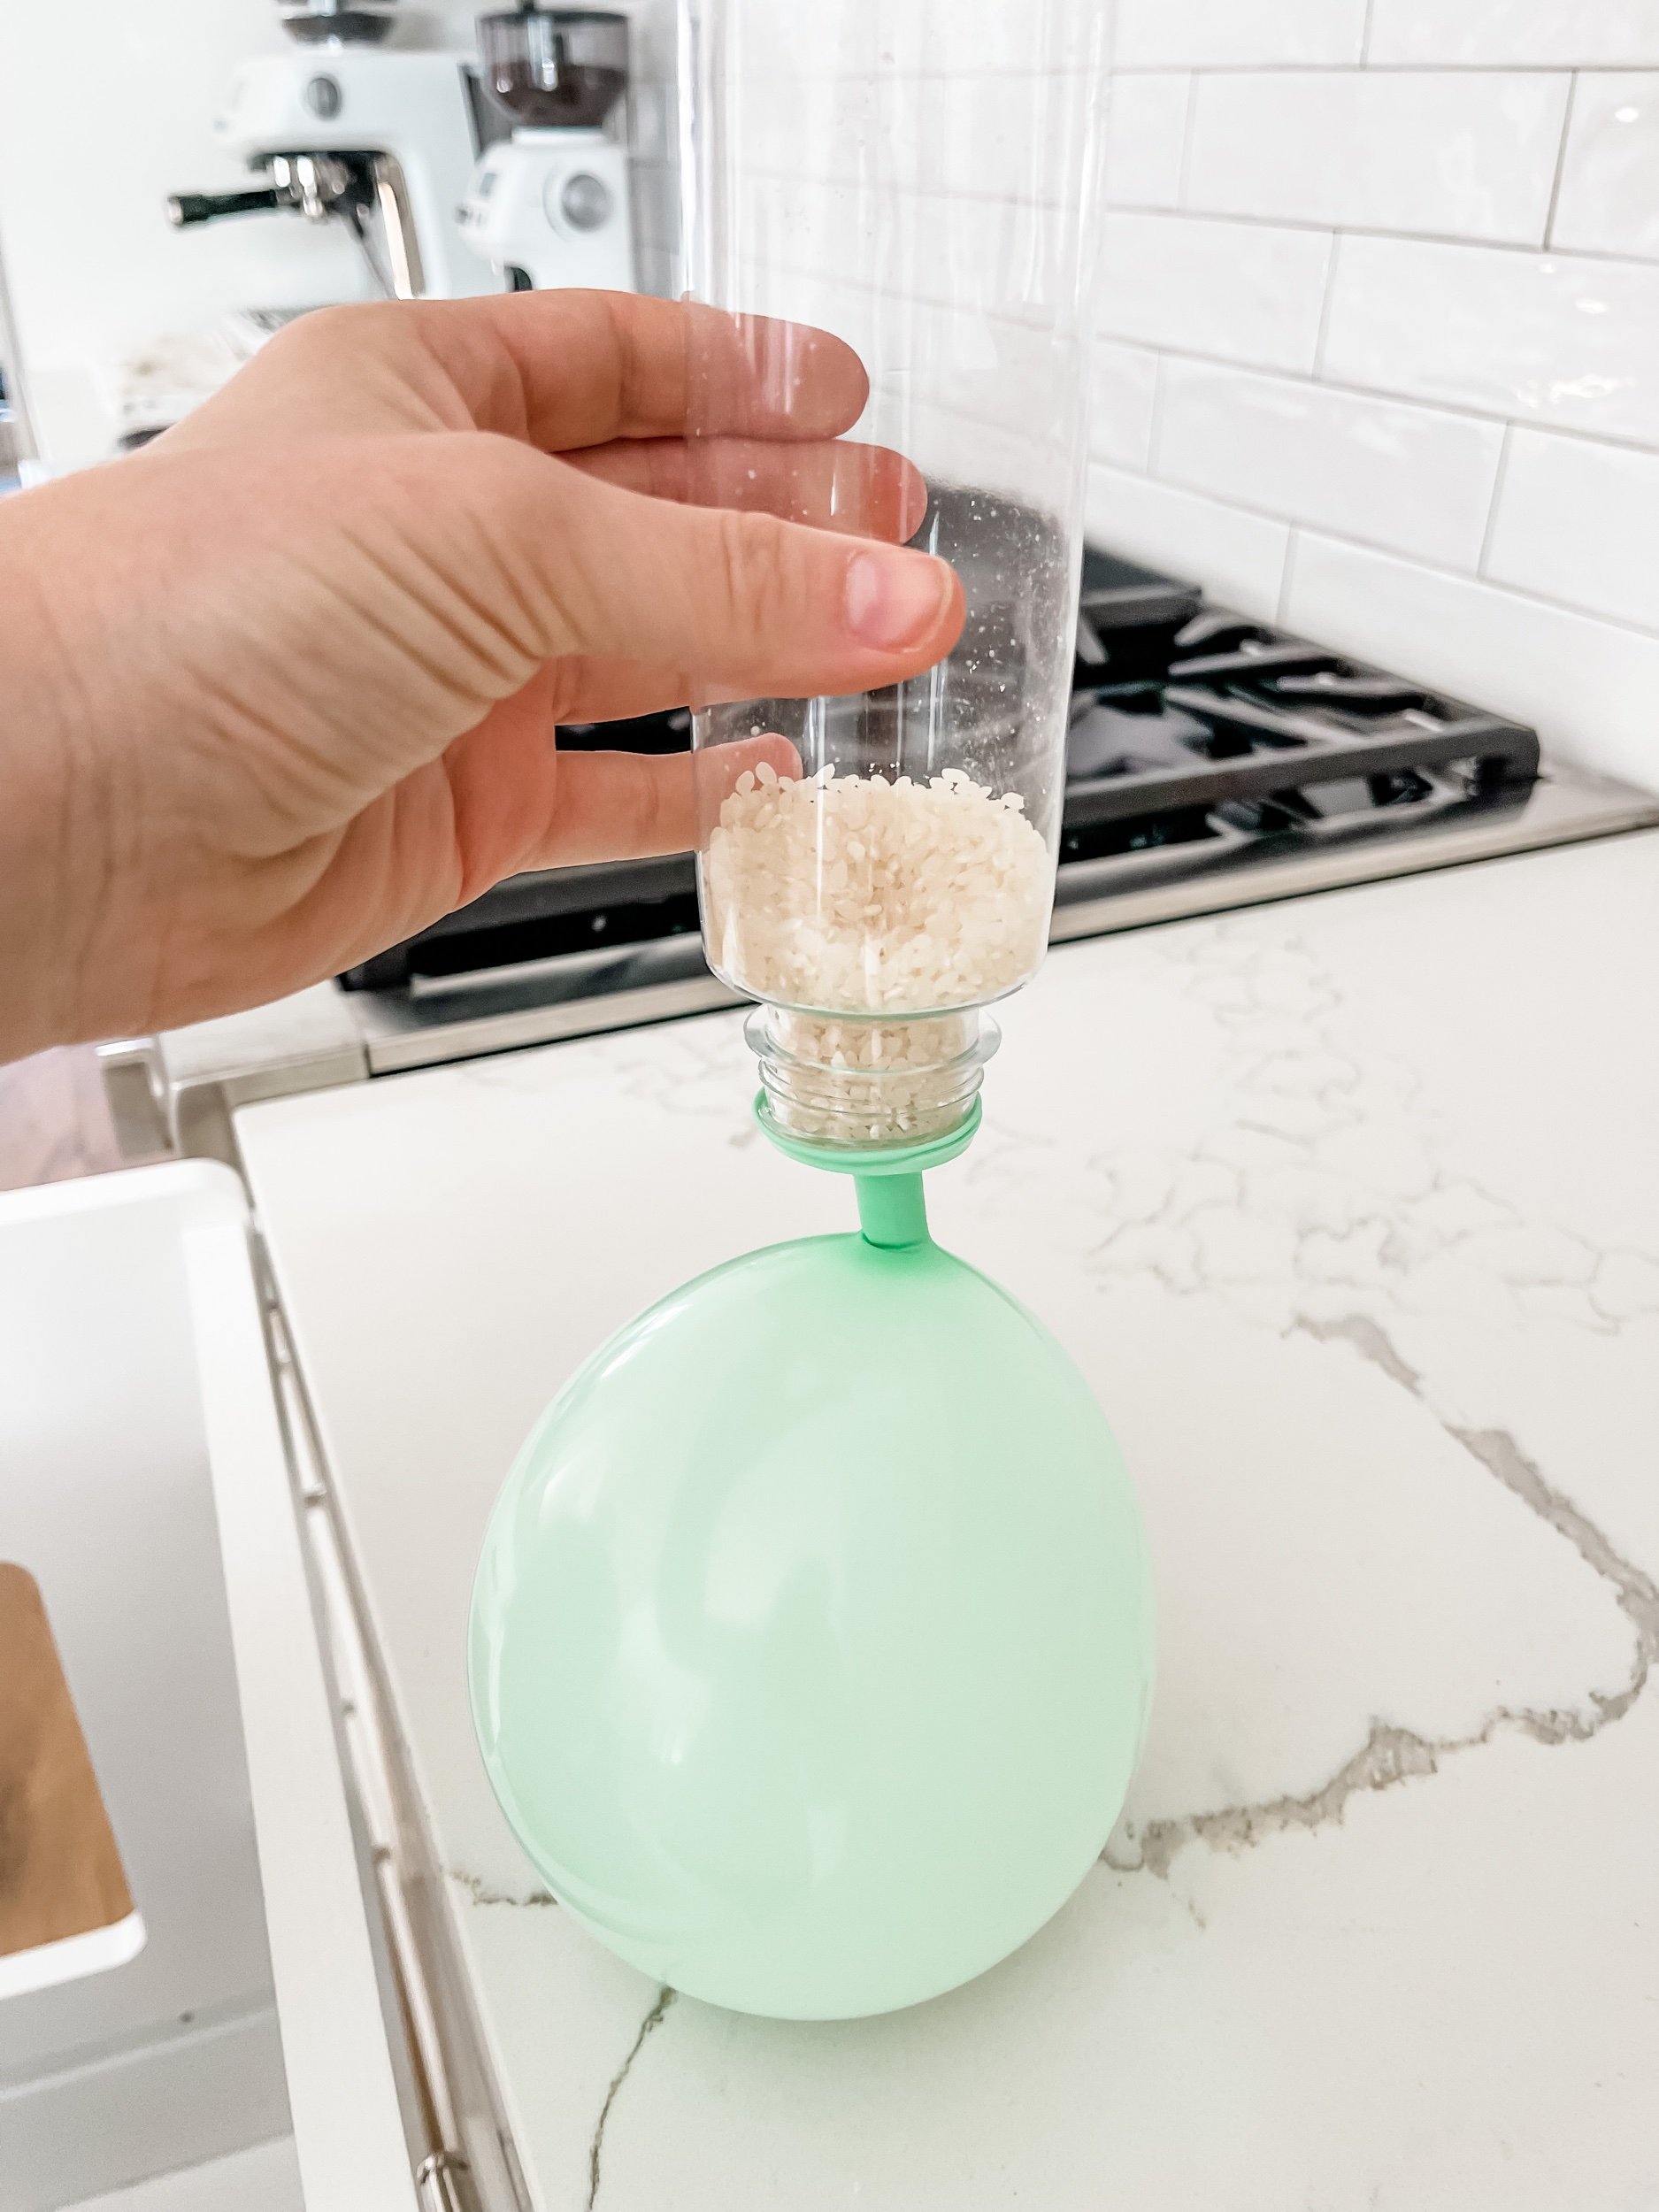
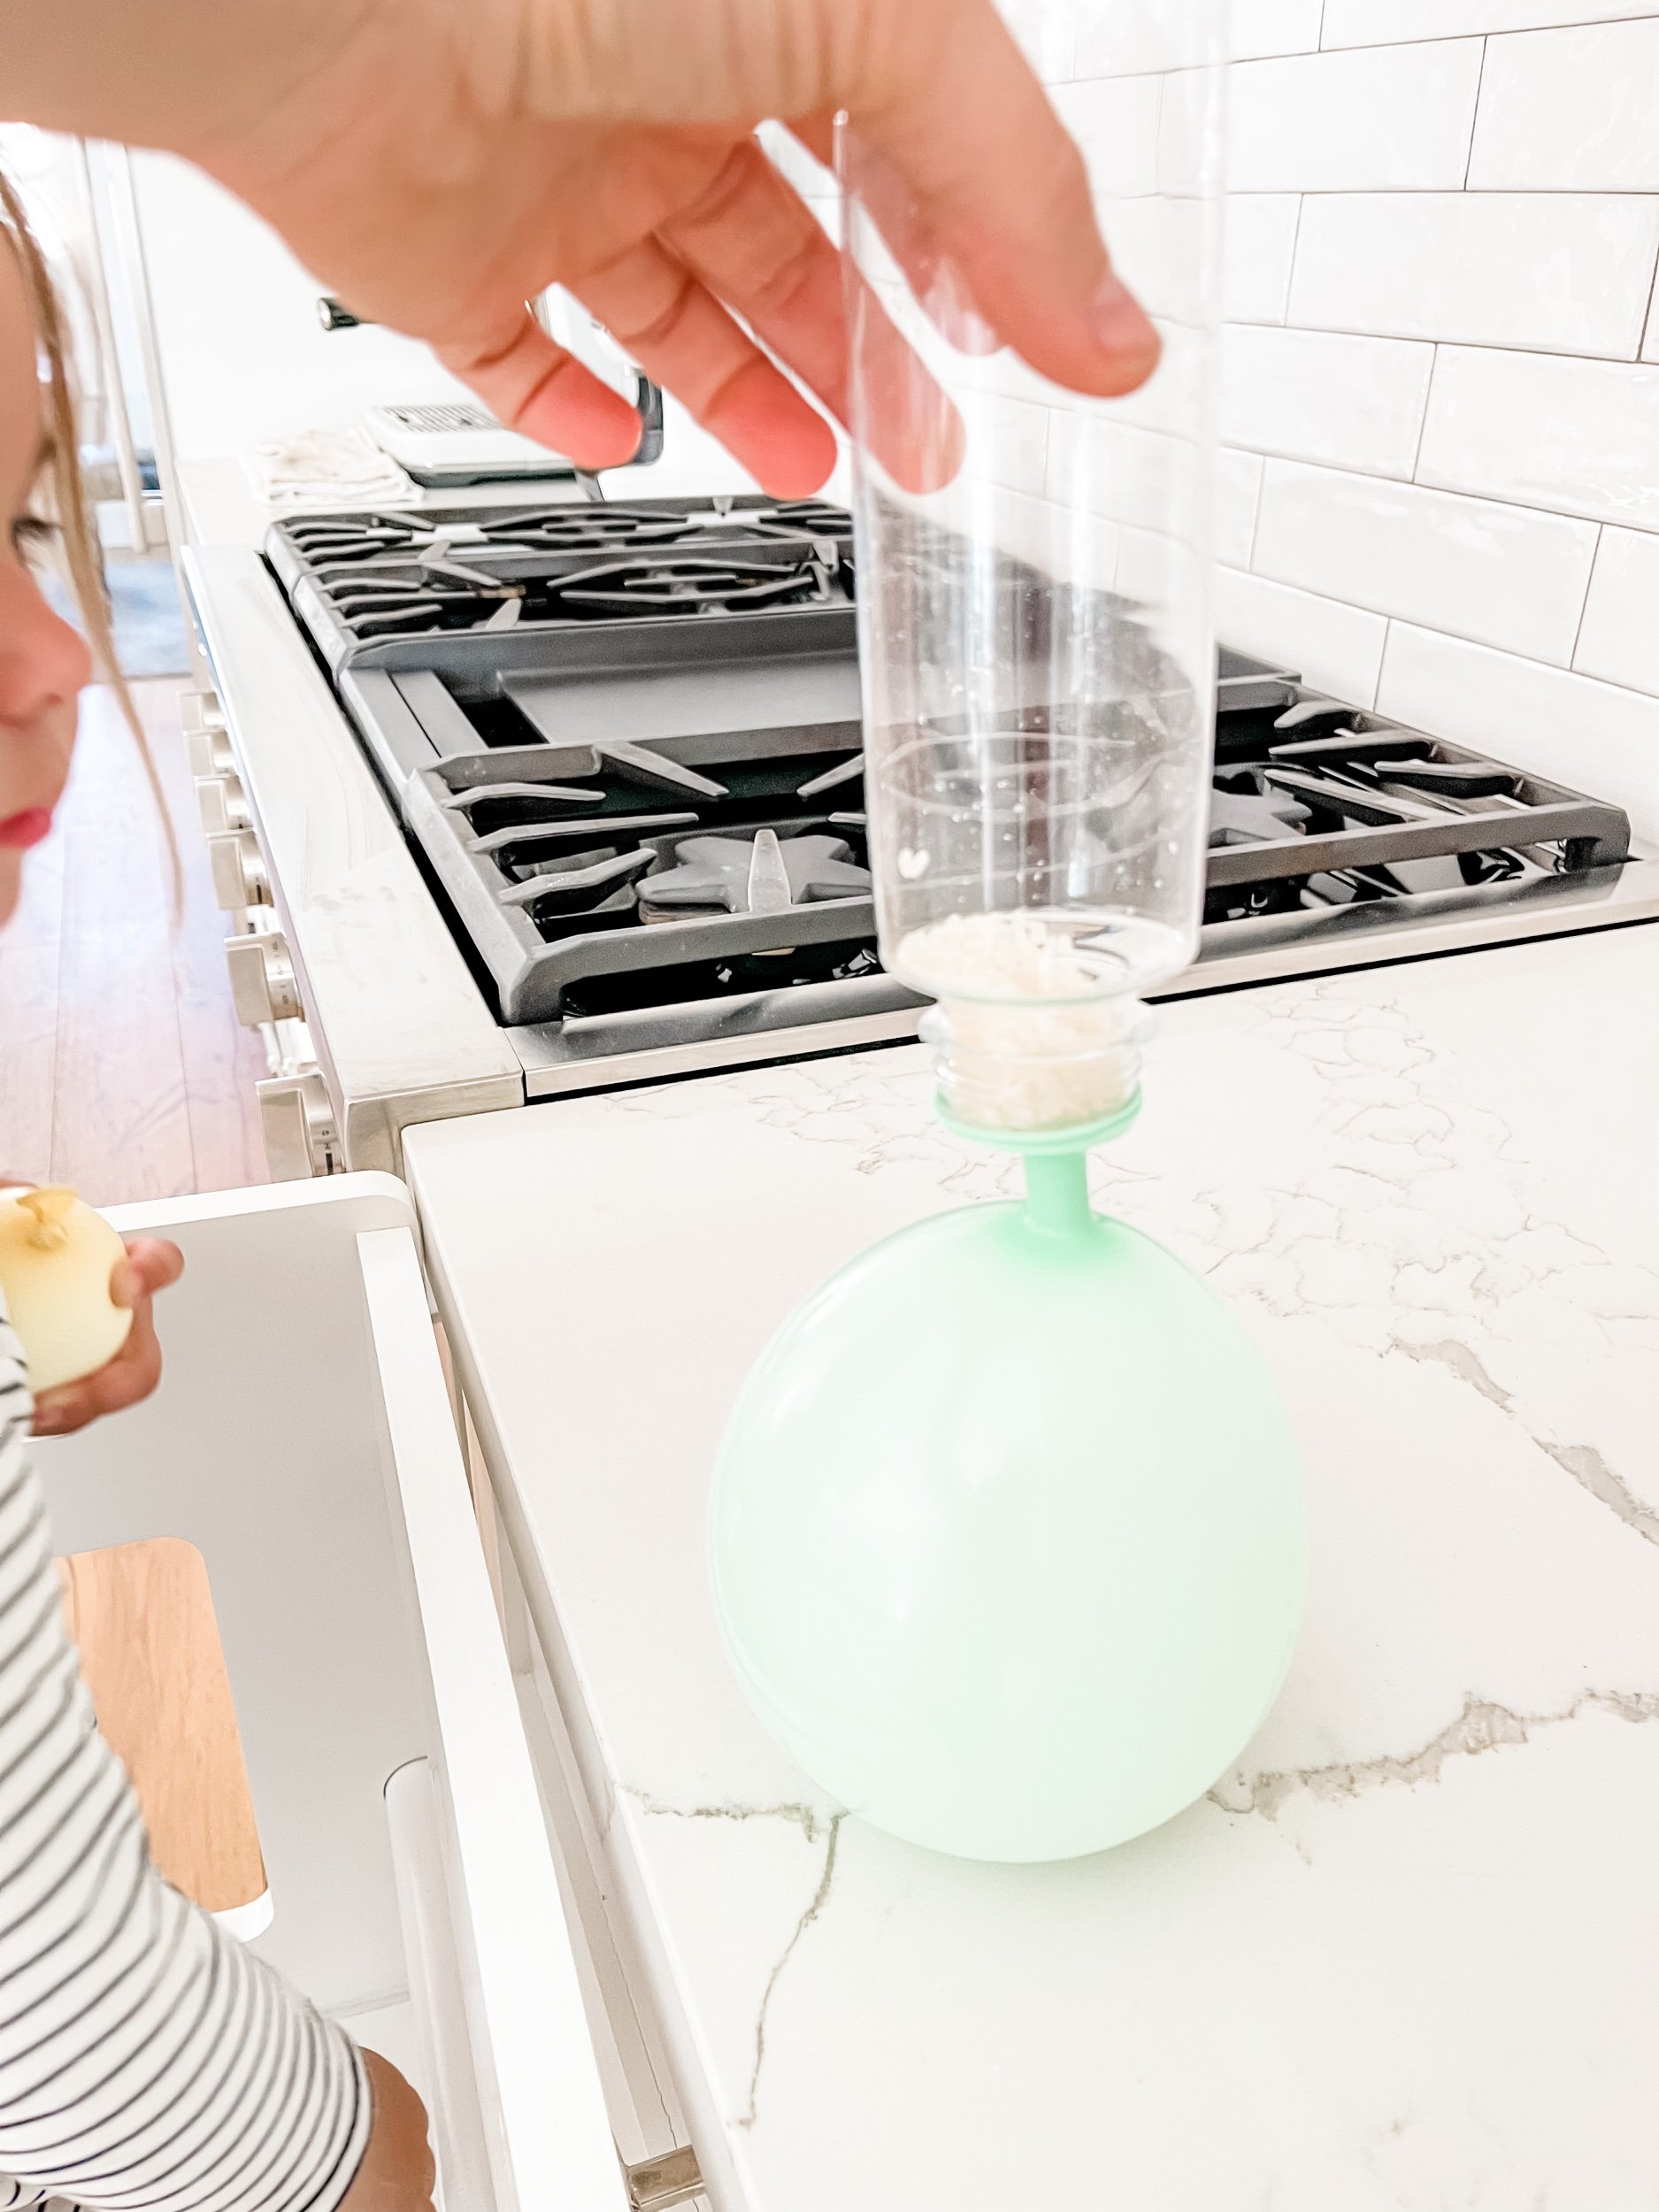
This was such a fun activity that I thought I’d share! We made these four different sensory stress balloon balls out of typical everyday fillers. You have to first fill a container with a small spout with the filler — we used salt, flour, sushi rice, and oatmeal. I didn’t double layer the balloons, but I’d highly recommend that so that they last longer. Then blow up the empty balloon and while holding the air in, wrap the neck around the bottle spout. Turn the bottle upside down and let the filler fall in. The thicker the filler, the more you will have to coax it through the neck of the balloon. Then take the balloon off and tie it and voila! Sofie loves squeezing these and playing with them whenever she’s frustrated.


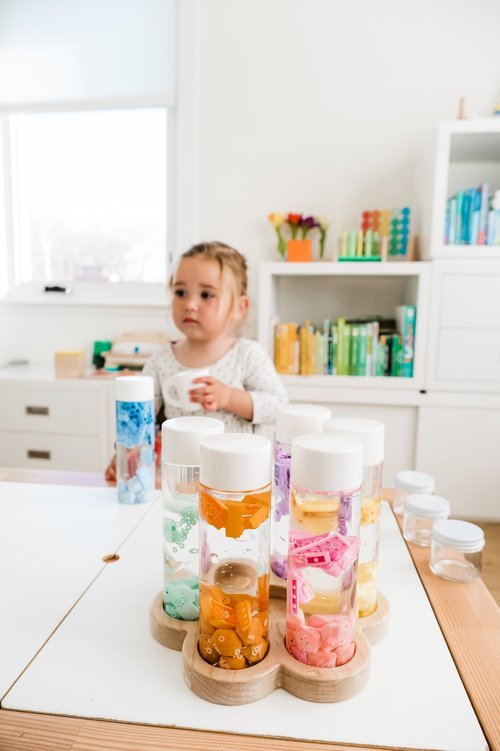
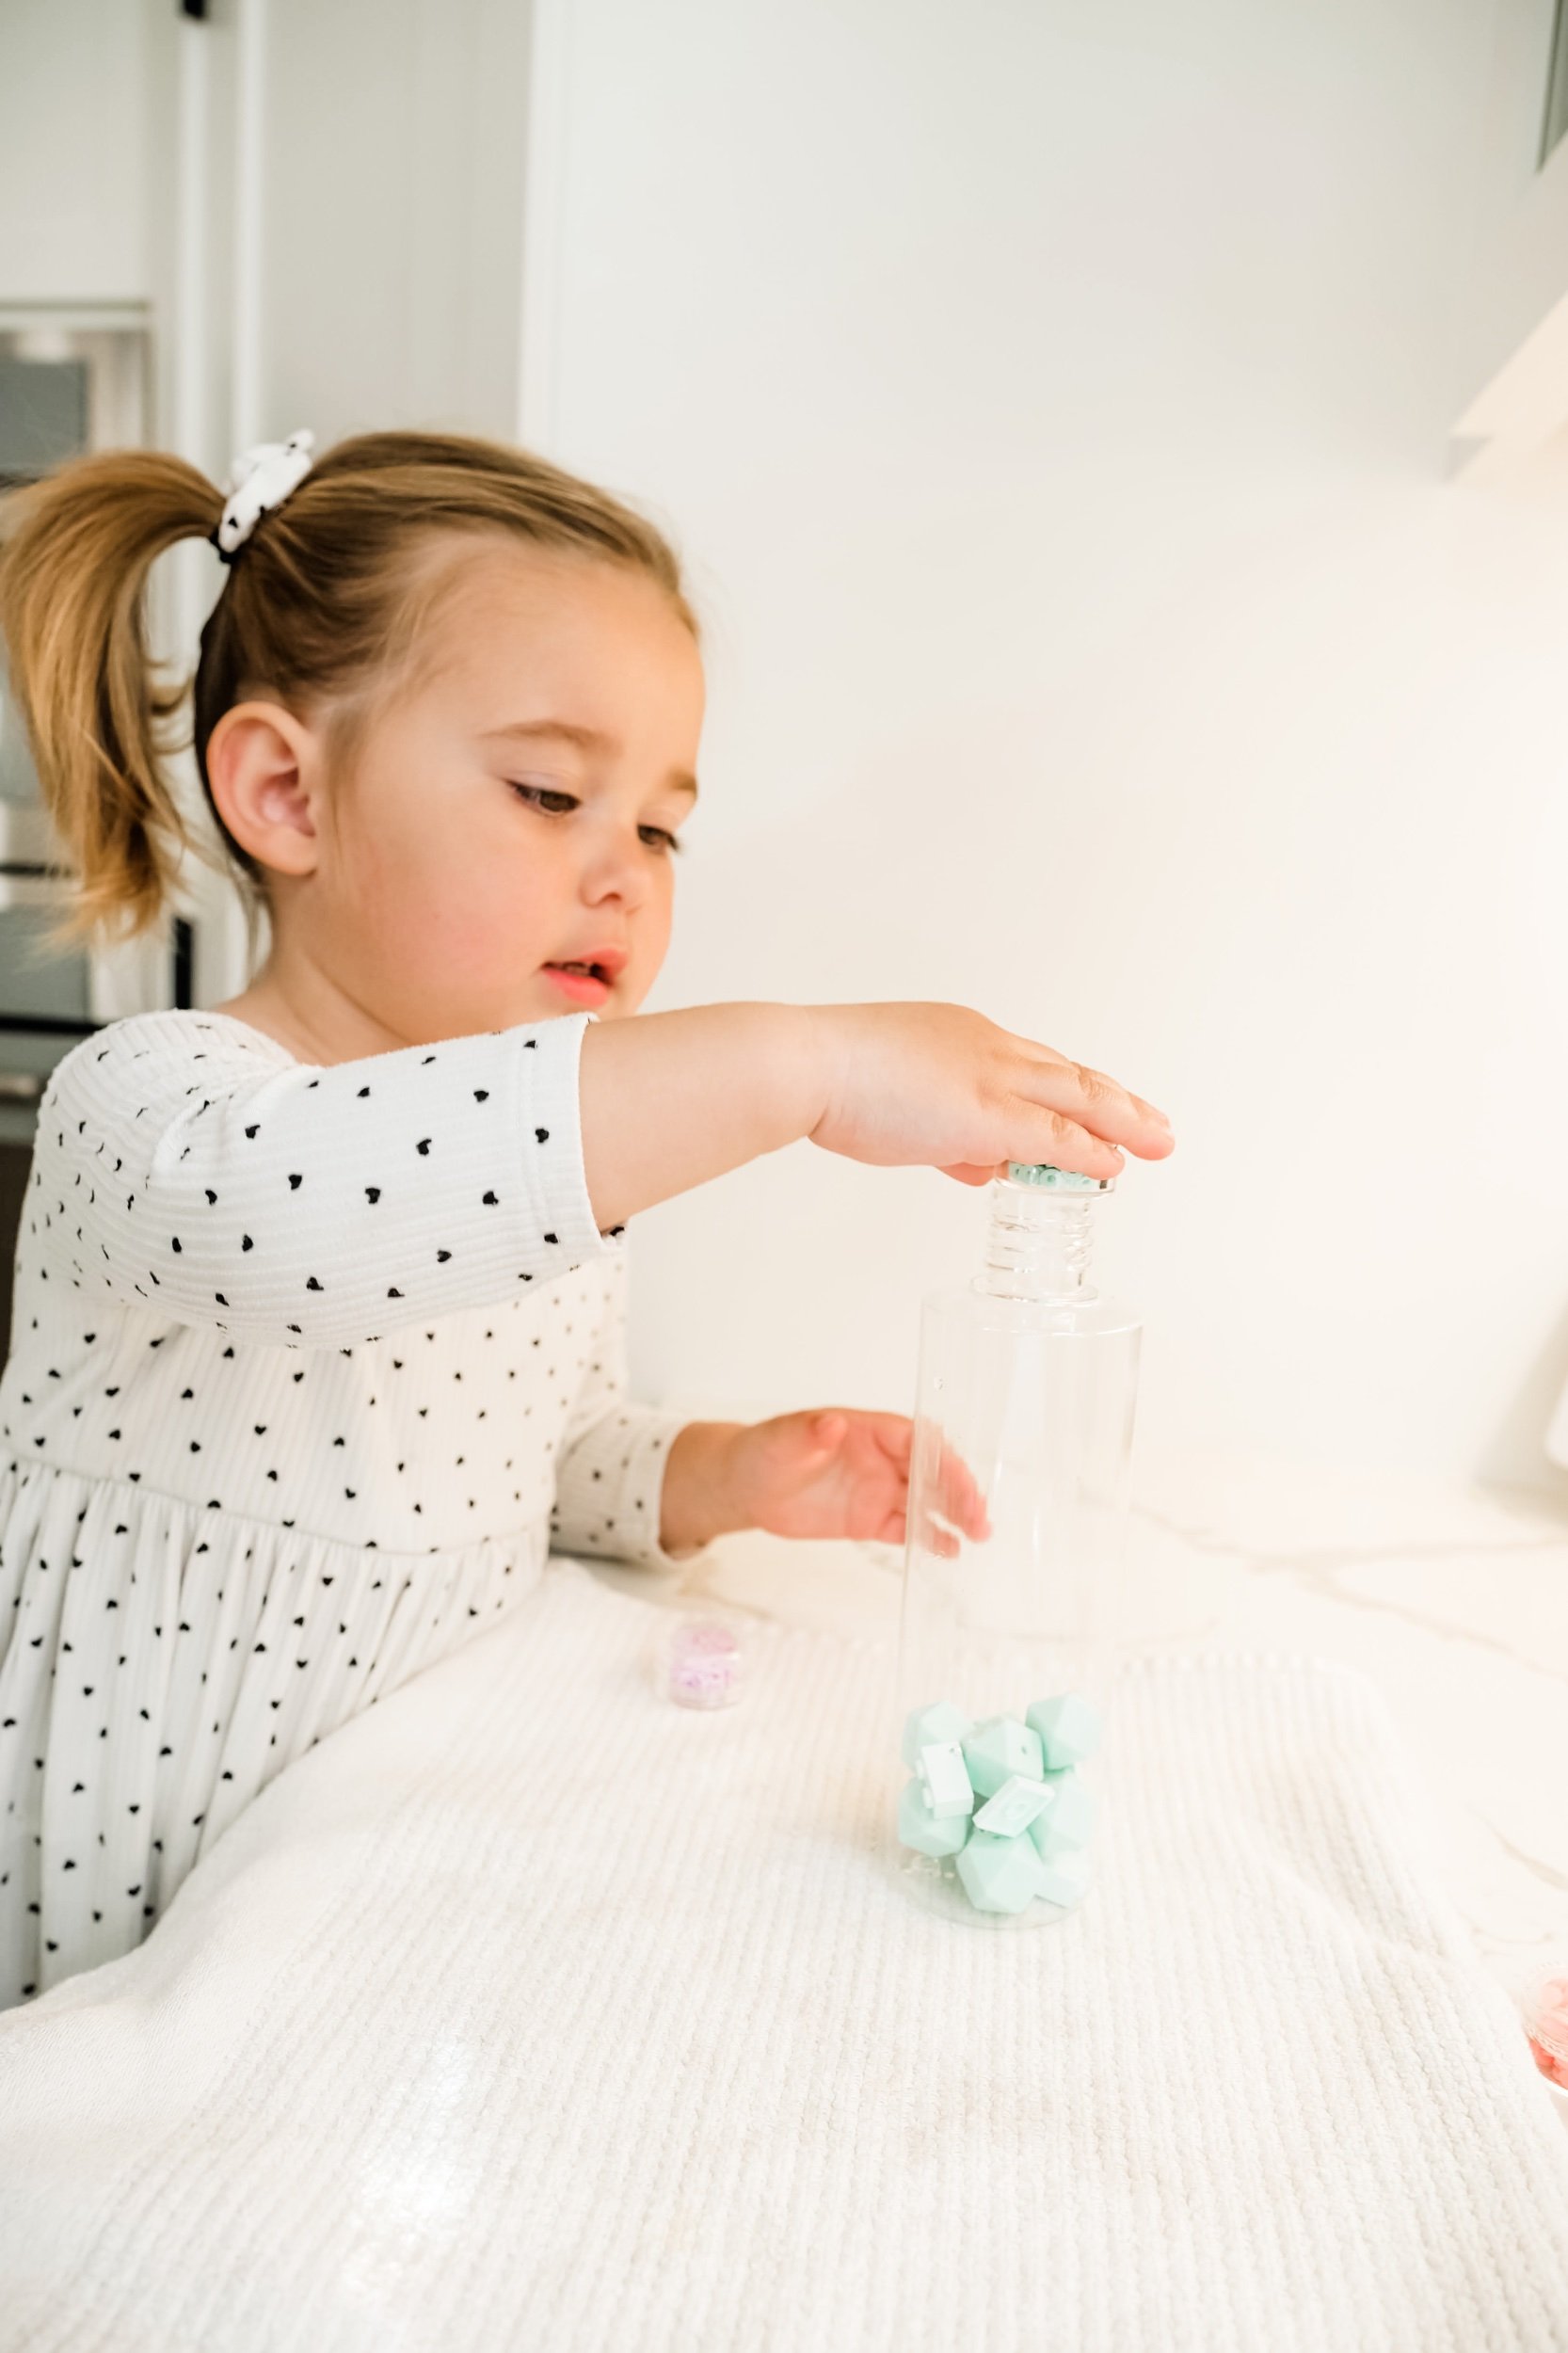
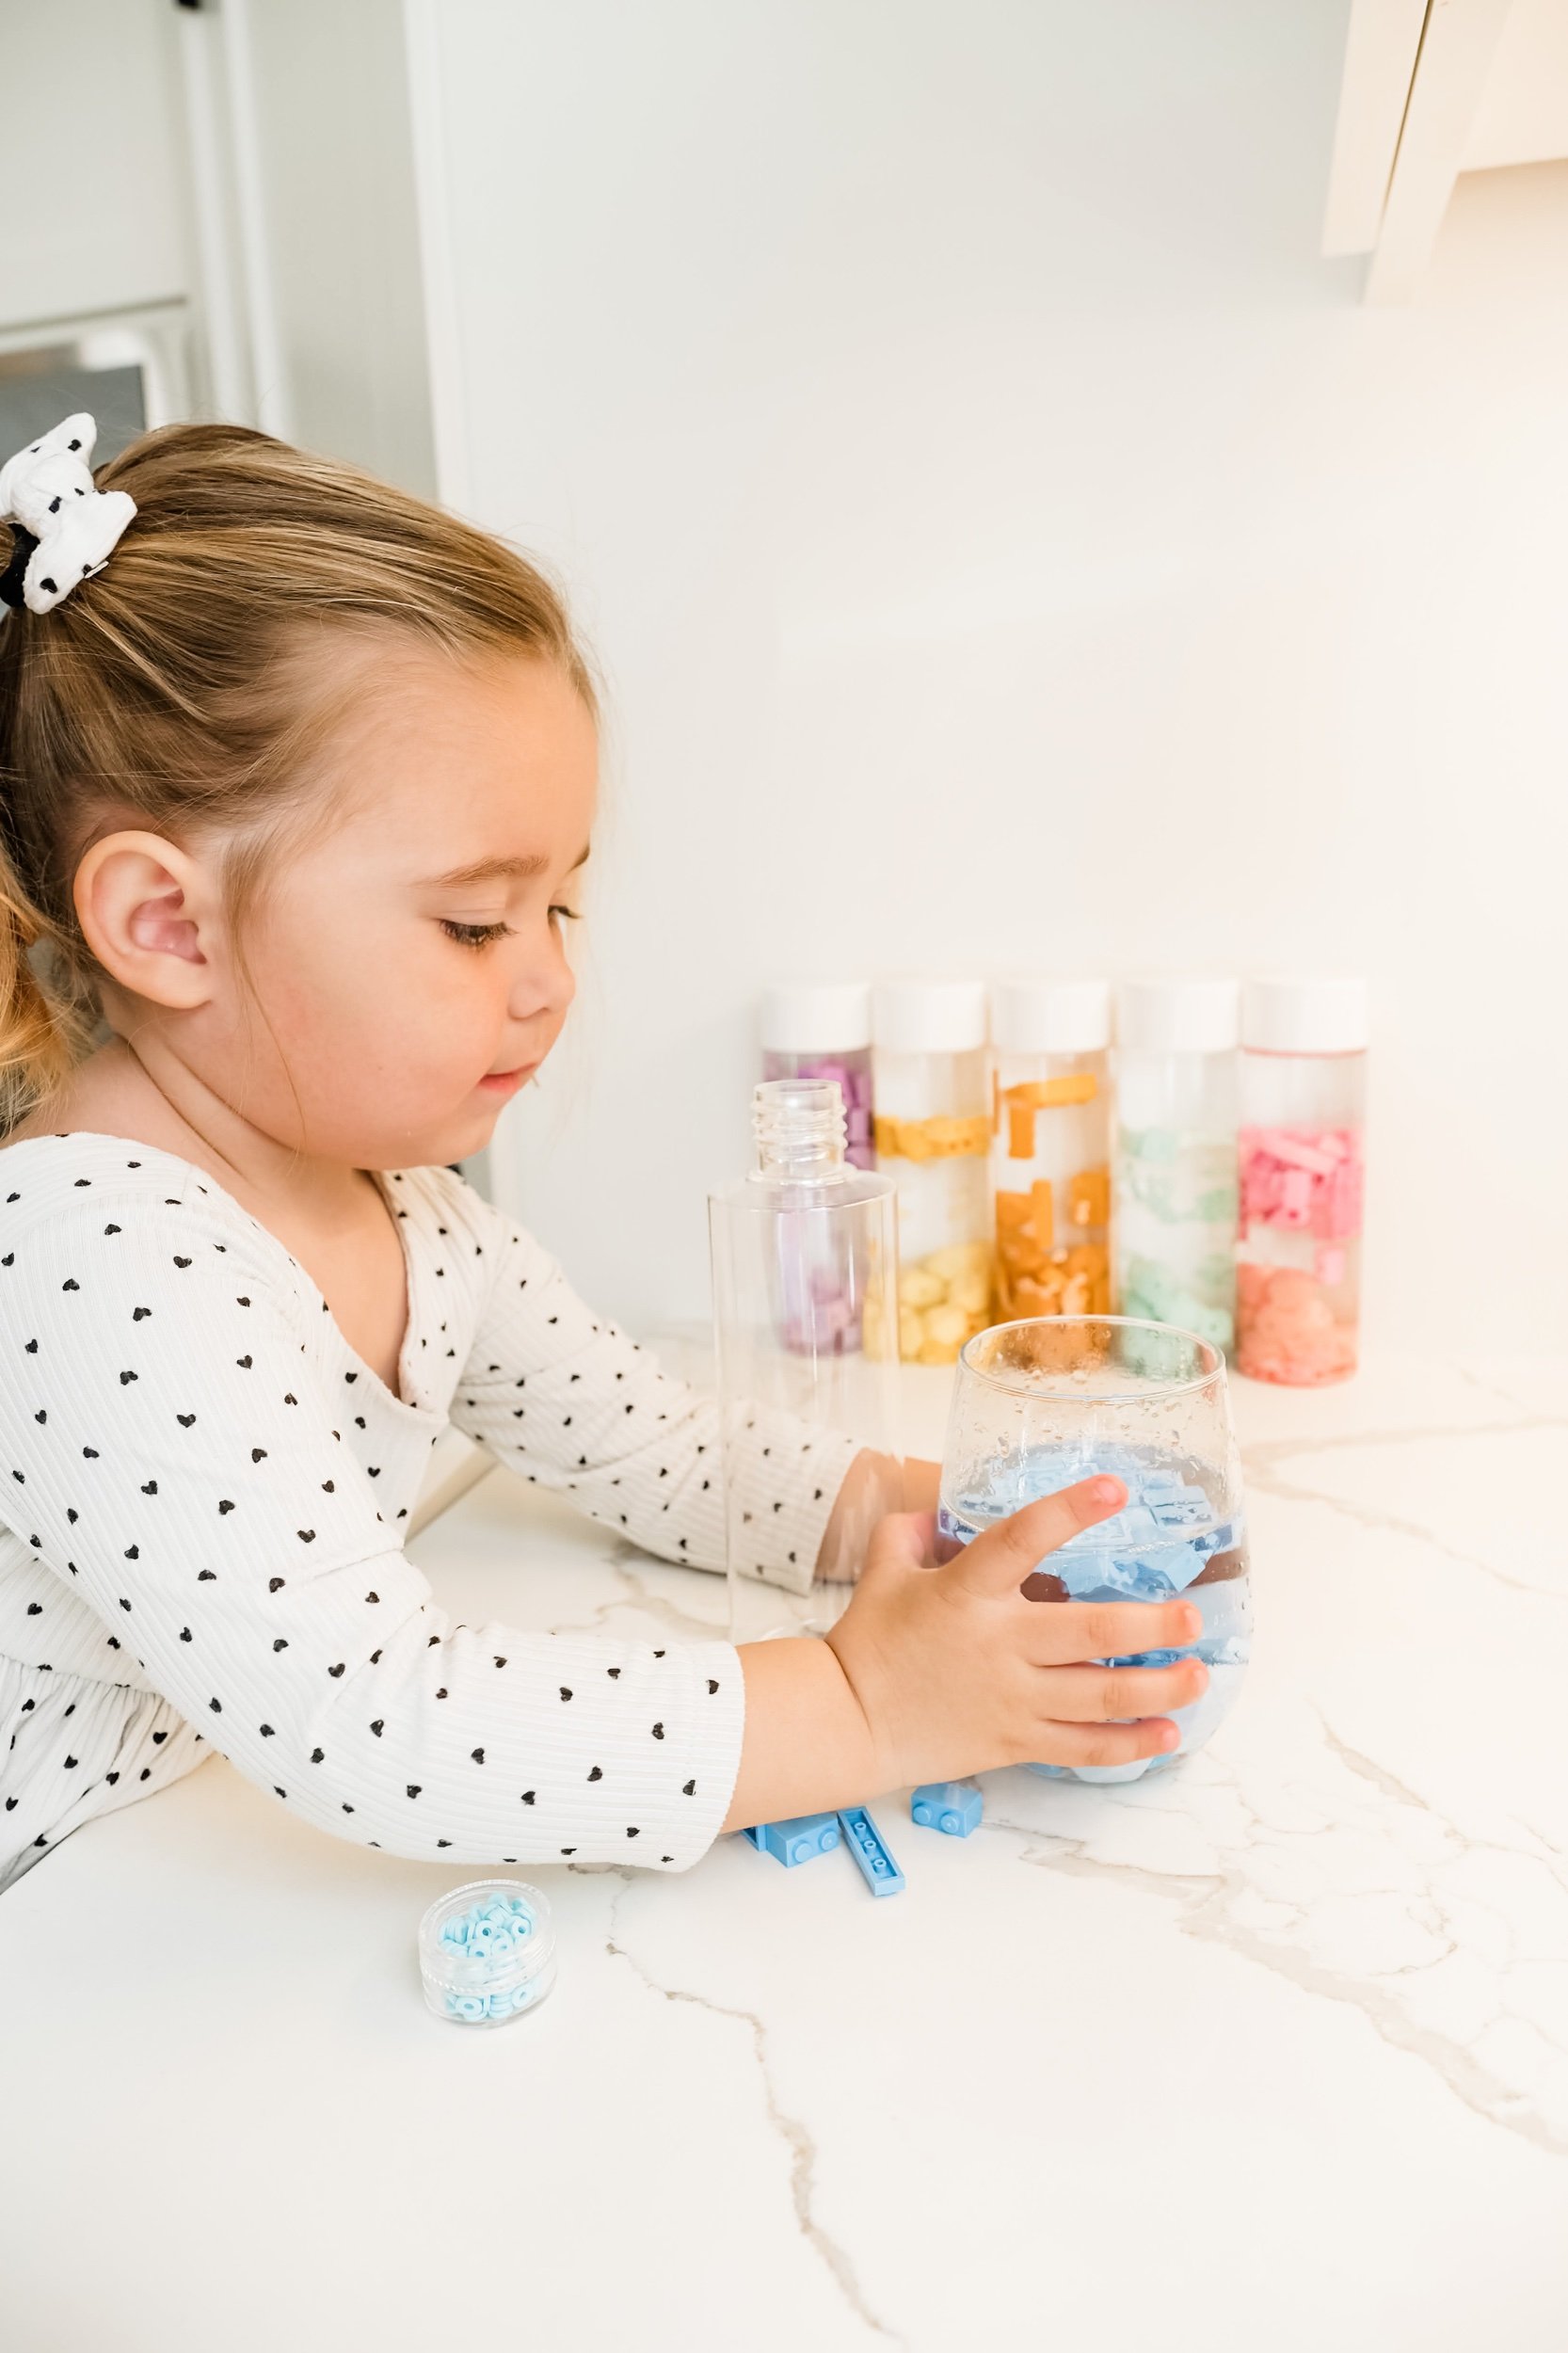
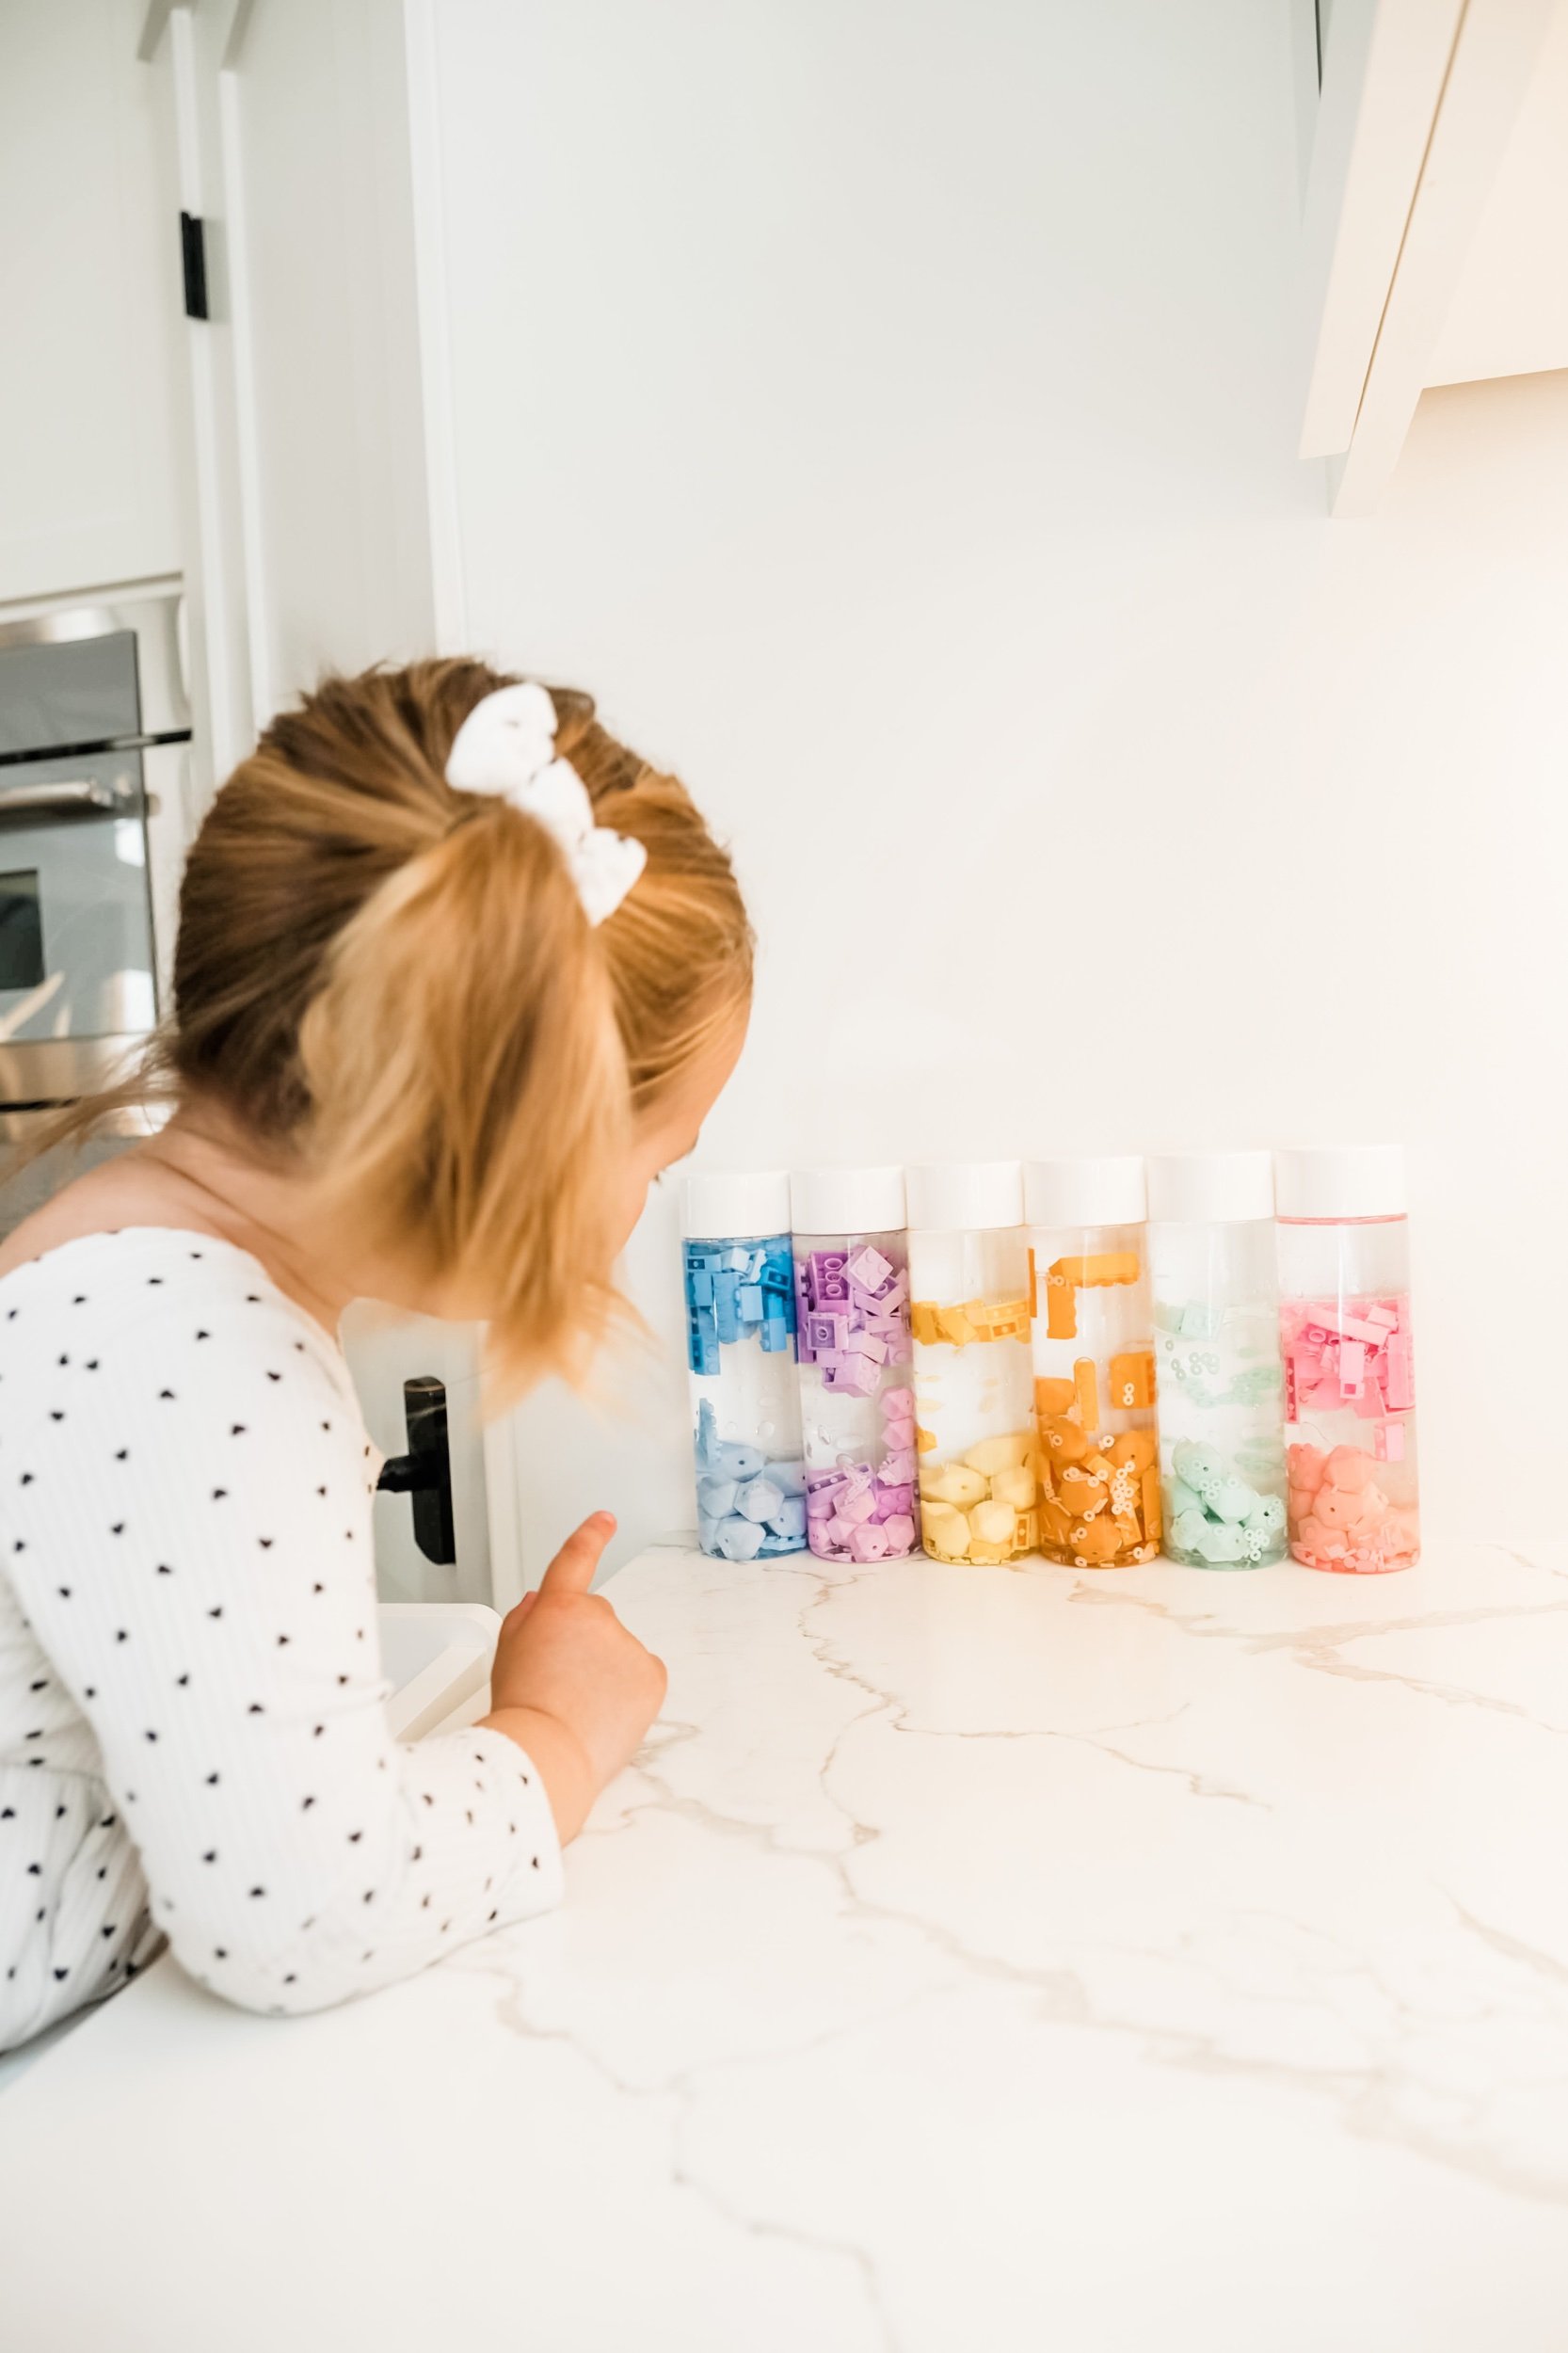
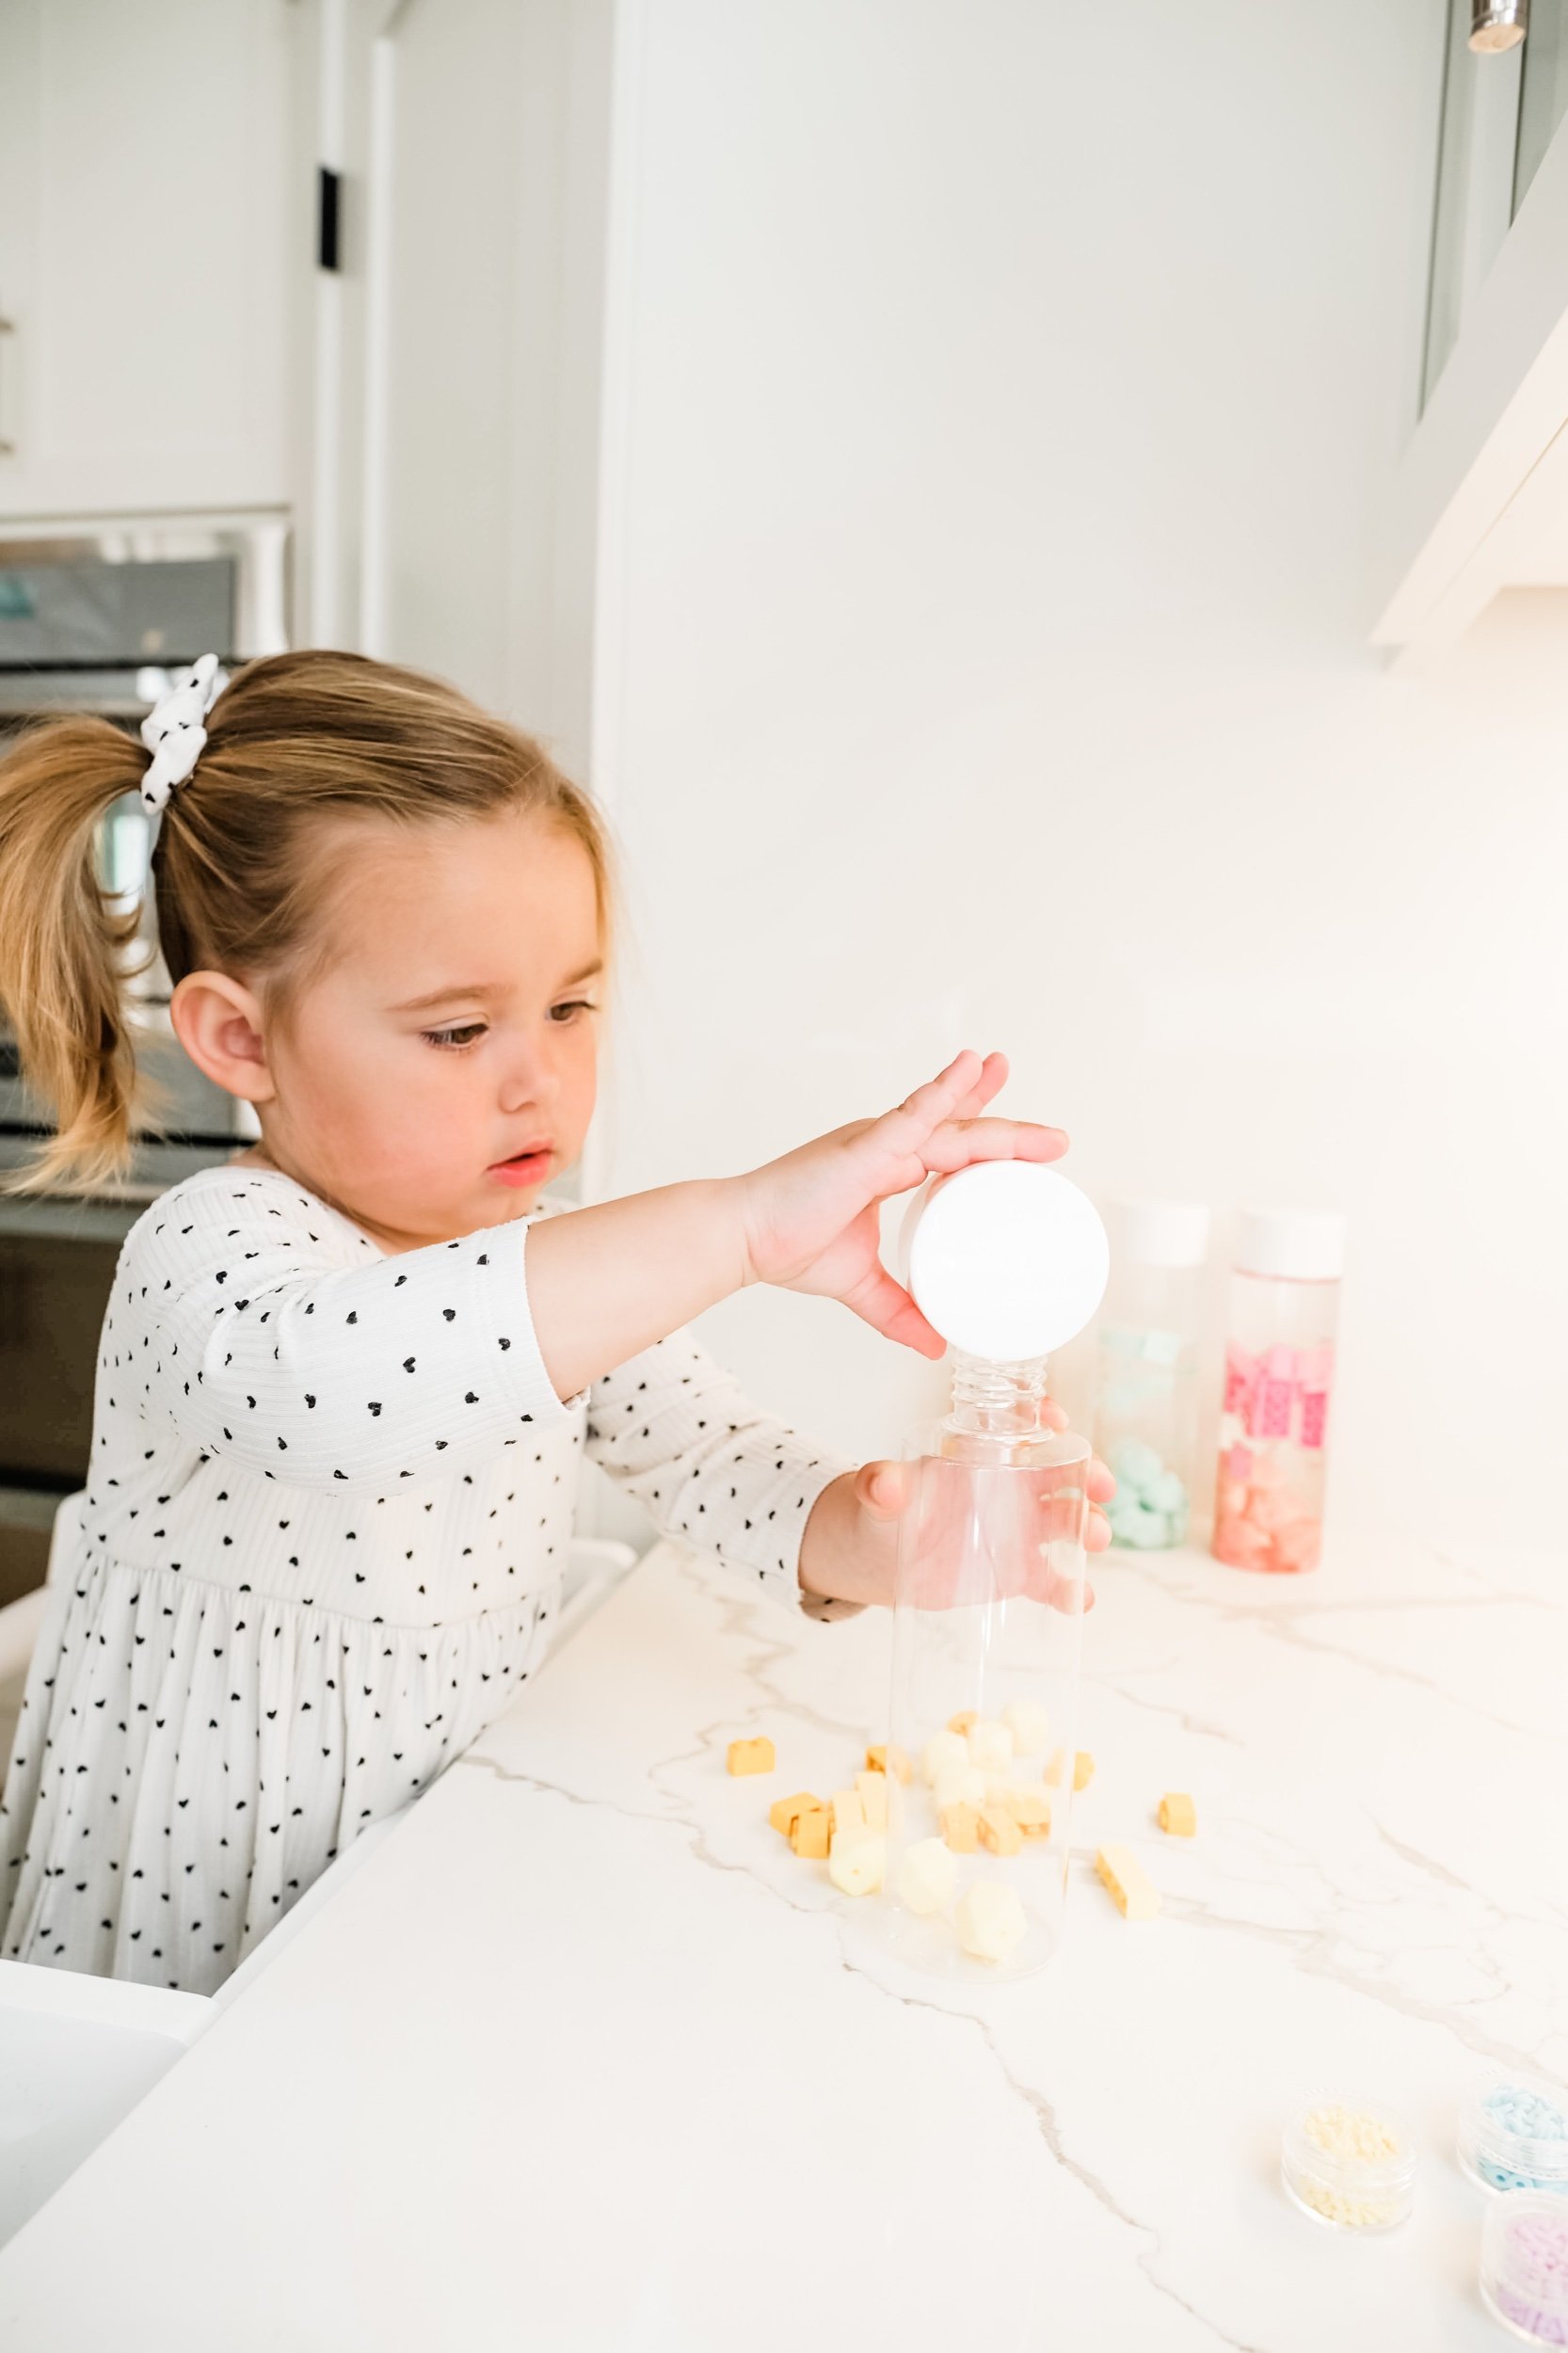
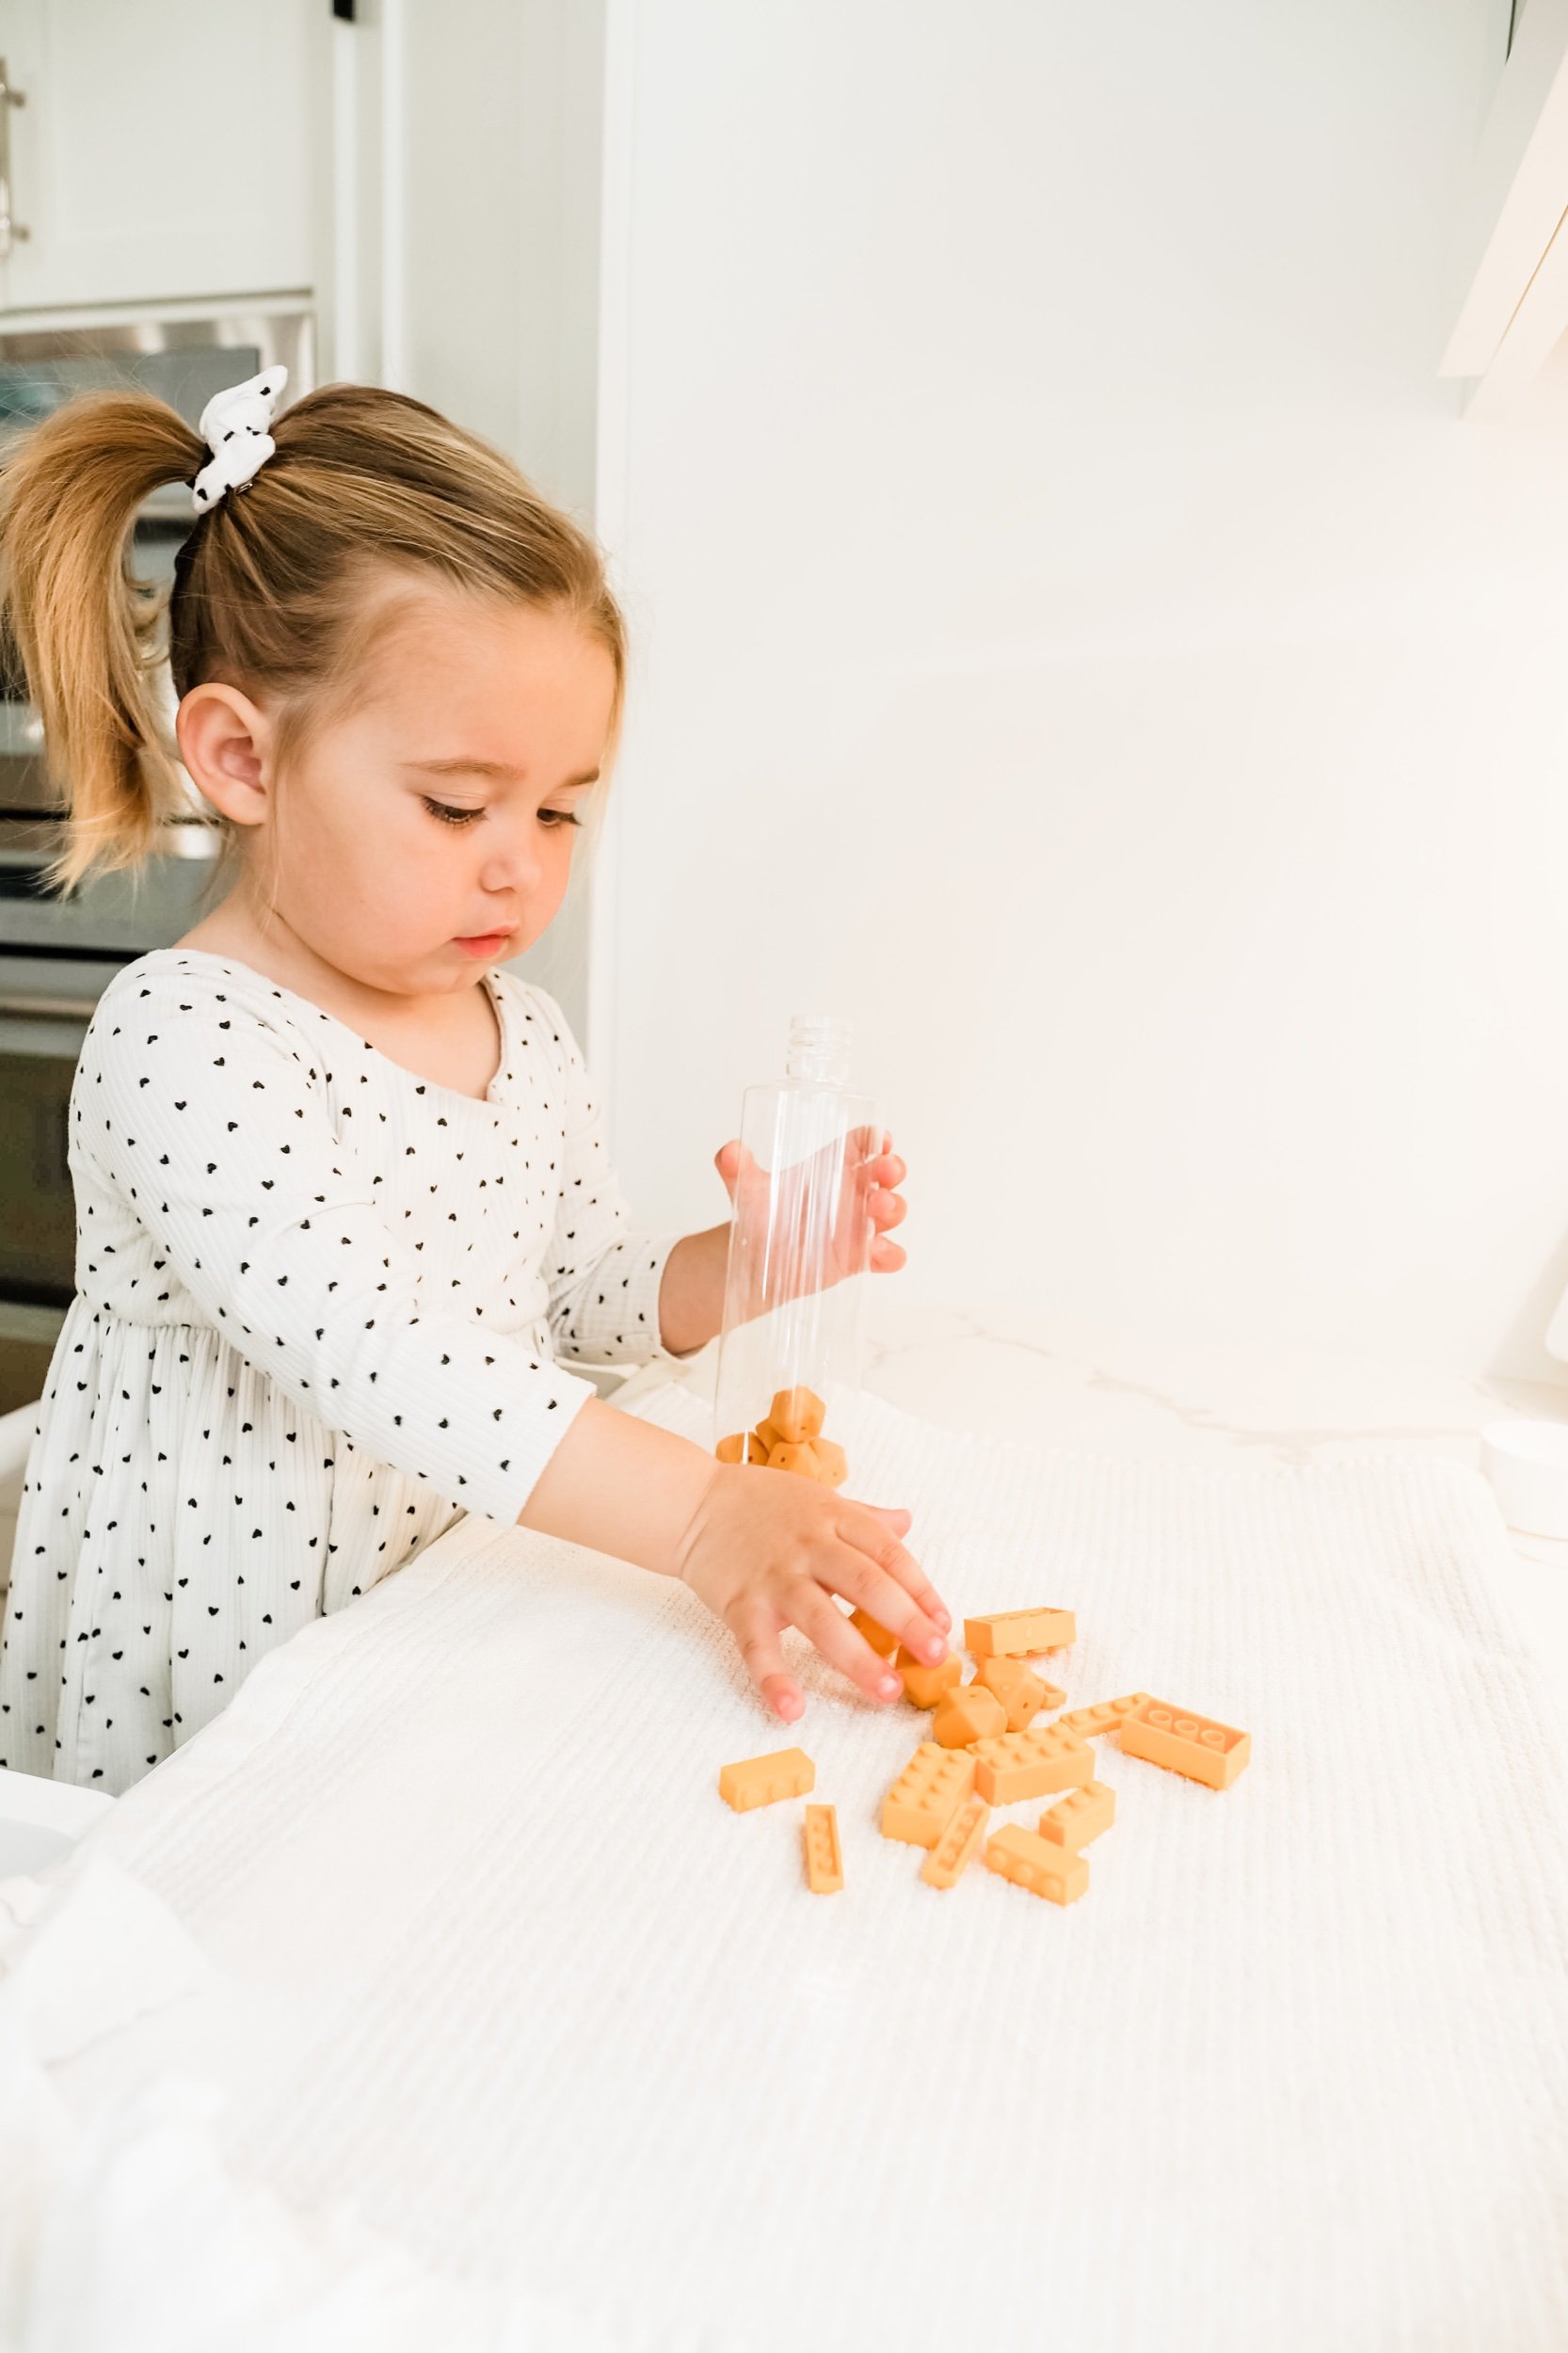
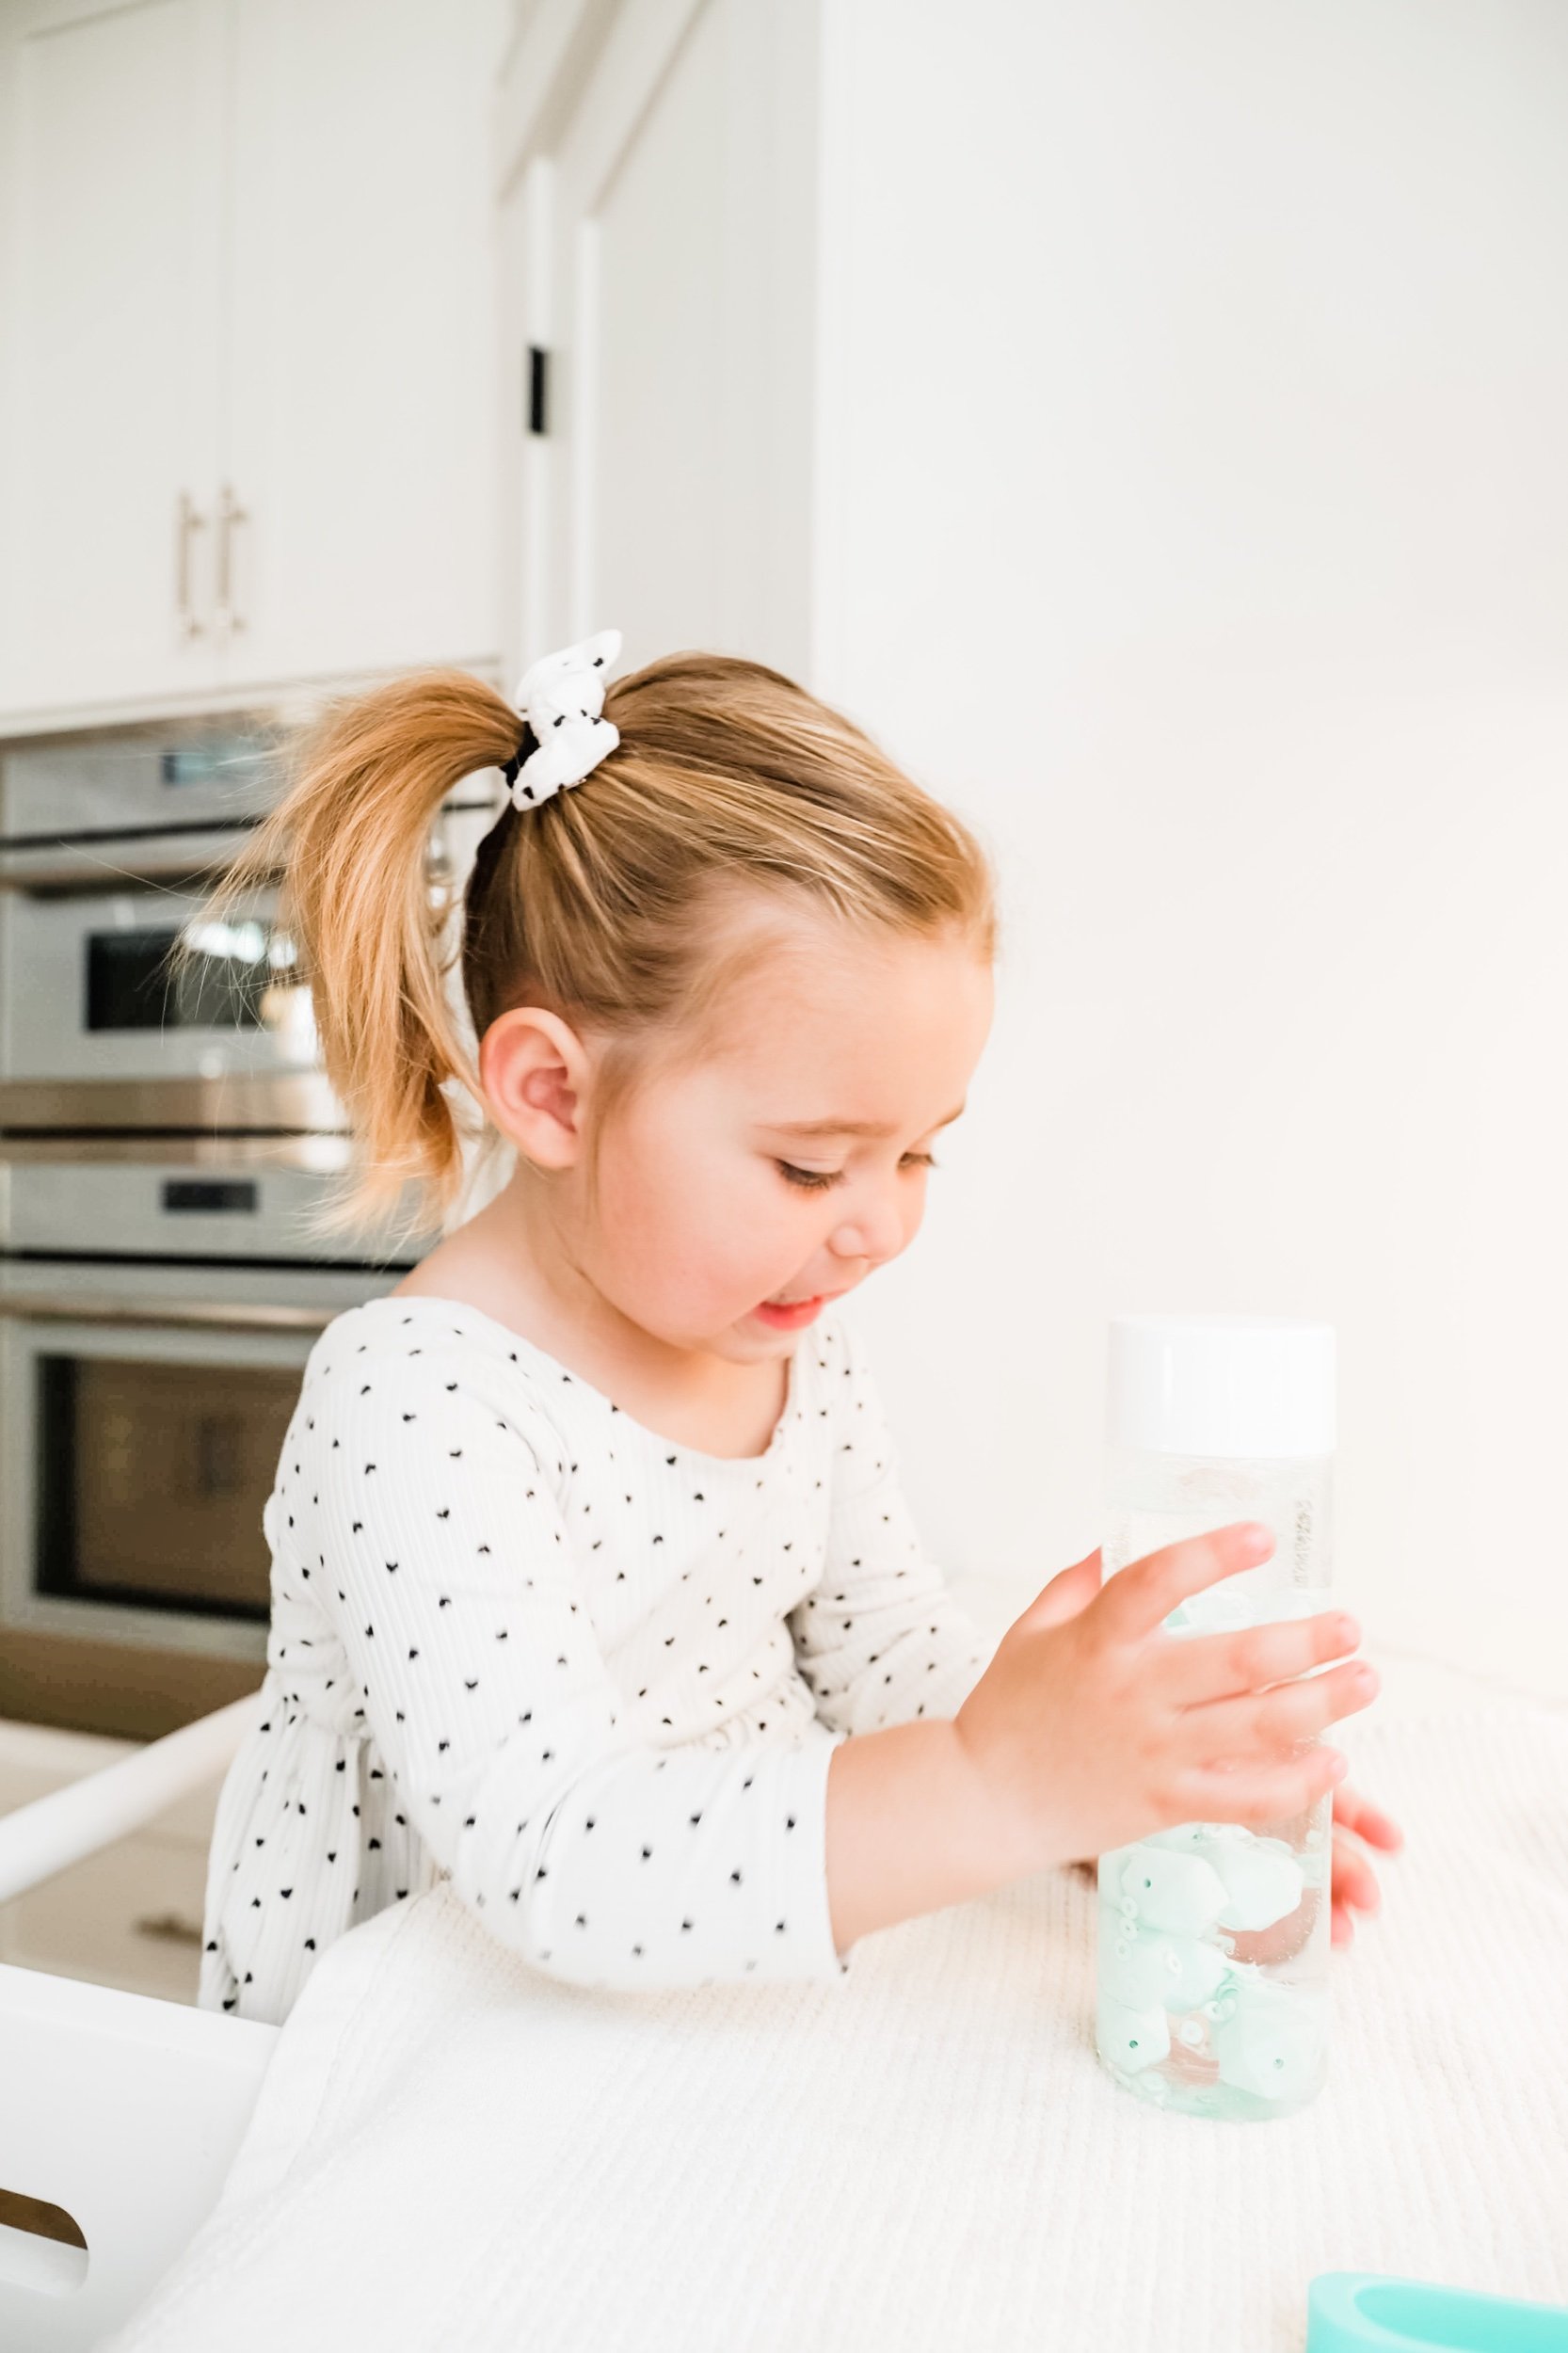
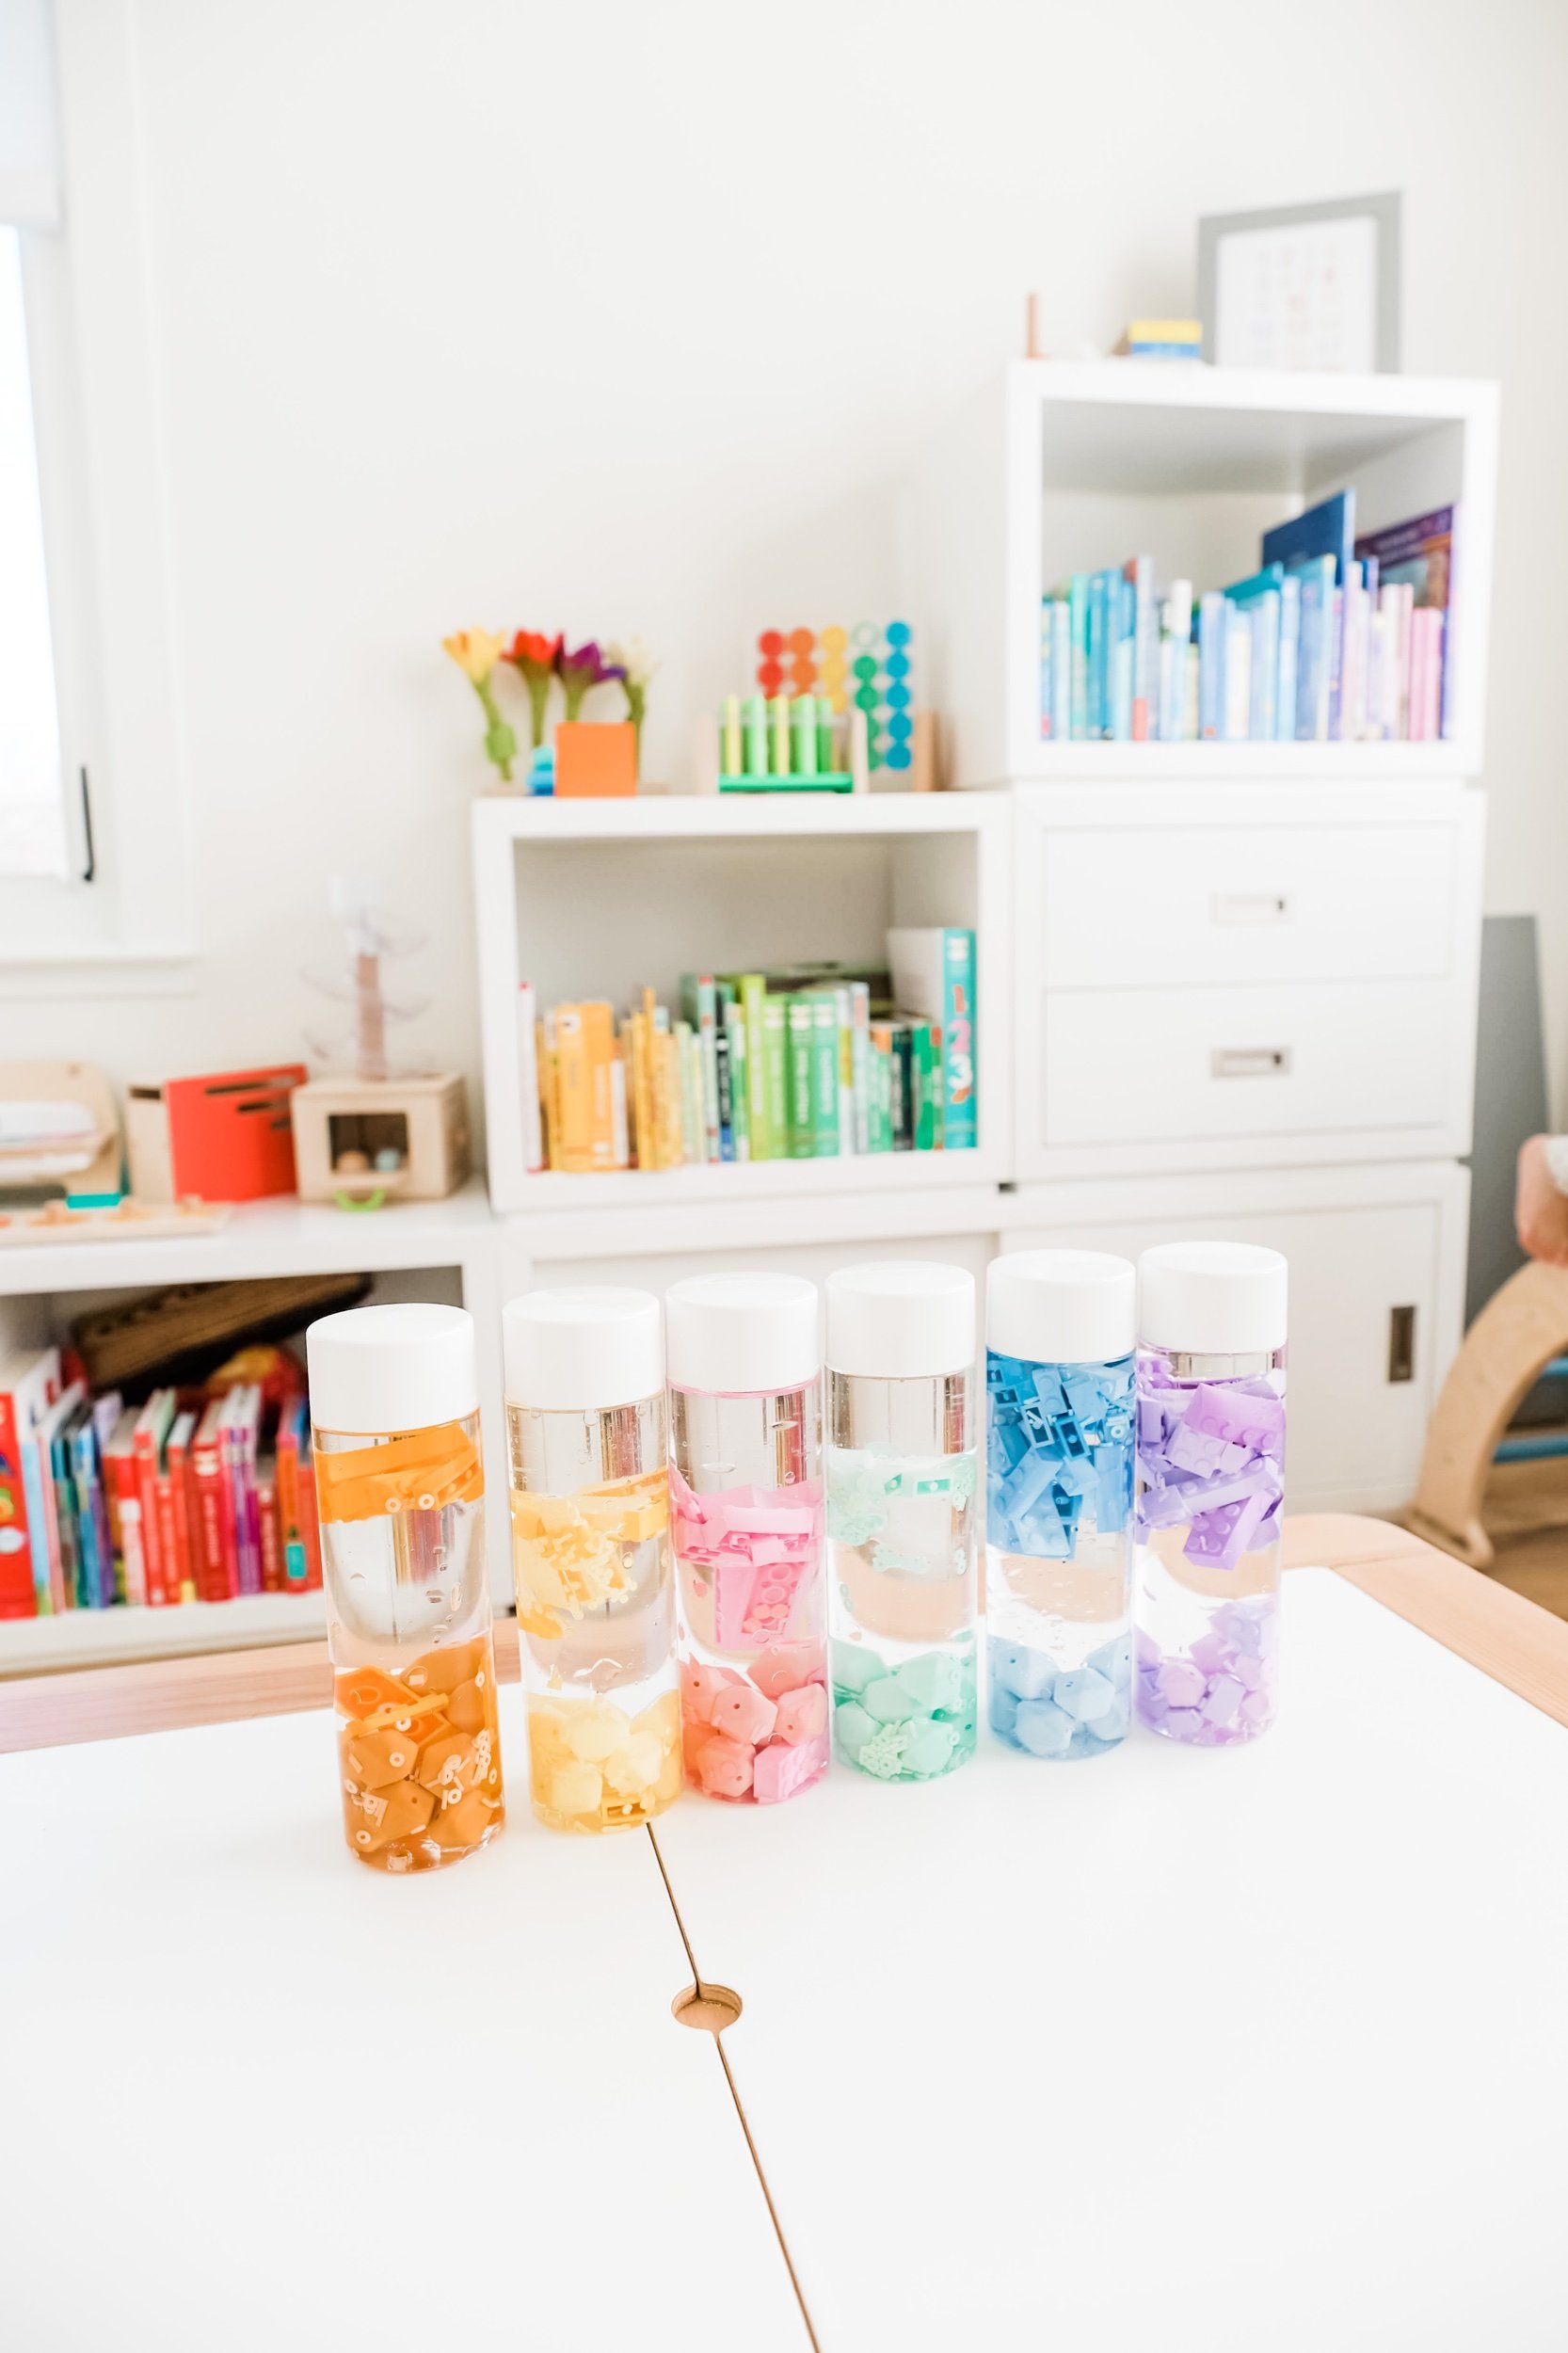
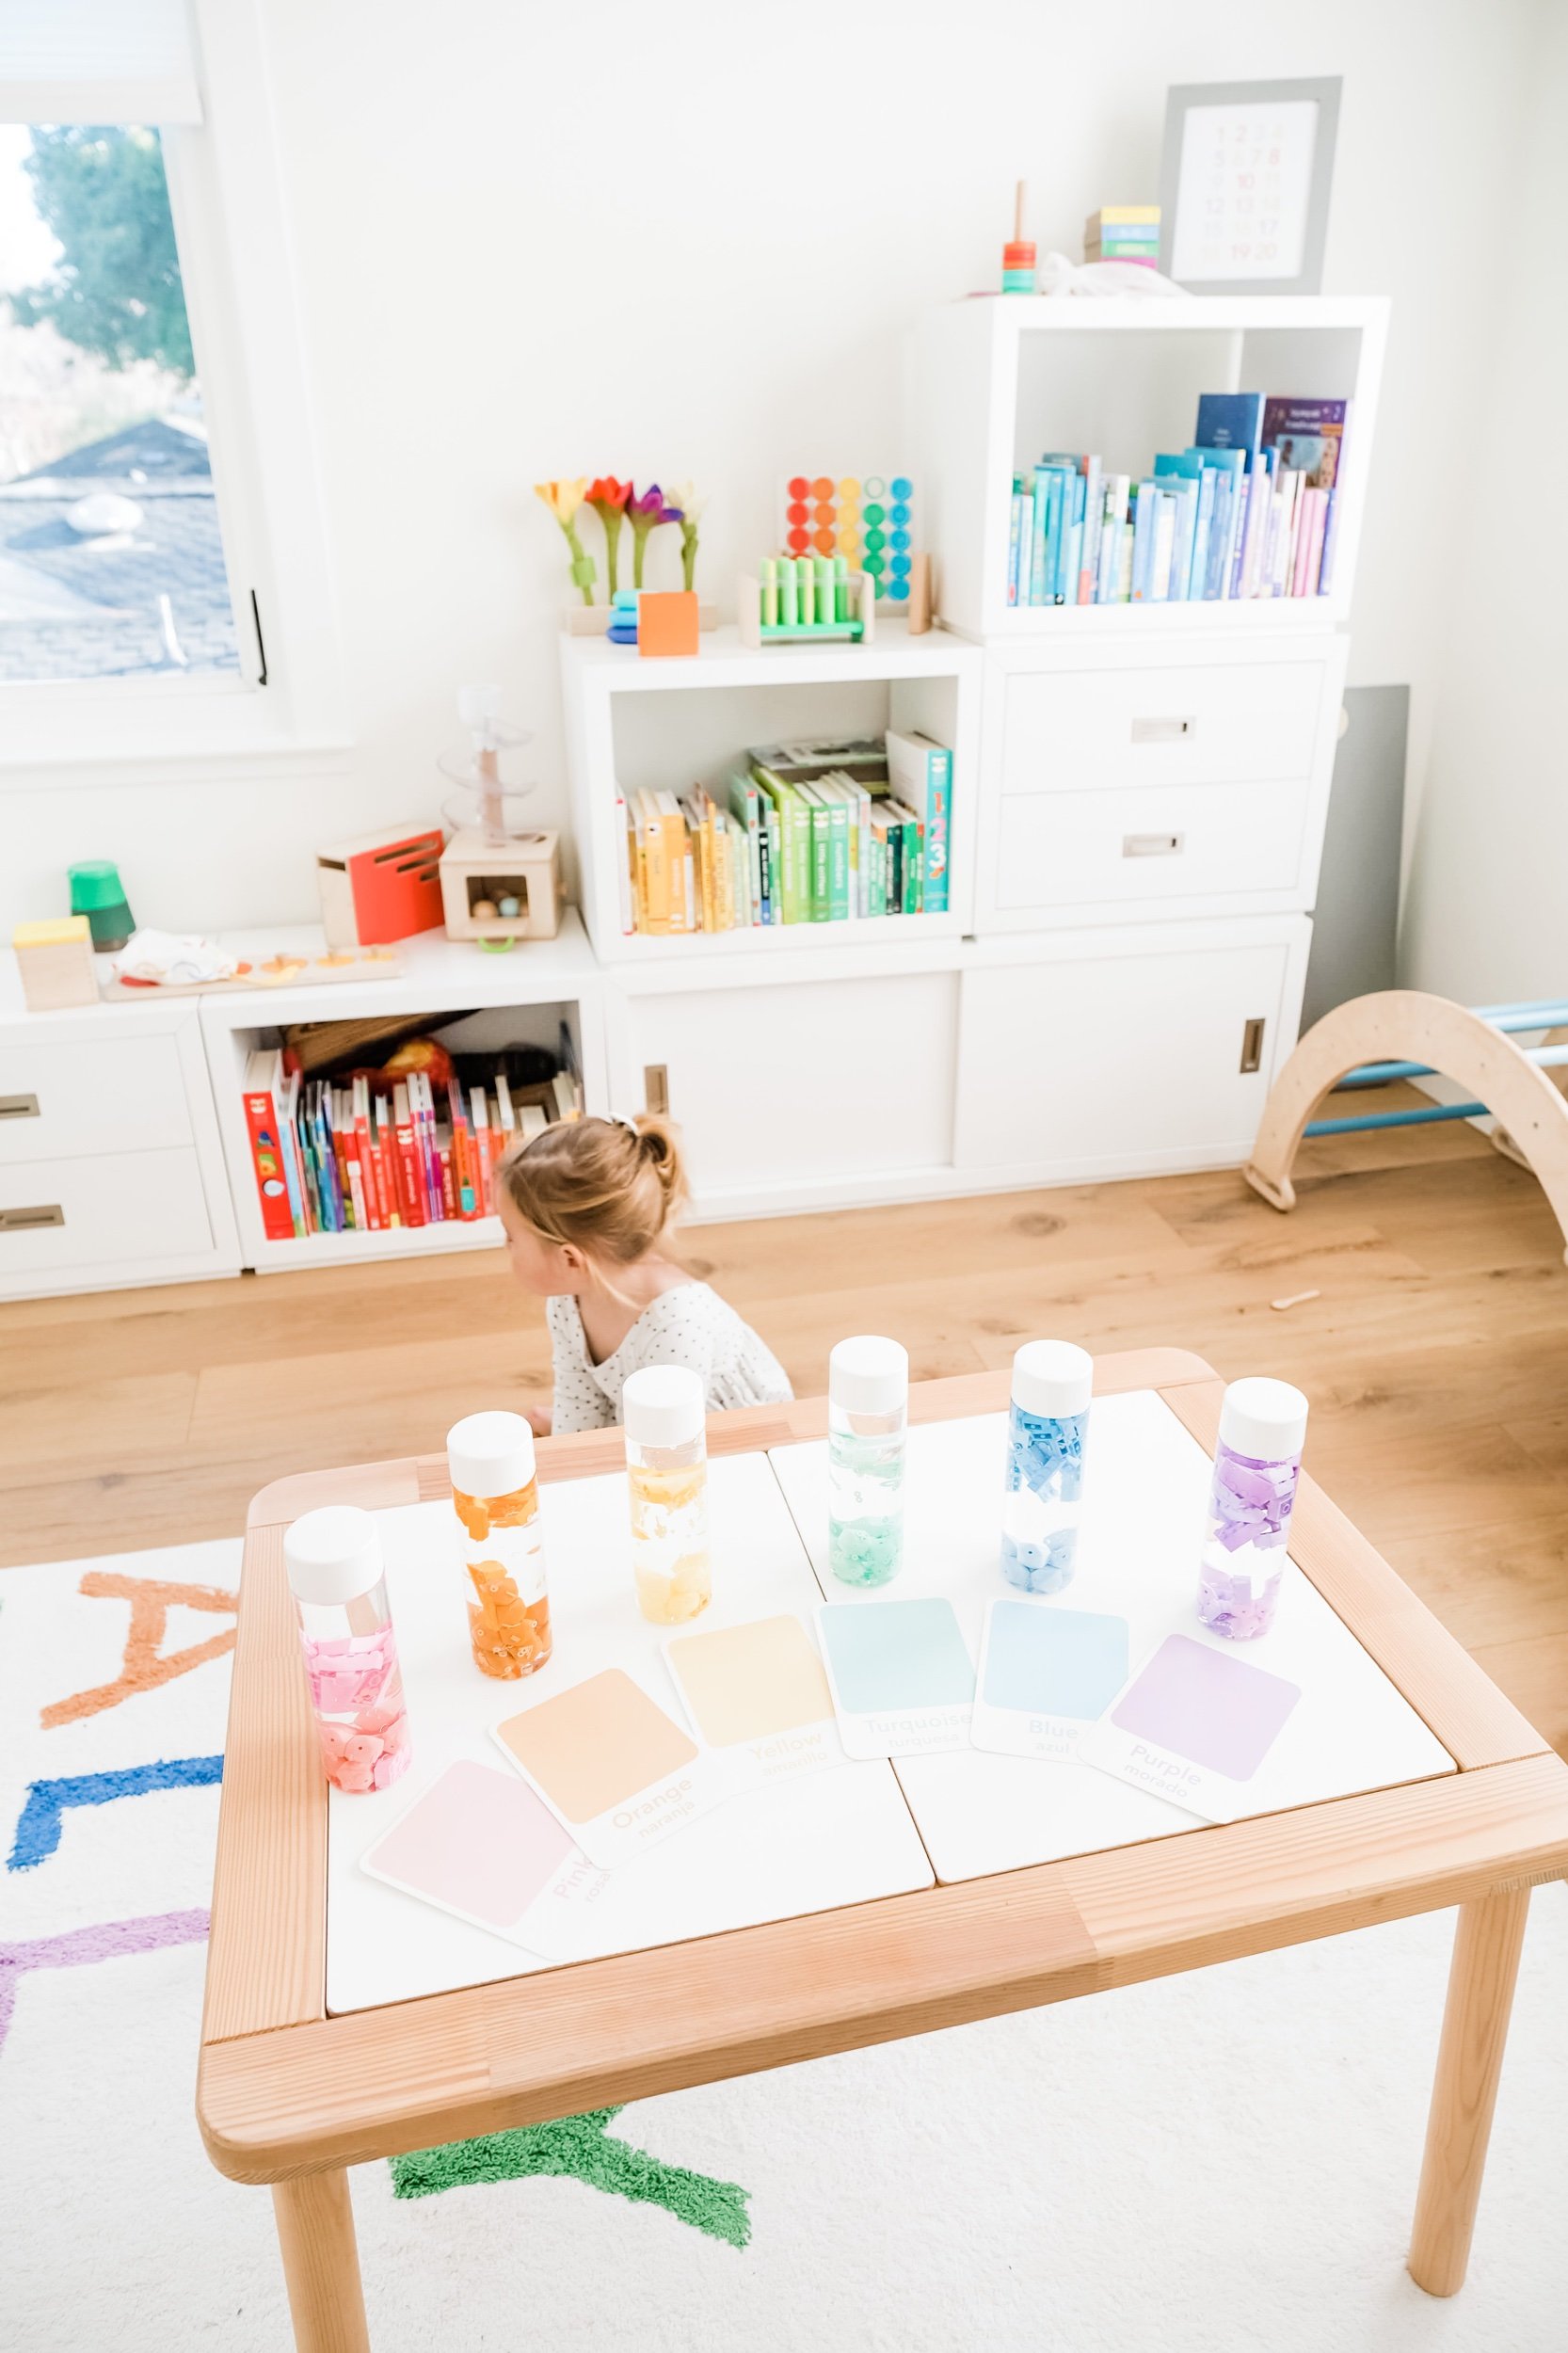
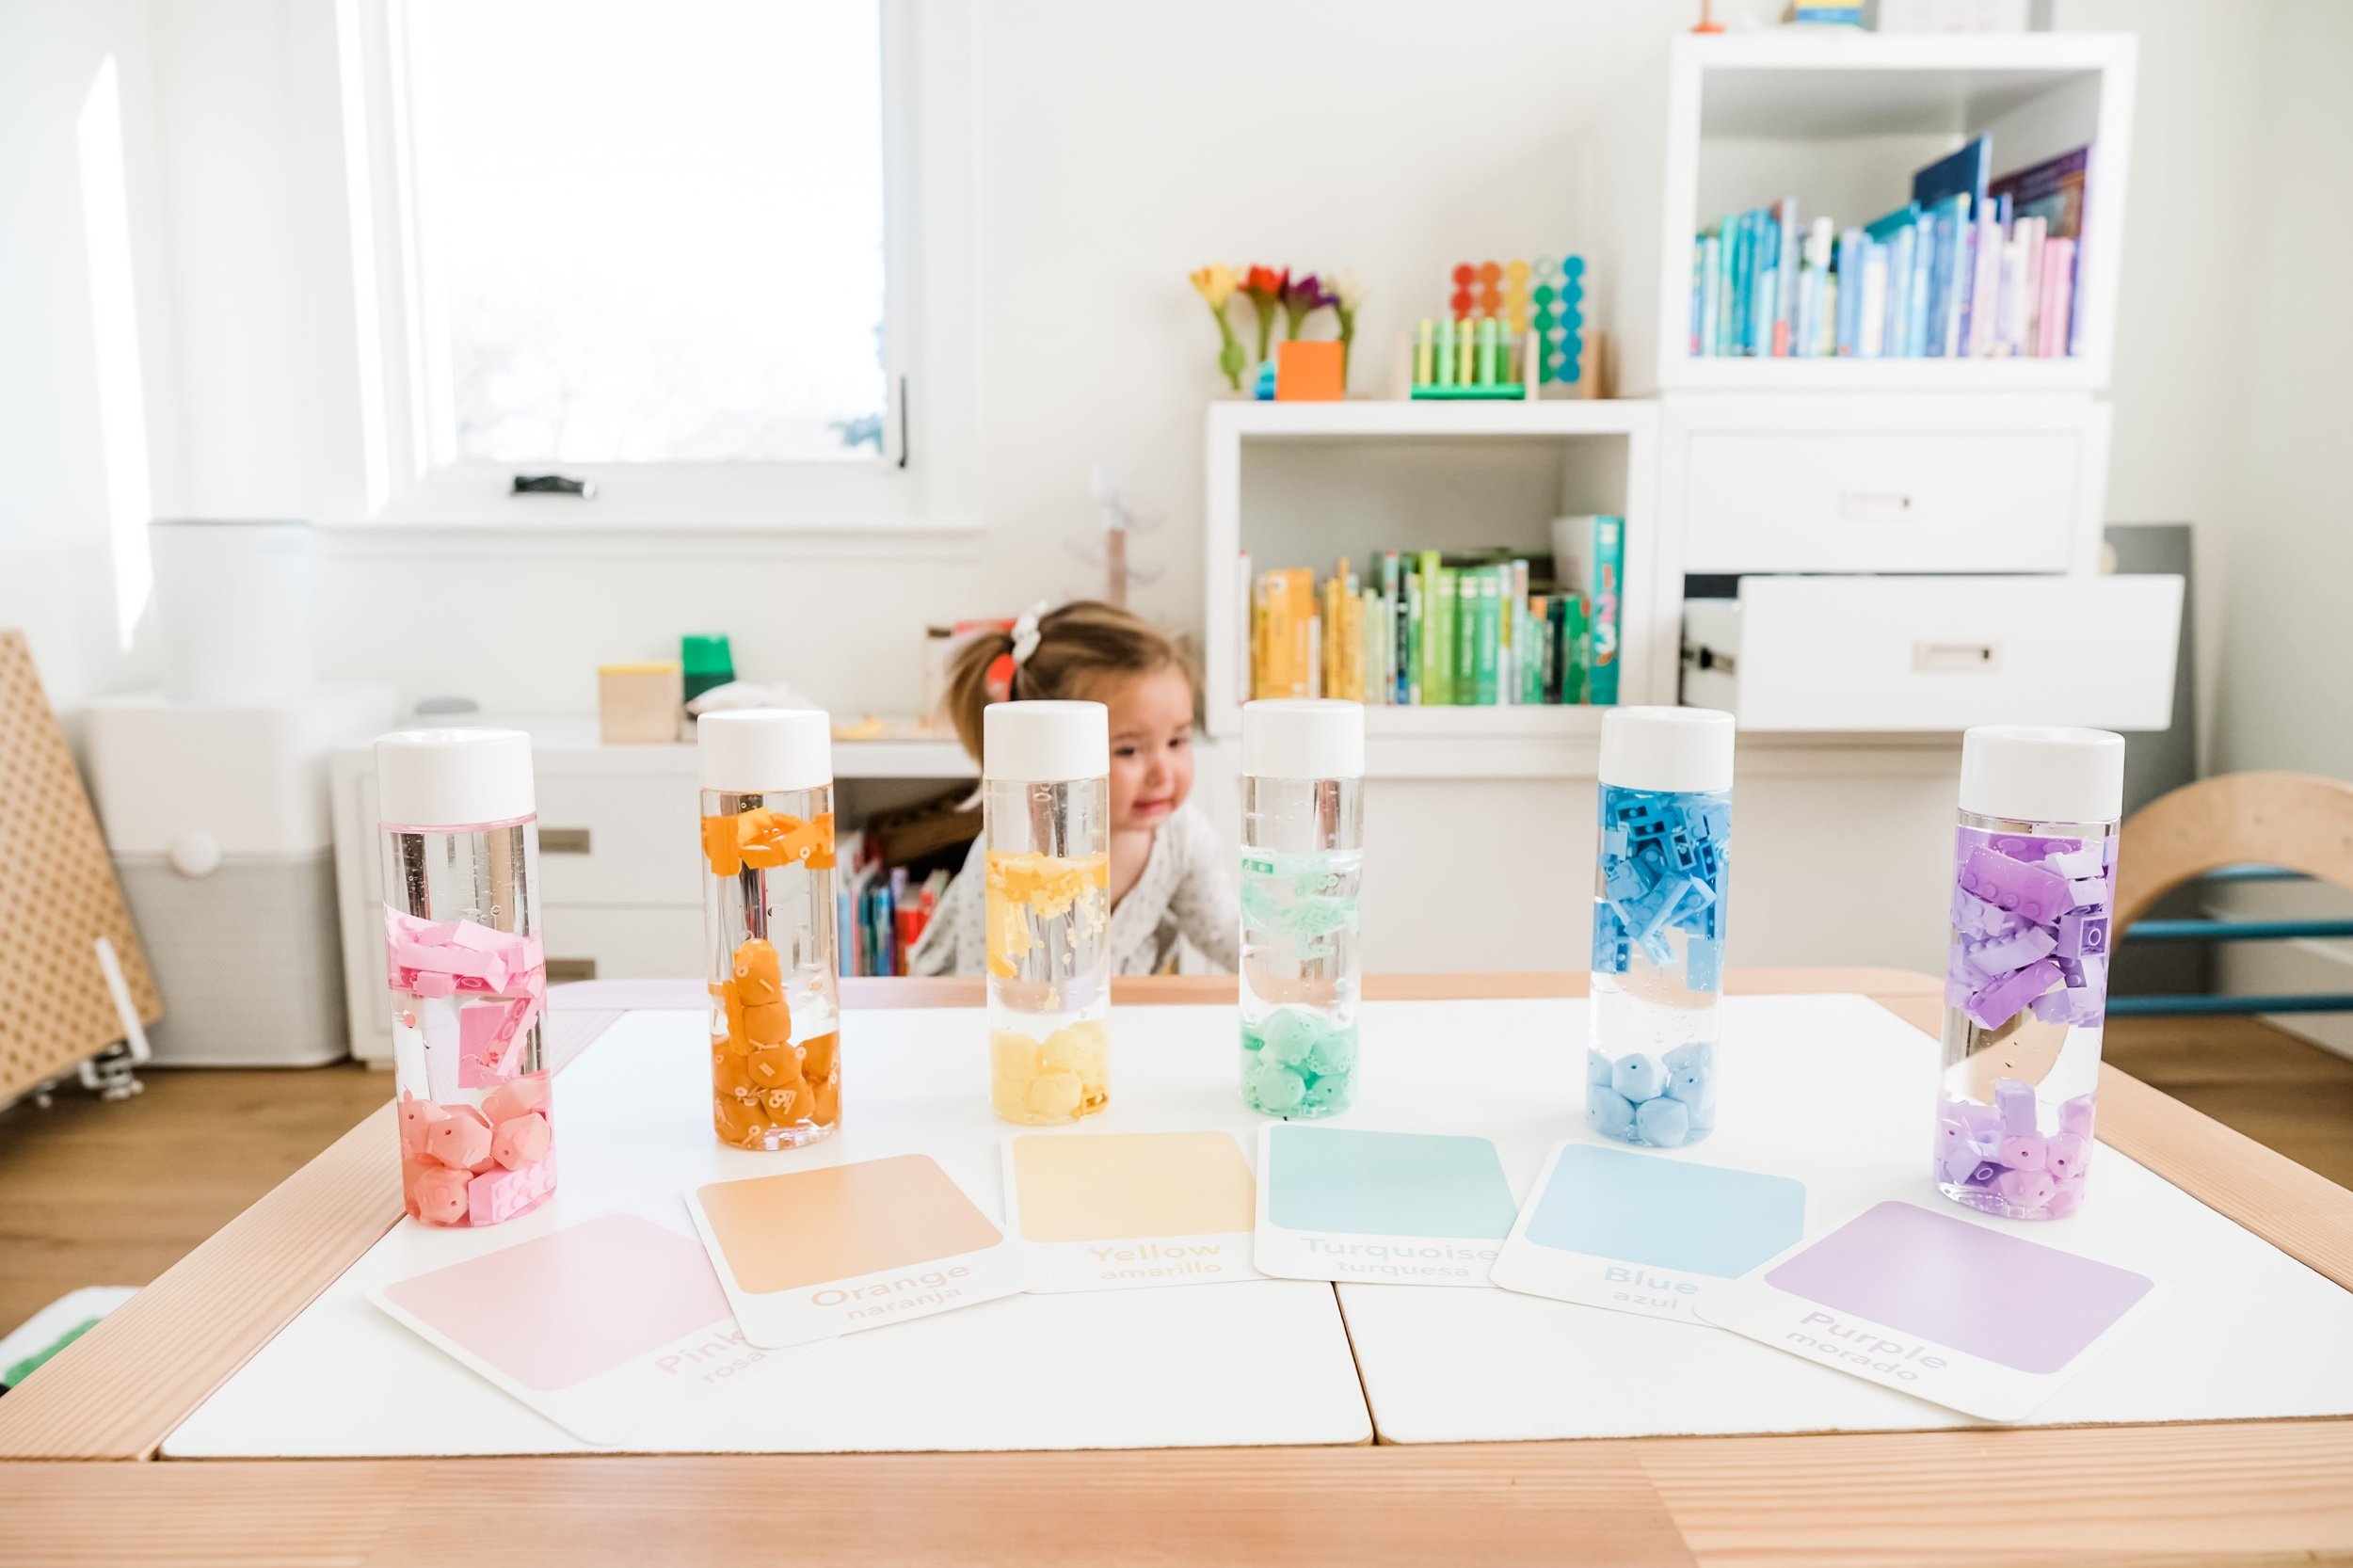
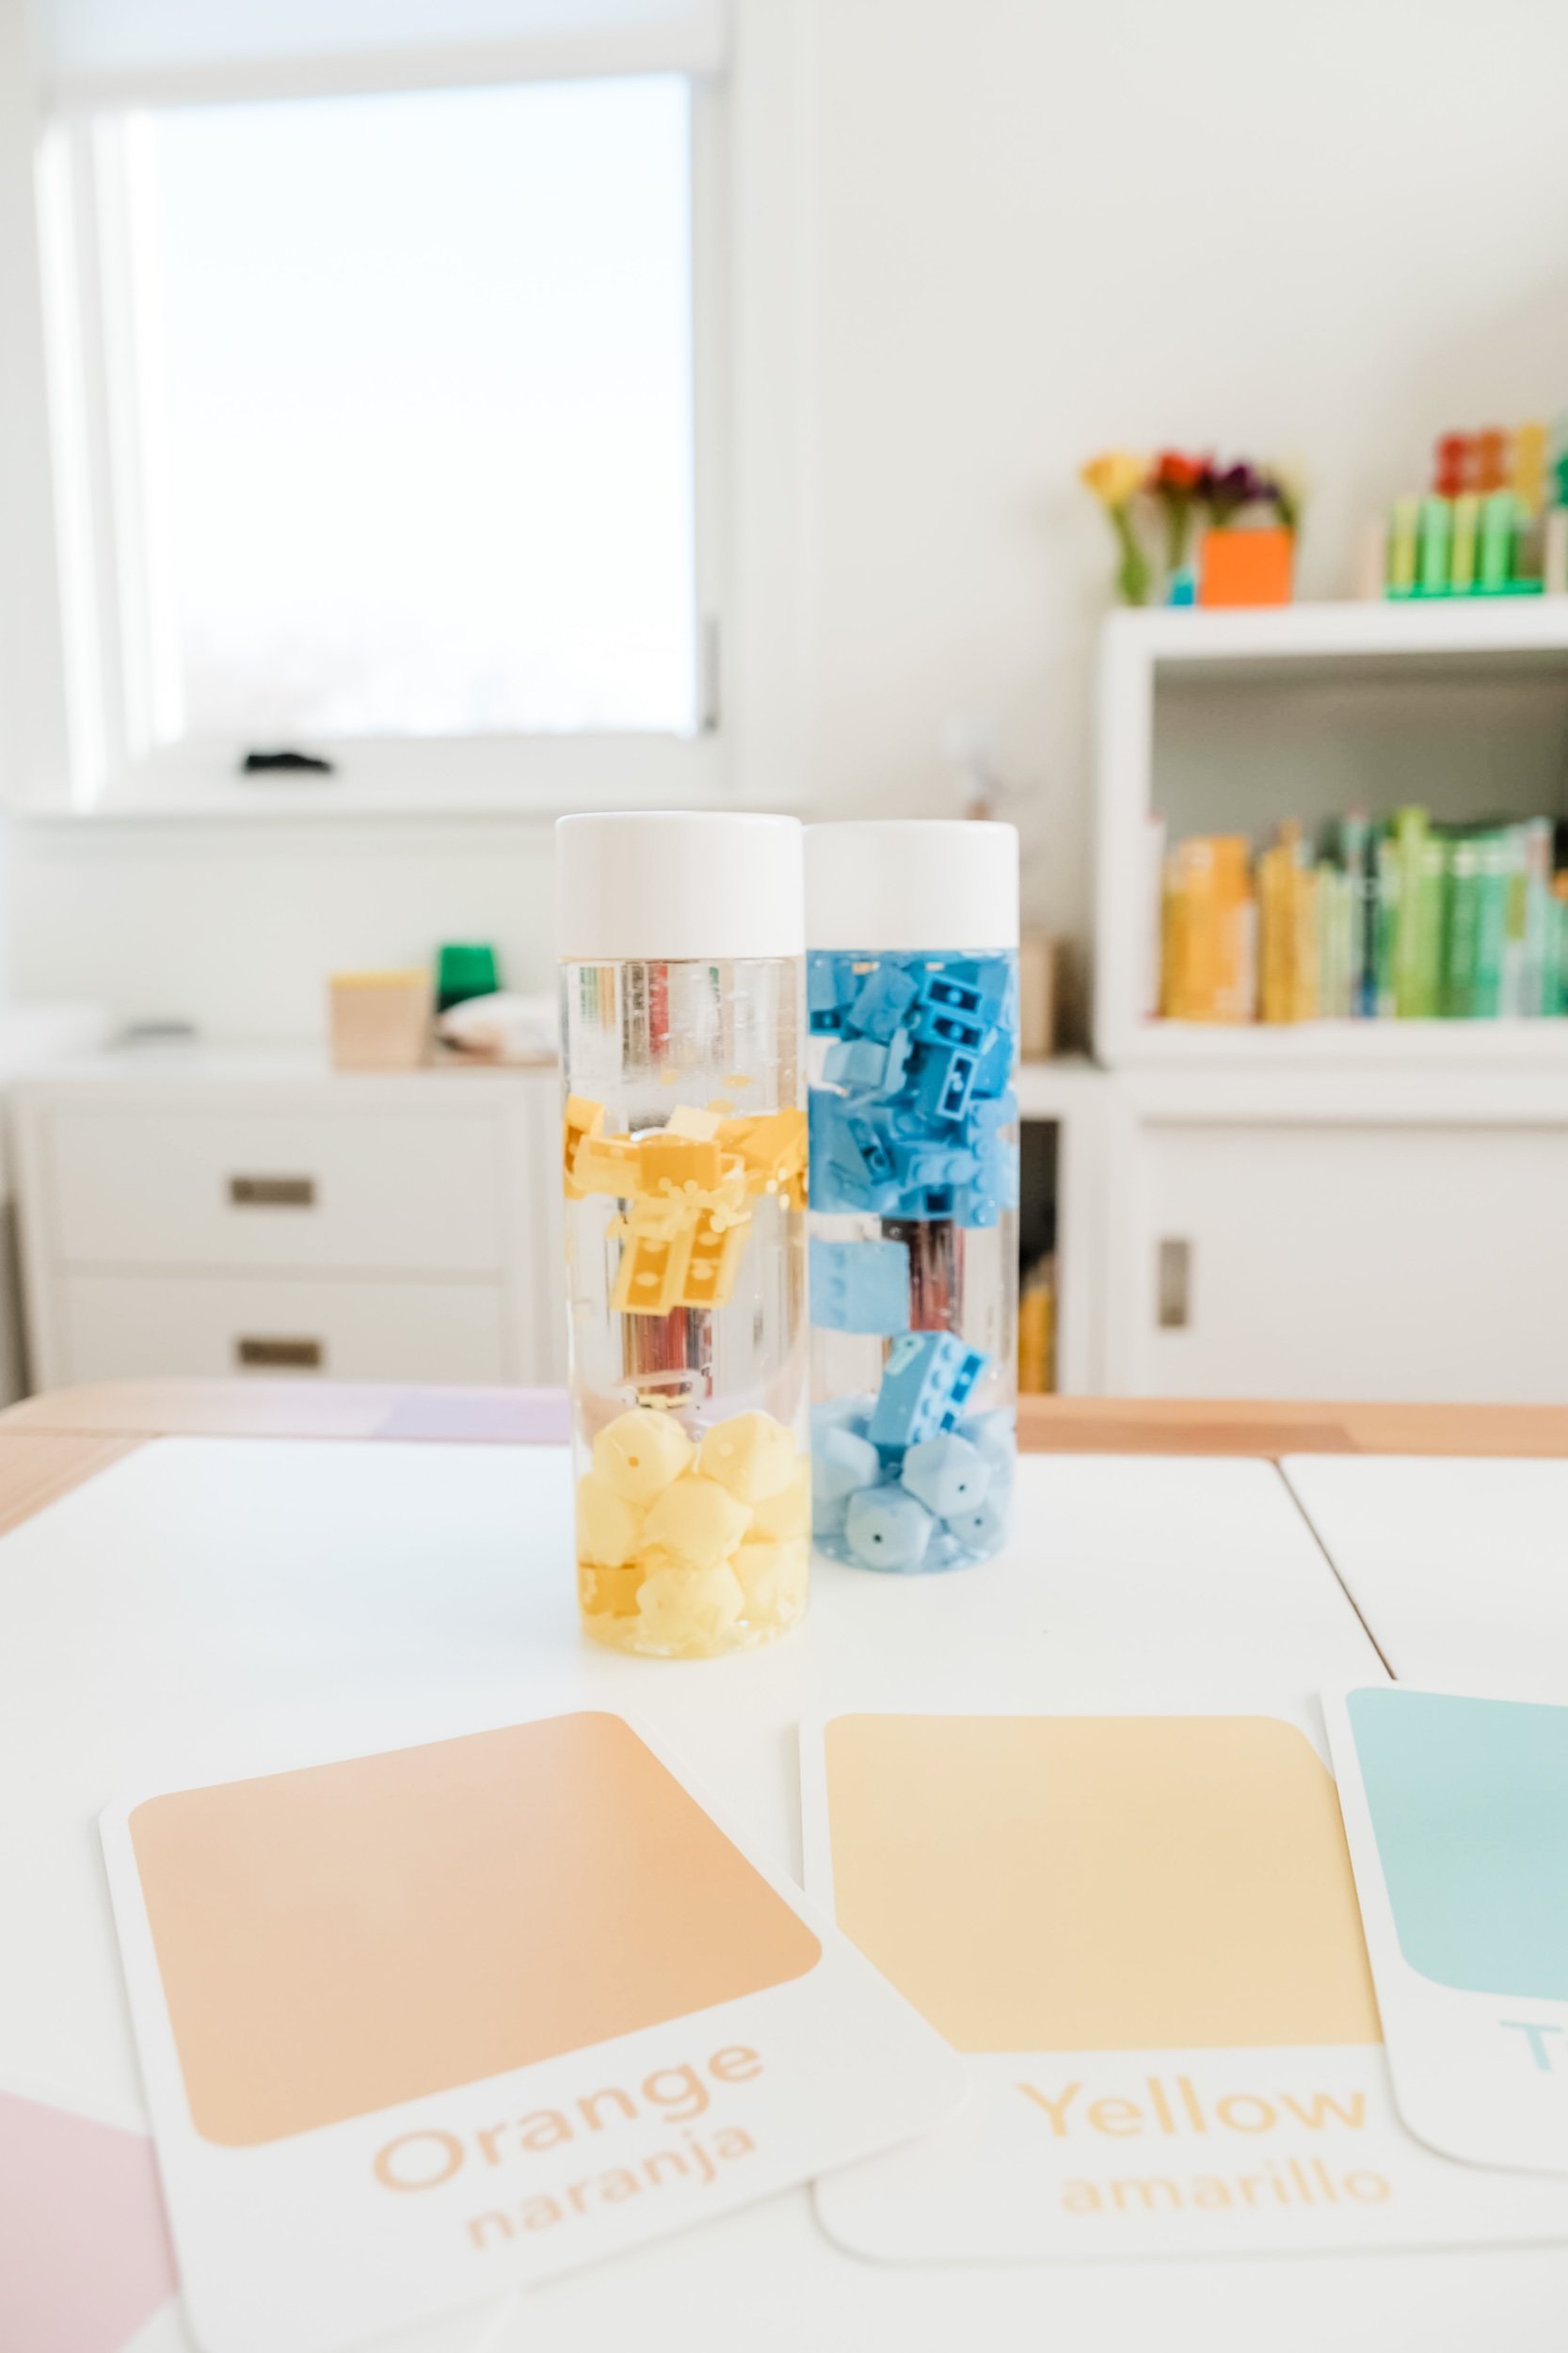
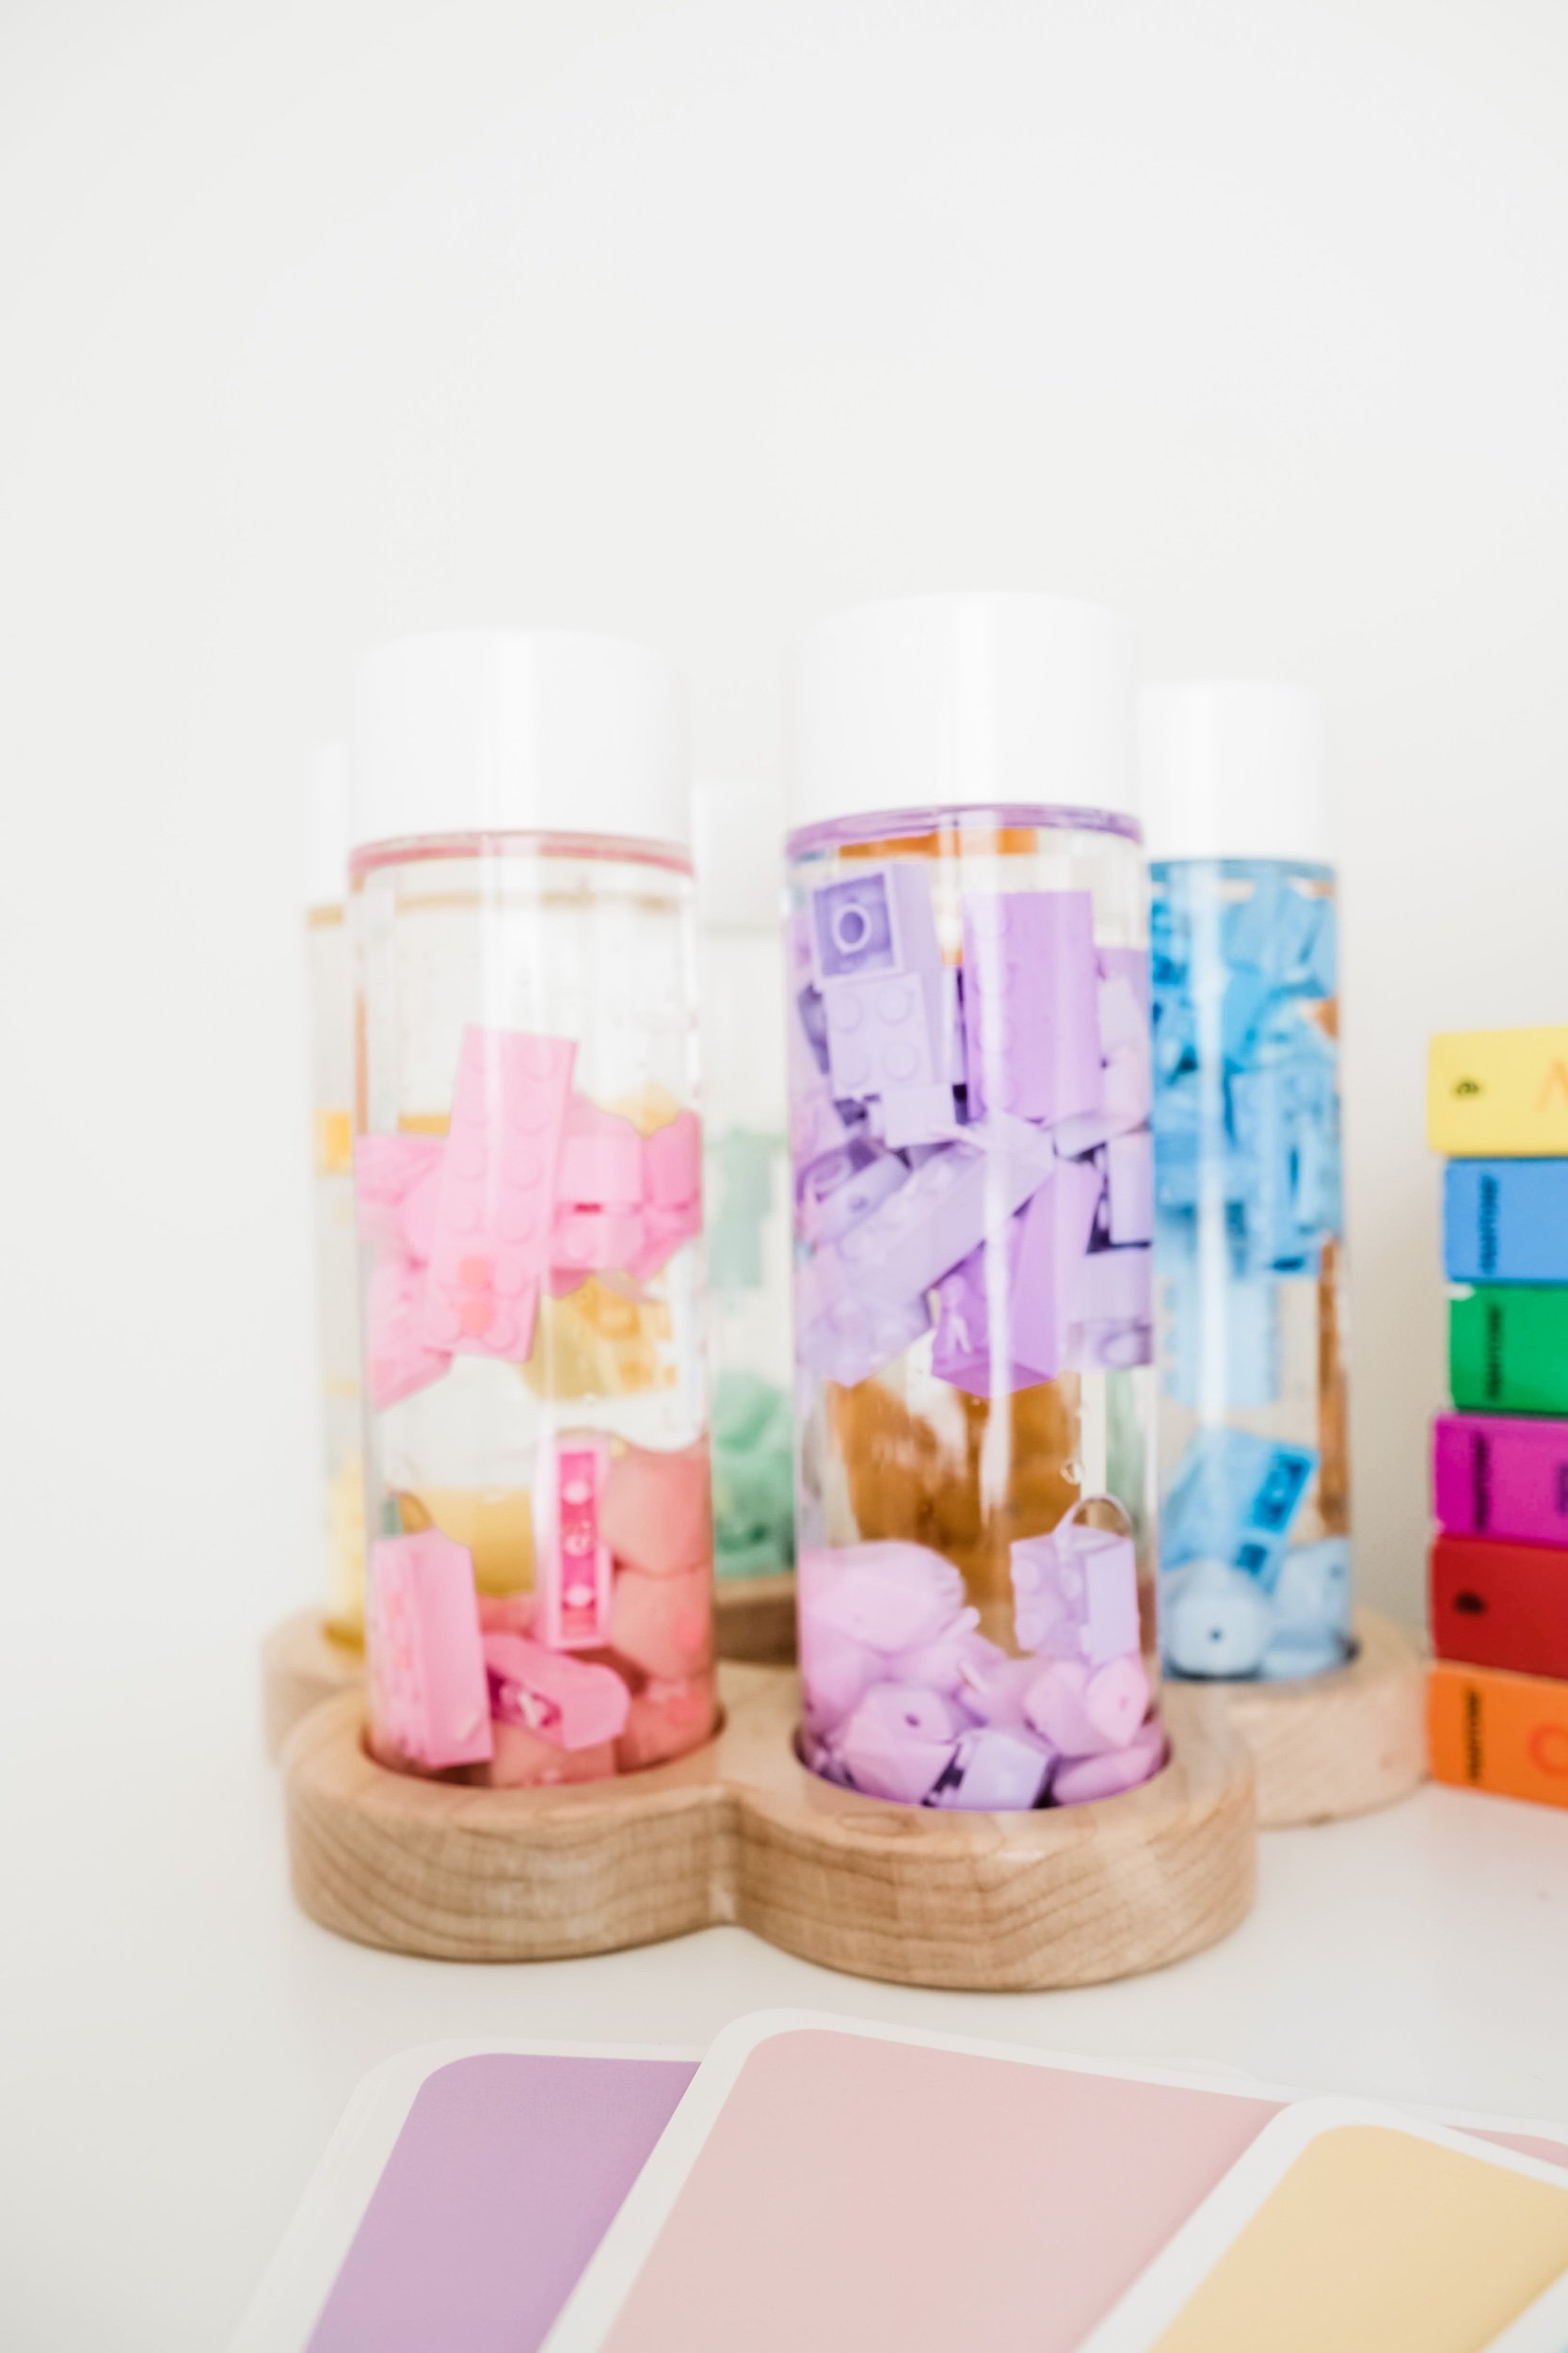
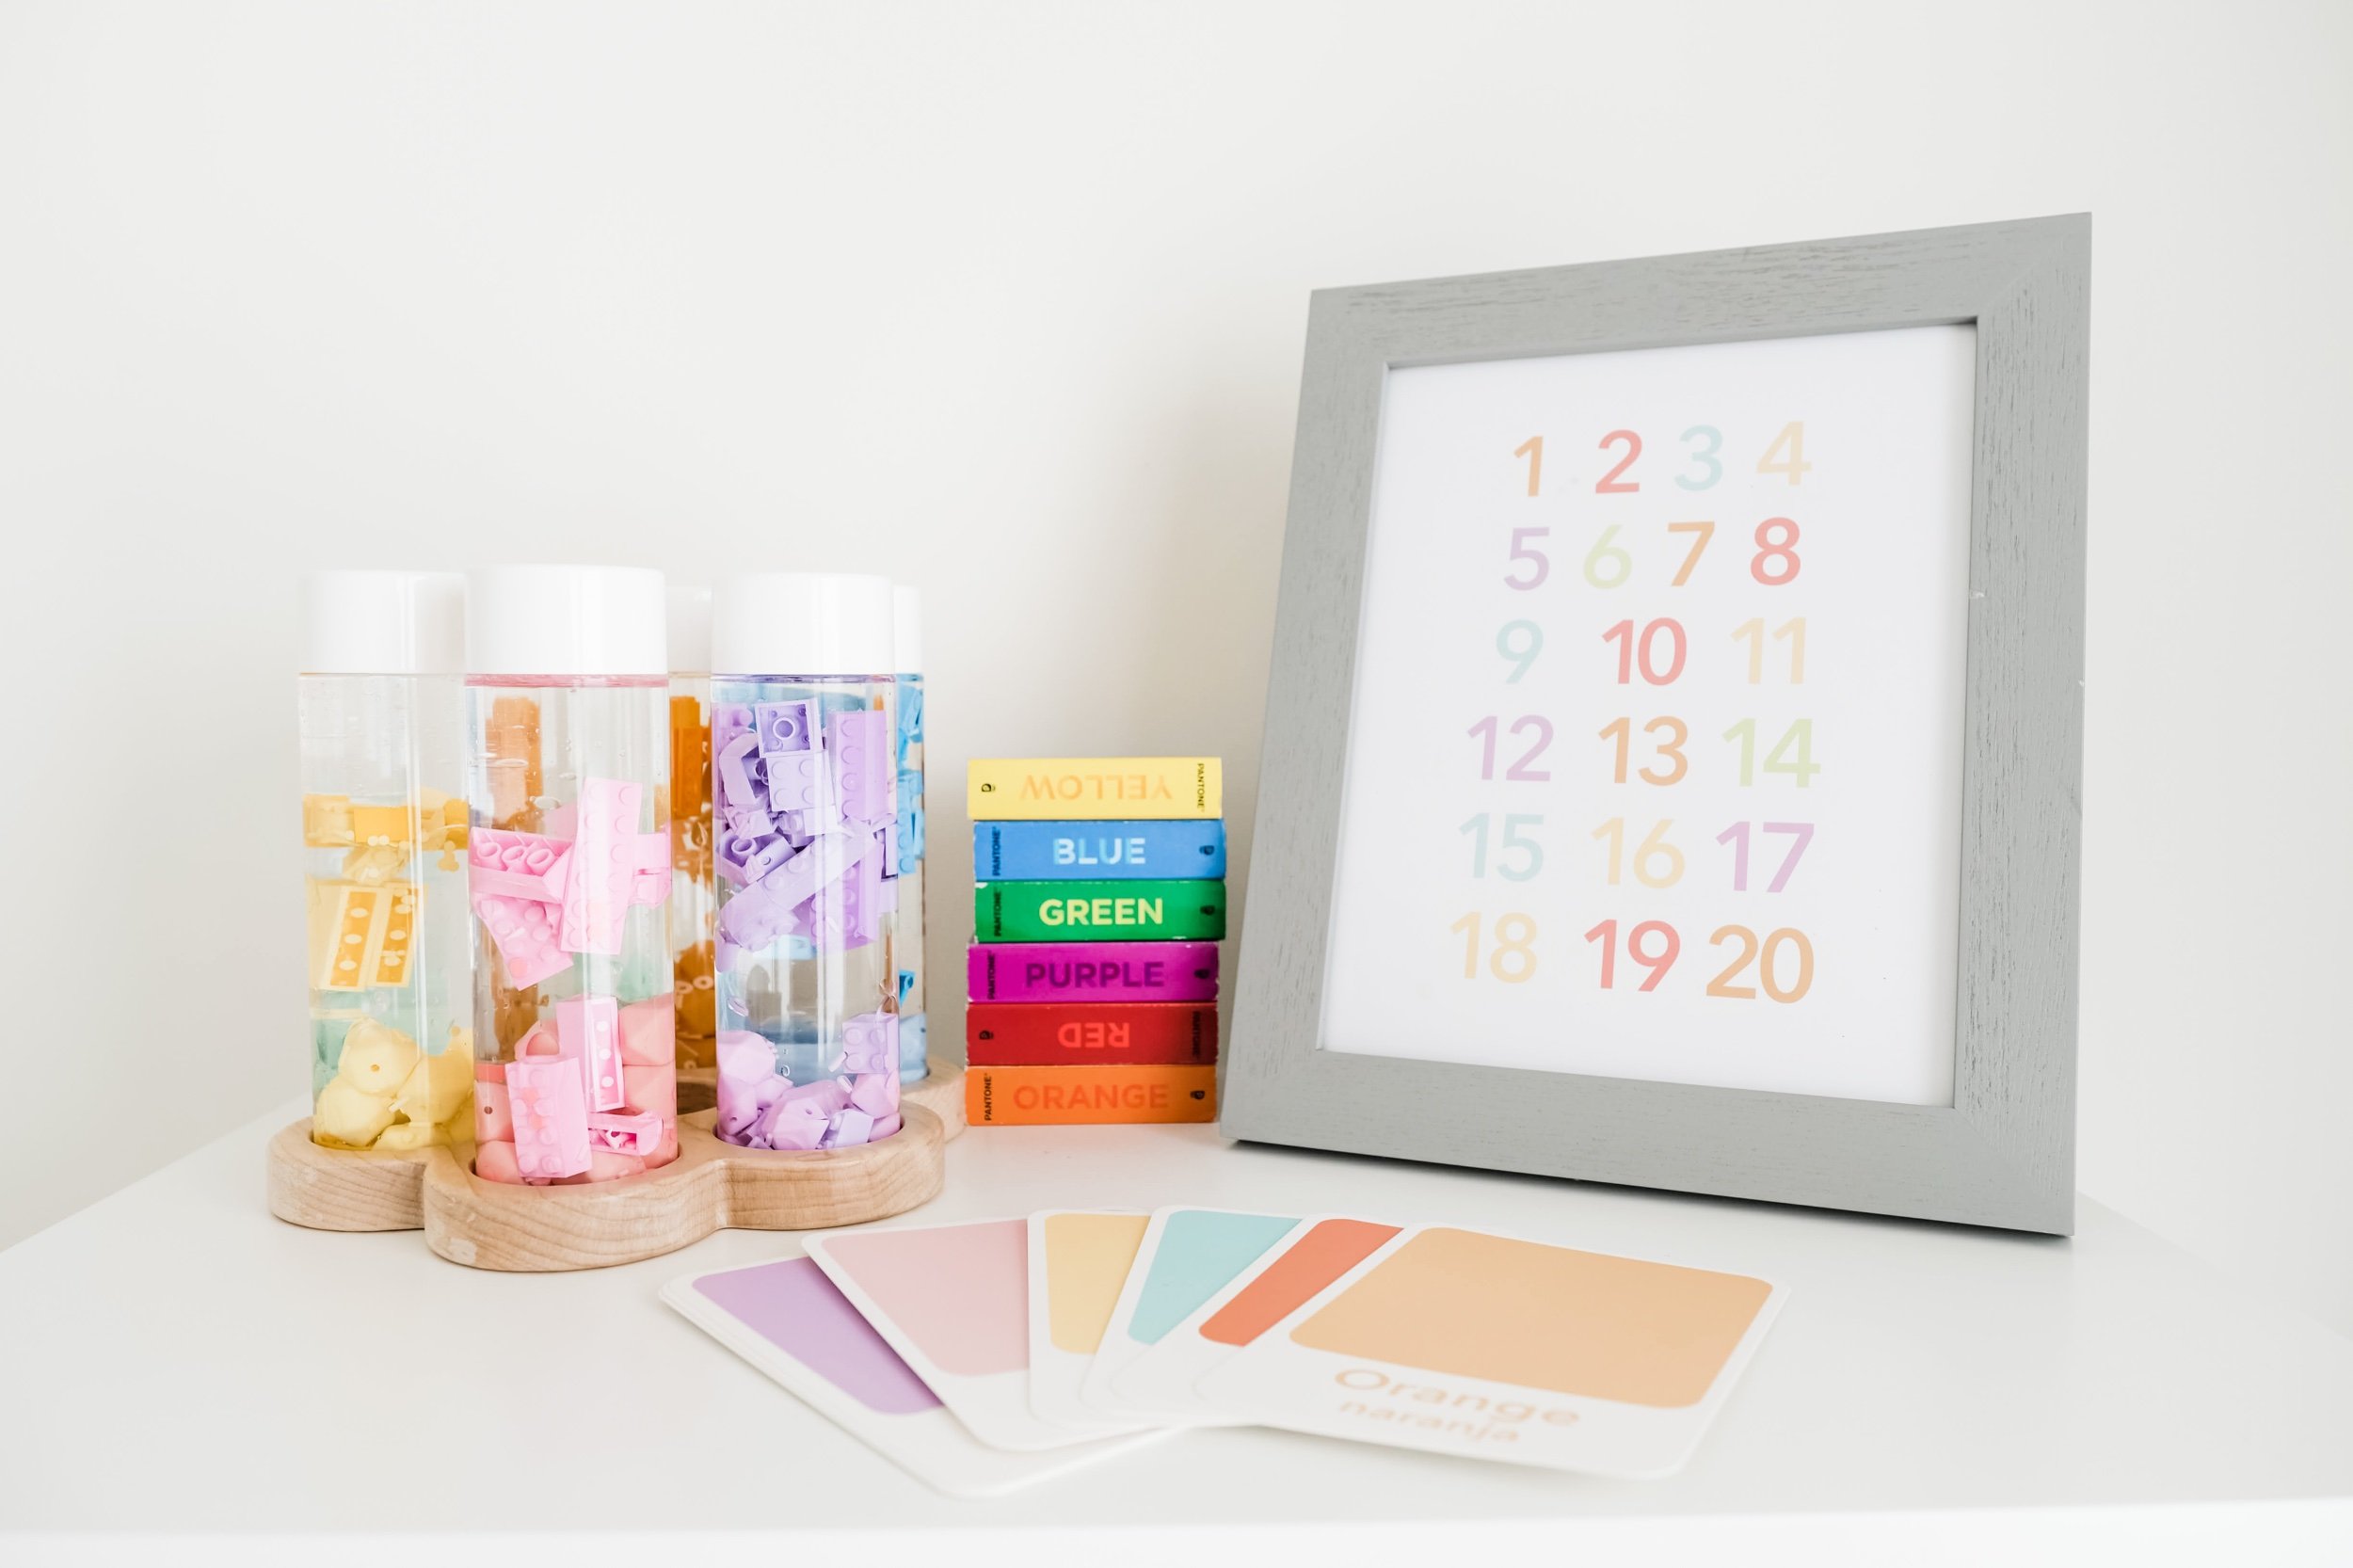
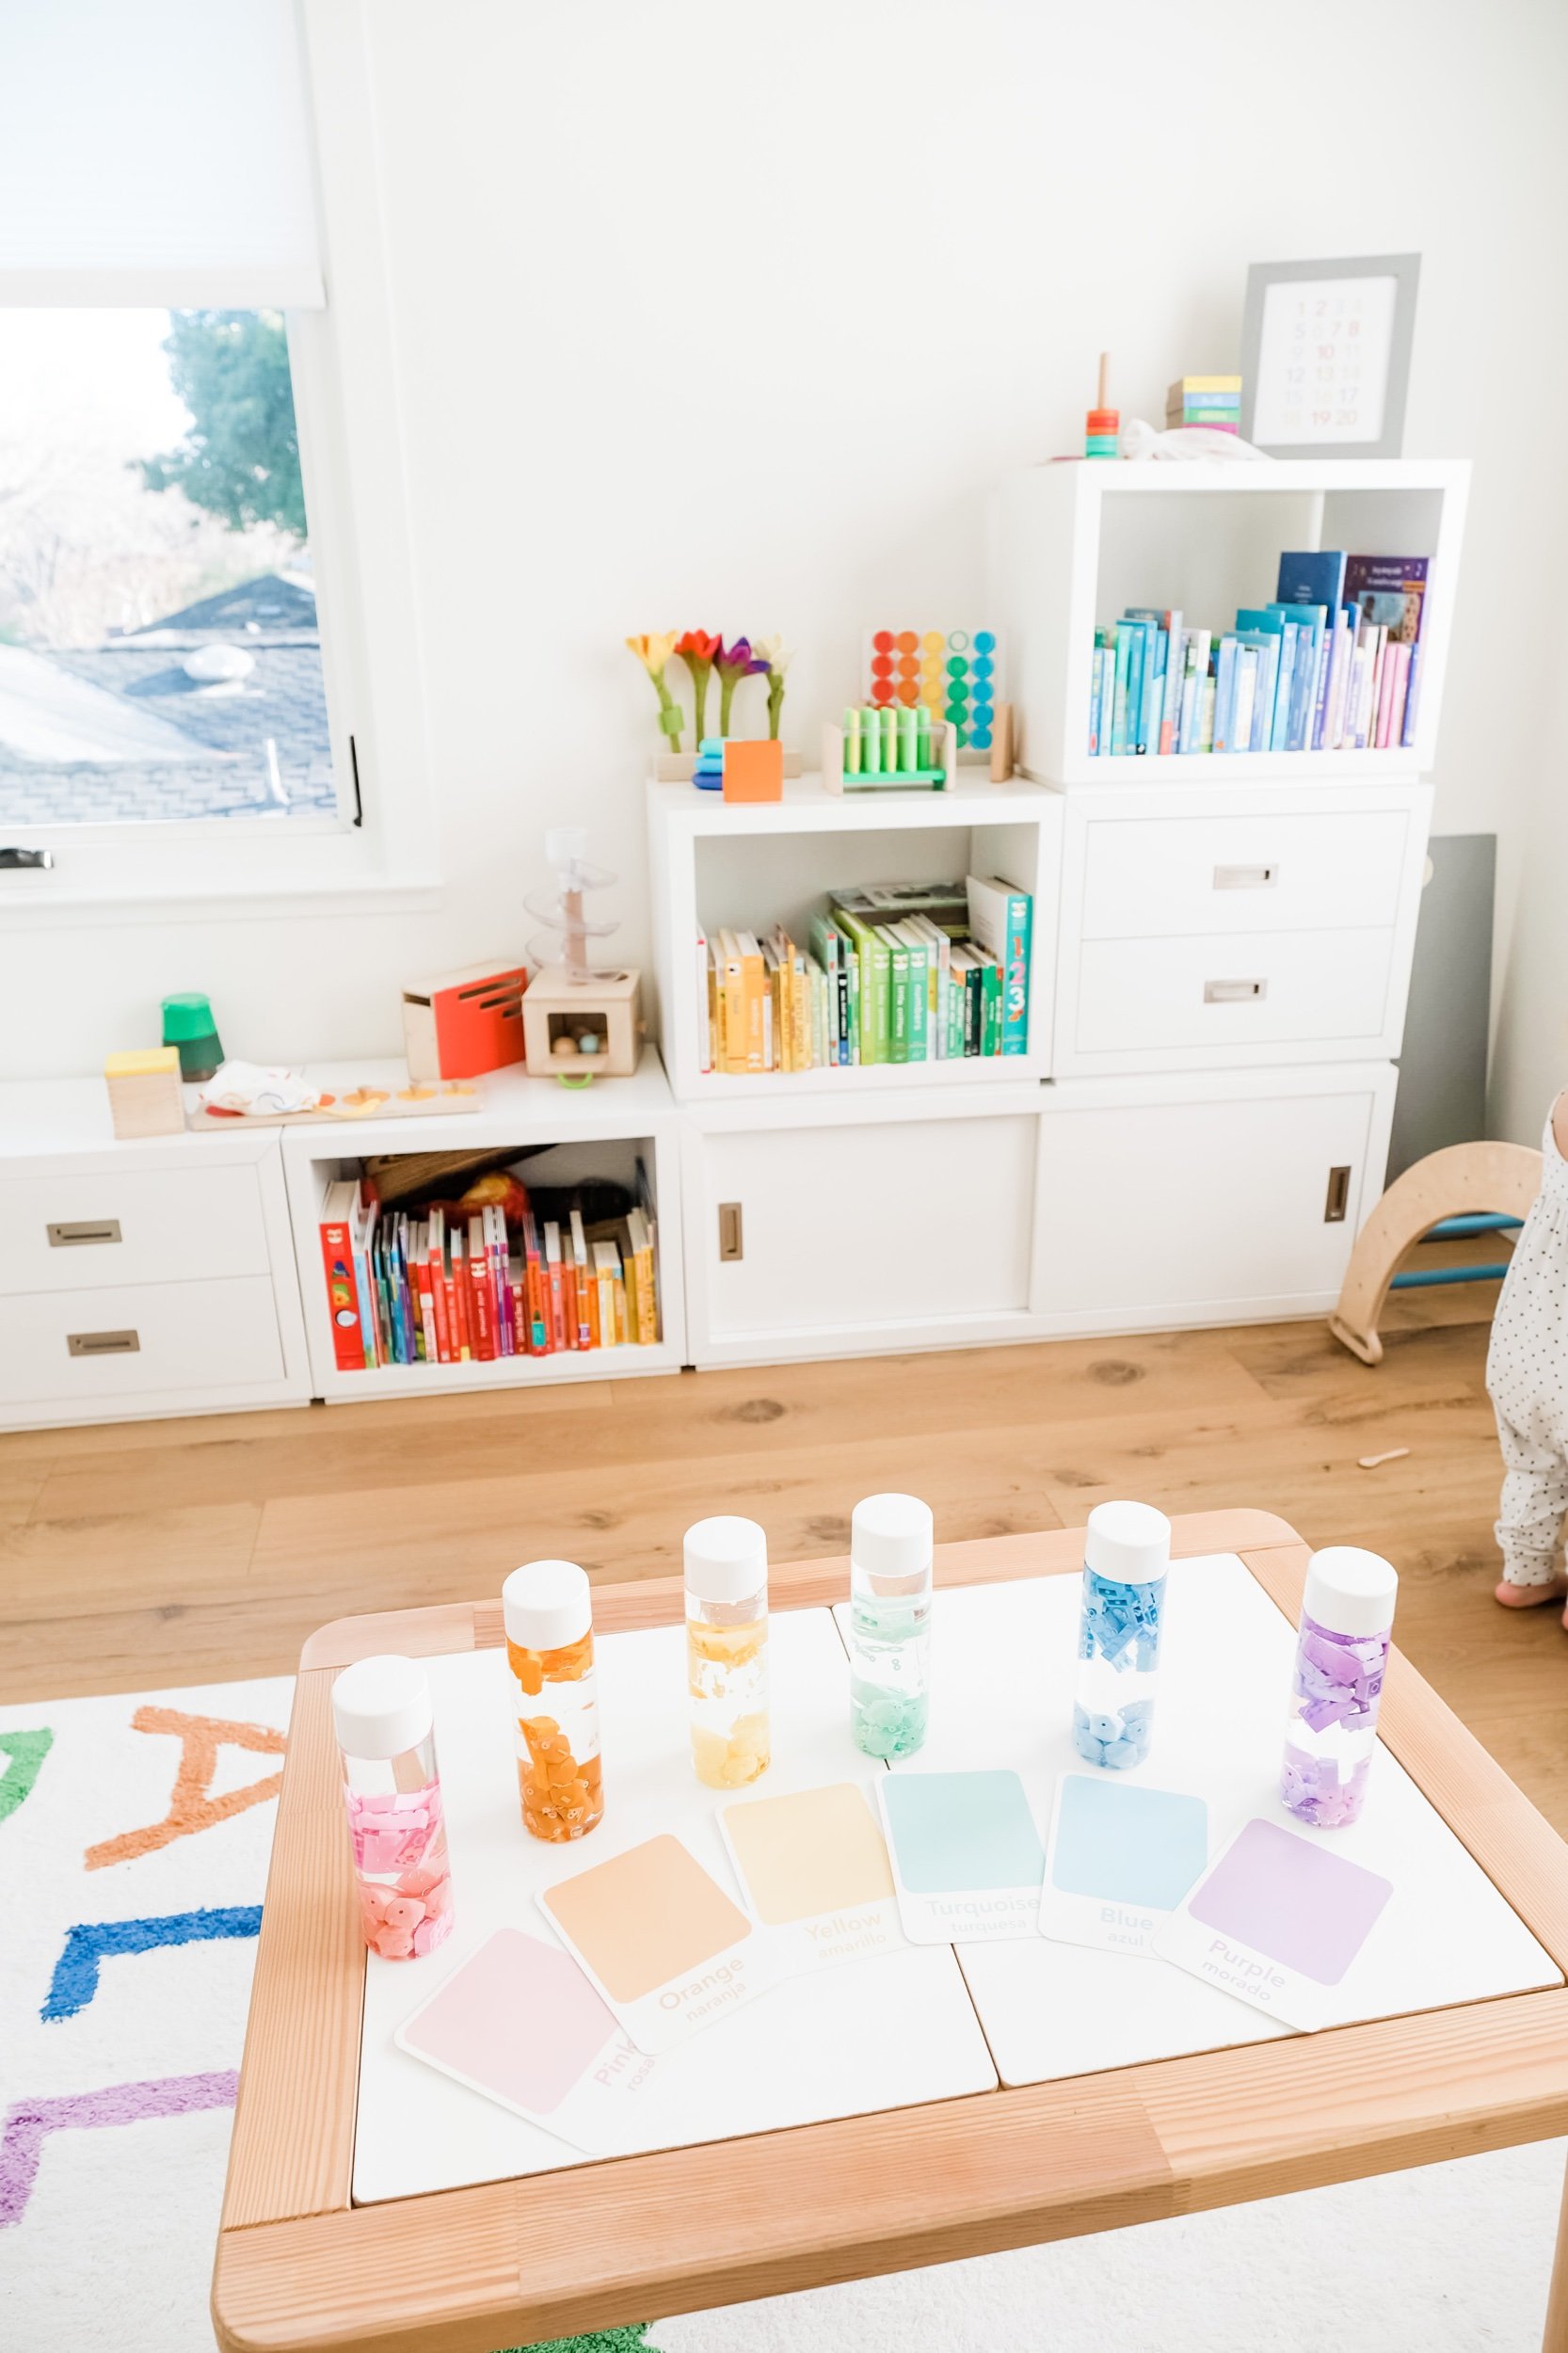
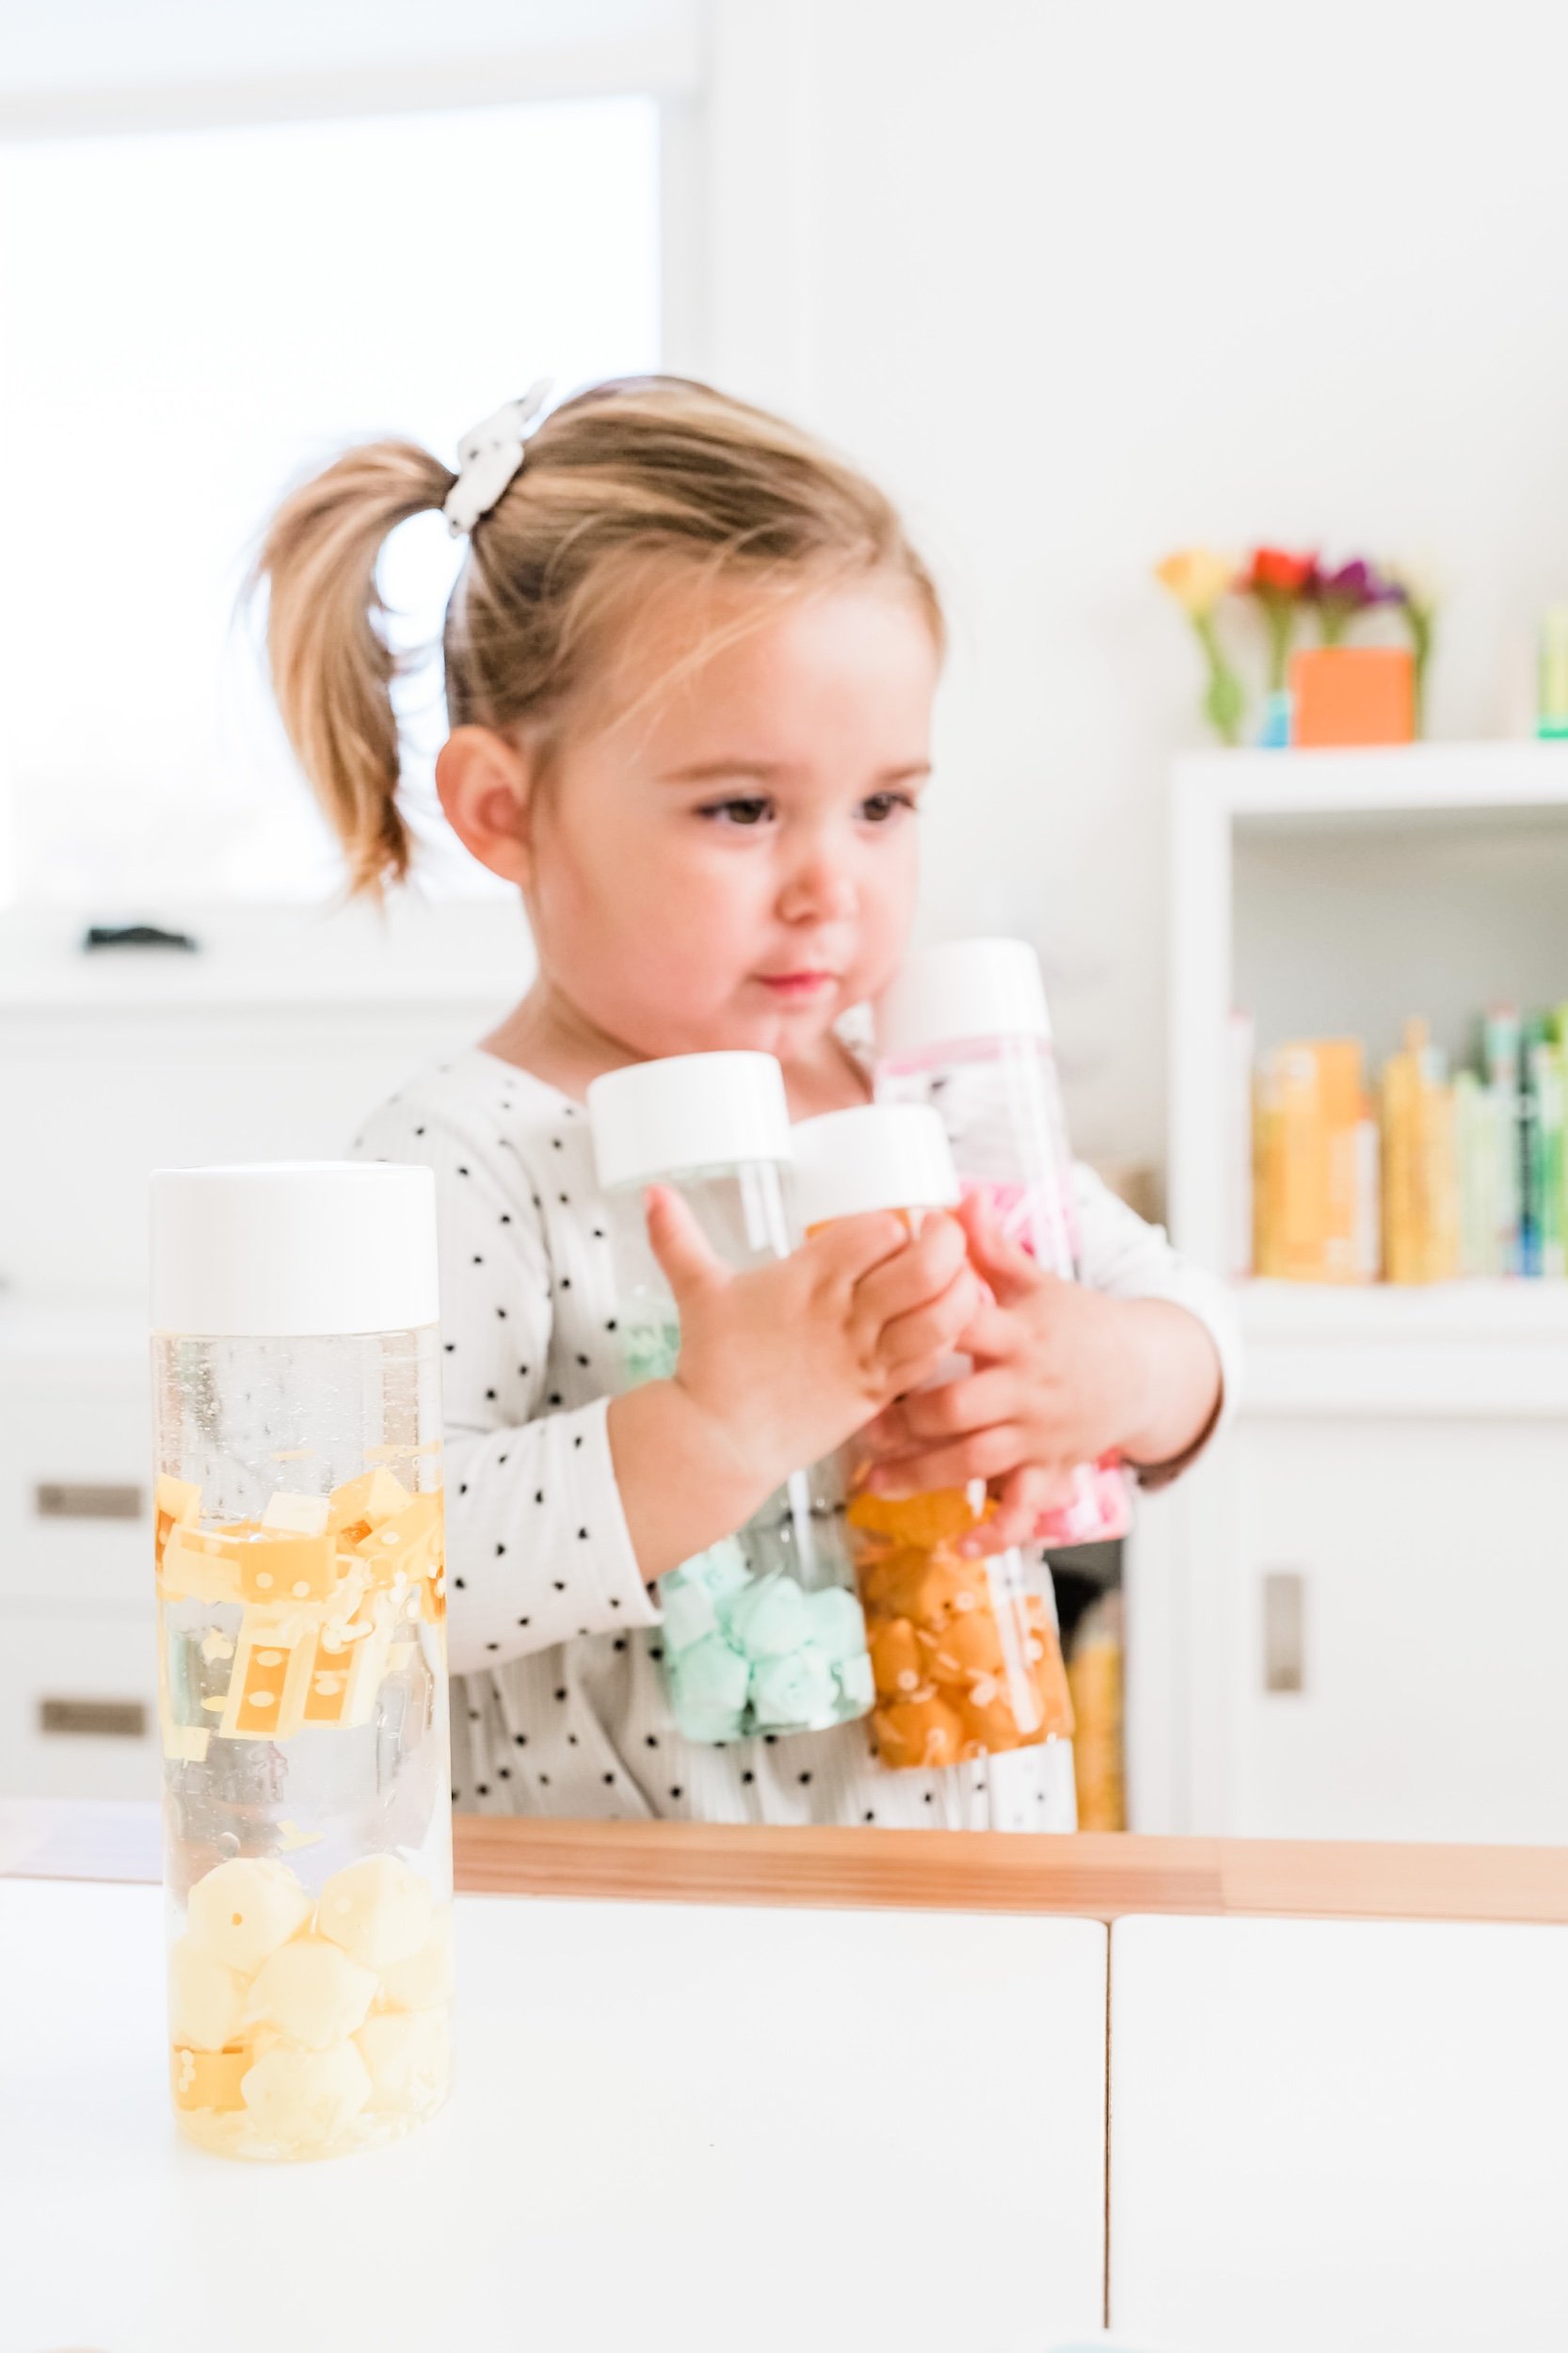
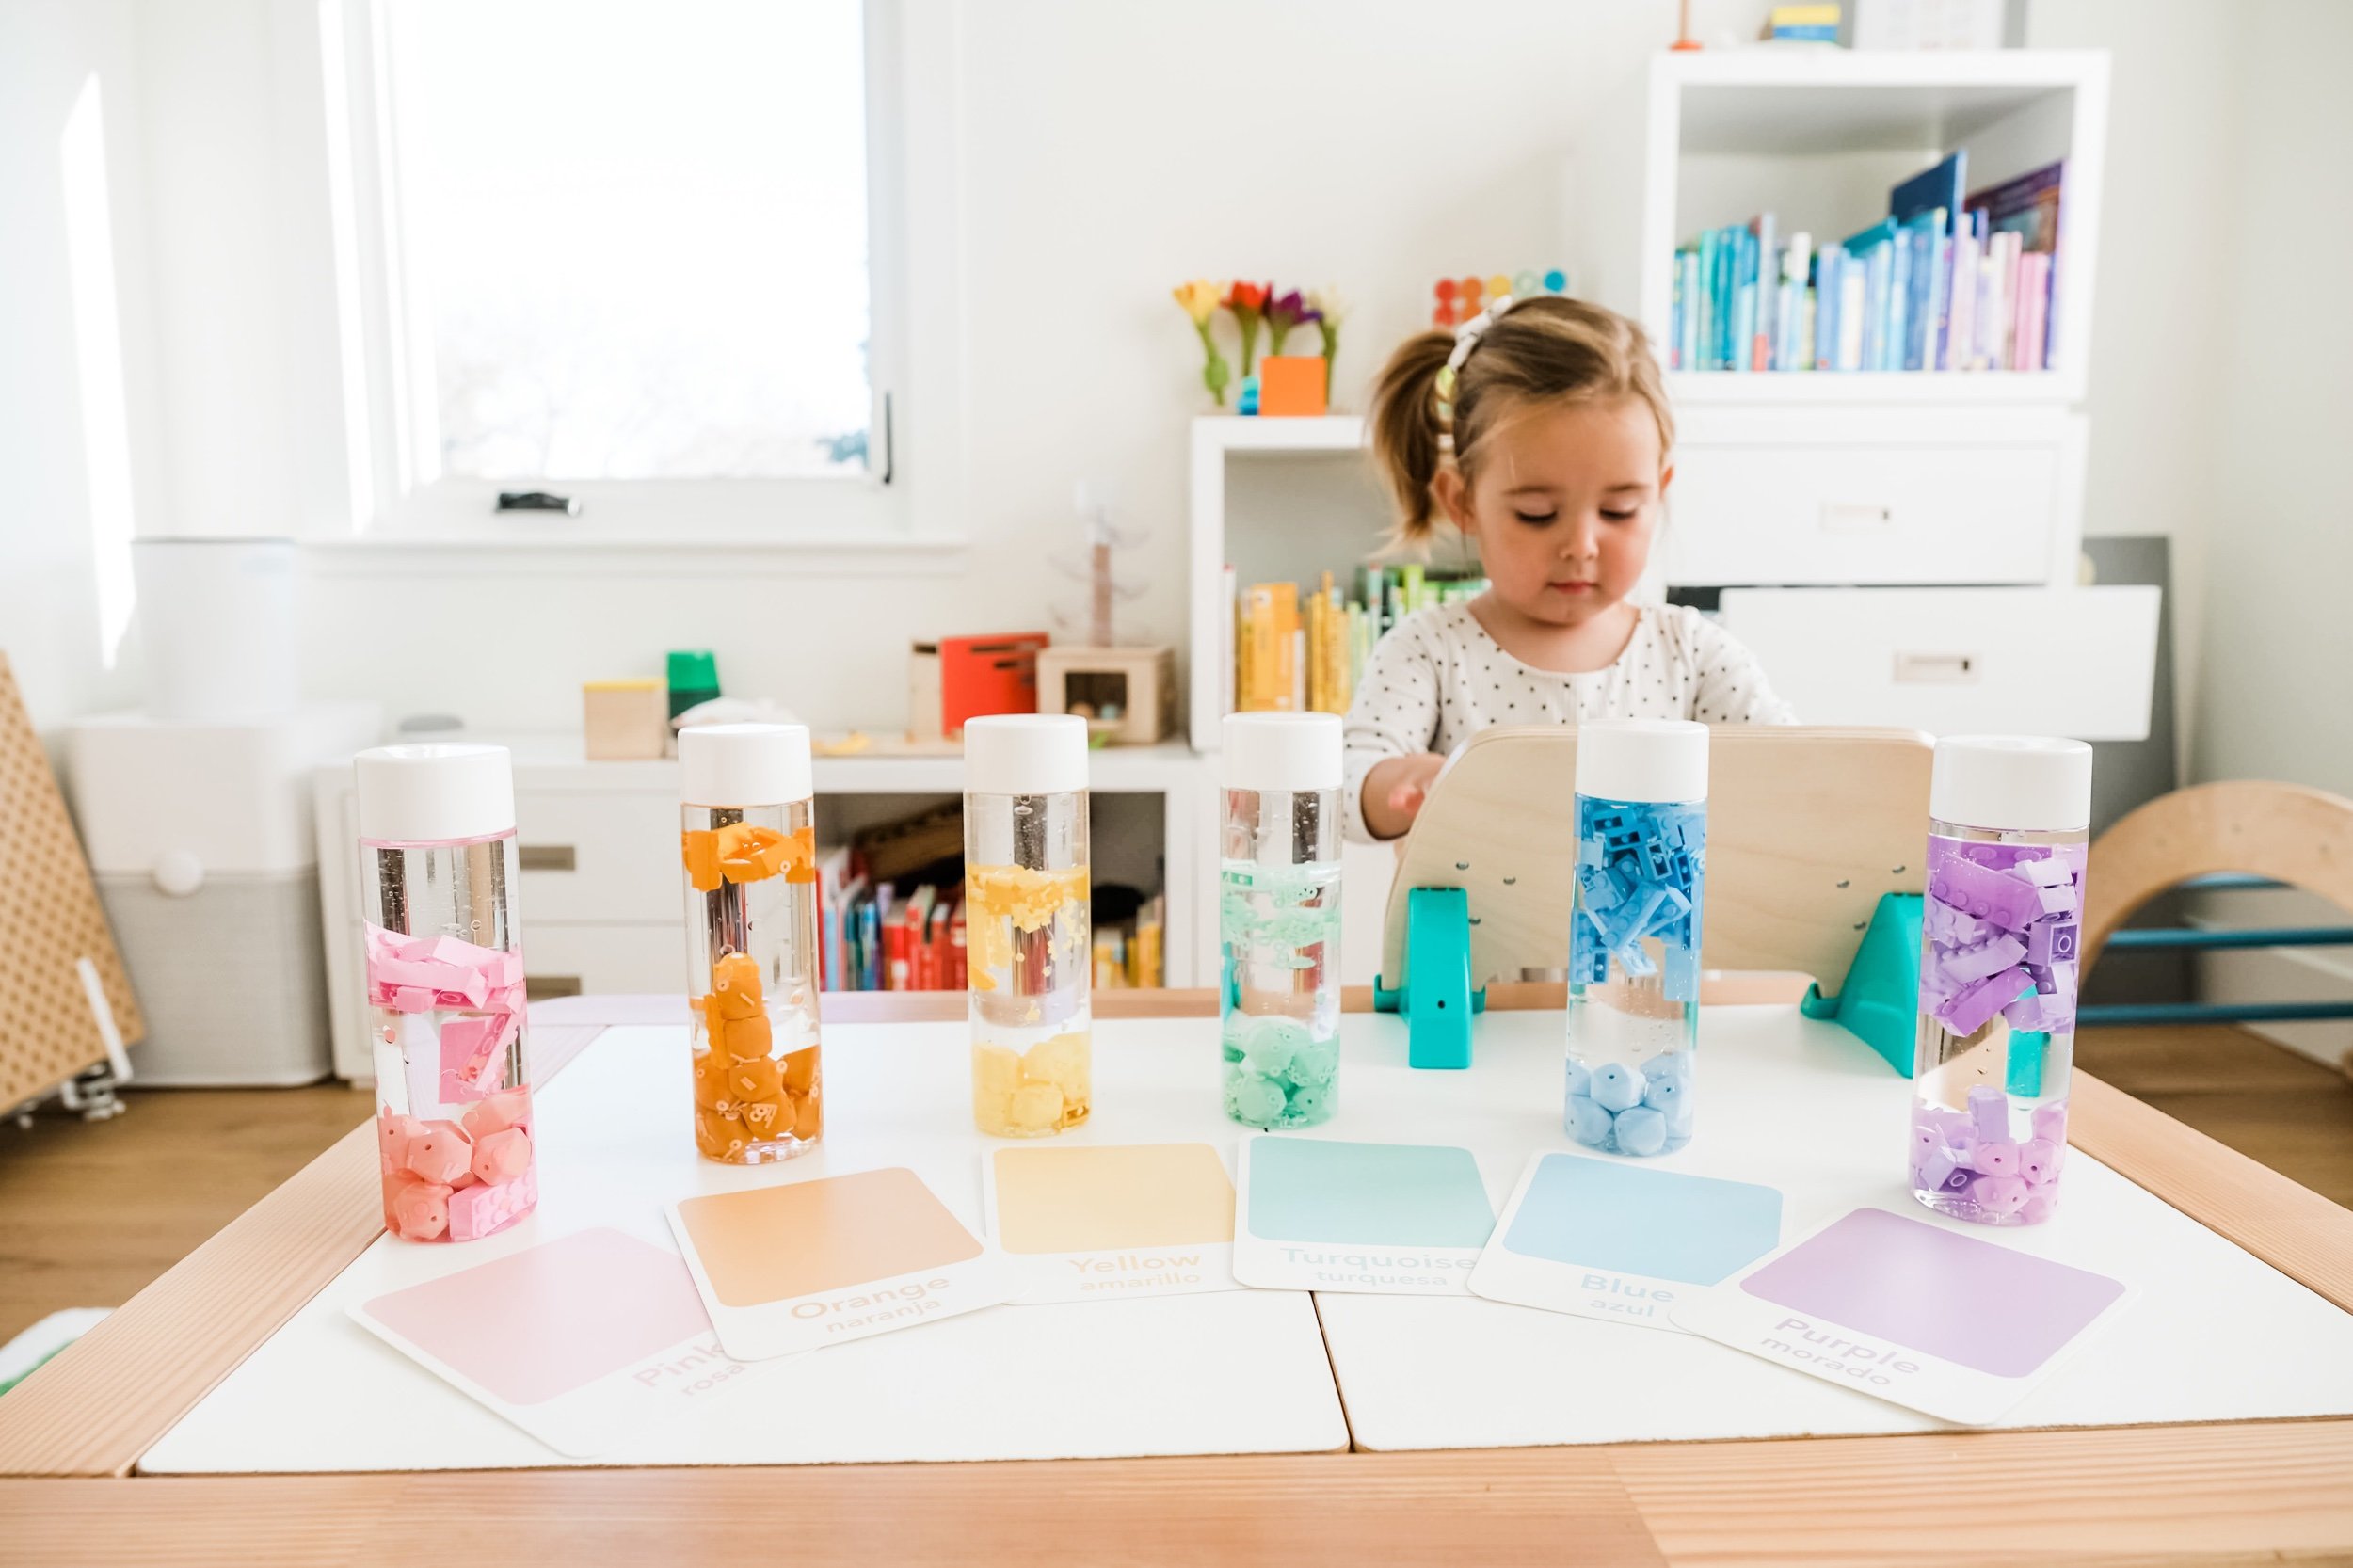
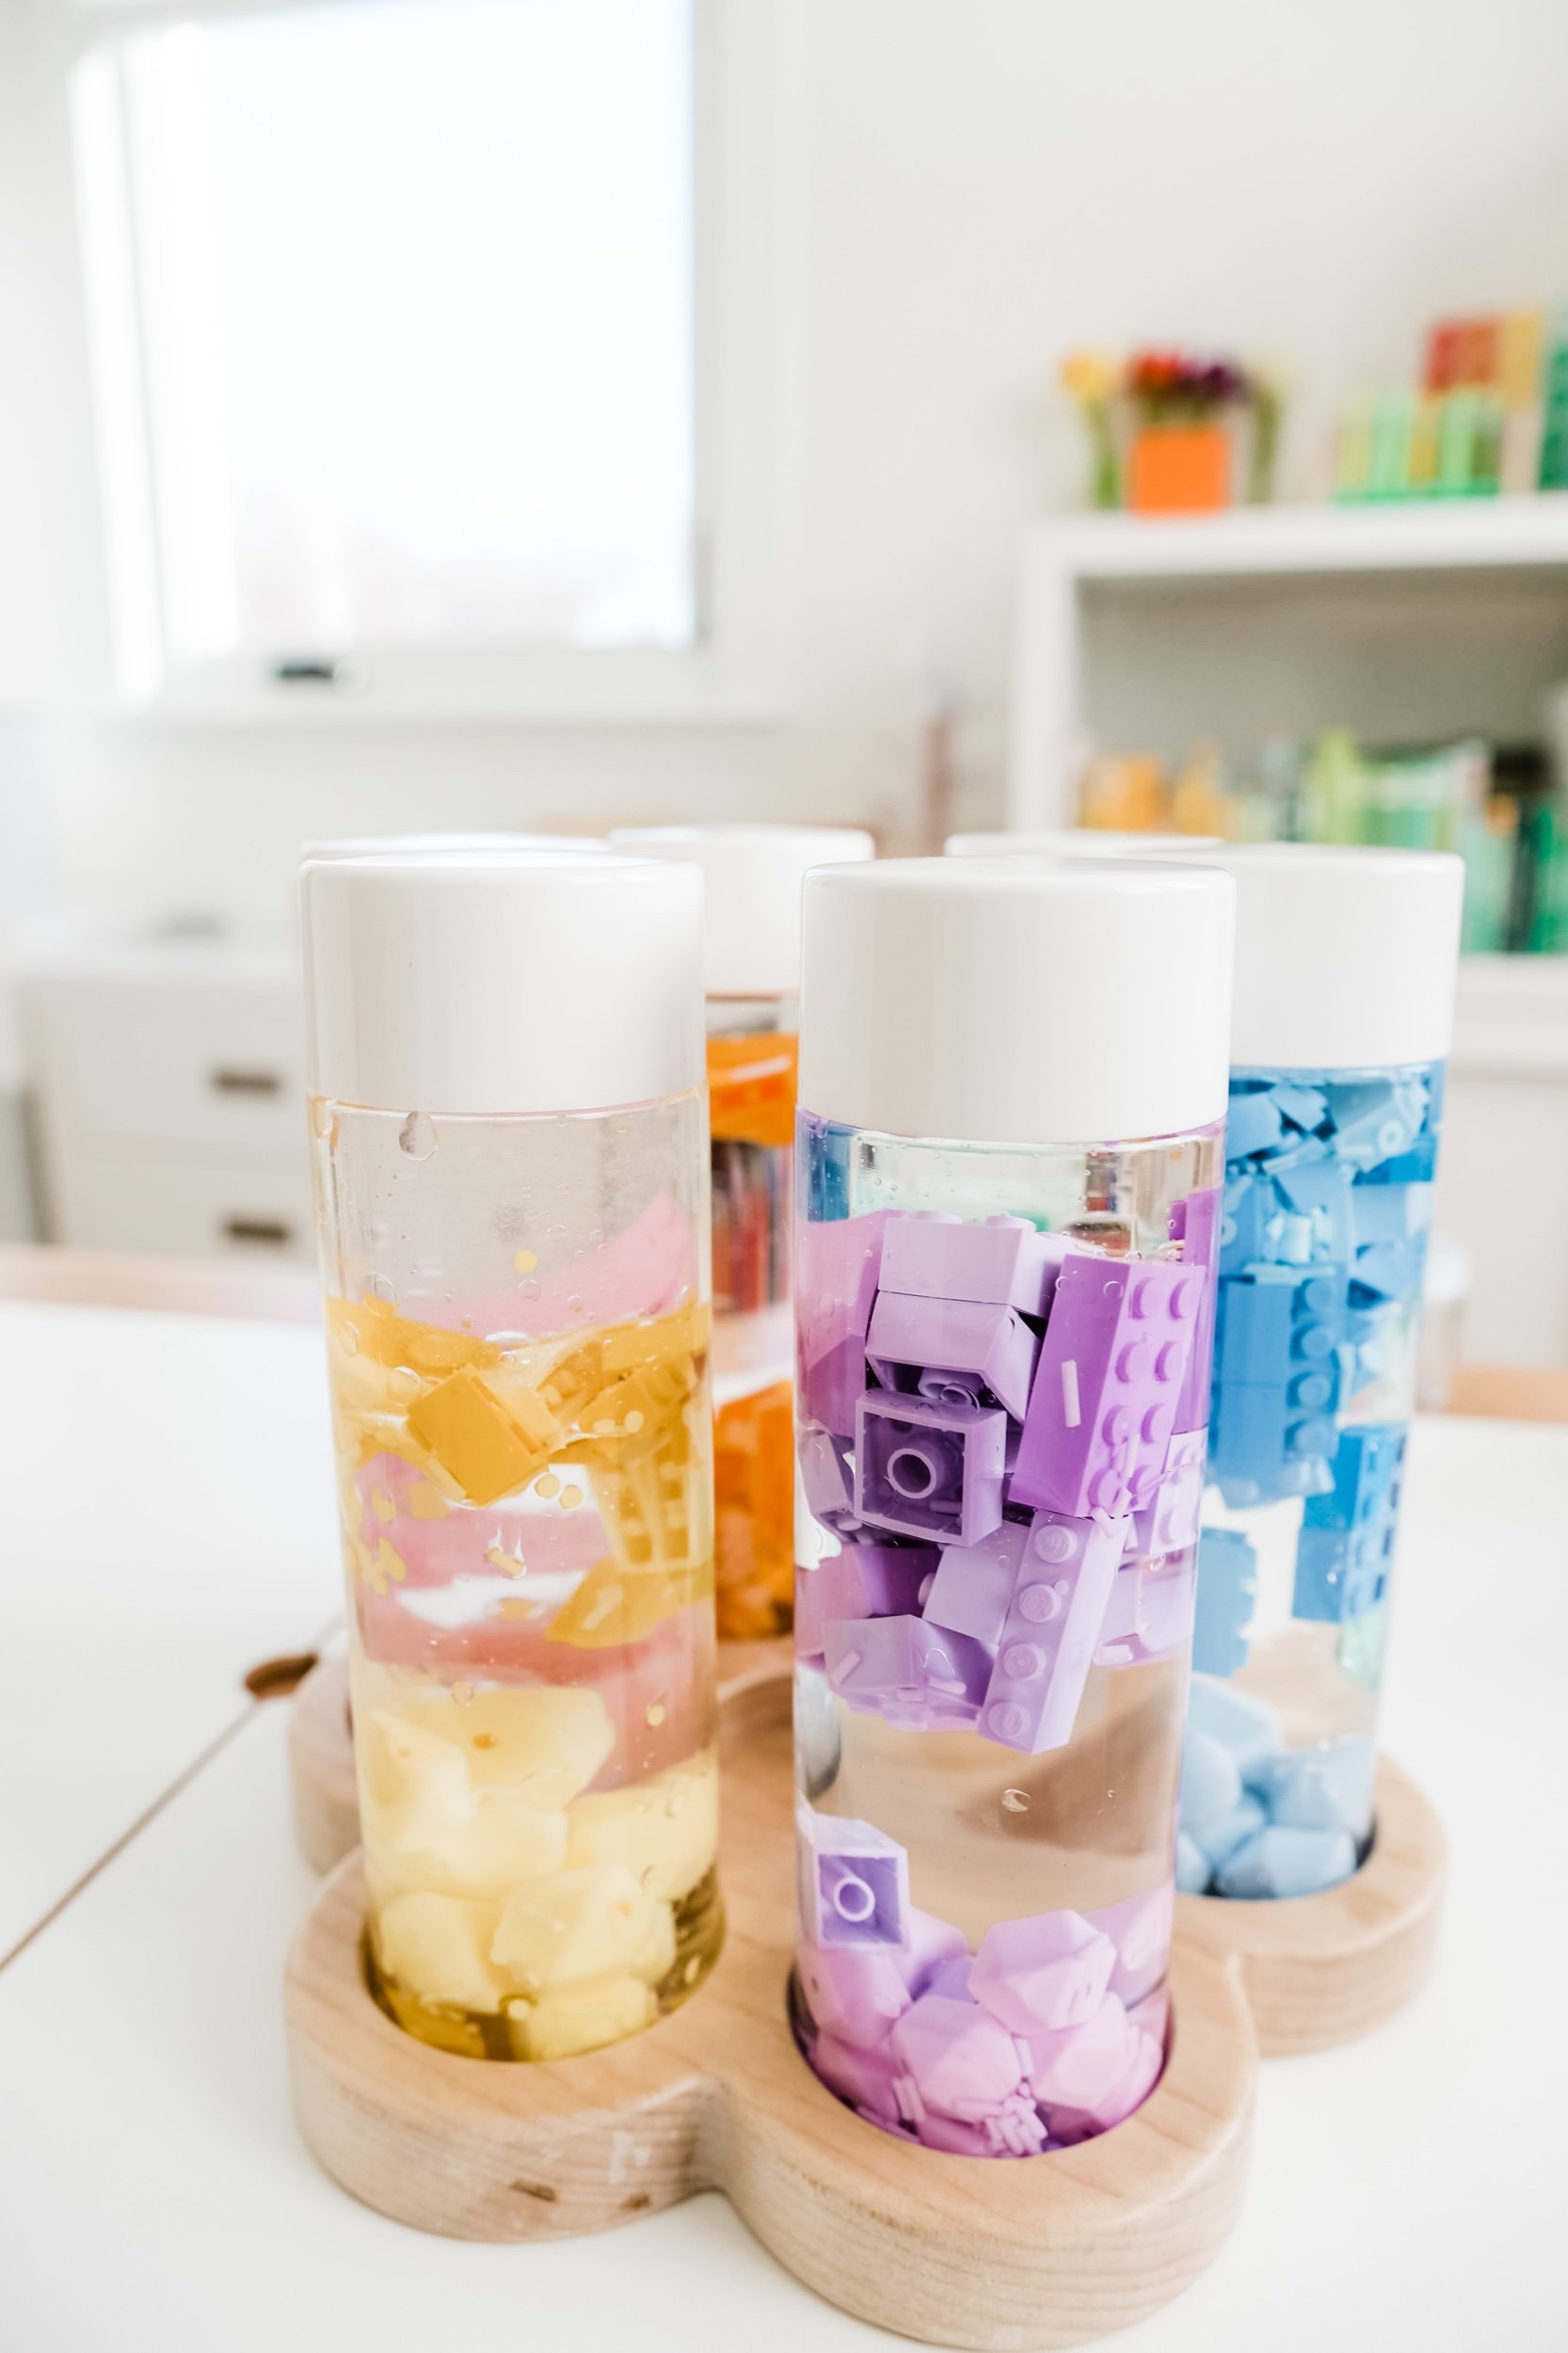
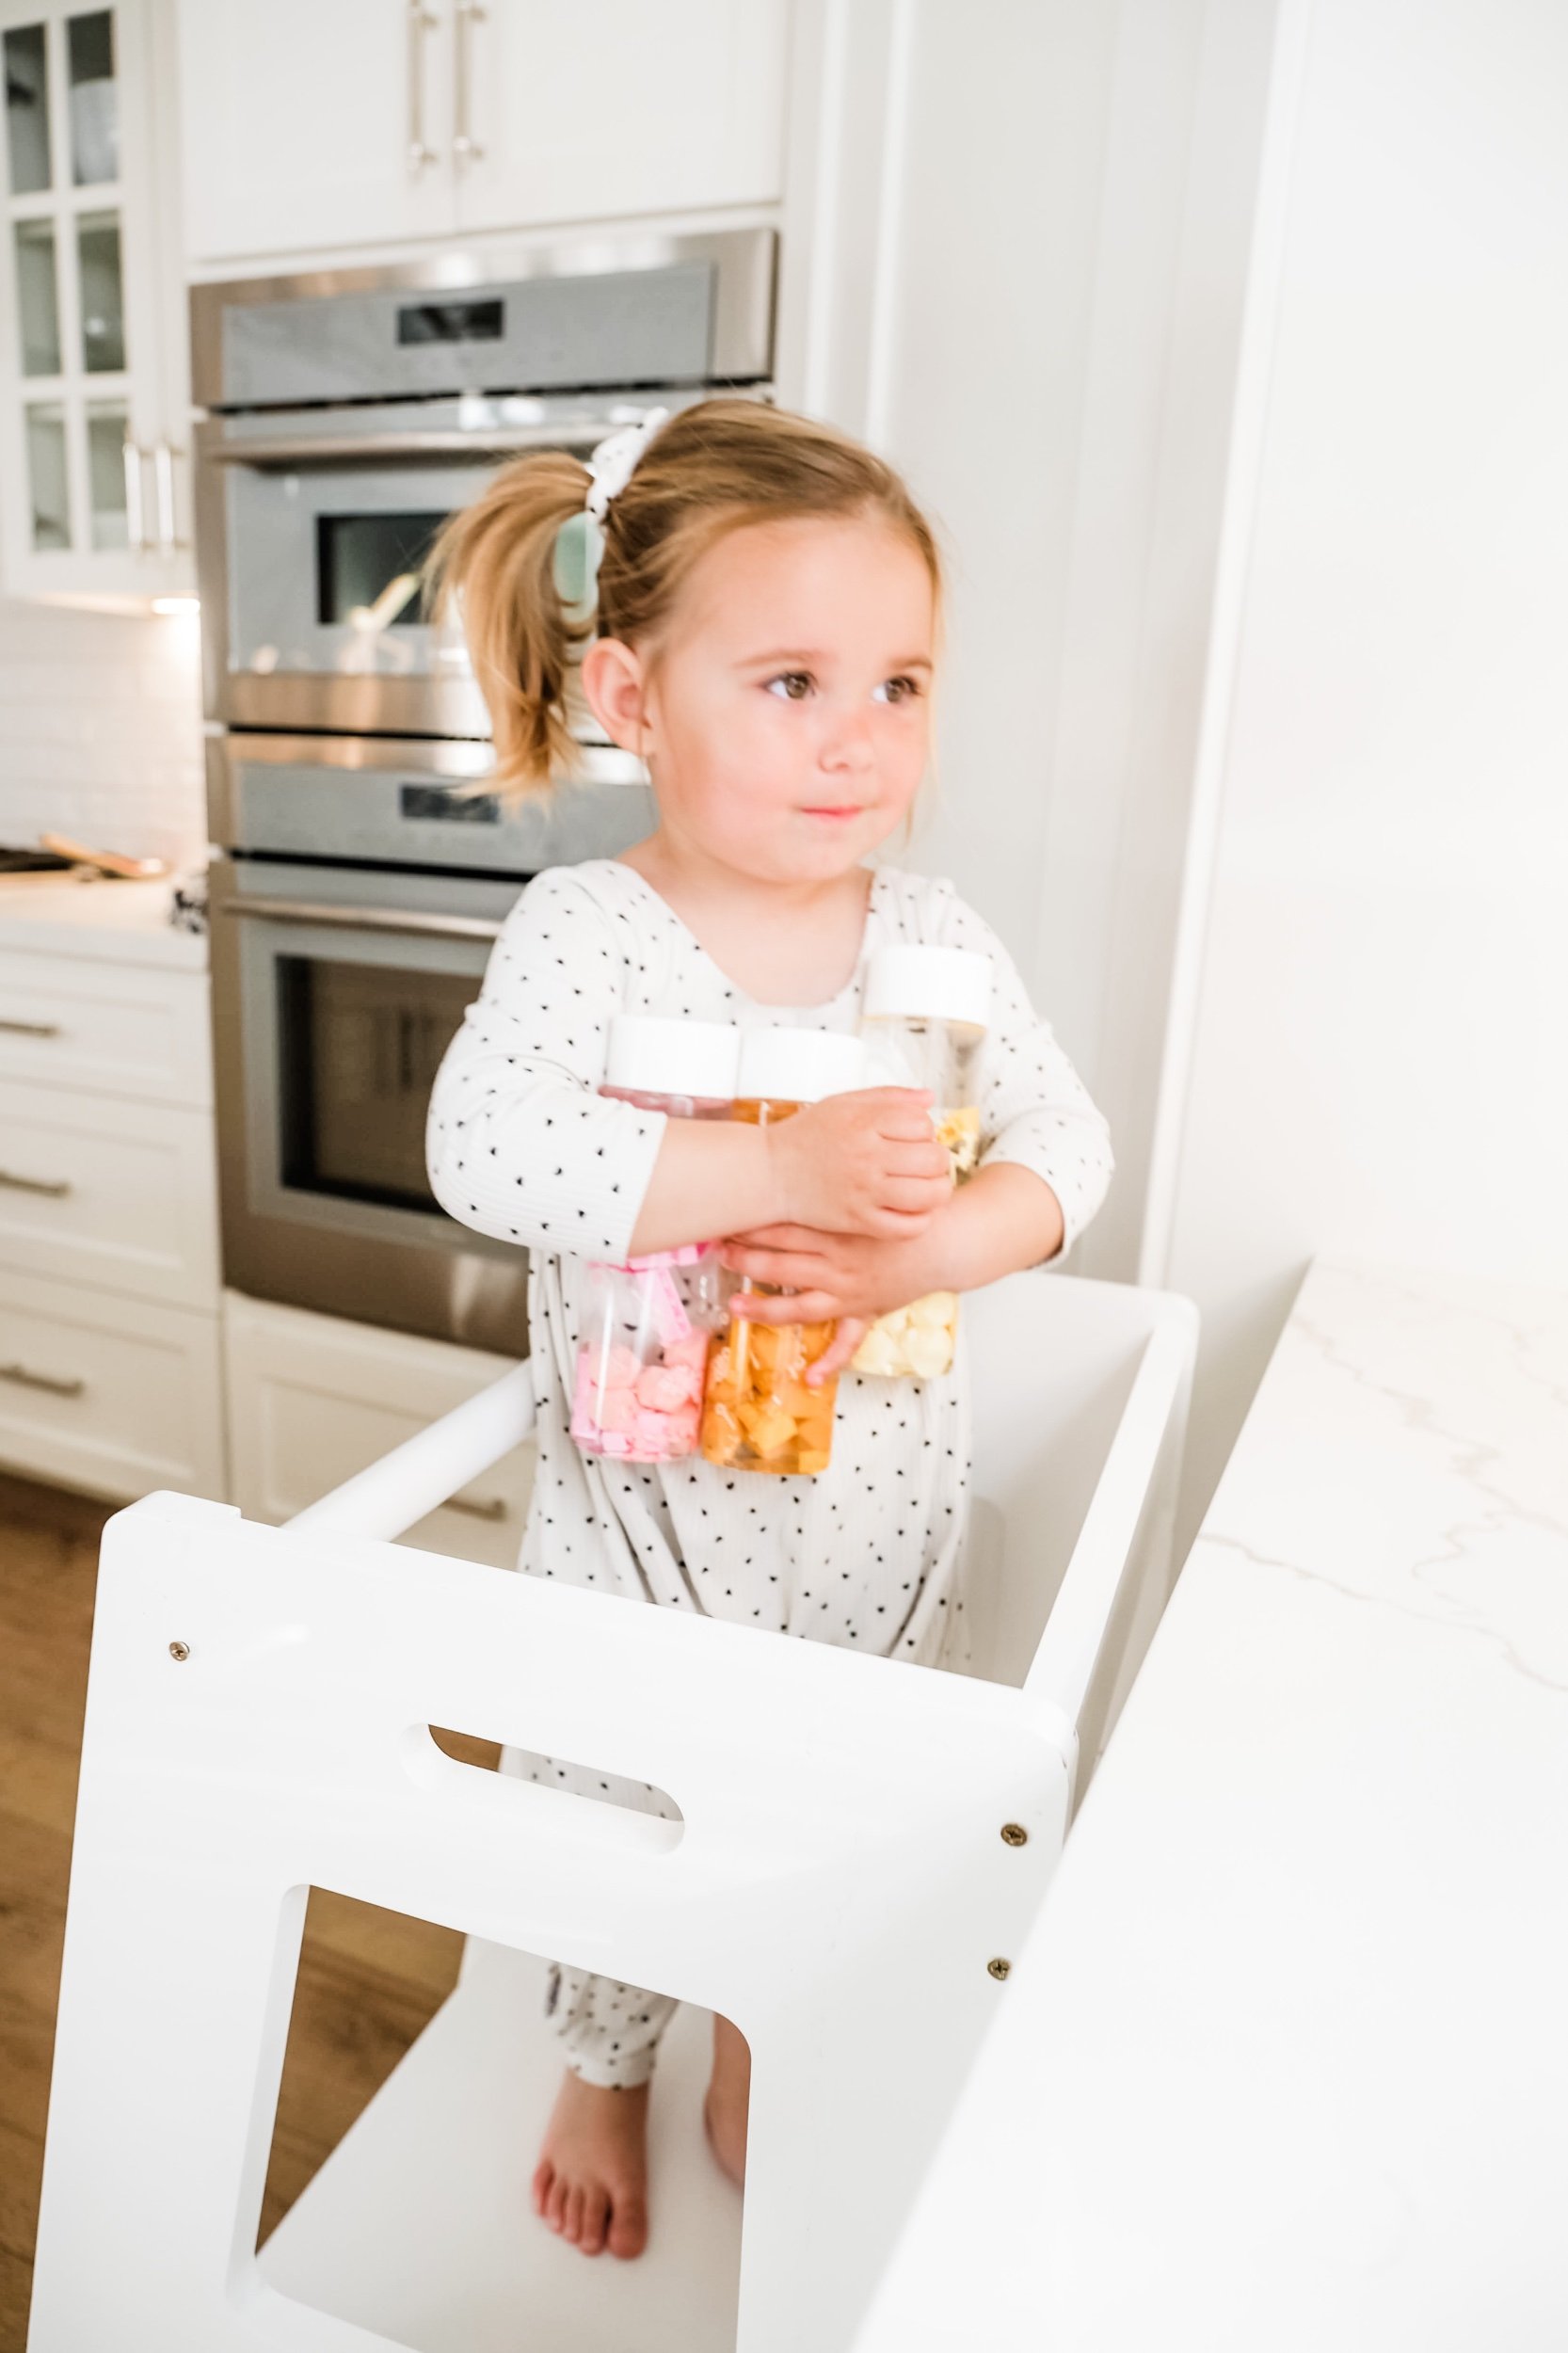
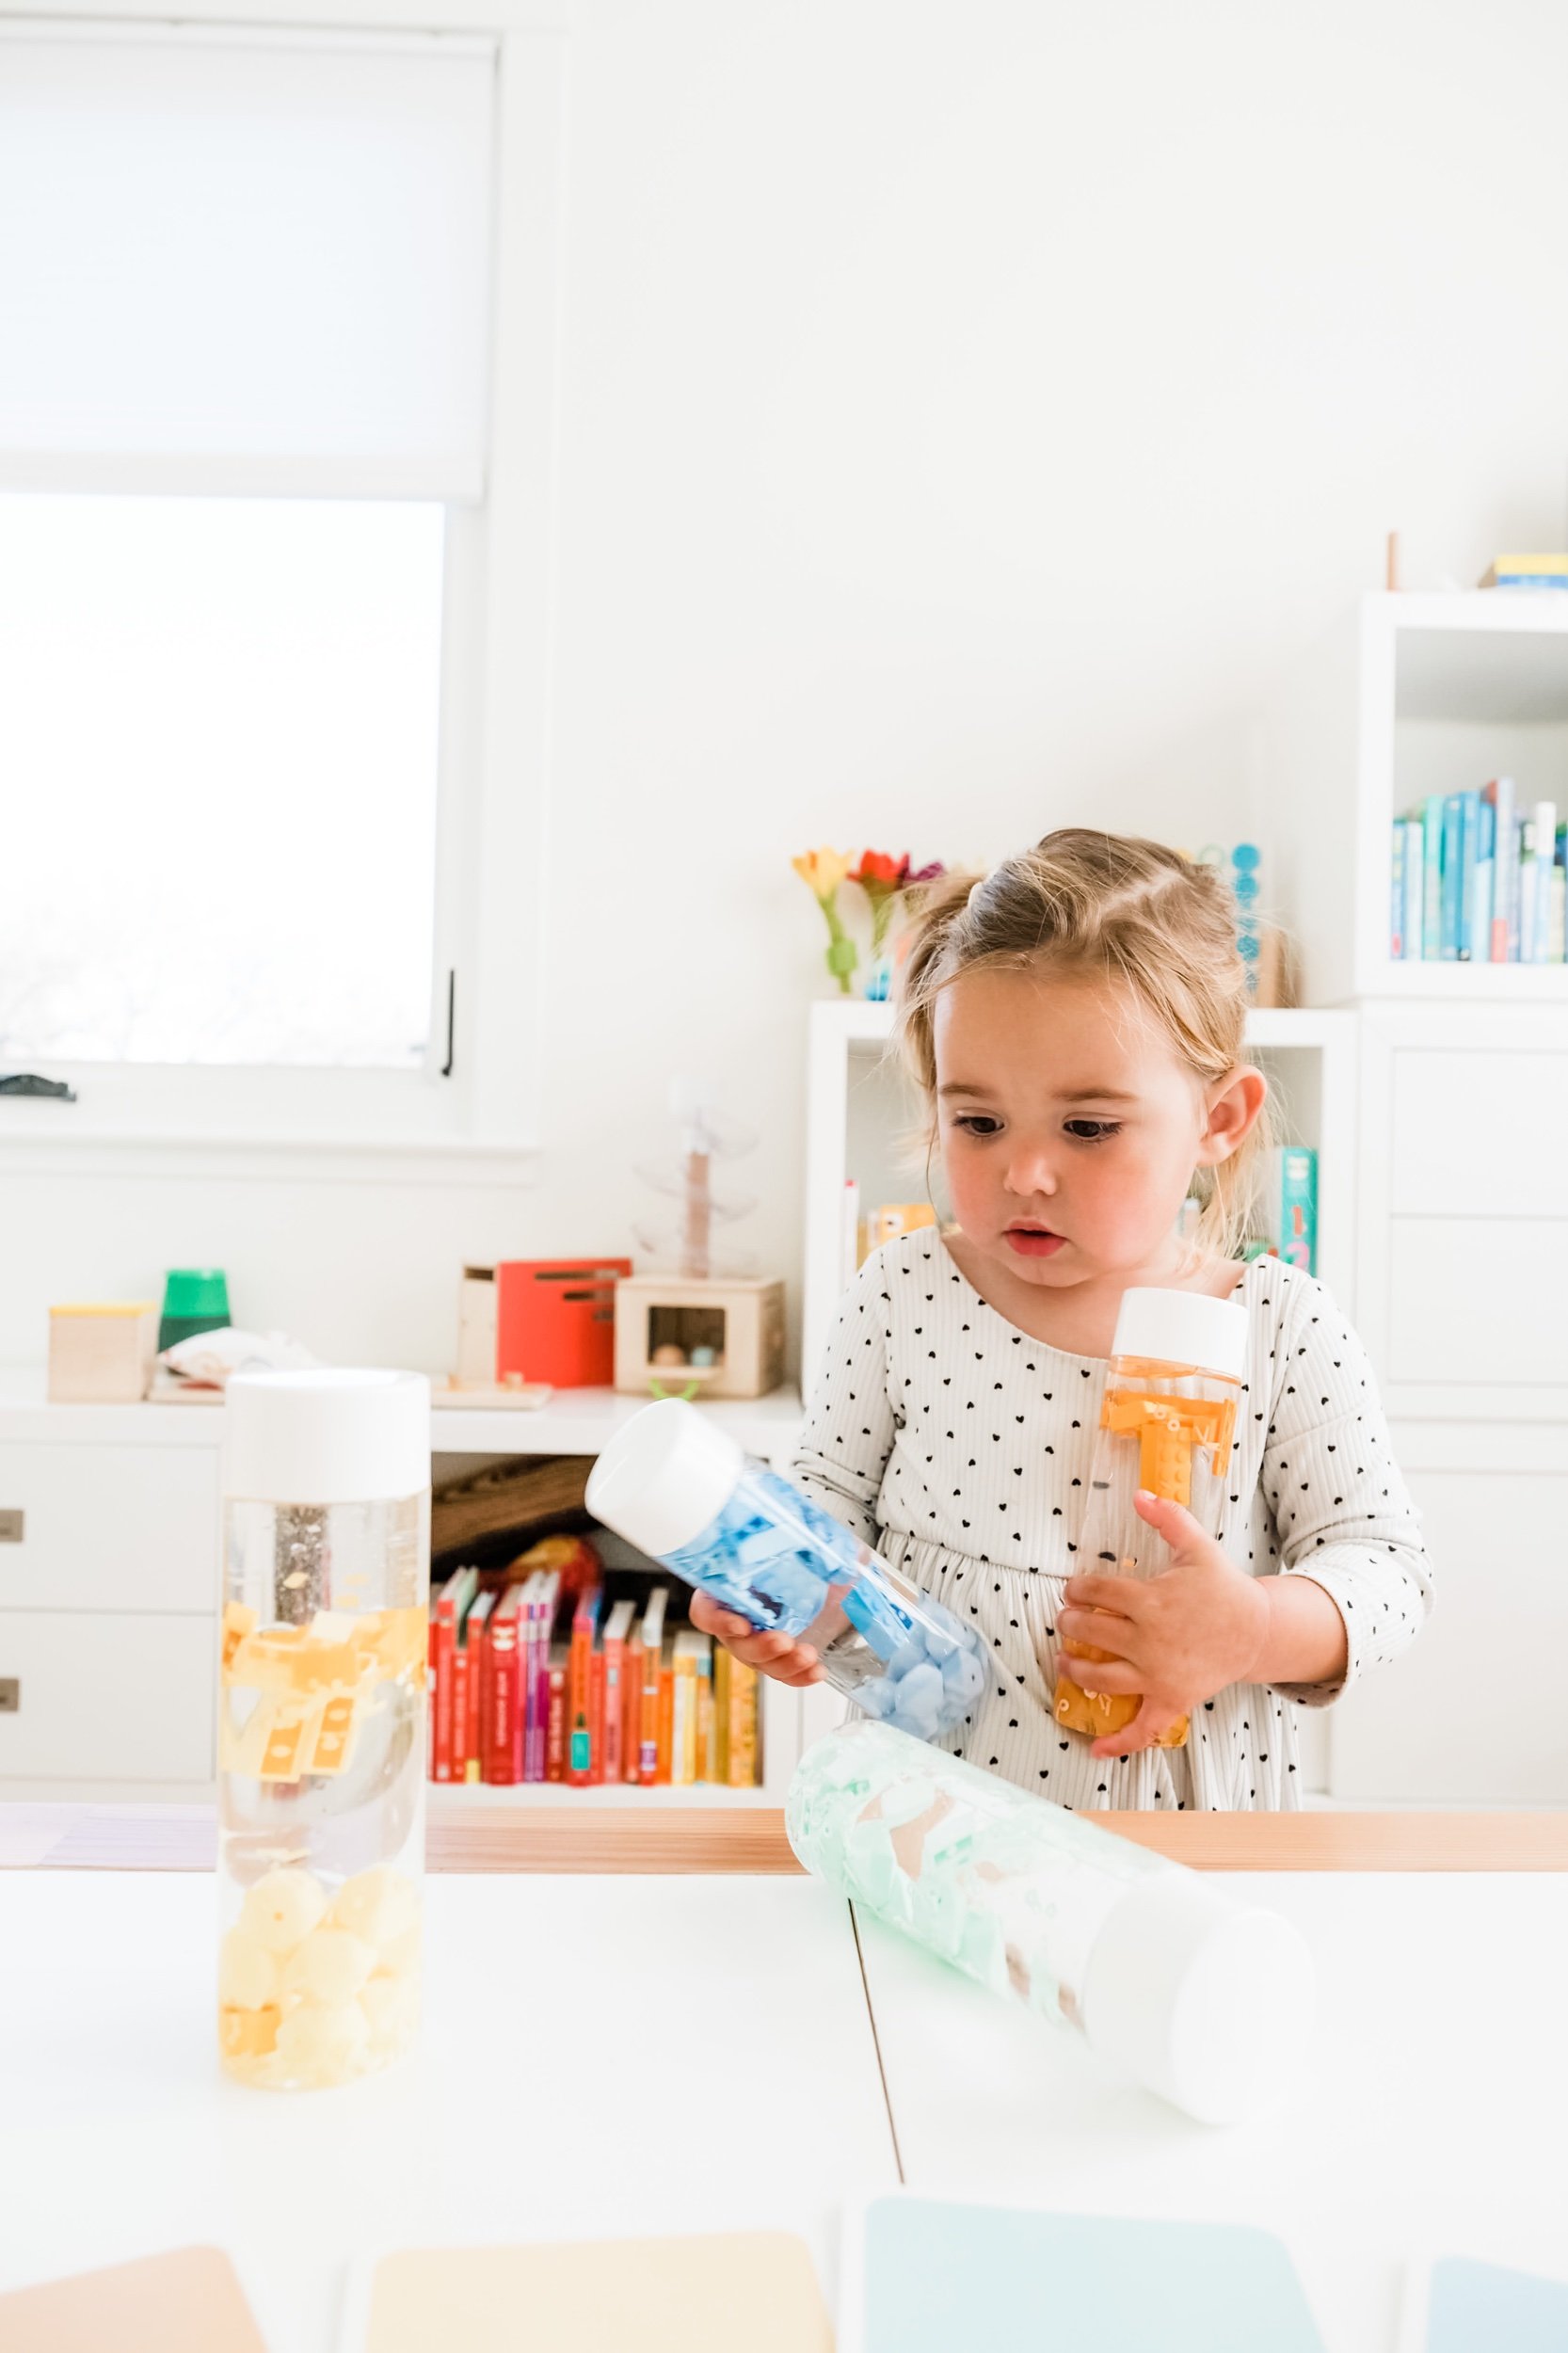
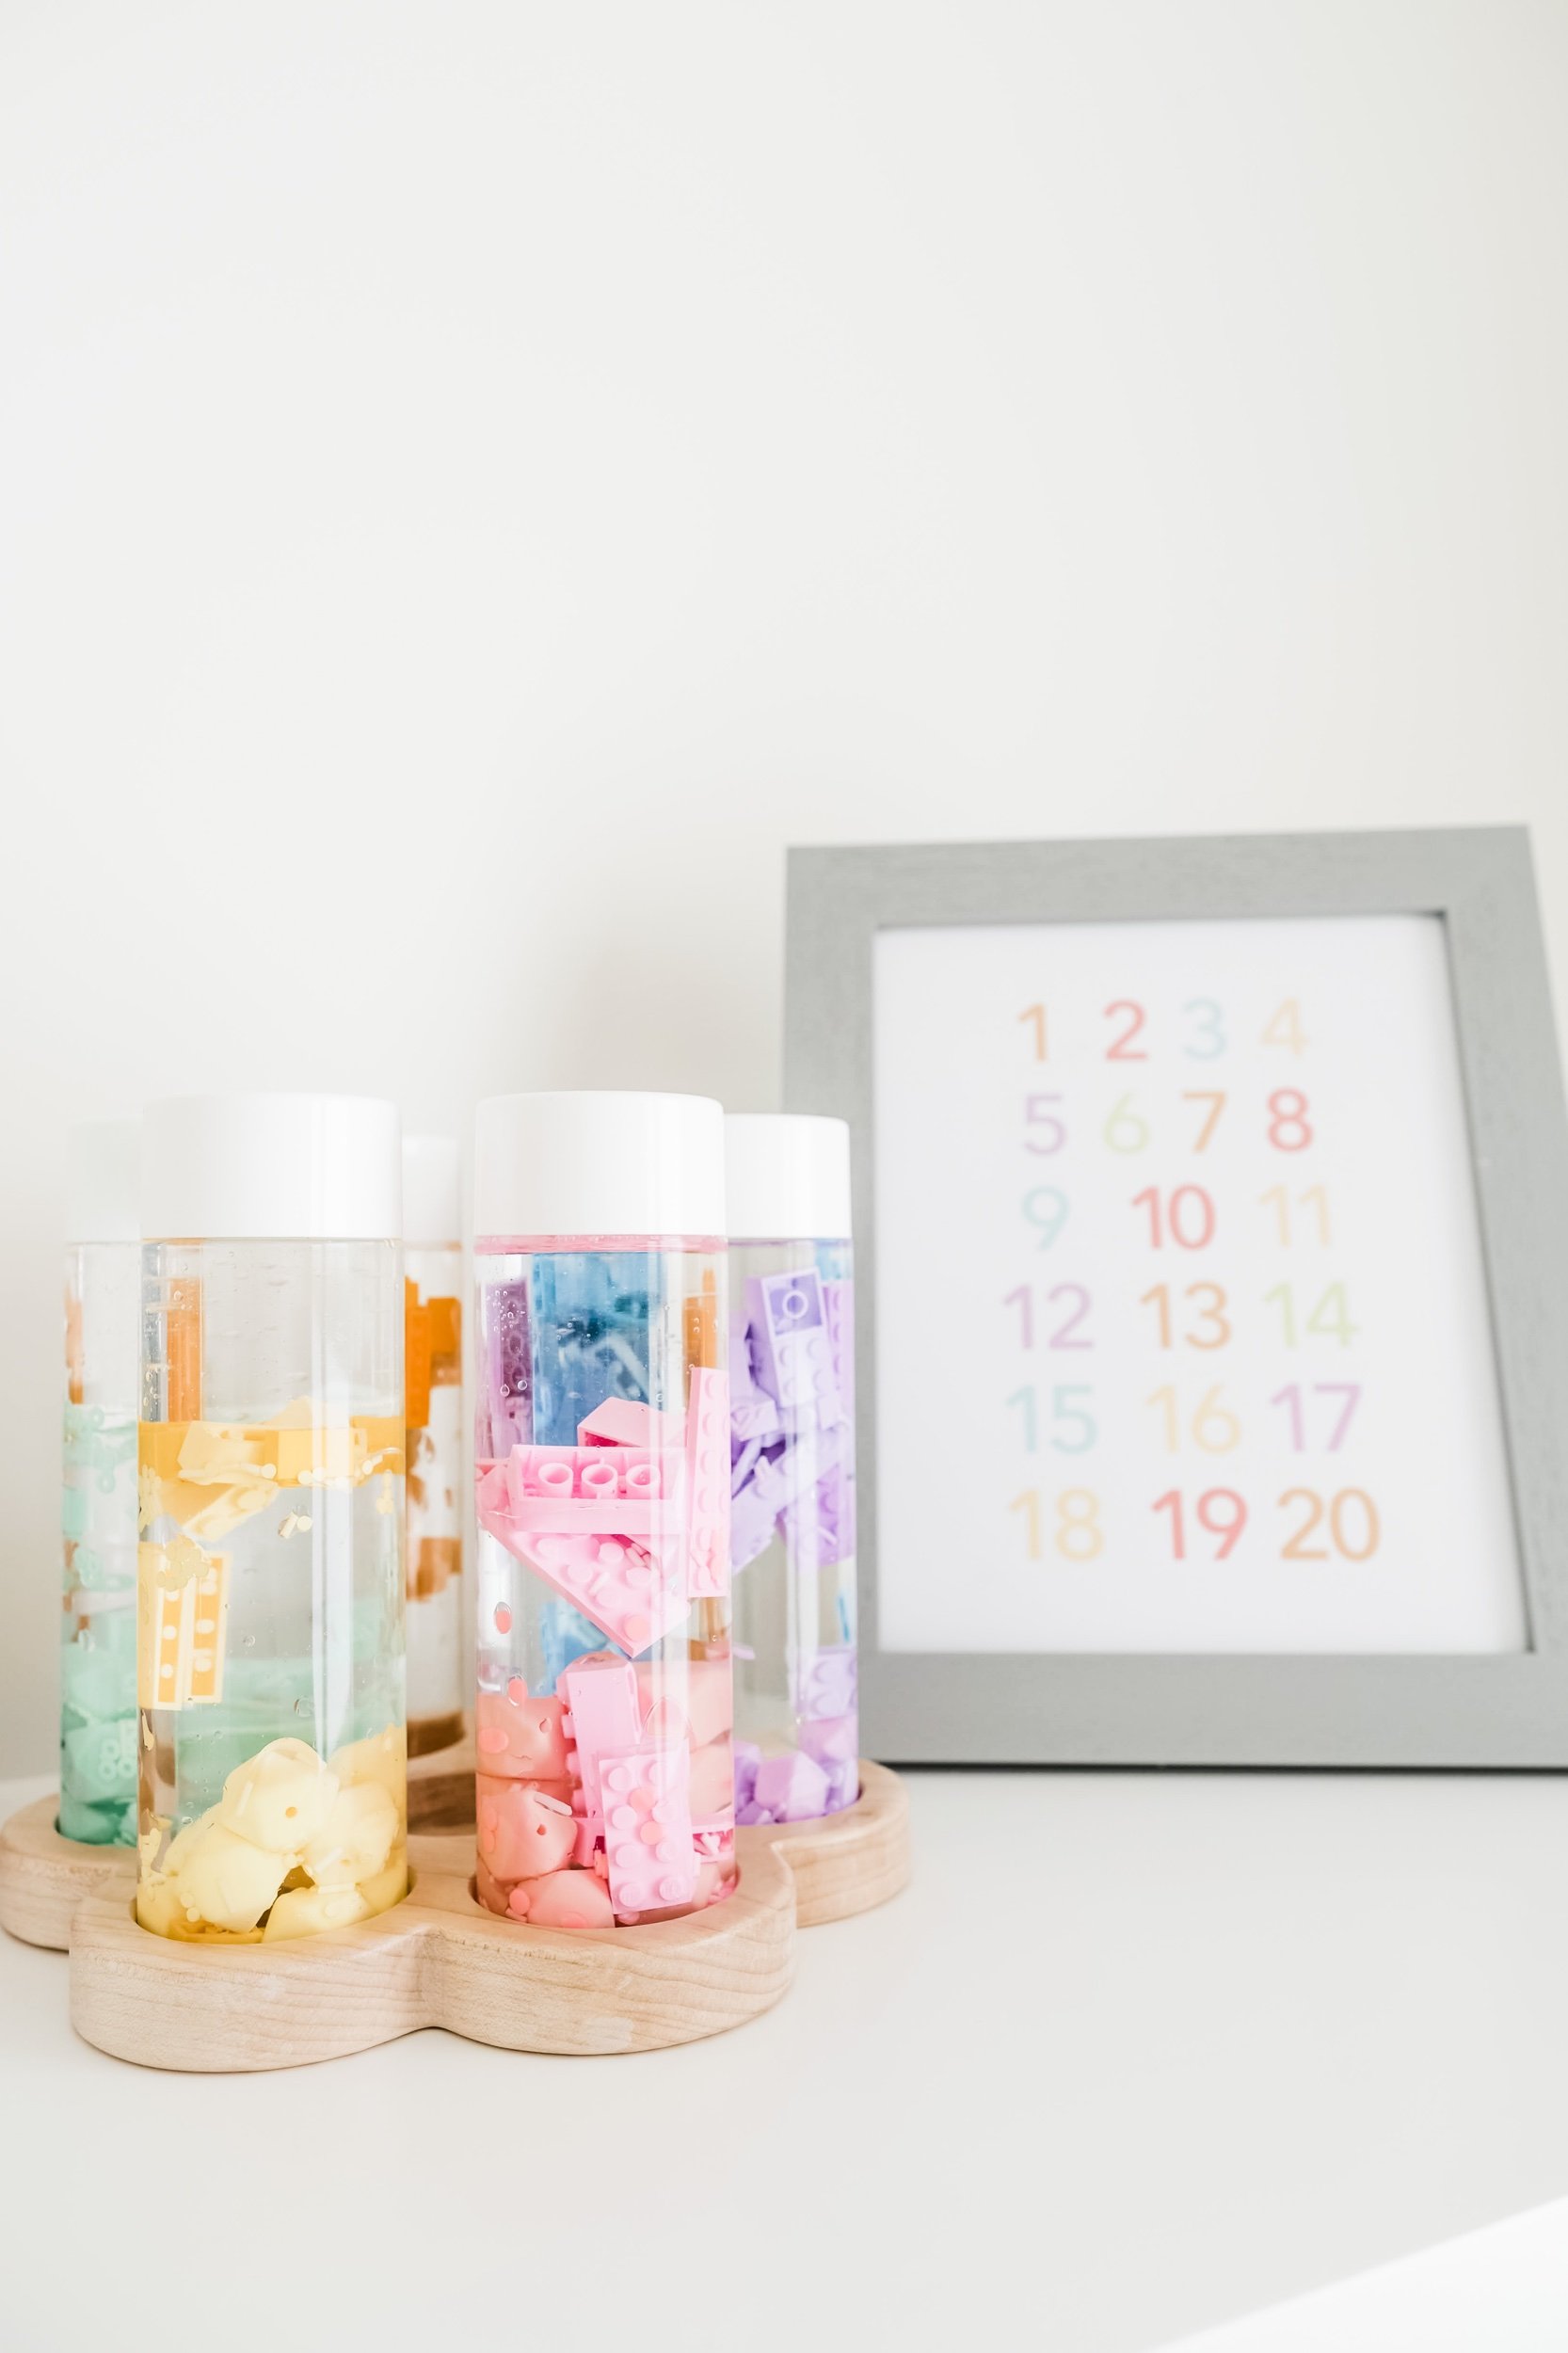
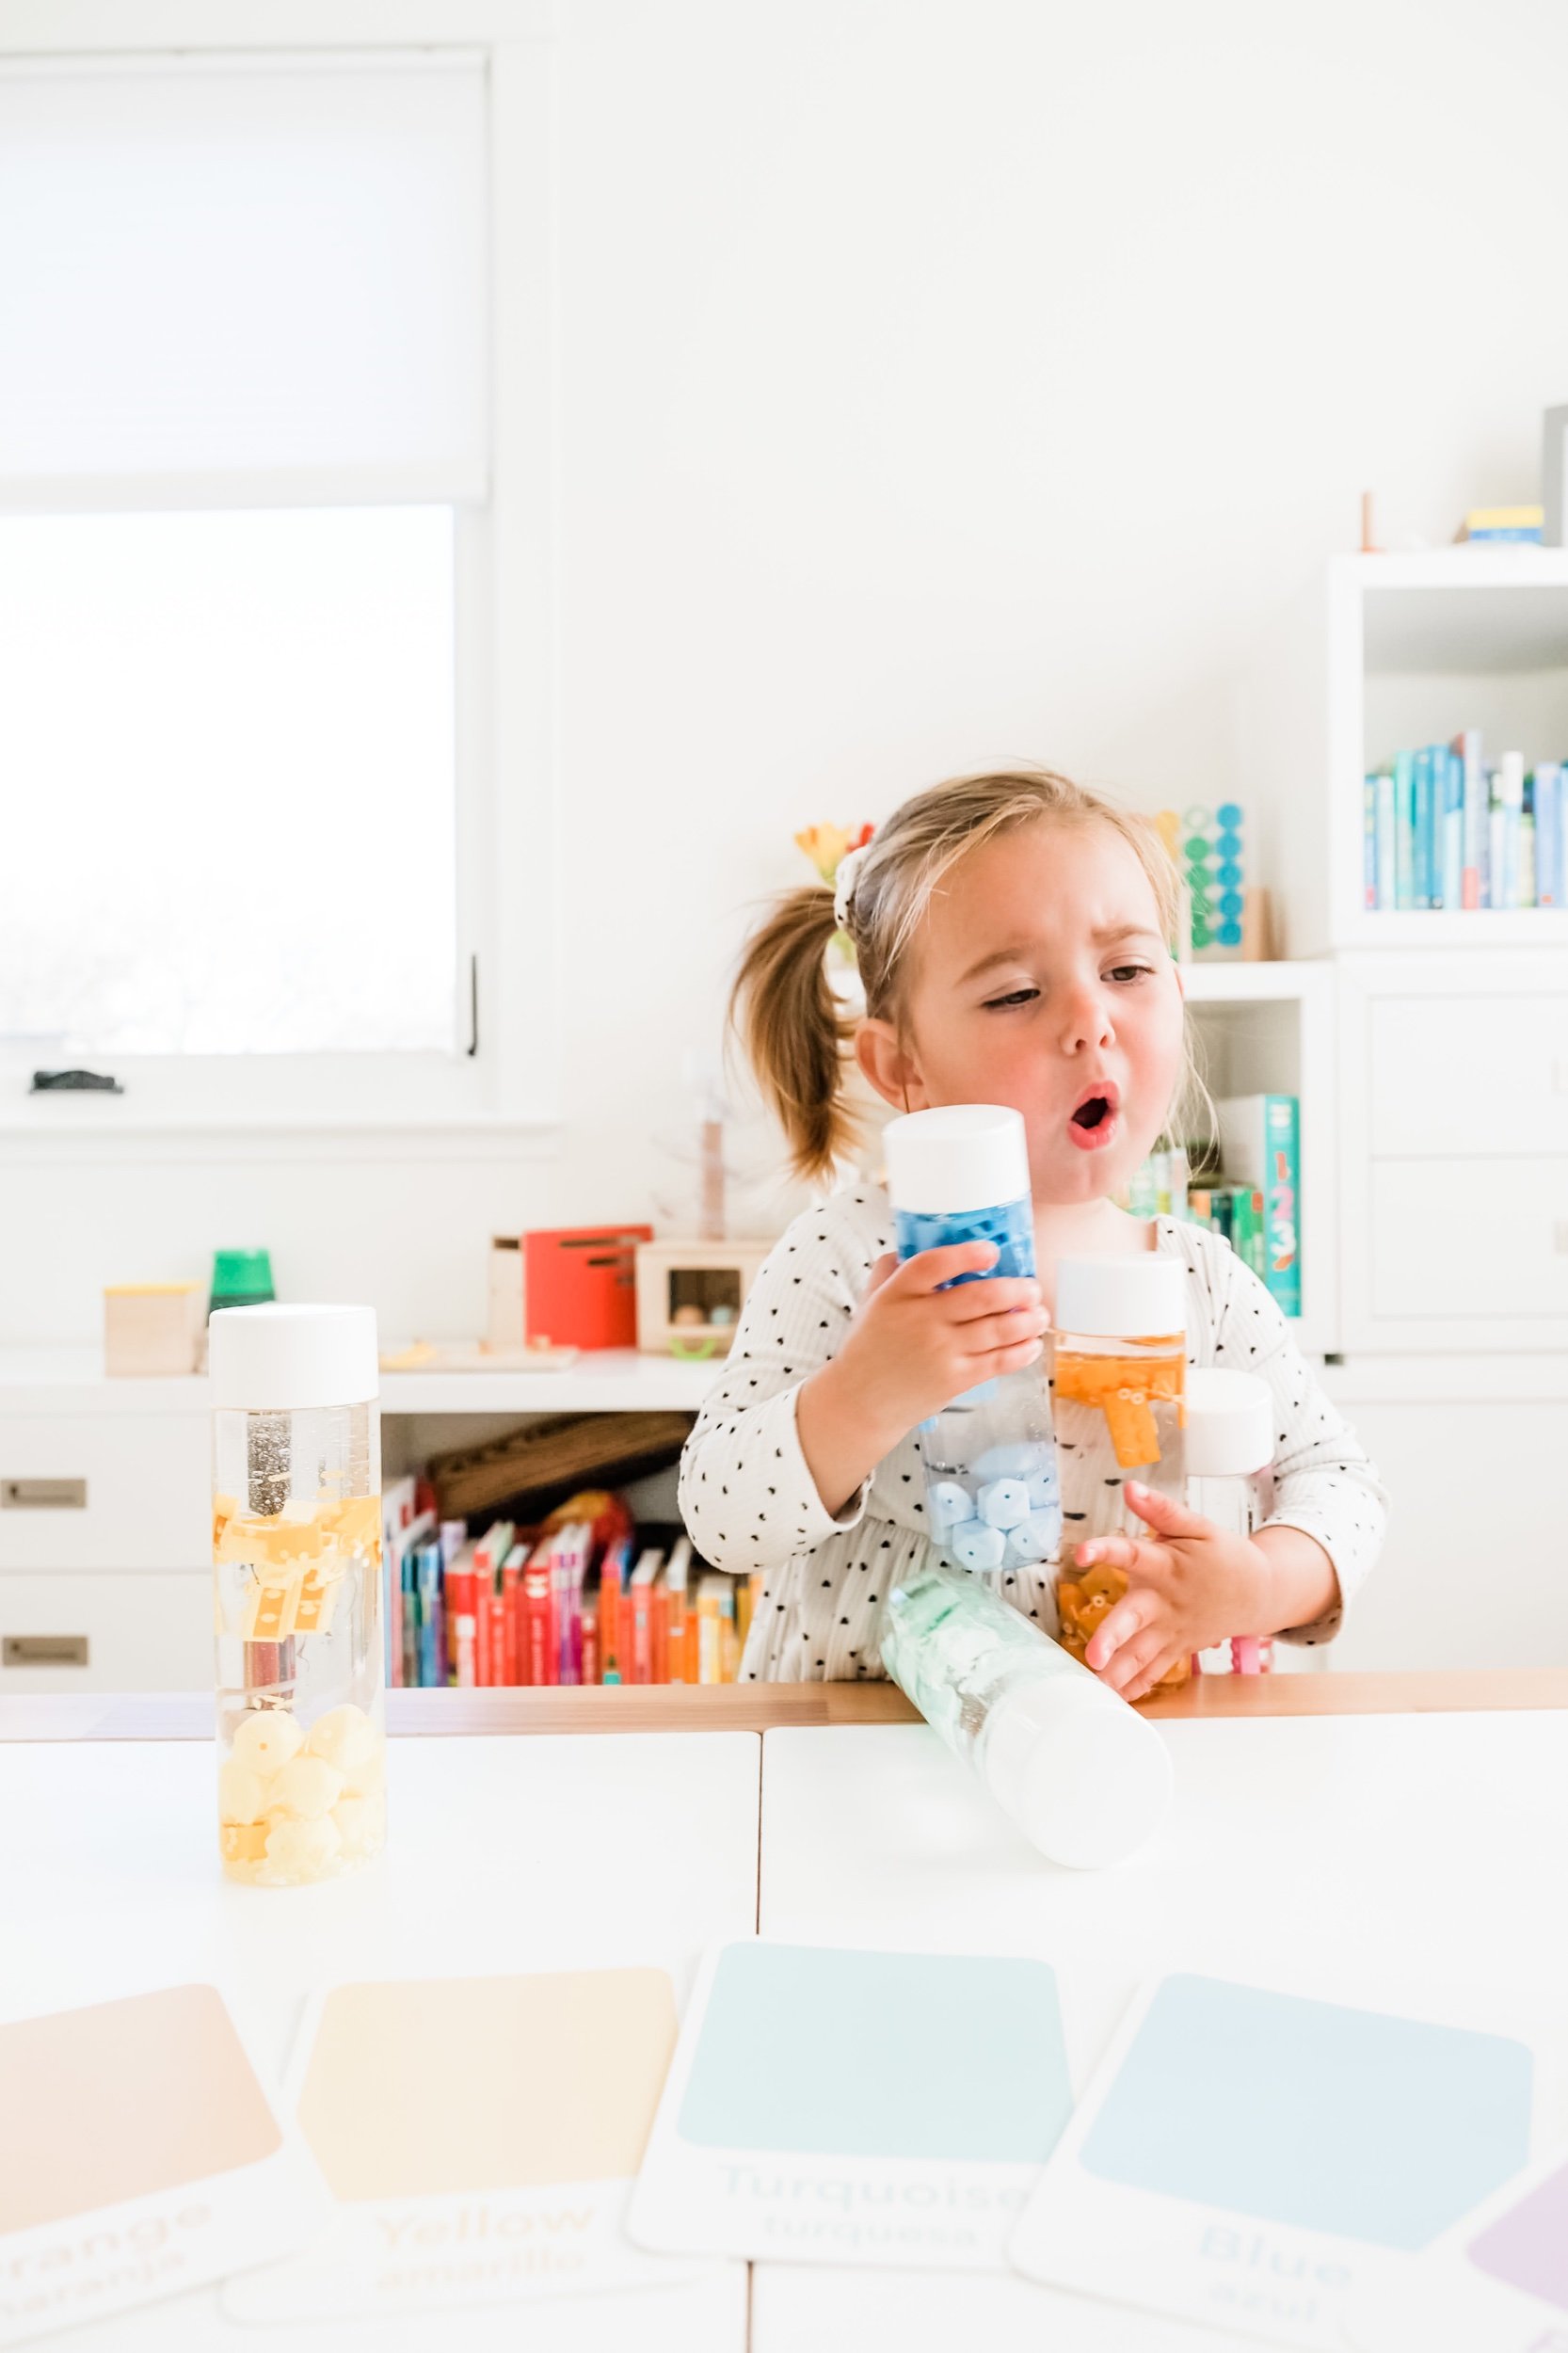
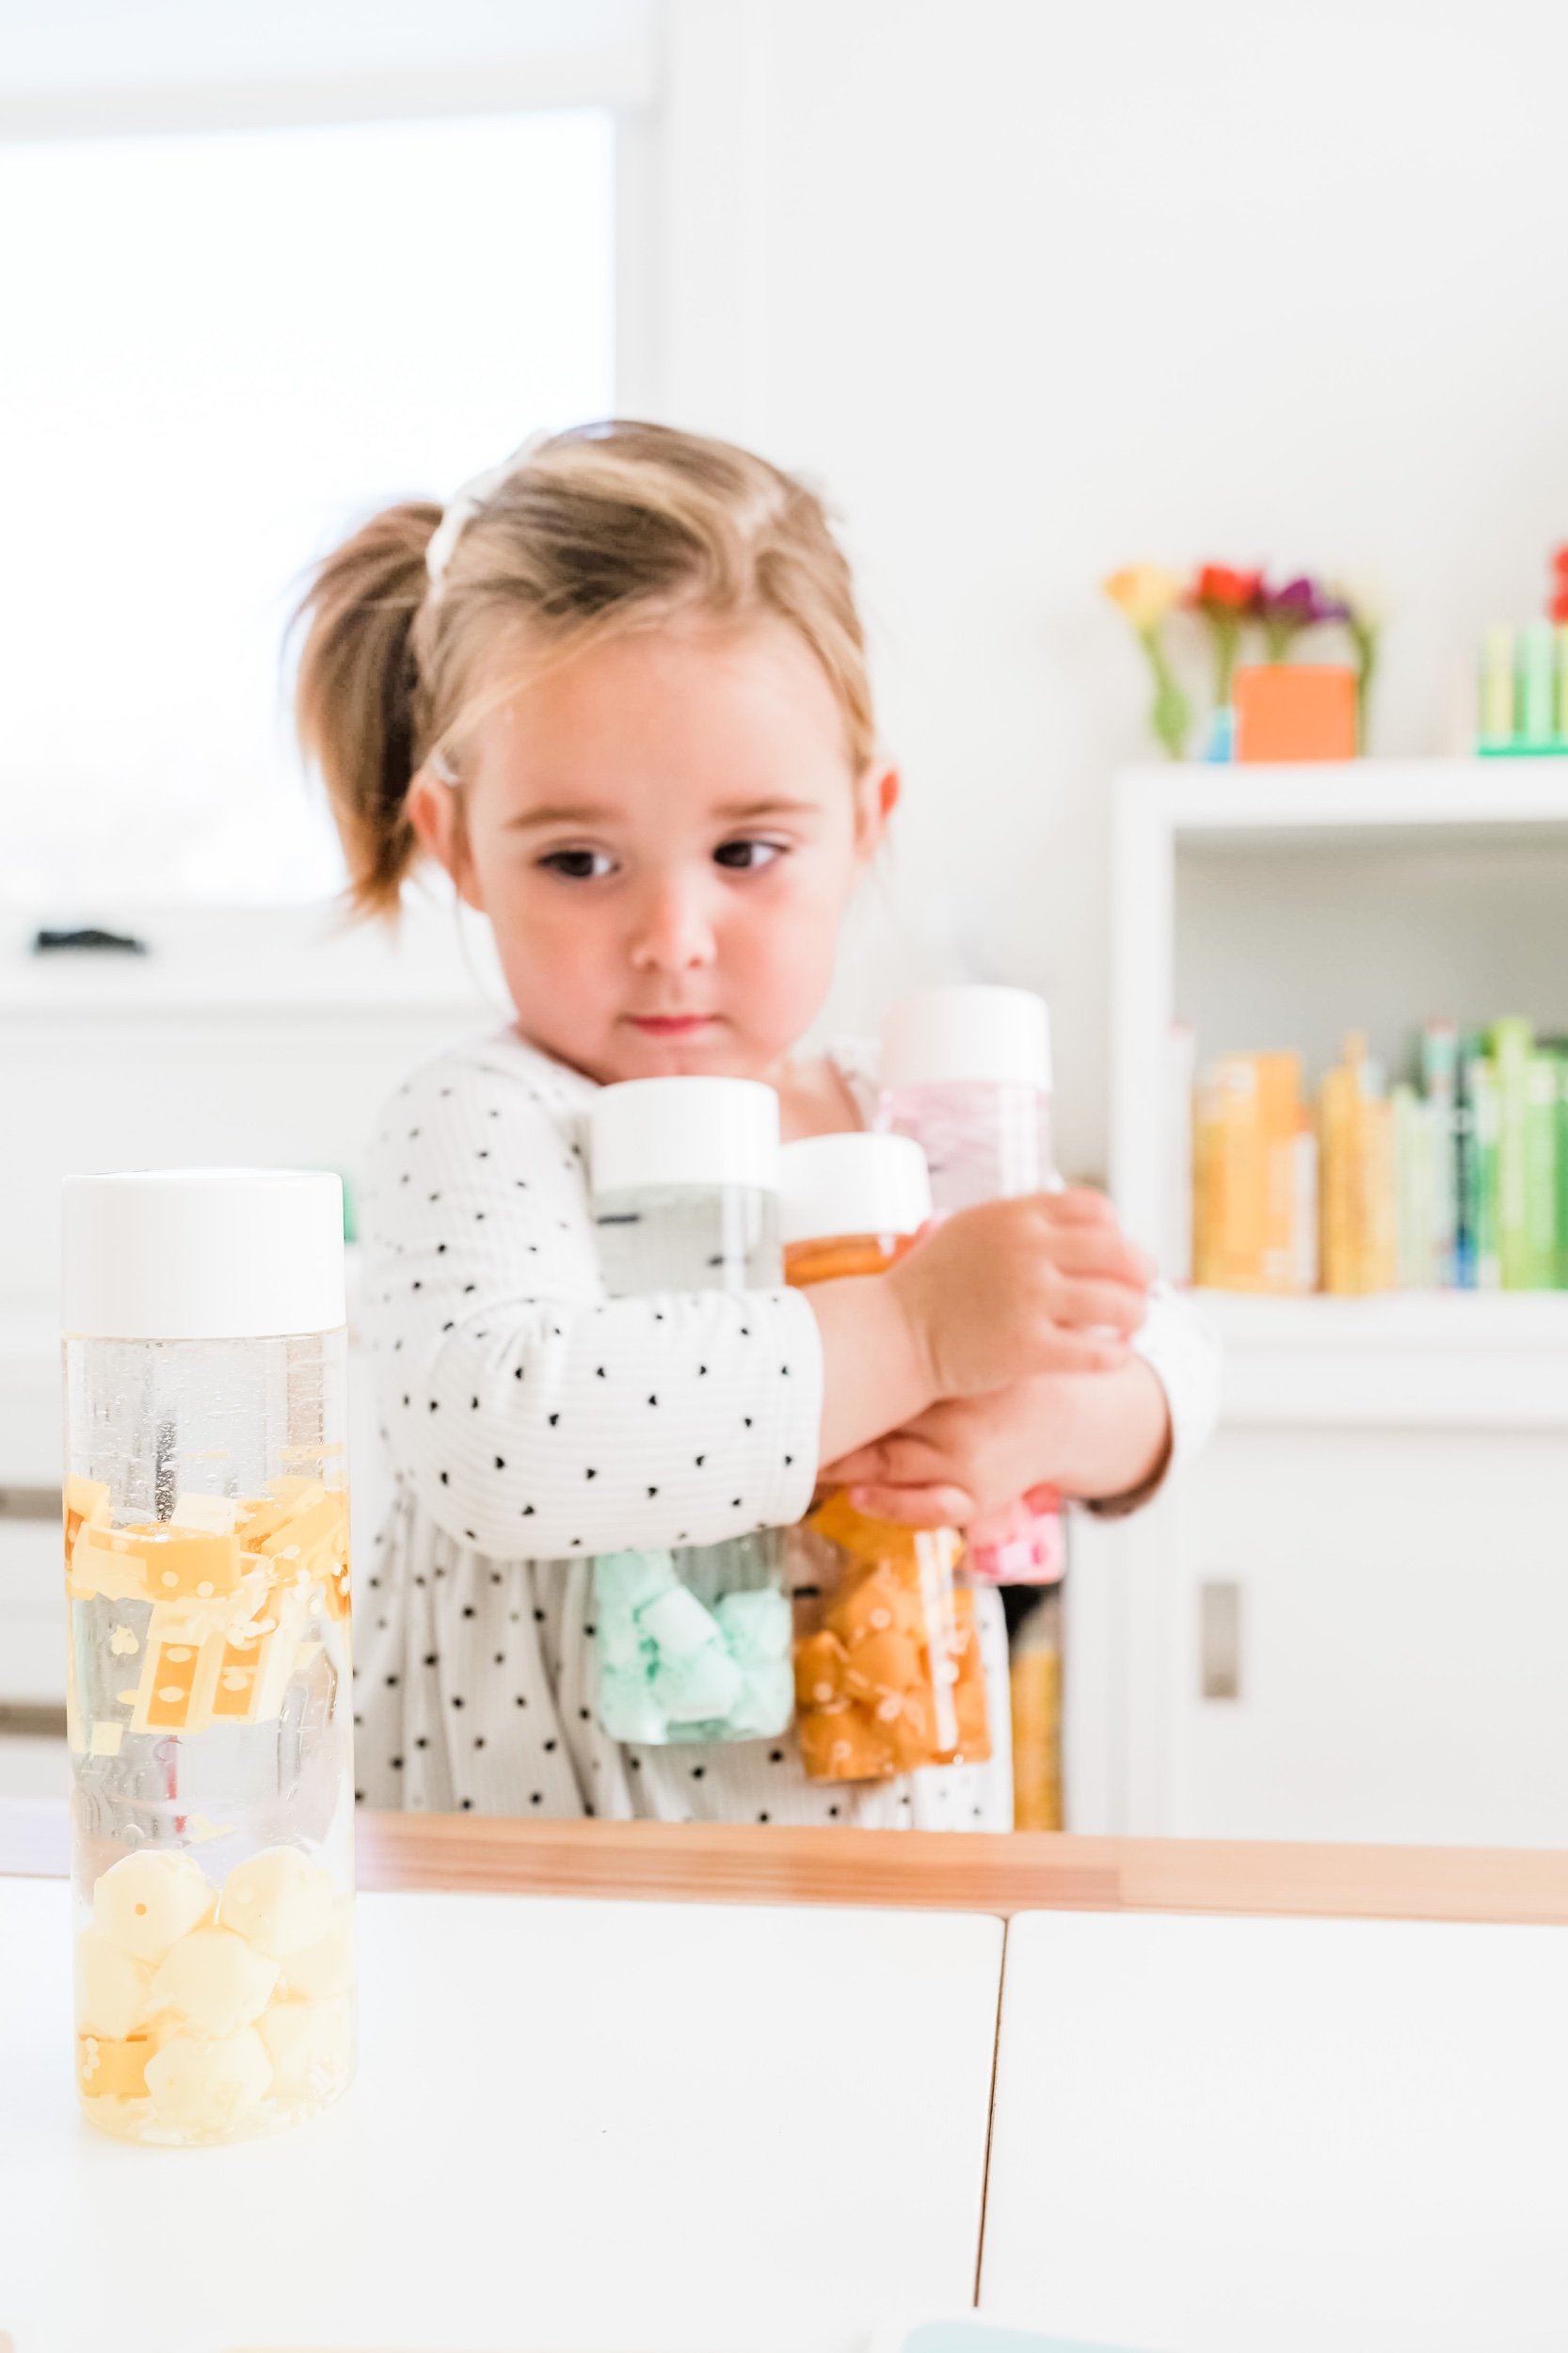
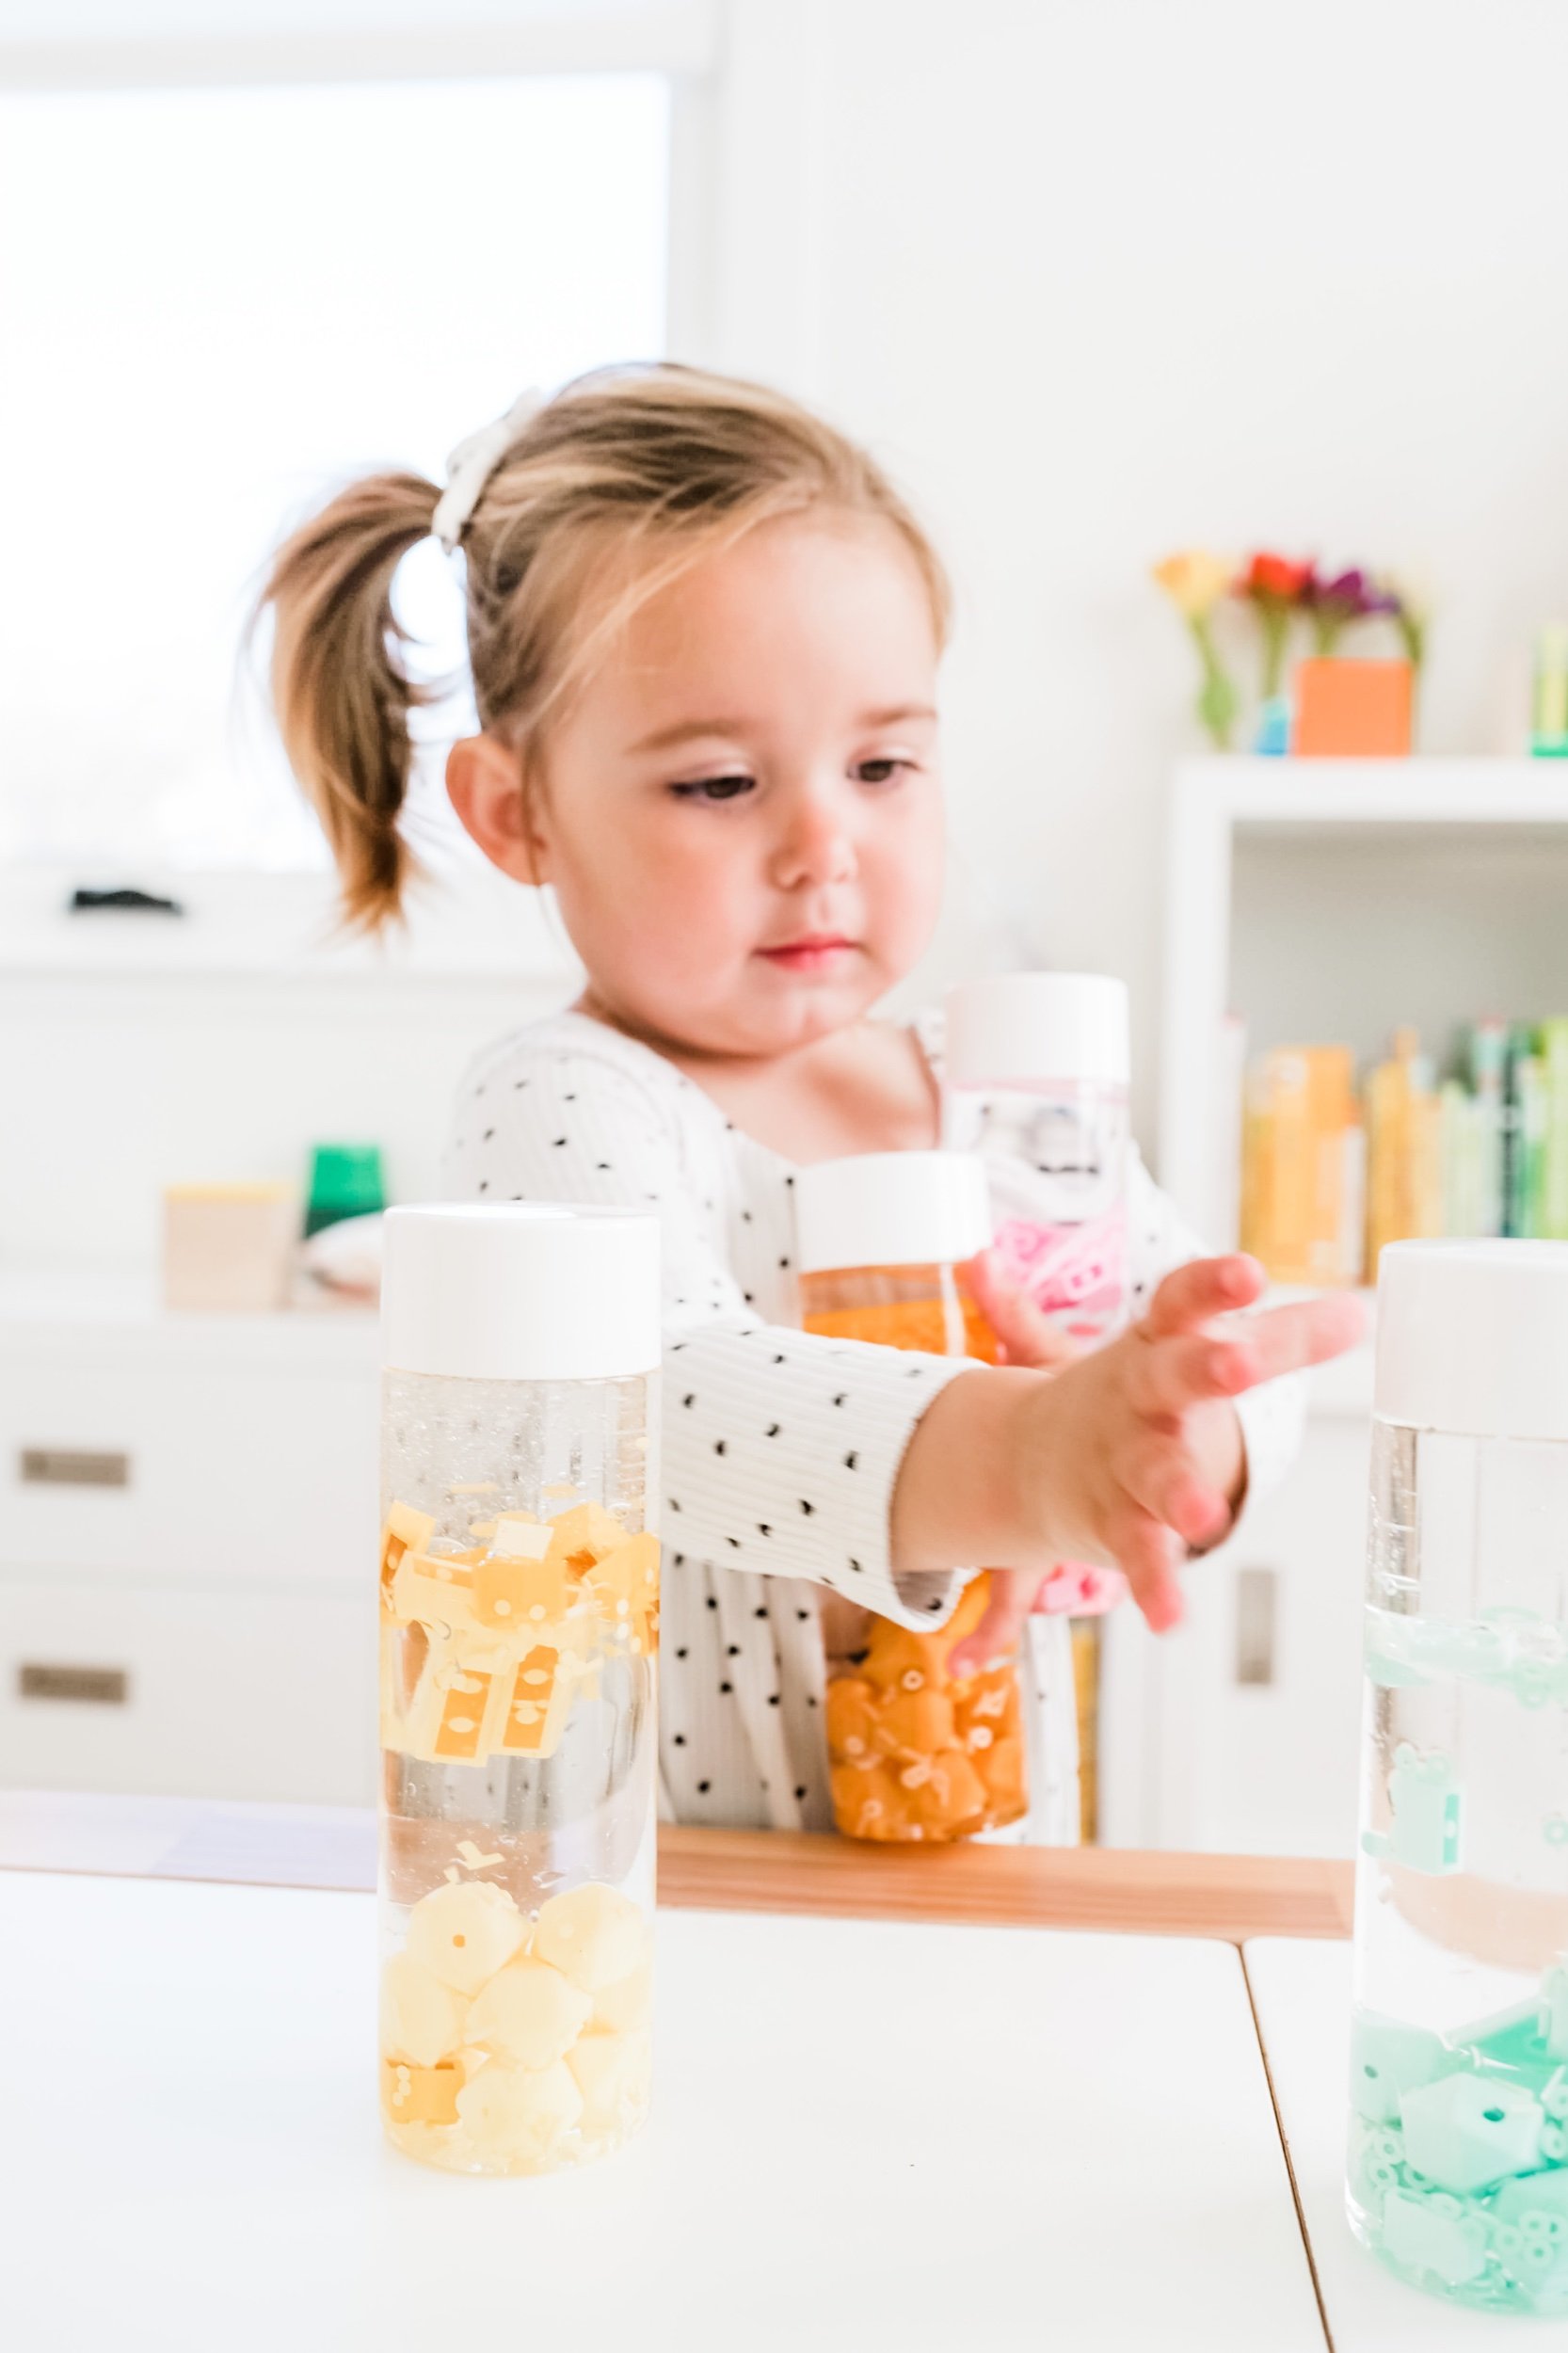
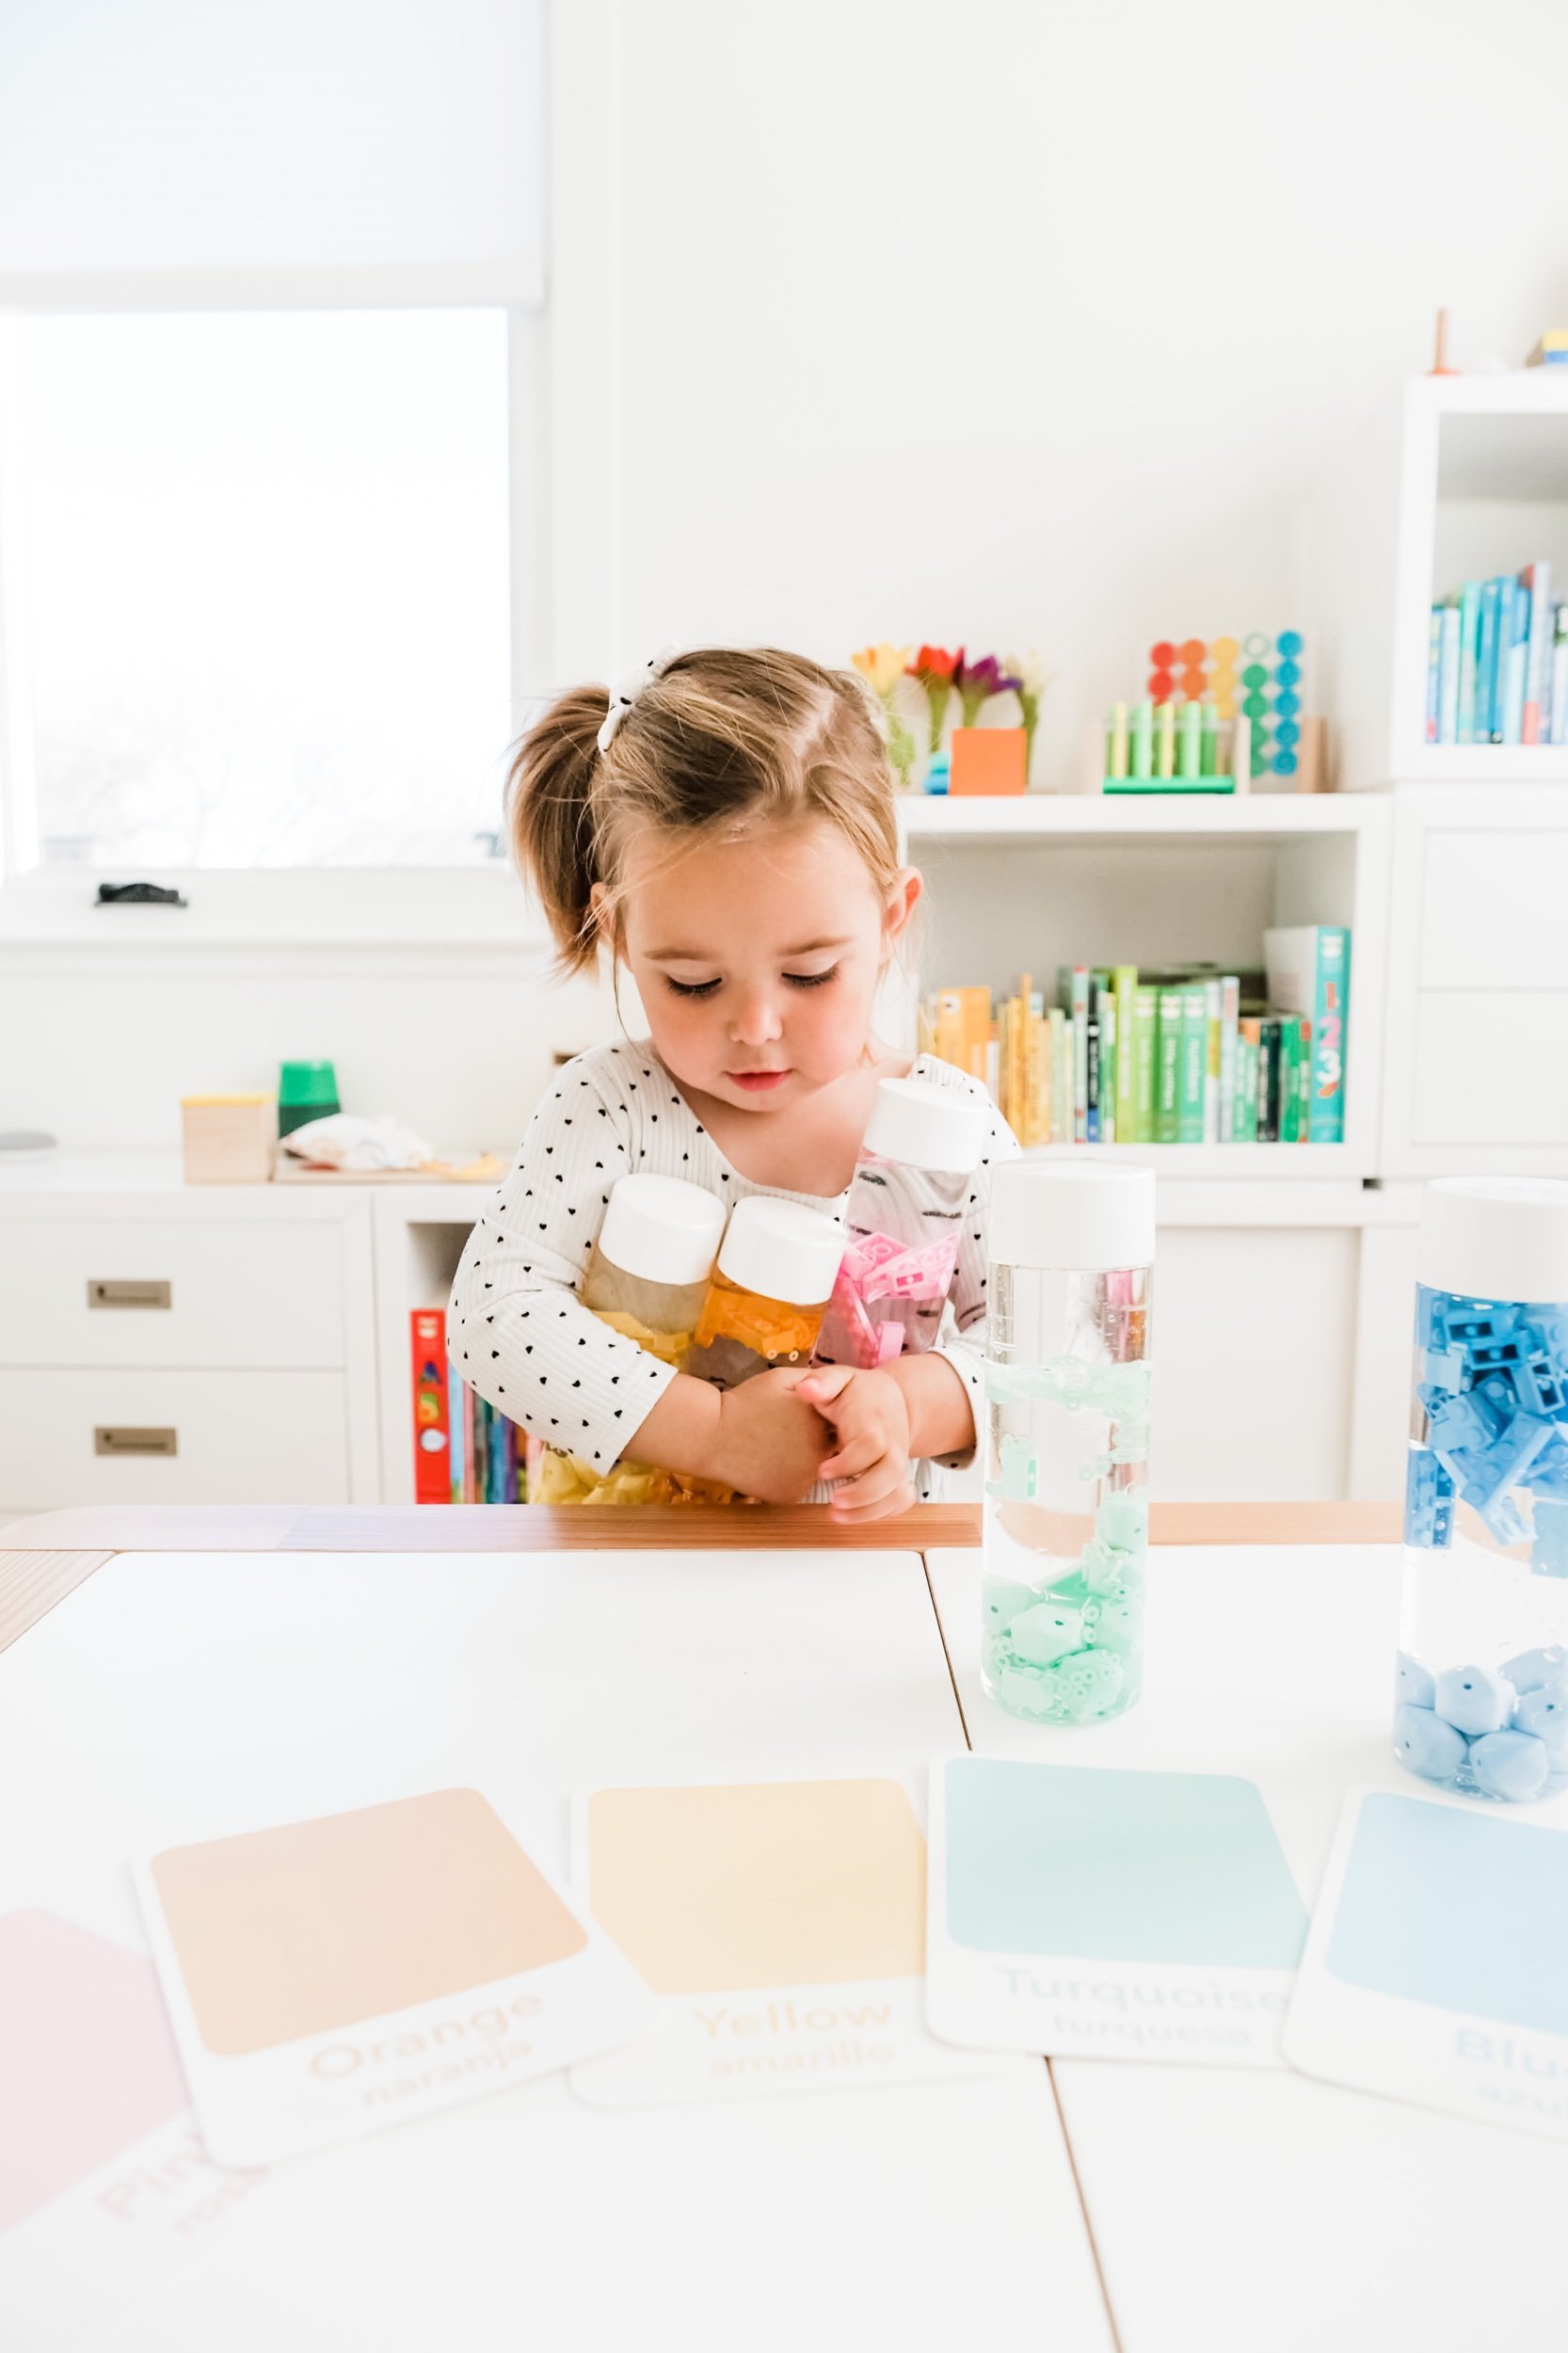
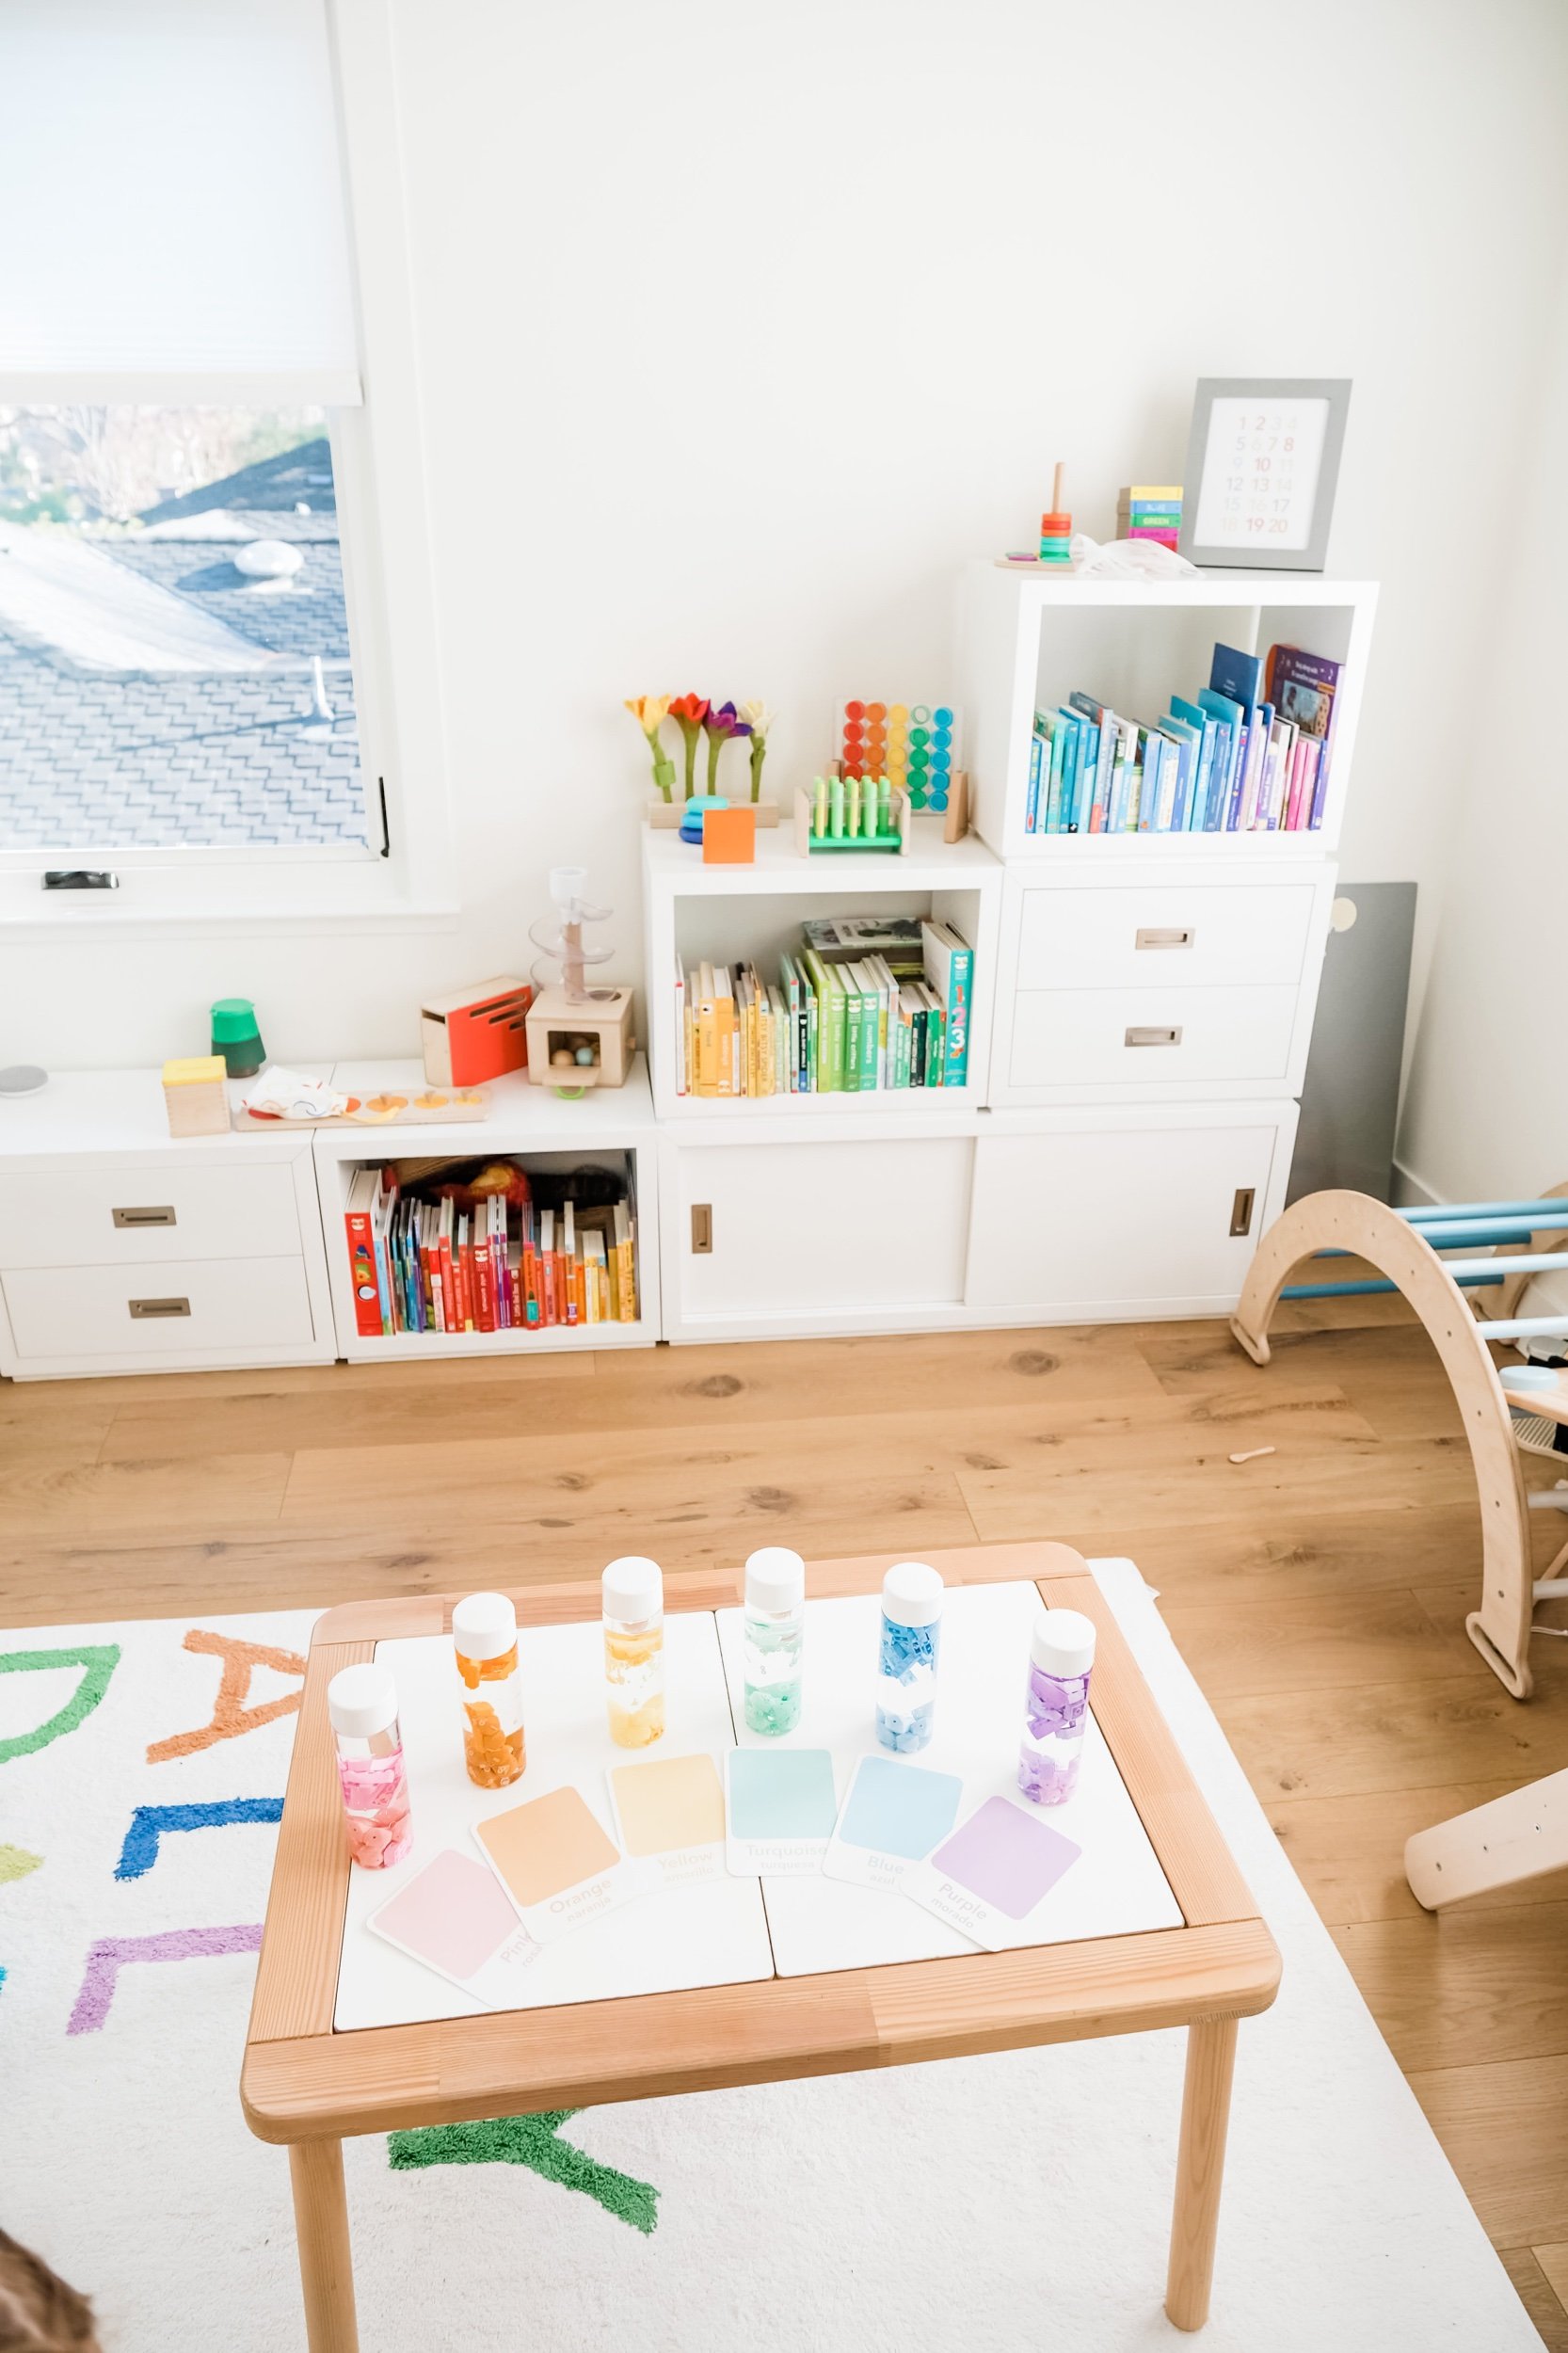
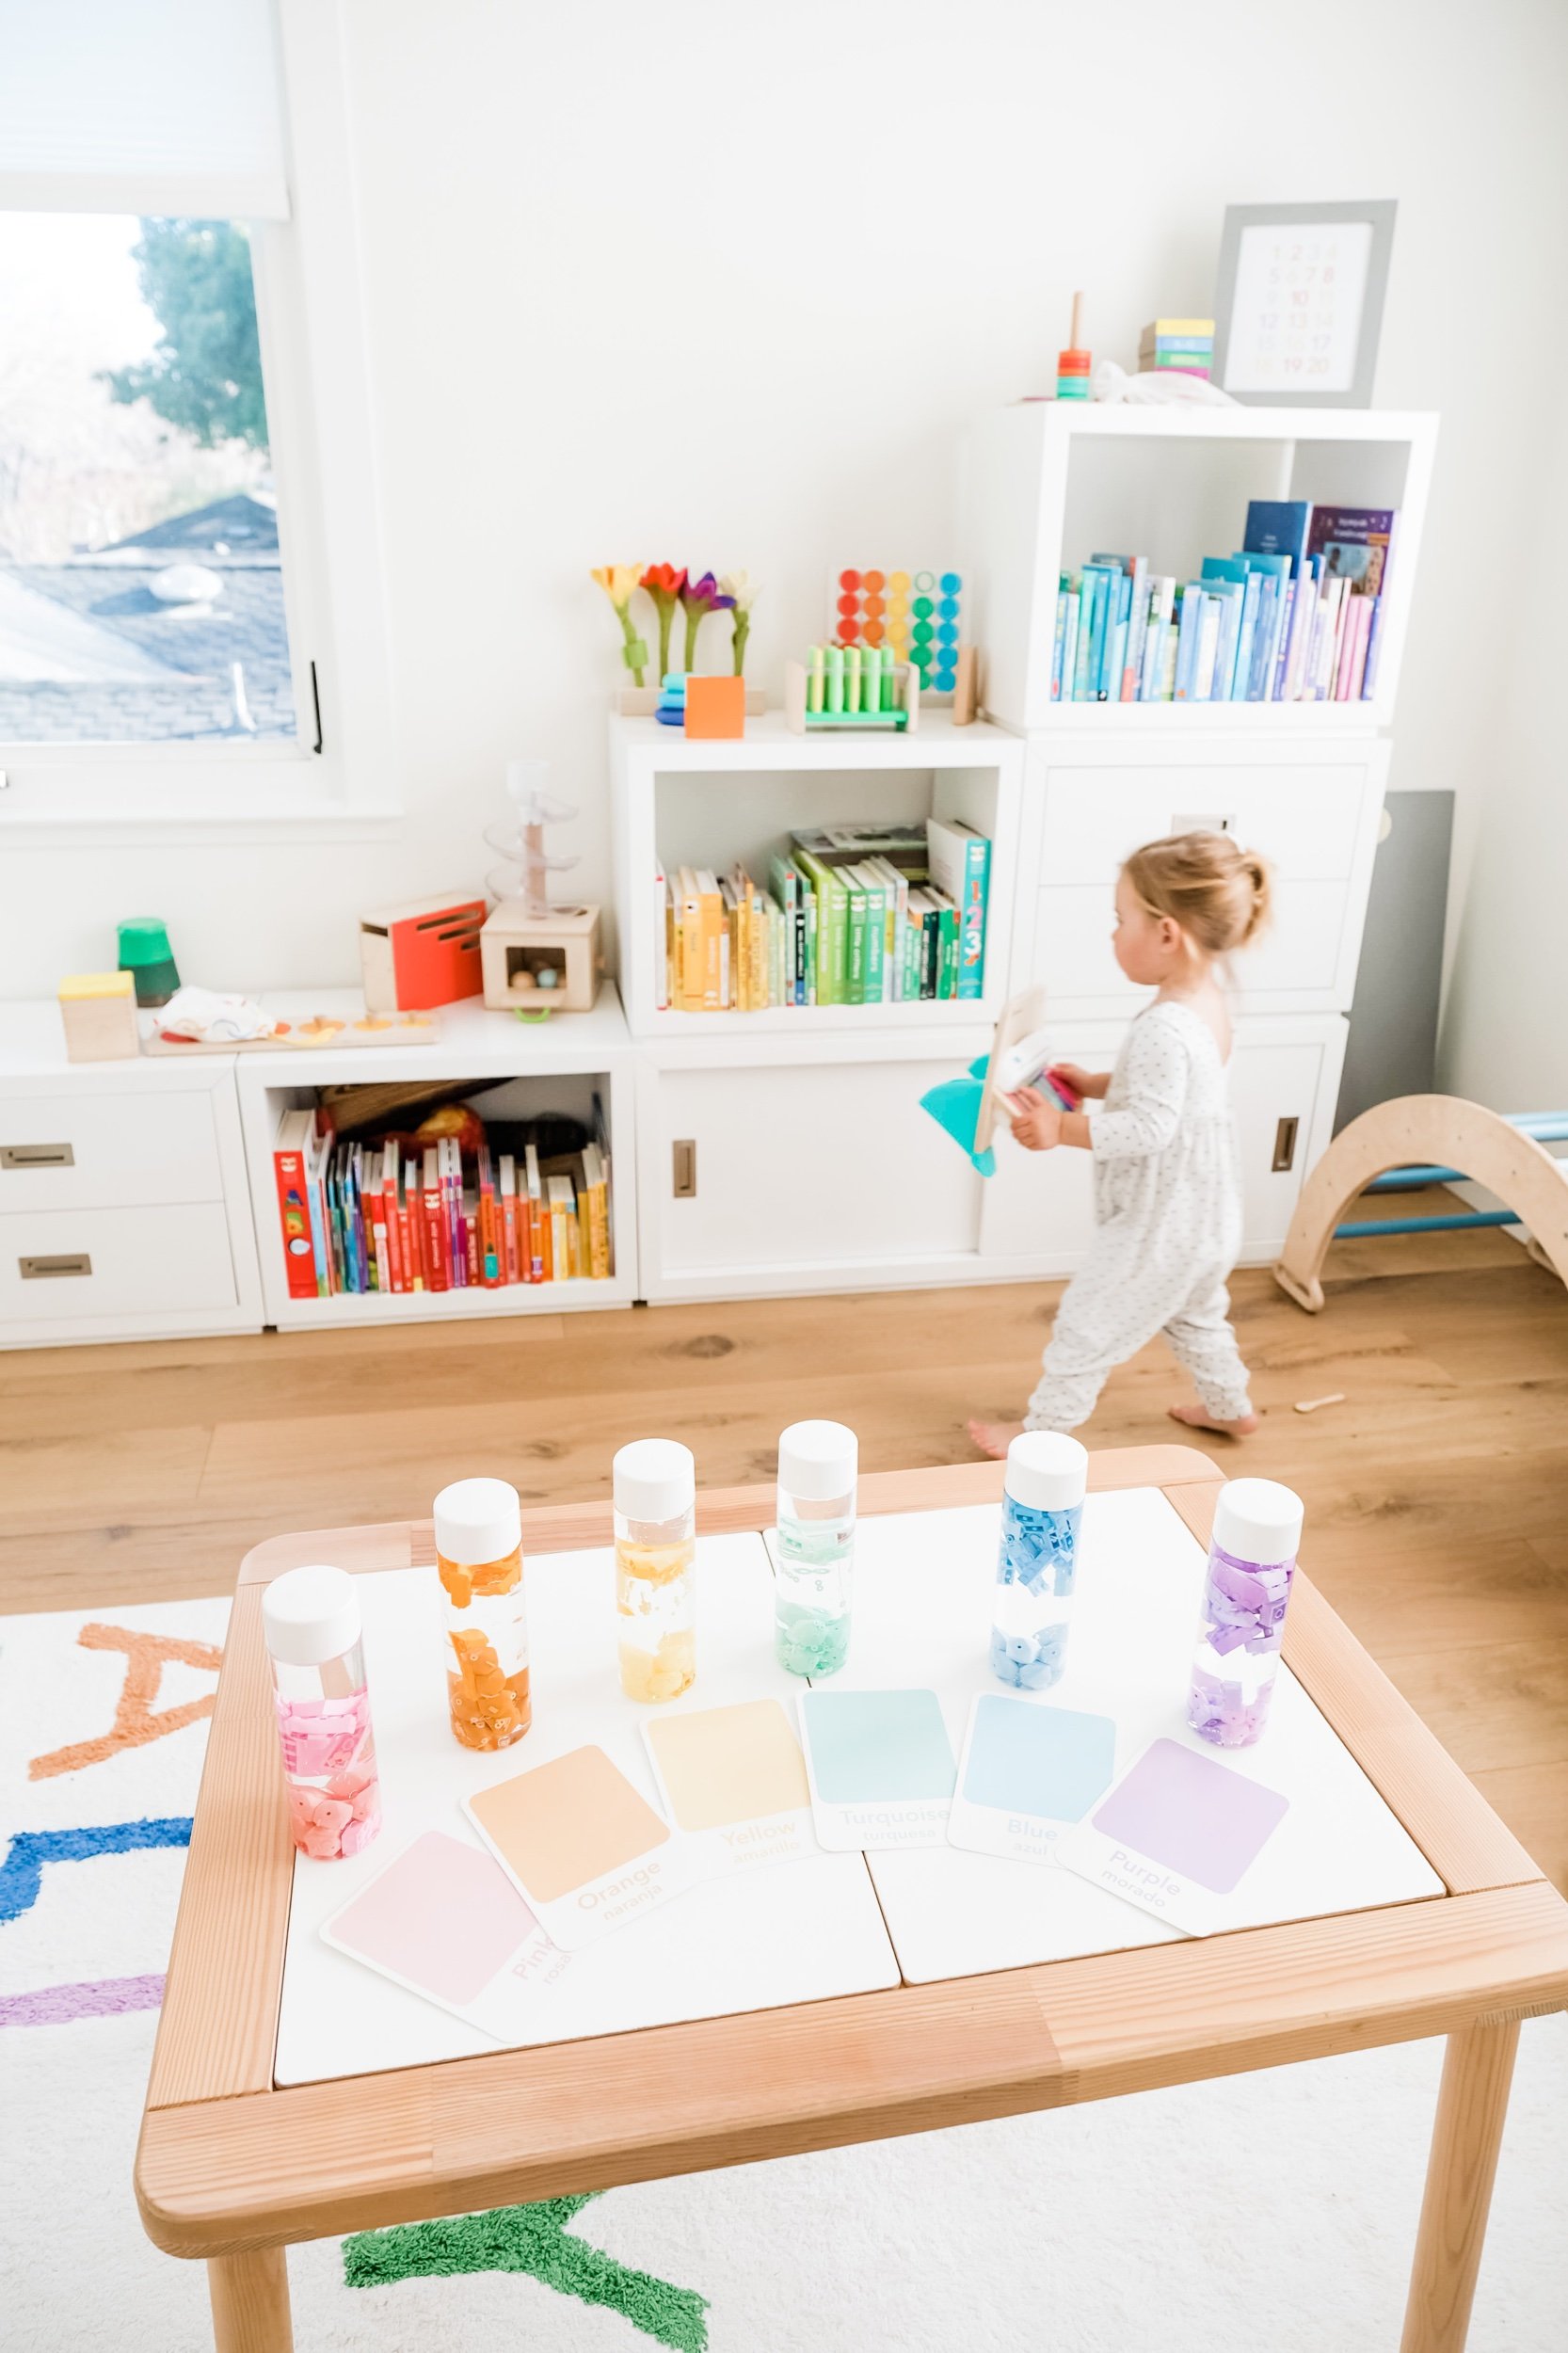
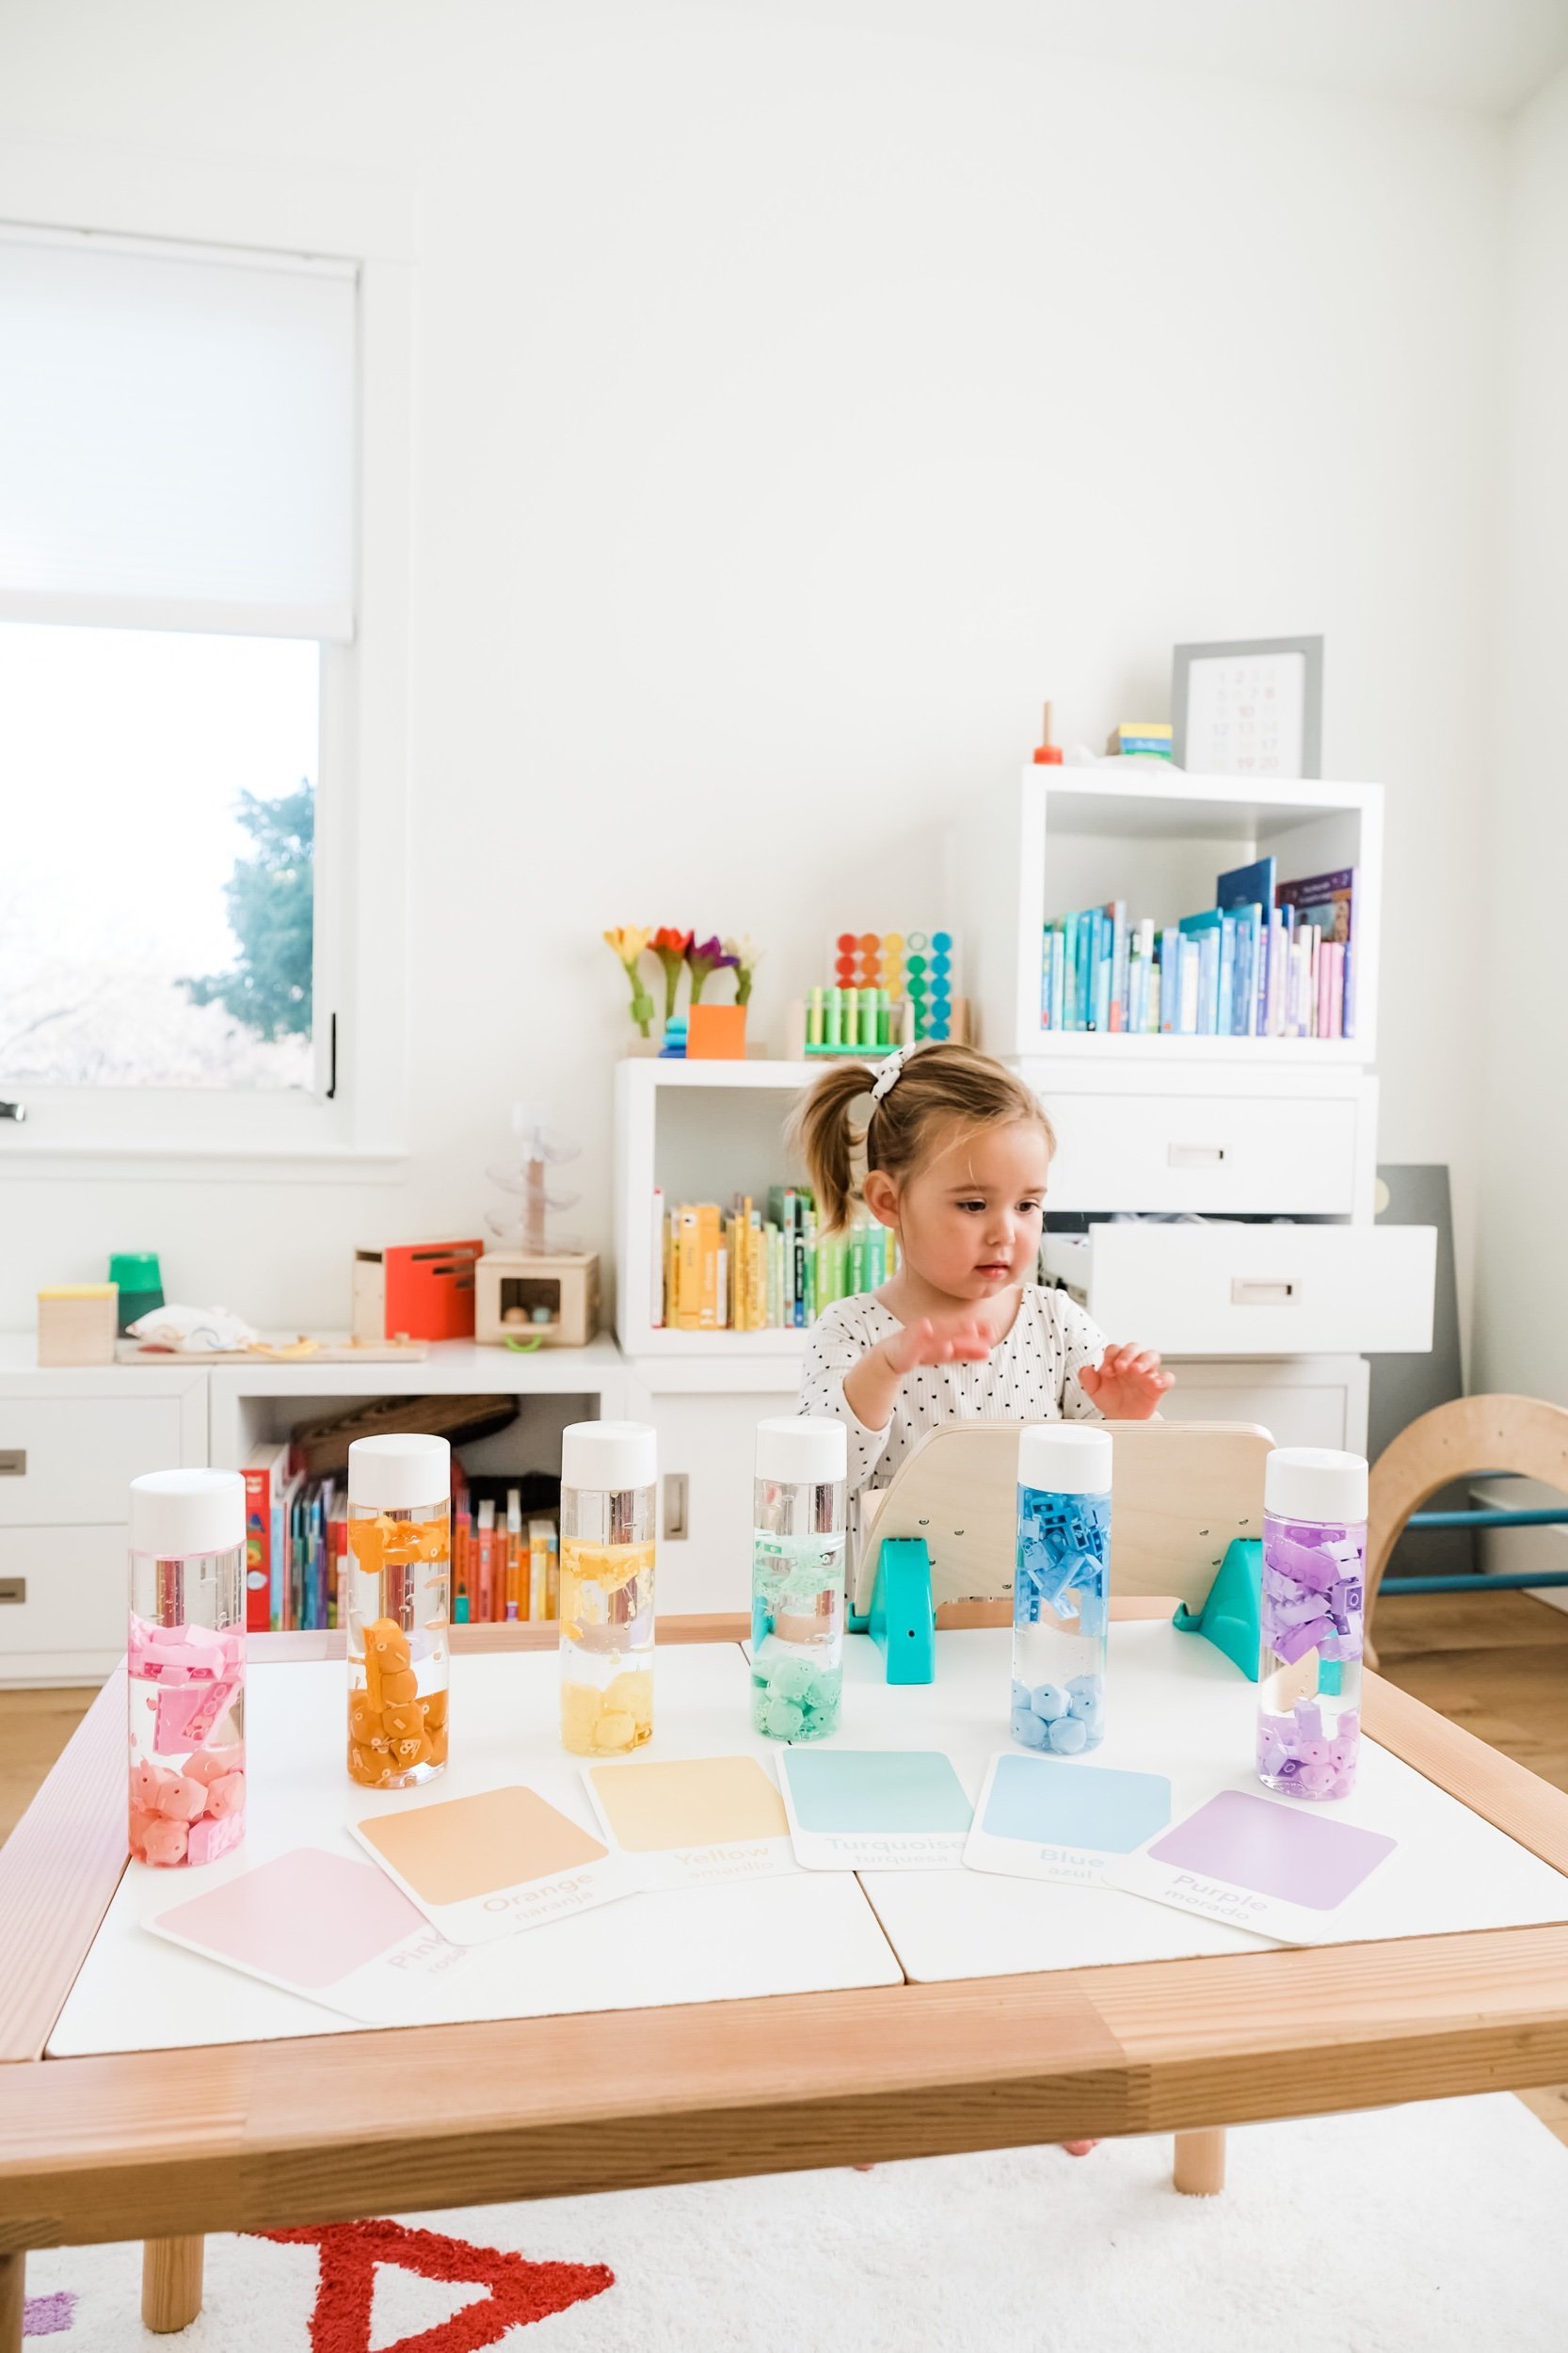
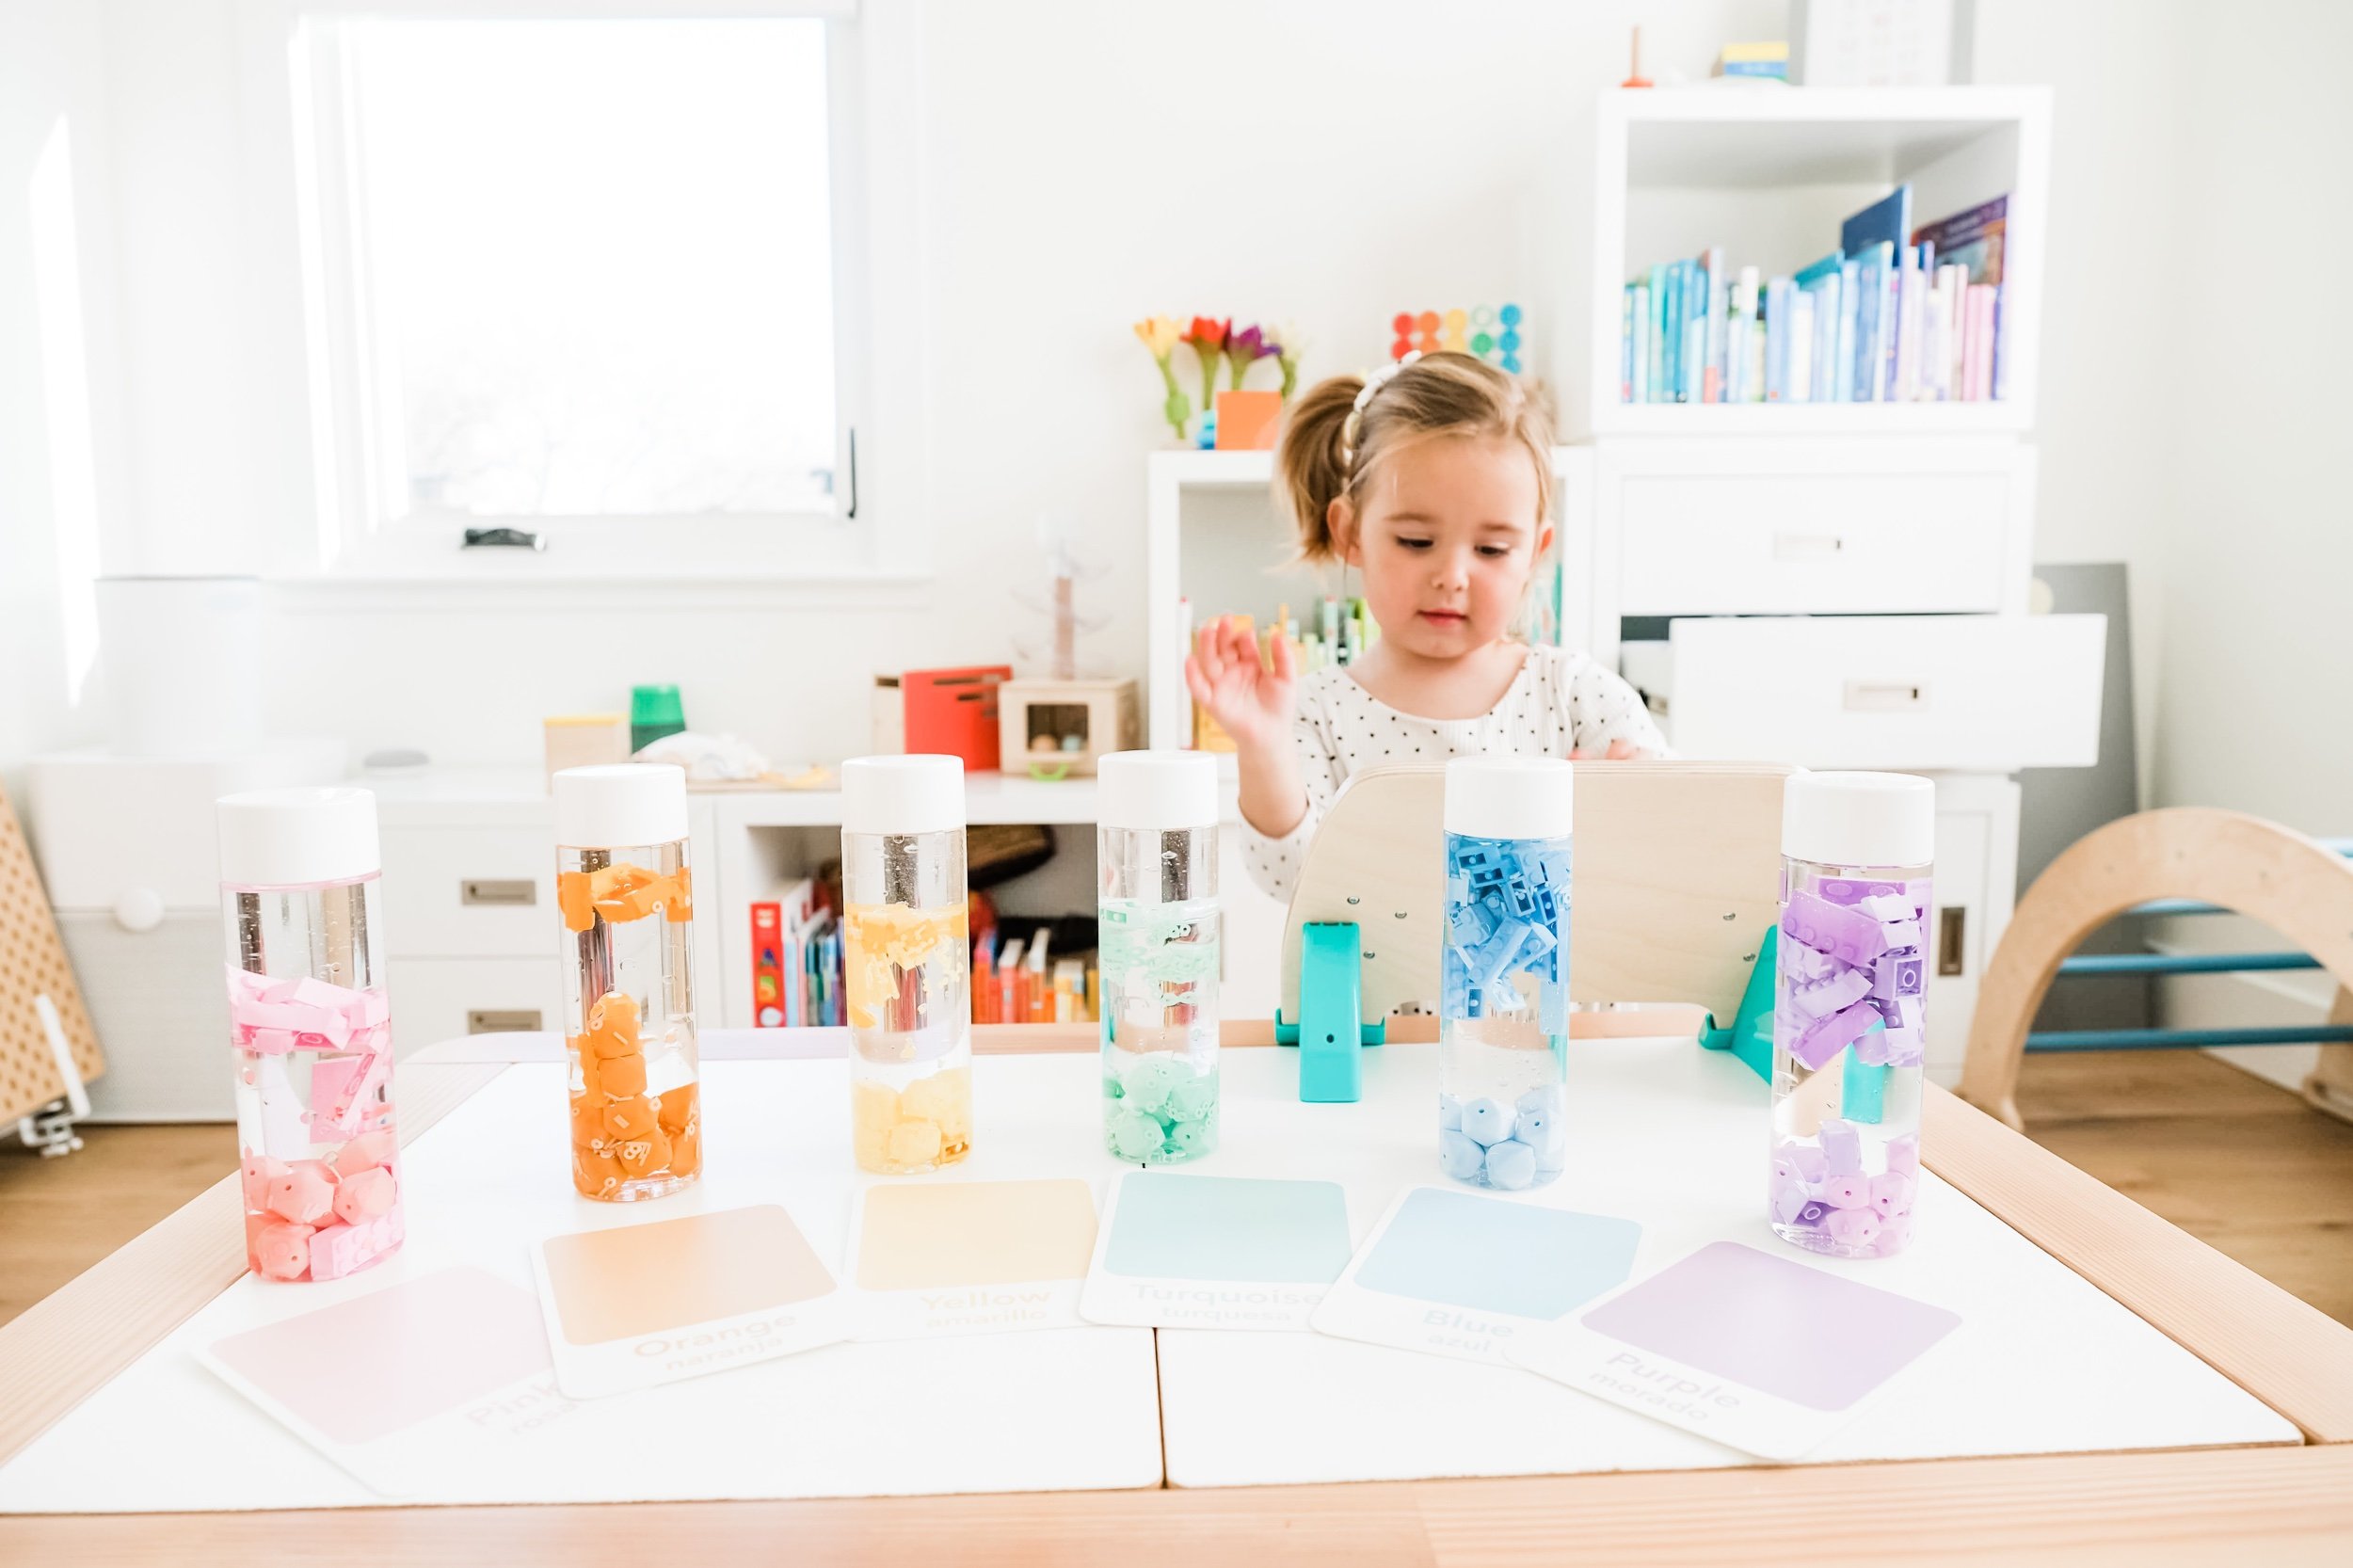
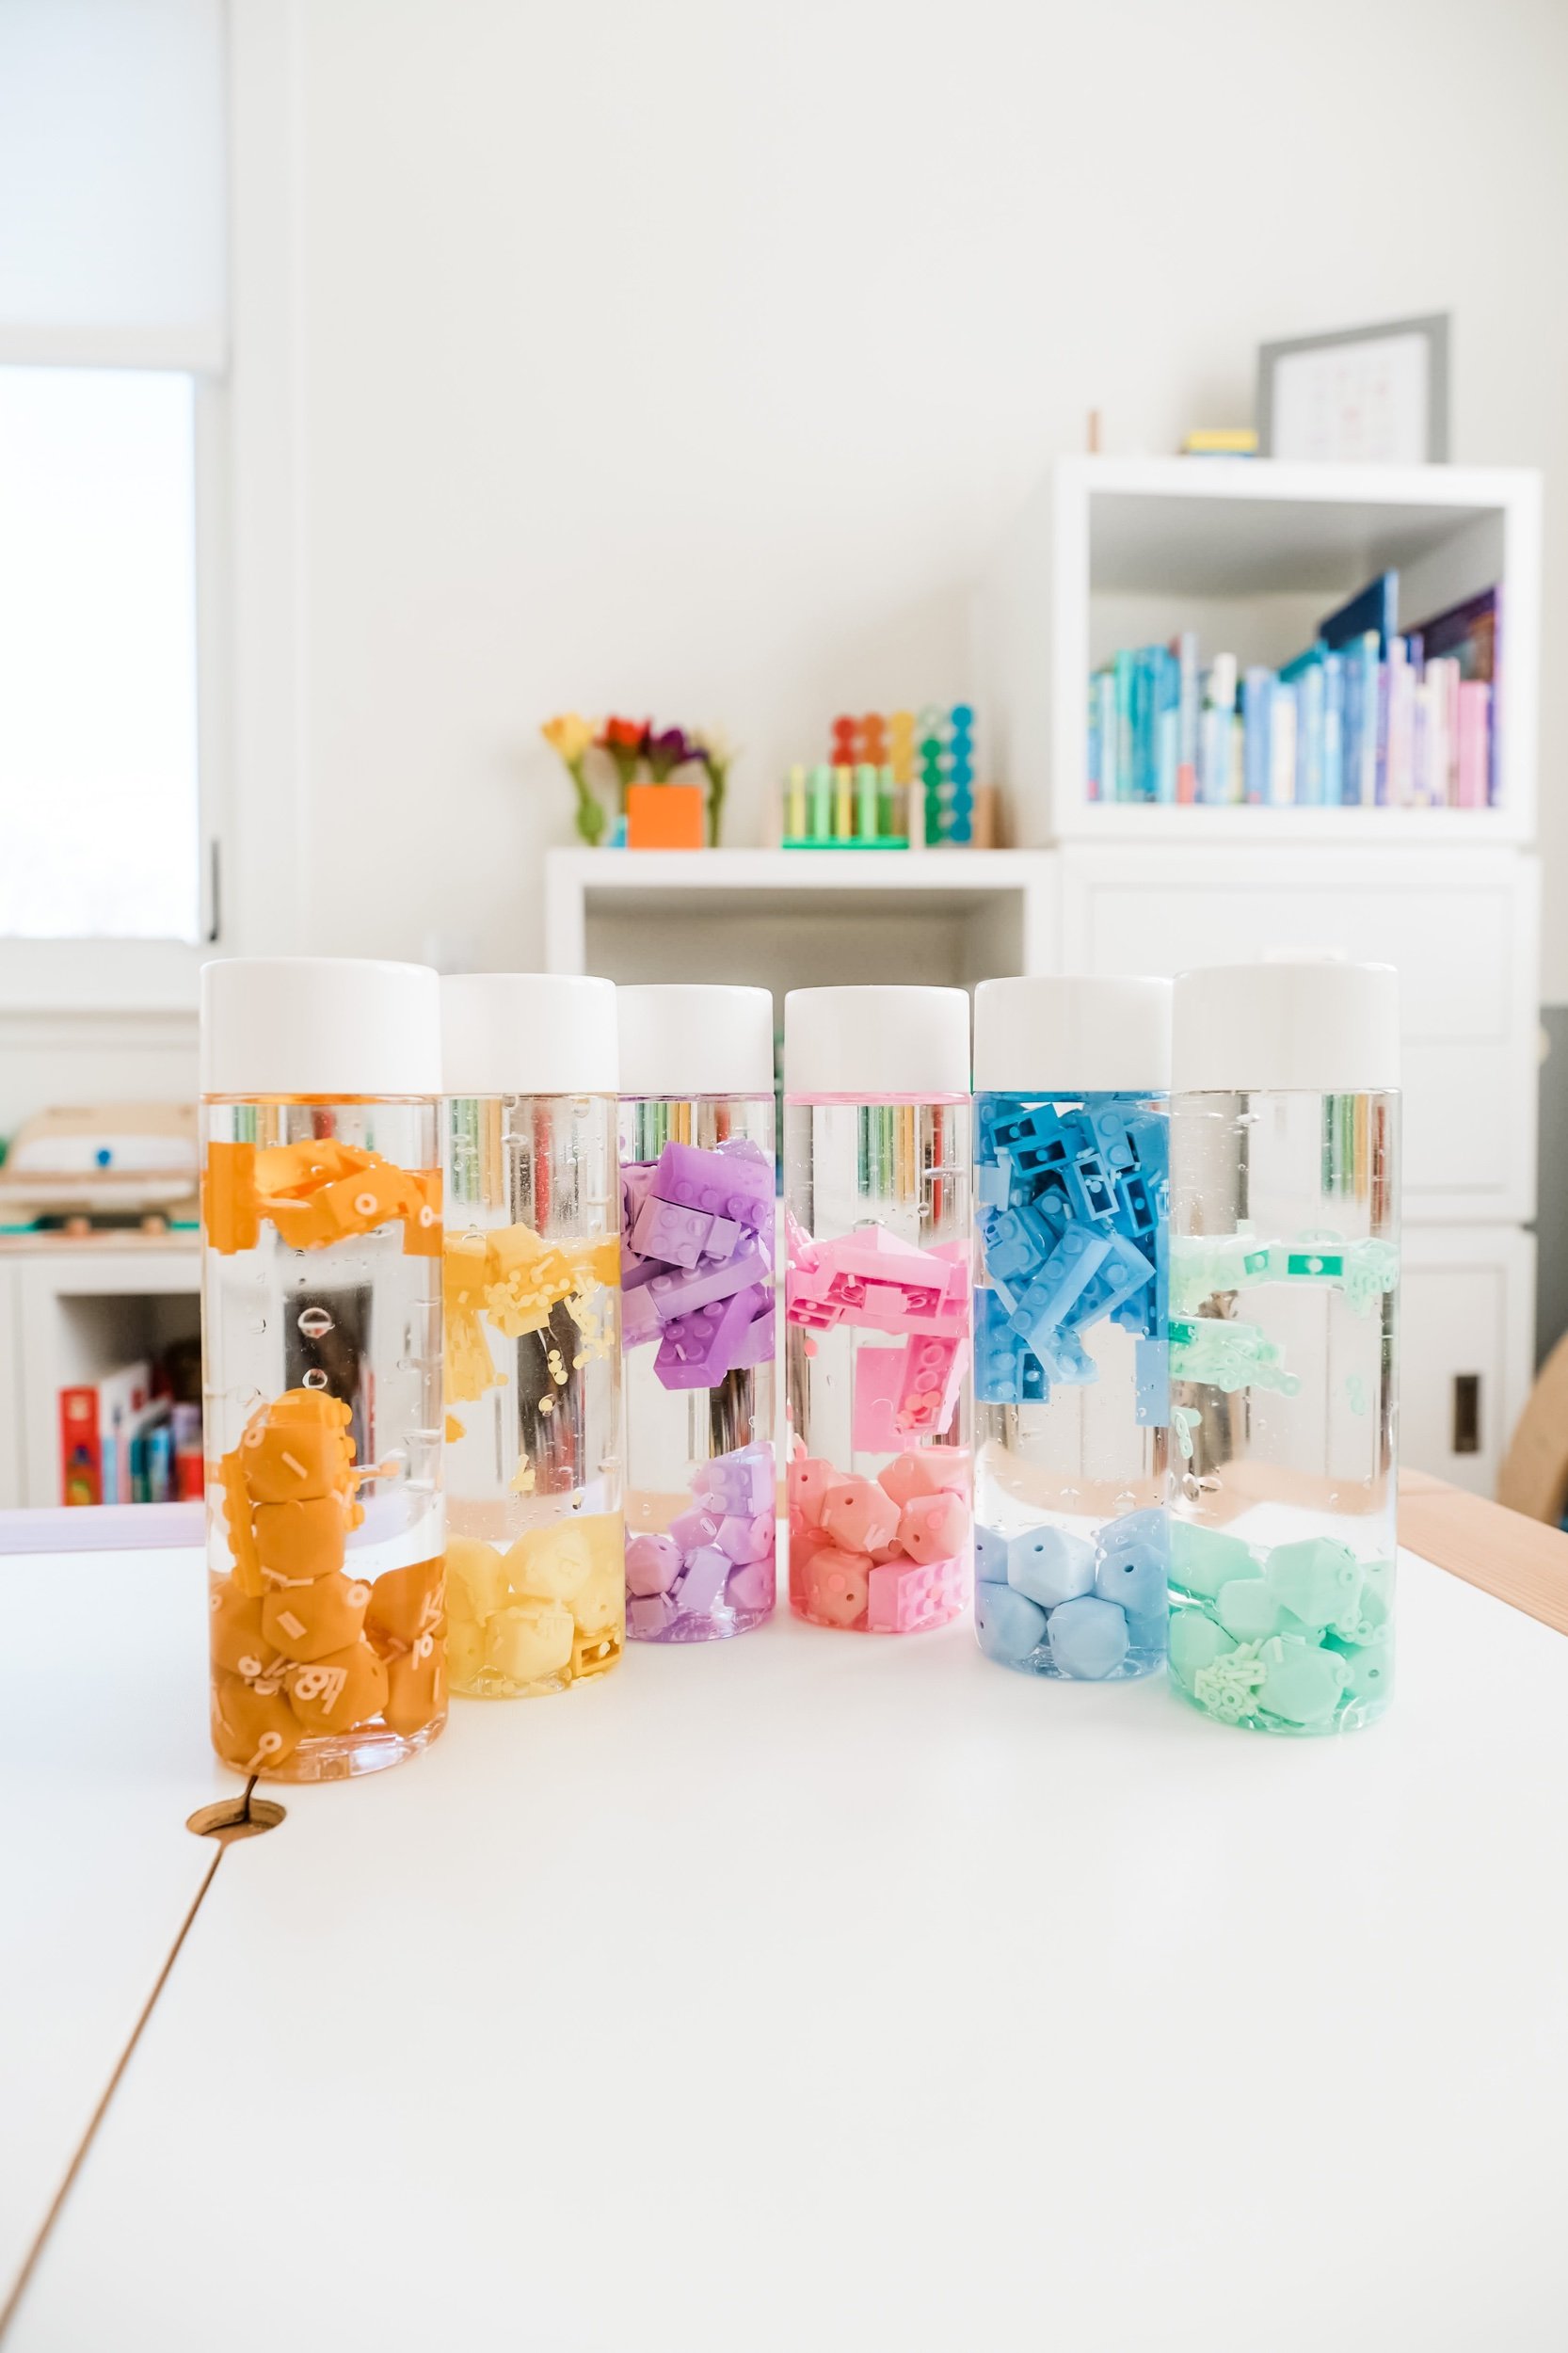
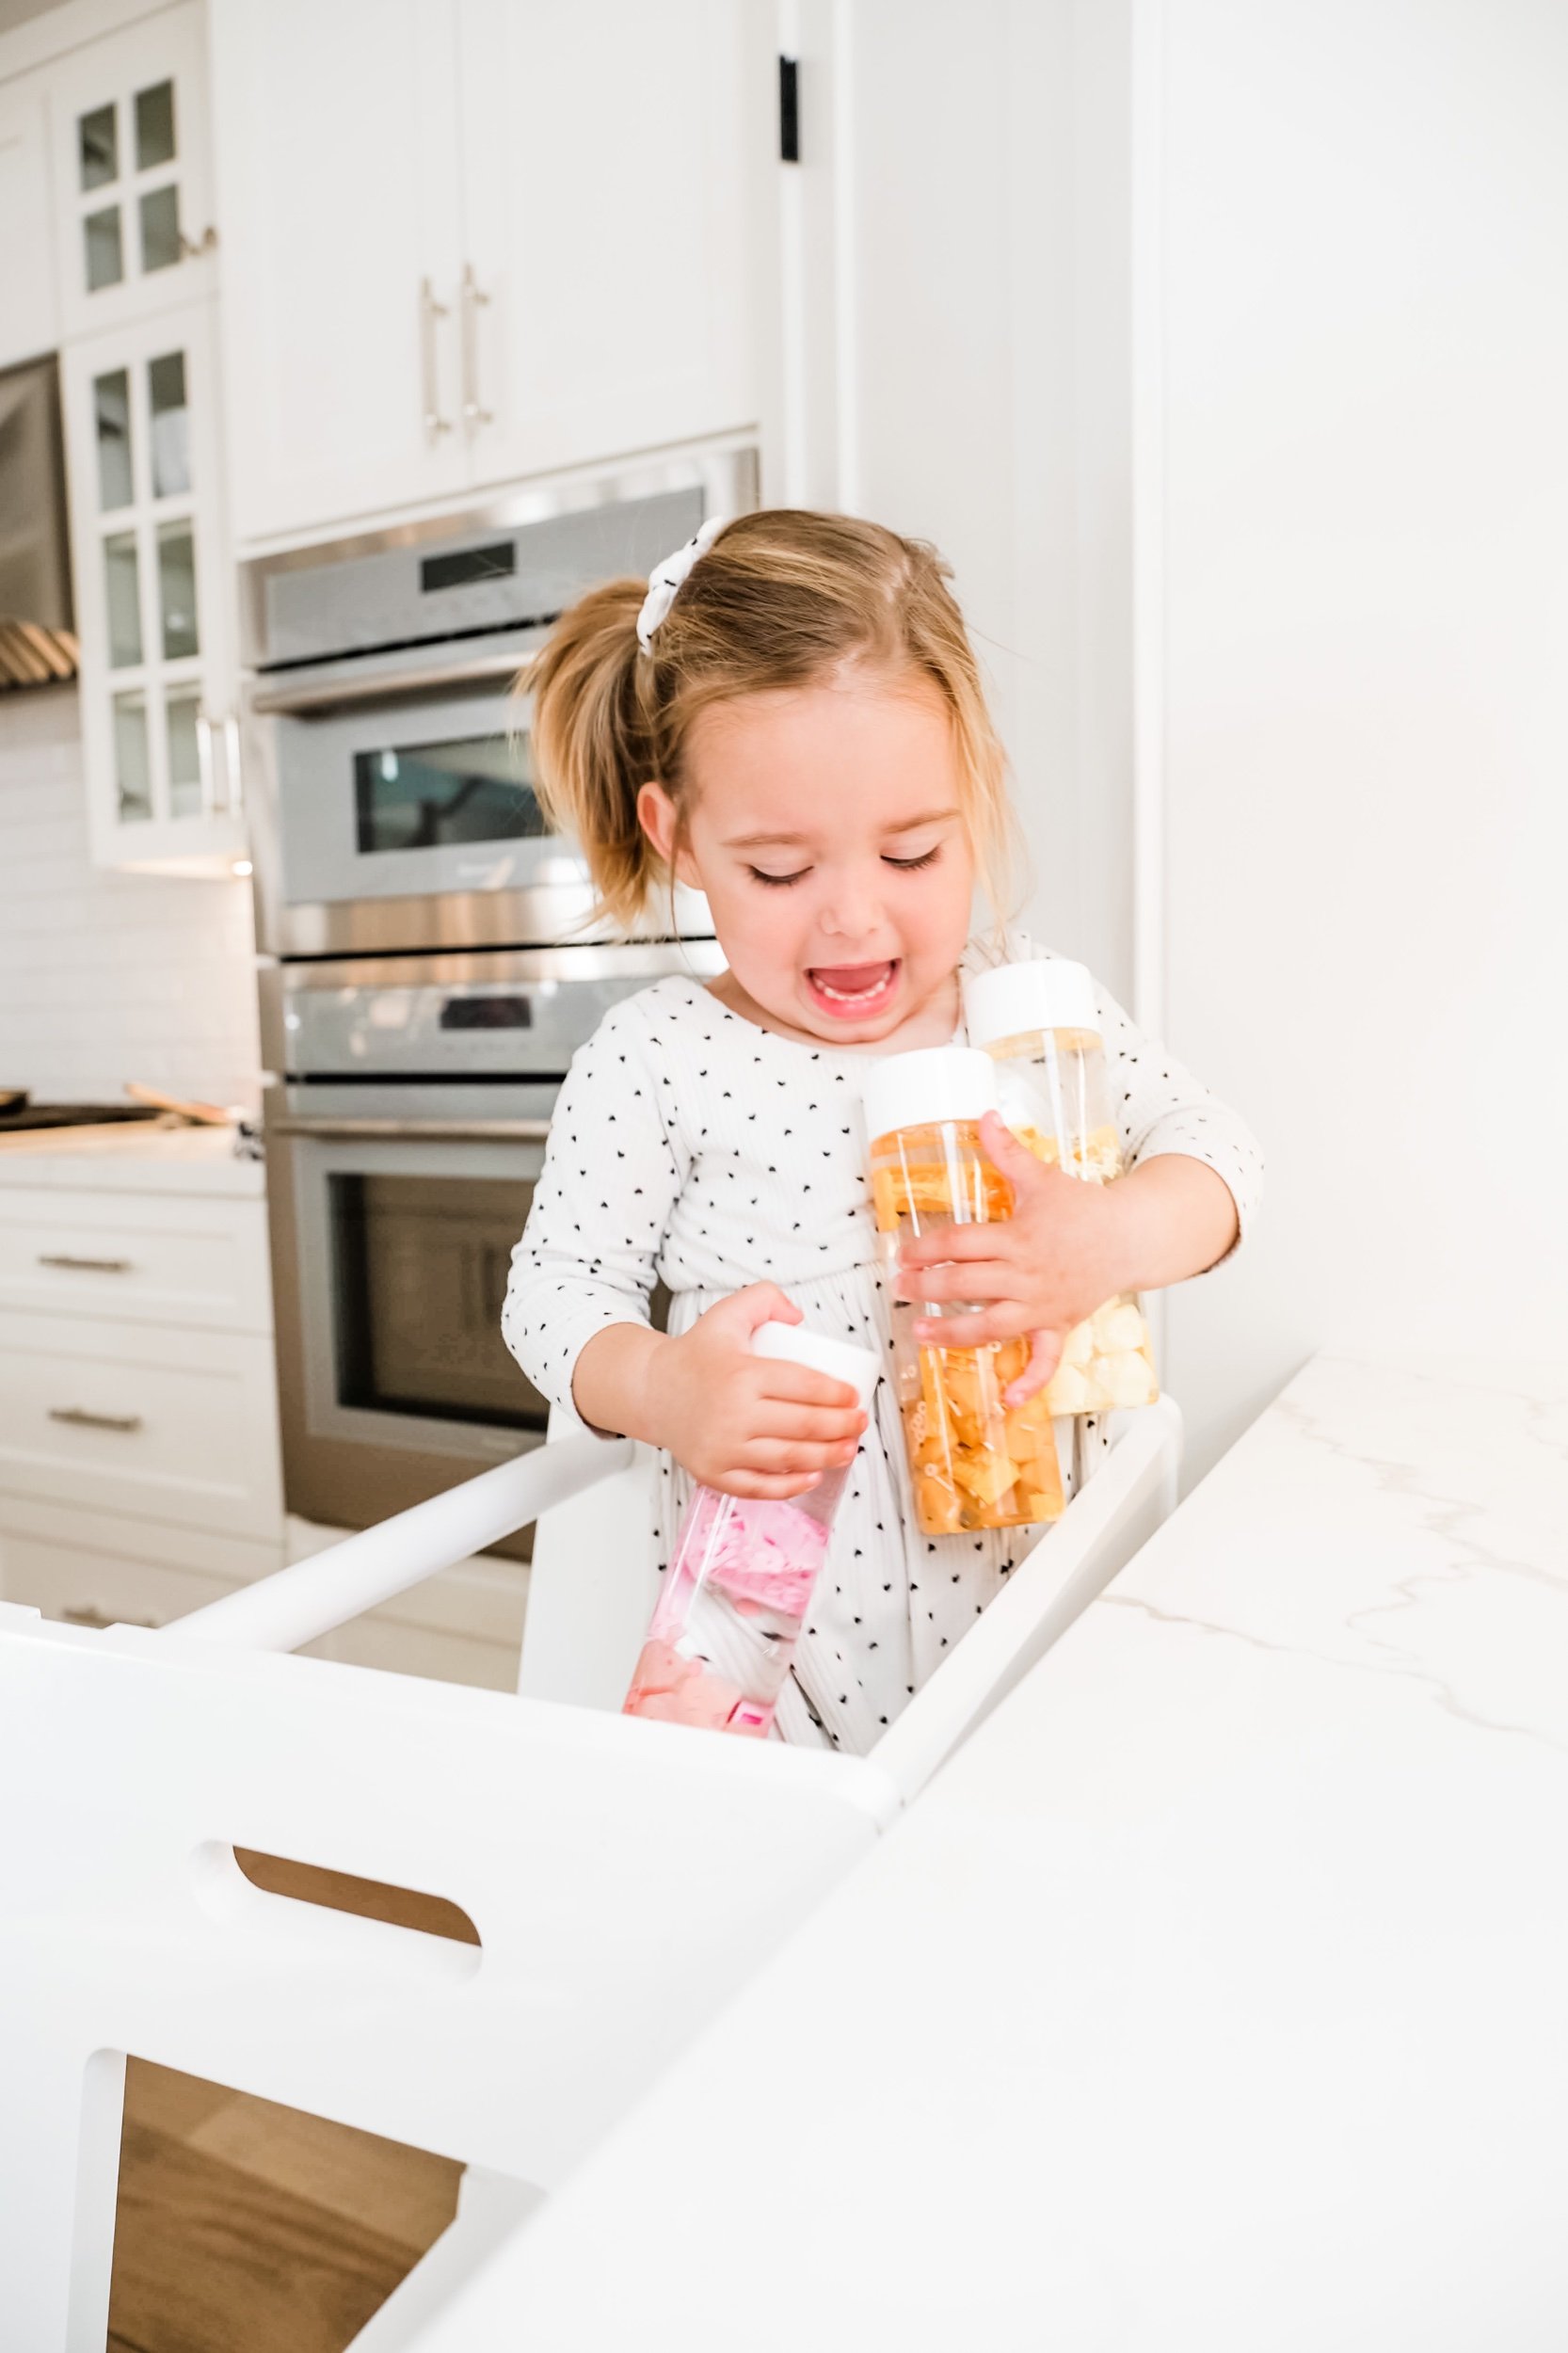
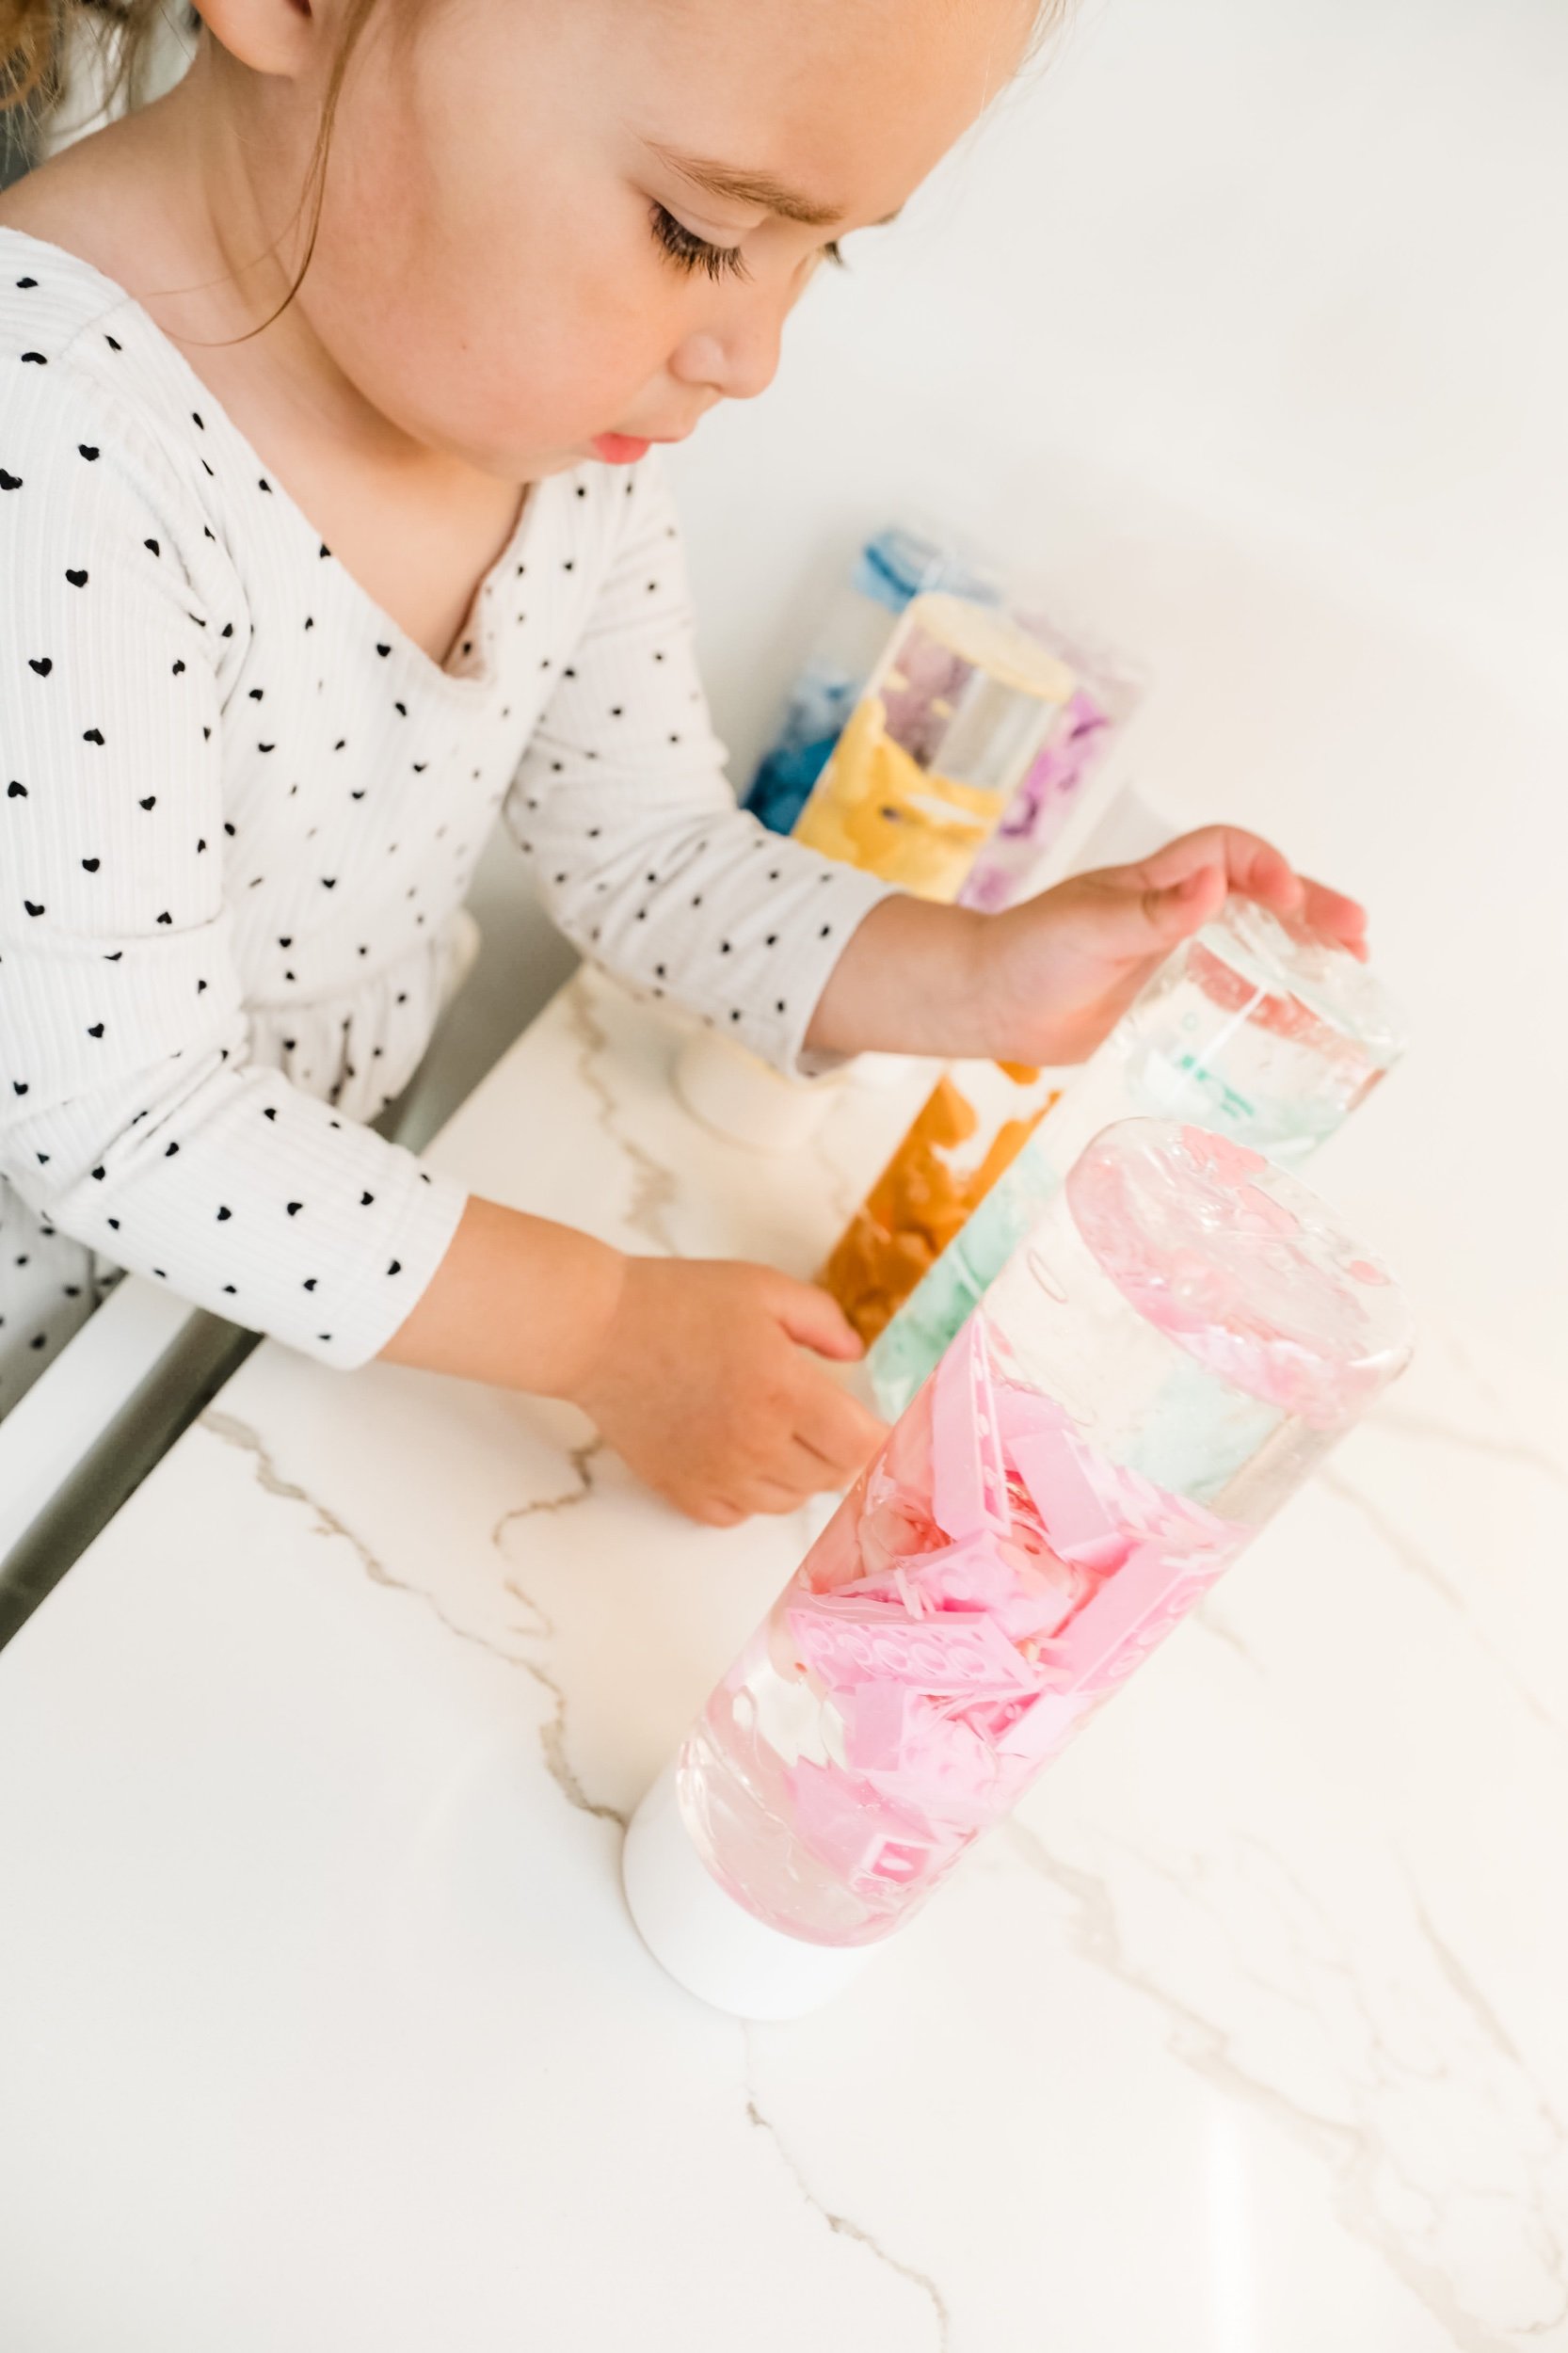
As a mom of a toddler, I understand the daily challenges of helping kids navigate through overwhelming feelings. In my journey, I've found sensory bottles to be a game-changer. Not only do they provide a calming effect, but they also offer a myriad of developmental benefits for little ones. In this post, I'll share the wonders of sensory bottles, how they assist kids with sensory issues, and provide a step-by-step guide on creating your own sensory bottles at home.
Here’s what you’ll need to create them yourself.
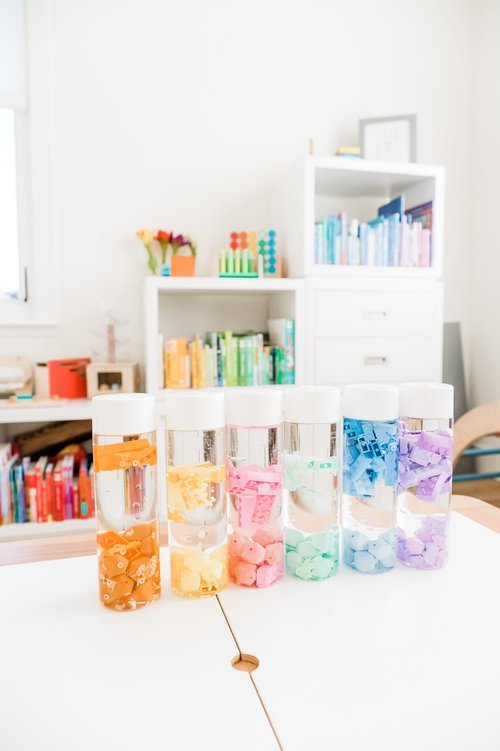
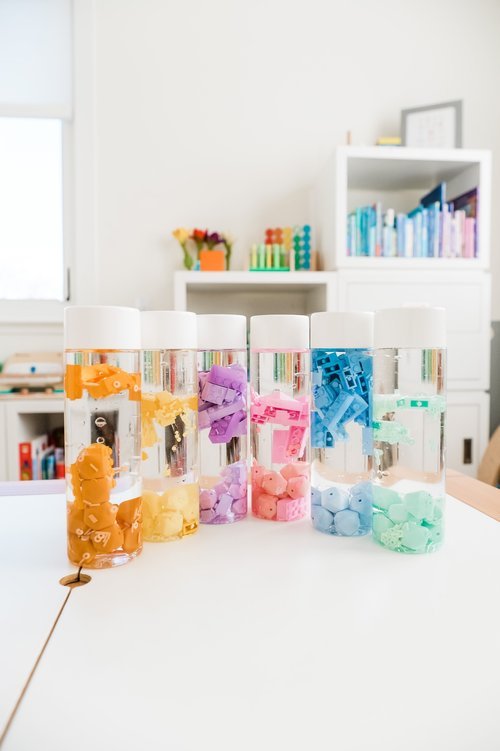
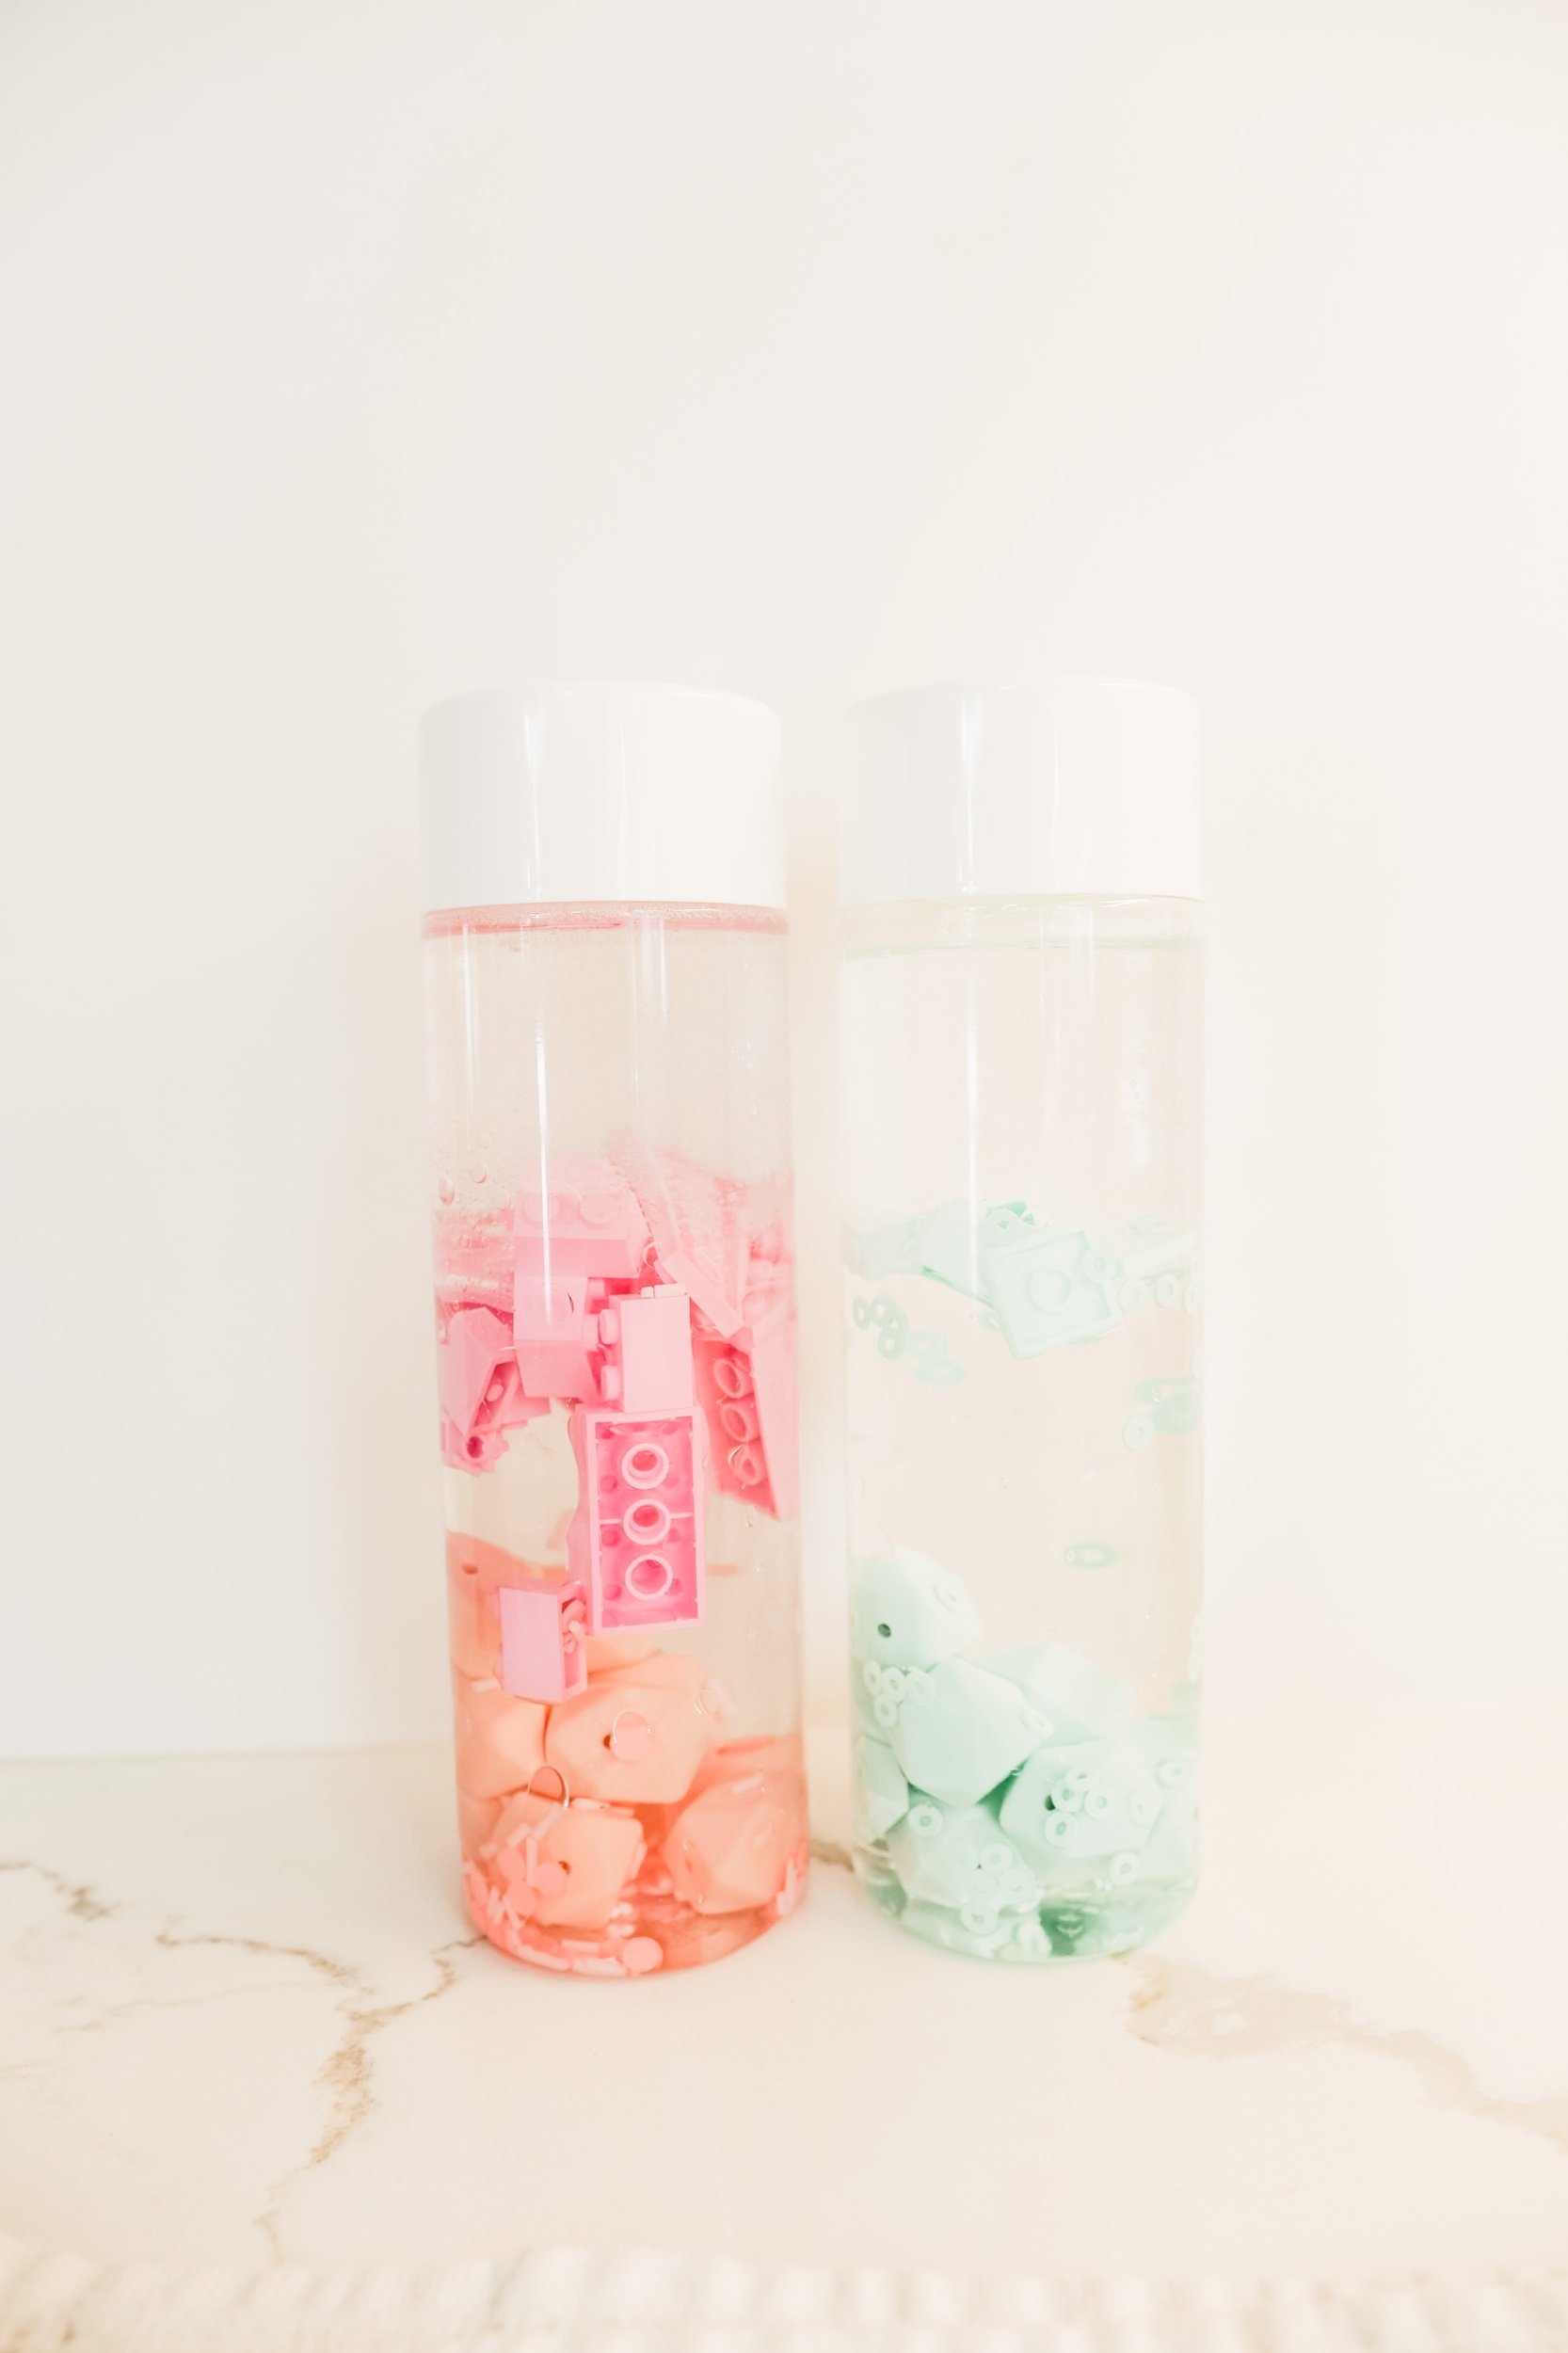
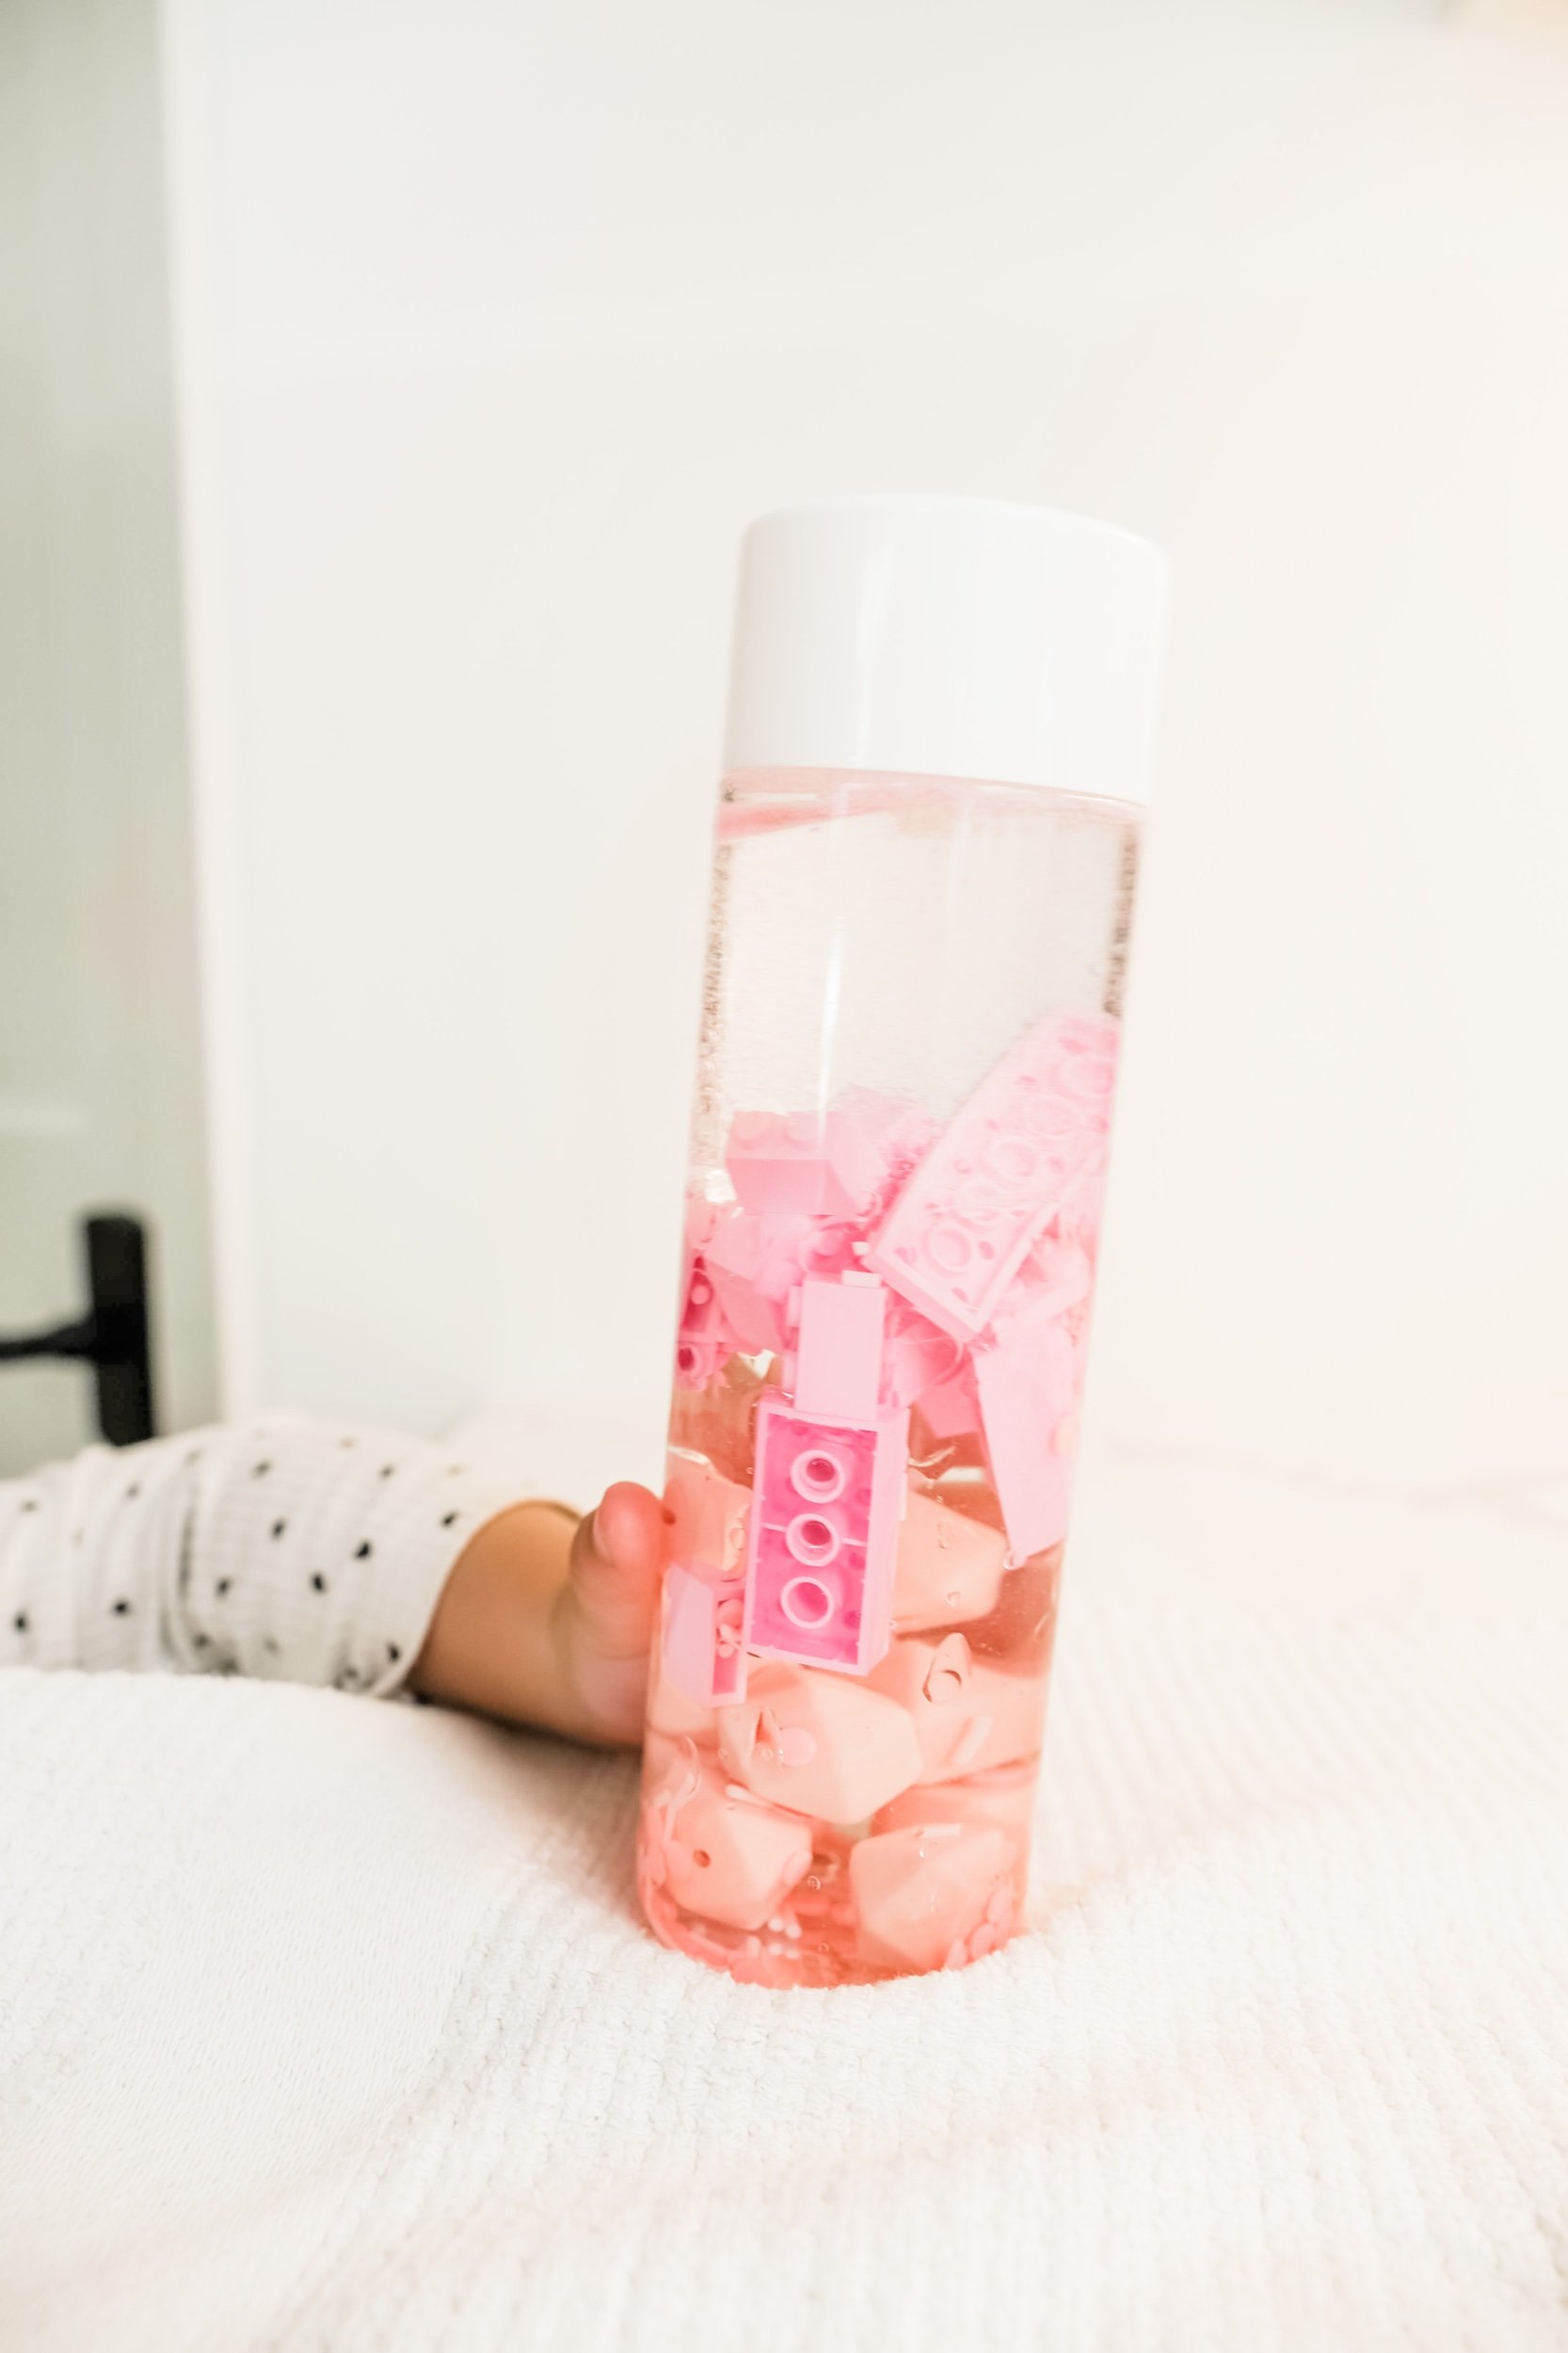
Sensory bottles, also known as calm-down or discovery bottles, are transparent containers filled with materials that engage the senses. The mesmerizing effect of watching colorful items float and swirl inside the bottle can effectively capture a child's attention, bringing a sense of tranquility and focus. These magical bottles are particularly beneficial for children with sensory processing challenges as they provide a safe and controlled sensory experience, promoting self-regulation and emotional well-being.
1. Calming Effect: Sensory bottles serve as a visual sensory tool helping children to self-soothe and regulate overwhelming emotions. The gentle movement and intriguing colors can provide a sense of relaxation during anxious moments.
2. Sensory Exploration: By creating and exploring sensory bottles, children engage in tactile, visual, and auditory experiences that can aid in sensory integration, assisting them in processing sensory information more effectively.
3. Encourages Focus and Attention: The captivating nature of sensory bottles captivates children's attention, making them an excellent tool for promoting concentration and minimizing distractions, especially for kids with attention difficulties.
In addition to sensory bottles, various calming techniques can be incorporated to create a supportive environment for kids with sensory sensitivities. These techniques include deep pressure activities, sensory-friendly play spaces, and breathing exercises that encourage relaxation and self-regulation.
Clear plastic bottles with secure lids
Clear baby oil, glue or glycerin
Water
Food coloring
Glitter, sequins, beads, or small toys
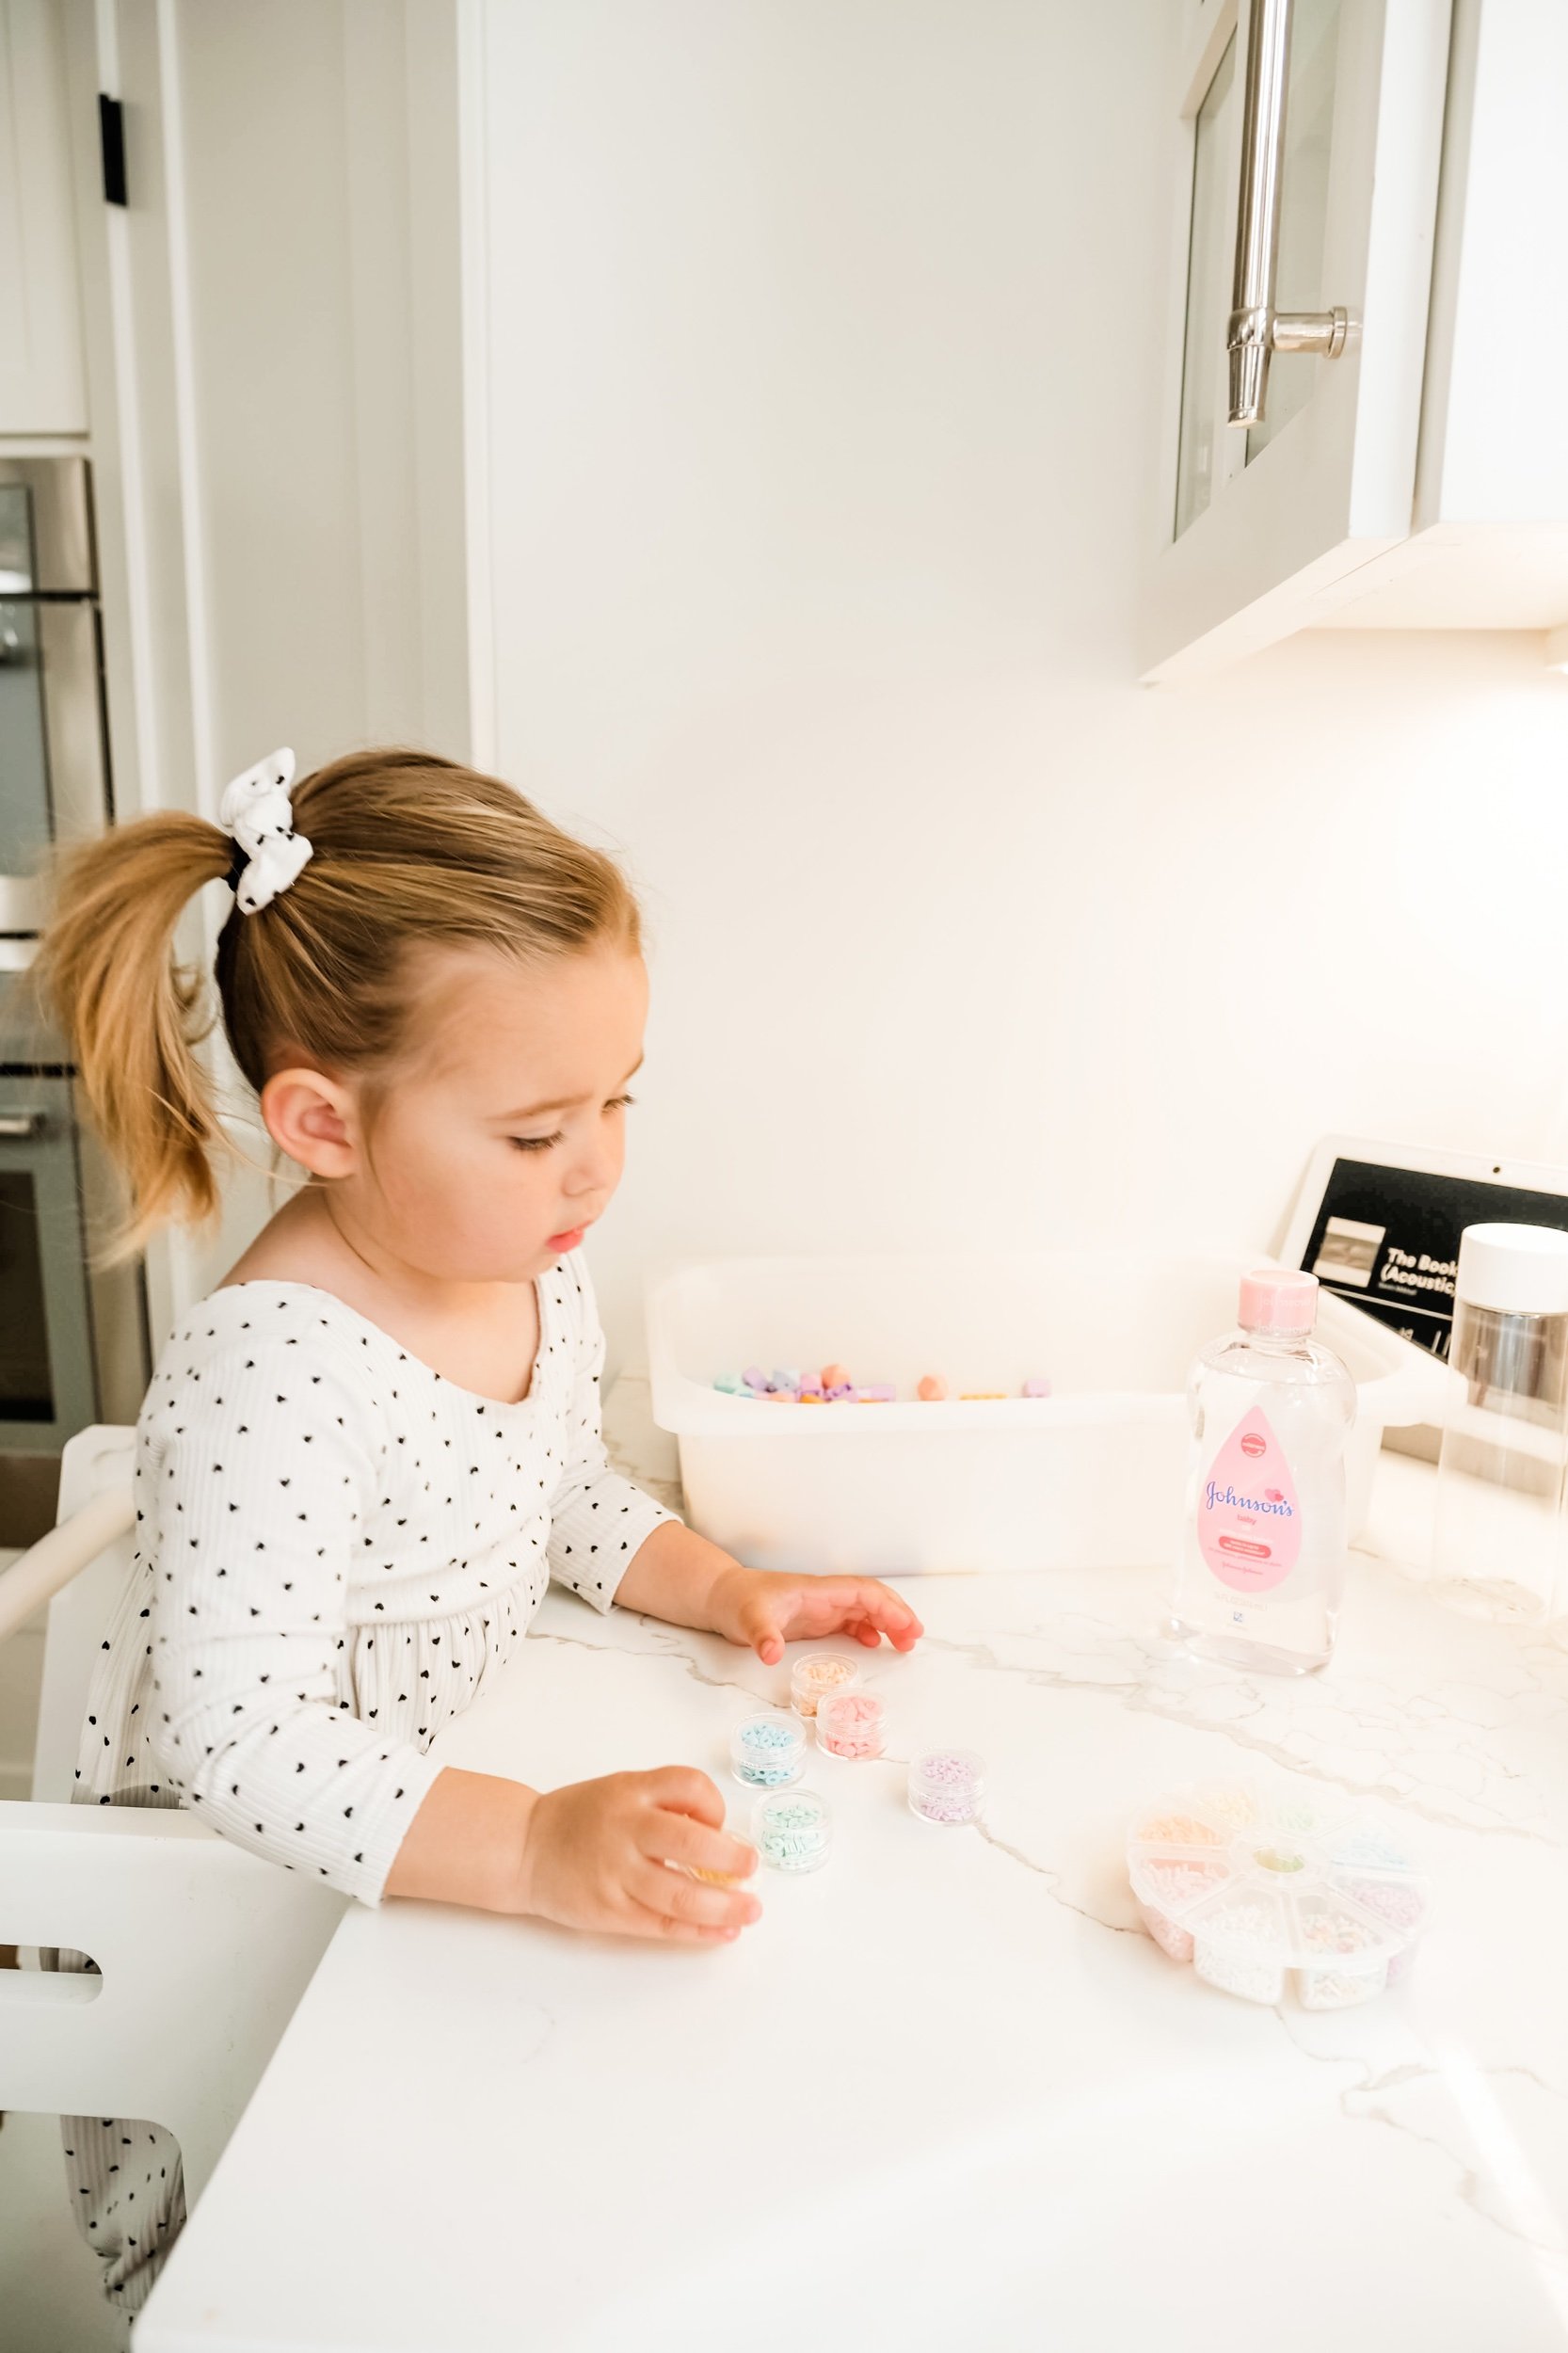
1. Begin by selecting a few plastic bottles with secure lids to prevent leaks and spills.
2. Fill the bottles halfway with warm water.
3. Add clear glue or glycerin to the water. They help slow down the movement of the items inside the bottle.
4. Drop a few drops of food coloring into the bottle. Choose colors that your child finds soothing.
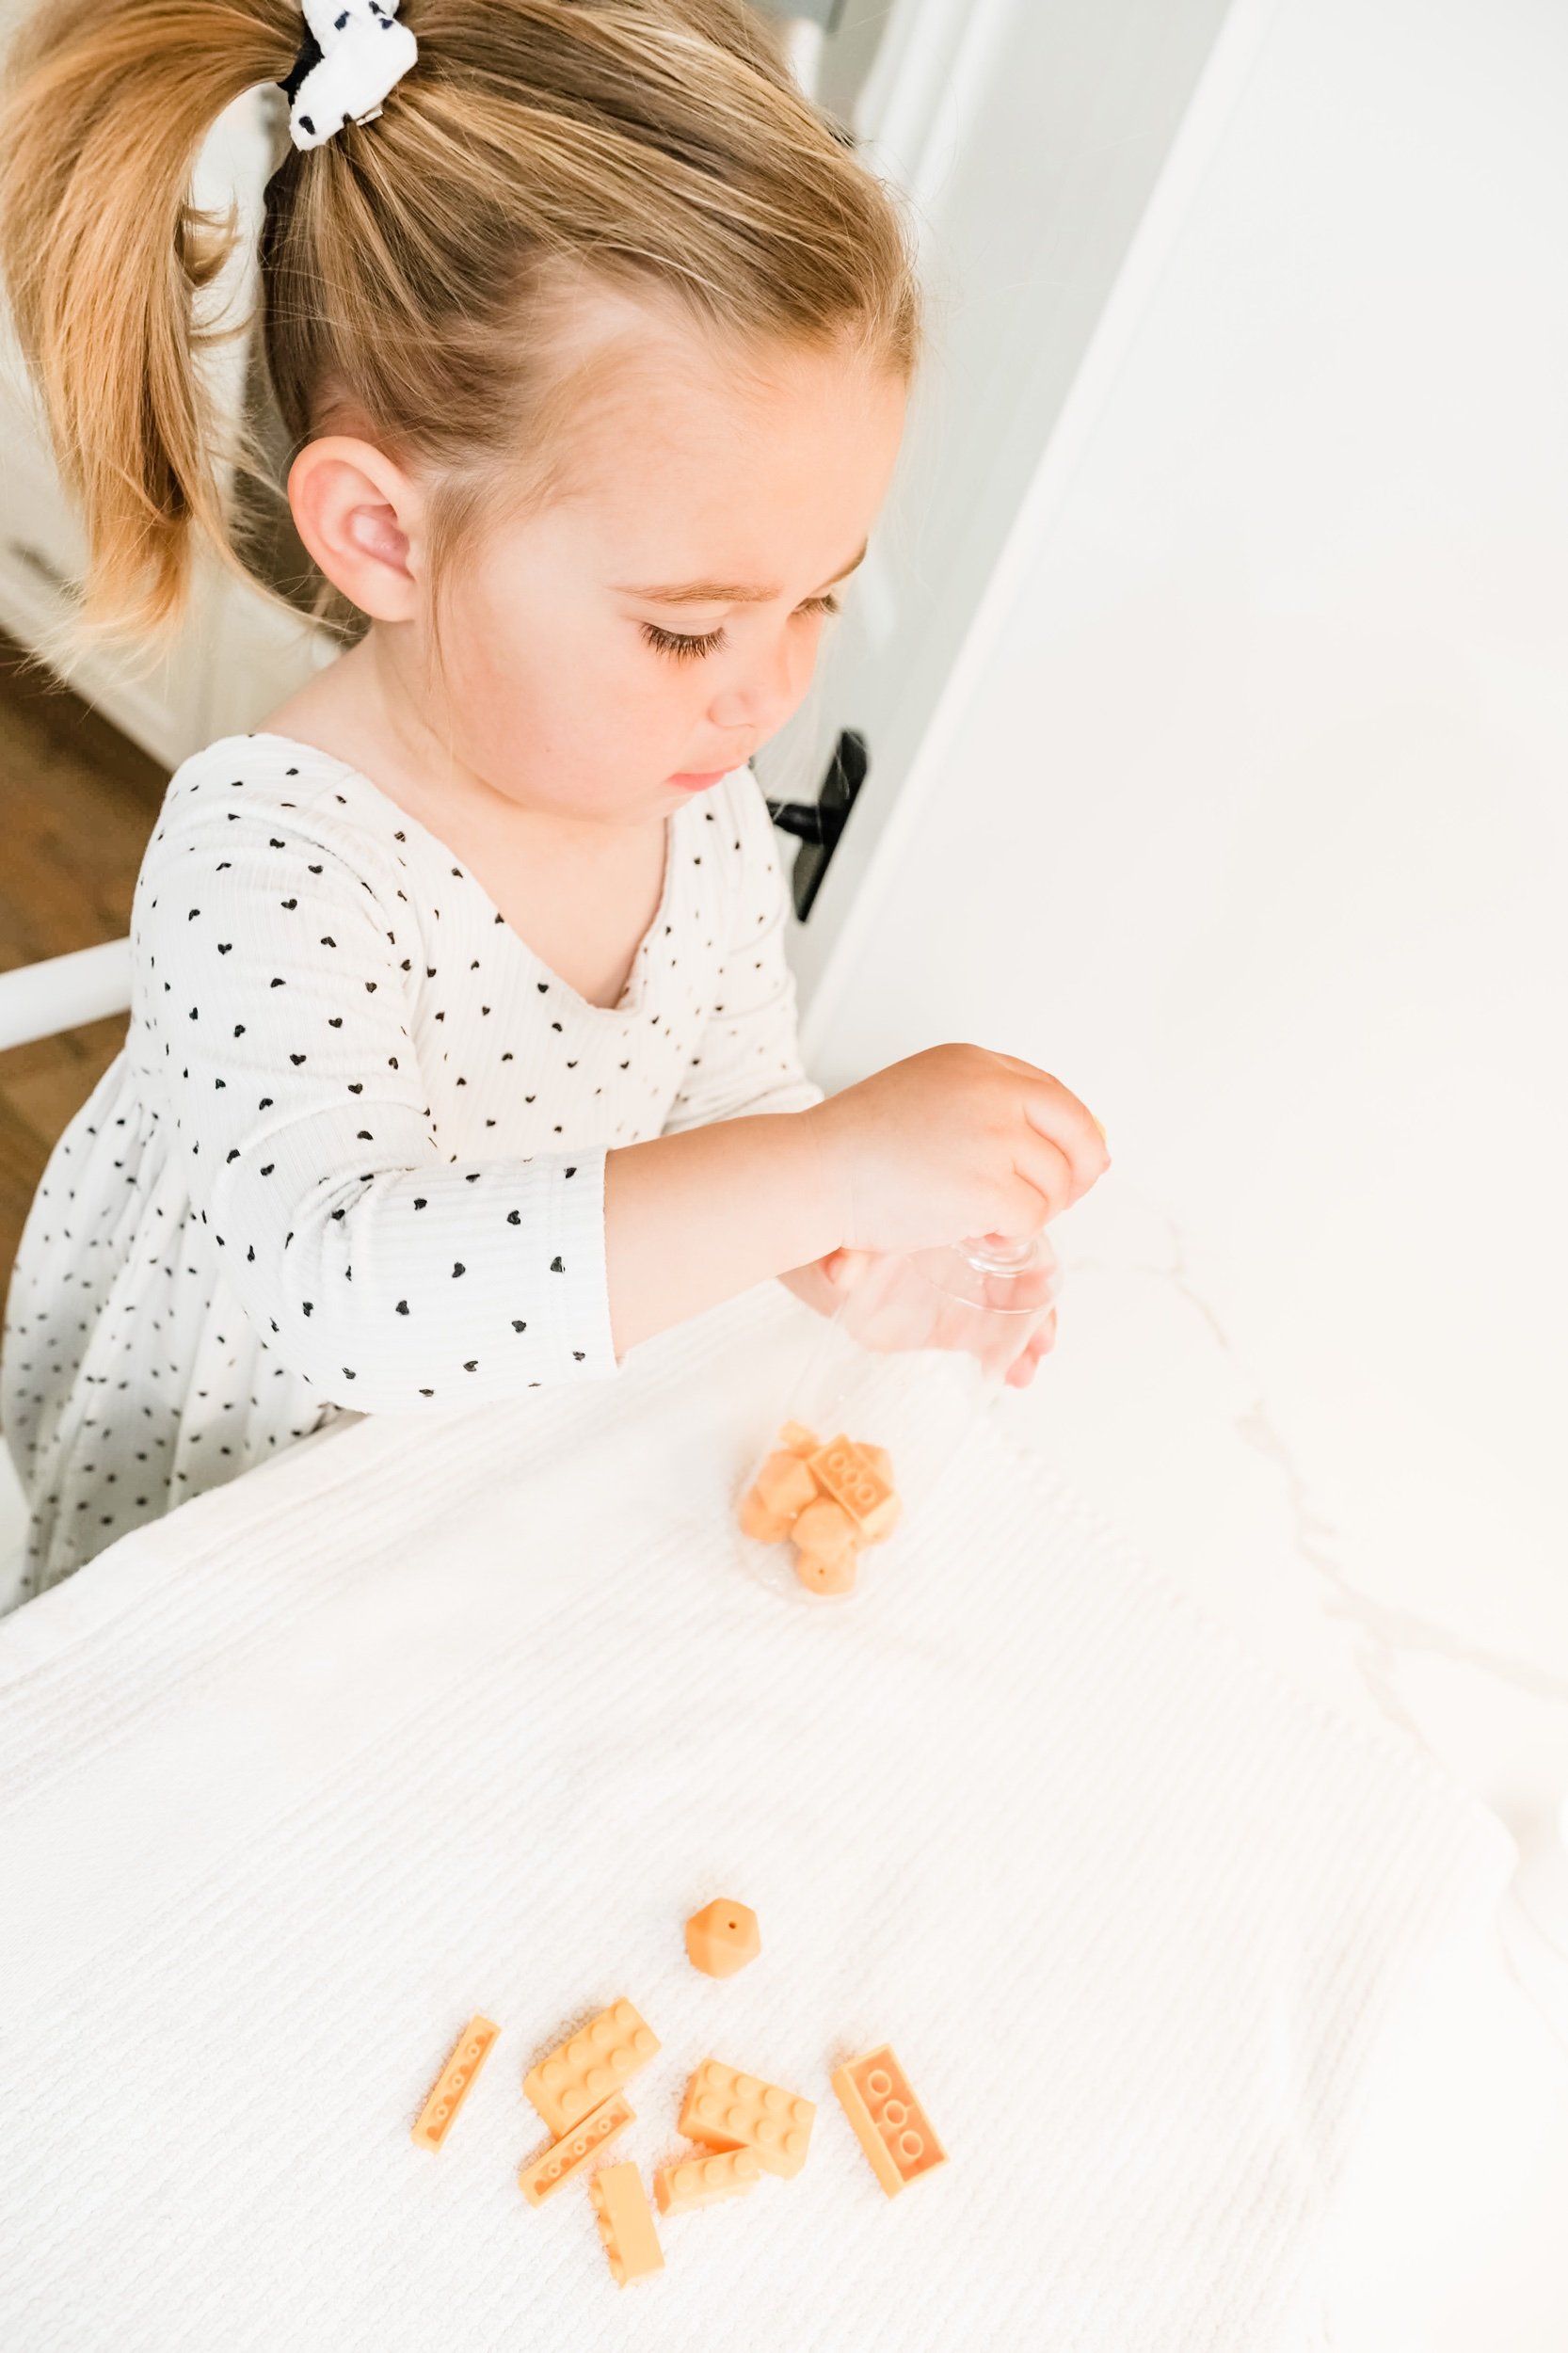
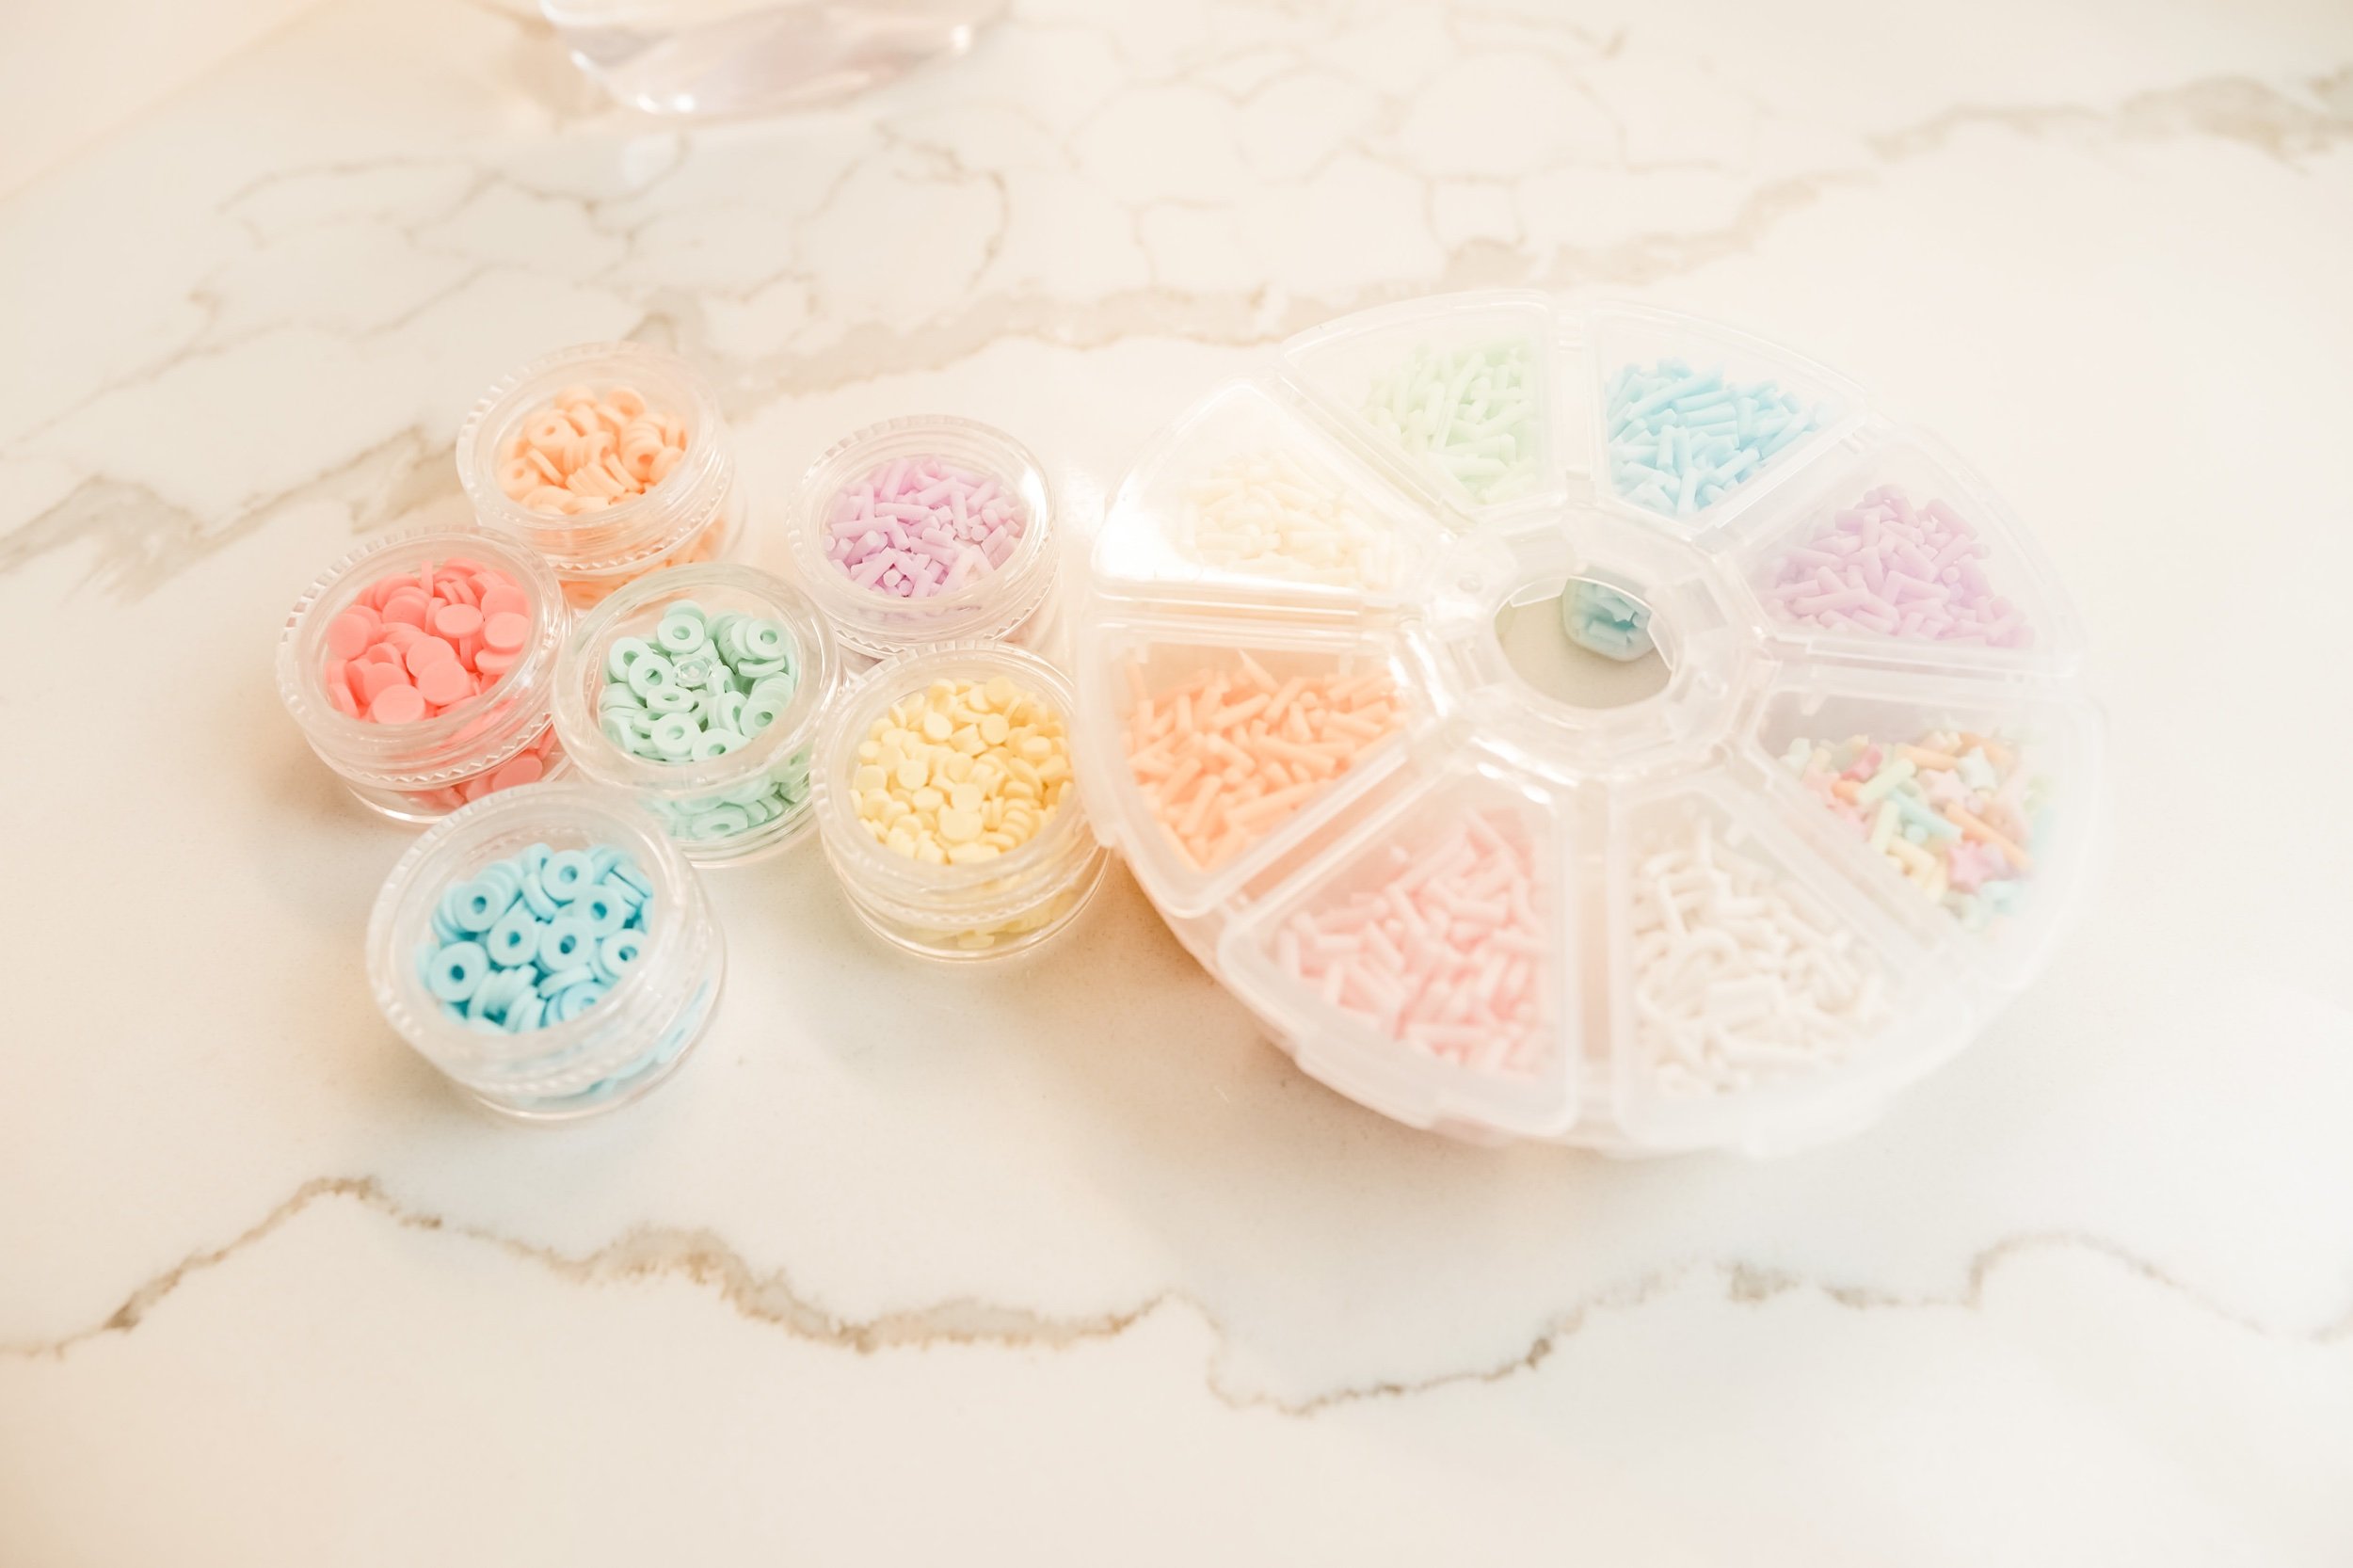
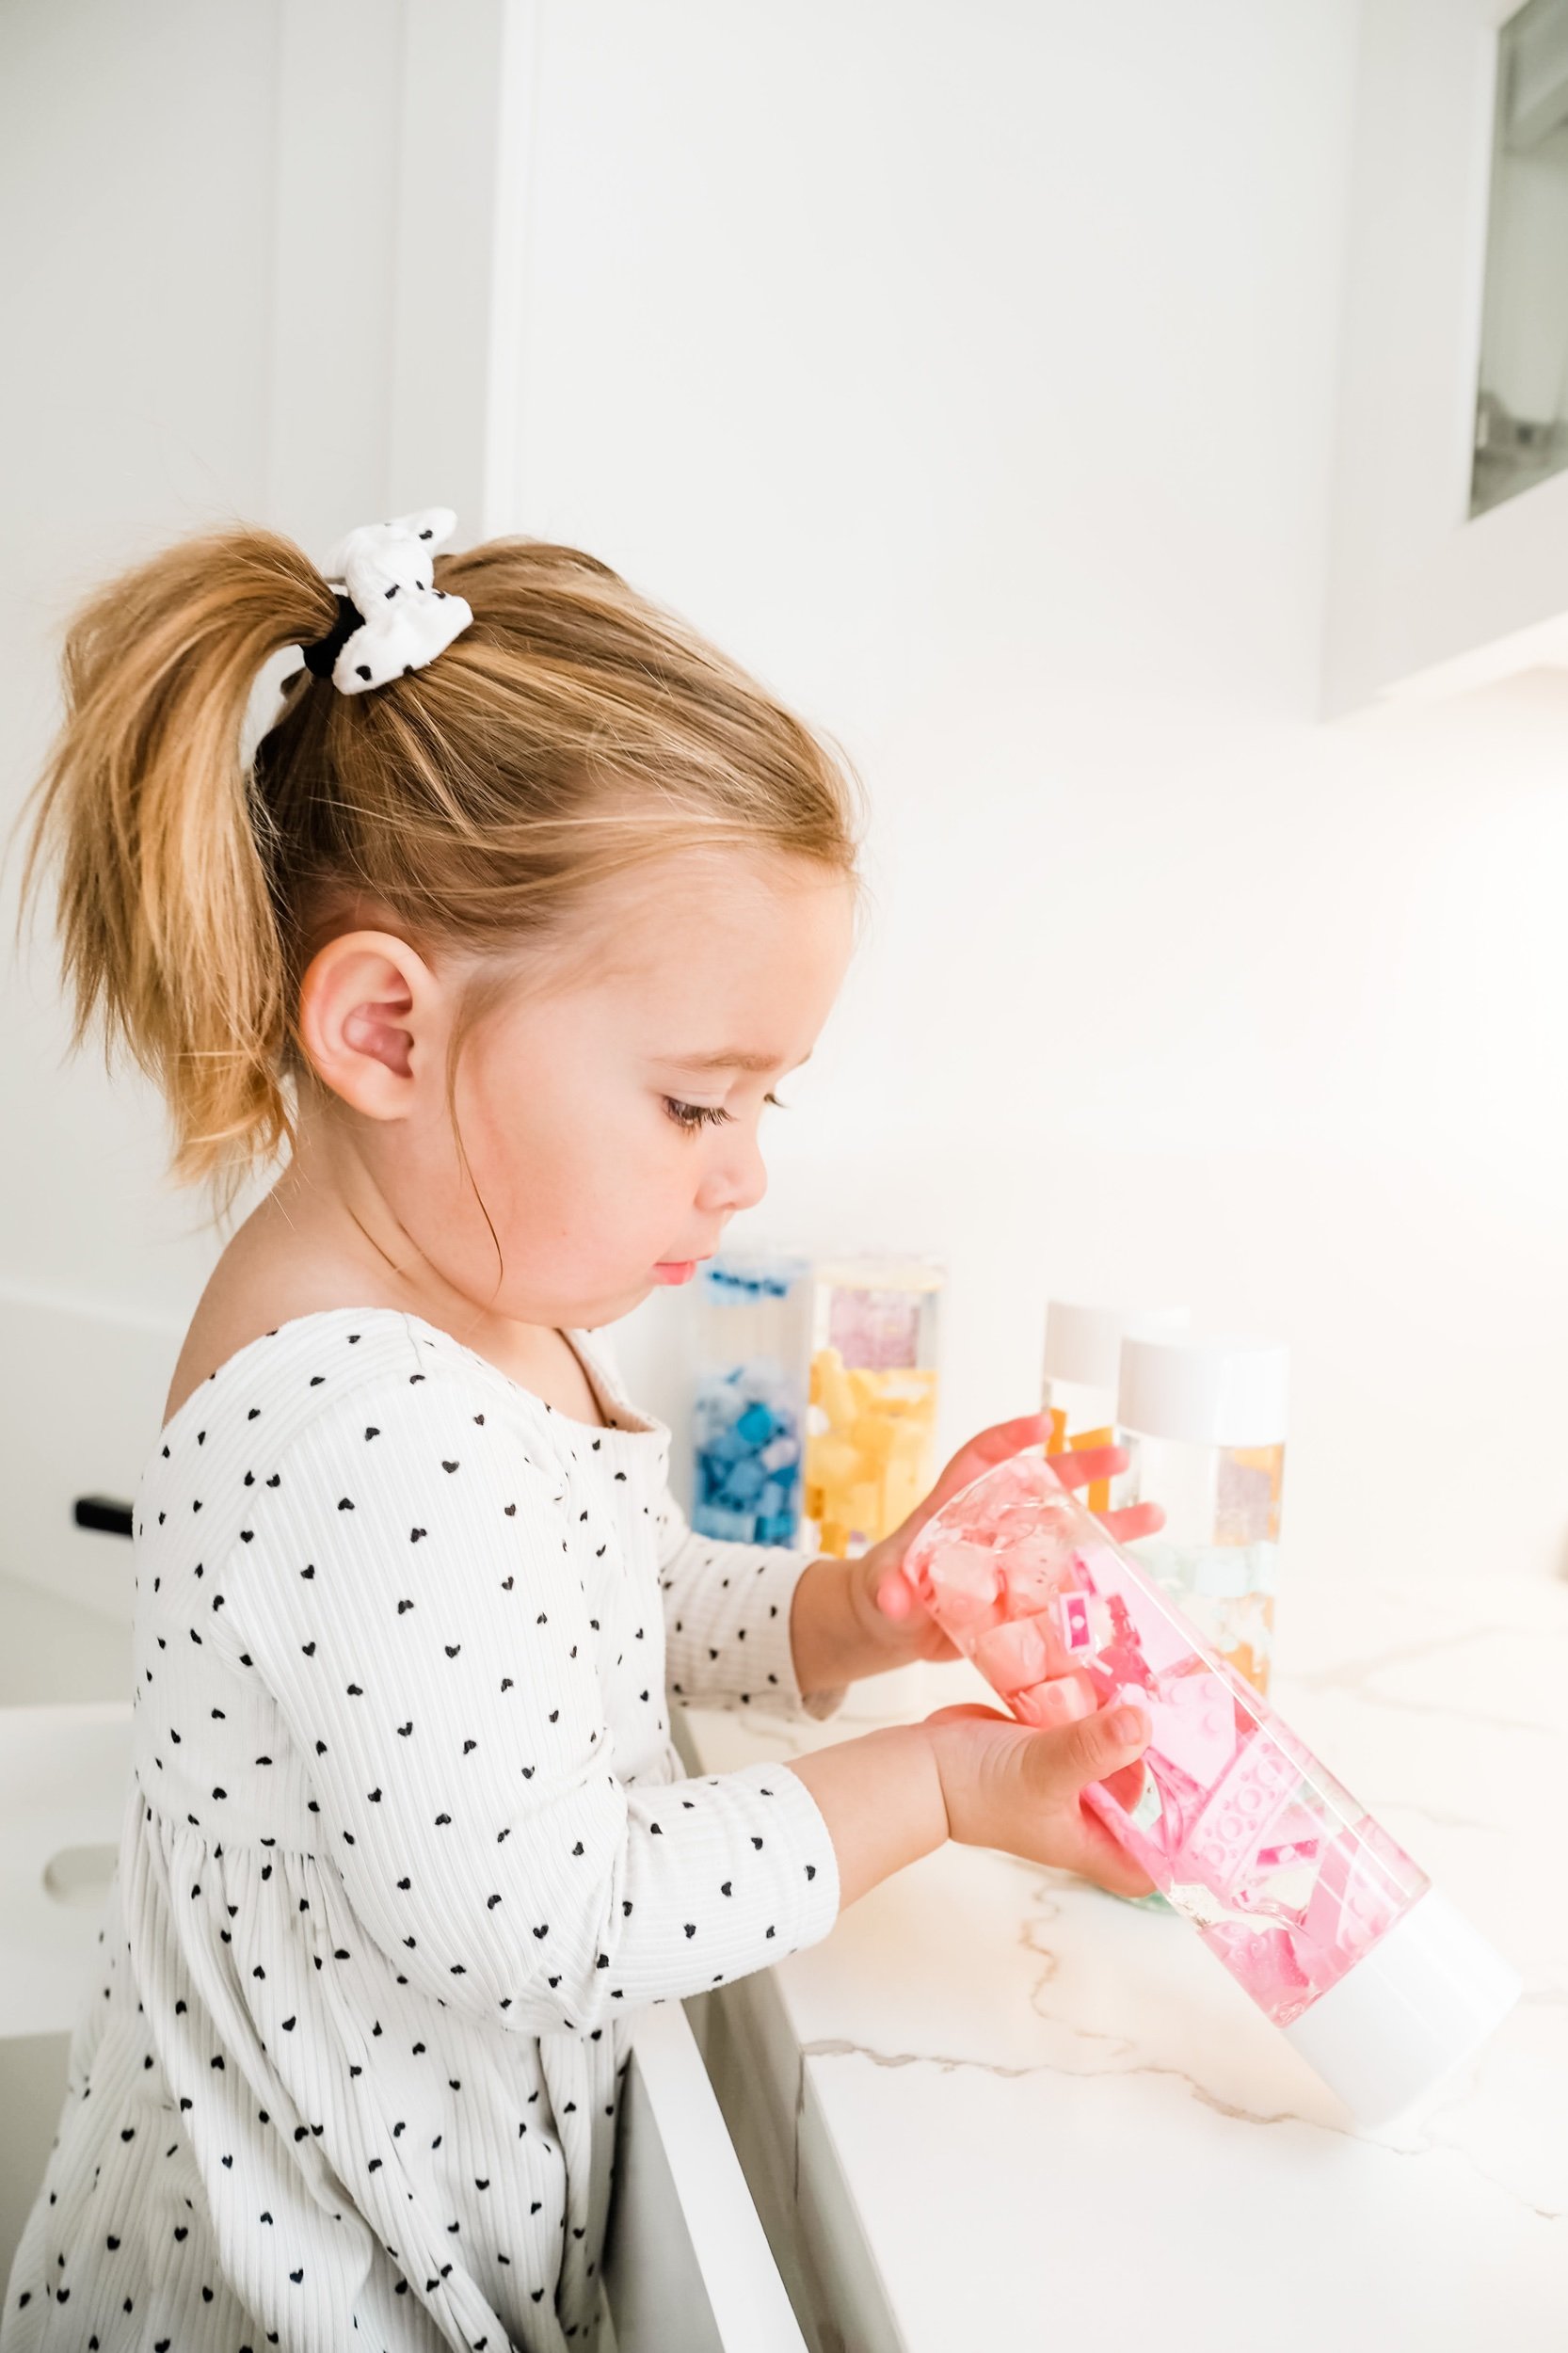
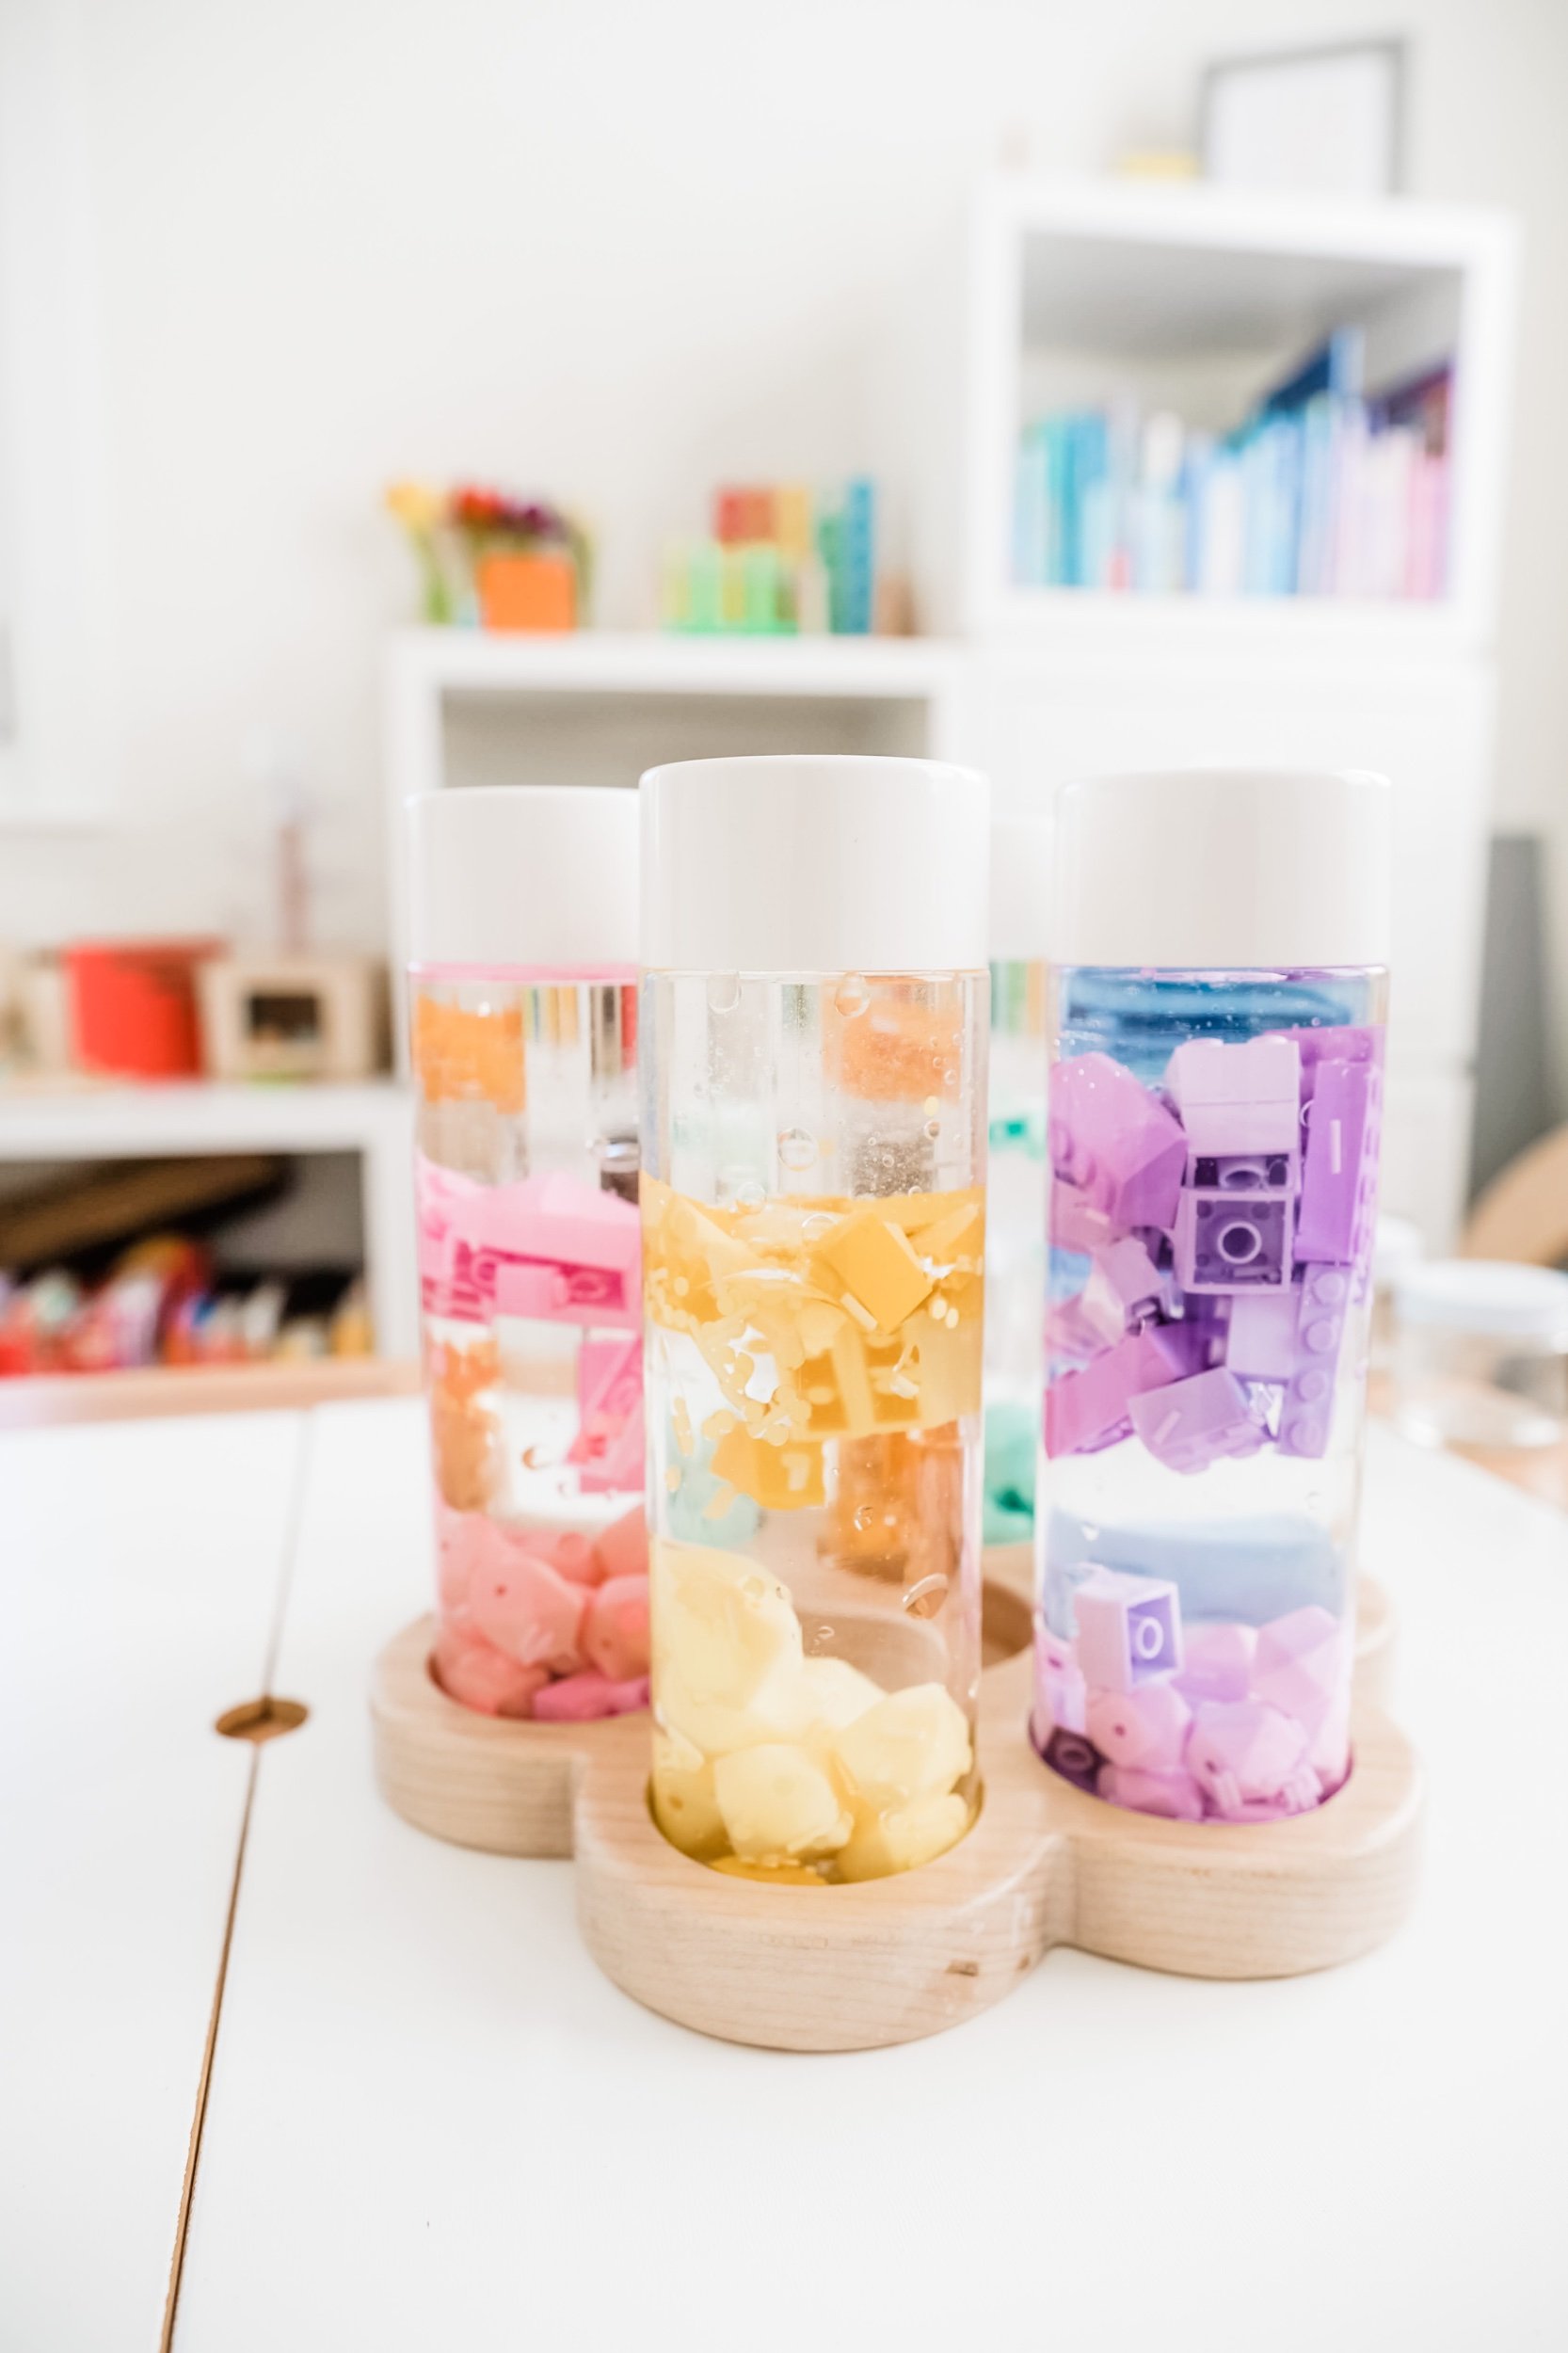
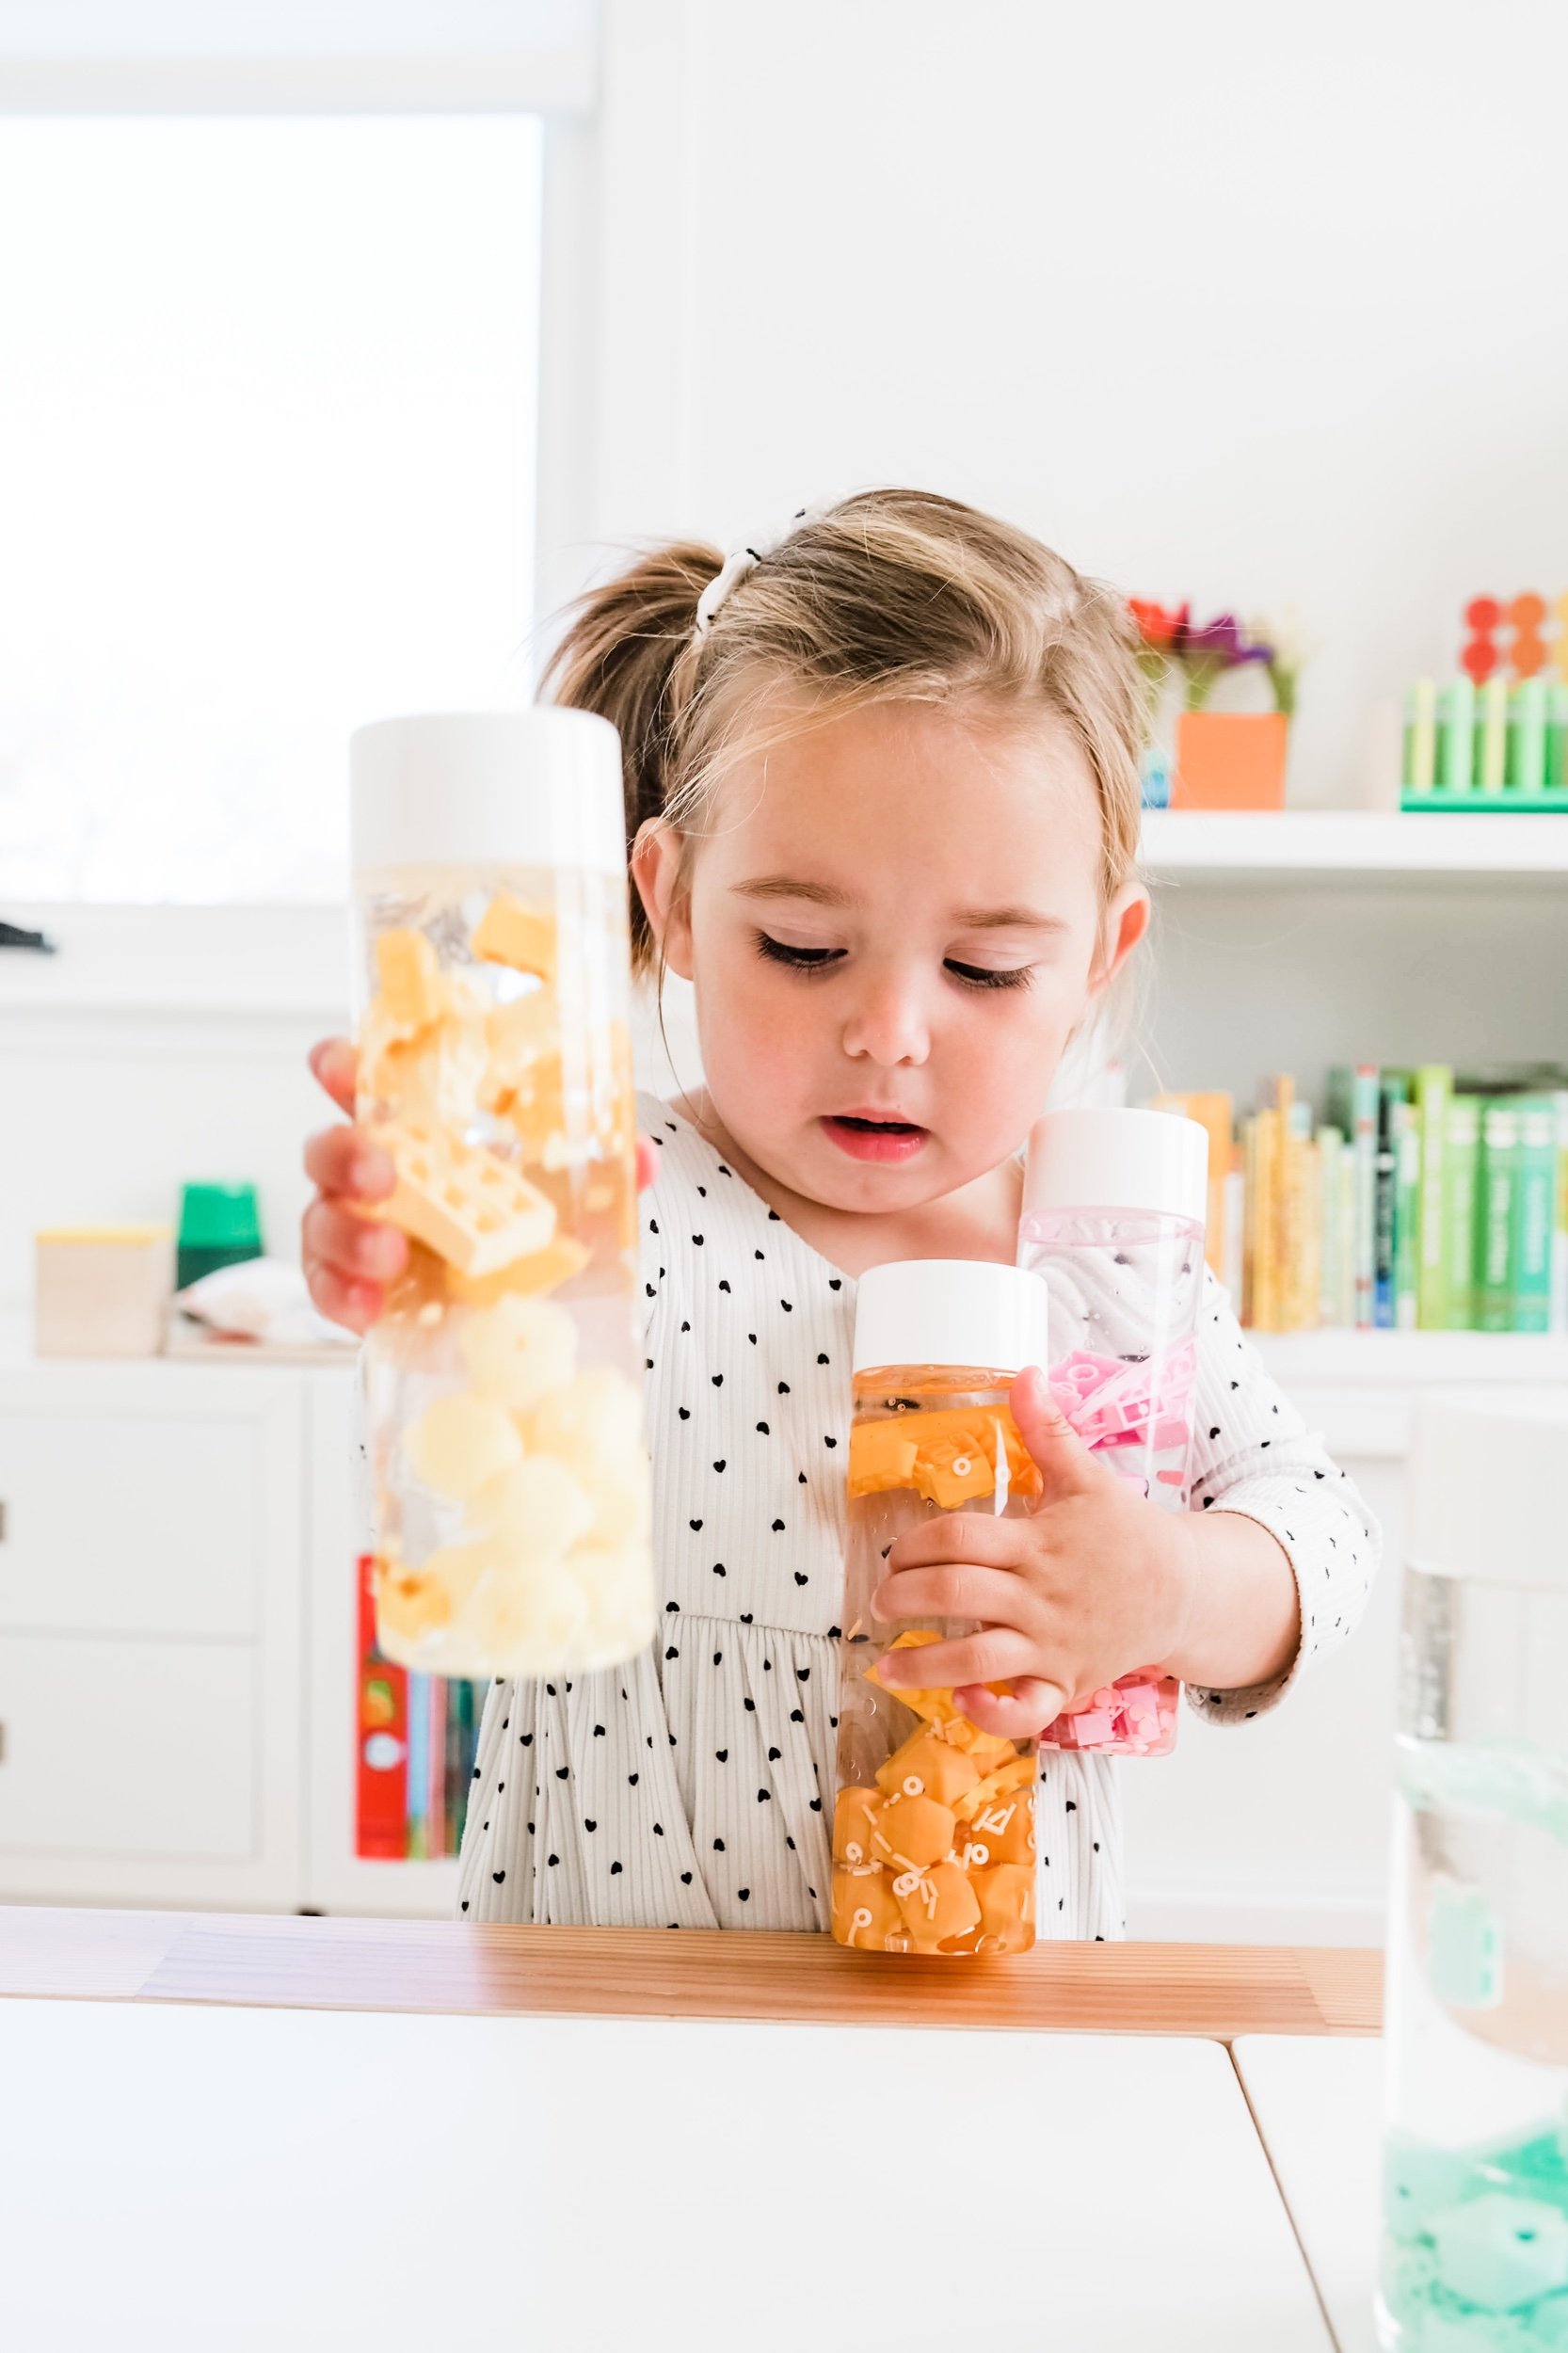
5. Next, add glitter, sequins, beads, or small toys to the bottle. These items will create an exciting visual effect when the bottle is shaken. I used teething beads, colorful legos, and resin sprinkles.
6. Once all the components are in the bottle, seal the lid tightly and secure it with hot glue if necessary.
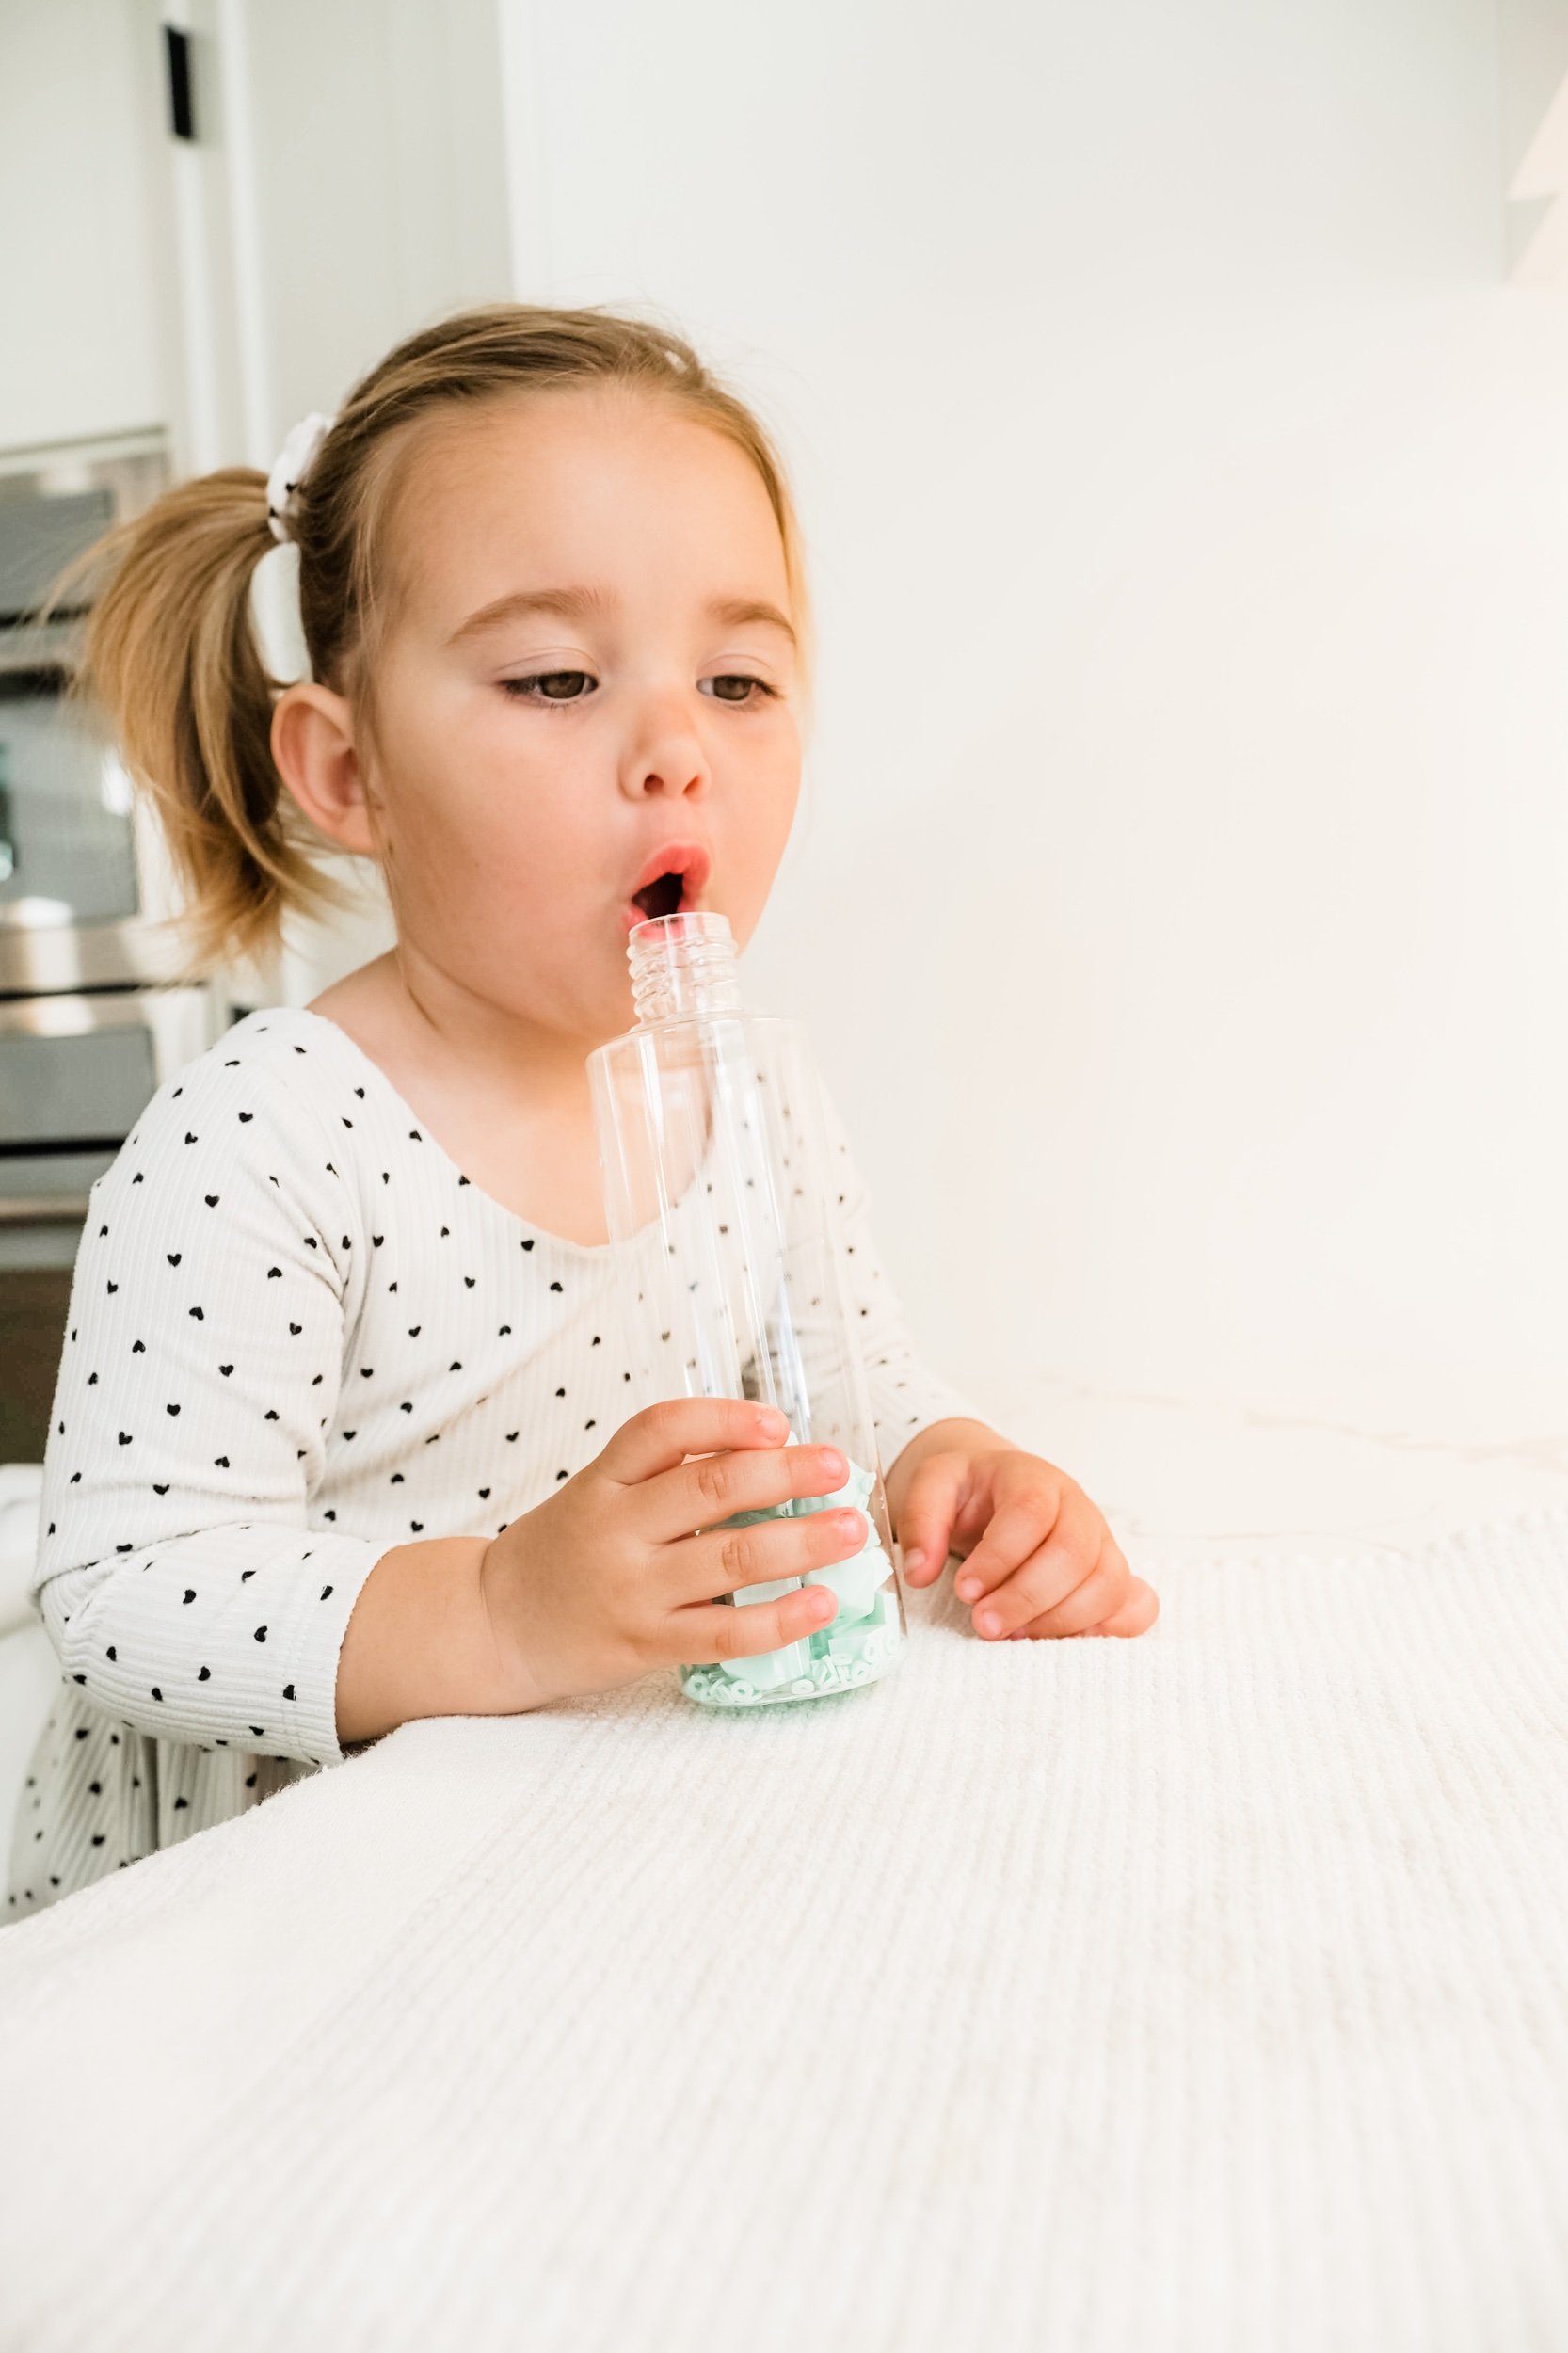
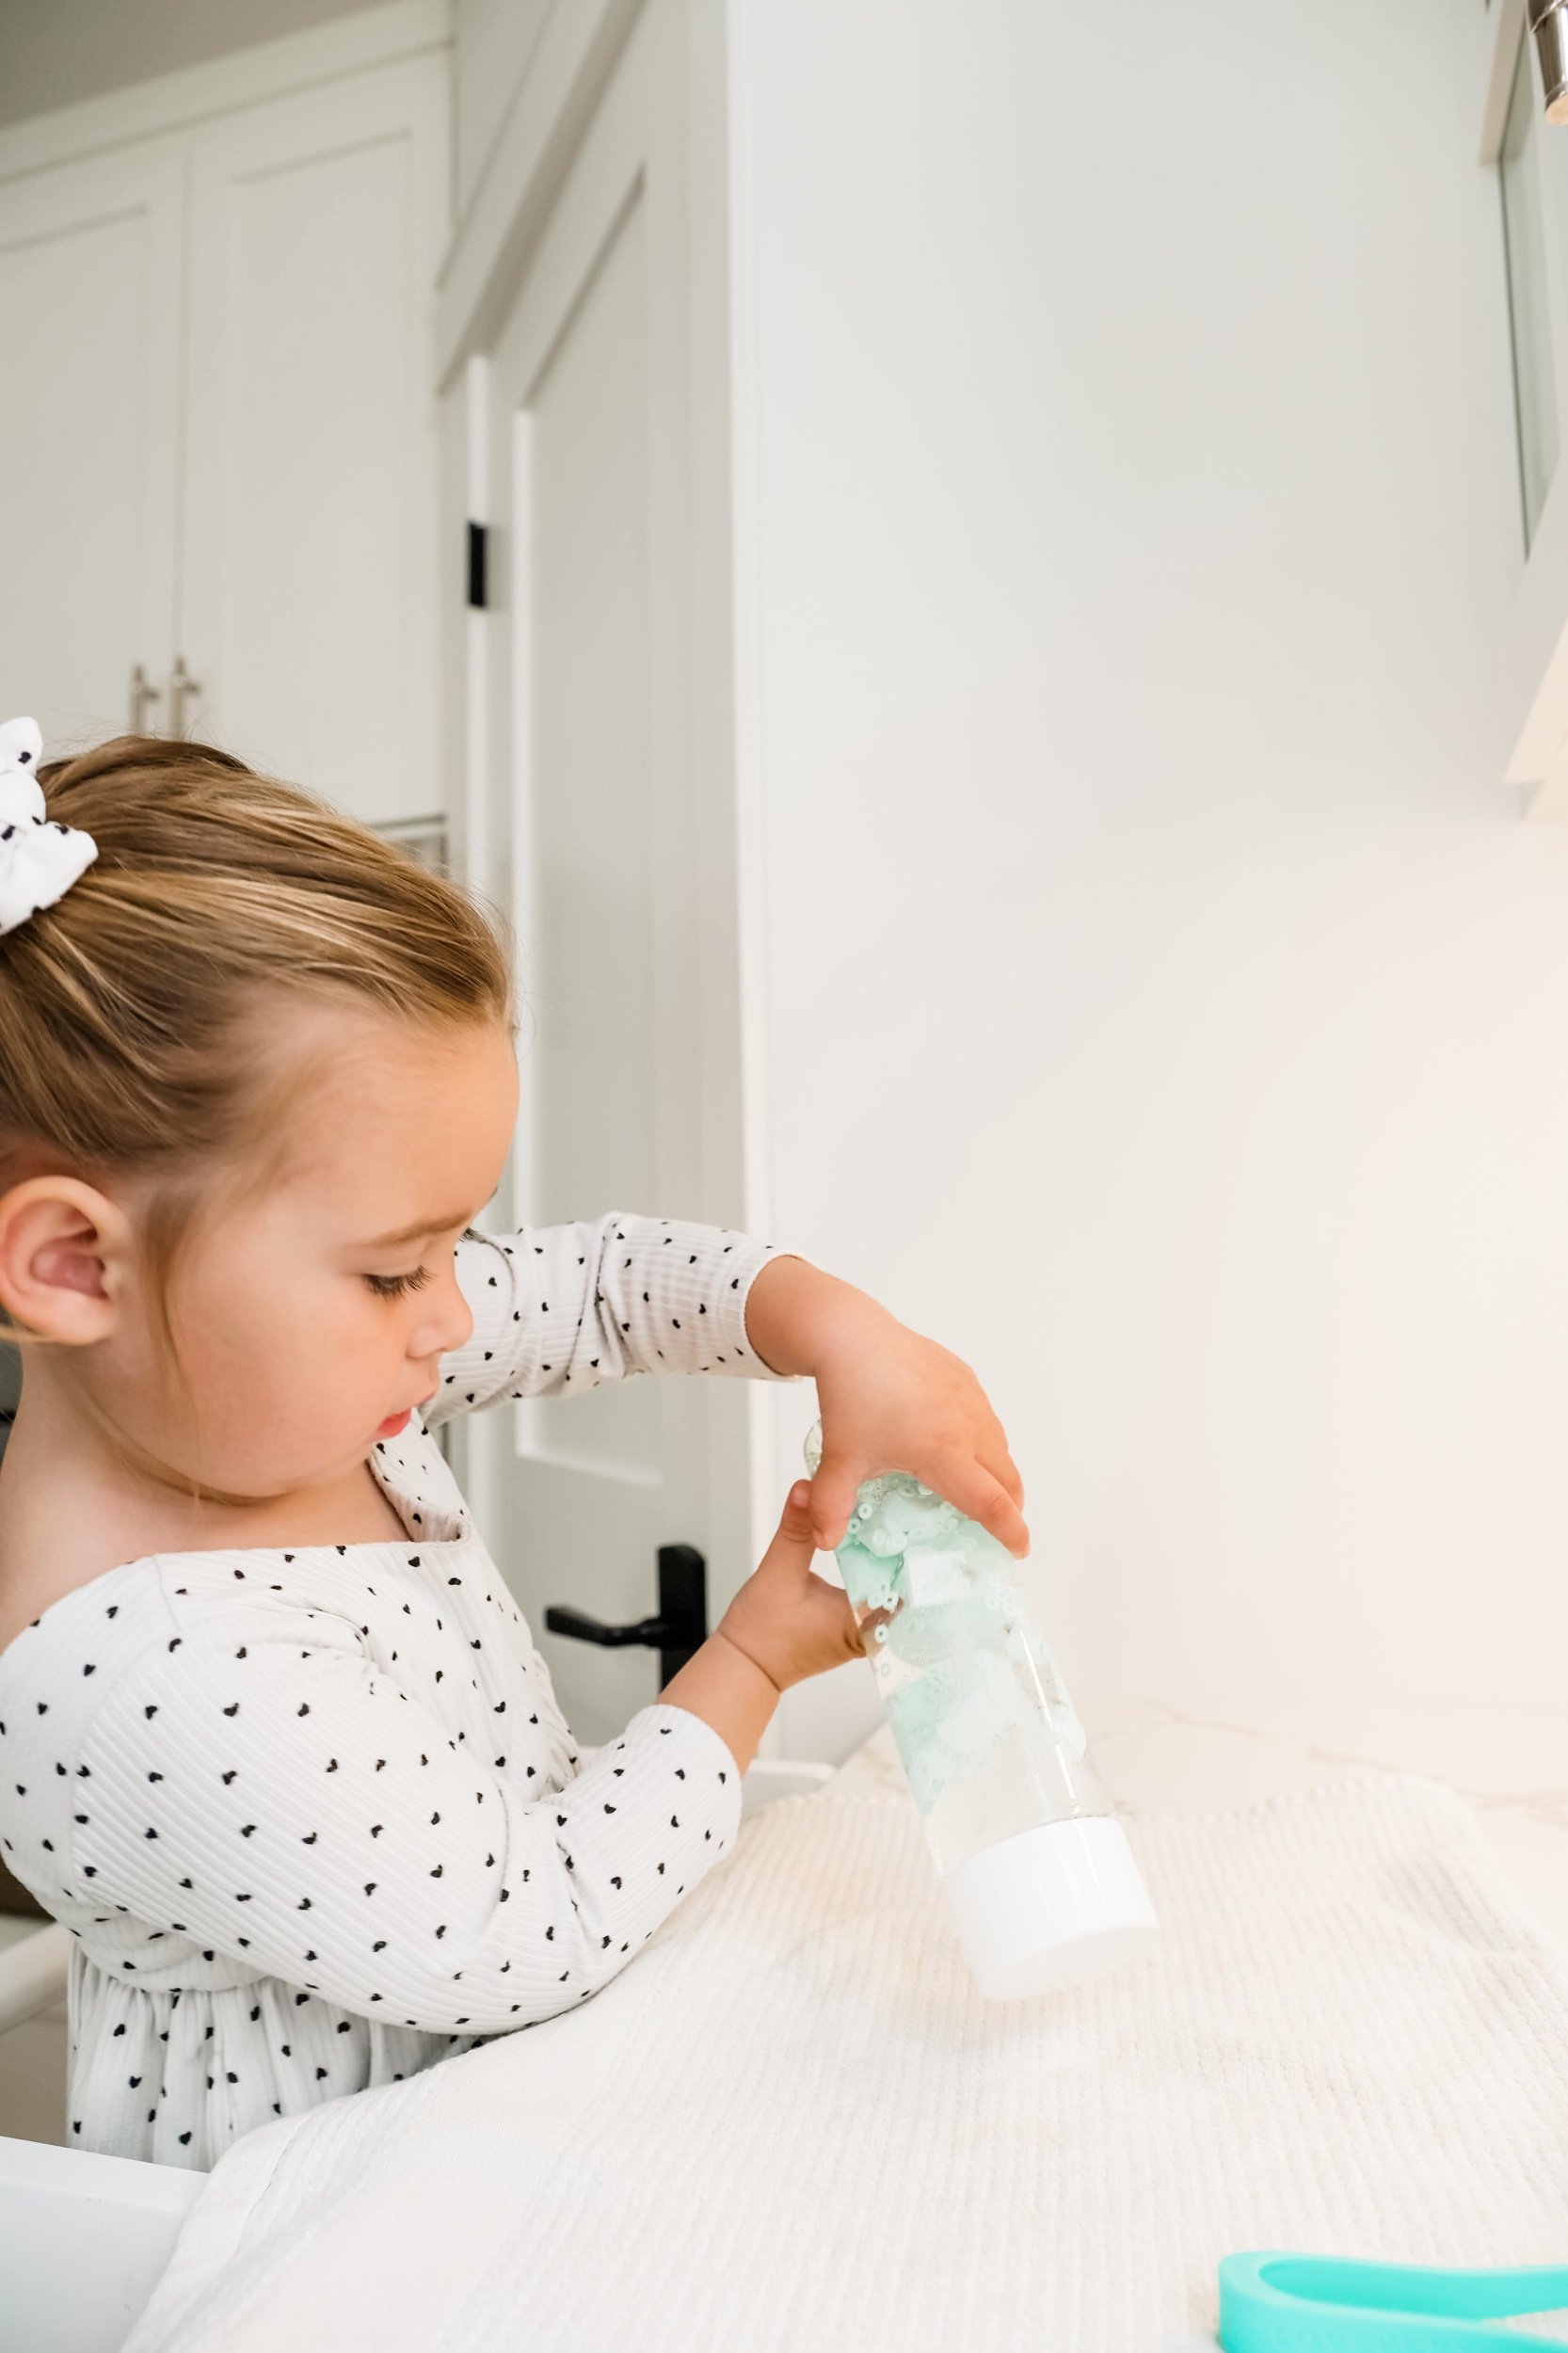
Shake and tilt the sensory bottle gently and observe the mesmerizing dance of colors and objects within. If your child is feeling overwhelmed, encourage them to focus on the bottle's movements, taking deep breaths as they watch the sensory magic unfold.
In conclusion, the benefits of sensory bottles for children, especially those with sensory issues, are vast. They not only provide a calming effect but also offer opportunities for sensory exploration and focus enhancement. By incorporating sensory bottles and other calming techniques into your child's routine, you can create a supportive environment that nurtures their emotional well-being and sensory development.
Remember, every child is unique, so have fun experimenting with different materials and colors to create sensory bottles that resonate with your little one's individual preferences and needs. Enjoy the journey of creating these enchanting tools and witnessing the calming magic they bring to your child's world.
Wishing you and your little ones moments of peace and tranquility,
xoxo,
Kylie


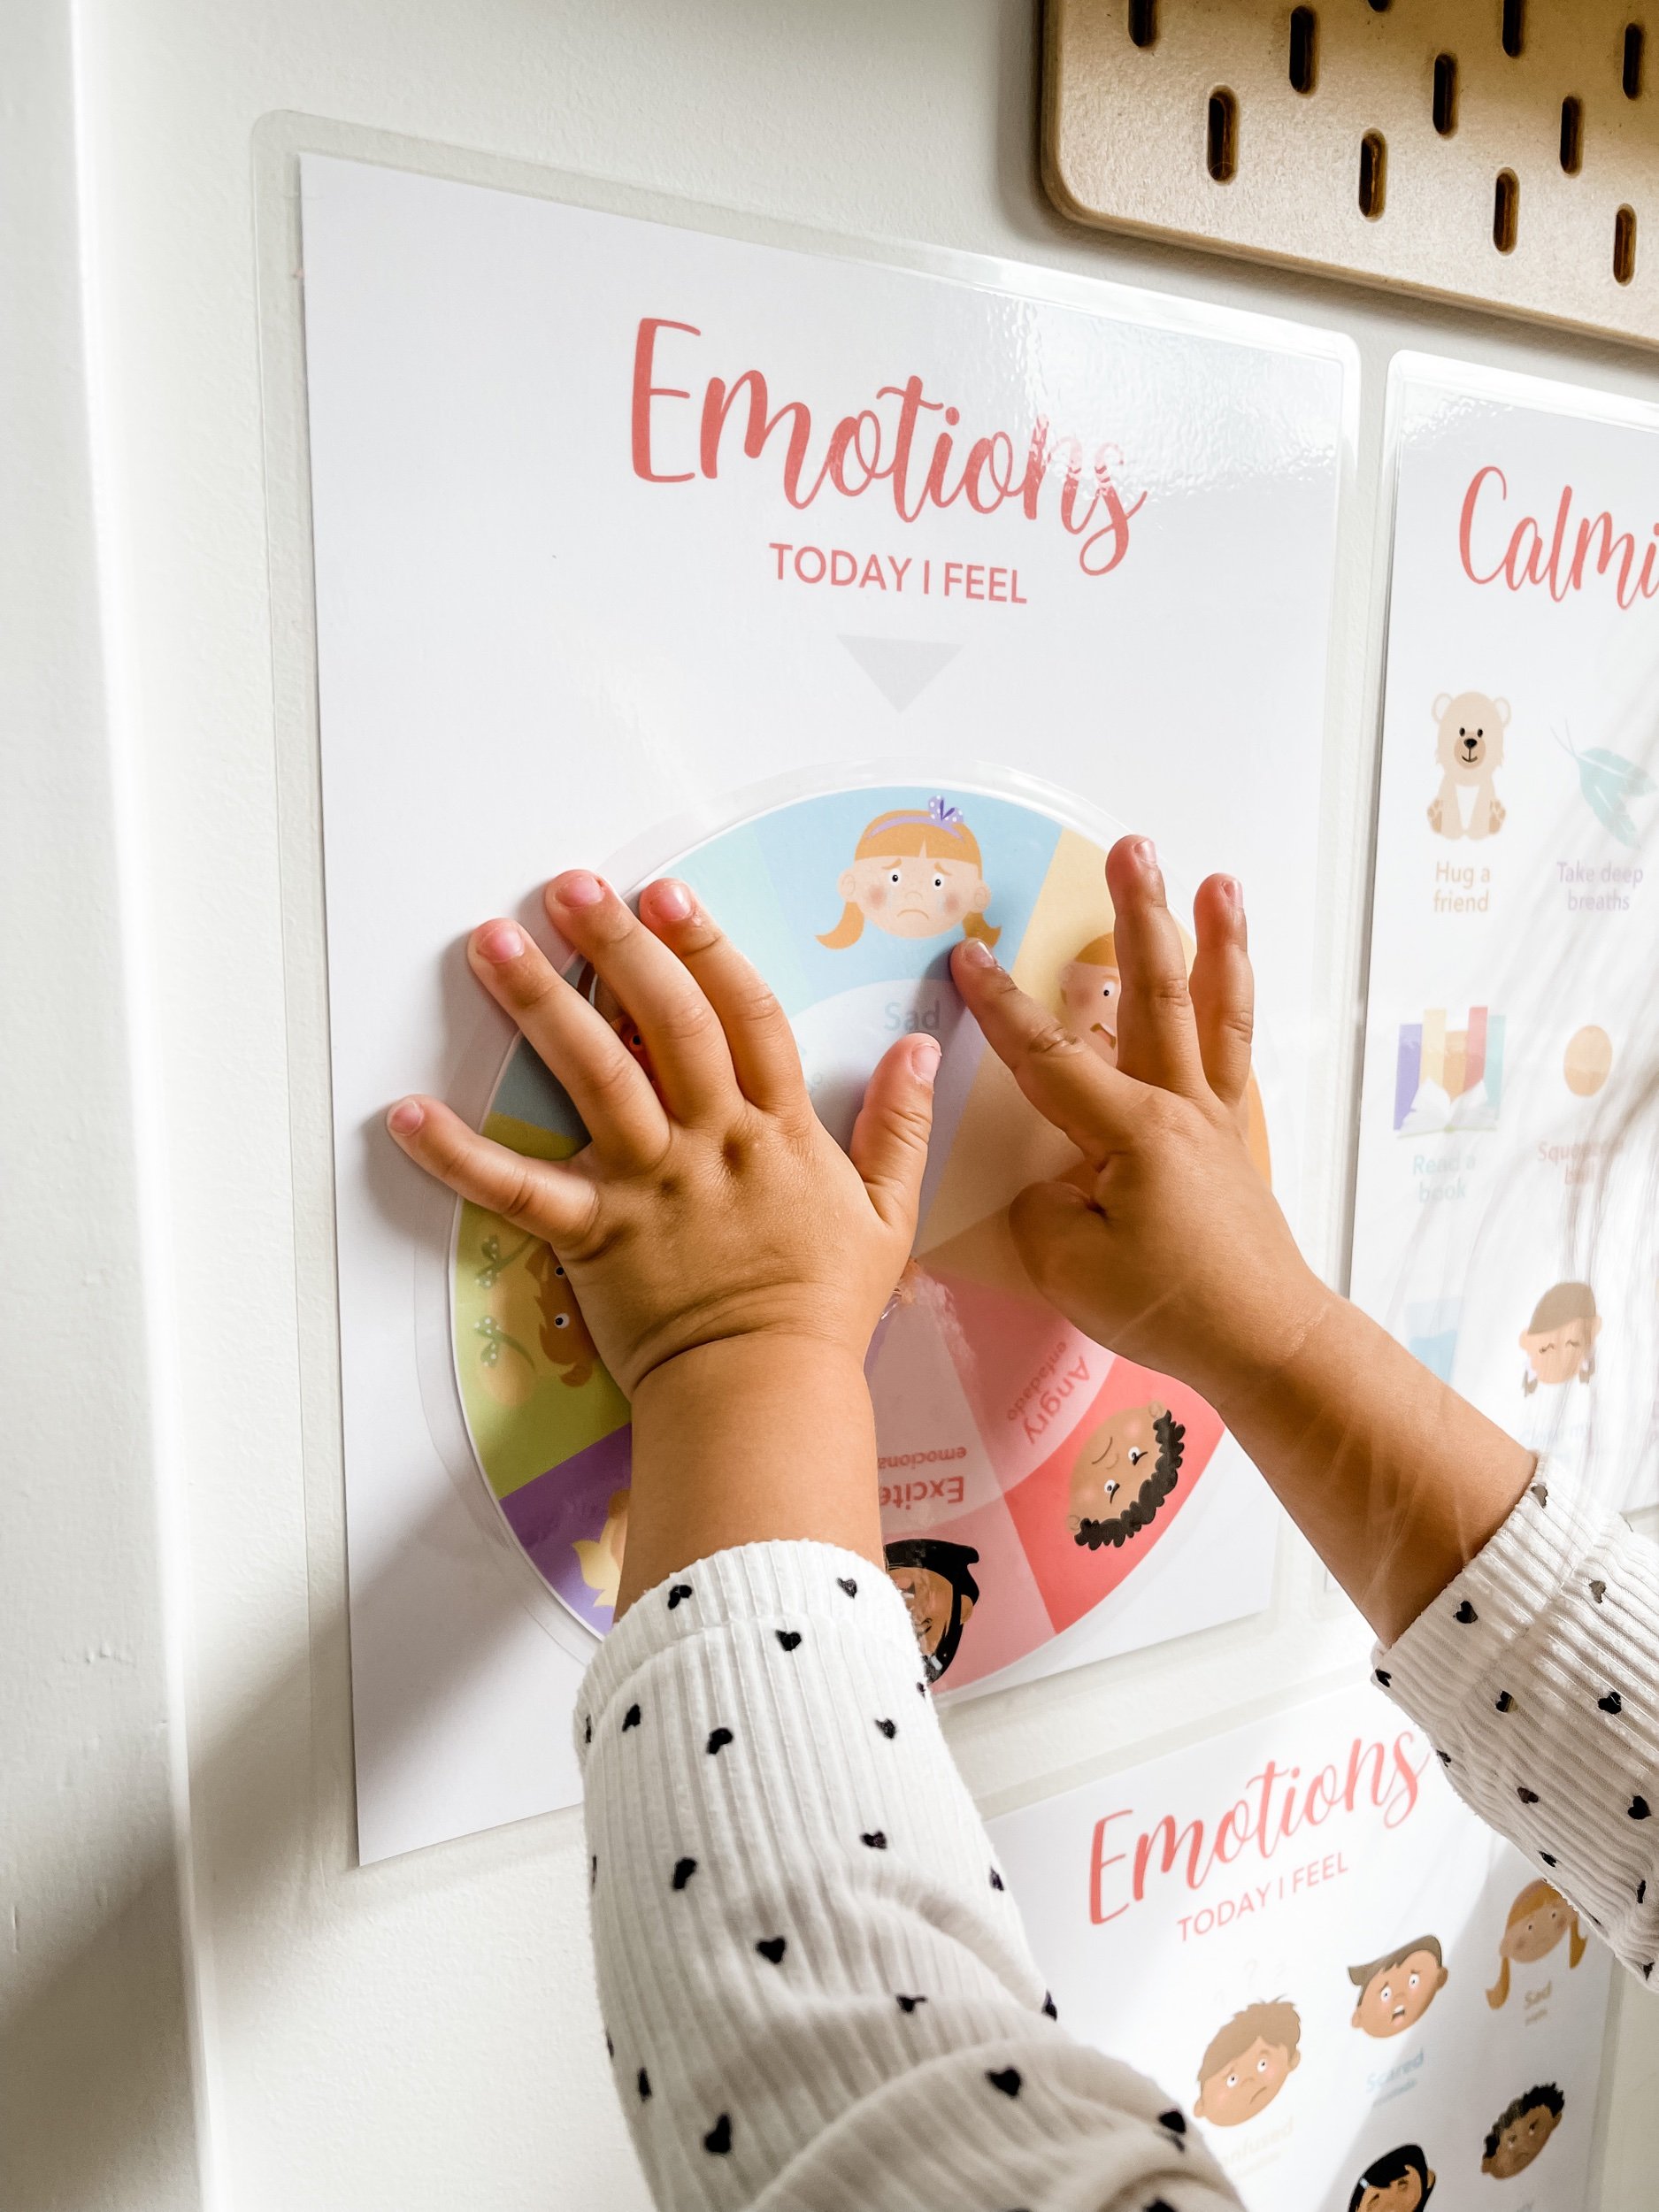
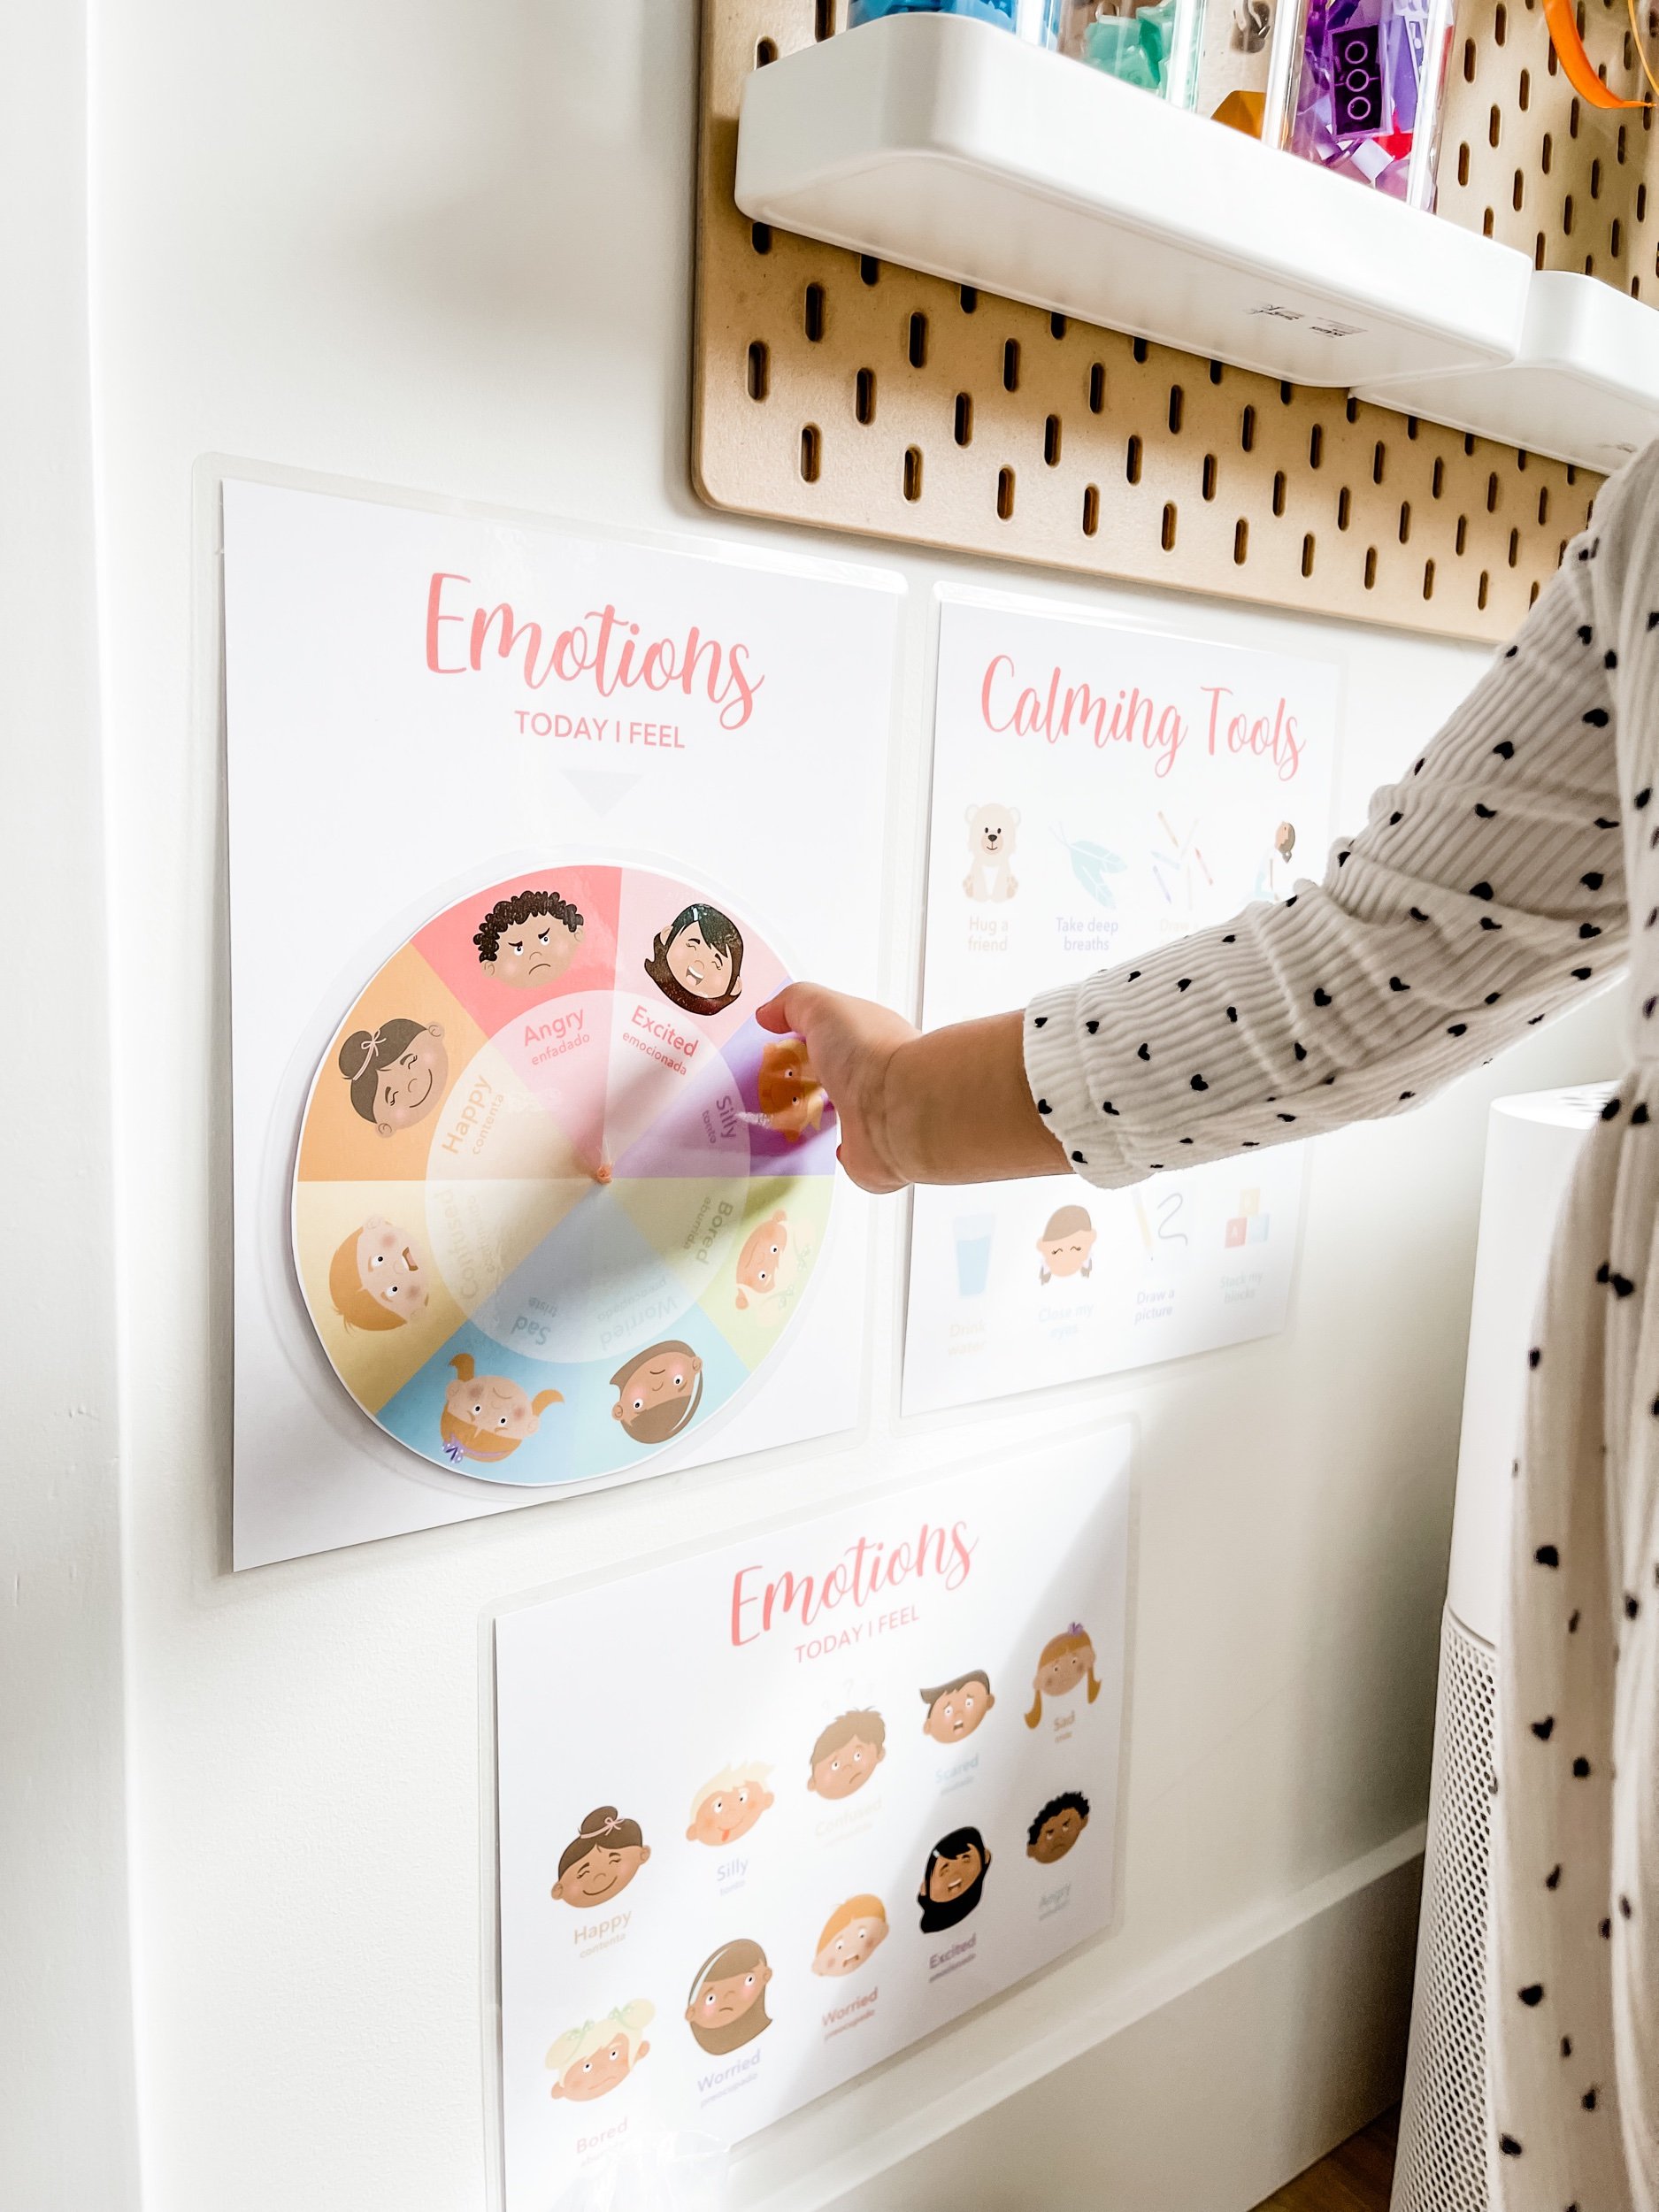
I’m super excited to finally have finished Sofia’s calming corner. It’s been months in the making, but I could never get around to pulling all of the pieces together. So I though I’d just take a minute to share the final setup!
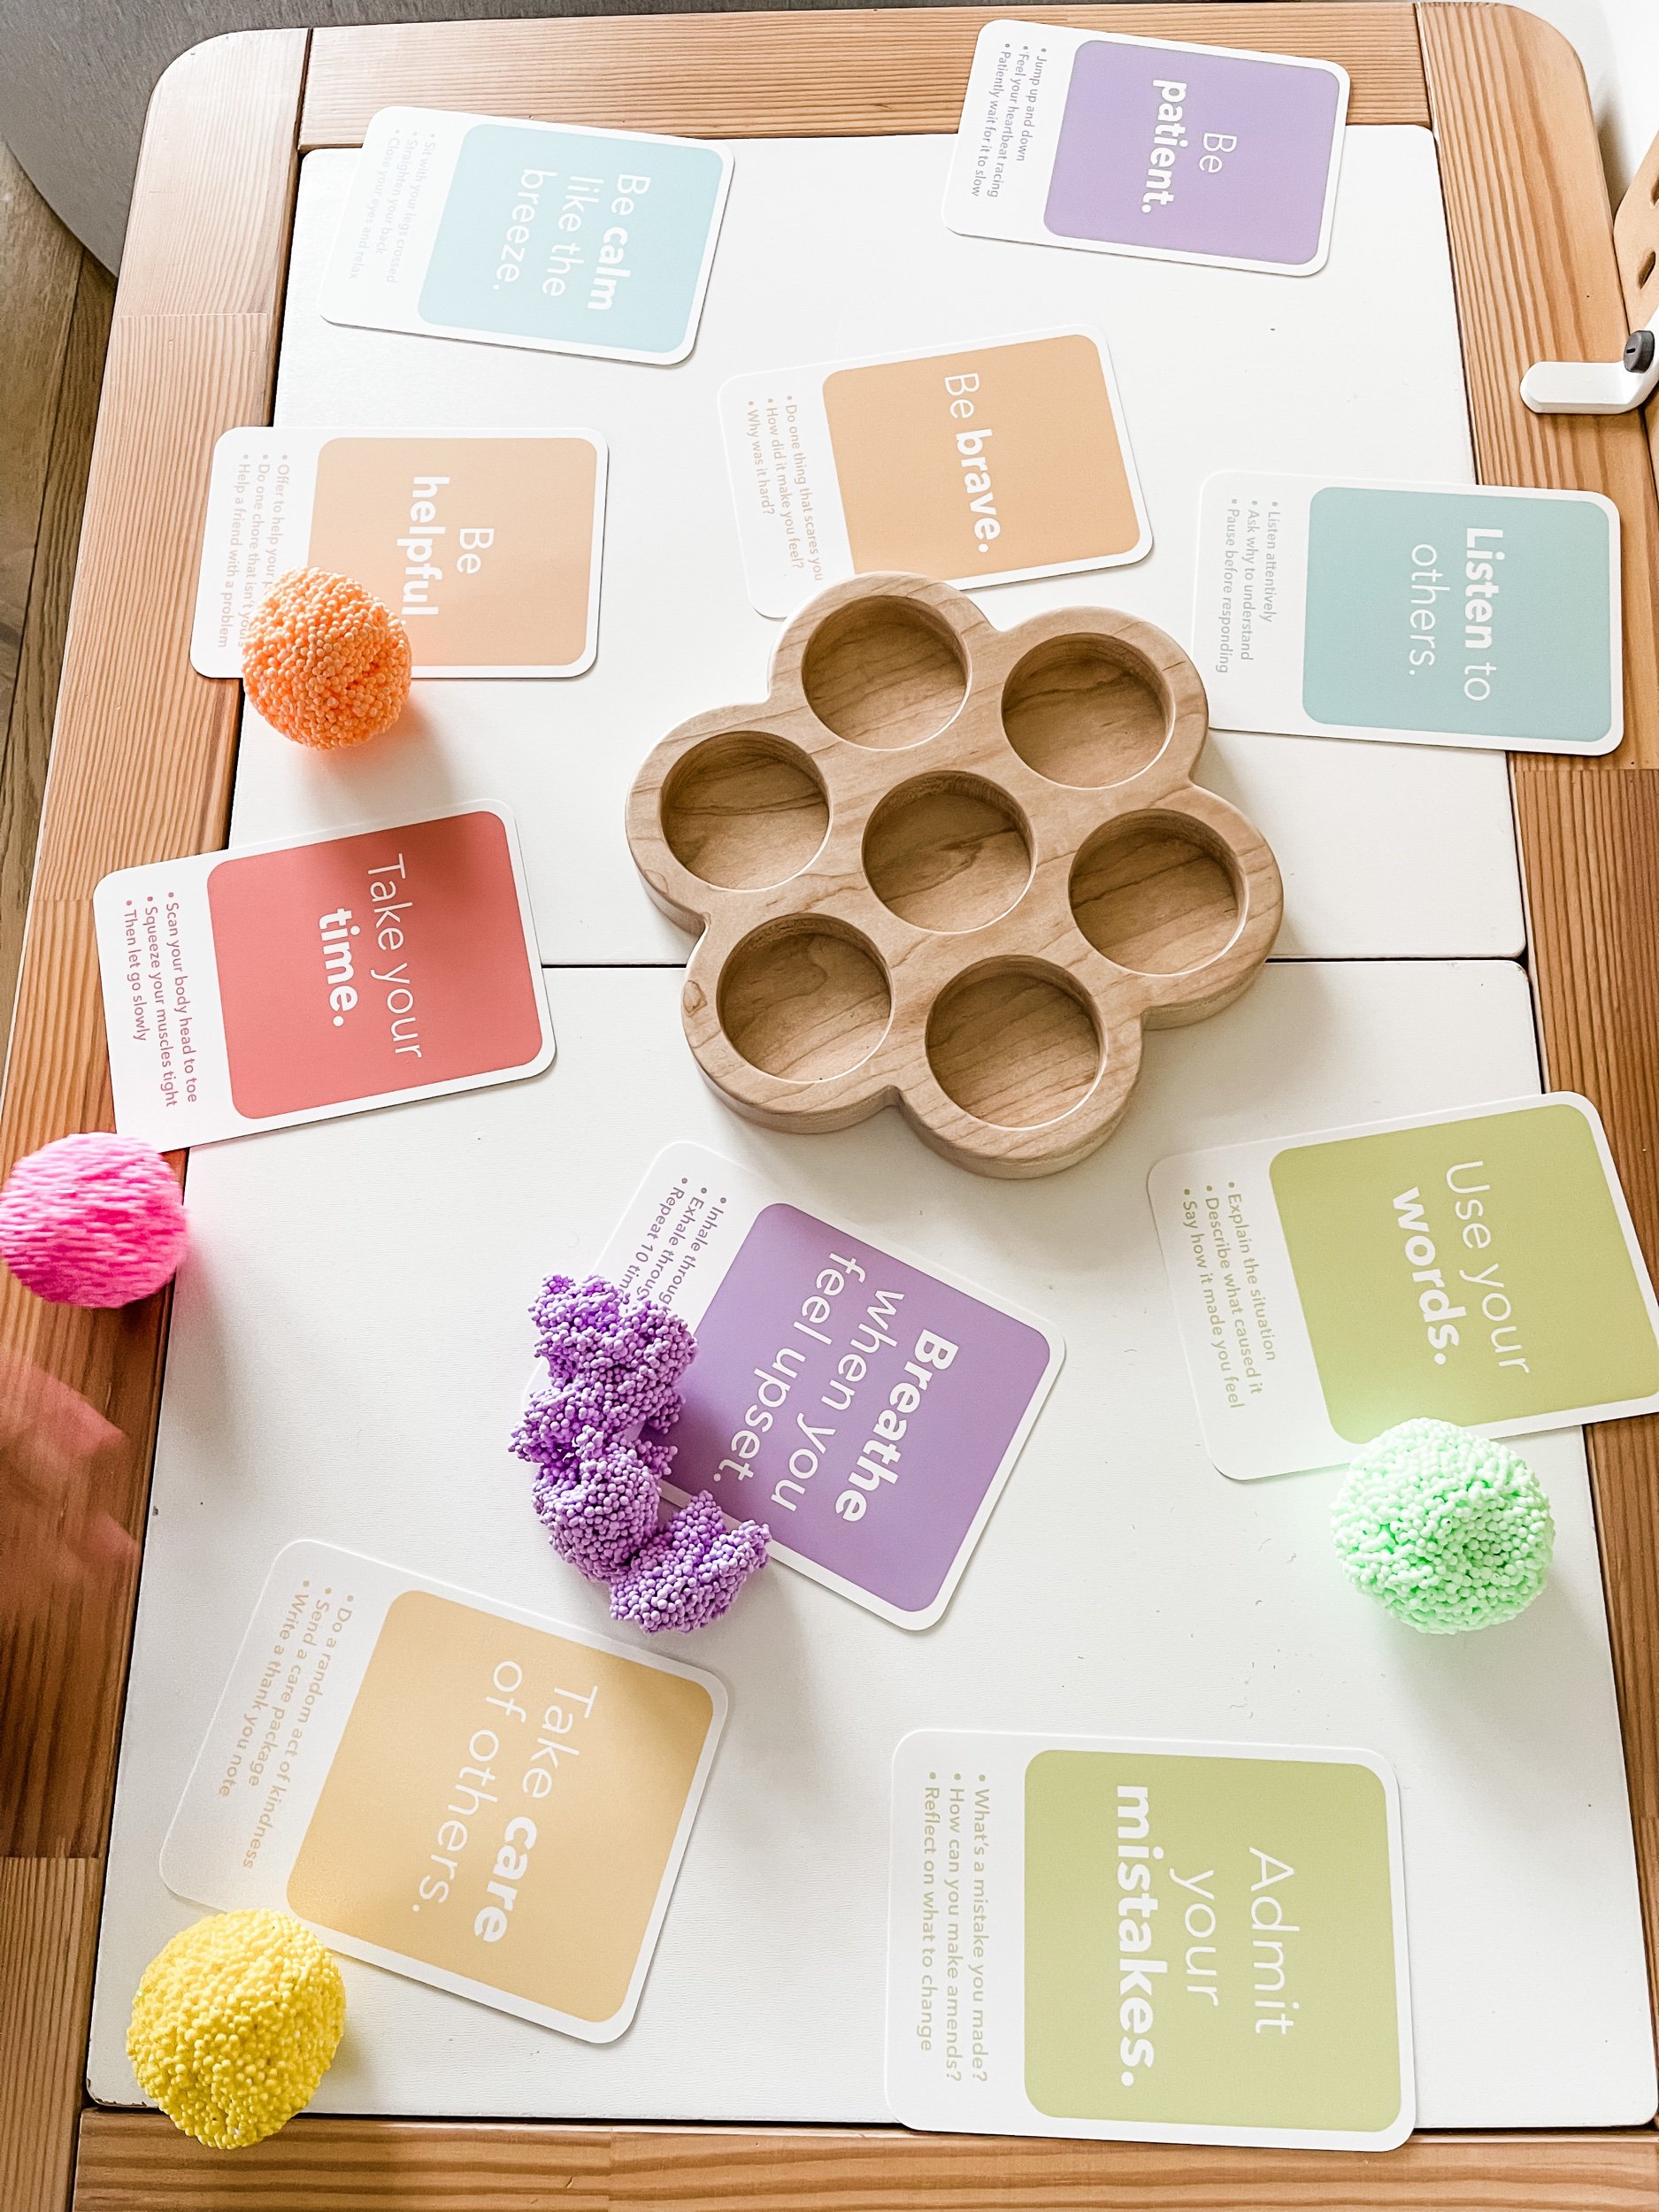
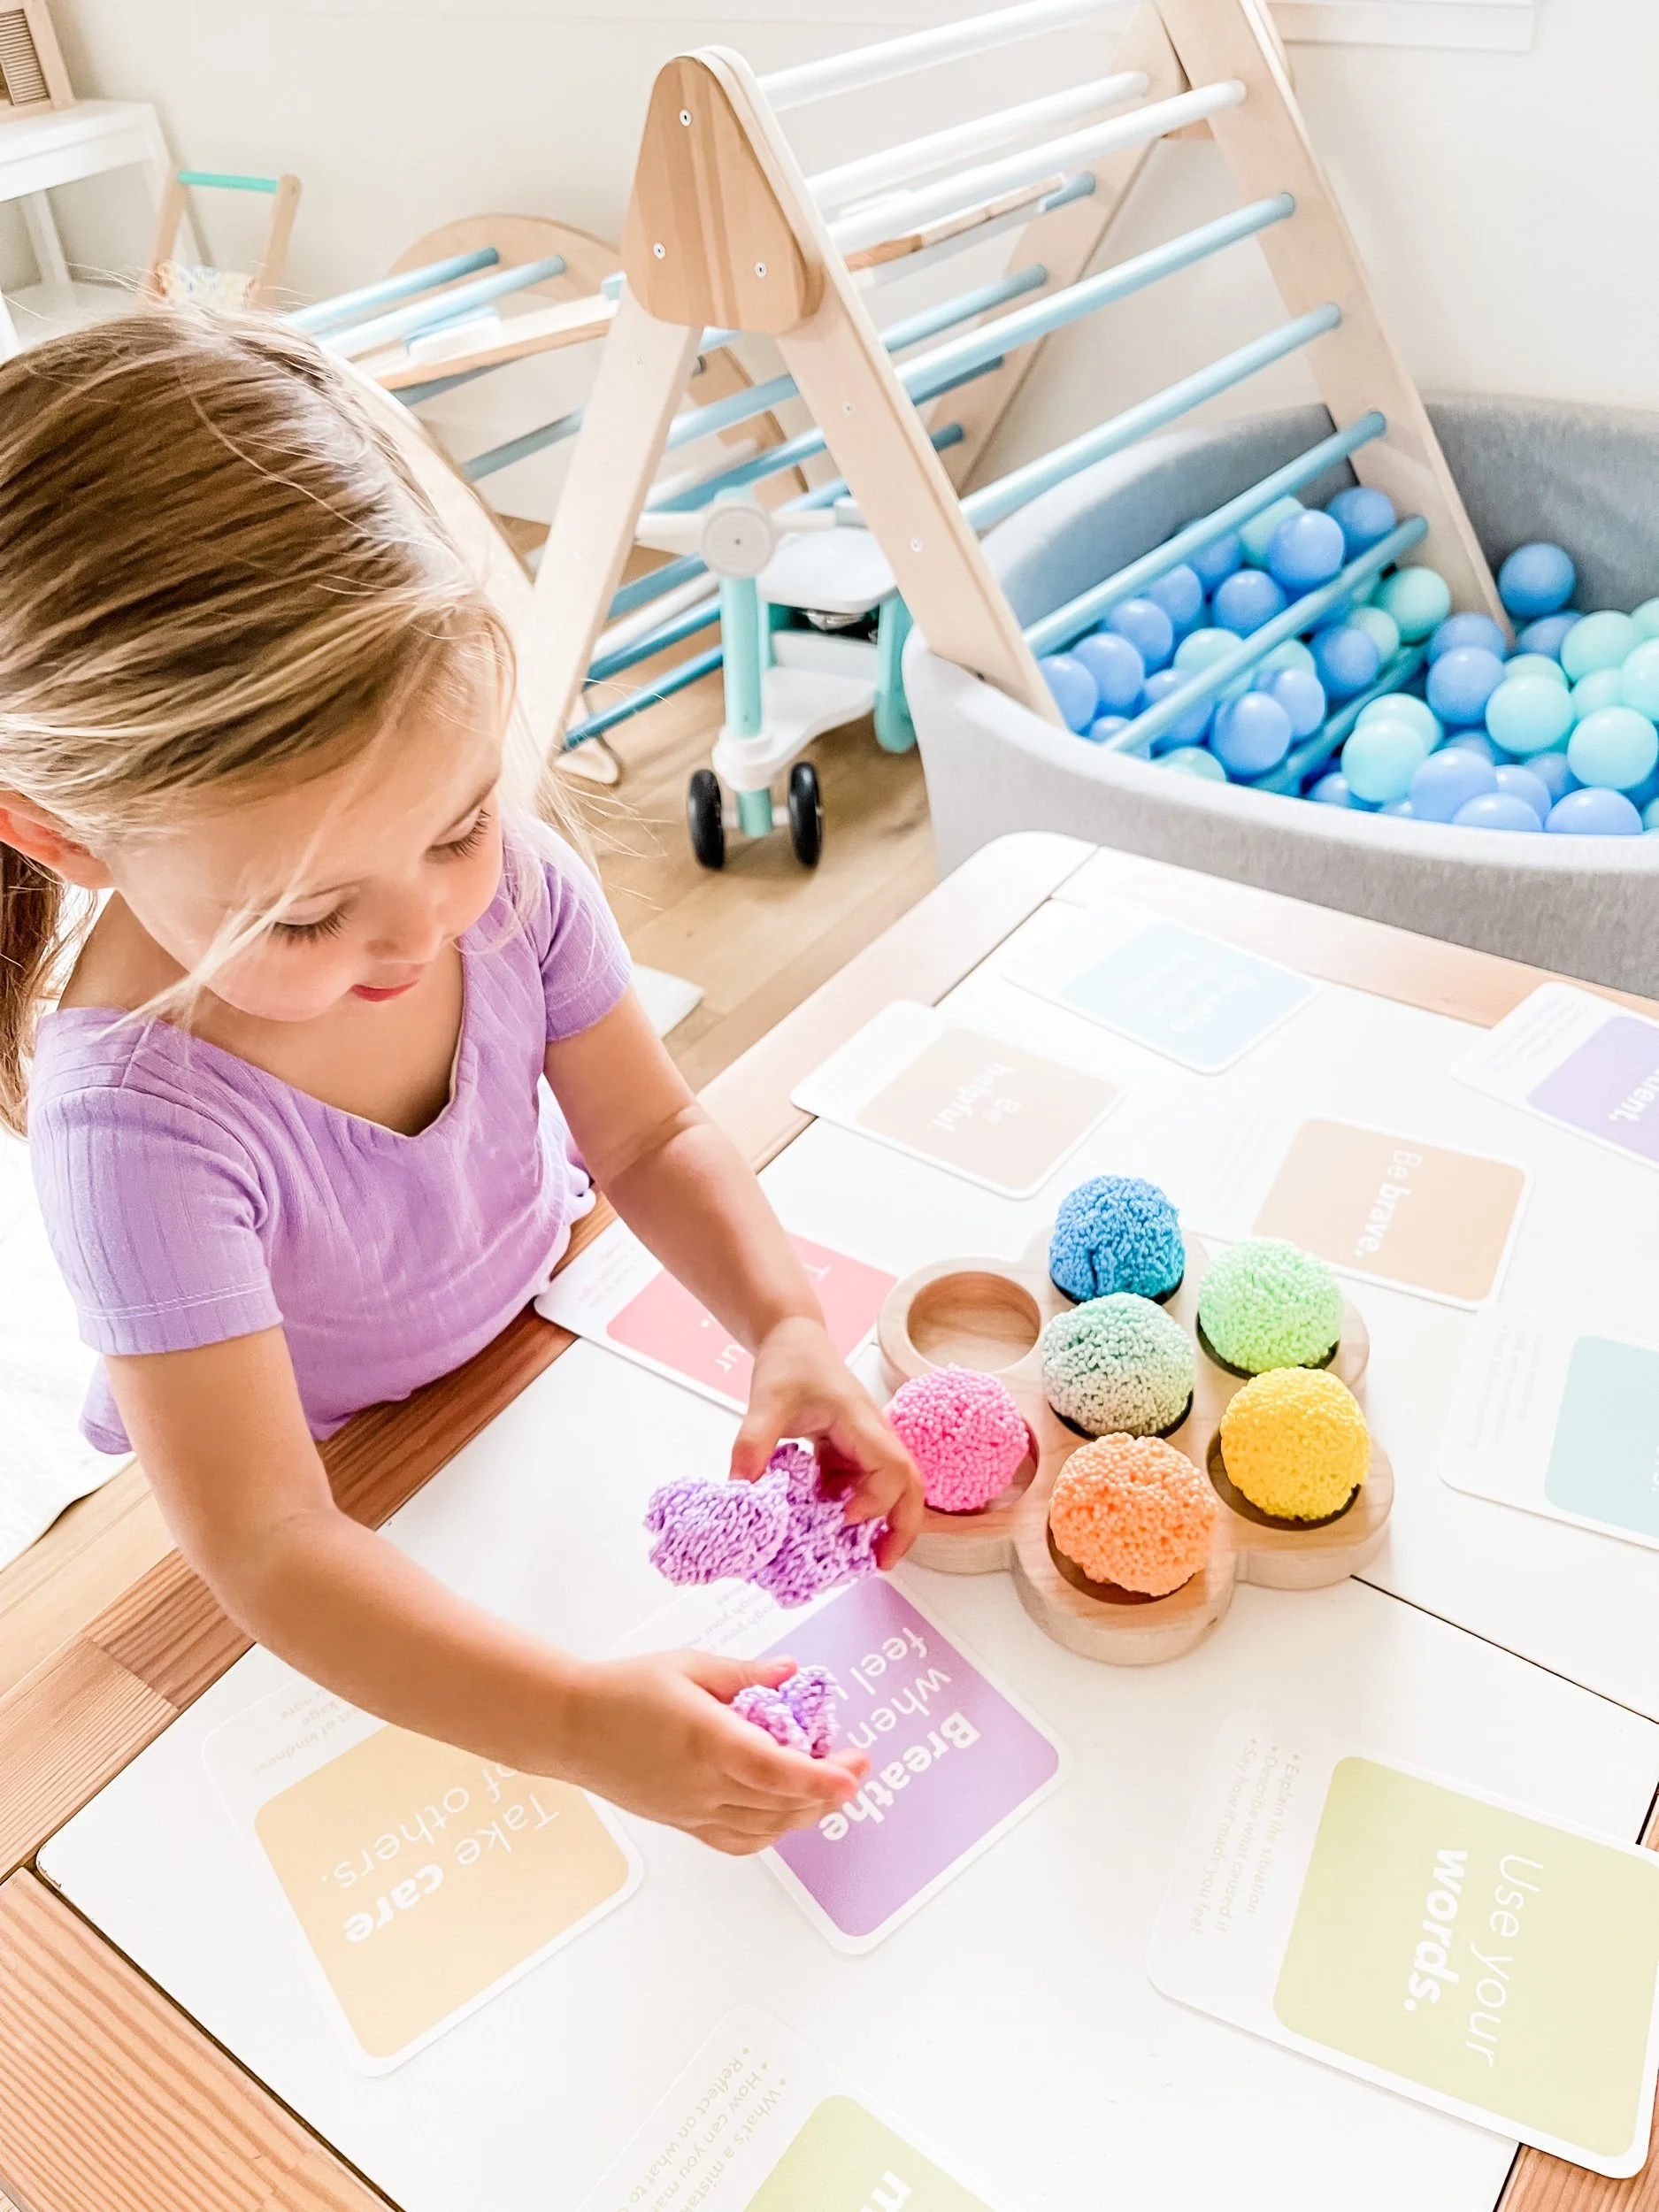
If you don’t want to draw then yourself, there are tons available online or you can download these ones directly from my shop. I find it helpful to have both the Emotions Wheel, and the Calming Tools which gives Sofie a way to identify her emotions and also techniques for calming down.


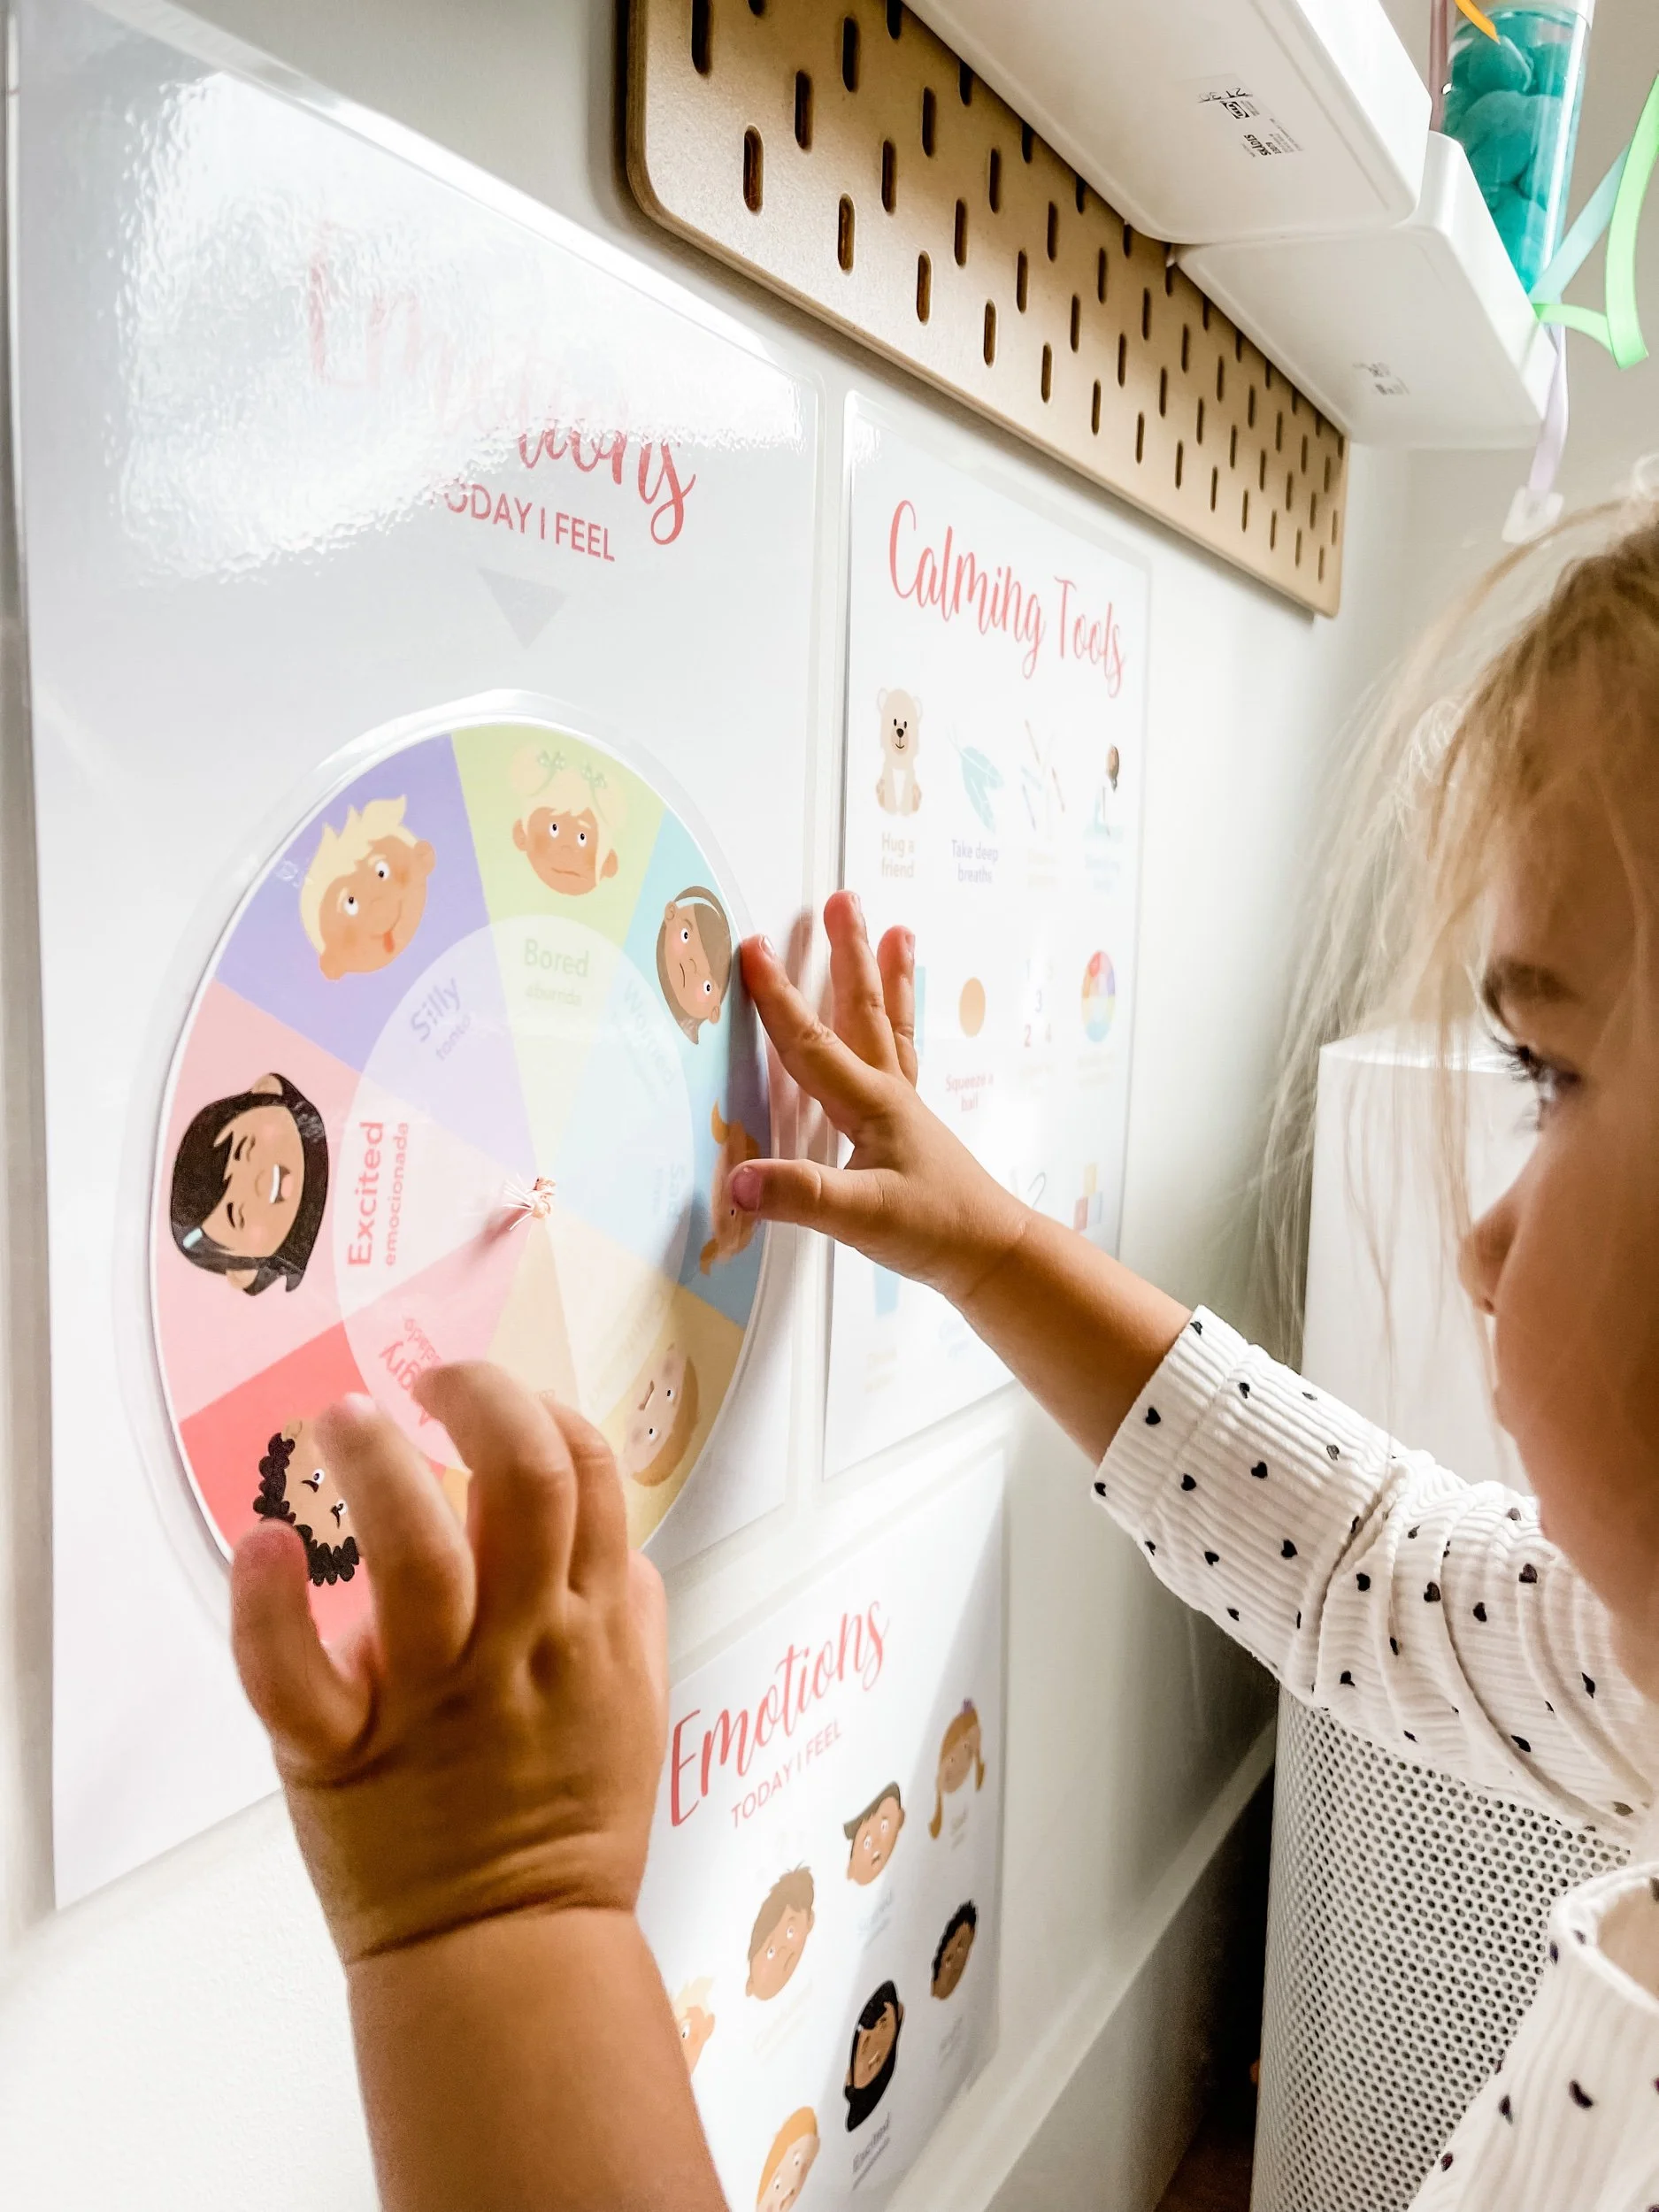


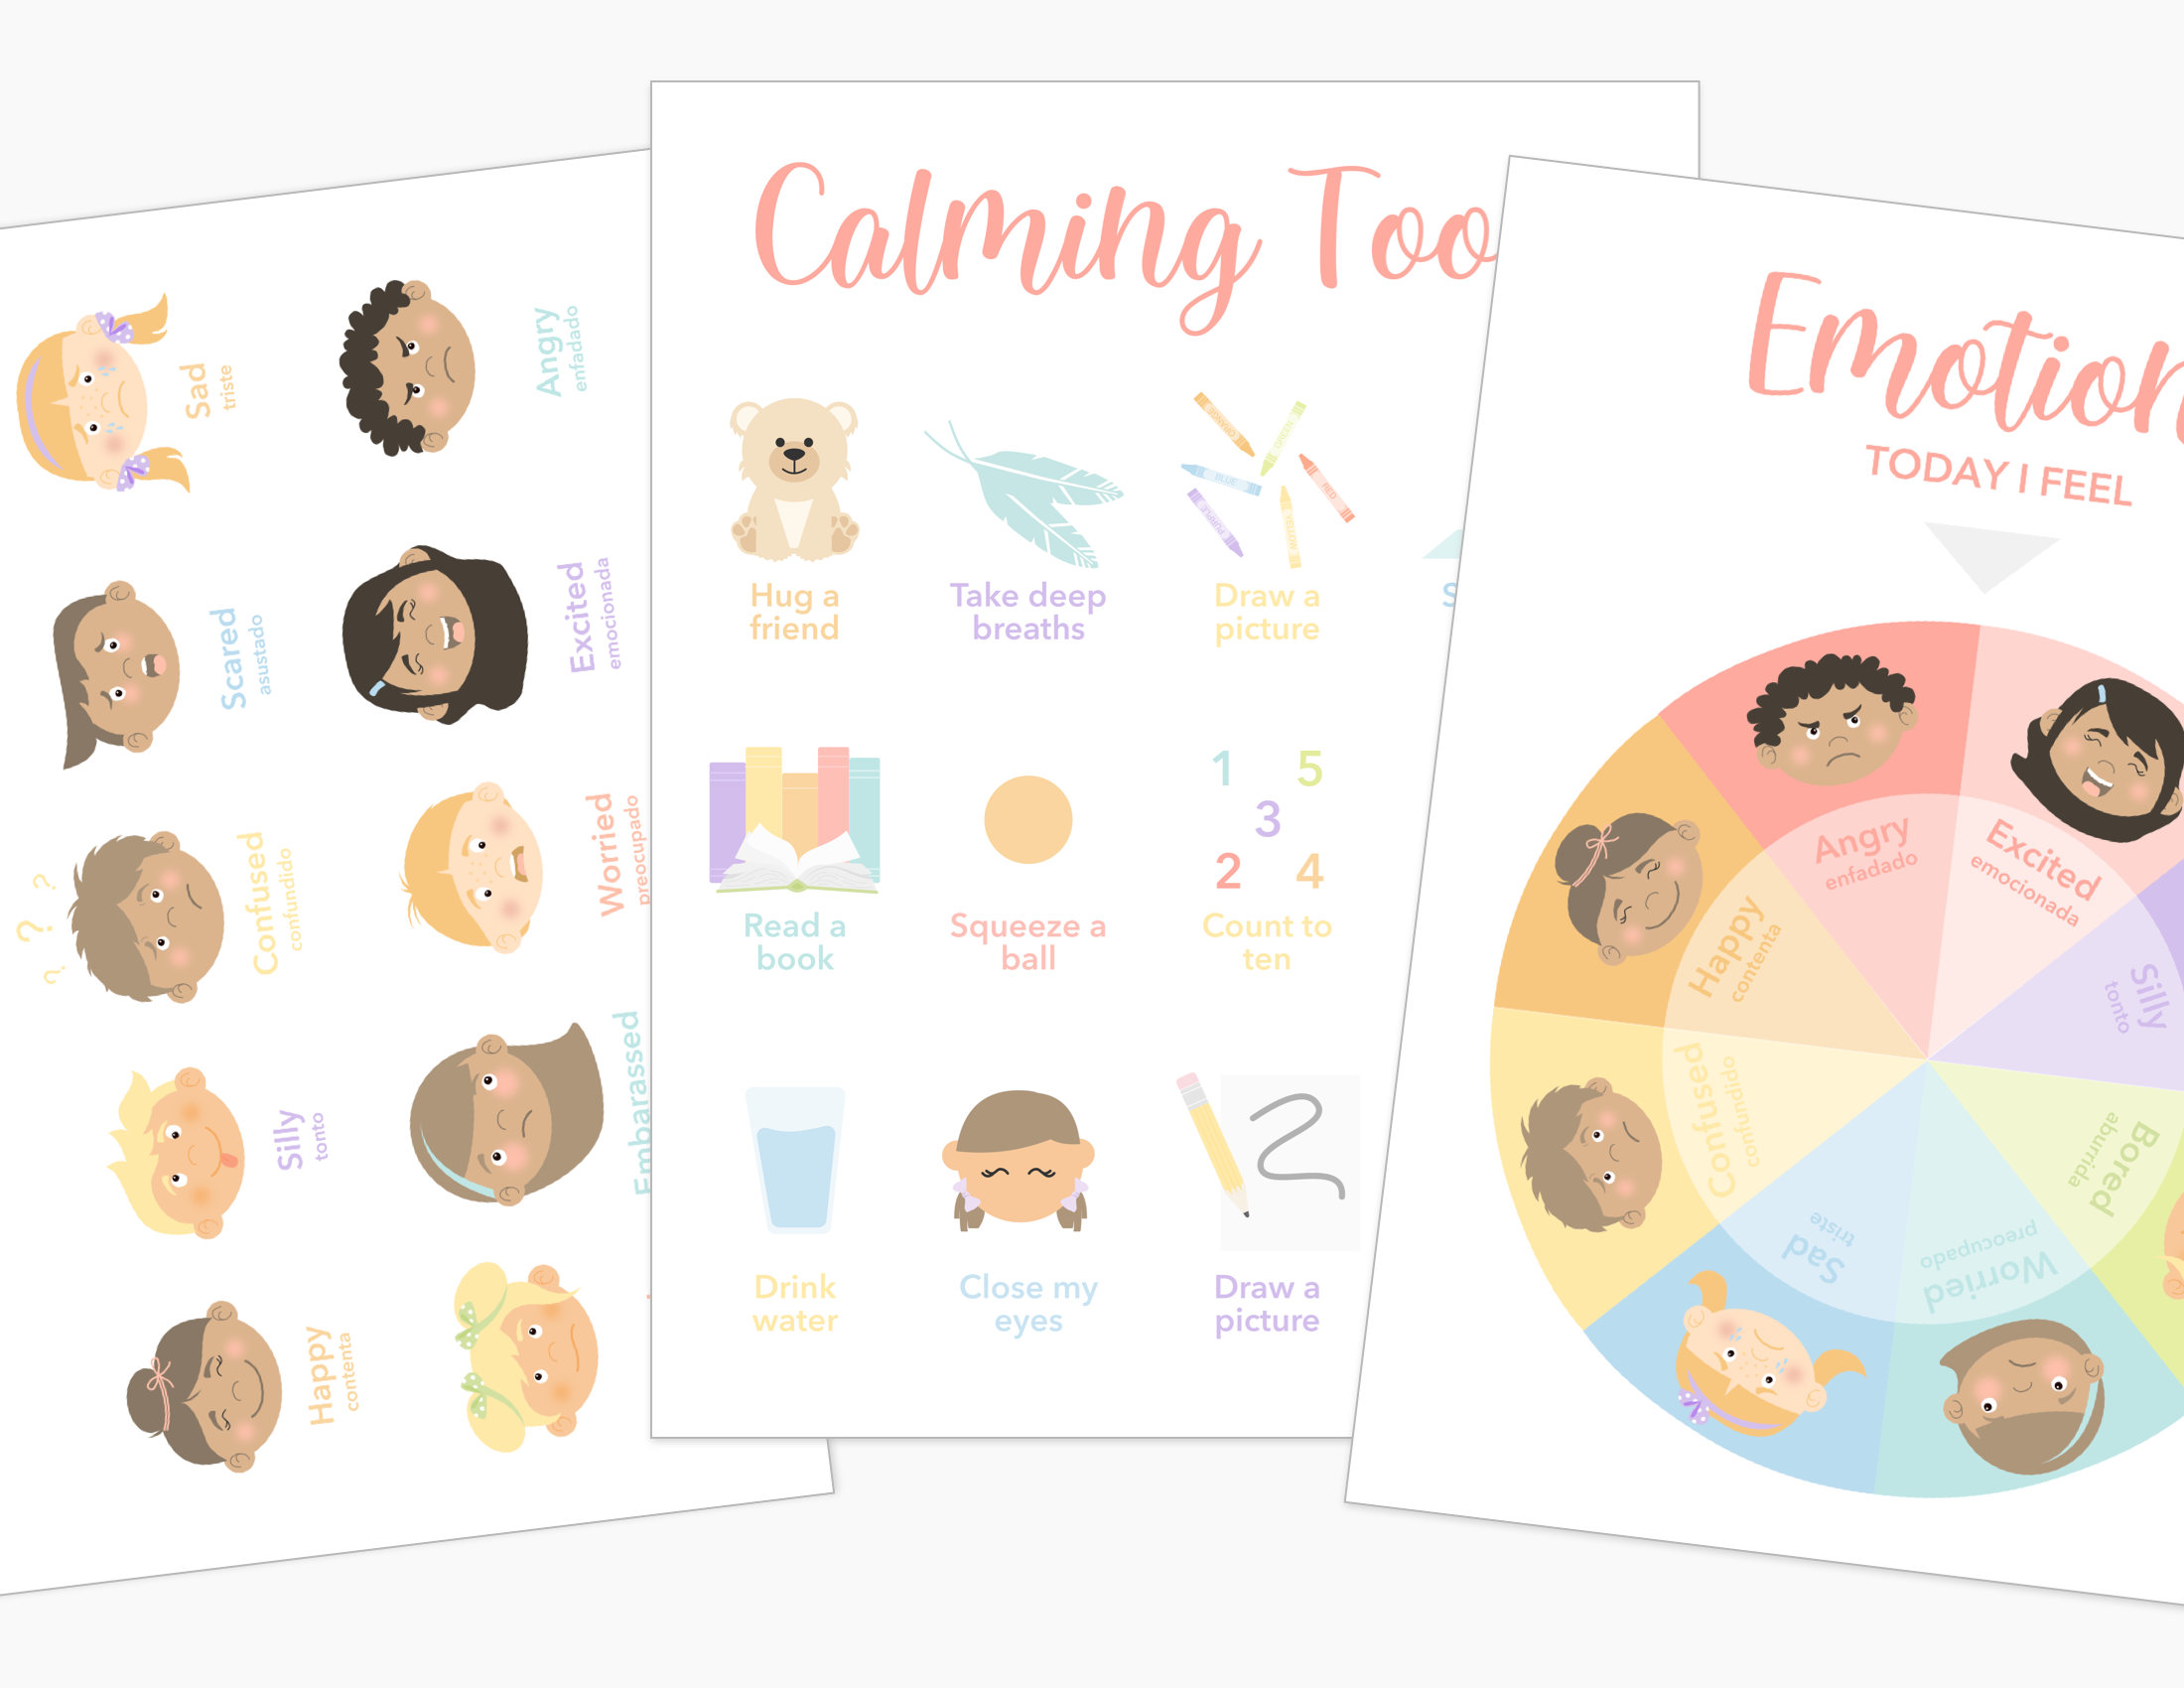
Creating a Calming Tools kit is super simple! I made a few things from scratch because it get us an extra activity to do, but you can also easily purchase a few key items that will give your passionate toddler something to focus on while they’re frustrated or upset. For Sofie, we’re working really hard on how to deal with frustration and that it’s okay to be upset, but it’s not okay to hit or spit.

Calming basket supplies:
Feathers
Books
Drawing supplies
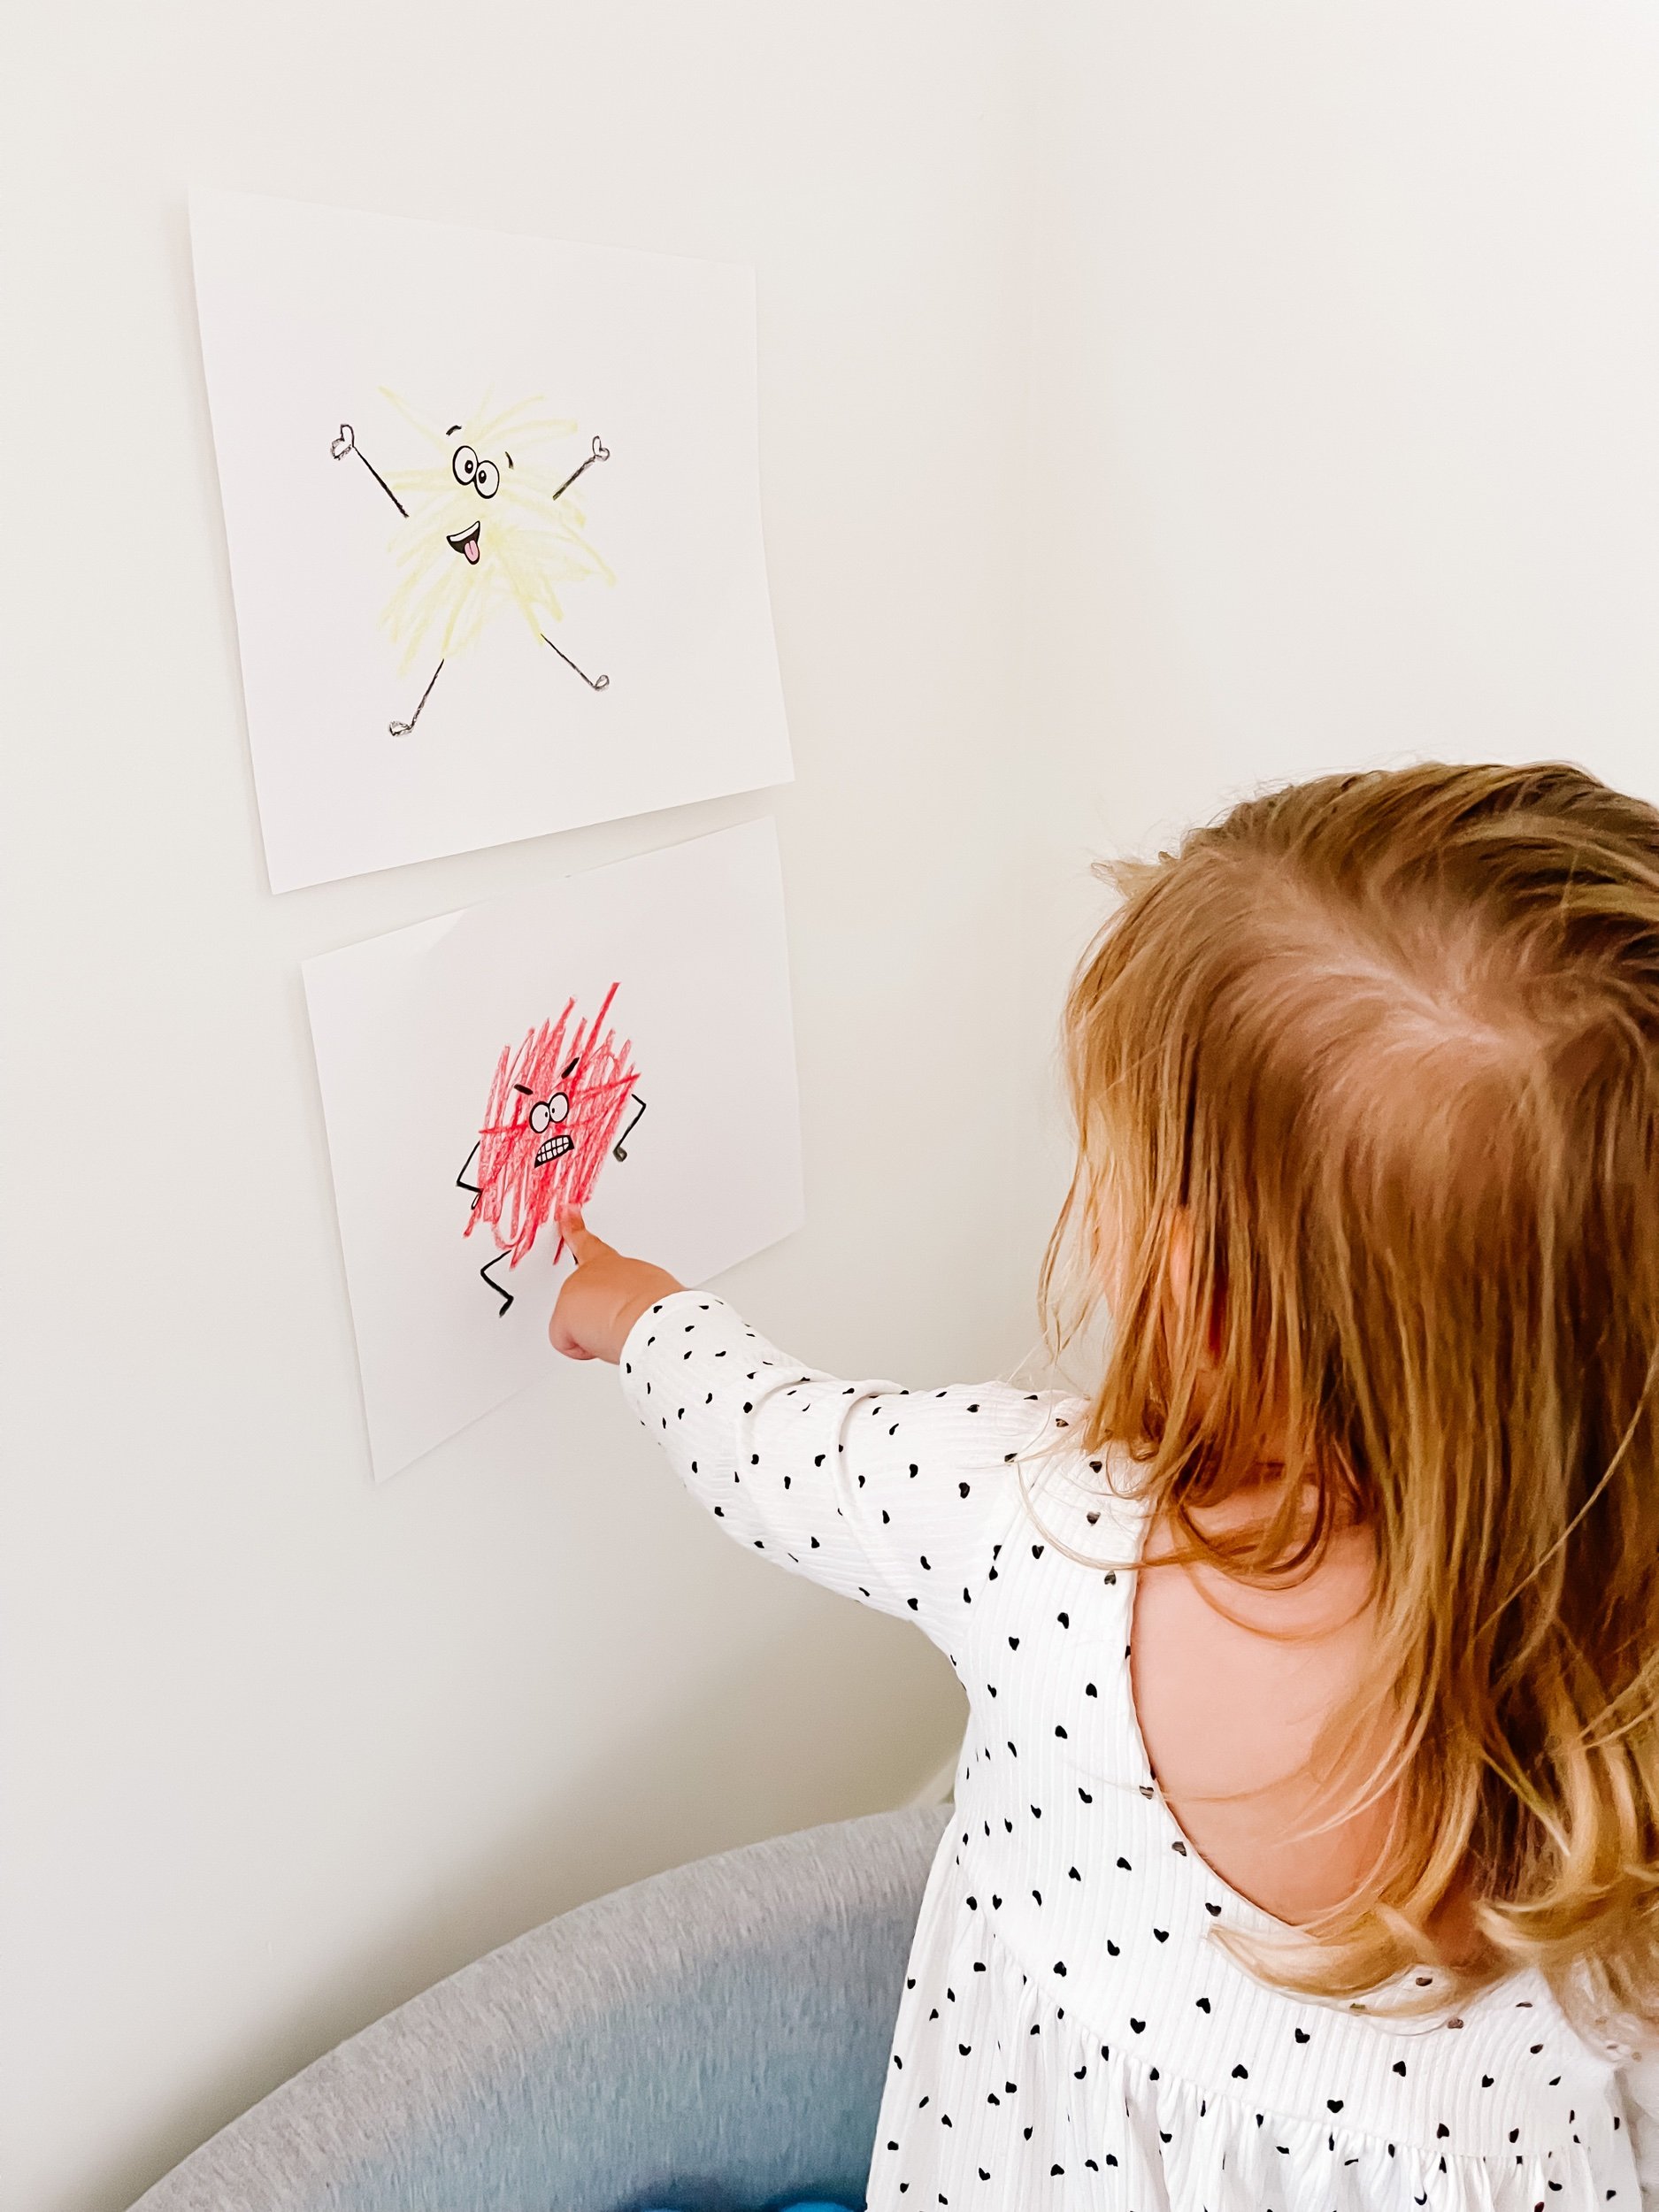
One of my favorite parts of creating this calming space for Sofie was giving her time to practice drawing and coloring and associating colors with emotions. I think it really helped her grasp the concept well. For this activity, I grabbed some art supplies and our Scribble Art book to make some fun and unique art for her calming corner based on colors and emotions.
Supplies:
Drawing Note Pad - I prefer the ones that are spiral bound so that it keeps all of her artwork neat and together.
Color Spots by Diane Alber - You don’t have to have the book, but I found that Sofie really gravitated toward the pictures to help her learn and associate the feelings. The book includes these awesome stickers to make faces on your scribbles, but you can also buy them separately here. I bought the extra pack of stickers since we do this so often.
Color Crayons - After trying many different versions of coloring supplies (even Crayola Color Wonder Markers), I found that these Acrylic Paint sets and these Reusable Crayon Pens were the best. We use our art supplies practically every day.


A calming corner is not only a great idea for kids, but it can also help you and your partner role model good self-calming techniques. We all know big emotions are just as stressful on the parents as it is on the kids and our emotions and come out in big ways. If you’re struggling with yours and your partners emotions — check out this awesome article with great tips on how to stop fighting with your spouse over parenting.

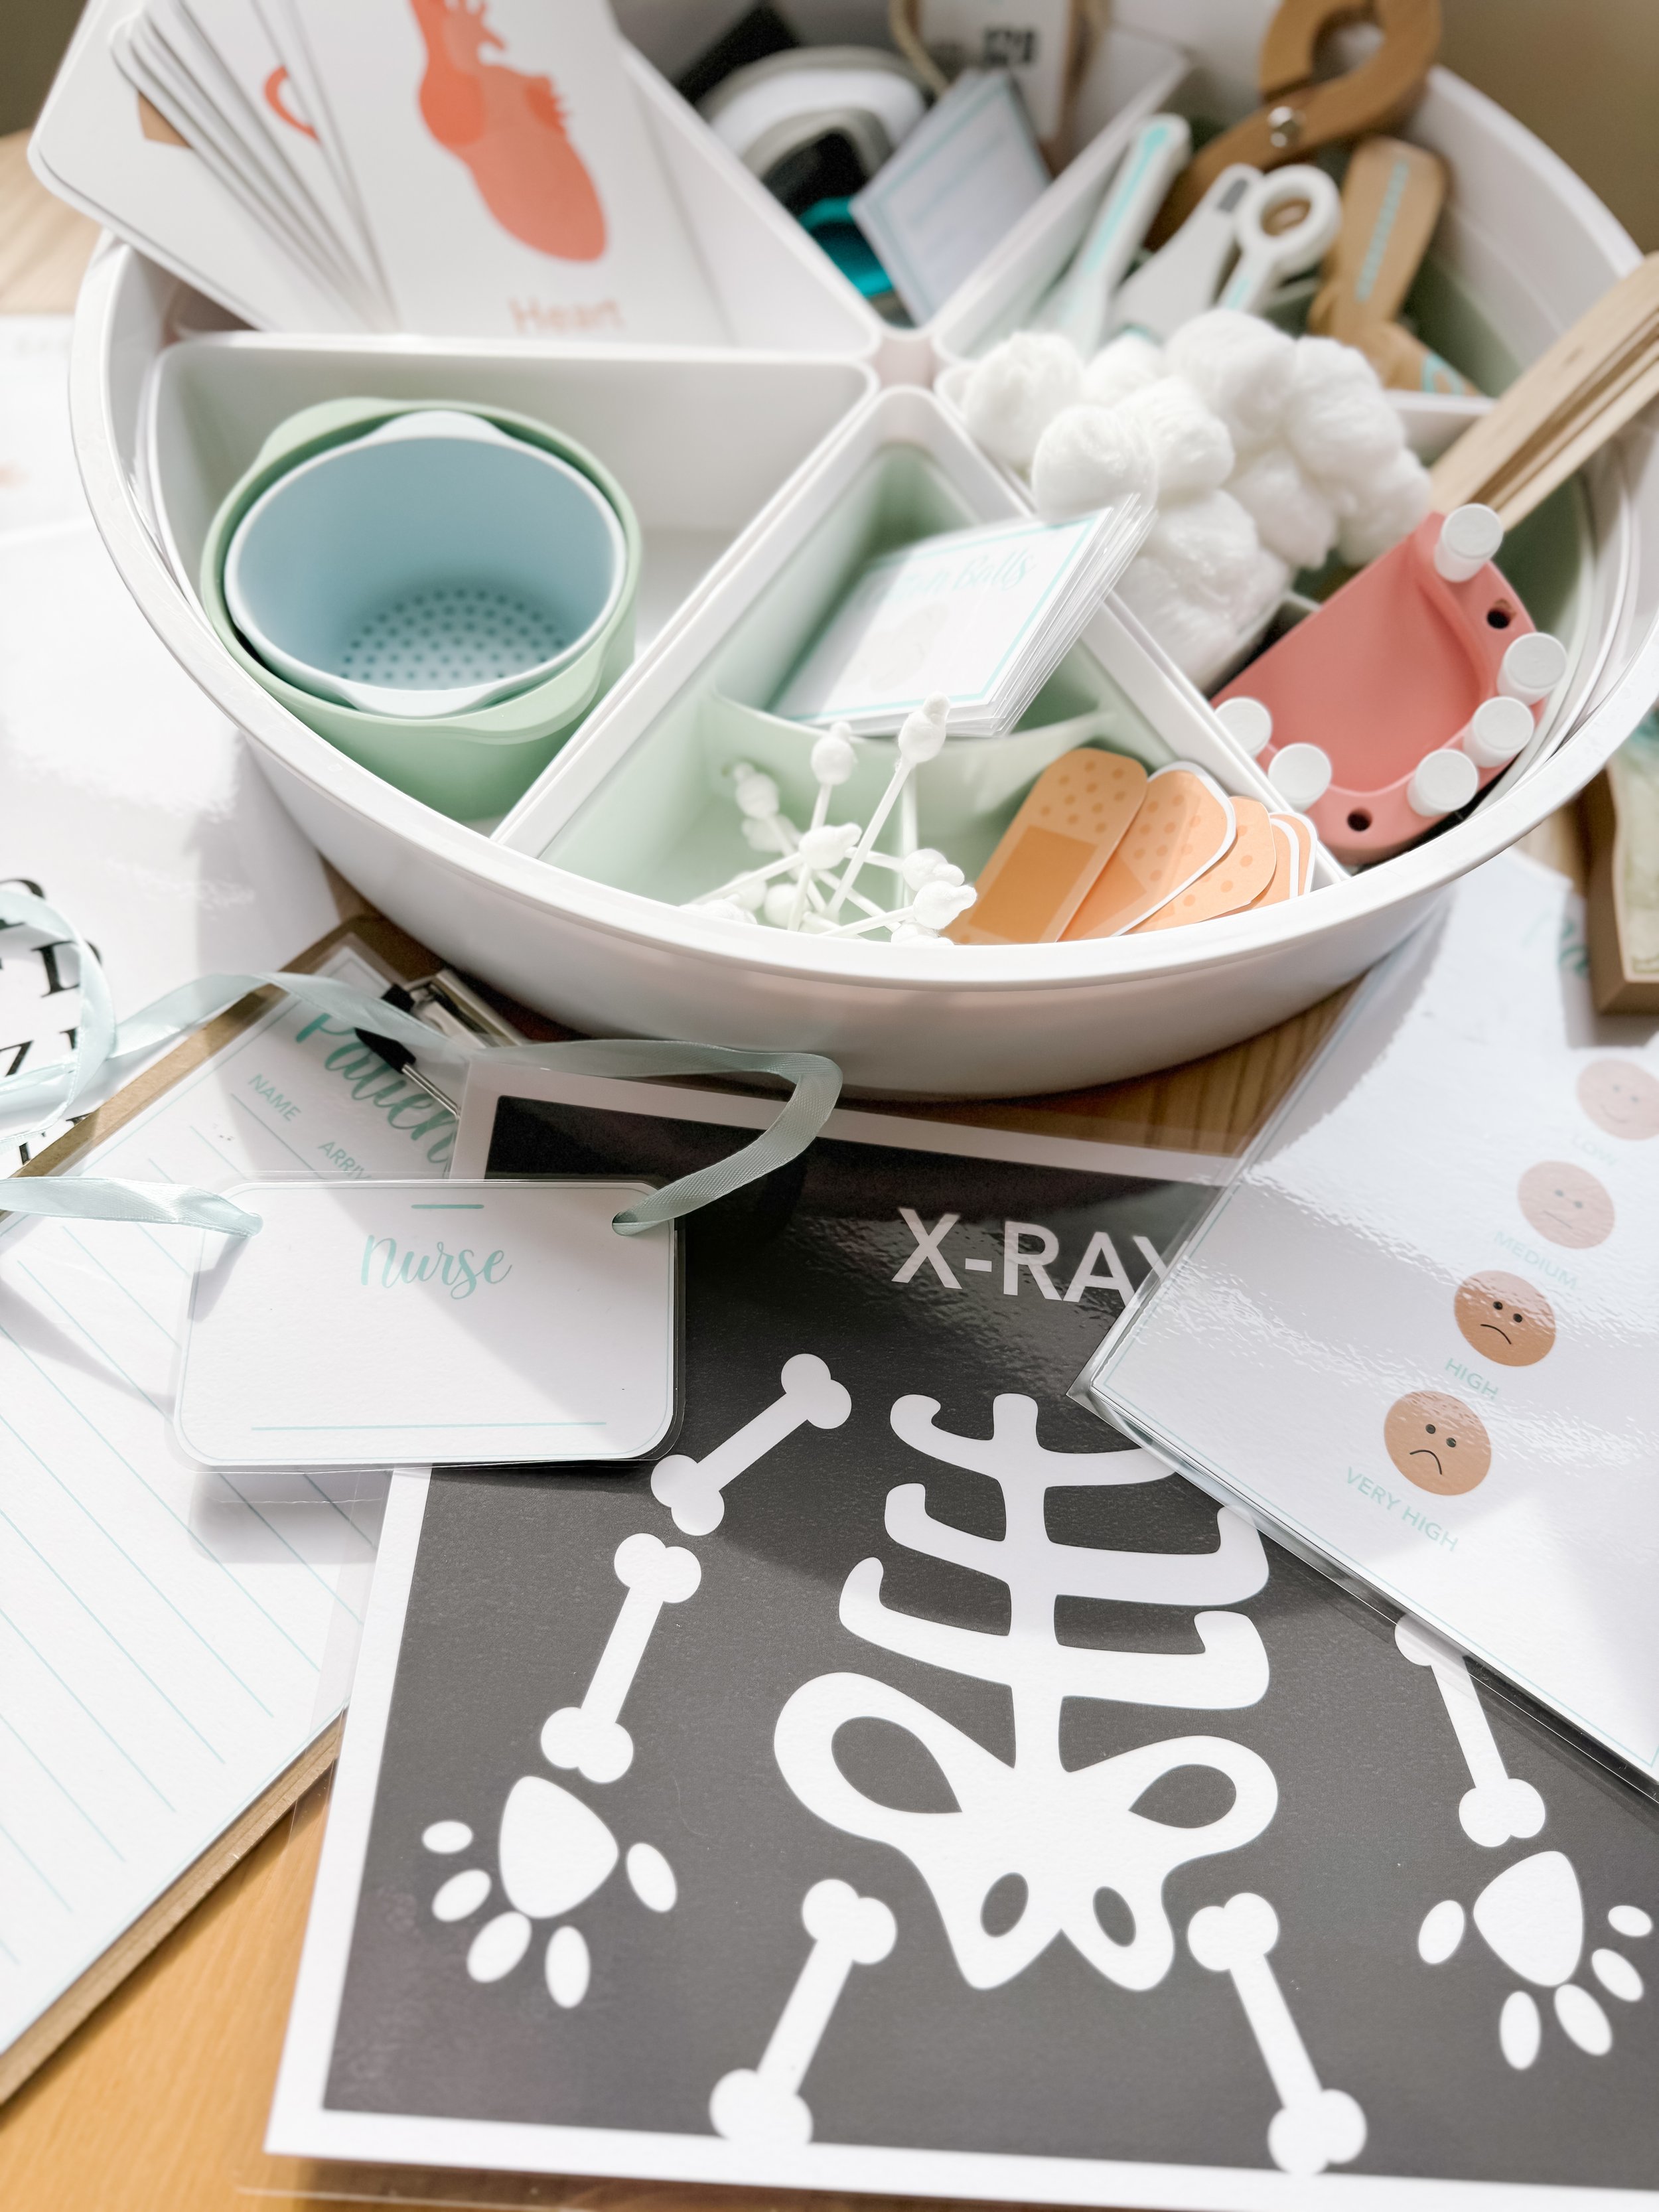
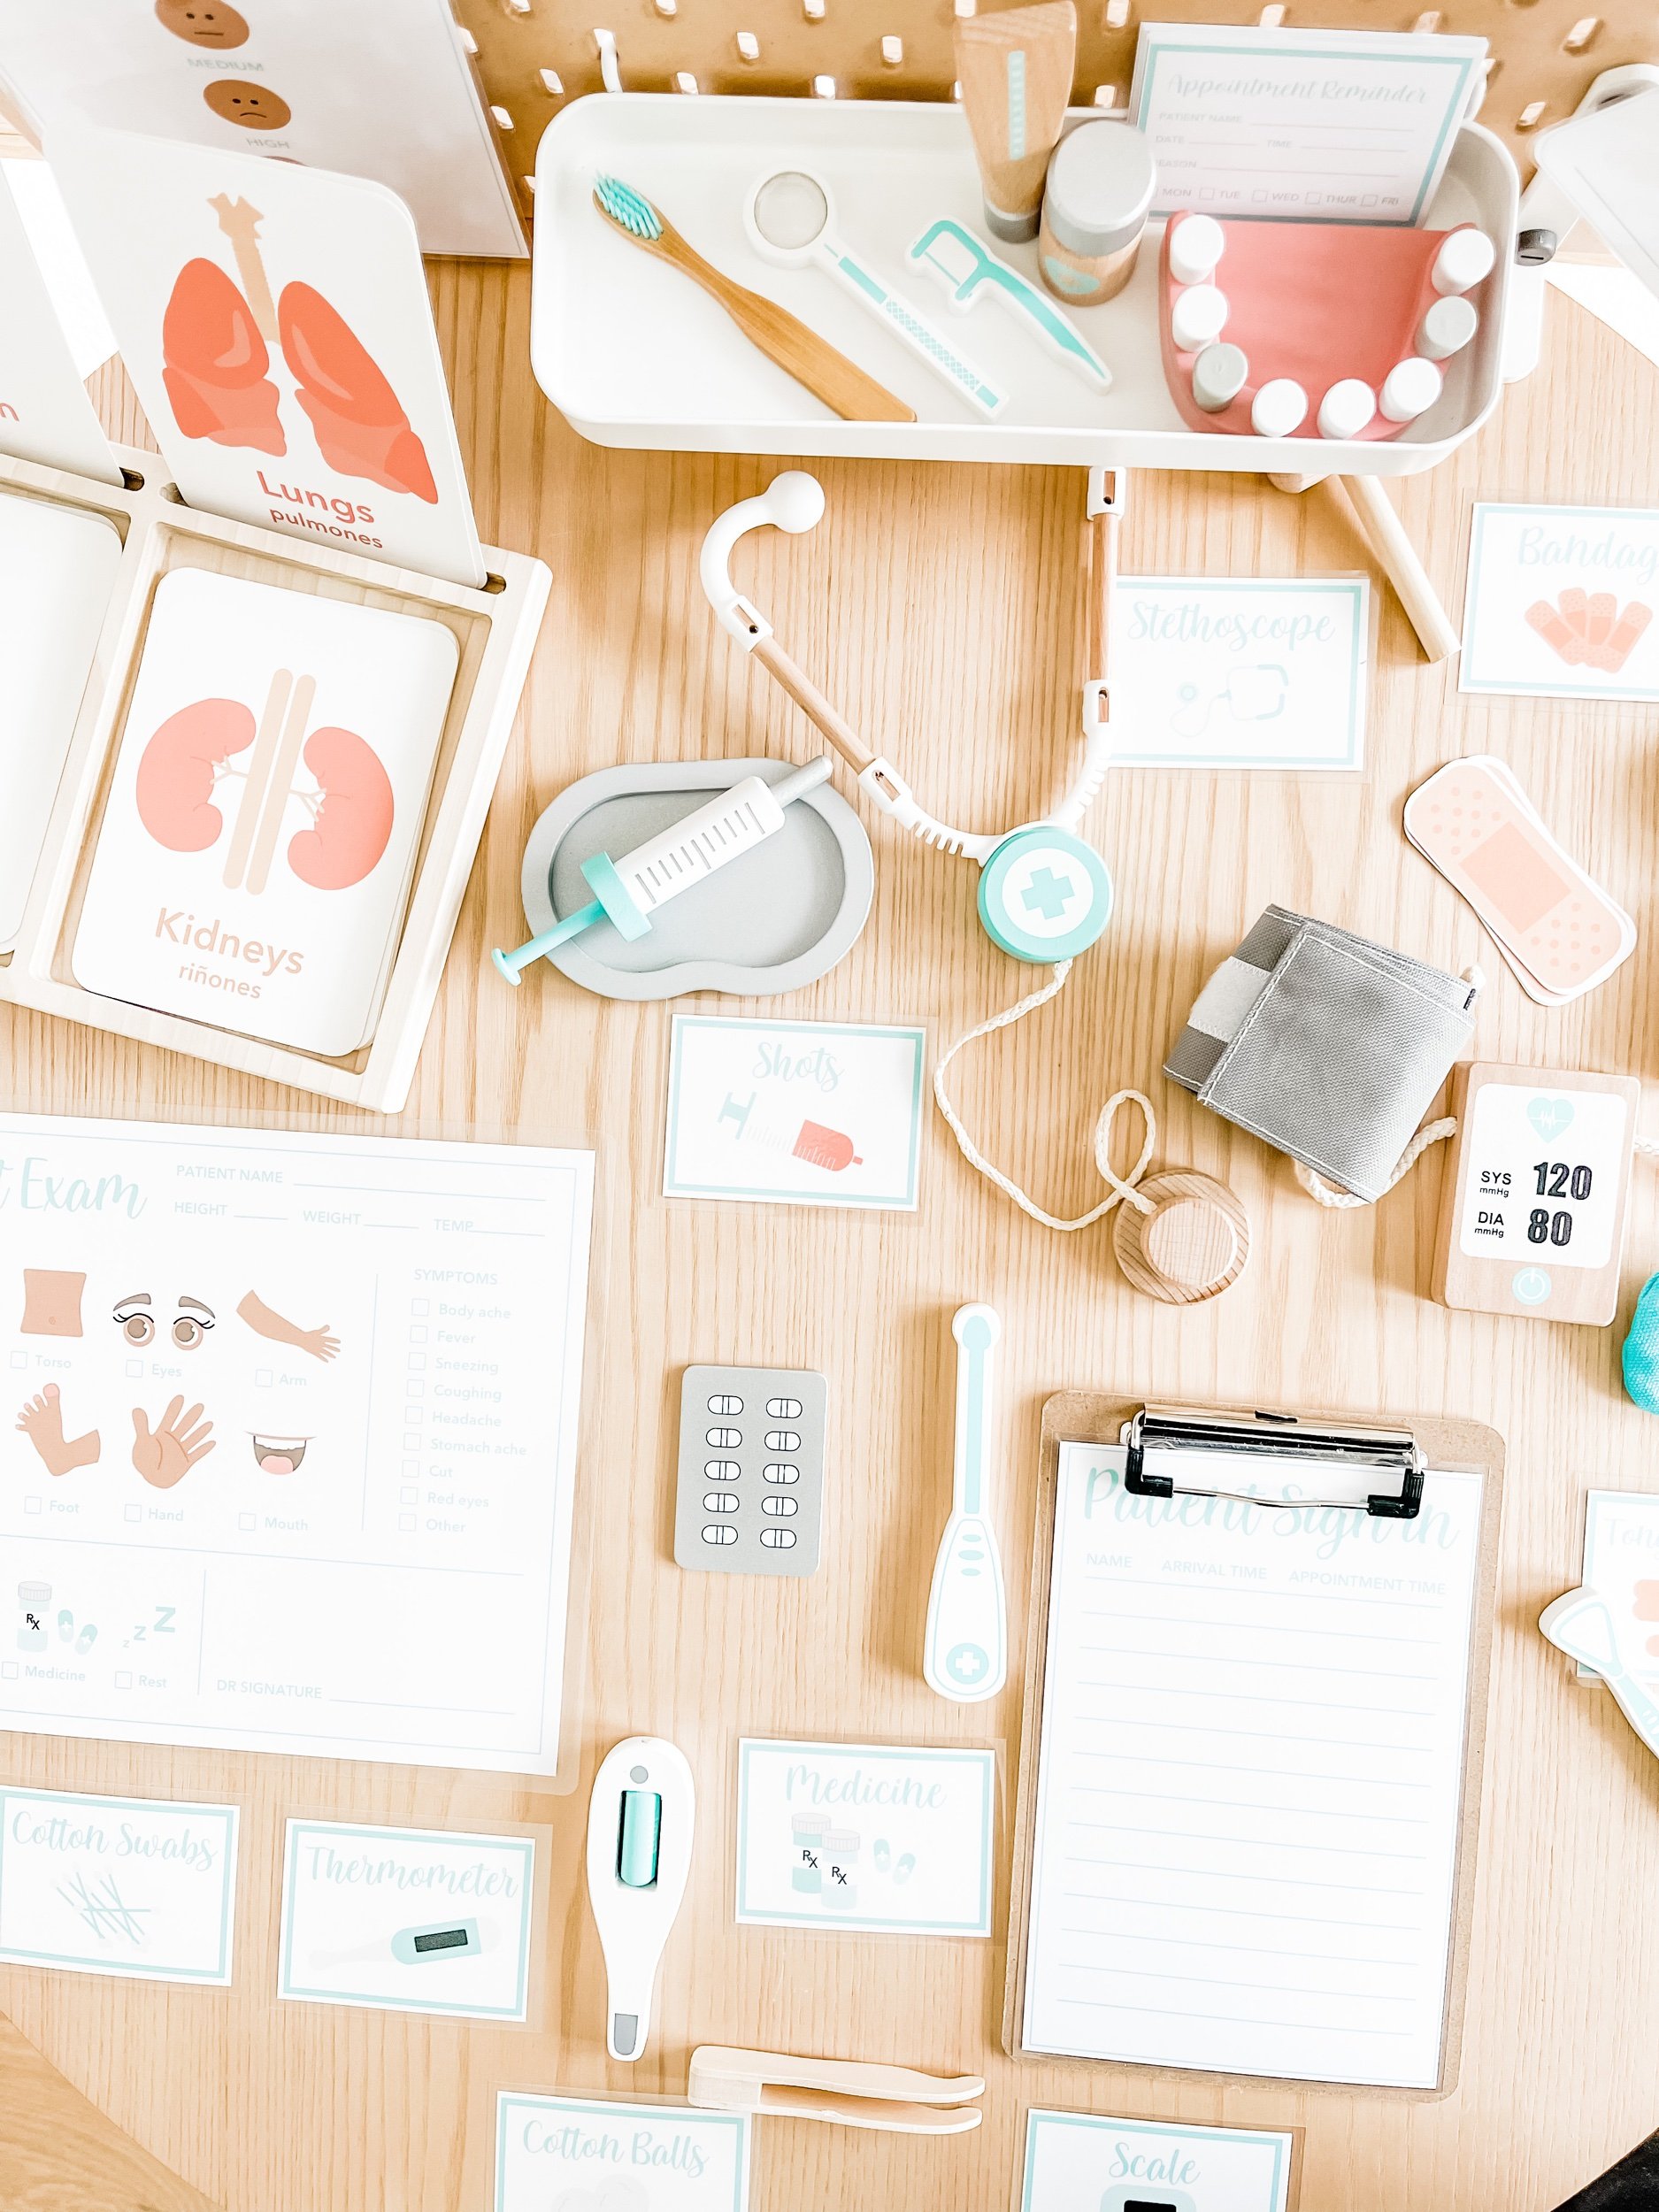
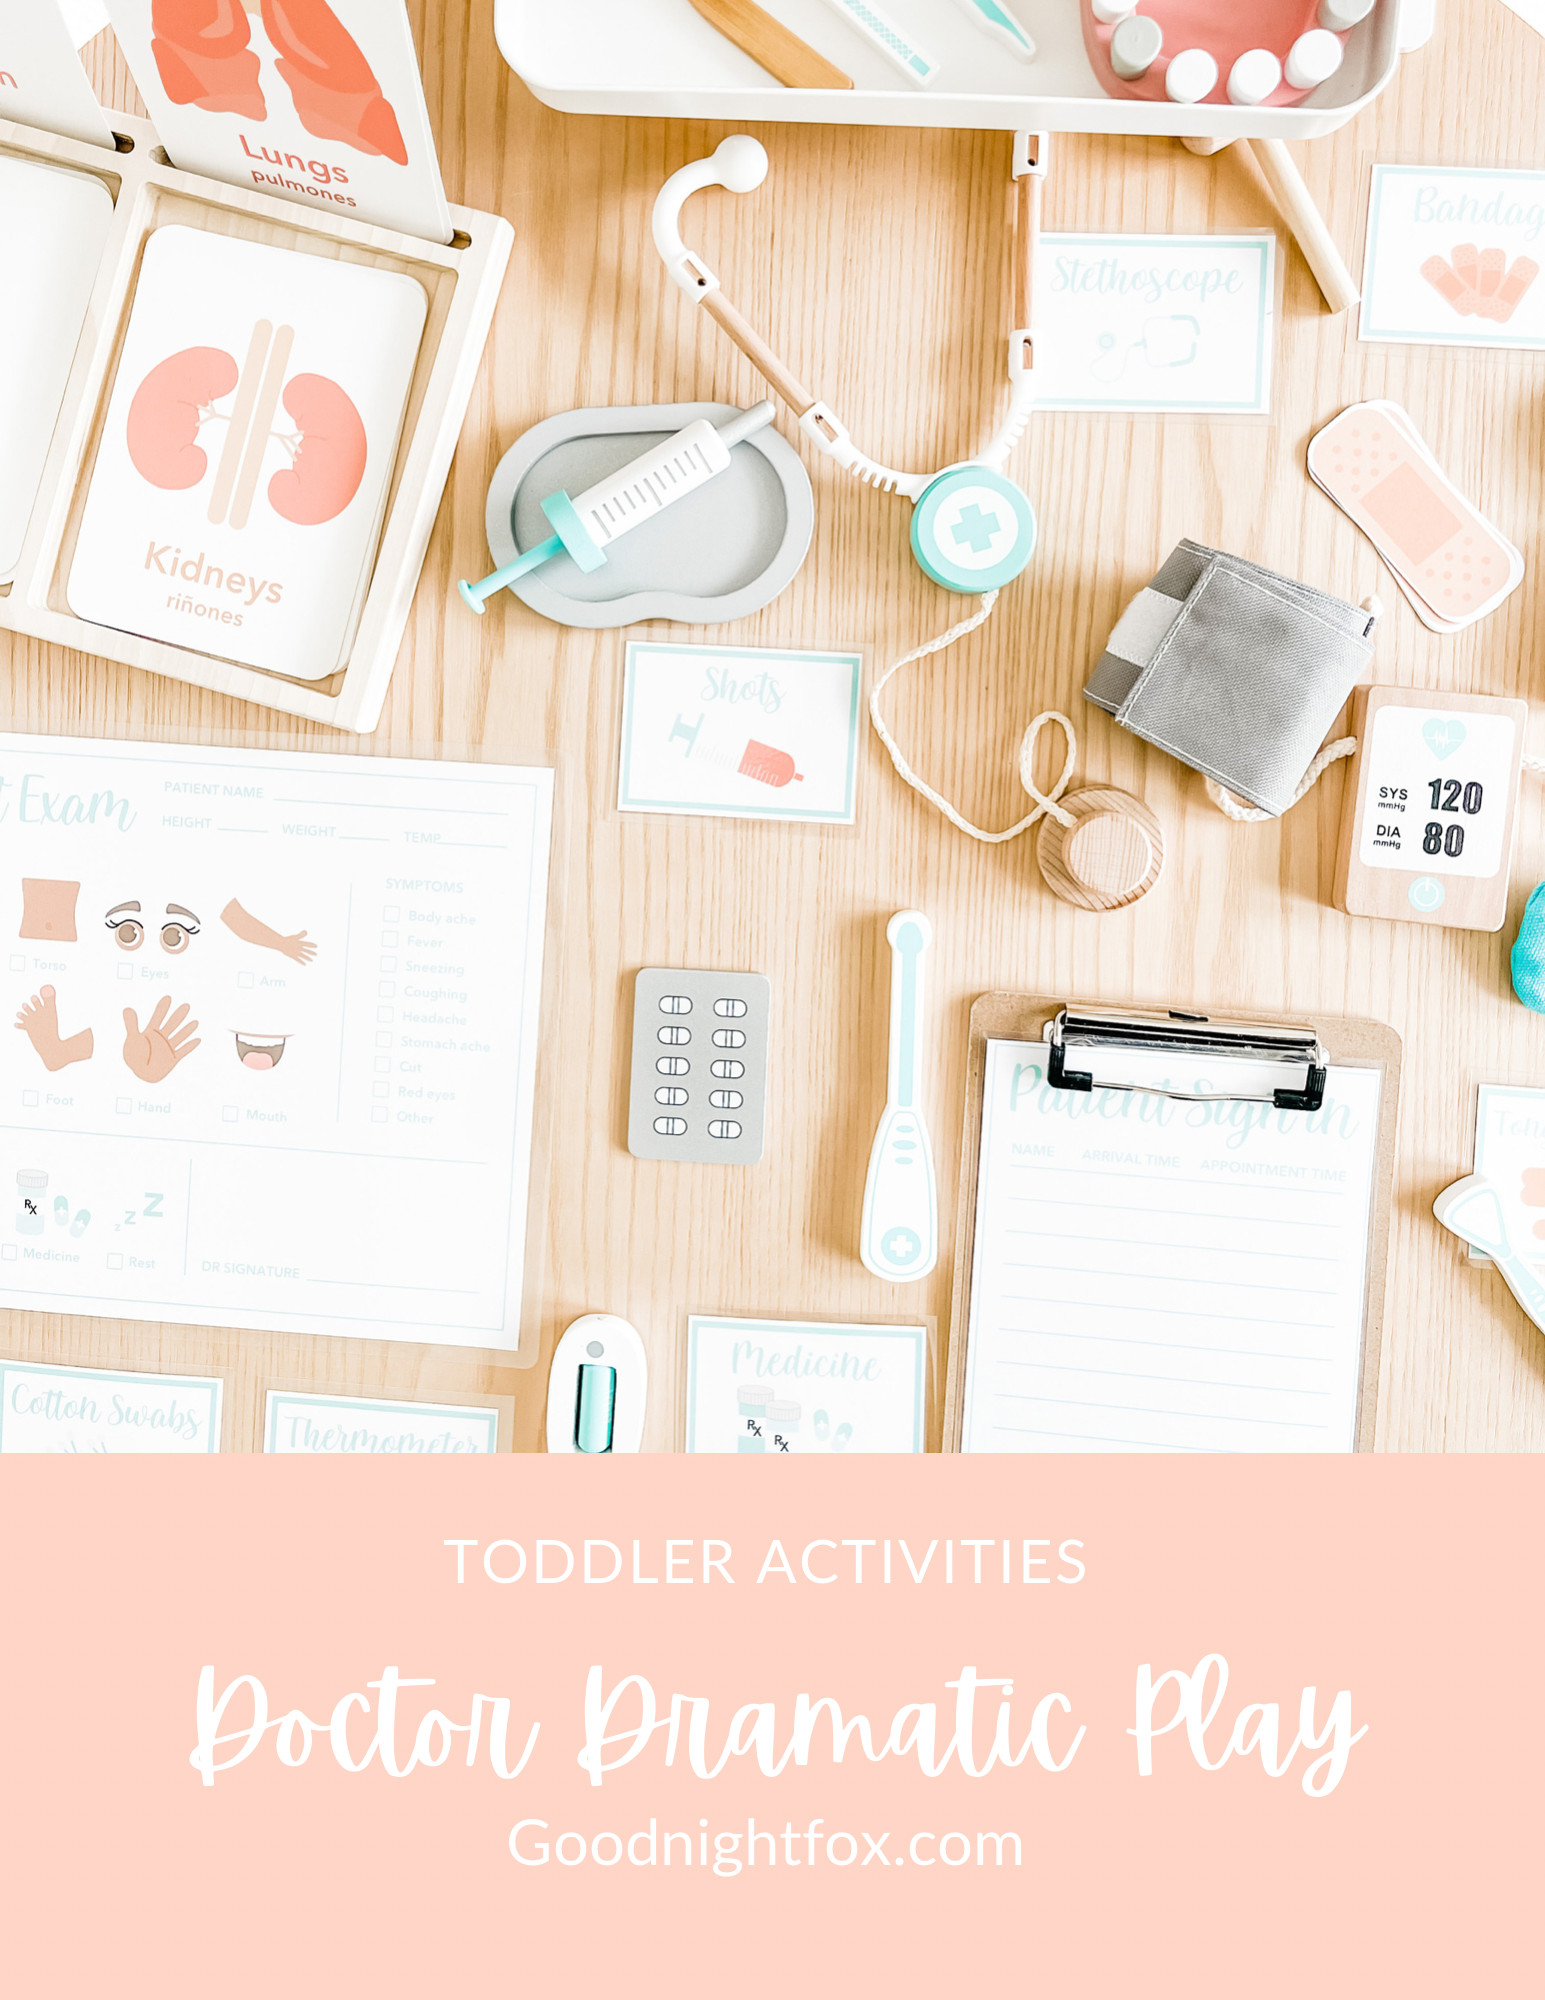
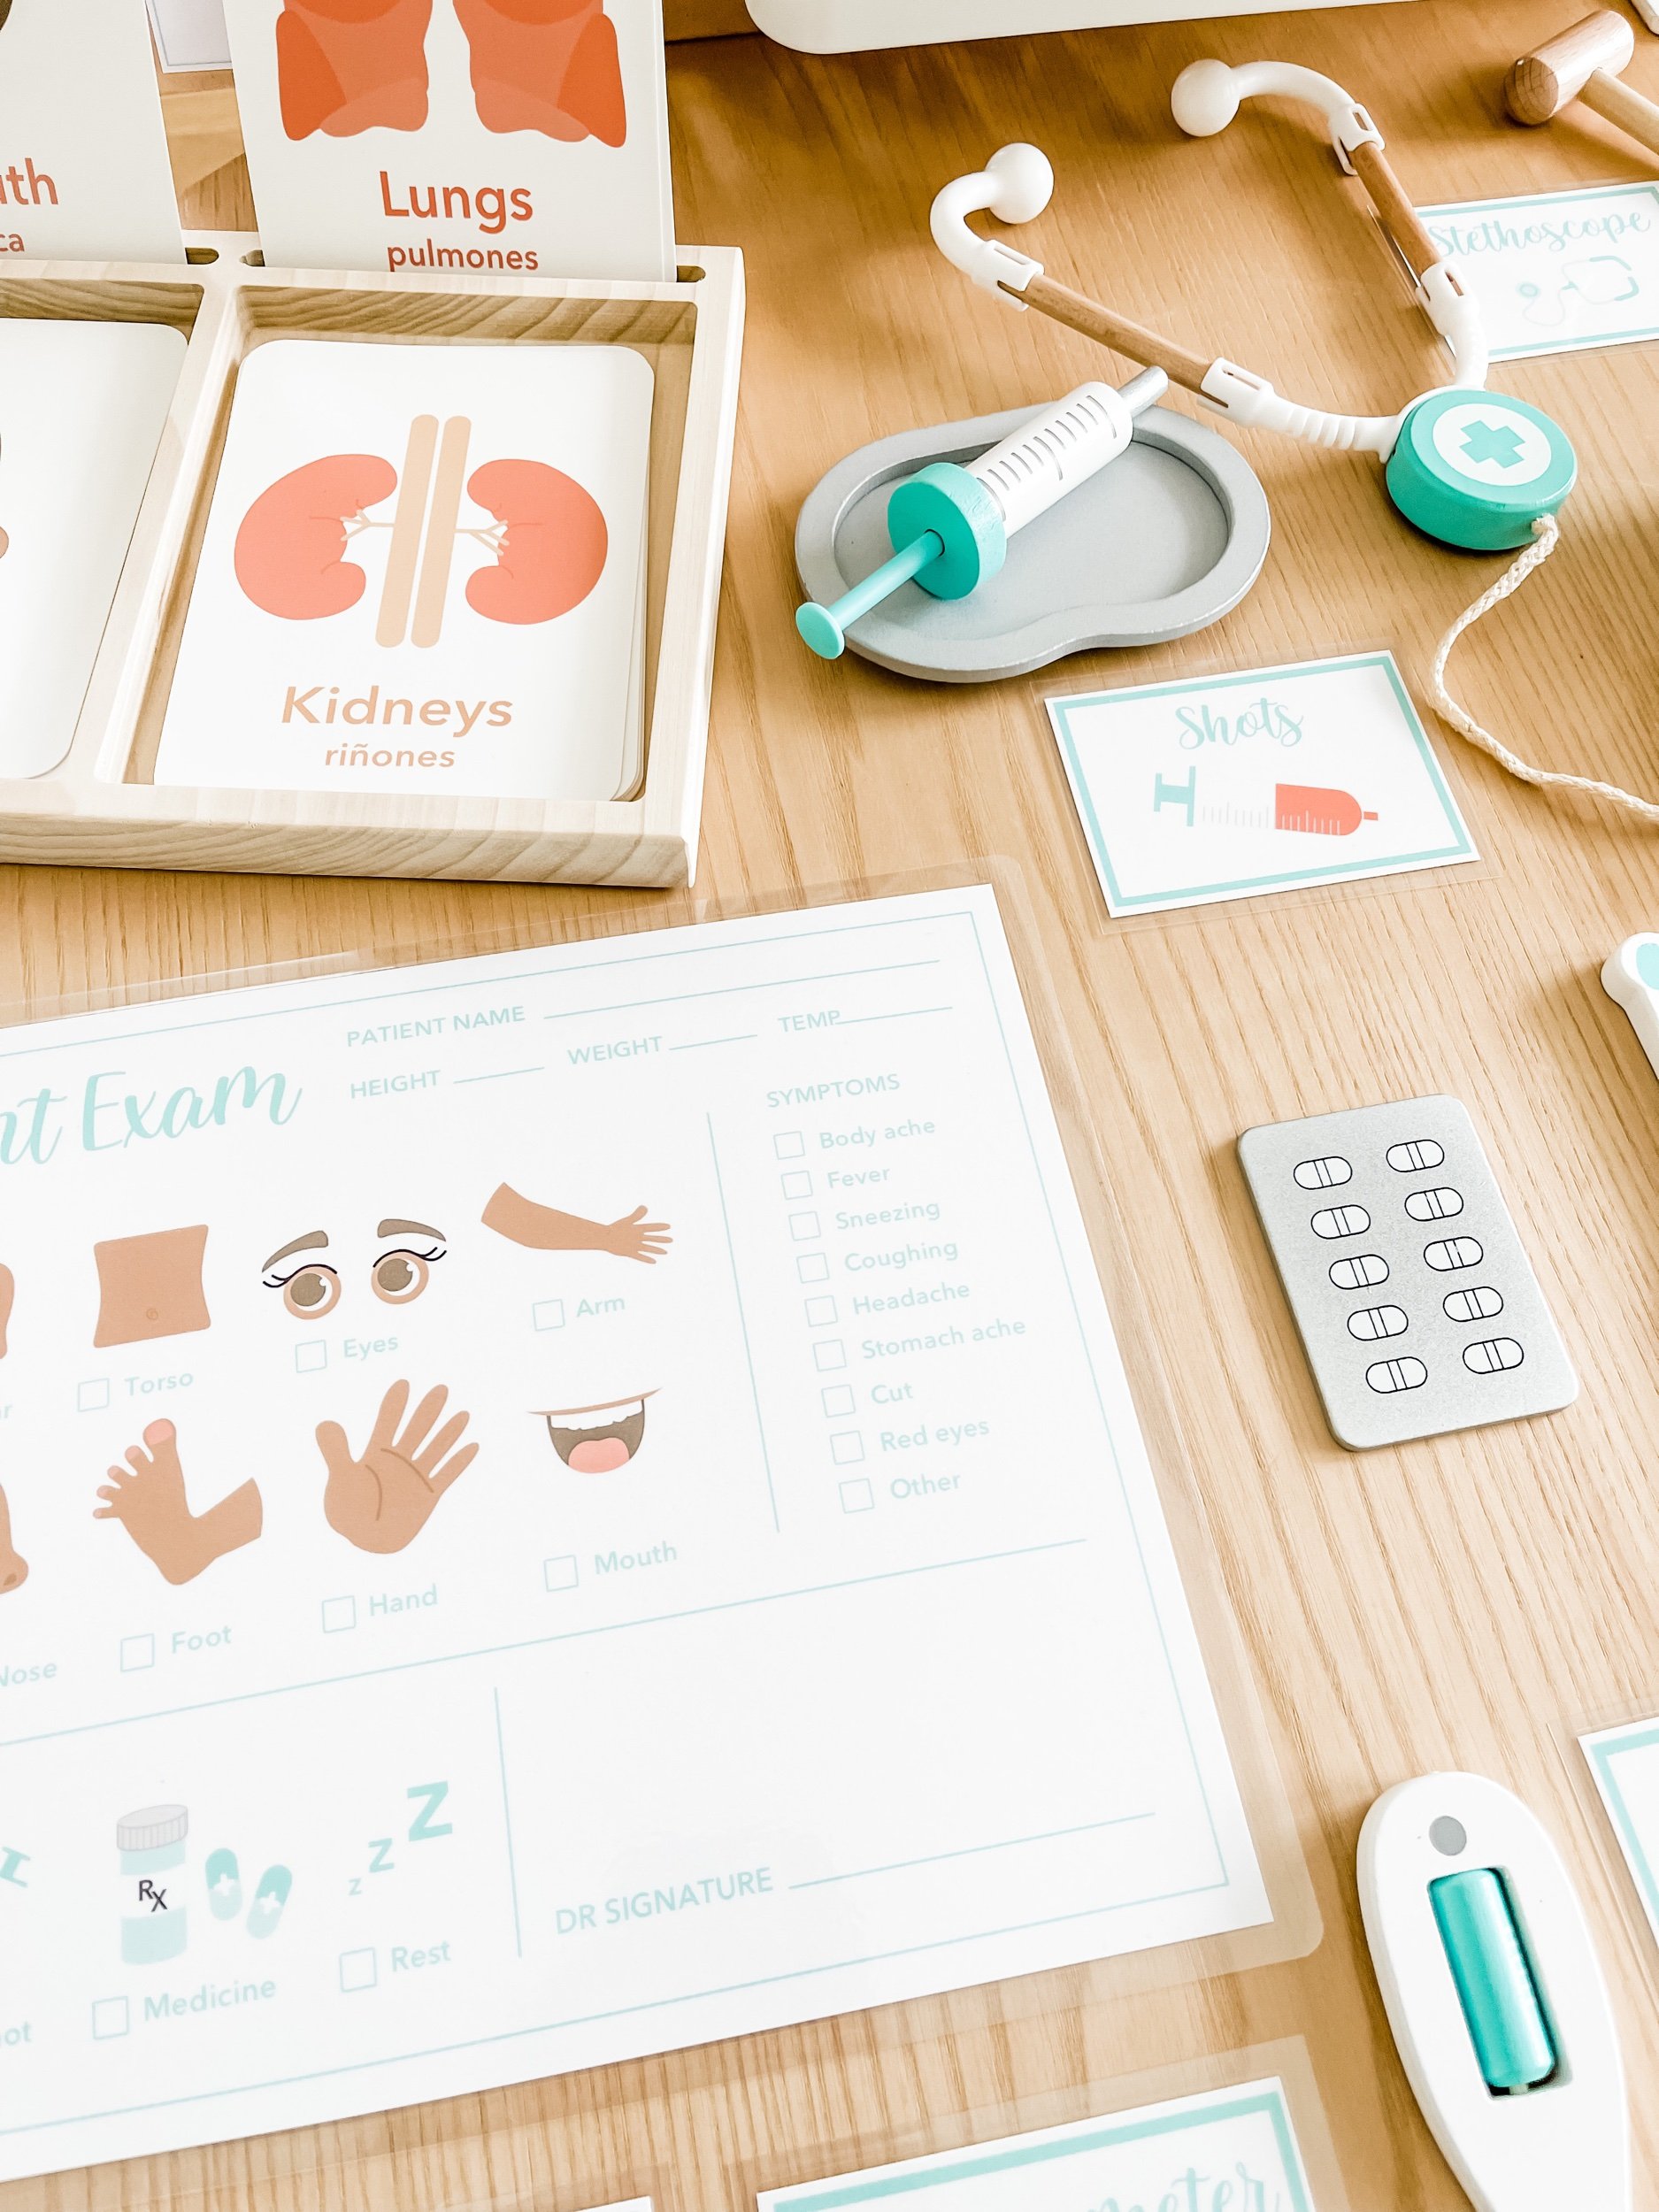
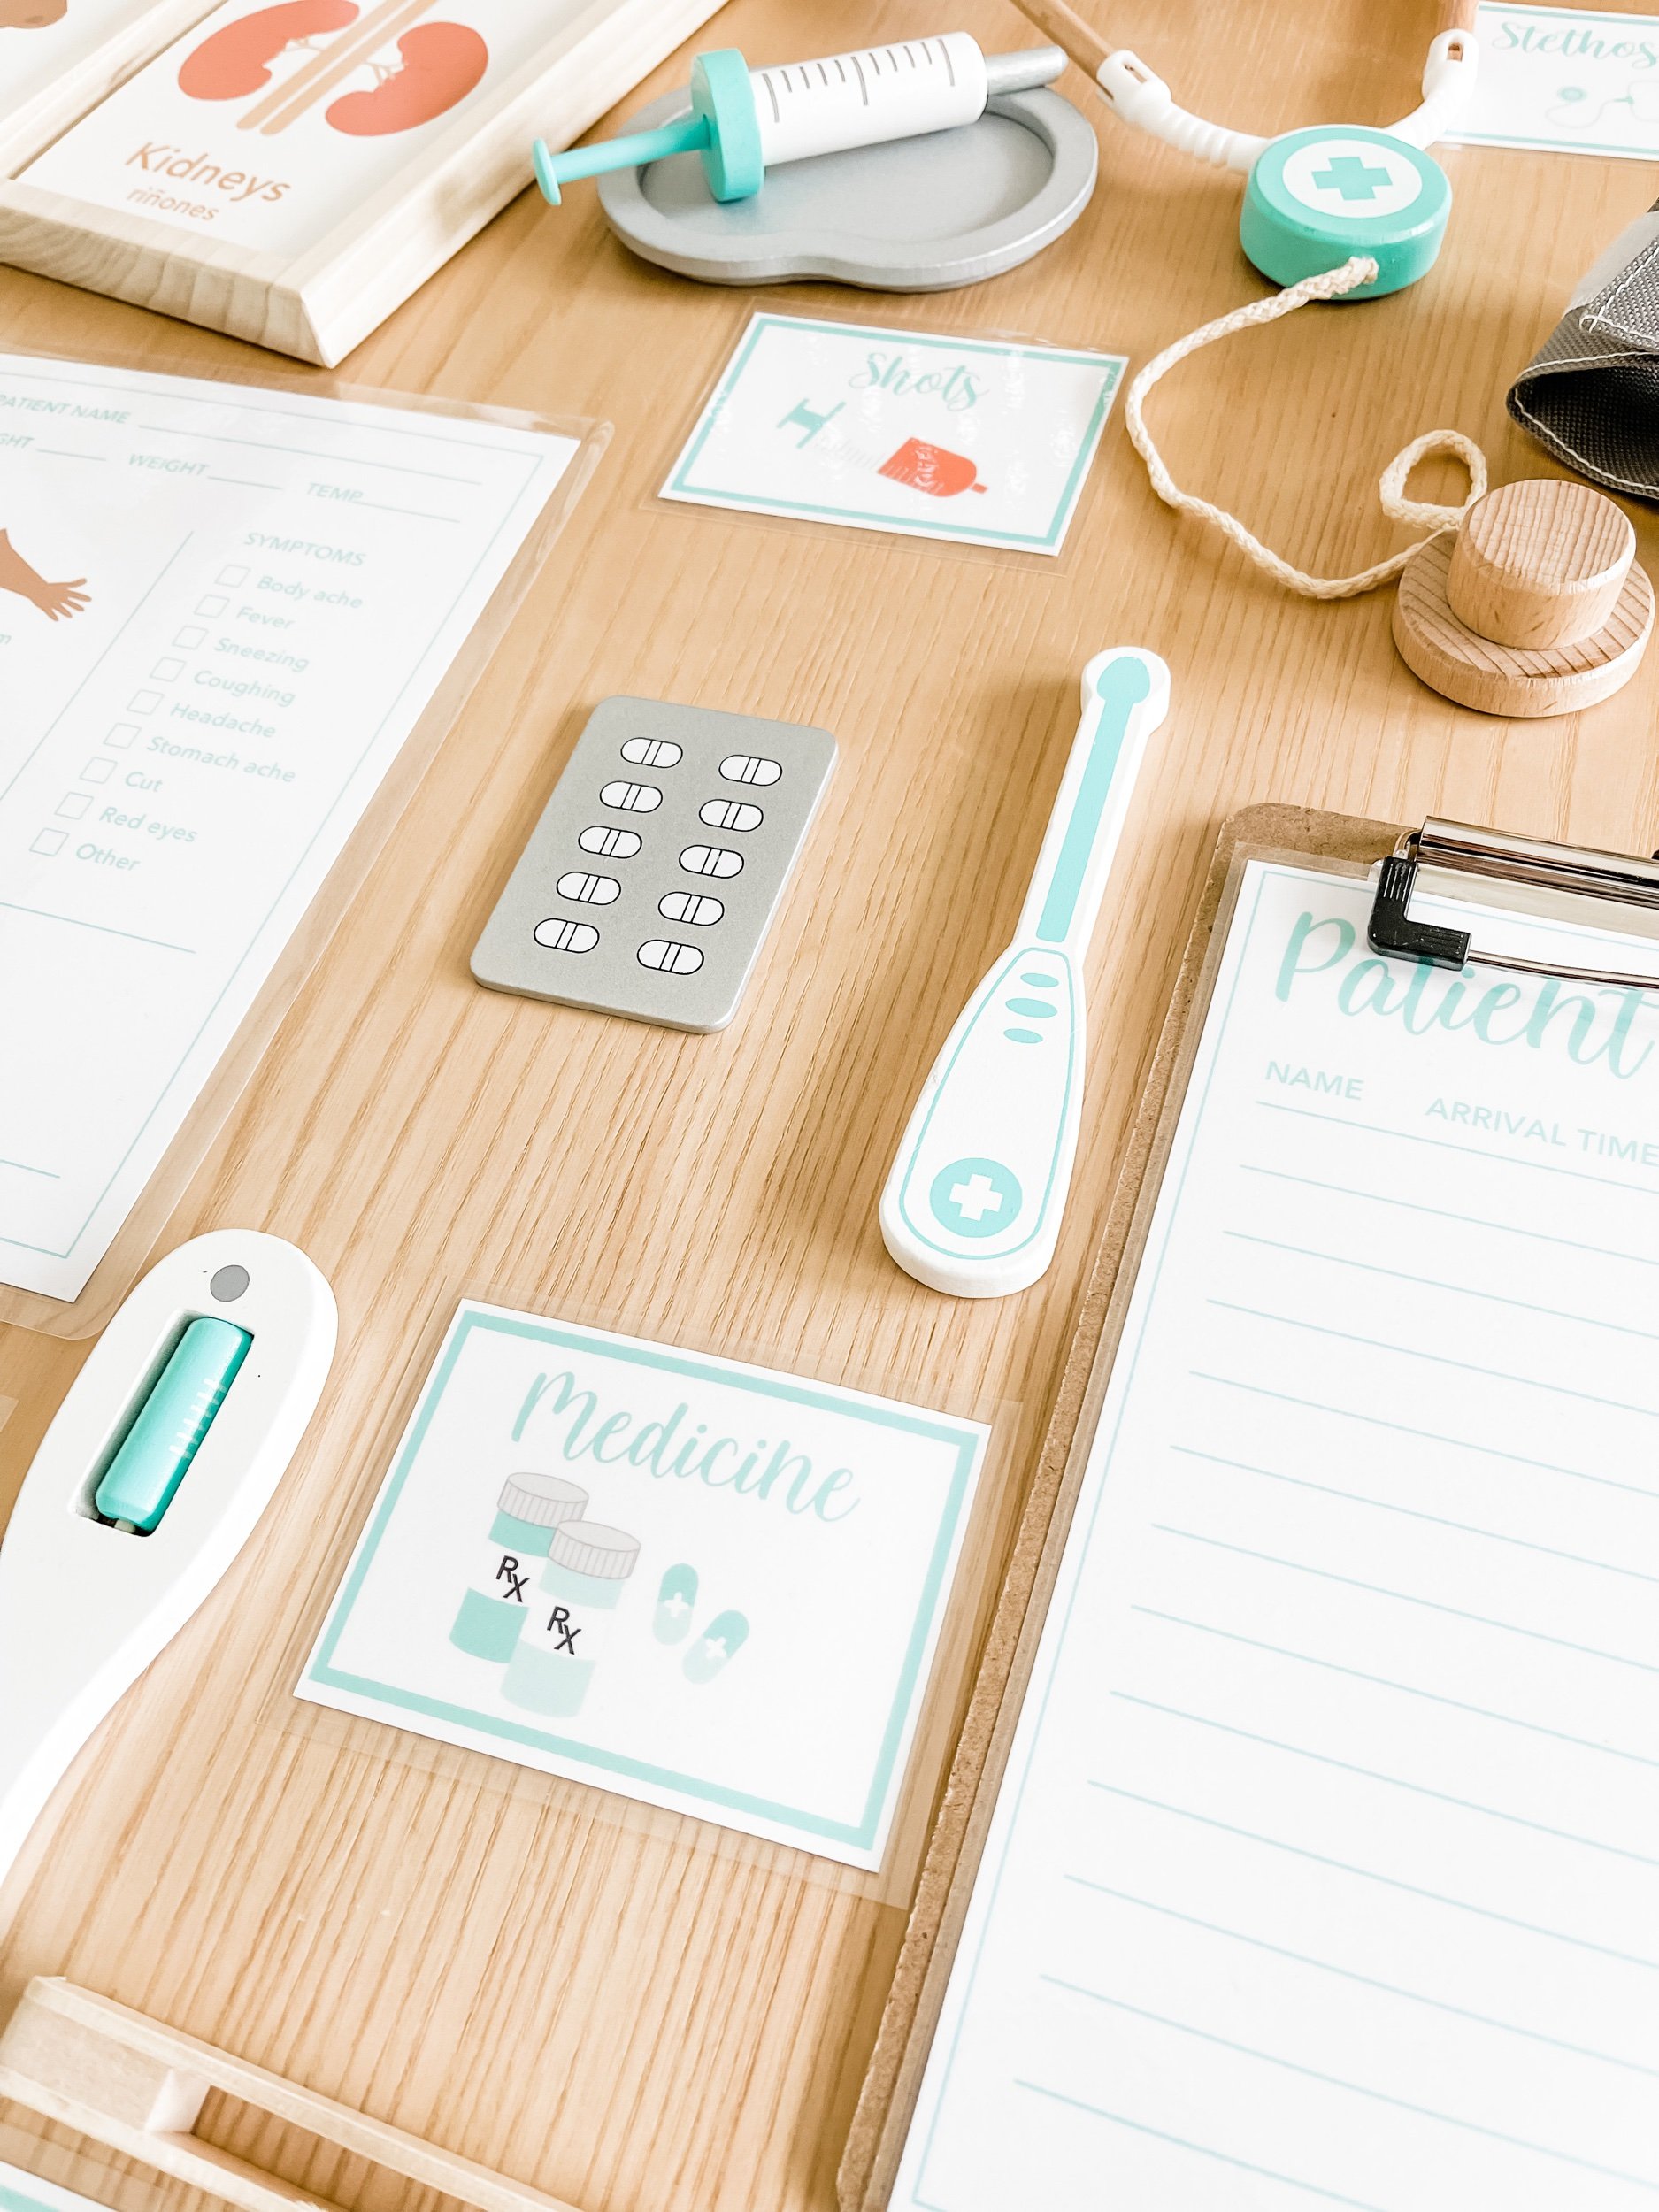
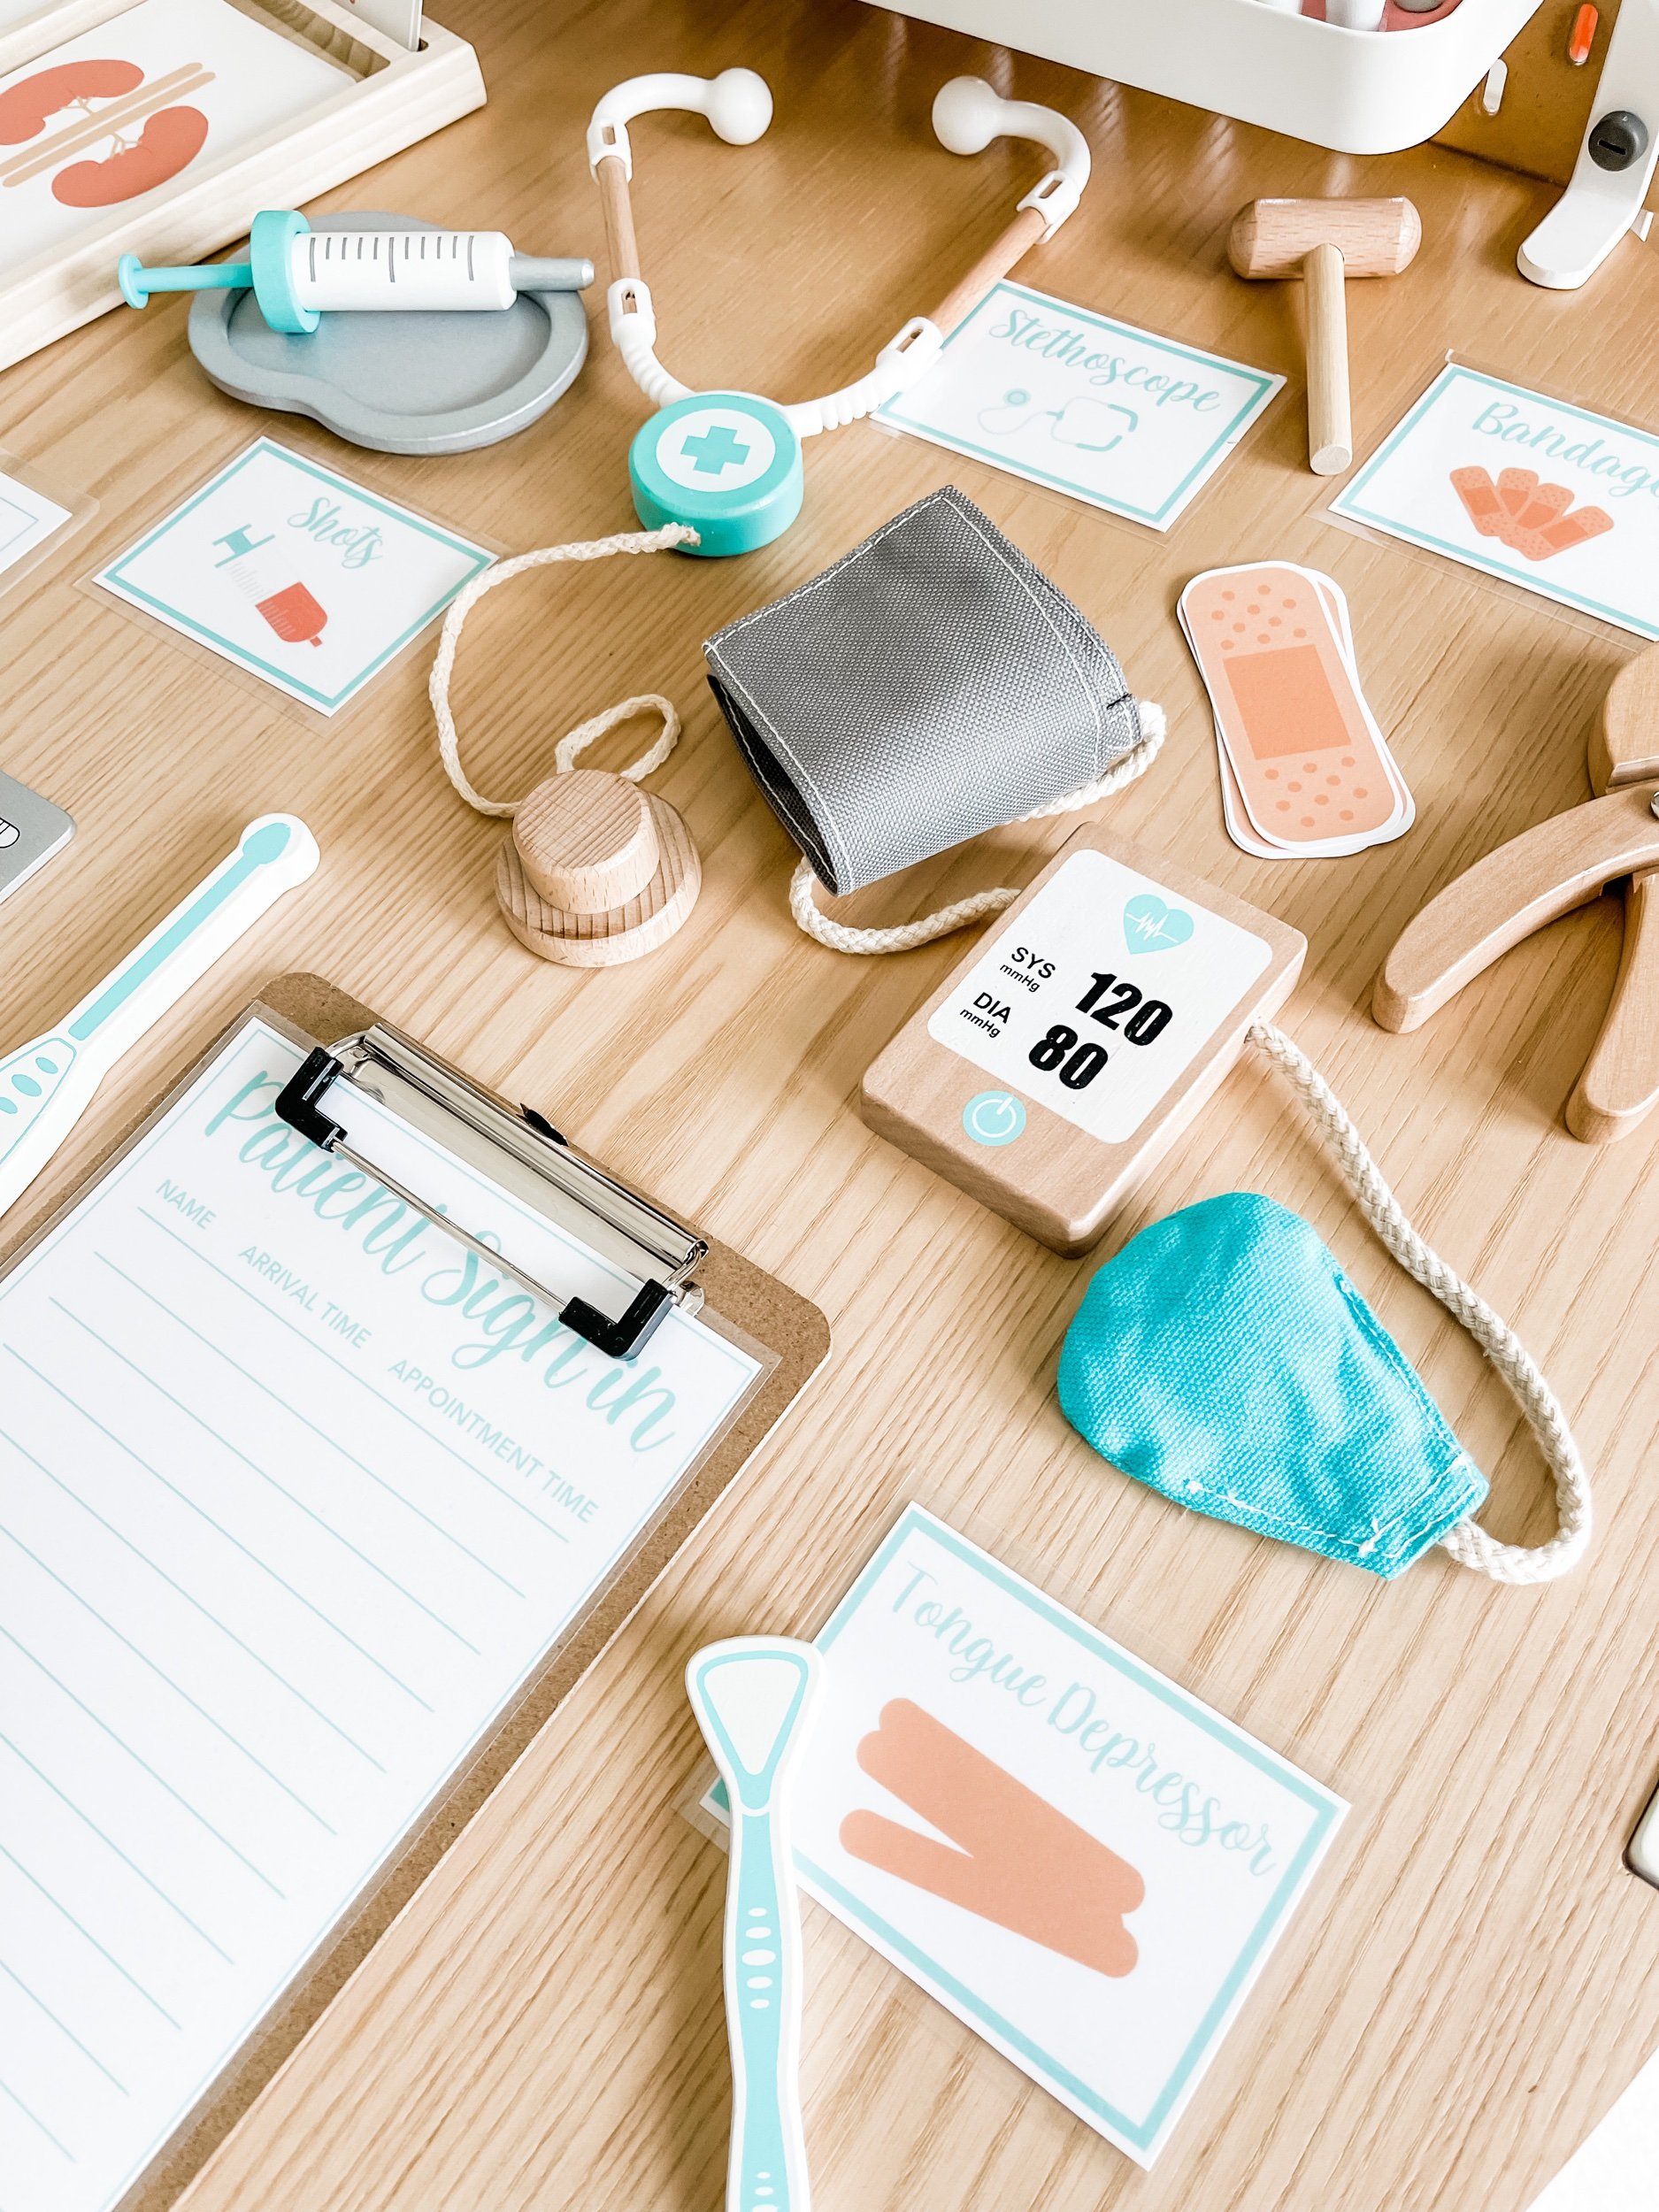
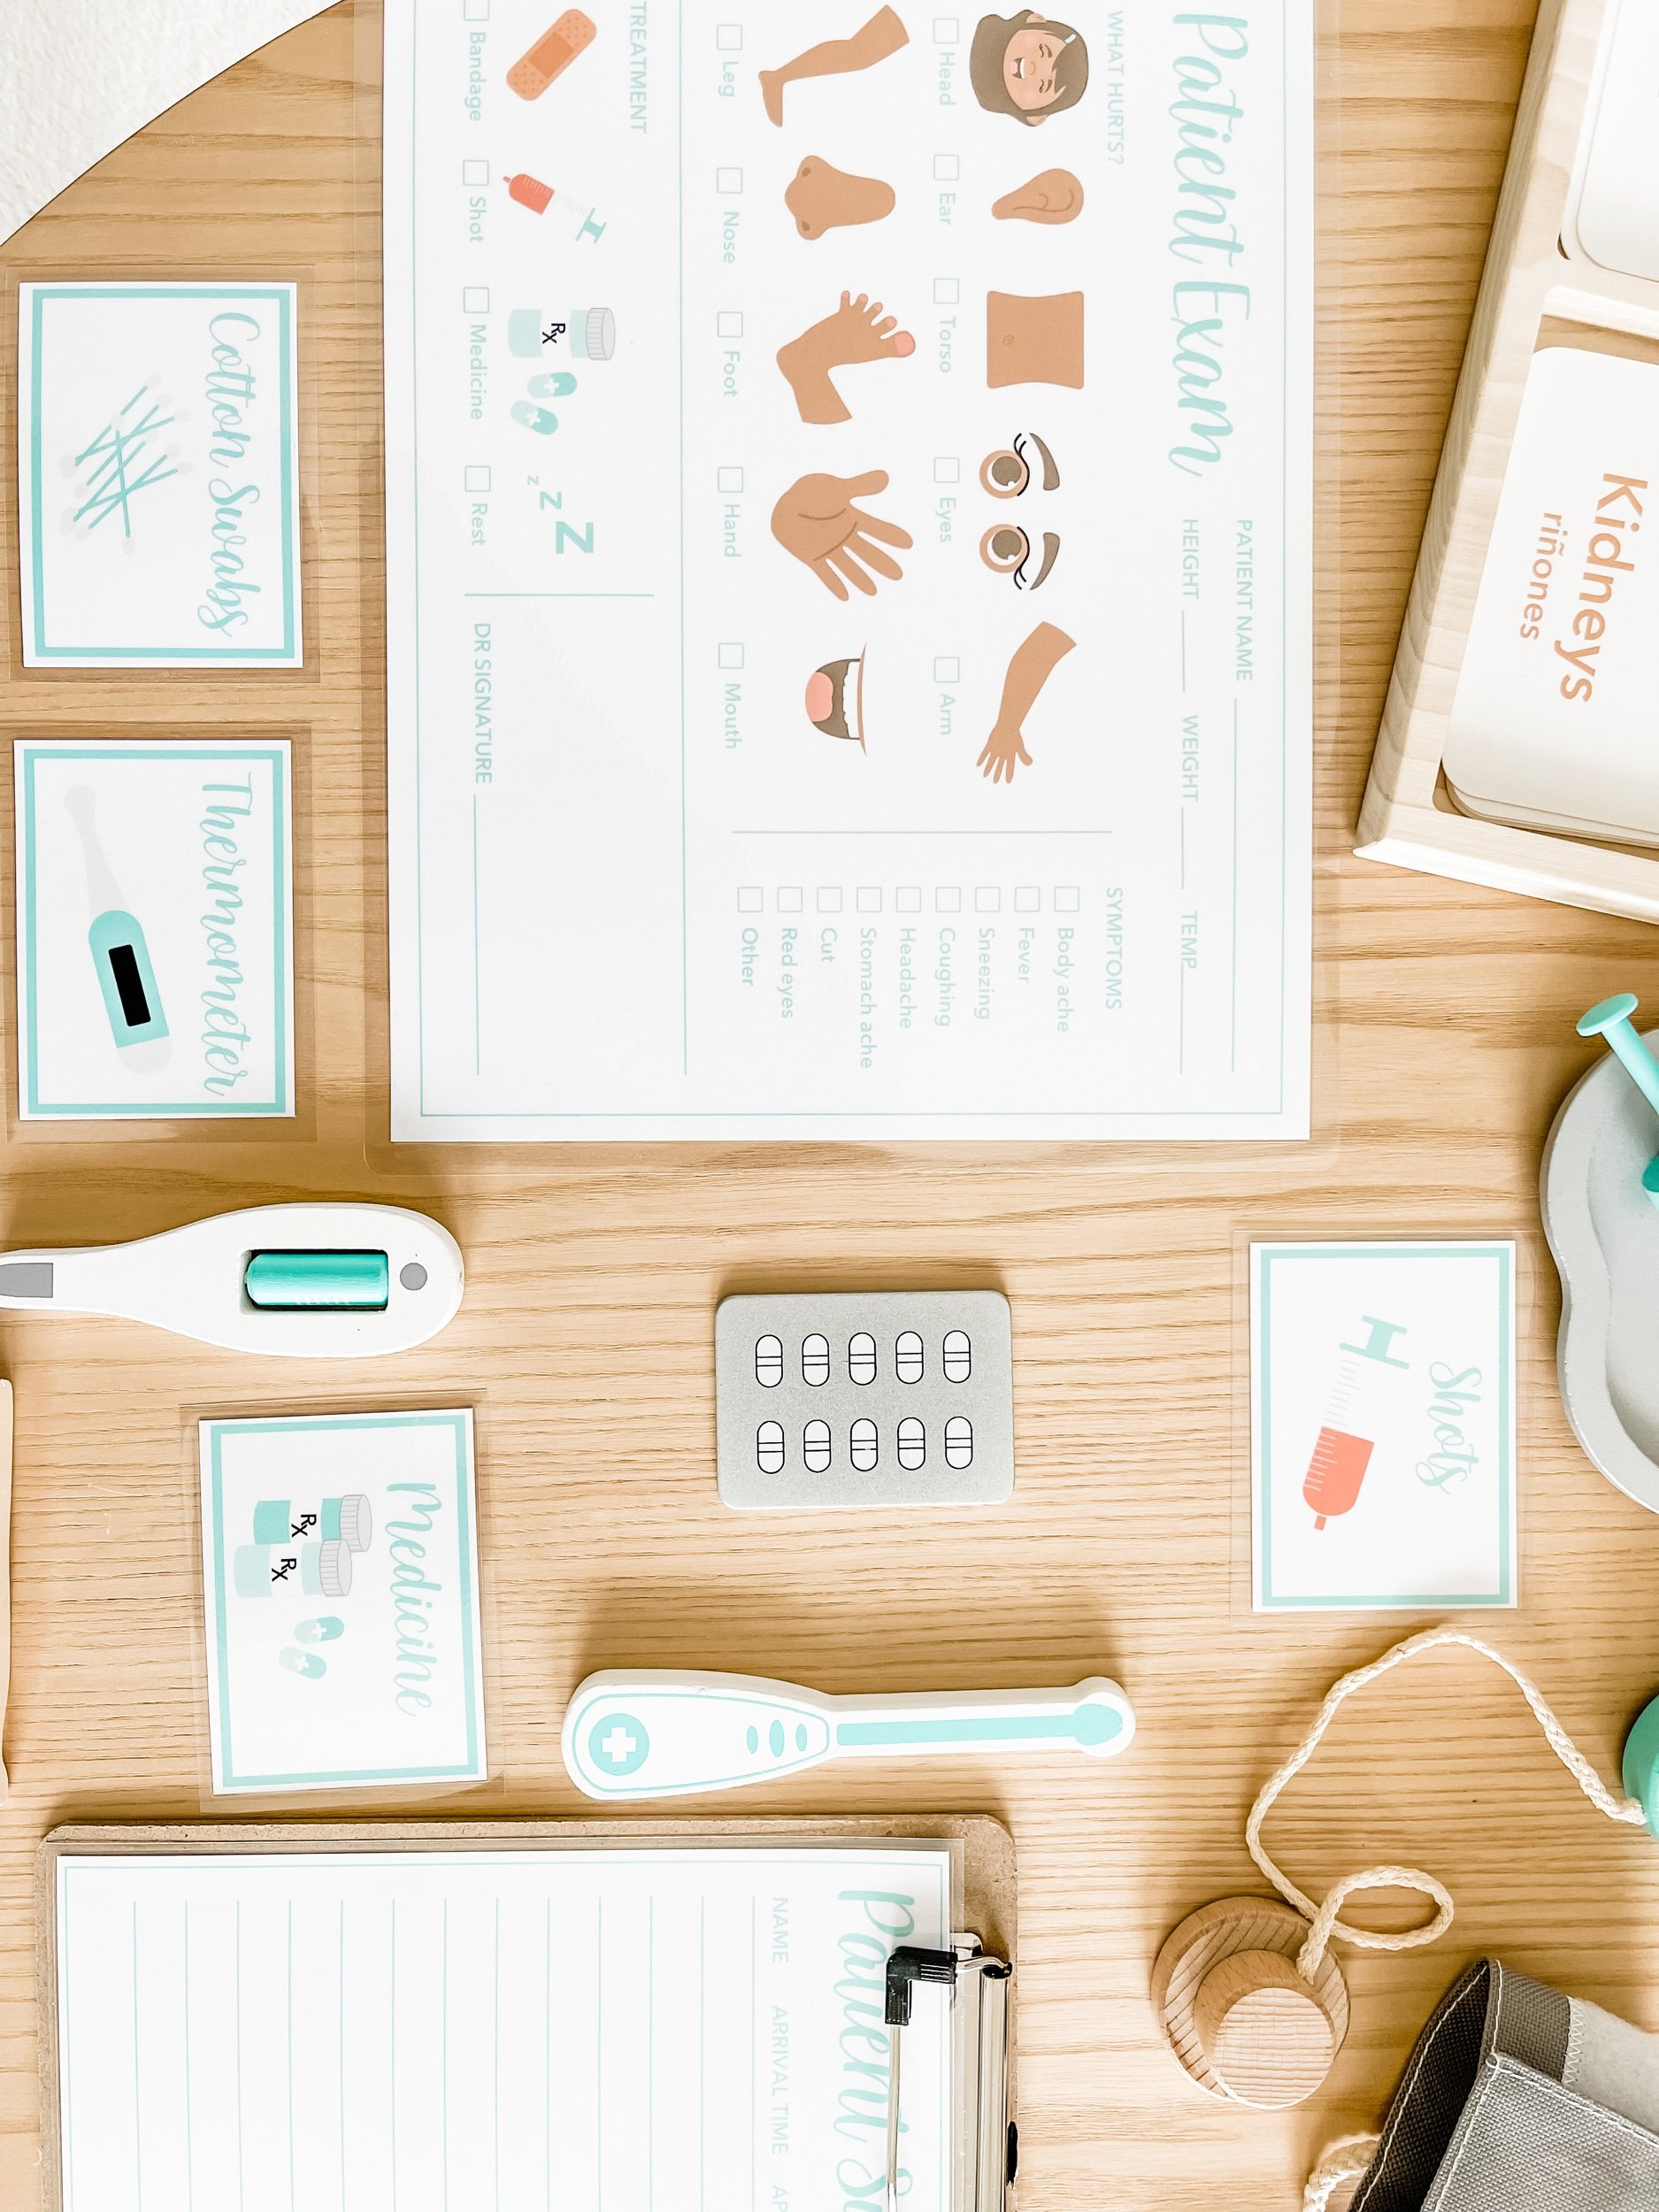
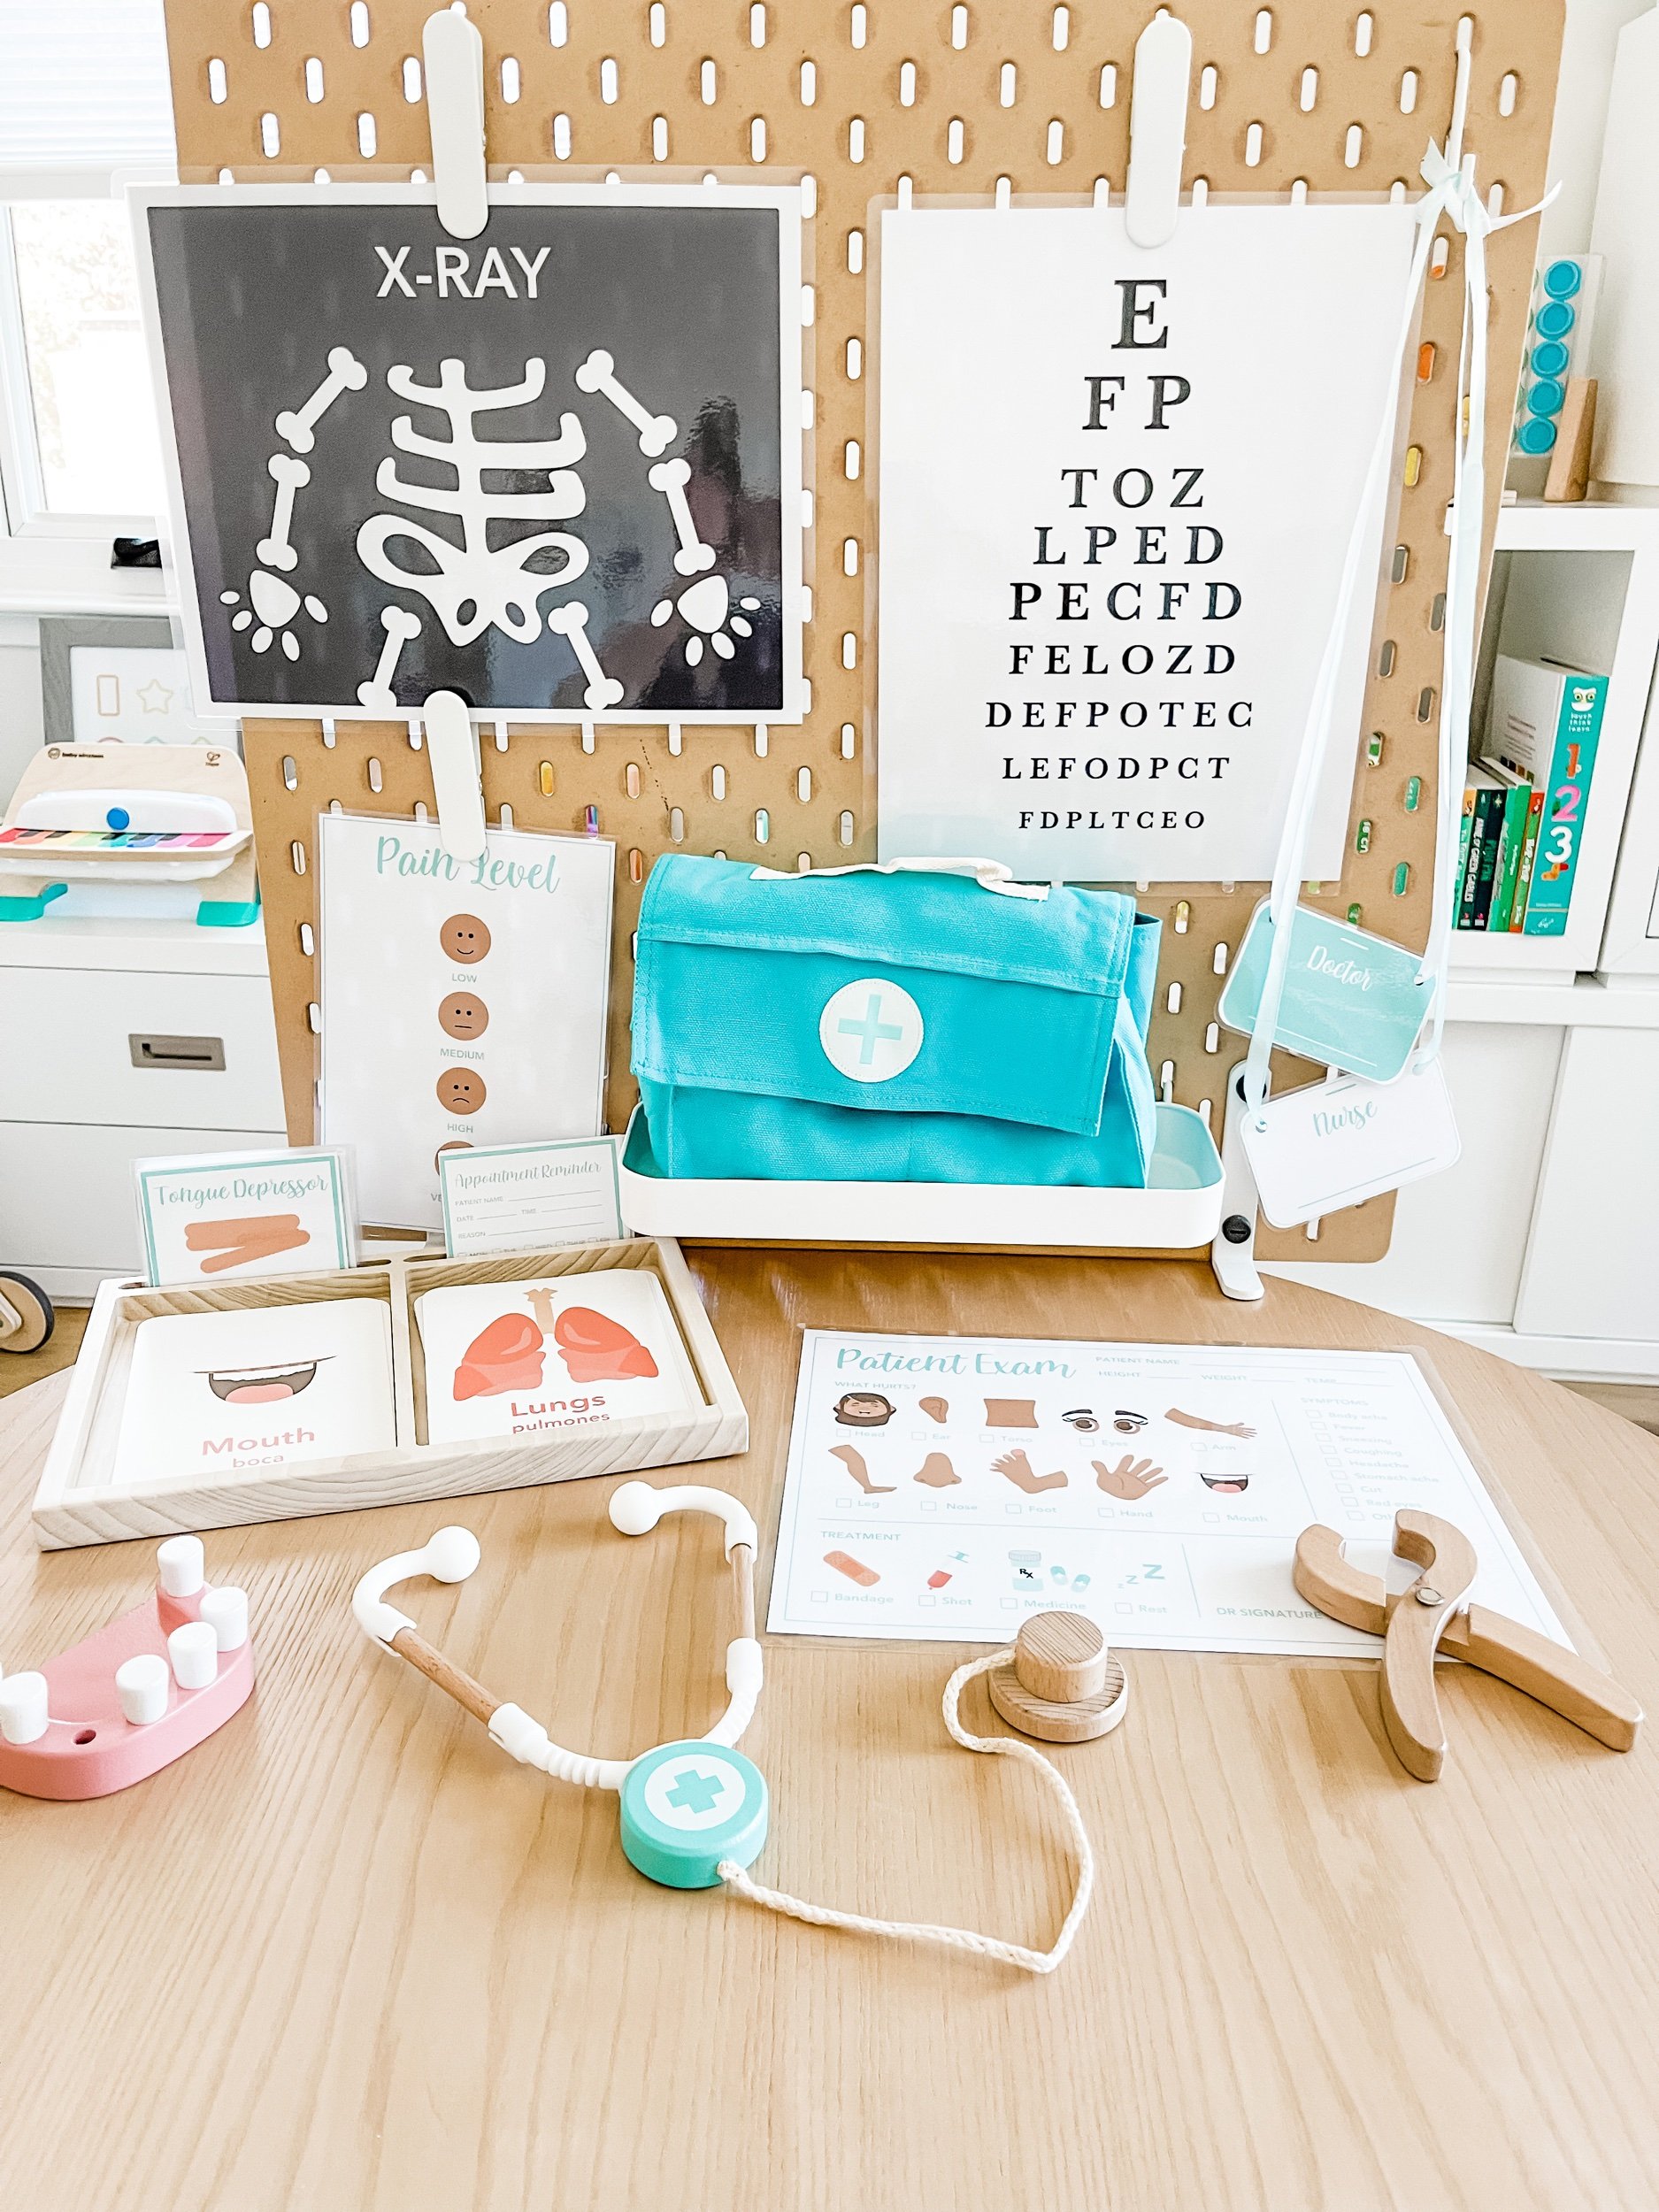
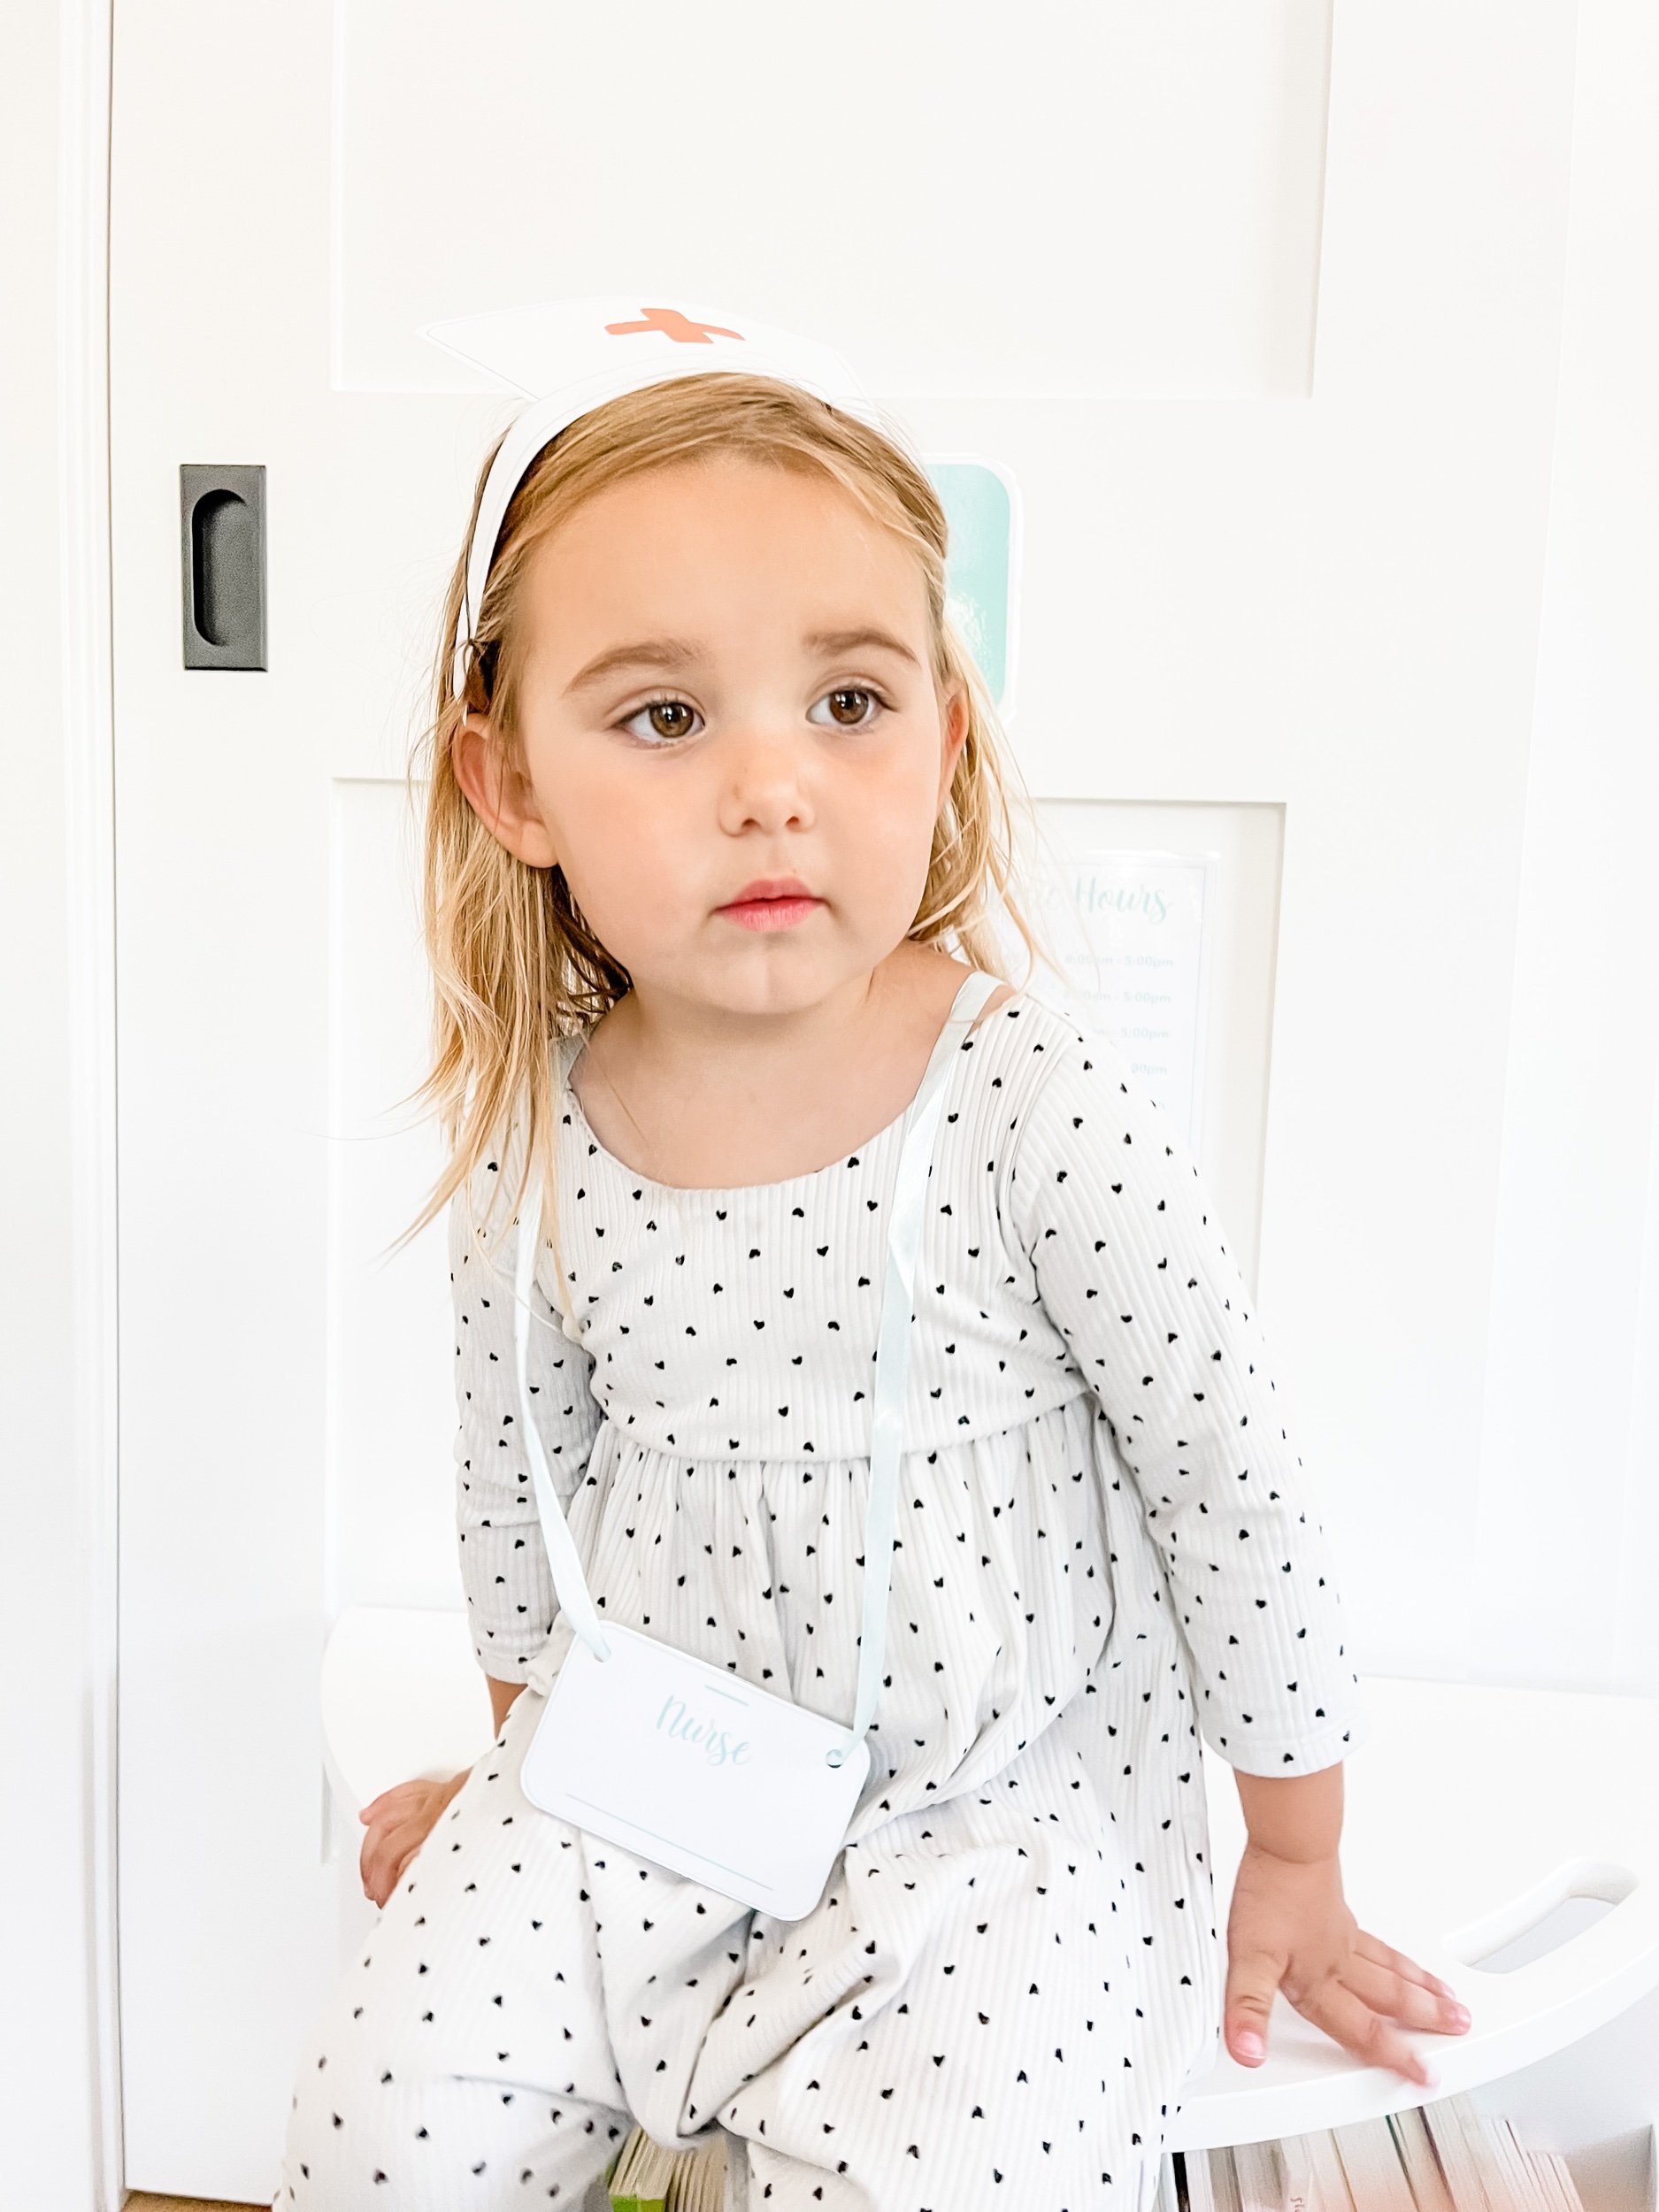
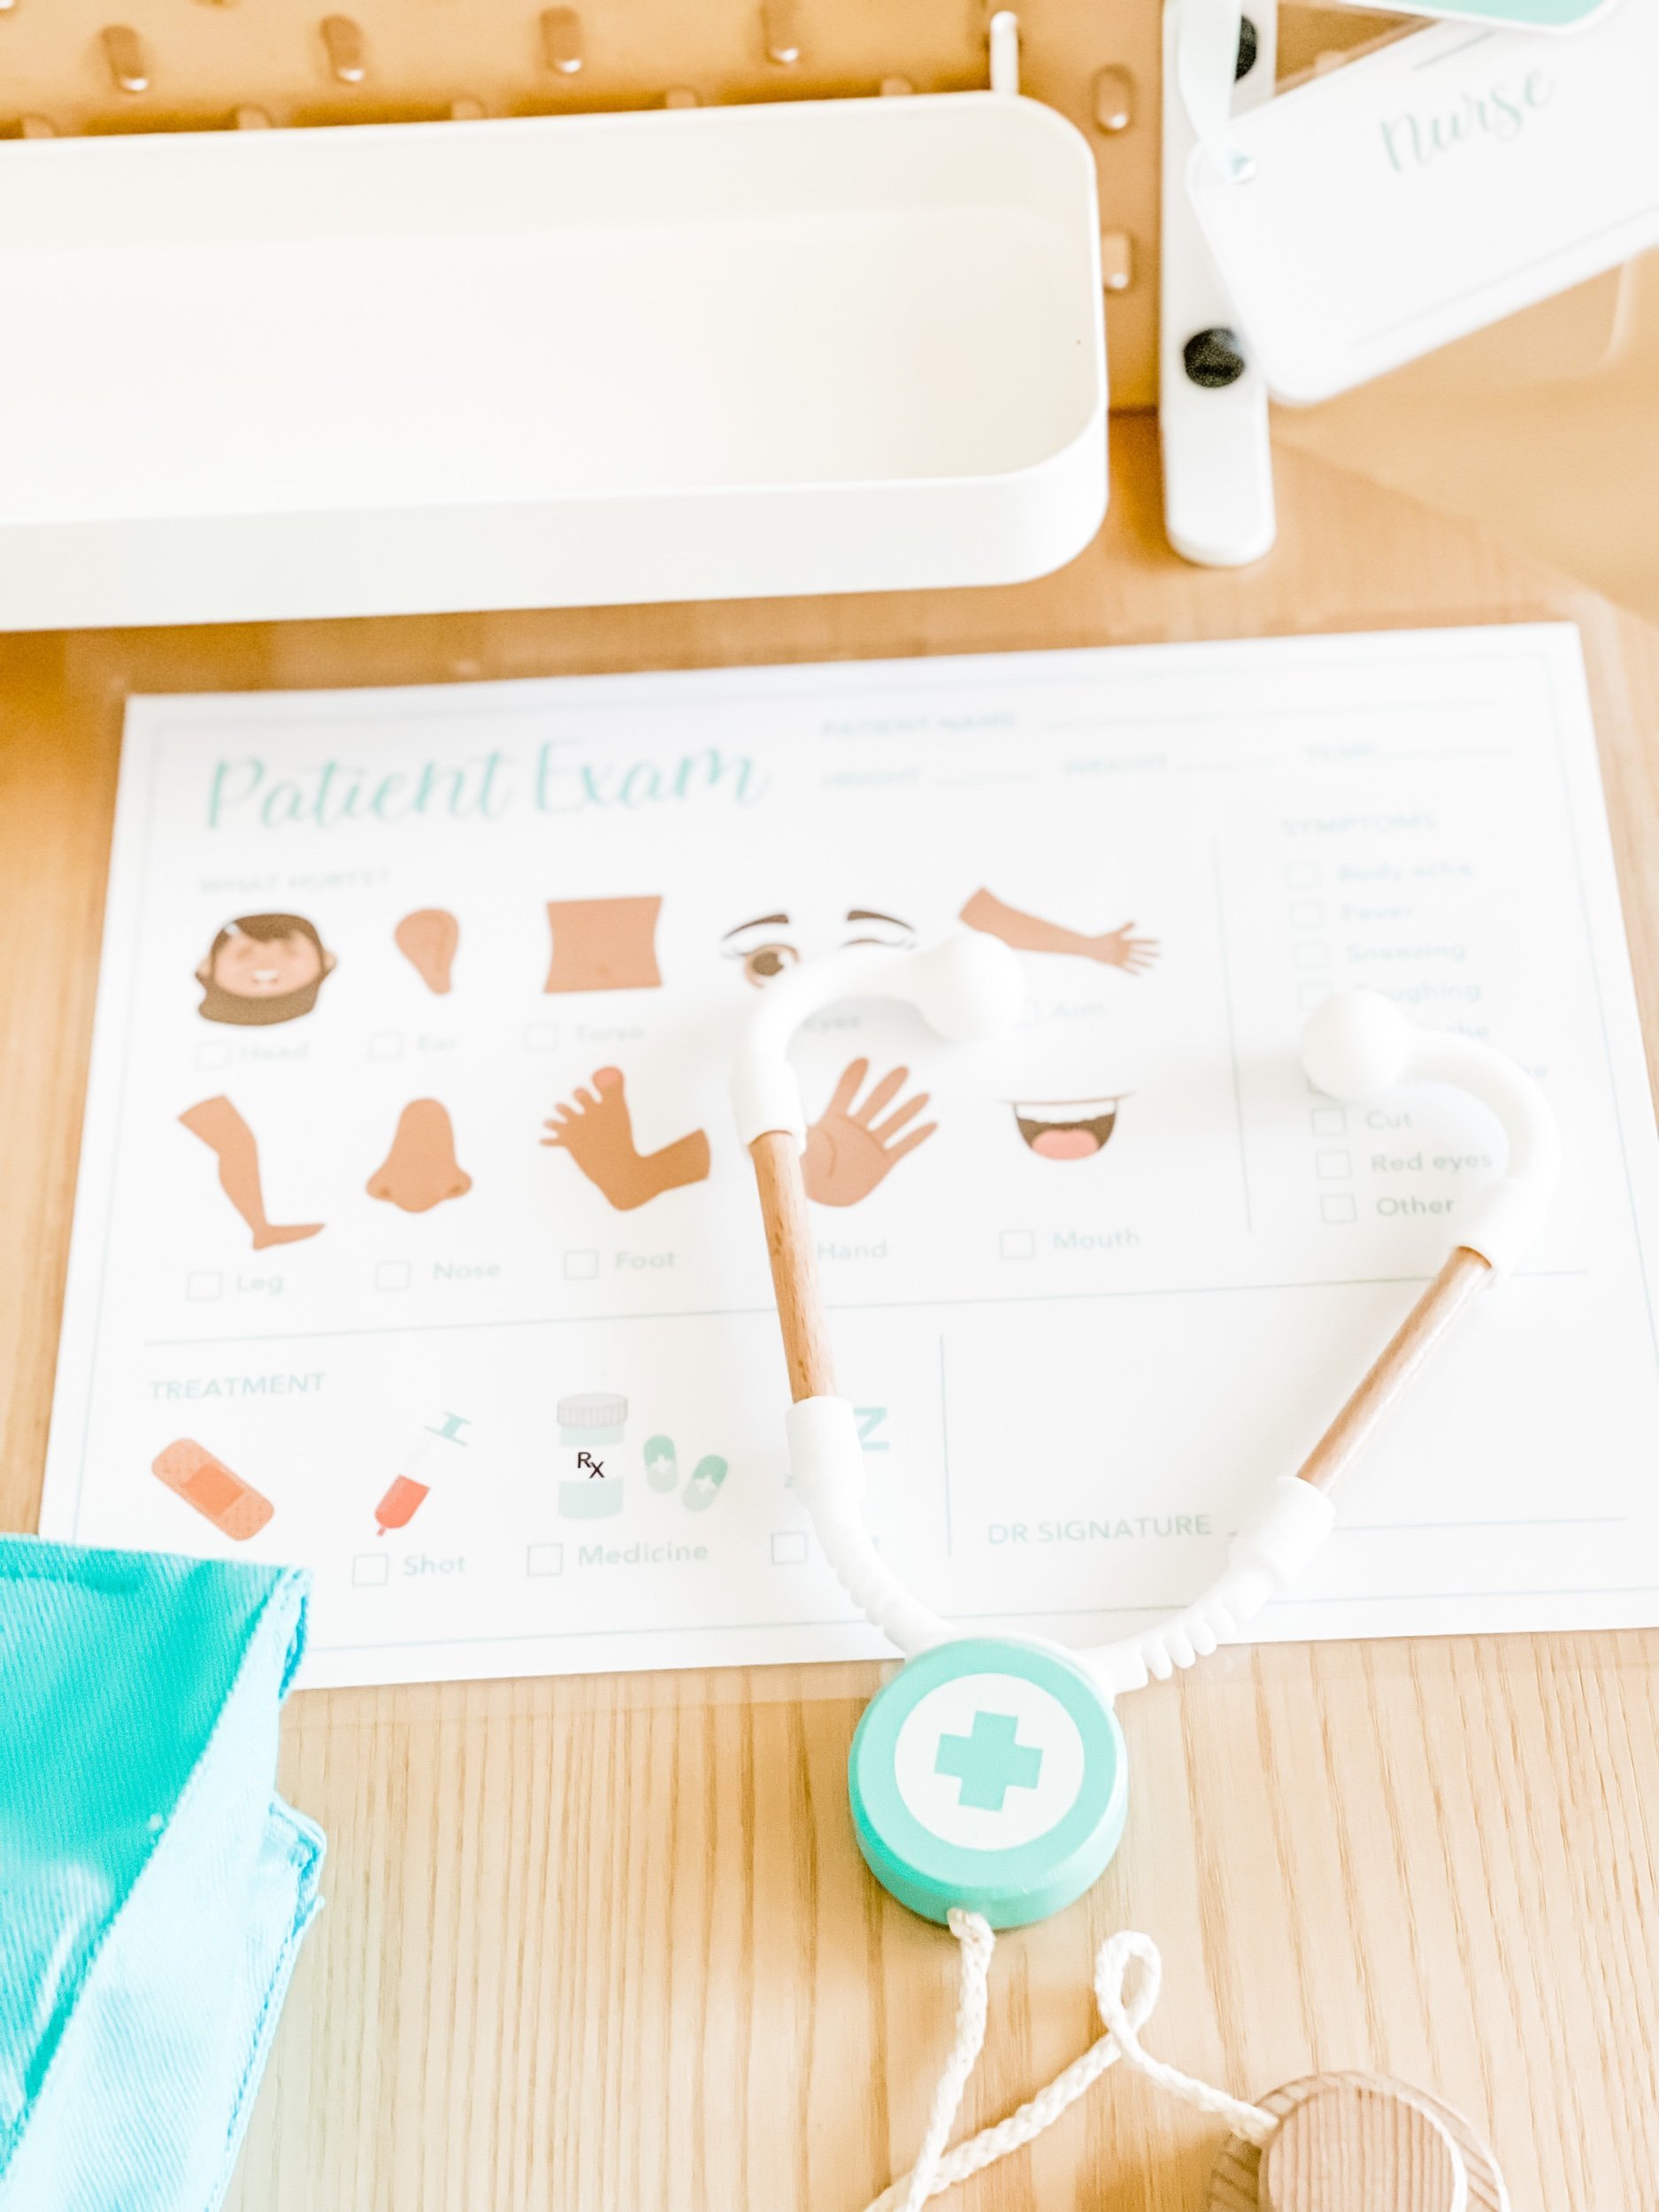
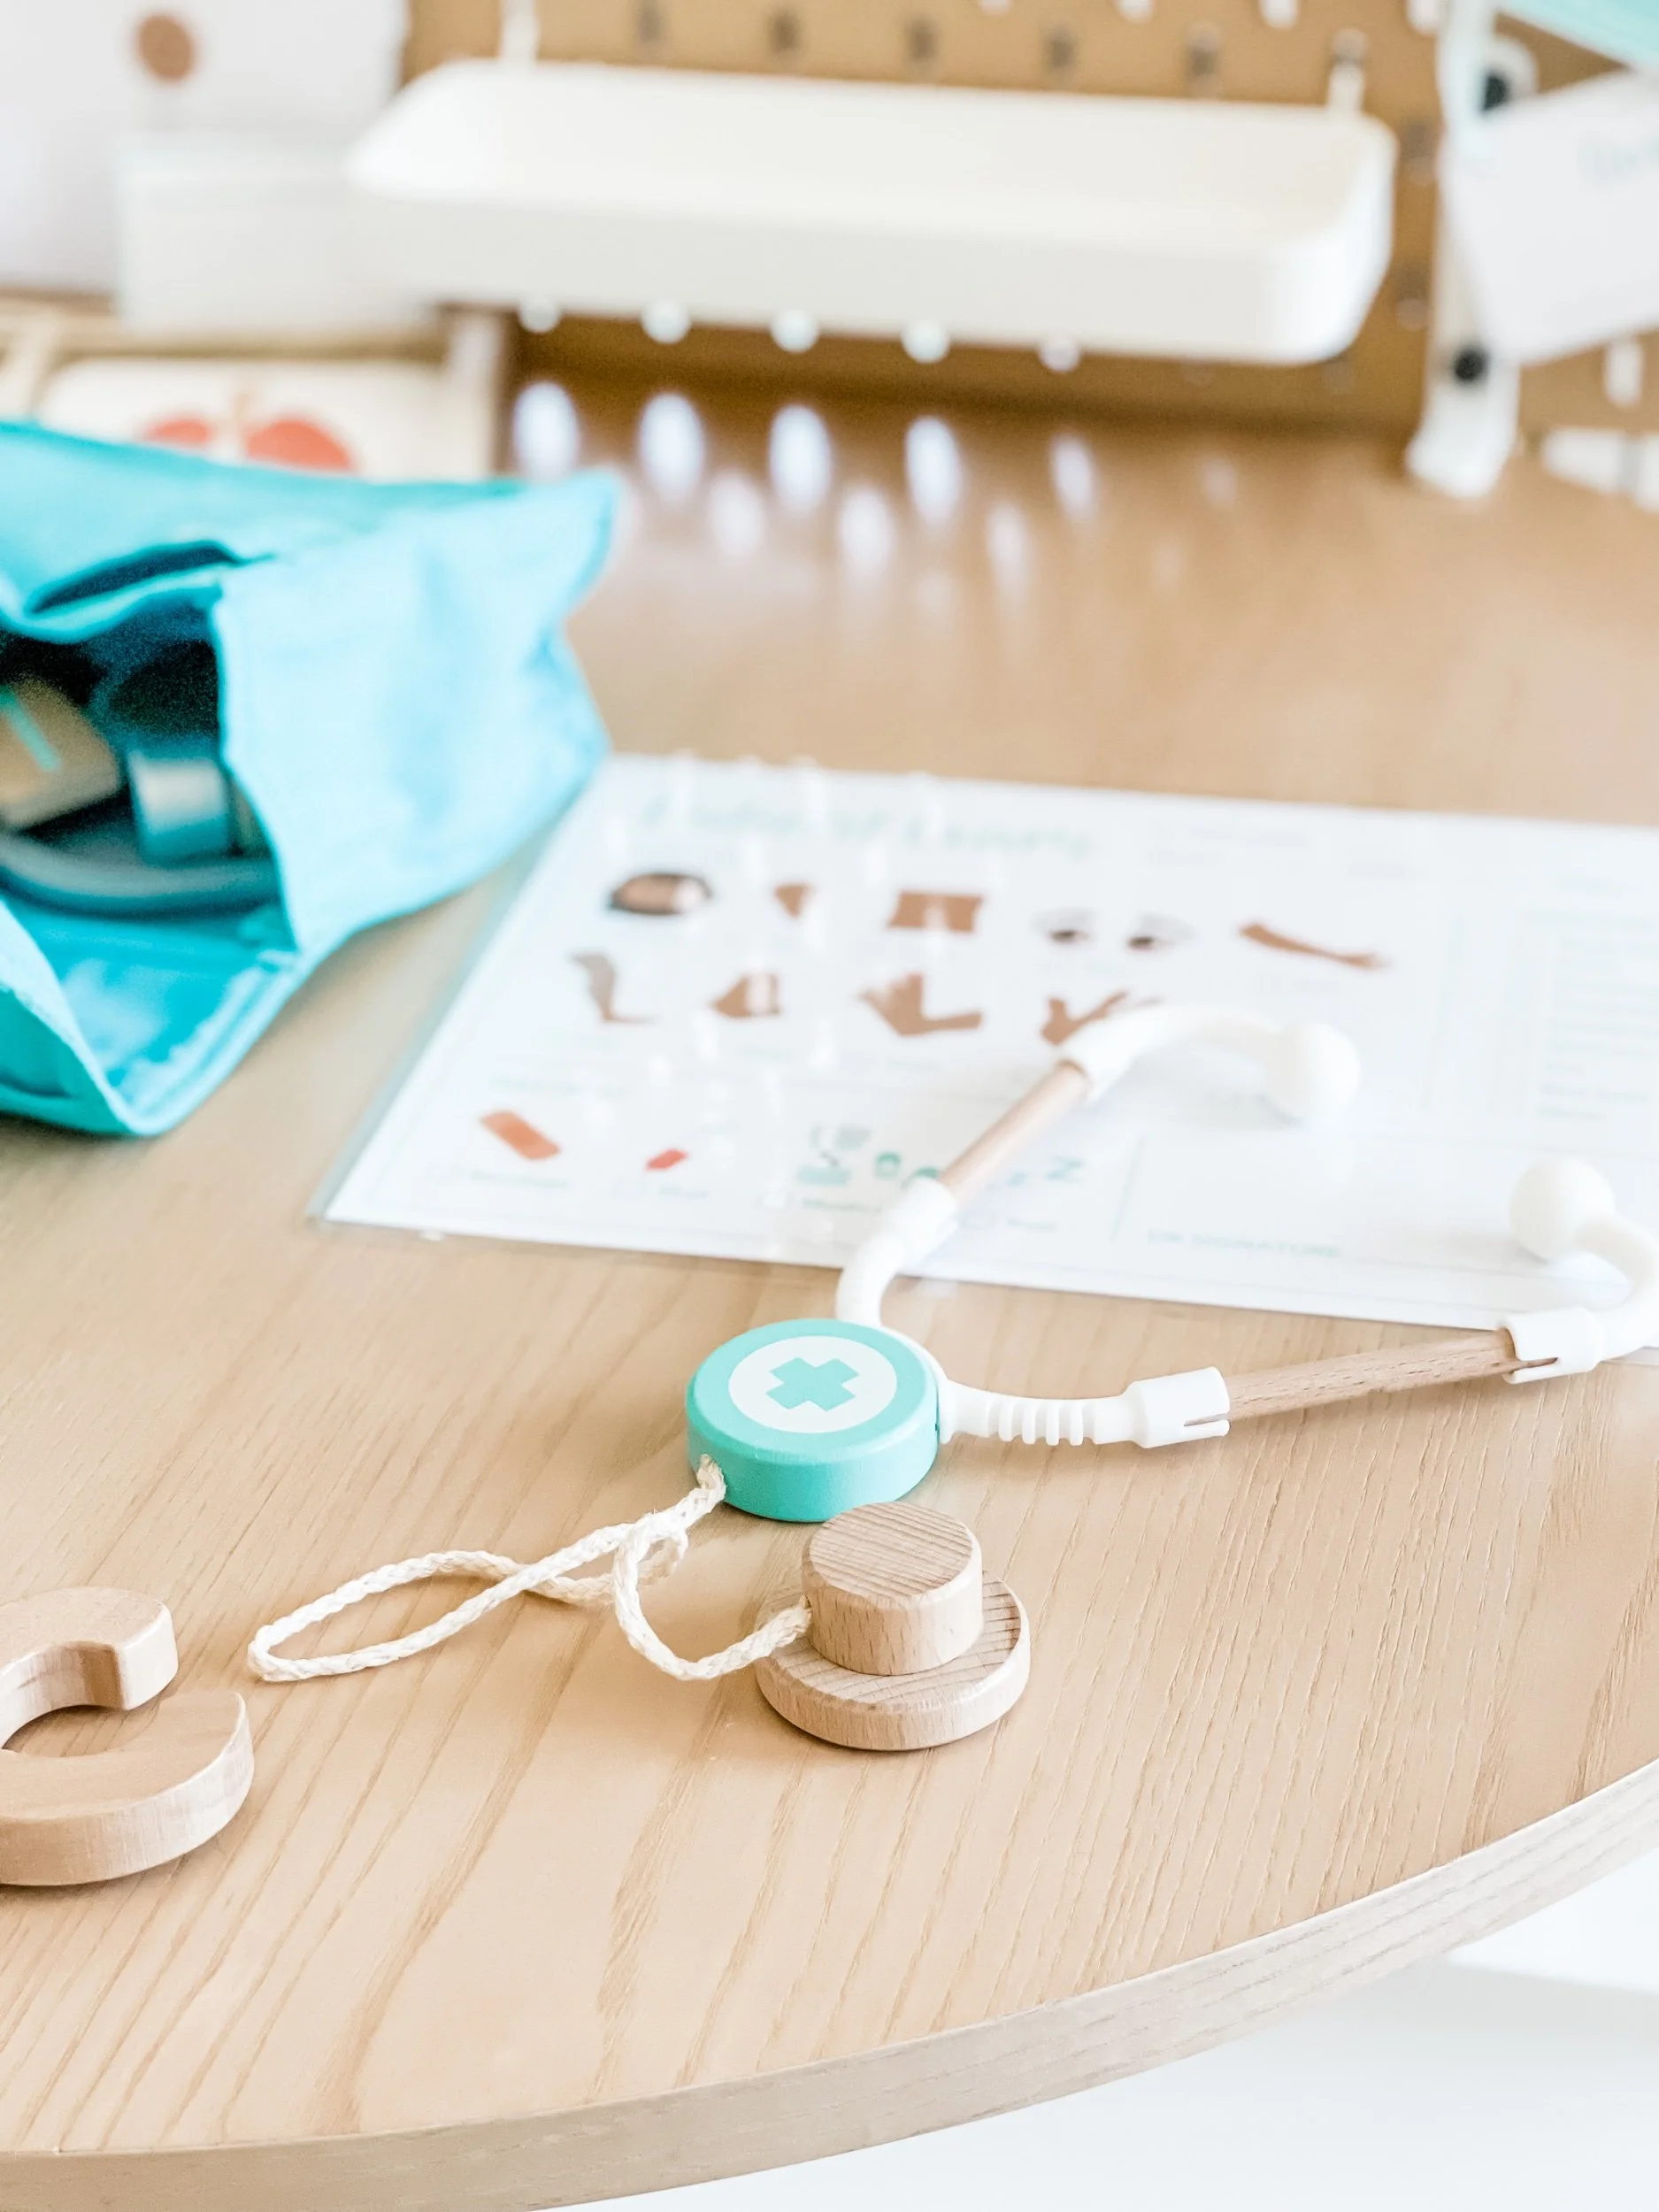
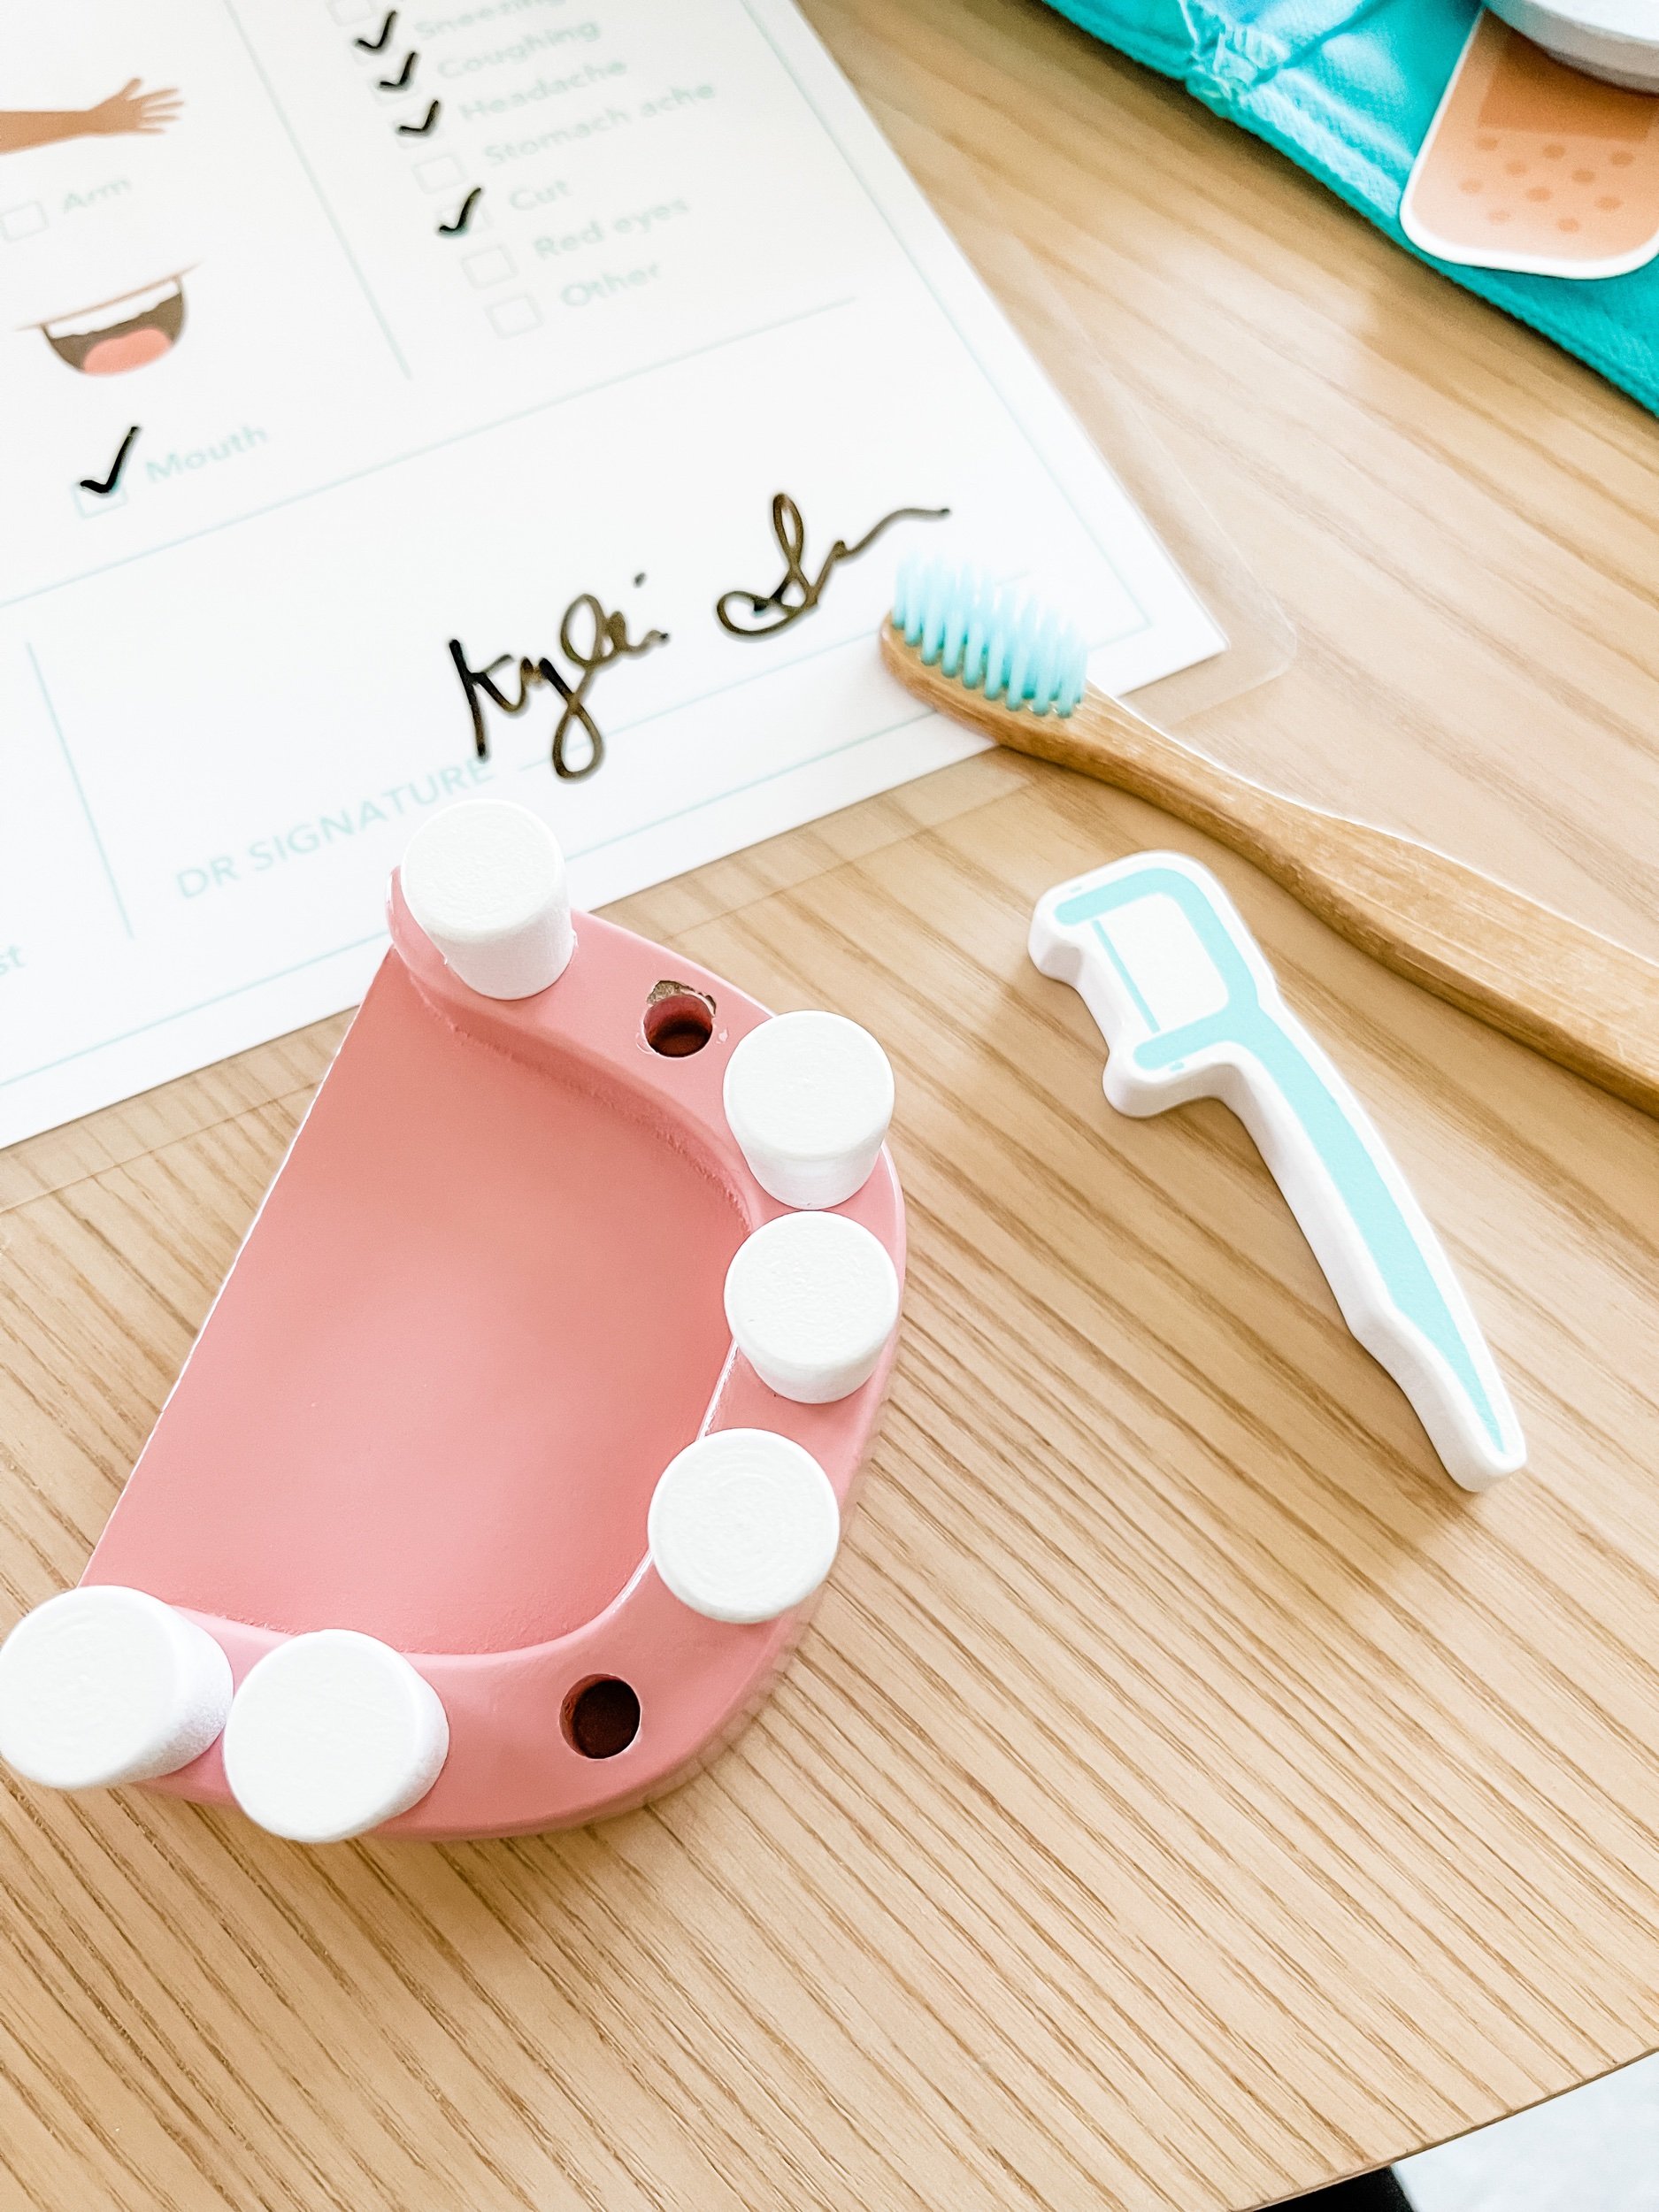
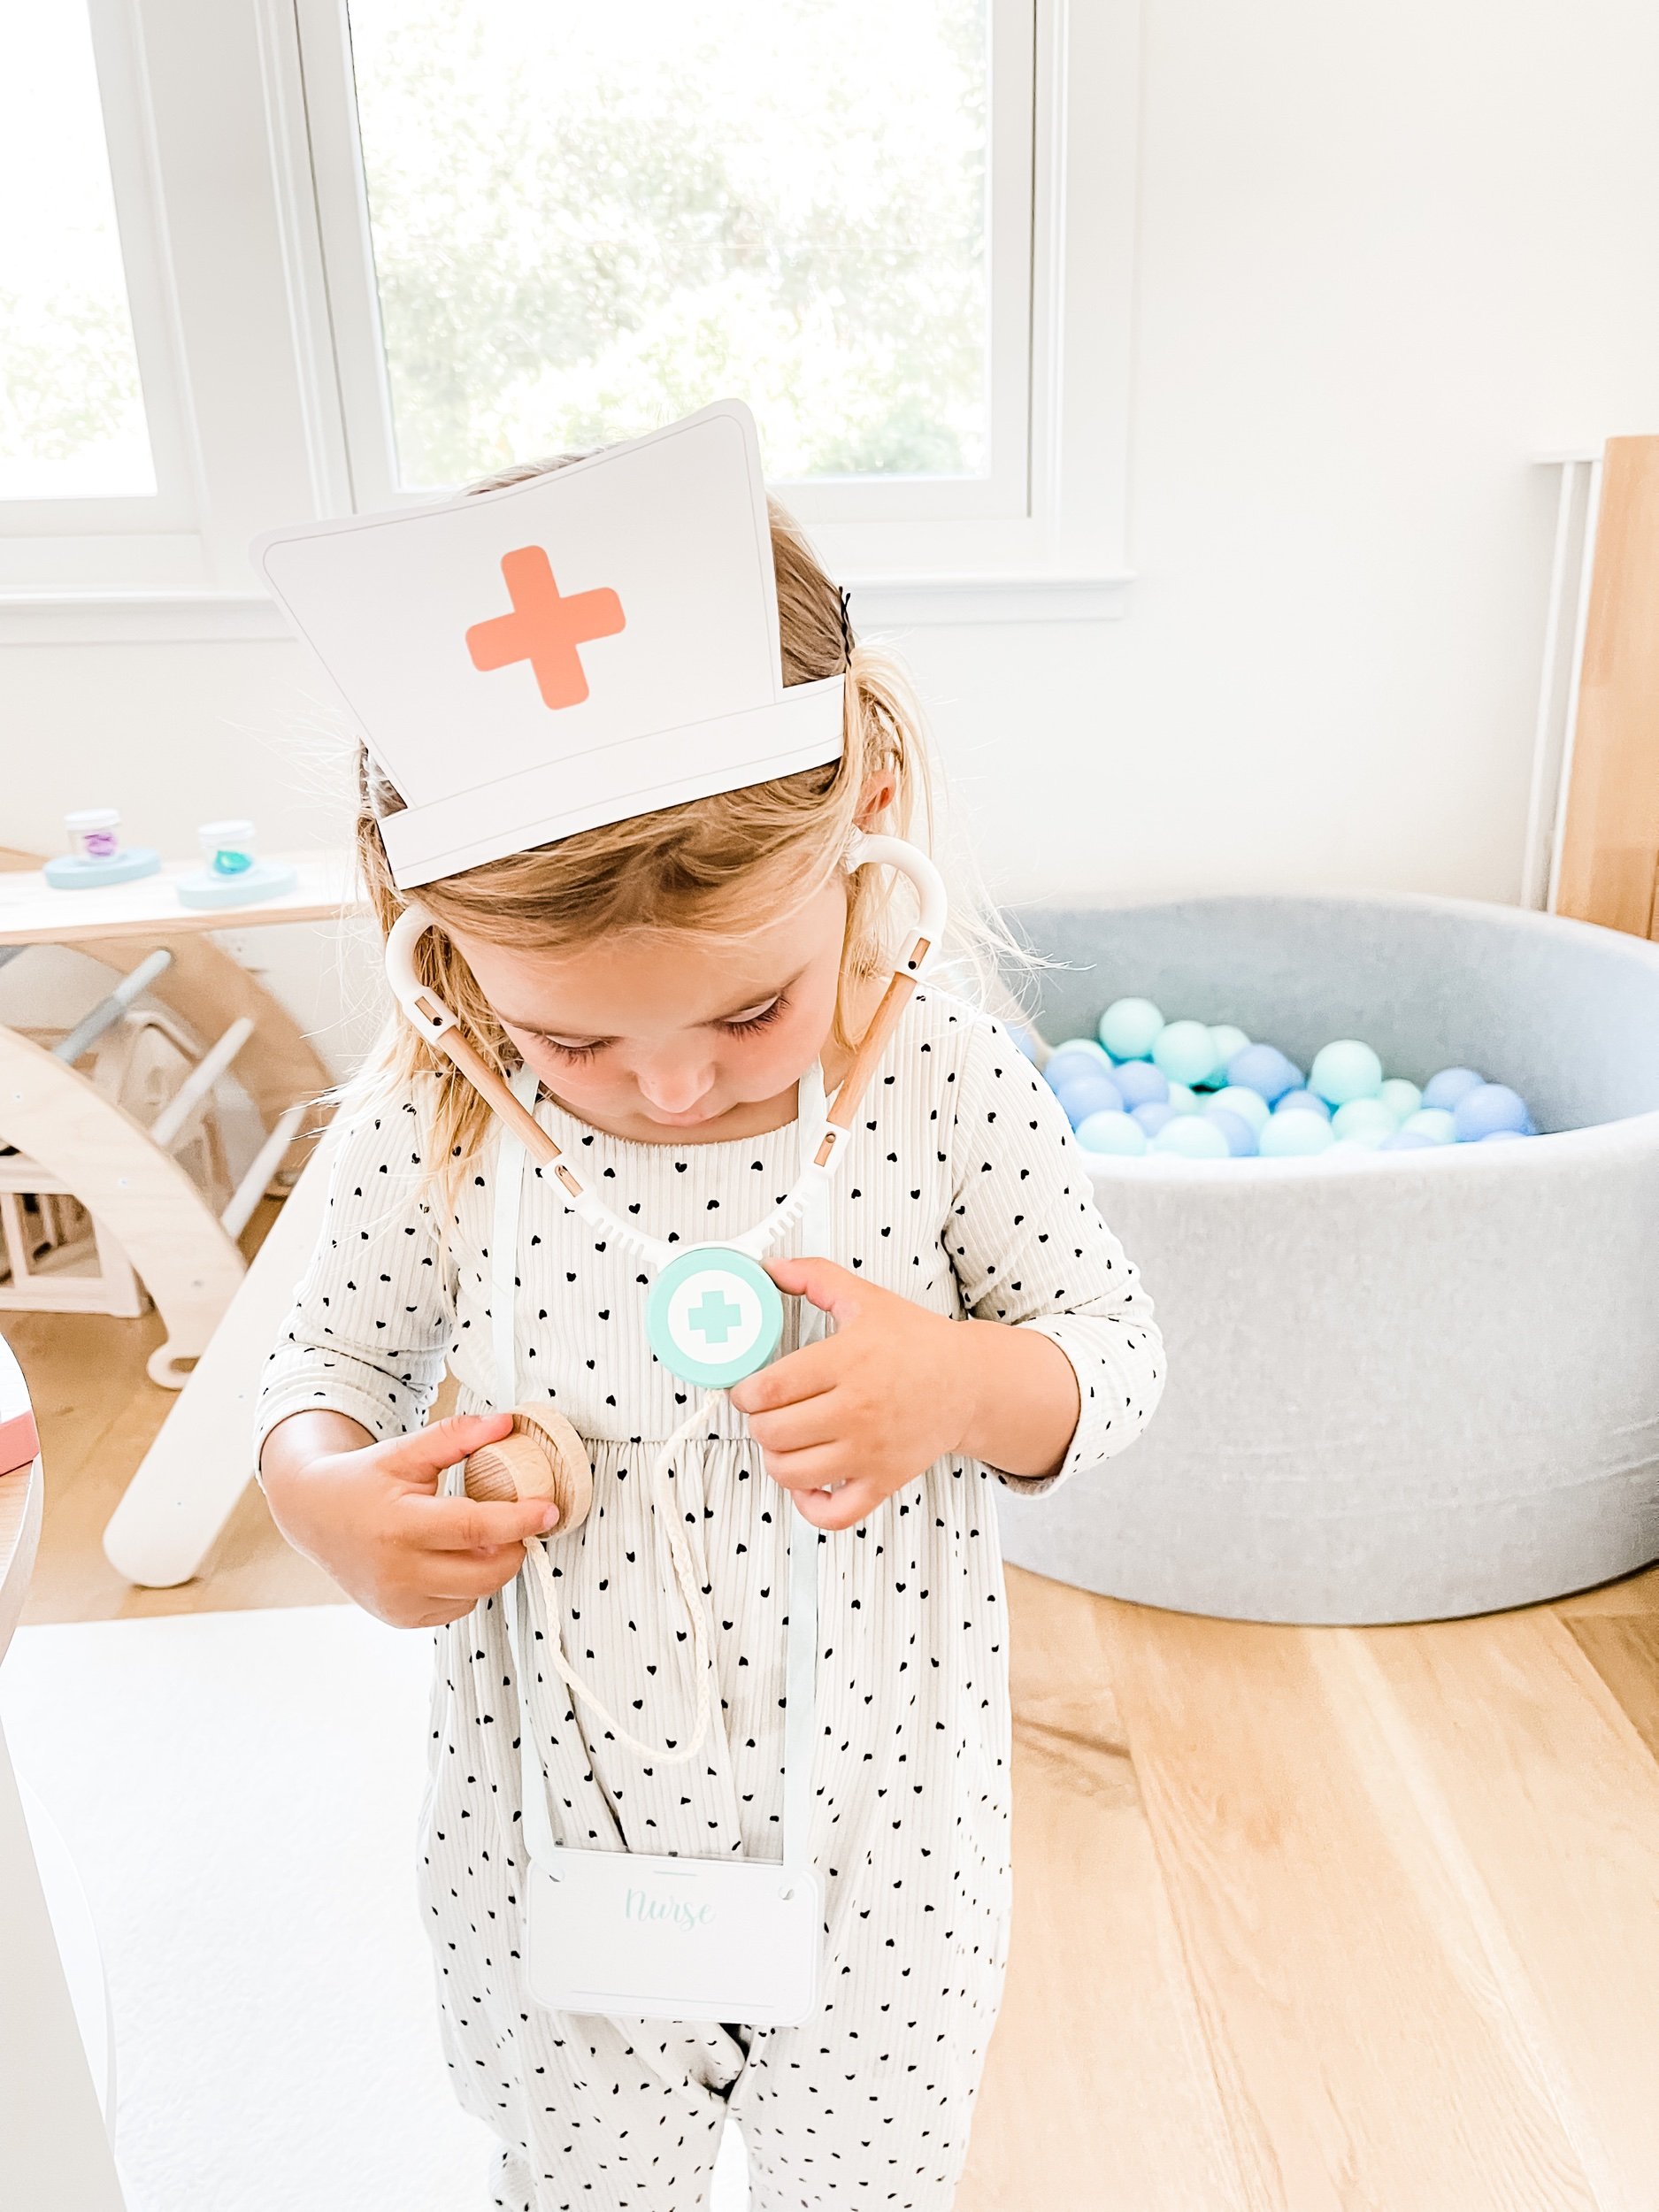
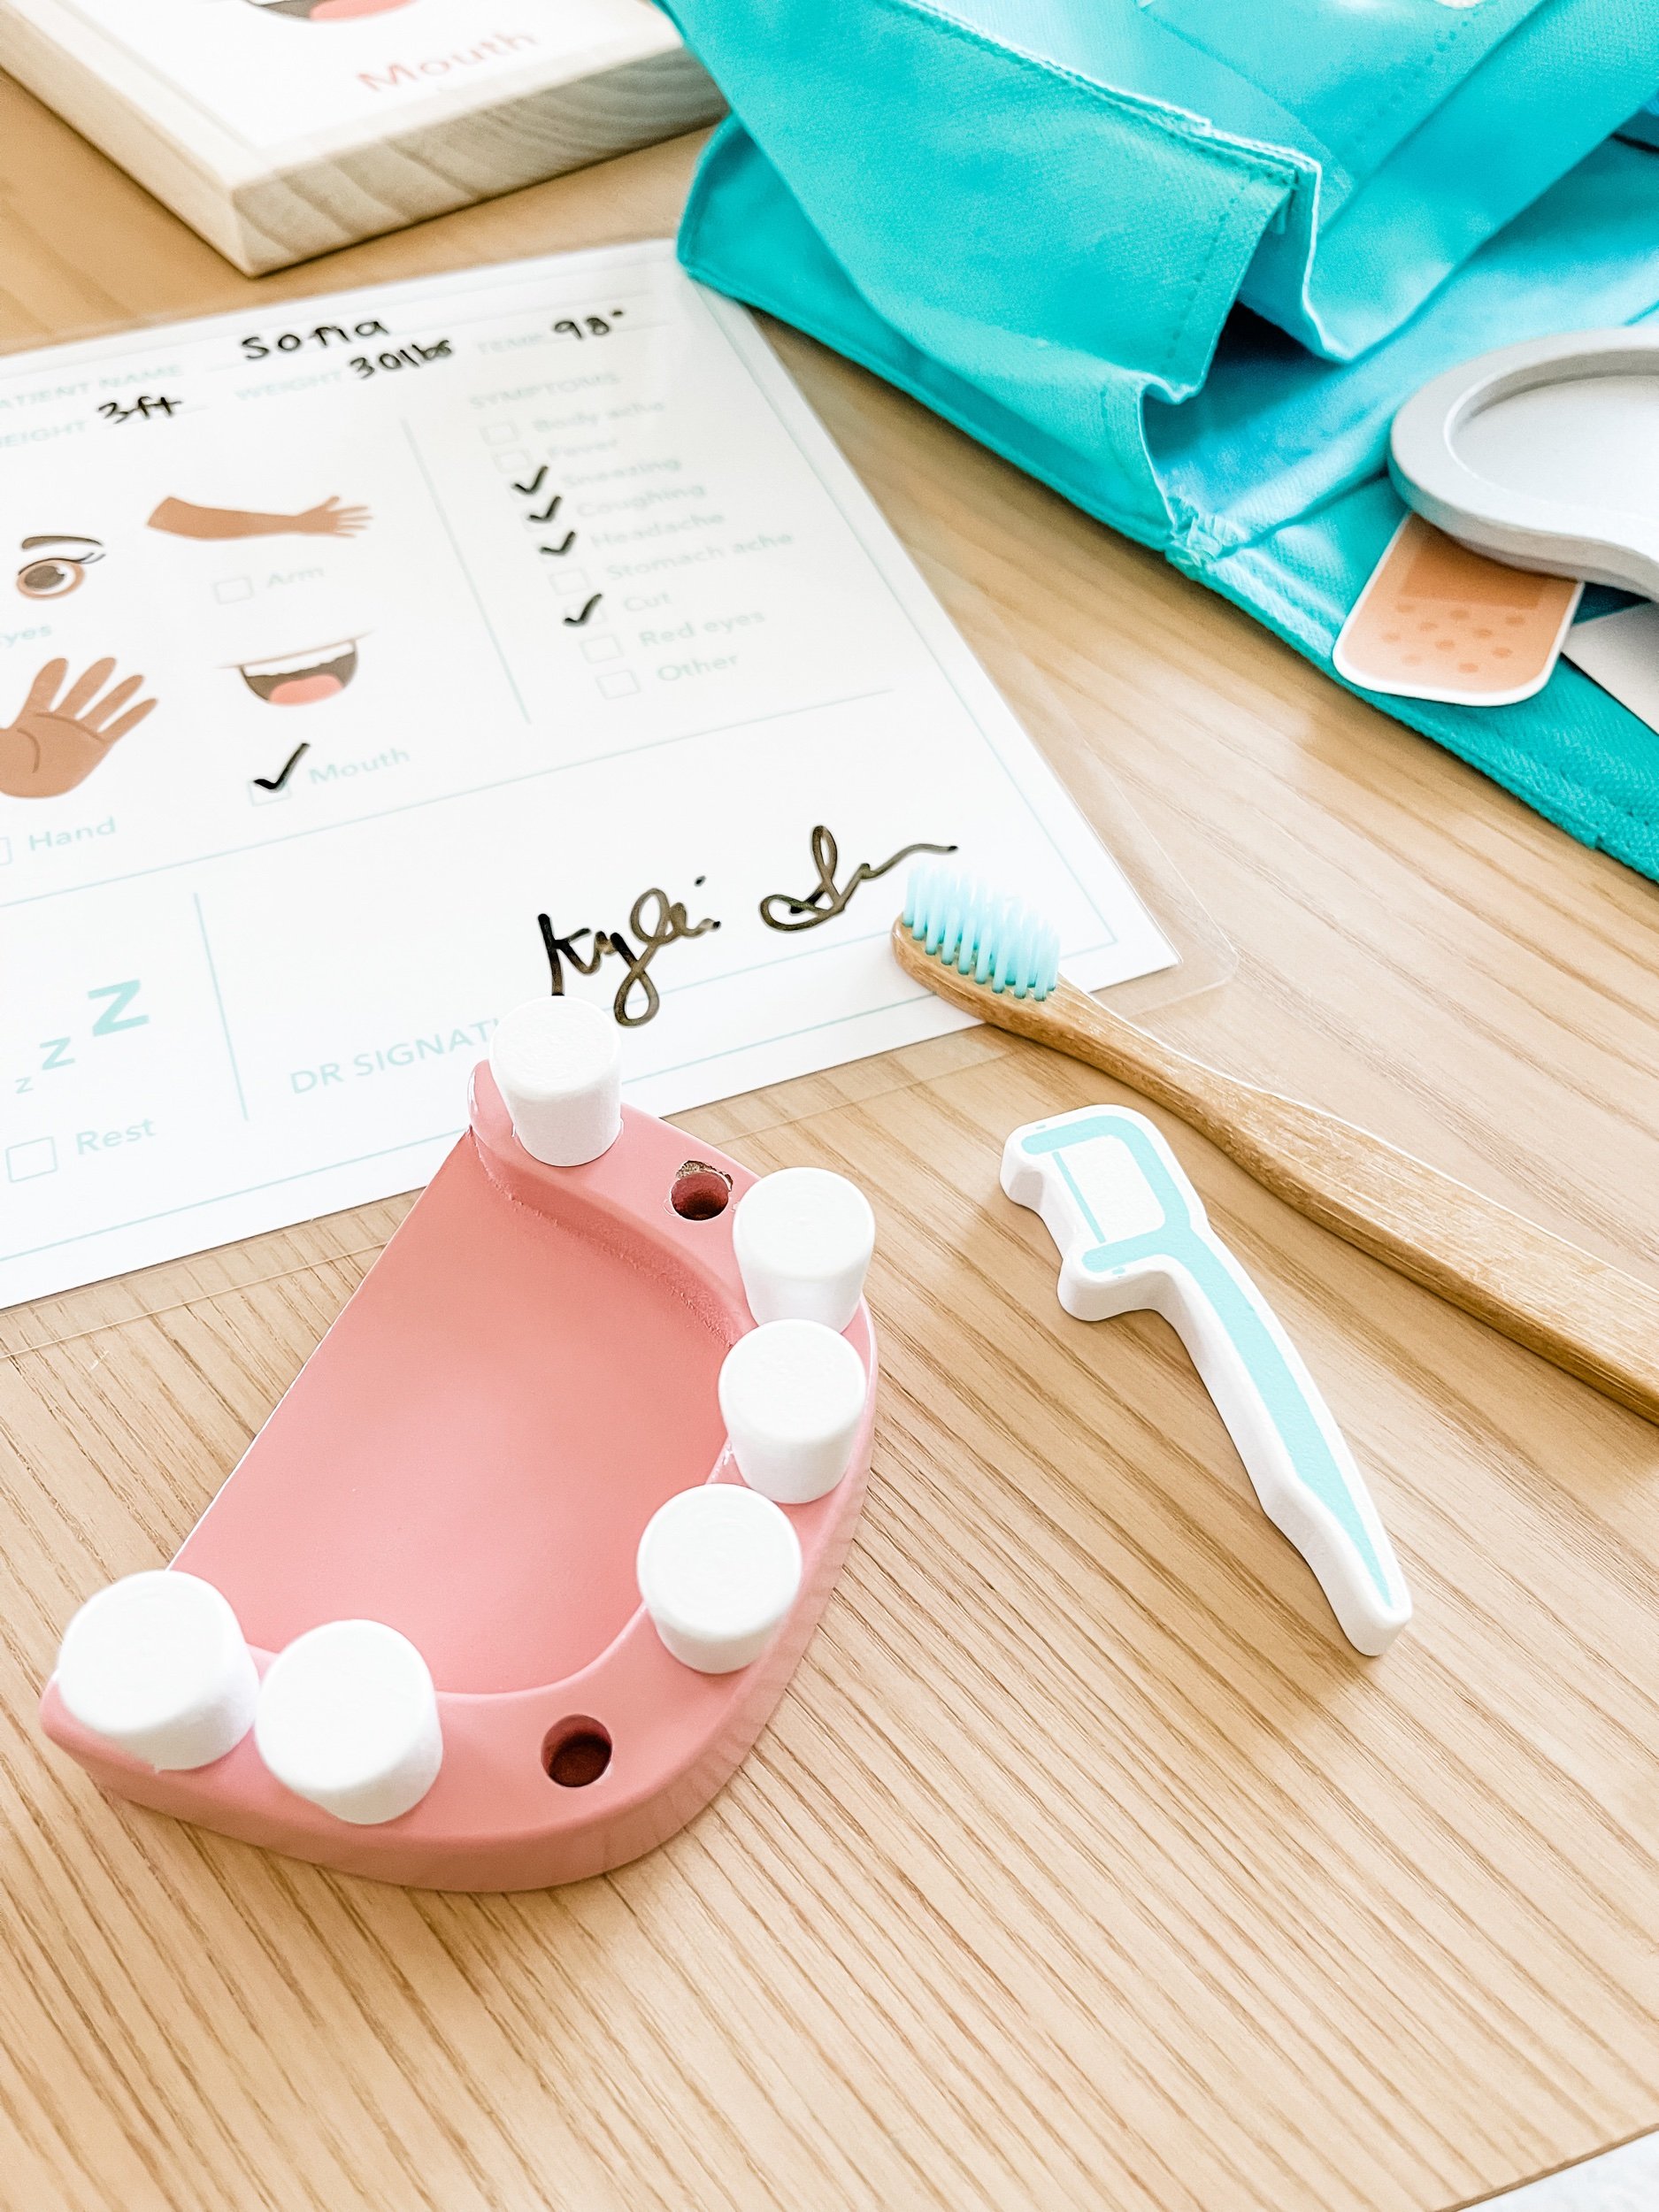
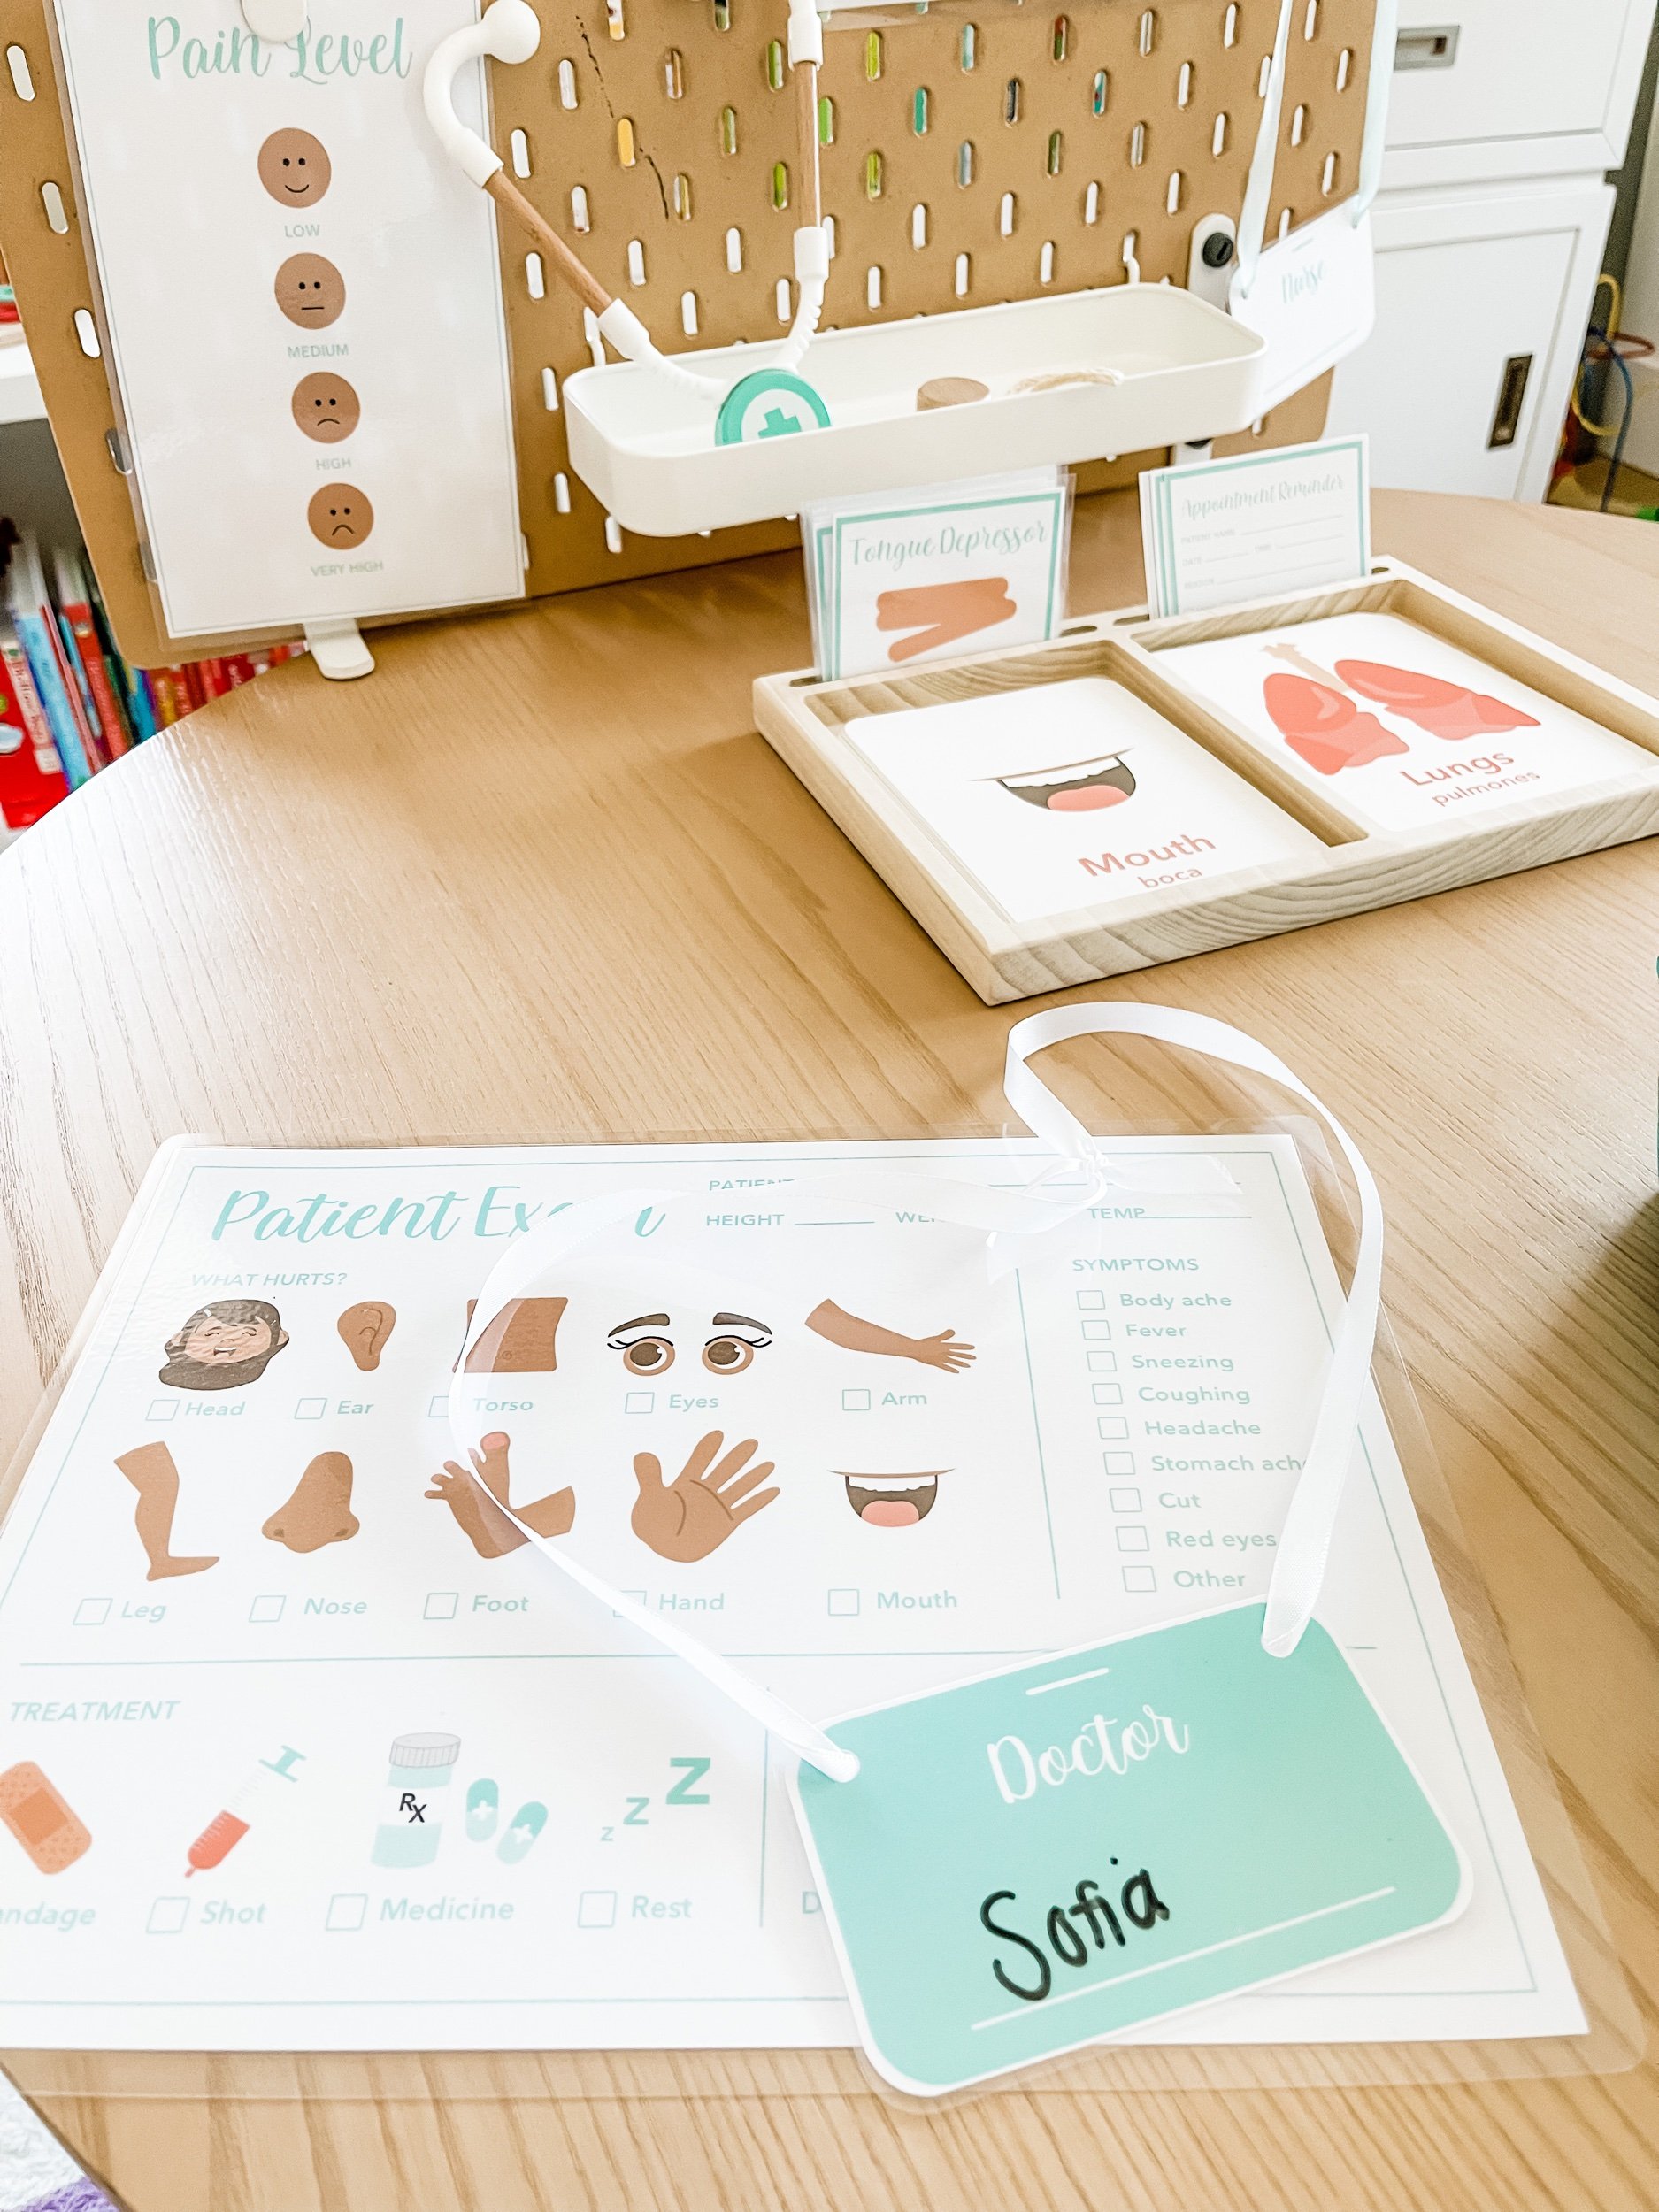
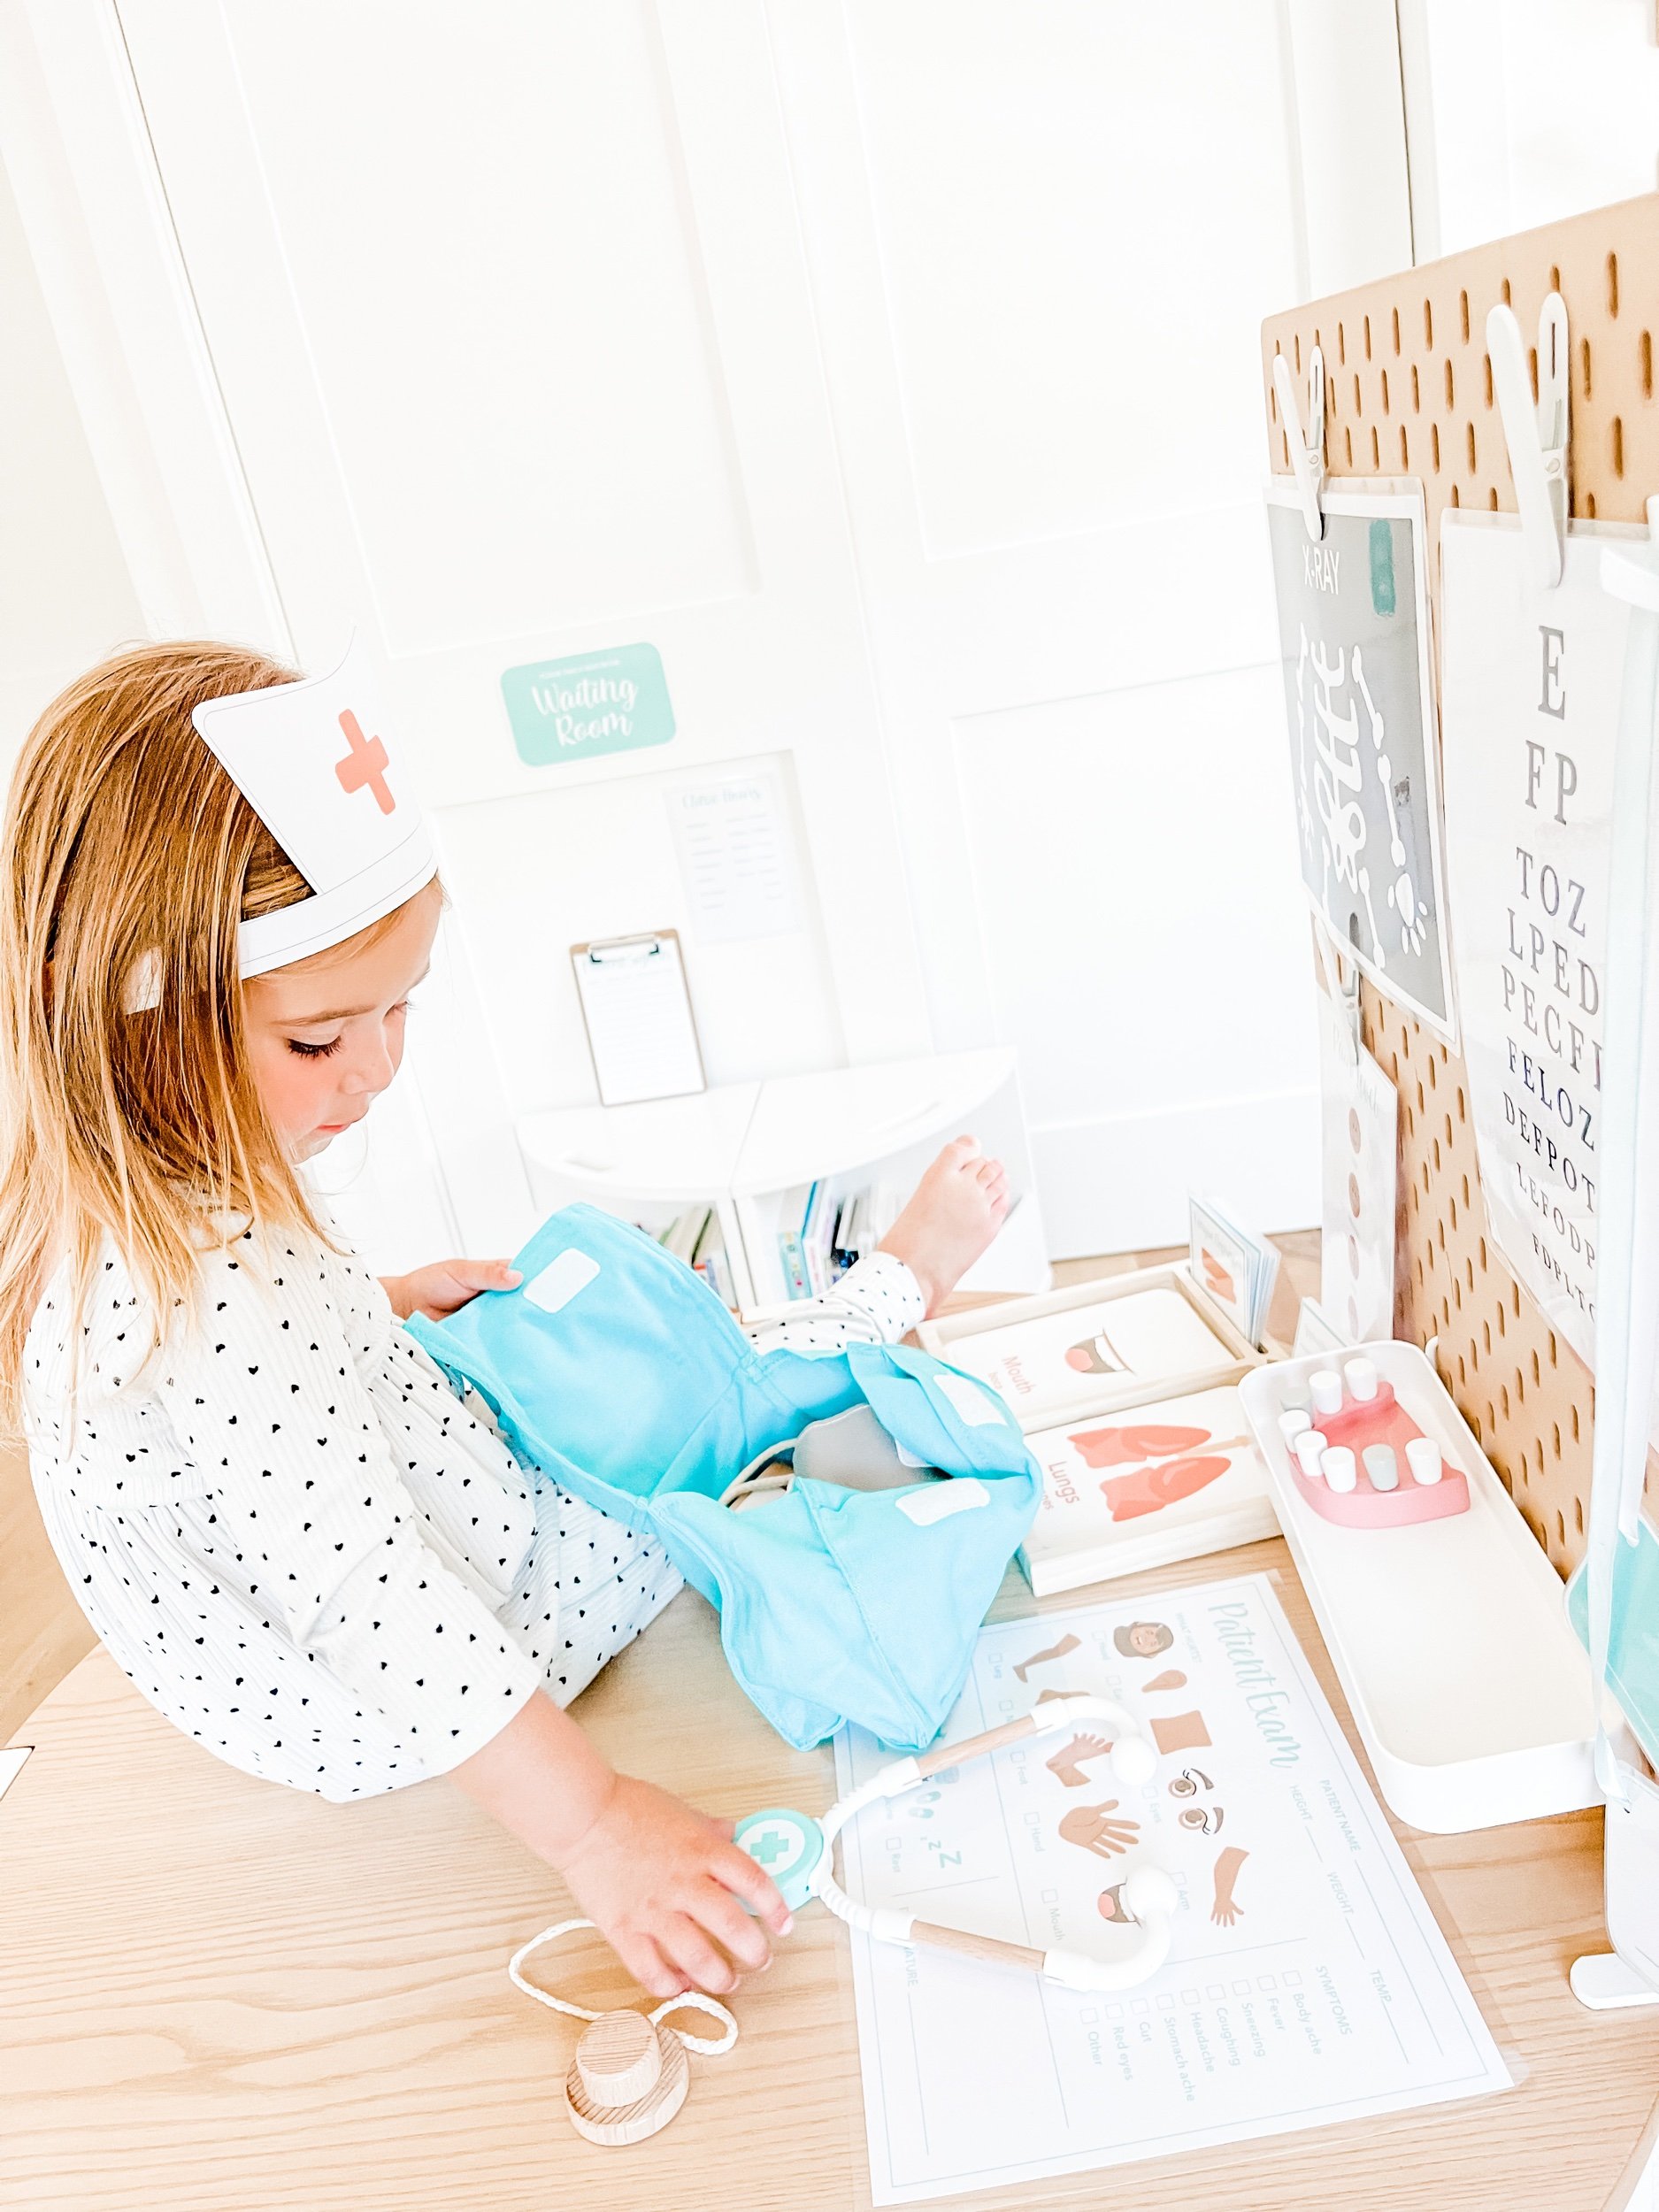
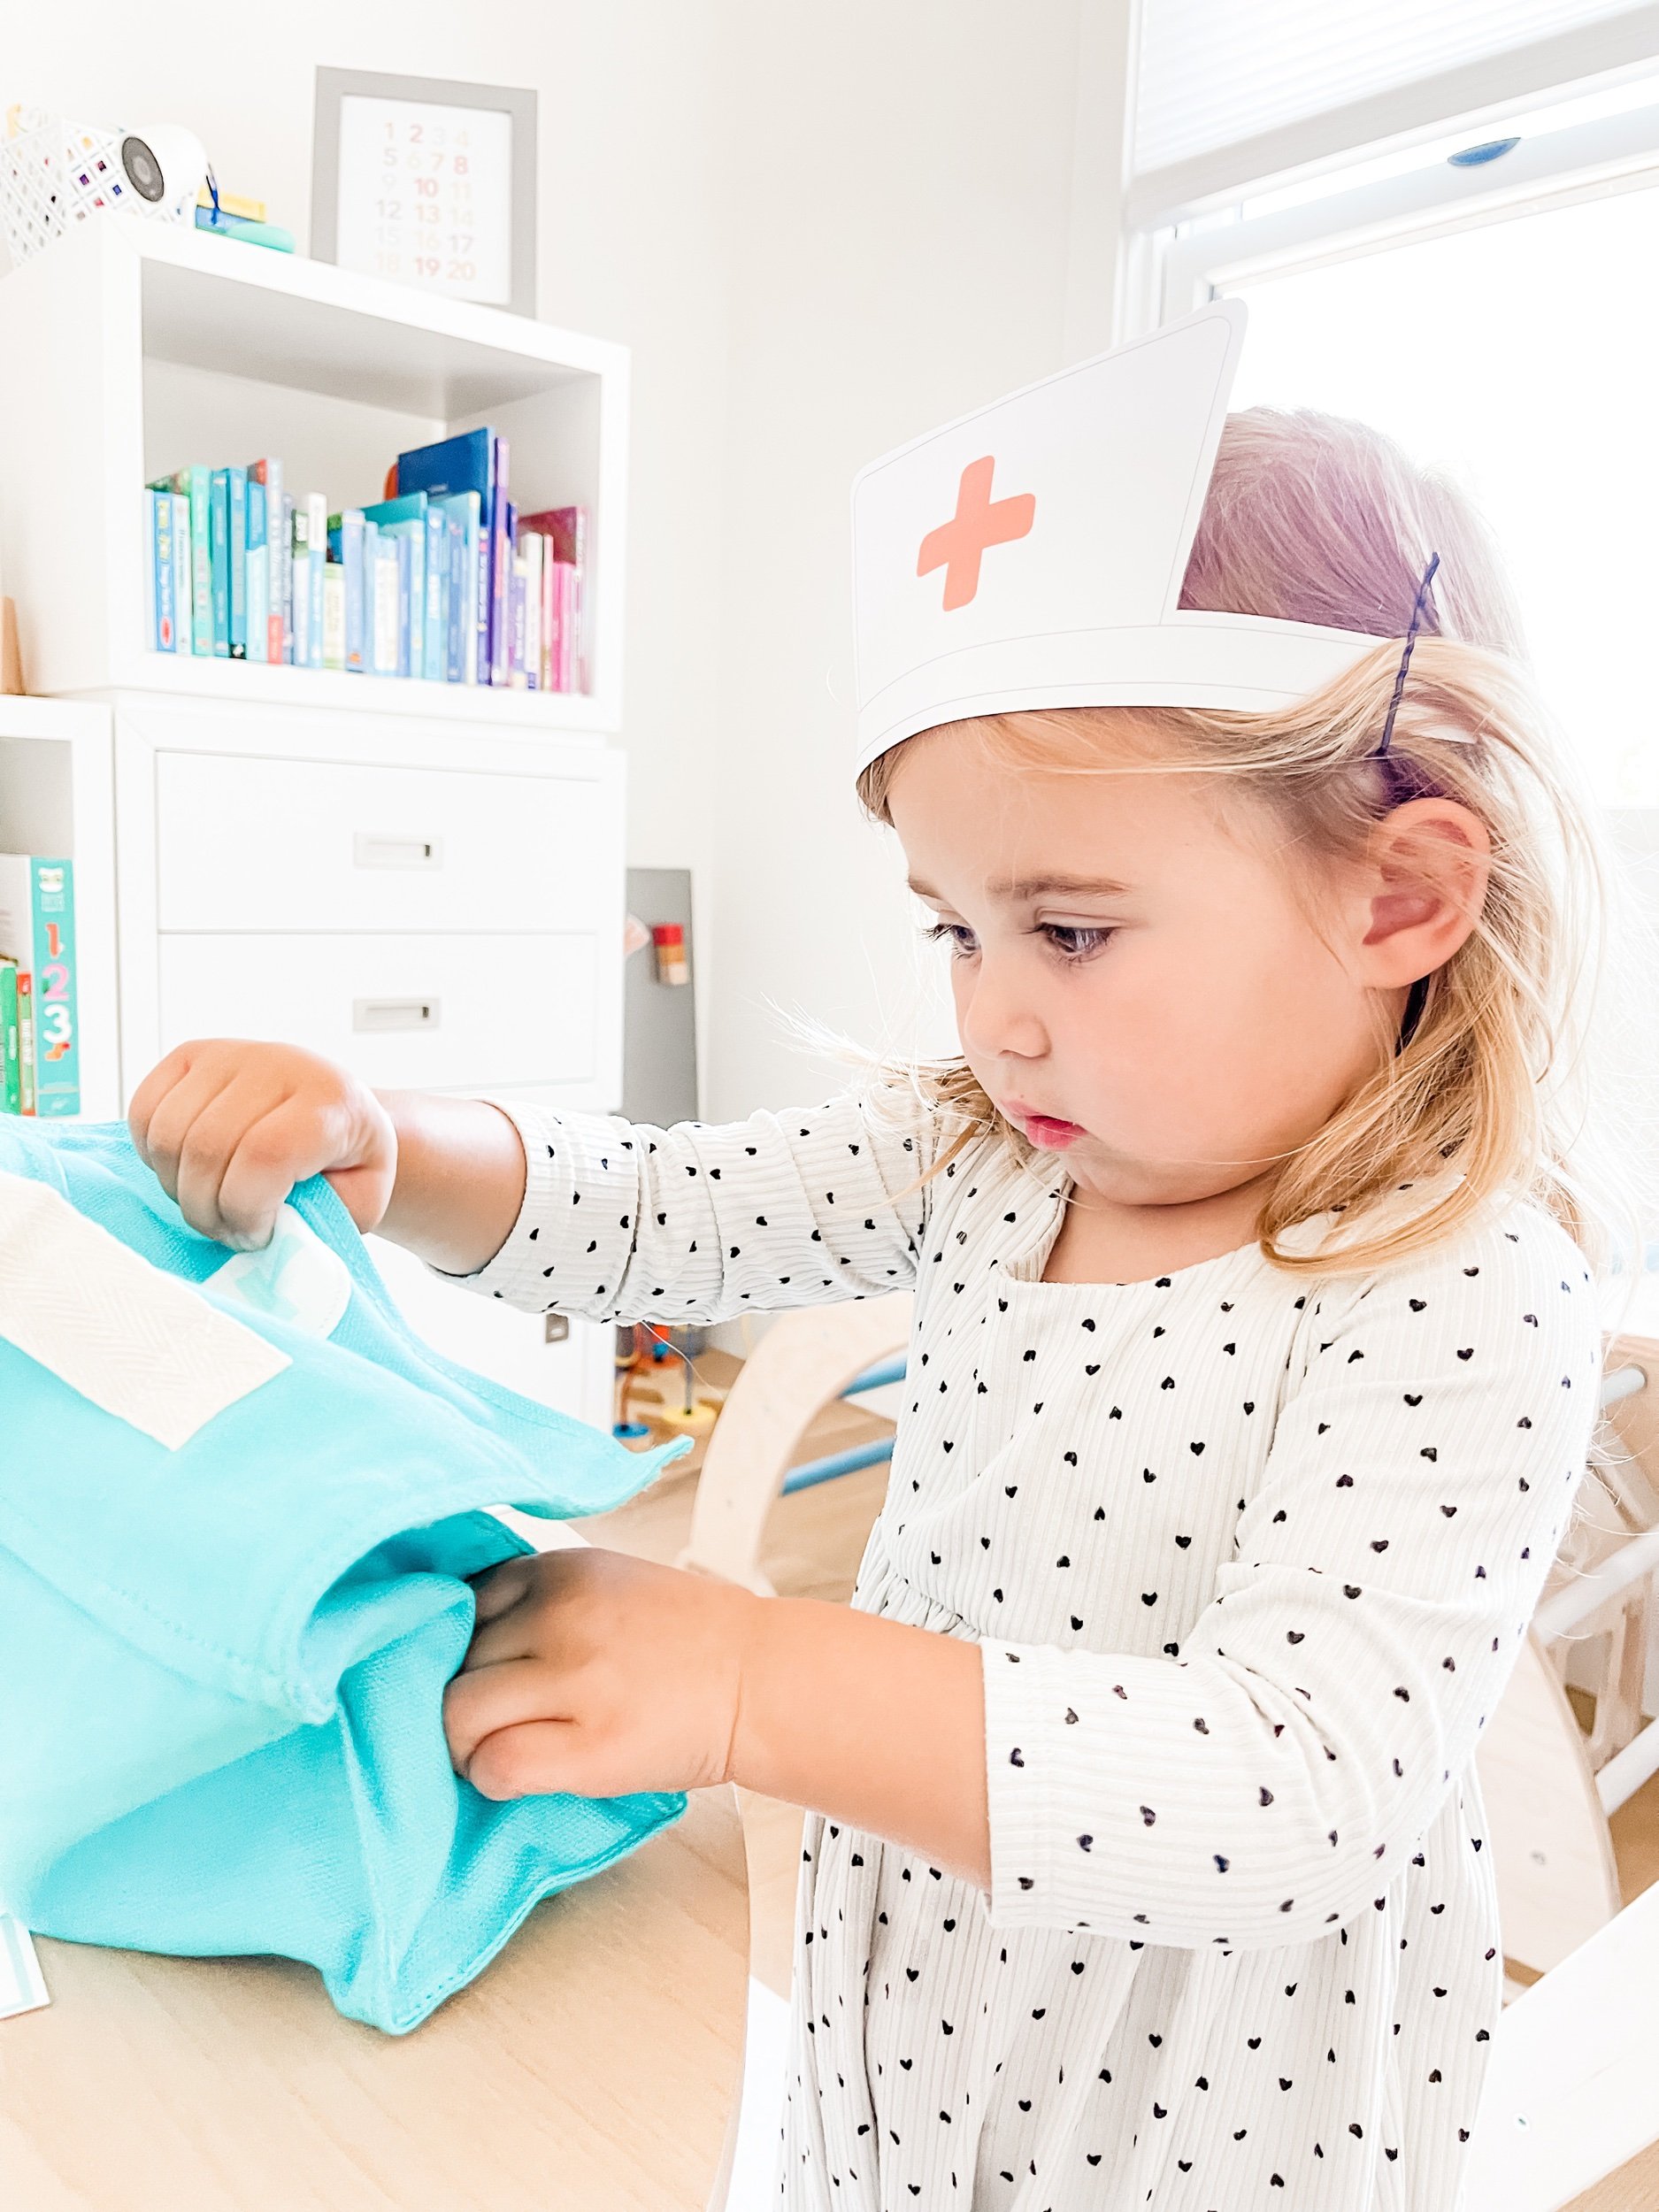
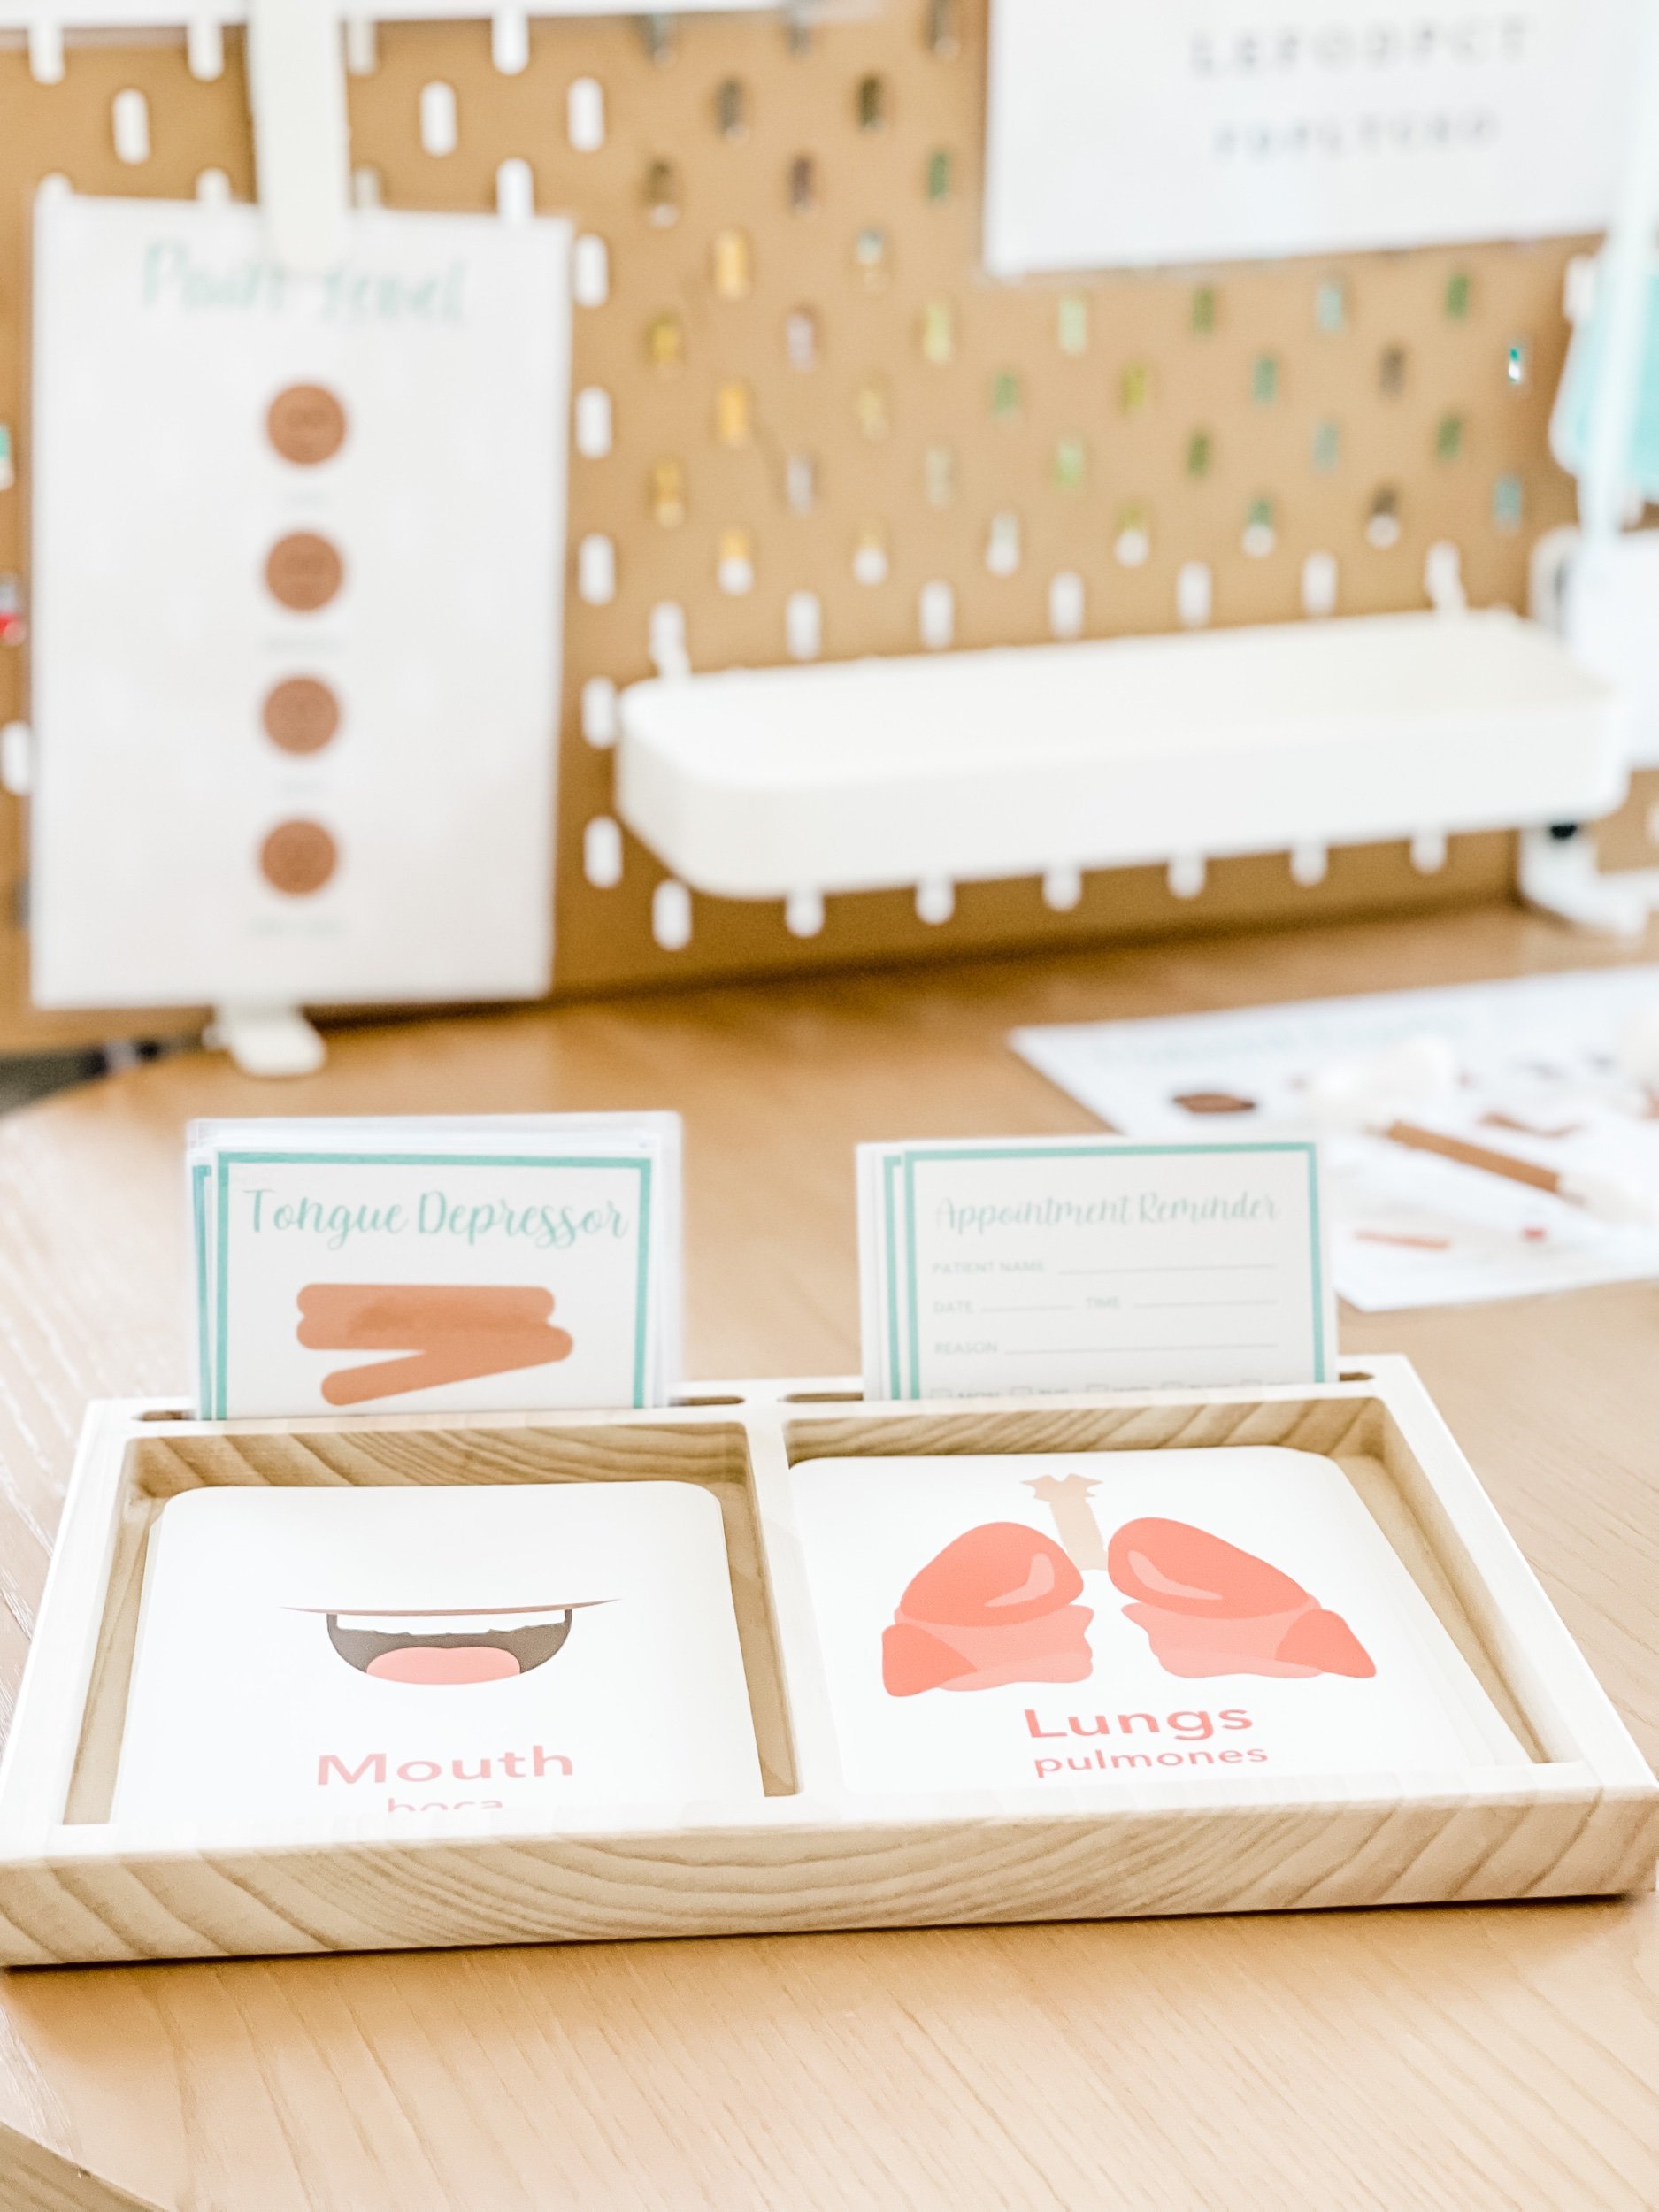
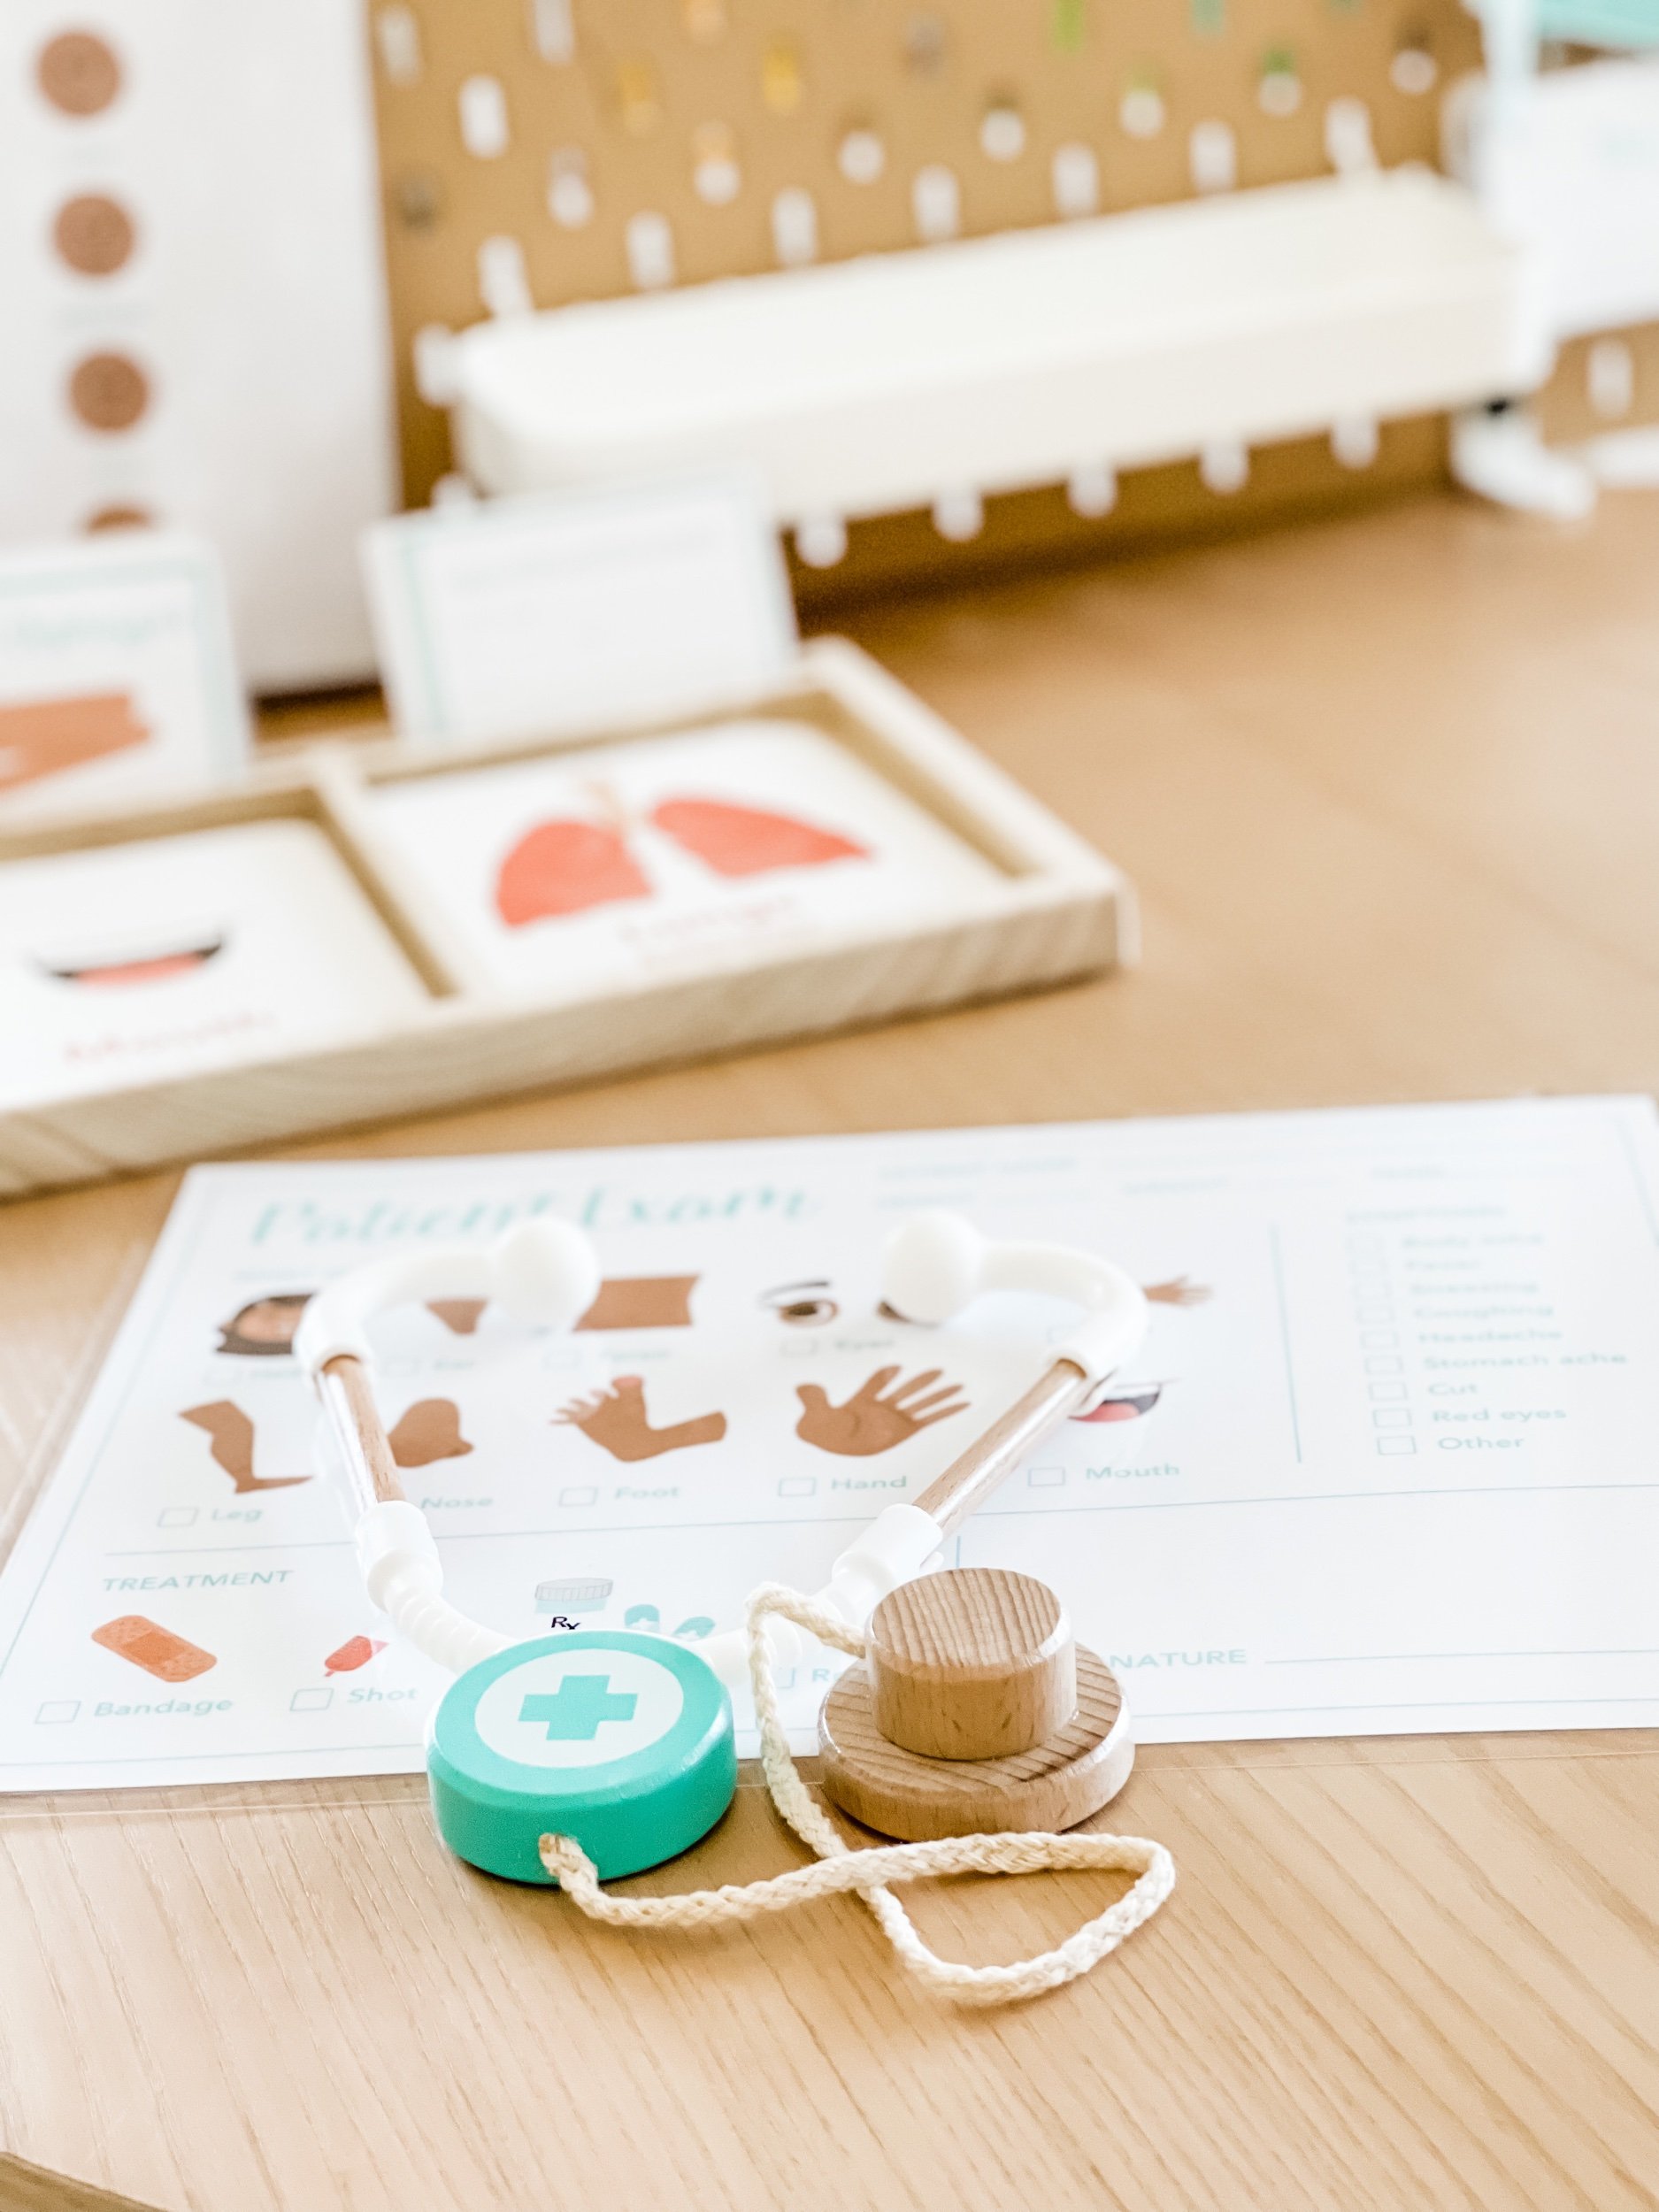
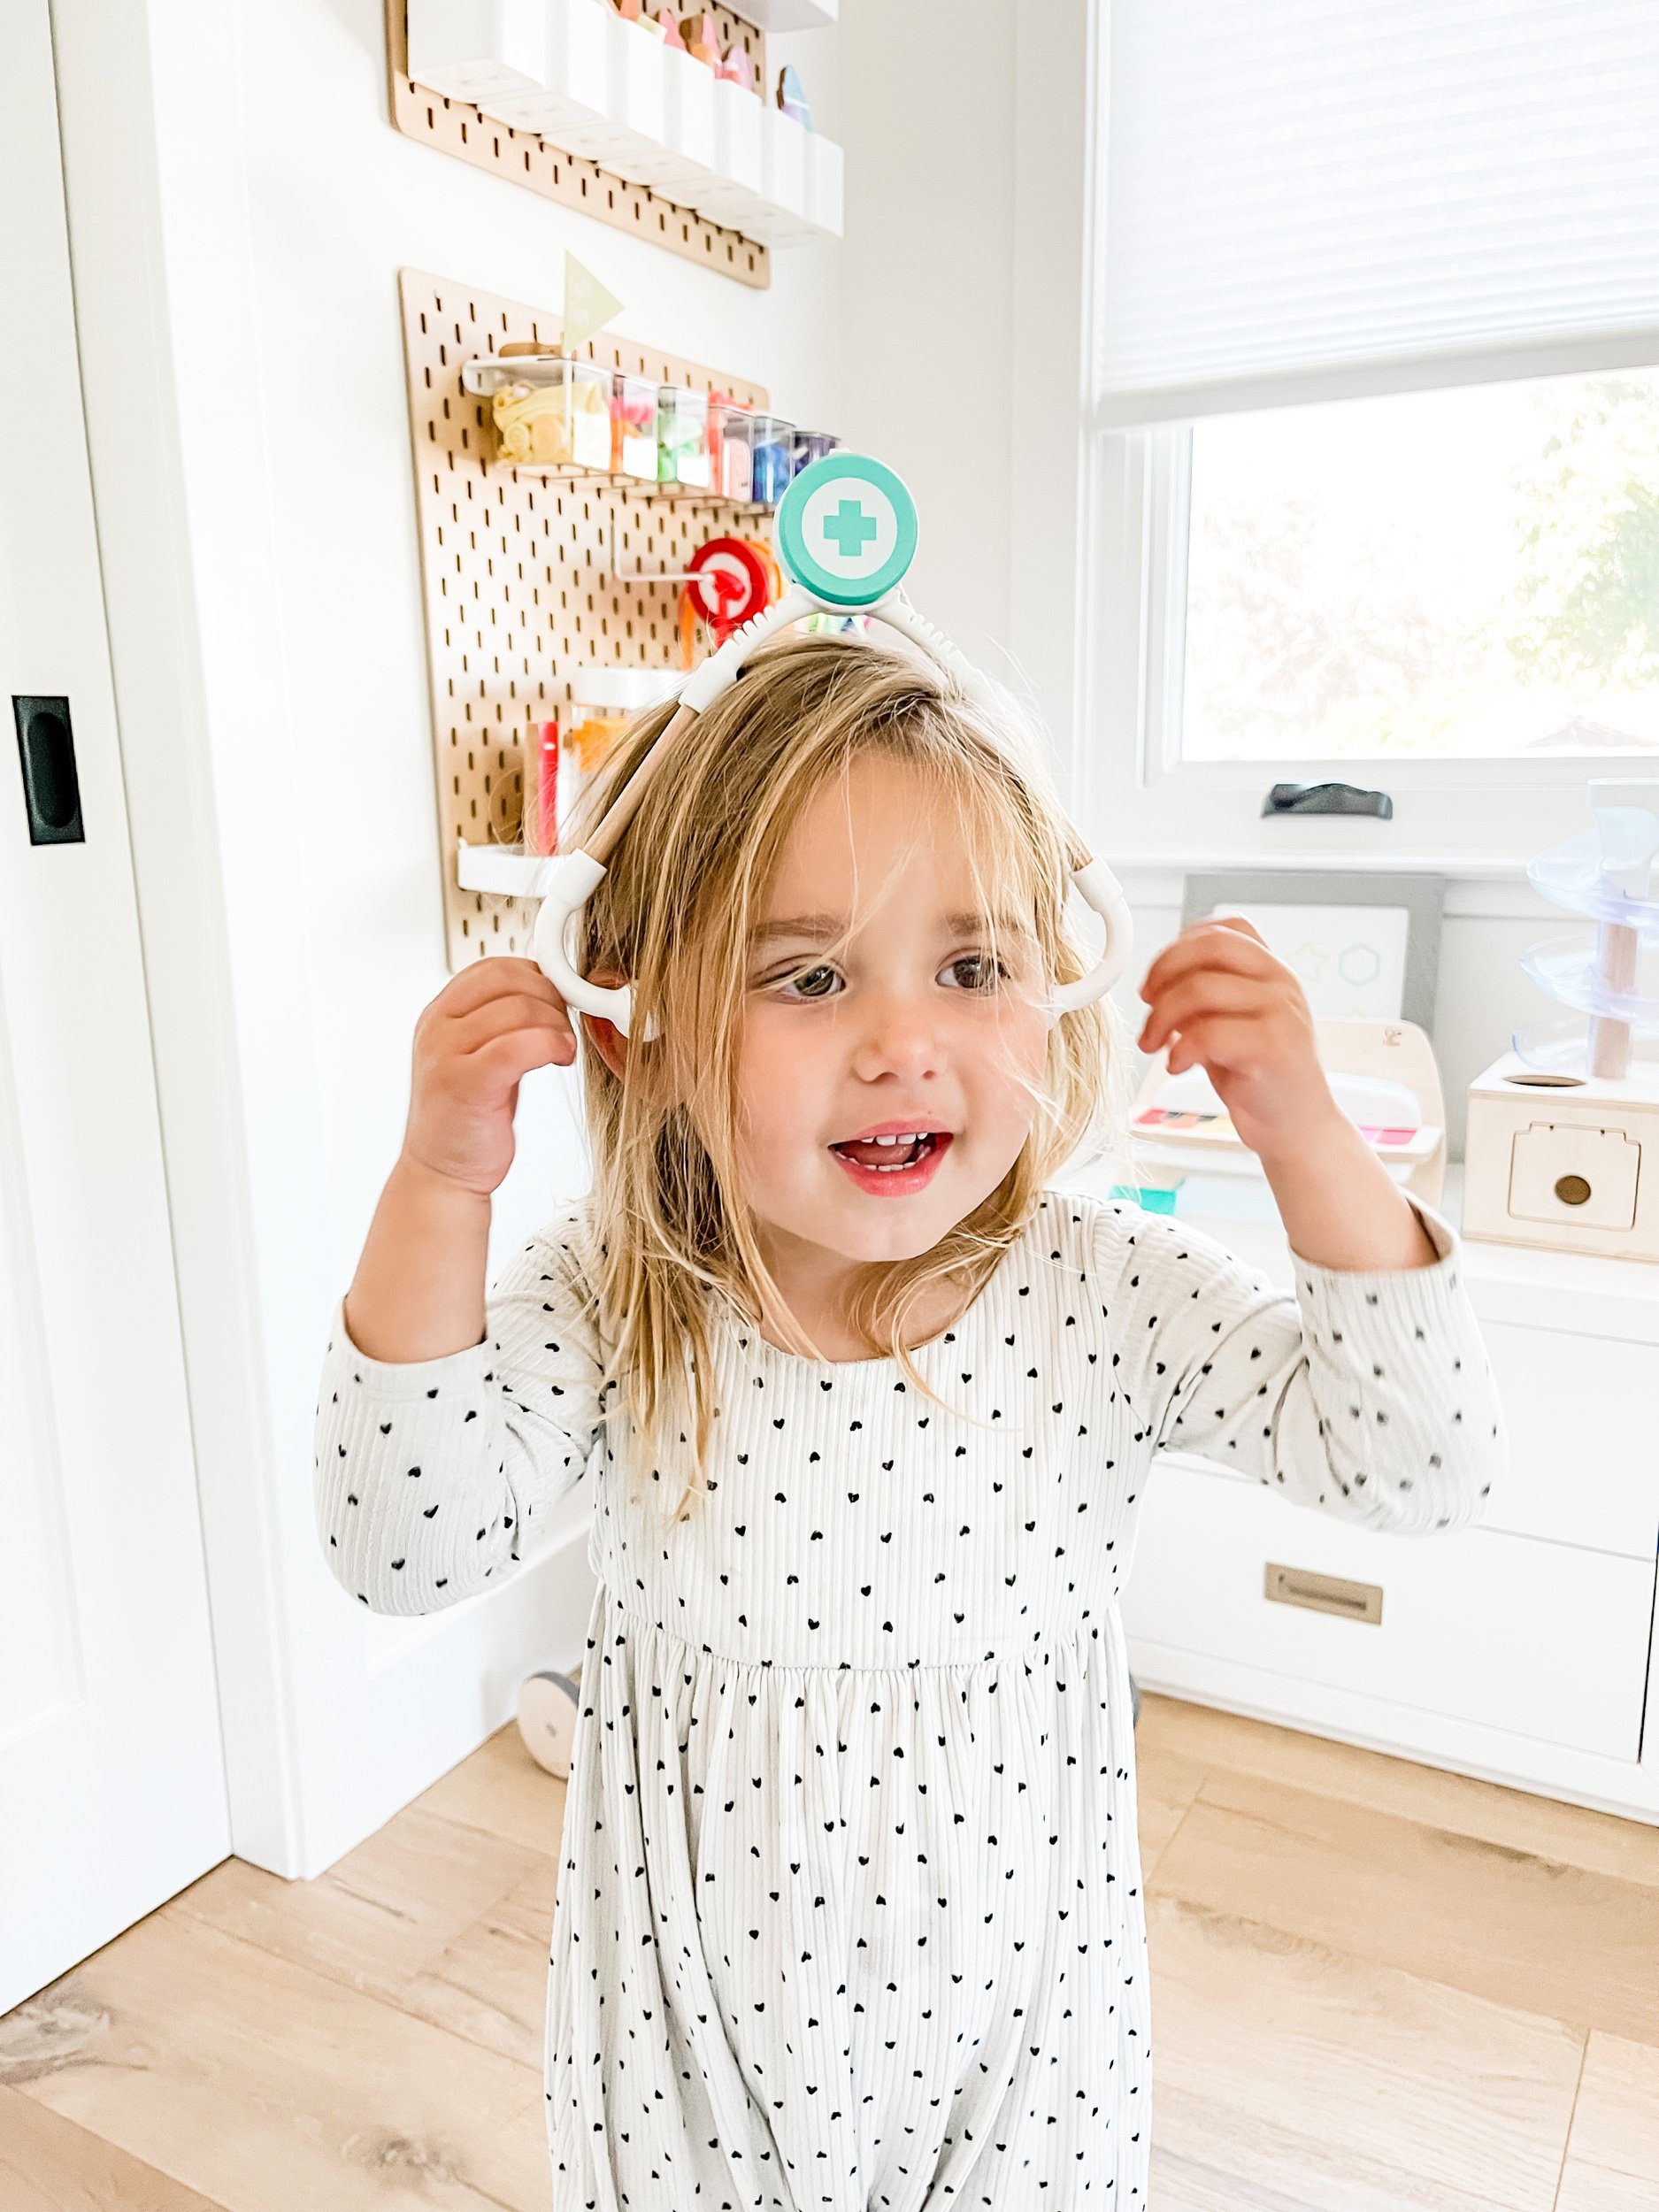
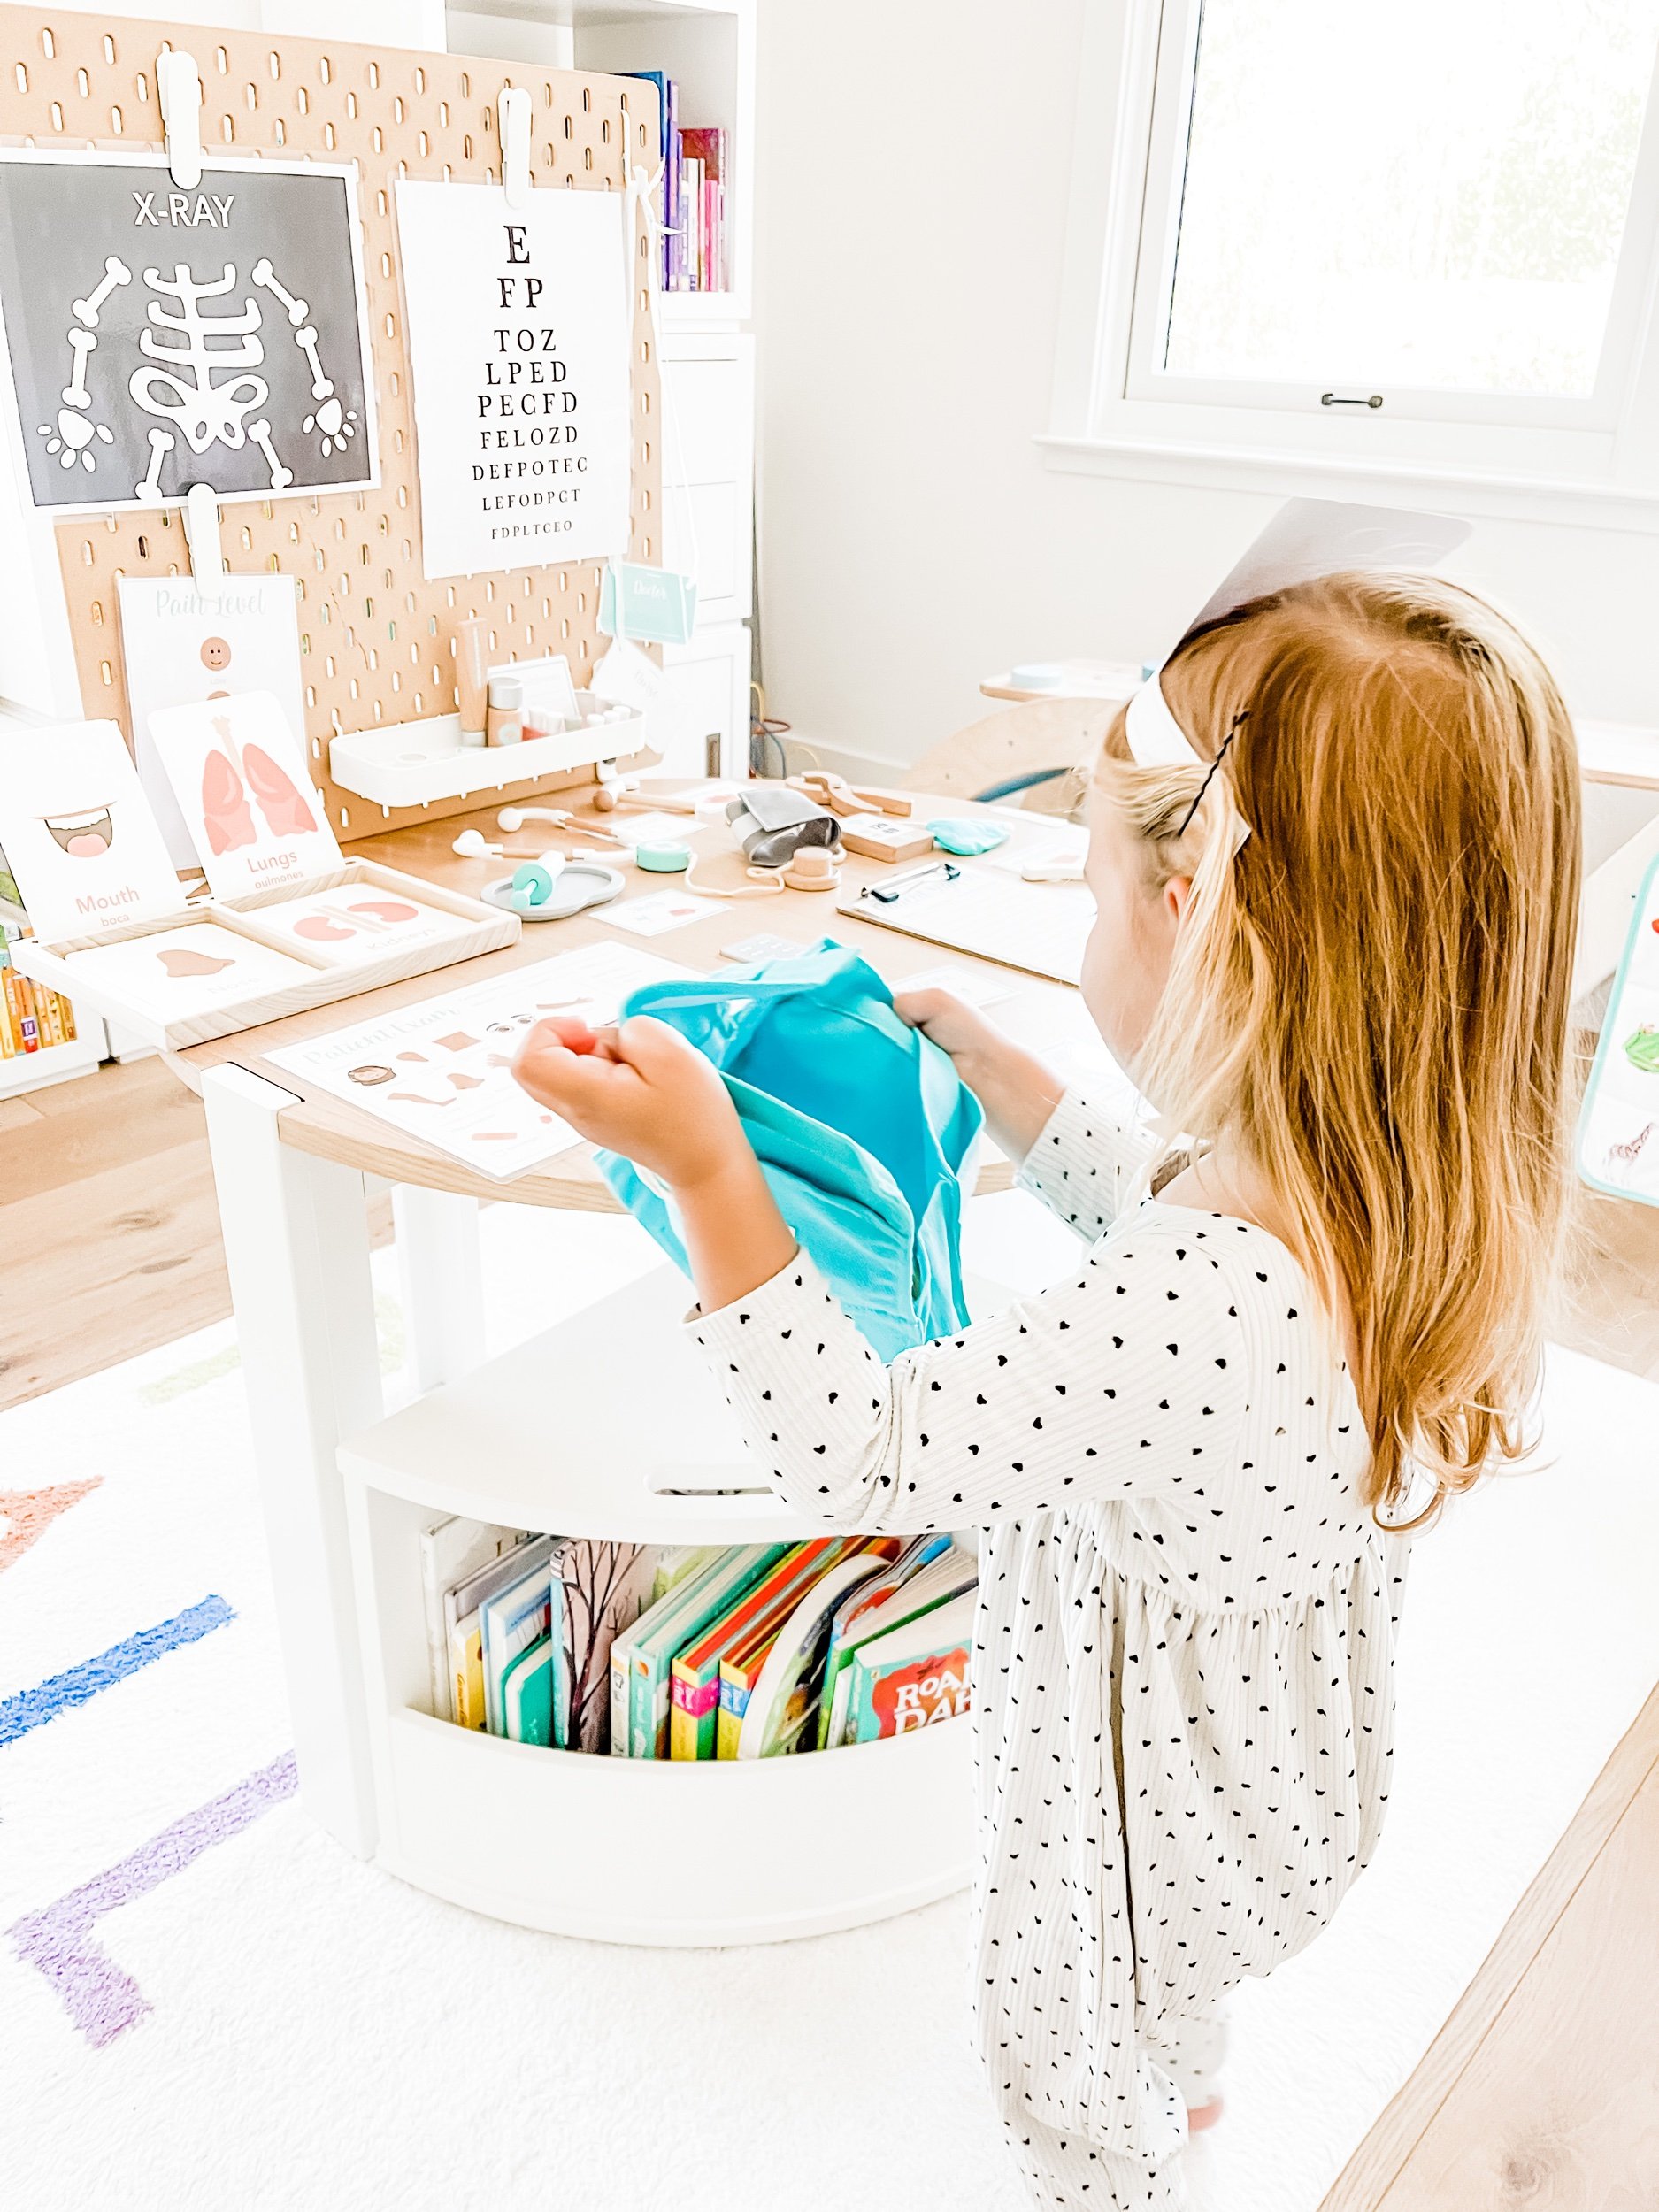
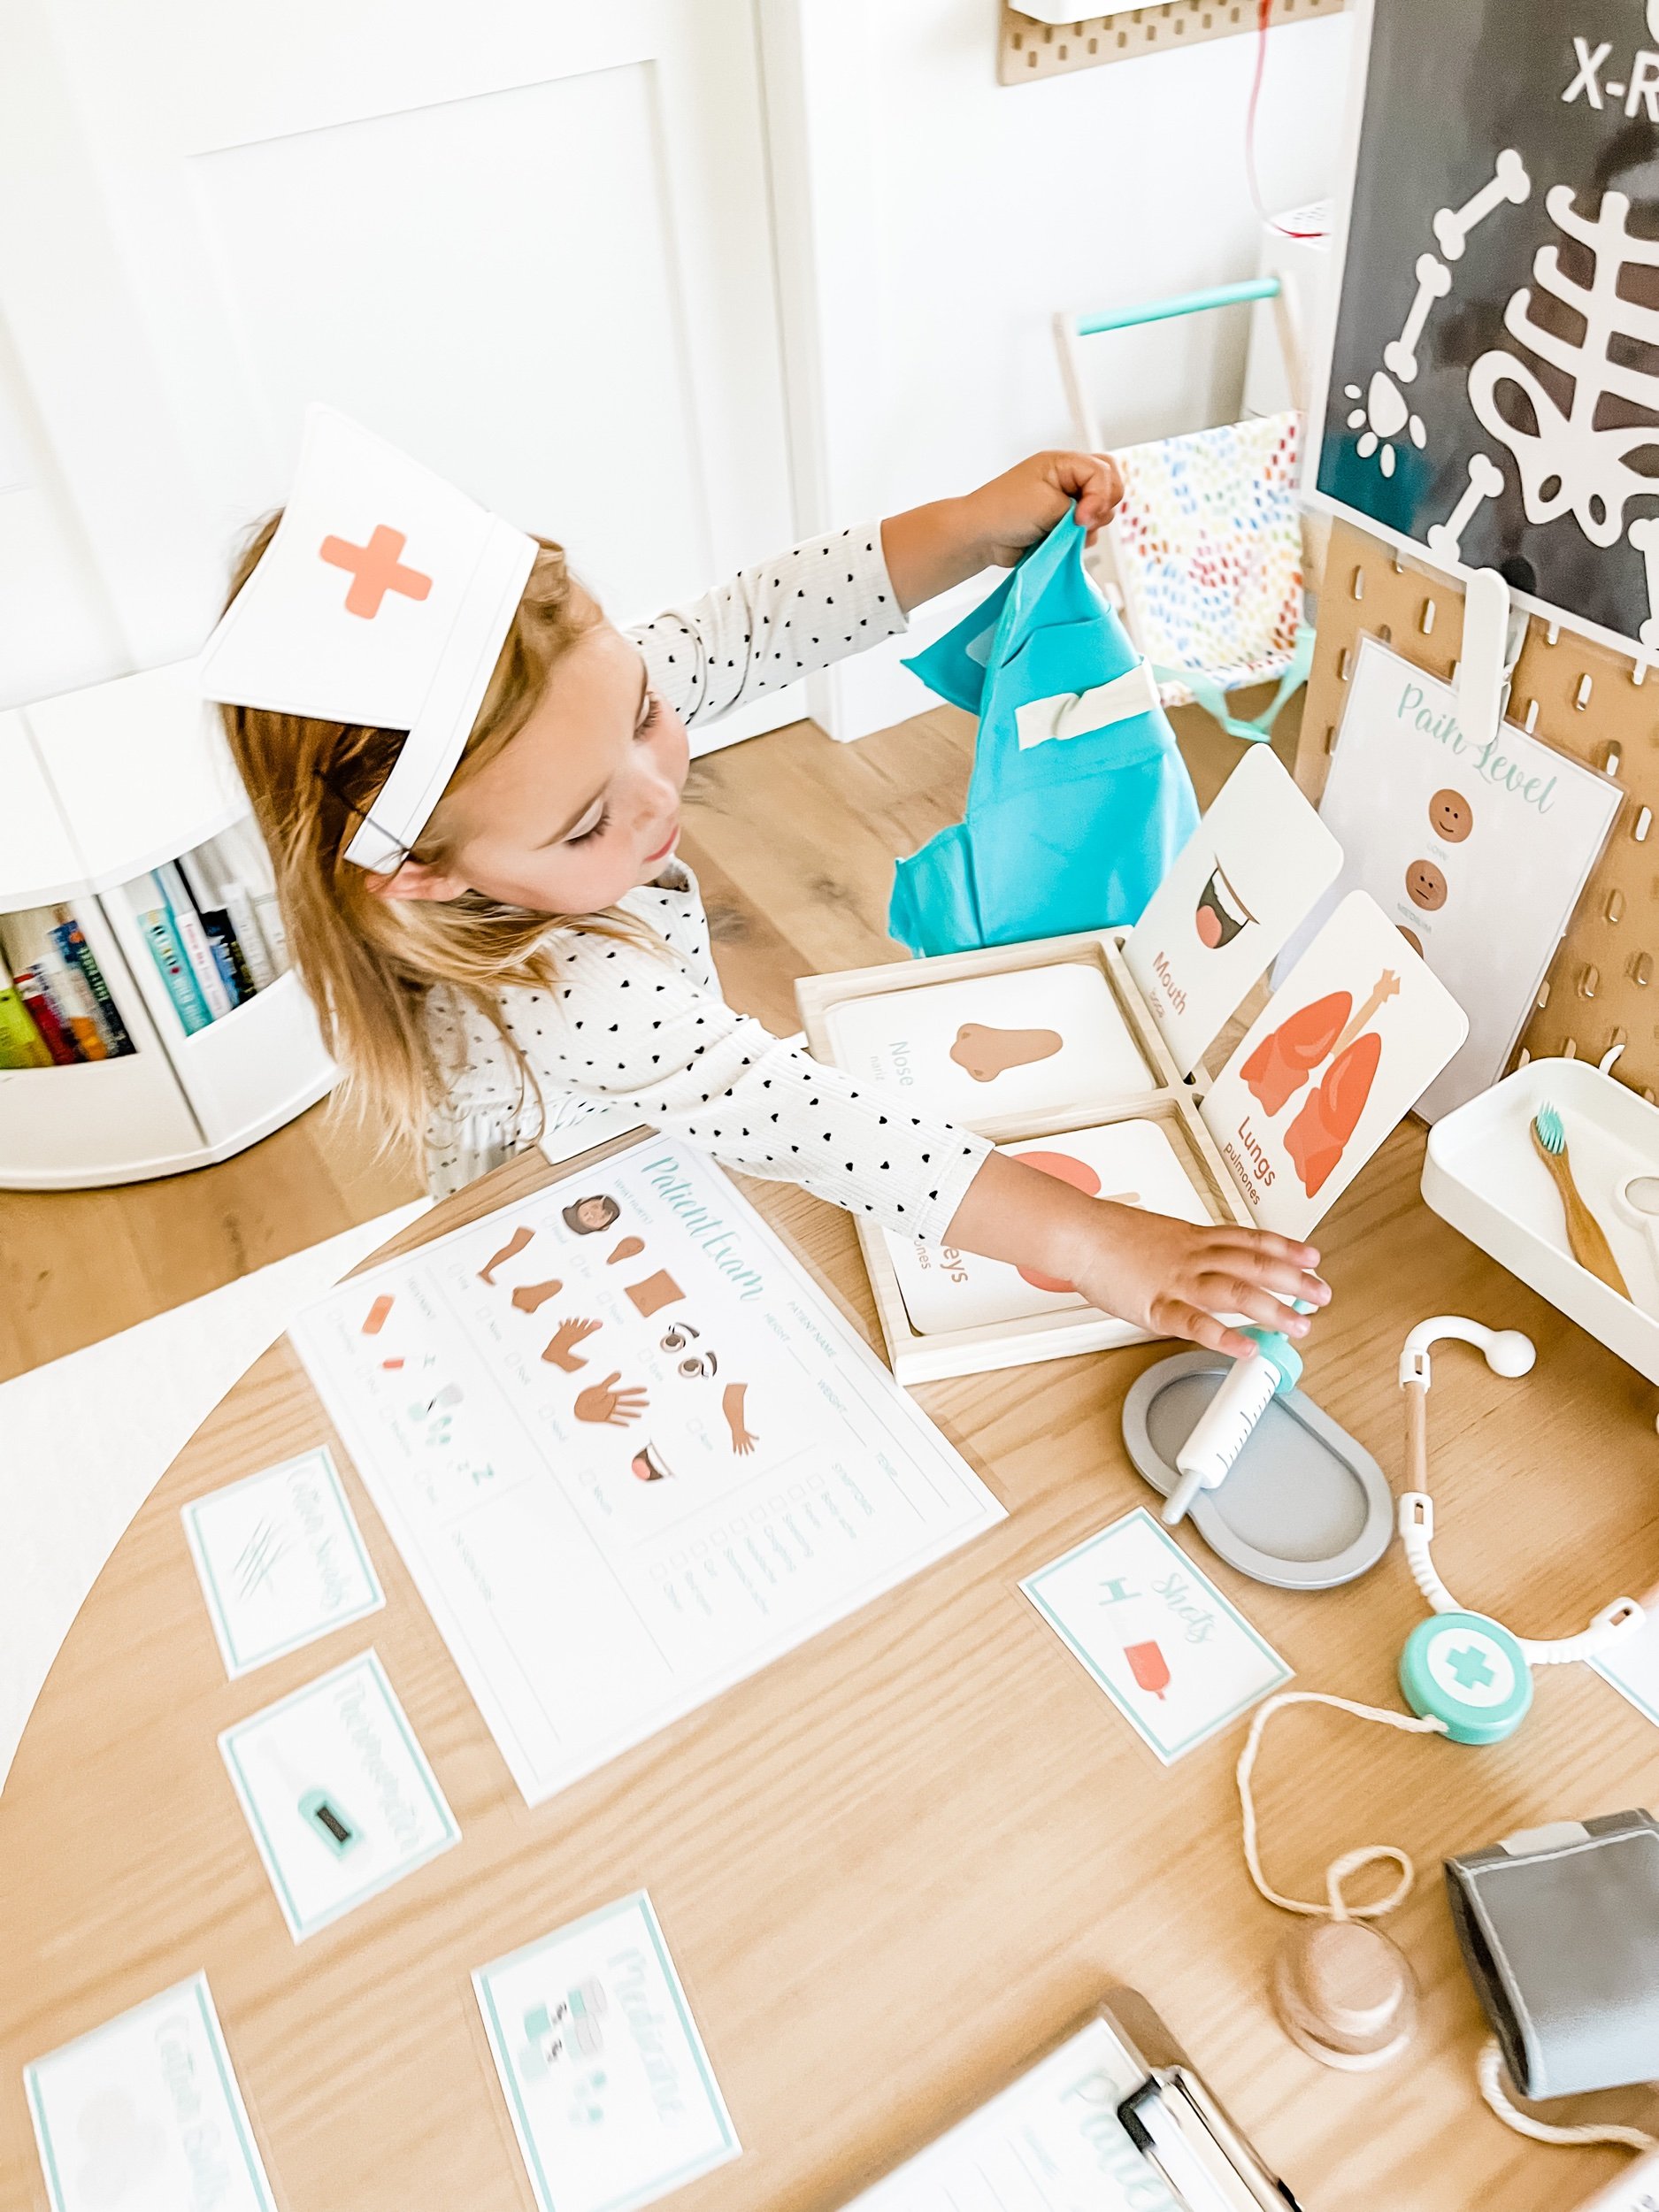
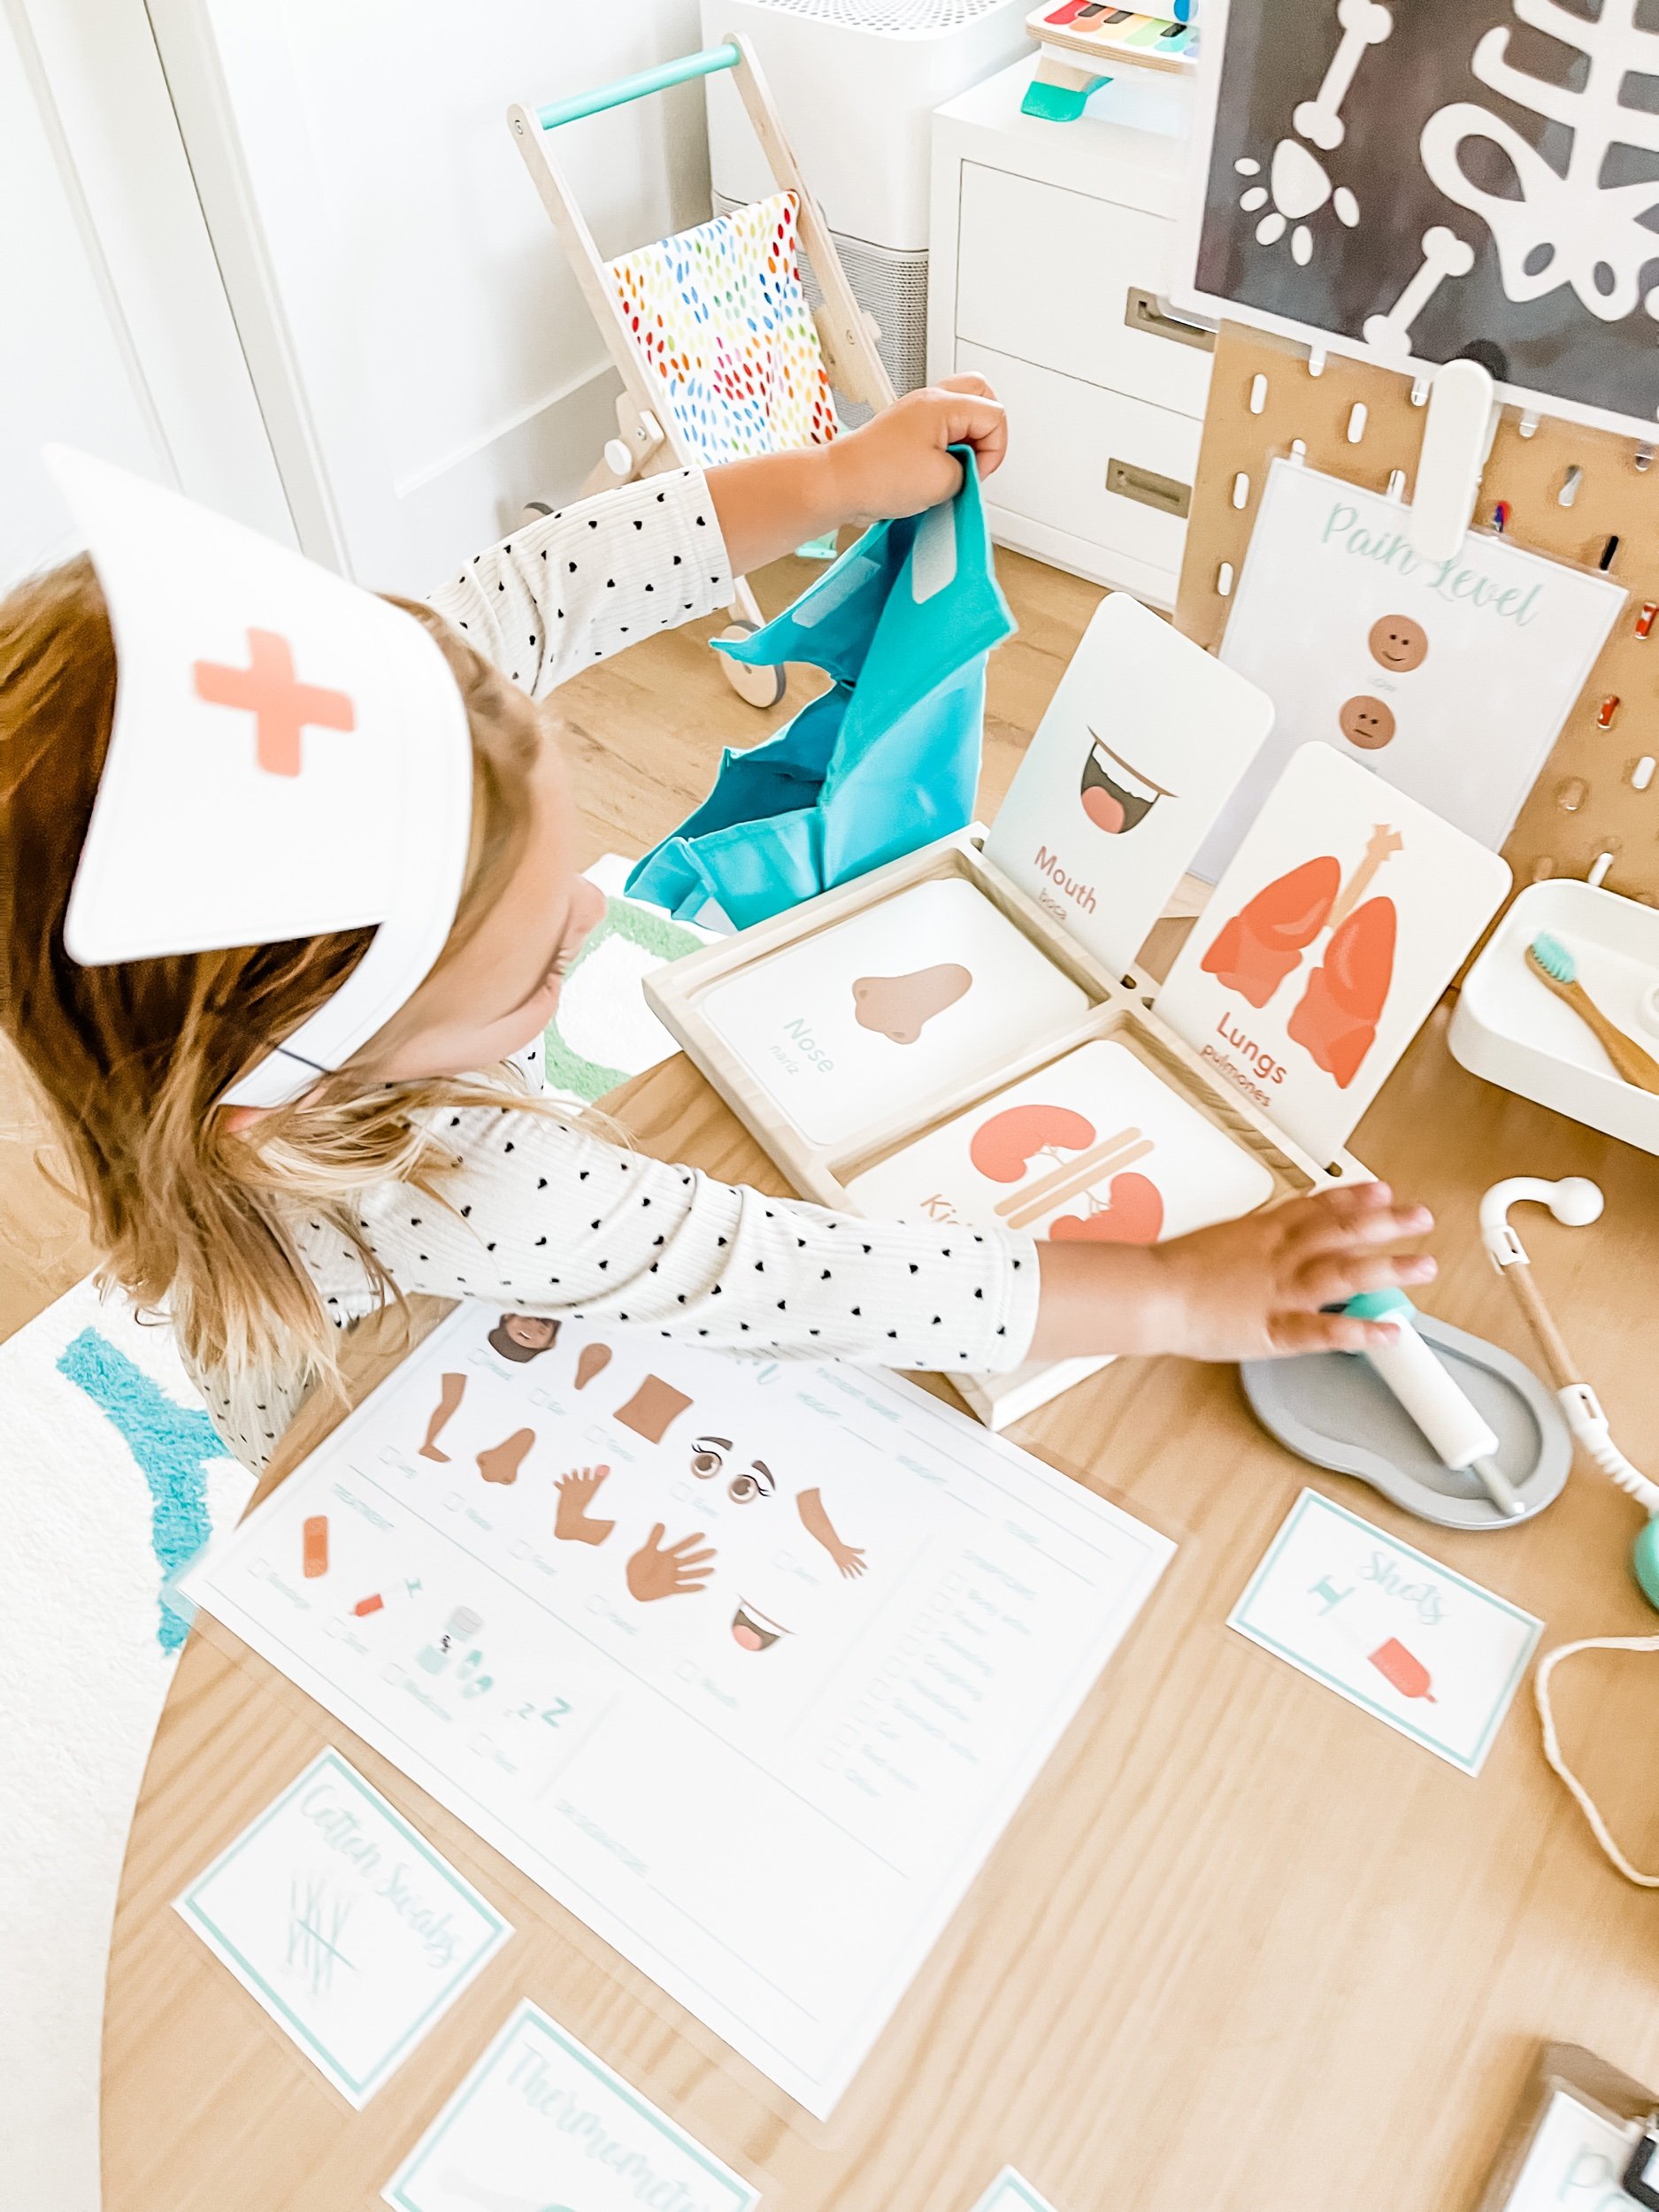
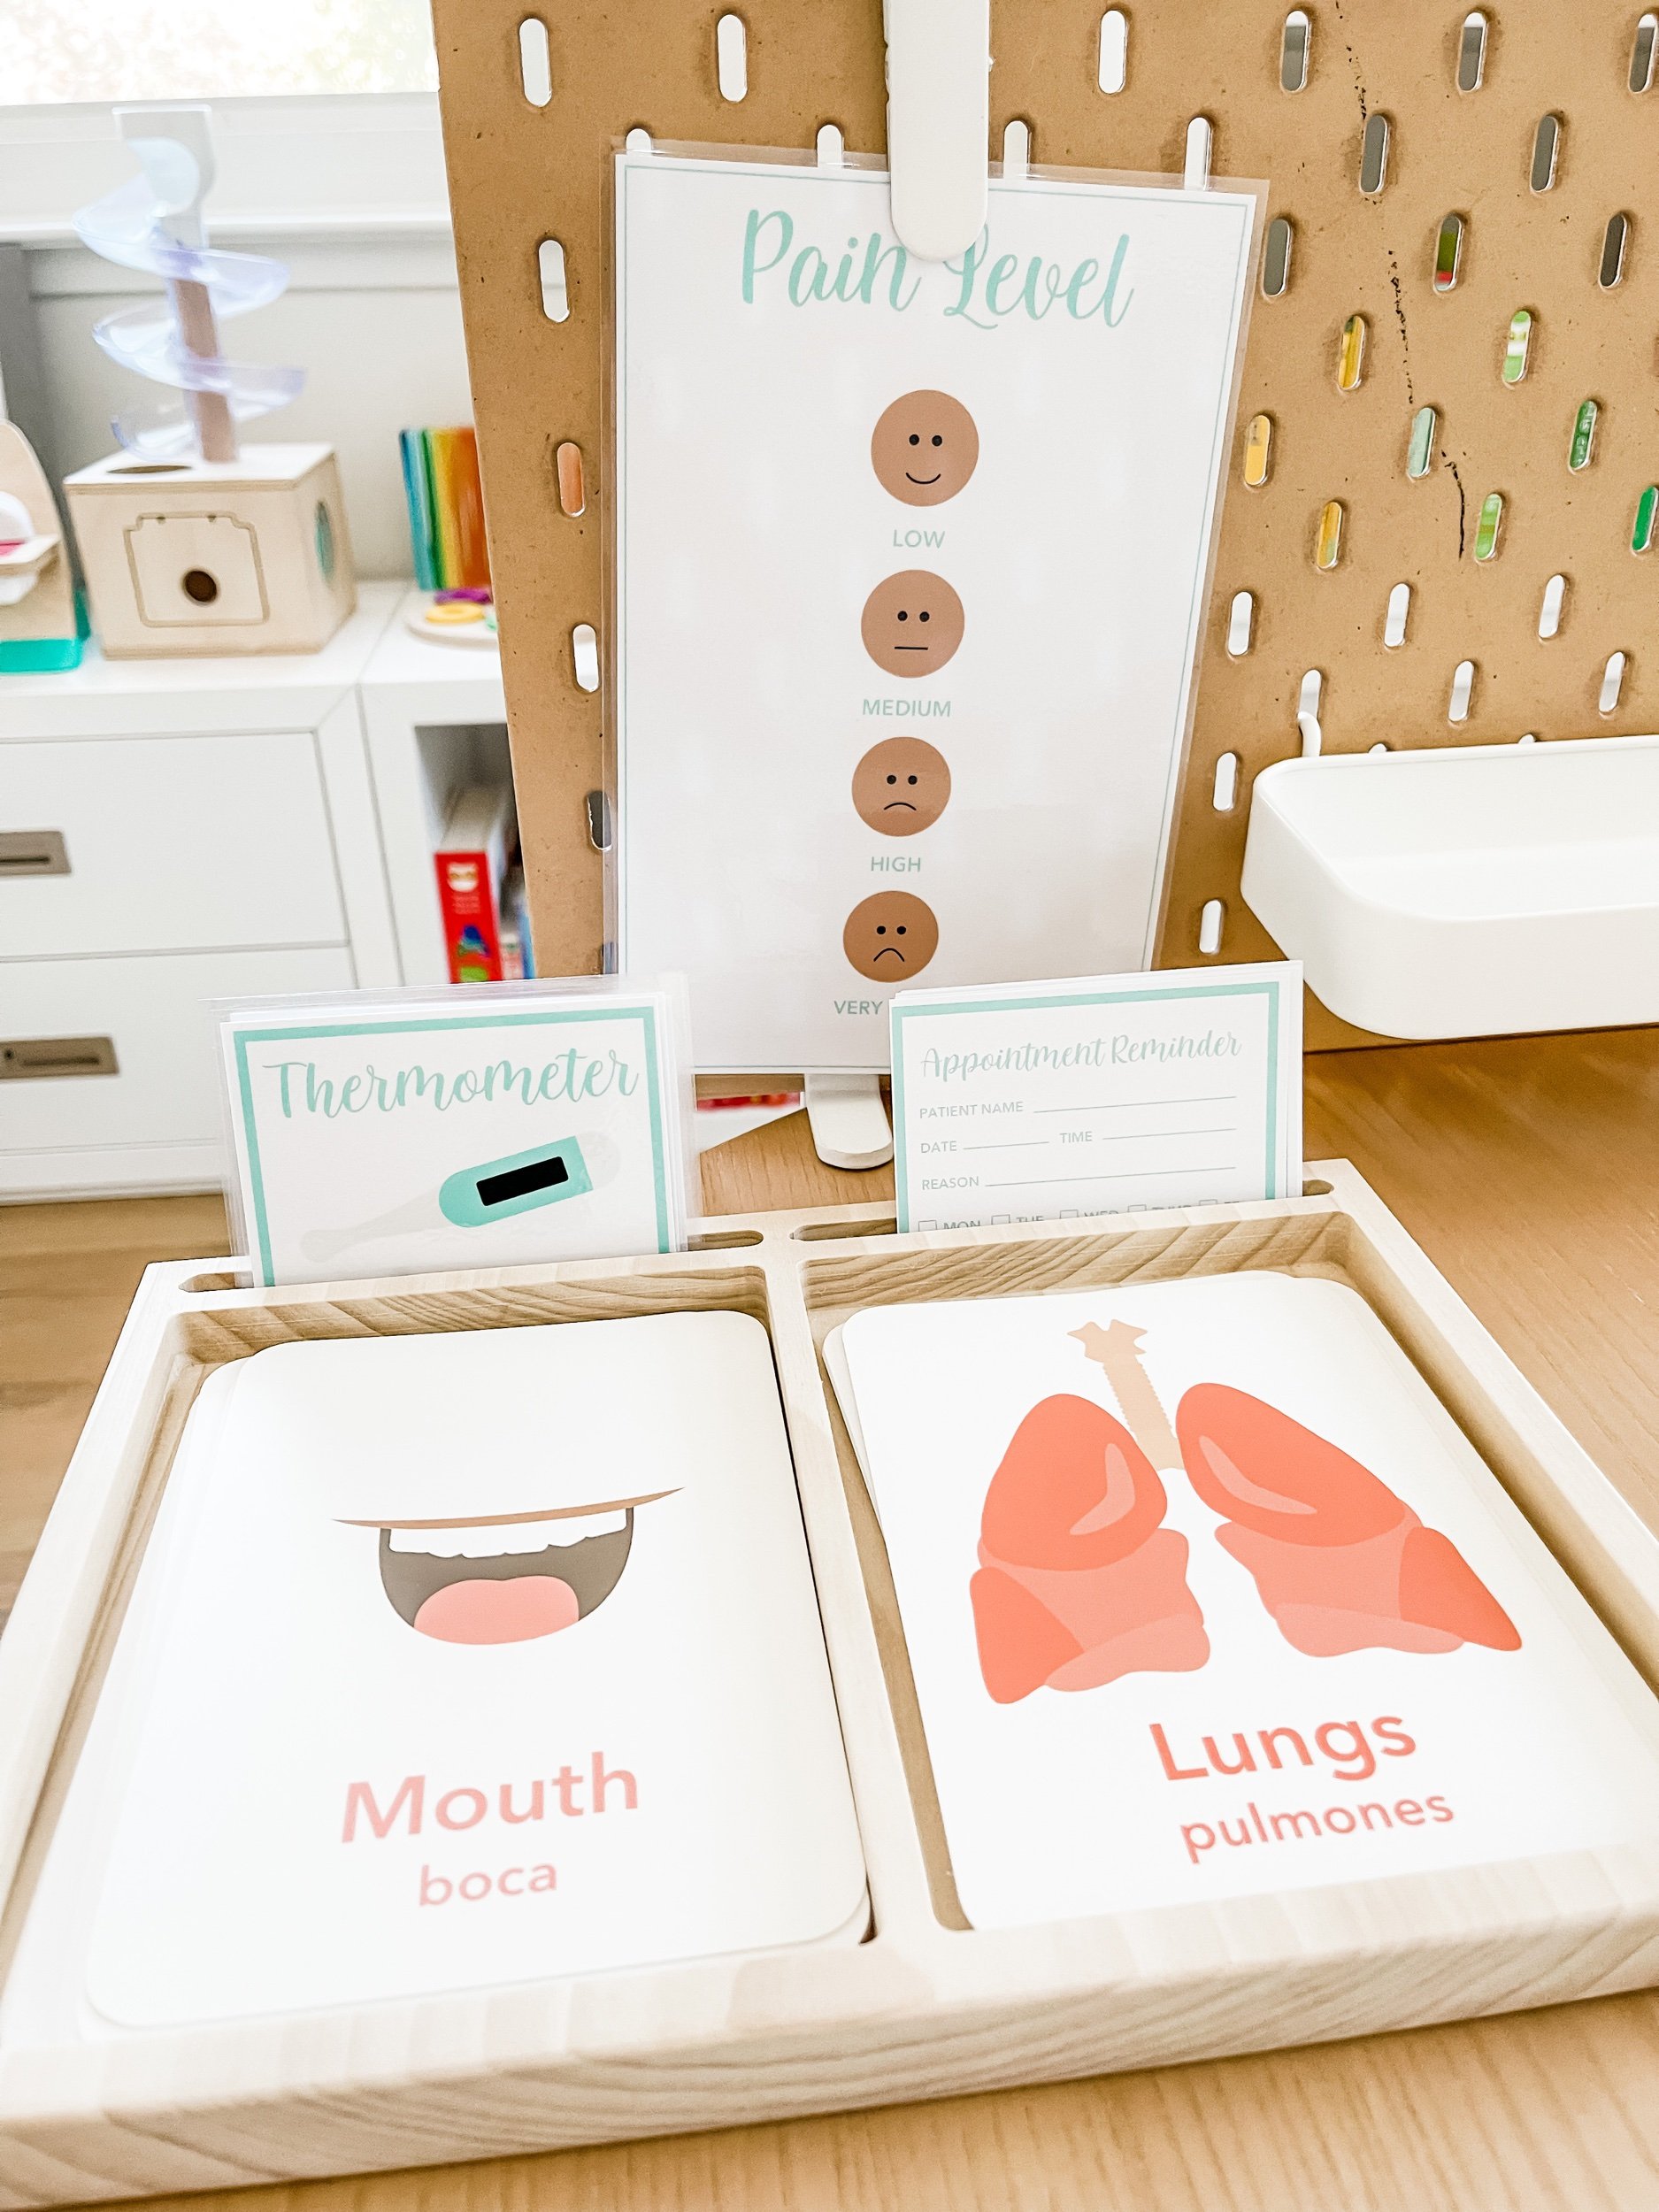
Sofia loves pretend play so I knew this doctors office dramatic play setup would be a huge hit. This time I laminated all of the materials so that they would last longer and I’m glad I did because Sofia loved pretending to be a doctor. Dramatic play is so great for expanding toddler’s minds and exposing them to new words, phrases, and objects. Here’s a little more about what’s included in this kit:
Creating a doctor-themed dramatic play setup can be an engaging and educational experience for children. Using our printable doctor dramatic play materials, you can set up an immersive and fun play area that encourages learning and creativity. Here’s how you can create three exciting bins to enhance the experience:
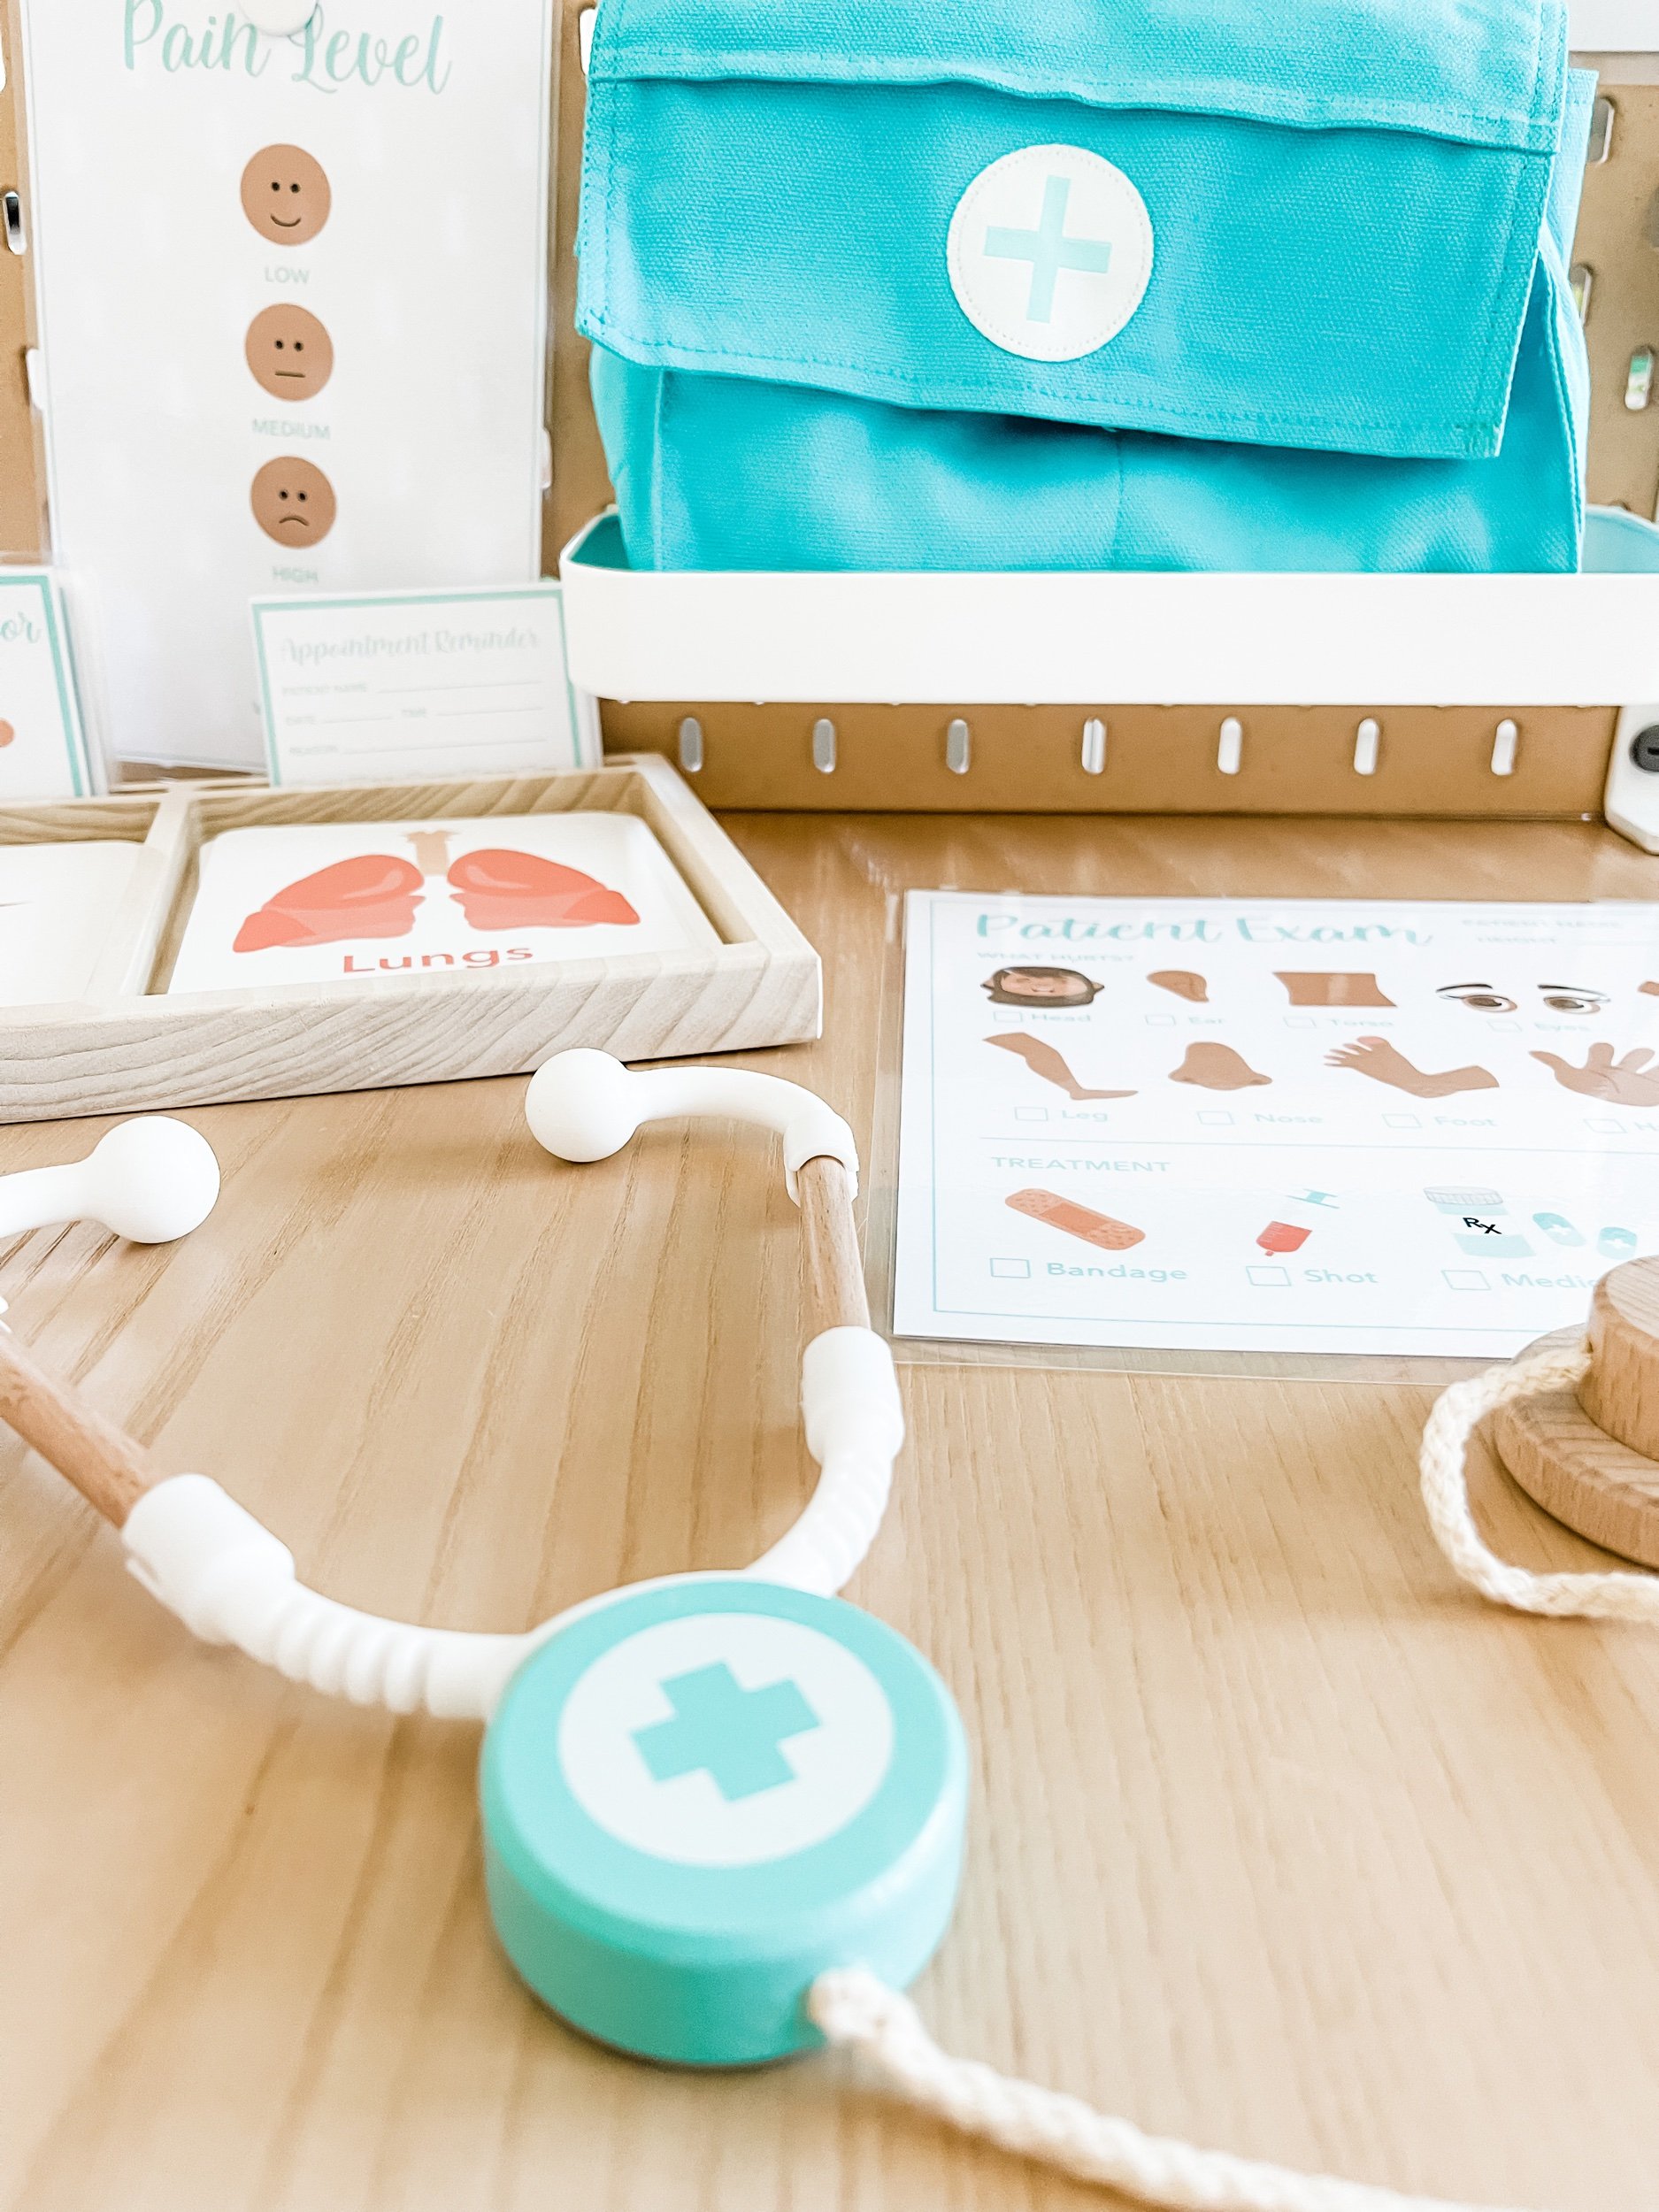
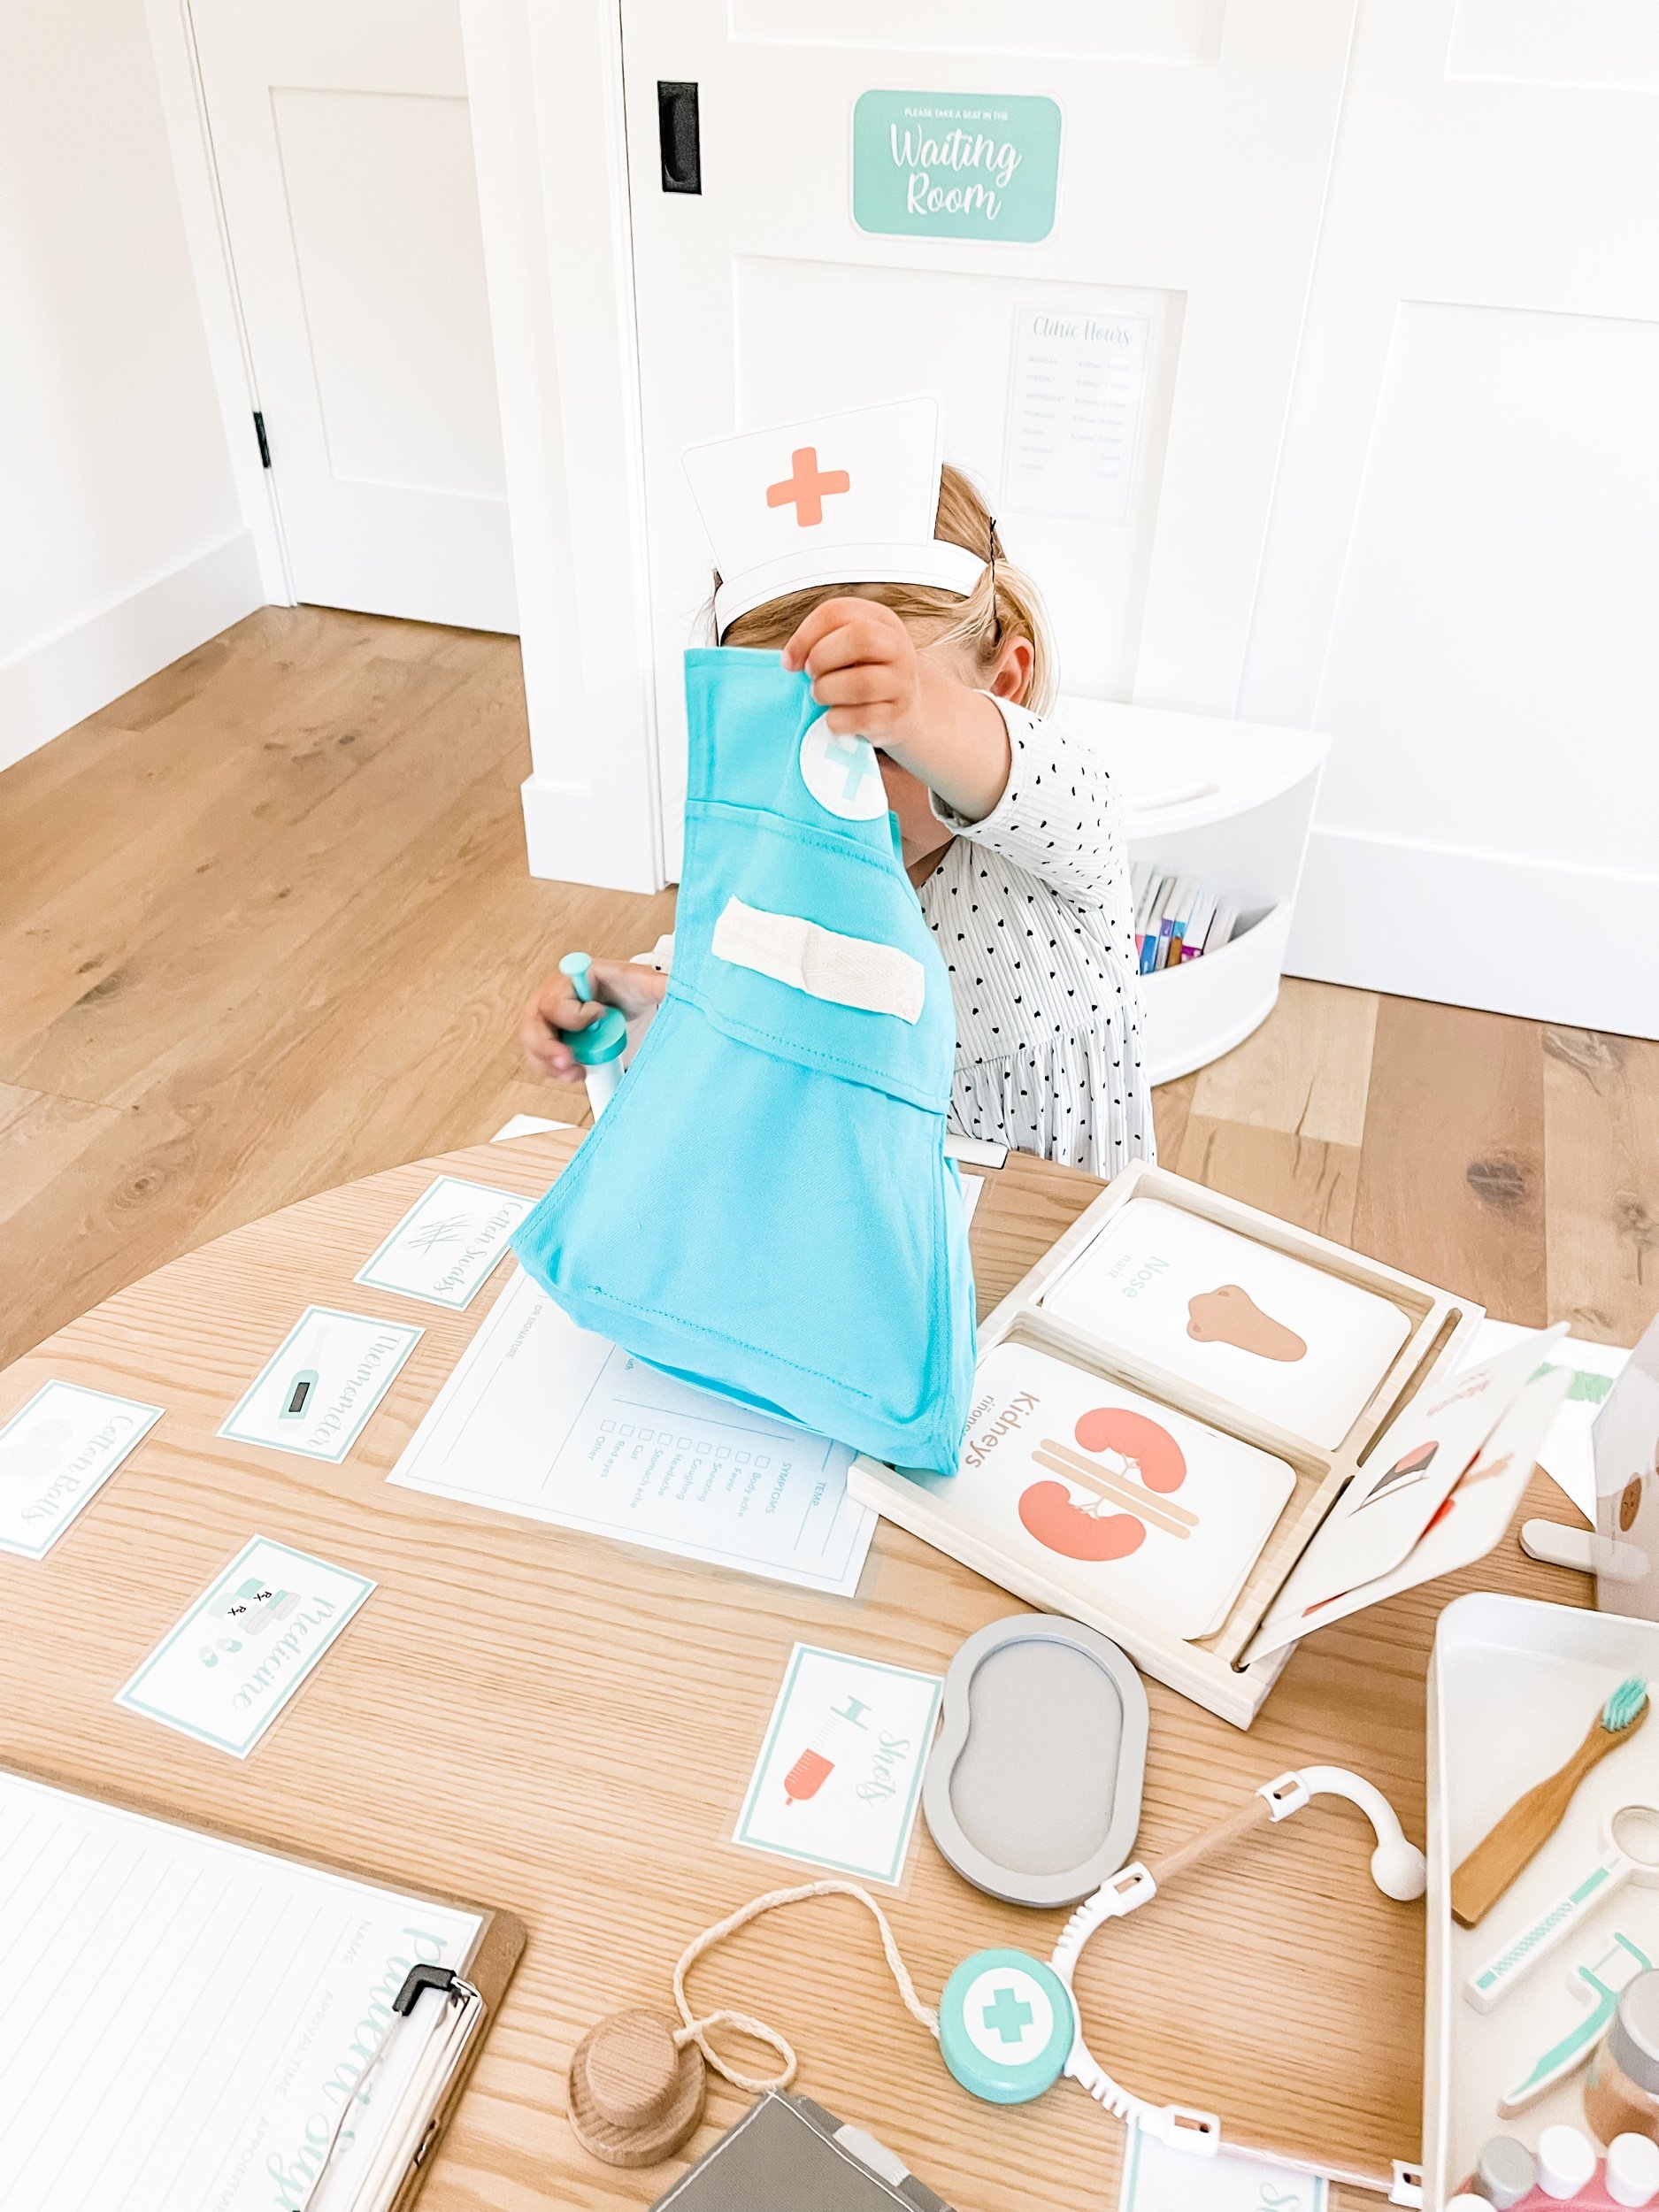
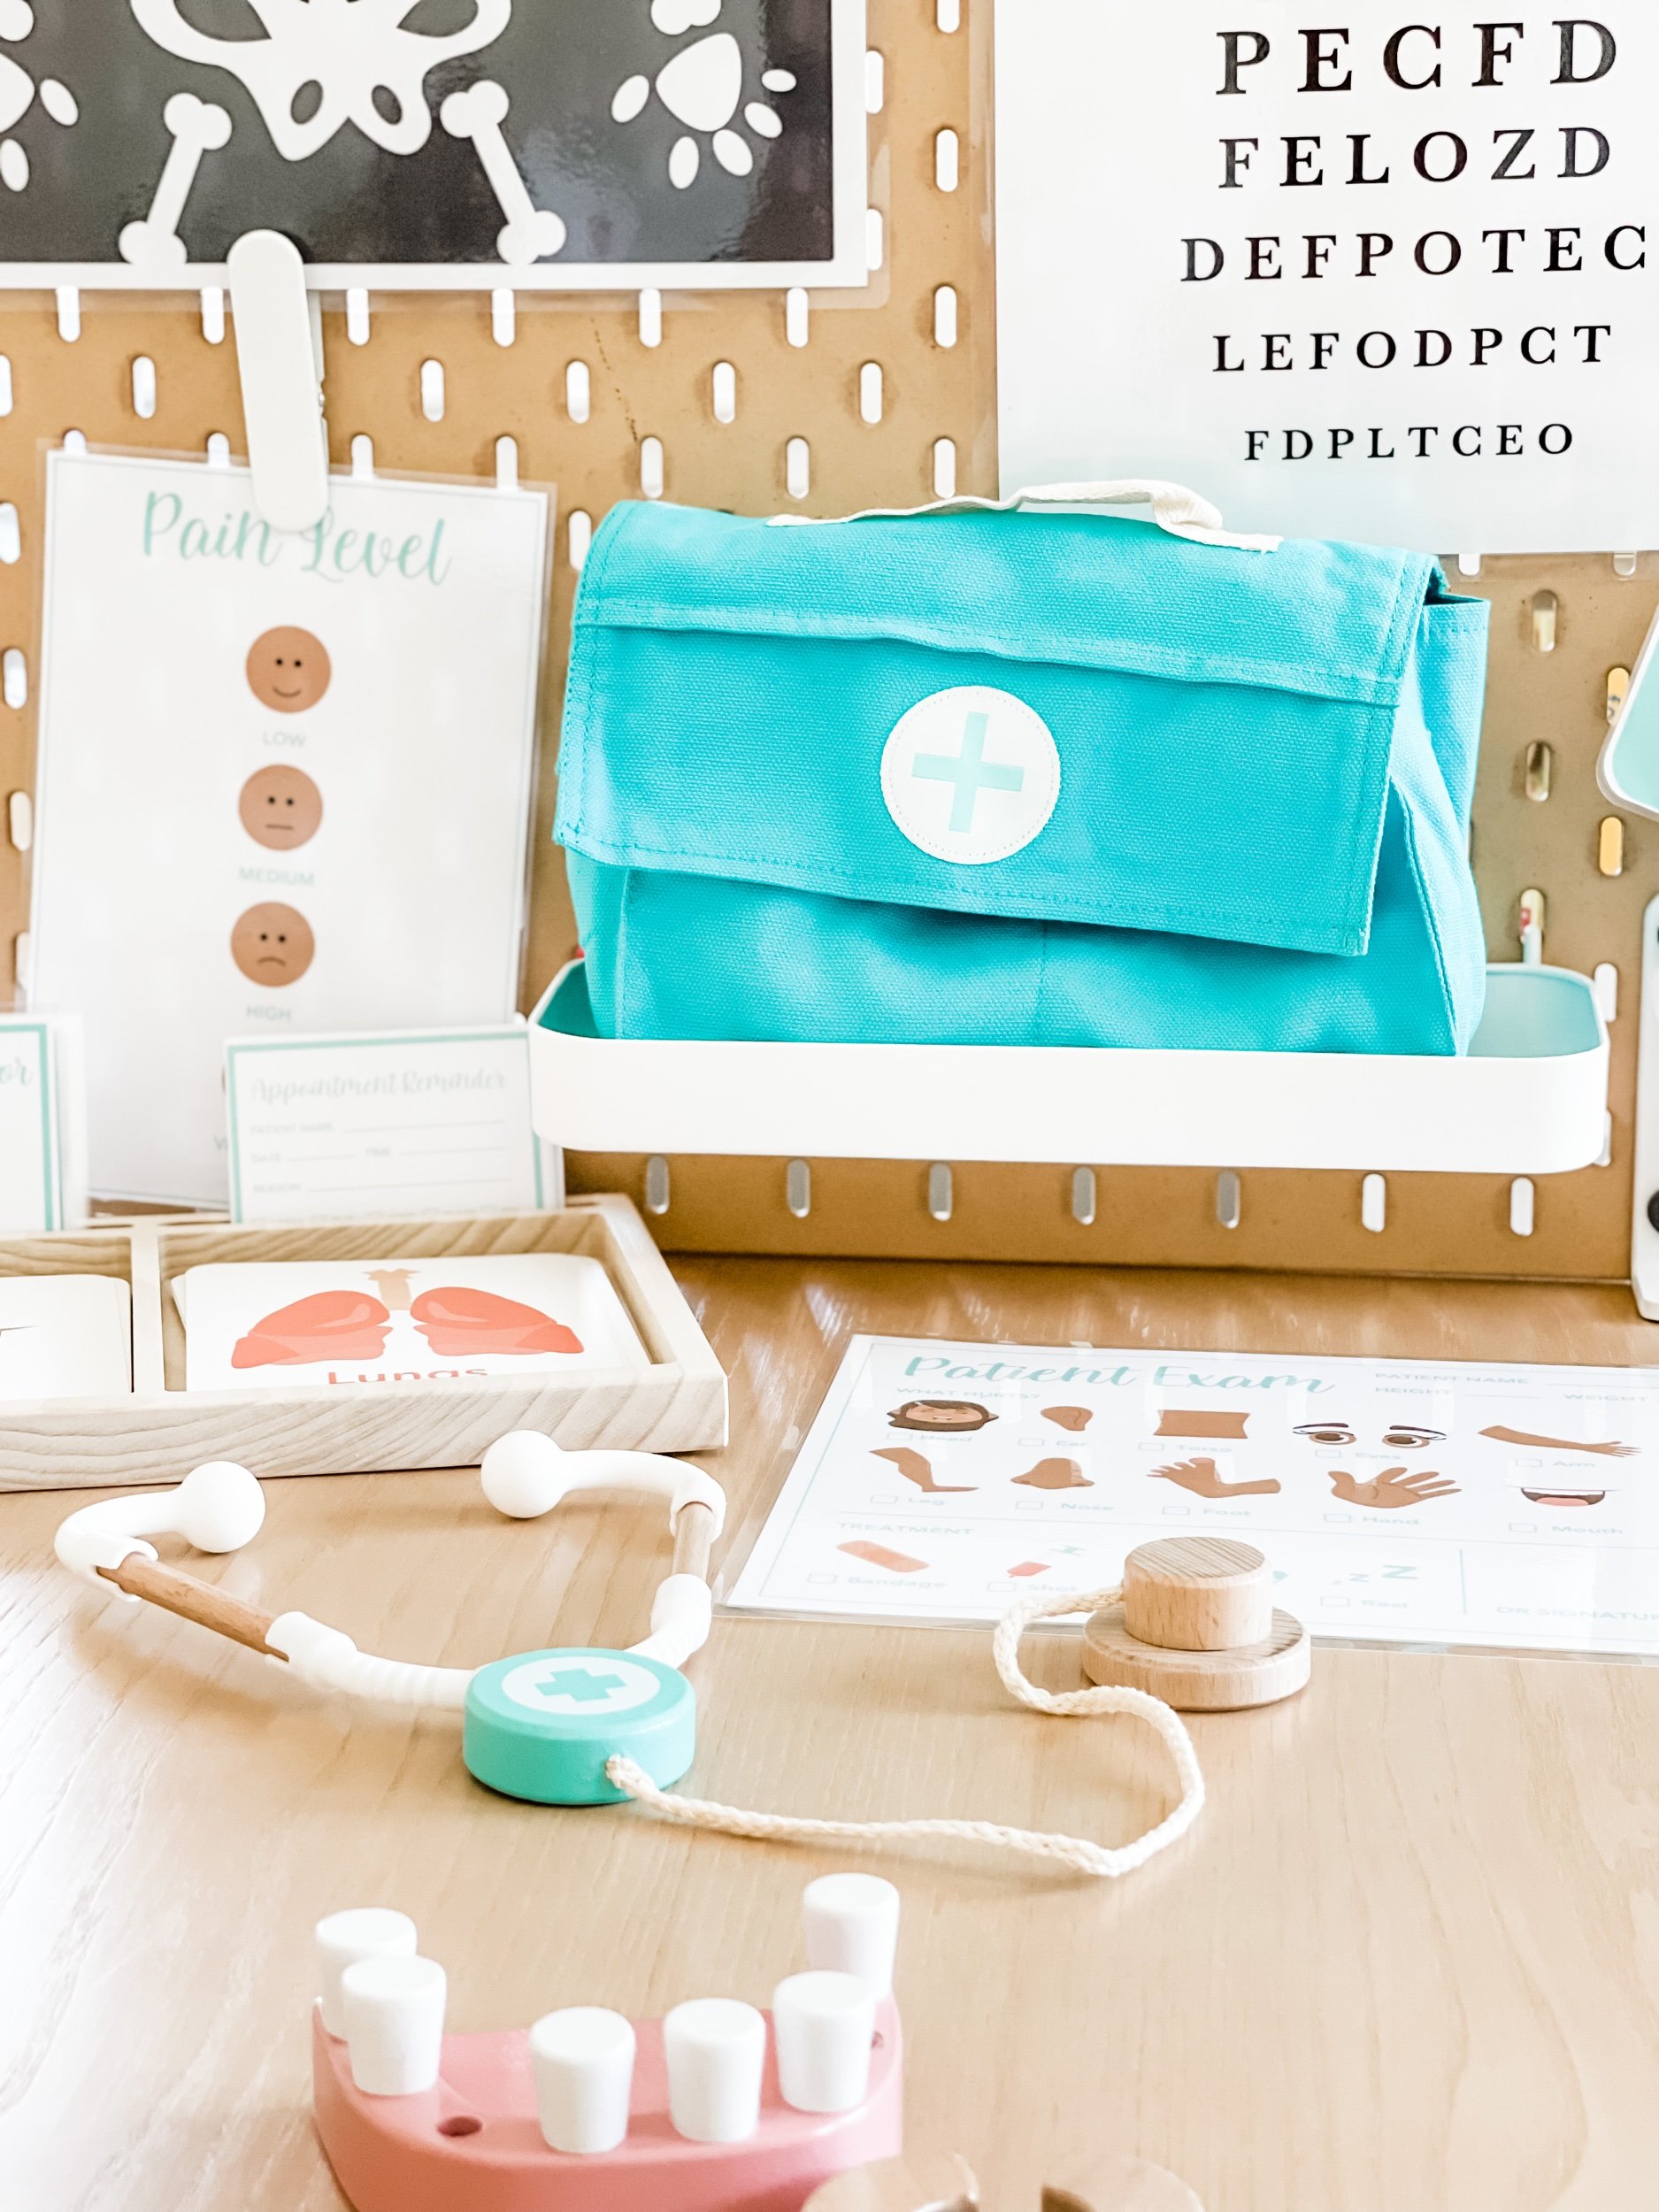
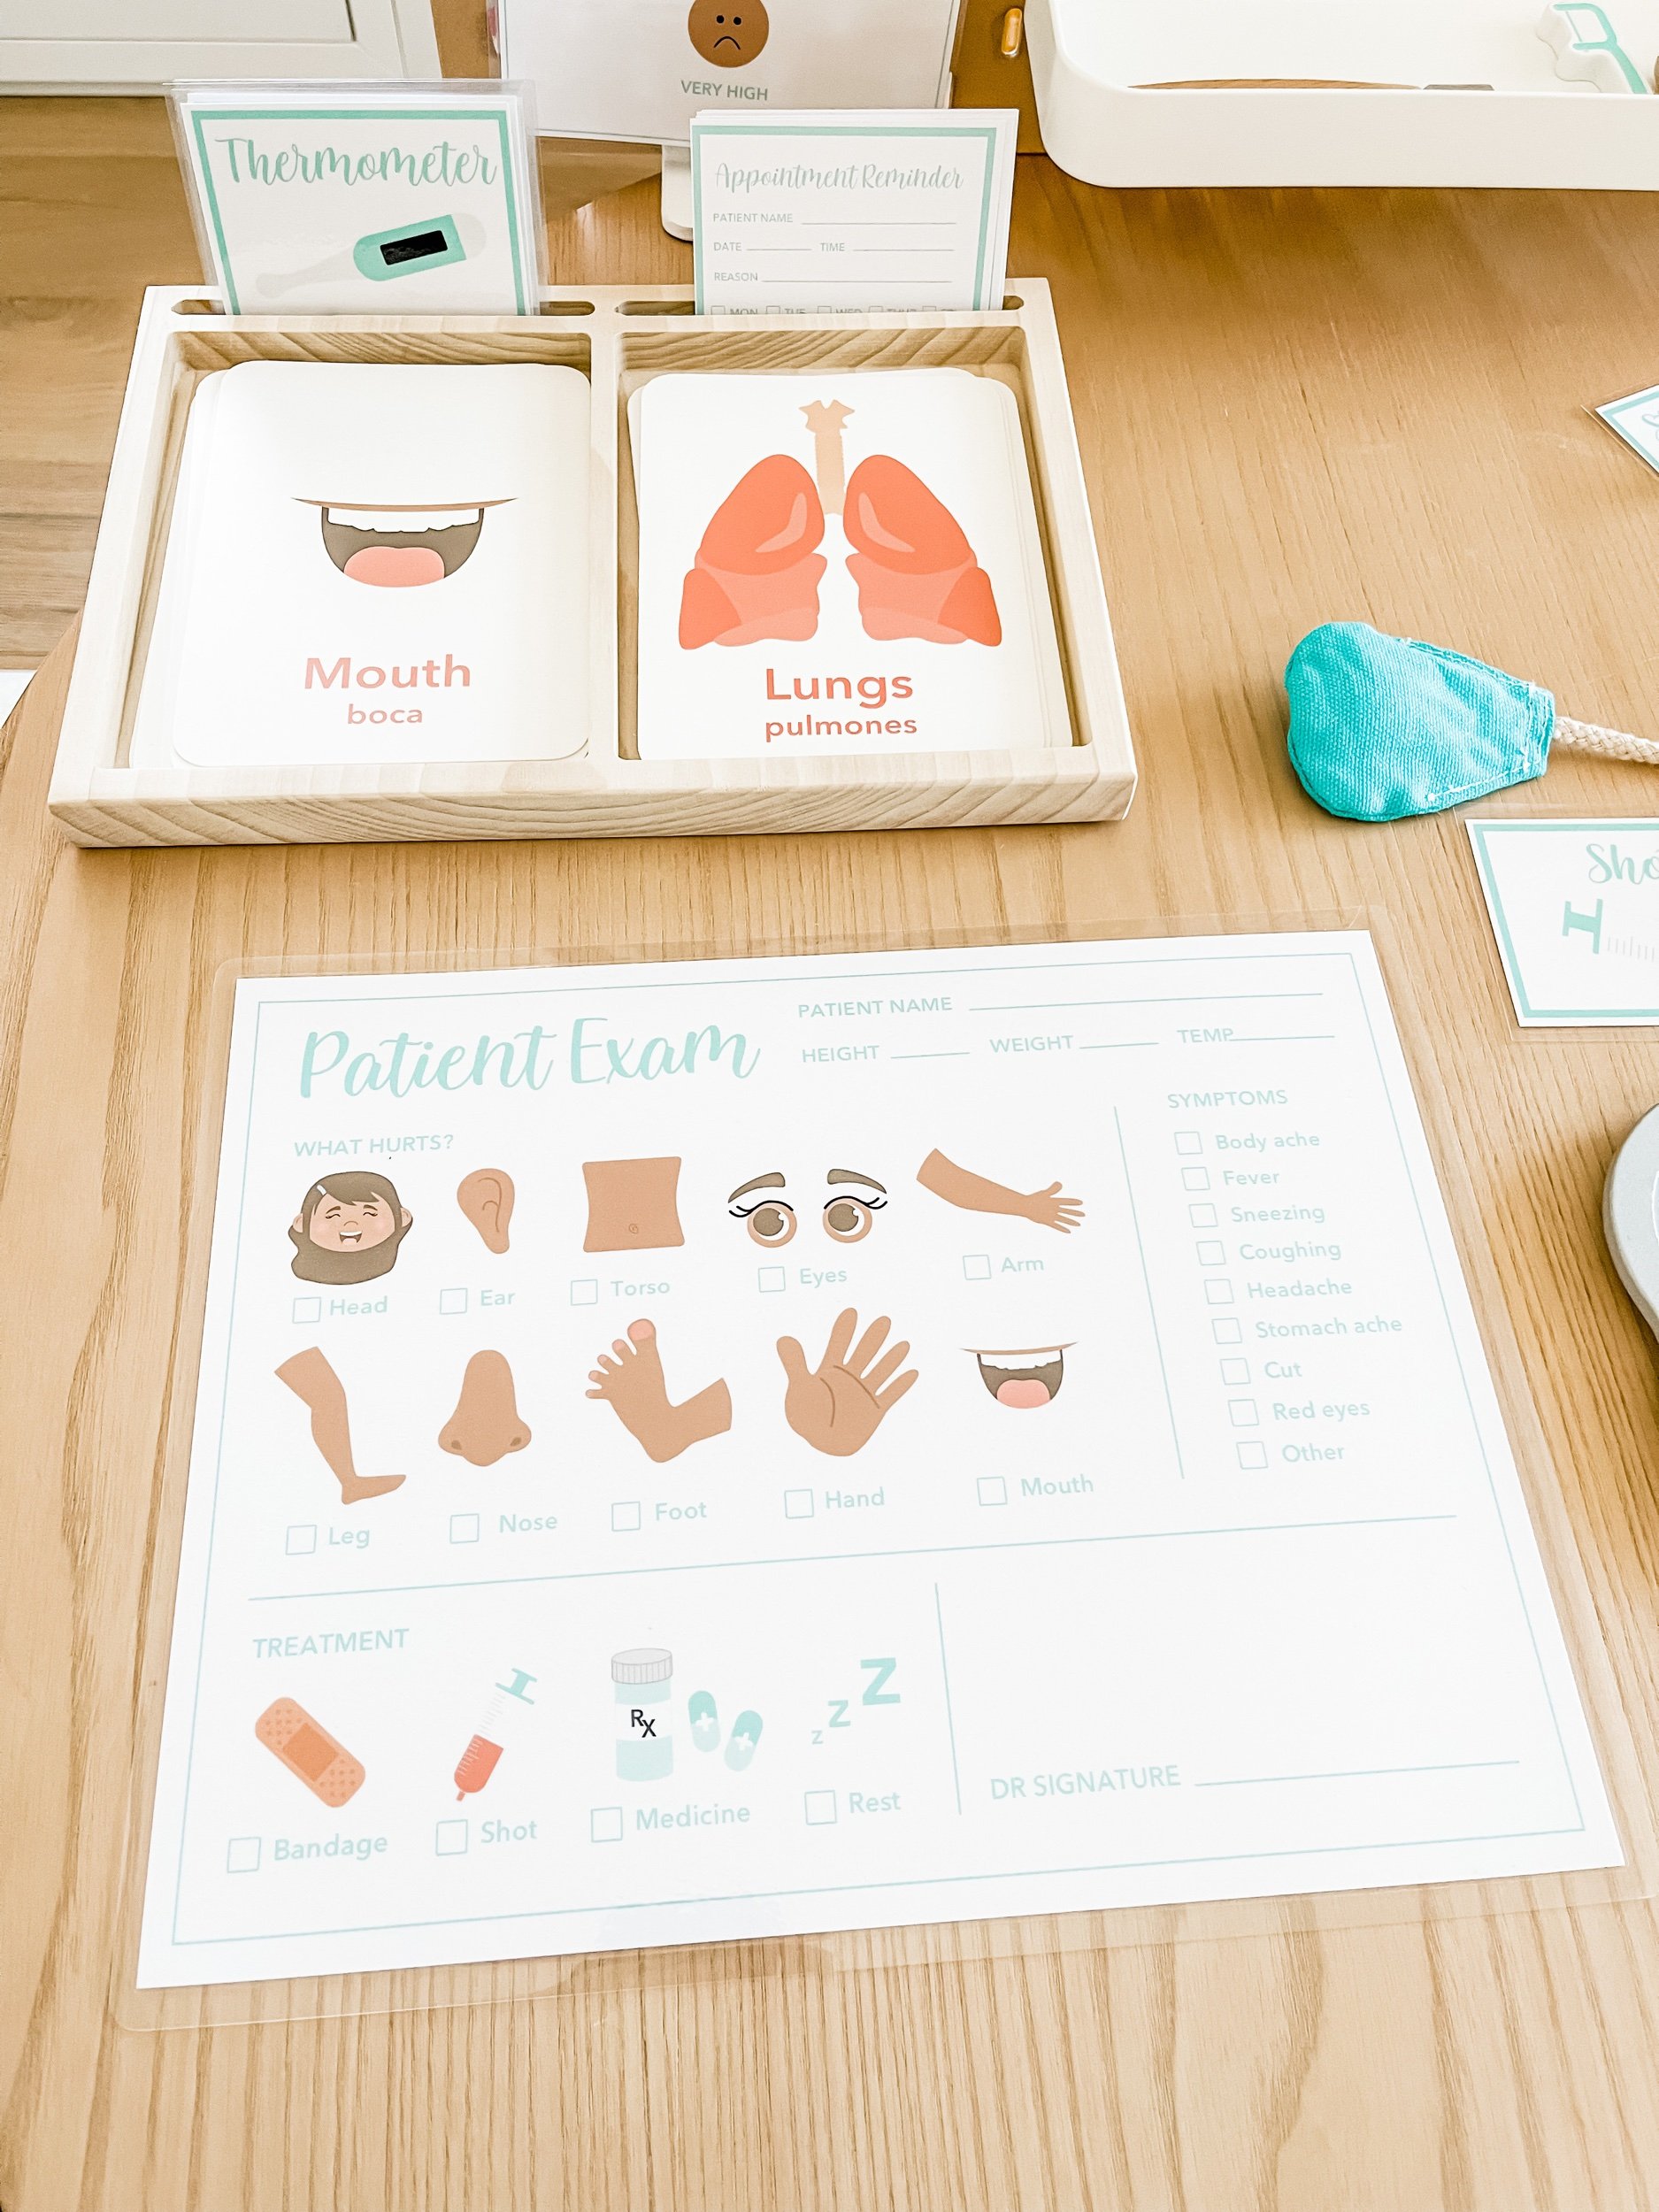
Here’s everything you need to setup your doctor supplies bin! This one is great for dramatic play — pretend to be the doctor and patient with the printable intake form. Use the cotton swabs and tongue depressors to treat minor illnesses!
Cotton balls
Swabs
Tongue depressors
Bandaids
Instructions:
Collect Supplies: Gather all the doctor supplies and organize them in a bin.
Set Up Stations: Create different stations for each type of supply, encouraging kids to use them in their pretend play.
Role Play: Children can use cotton balls for cleaning wounds, swabs for checking ears and throats, tongue depressors for oral exams, and bandaids for treating pretend injuries.
Here’s everything you’ll need to create a blood and guts sensory plan bin. This one is perfect for little ones who like to get their hands dirty! Especially perfect because it’s taste safe — and dare I say yummy!
Egg noodles
Red food coloring
Instructions:
Cook the Noodles: Boil the egg noodles according to the package instructions until they are fully cooked.
Add Color: Drain the noodles and mix in red food coloring until the noodles are evenly coated.
Set Up the Bin: Place the red-colored noodles in a sensory bin.
Pretend Surgery: Kids can use the noodles to simulate blood and guts, practicing their surgical skills in a fun and safe environment.

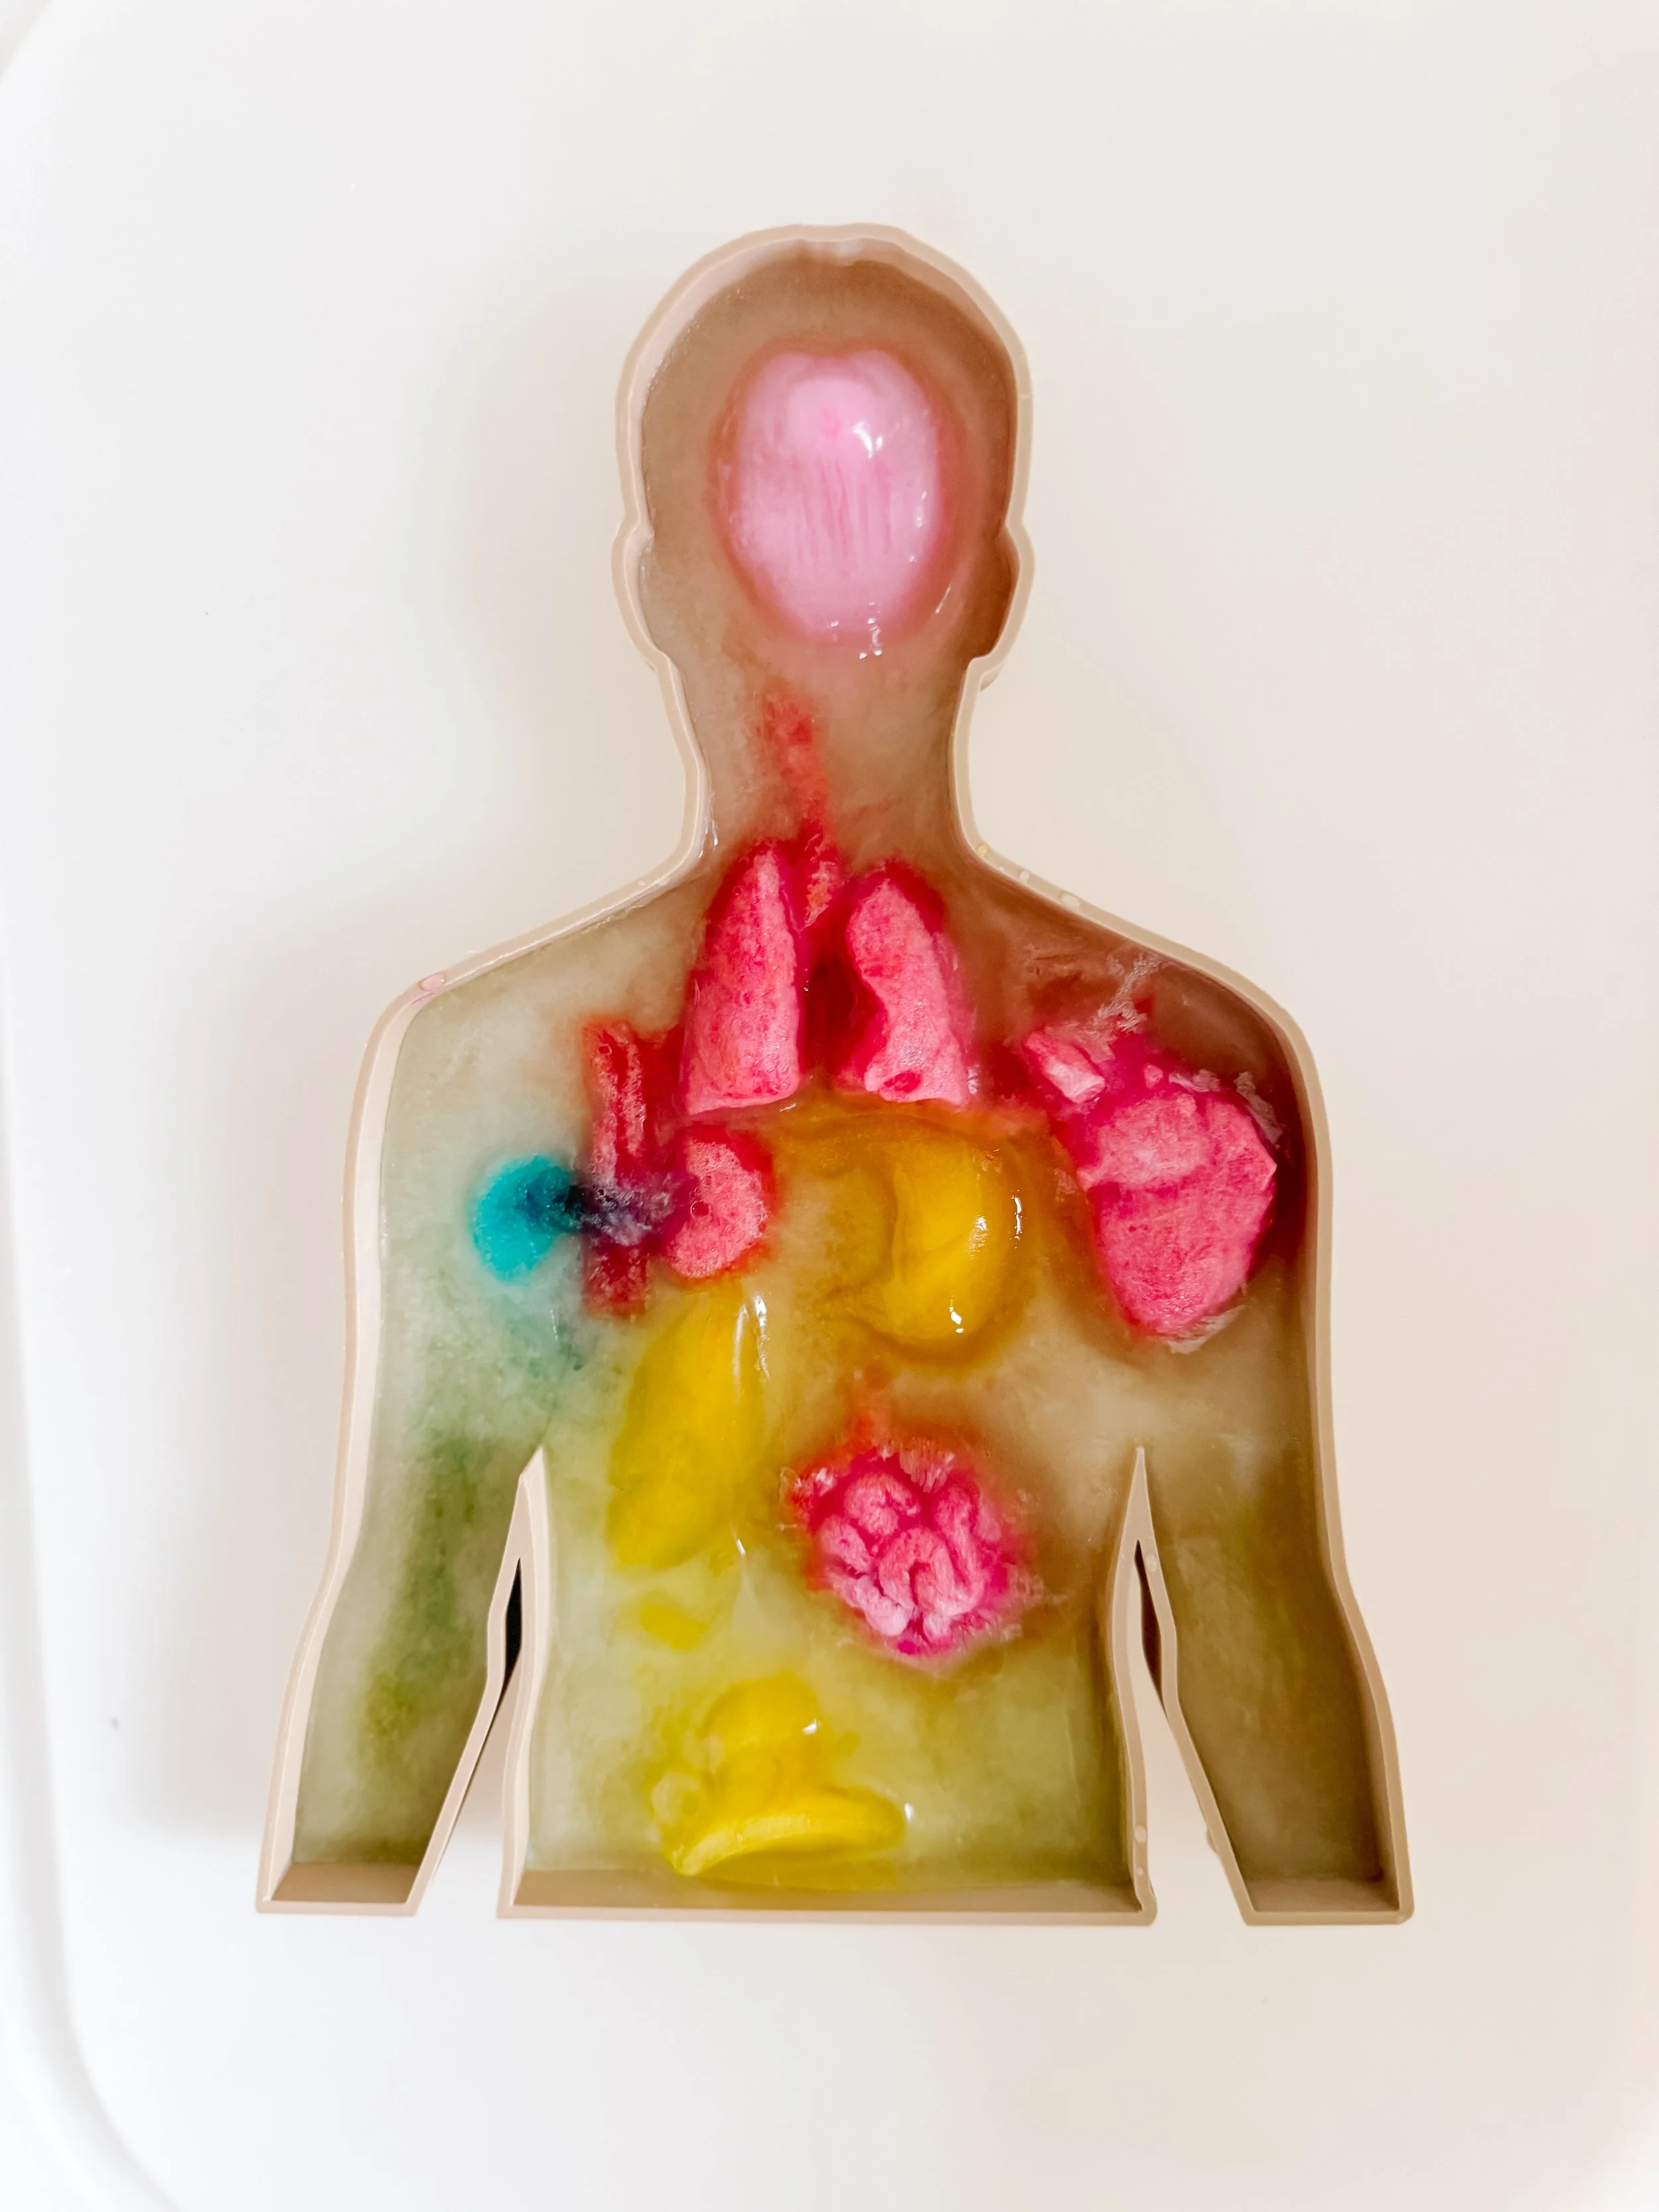
Here’s everything you need to make this frozen organs sensory activity bin.
Human organ silicone molds
Jello mix
Human body tray
Ice
Instructions:
Prepare the Jello: Follow the instructions on the Jello mix to prepare the solution.
Pour into Molds: Pour the Jello into the human organ silicone molds and let it set in the refrigerator.
Create the Frozen Body Tray: Once the Jello organs are set, place them in a human body tray filled with ice.
Freeze: Place the entire tray in the freezer until the organs and ice are completely frozen.
Play Time: Let kids explore the frozen organs, encouraging them to identify and "operate" on the different body parts.
Expand your child's vocabulary with these doctor-themed words:
1. Stethoscope
2. Thermometer
3. Syringe
4. Patient
5. Bandage
6. Prescription
7. Diagnosis
8. Heartbeat
9. Checkup
10. Nurse
11. Medicine
12. Hospital
13. Exam
14. Treatment
15. Cure
16. Infection
17. Virus
18. Vaccine
19. Pulse
20. X-ray
21. Surgeon
22. Emergency
23. Cast
24. Chart
25. Clinic
Creating a doctor-themed dramatic play setup with these bins is a fantastic way to combine fun and learning. Don’t forget to download our printable doctor dramatic play materials to complete your setup. Visit the link in our bio to get started!
Engaging in sensory play, especially with themed setups like our doctor dramatic play, provides numerous benefits for children:
Fine Motor Skills: Handling small items like cotton balls and swabs helps improve dexterity and hand-eye coordination.
Imaginative Play: Pretend play scenarios foster creativity and imagination, allowing children to explore different roles and scenarios.
Language Development: Using themed vocabulary during play helps expand a child’s language skills and comprehension.
Social Skills: Playing in a group setting encourages teamwork, communication, and sharing.
Cognitive Growth: Sensory play stimulates brain development by engaging multiple senses at once.
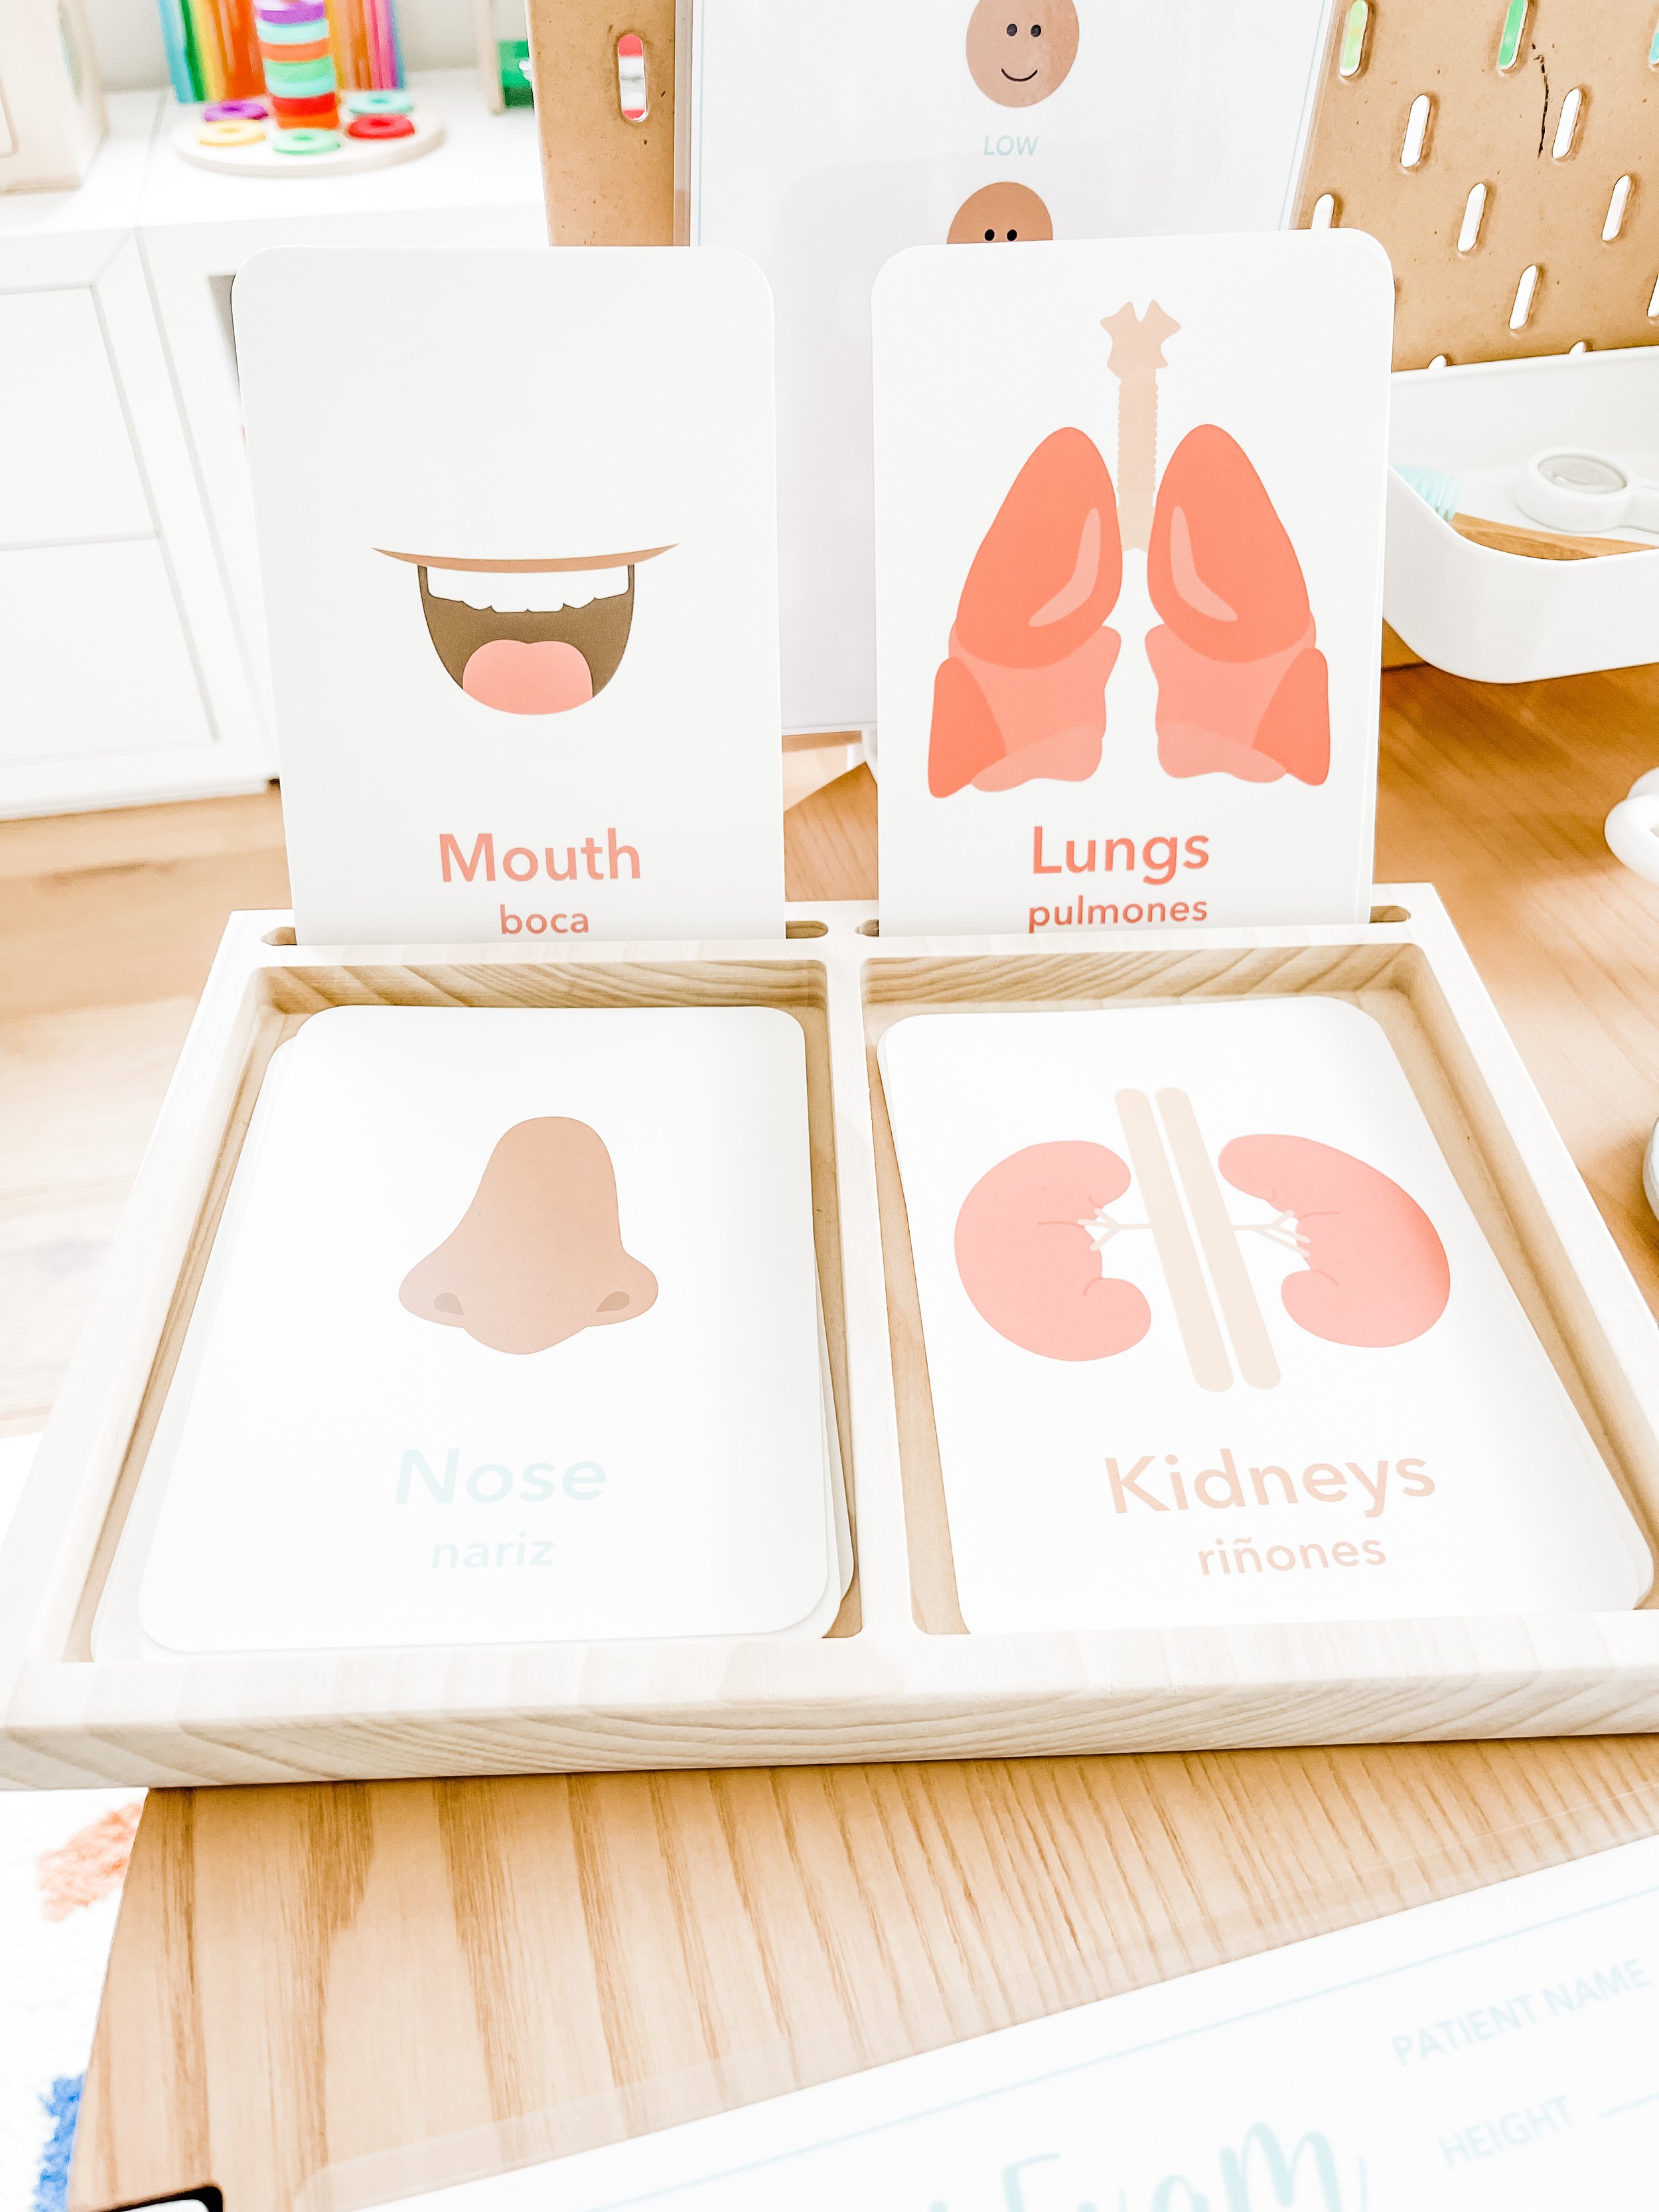
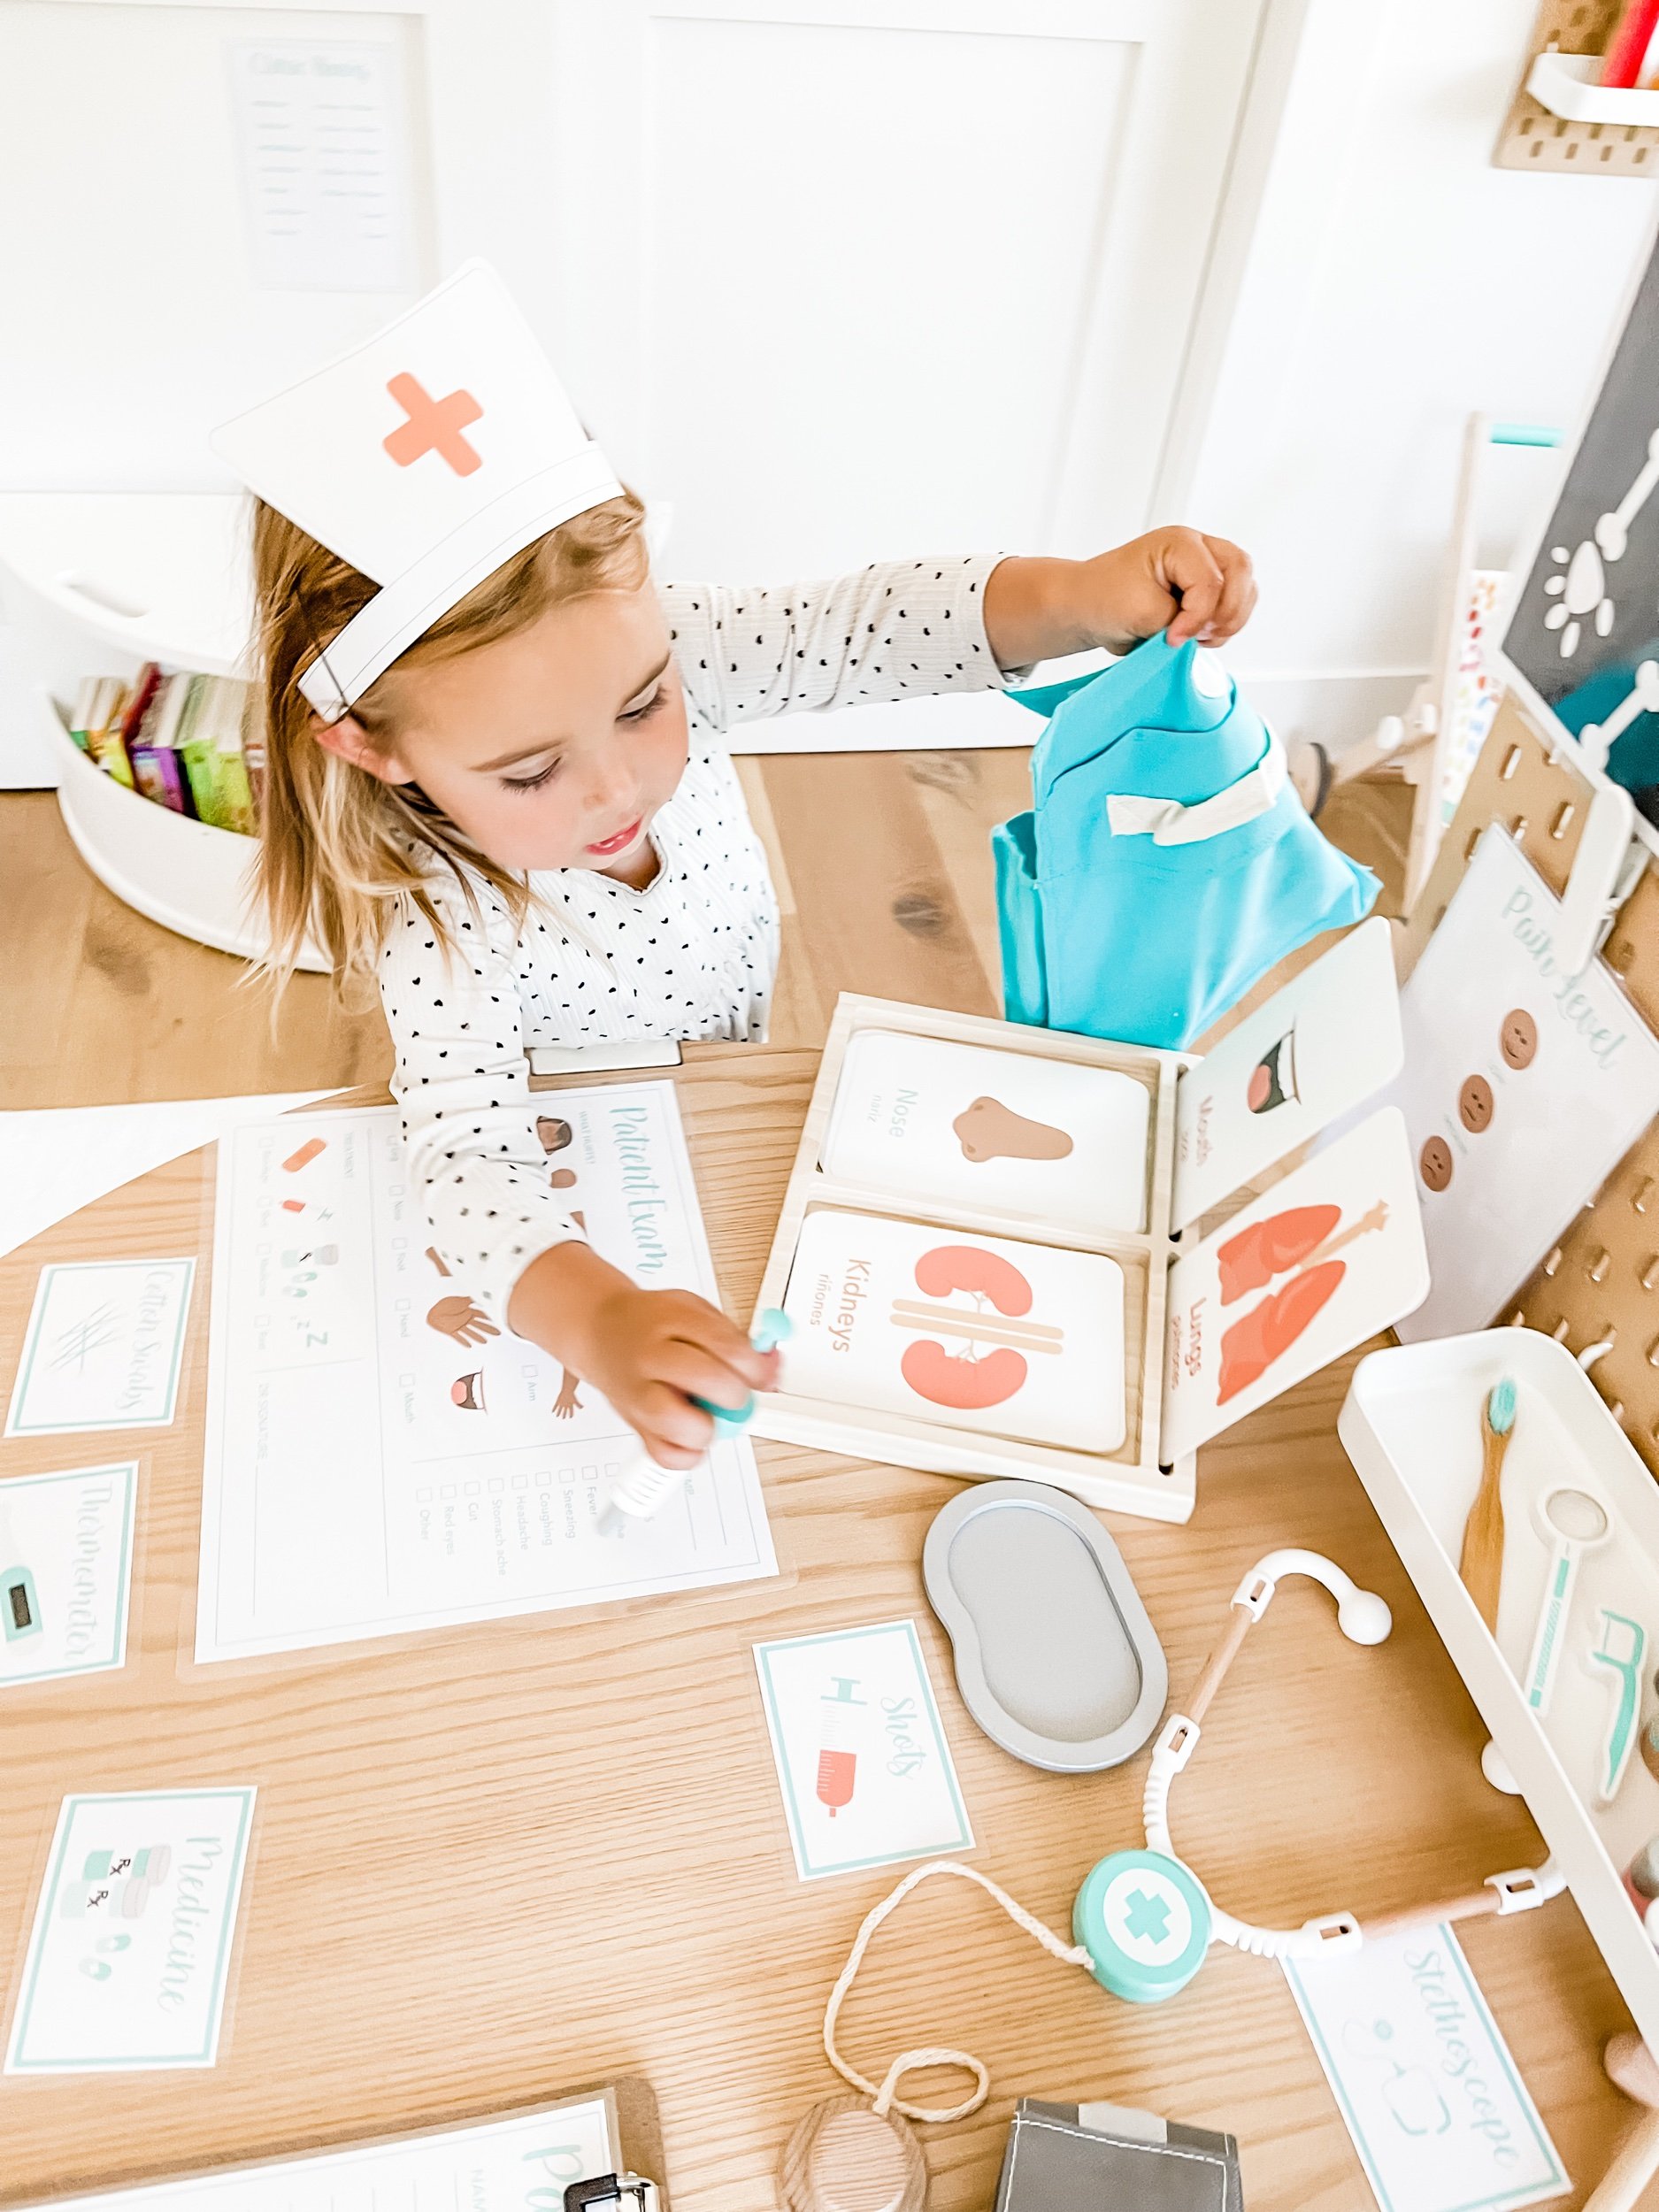
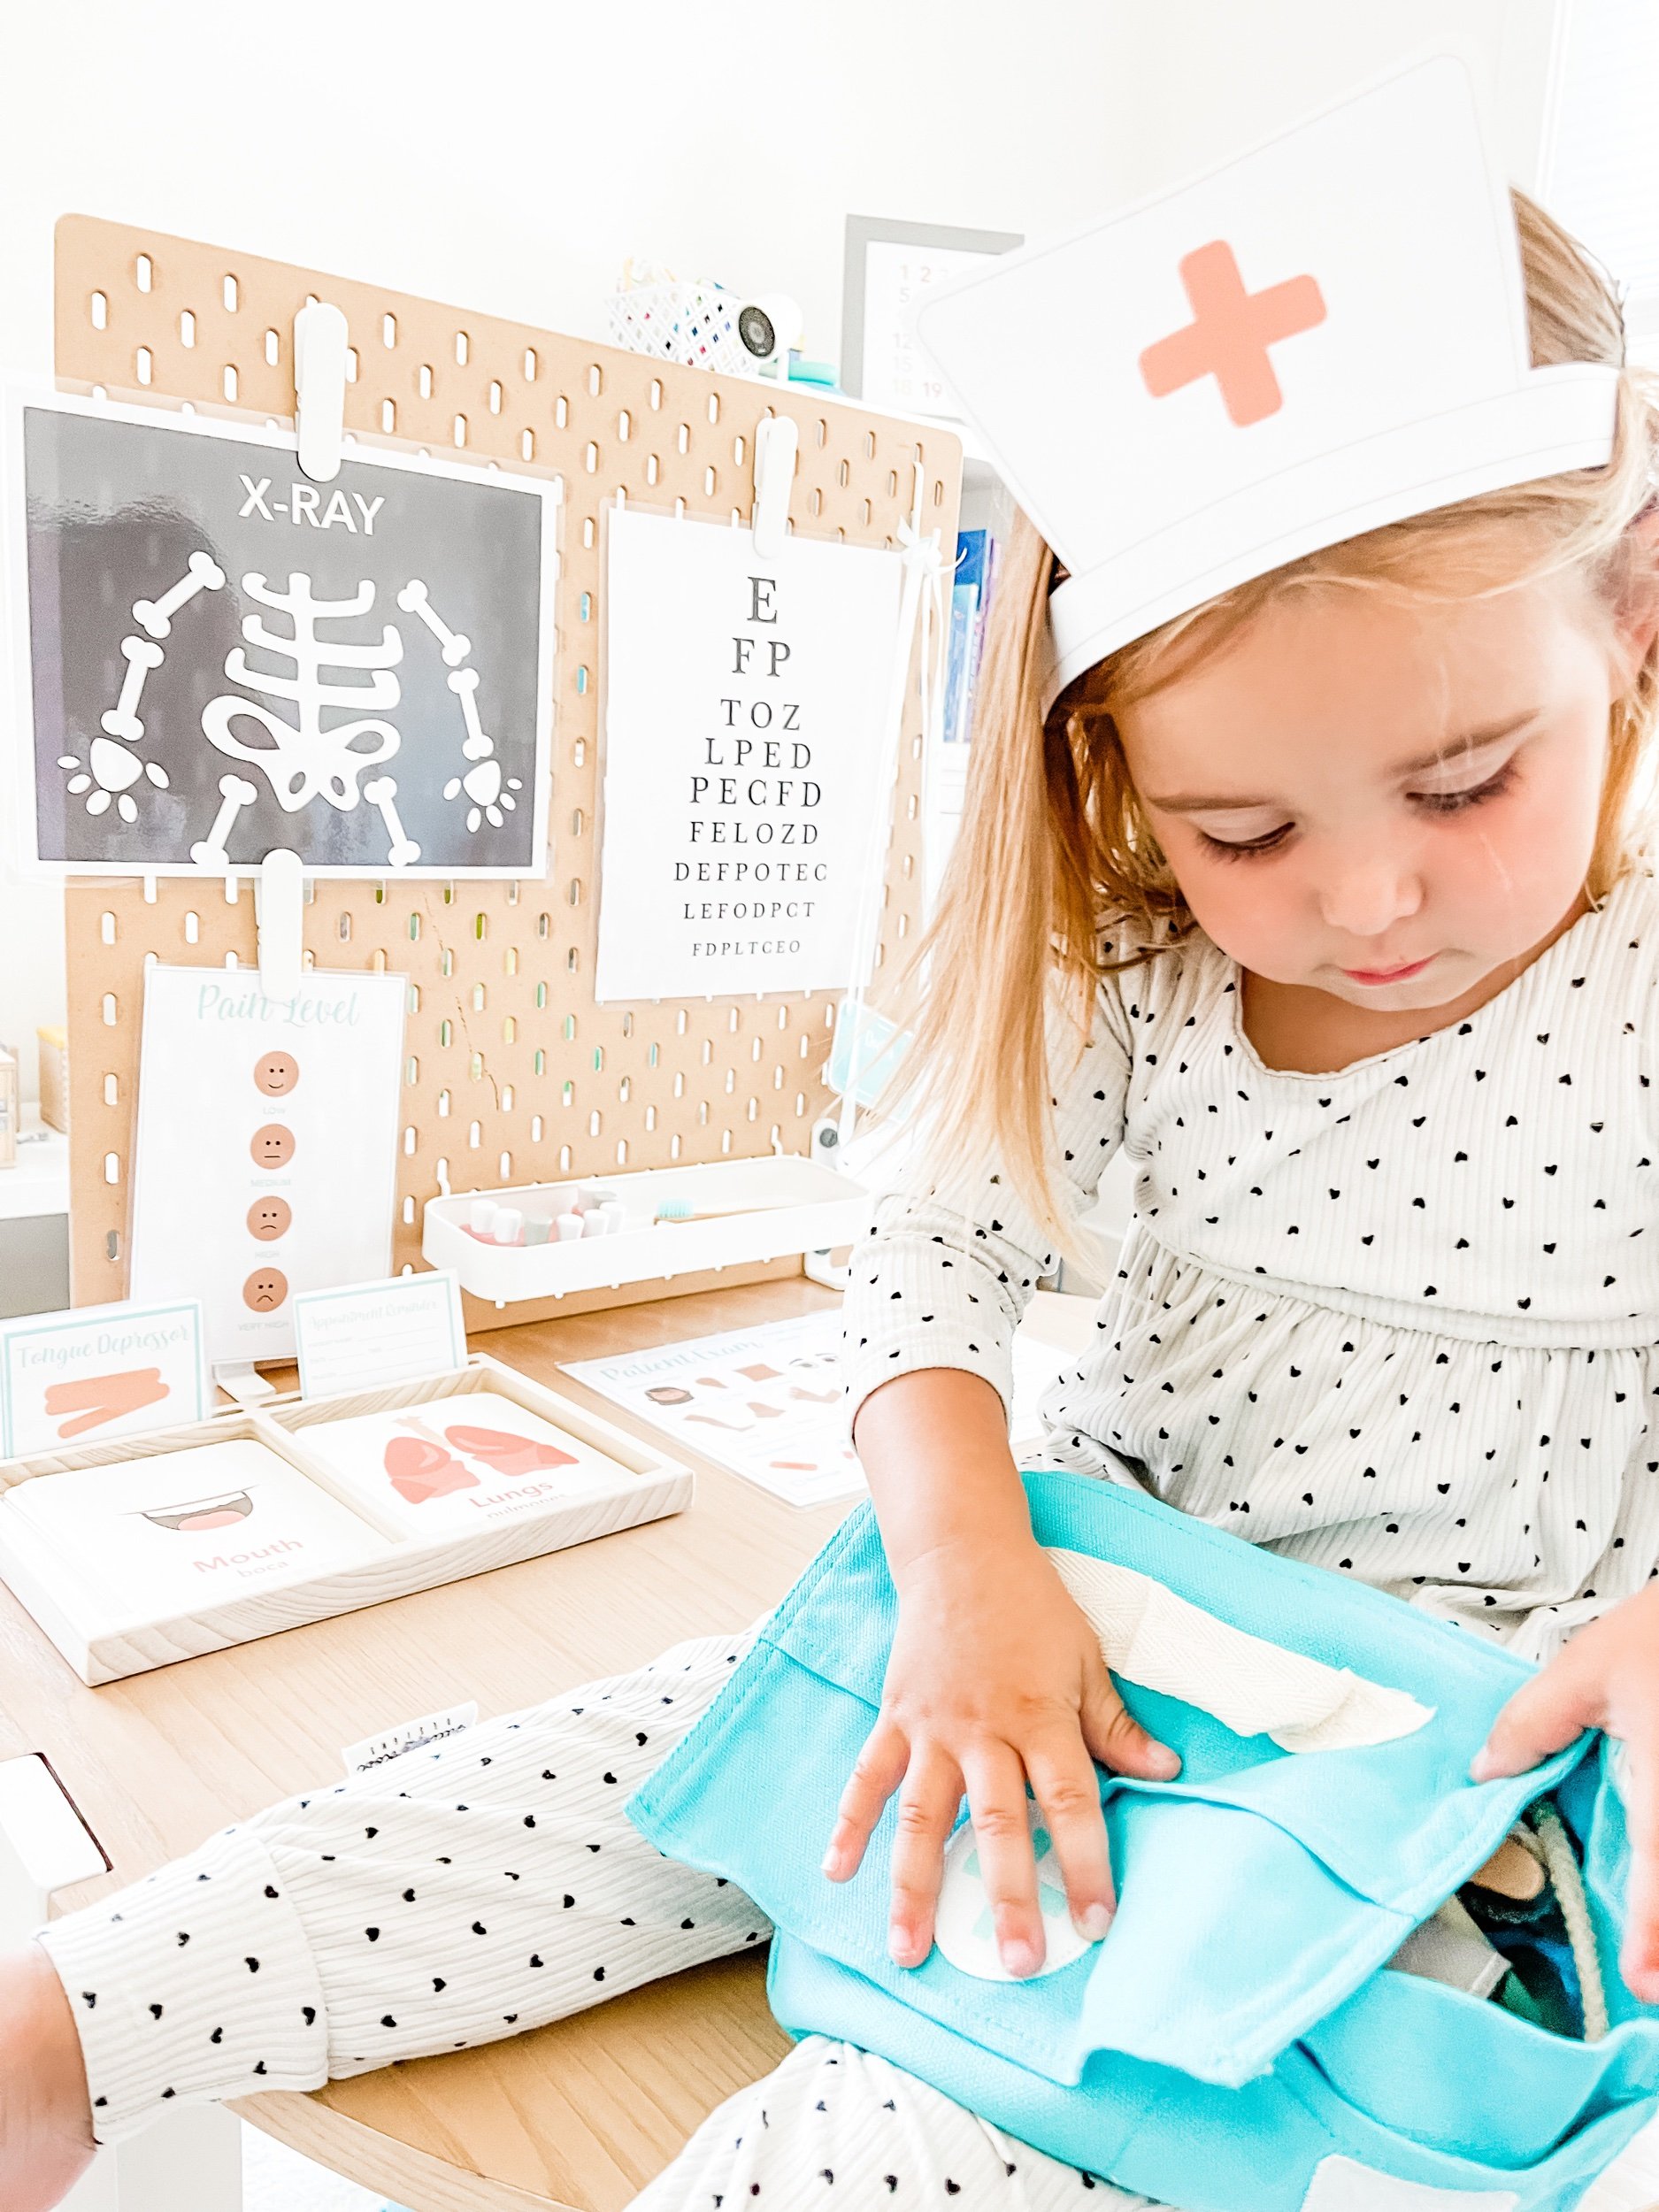
First off, these Body Parts Flashcards and Human Organs Flashcards were a great introduction to everything inside and outside of the body. These are super basic human anatomy, but Sofia loved pointing them out on her own body. And internal organs are challenging because she can’t see them, but we used phrases like “this is a stomach, like when your tummy is saying it’s hungry” and that really helped her imagine where they were.


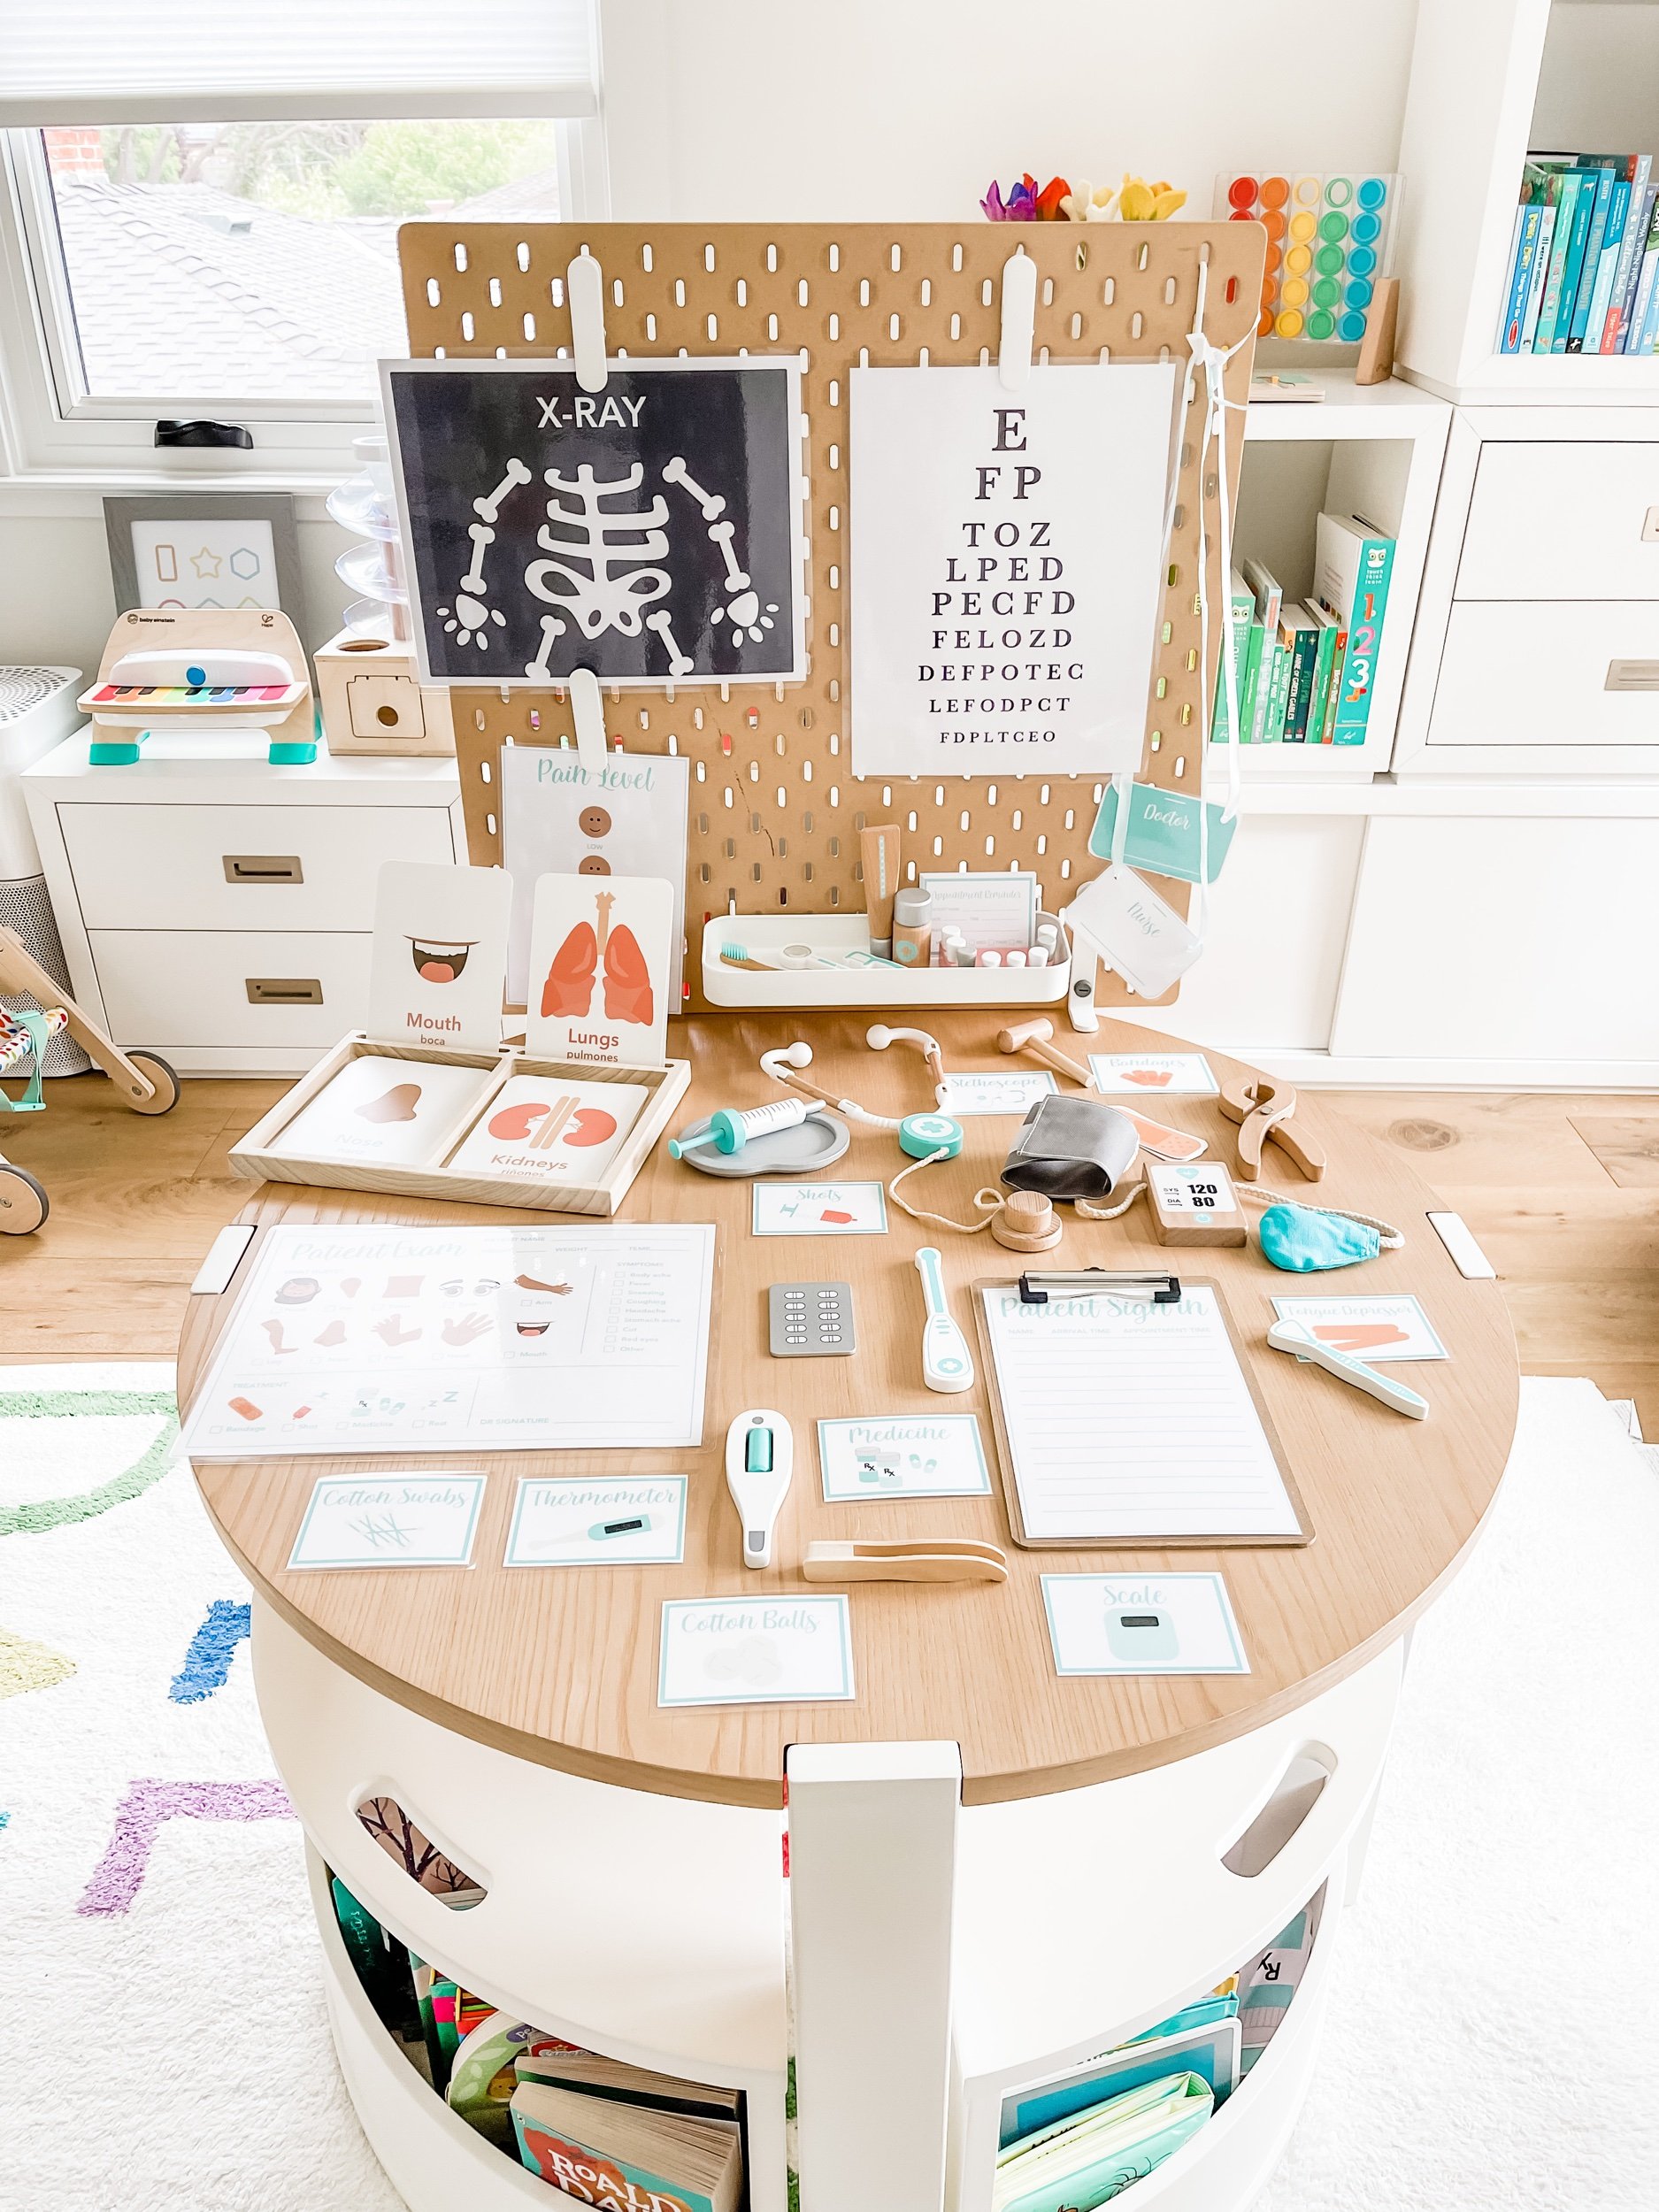


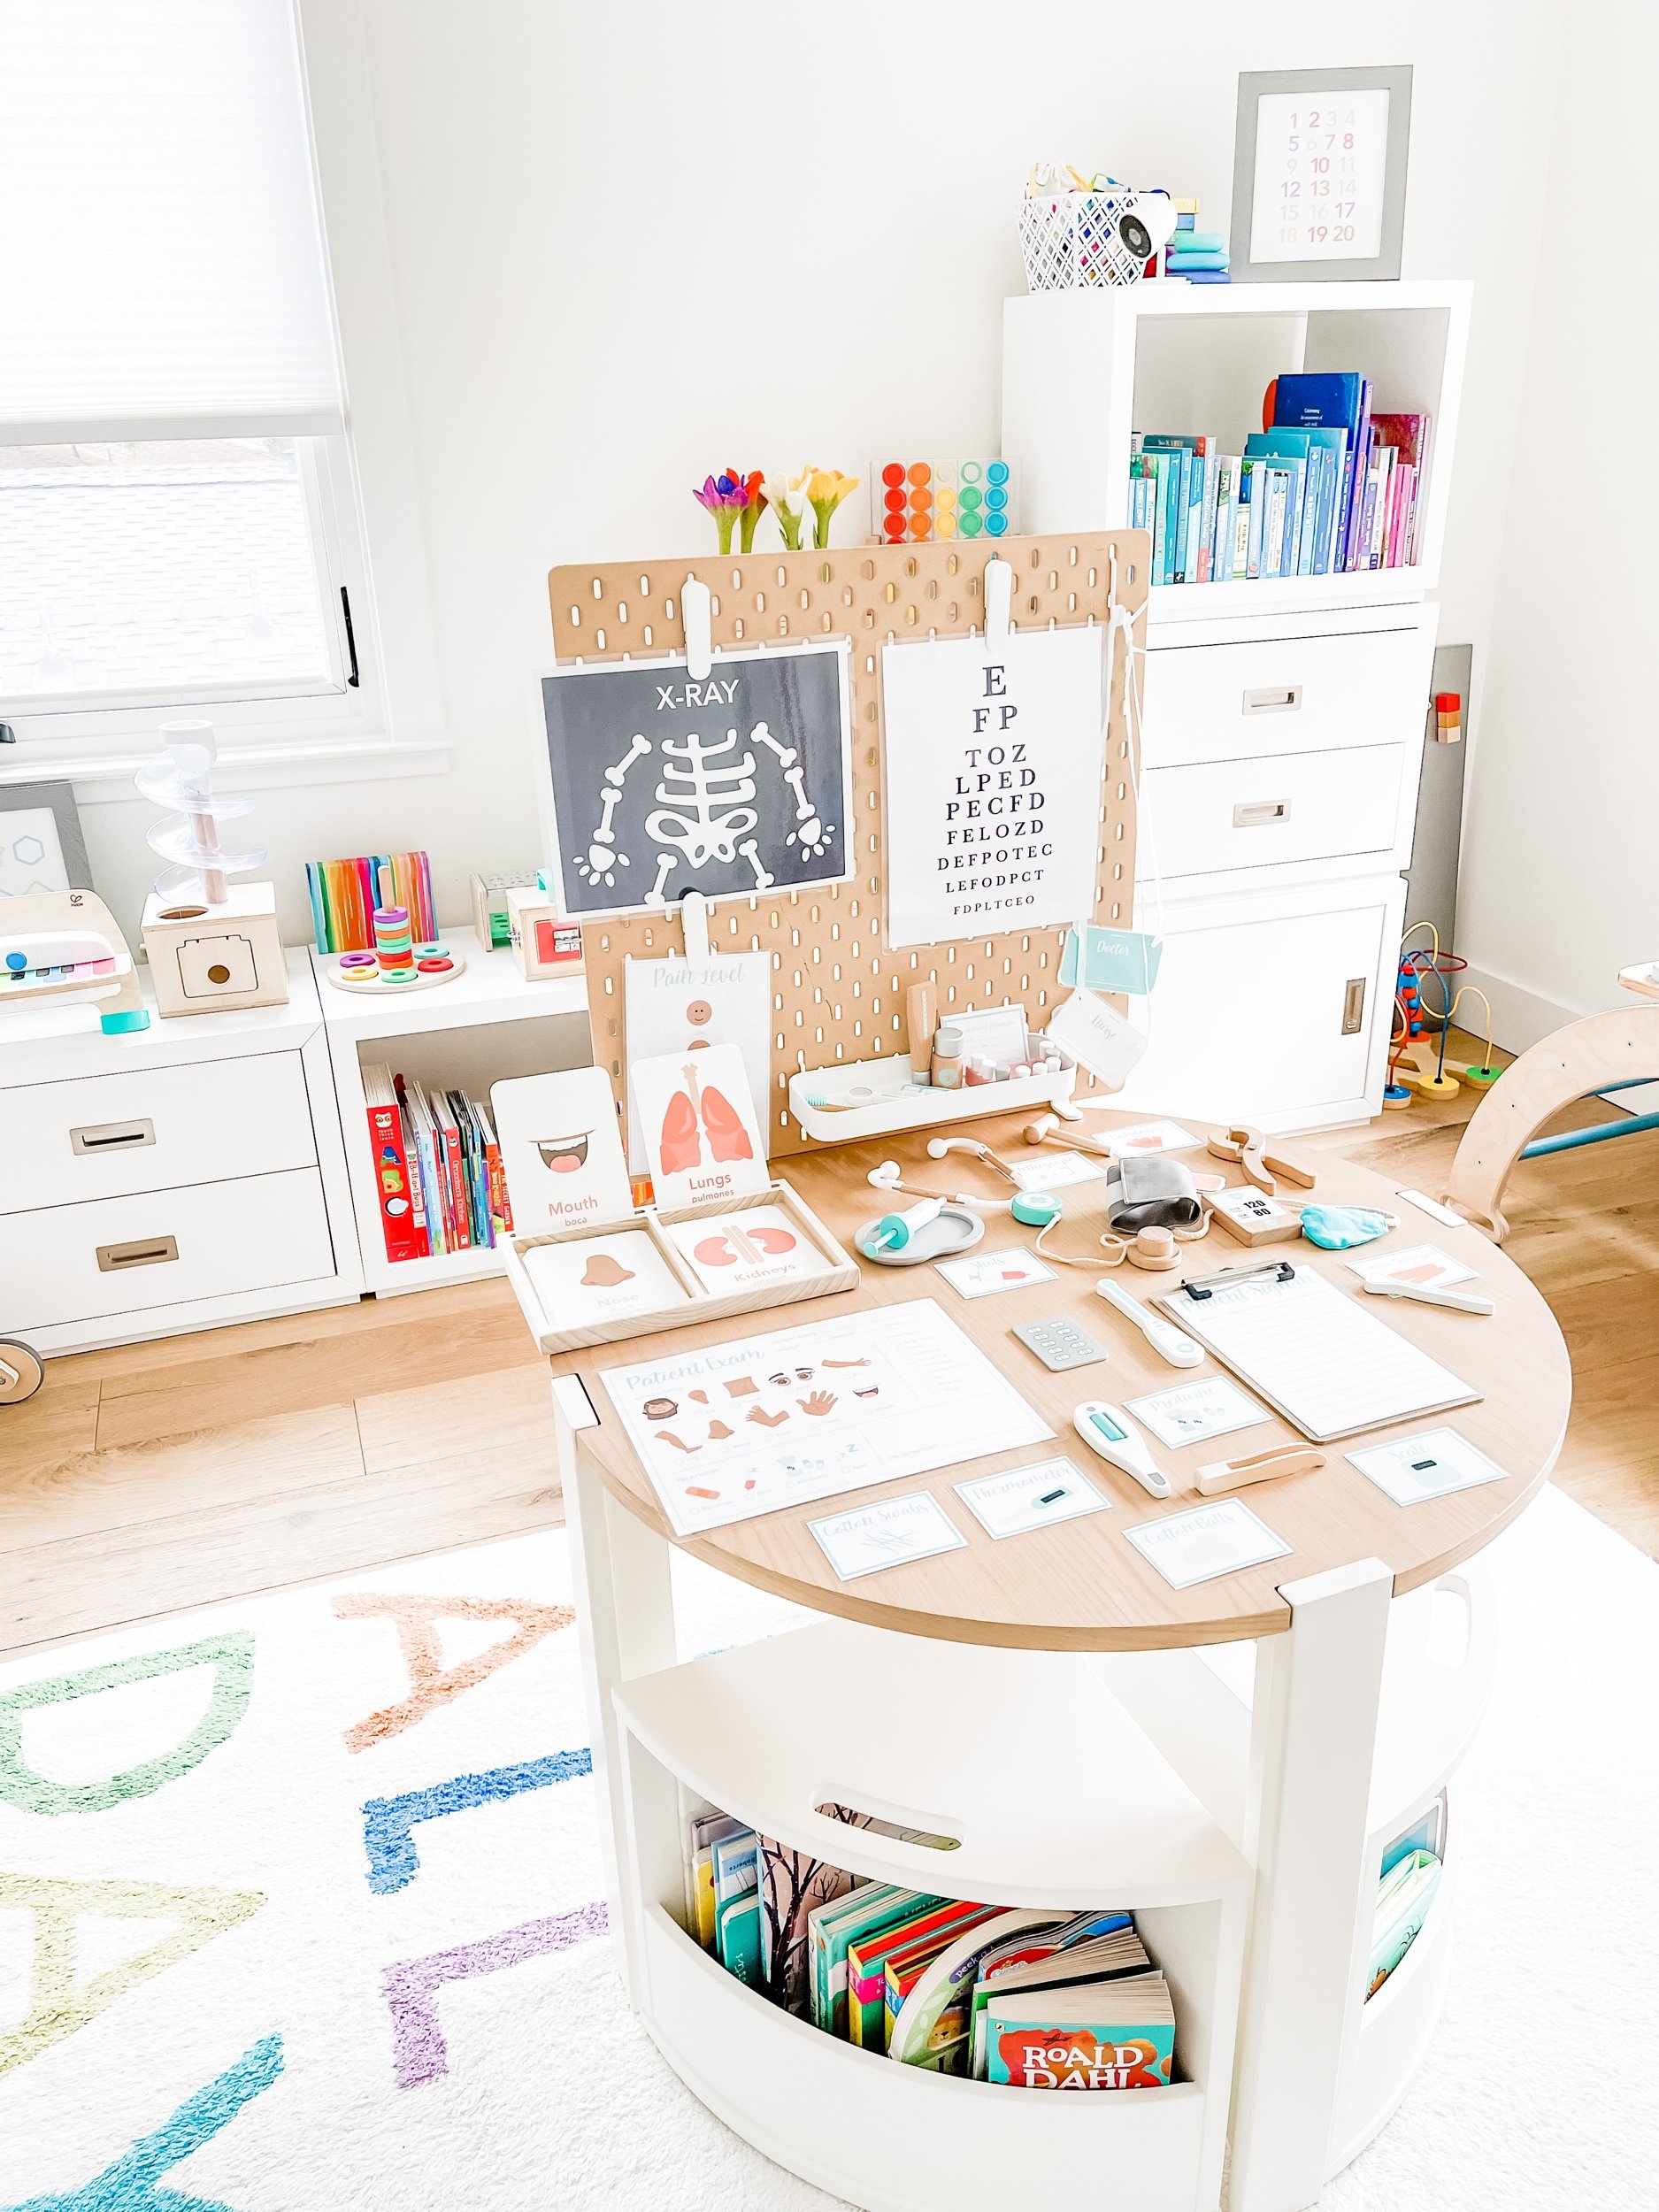
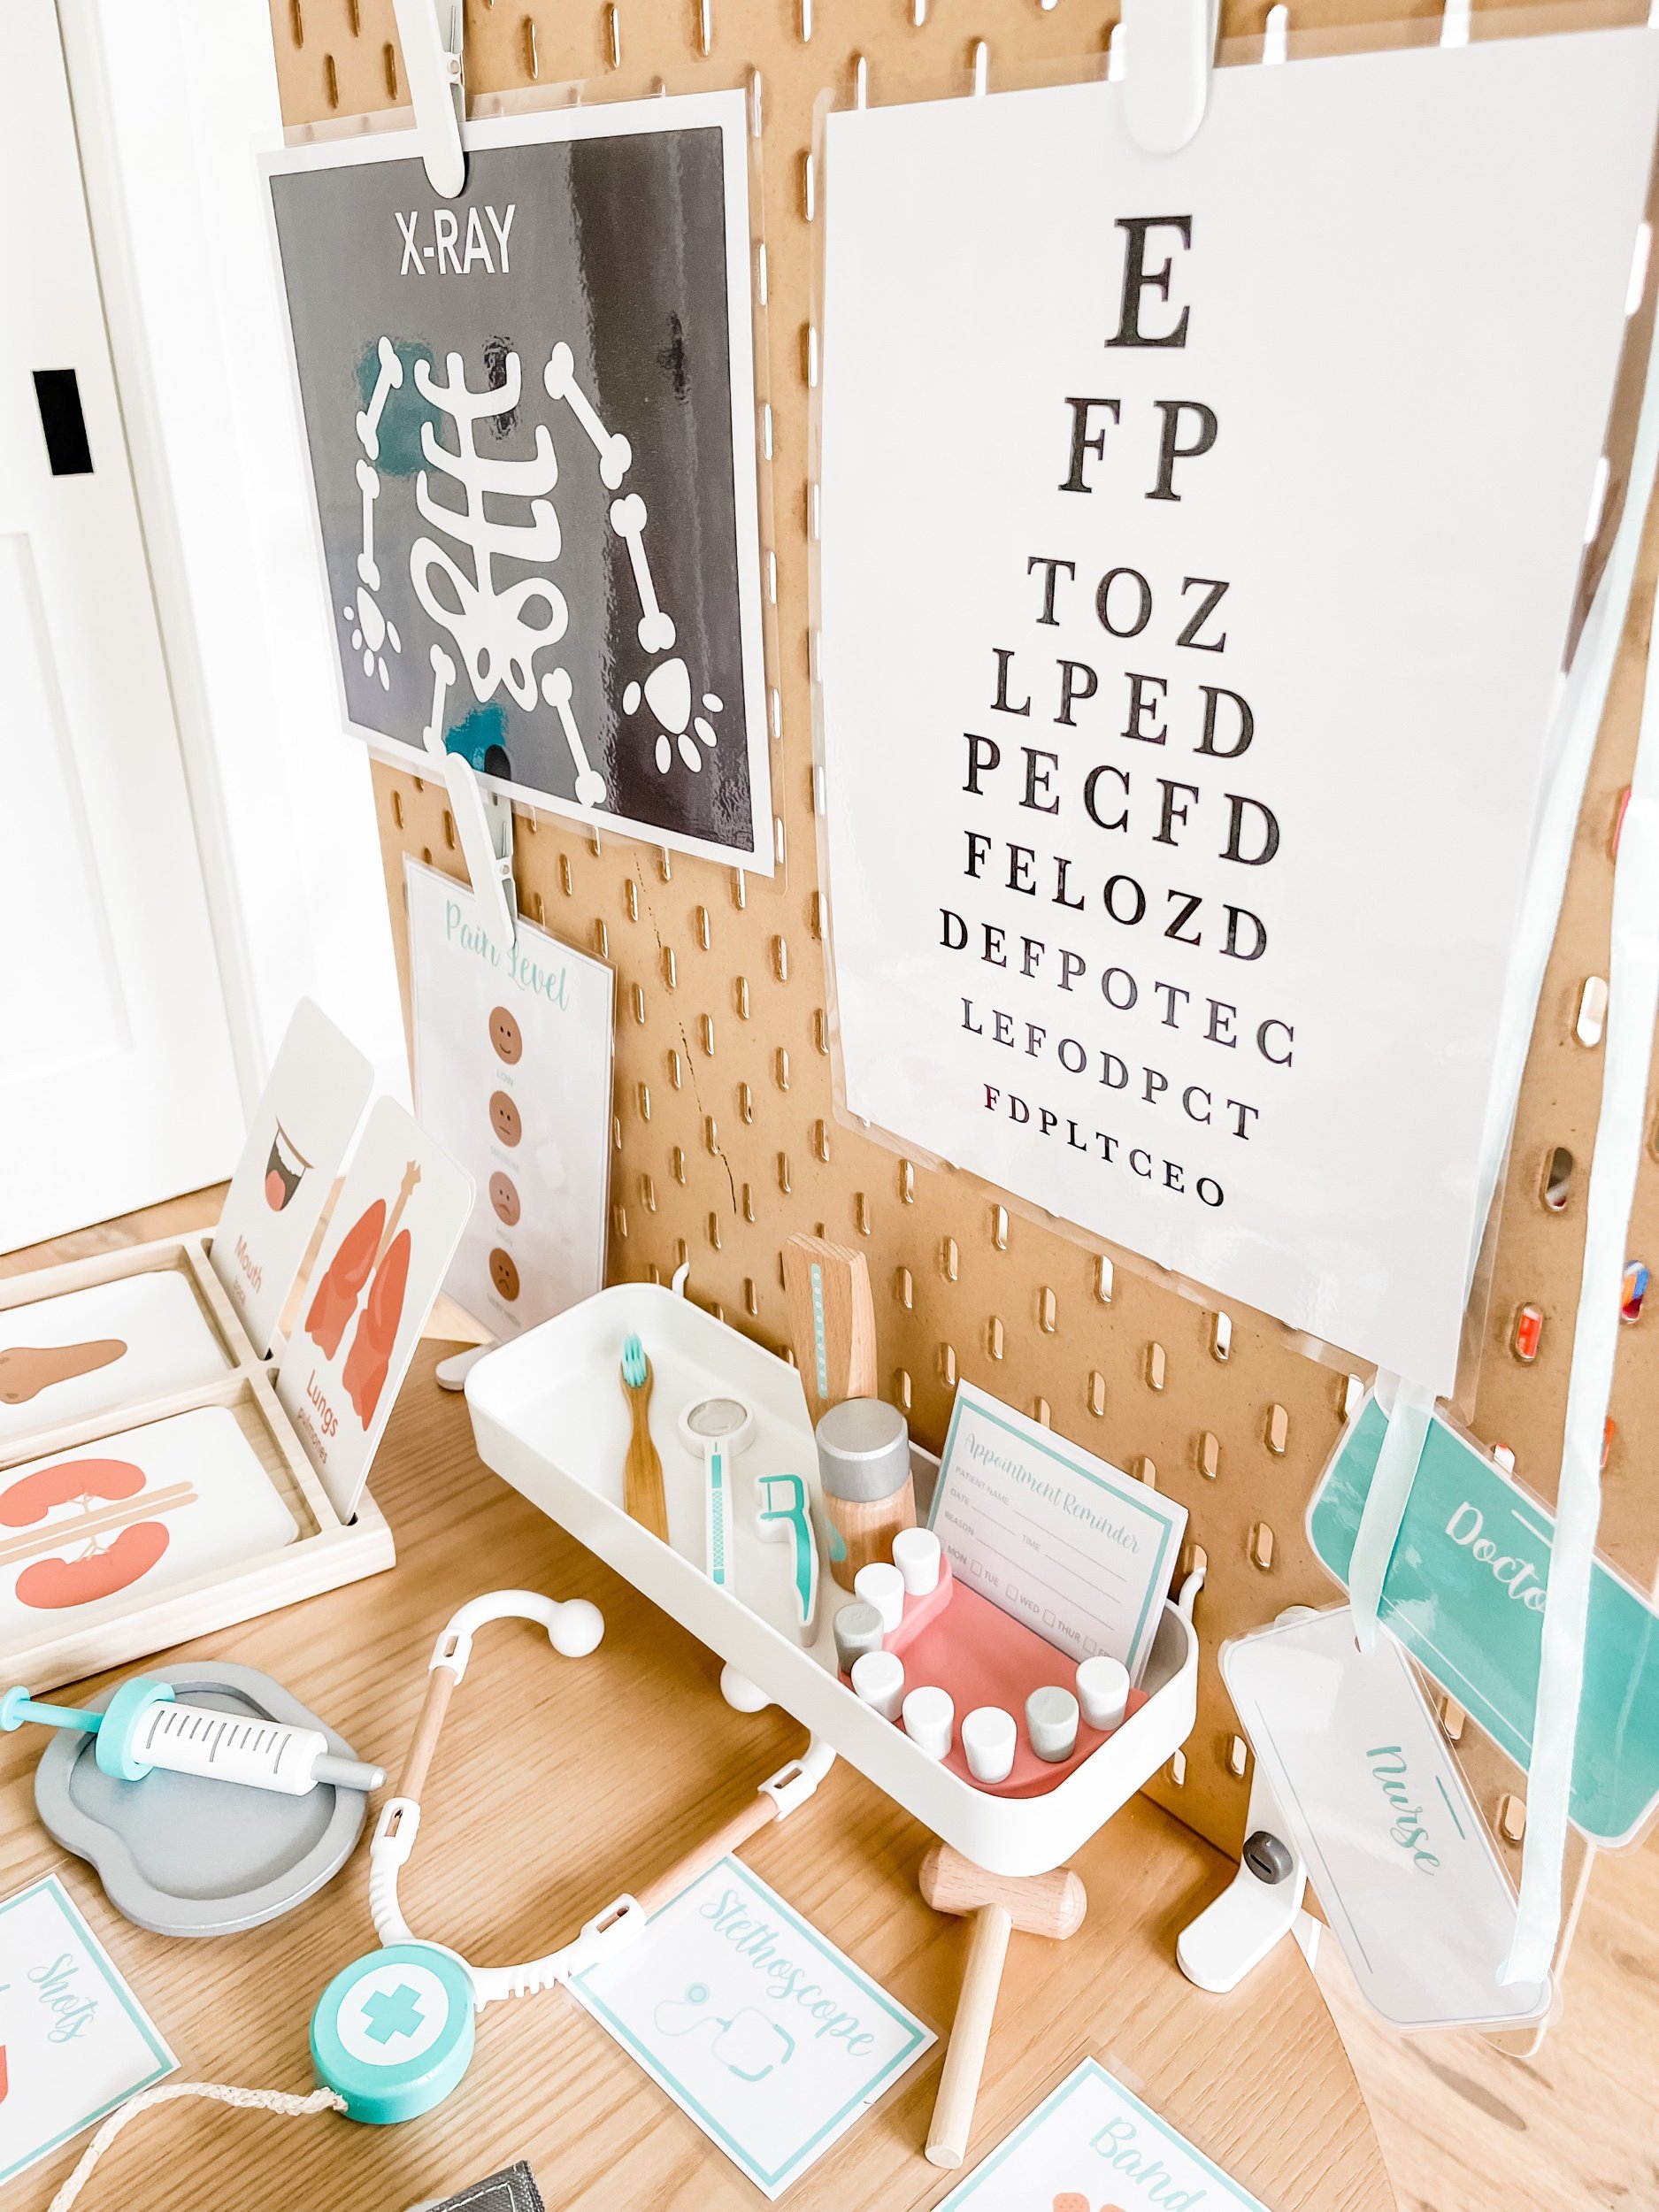

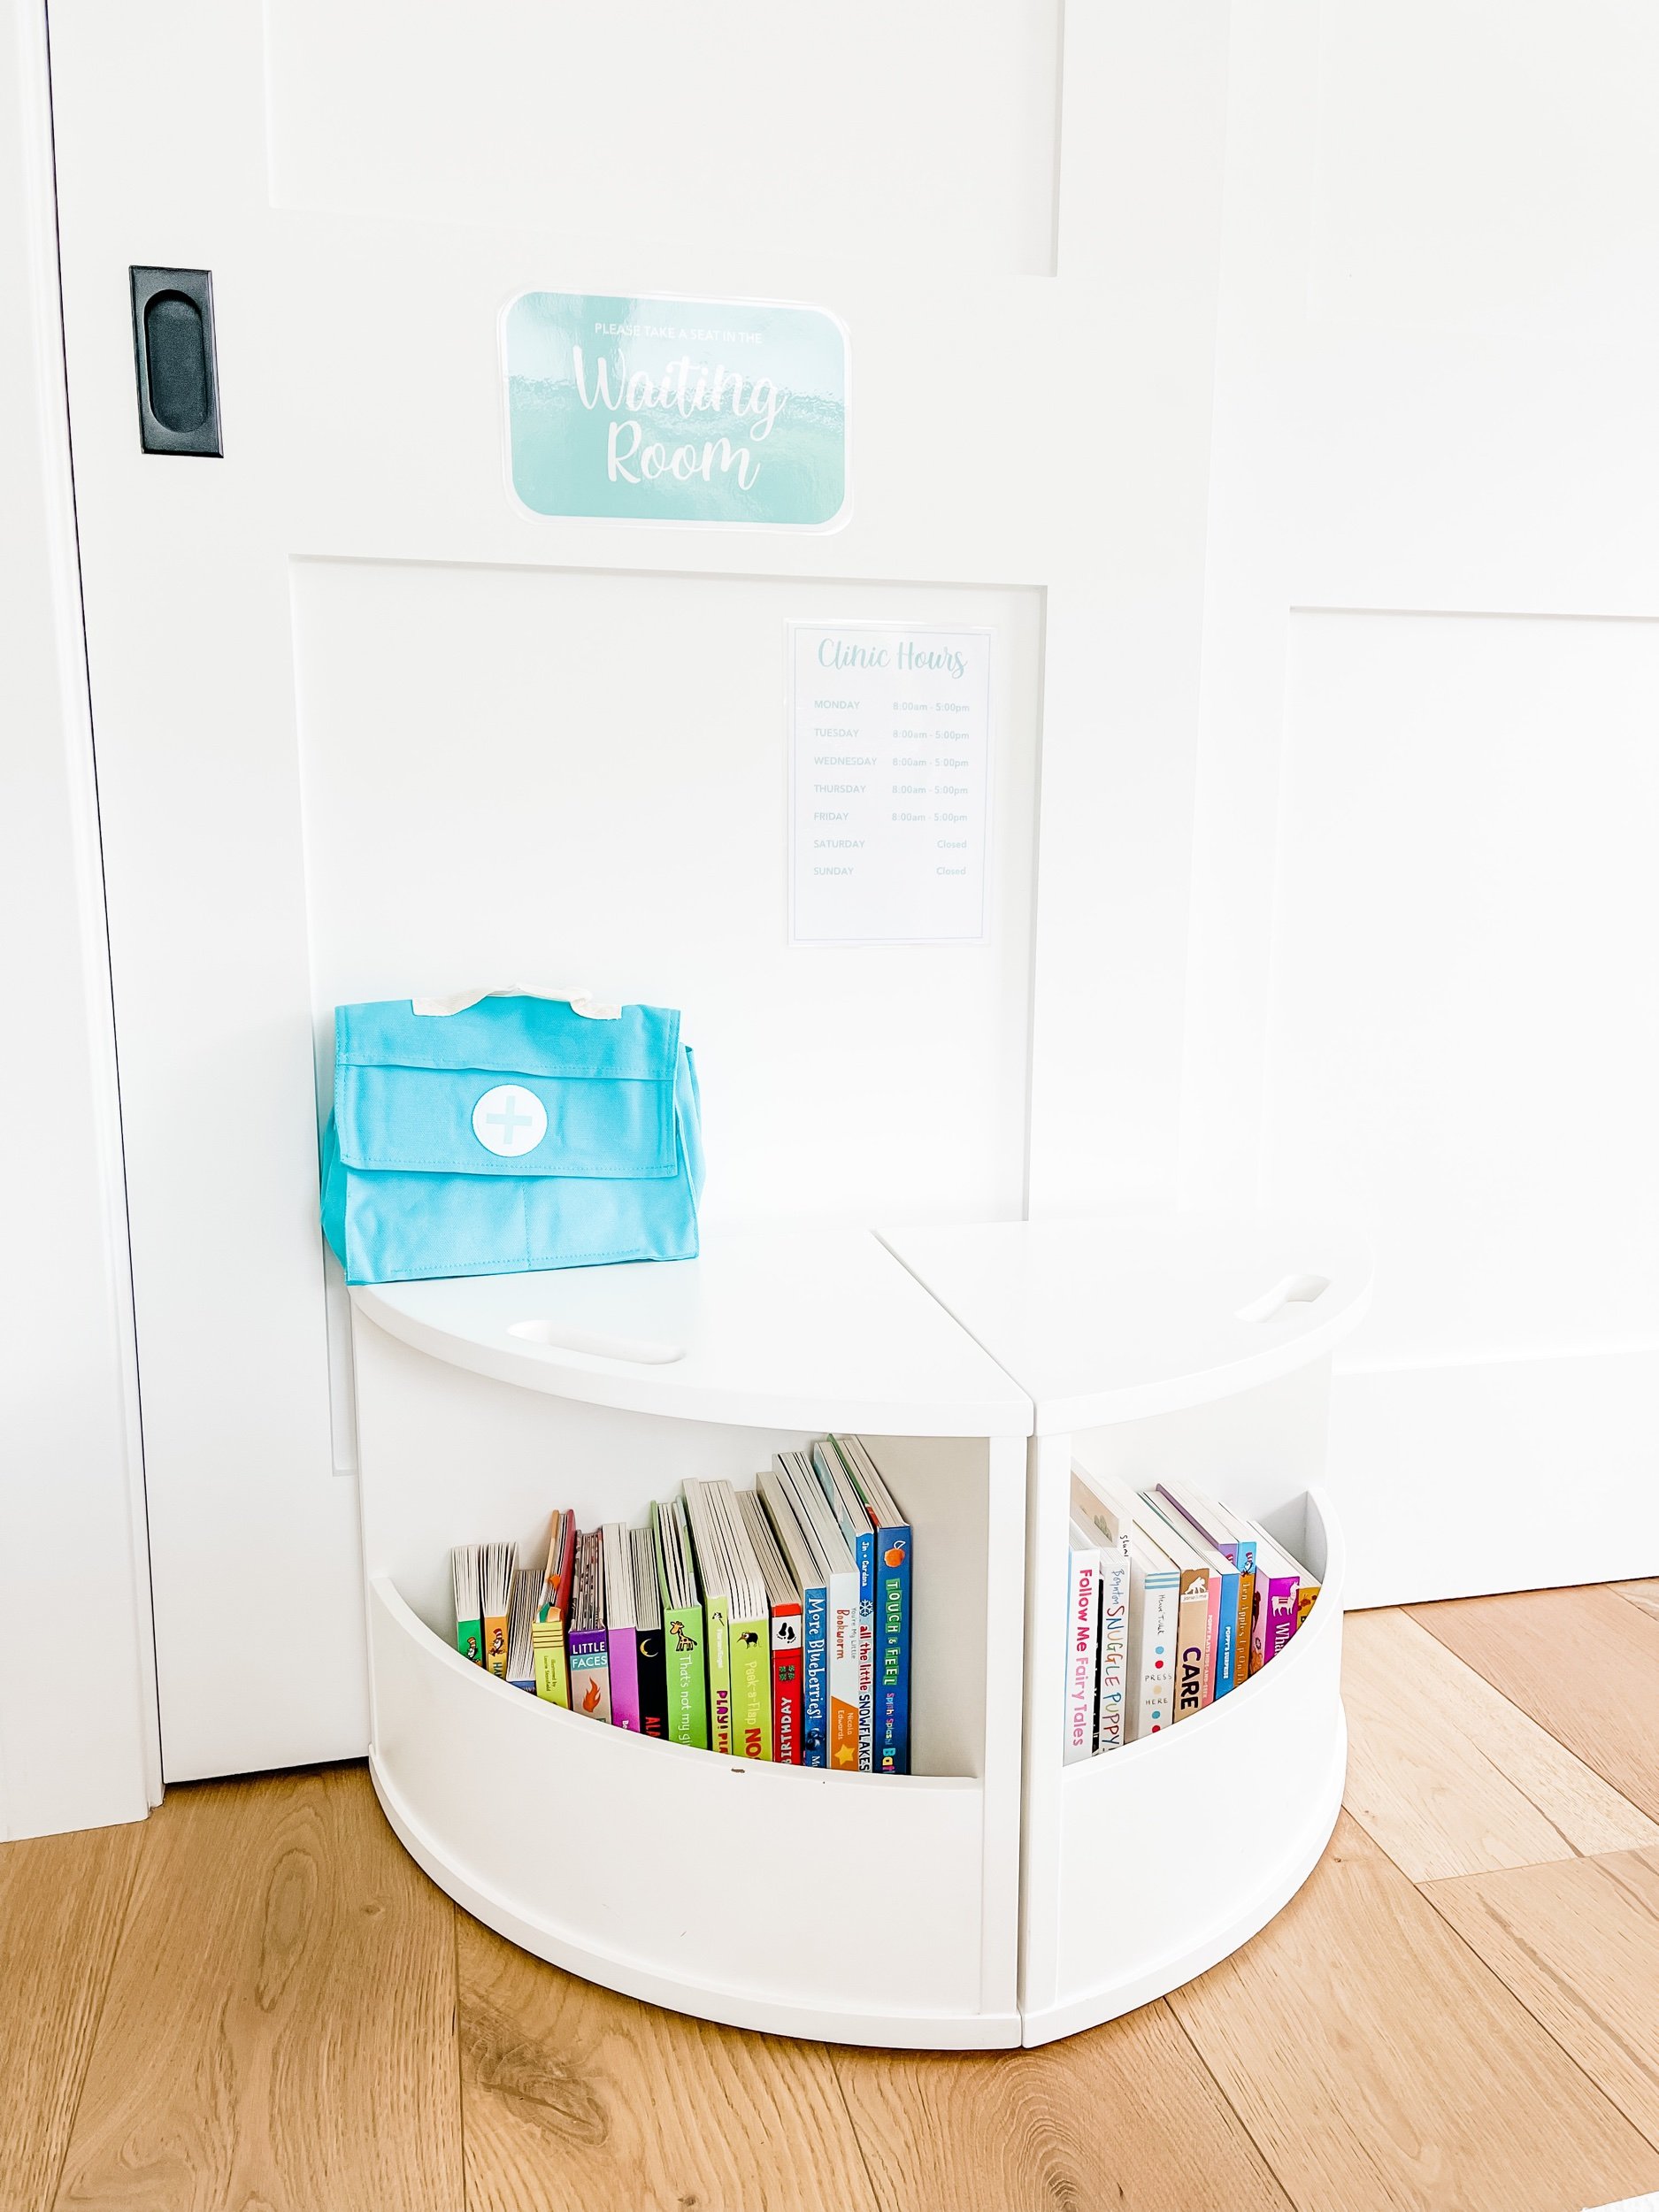
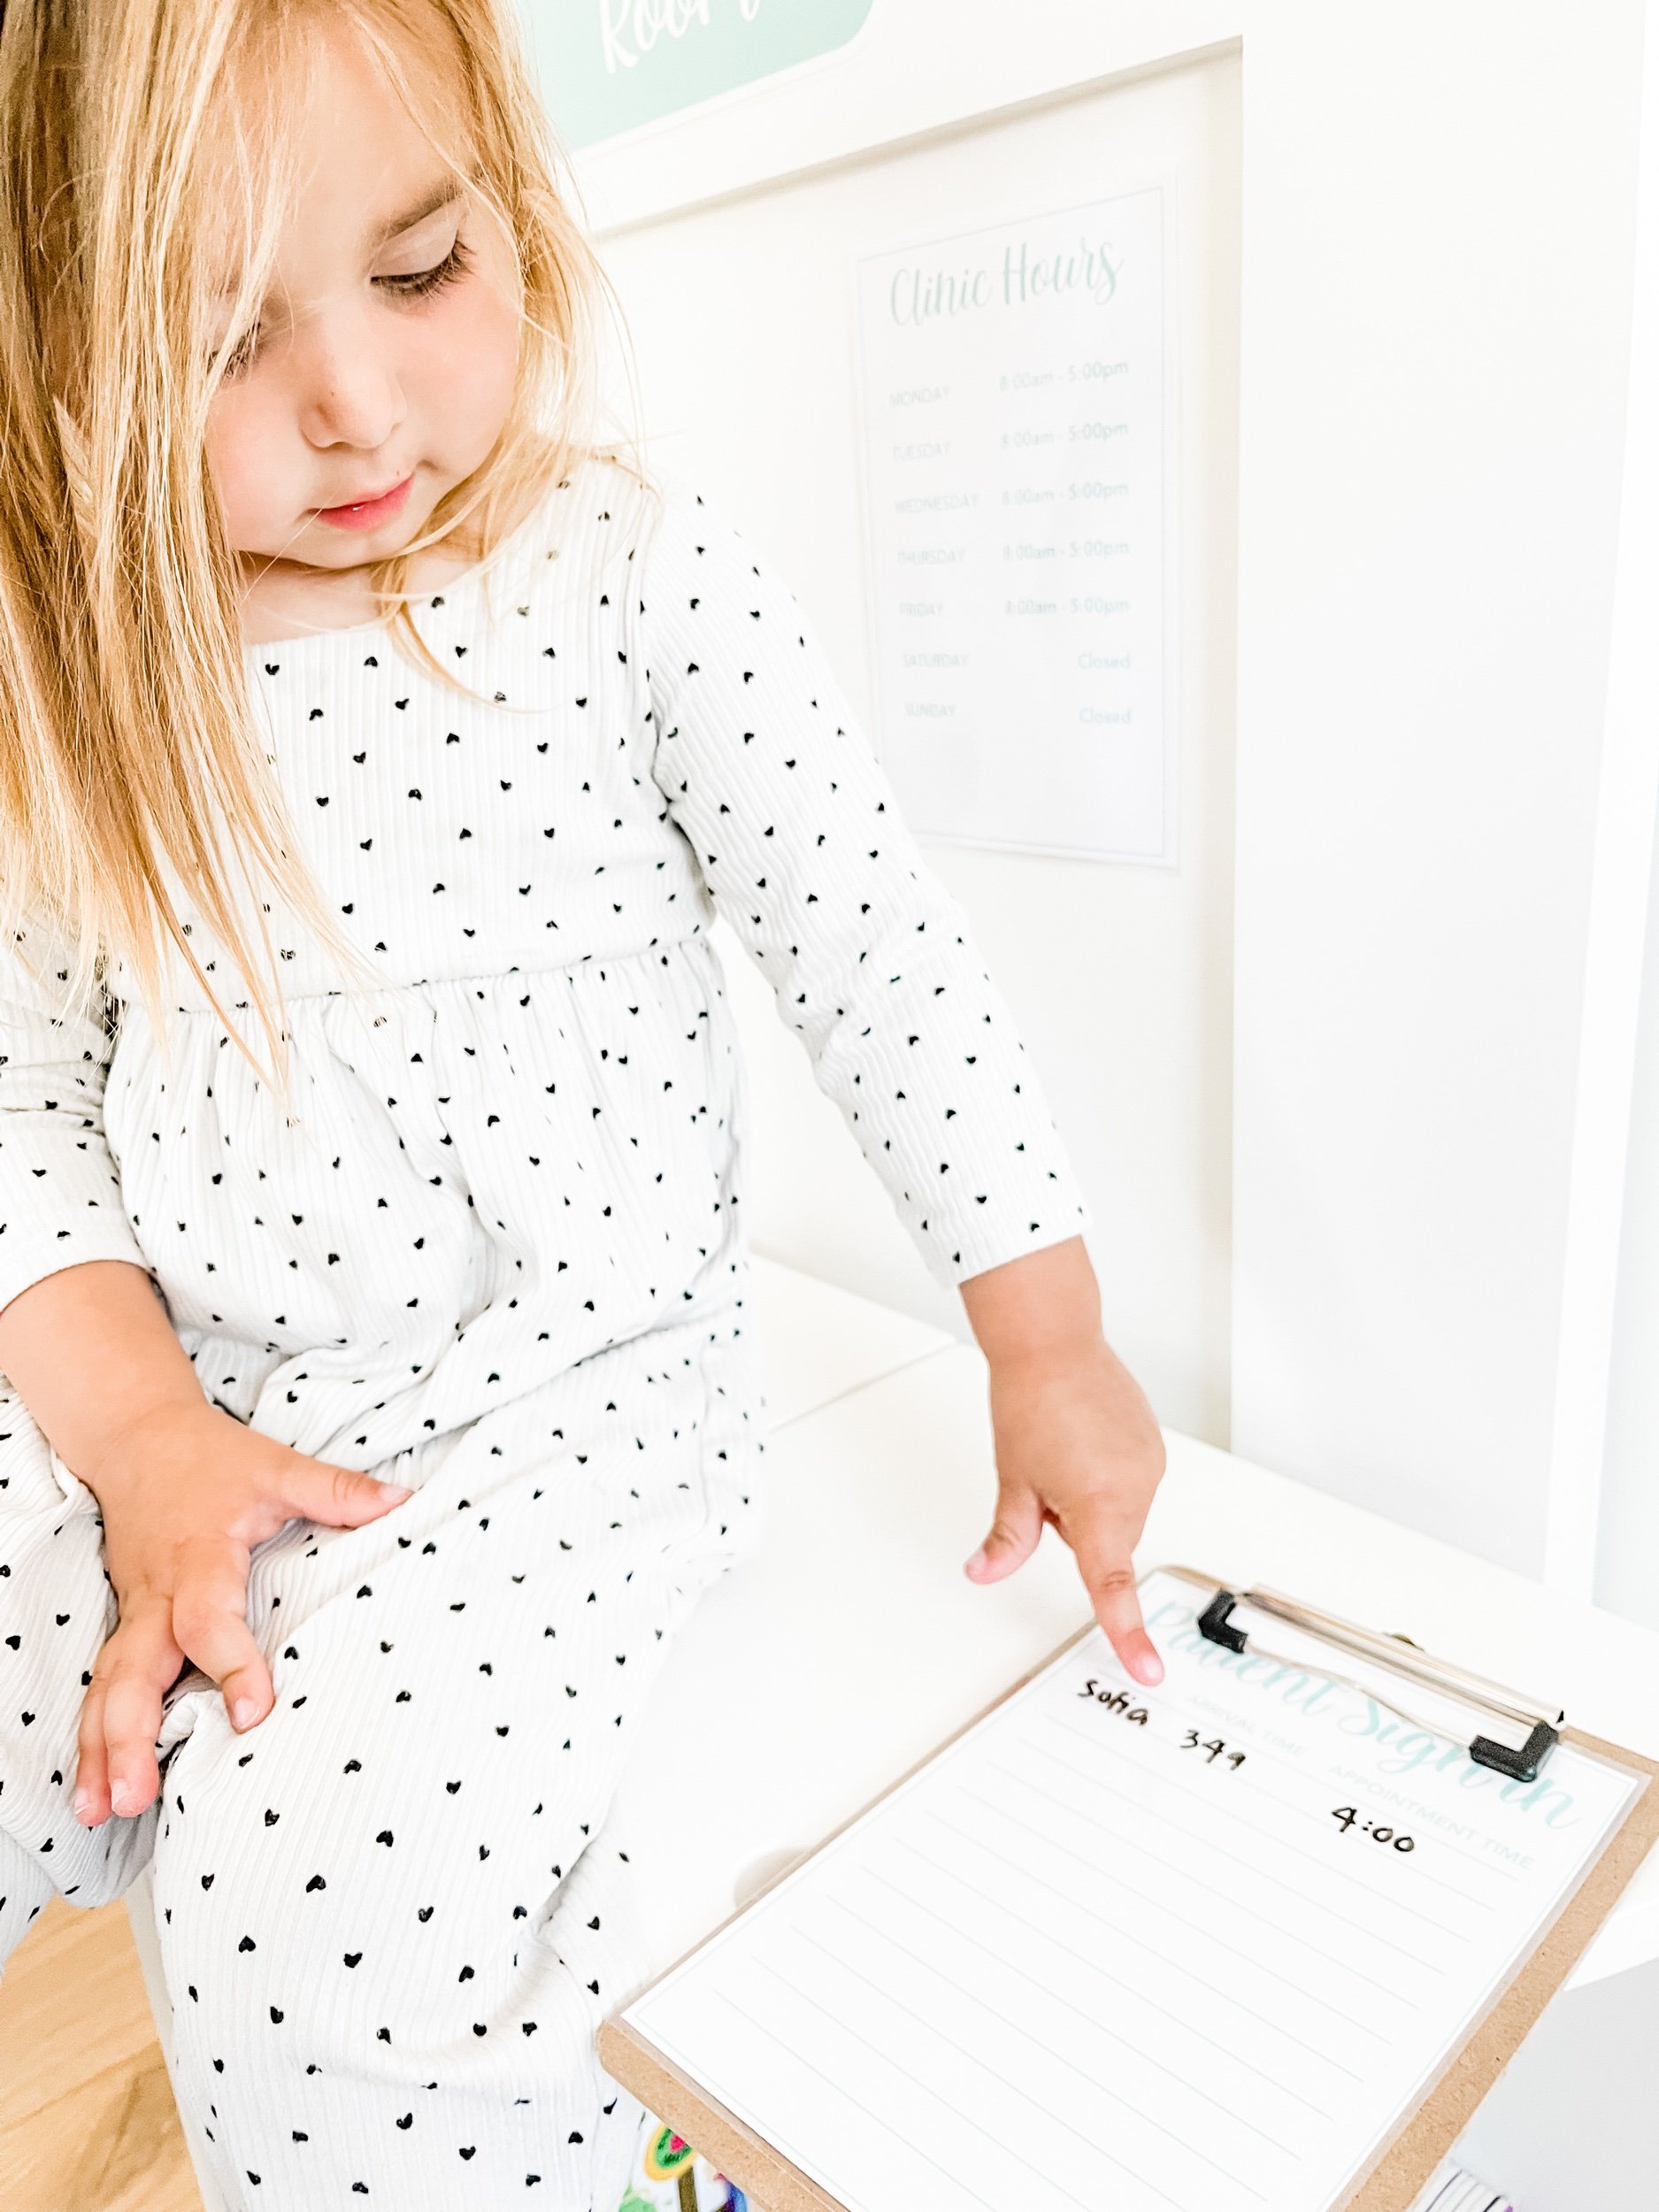
The dramatic play all starts with the waiting room. Sofie put on the nurse badge and nurse hat and asked us to wait in the waiting room while she prepped the doctors office. She loved tidying up and getting everything ready. Then when we came in, she started by asking about my pain level using her pain level chart. This was a great way for us to discuss when it’s okay to be really upset vs when a boo boo is no big deal.
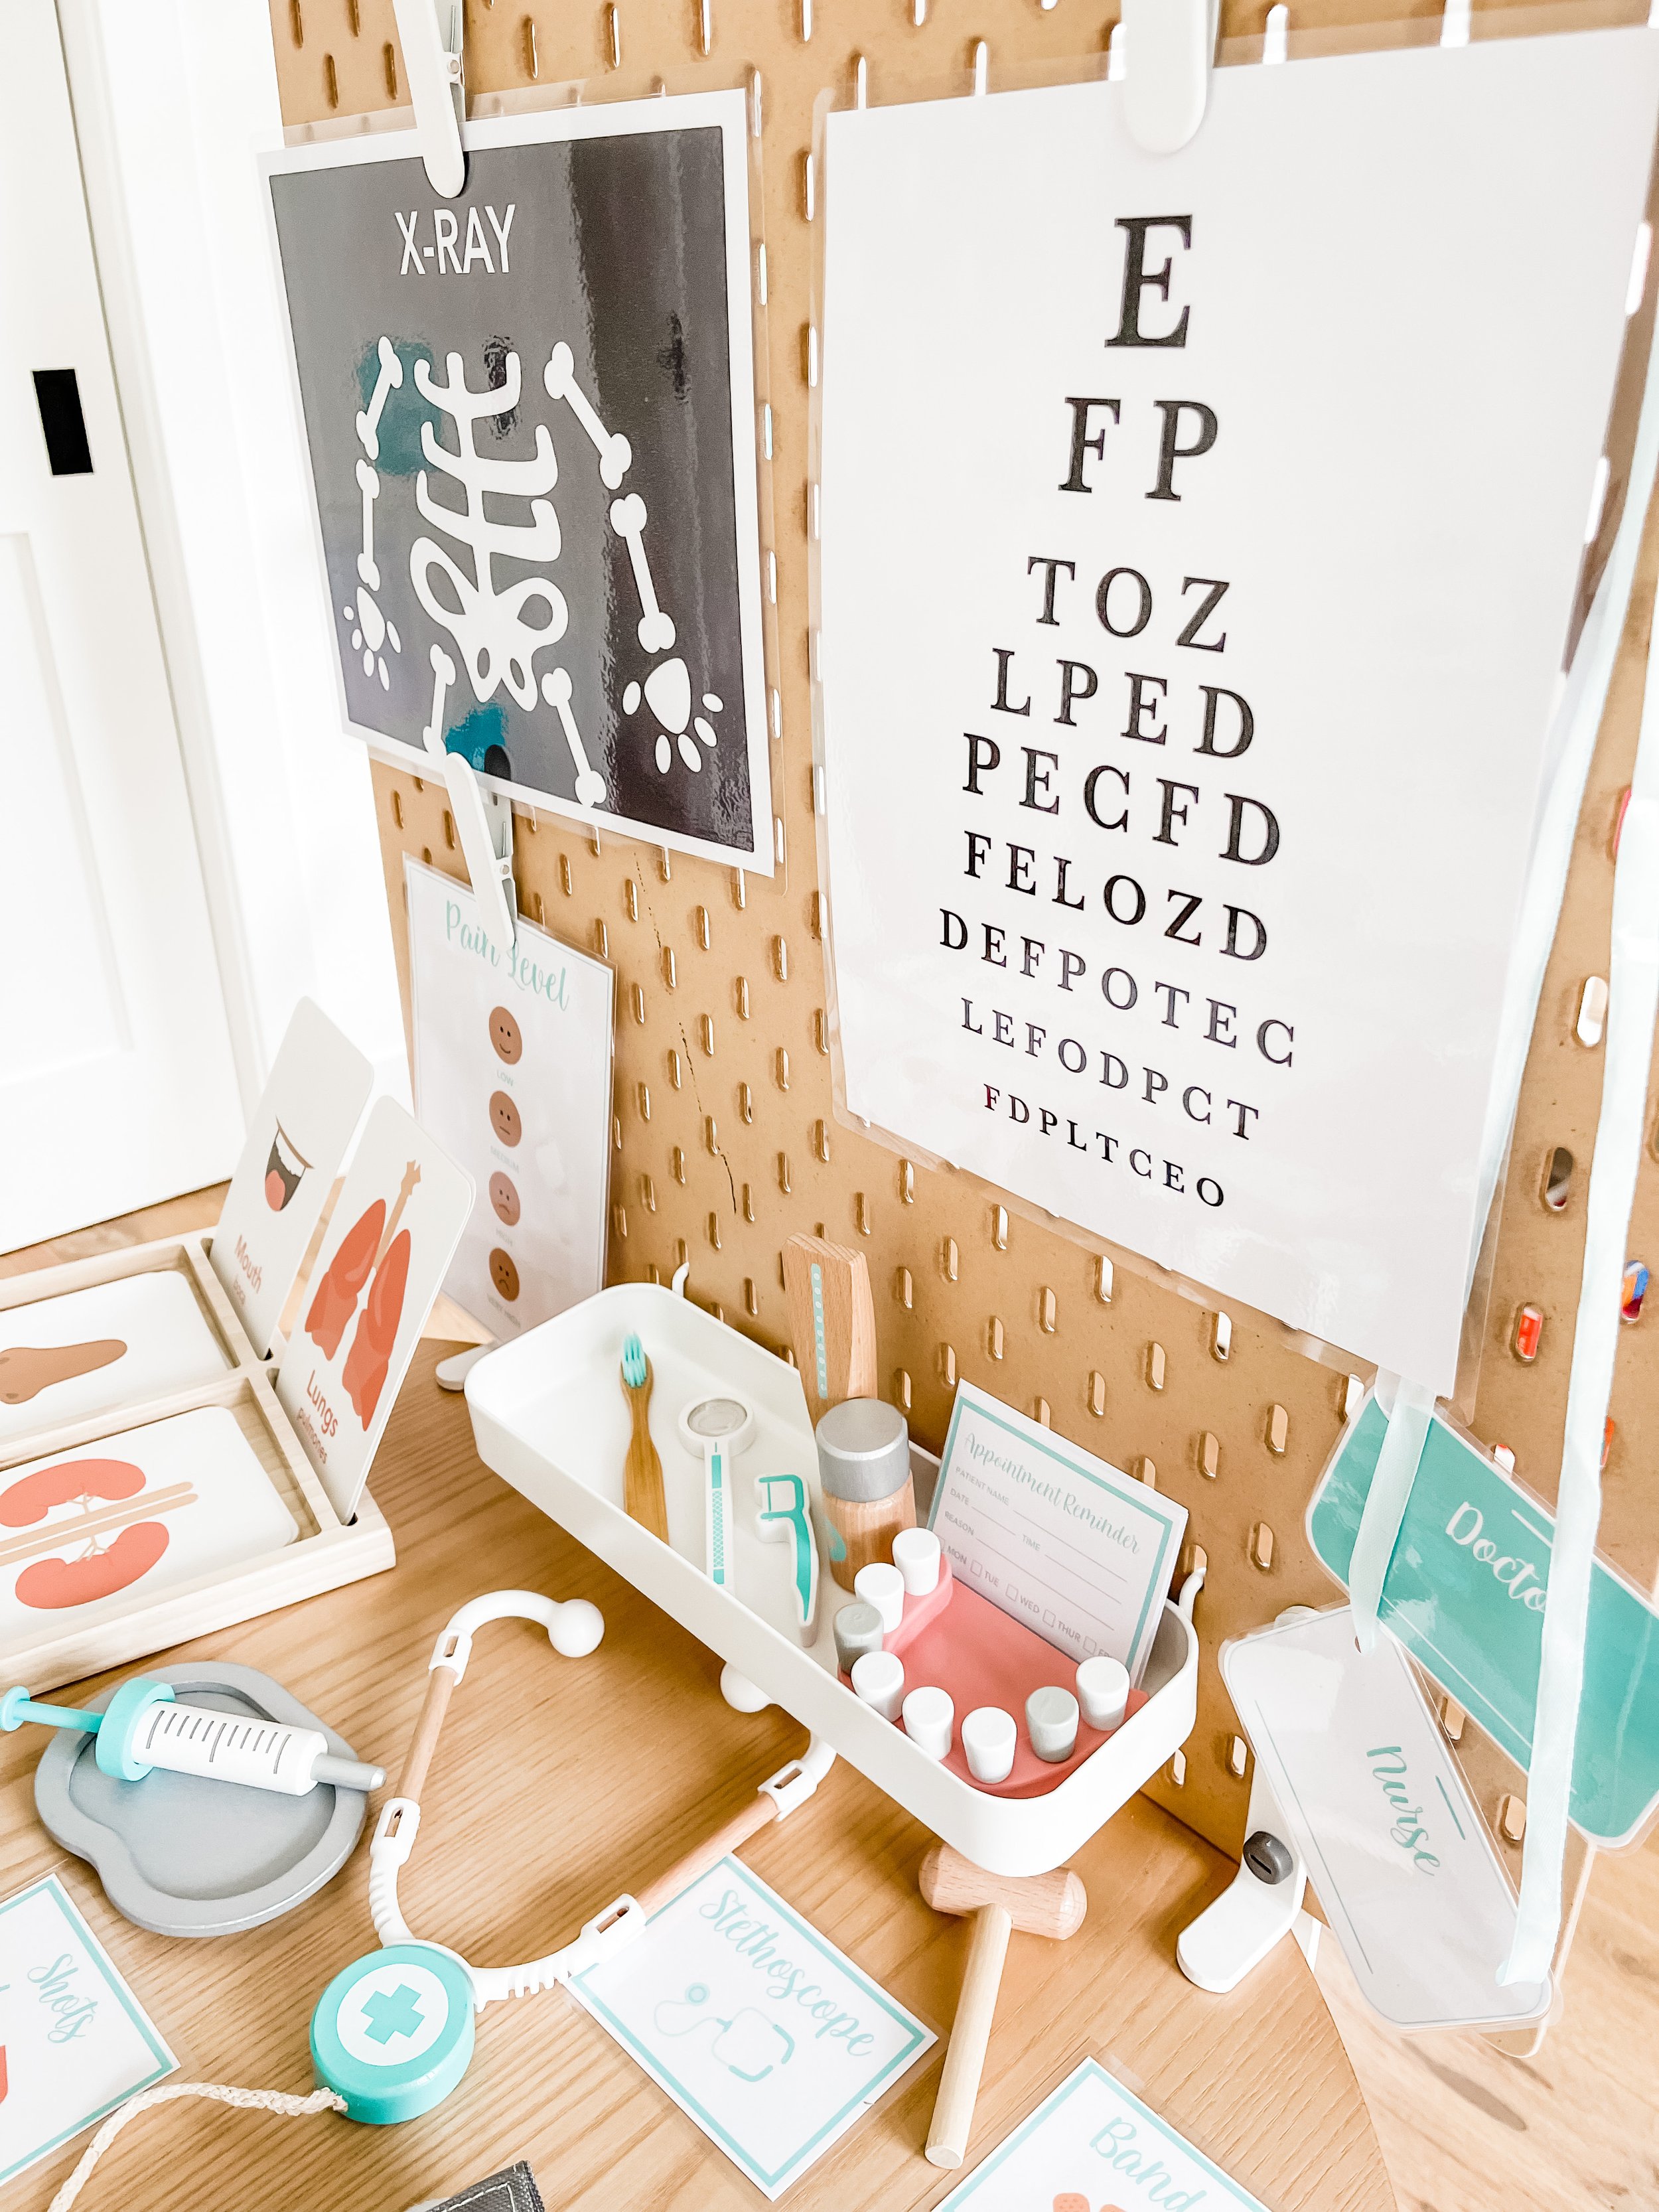
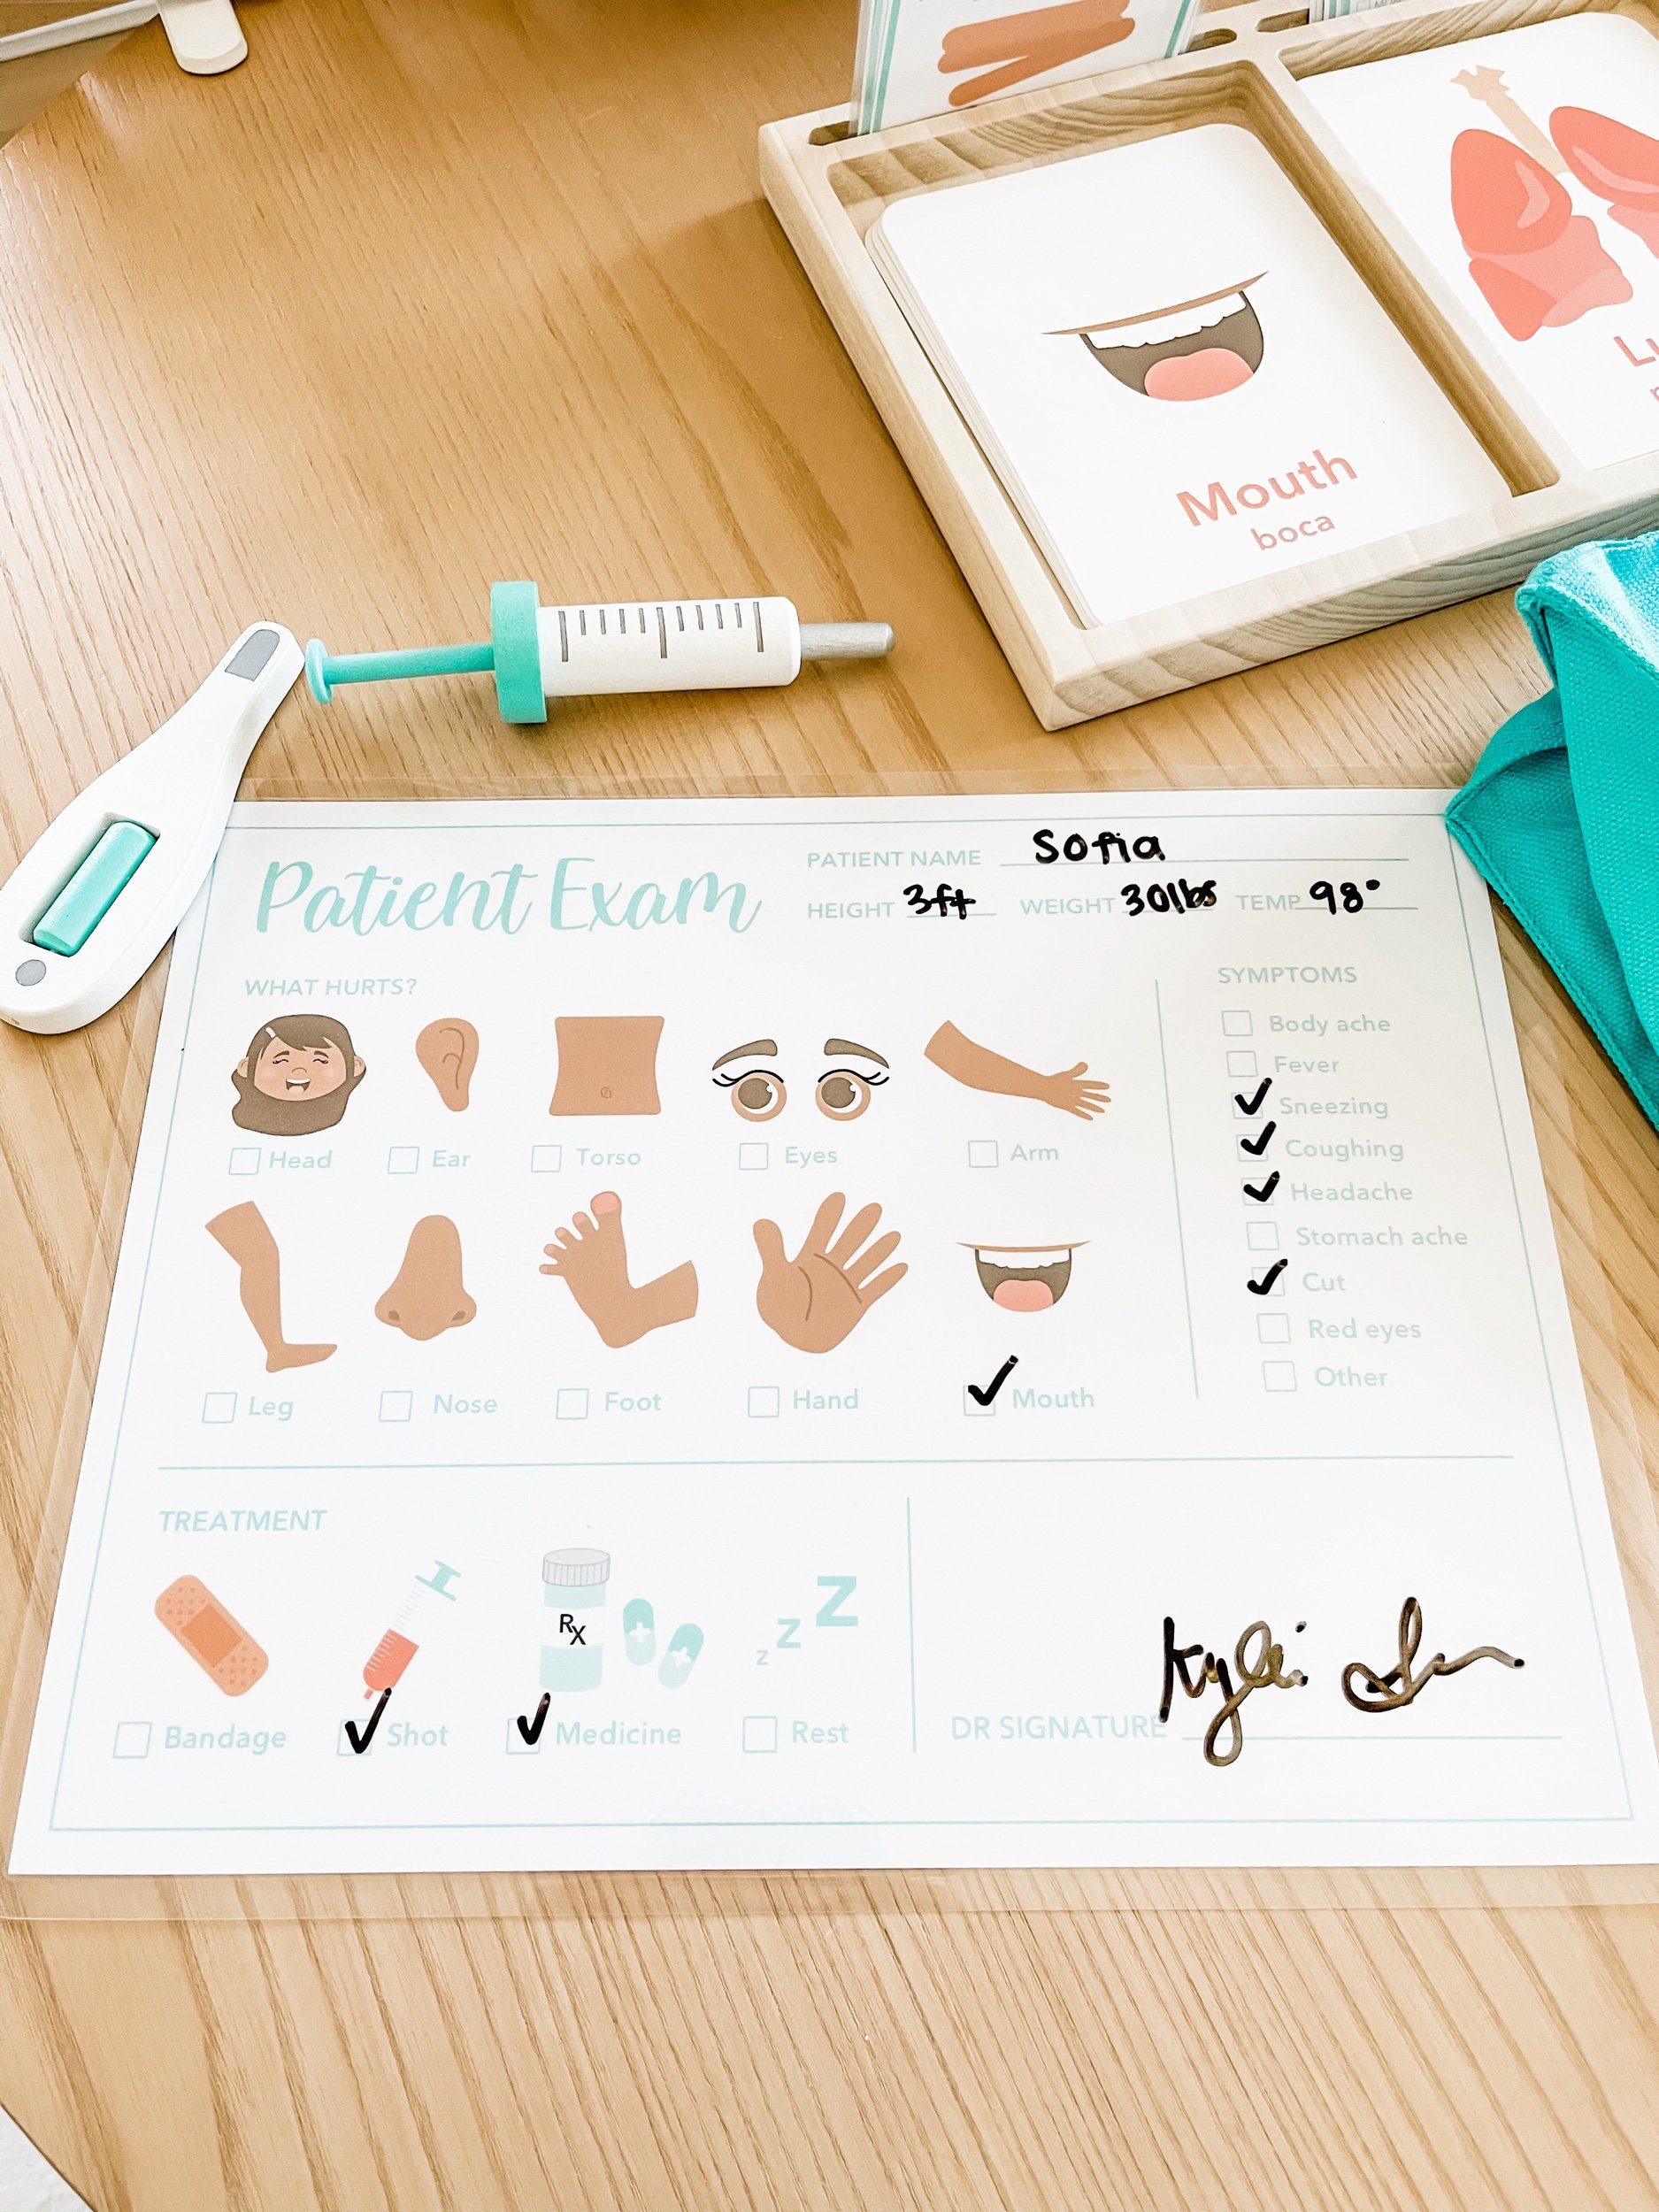
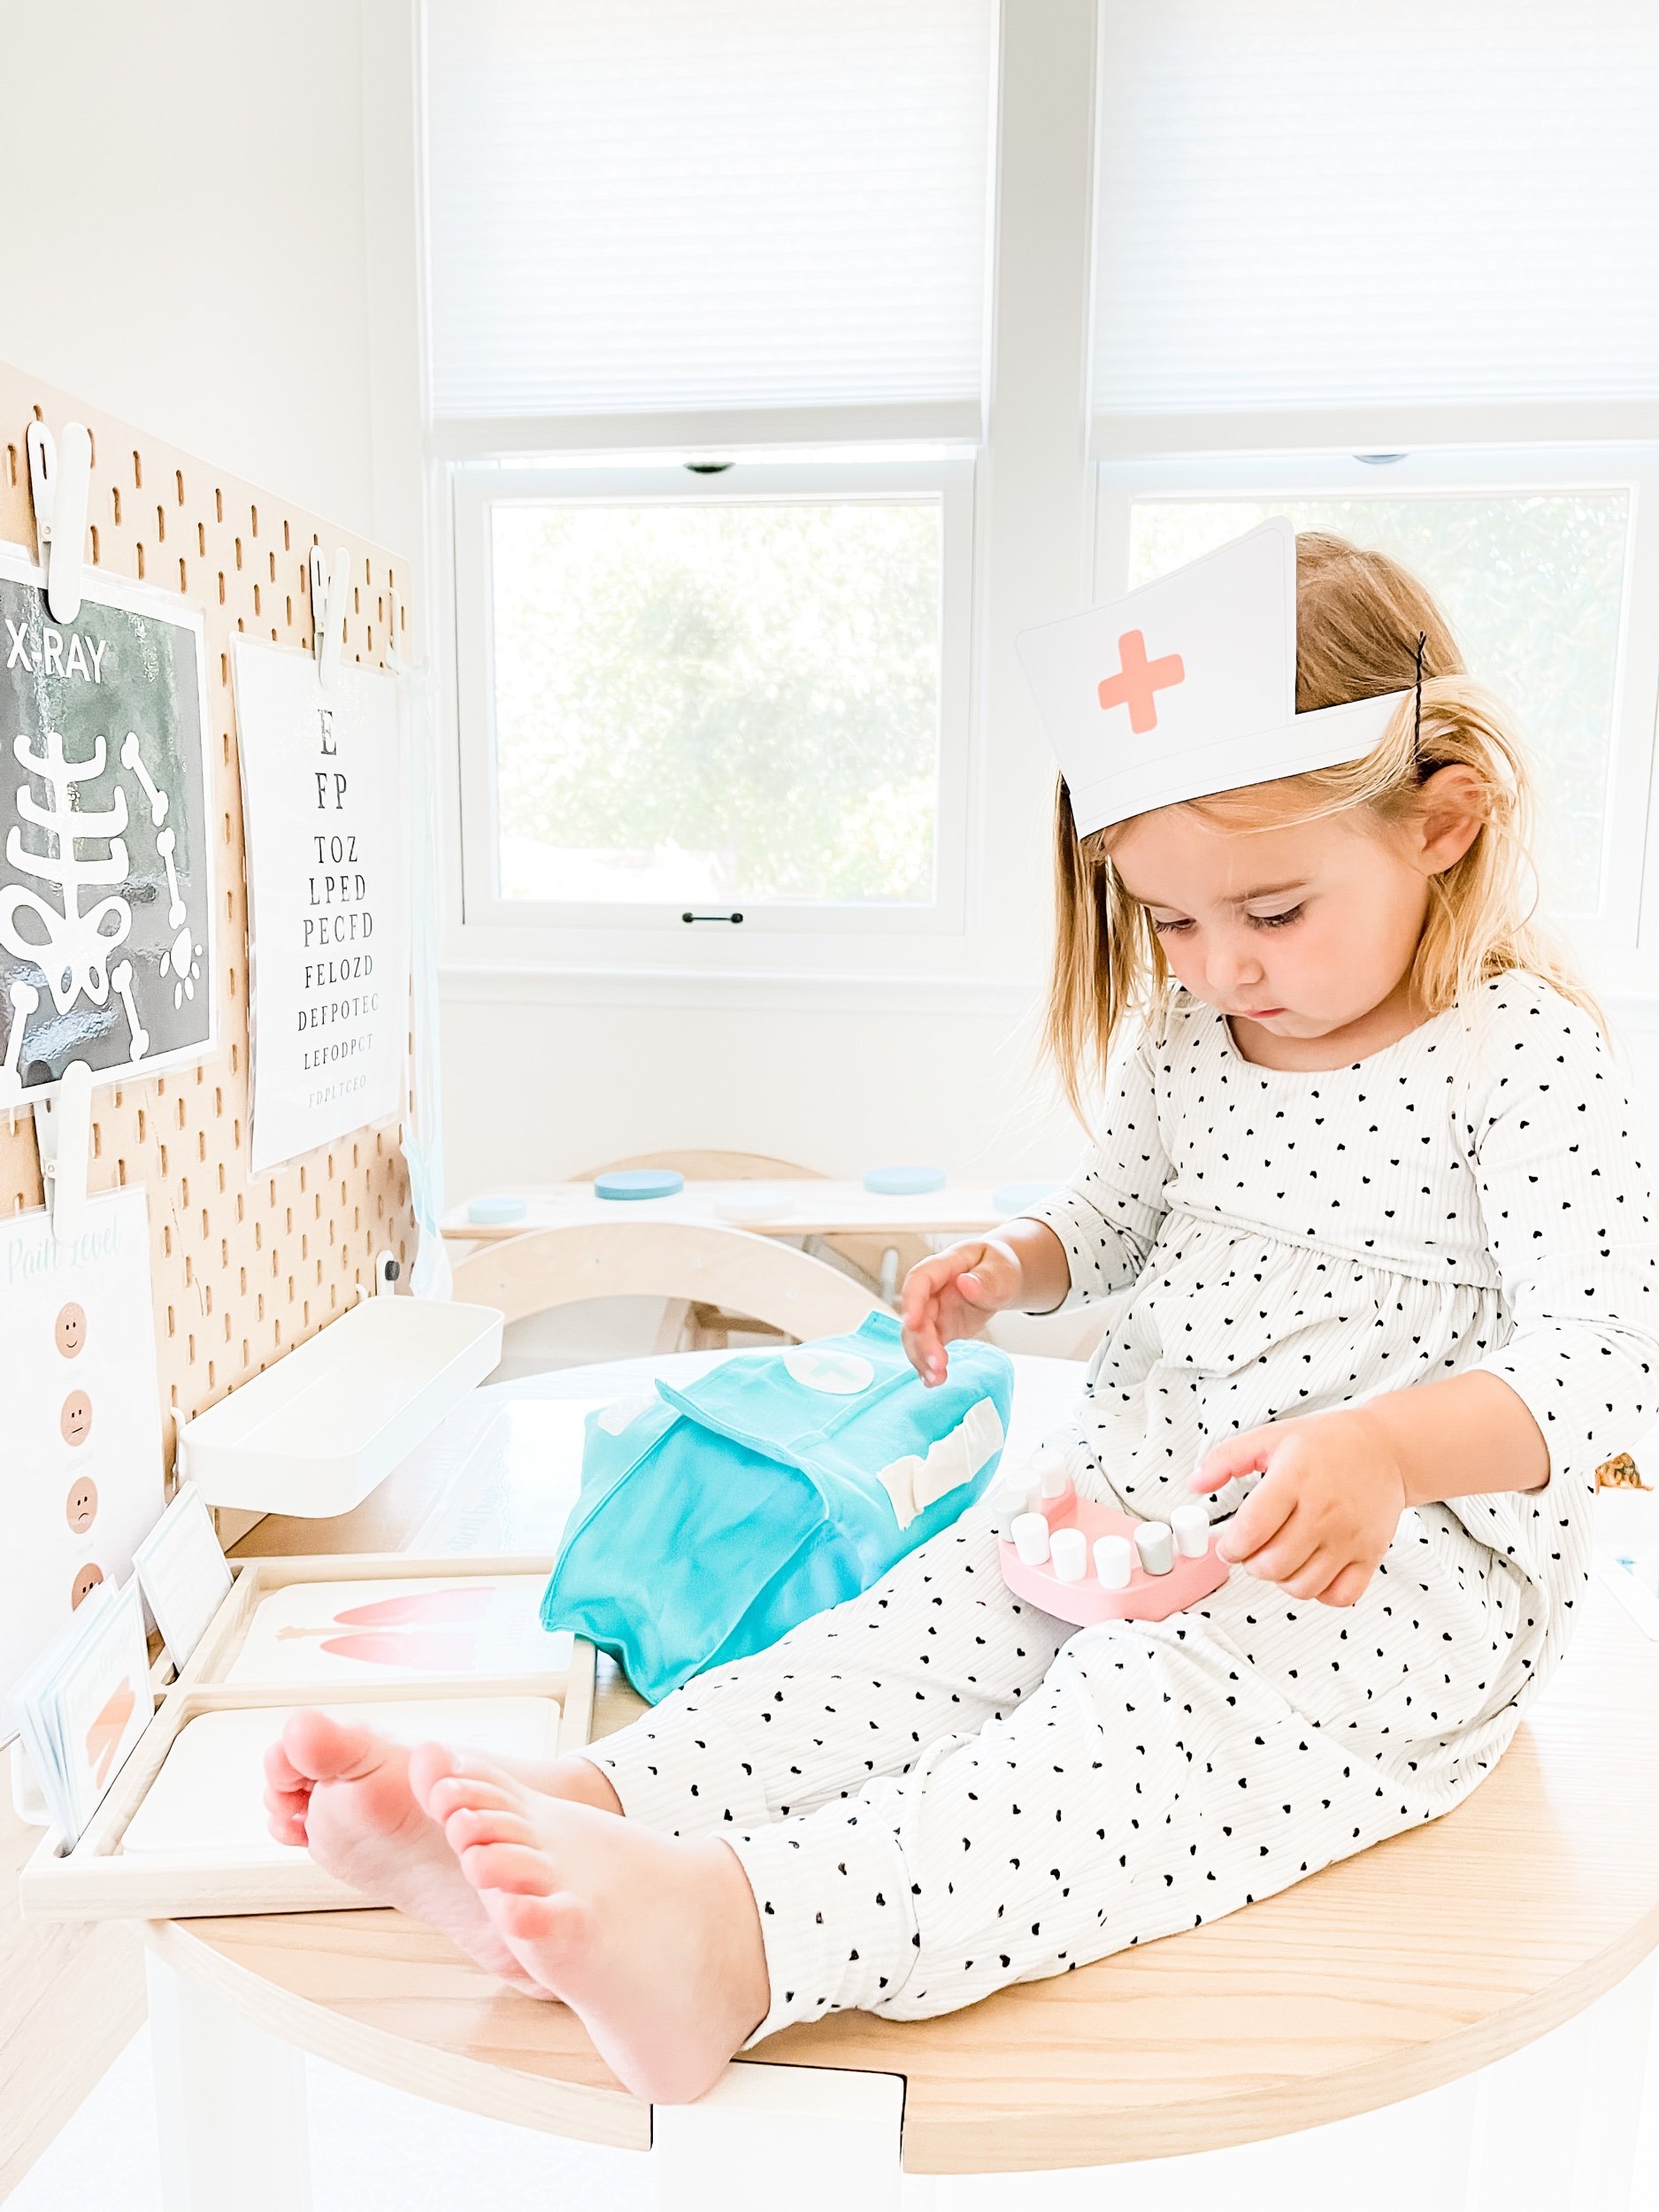
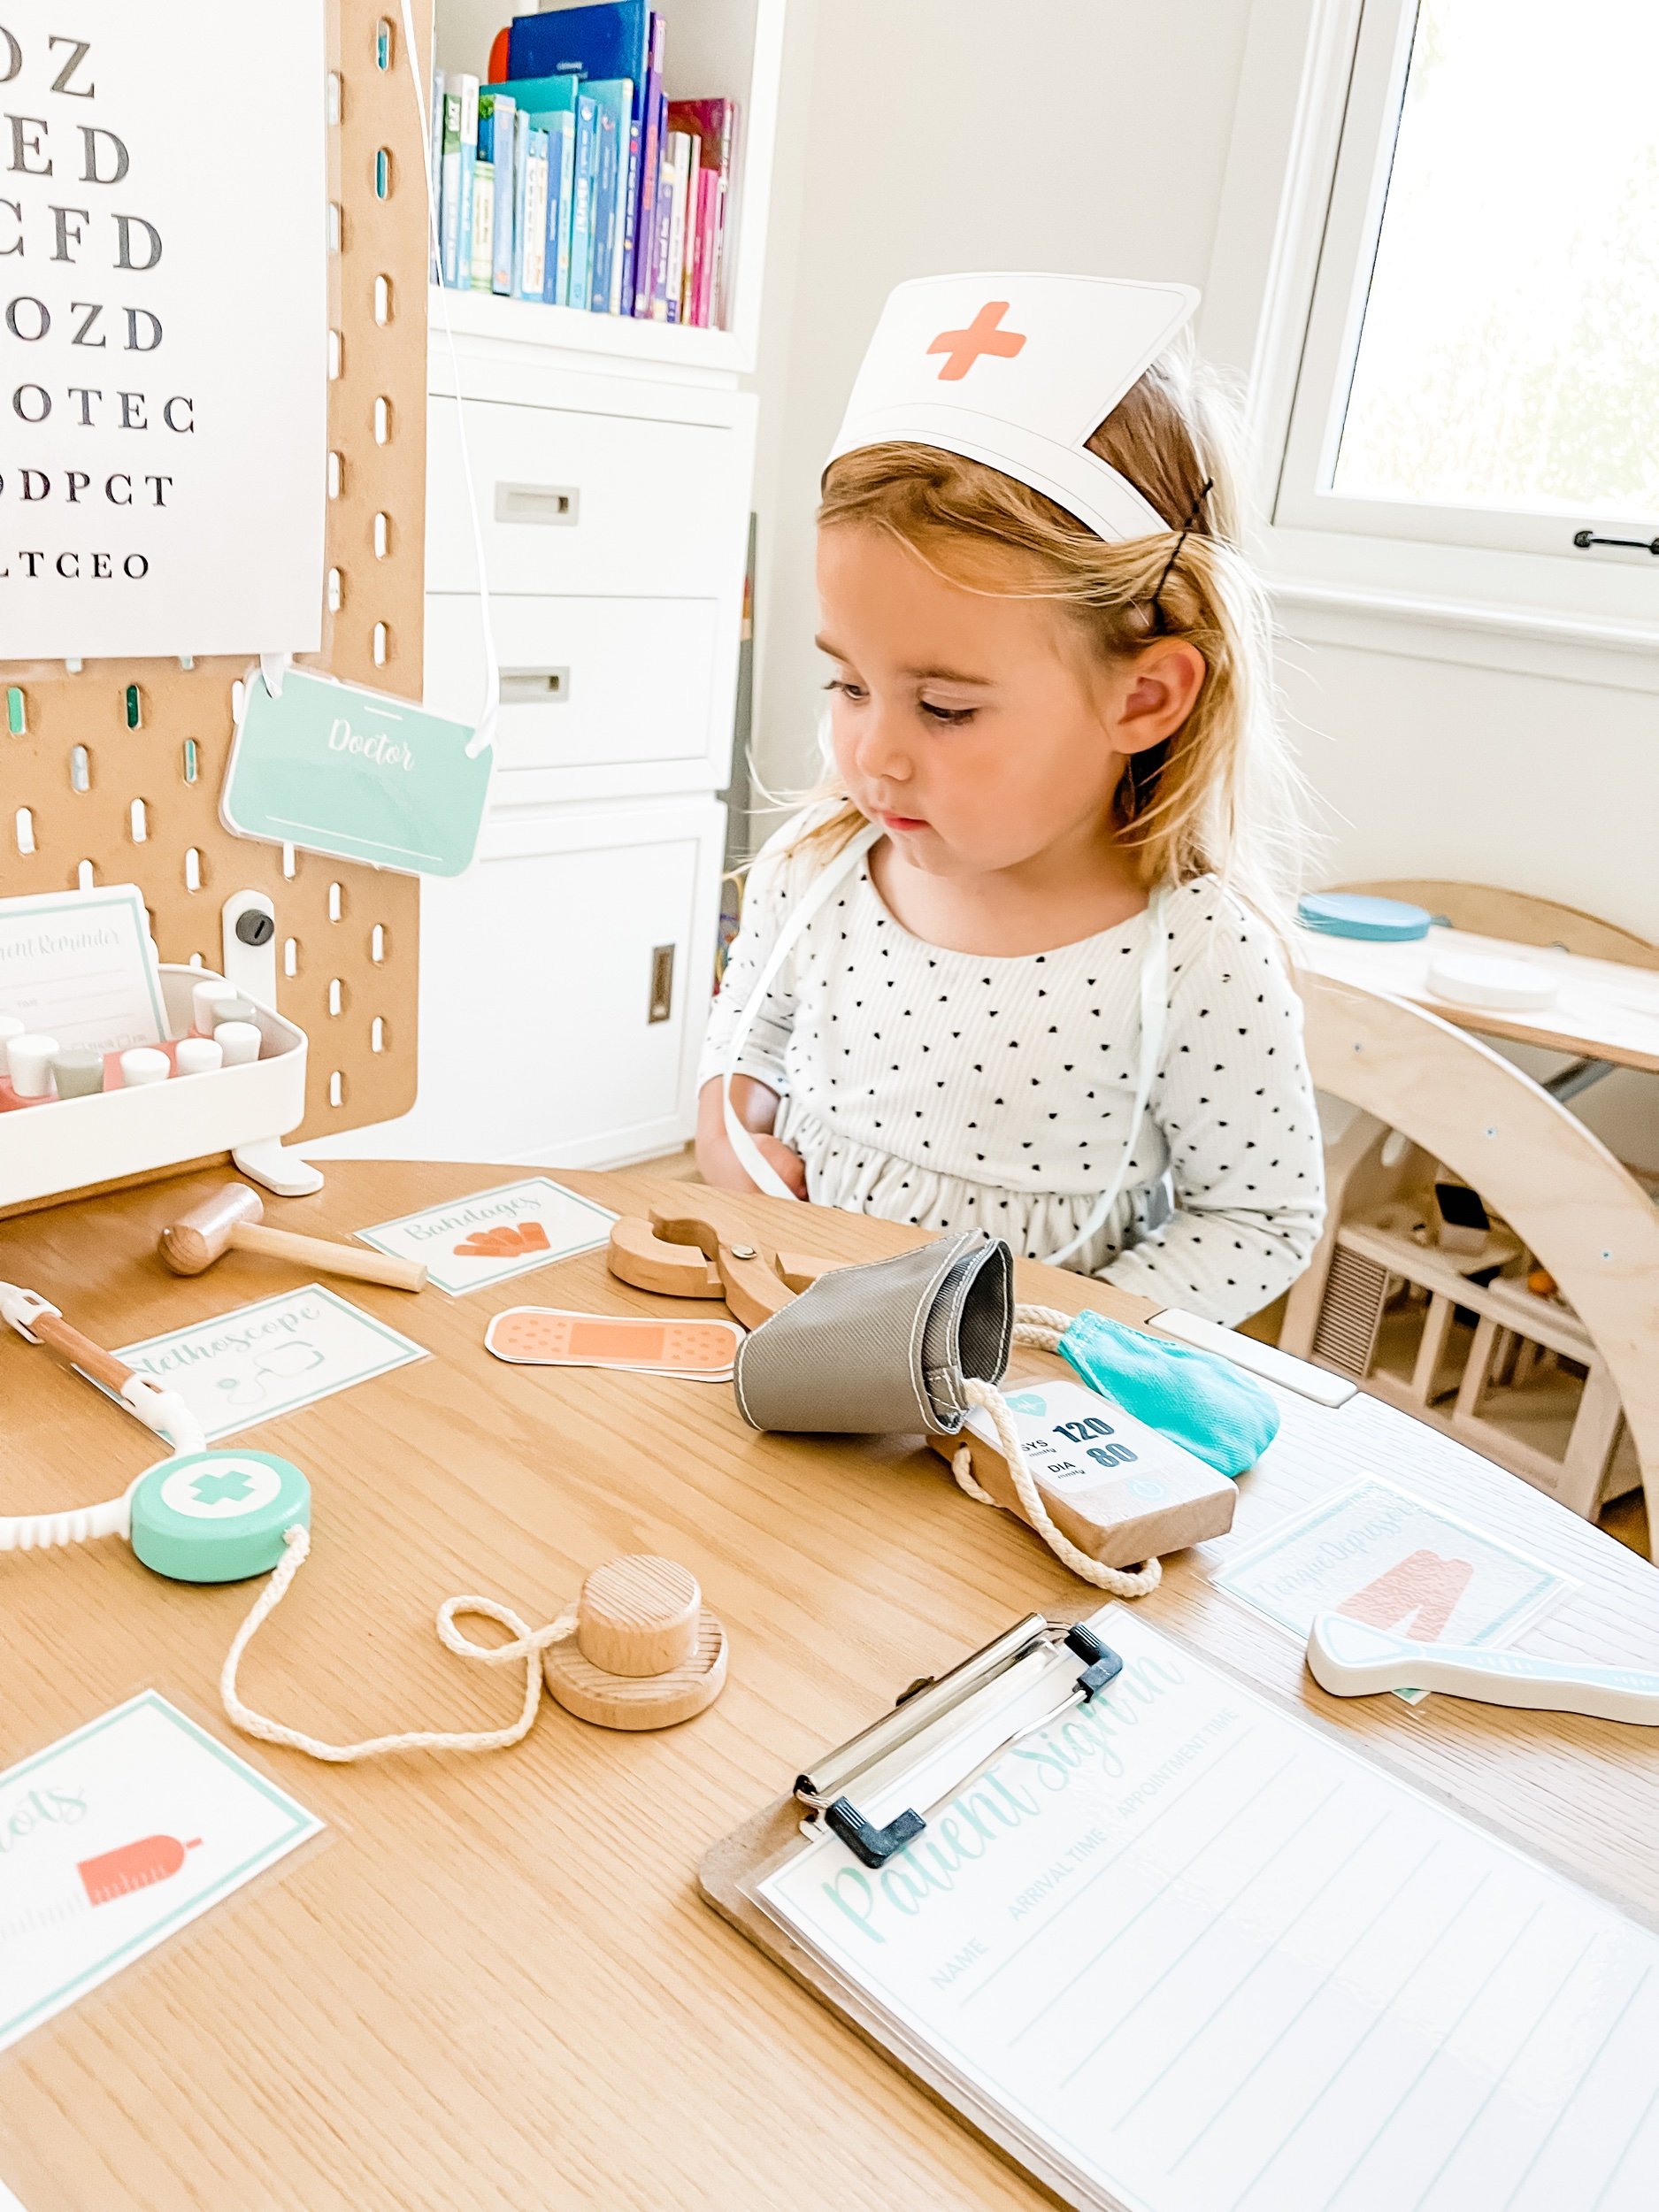
After assessing my pain level, Sofie proceeded with the patient exam. She started by getting my name and birthdate and all of the details and then filled out the form. She asked me where it hurt and today I told her my eyes were itchy and throat itchy from allergies. So she marked that down on her form and got to practice identifying her body parts.
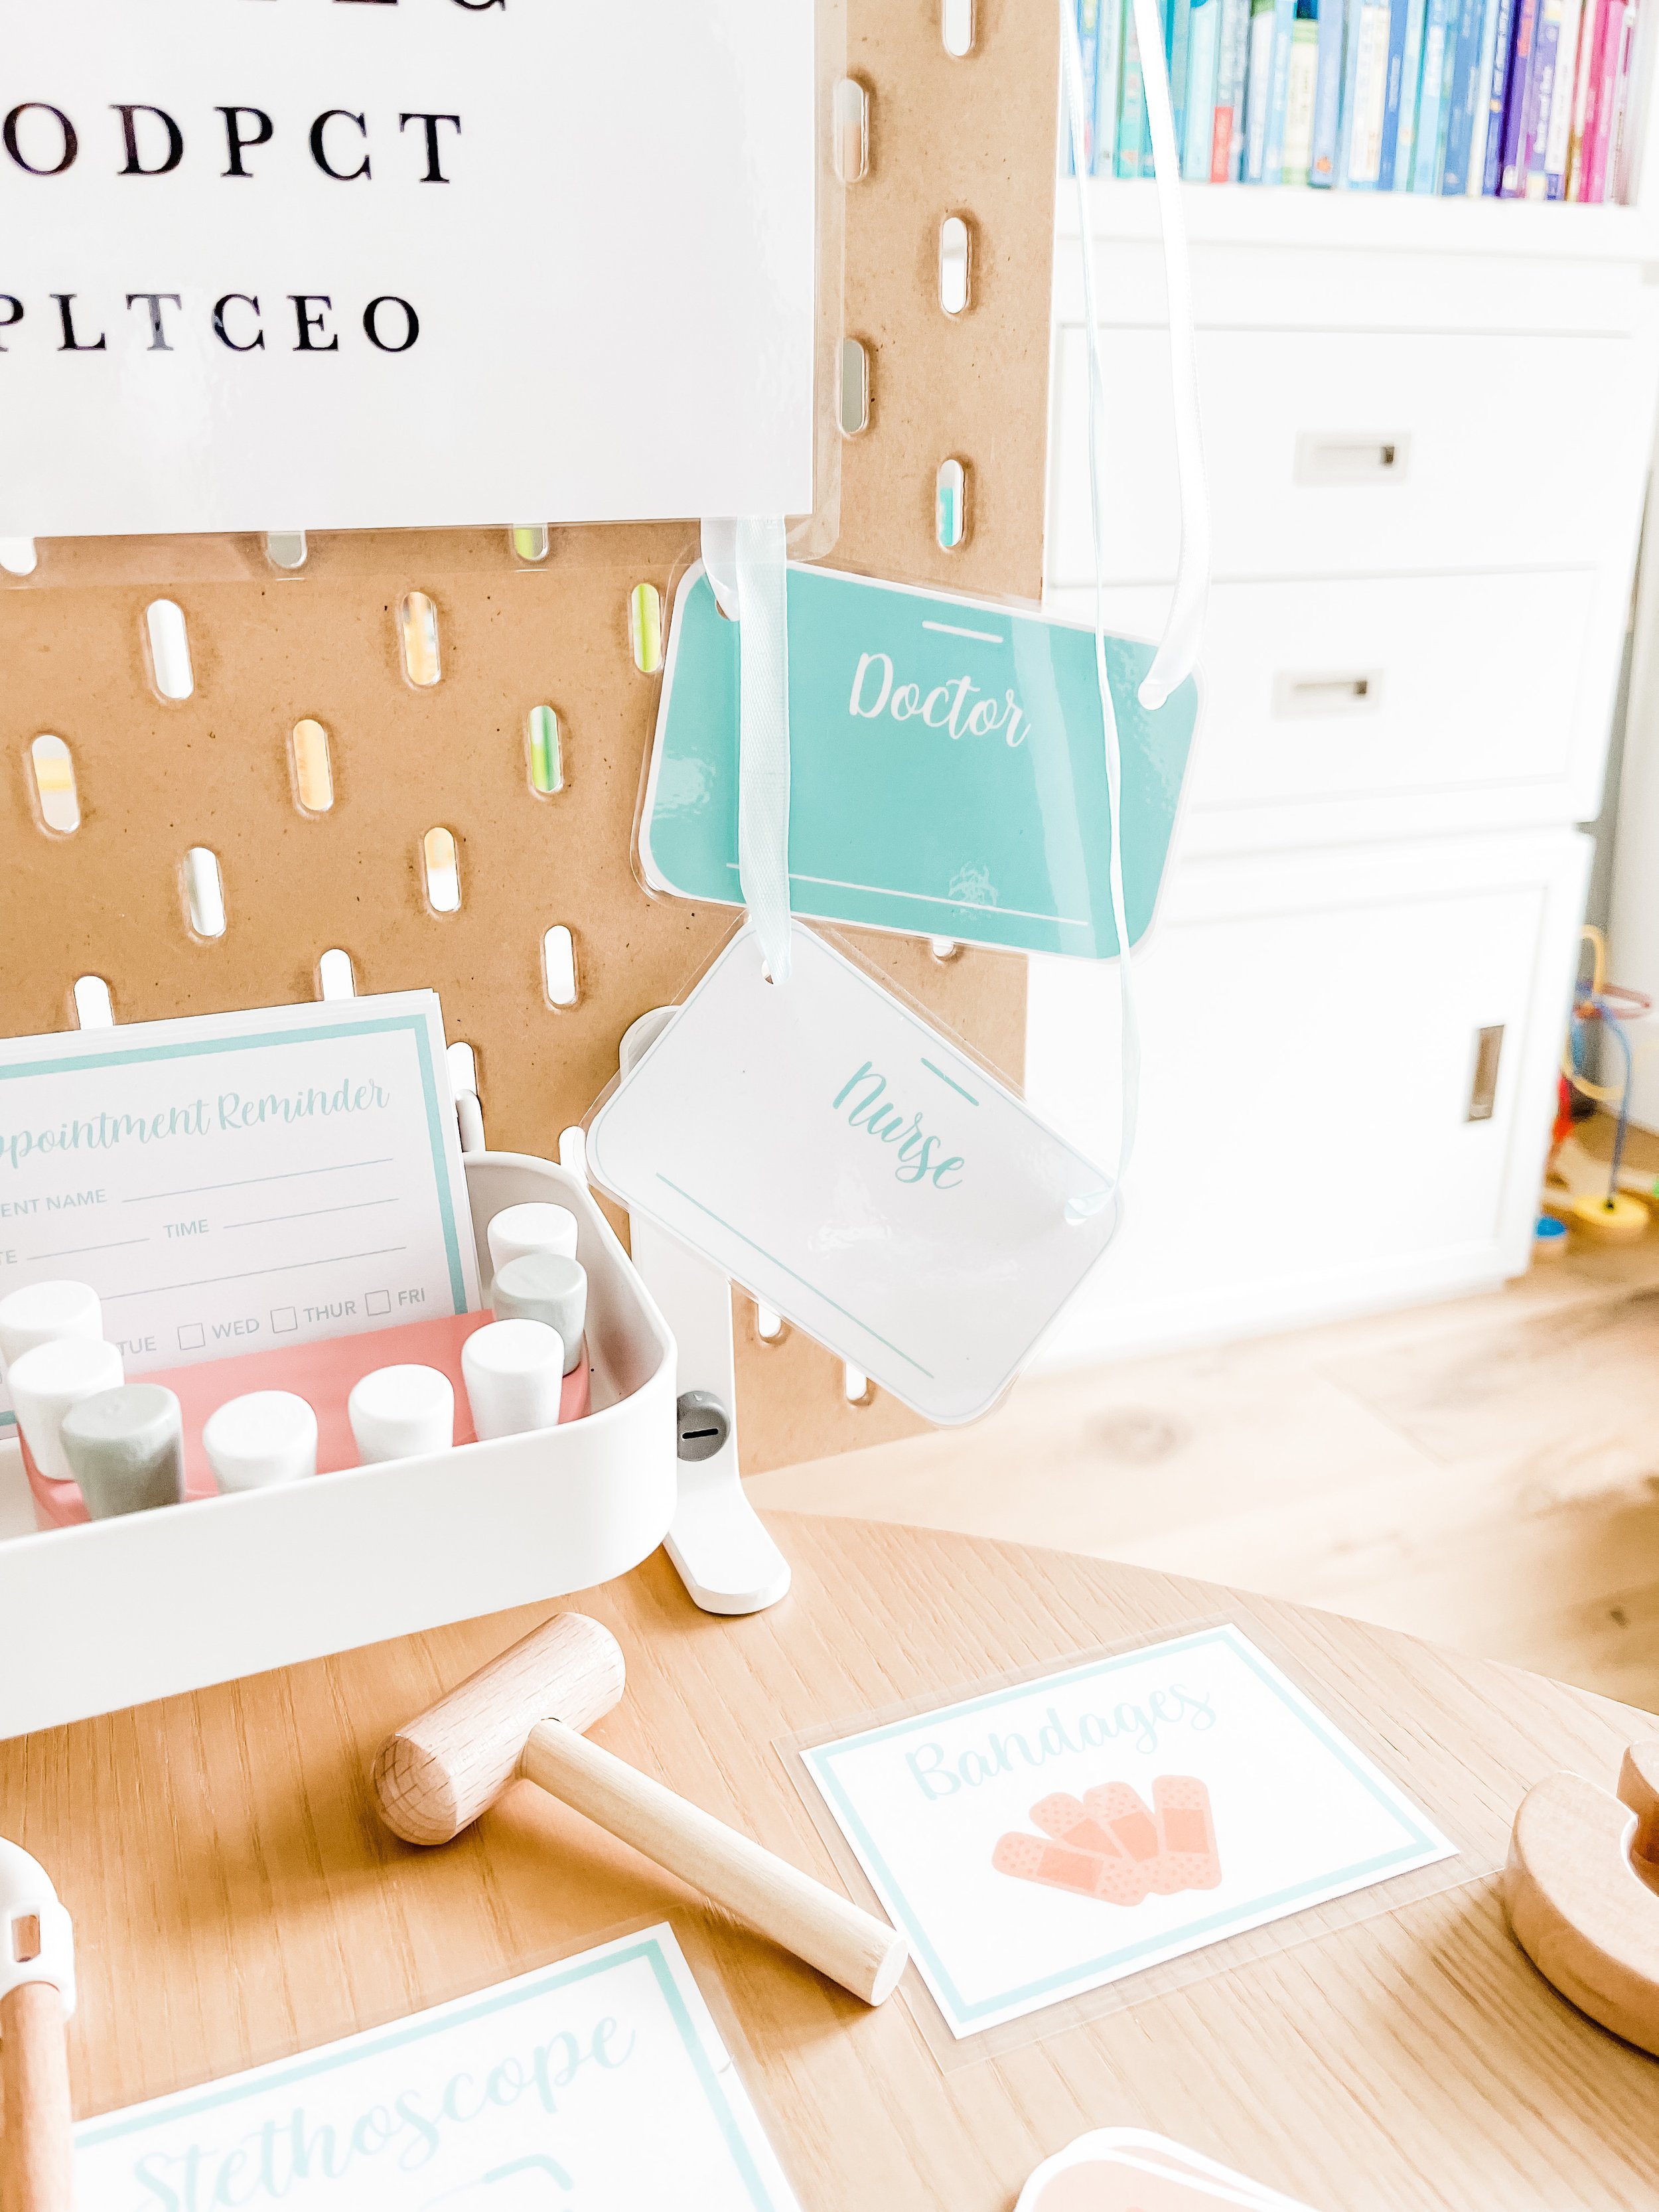
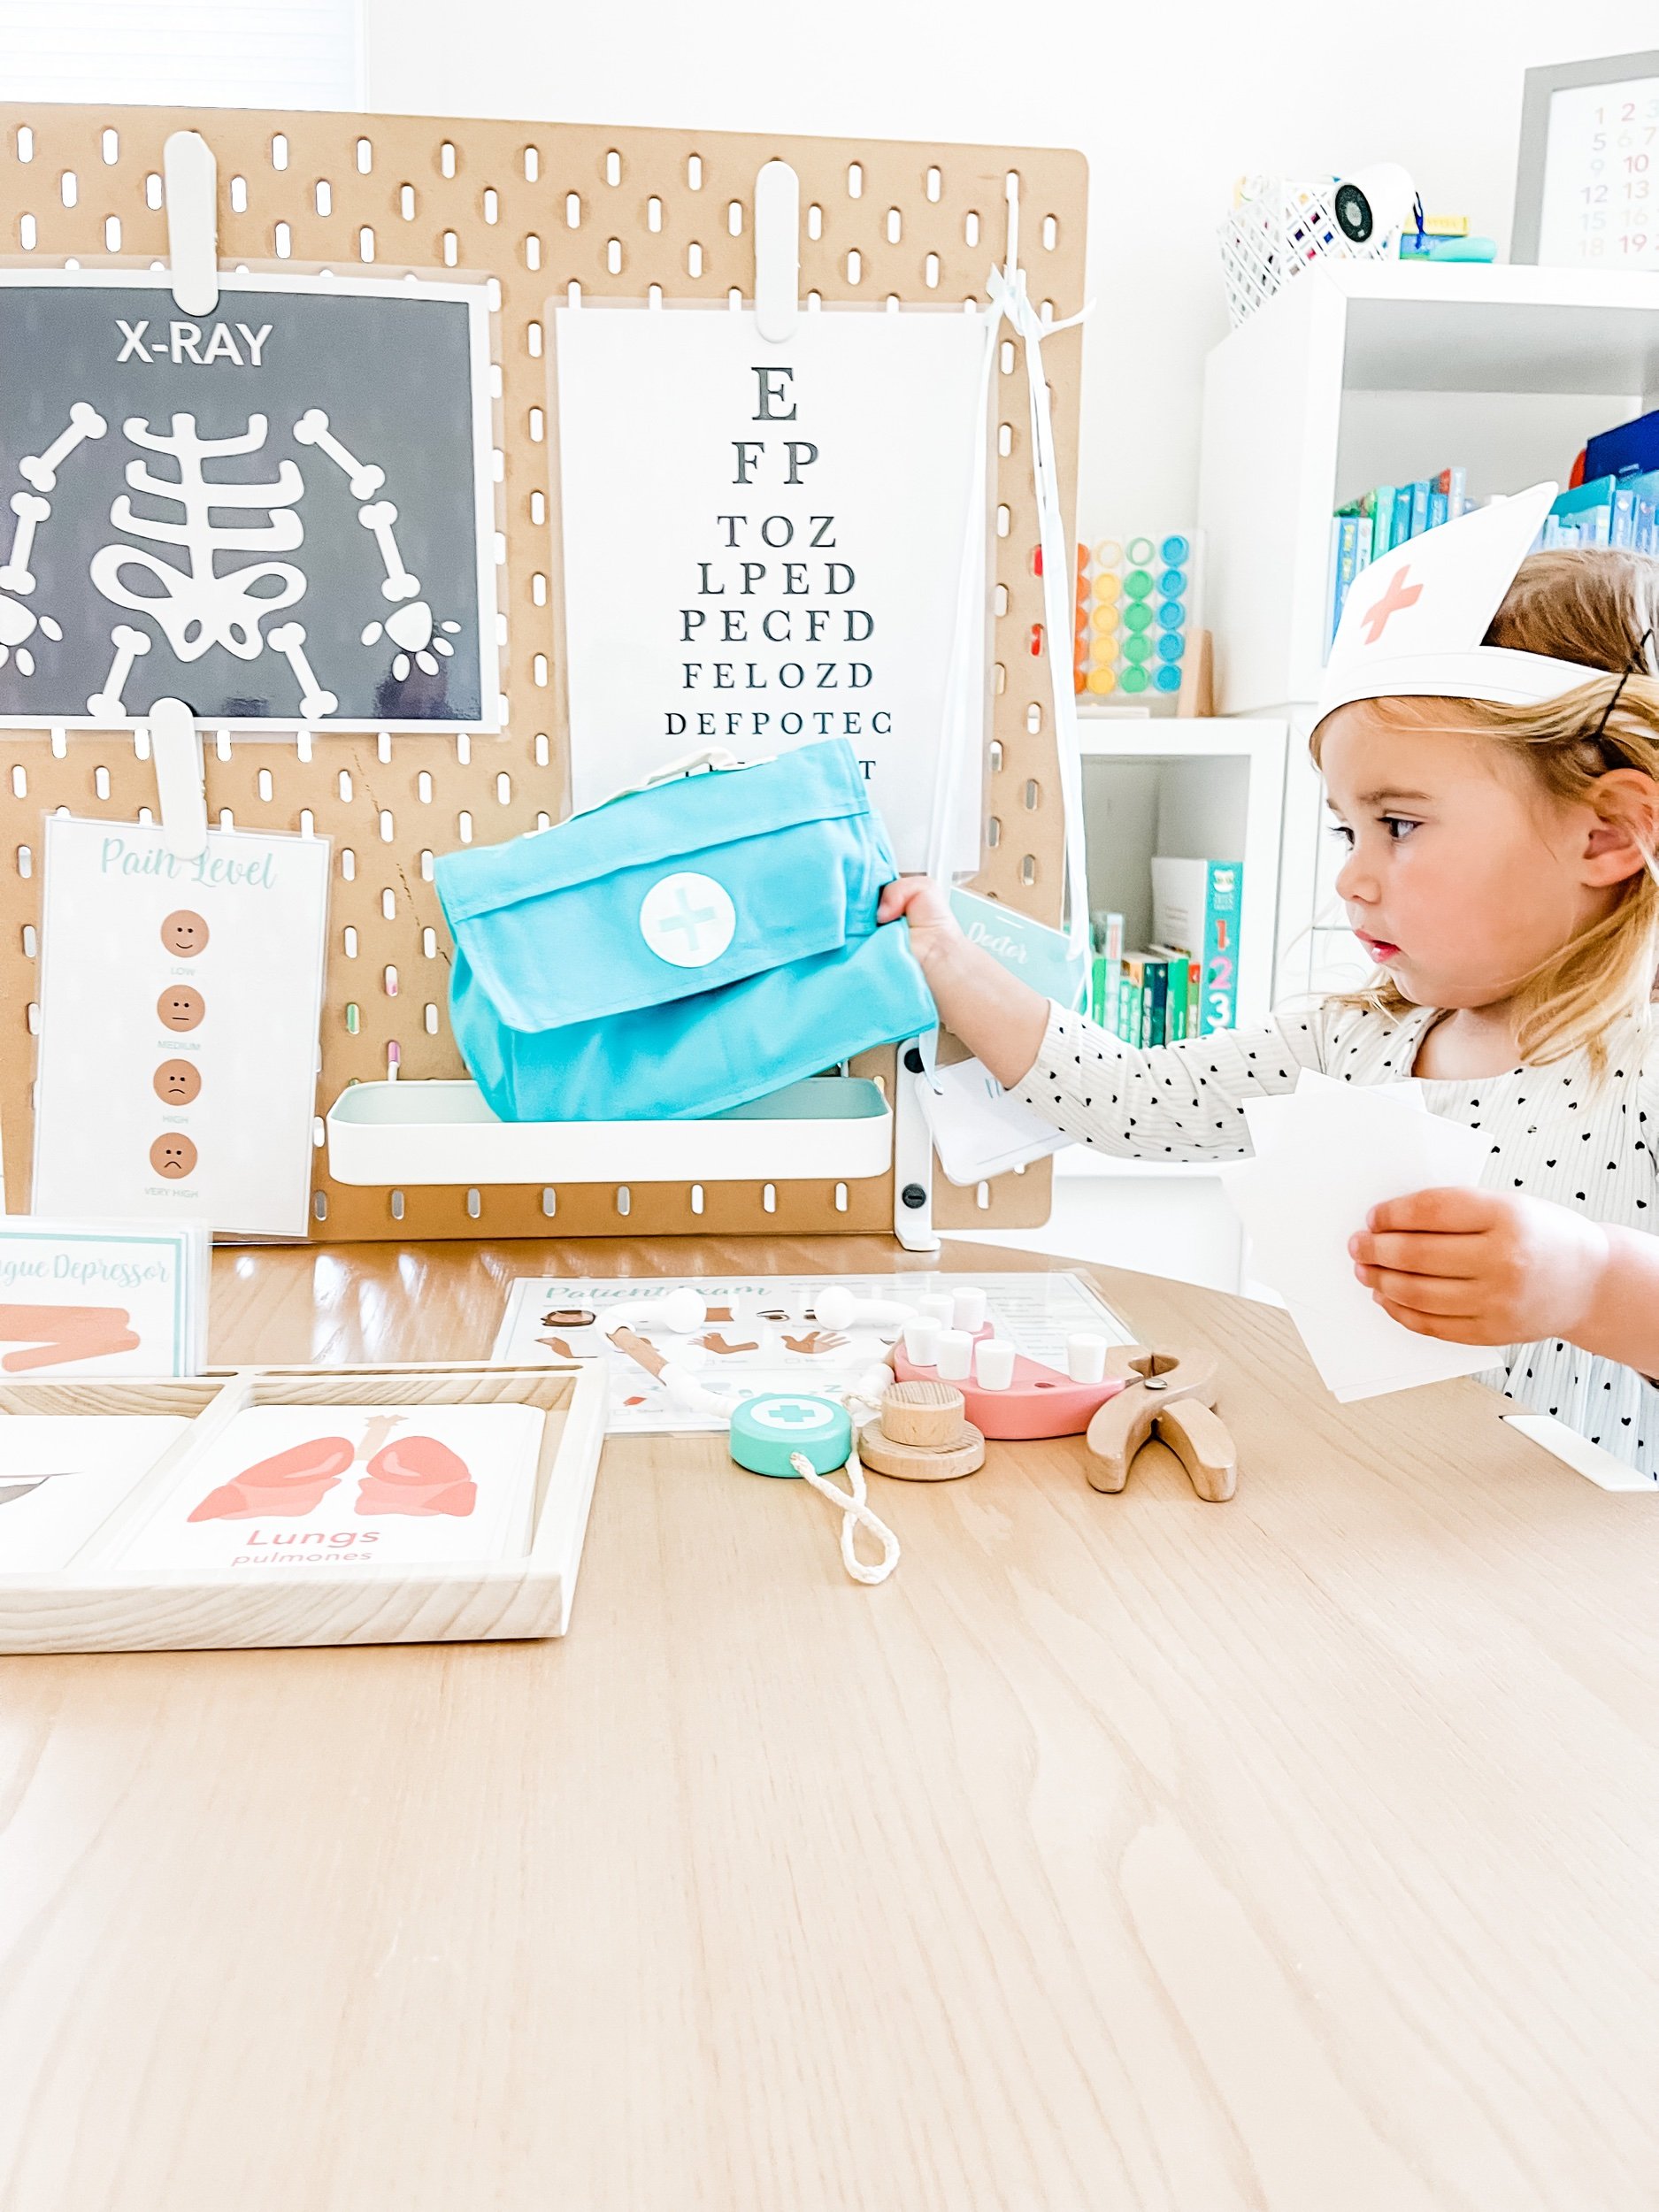
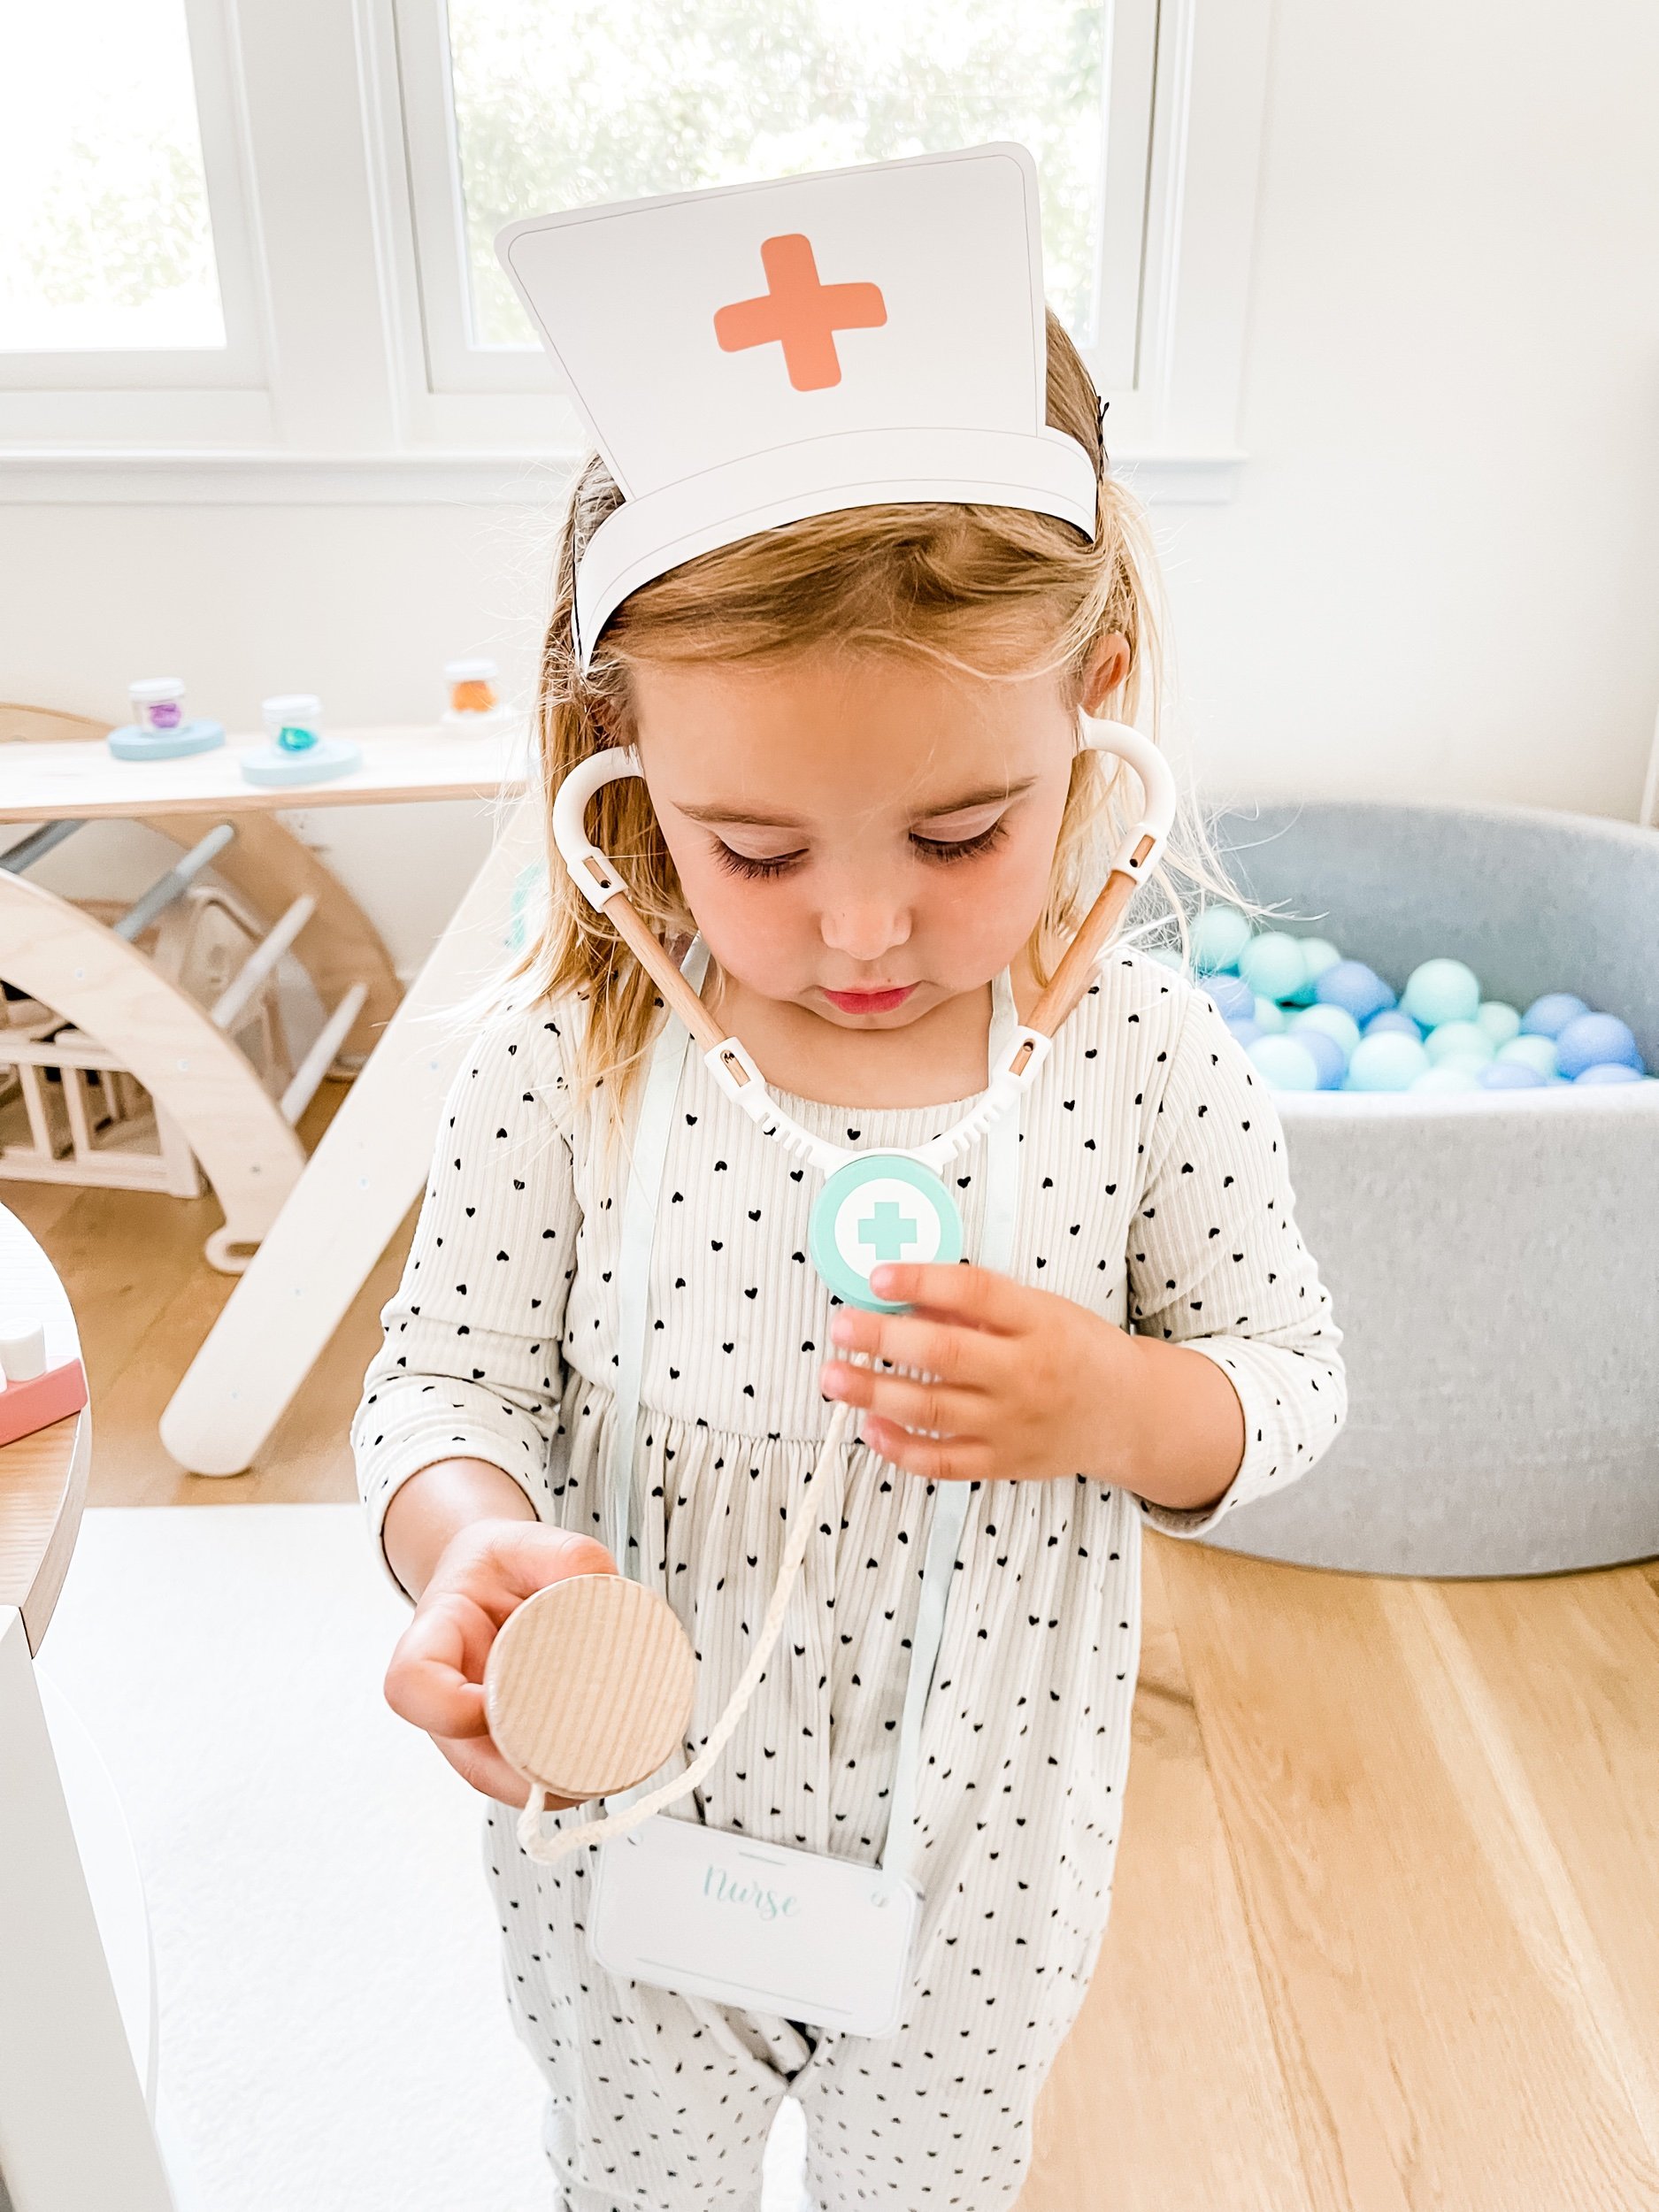
After asking her up front exam questions, Sofie proceeded to checking all of my vital signs. She started with the blood pressure monitor which she loved wrapping around my arm. Then she moved on to her stethoscope (which she’s always afraid of at the doctor) and she used it to listen to my lungs.

Then she moved on to her diagnosis and of course wanted to use everything in her doctors toolkit to remedy my allergies. She started by giving me a shot in my arm (which she also hates at the doctor) so it was nice for her to get to be the one to administer the shot. Then she gave me a bandaid to cover up my shot, just like they do at the doctors.

After that she decided I should probably take some medicine to make me feel better and she gave me the little tray of pills and the pill bottle. Then she remembered she forgot to take my temperature so she used her thermometer to do that. She loves the real thermometer we have at home so it was great to see her interacting with the fake one.


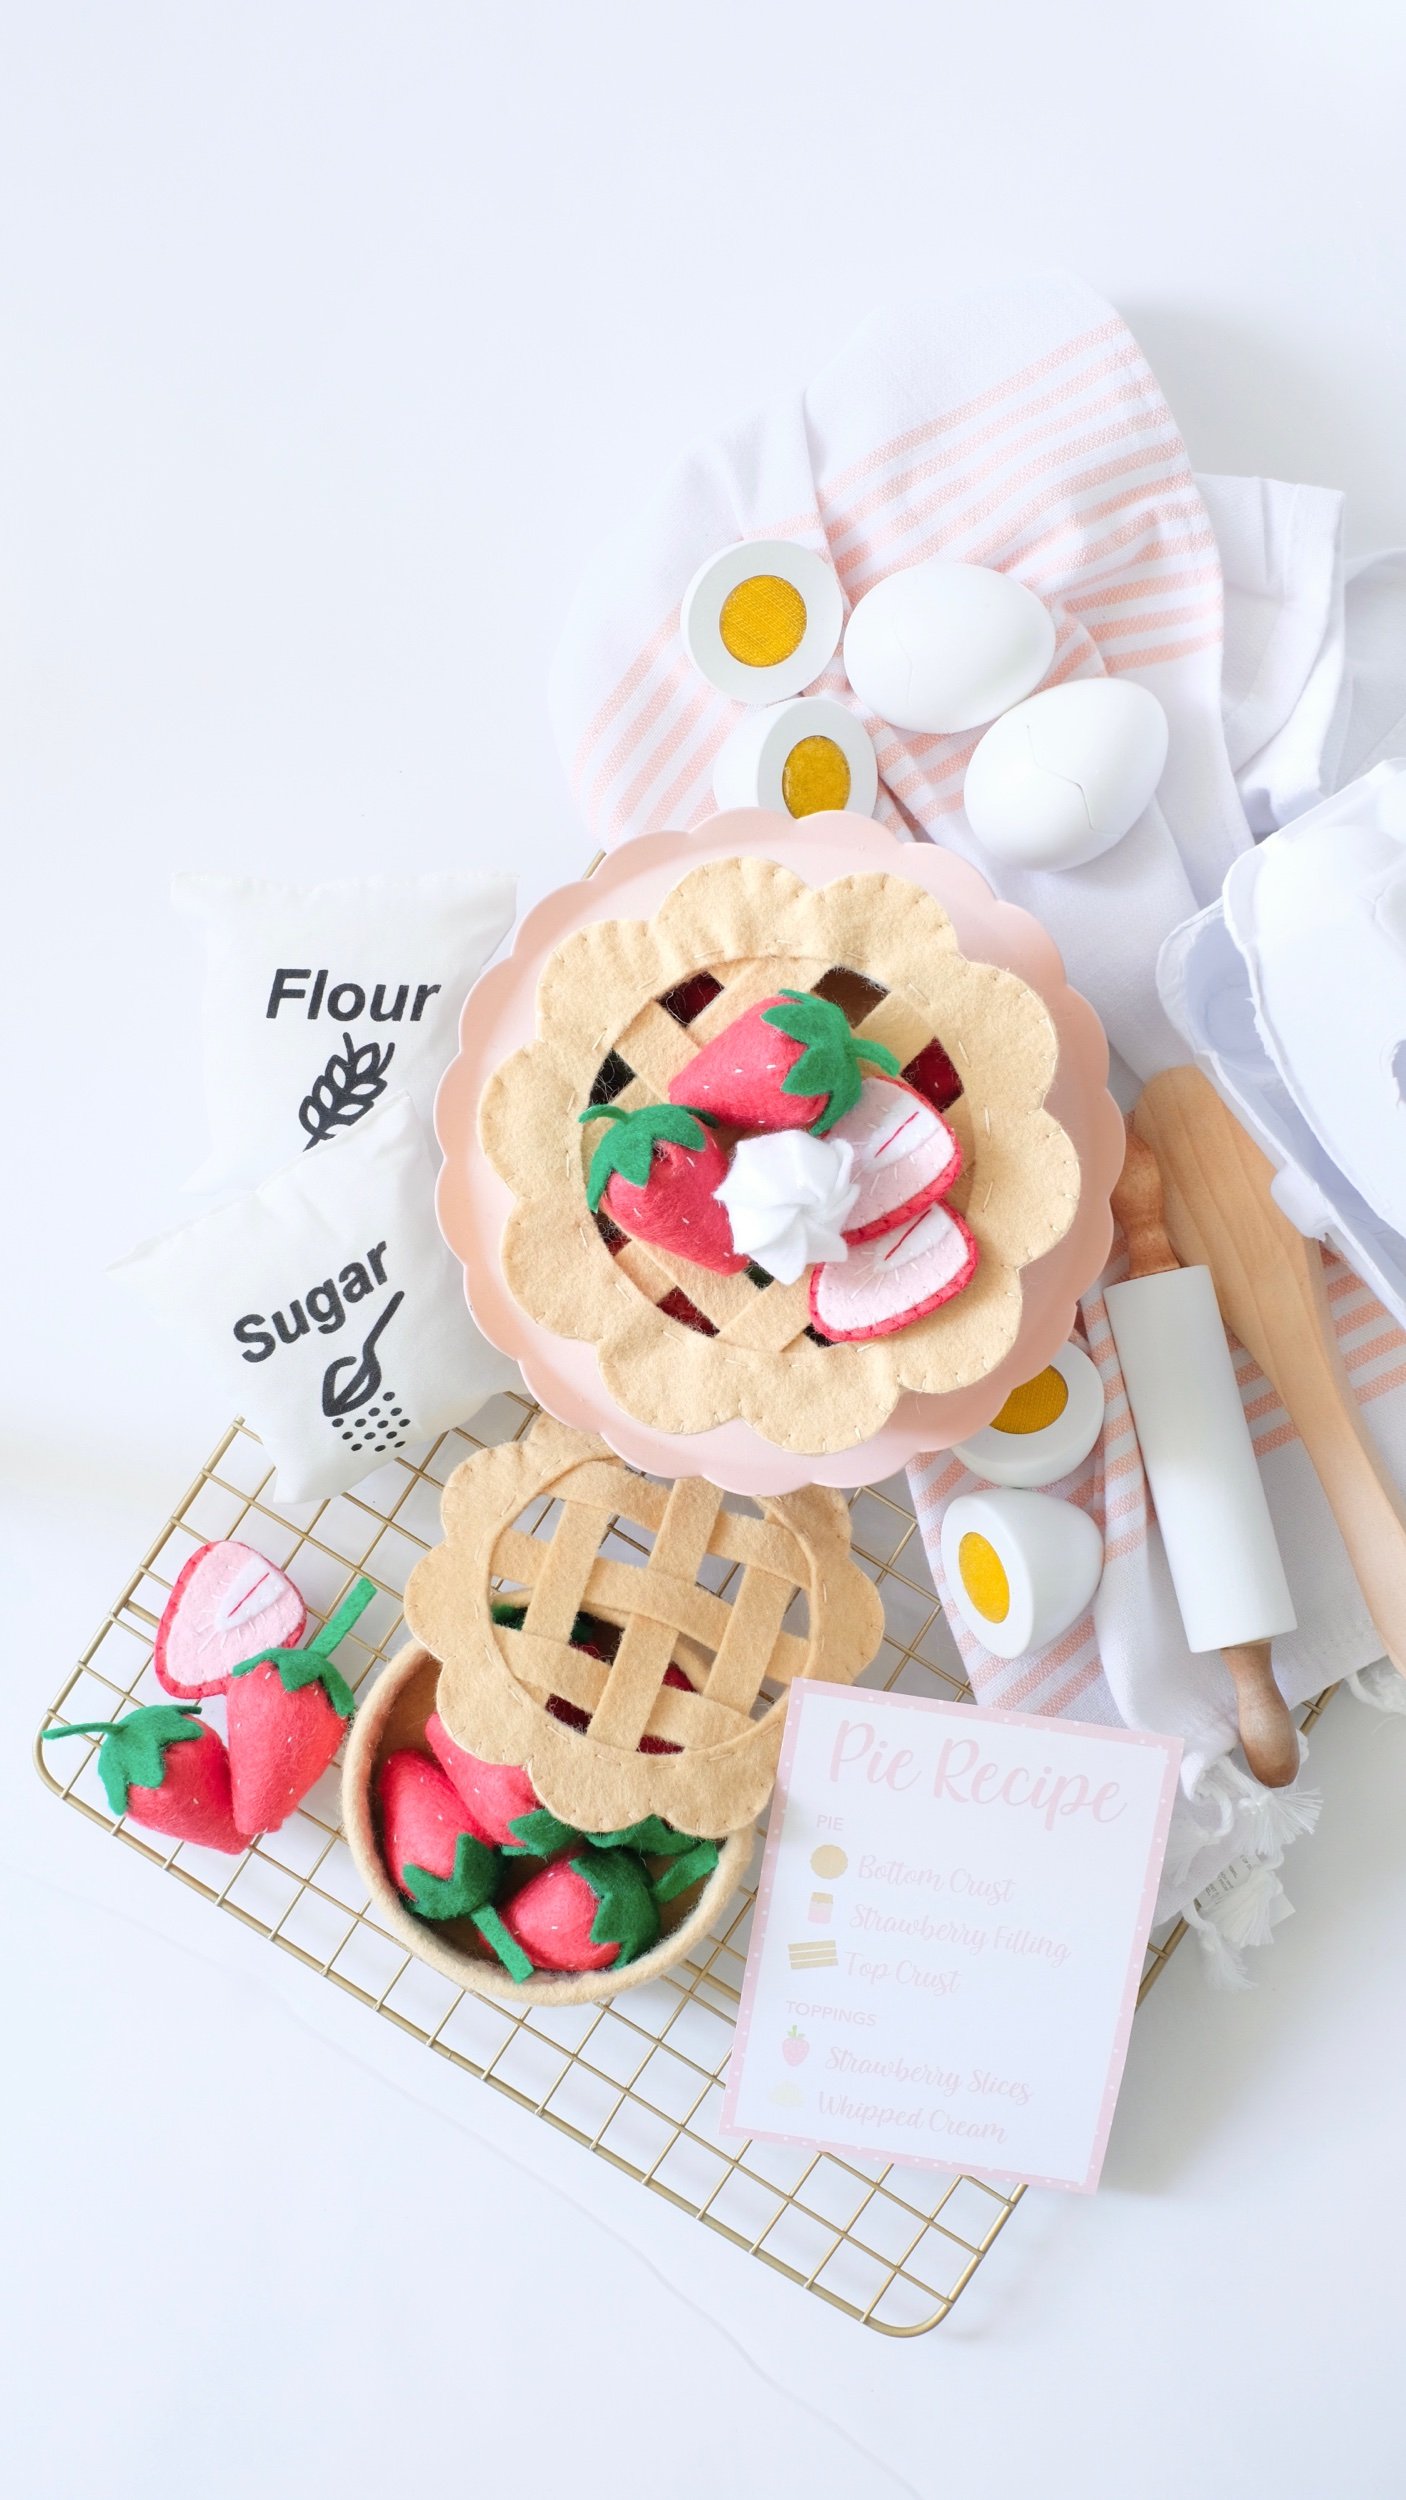
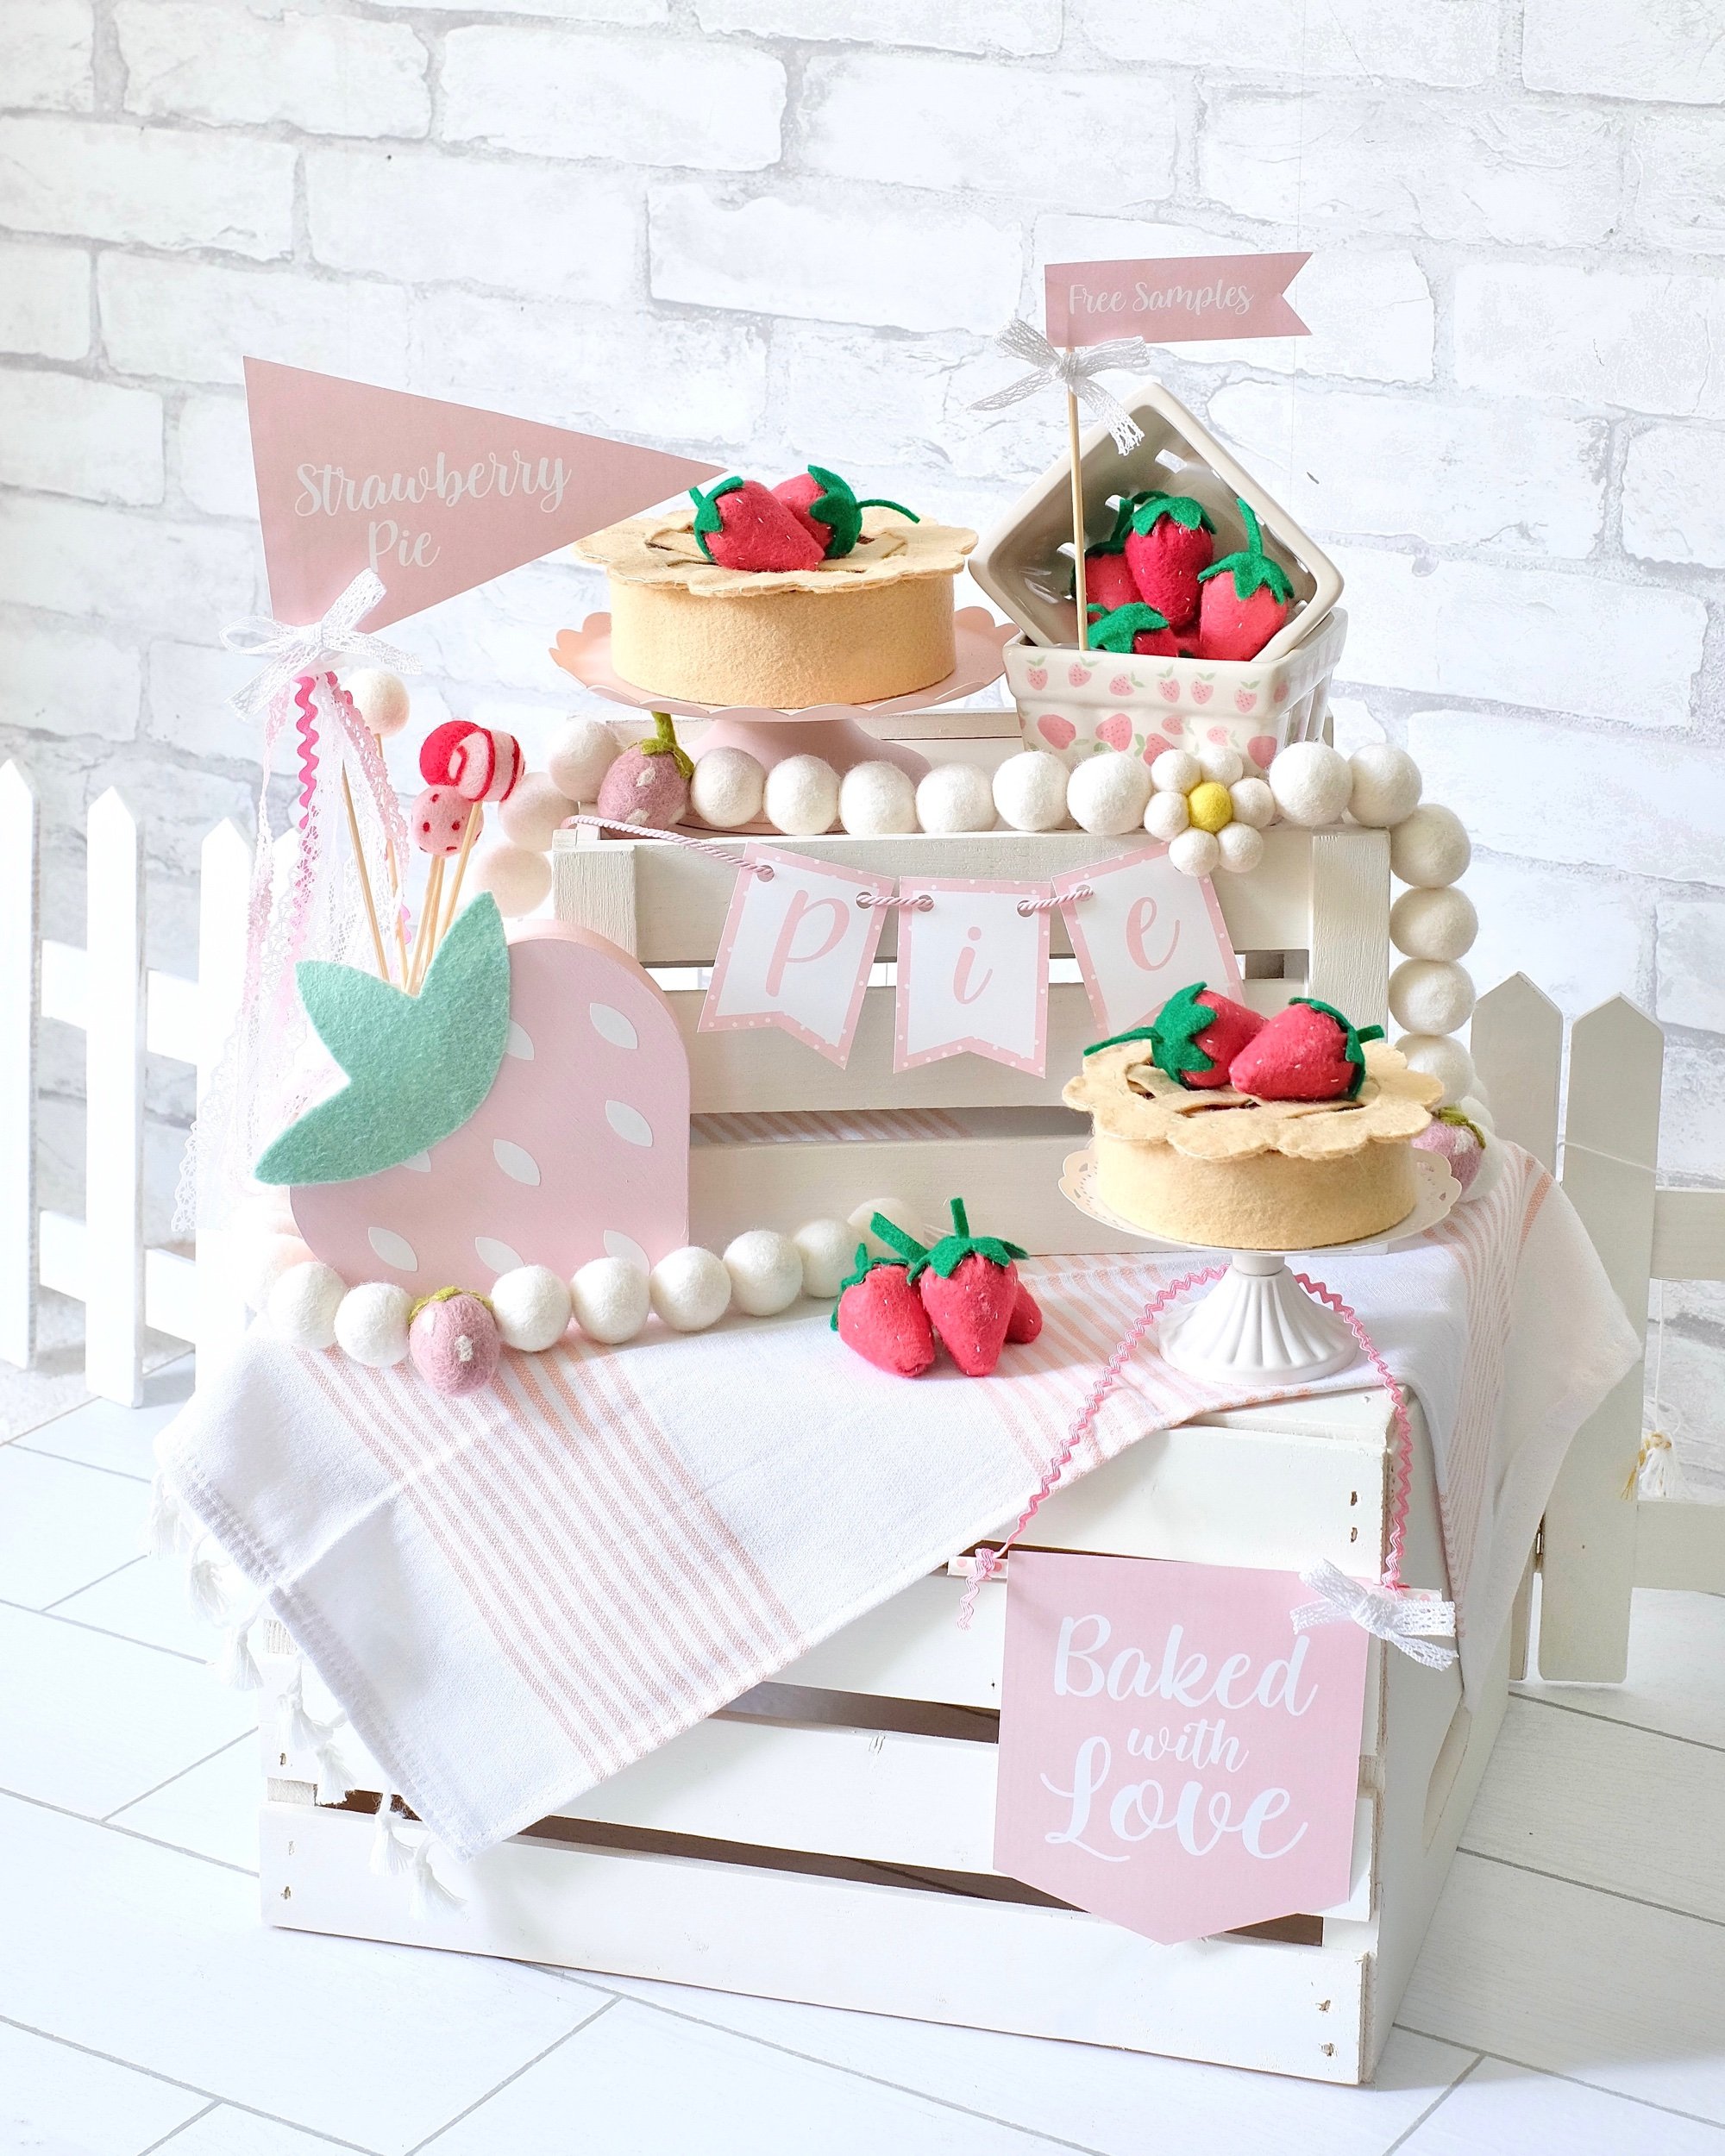
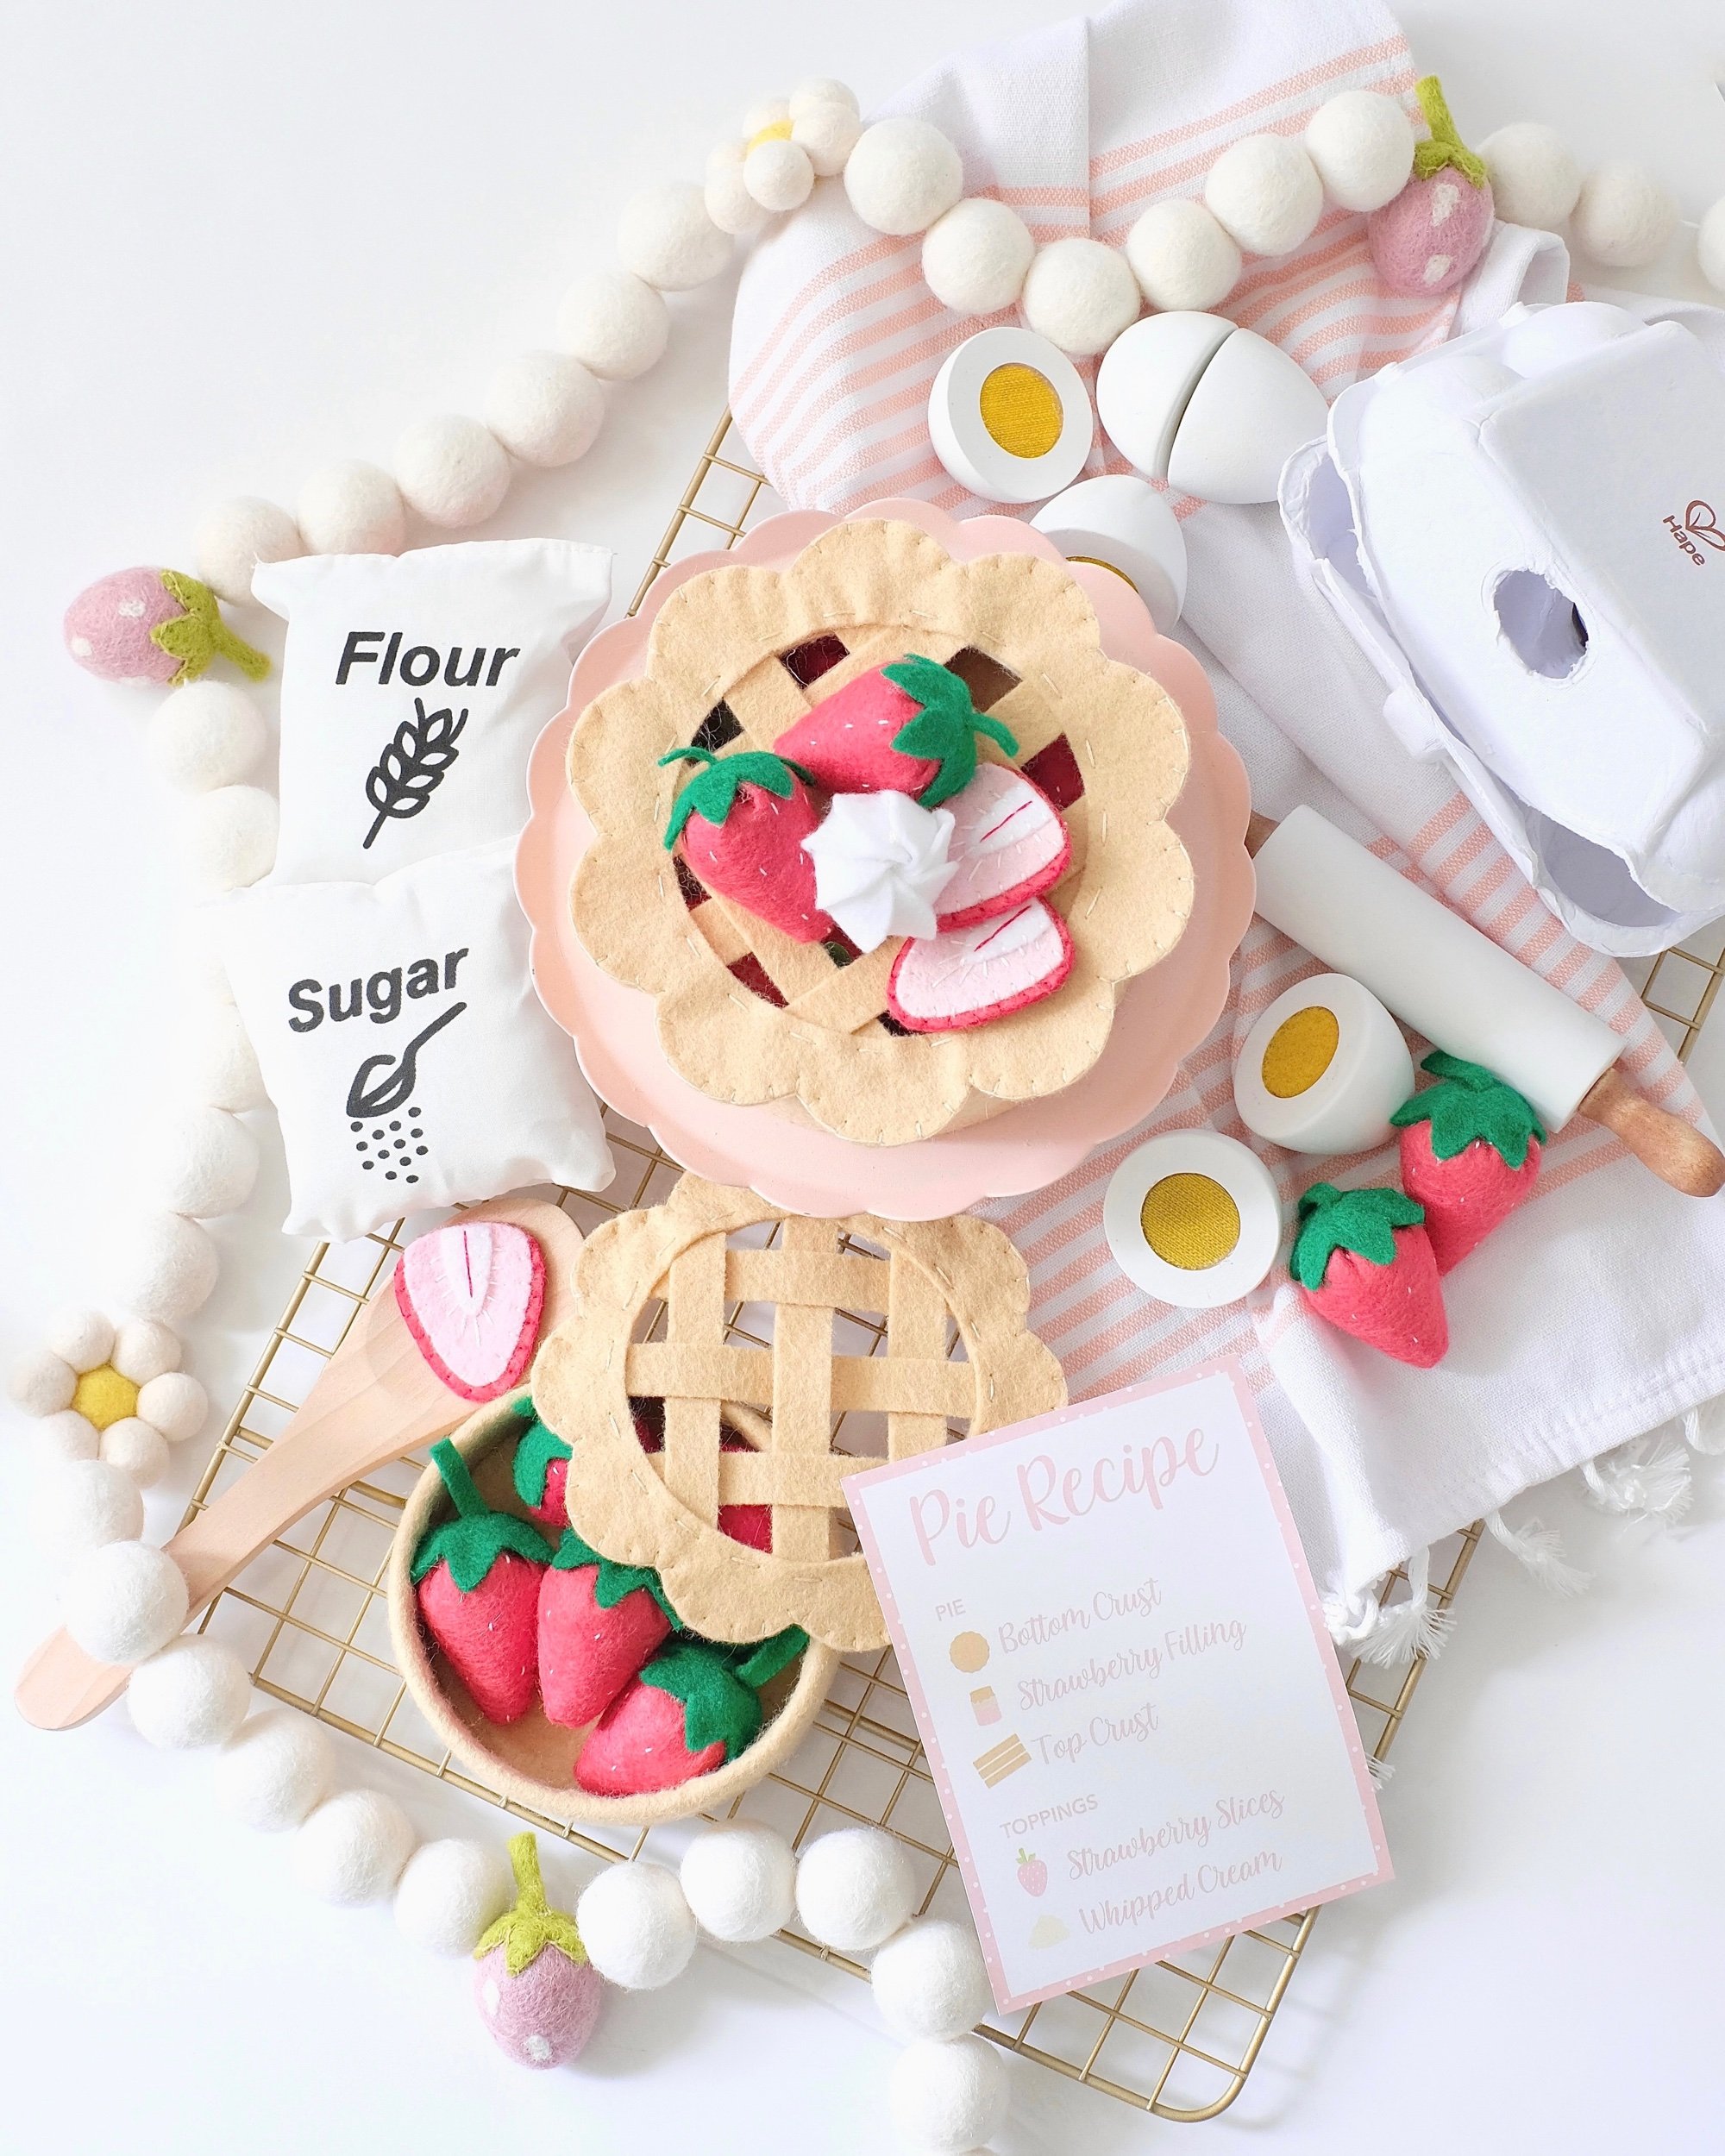
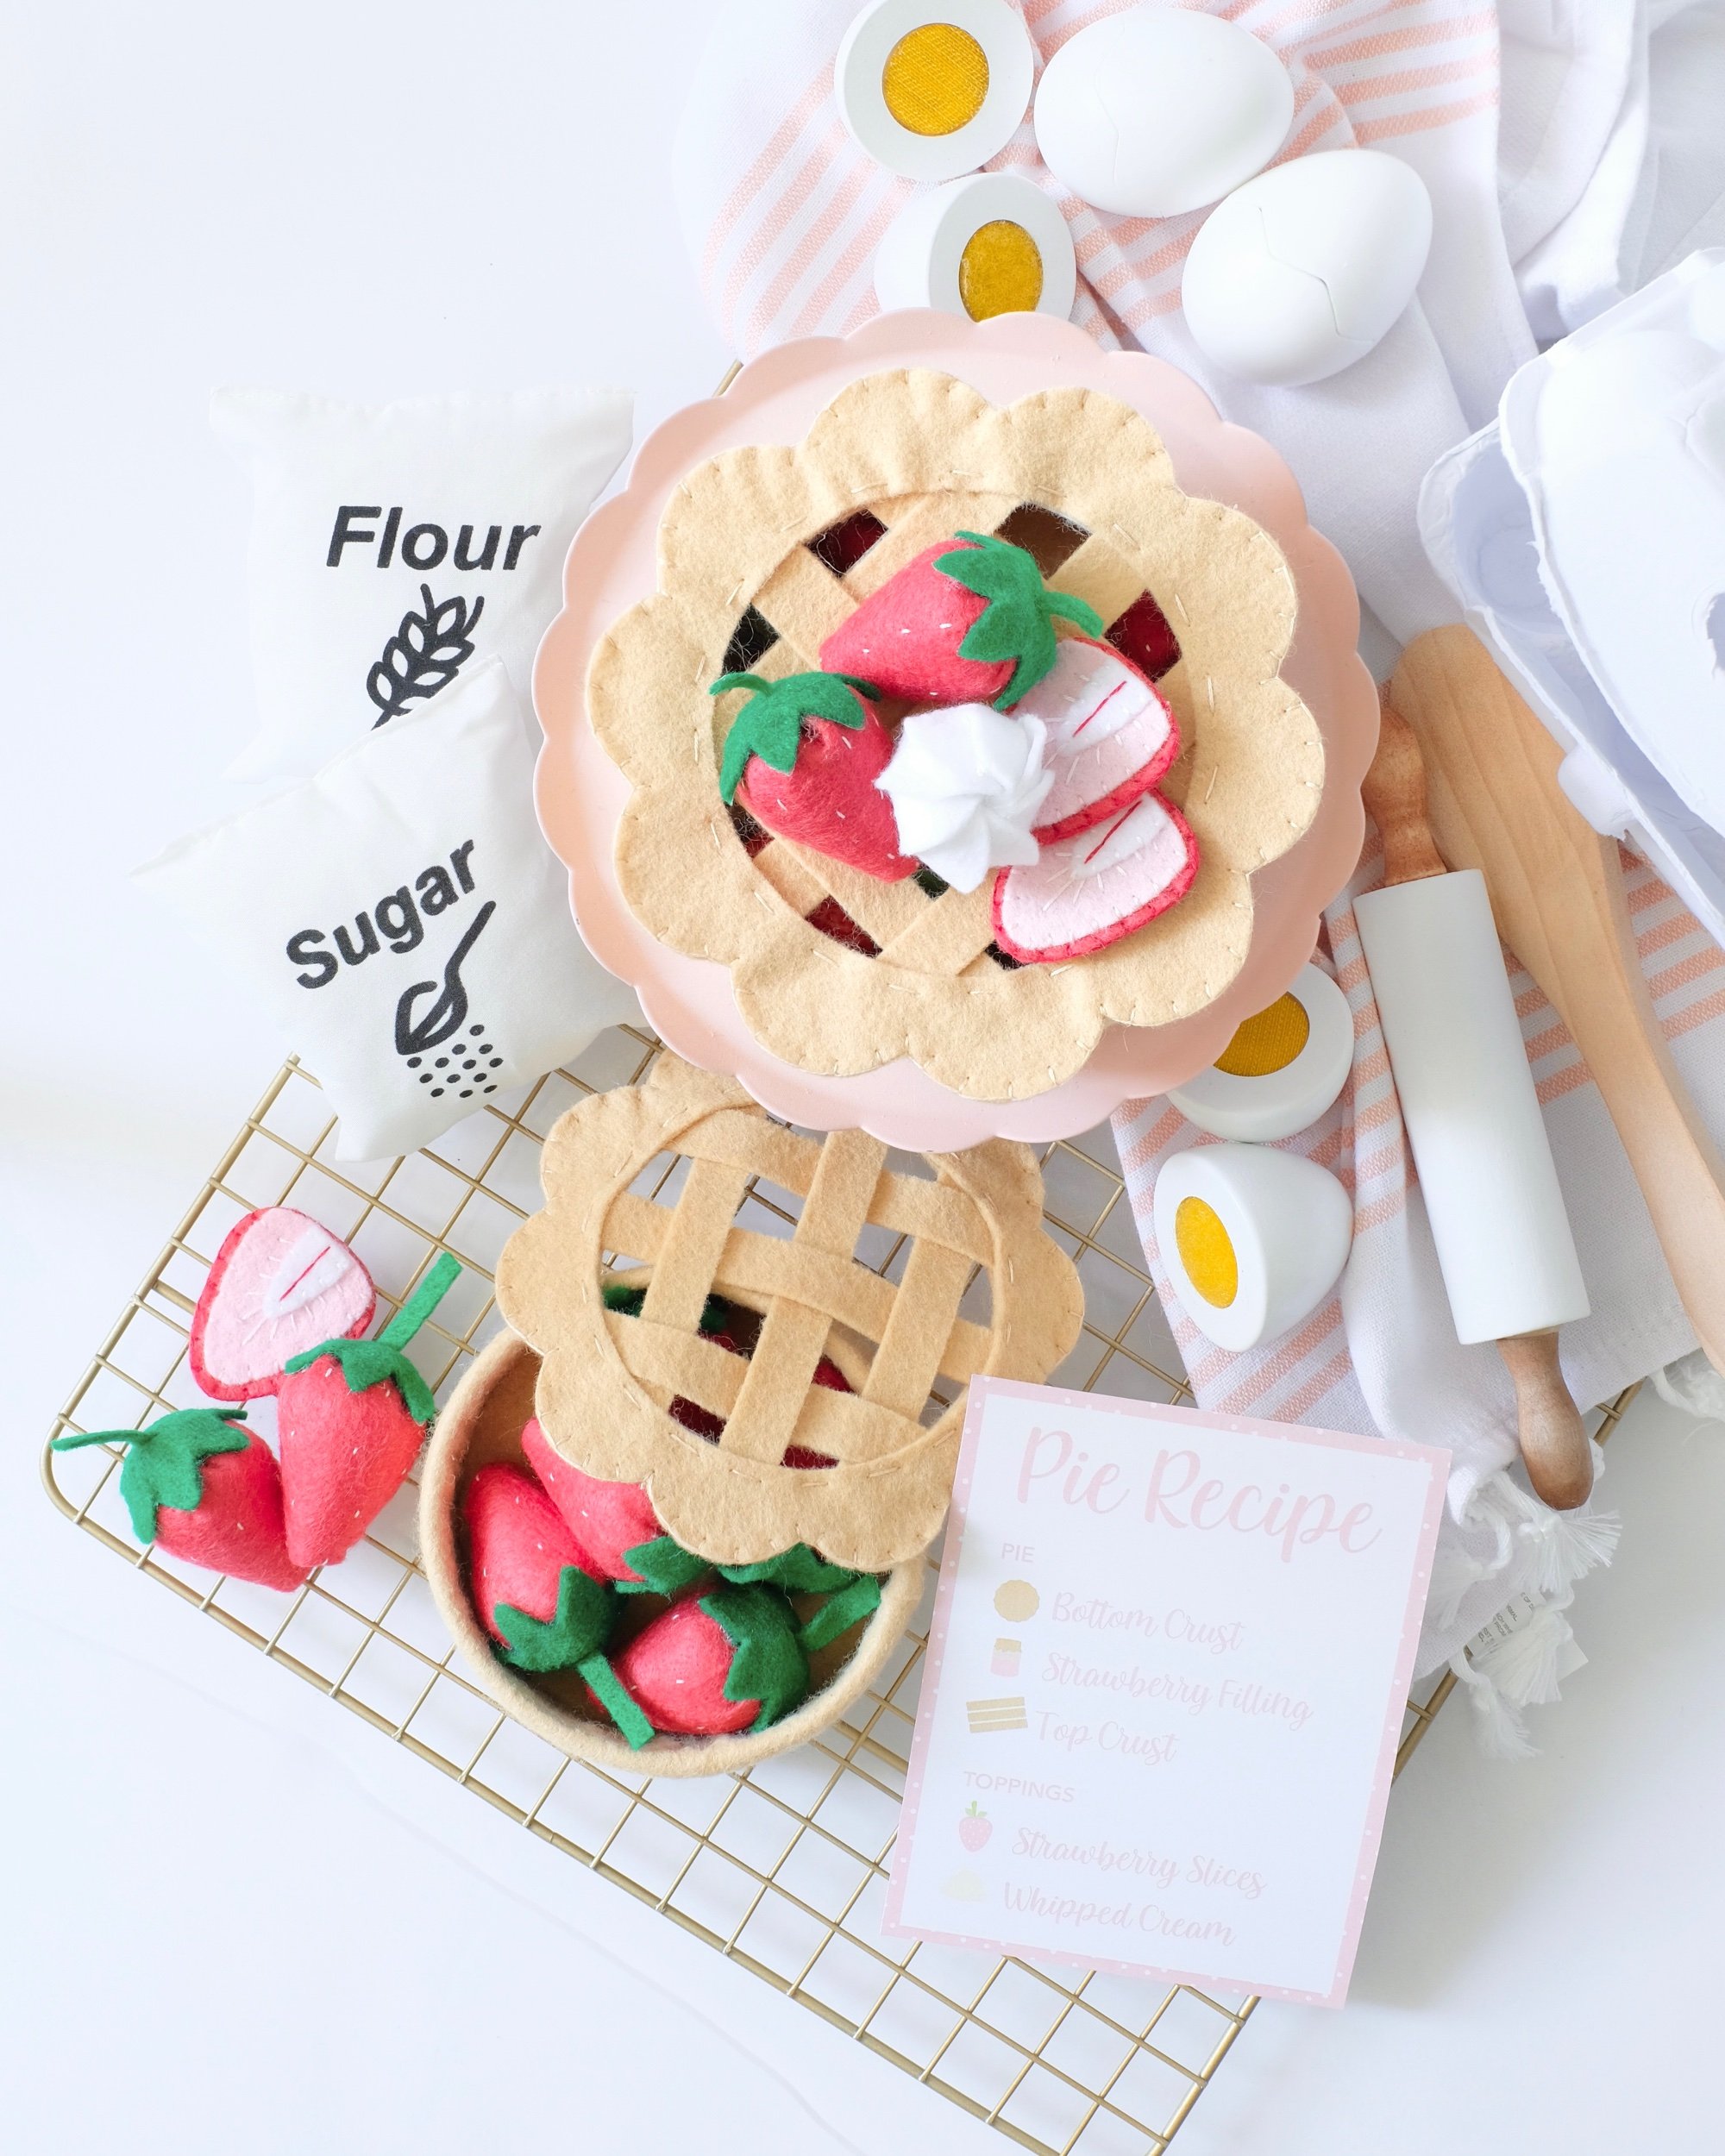
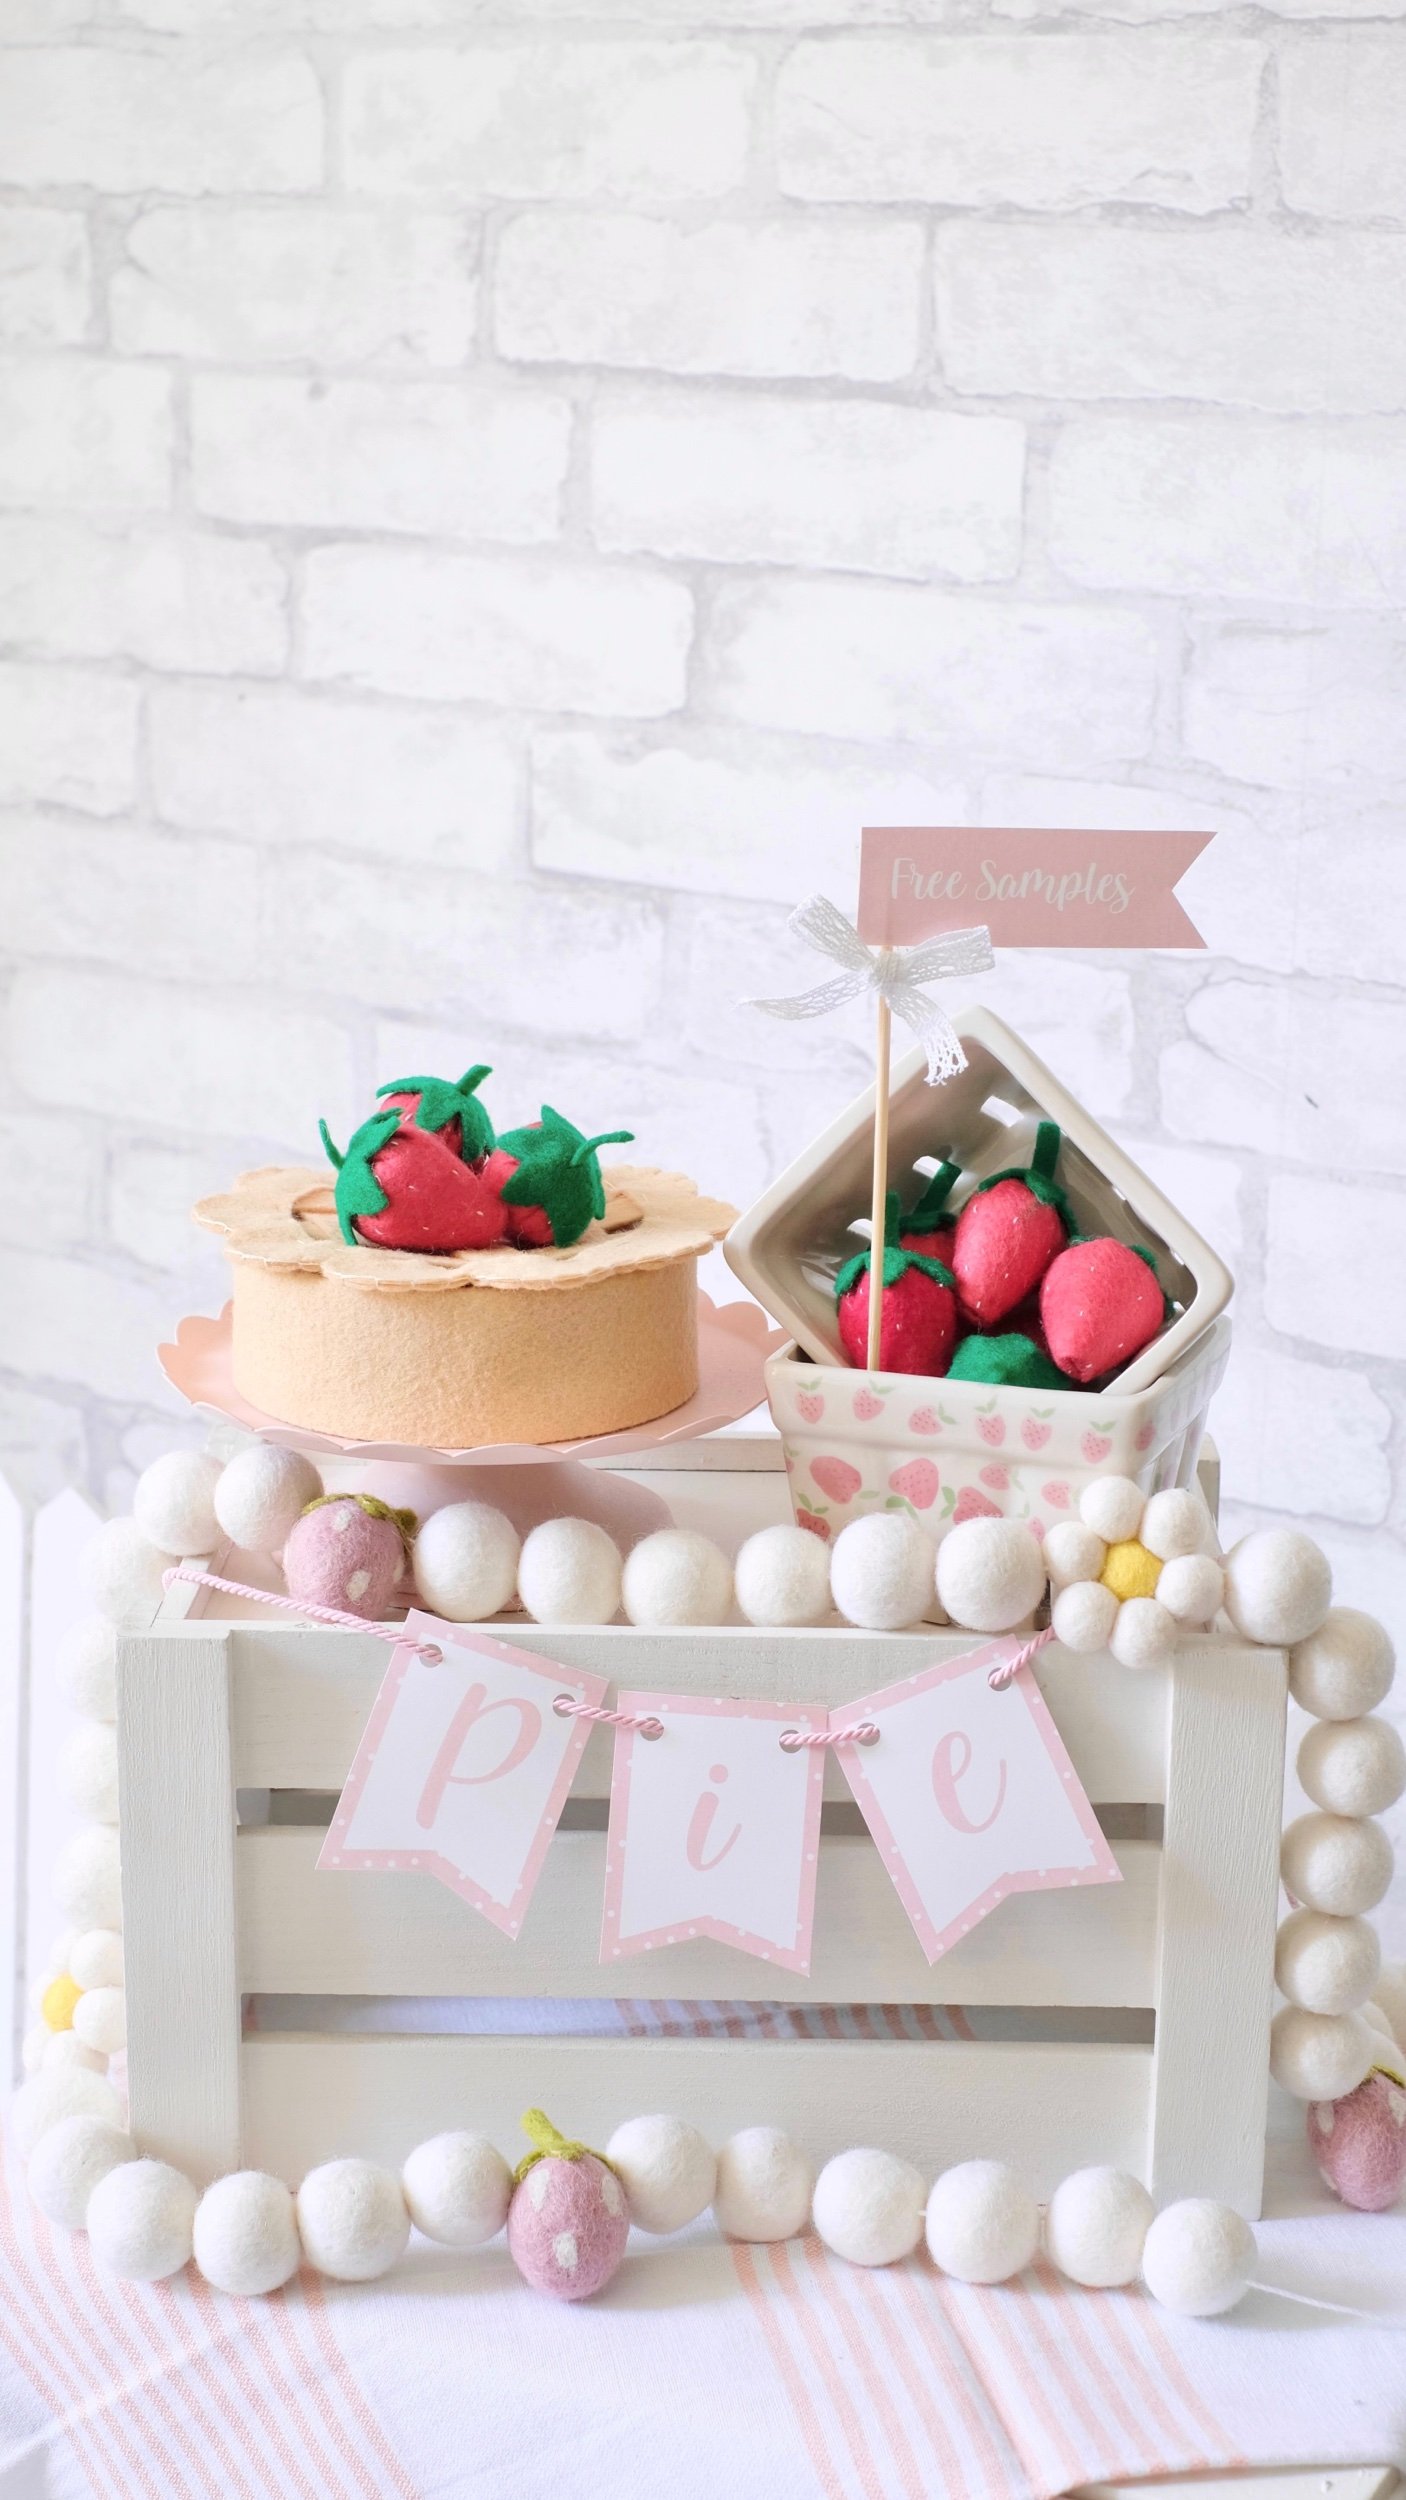
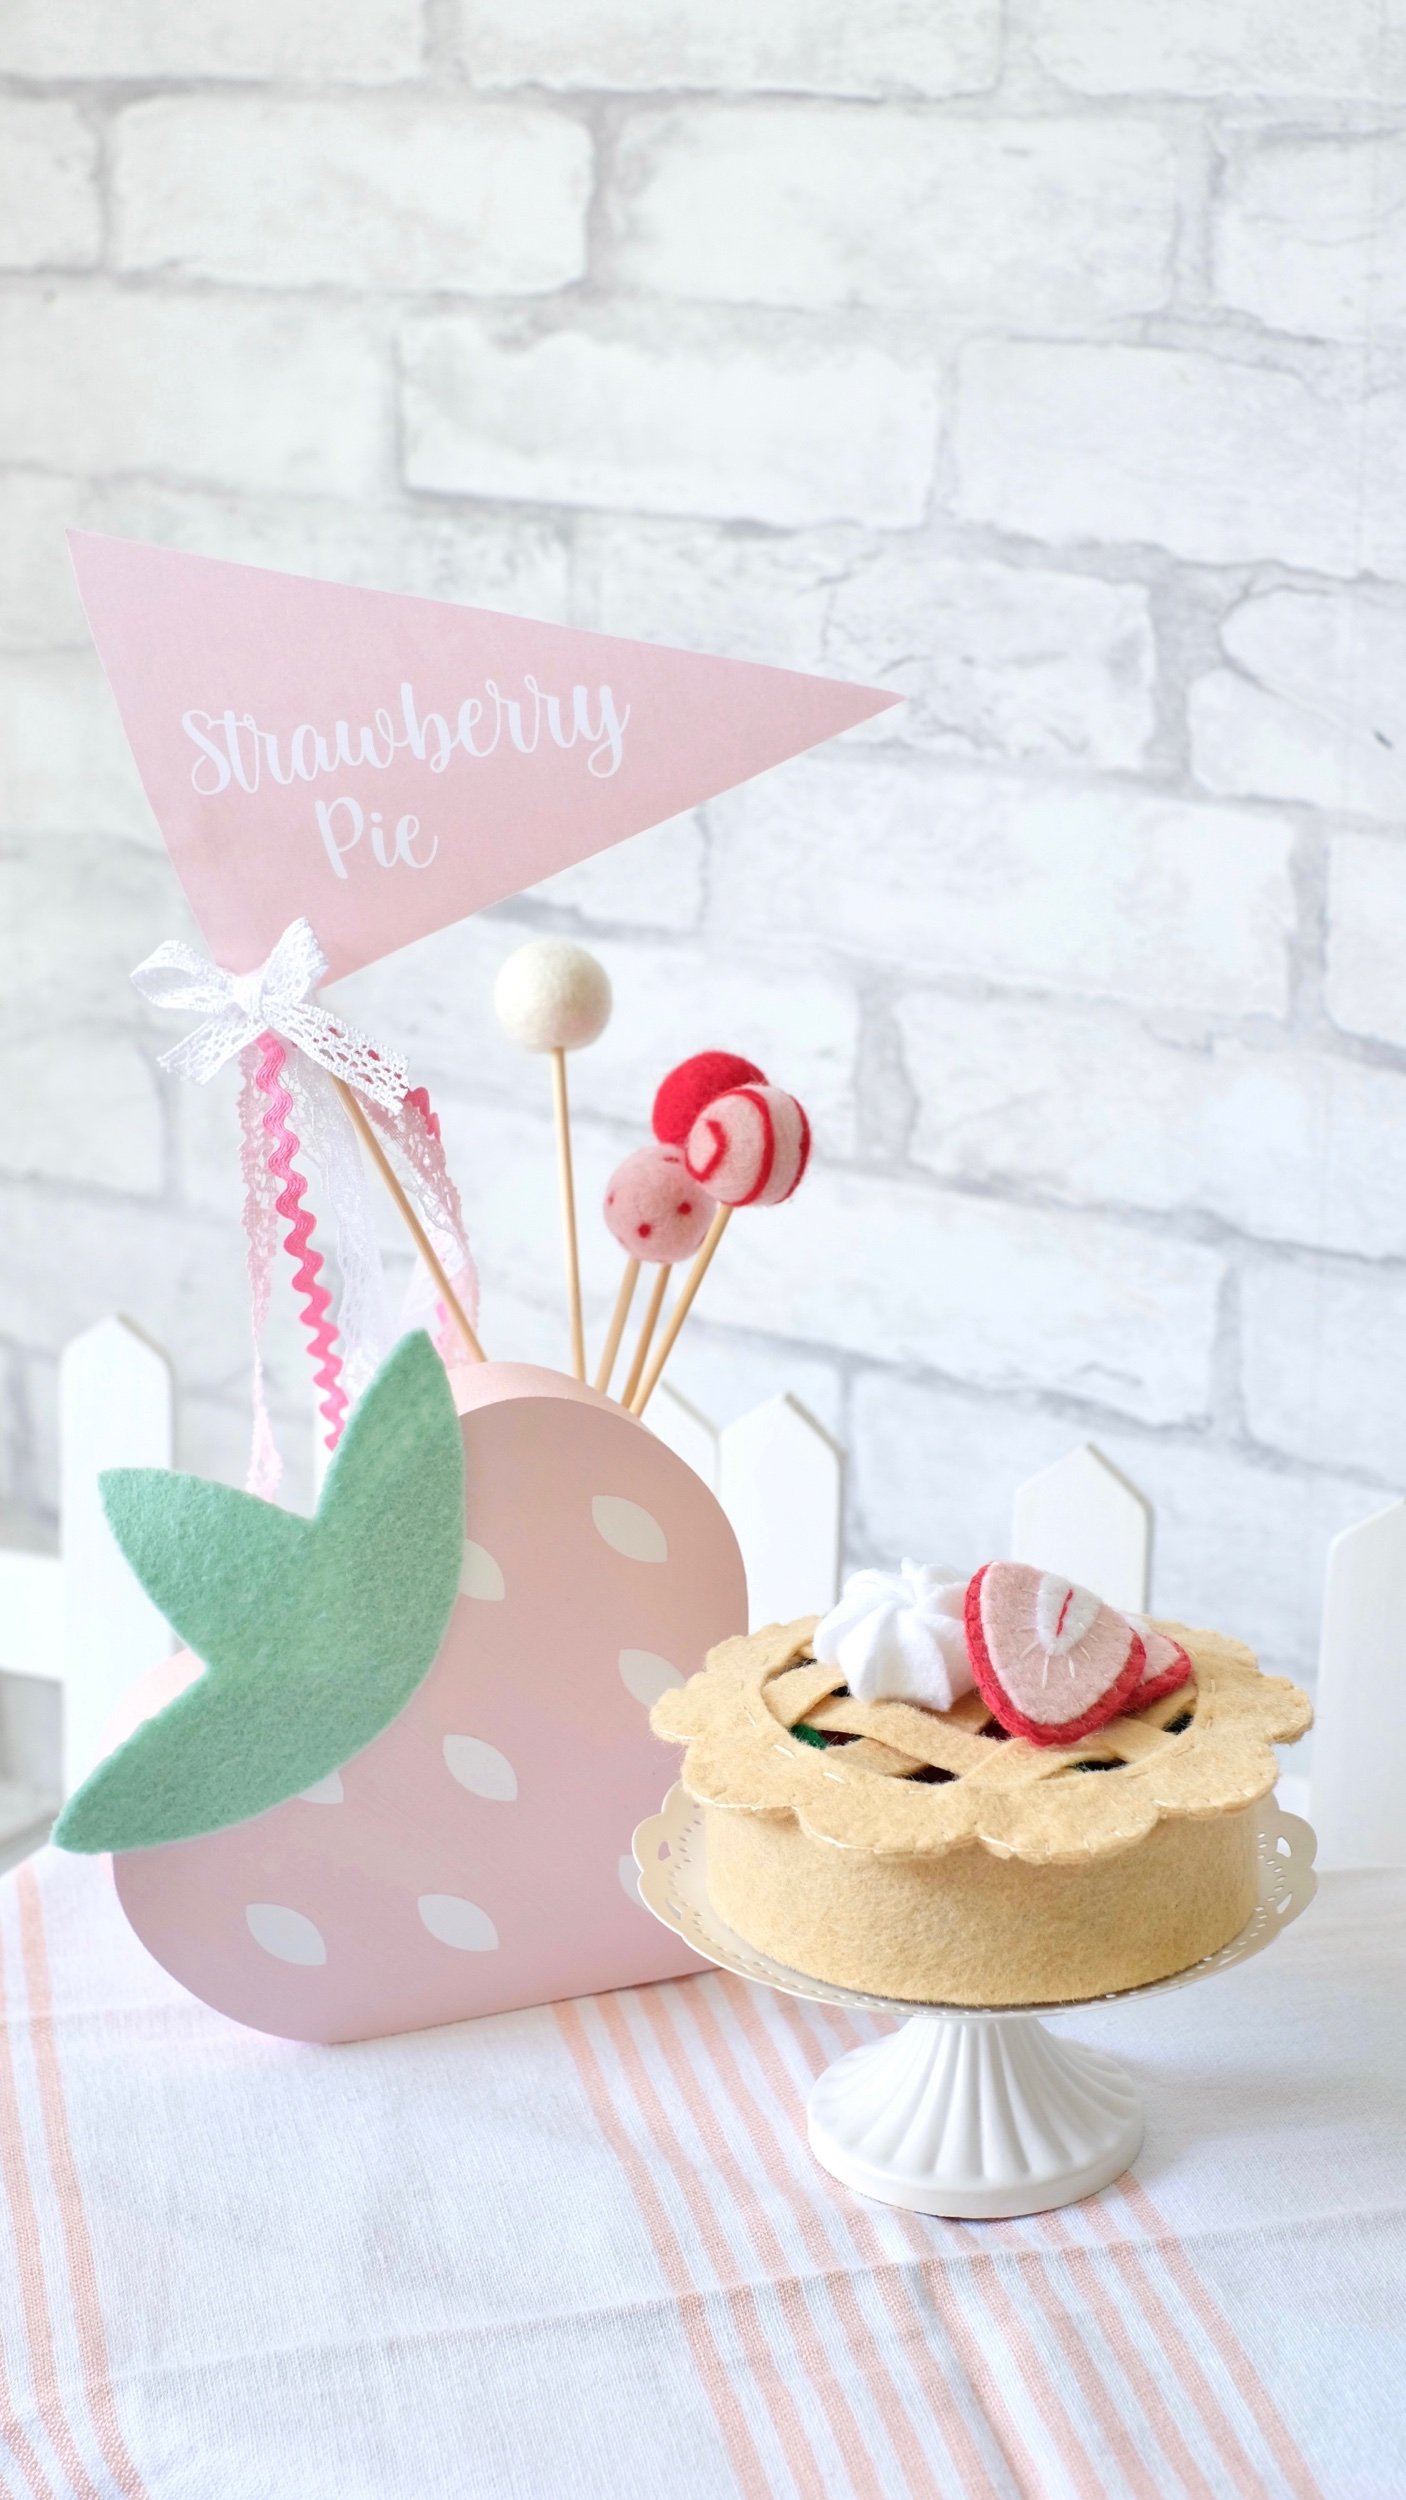
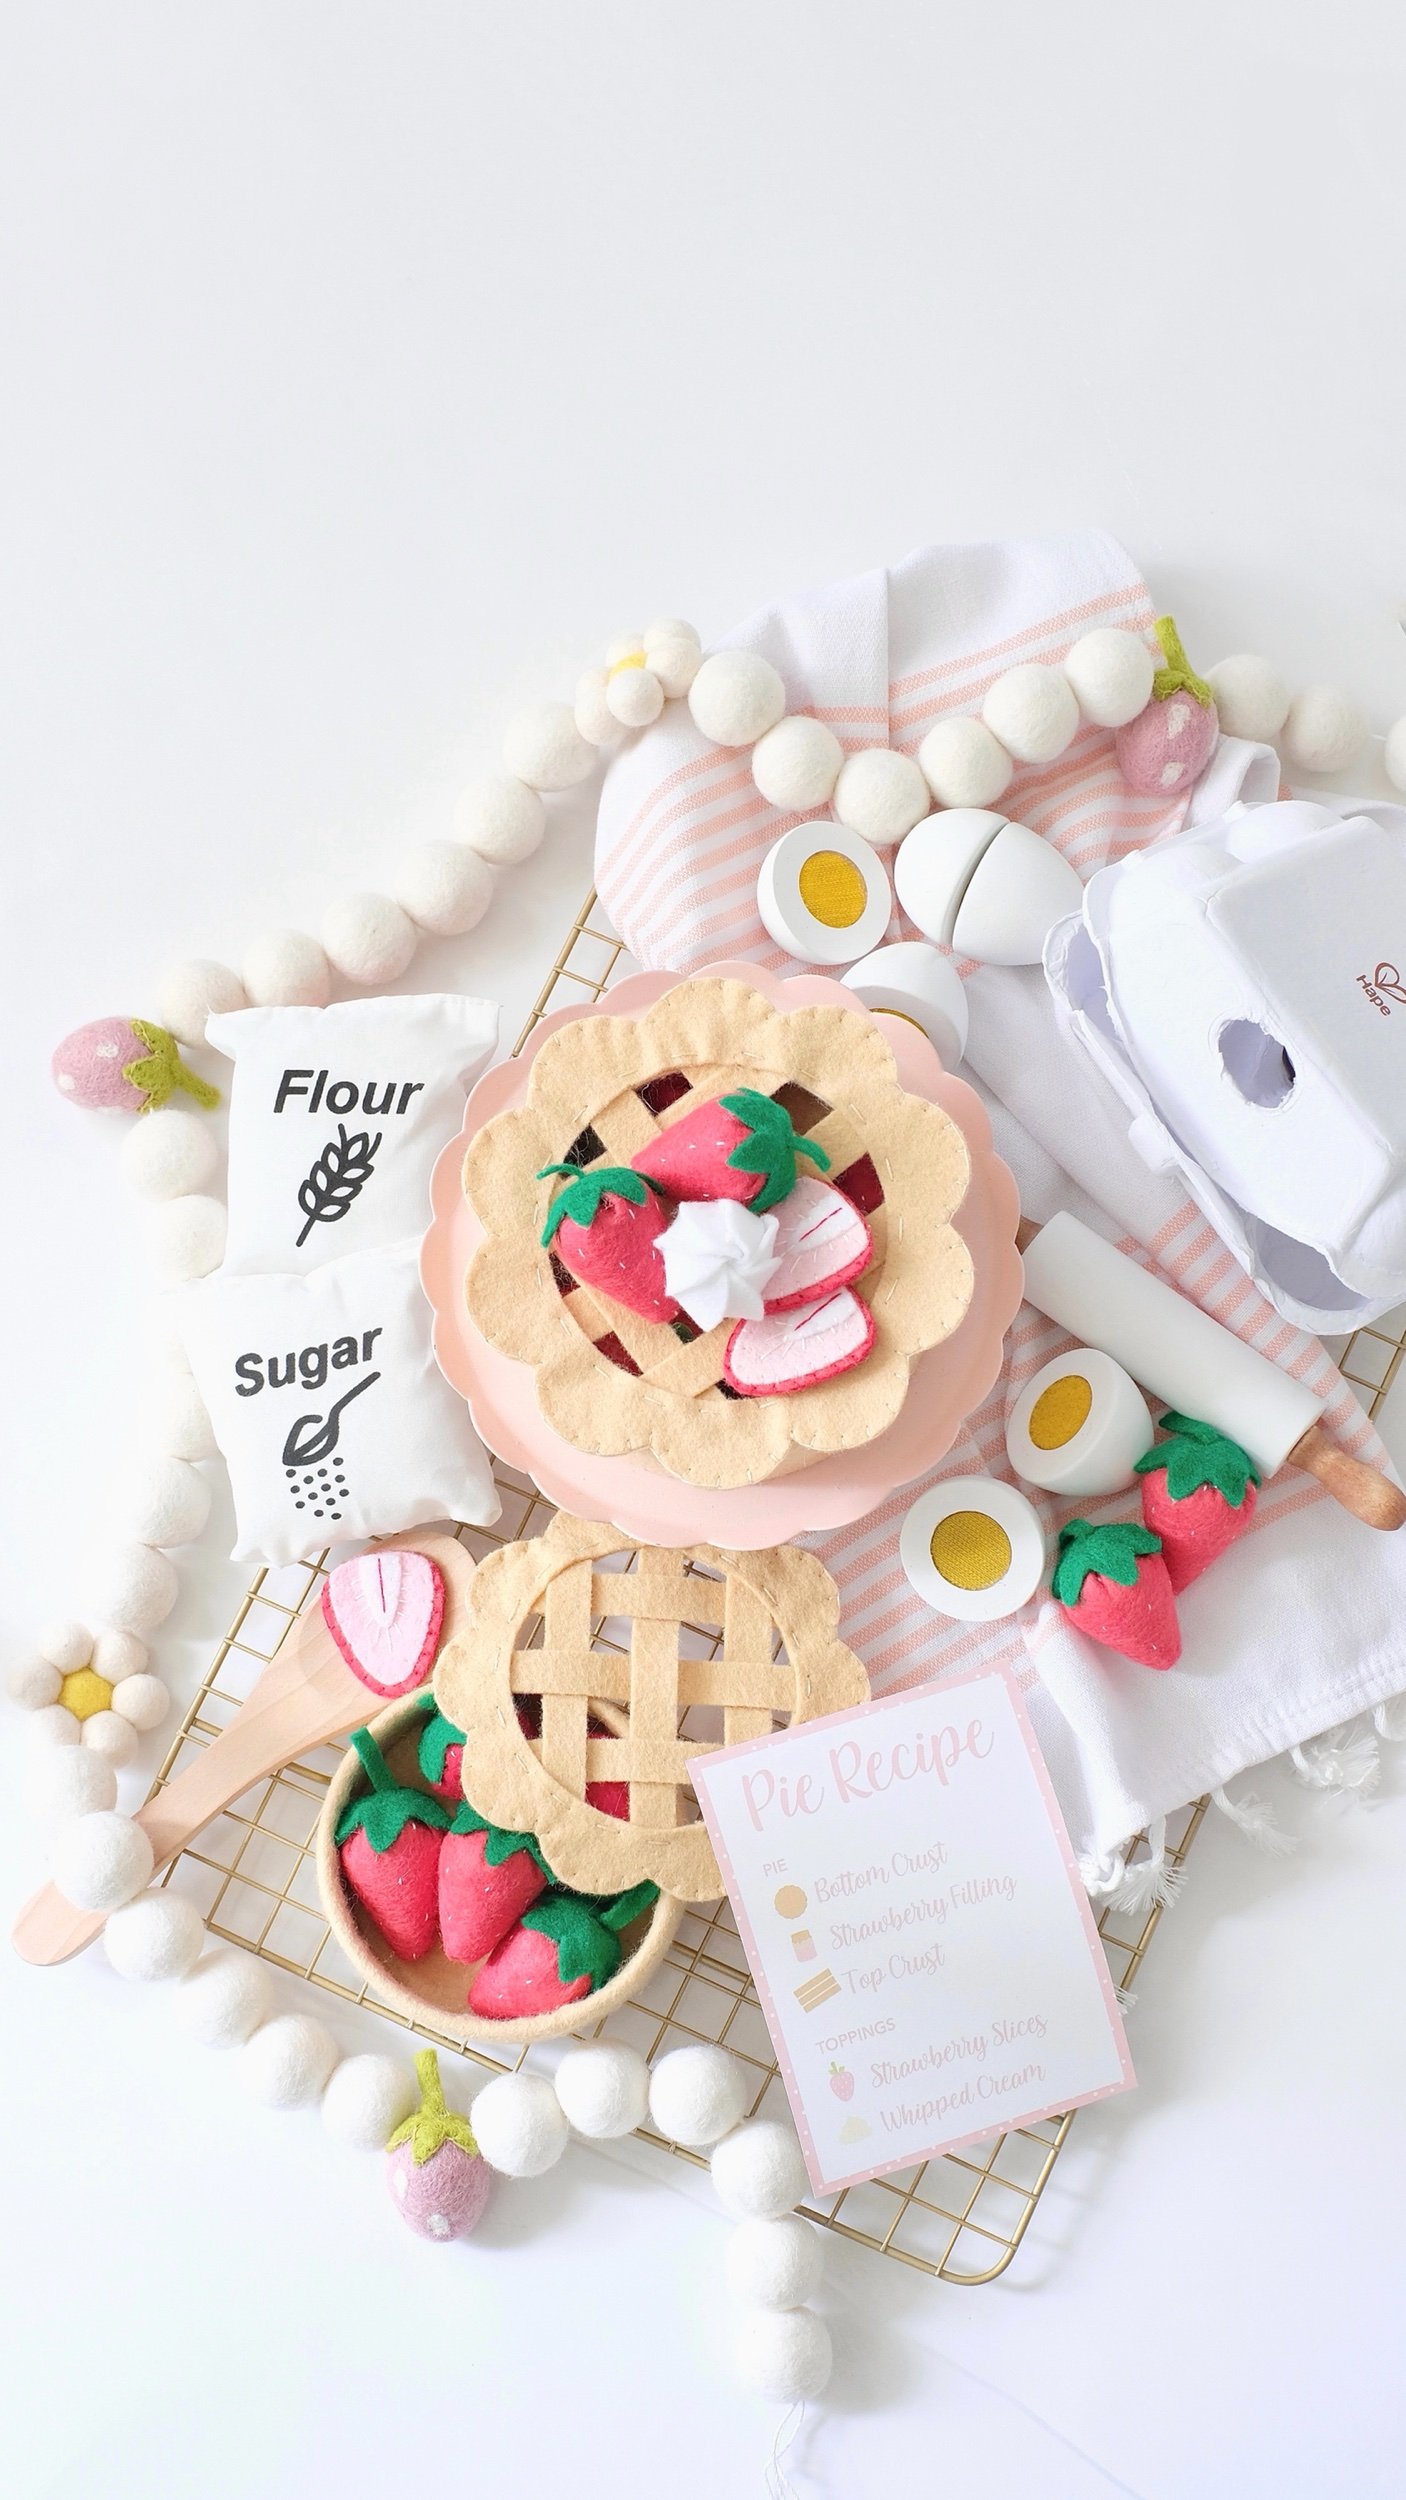
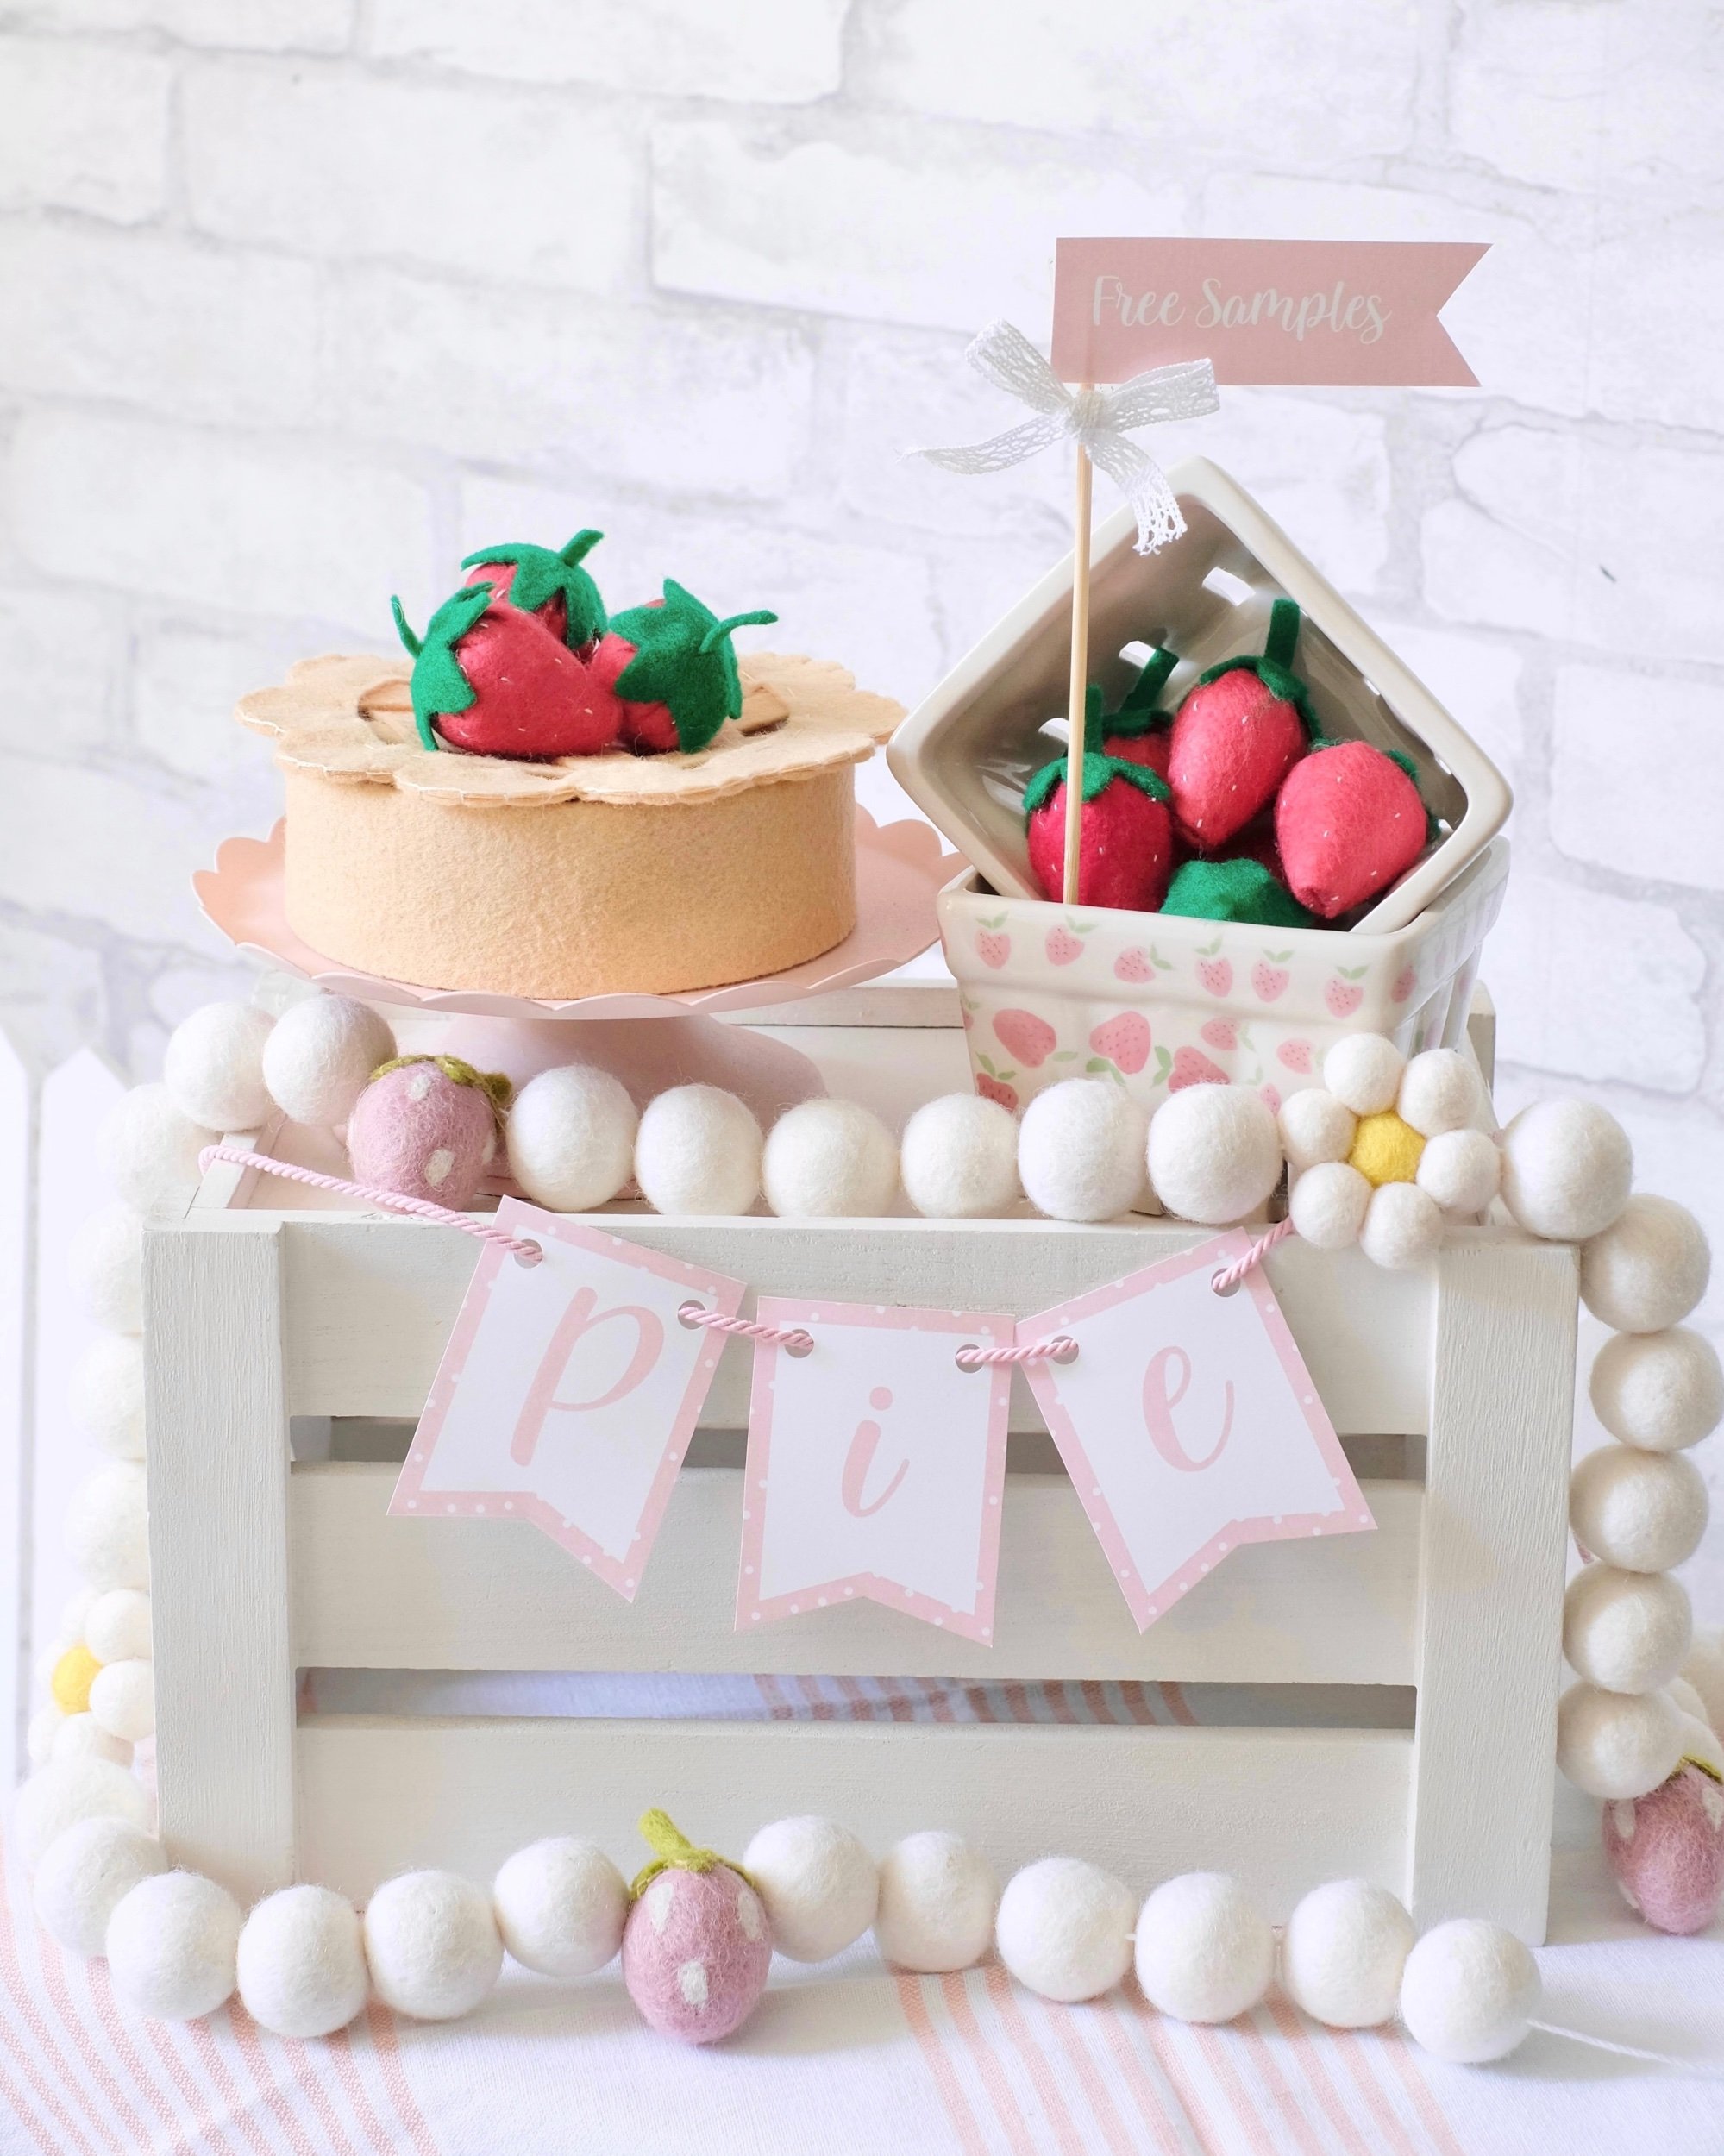
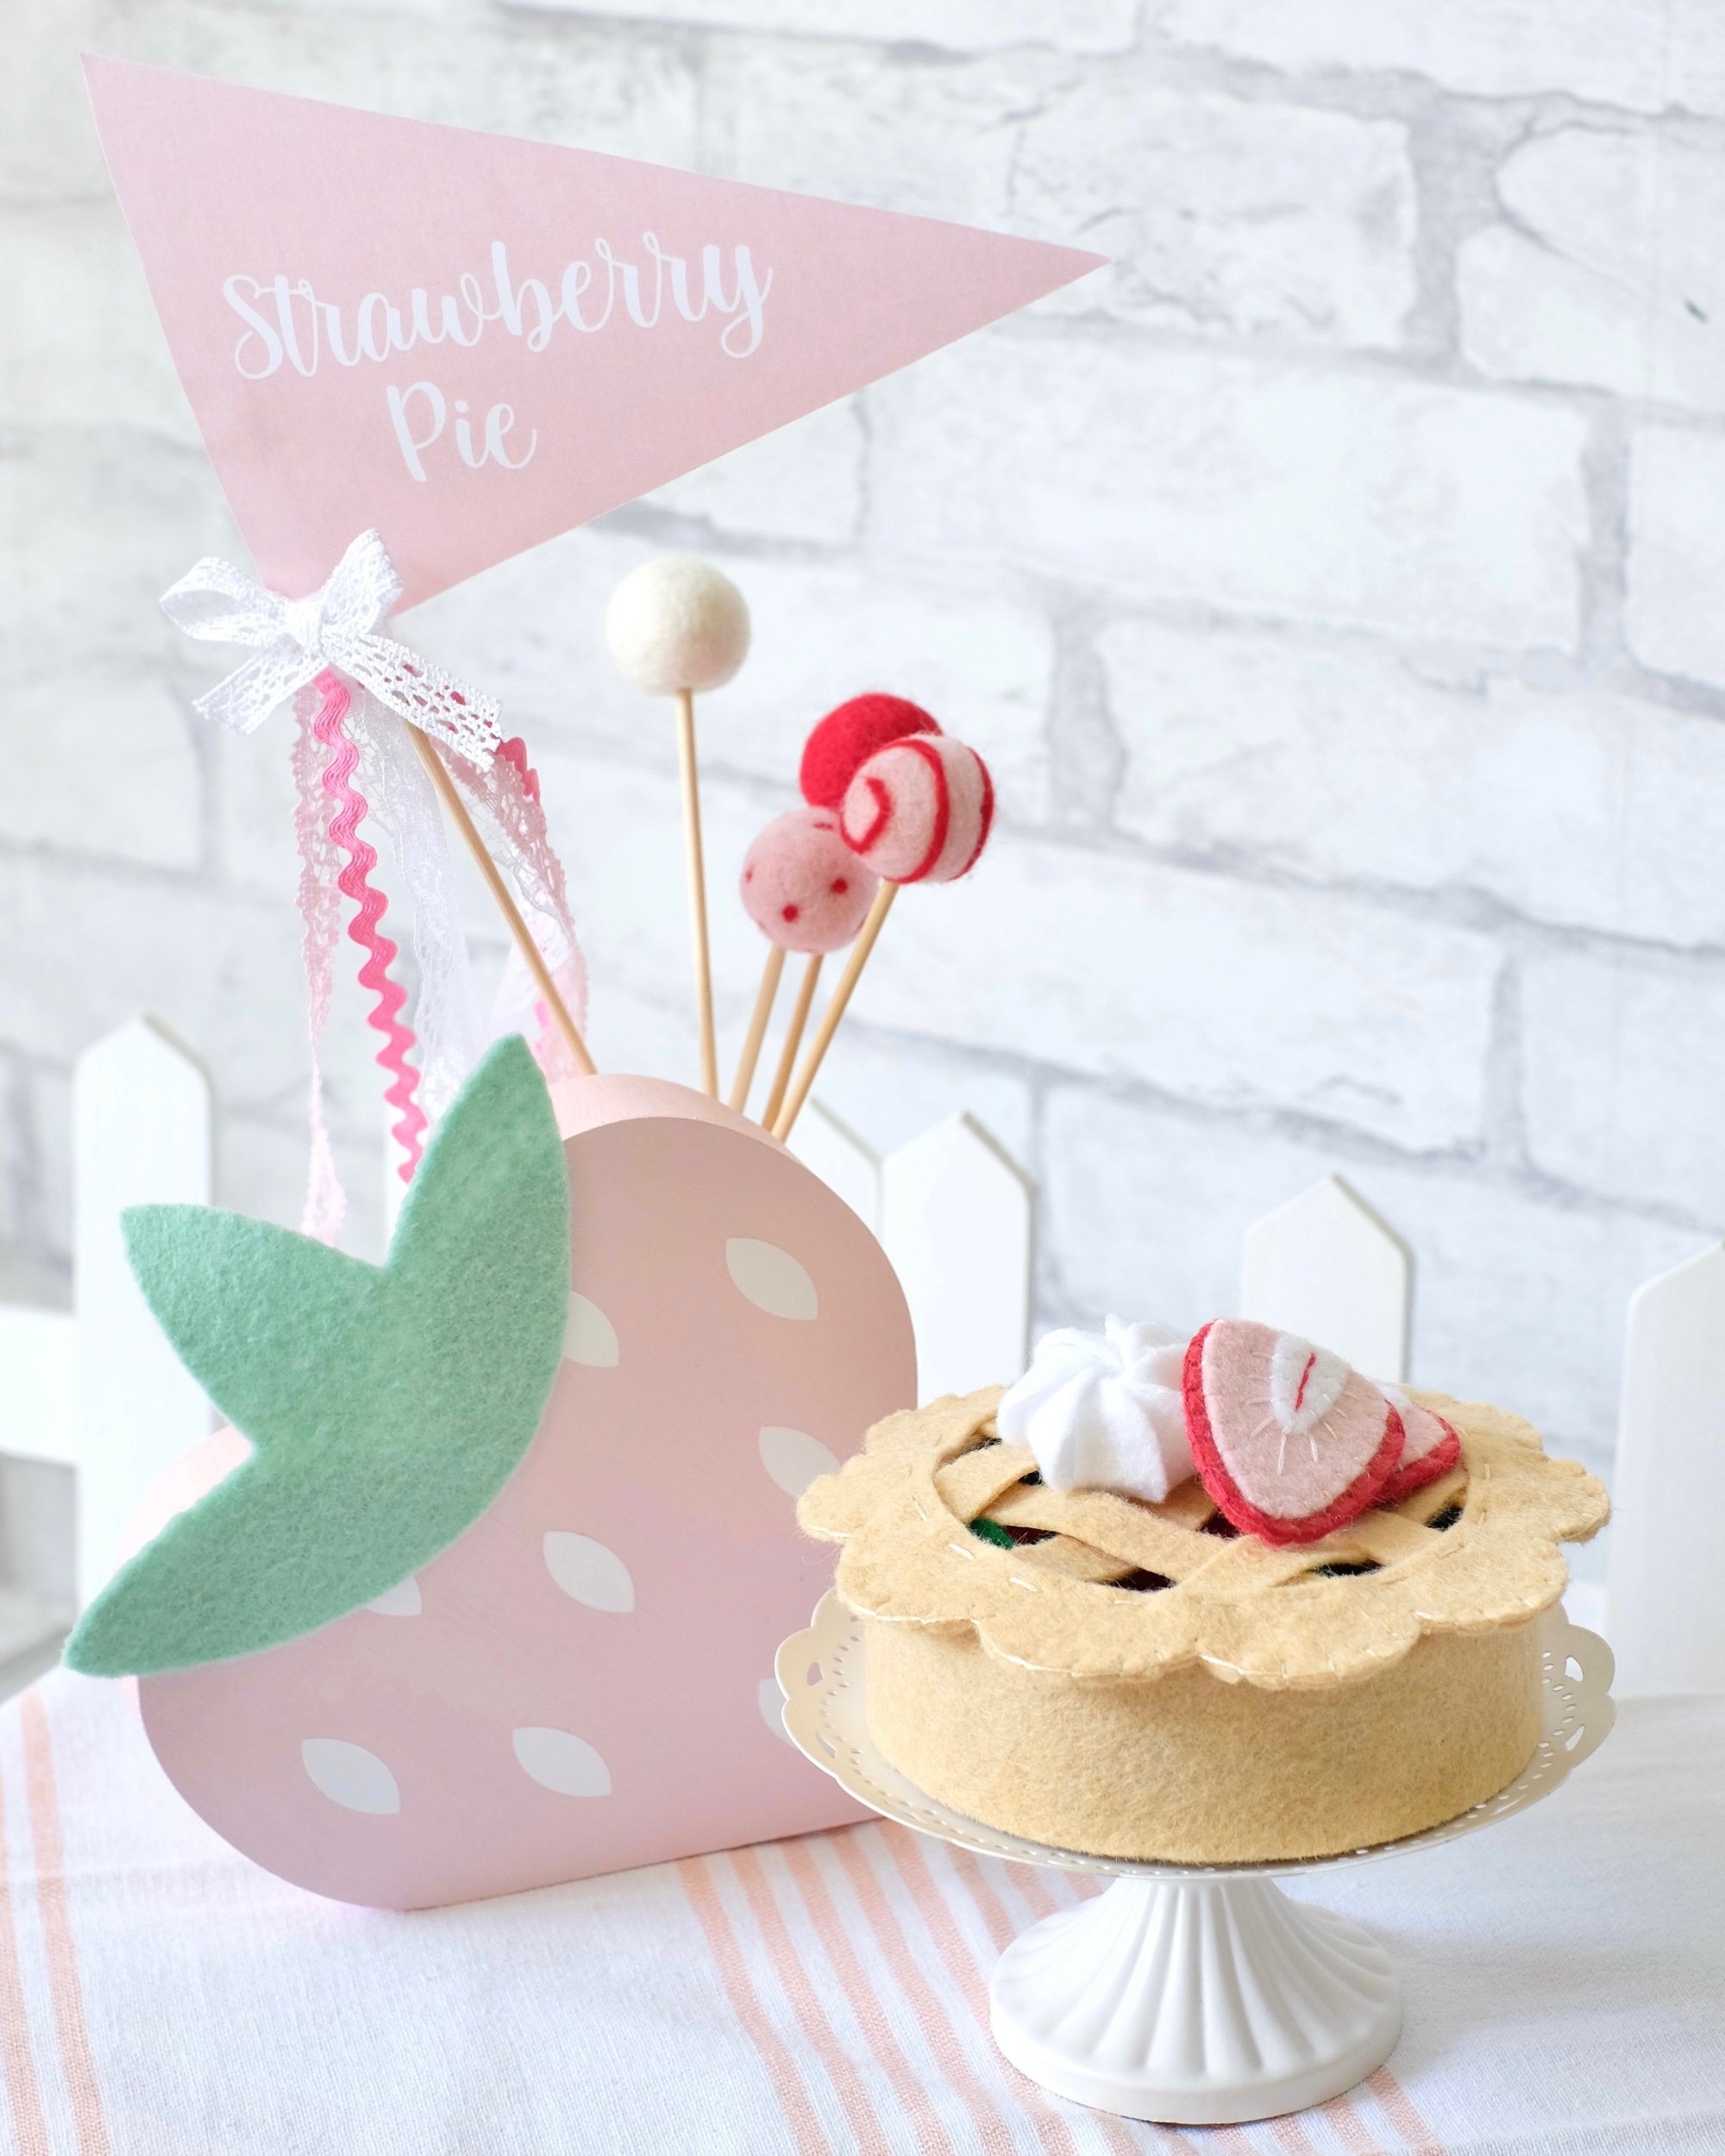
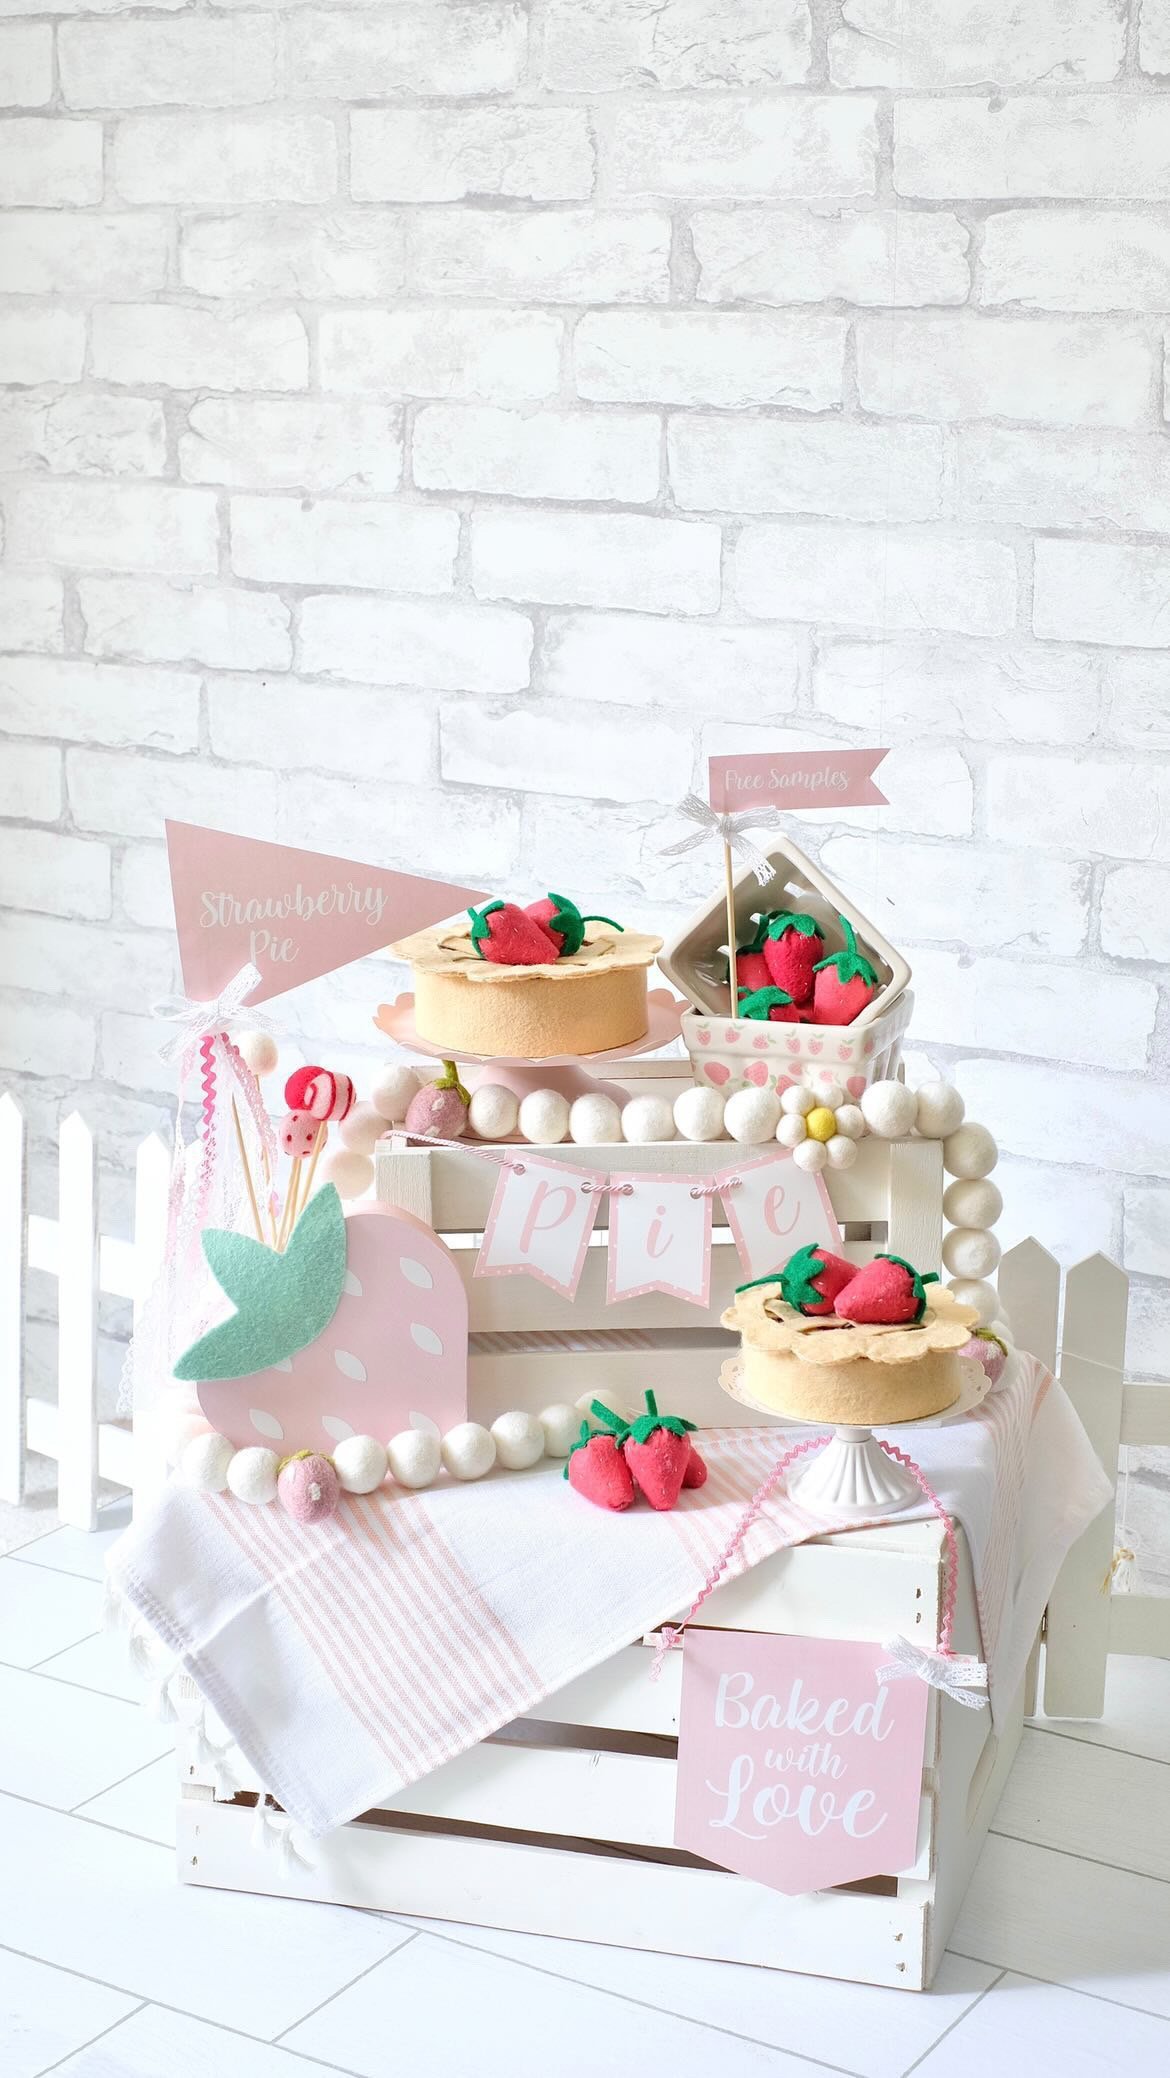
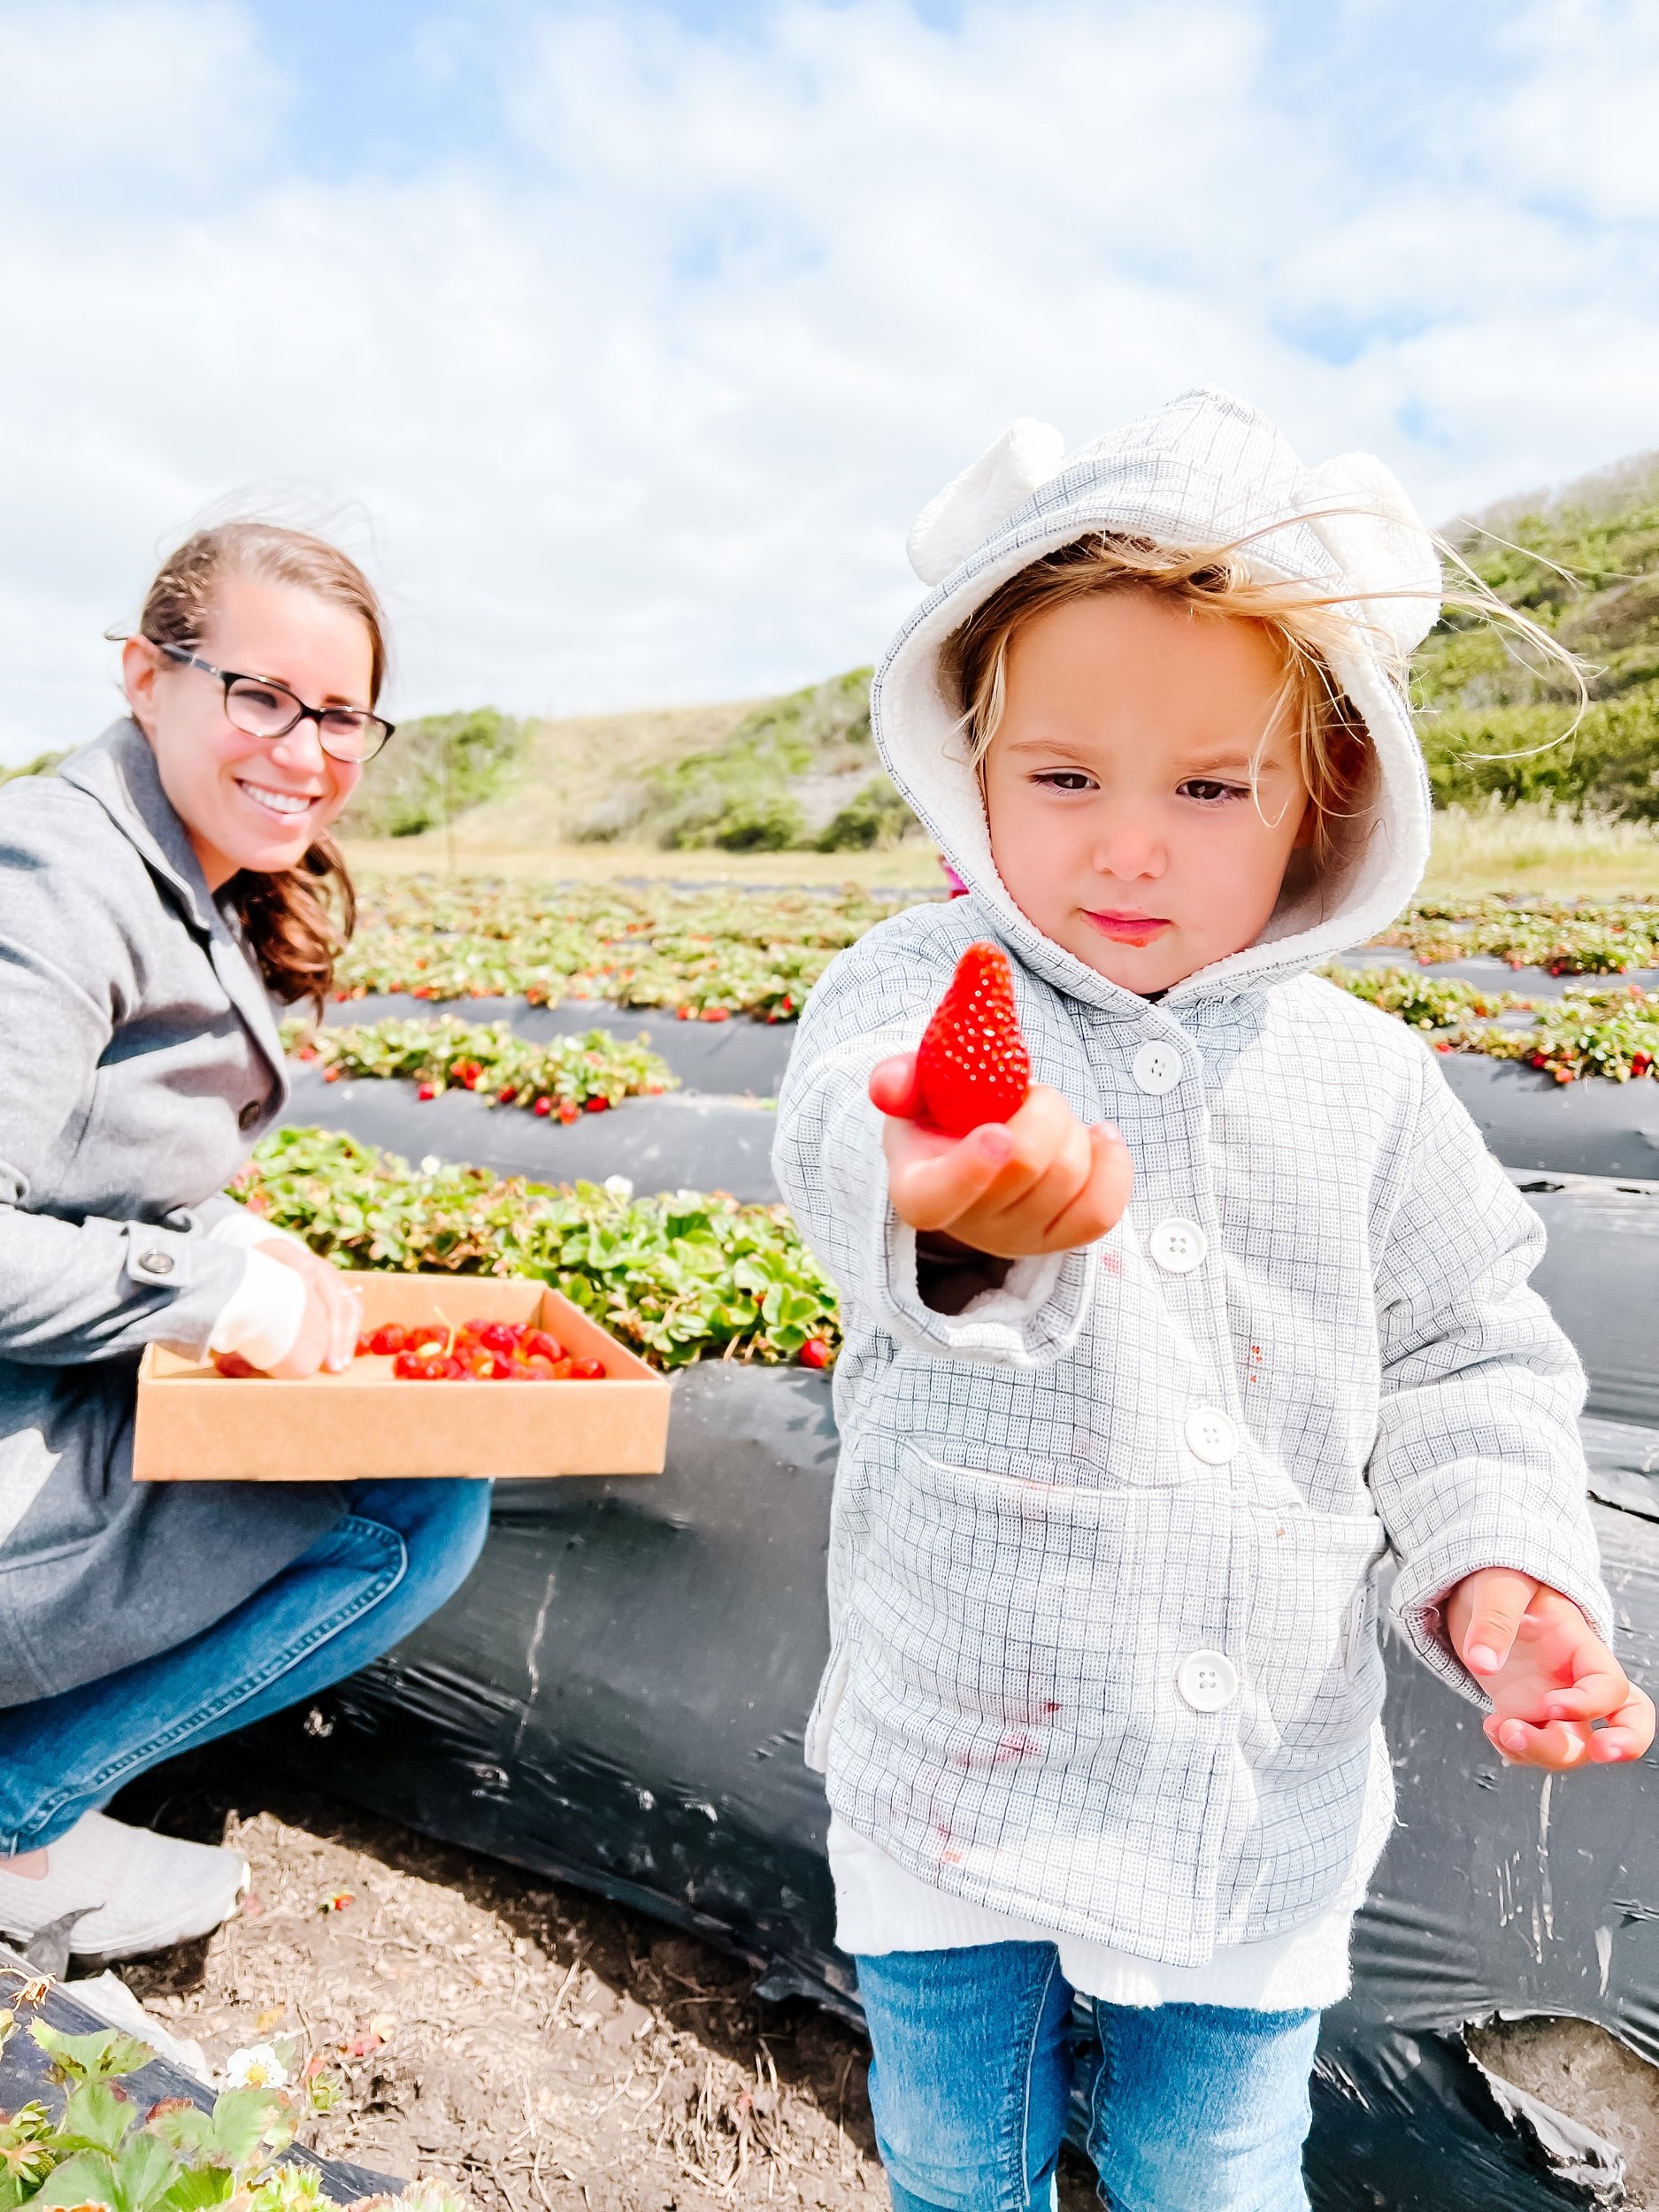
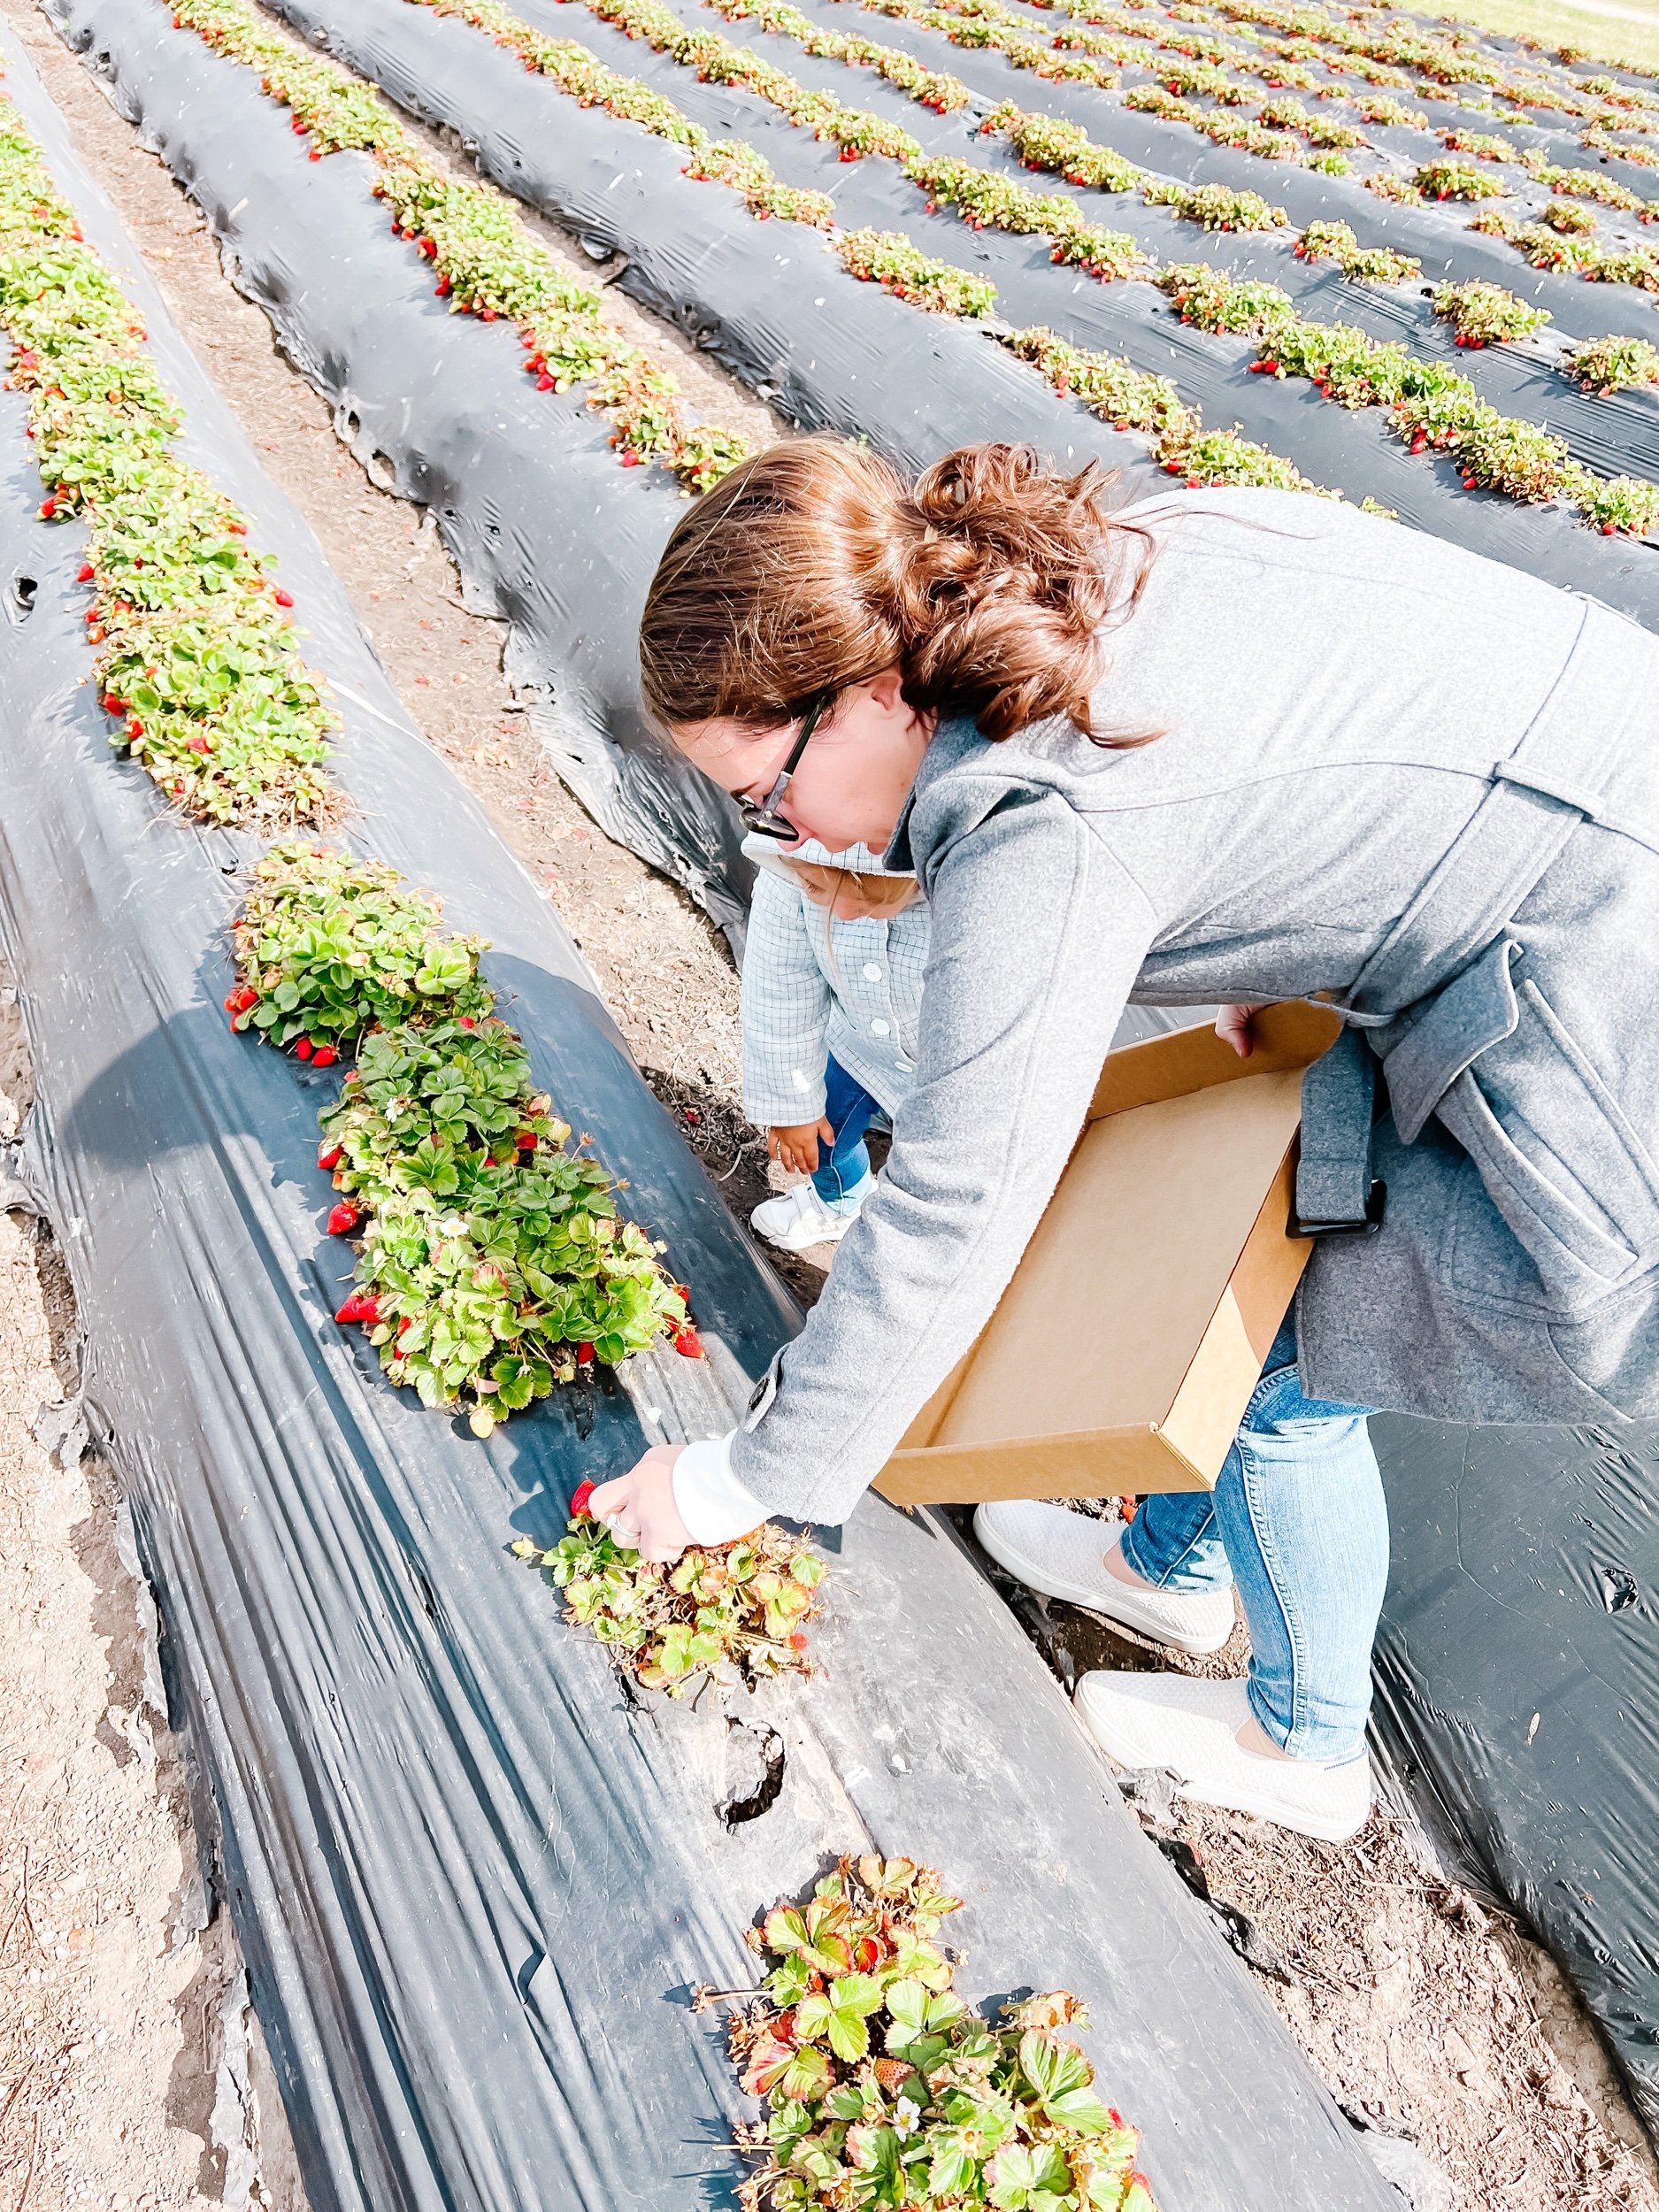
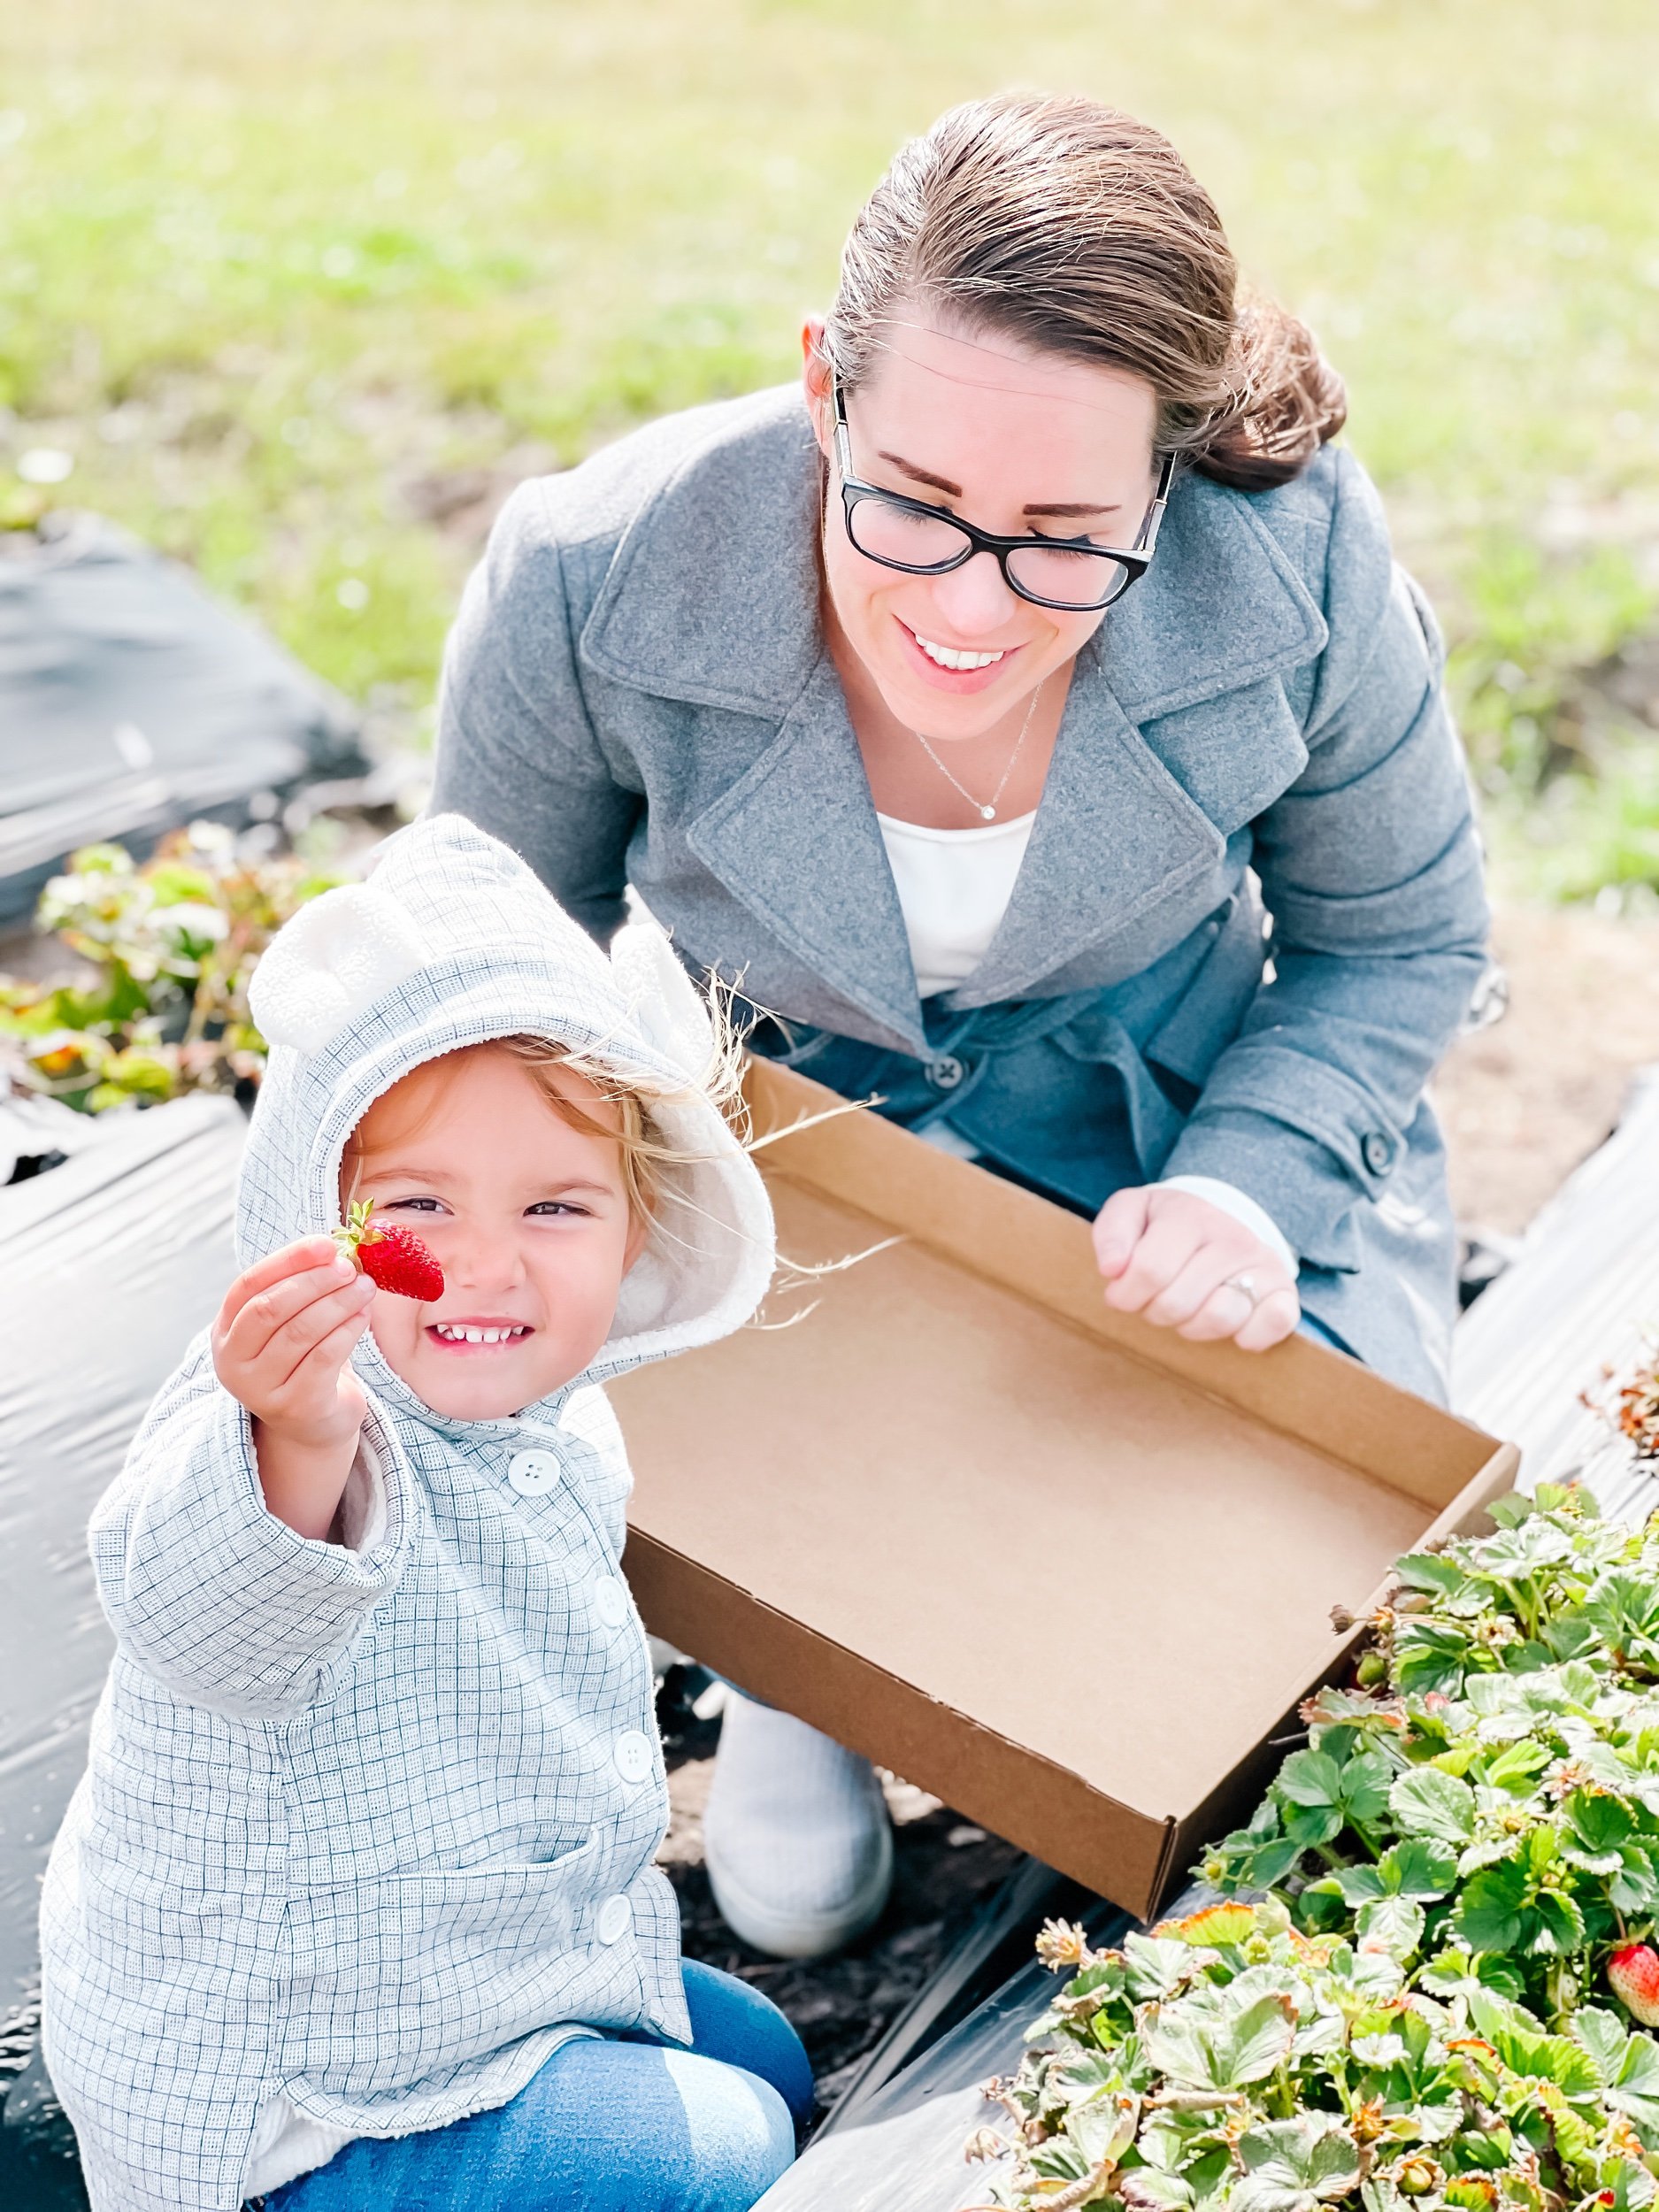
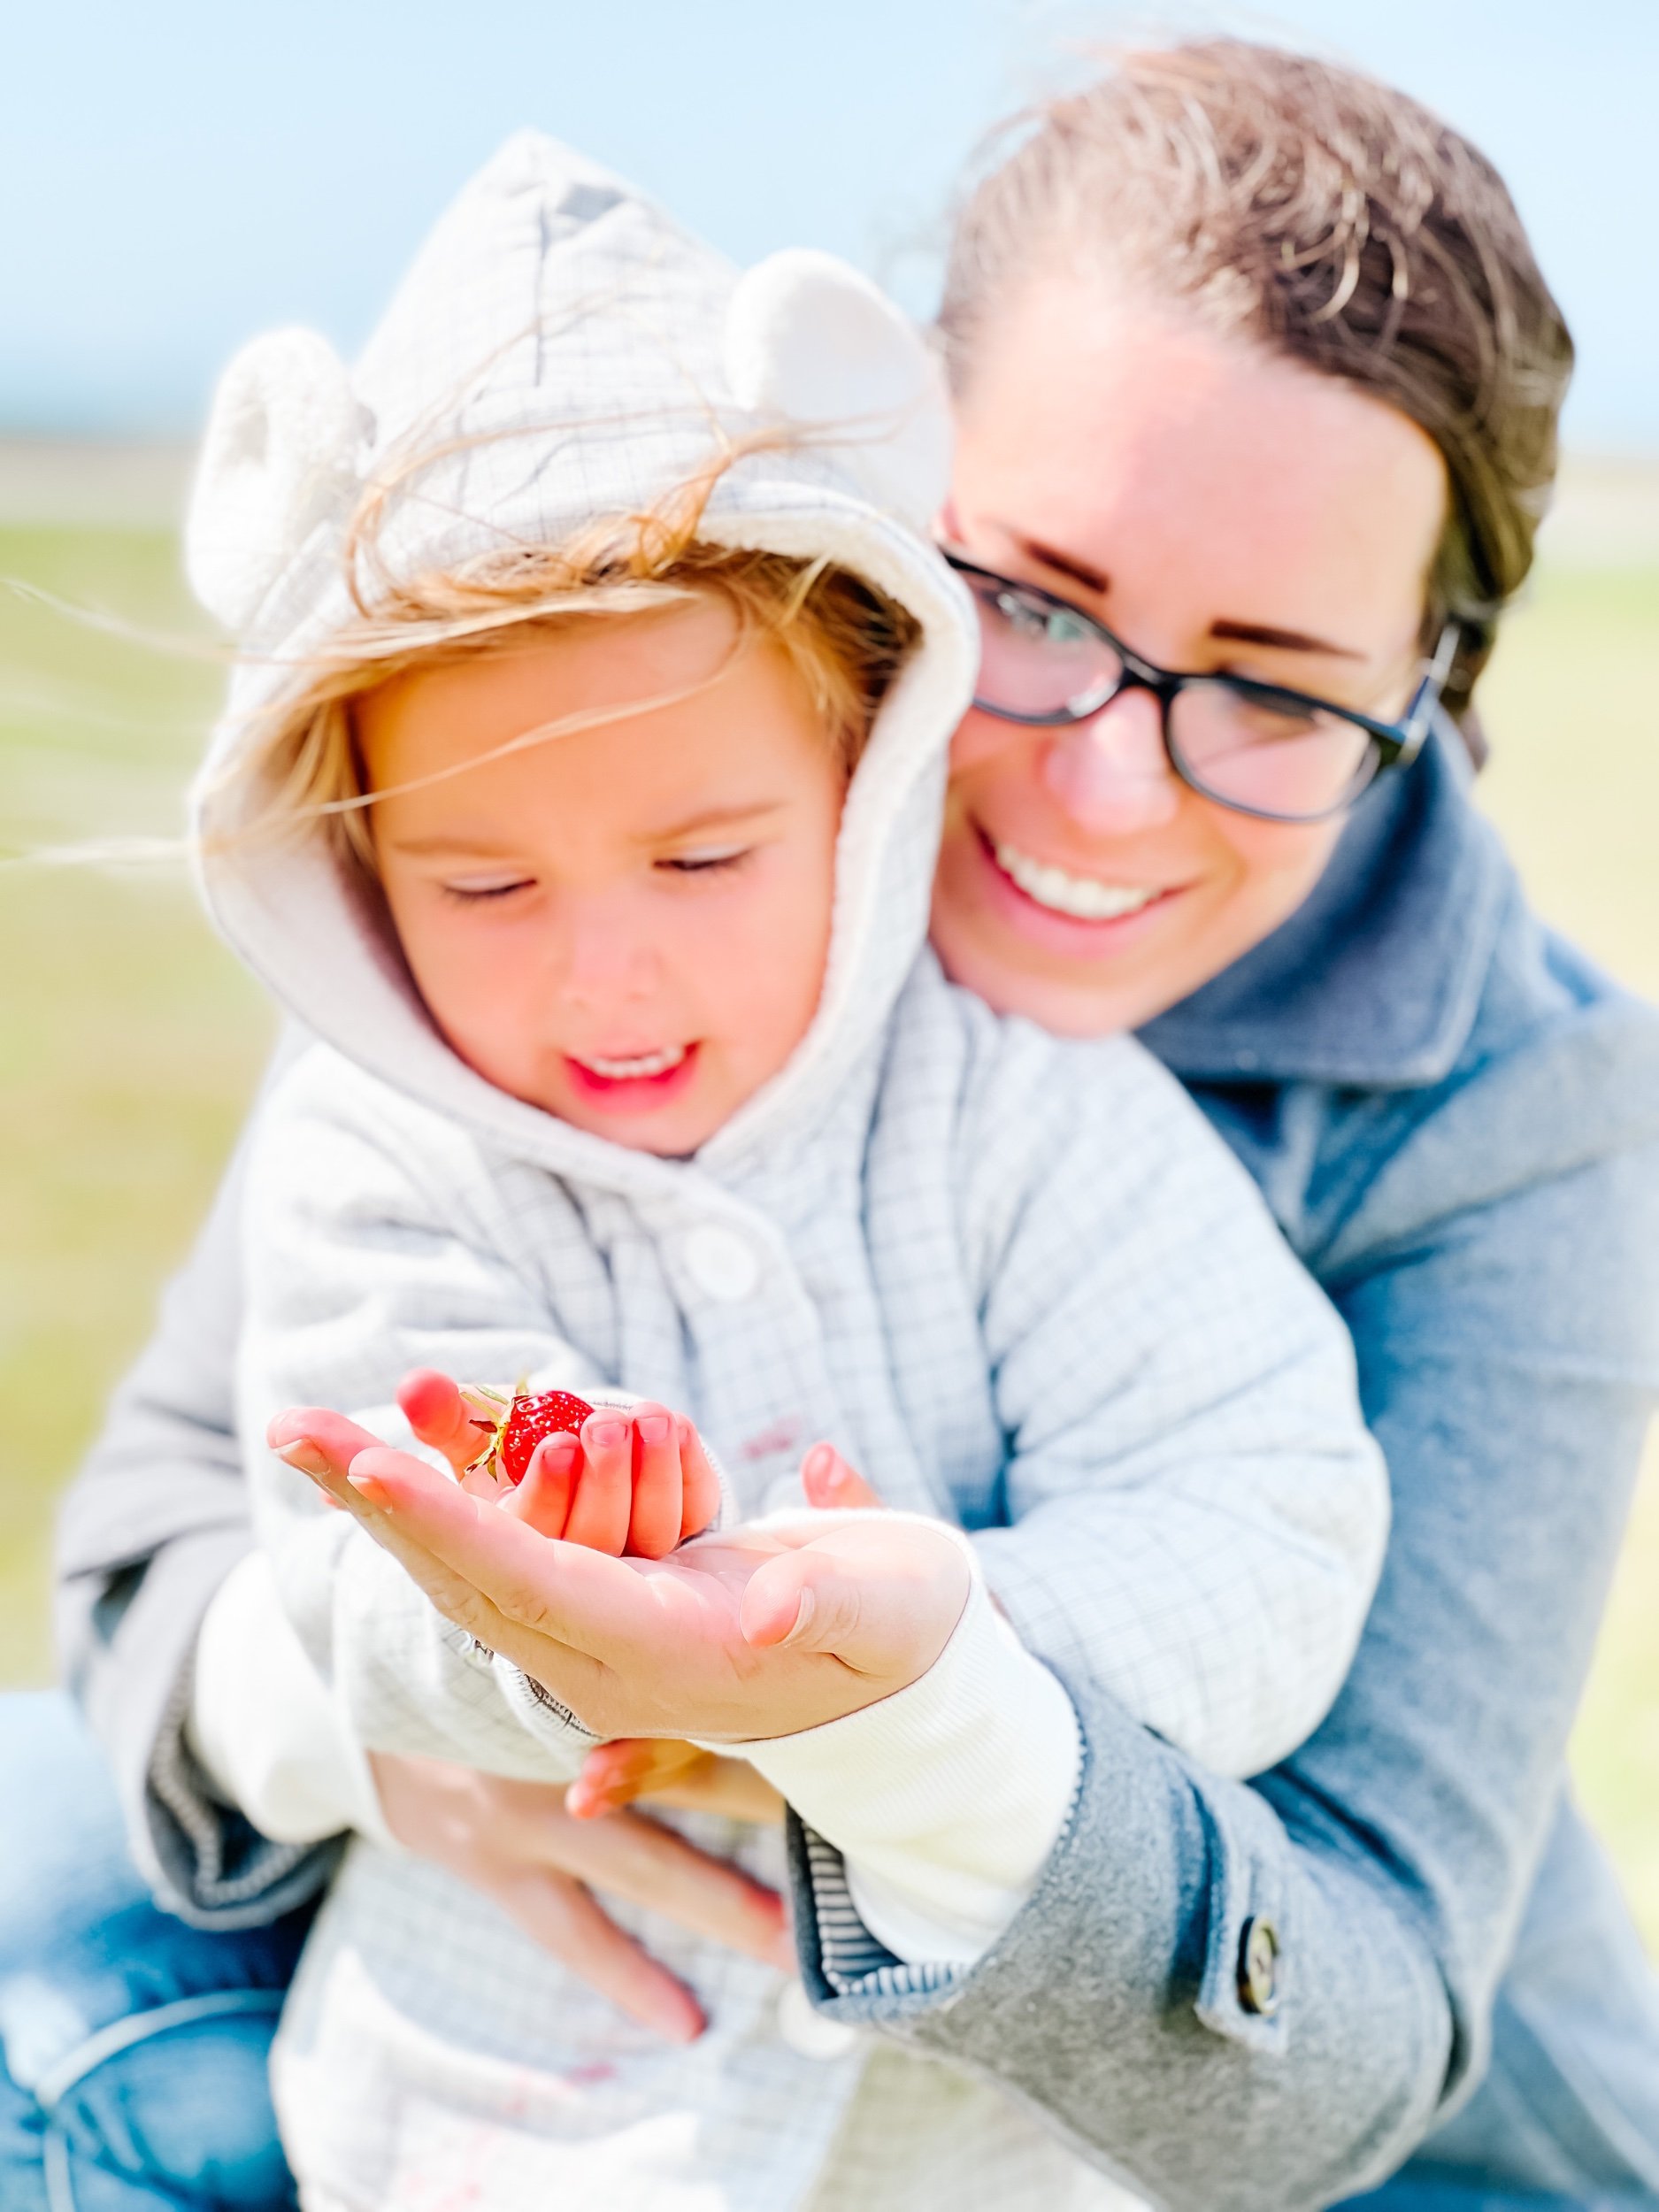
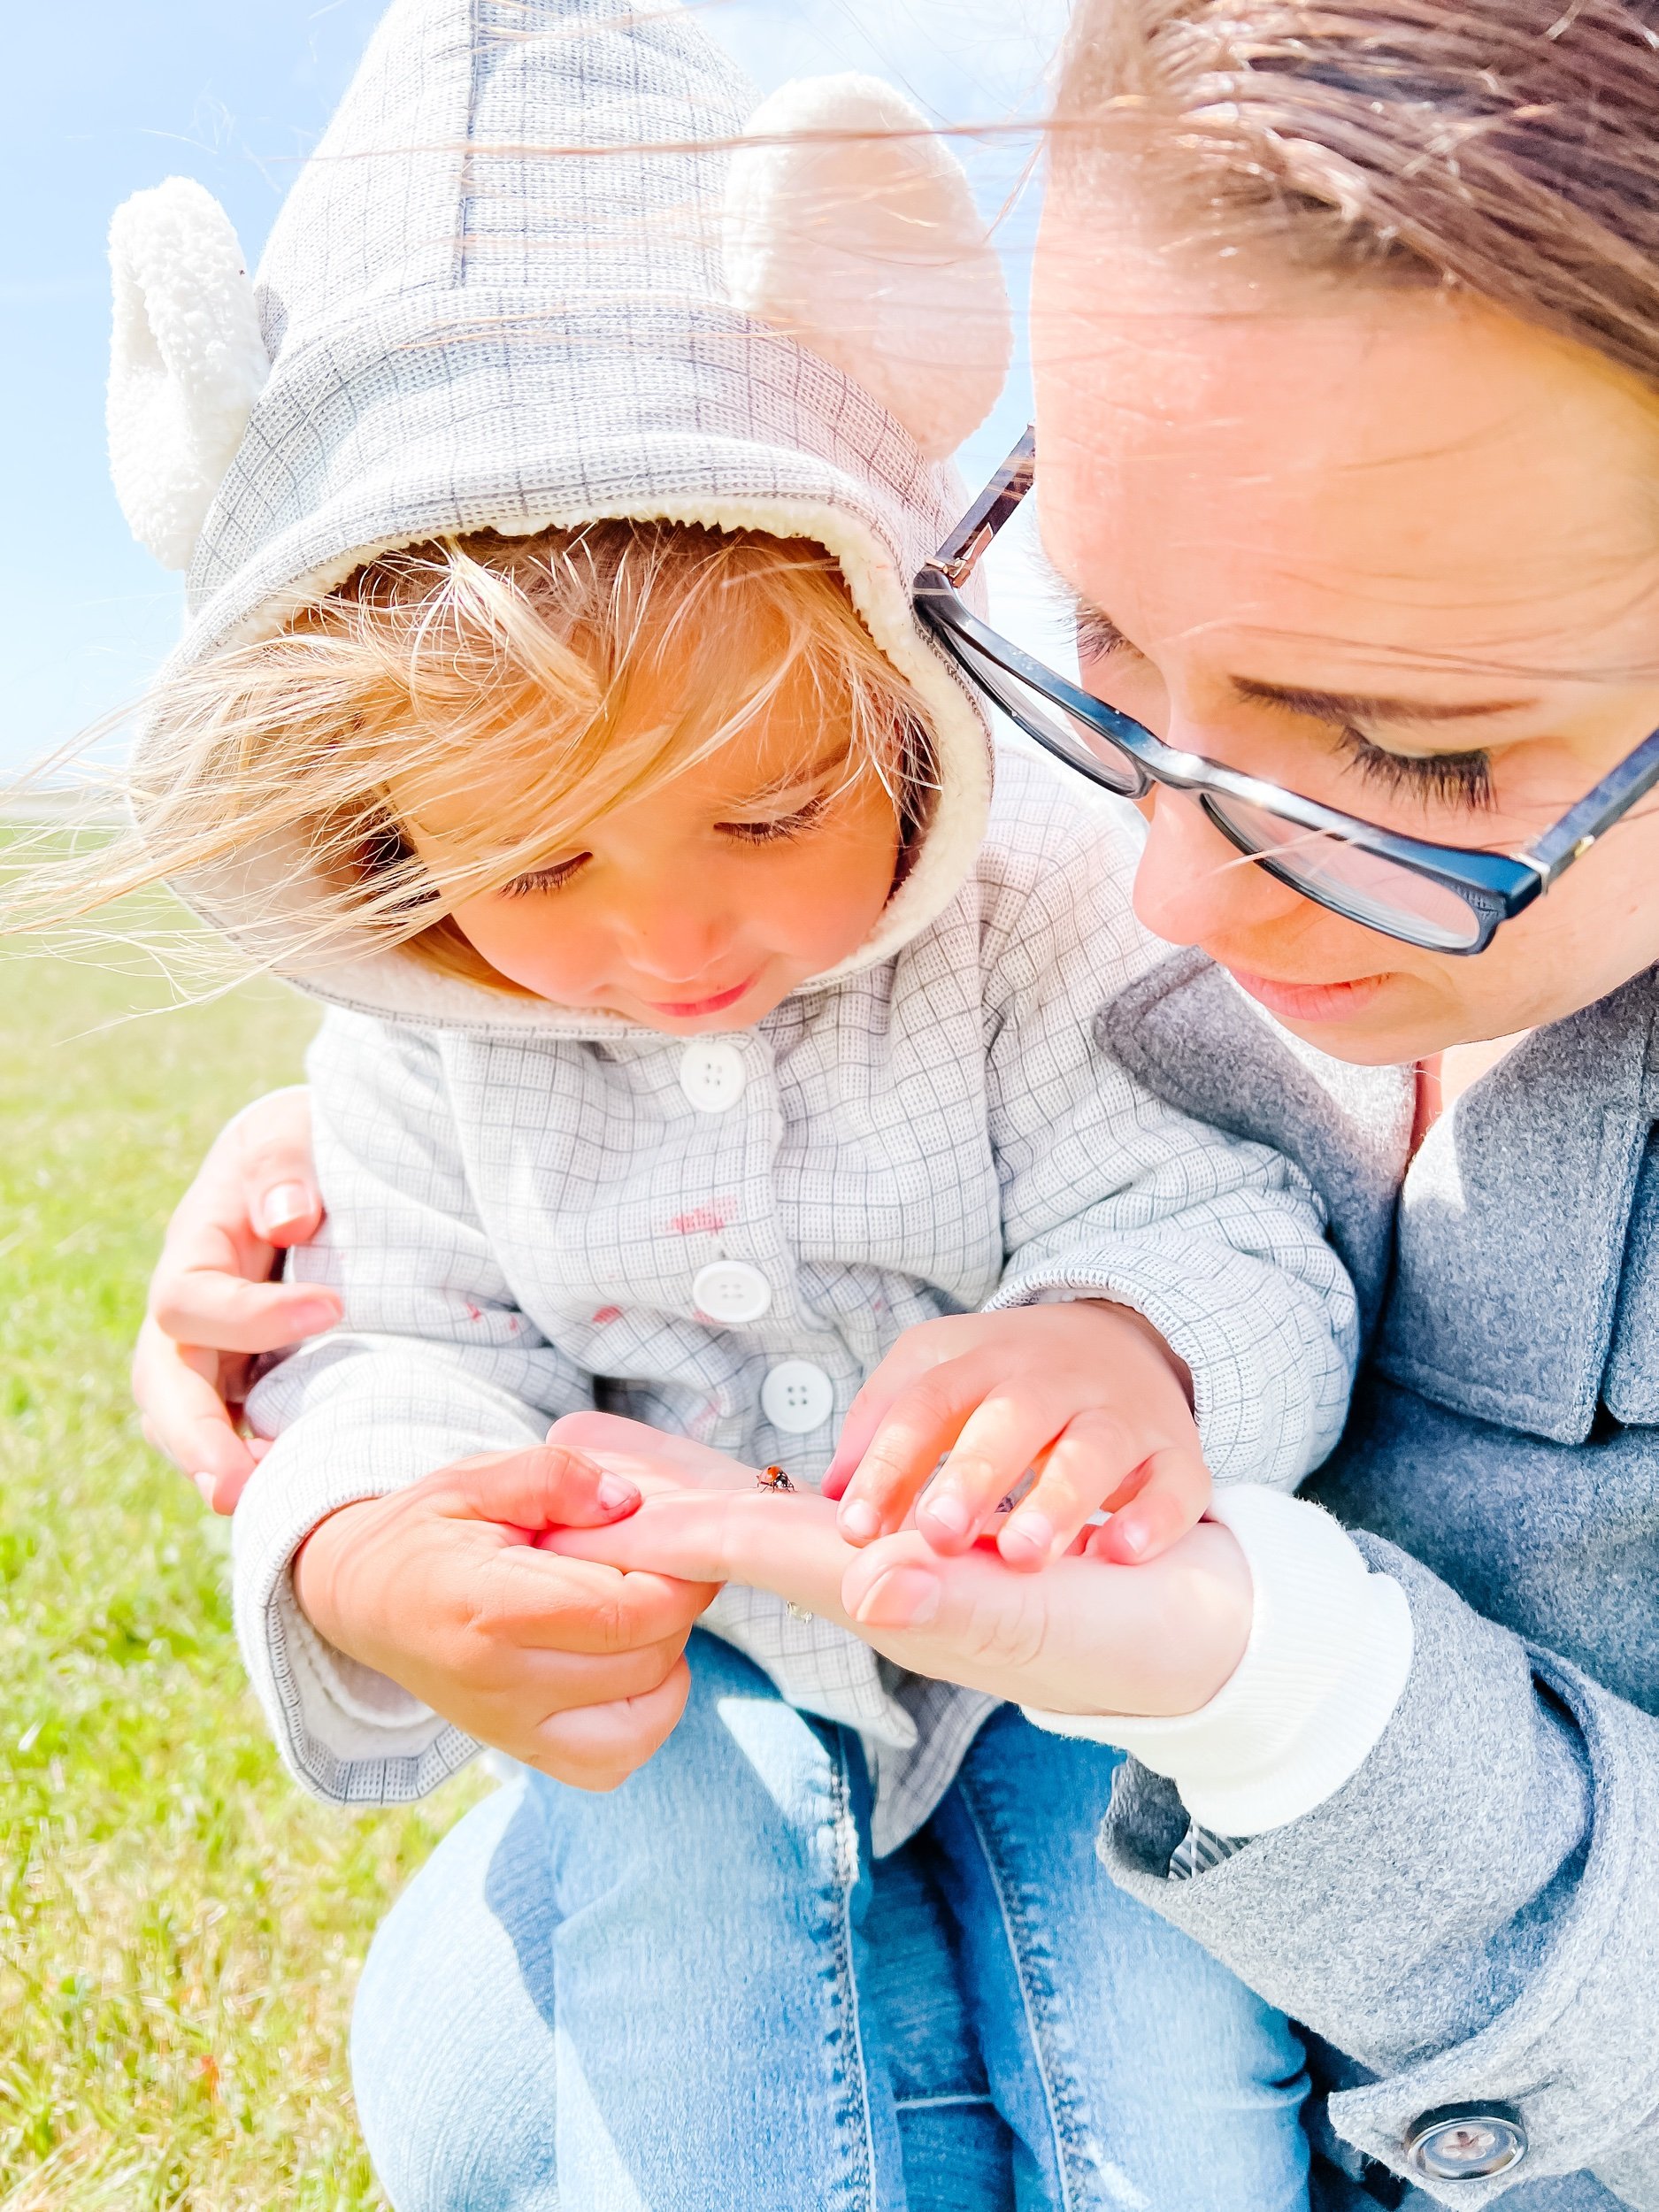
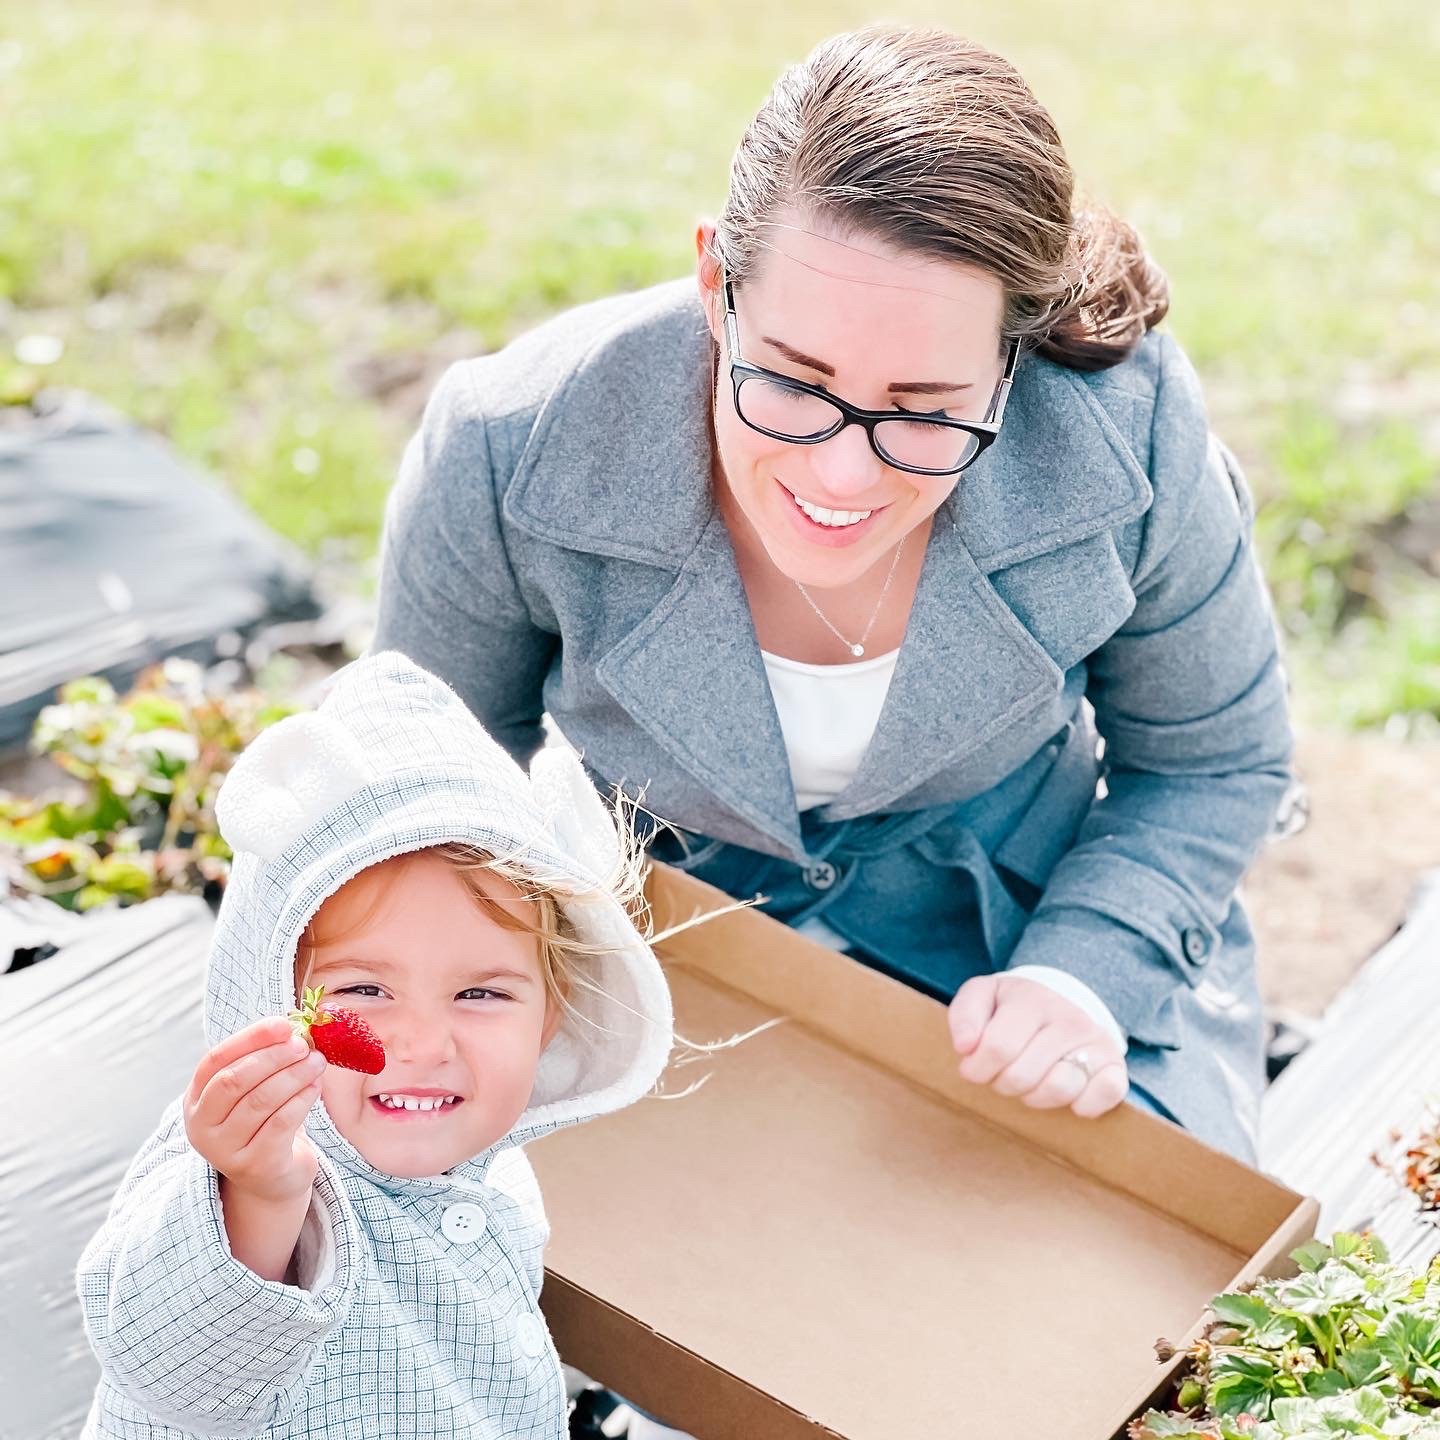
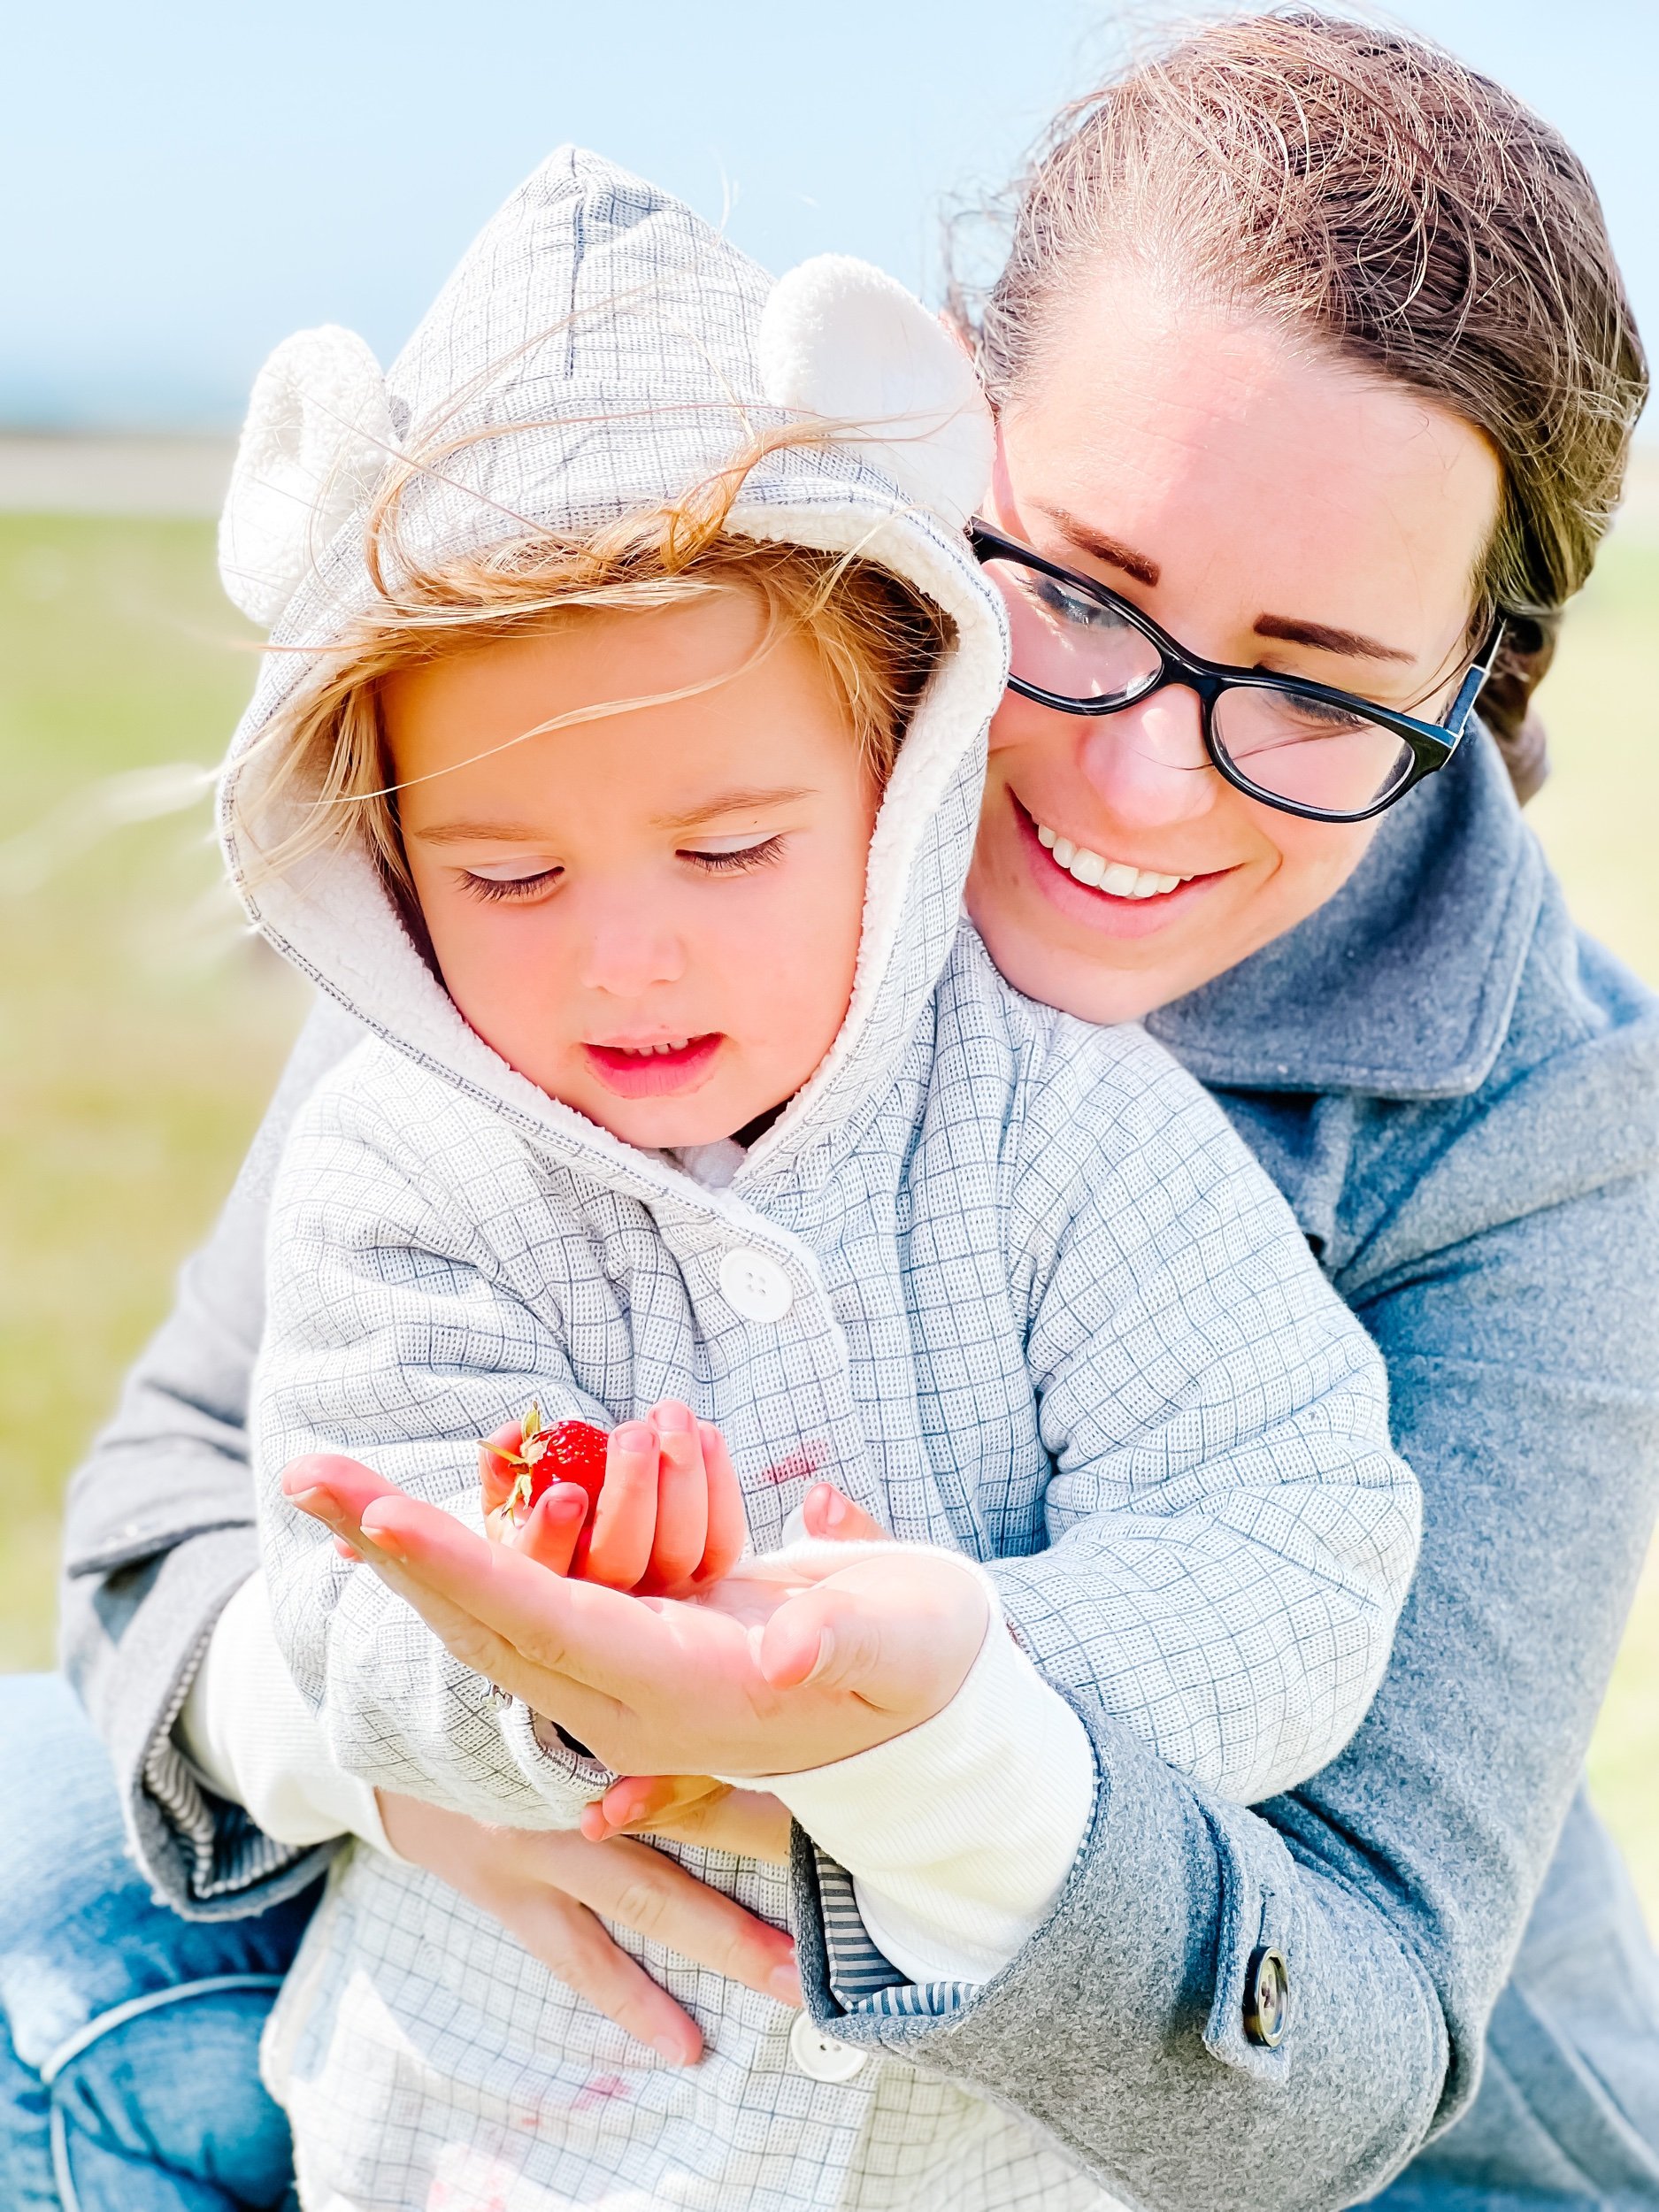
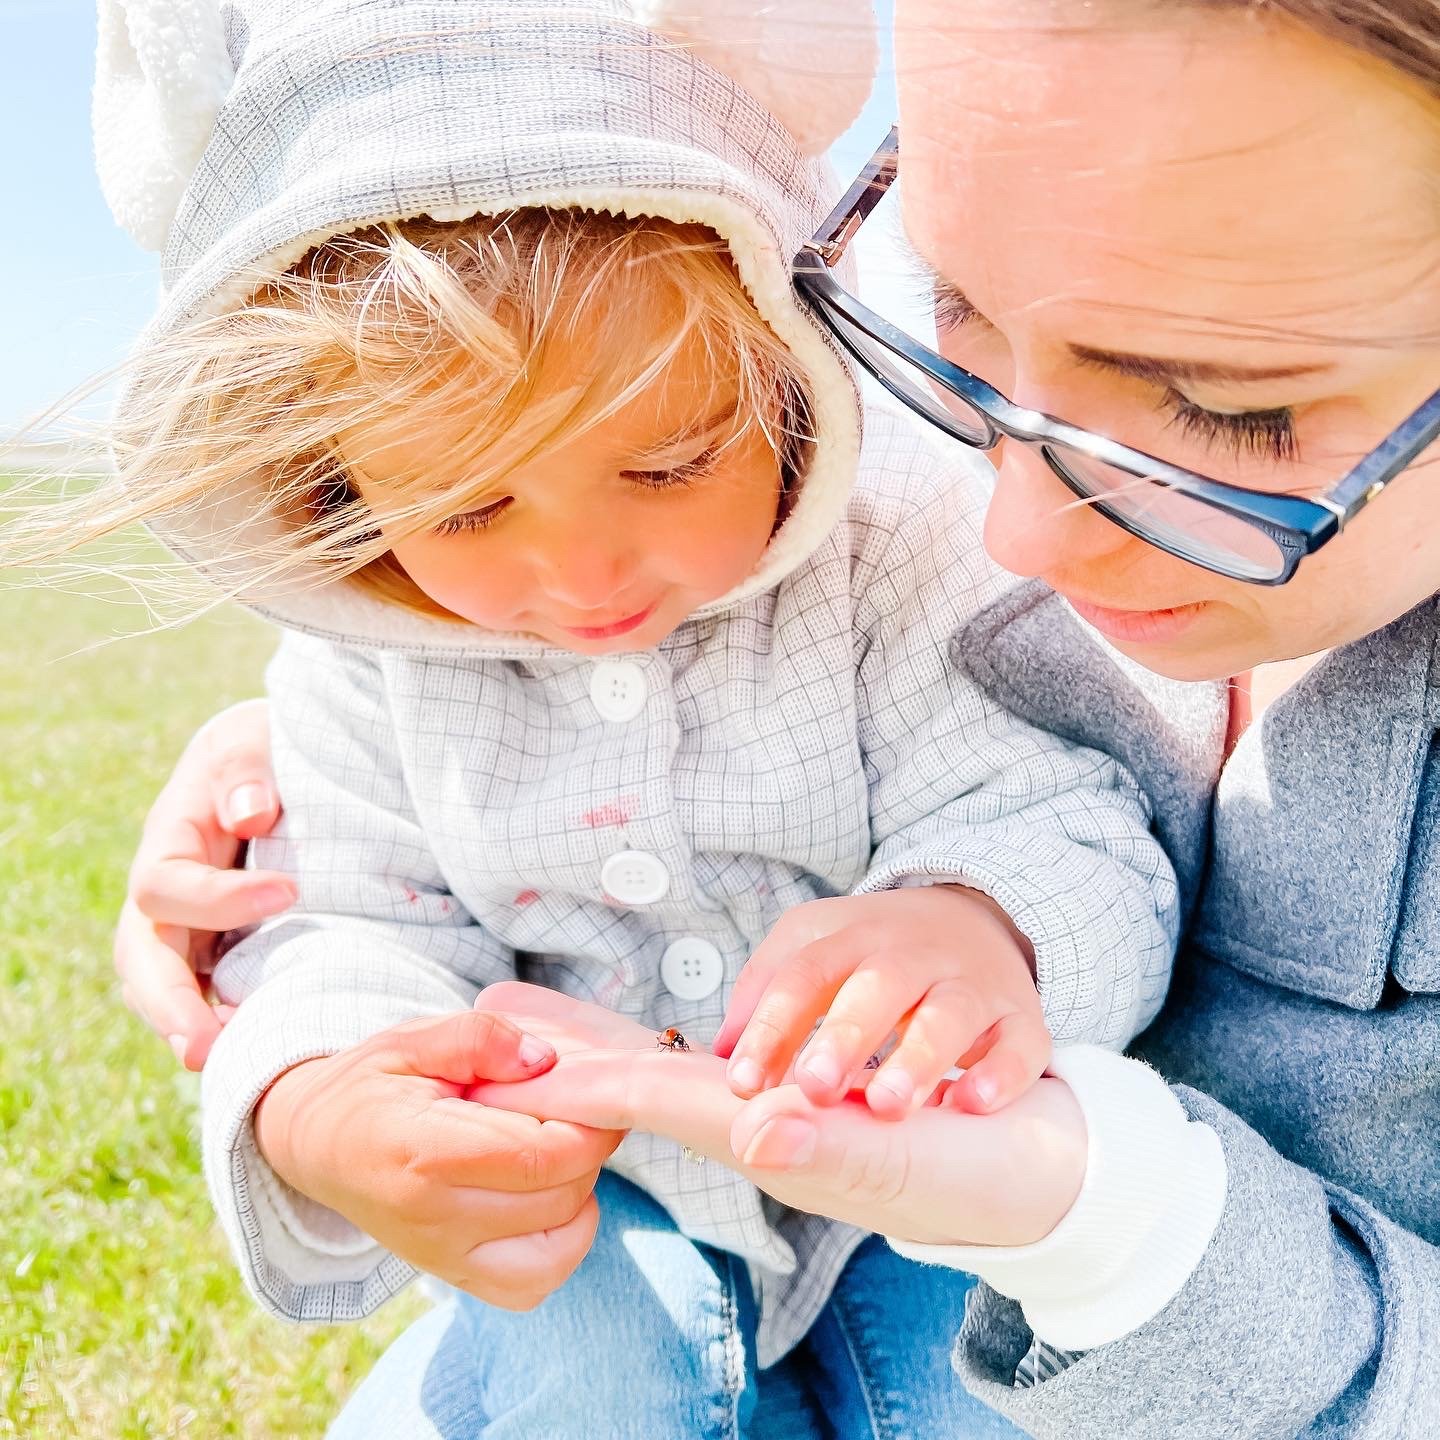
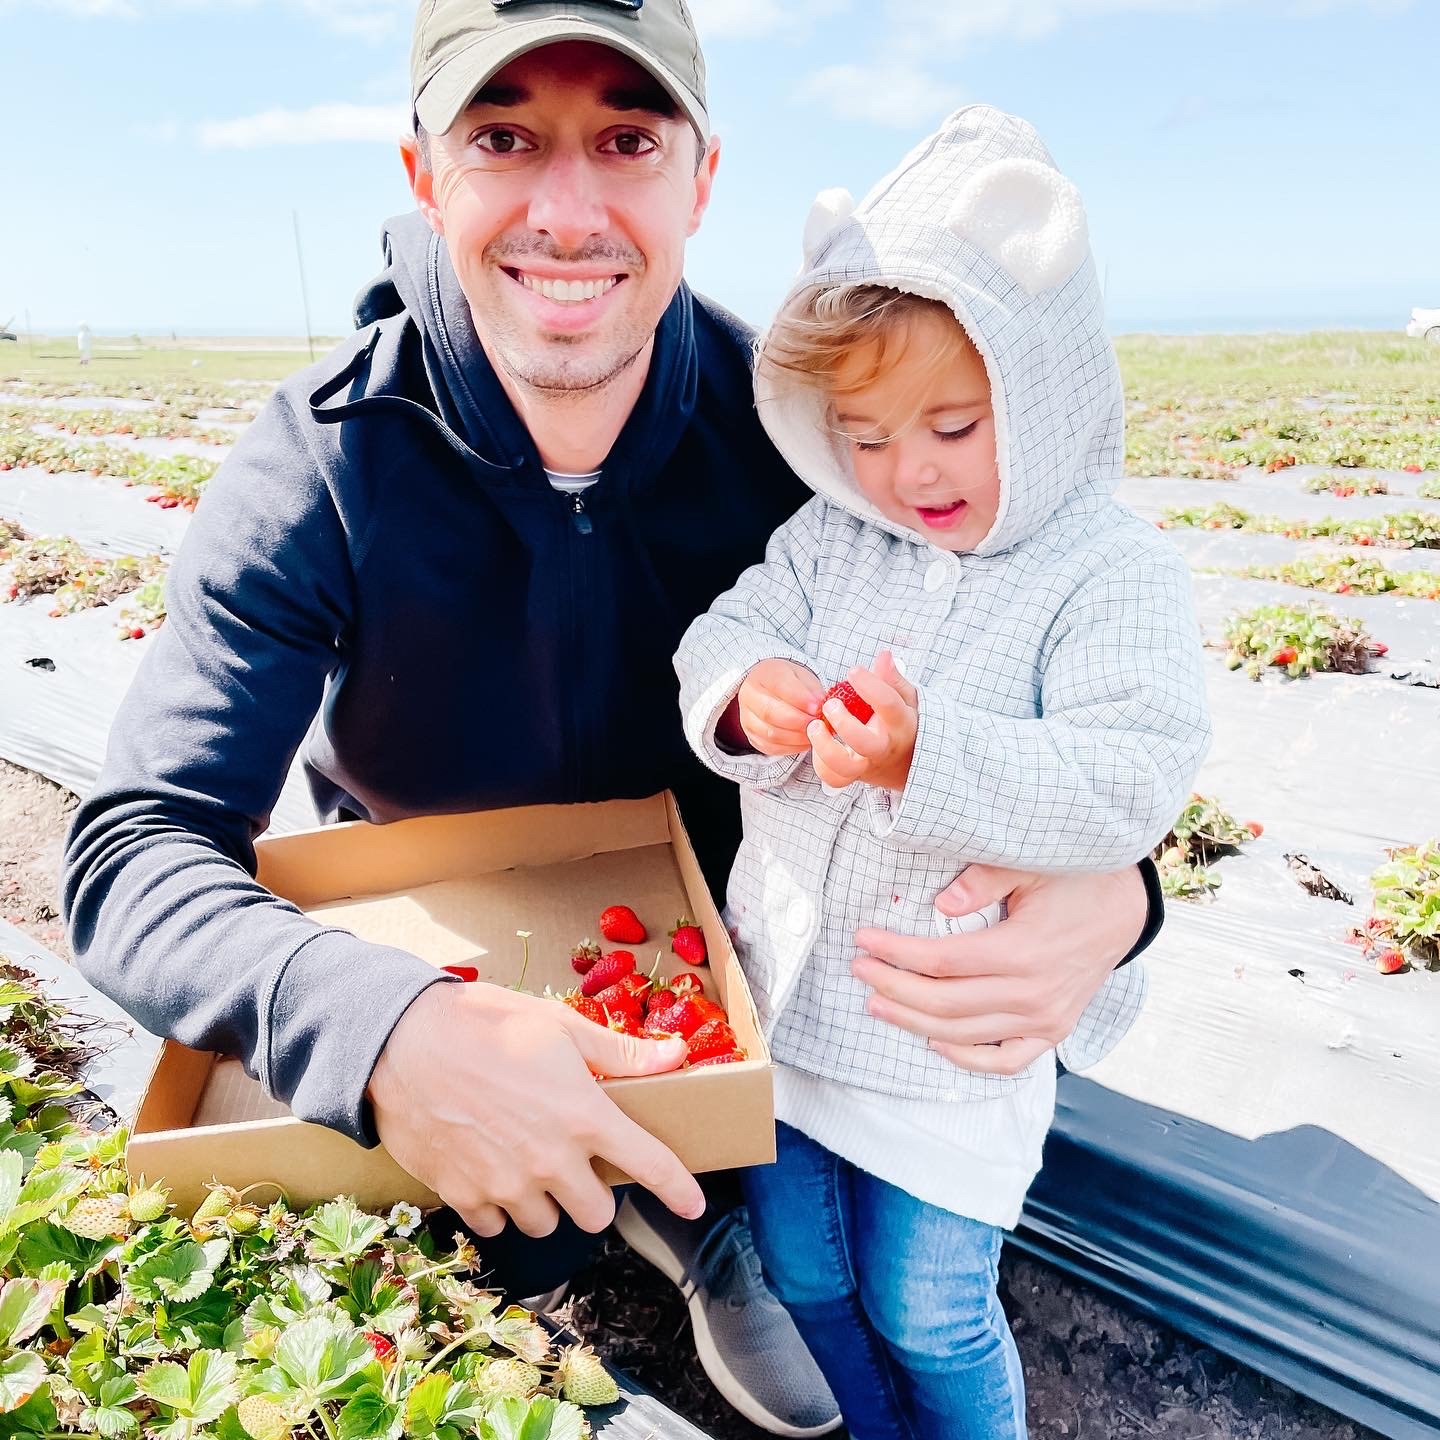
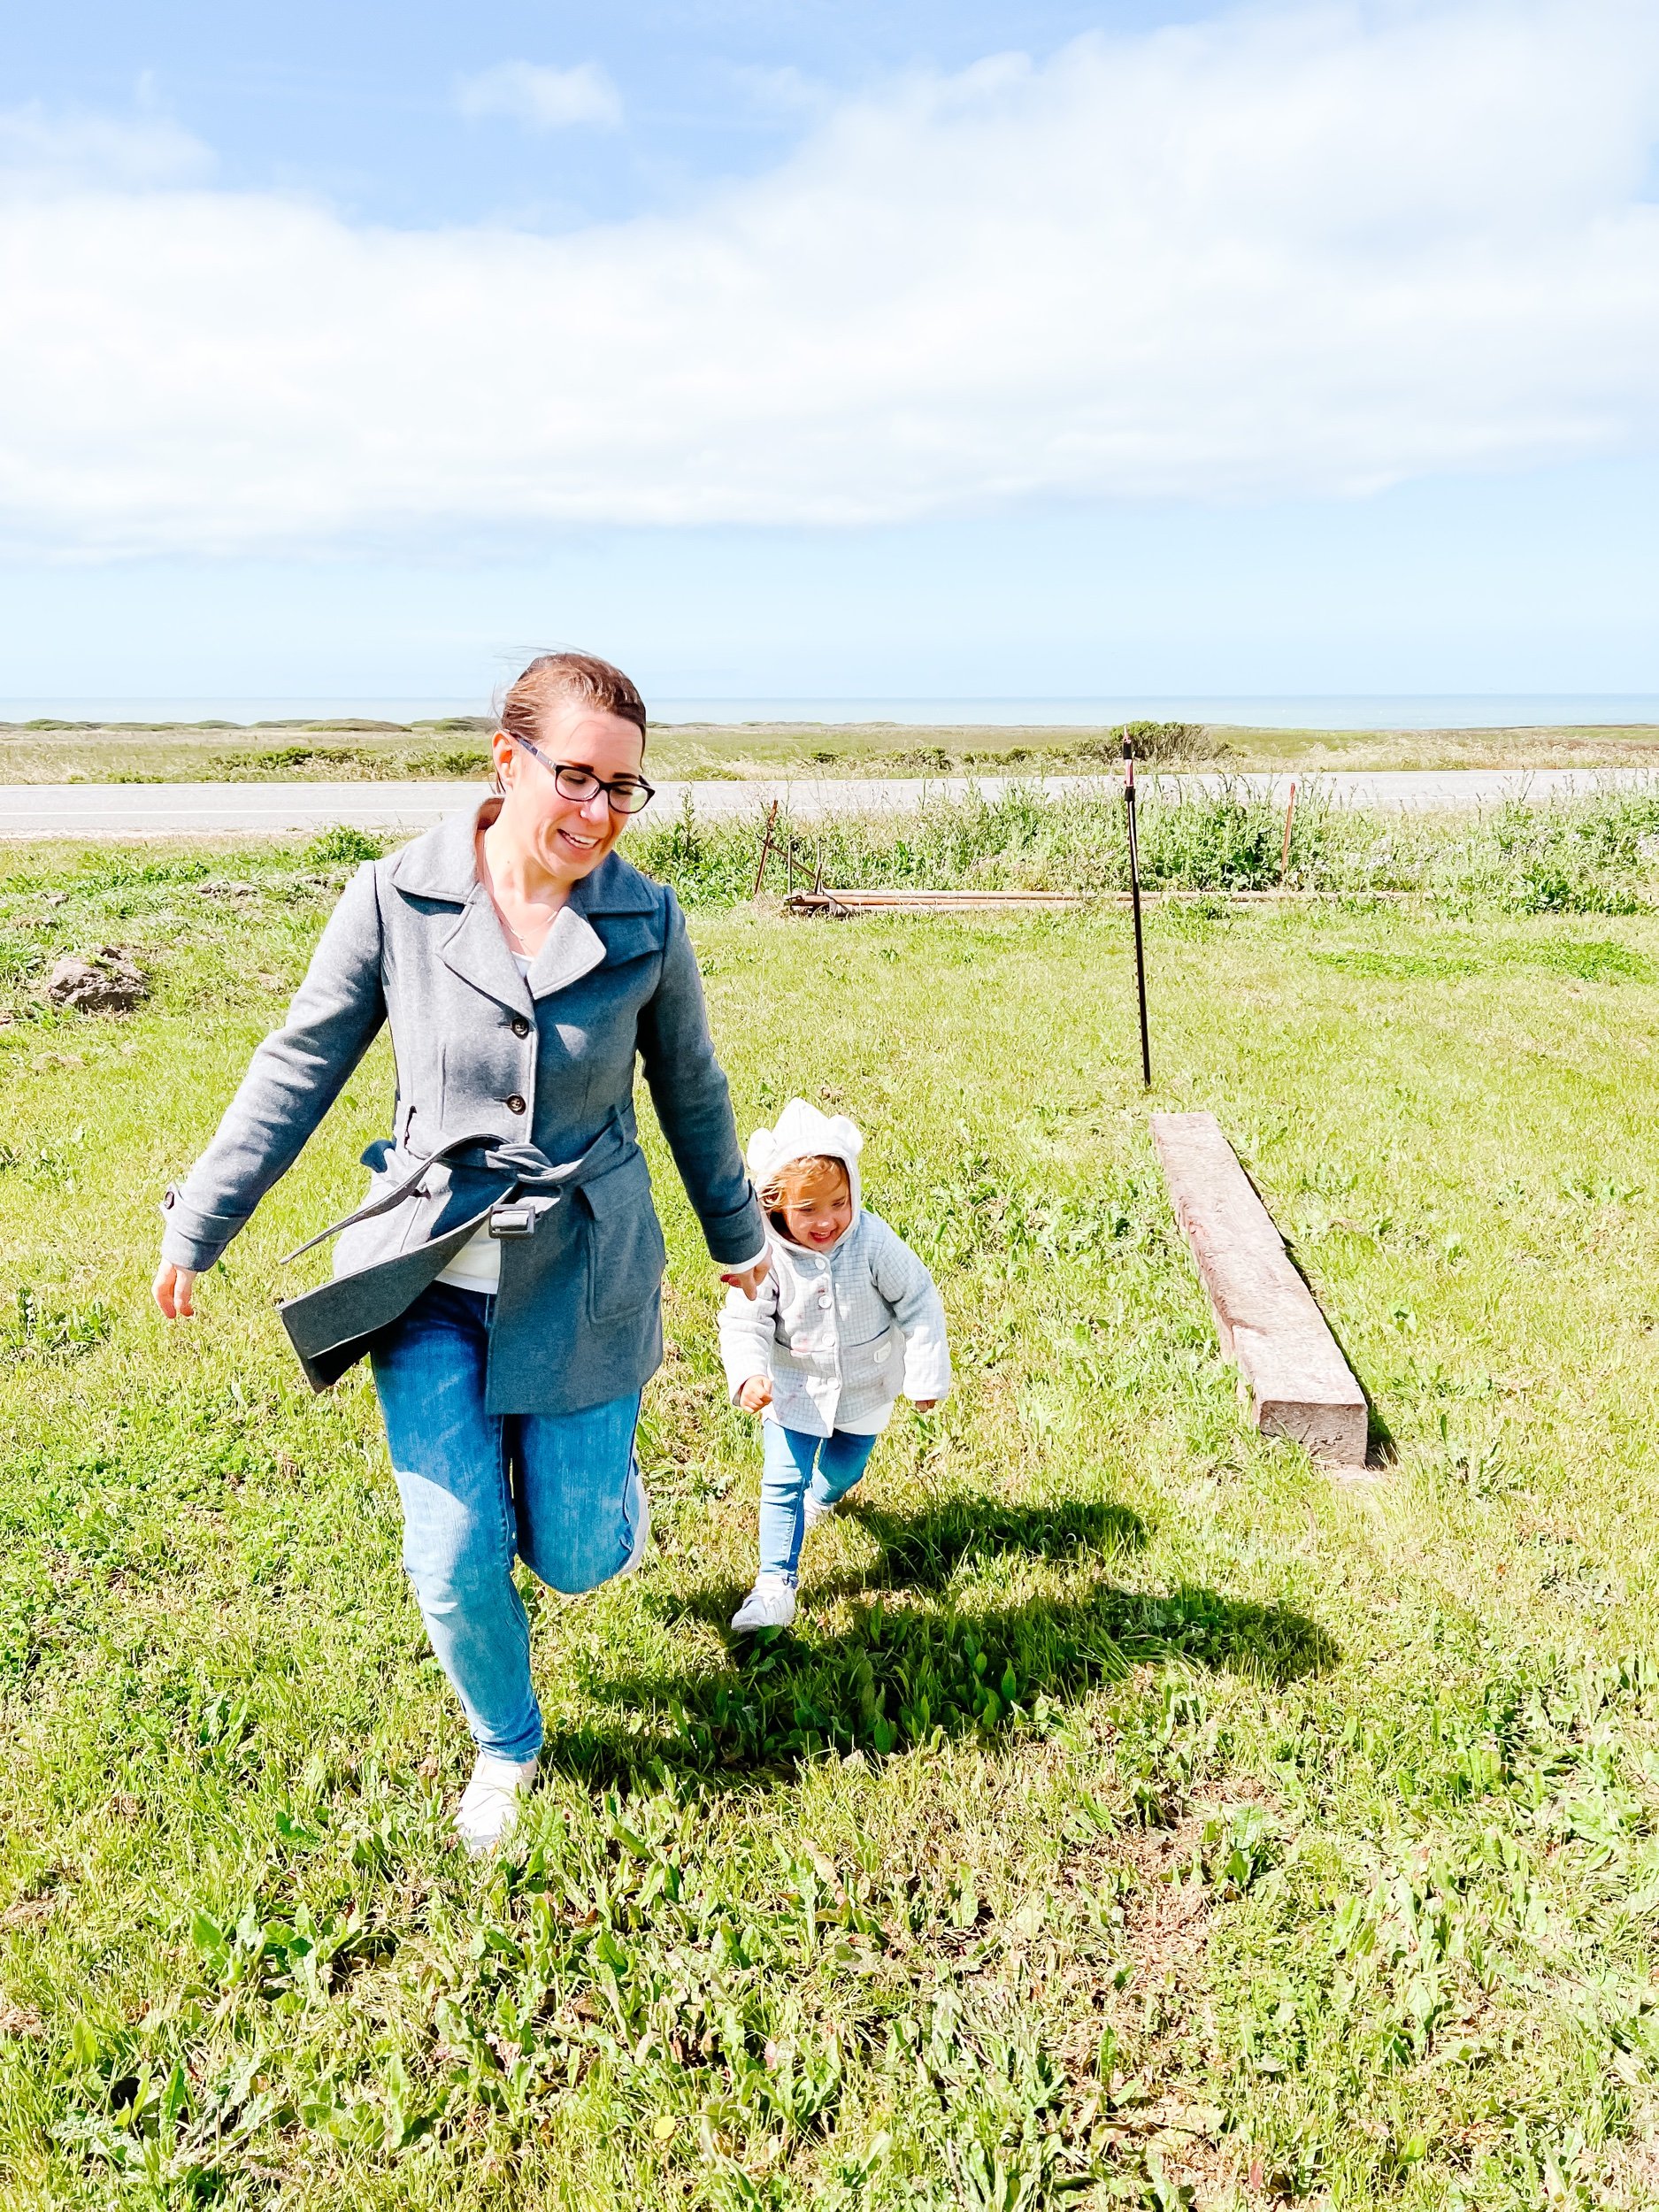
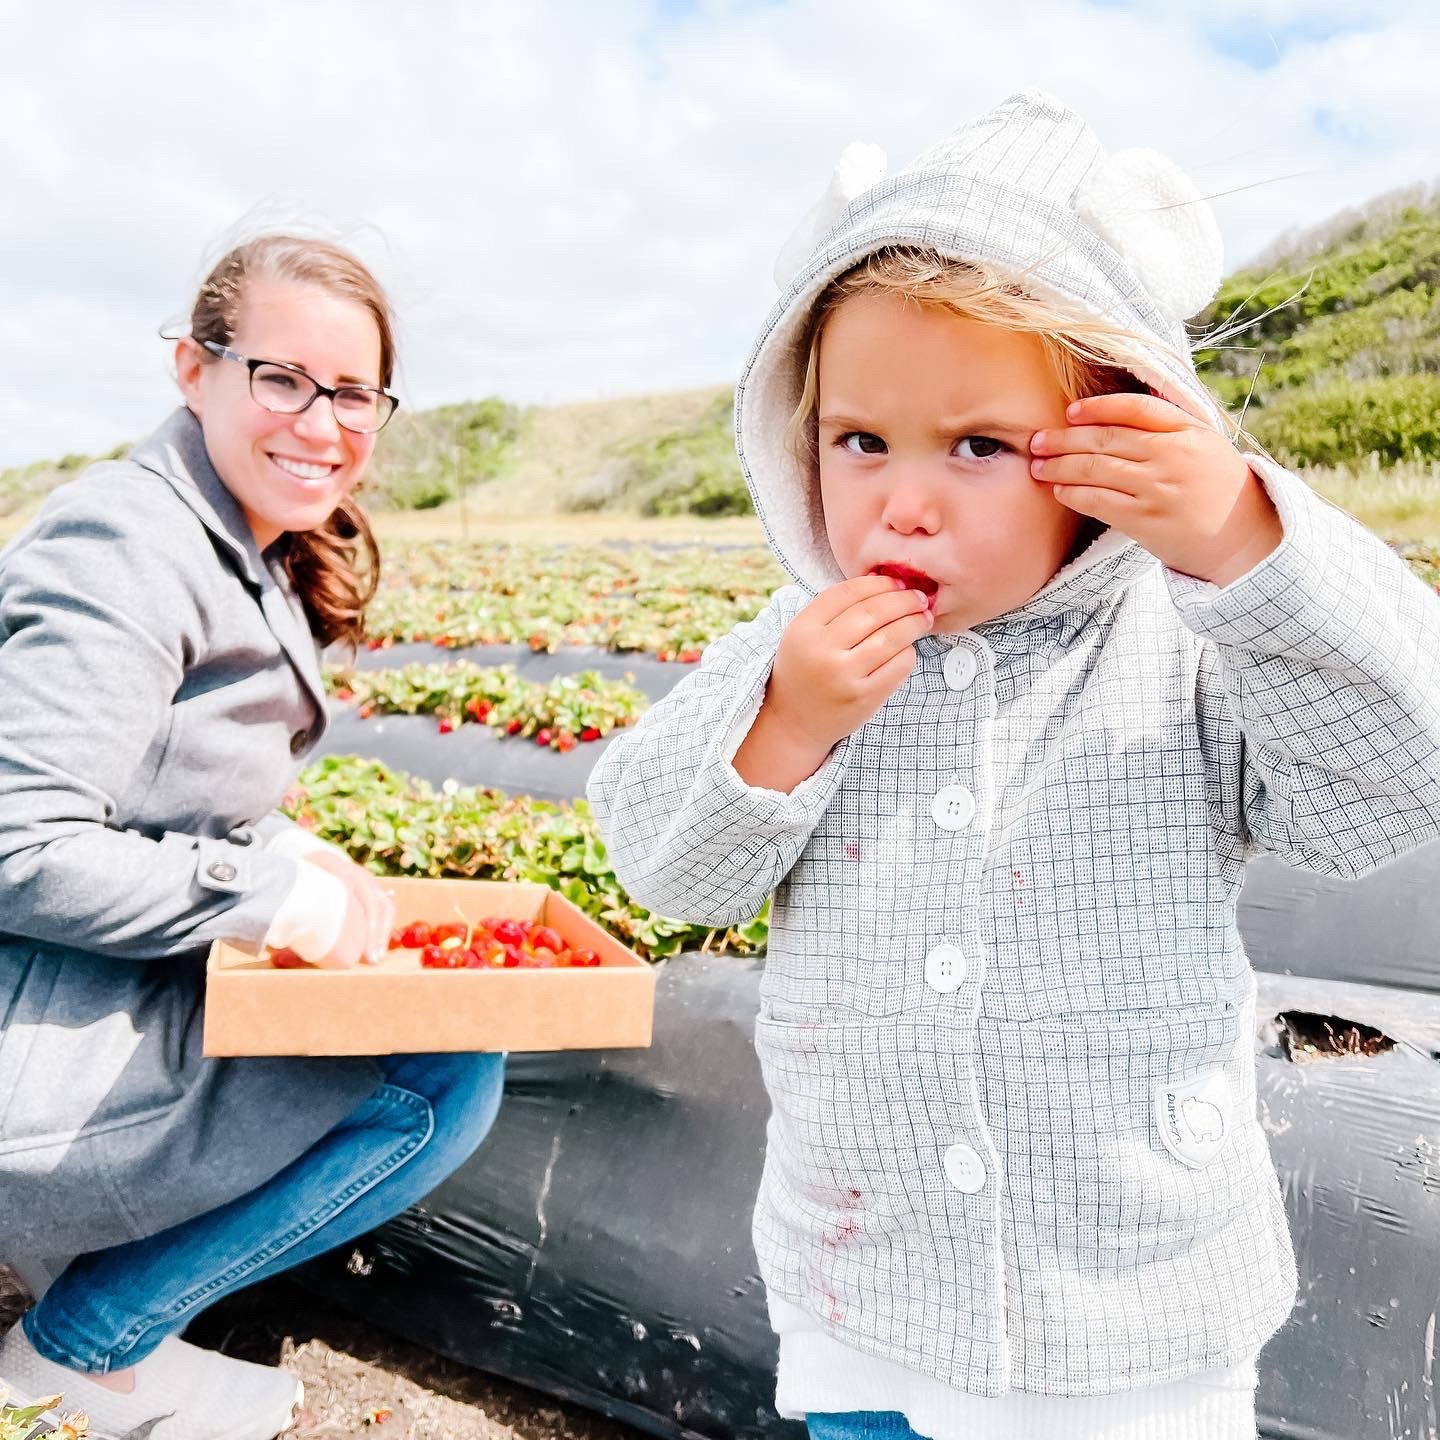
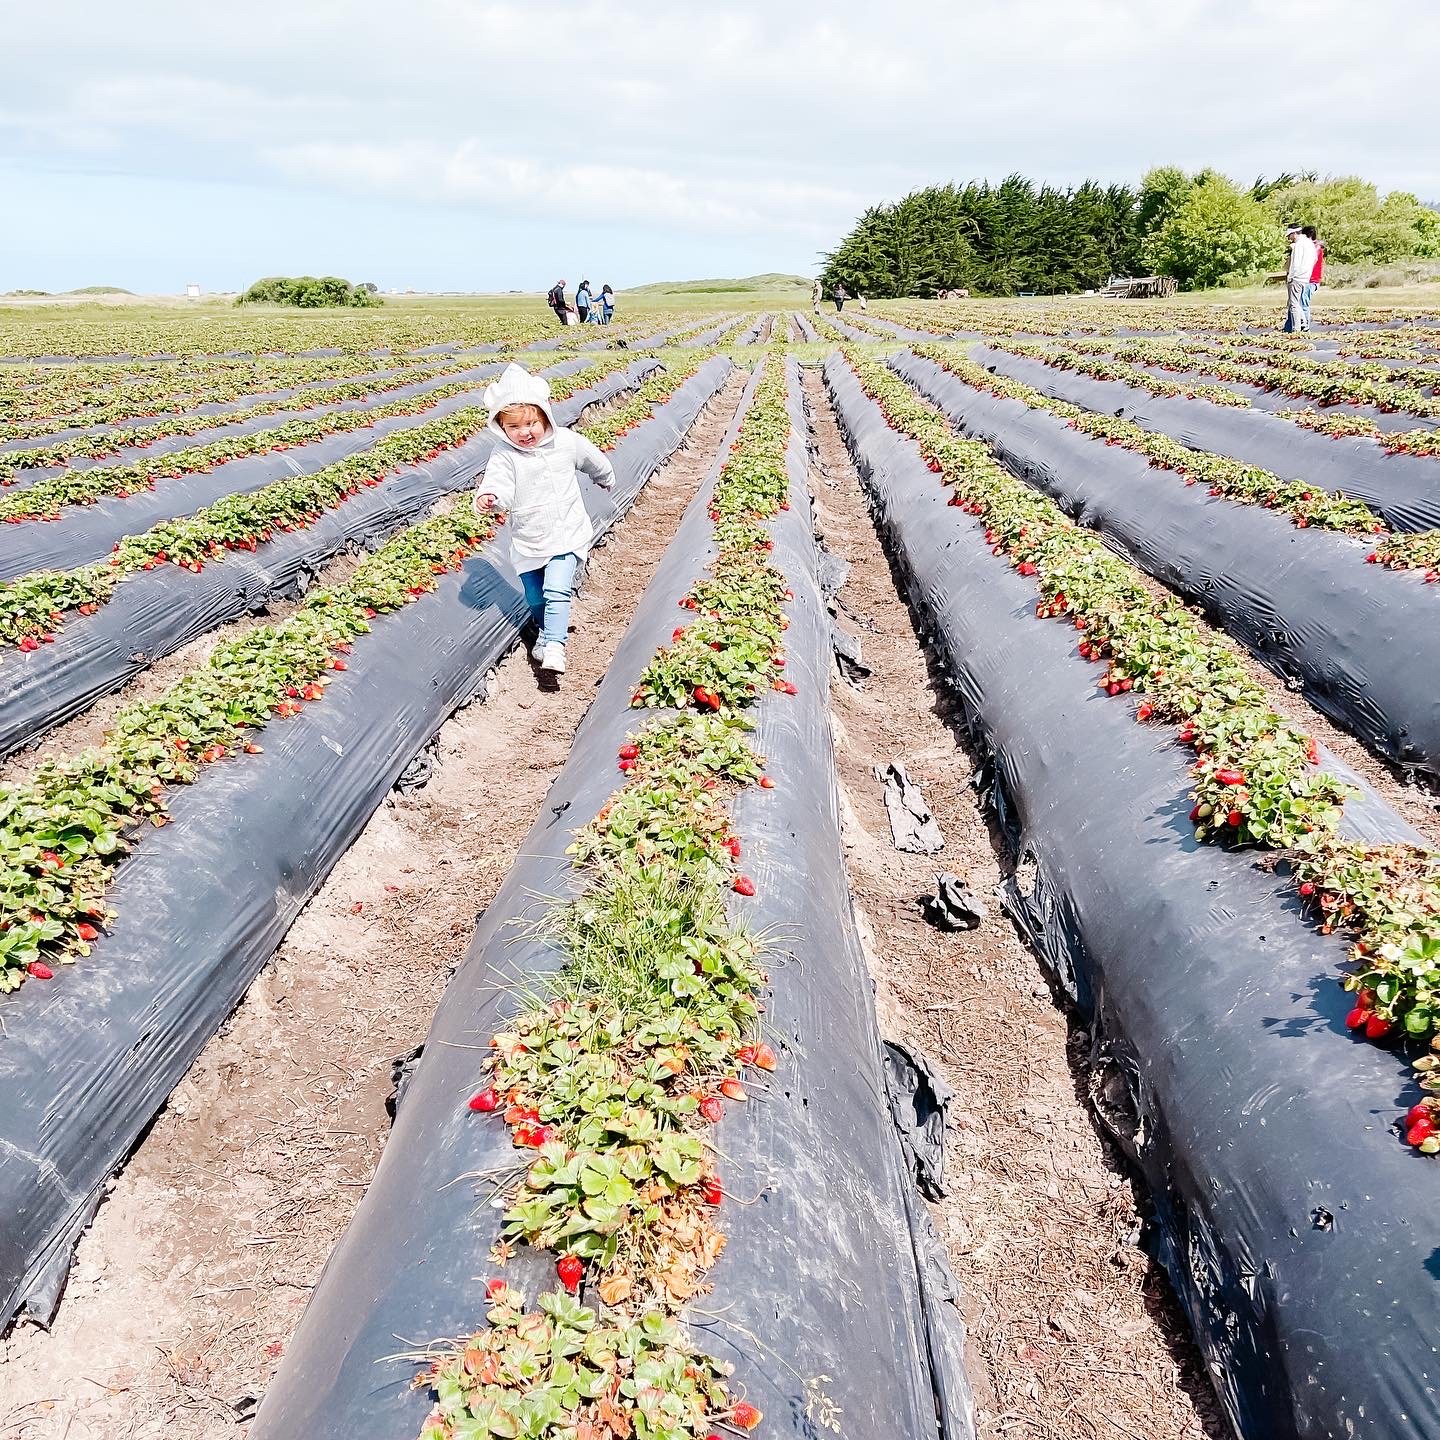
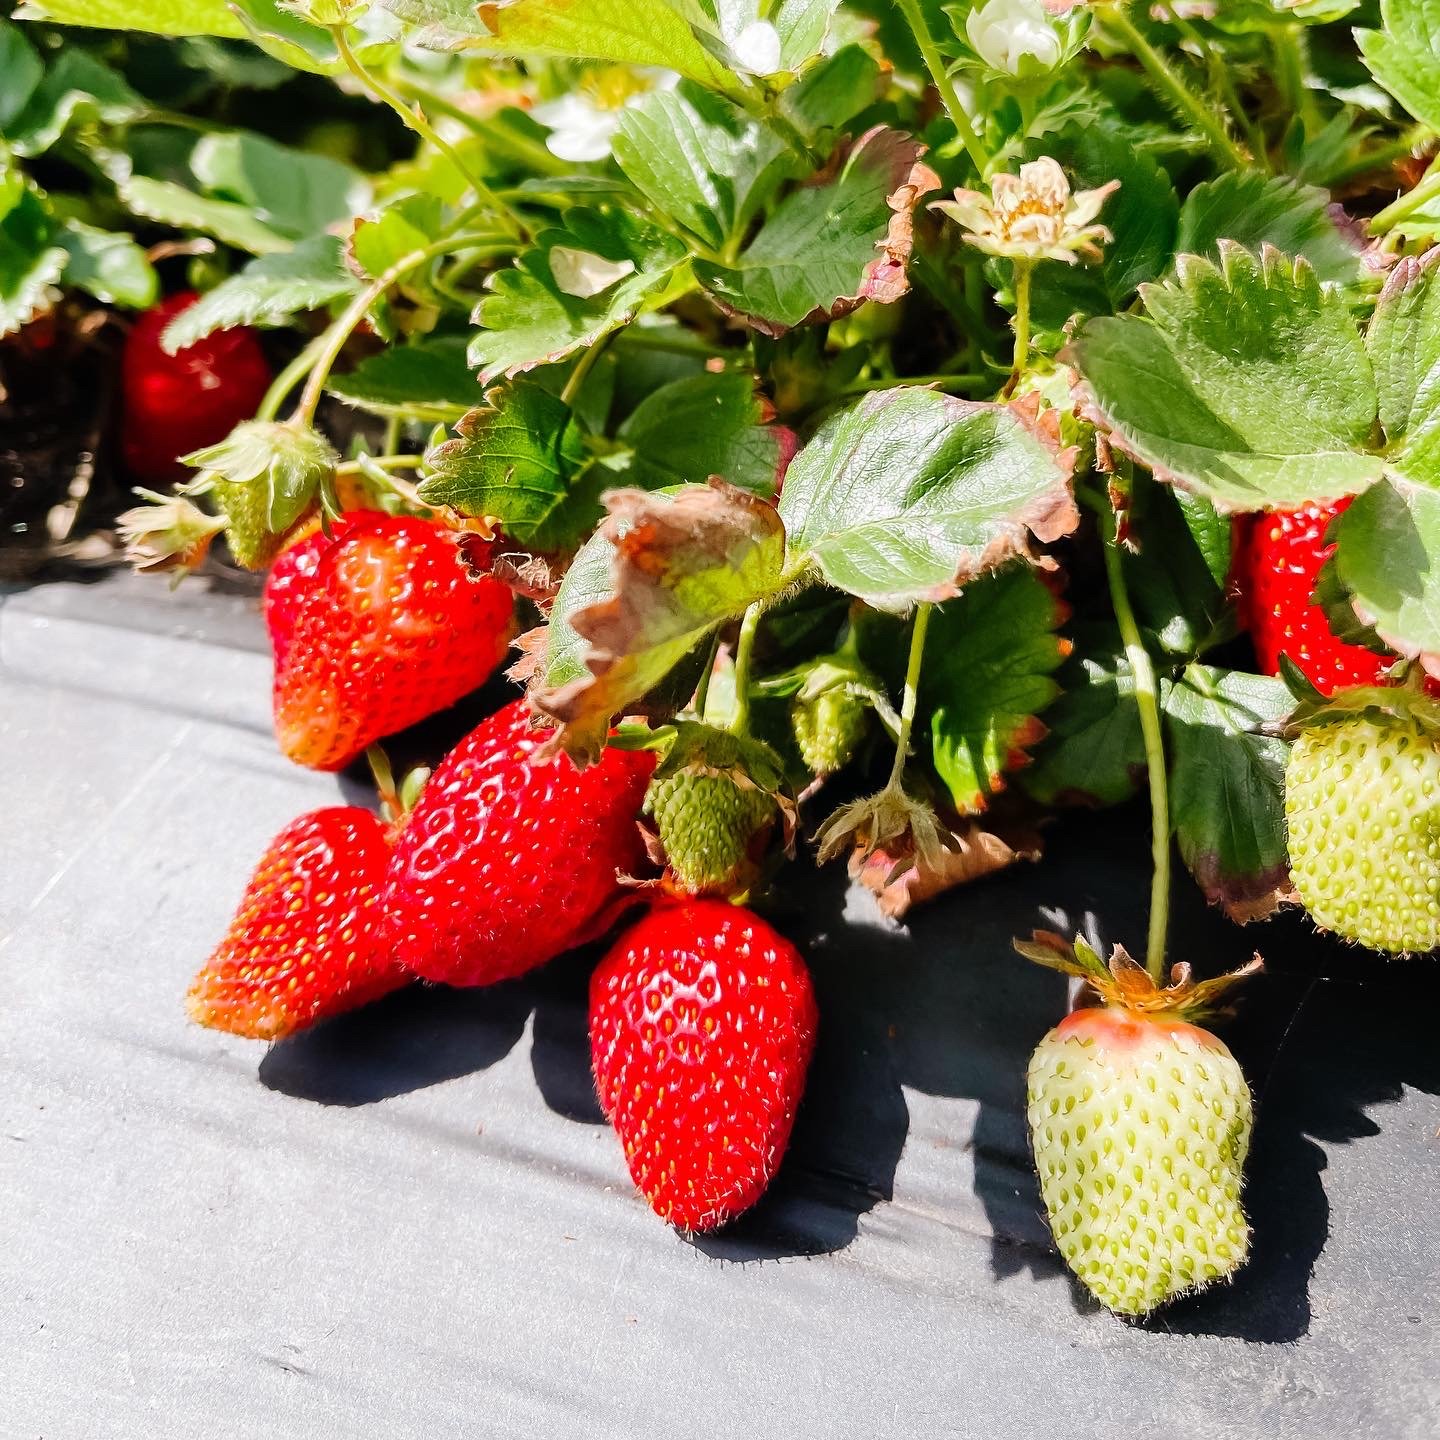
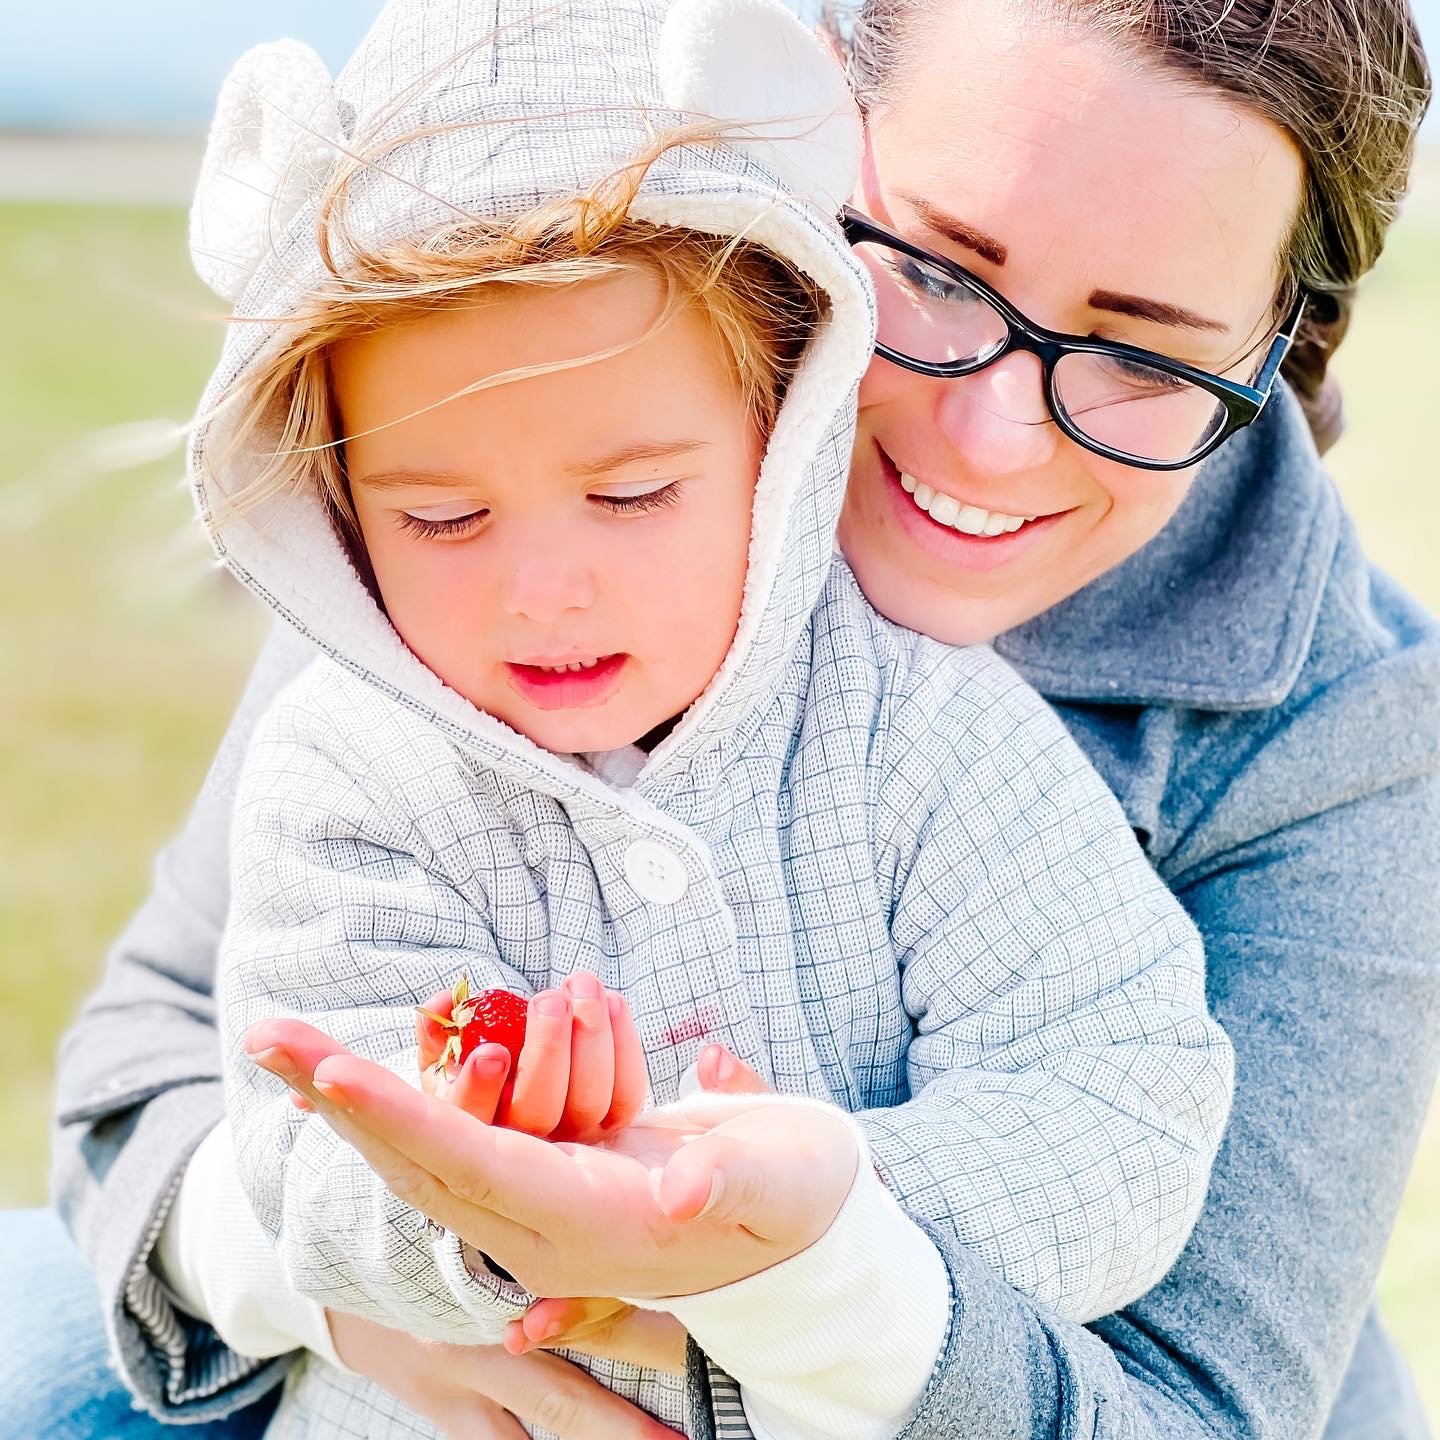
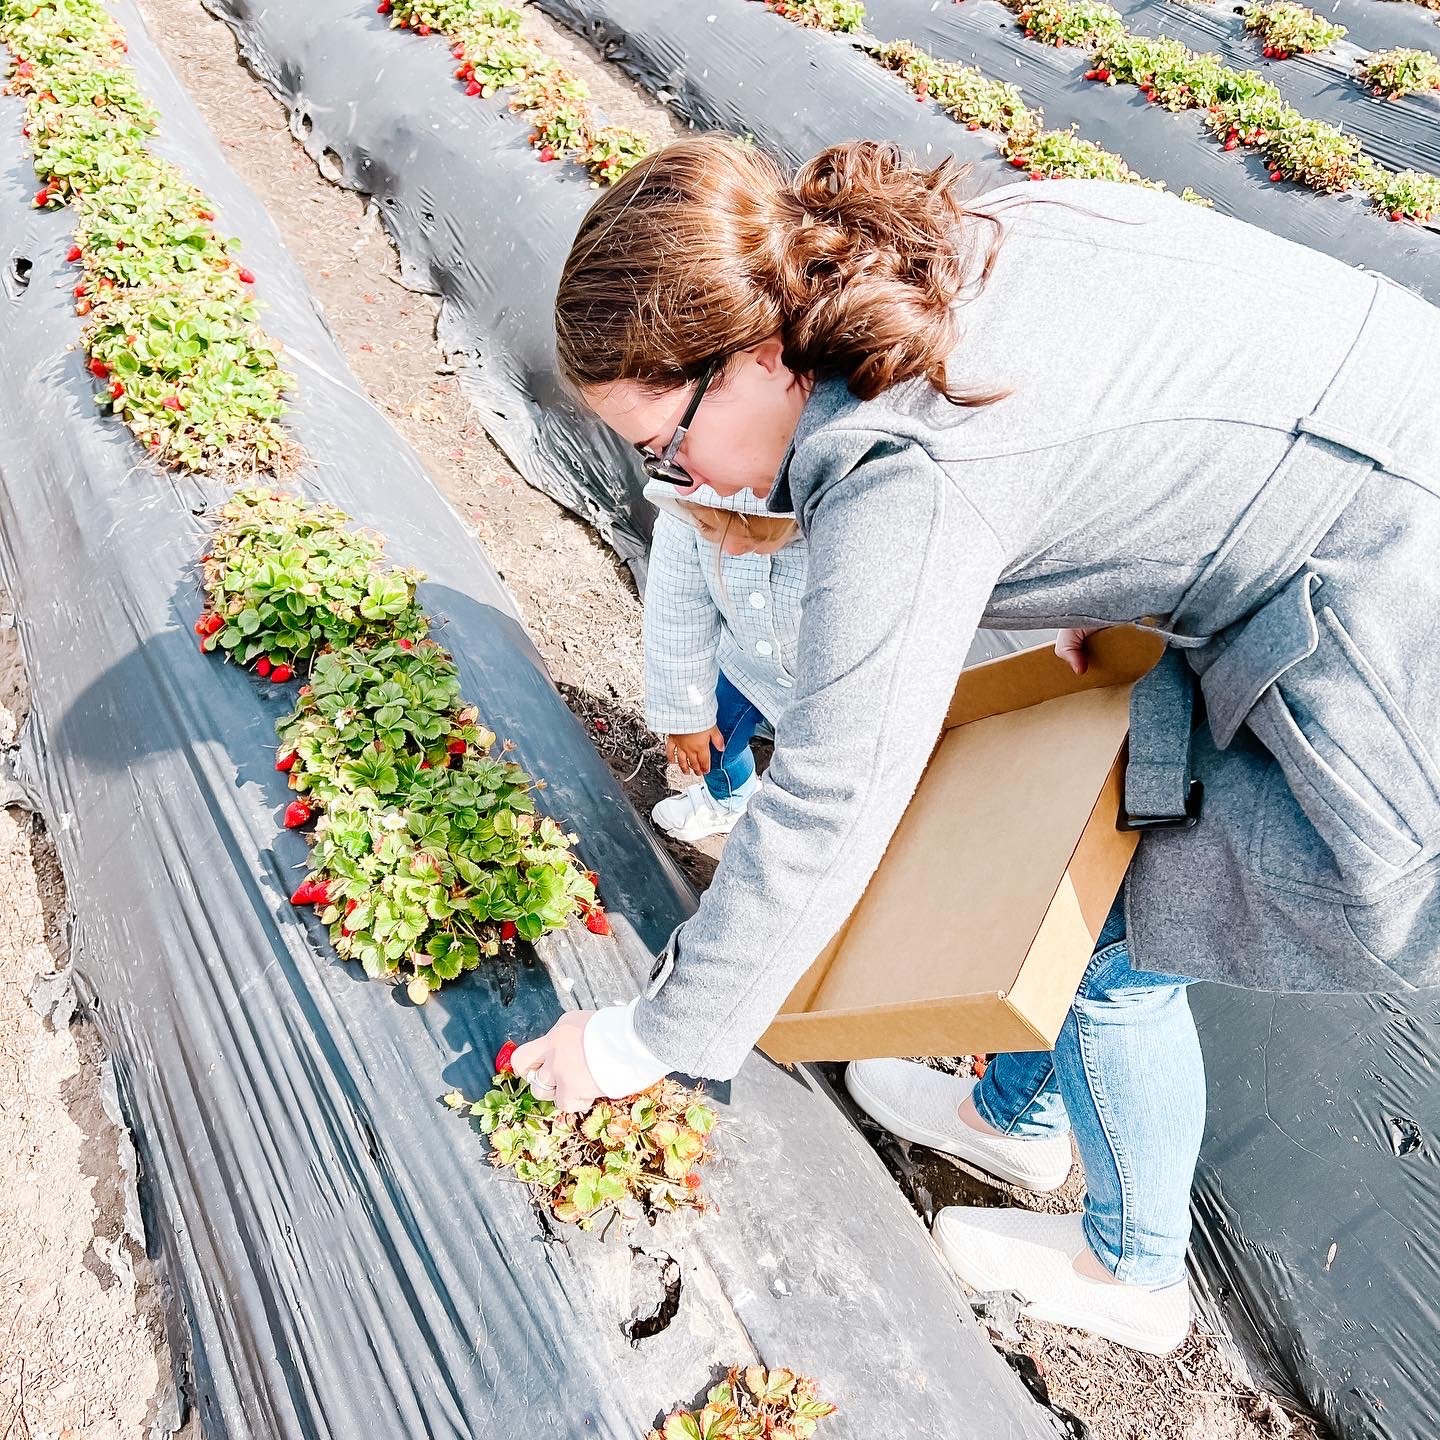
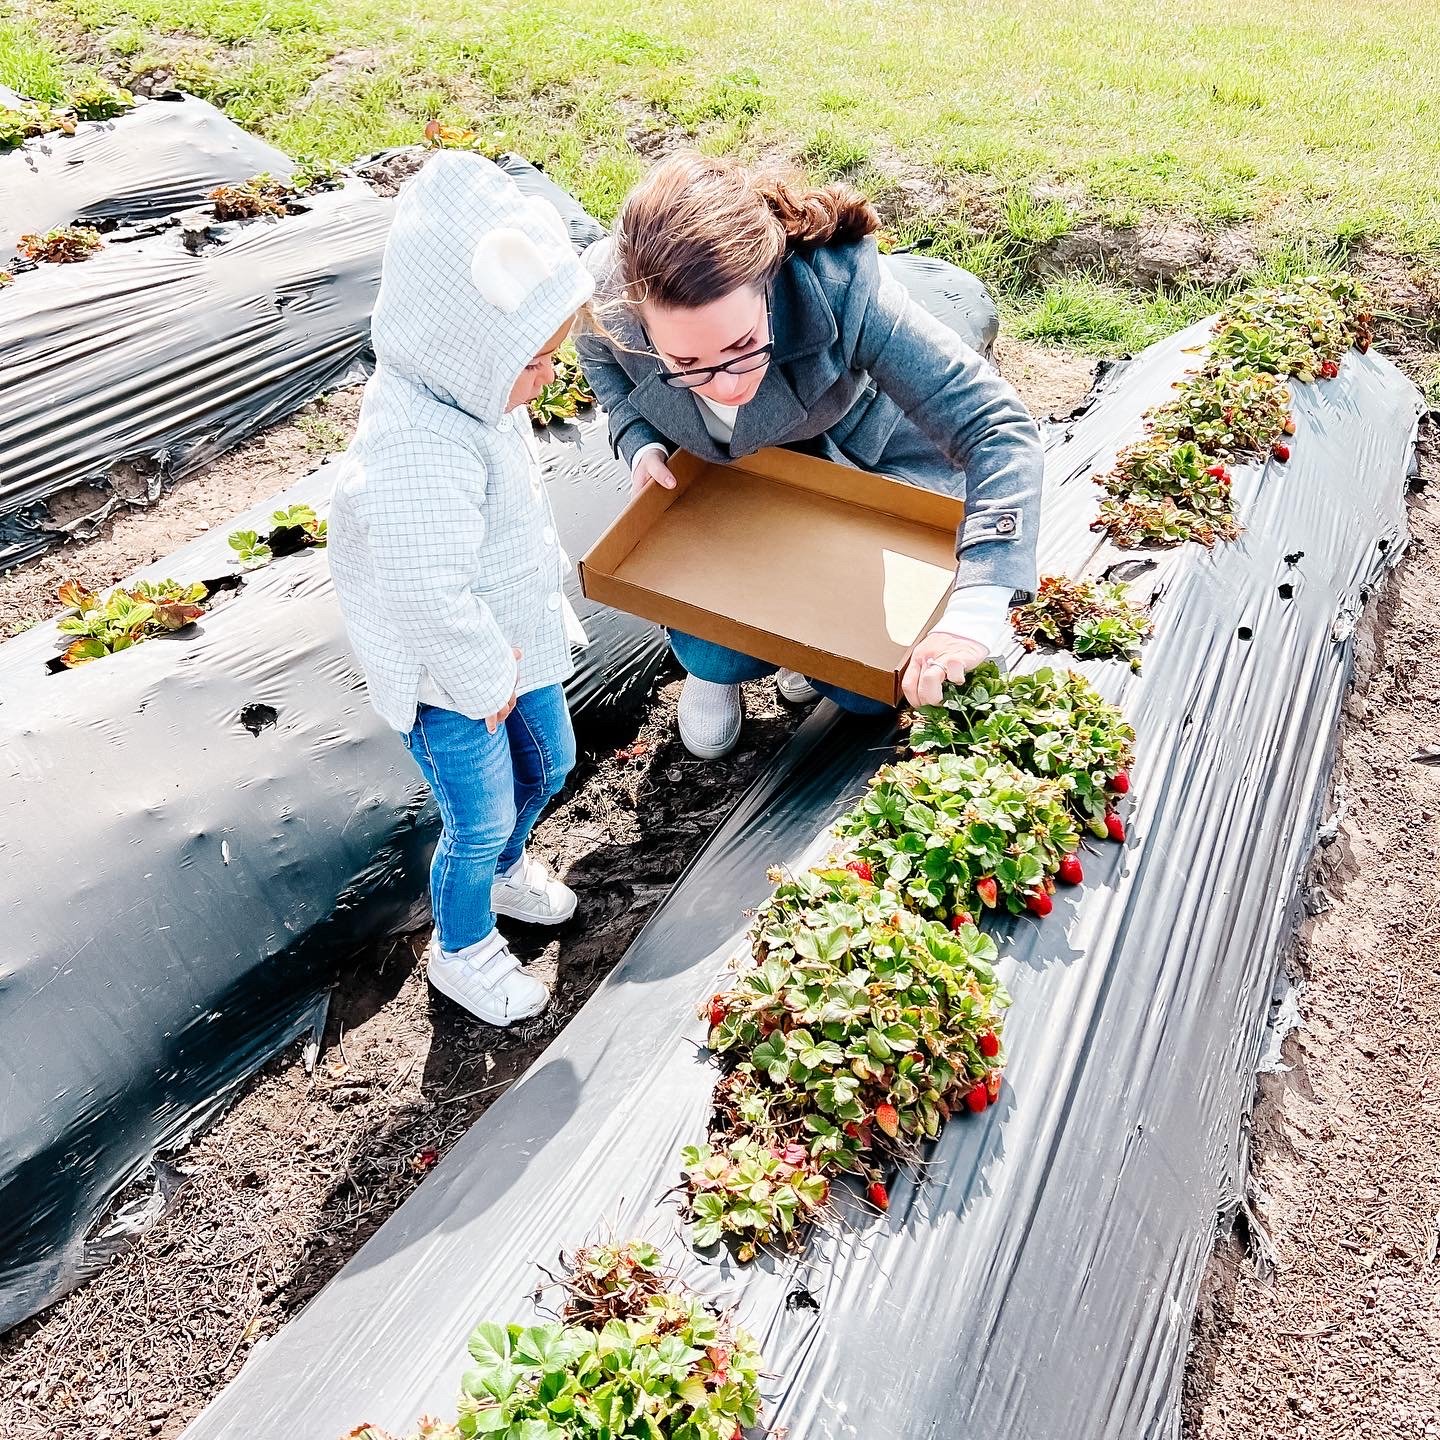
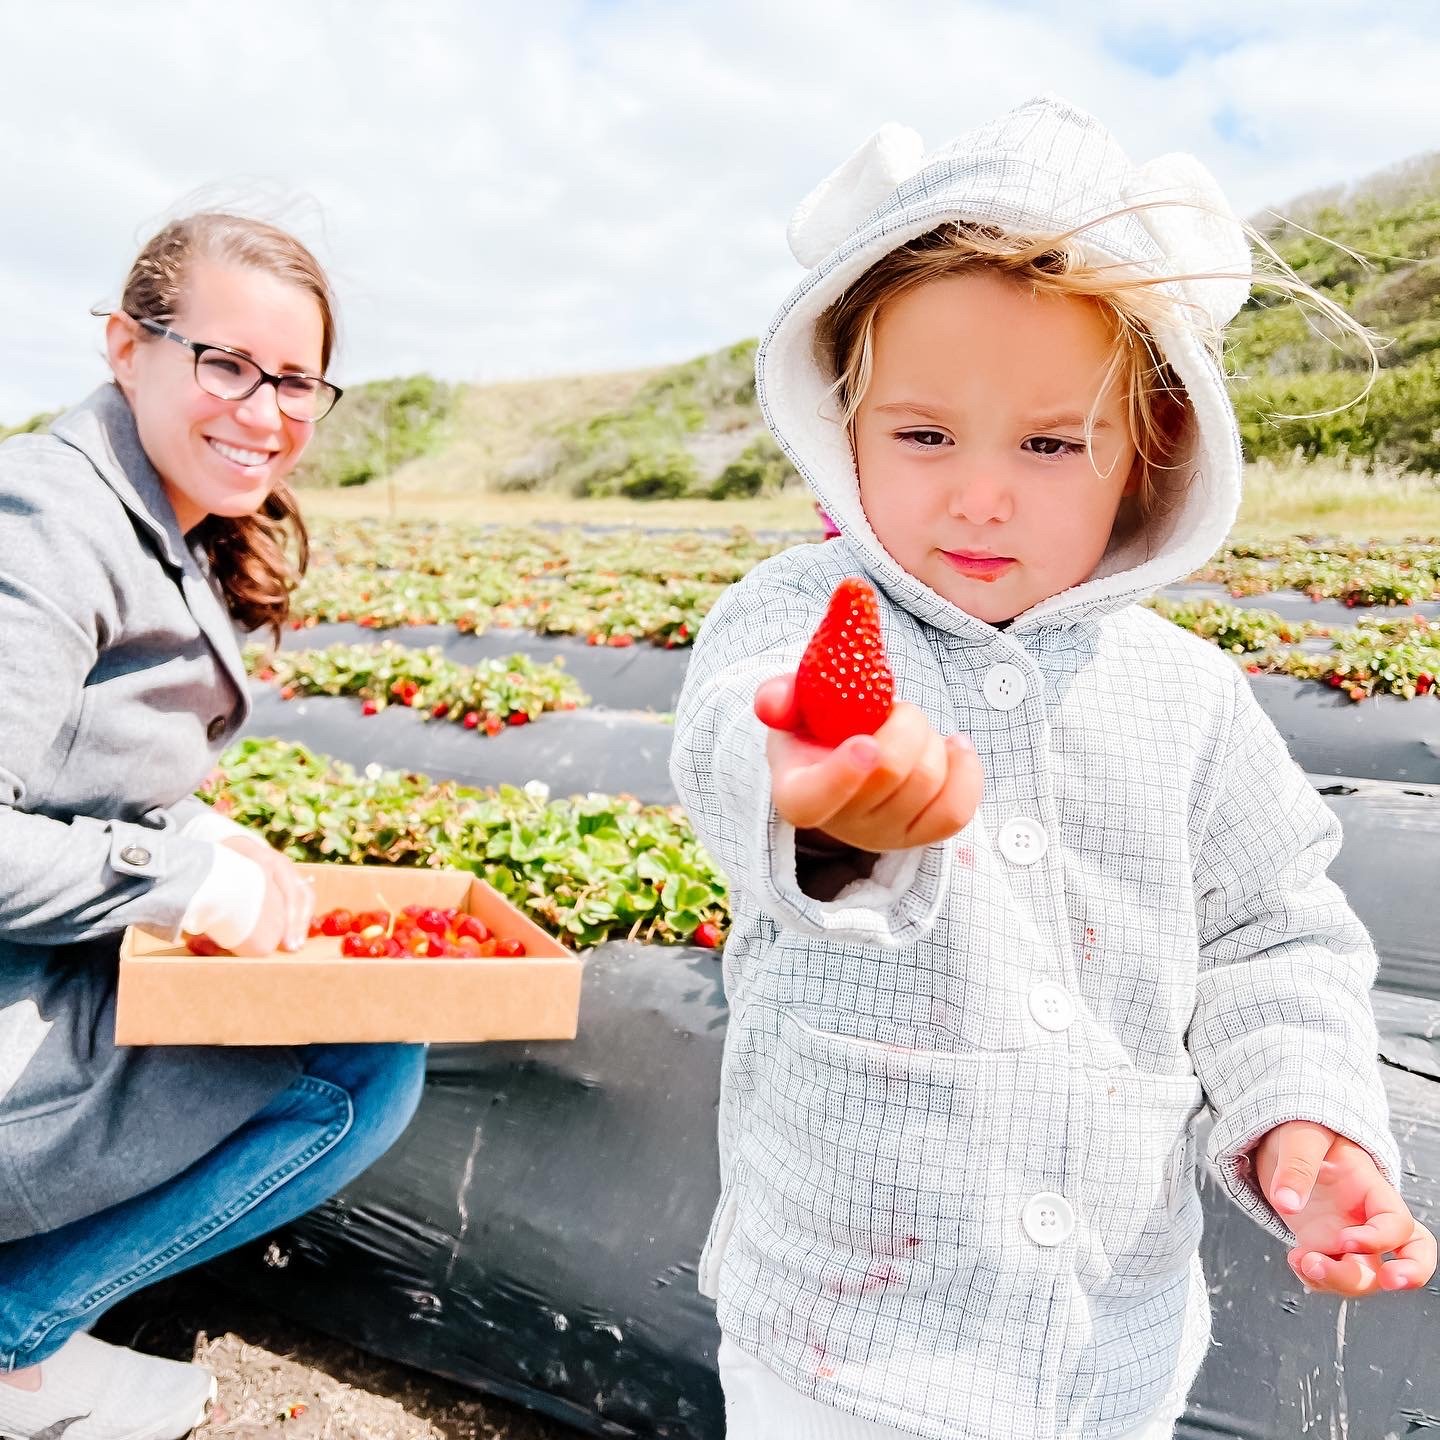
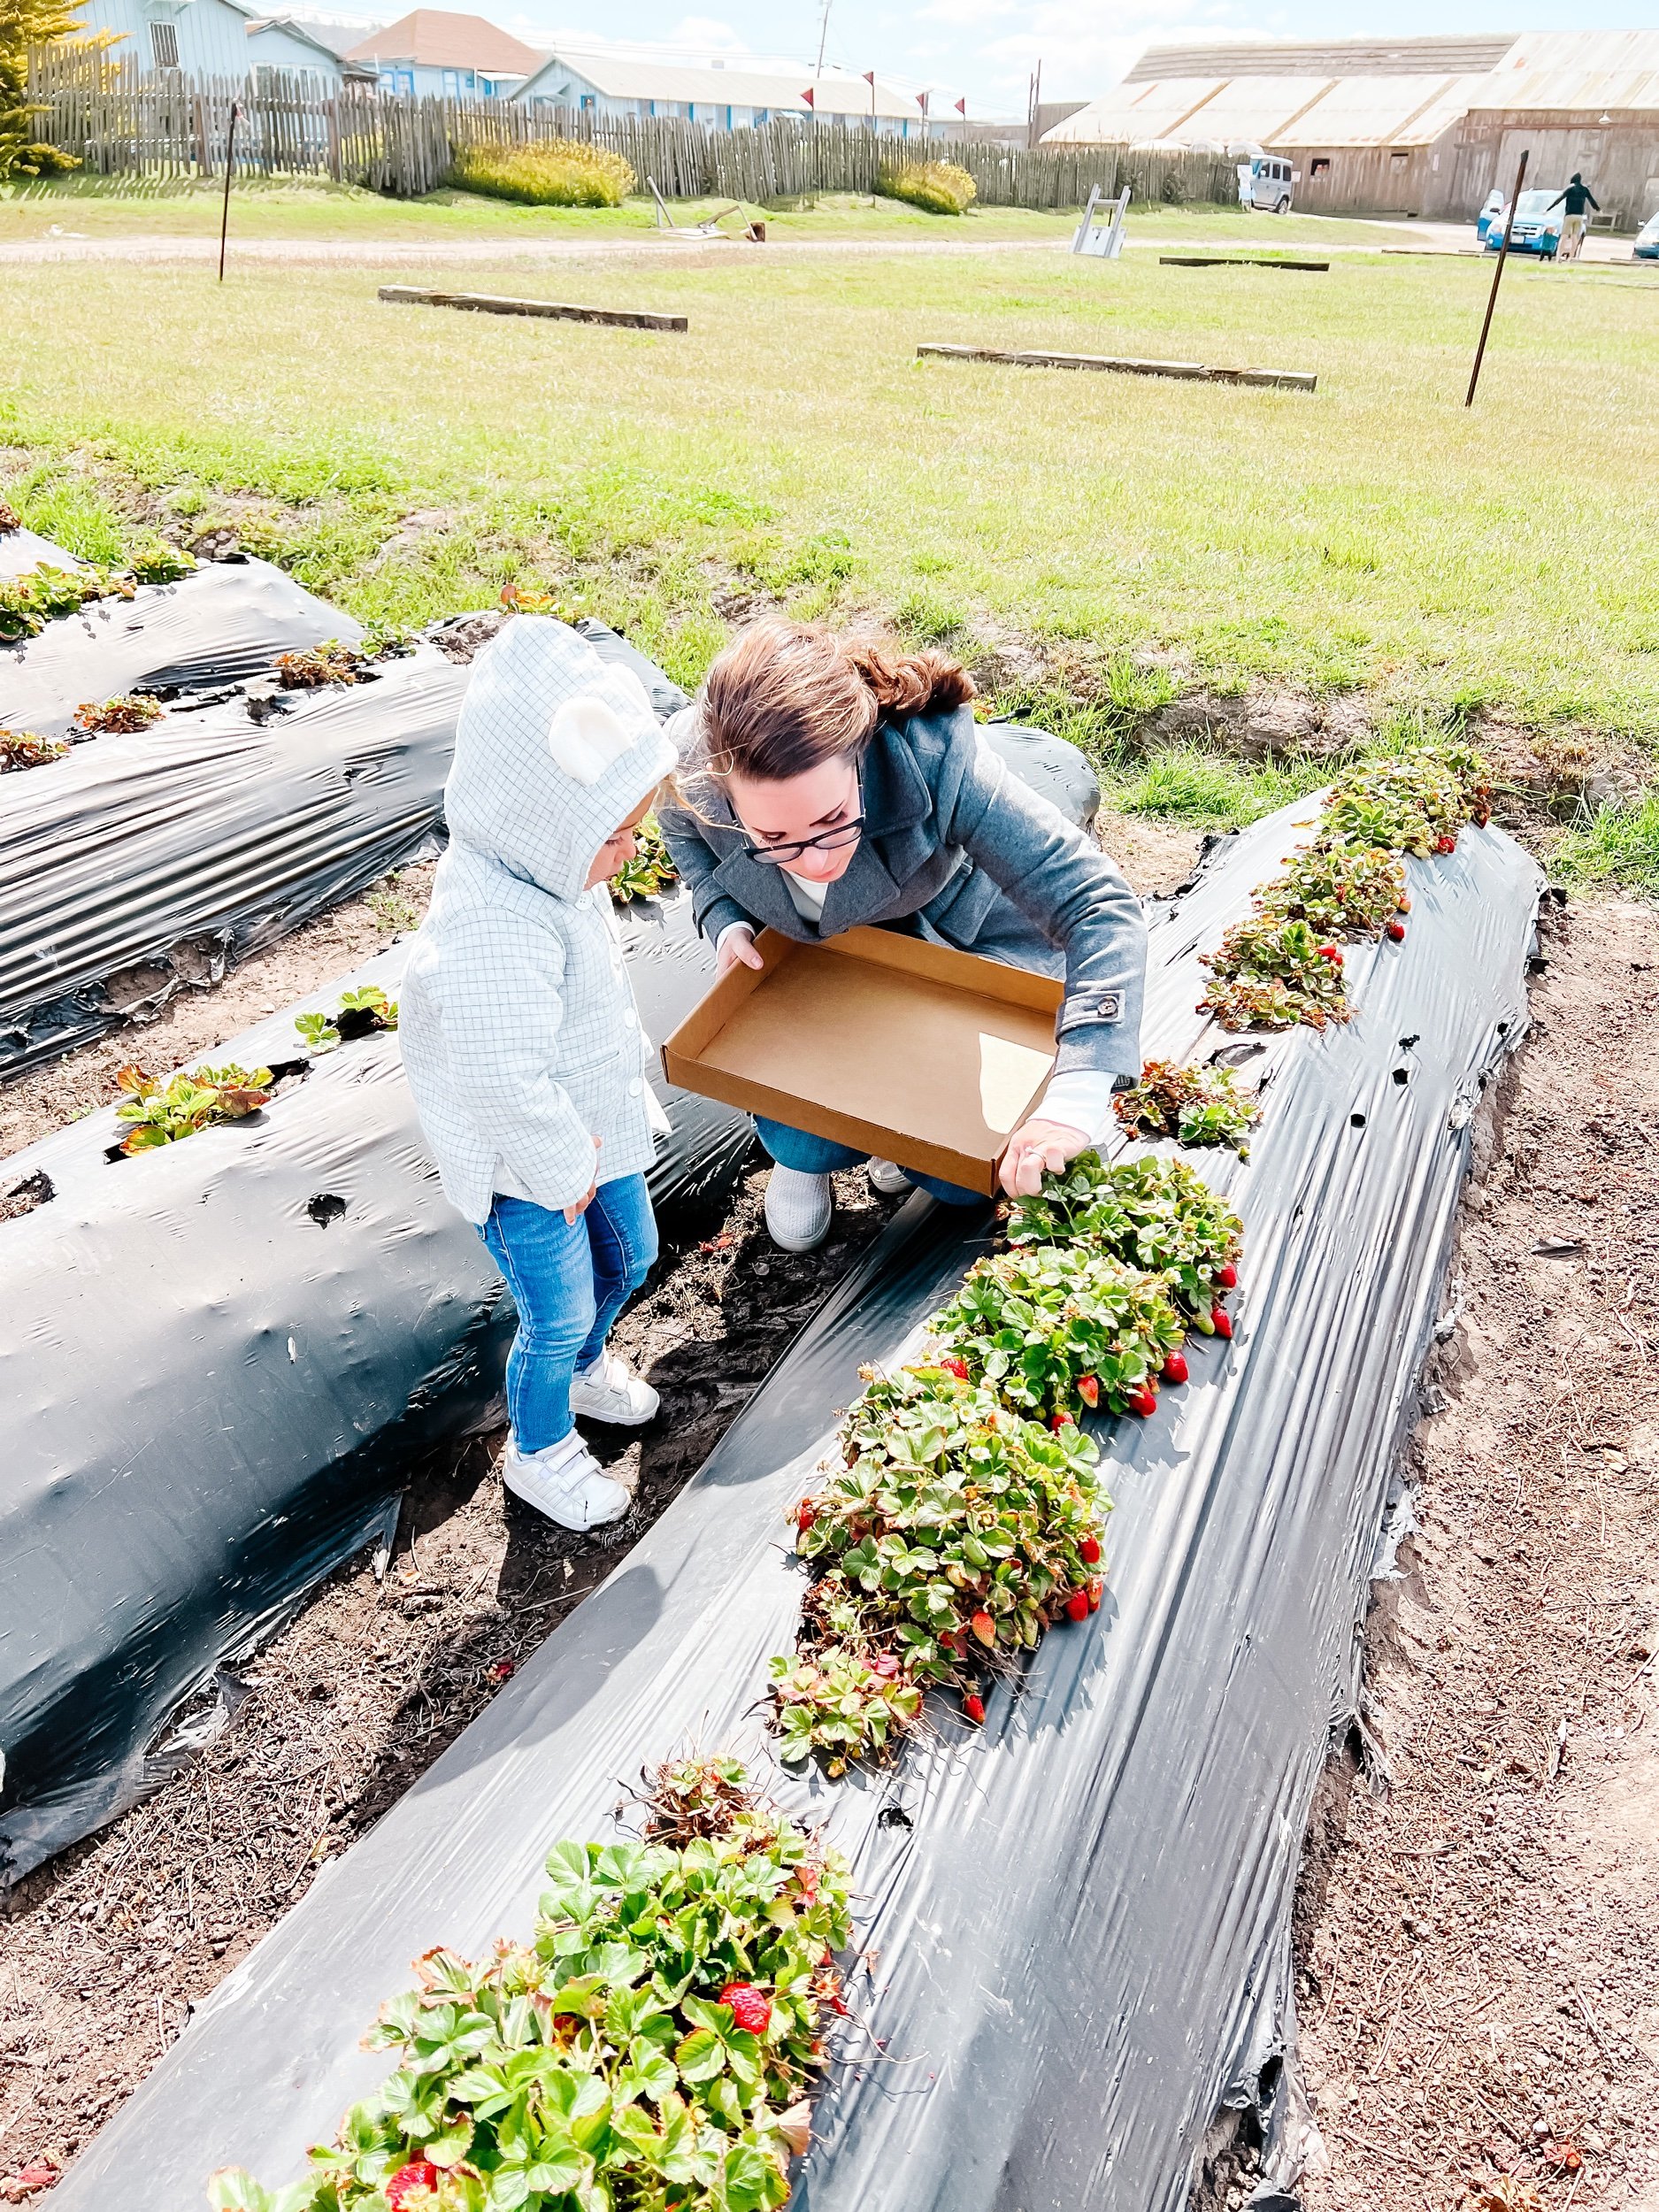
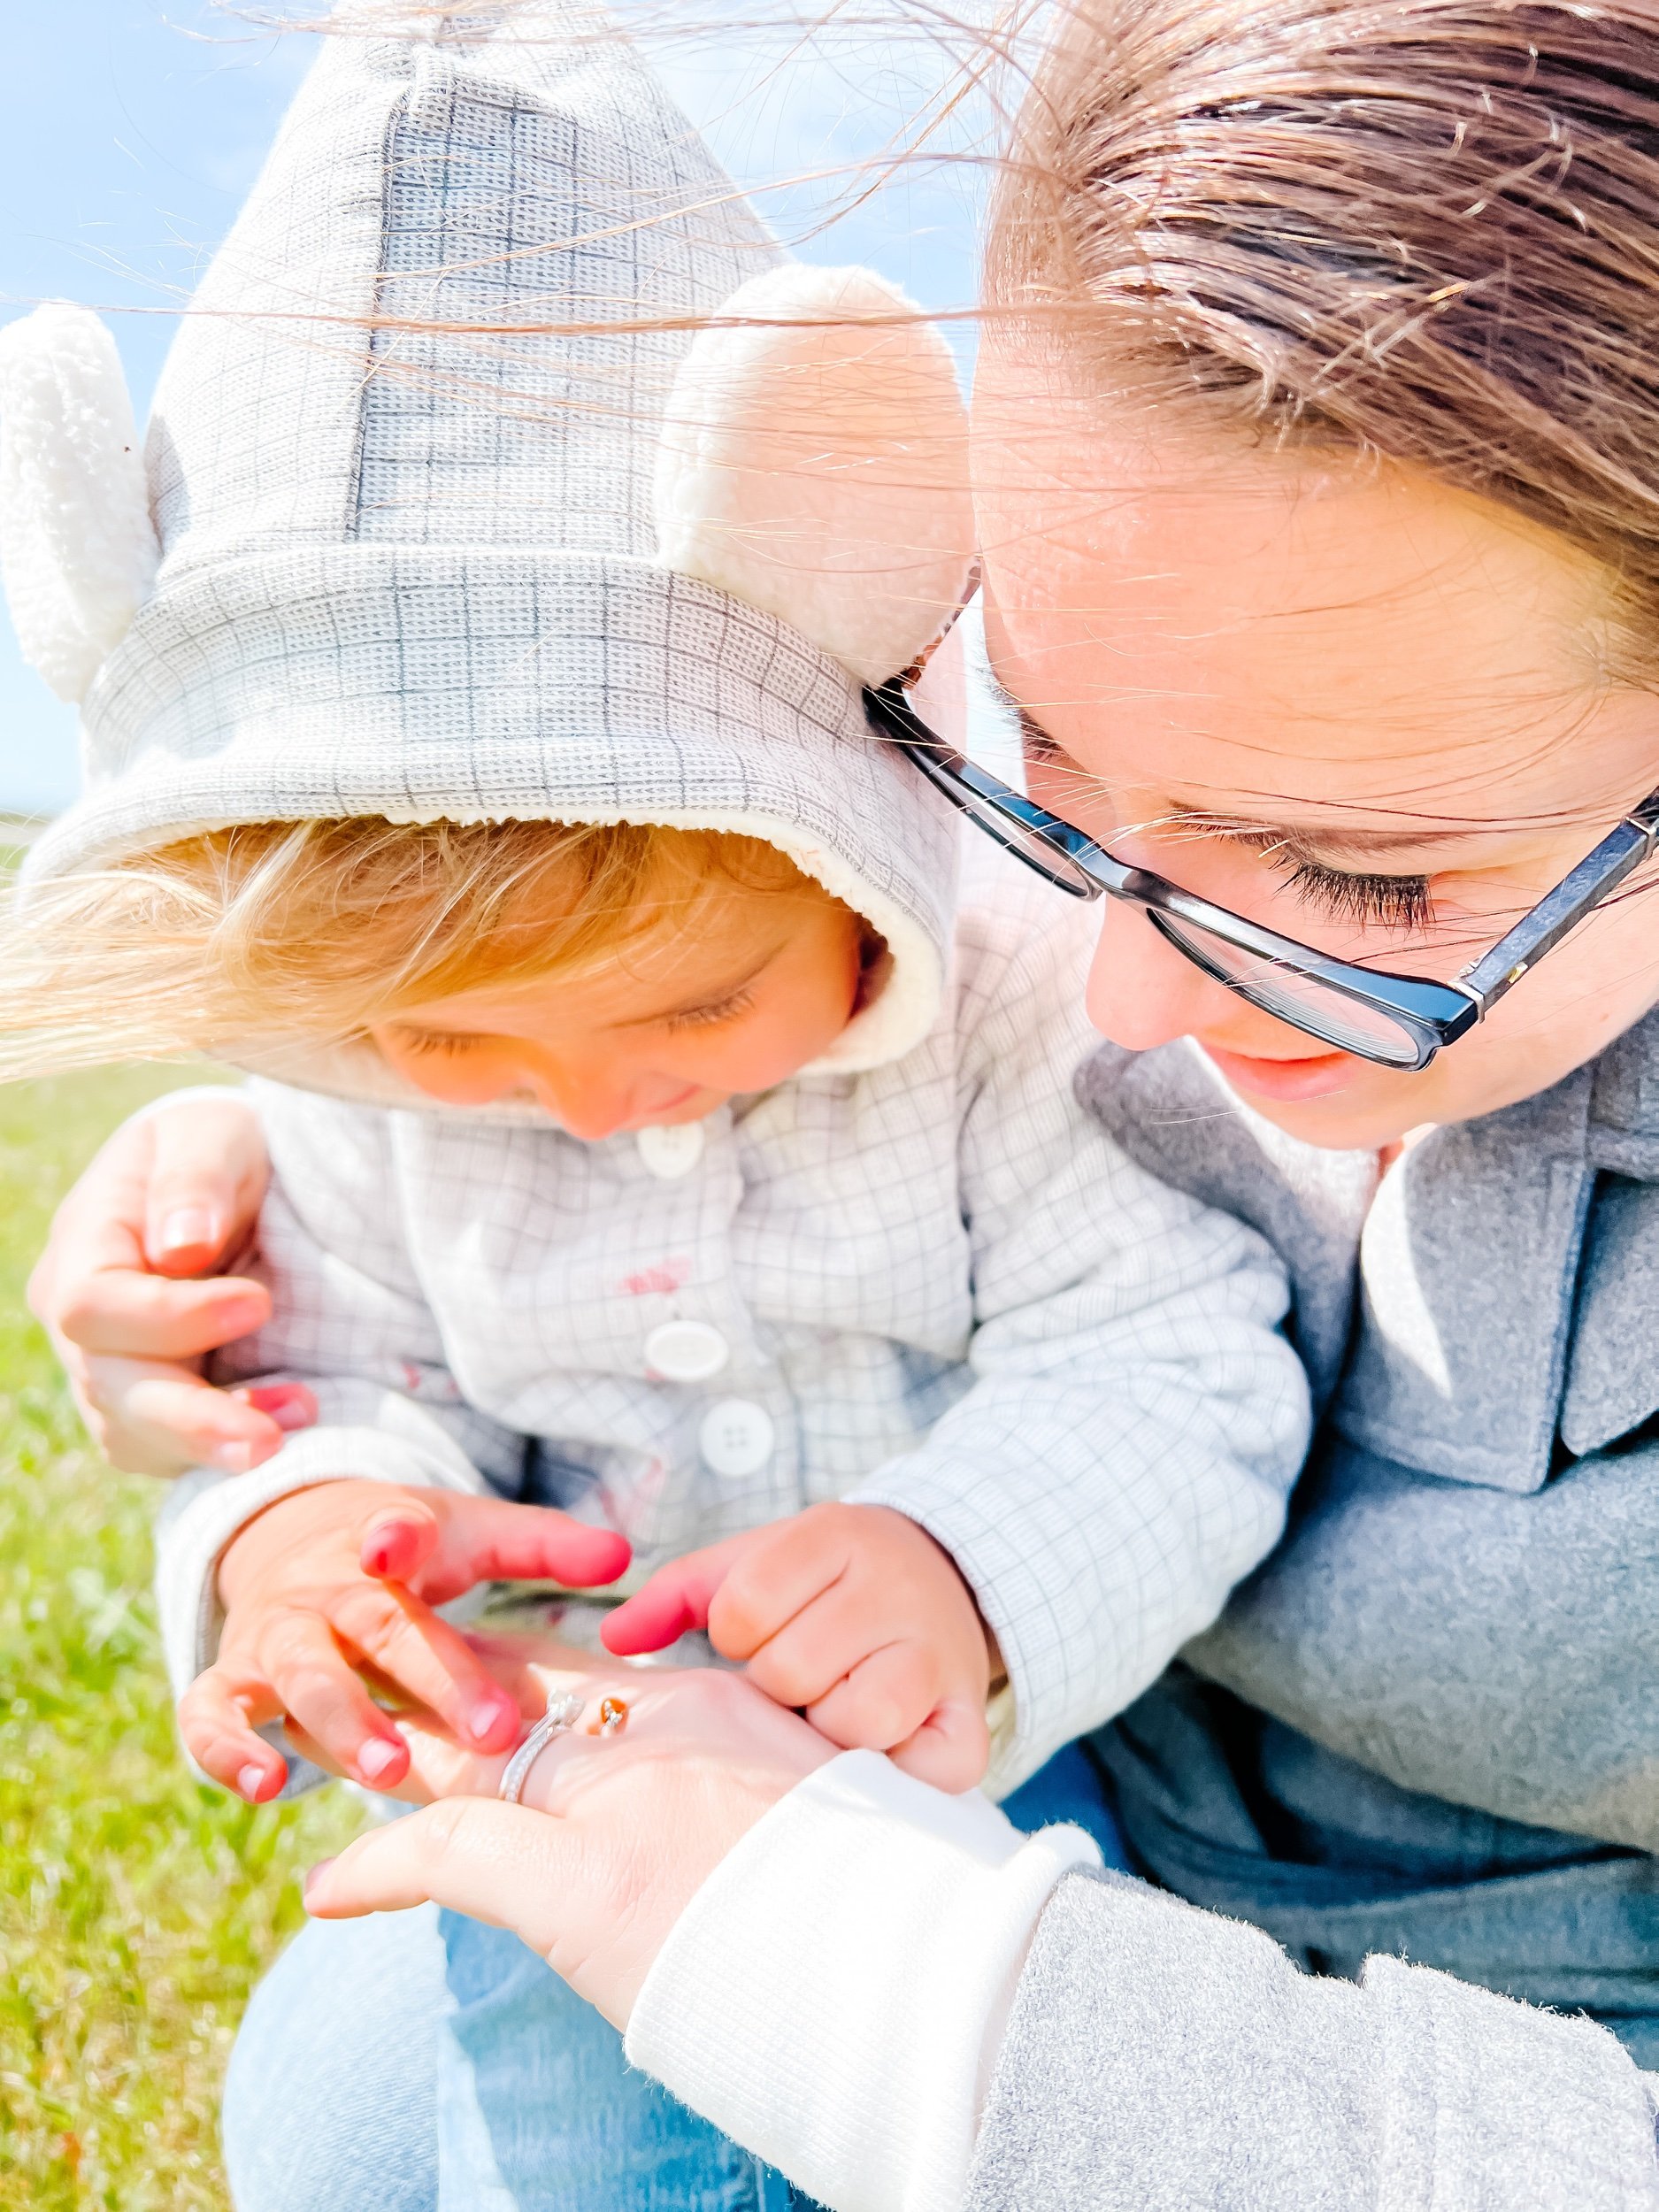
Happy National Pick Strawberries Day! We’re so lucky in that we live right next to Watsonville which is the strawberry capital of the US. And for Mother’s Day this year we took Sofie strawberry picking as a family. It was so much fun to watch her snag all of the strawberries and eat them as we went. The whole trip inspired me to design this adorable Strawberry Picking Dramatic play kit. How cute are these sensory set ups by @allthibgslambandroo and @pockets.of.sweetness!?


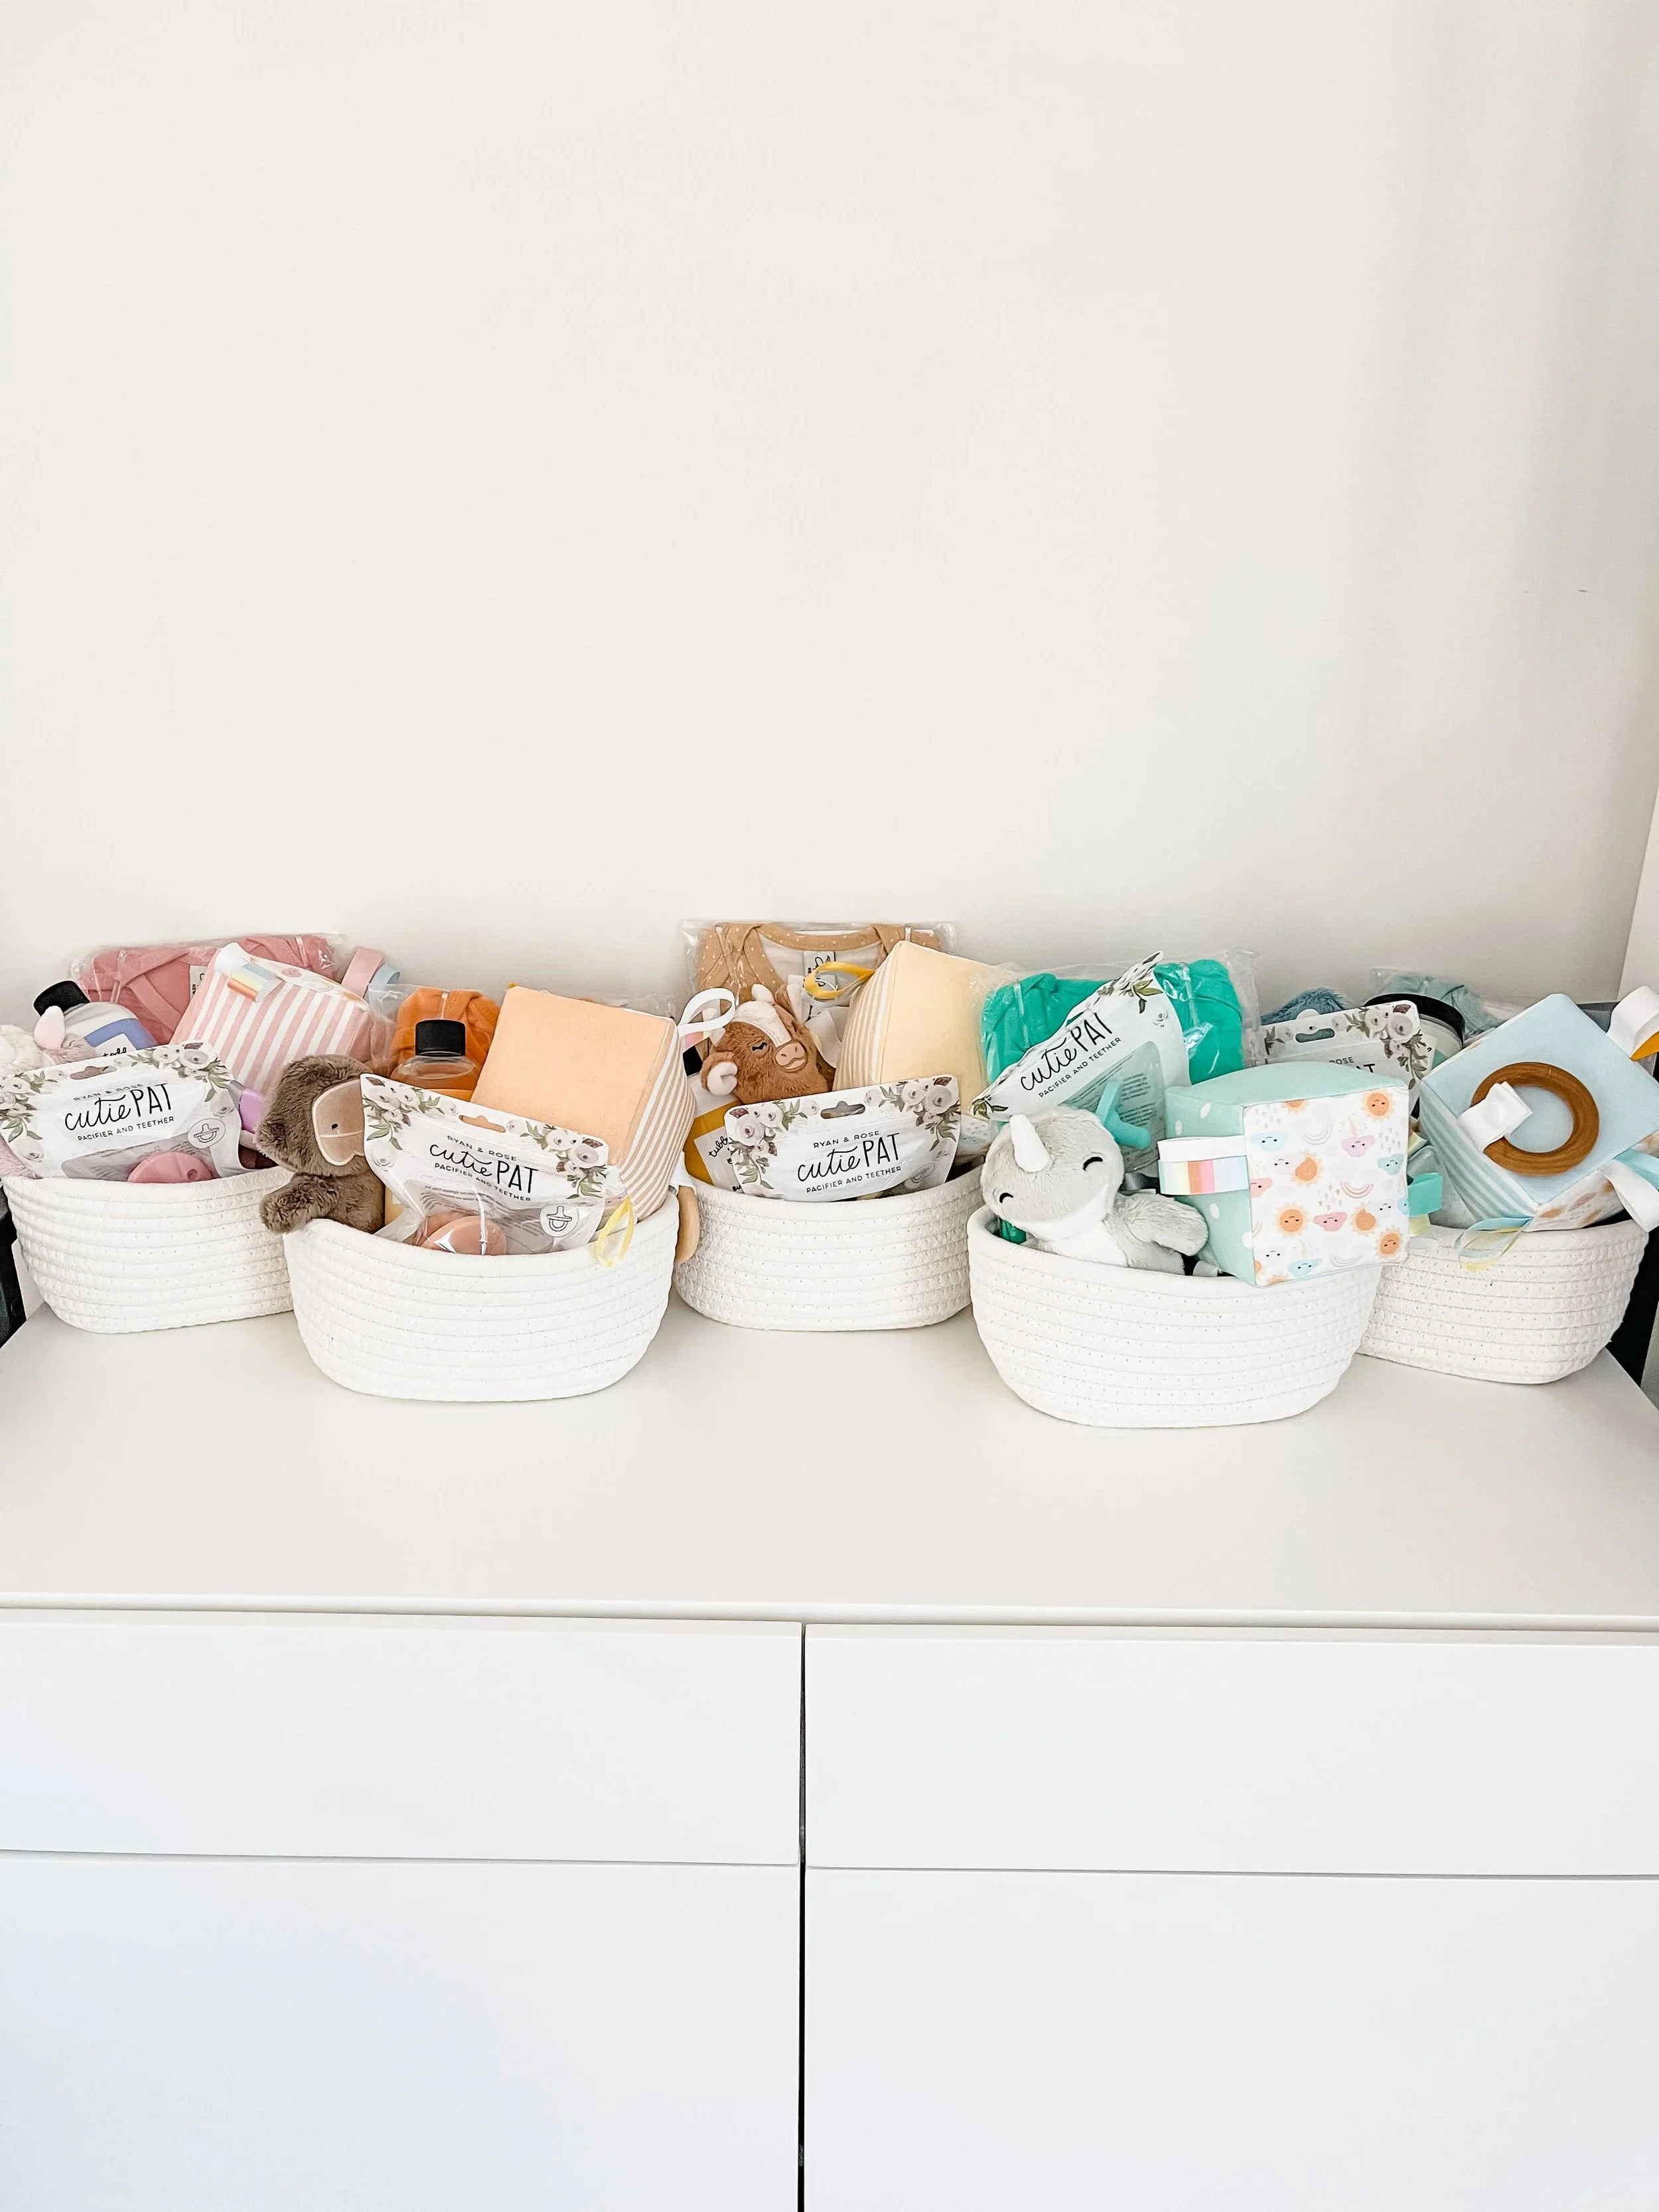
This spring five of my friends were having babies so I had to pull together the cutest little gift baskets to share all of my favorite small shops. And of course I wanted to make them all themed to bring them together. And luckily, because I was doing all five at once, I was able to make it more cost-effective. Check out all of the amazing shops below for the cutest baby gifts.
Copper Pearl Knotted Gowns — These are so adorable and we absolutely loved Copper Pearl bibs when Sofie was a baby. And now that they have gowns and onesies, I had to snag them in these adorable rainbow colors.
Tubby Toddy— When Sofie was a baby she had such terrible dry itchy skin. We tried everything to clear it up and eventually found the All Over Ointment from Tubby Todd and within two days her skin was perfect. Highly recommend trying it out if you haven’t already! Get 10% off your order!
Slumberkins — Sofie loves her Honey Bear and she sleeps with them every night. So when I saw that Slumberkins had the five packs of friend, I thought it would be the perfect way to get my friends hooked on Slumberkins too. If you haven’t already seen these gift sets for the minis, you should definitely check them out. Sofie loves the books and the stories that go with each friend.
Little Cozy Fox — I teamed up with Little Cozy Fox to create the fabric for these custom baby blocks and they do not disappoint! I love them so much they’re just so adorable. And perfect for those little teethers.
Ryan & Rose — When Sofie was a newborn these little CutiePat pacifiers were amazing. The clips kept them attached so that she could retrieve them herself and helped her self-sooth. And I don’t know, maybe we just got lucky, but she never got addicted or attached to them! Get $5 off your first purchase with this link: Get $5 Off
Memory Game Cards — Of course I had to throw in some GoodnightFox goodies and I picked a memory game card set to match each color basket.
Woven Baskets - Okay, these ones aren’t from a small shop, but they were the cutest little way to bundle everything together.


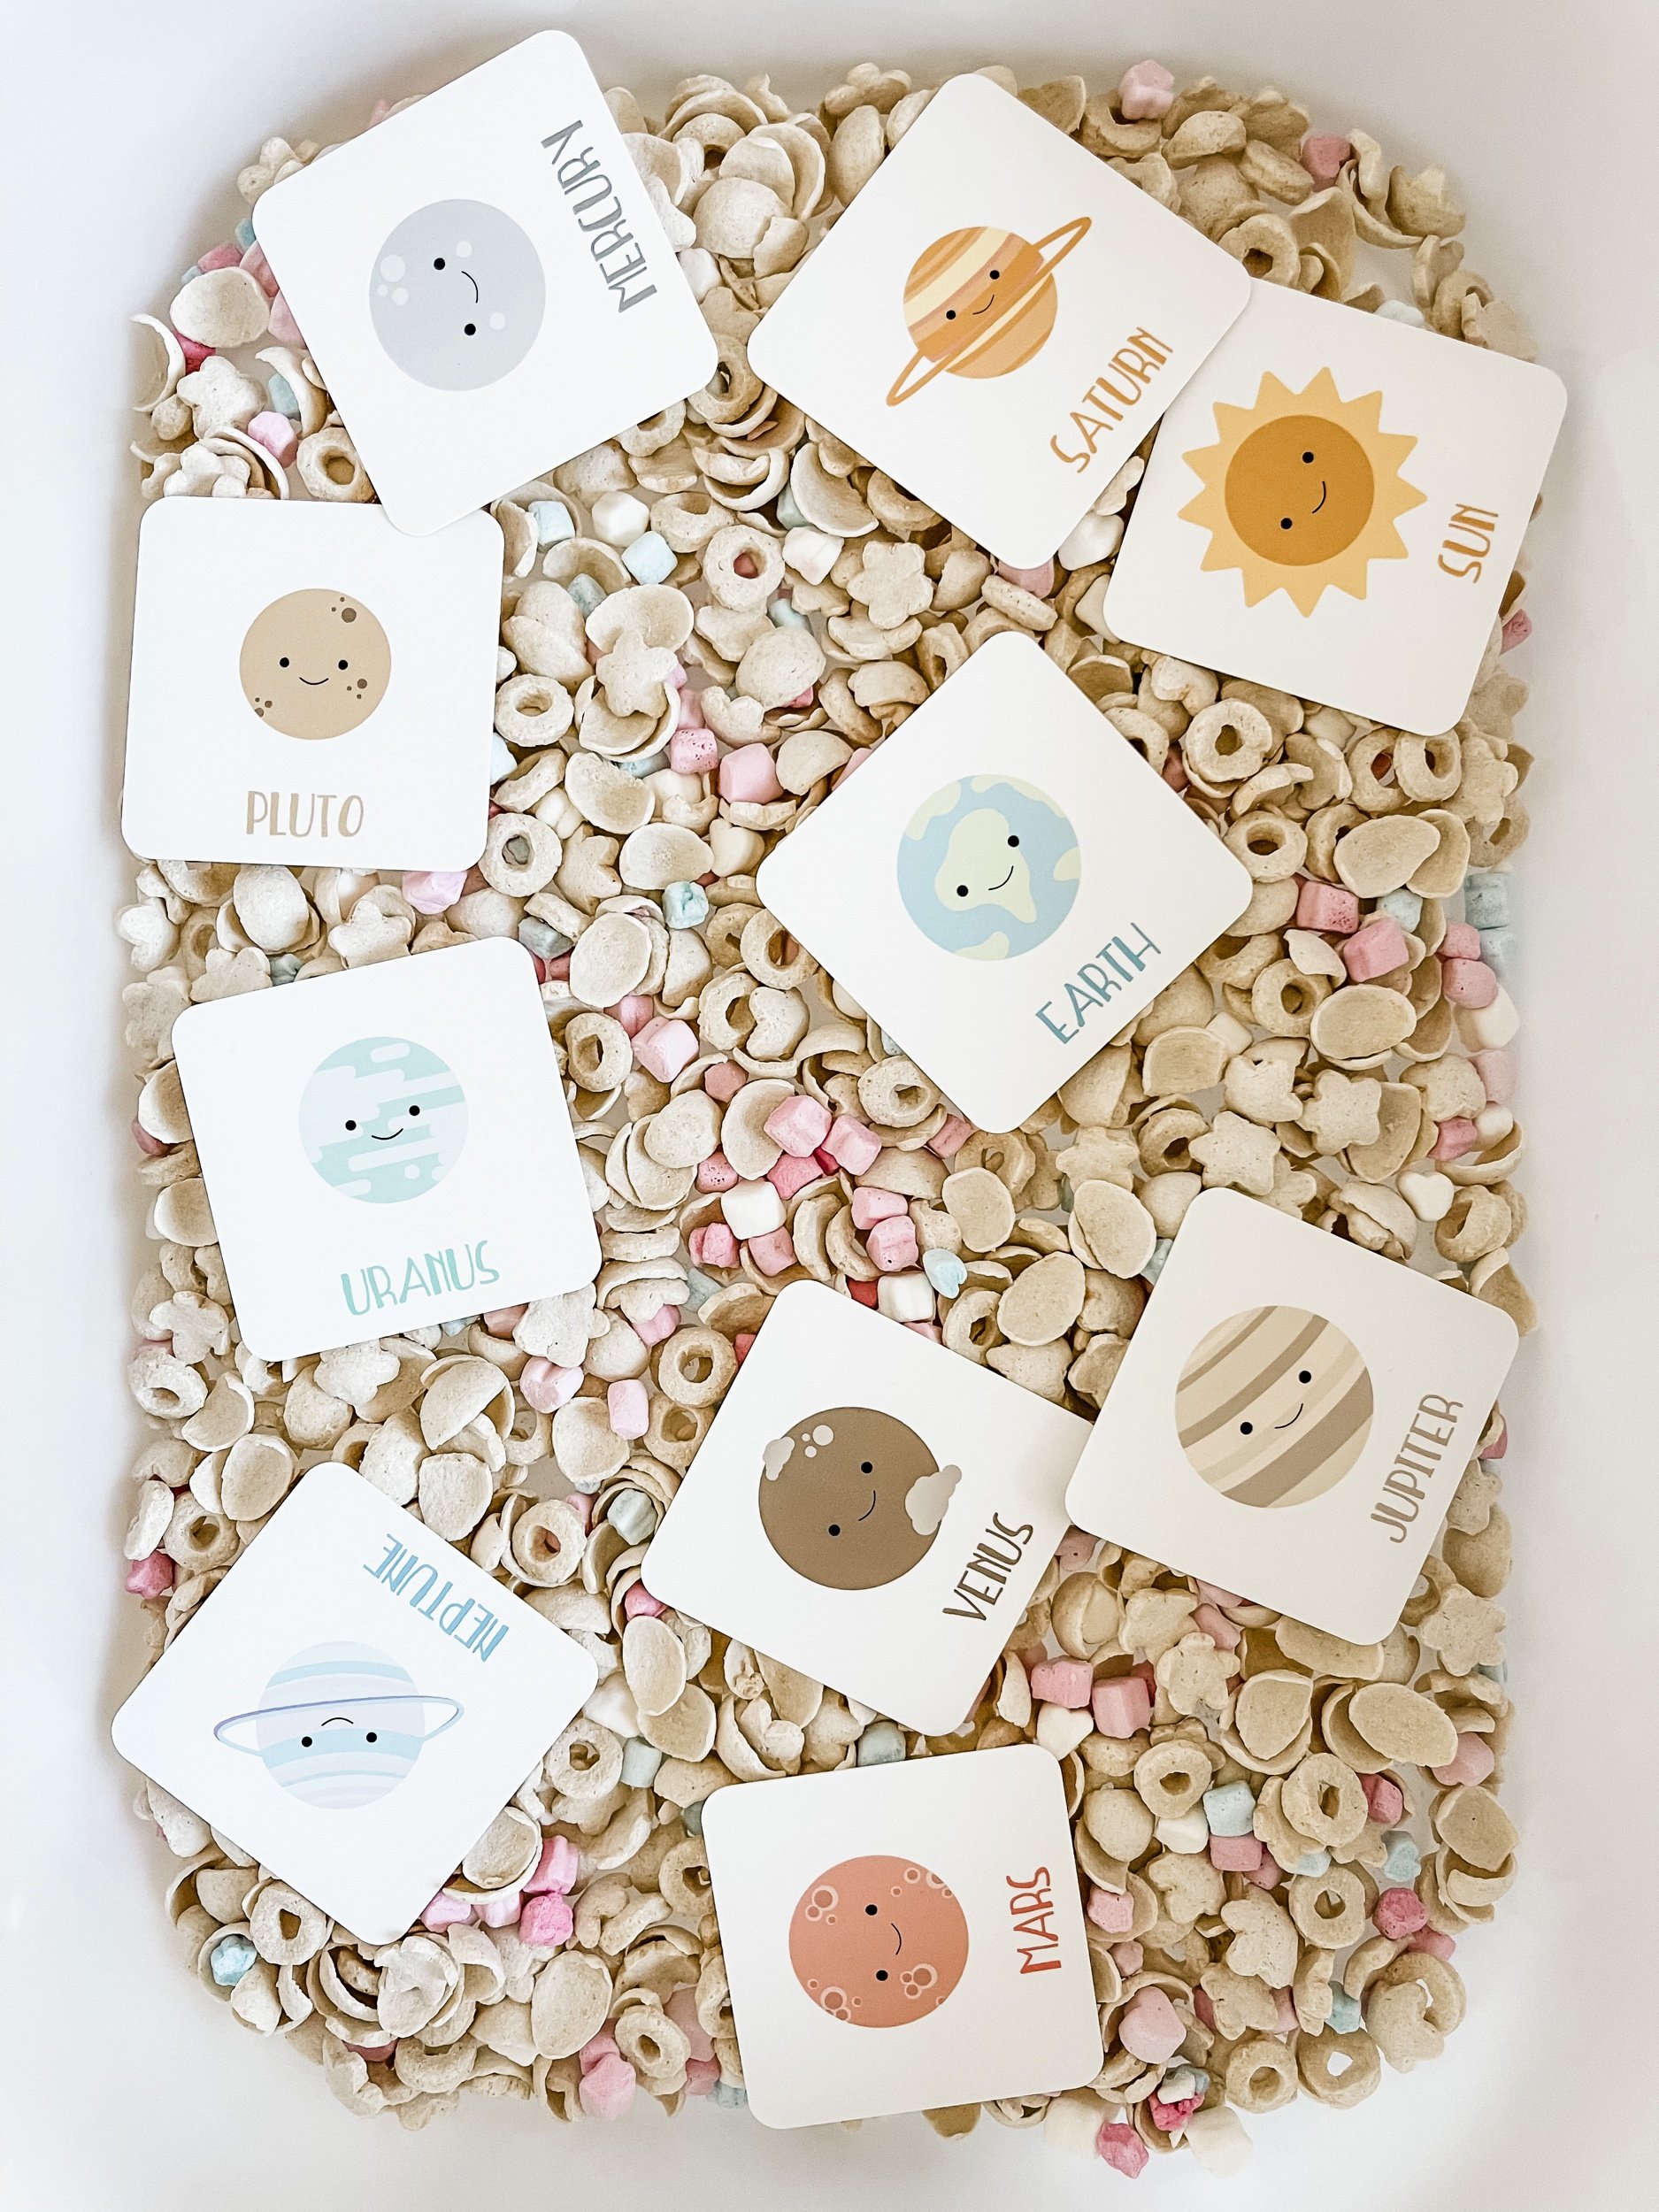
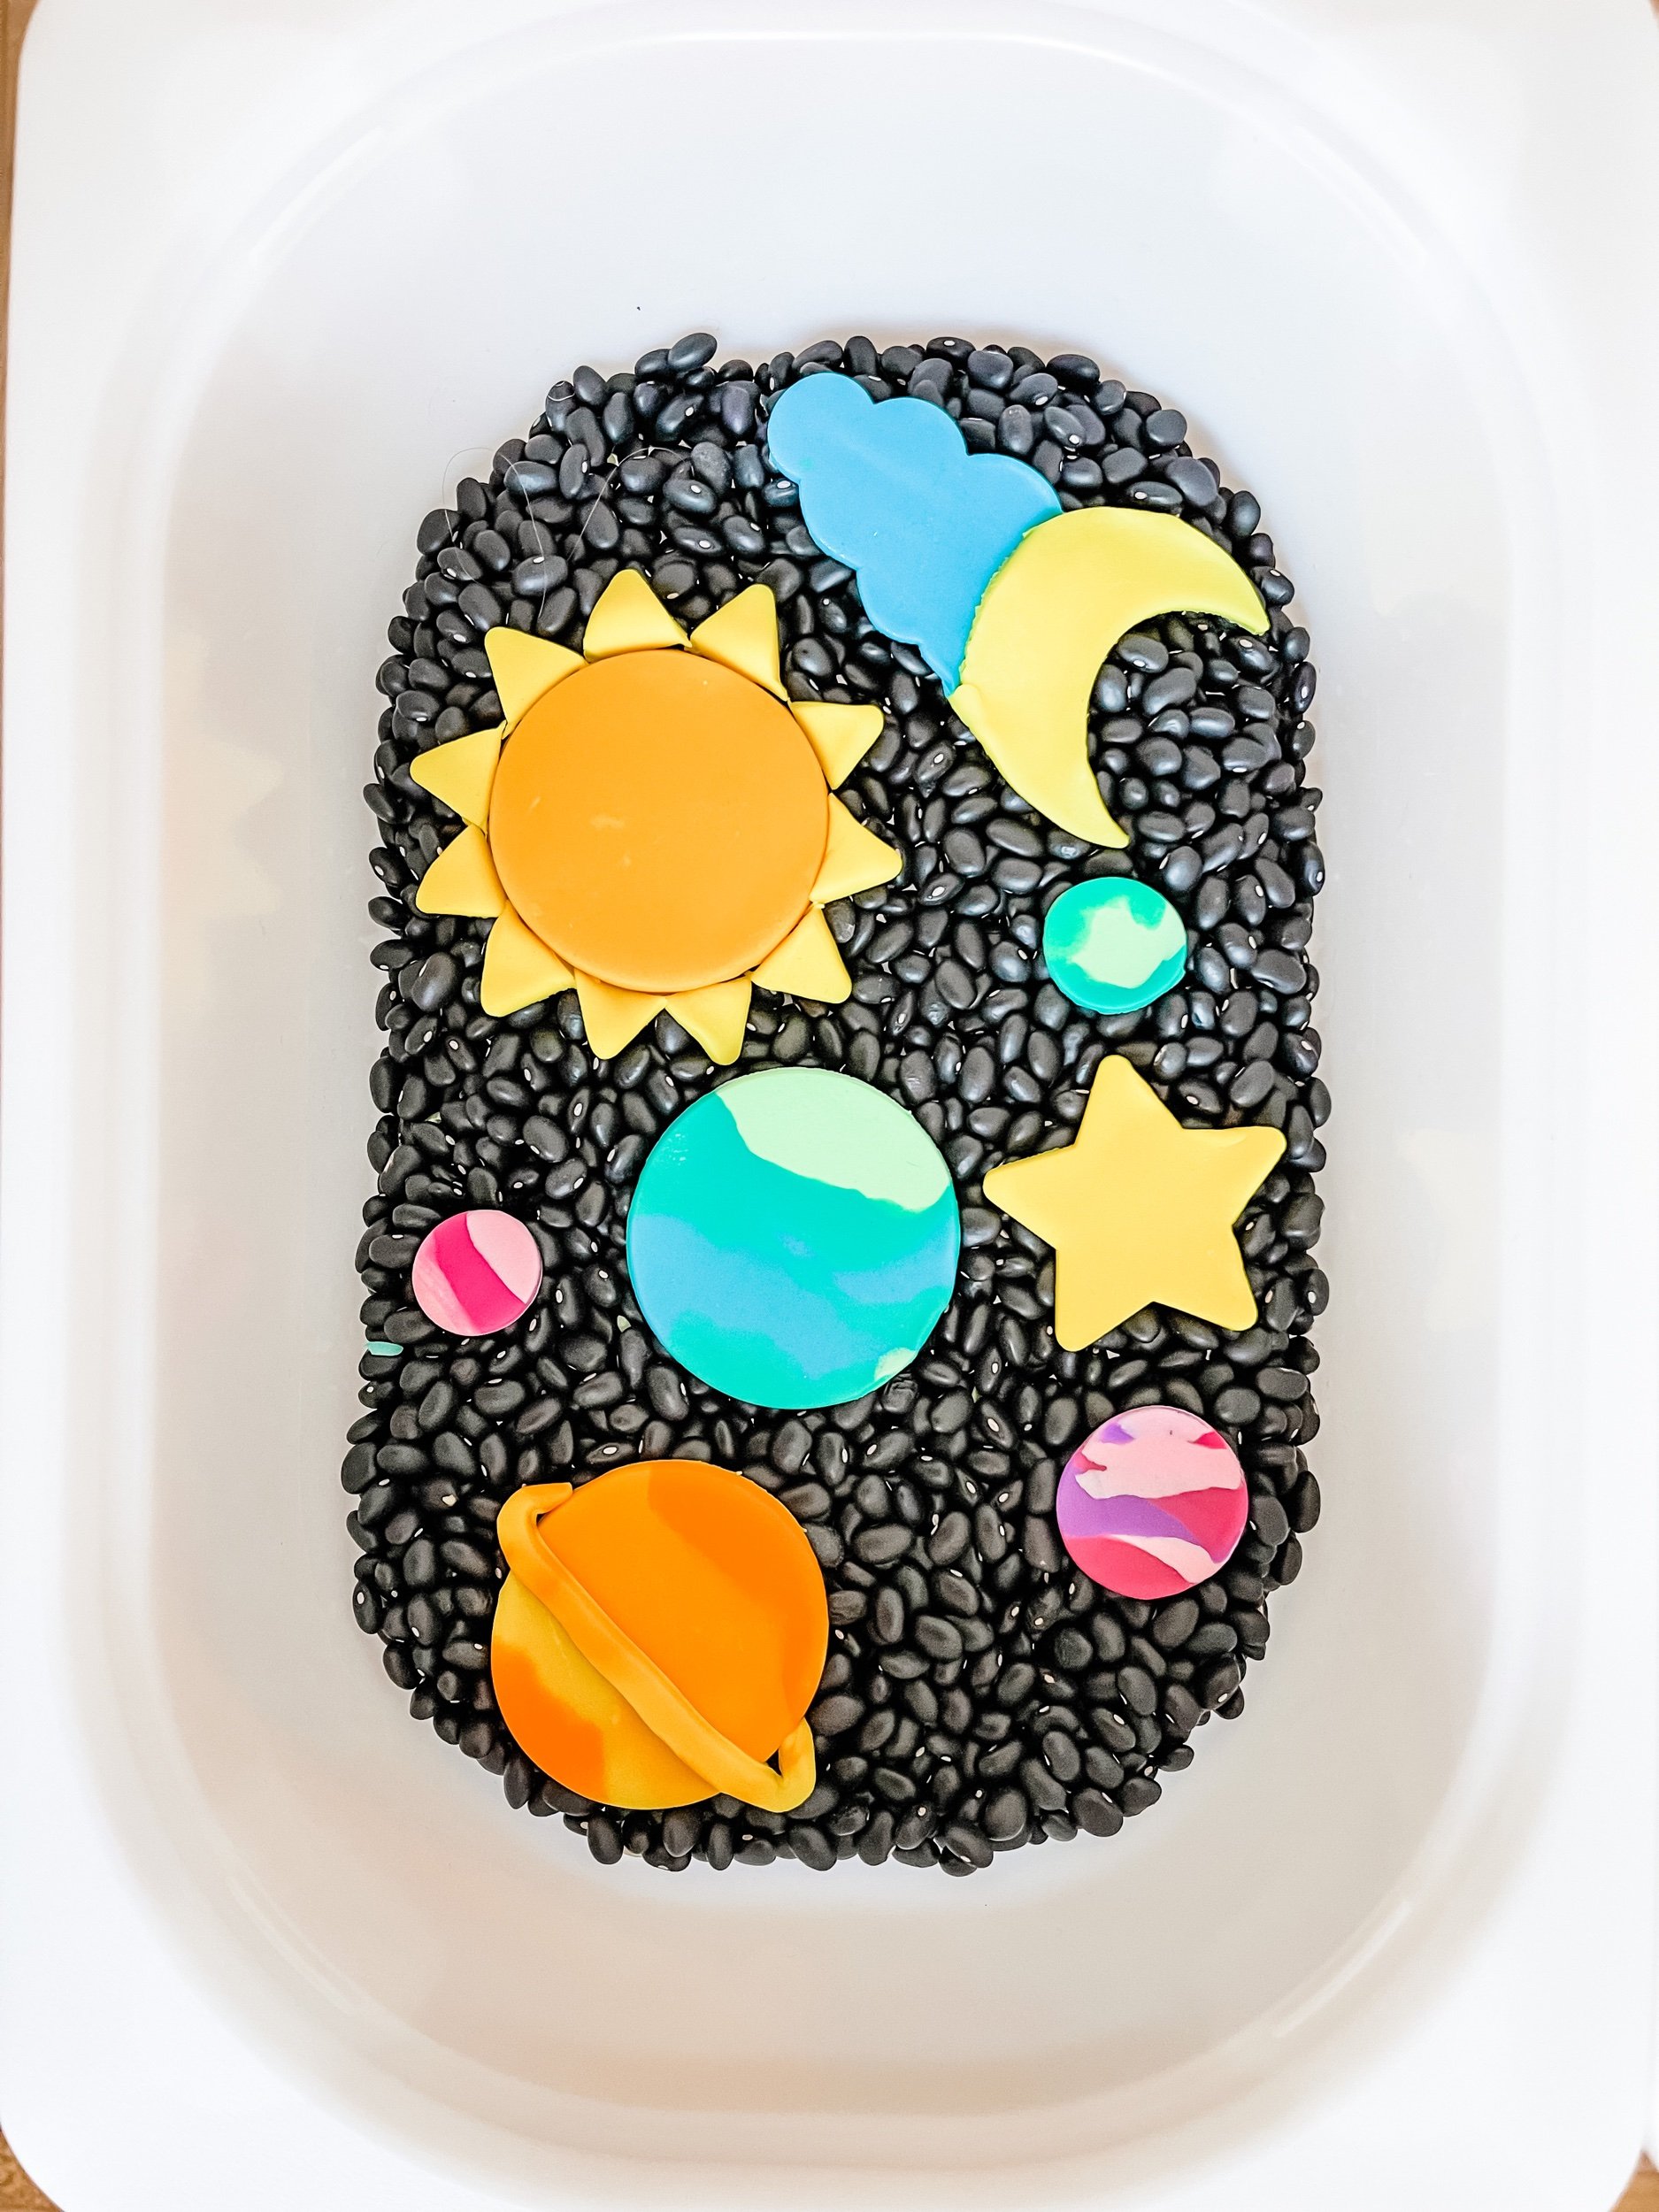
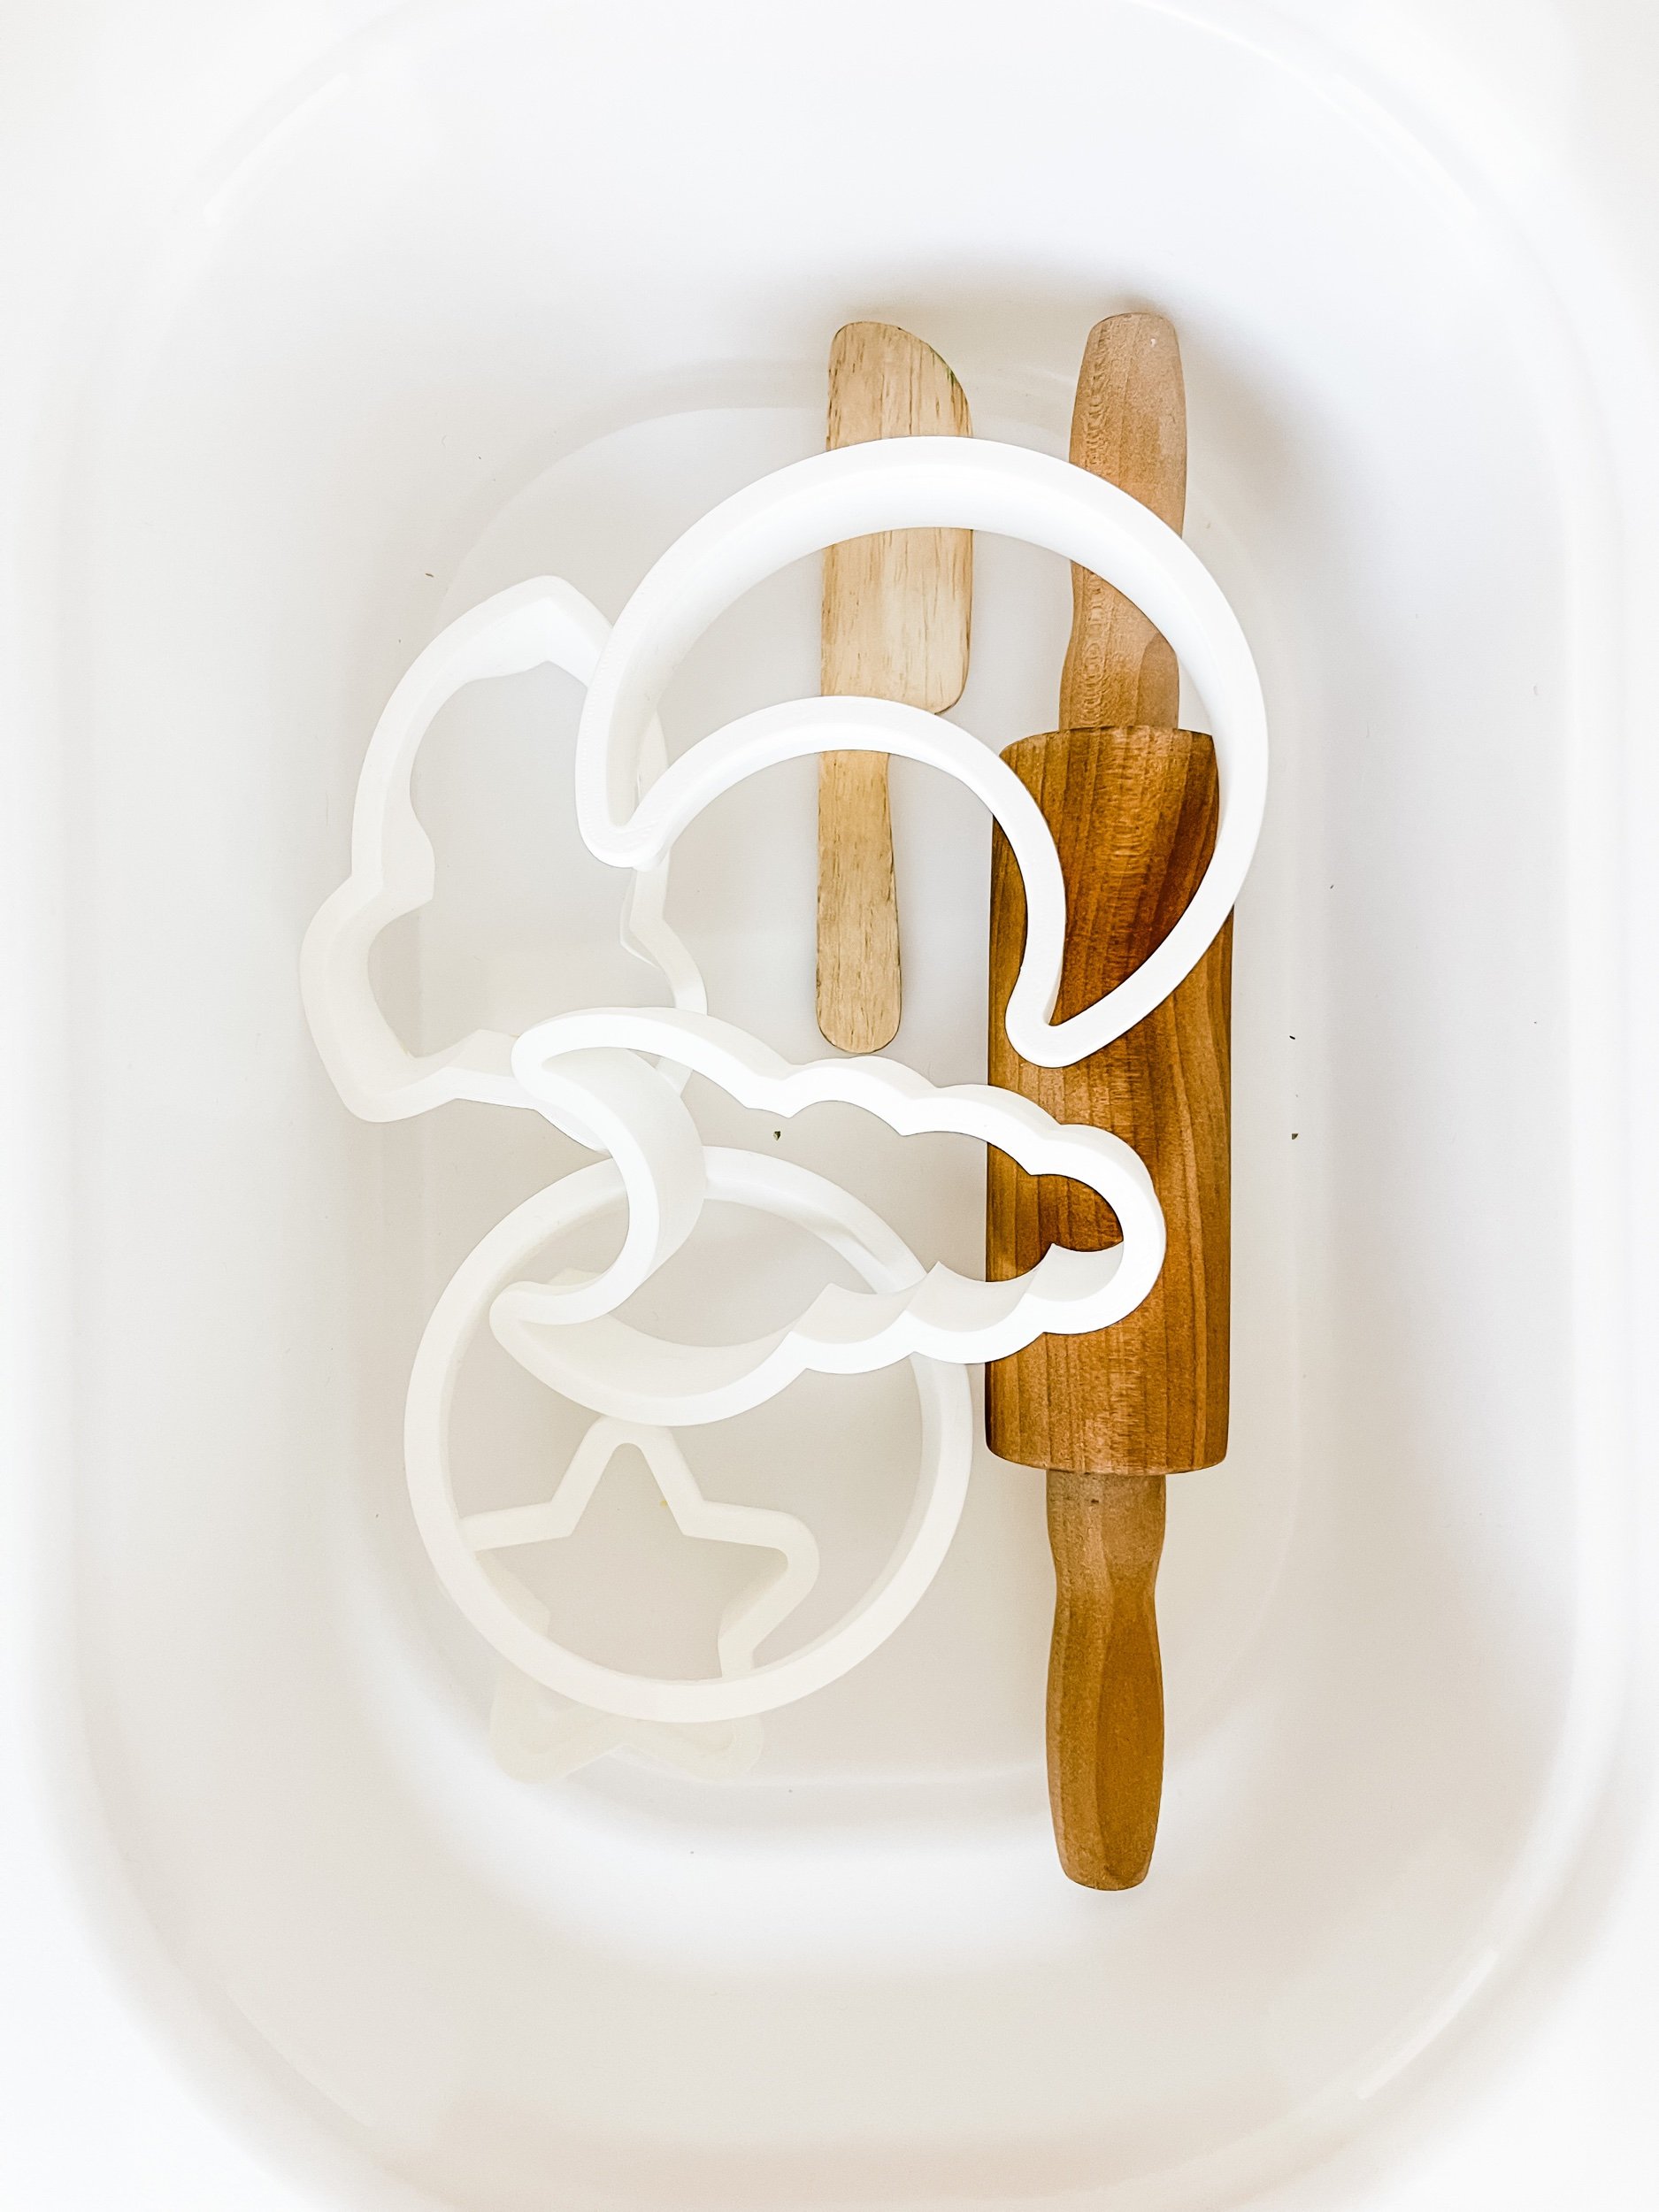
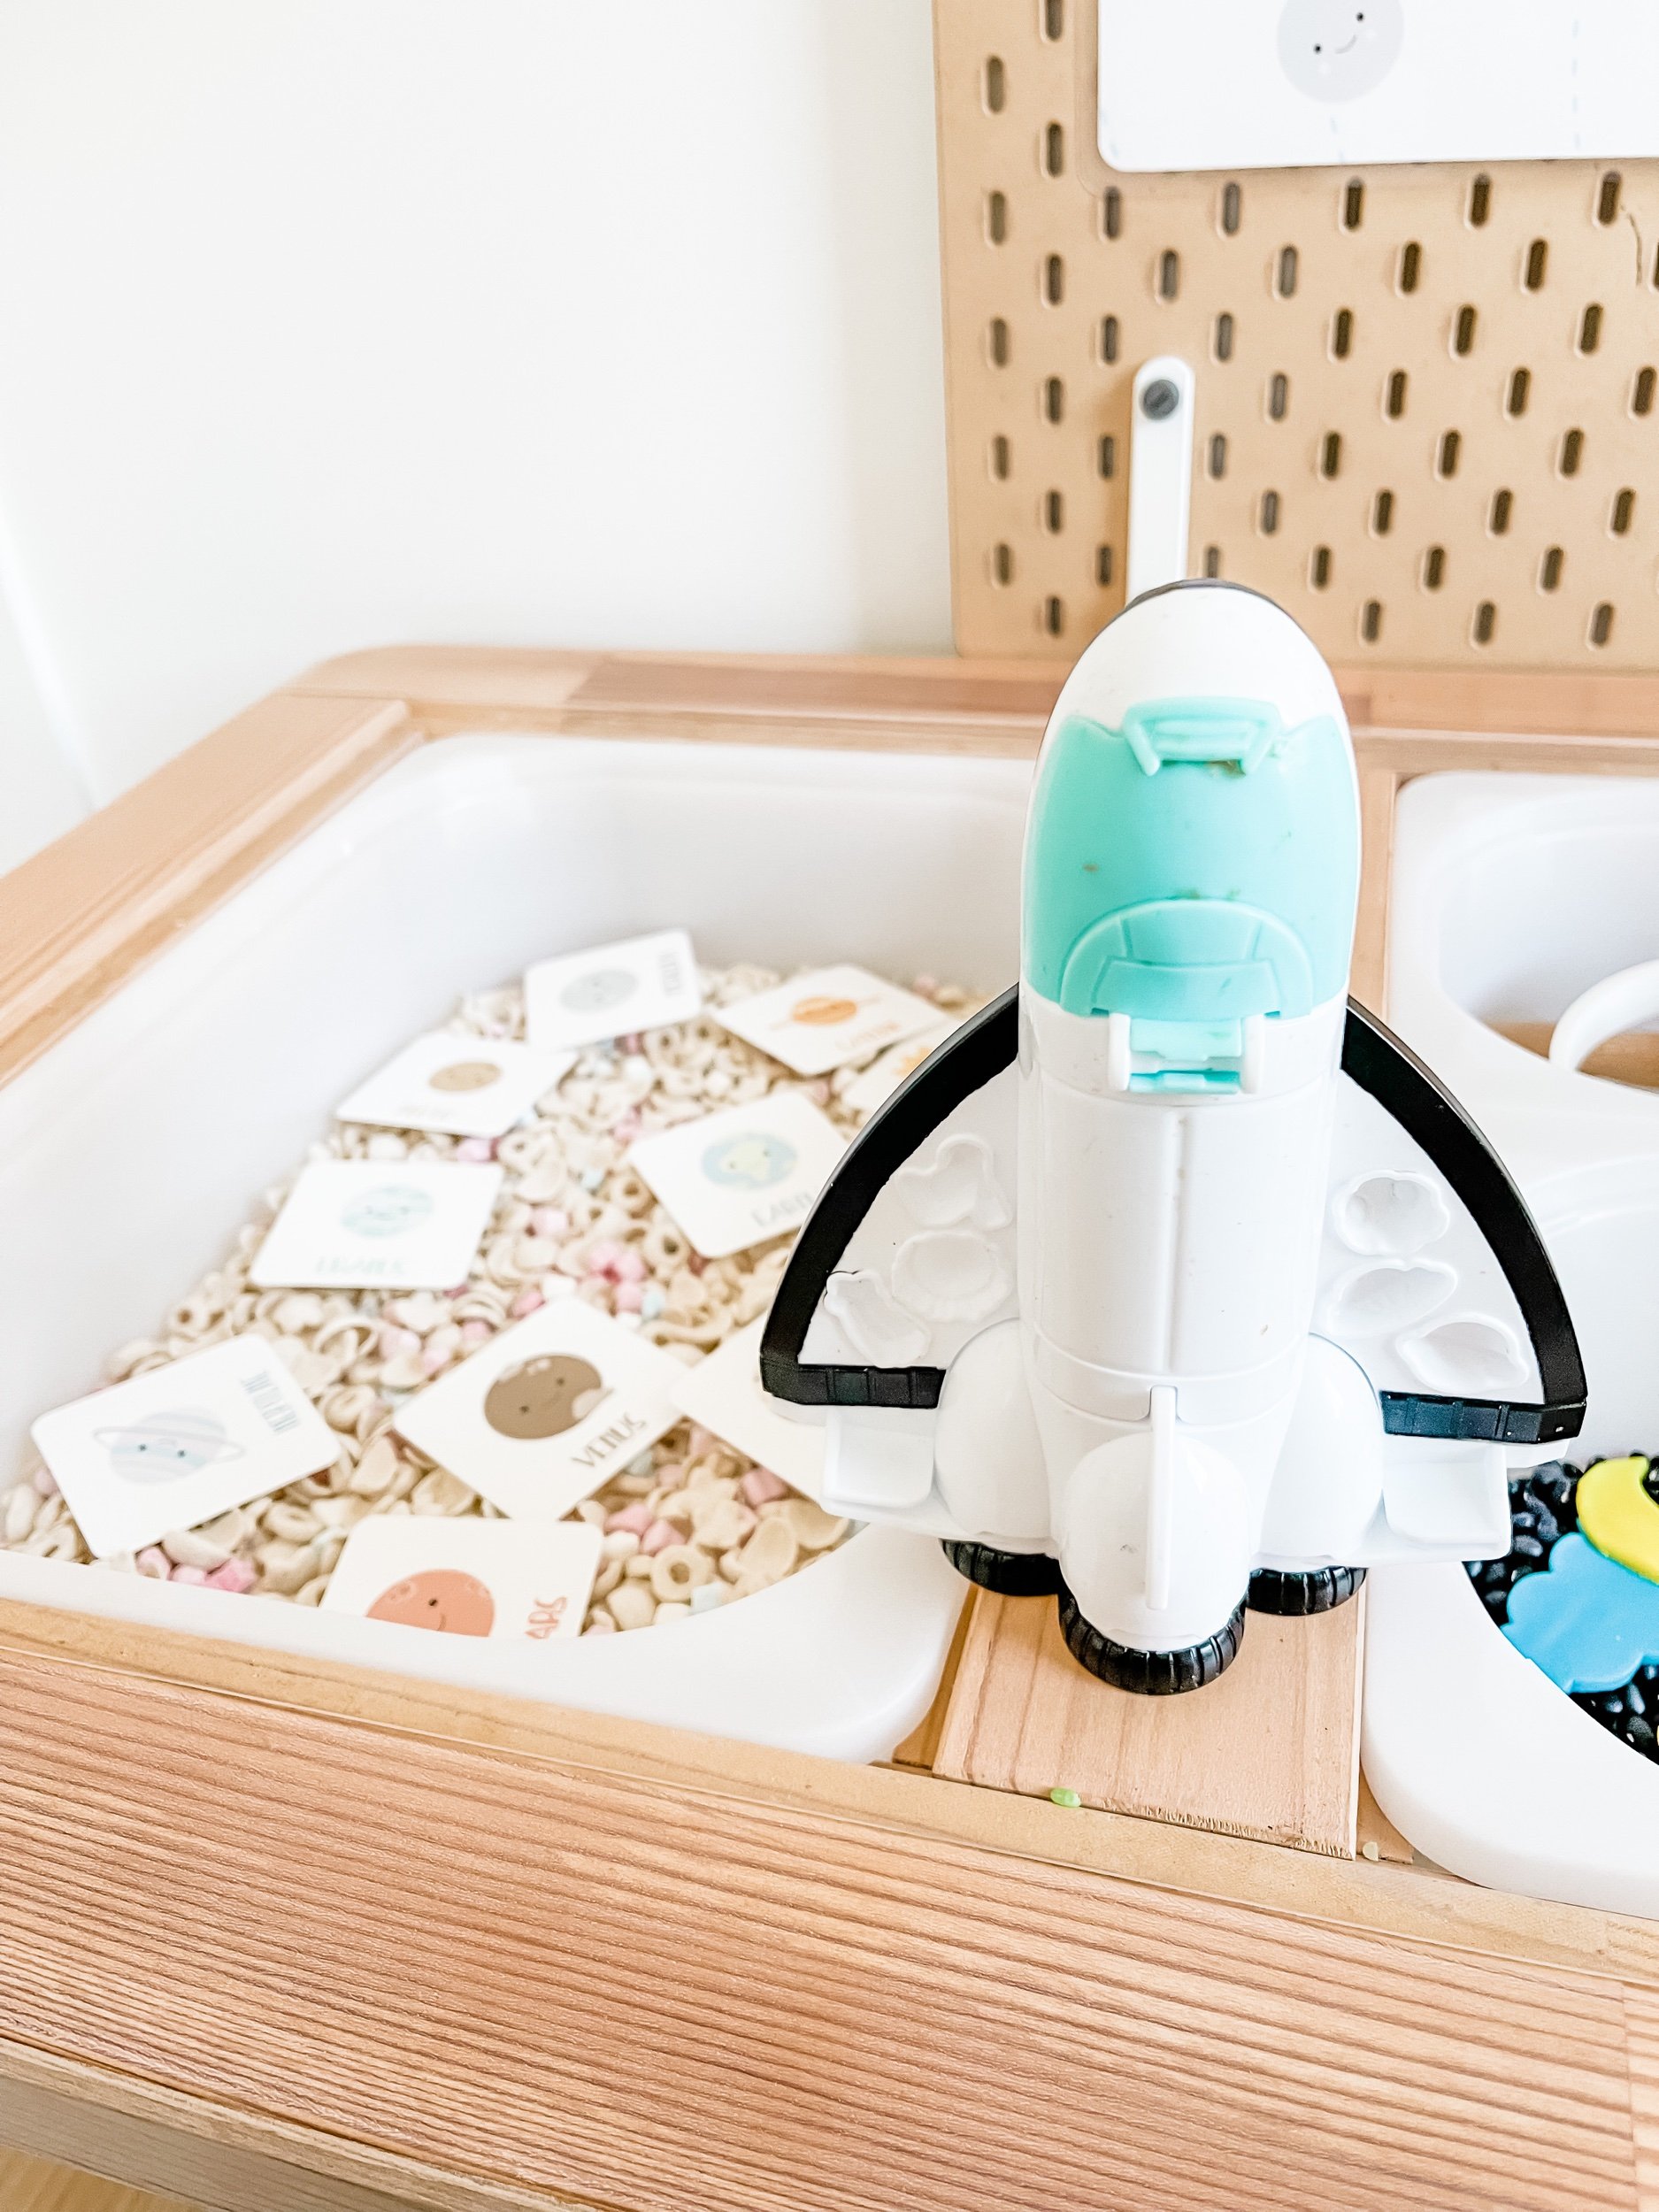
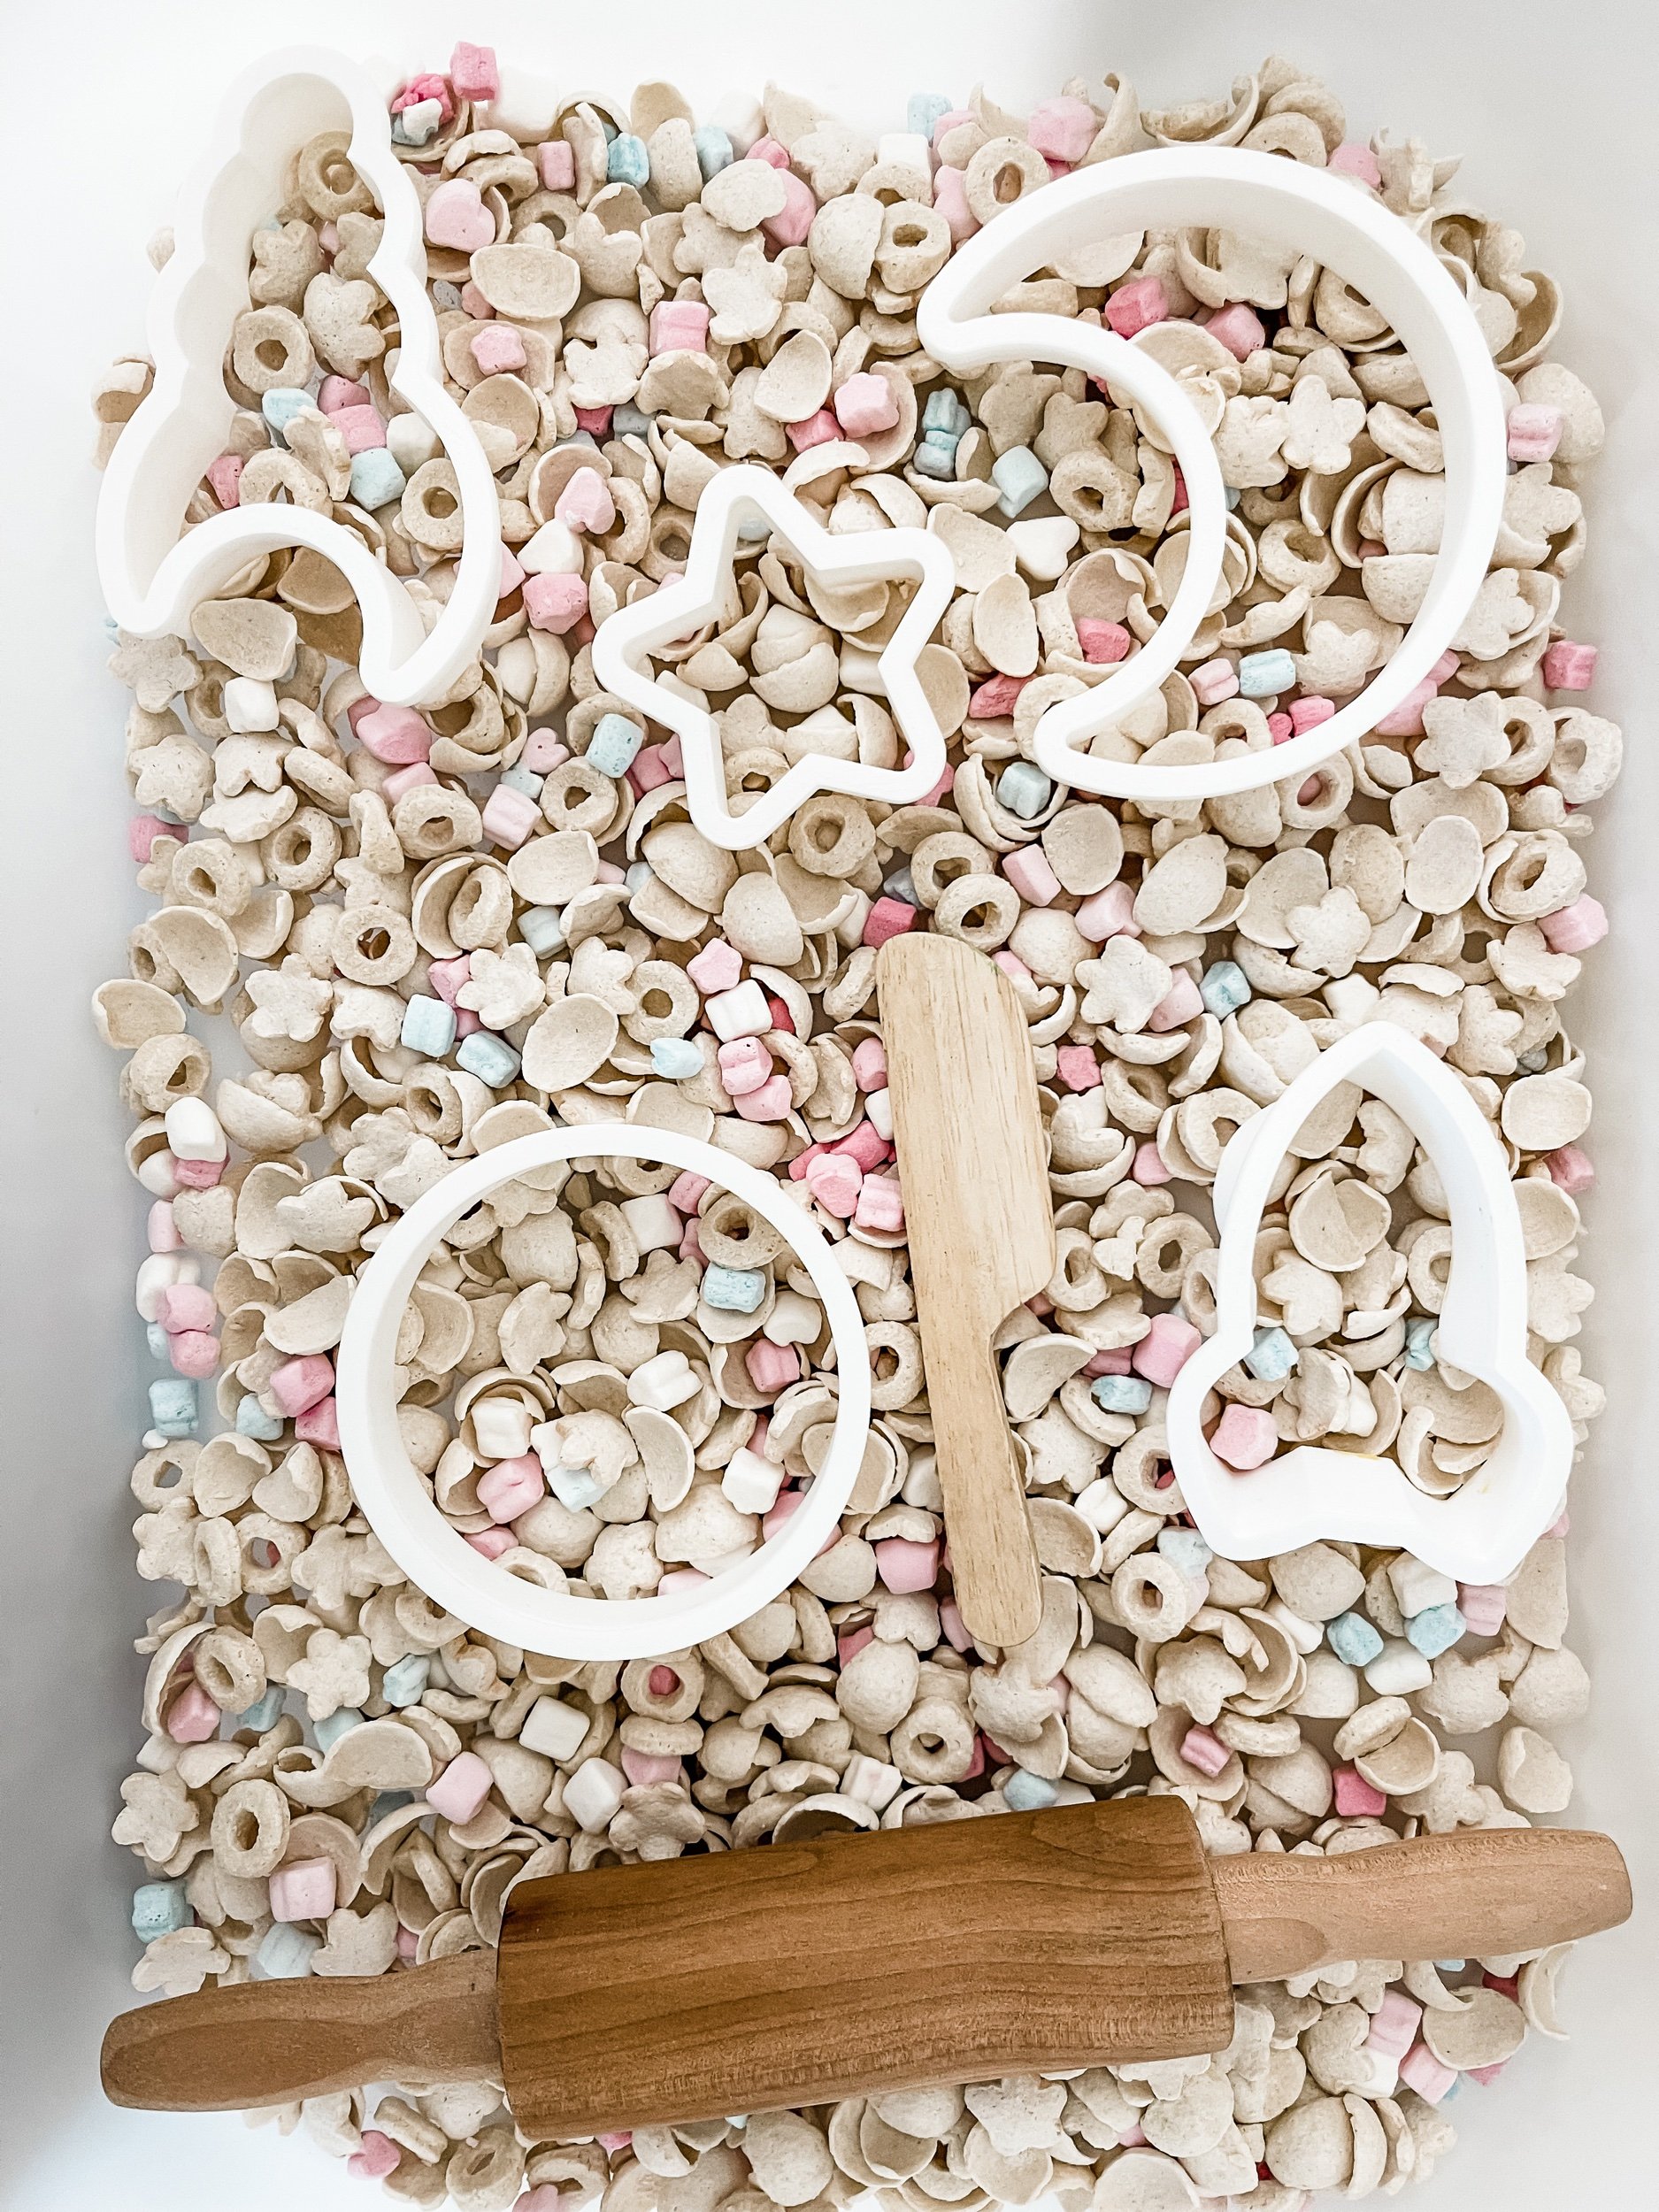
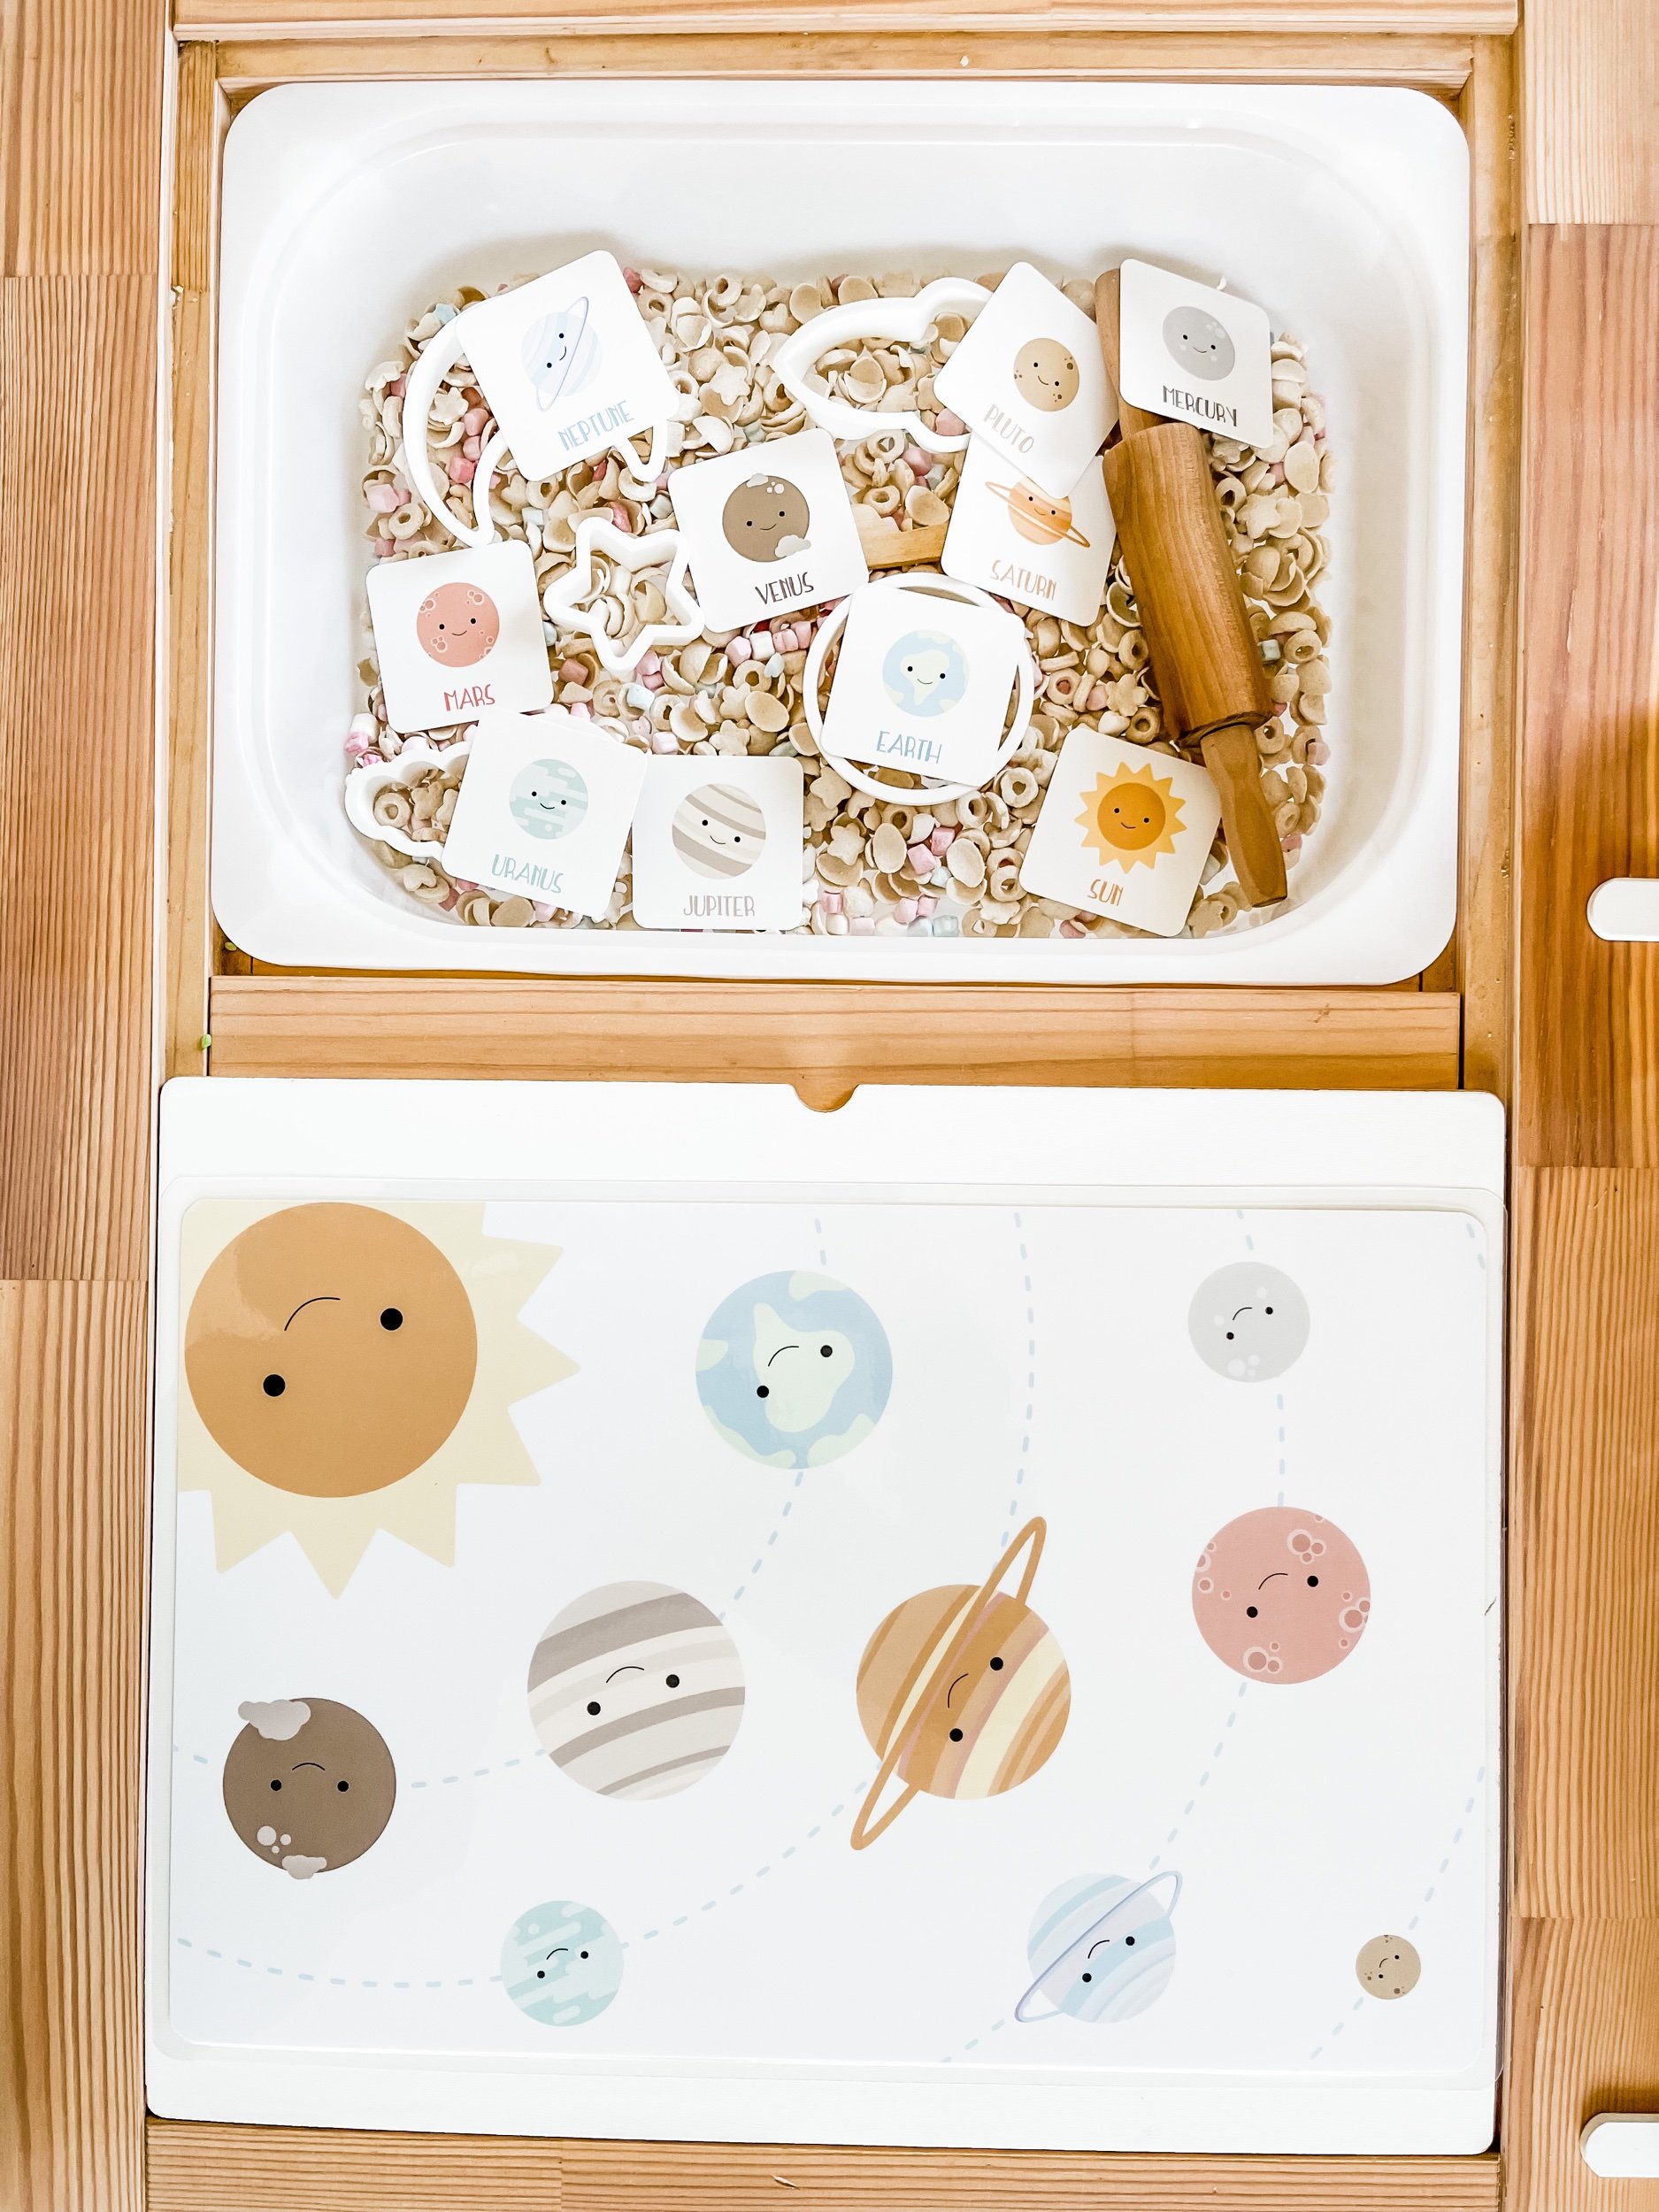
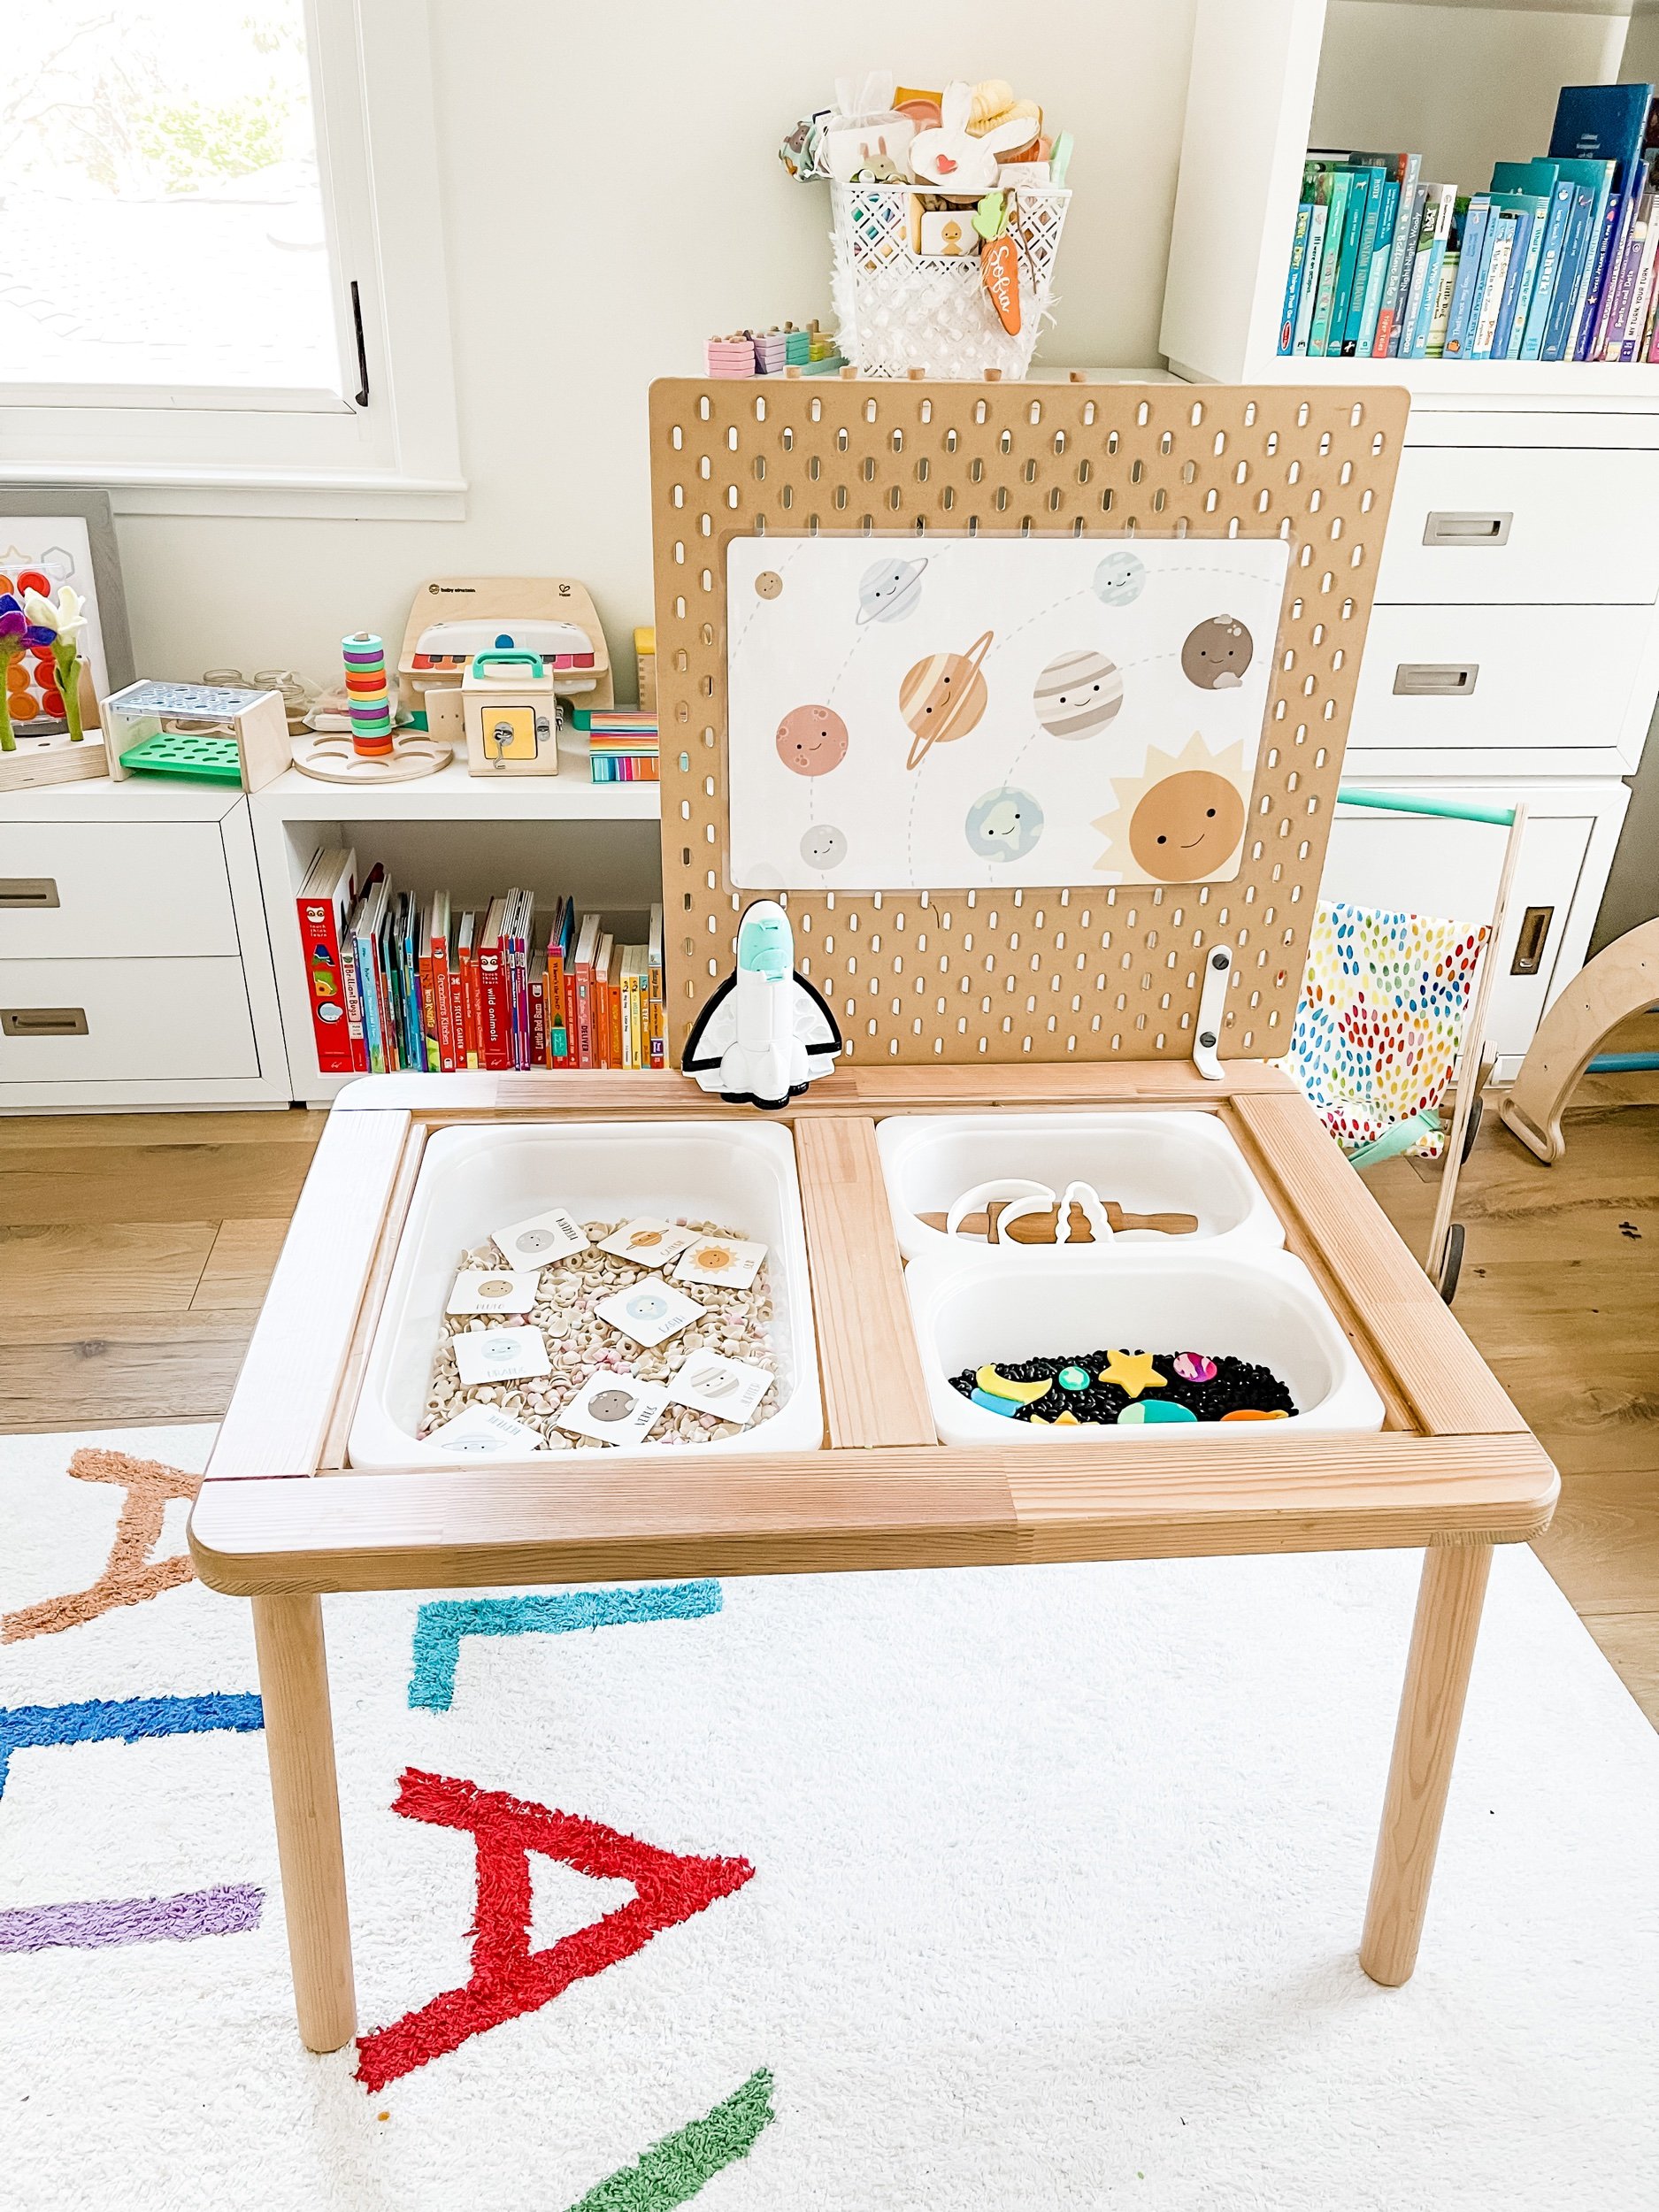
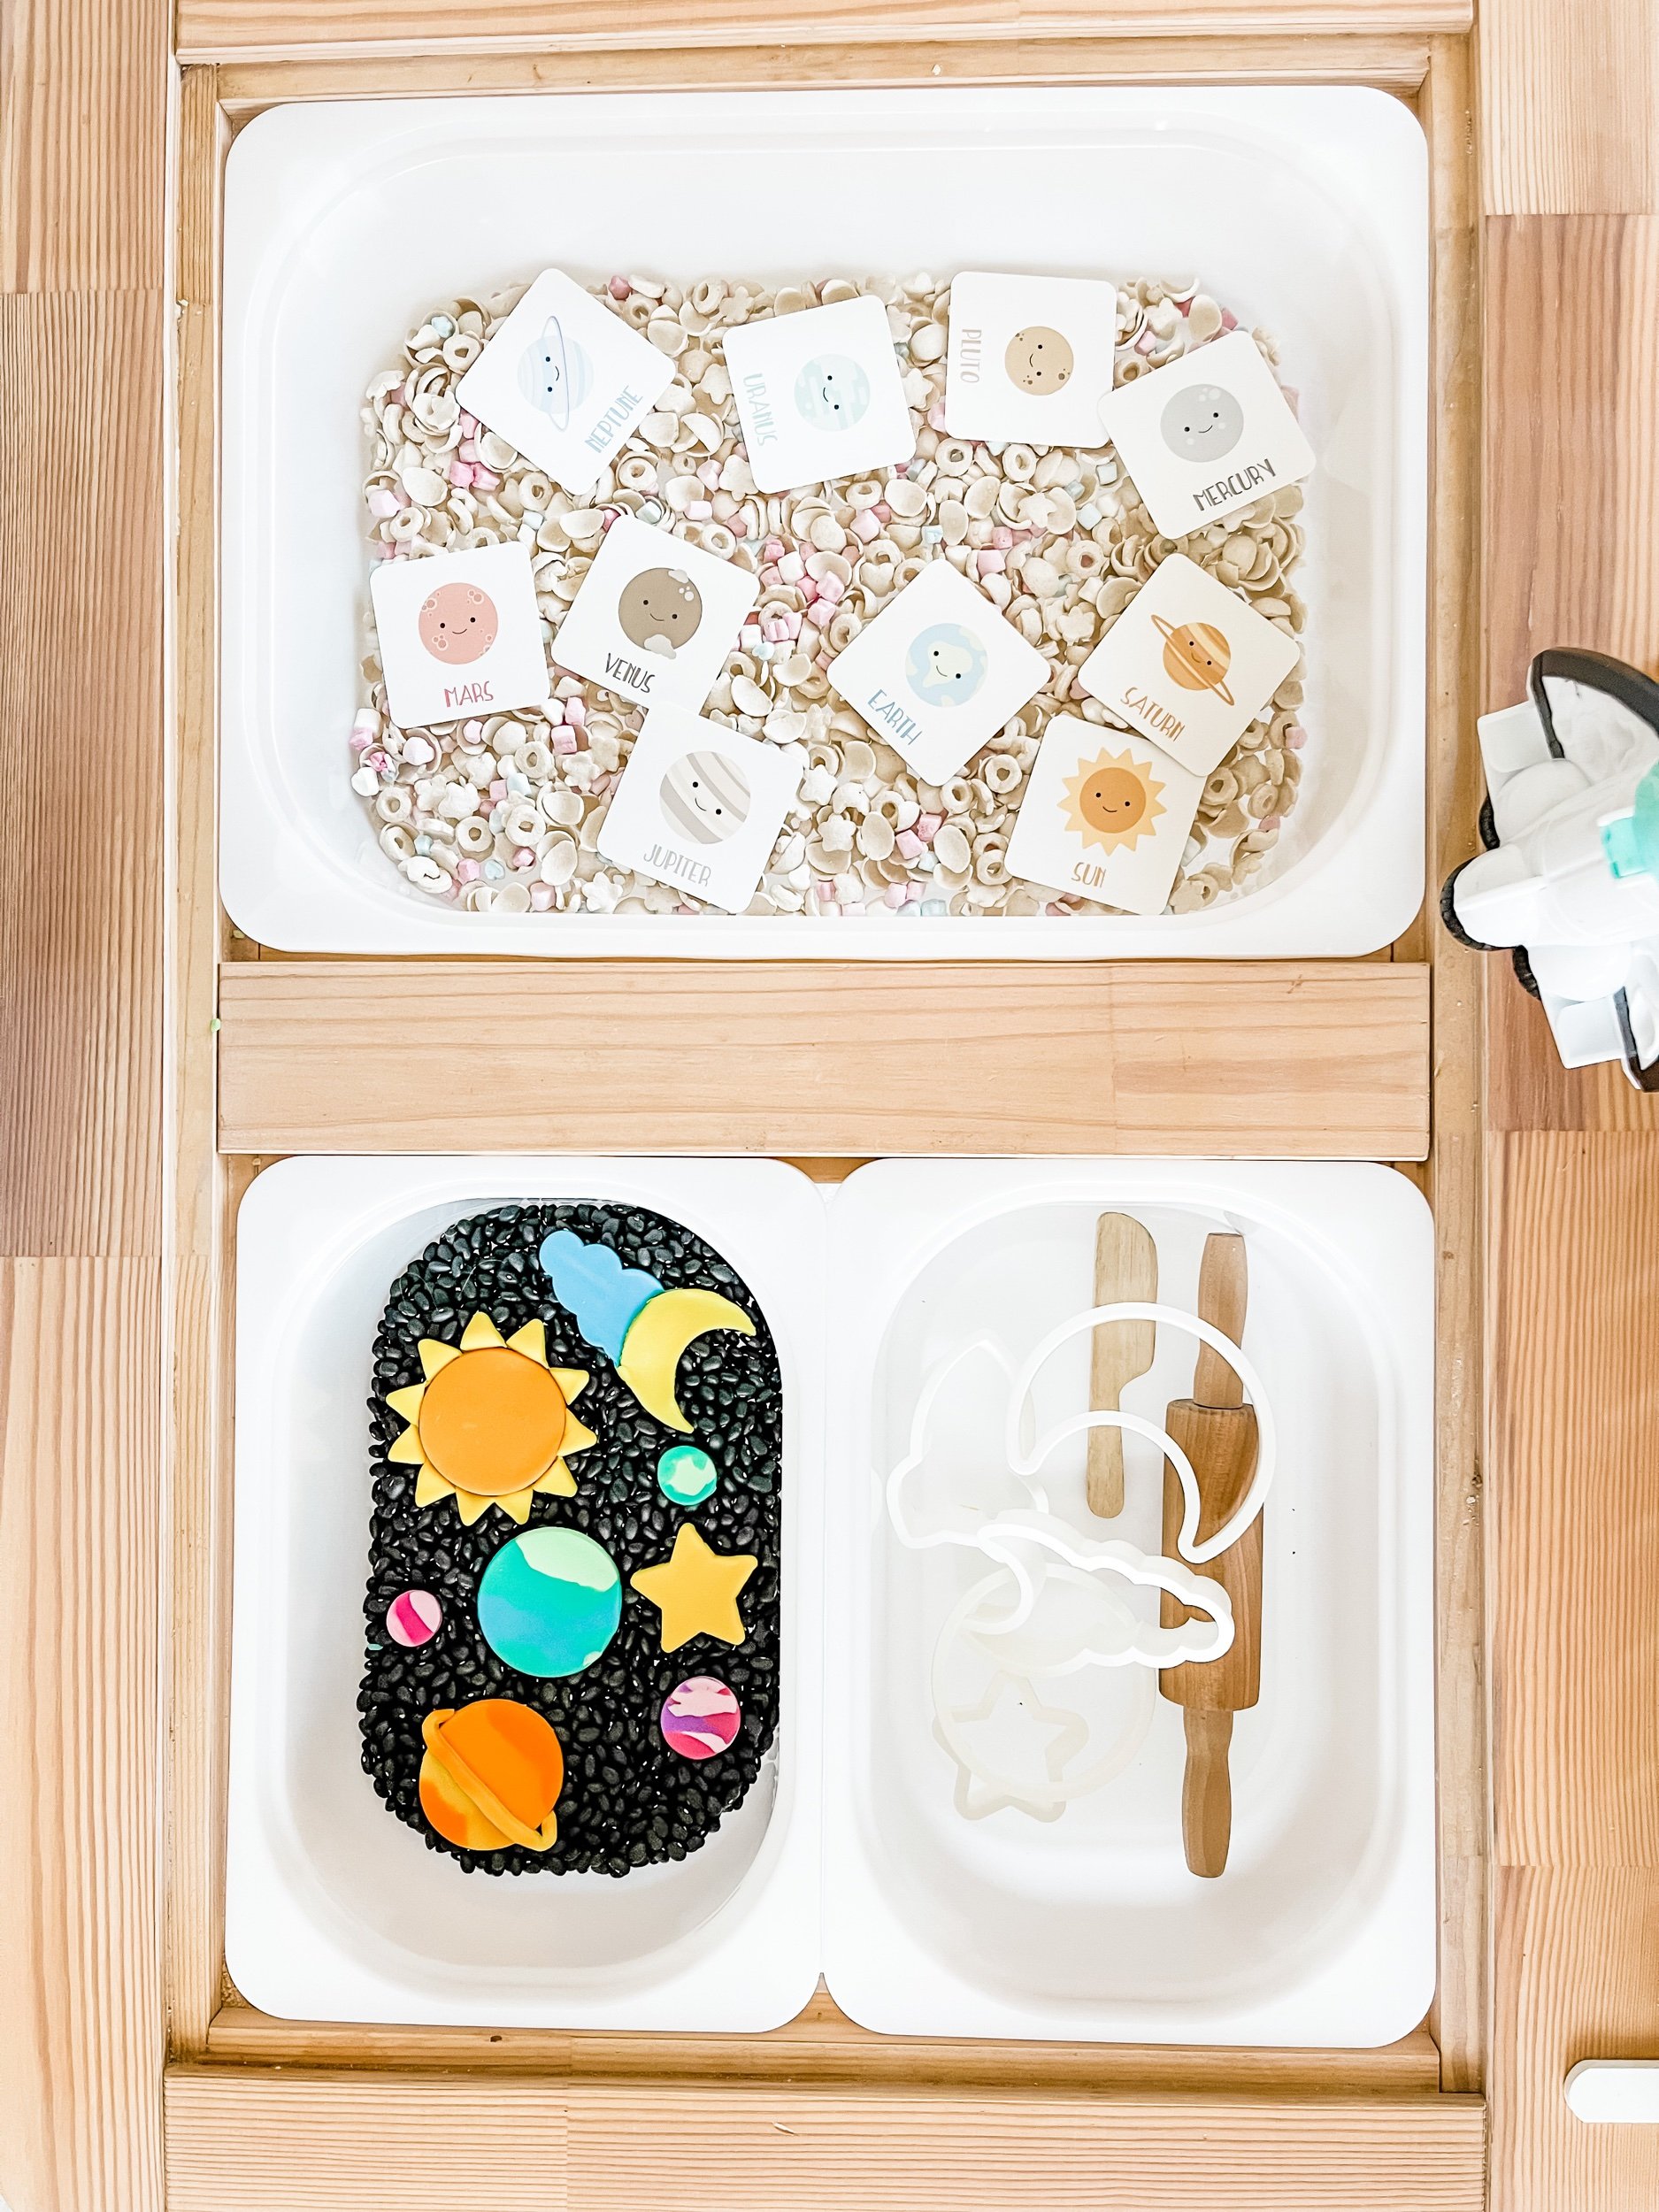
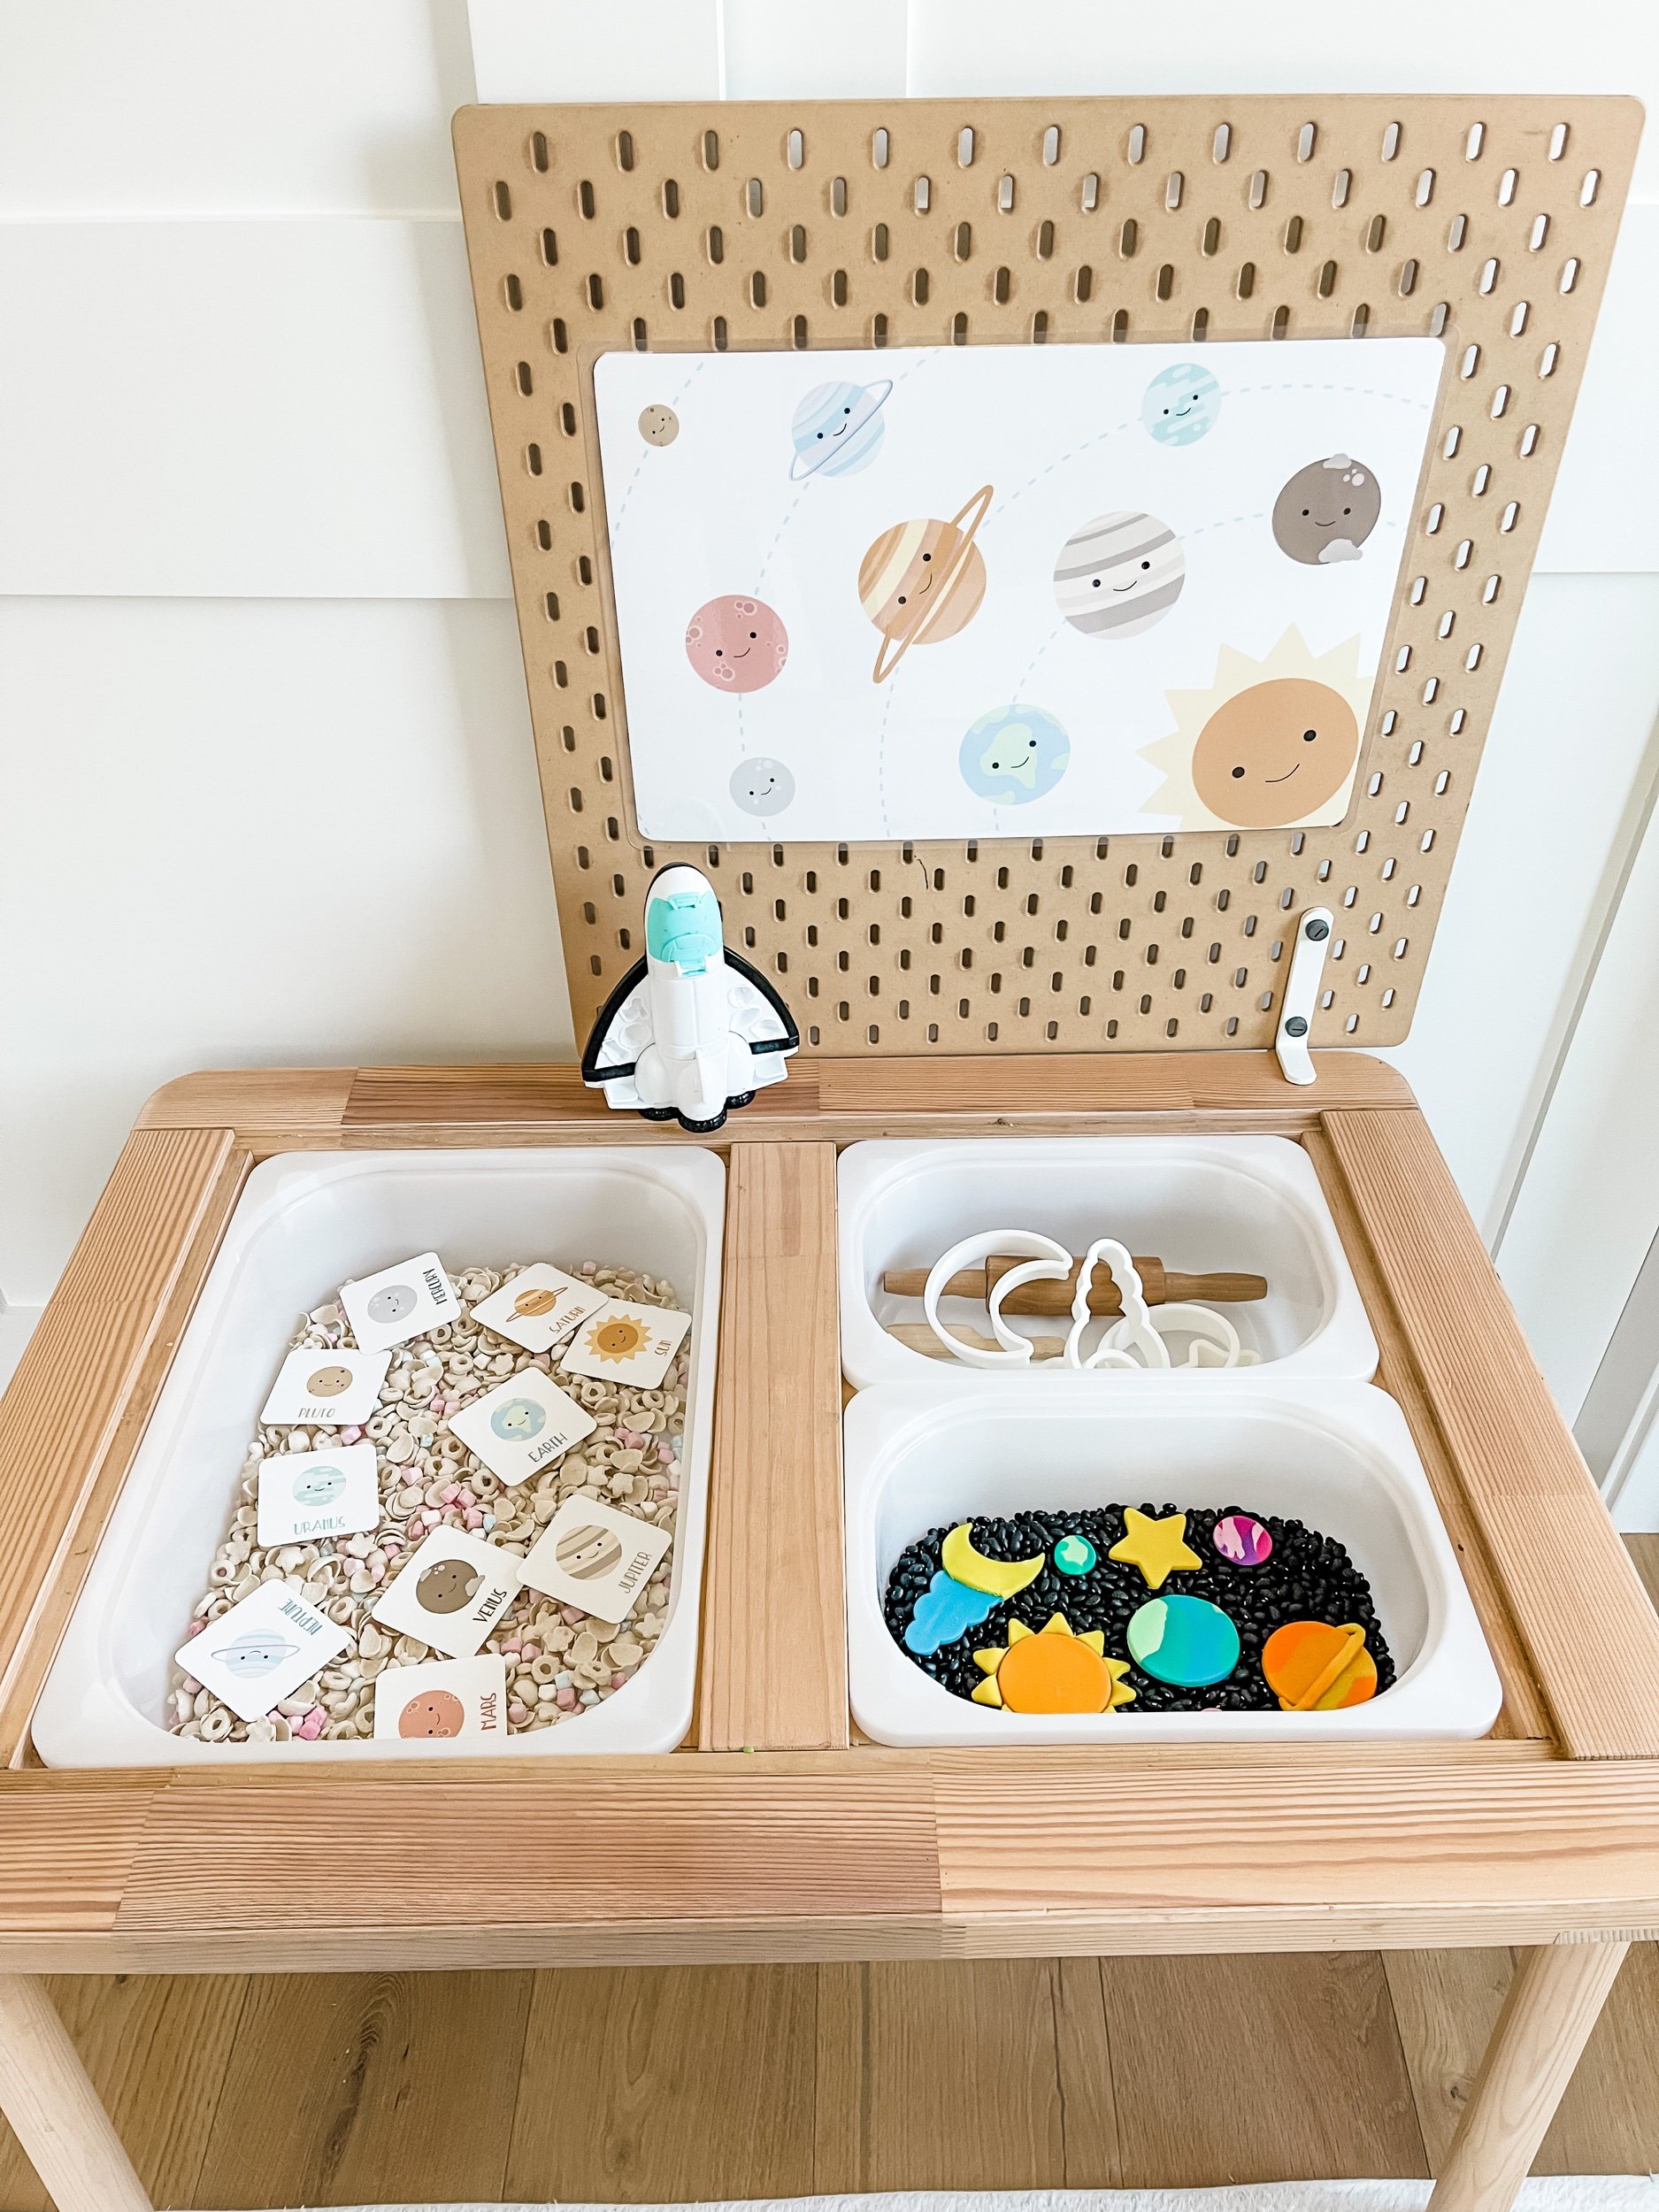
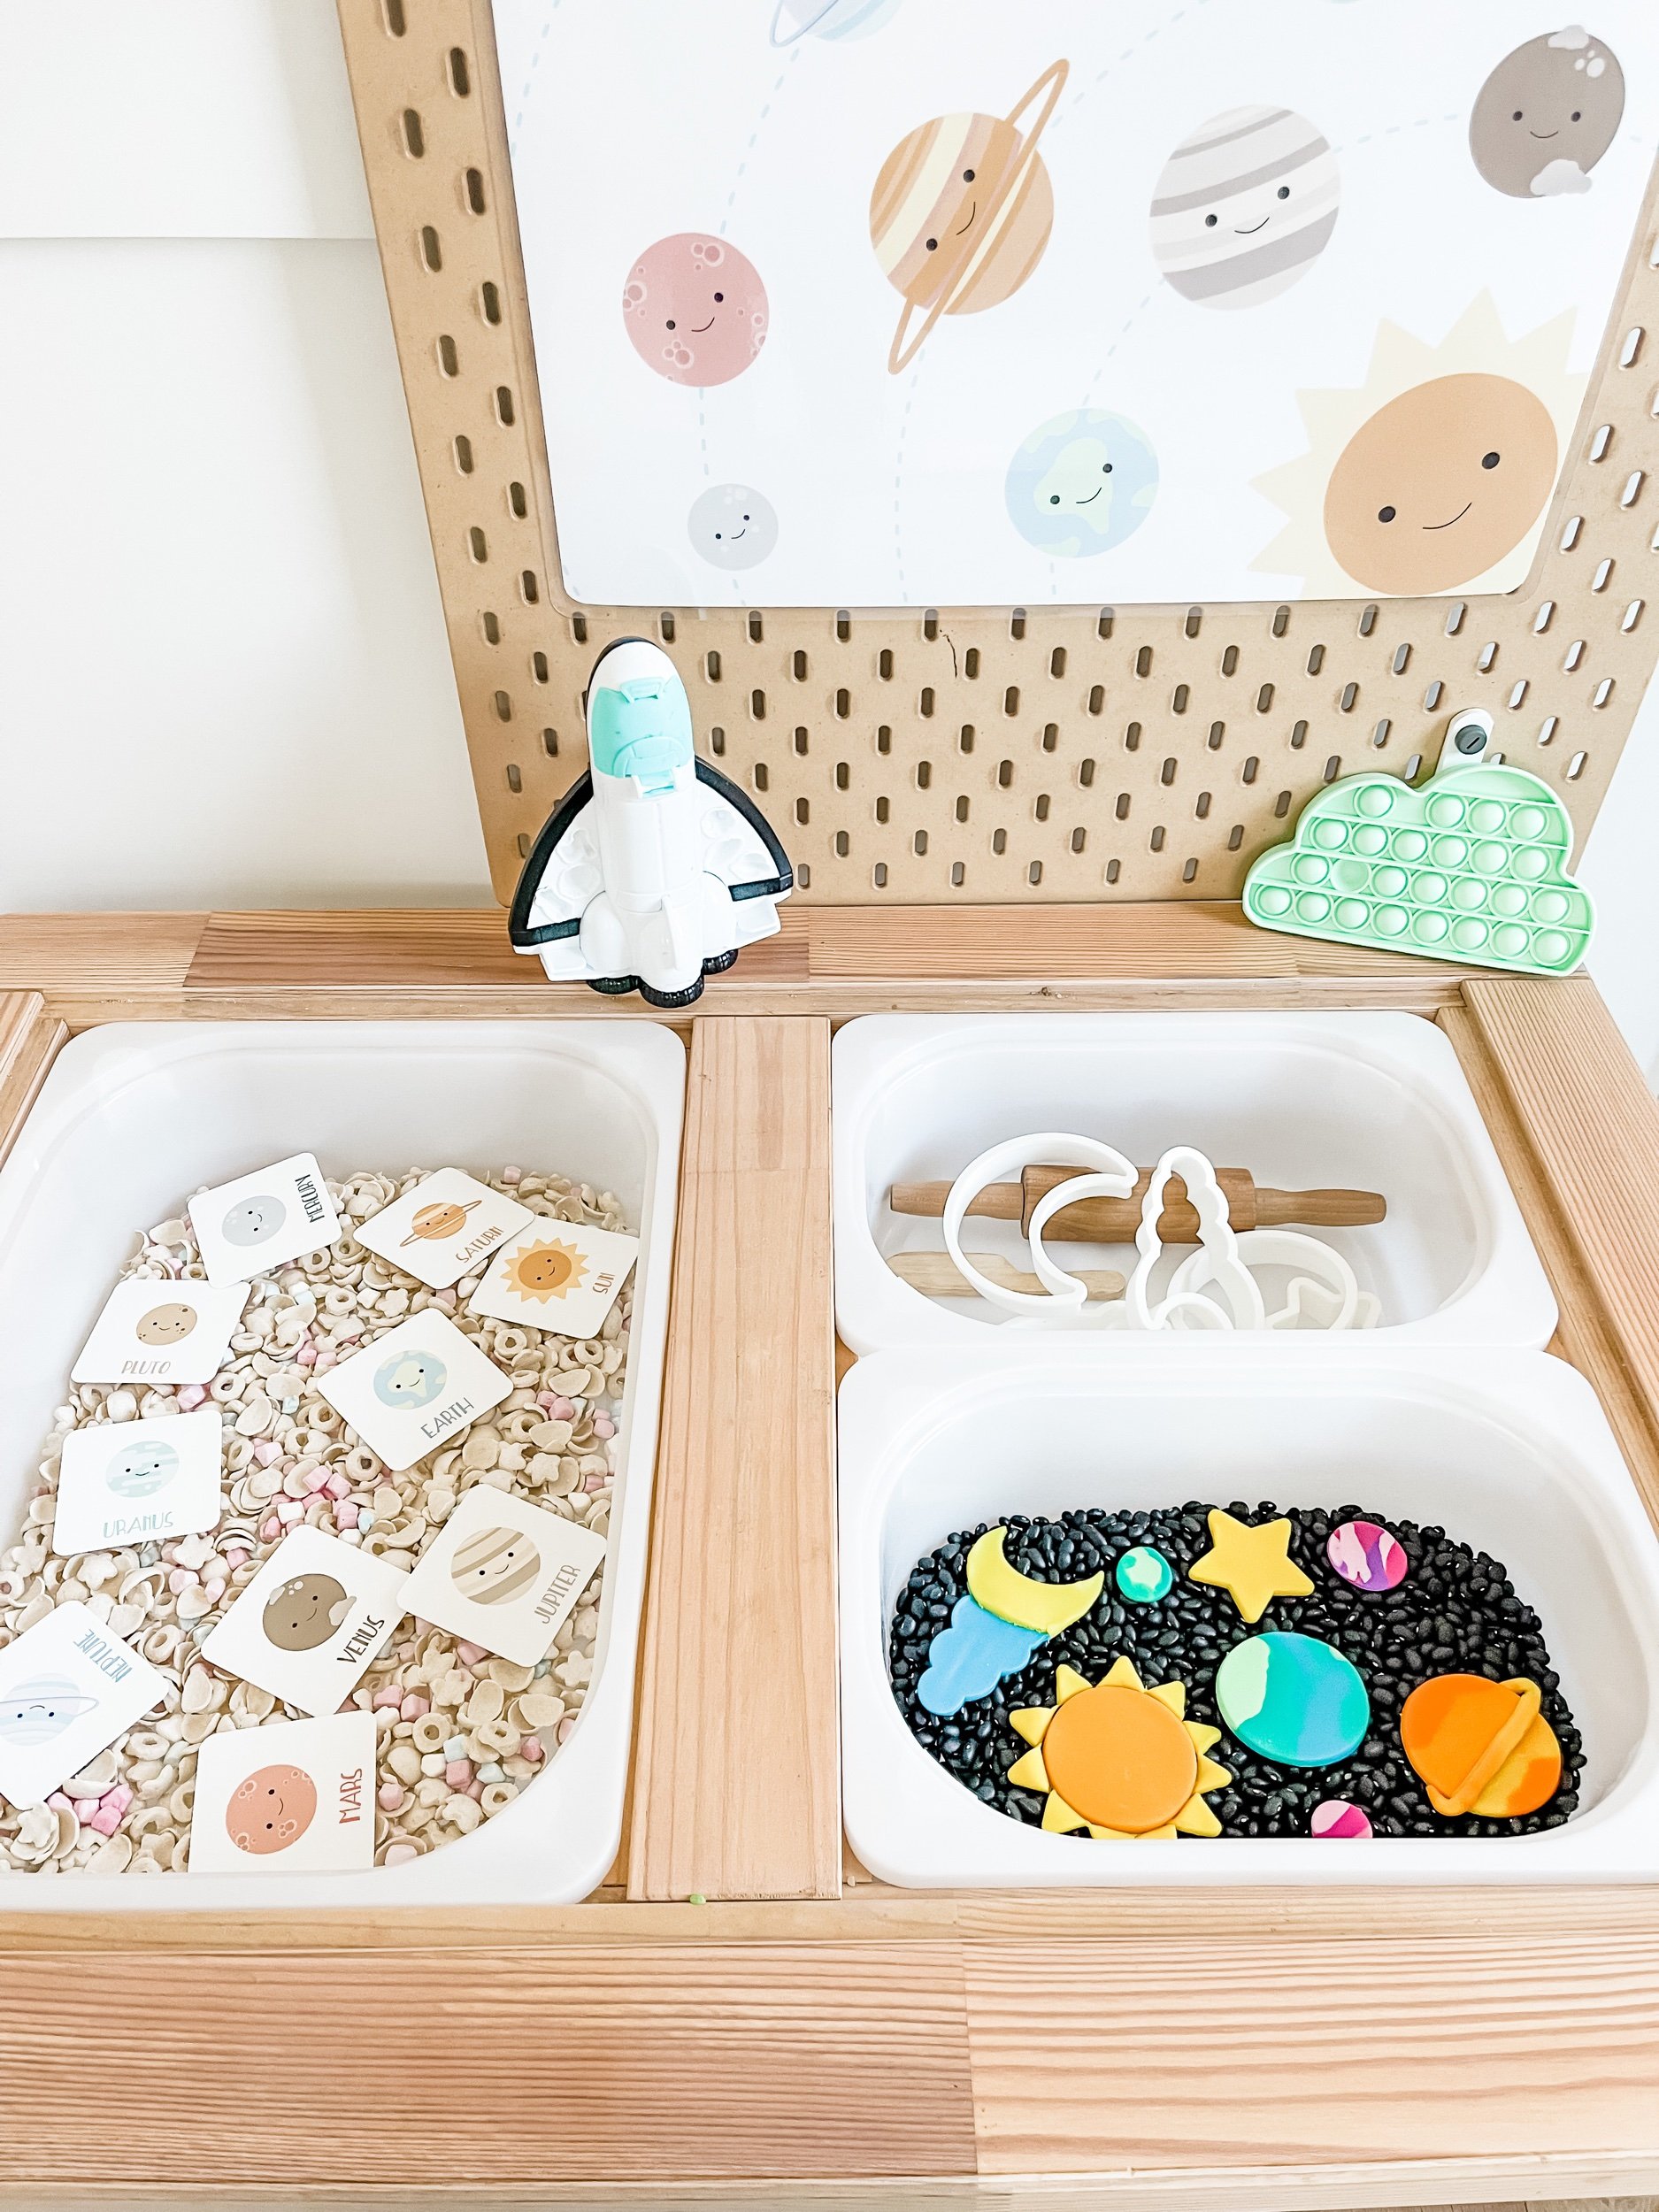
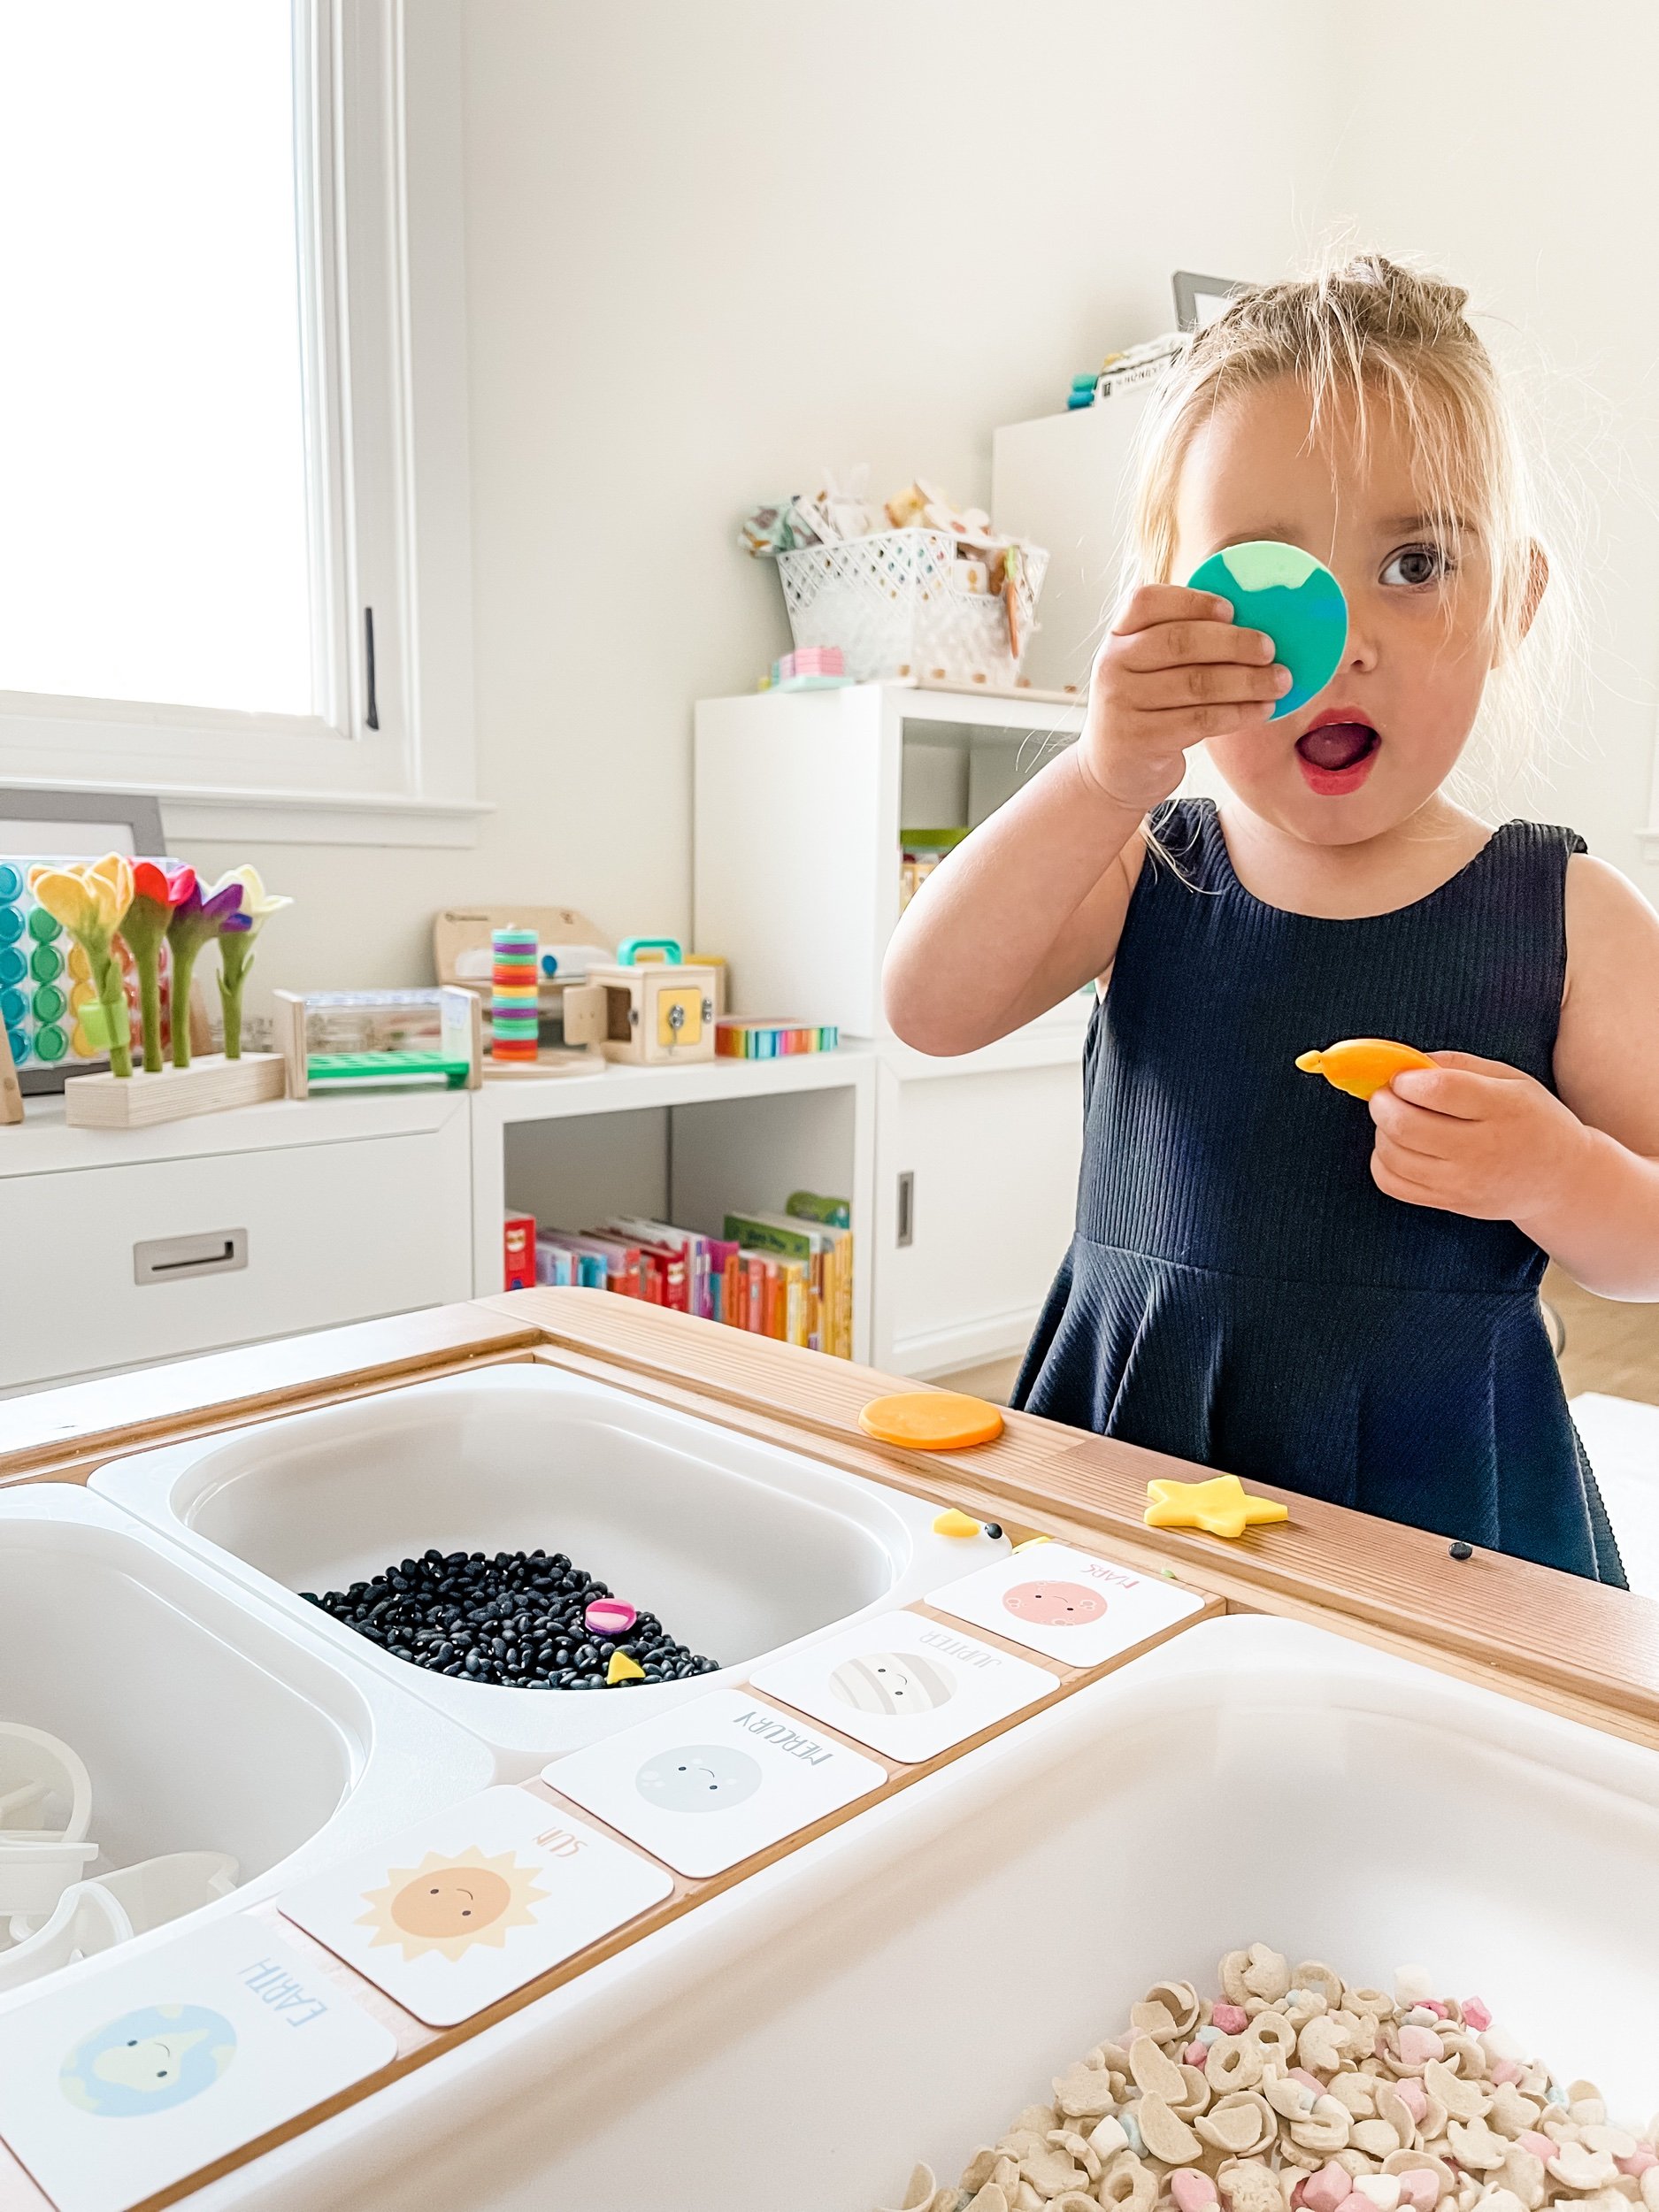
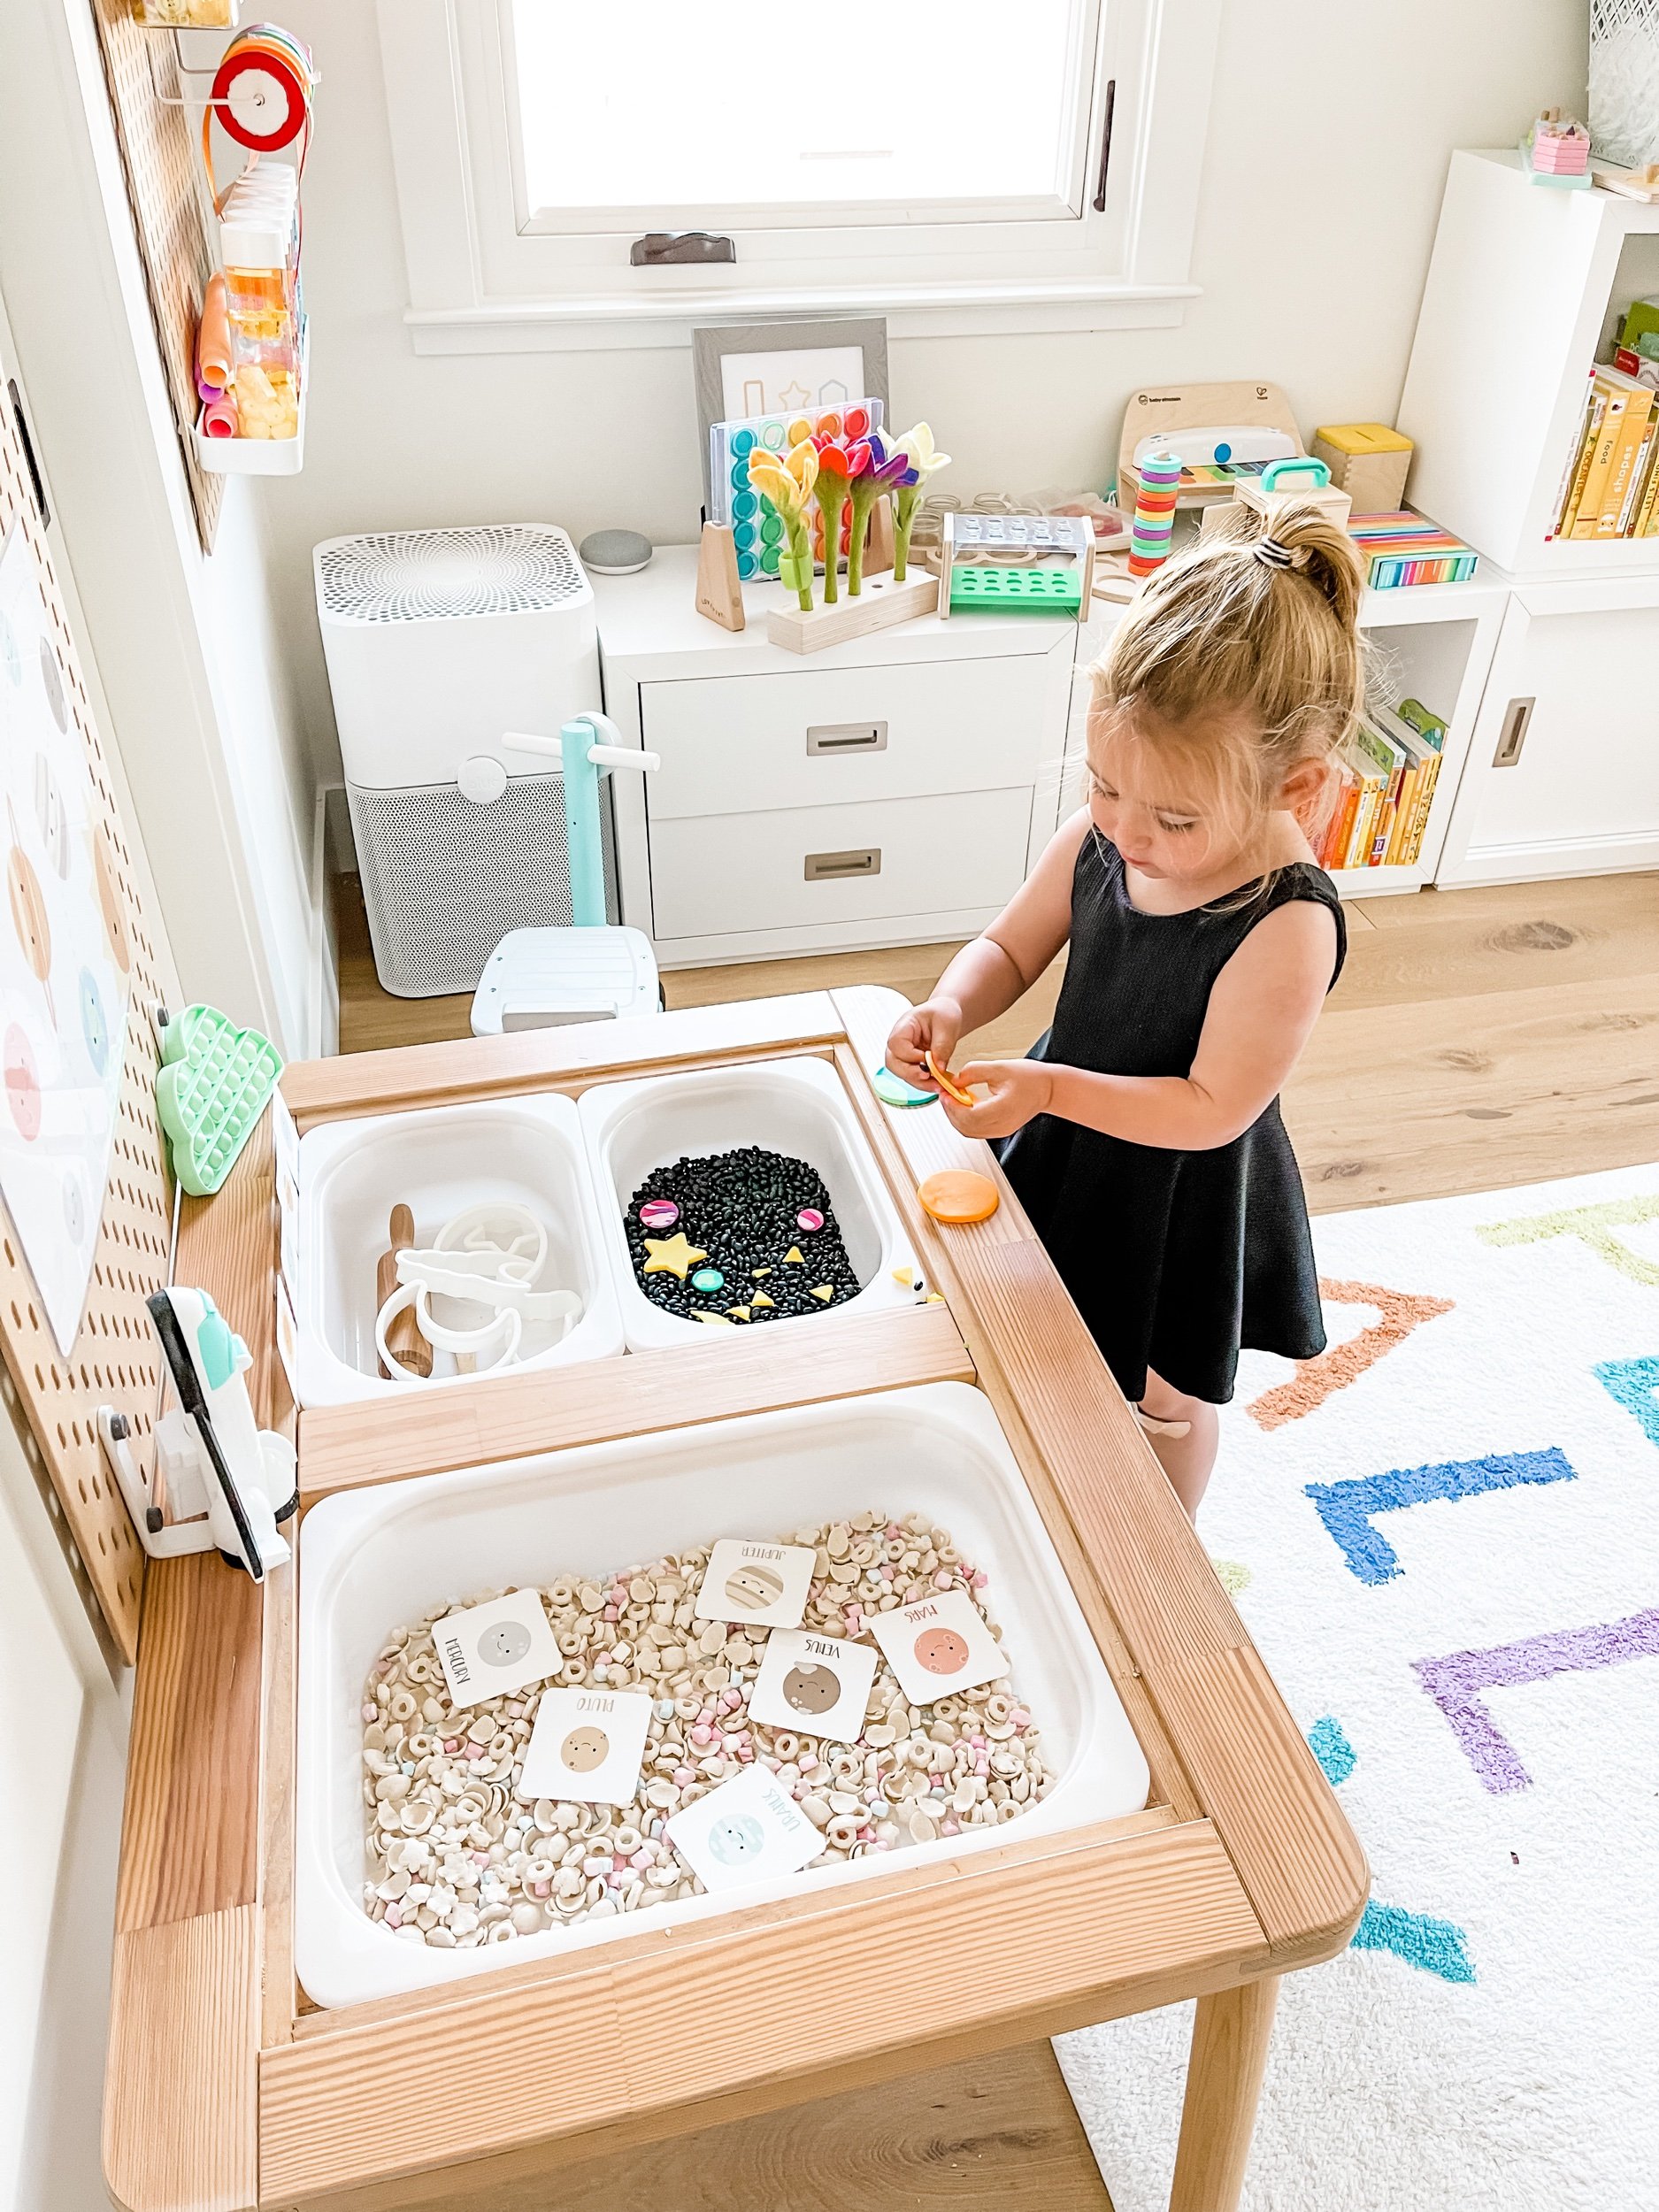
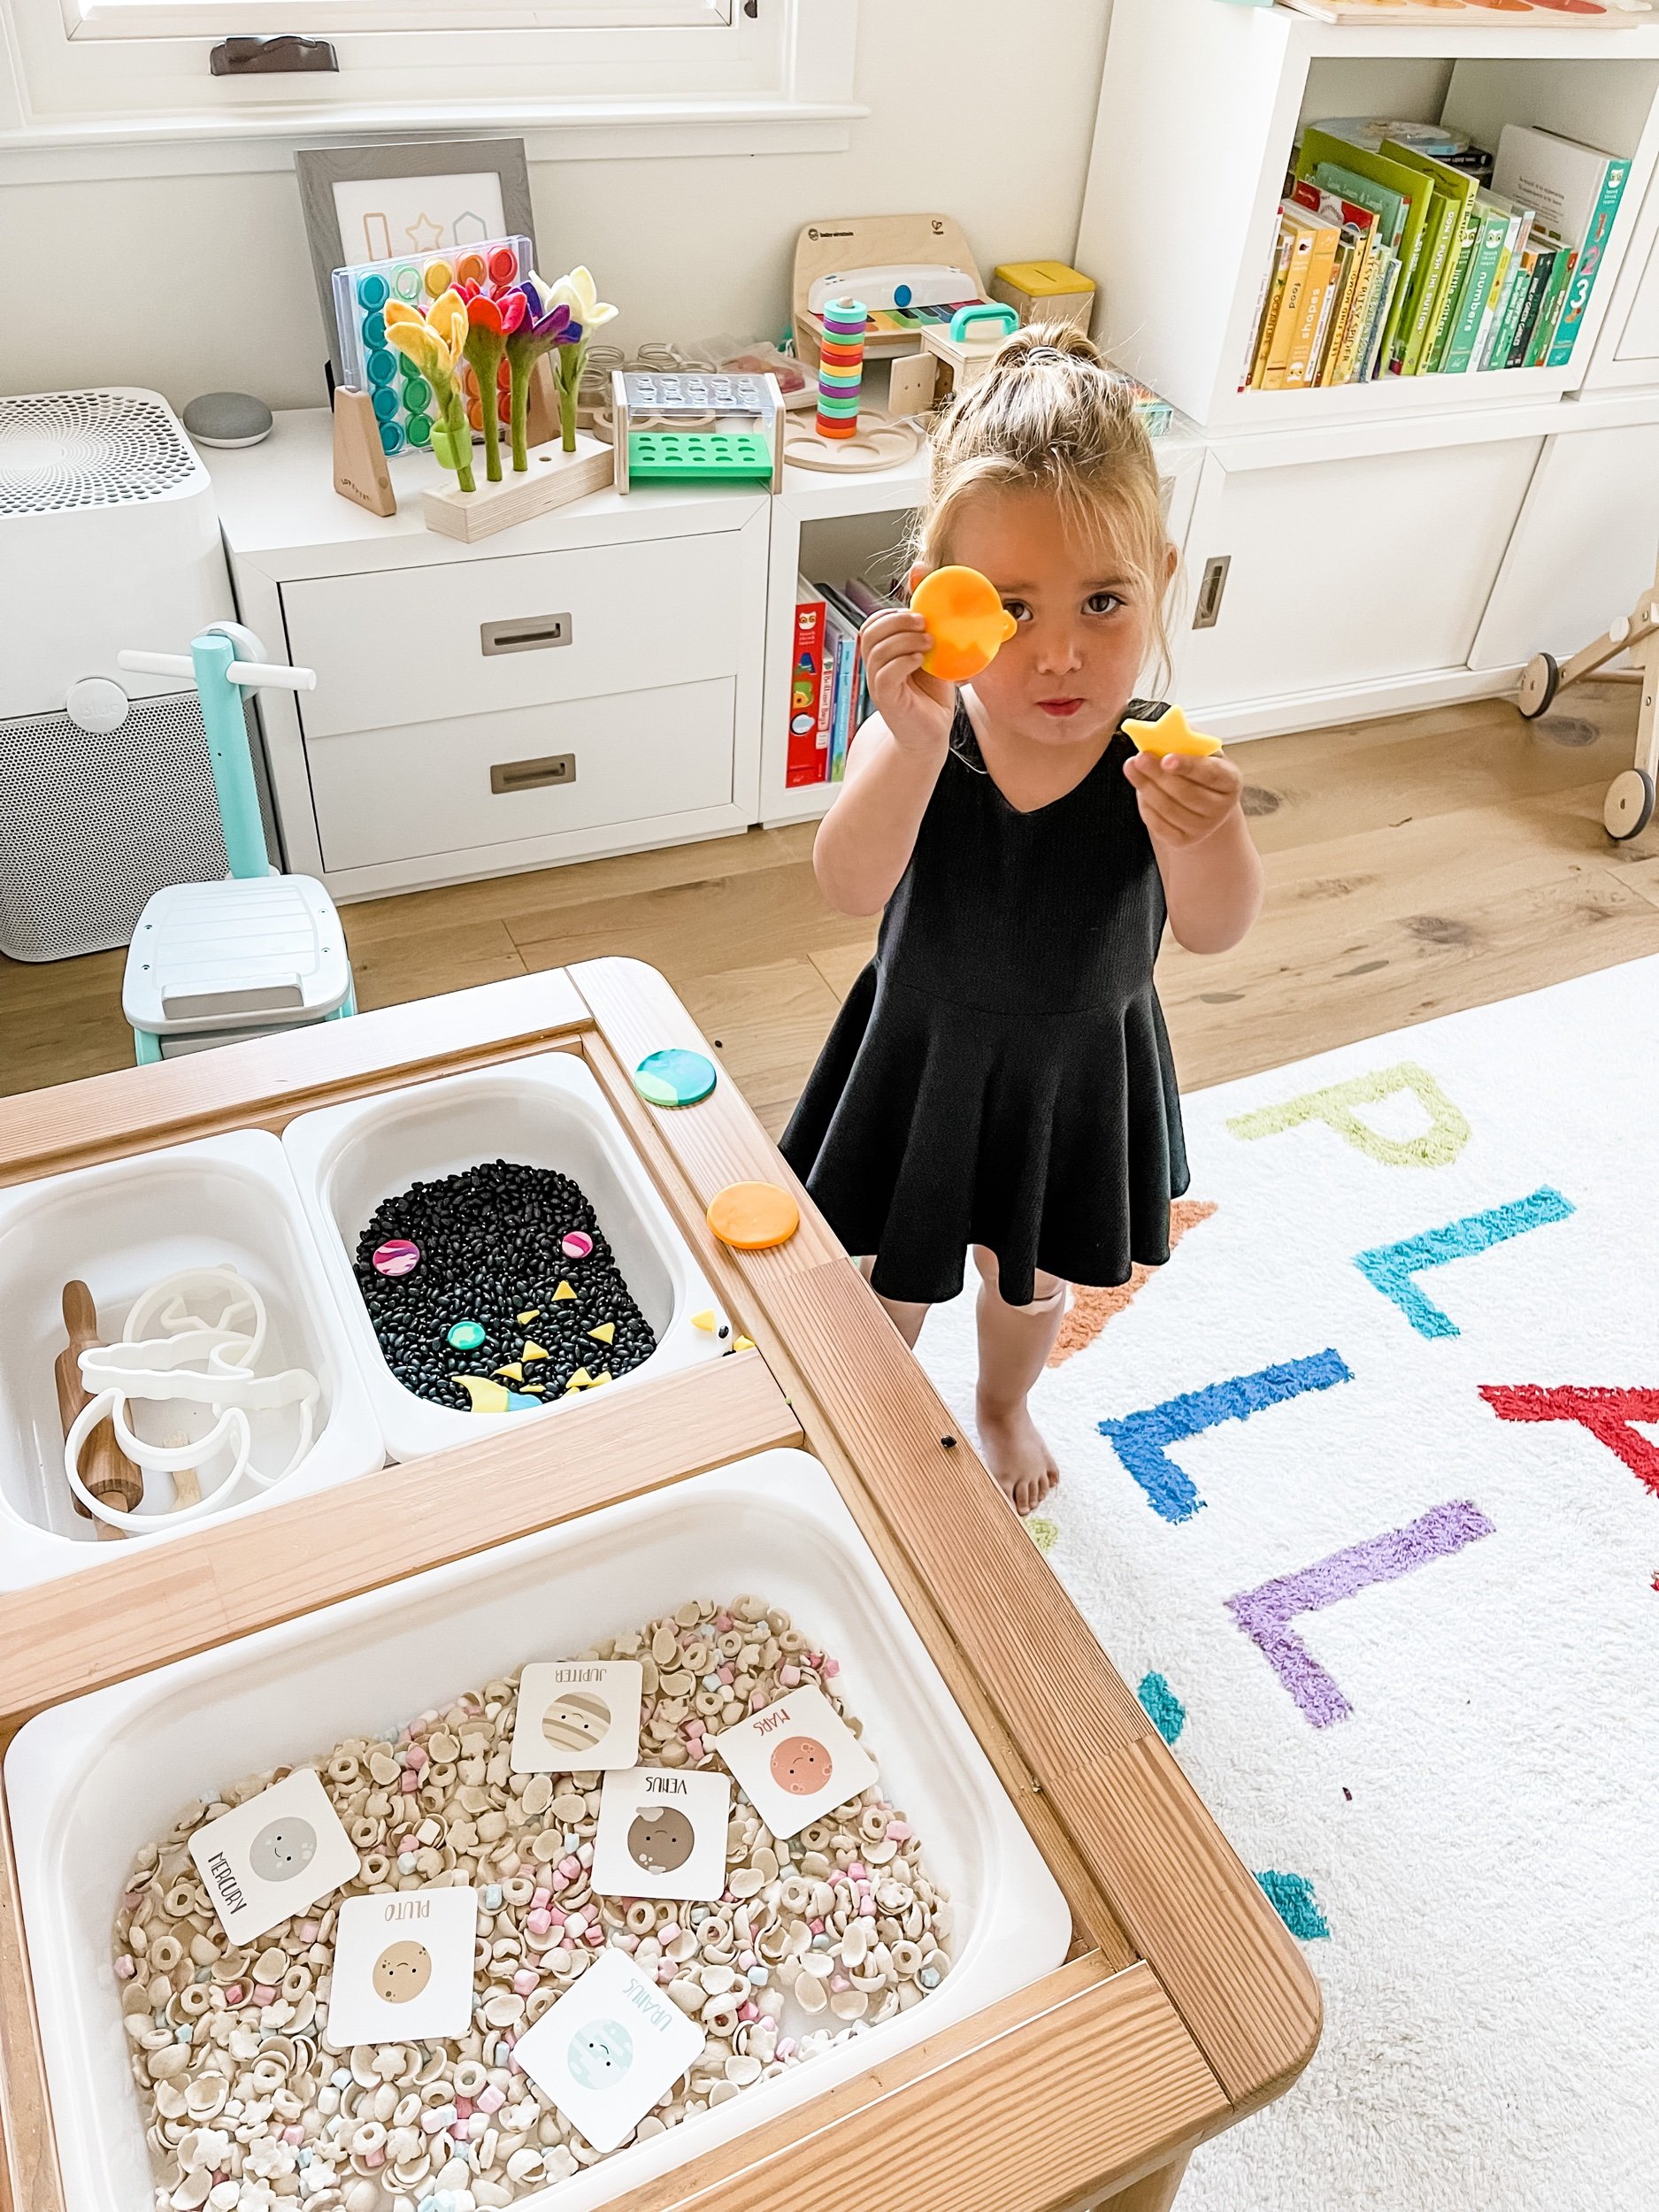
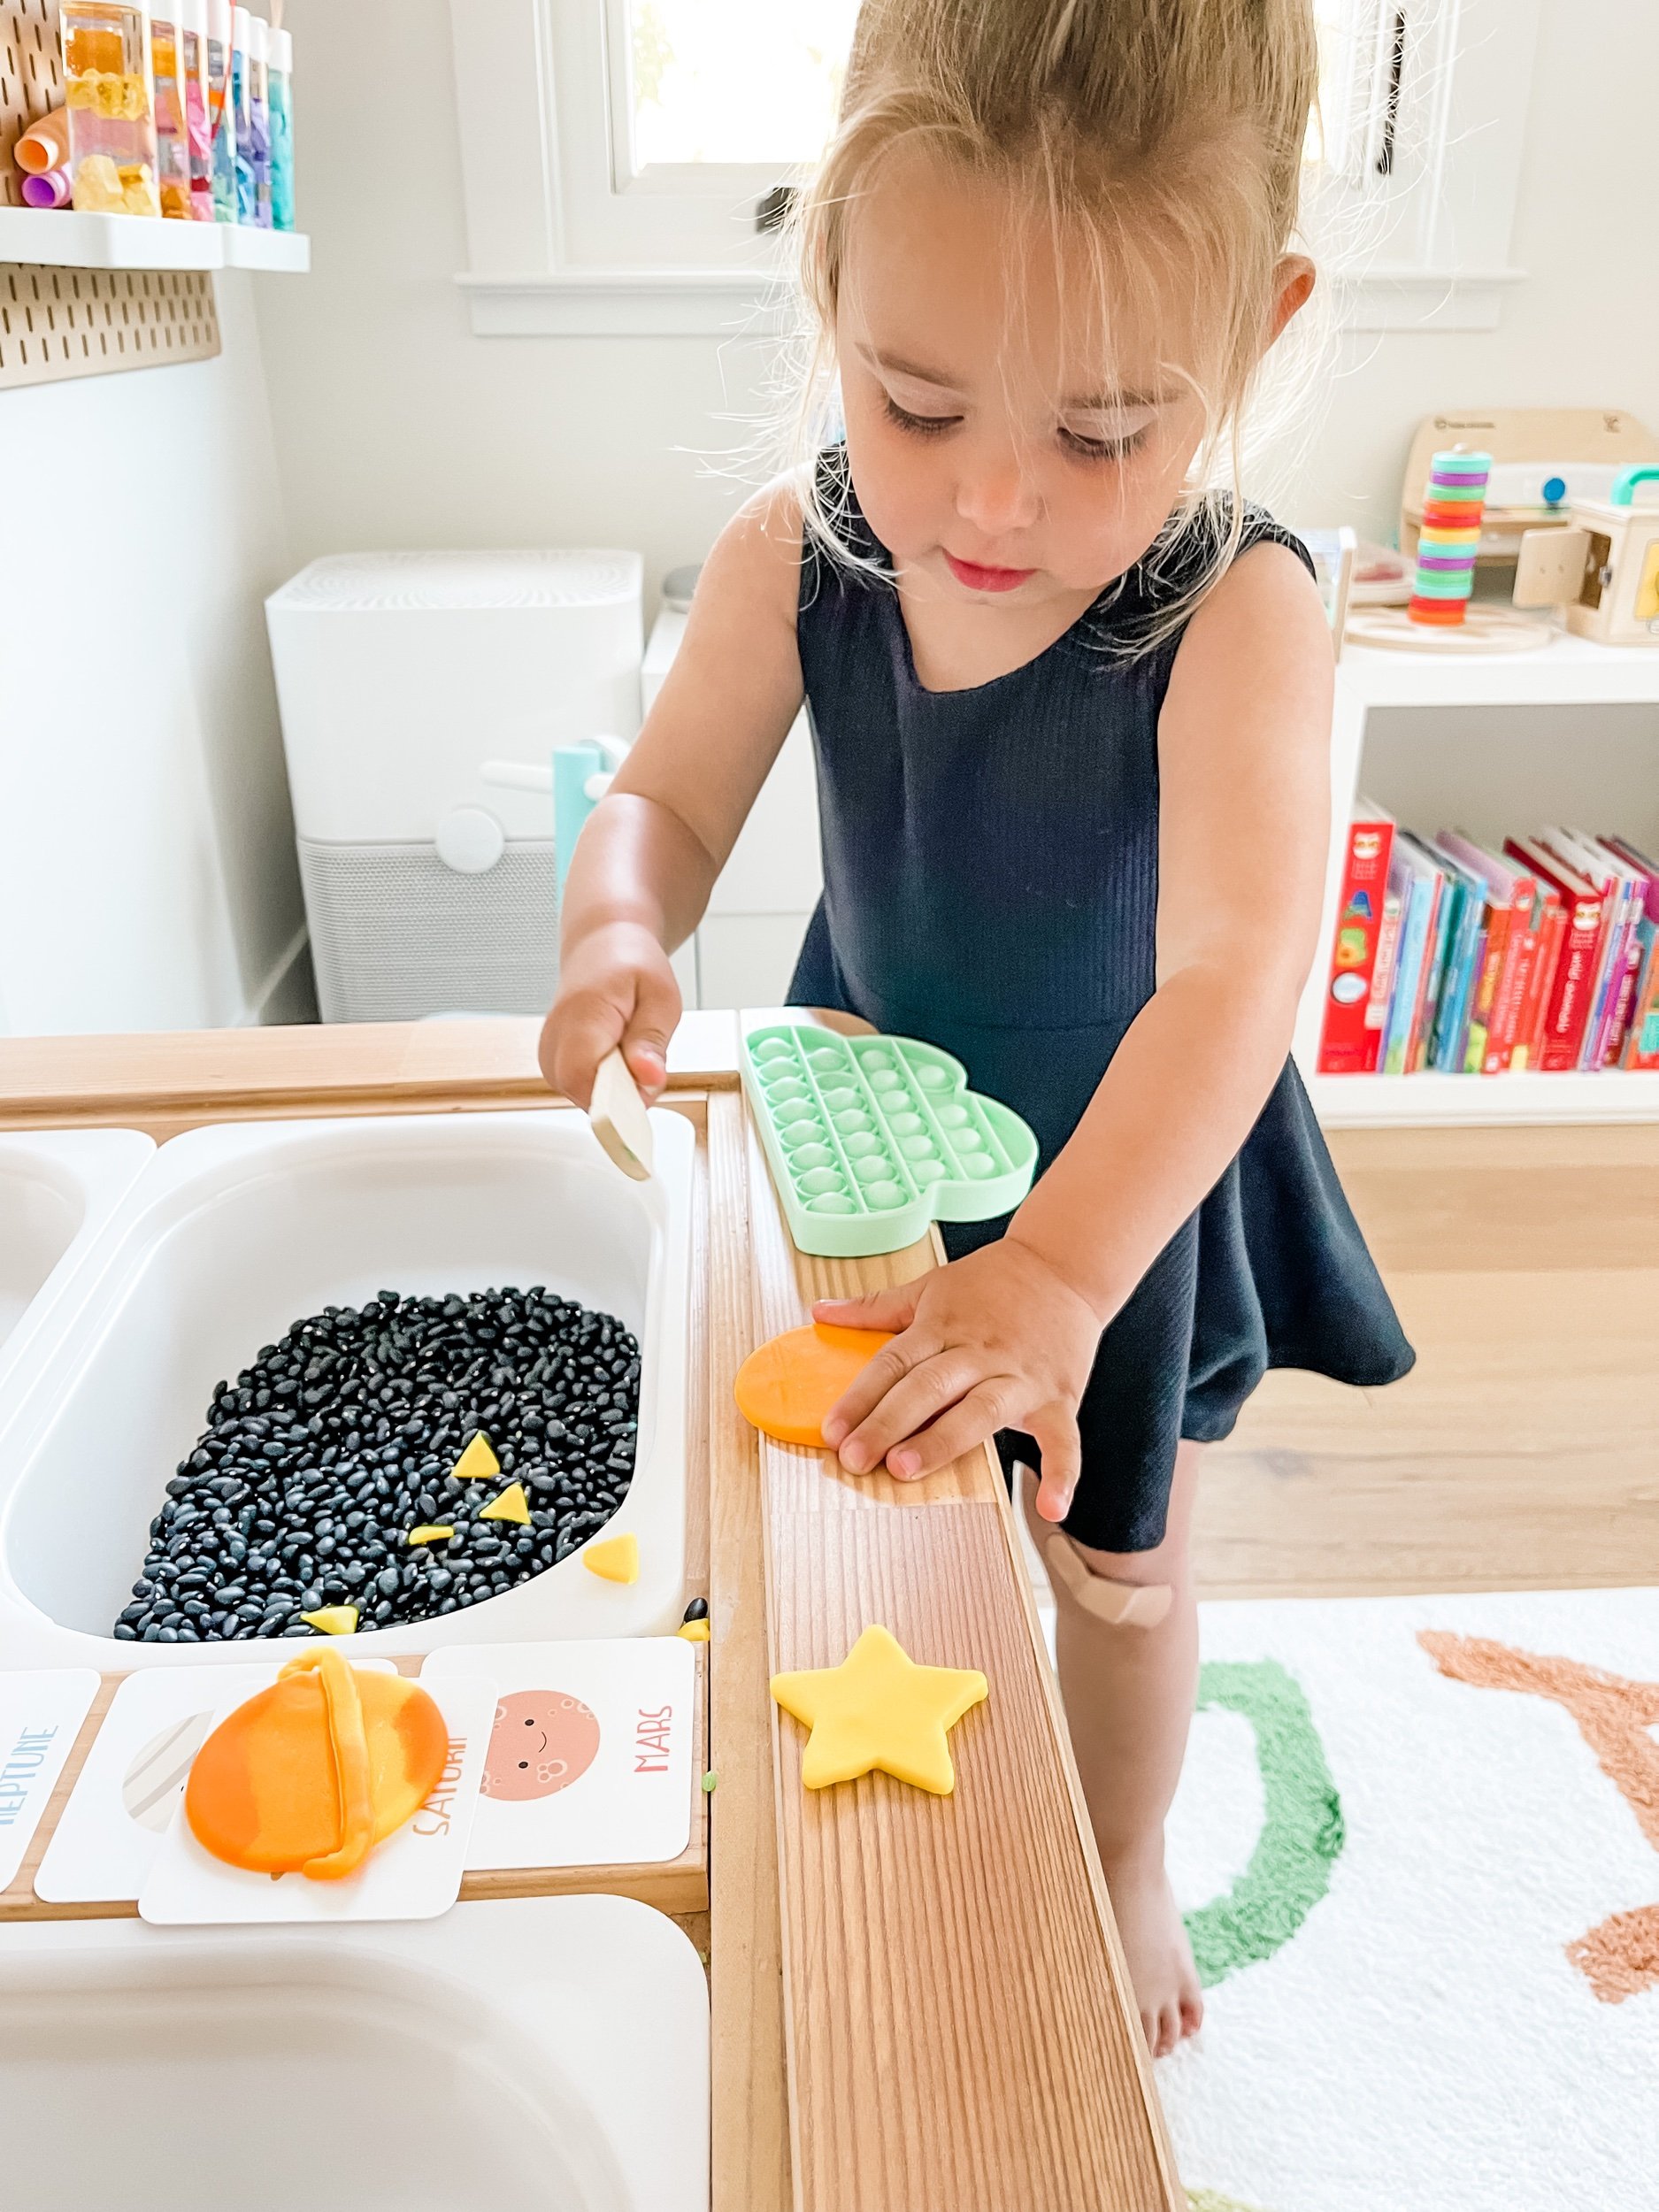
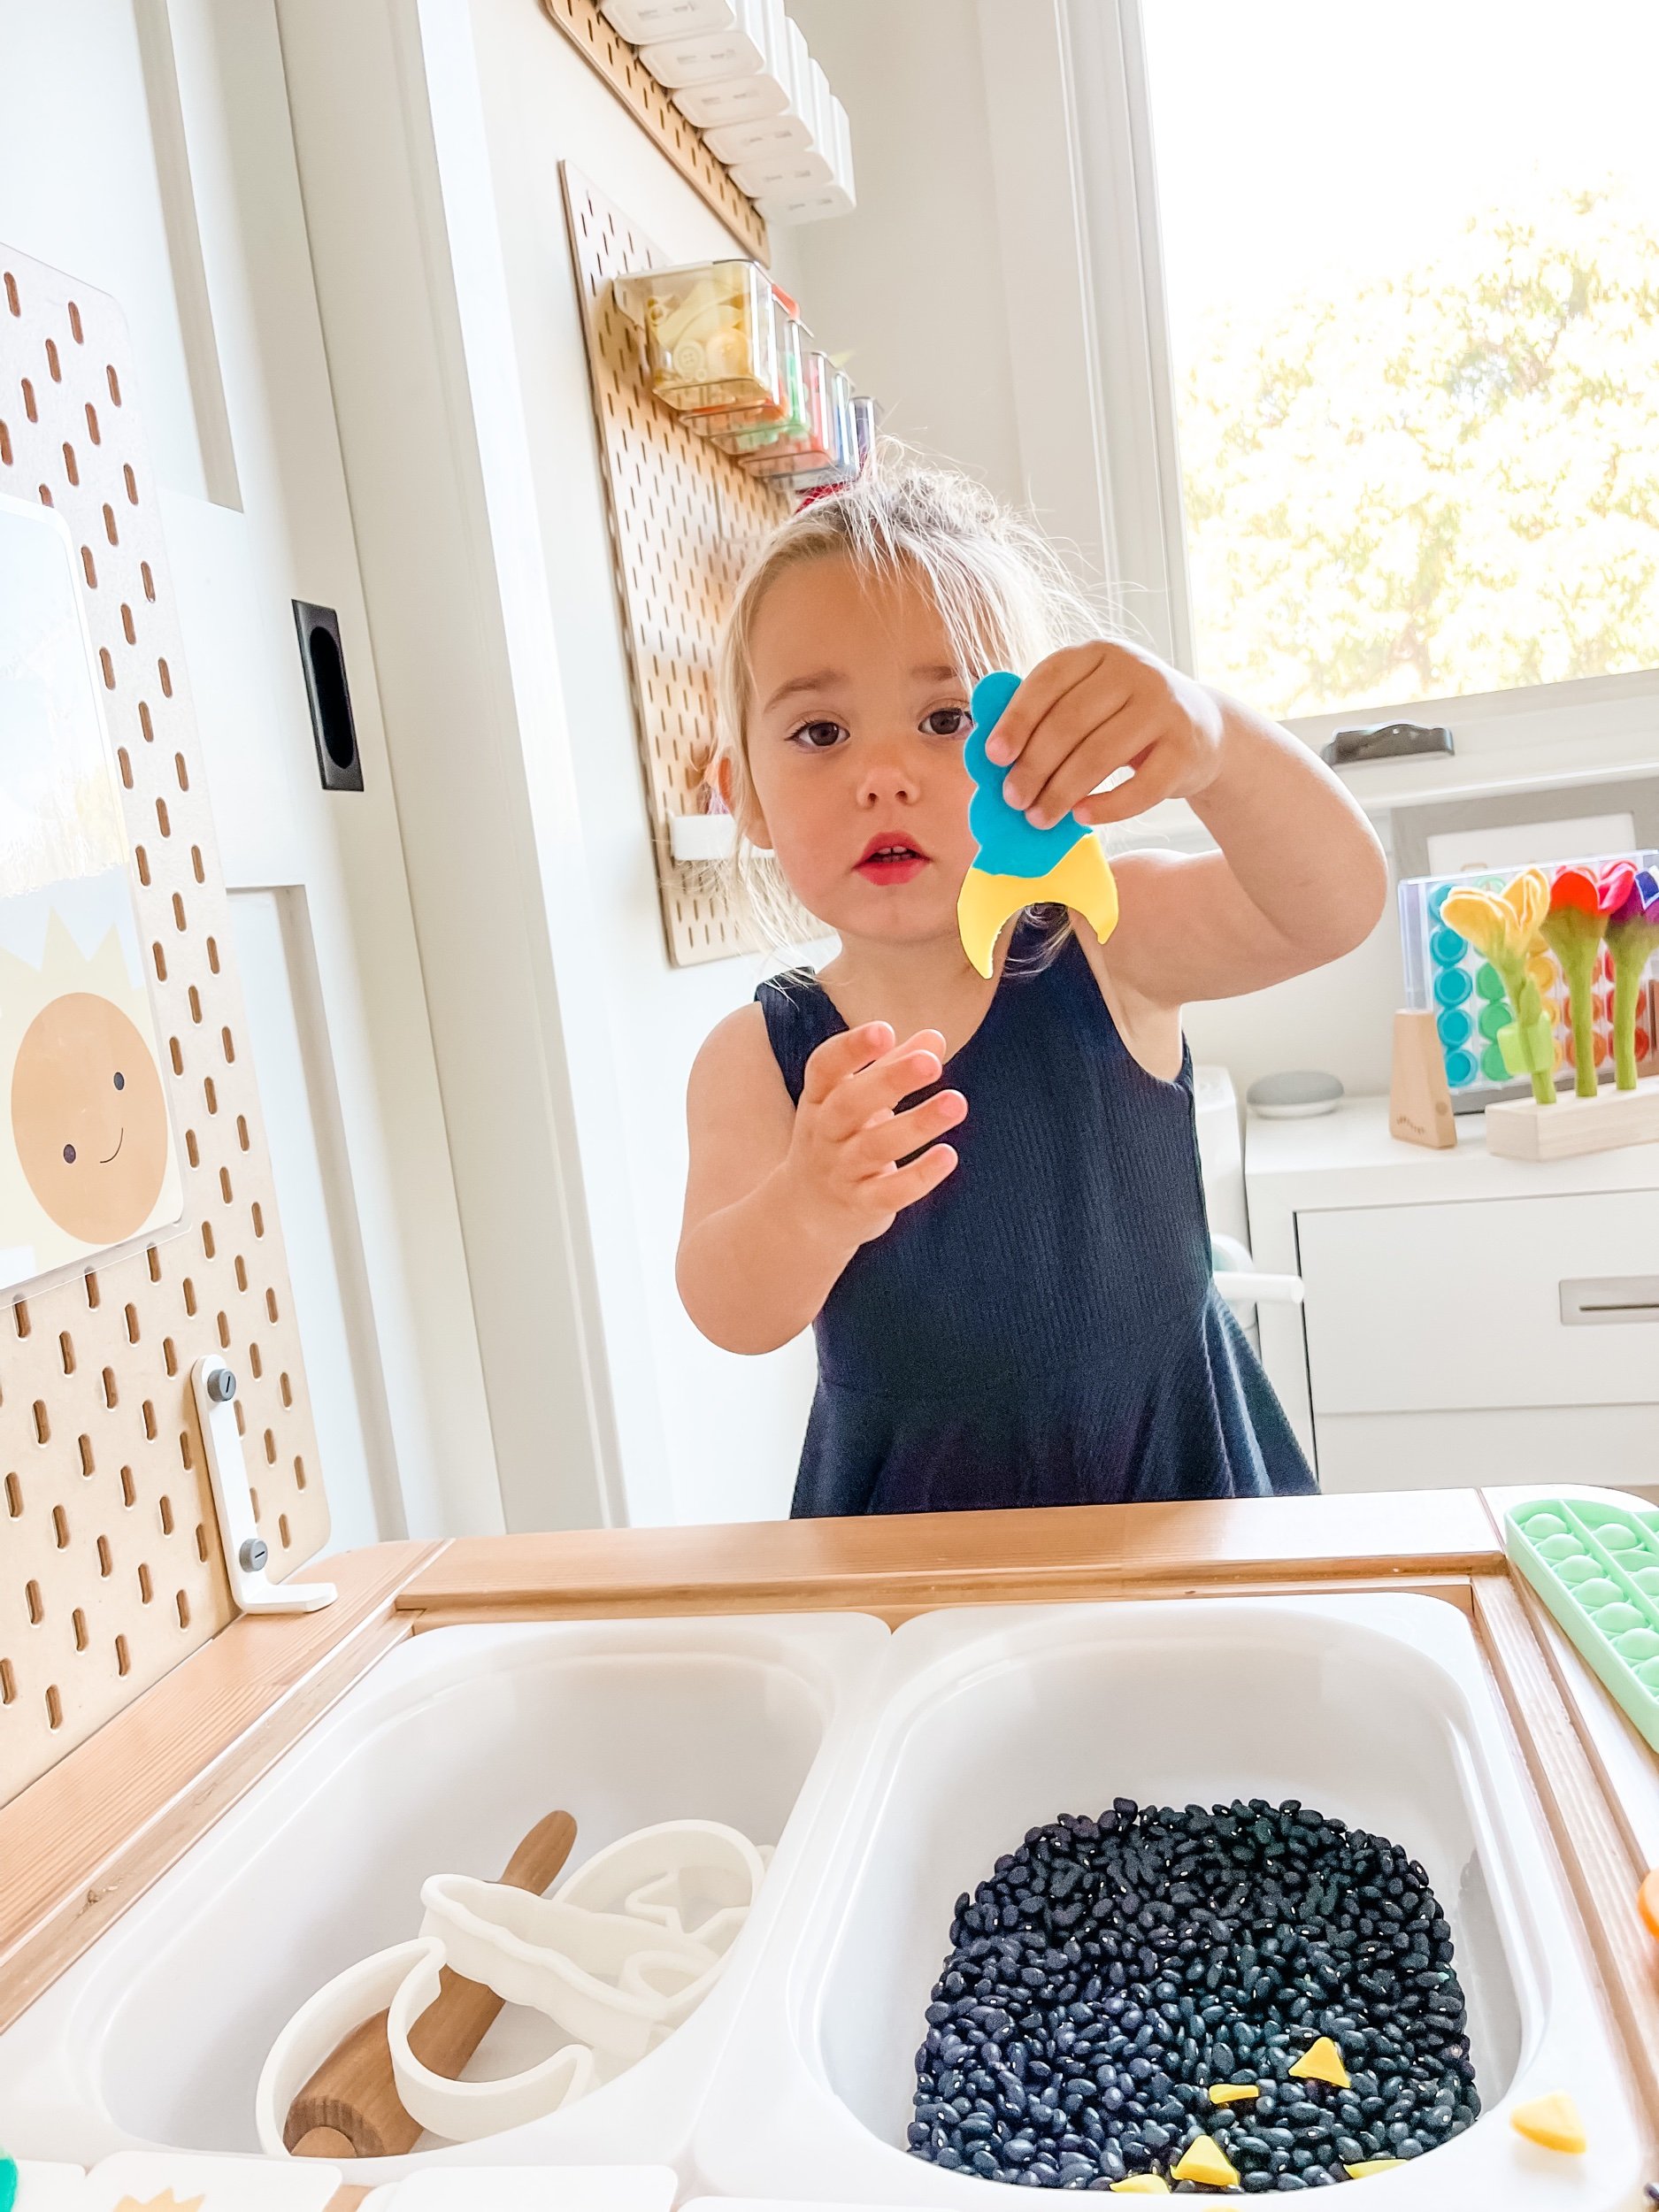
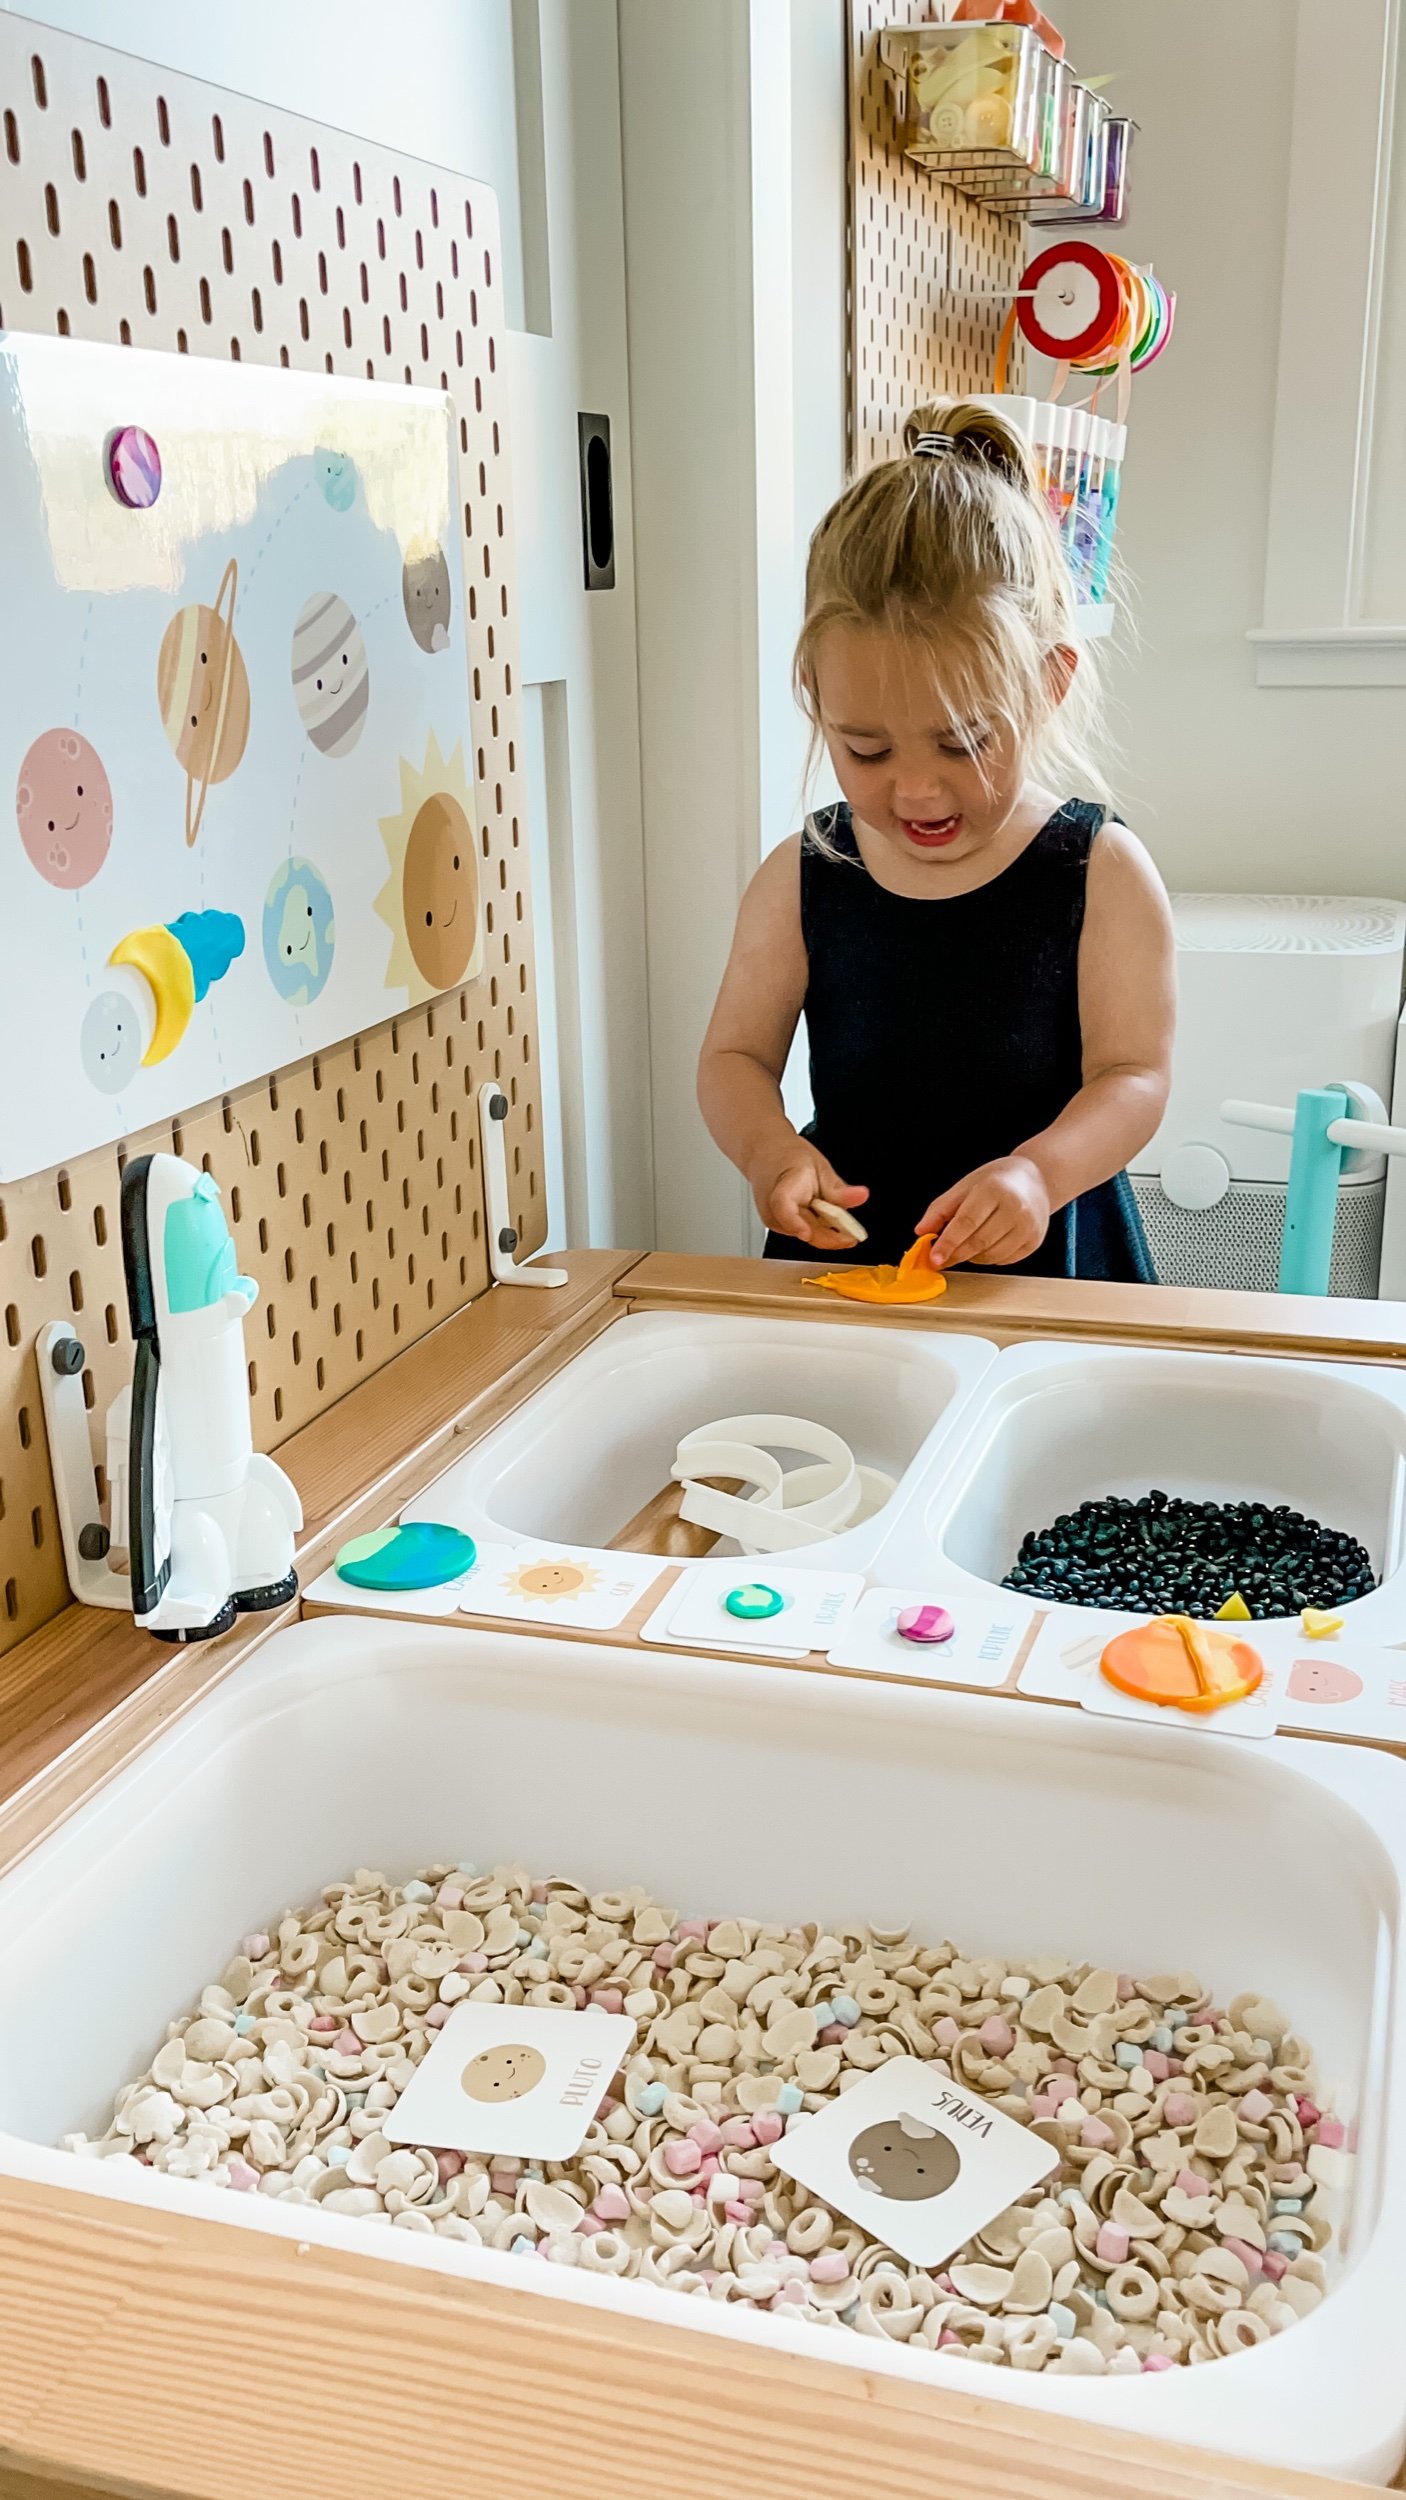
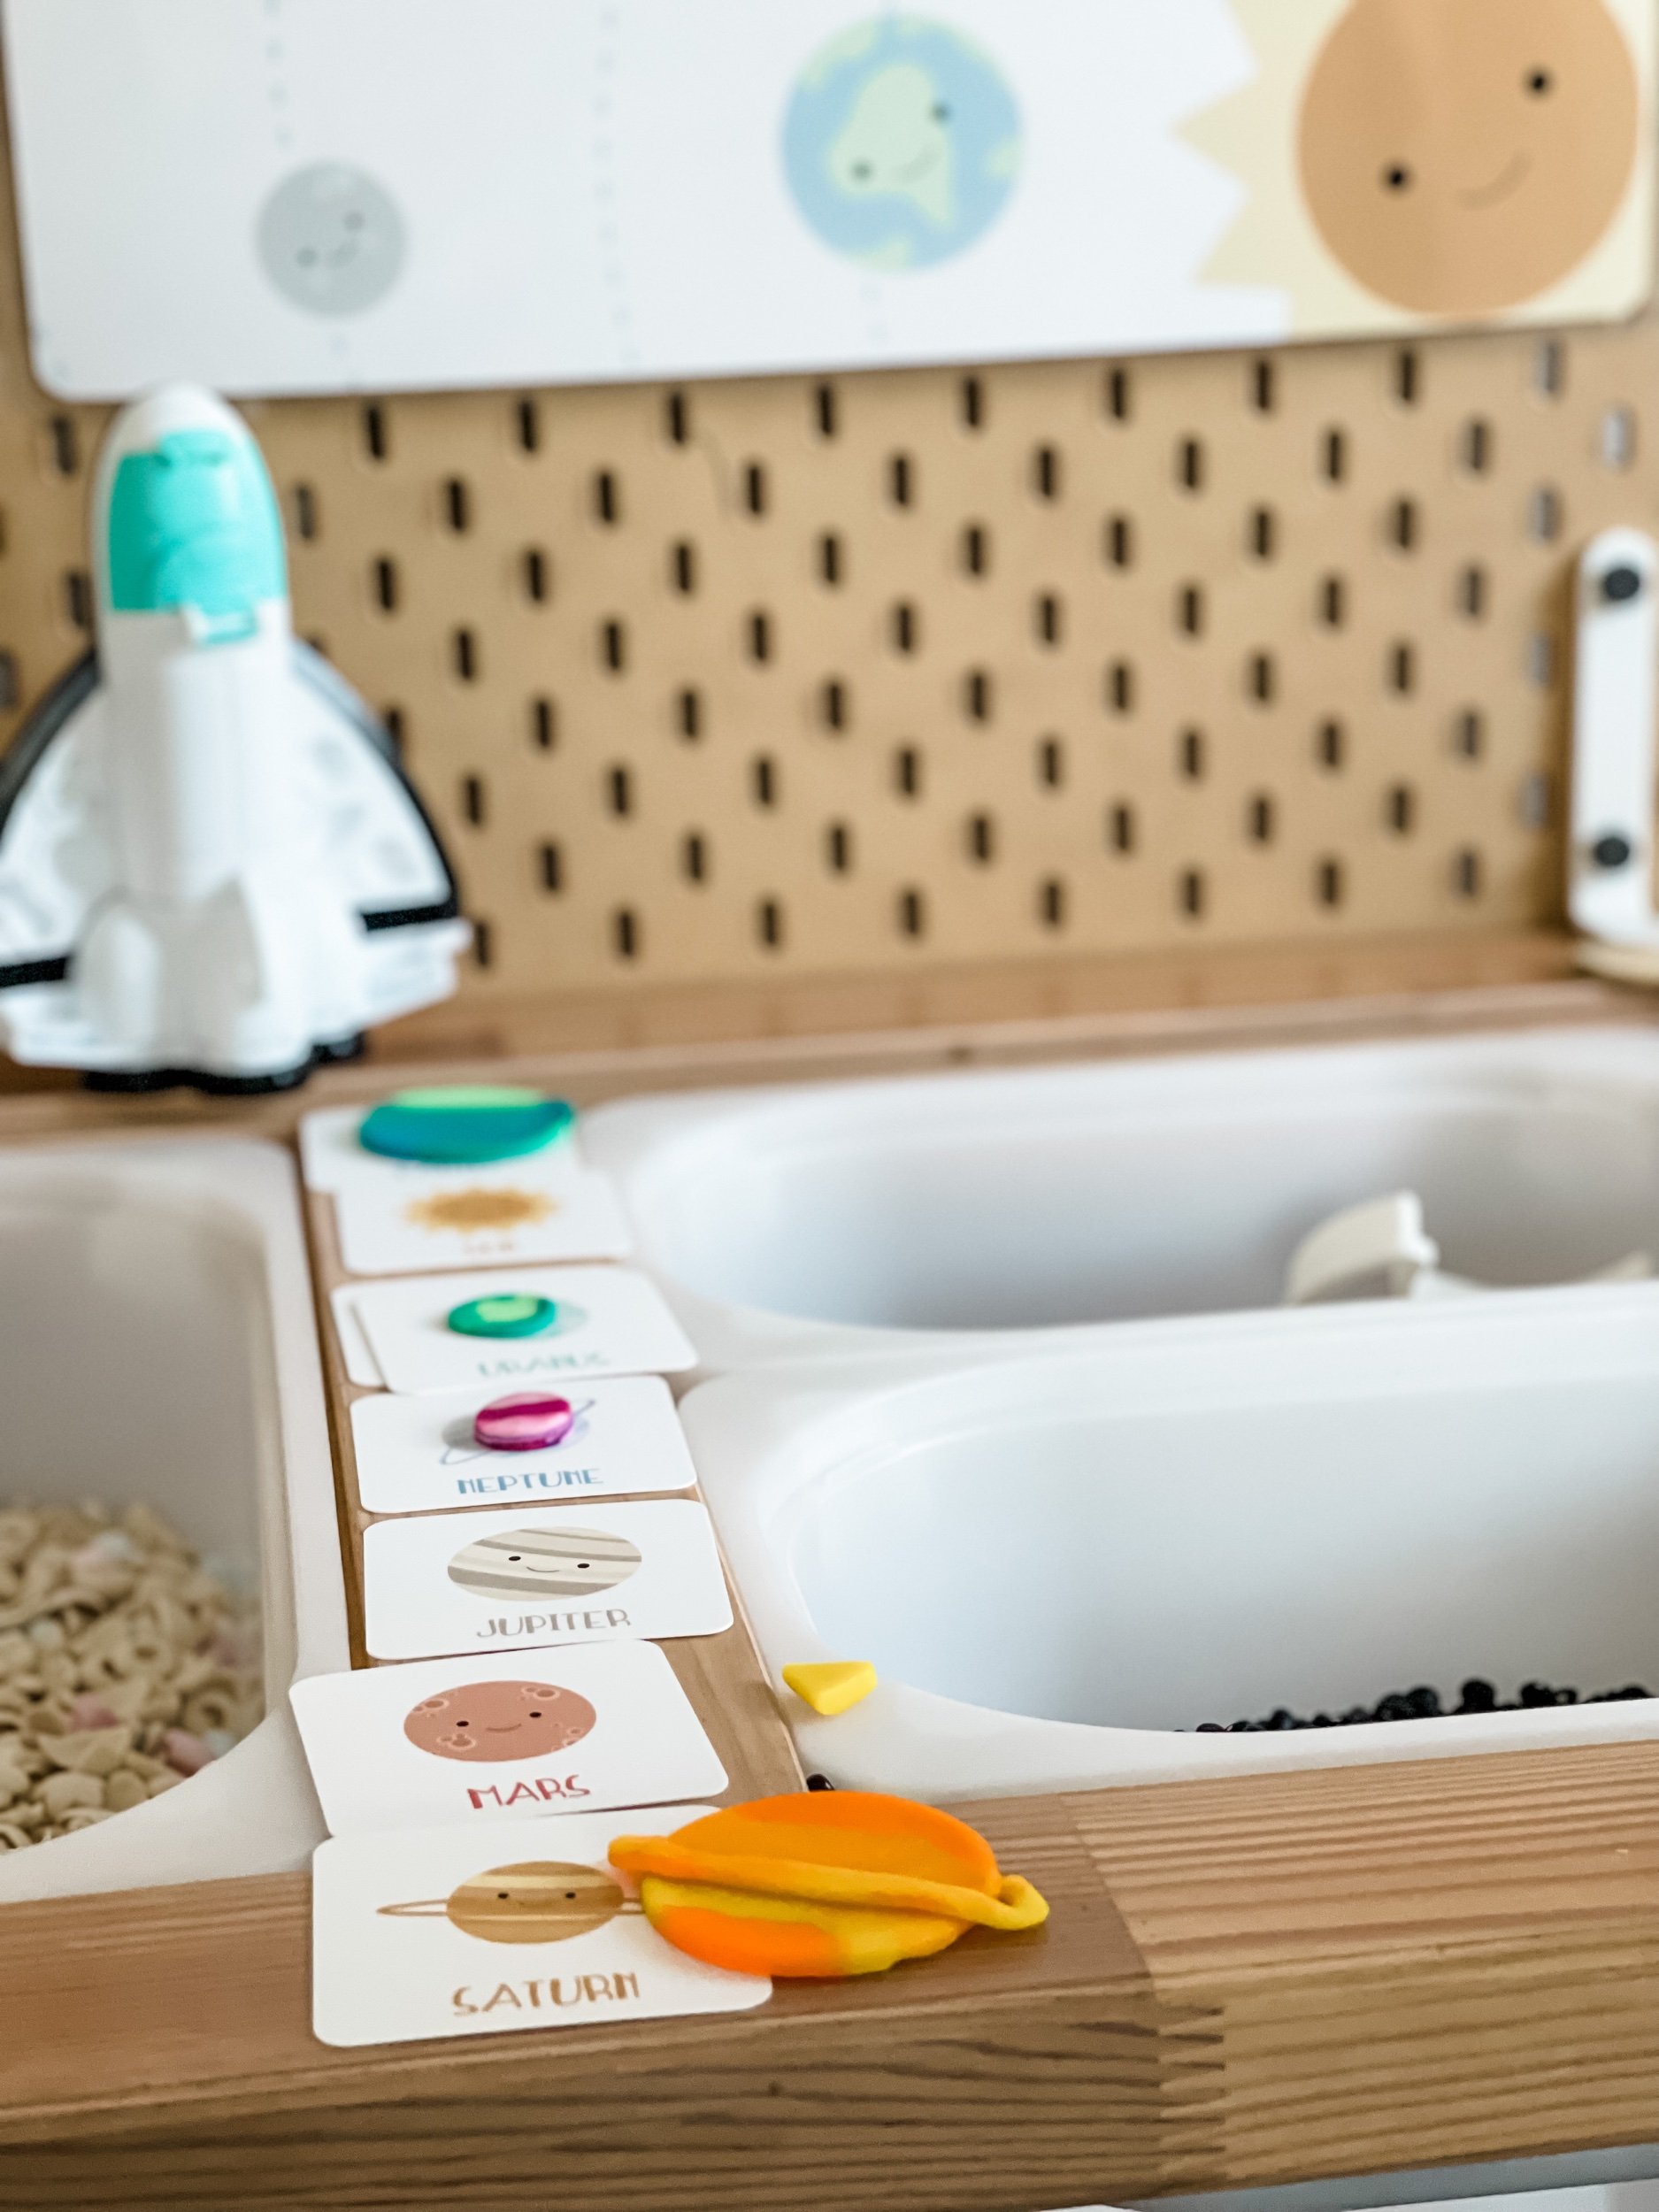
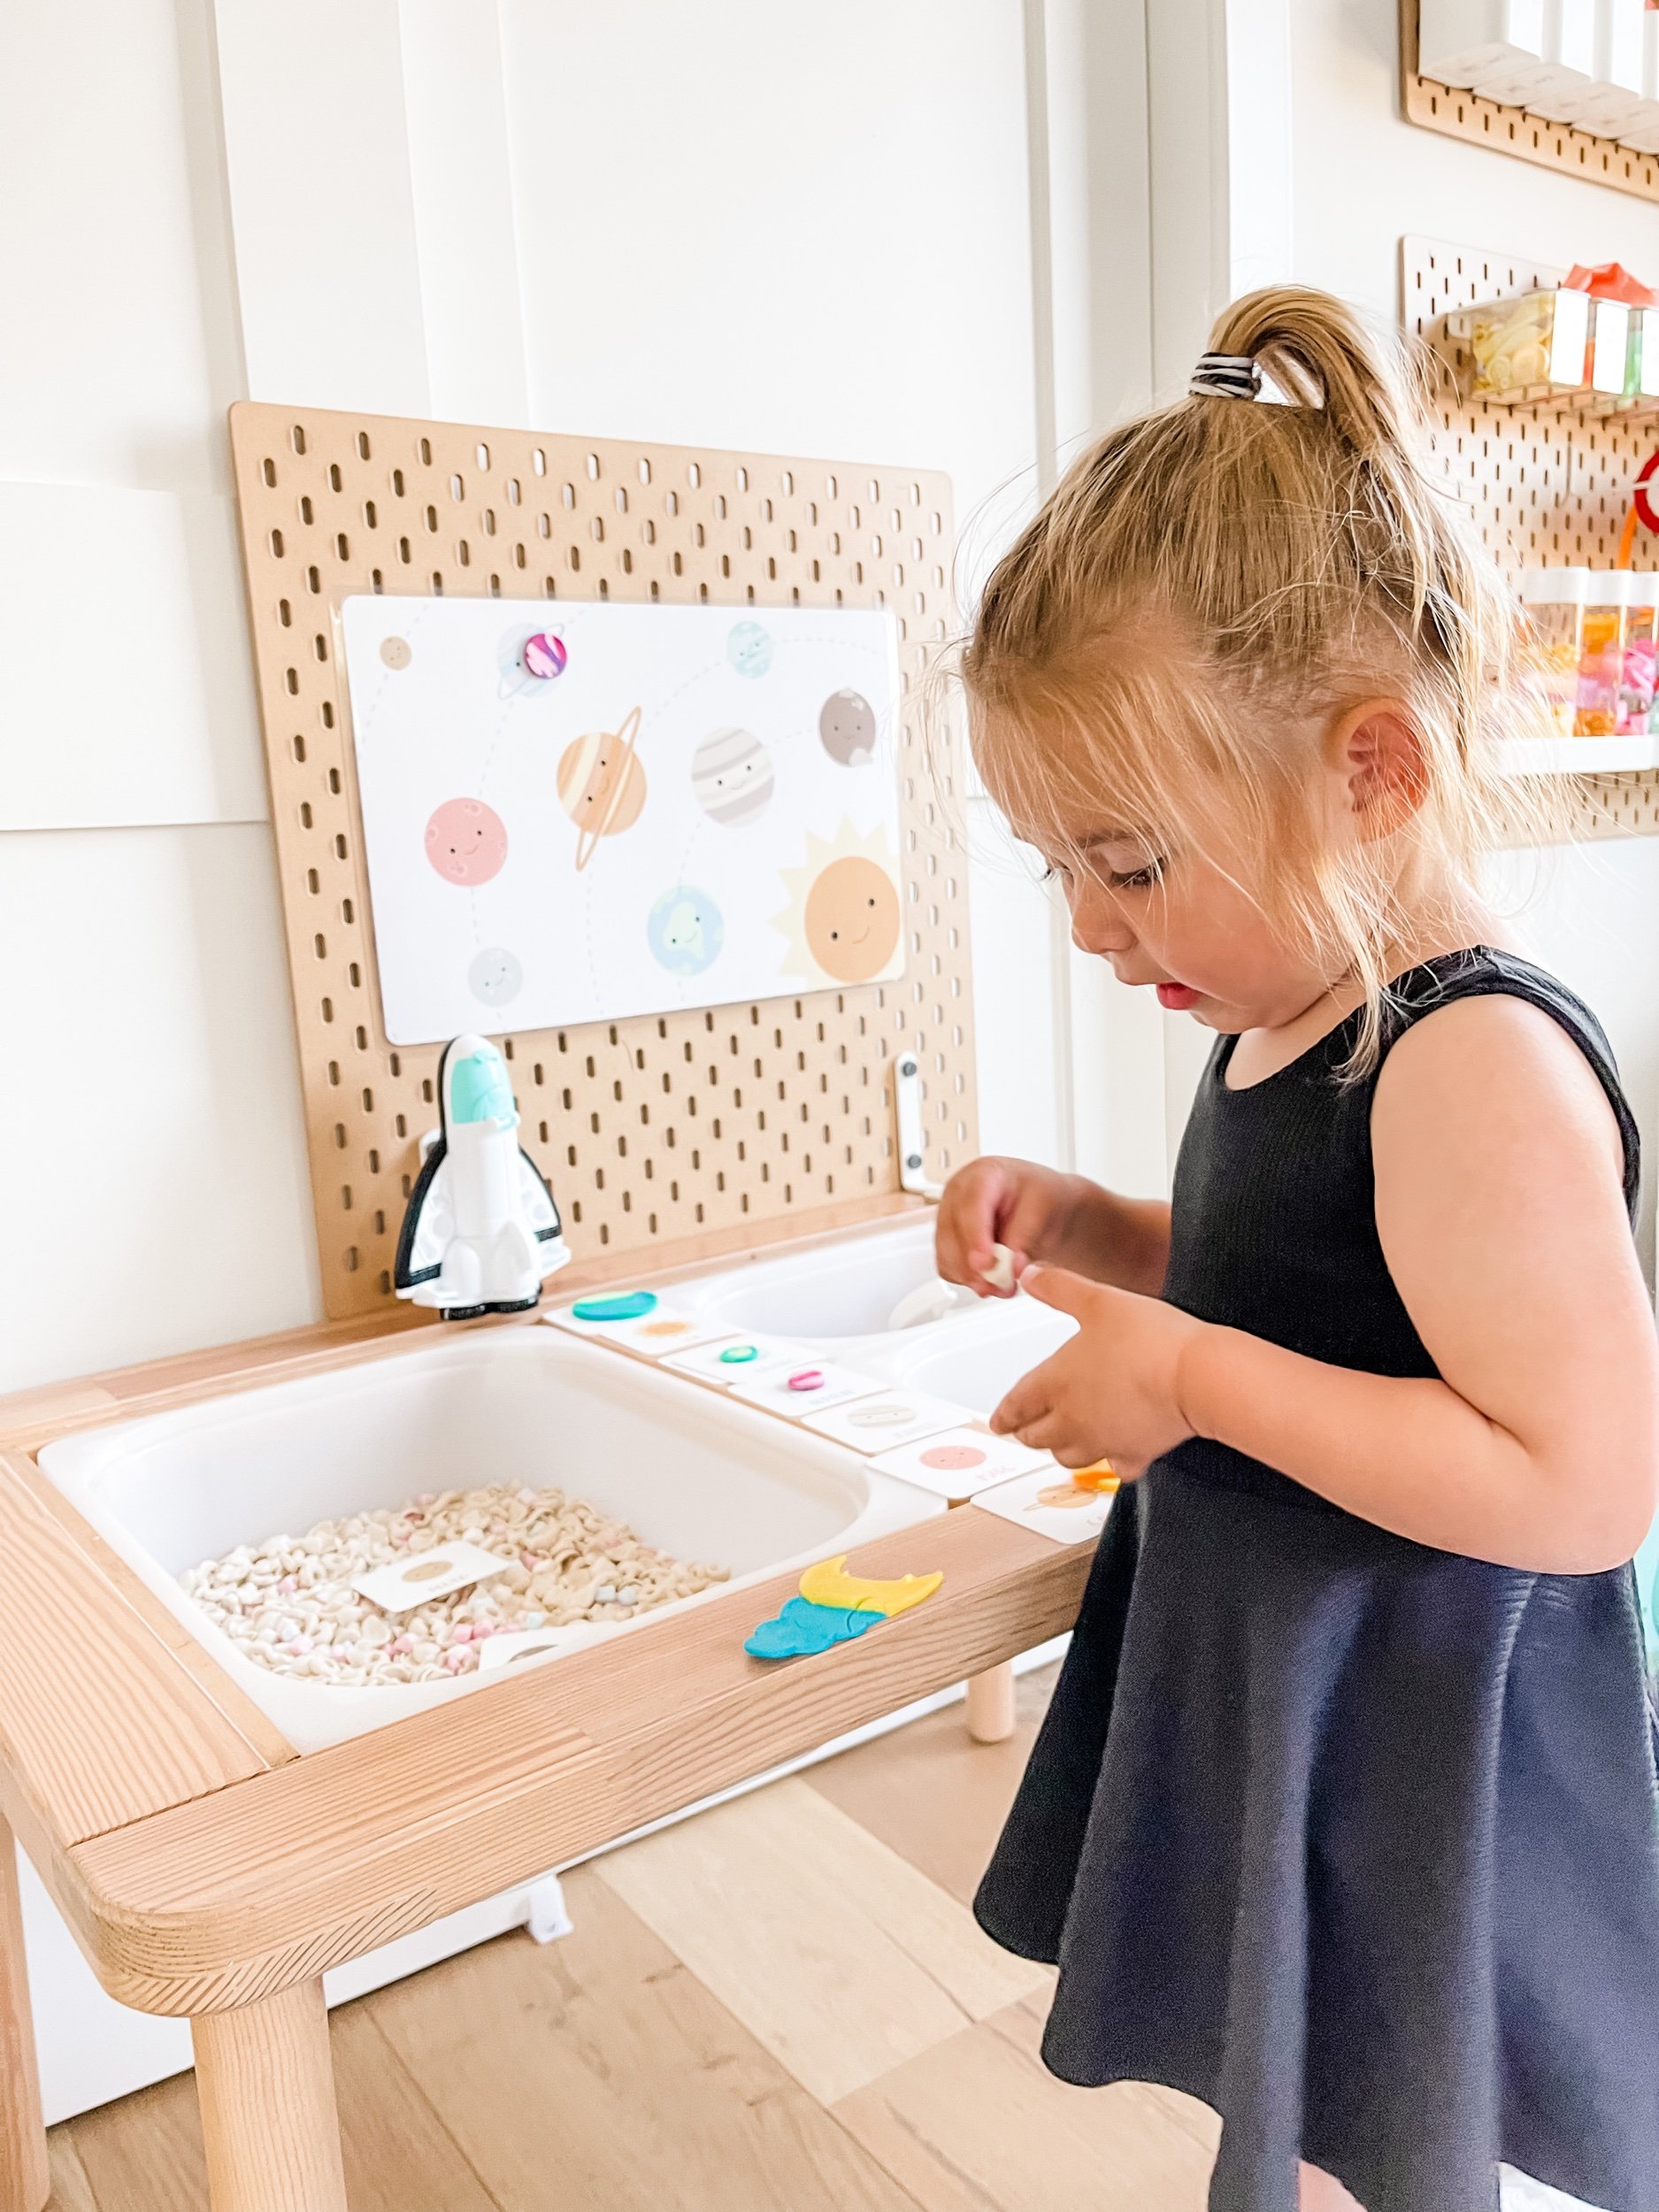
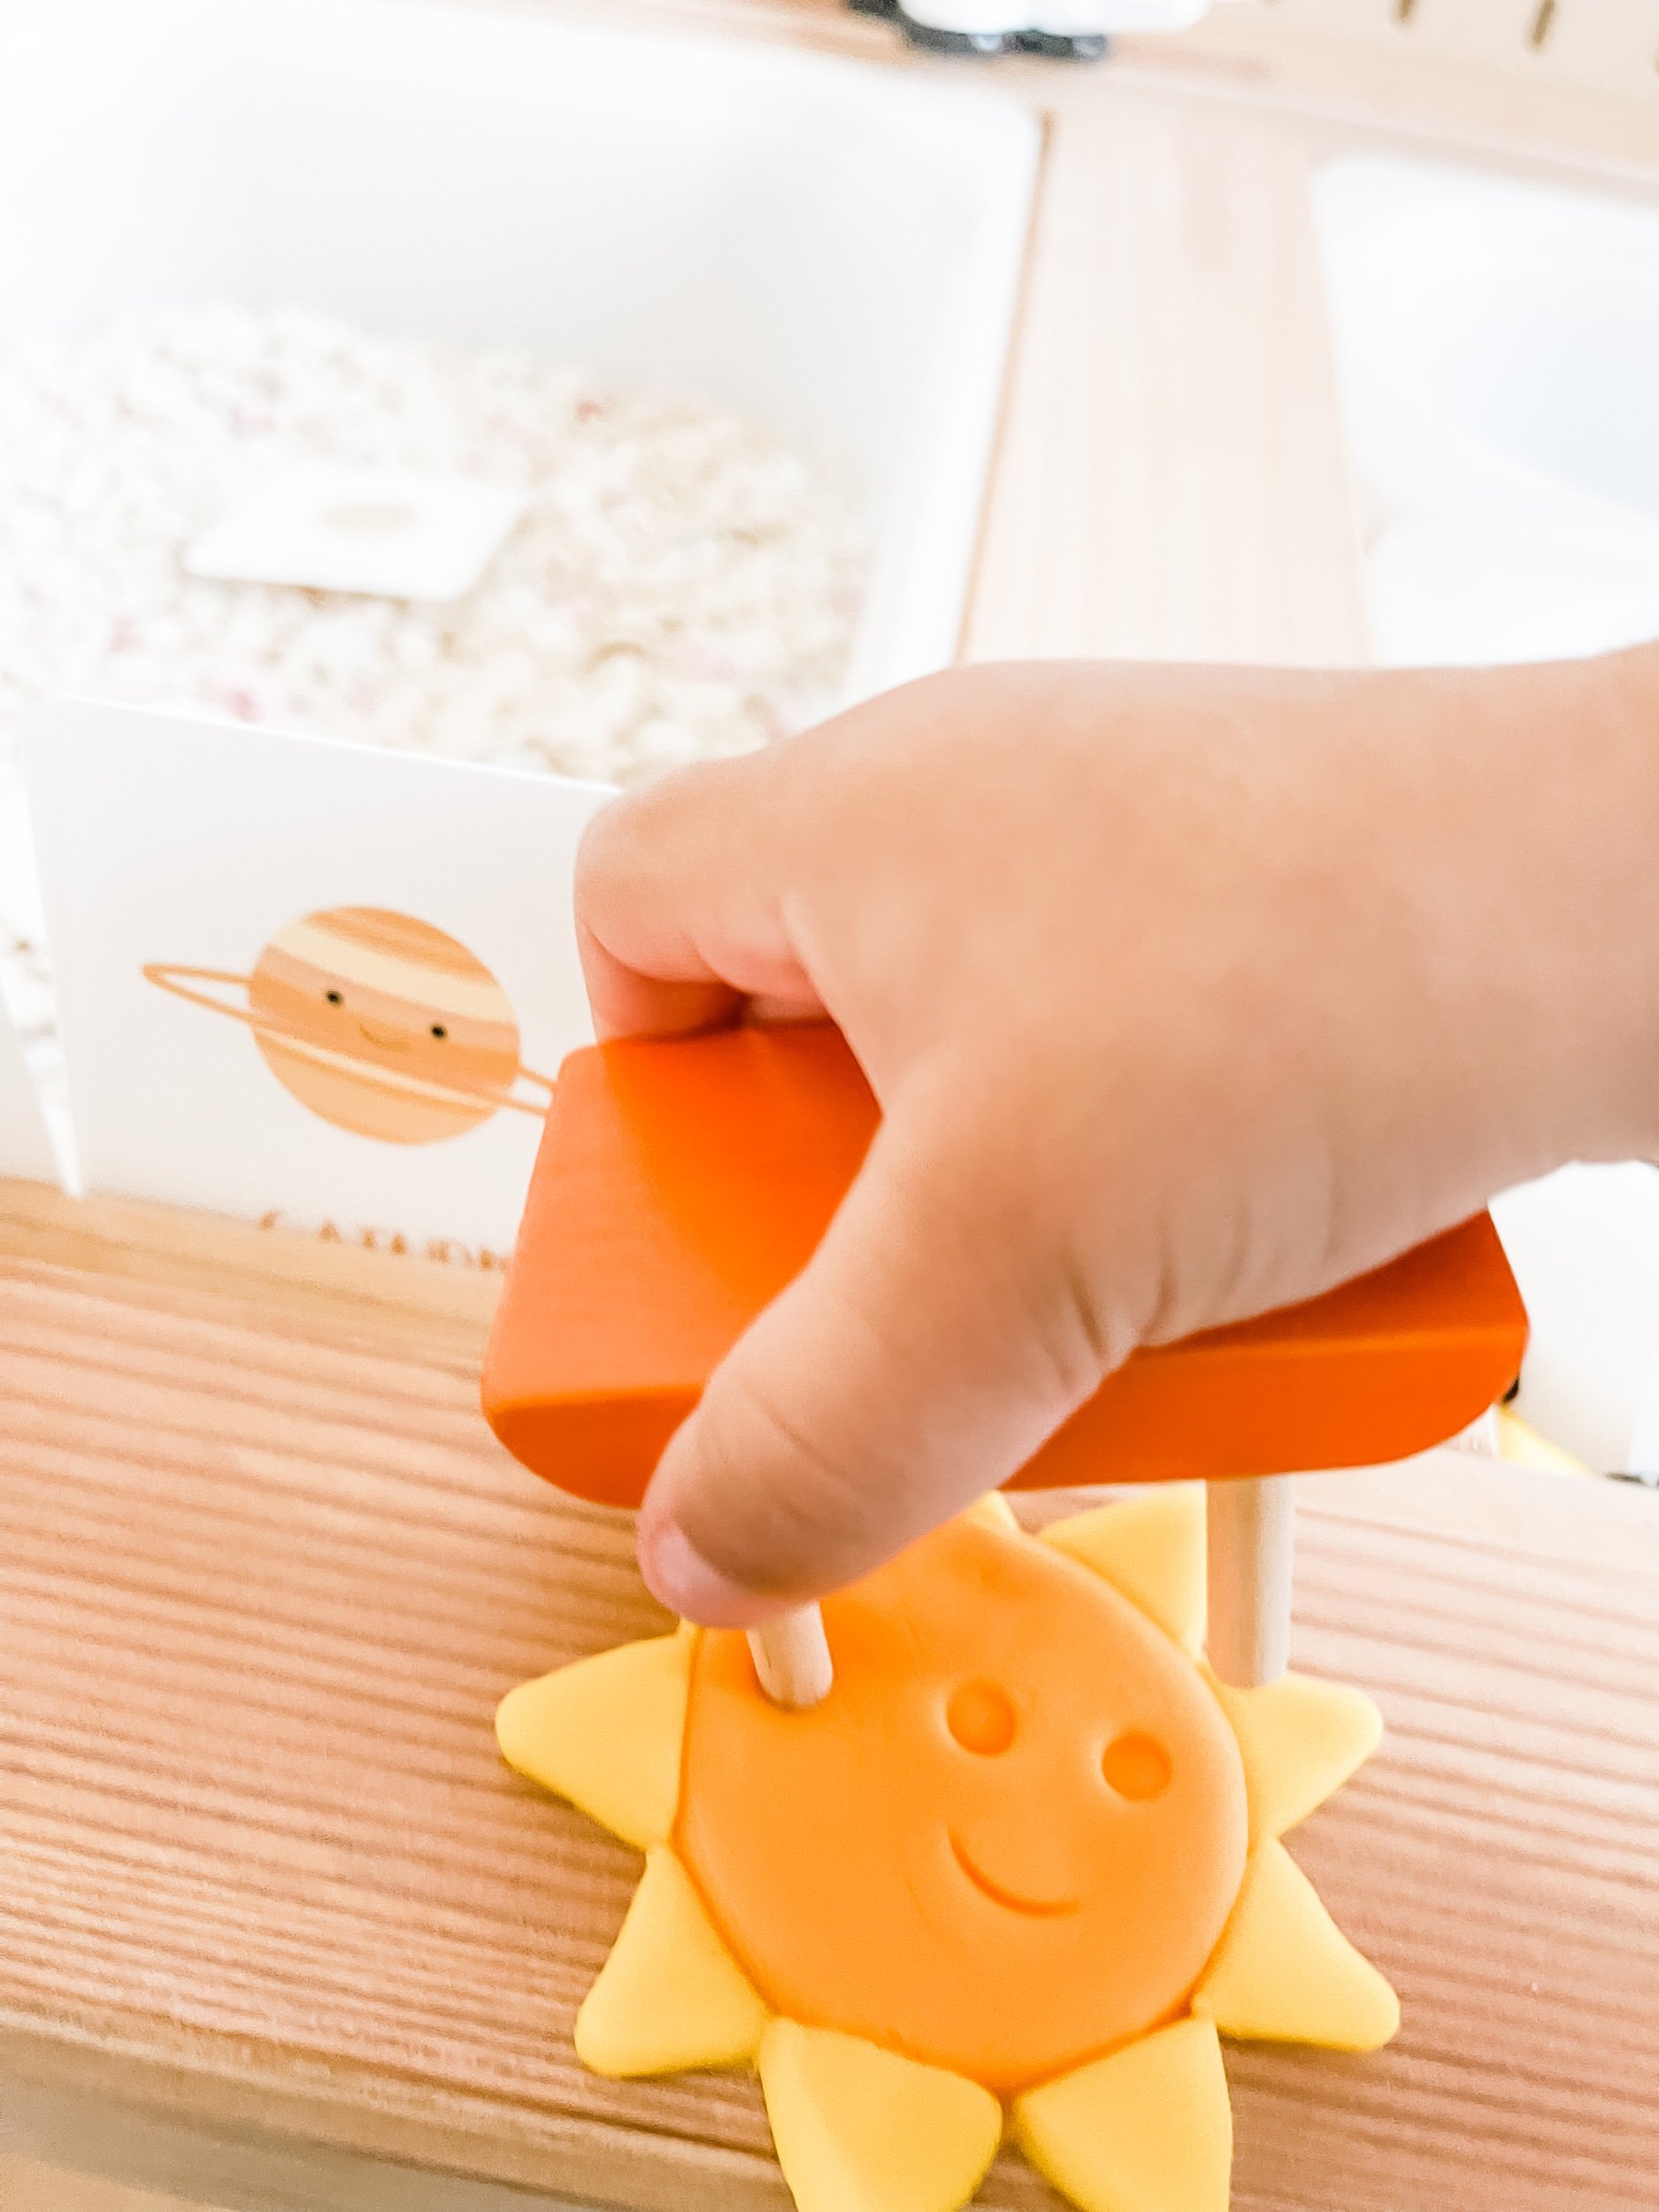
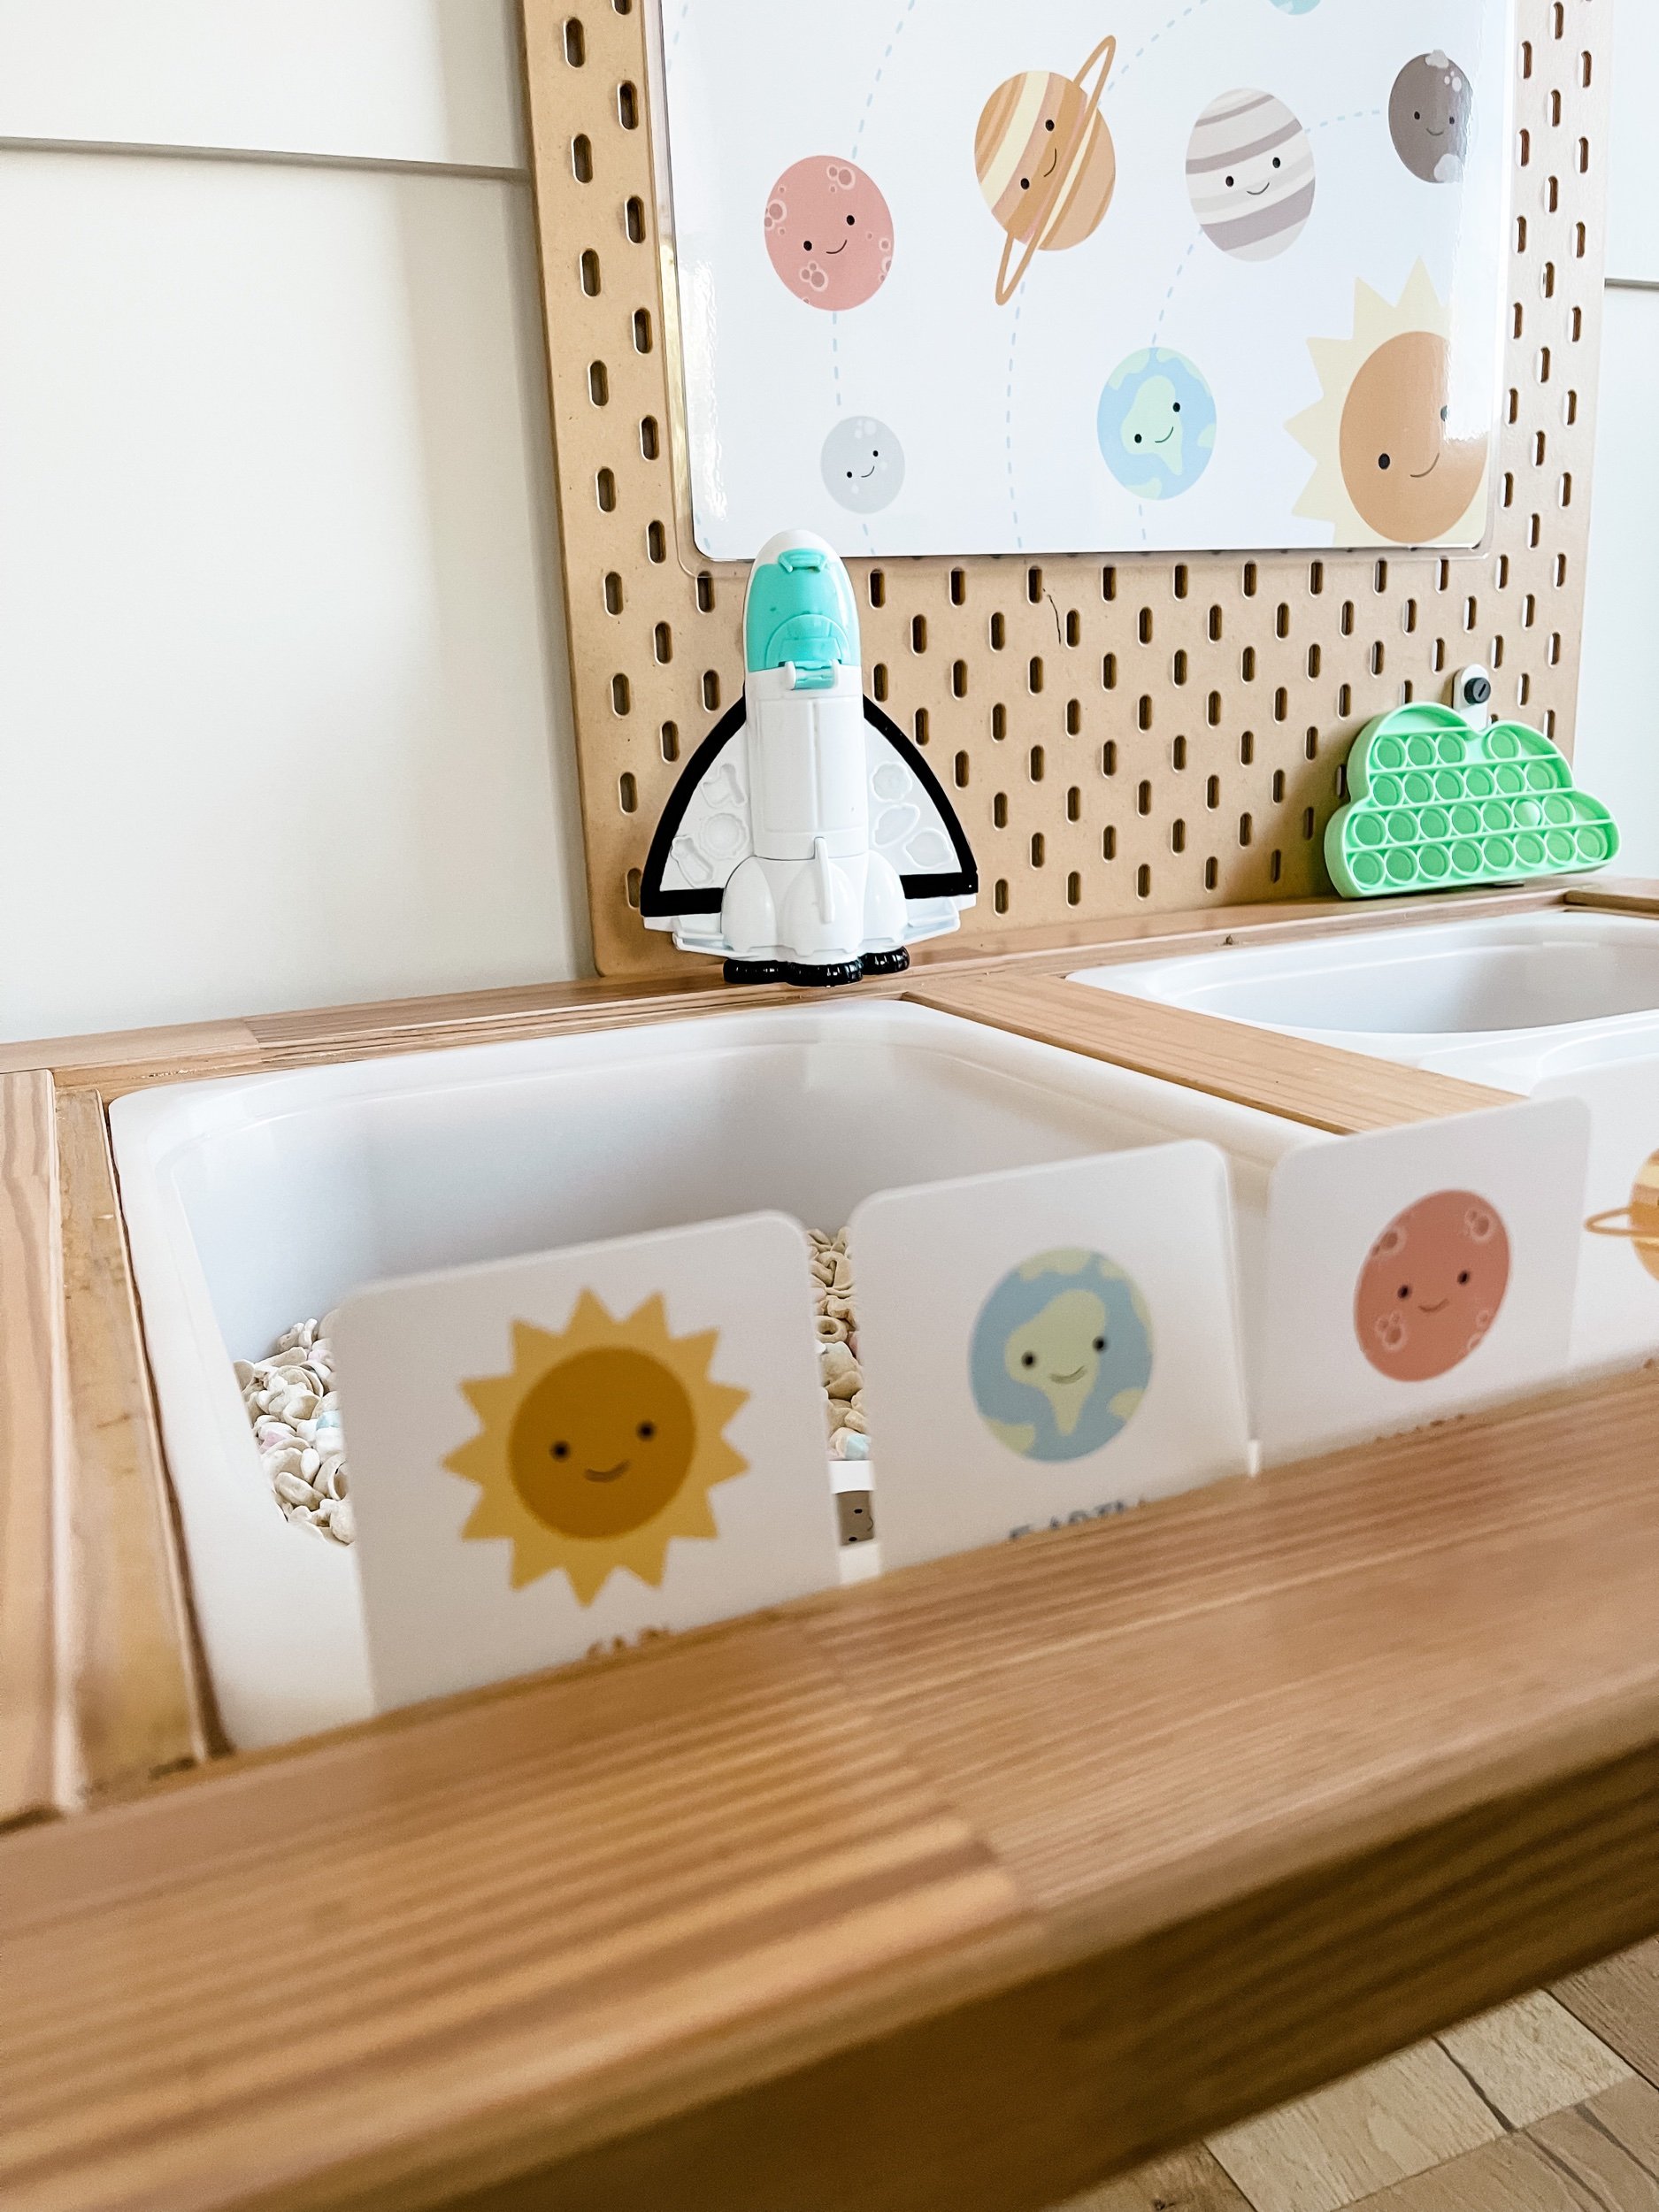
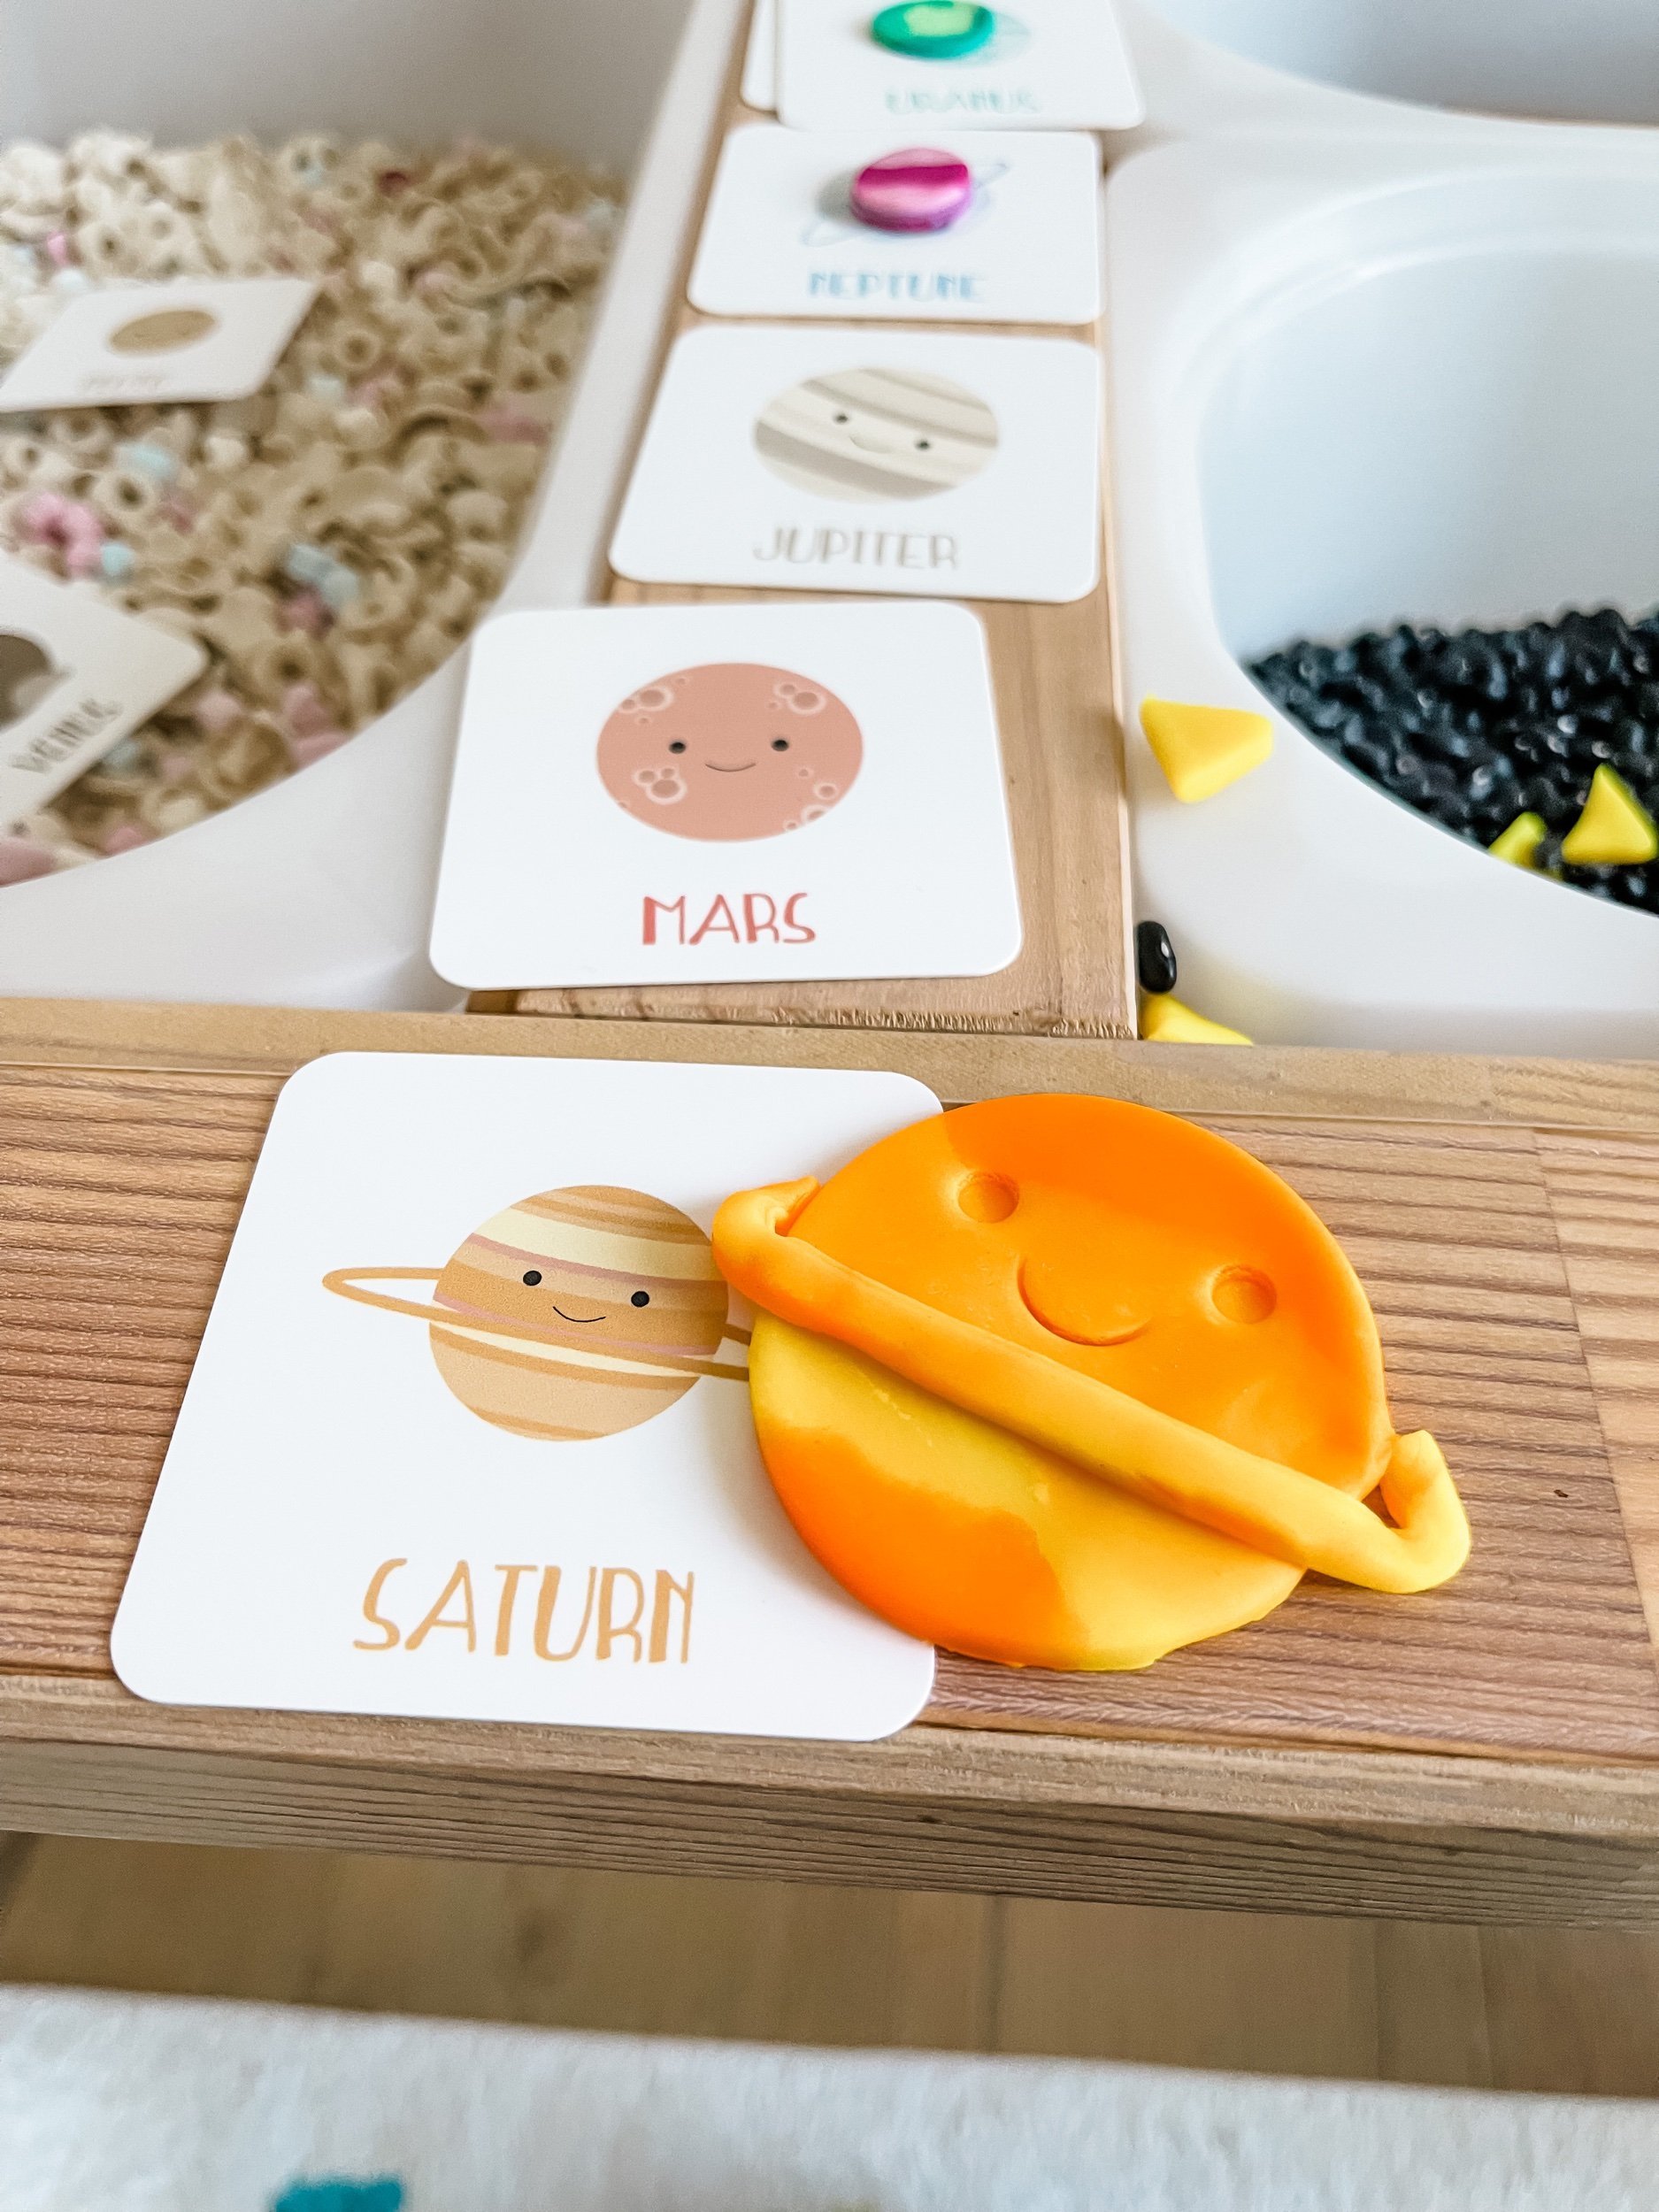
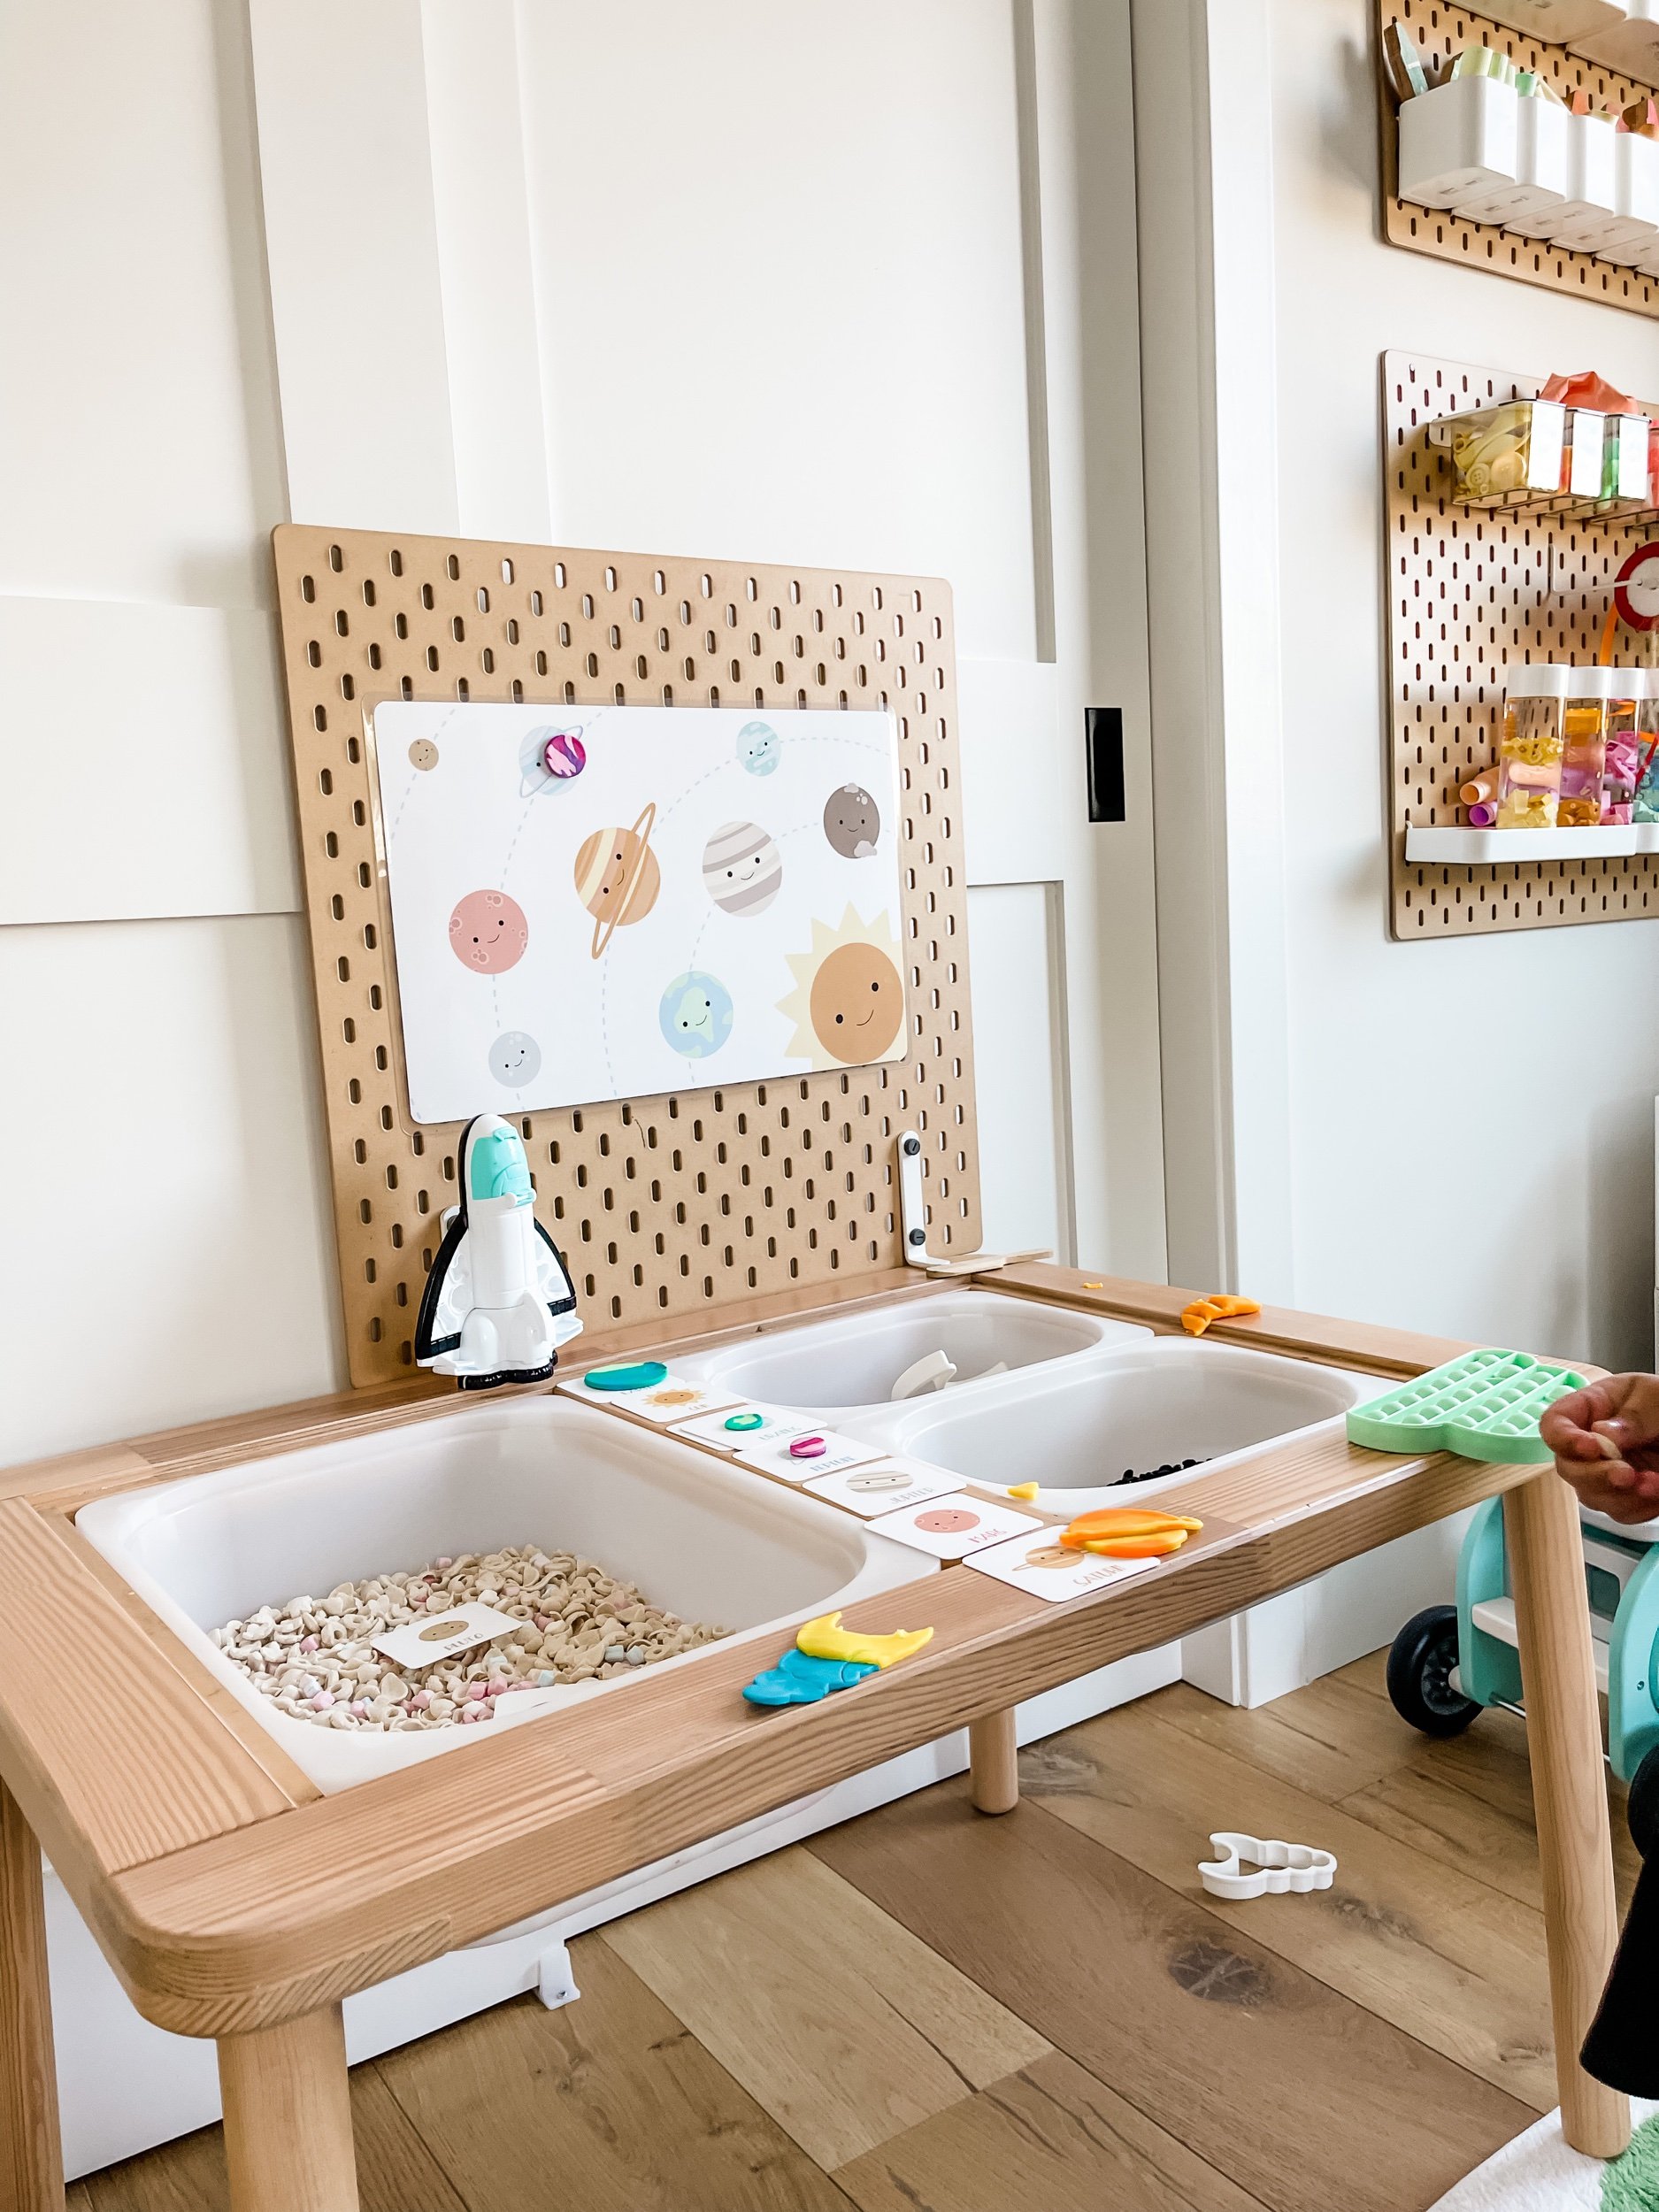
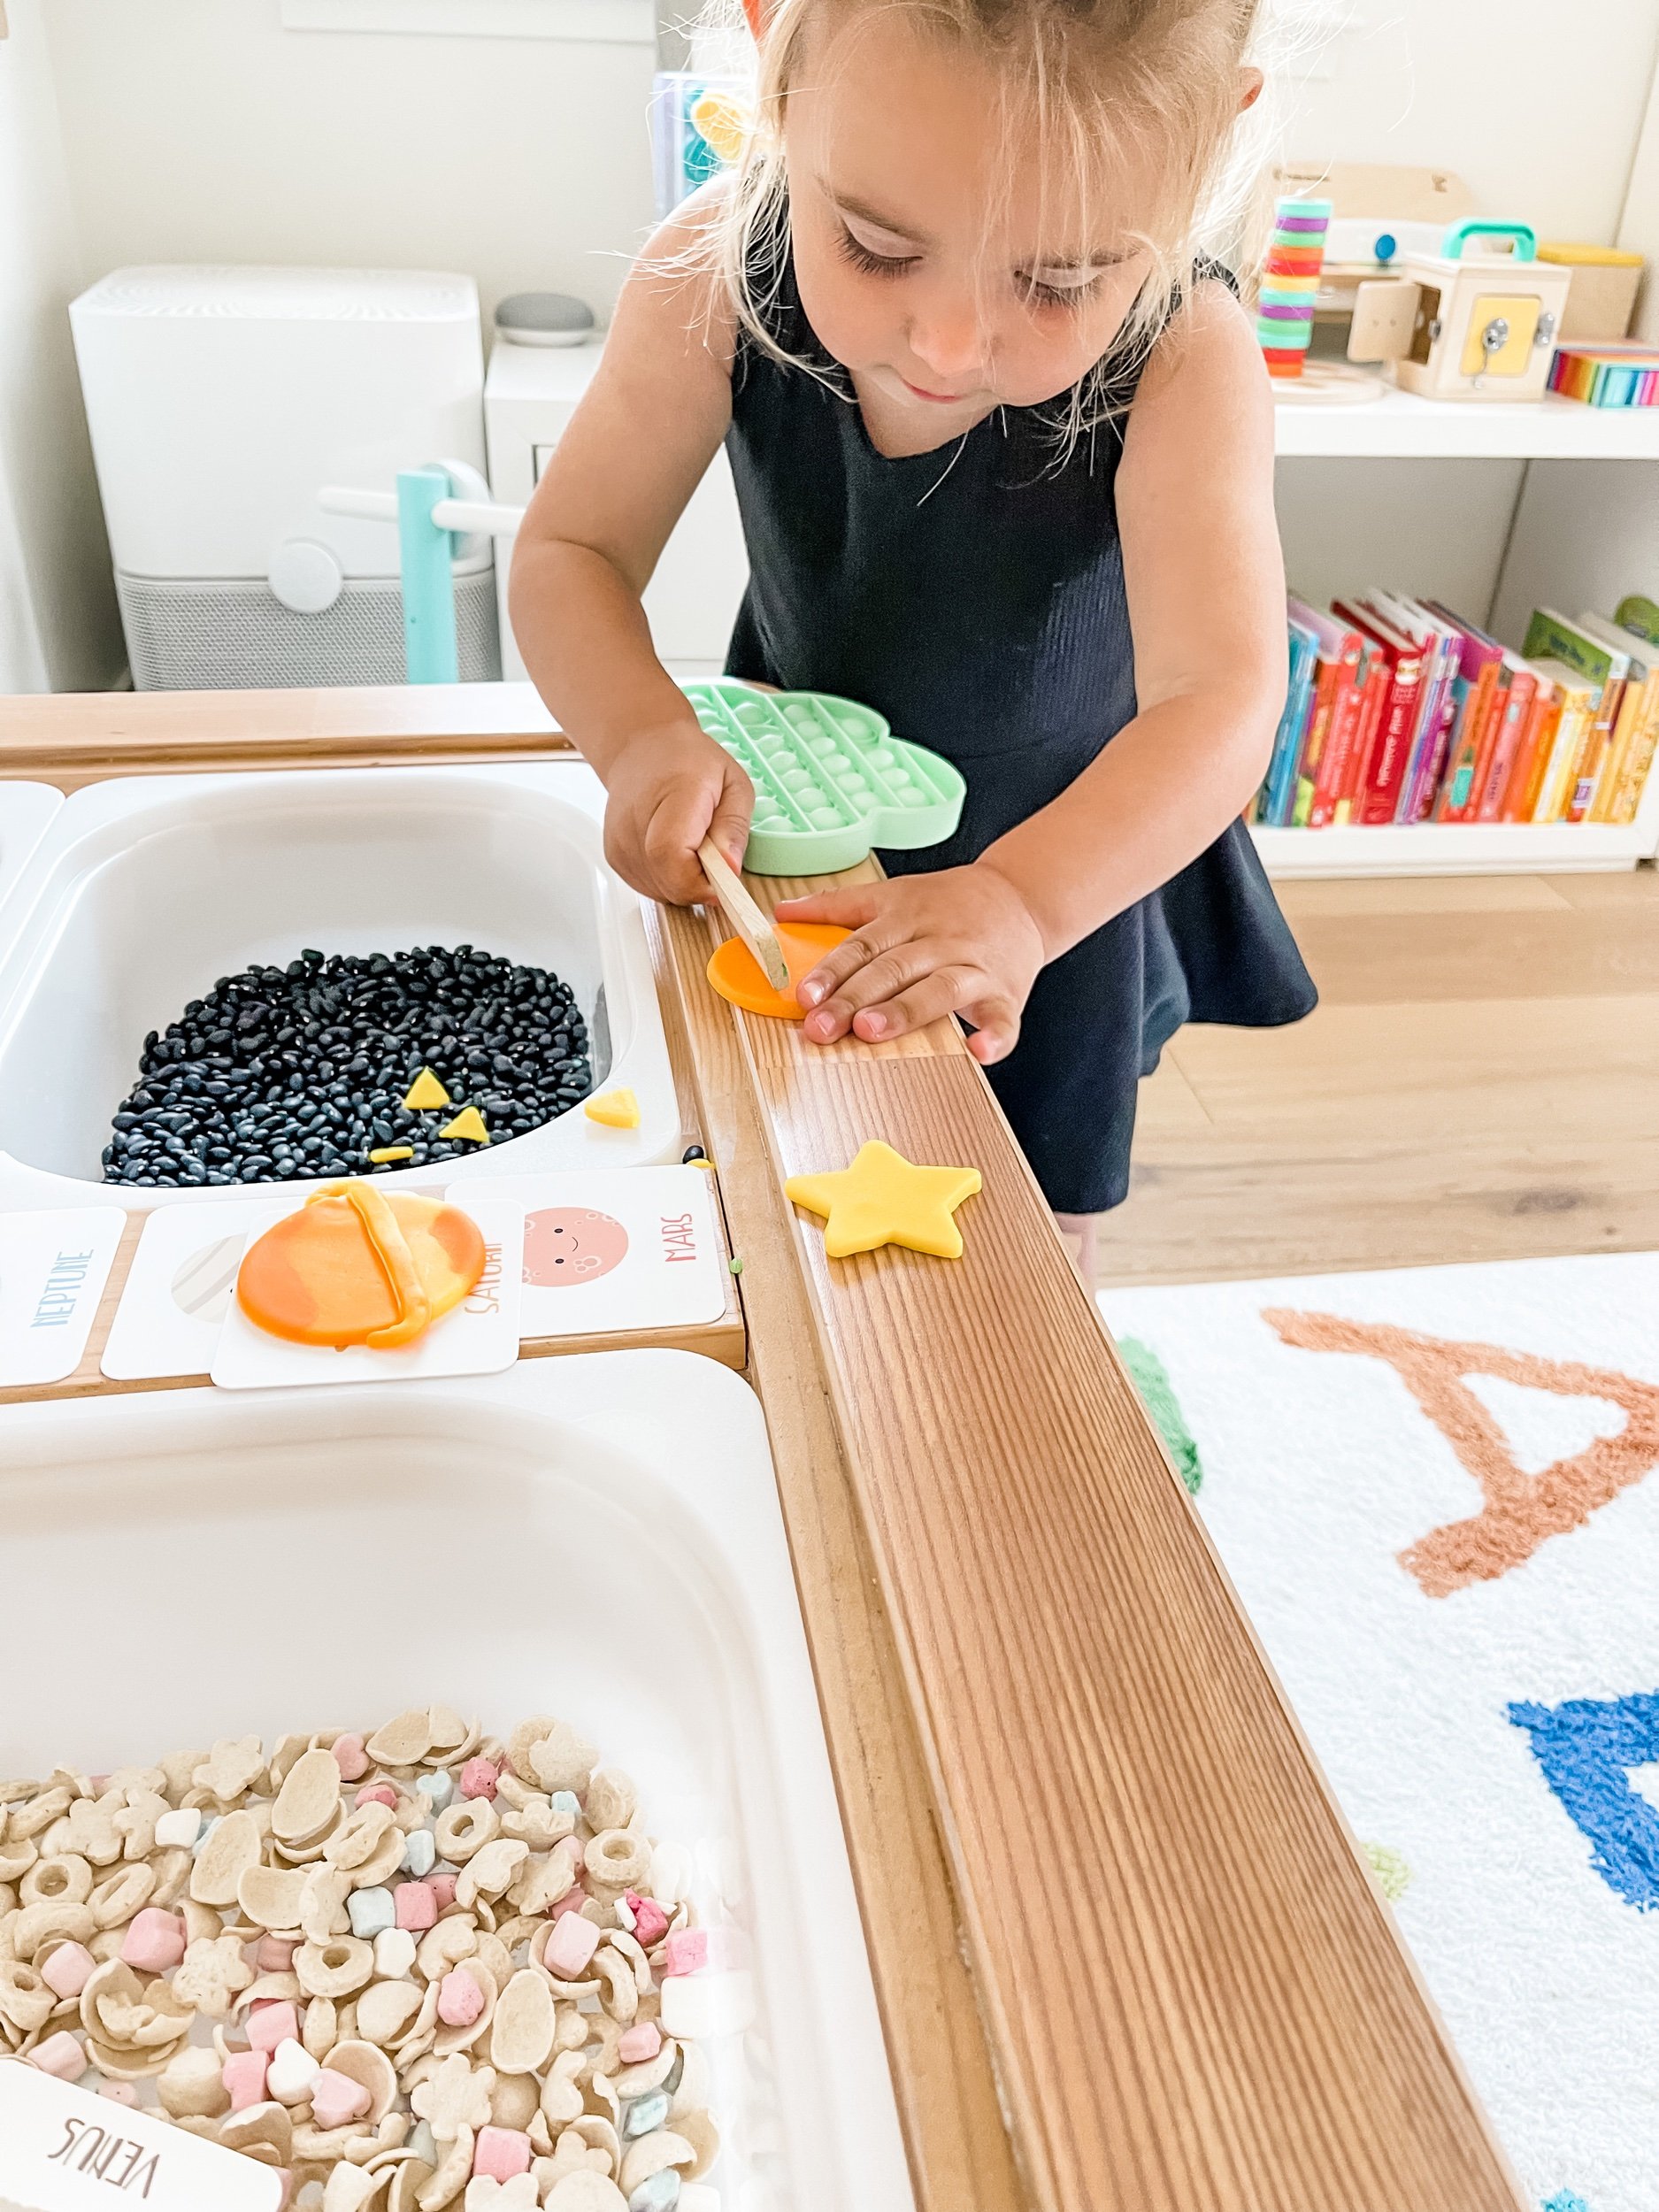
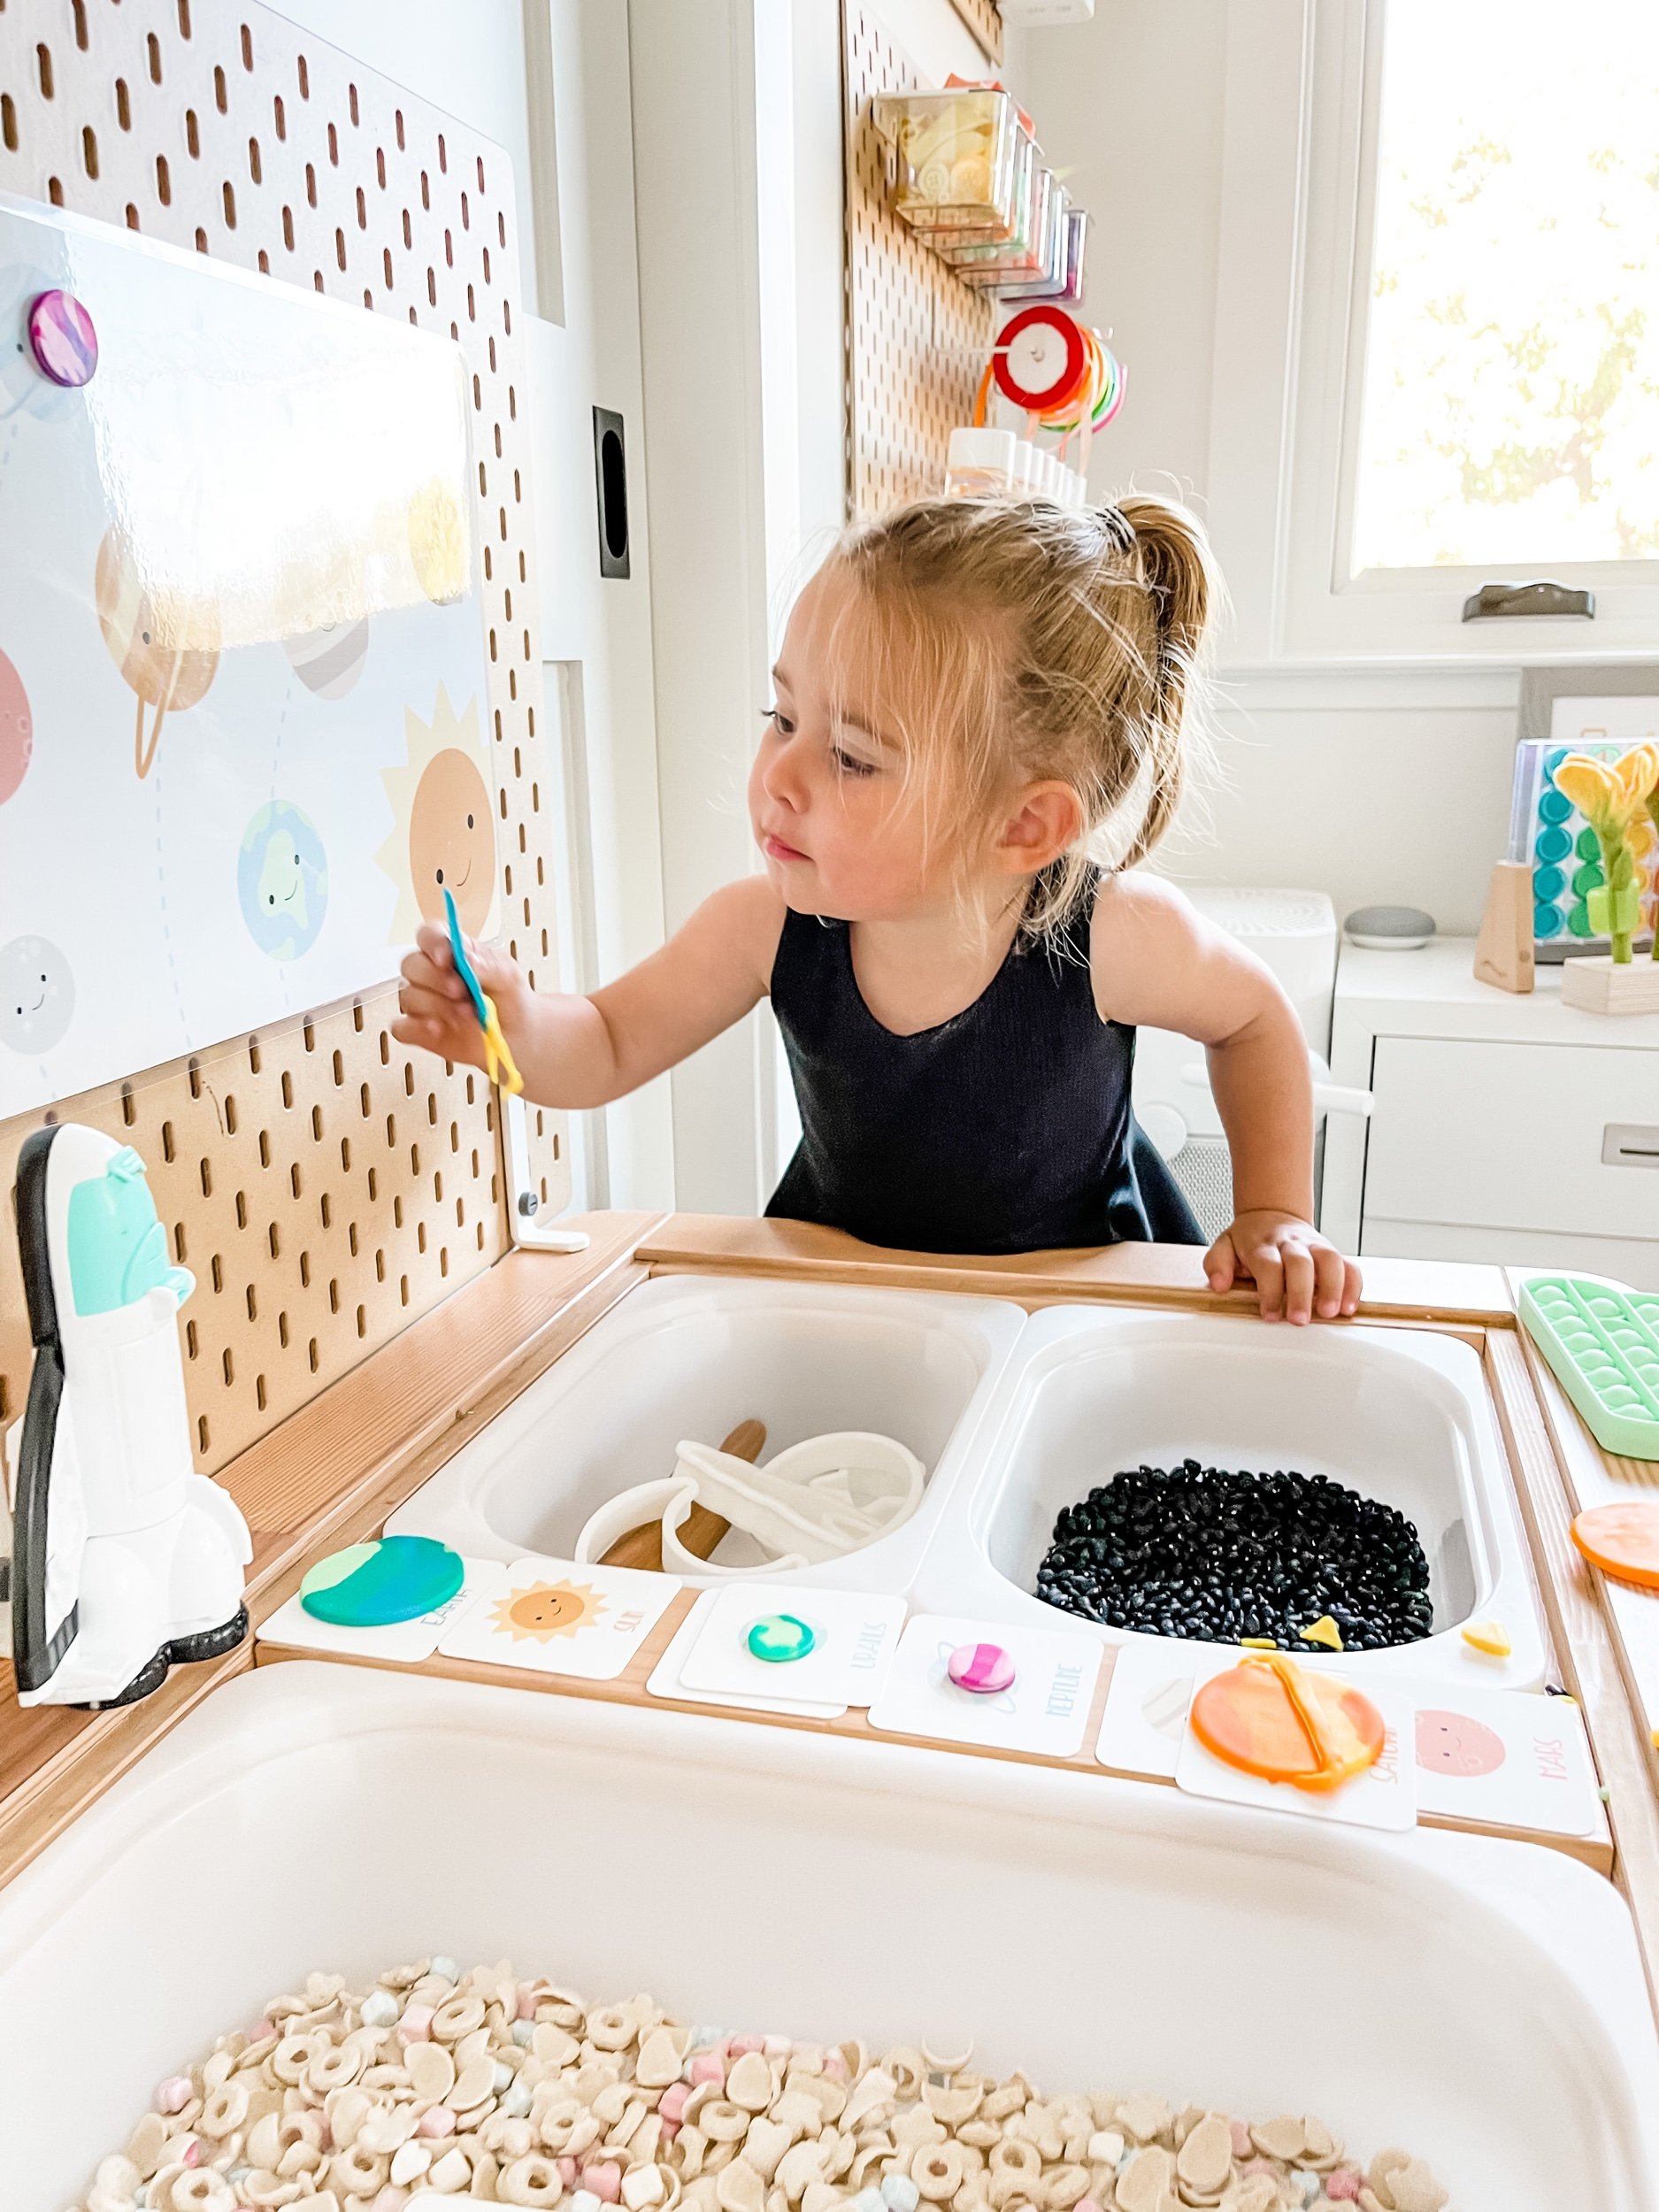
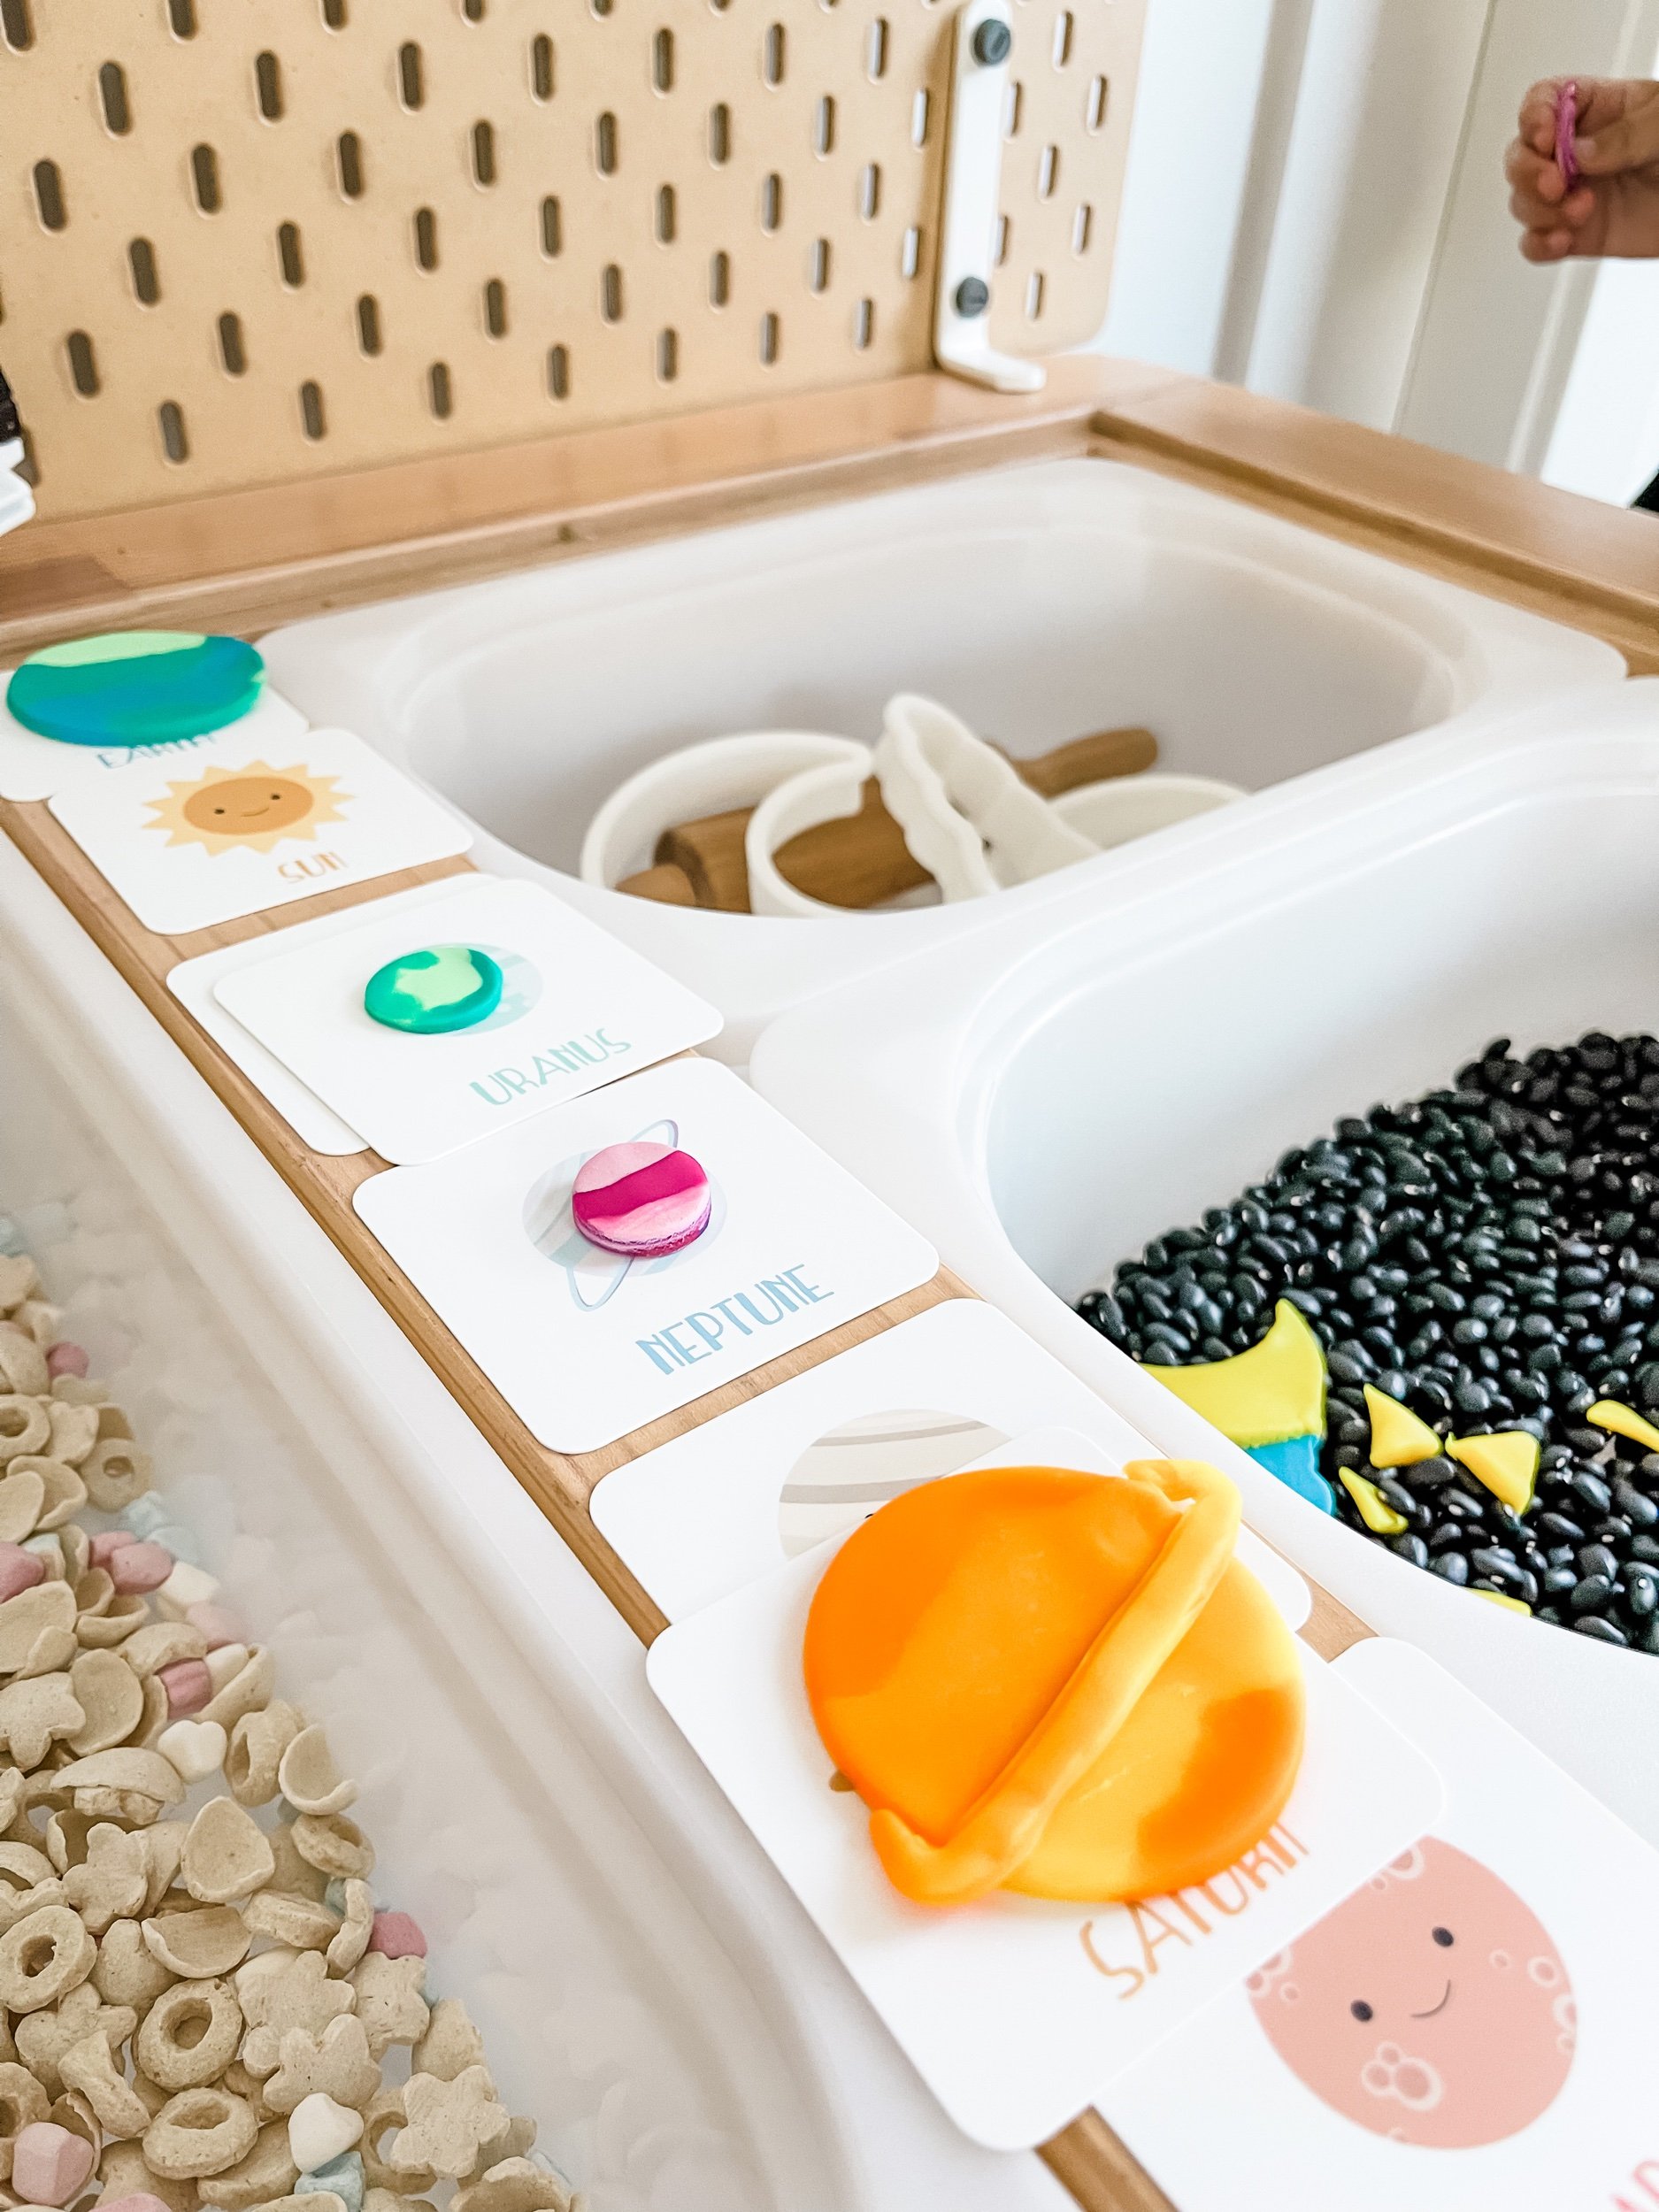
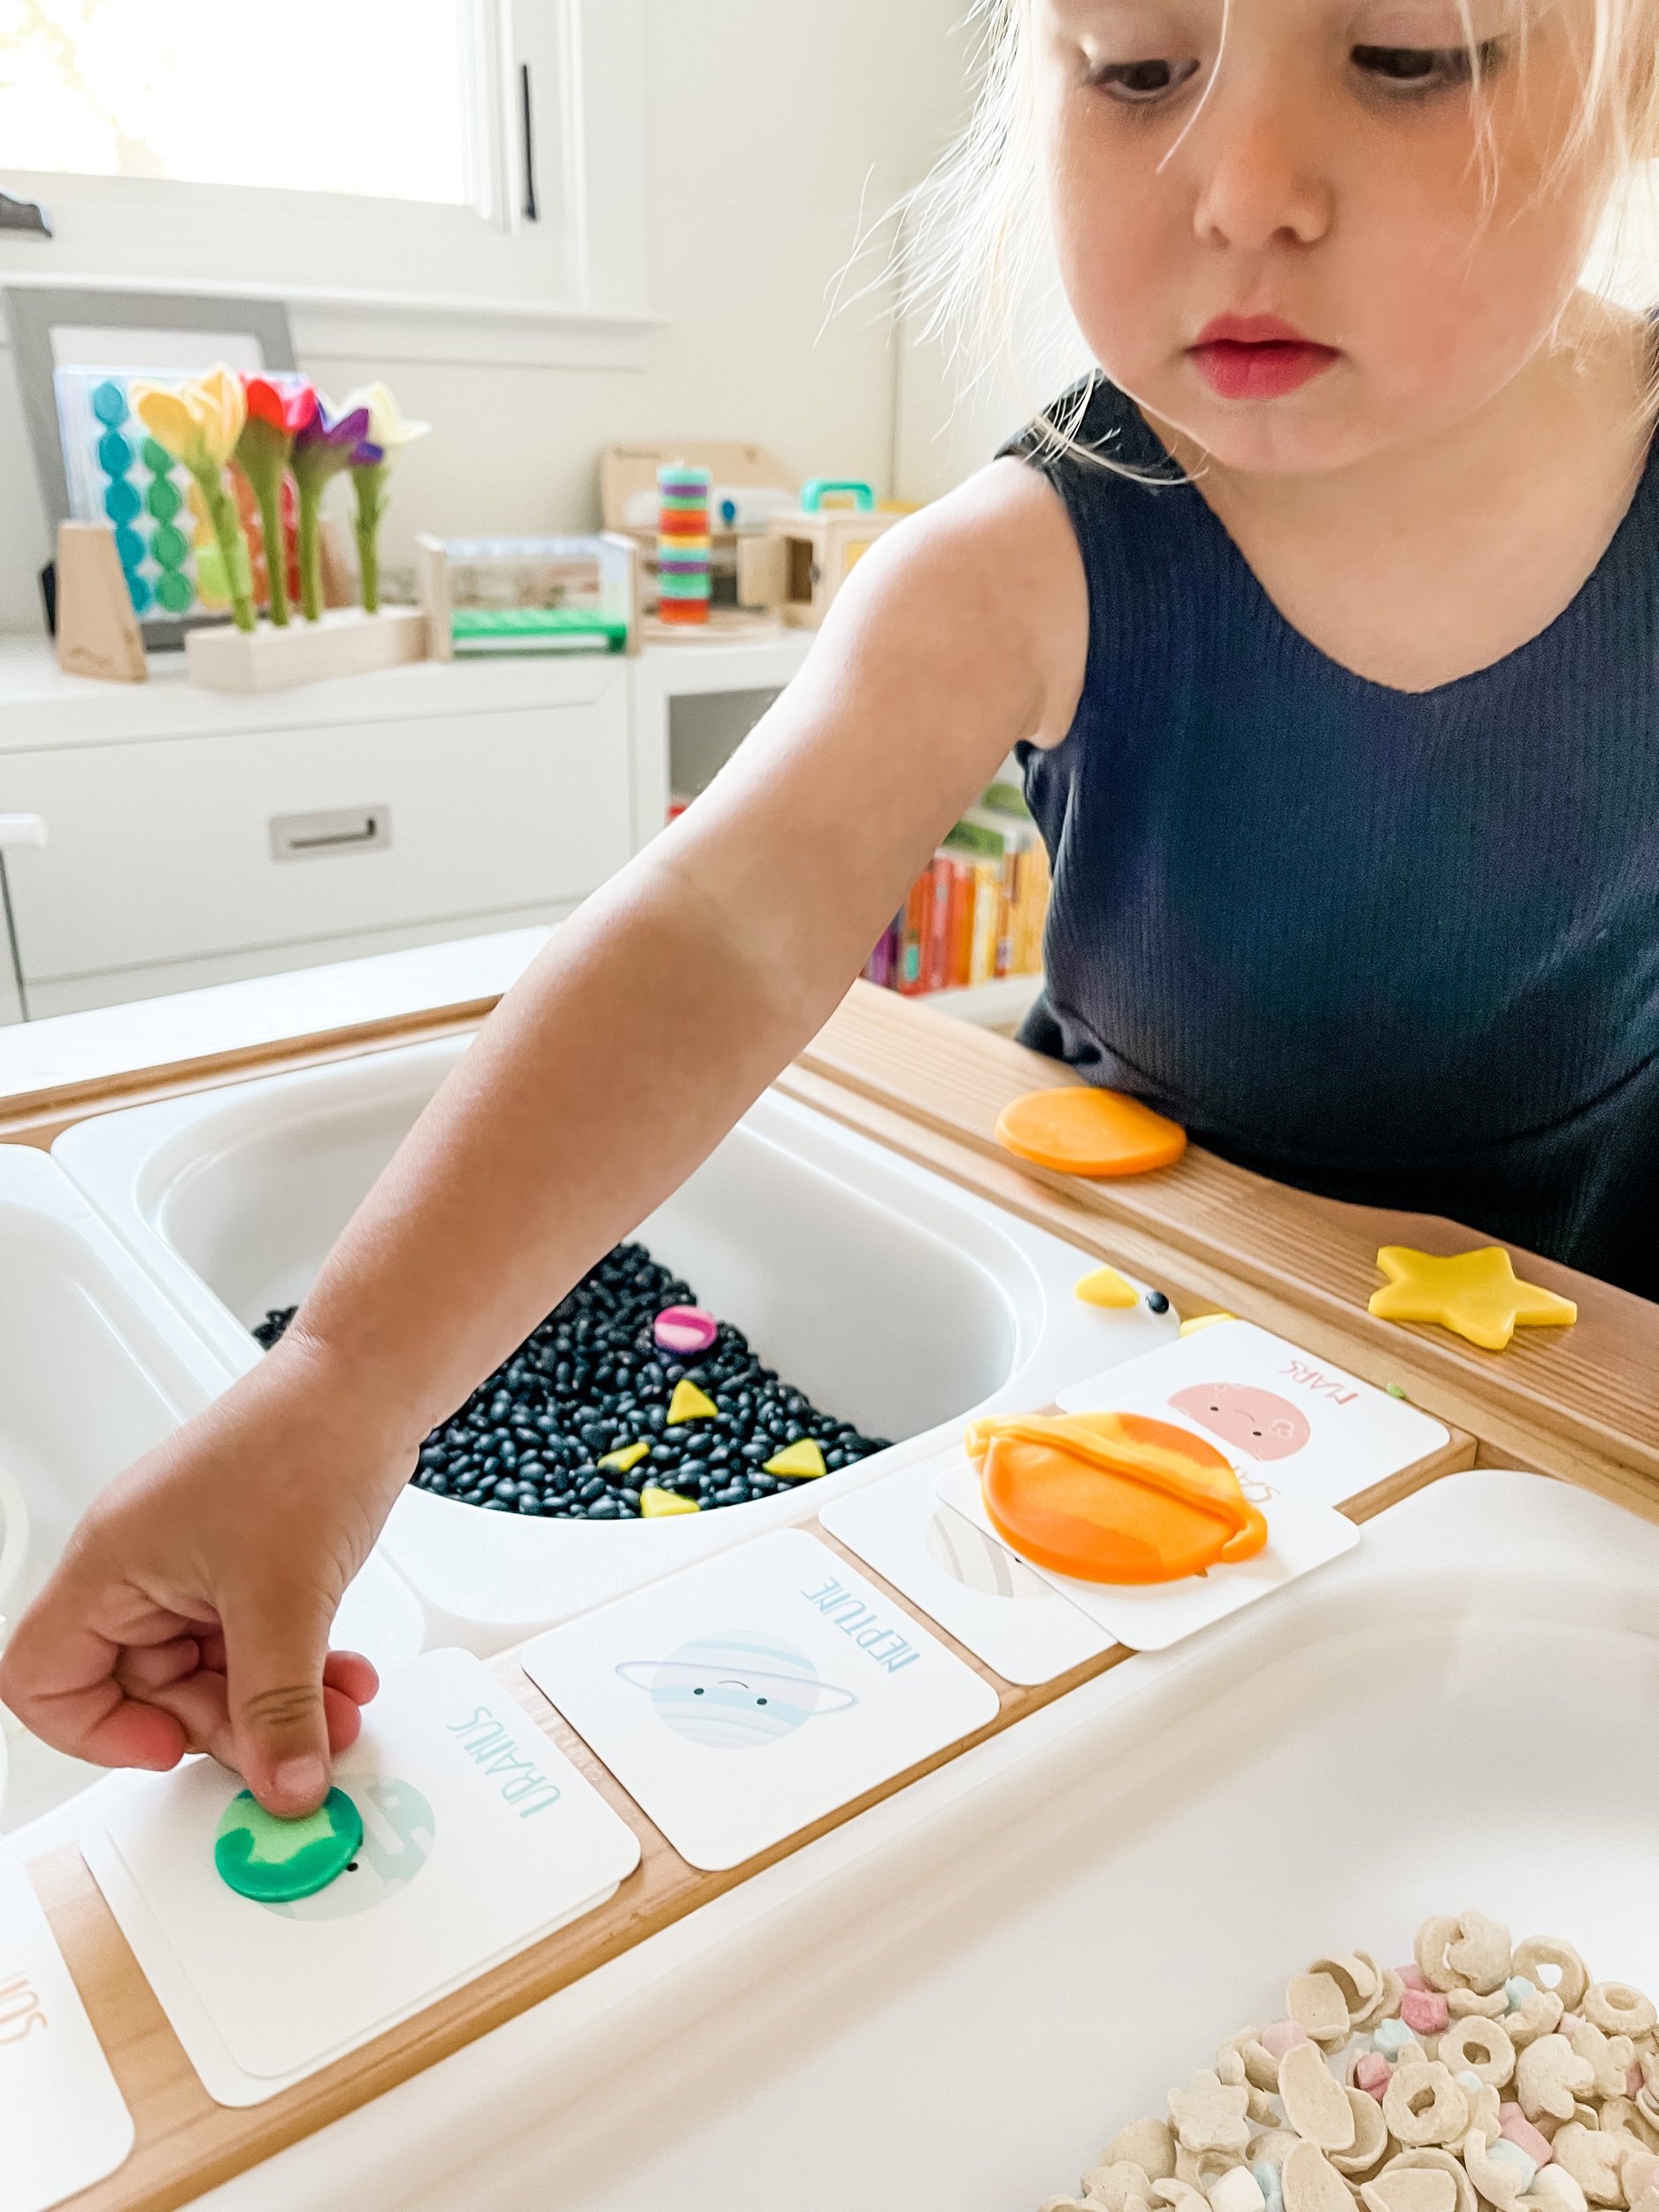
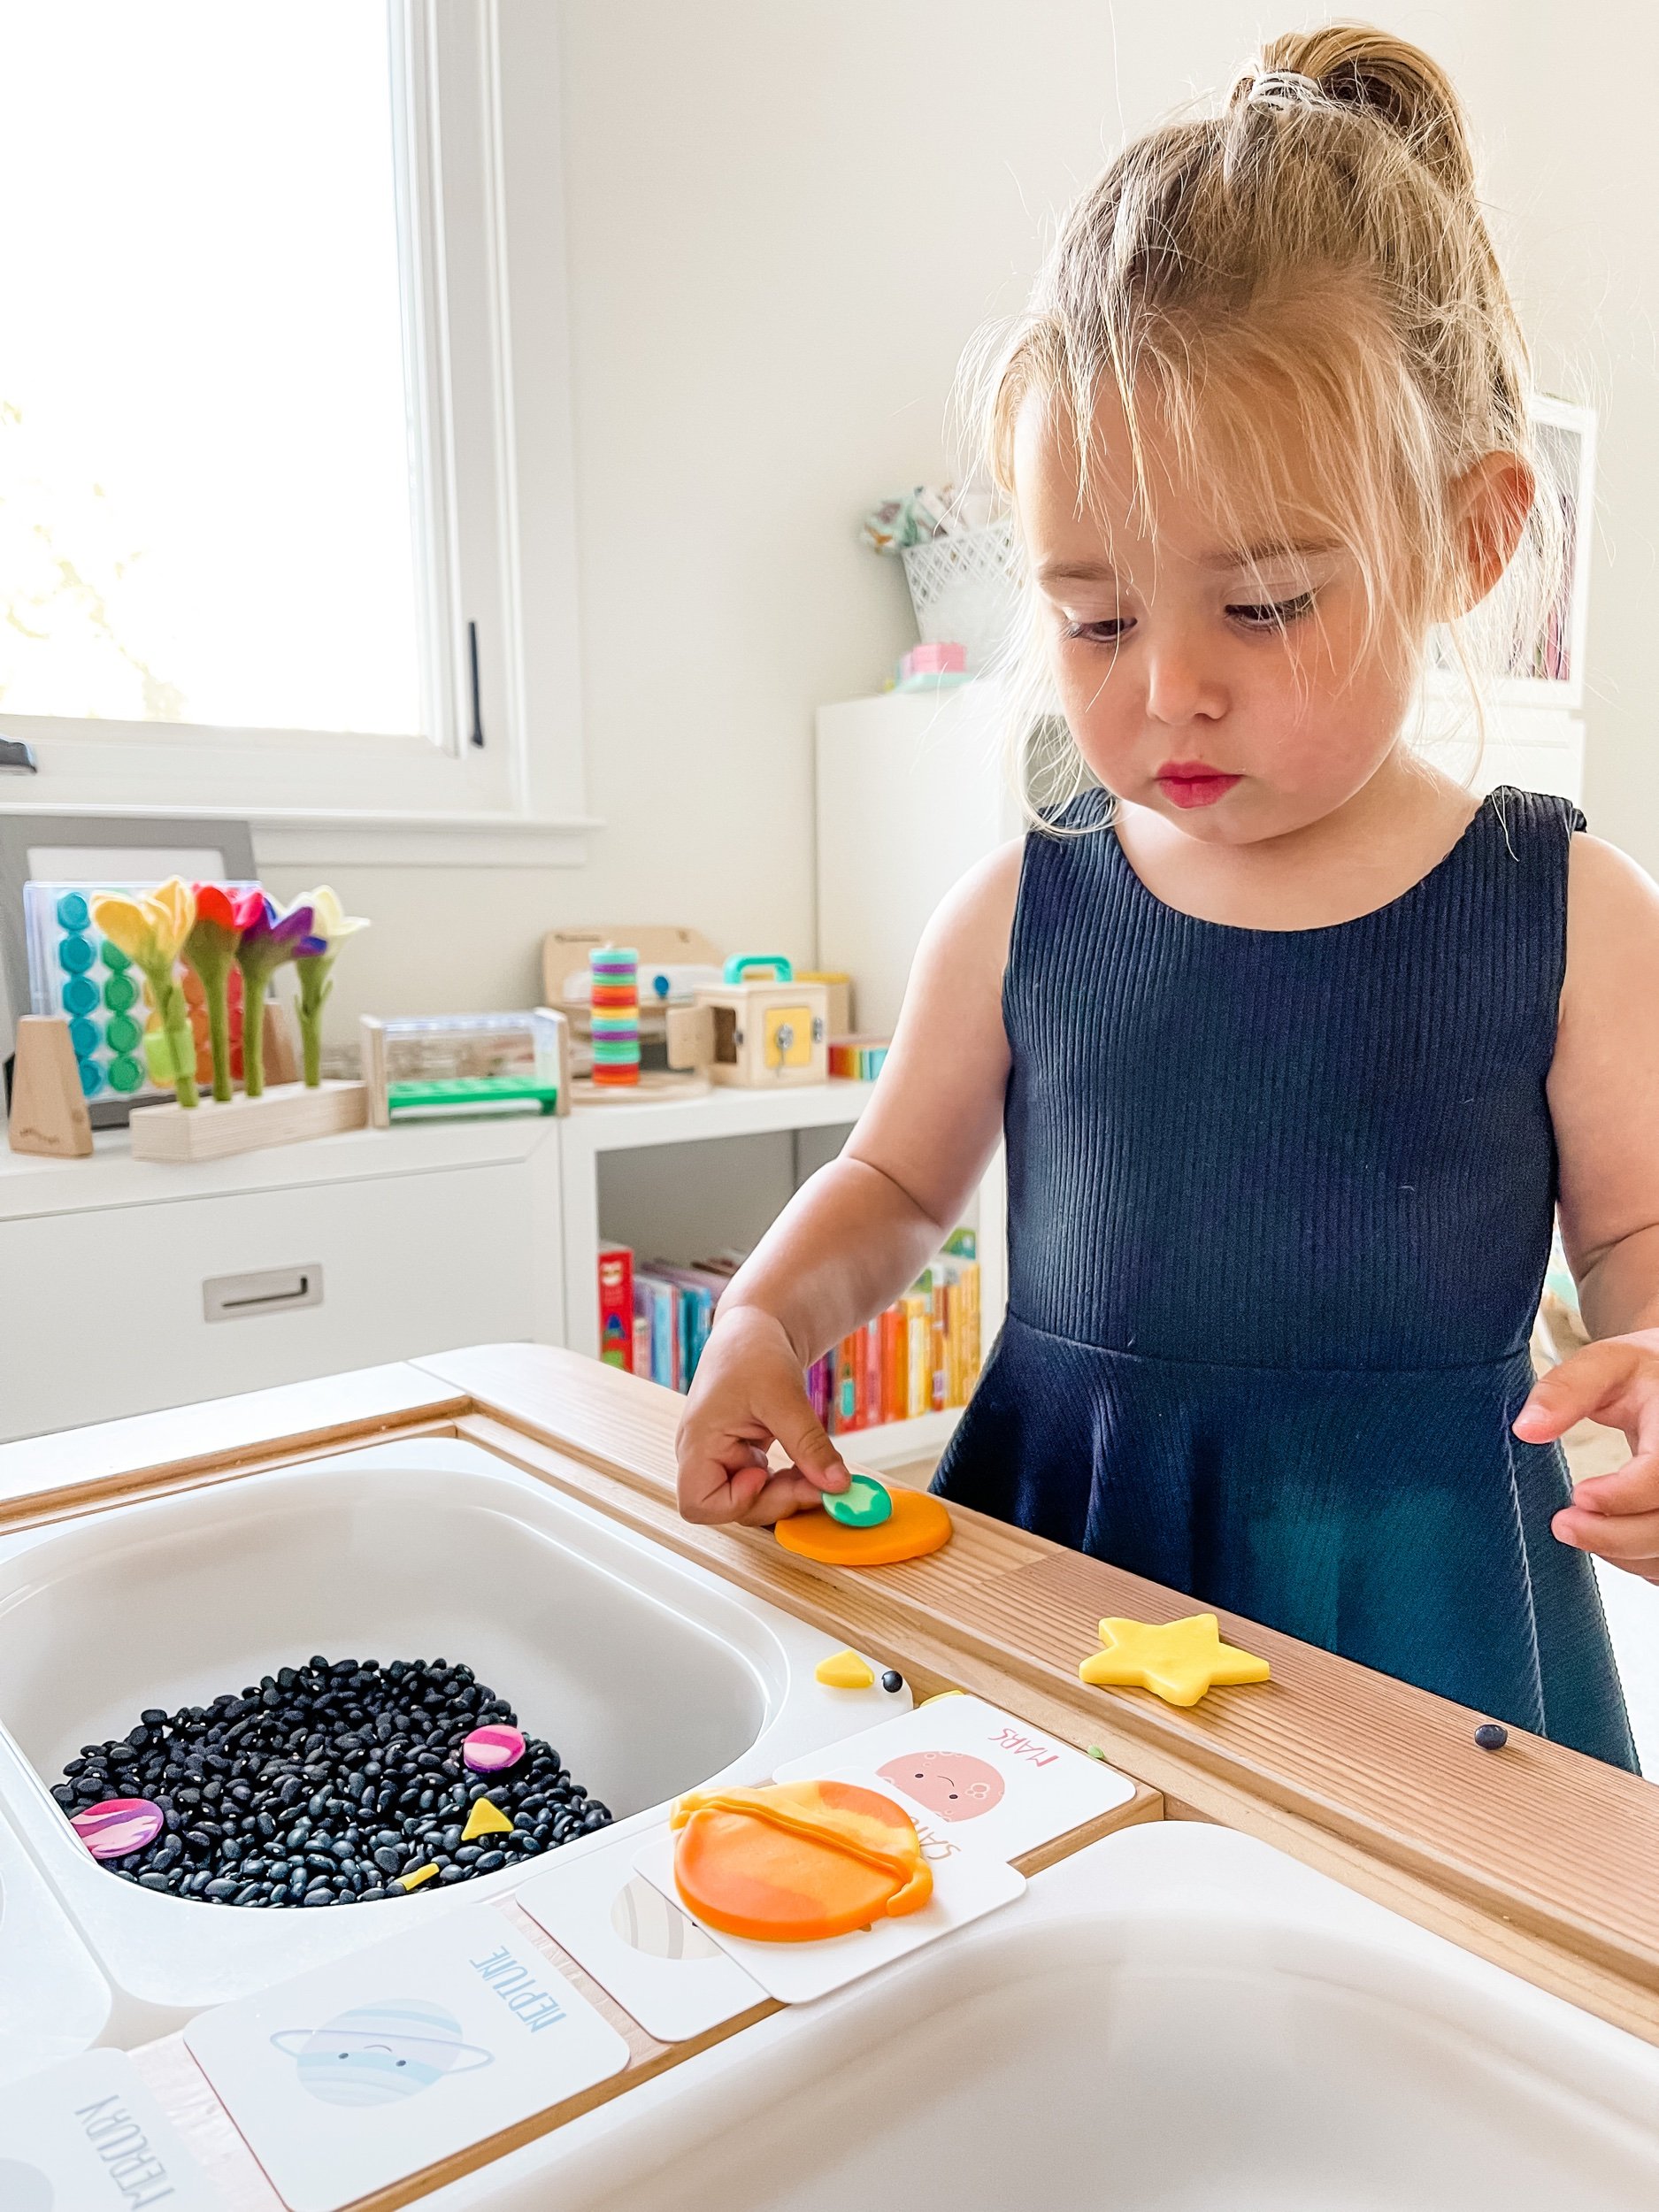
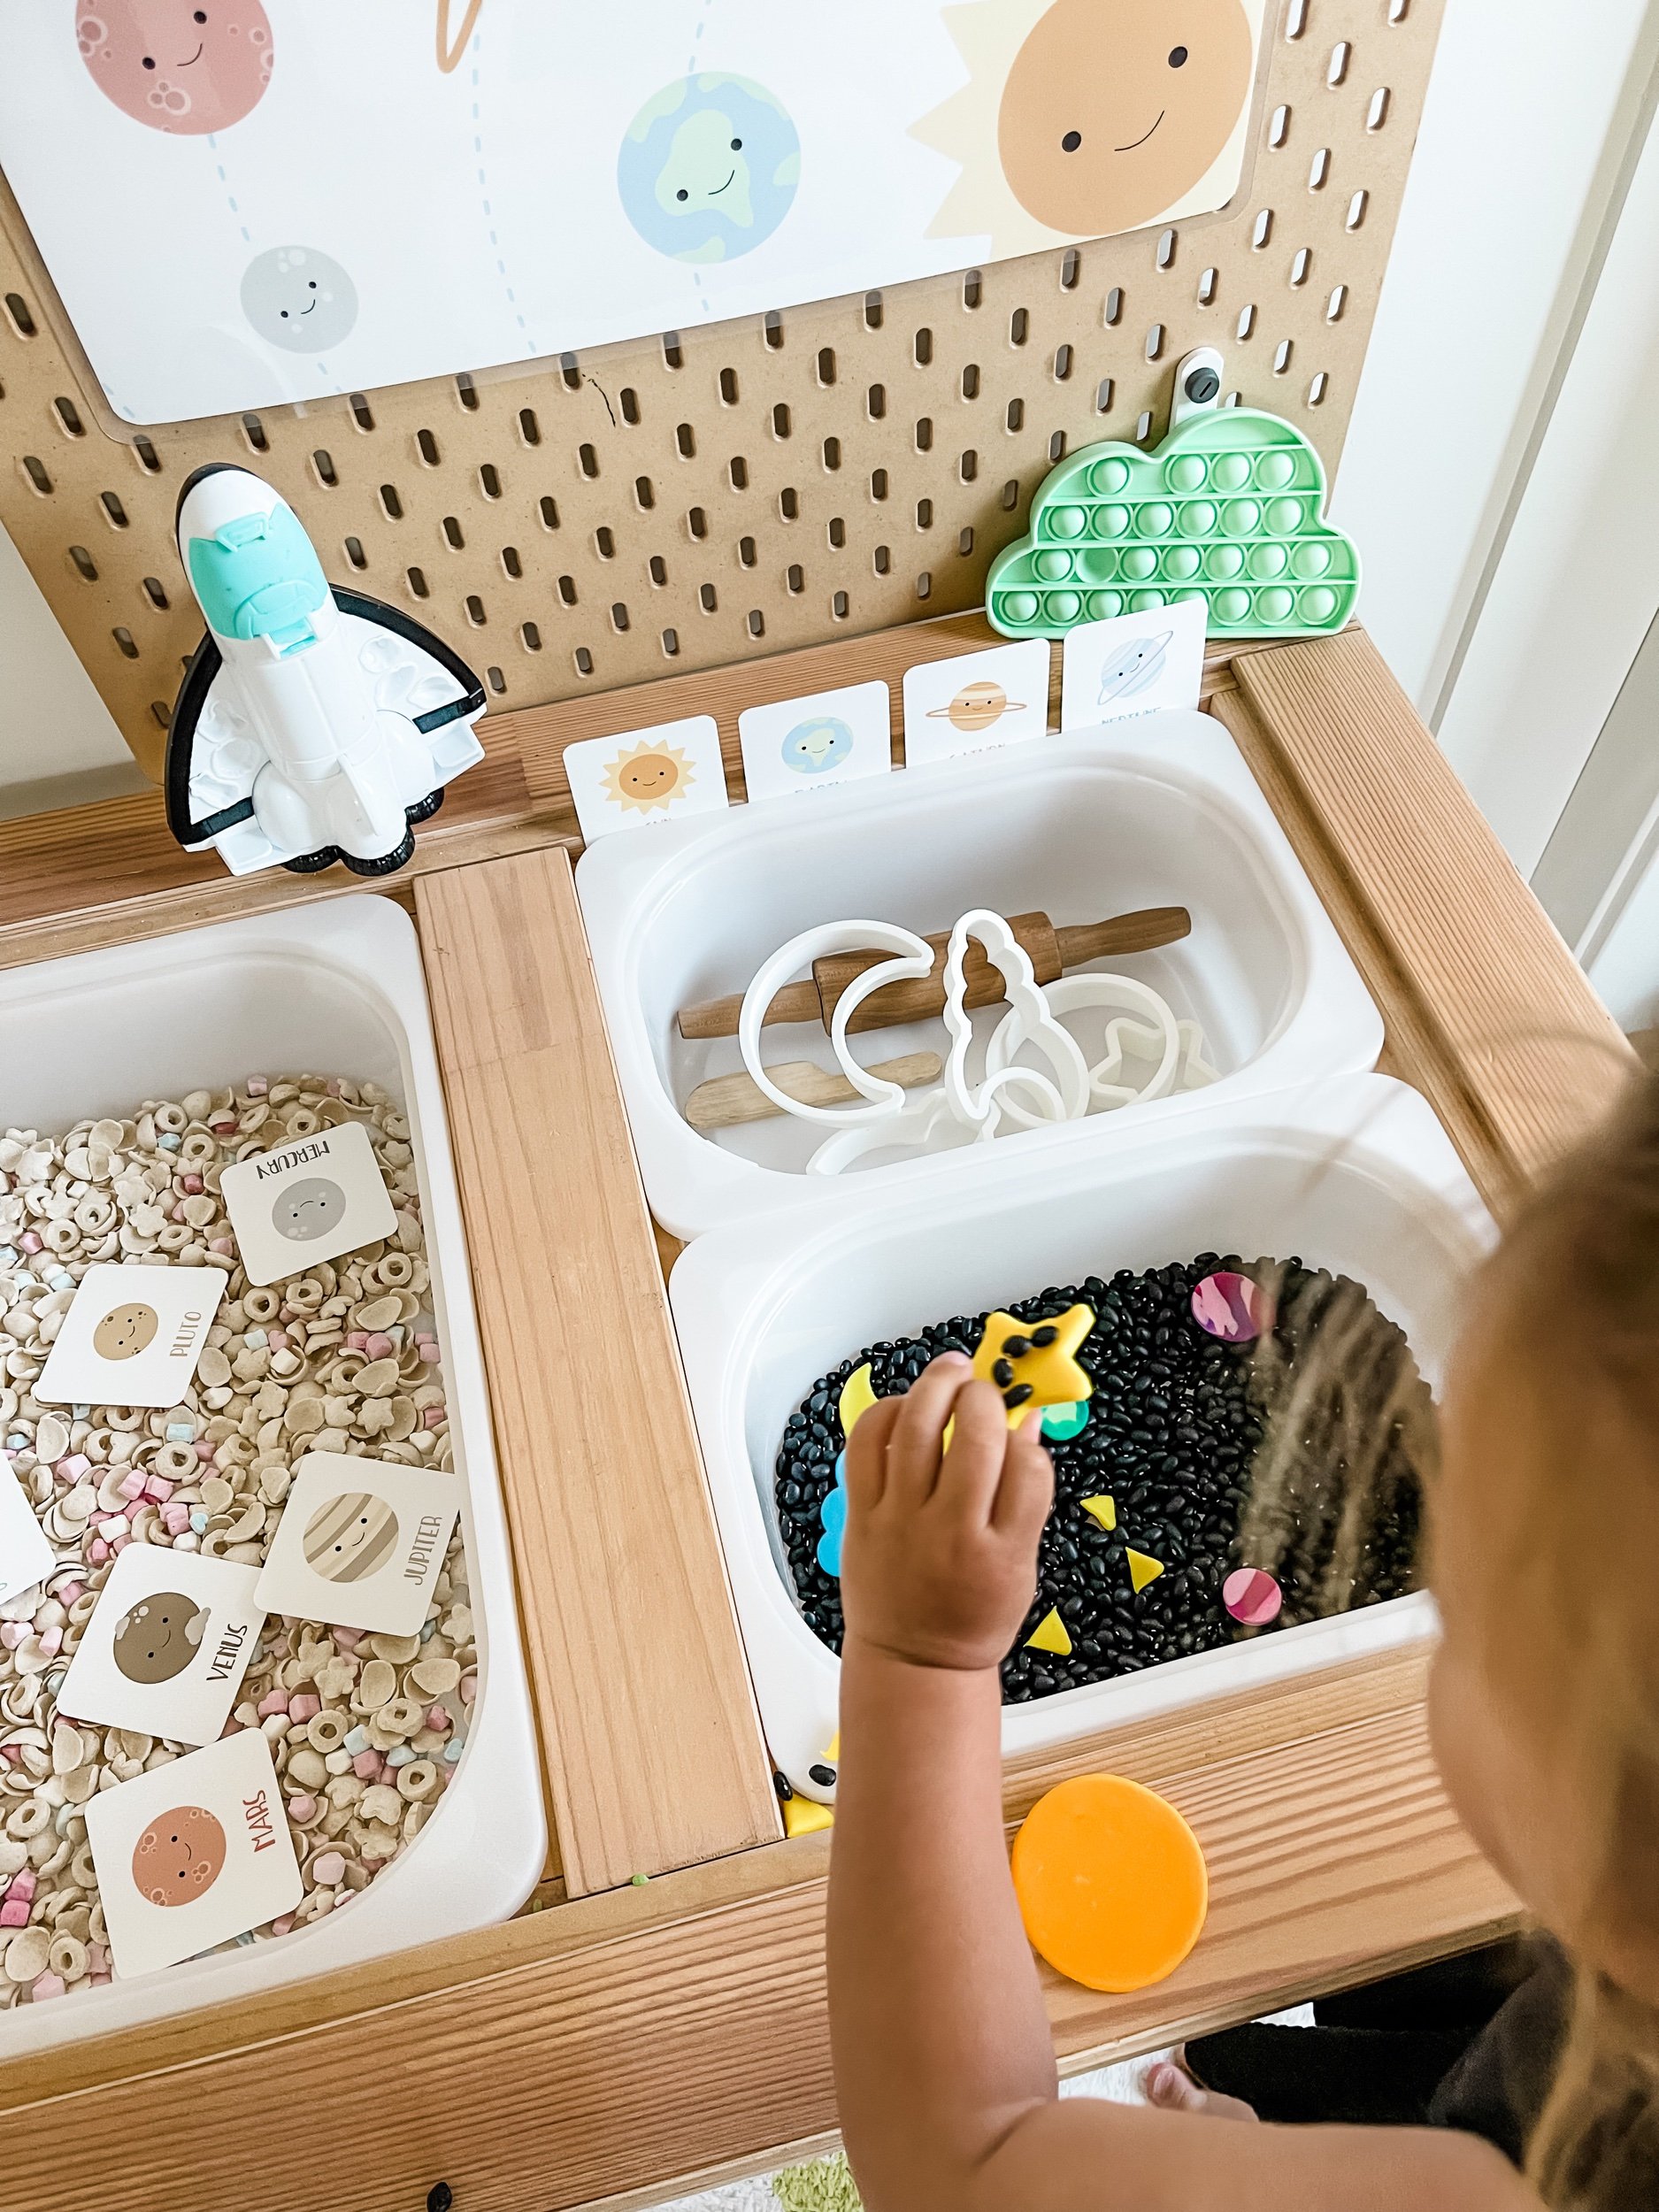
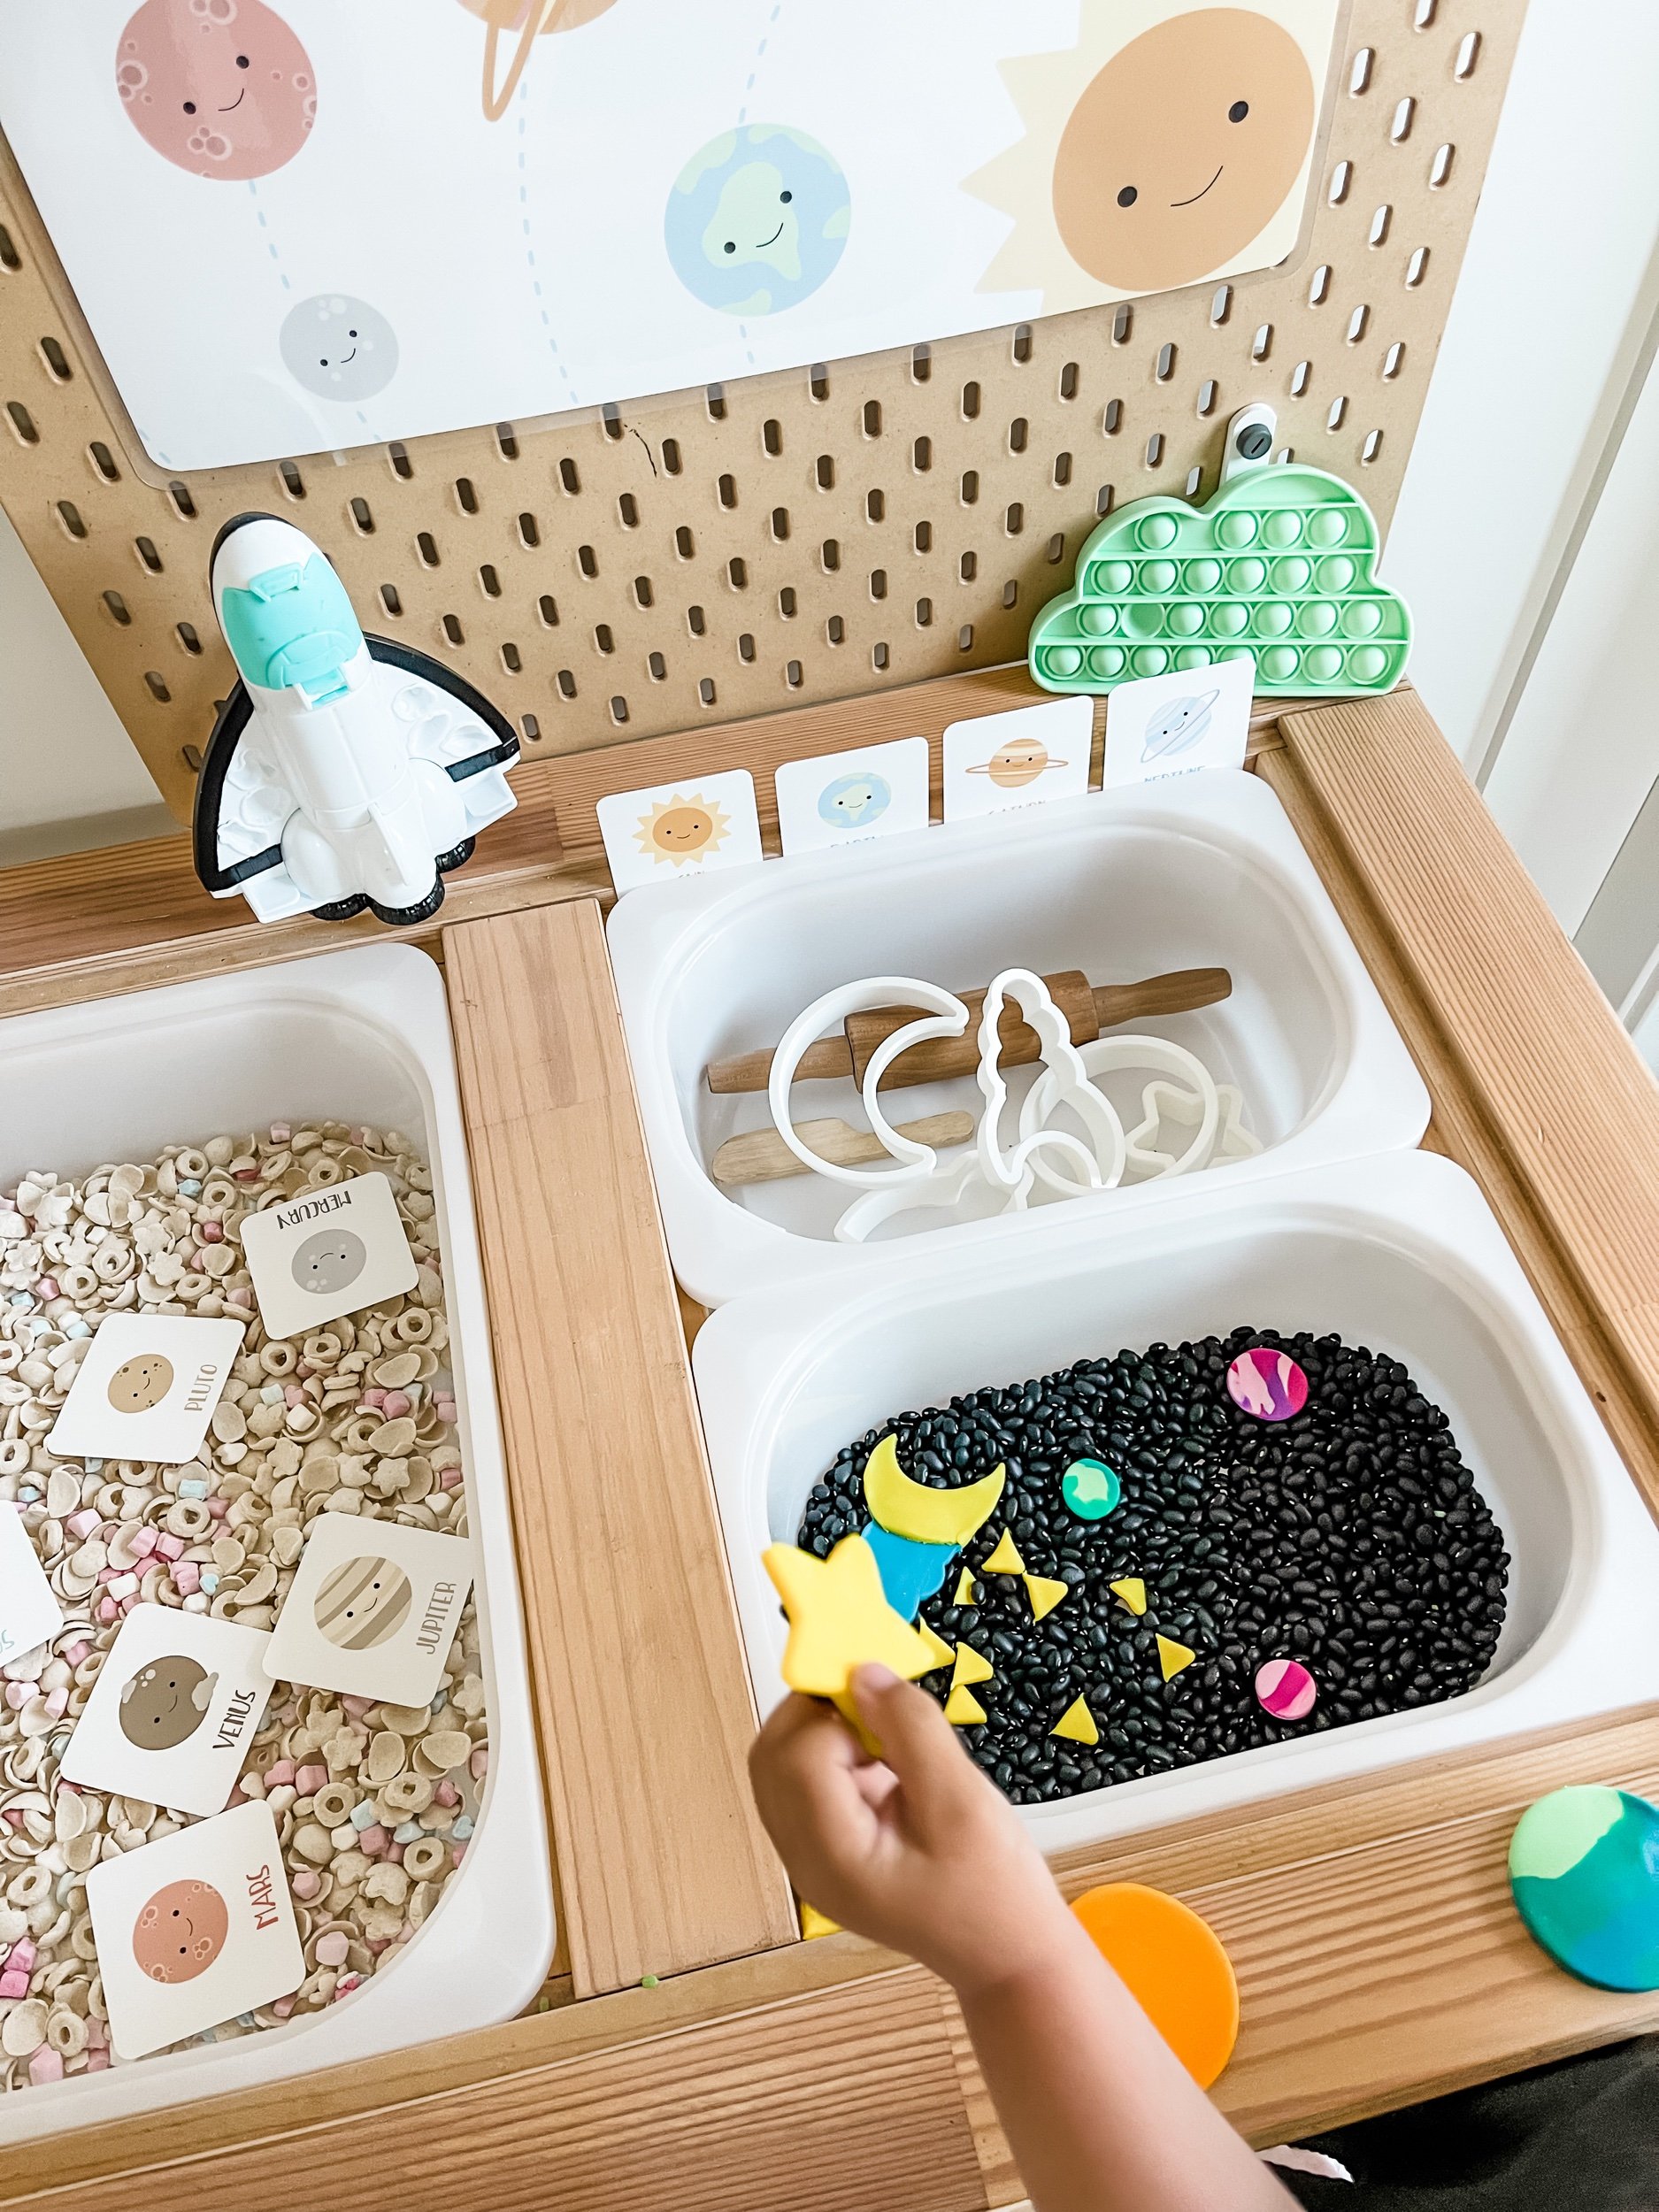
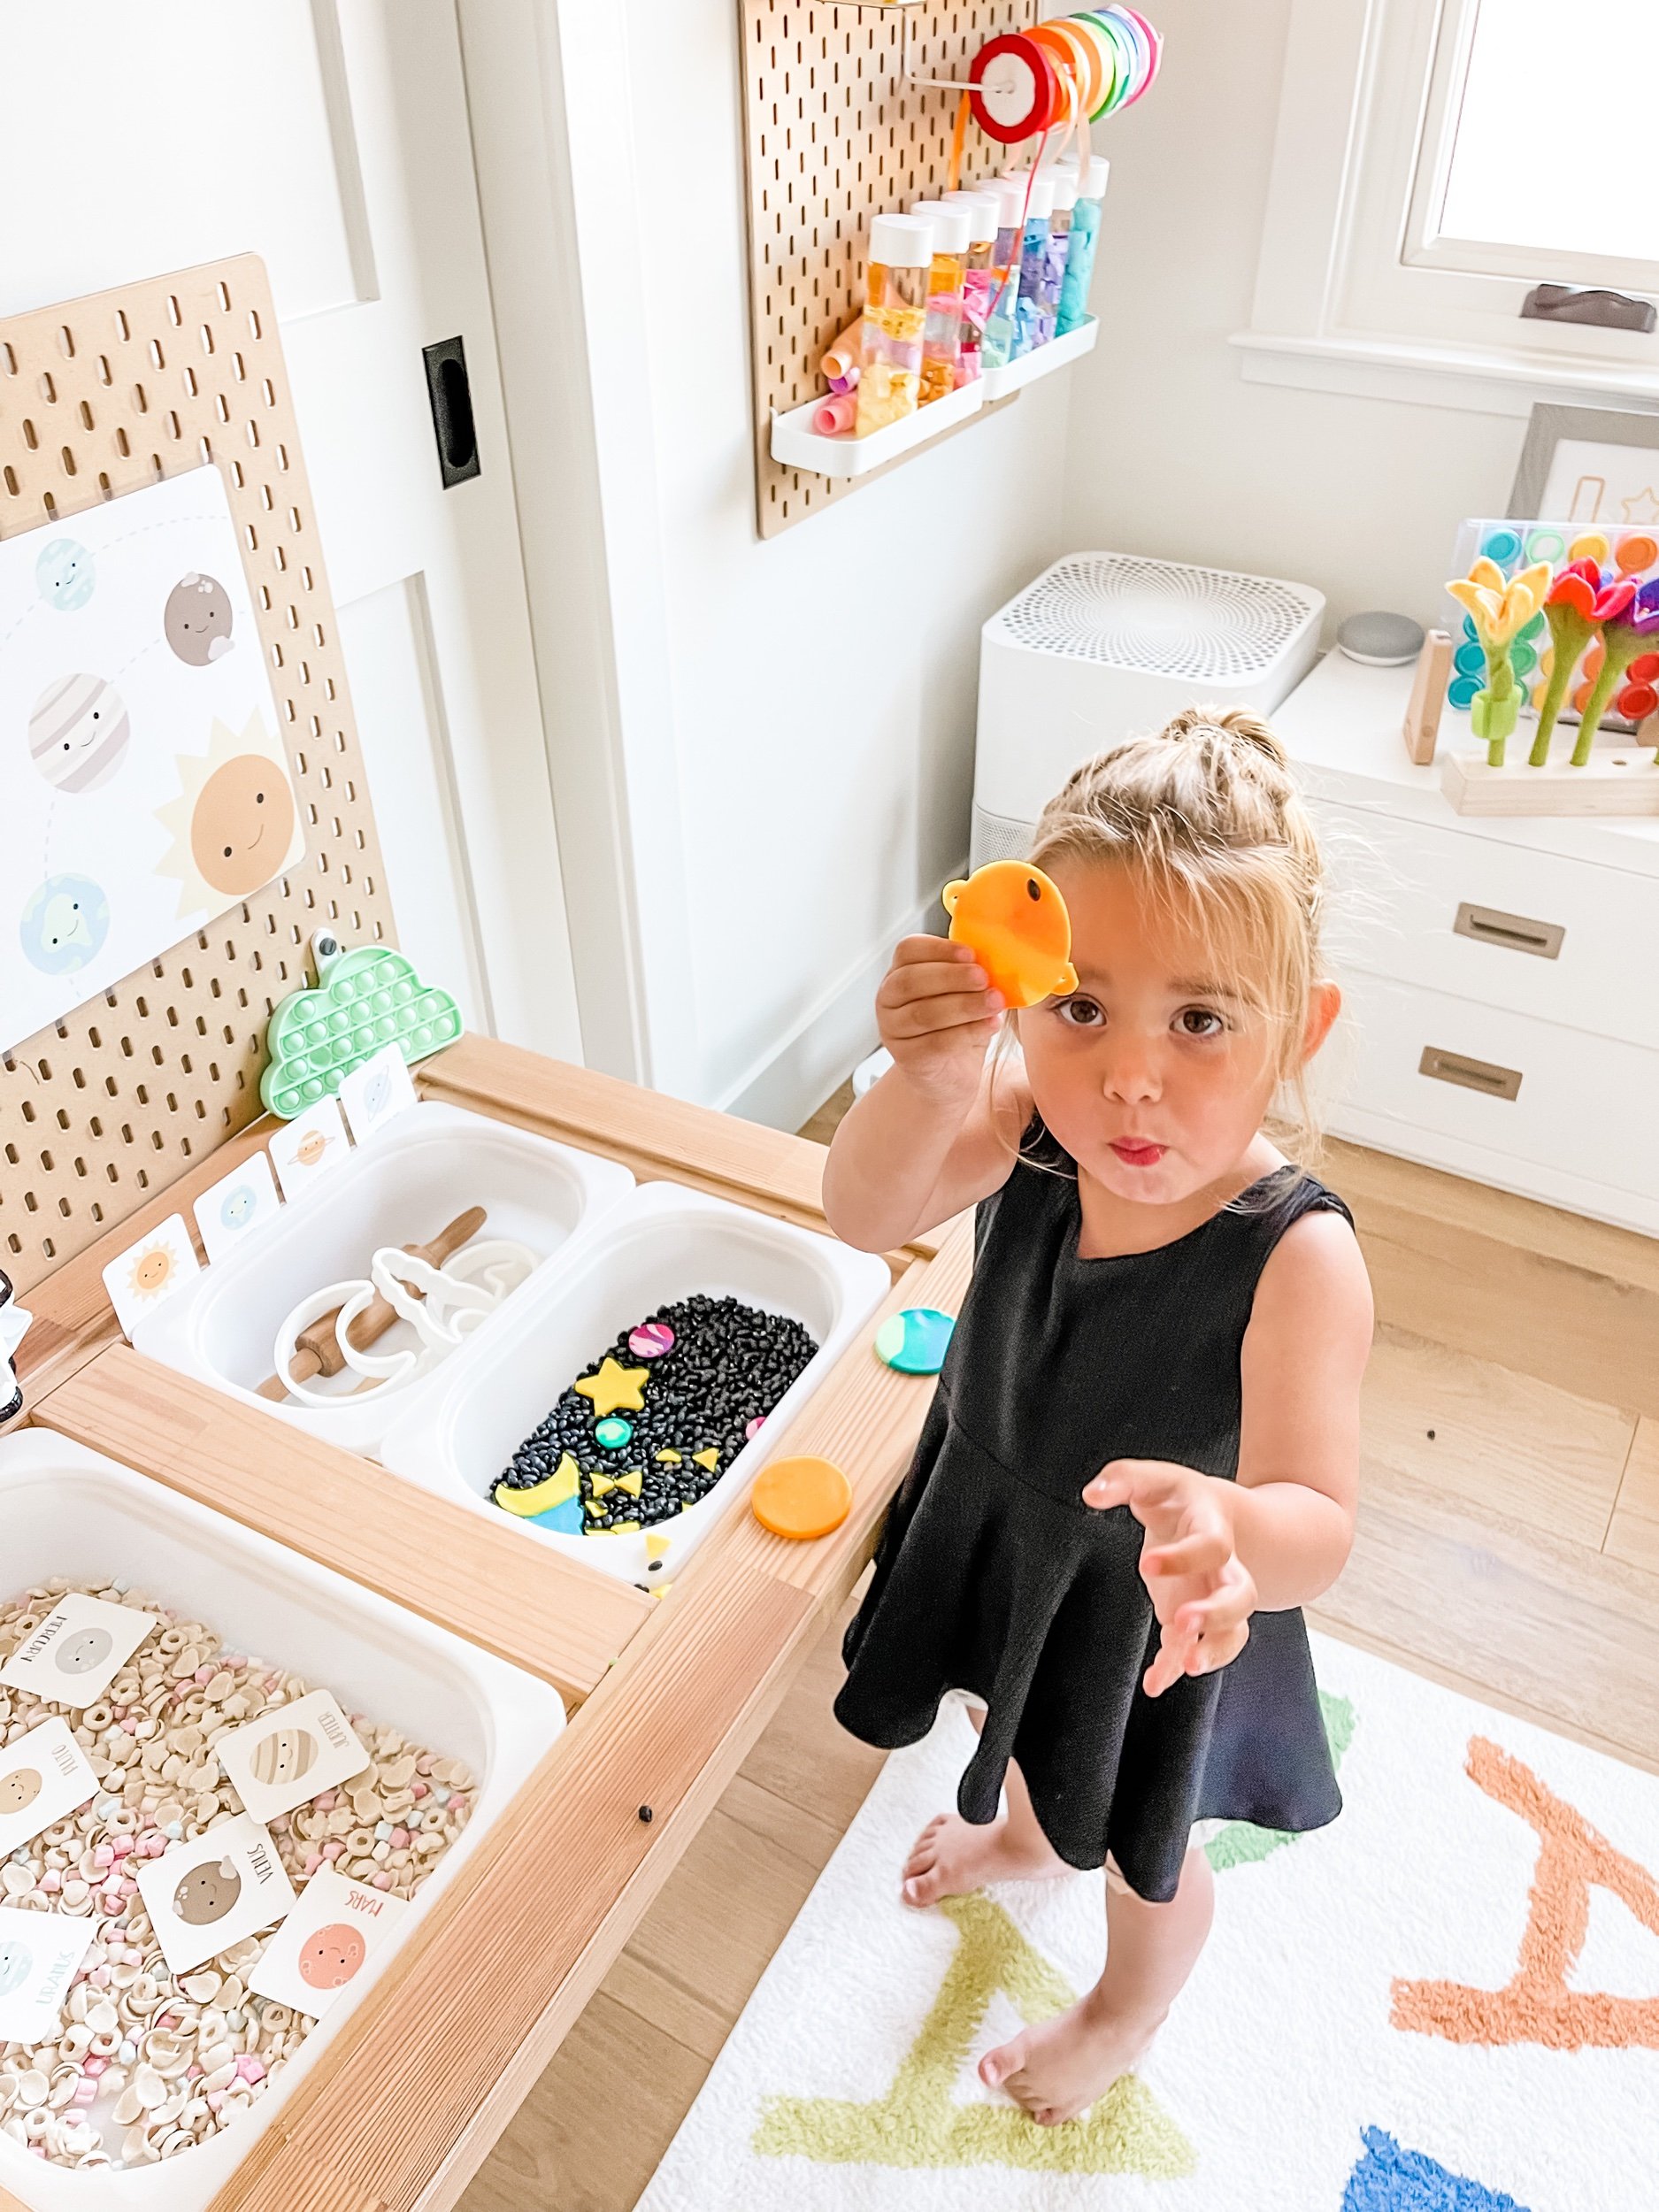
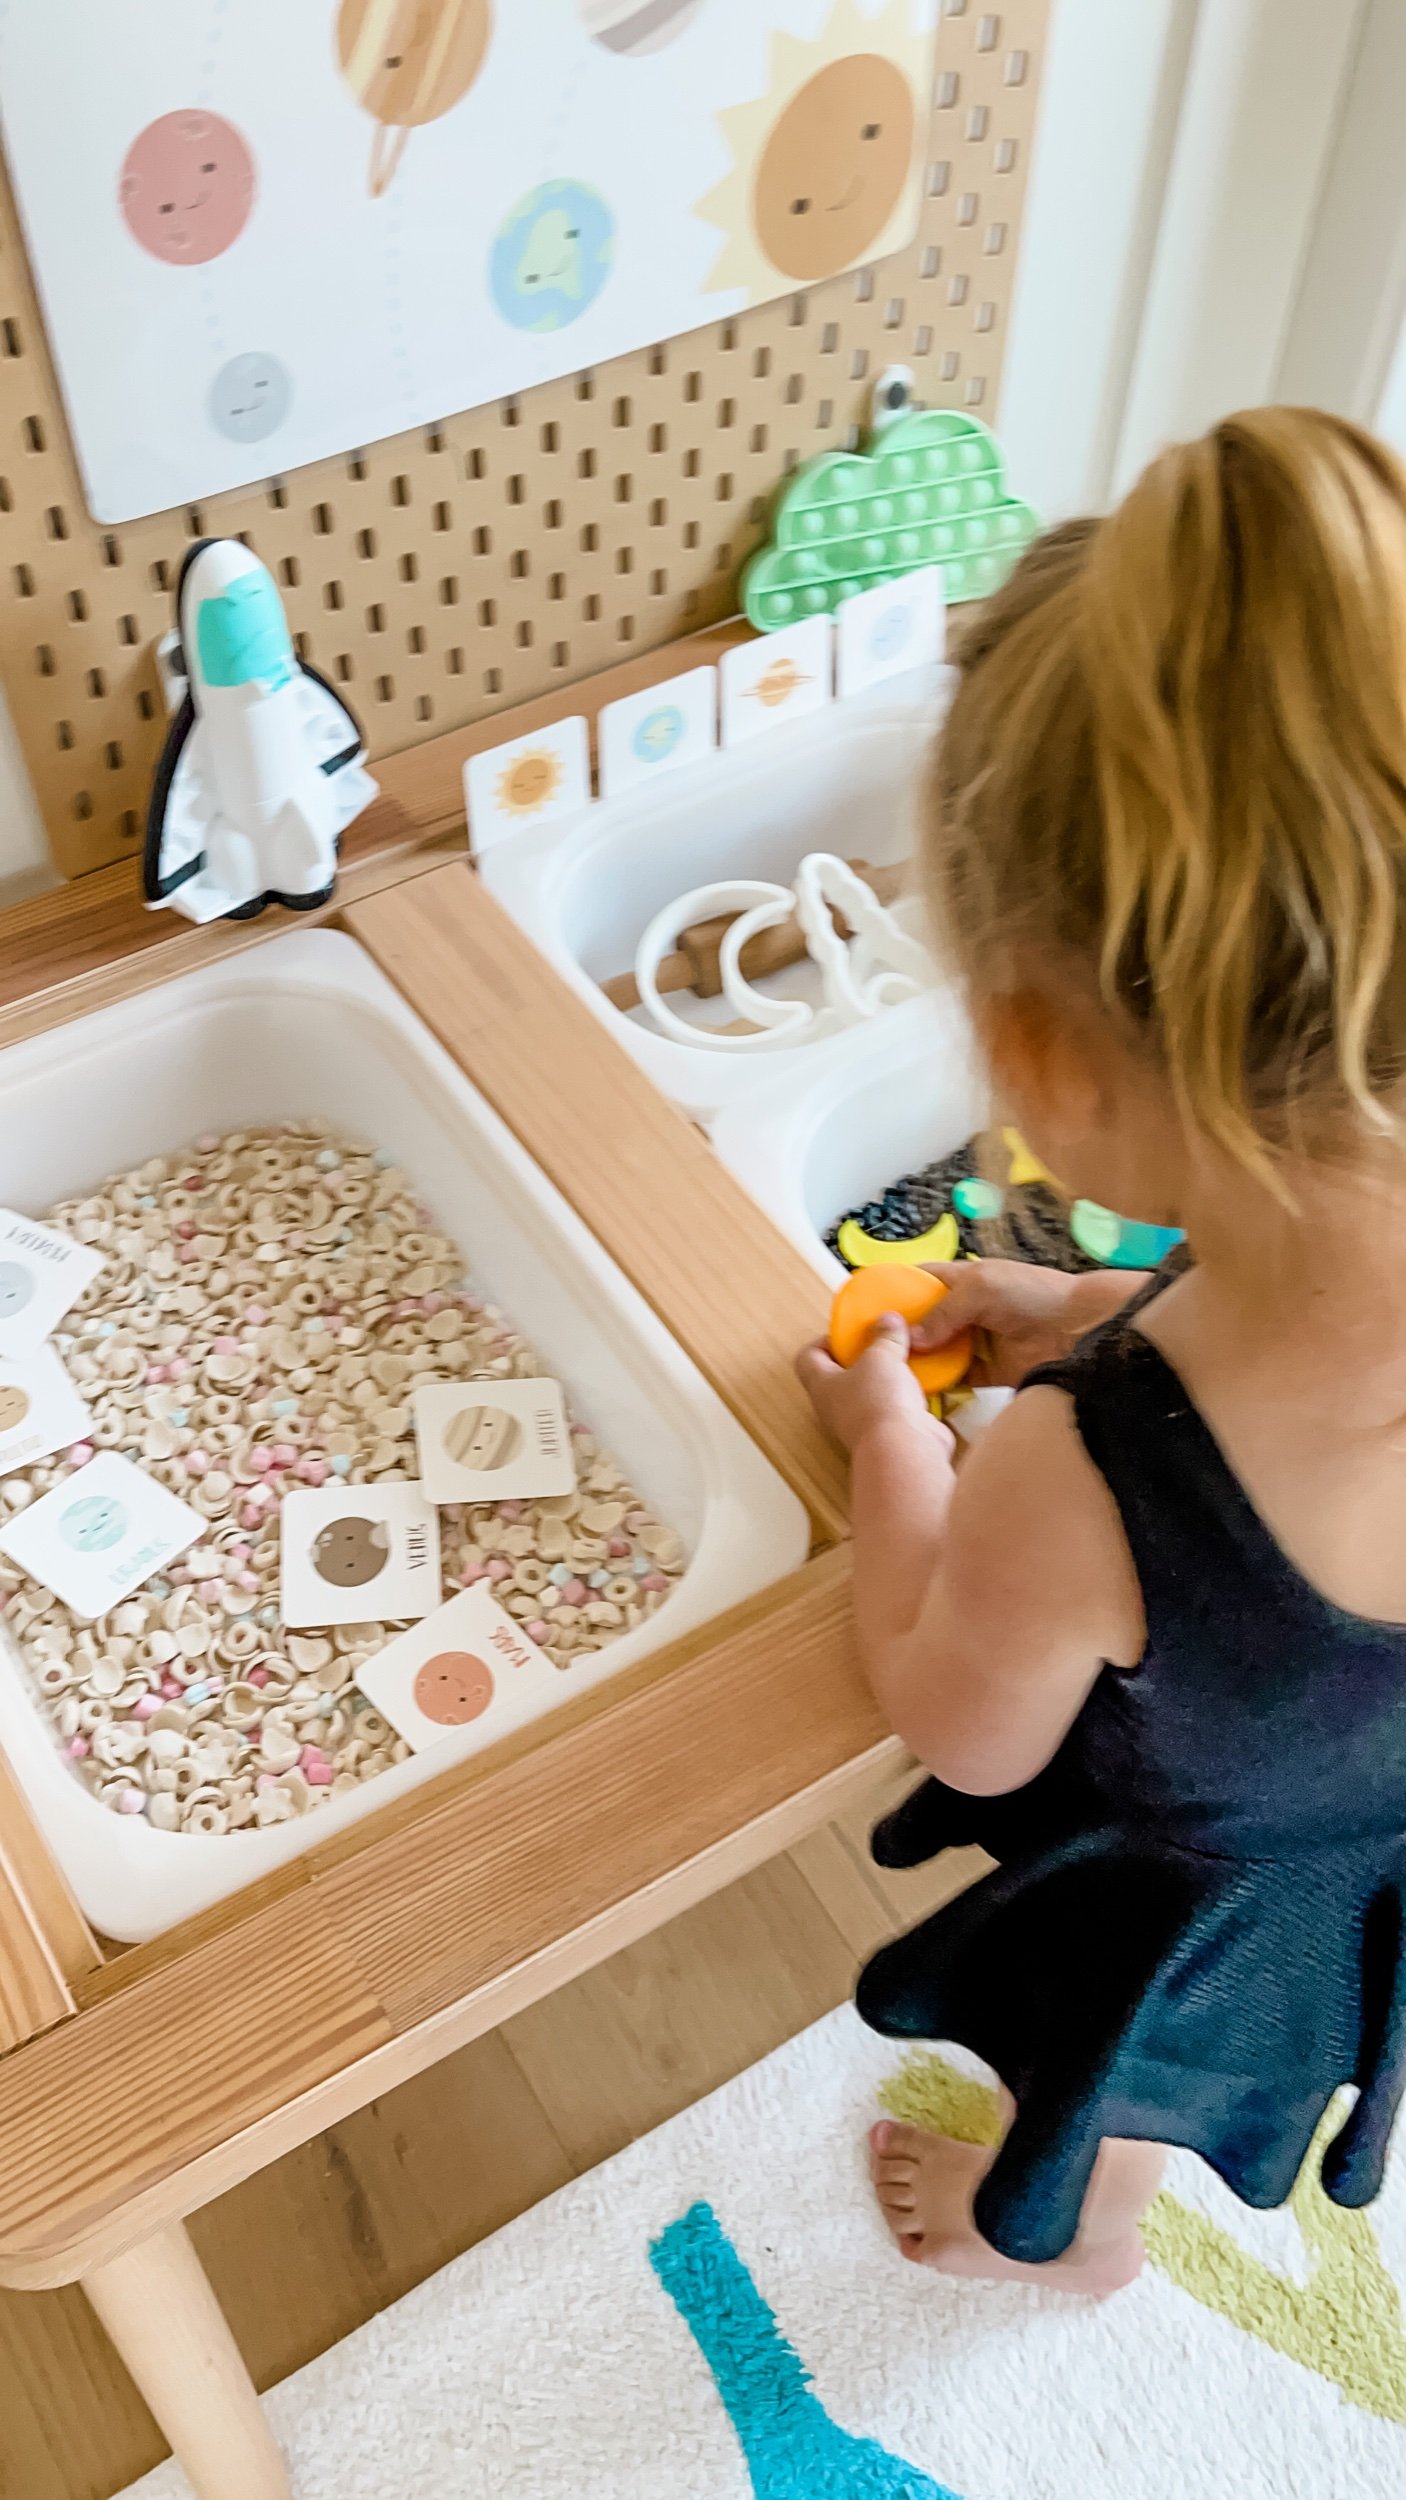
This outer space sensory play setup was so perfect for our weekend play time. I used Galaxy Cereal from whole foods which was basically cheerios plus moons and star marshmallows to make a taste safe snack bin — Sofie loves having snacks when she wakes up from her nap! Paired with some basic black beans and some fun play doh planets, moons, stars, etc. Plus we had this awesome space themed play doh kit that I found at target and it was so great use it for little molds. Also, I just absolutely love these simple white cookie cutters from Holly Fox on Etsy!
Also pictured here is our favorite Ikea Flisat Table and Skadis Peg Board set up!

Have a shop that specializes in baby gifts? I'd love to feature your shop and products in one of my weekly roundups. Email me at goodnightfoxstudio@gmail.com.
Check out GoodnightFox wholesale we’d love to have you carry the GoodnightFox brand.