
Handing a preschooler scissors for the first time can feel like handing them a tiny sword. But with the right progression — snipping before cutting, playdough before paper — those wobbly first cuts turn into real confidence fast.
Read moreEmotions on the Go: Teach Feelings Anywhere with Flashcards
Emotions on the Go: Teach Feelings Anywhere with Flashcards
The best emotions lesson isn't a lesson at all — it's a card pulled out in the backseat, a silly face in the grocery cart, a matching game while the food arrives. Feelings happen everywhere, so practice them everywhere: here are five easy ways to teach emotions on the go with flashcards.
Best forAges 2–5
Time2–5 min each
CostOne card set
SkillsEmotional vocabulary
Why on the go works so well
Big feelings don't wait for a calm moment at the kitchen table. They show up in the car, in line at the store, in the middle of a restaurant meal. Practicing emotions in those moments — with a card deck that fits in a diaper bag — wires the vocabulary right where your toddler needs it. No prep, no setup, just pull a card and play.
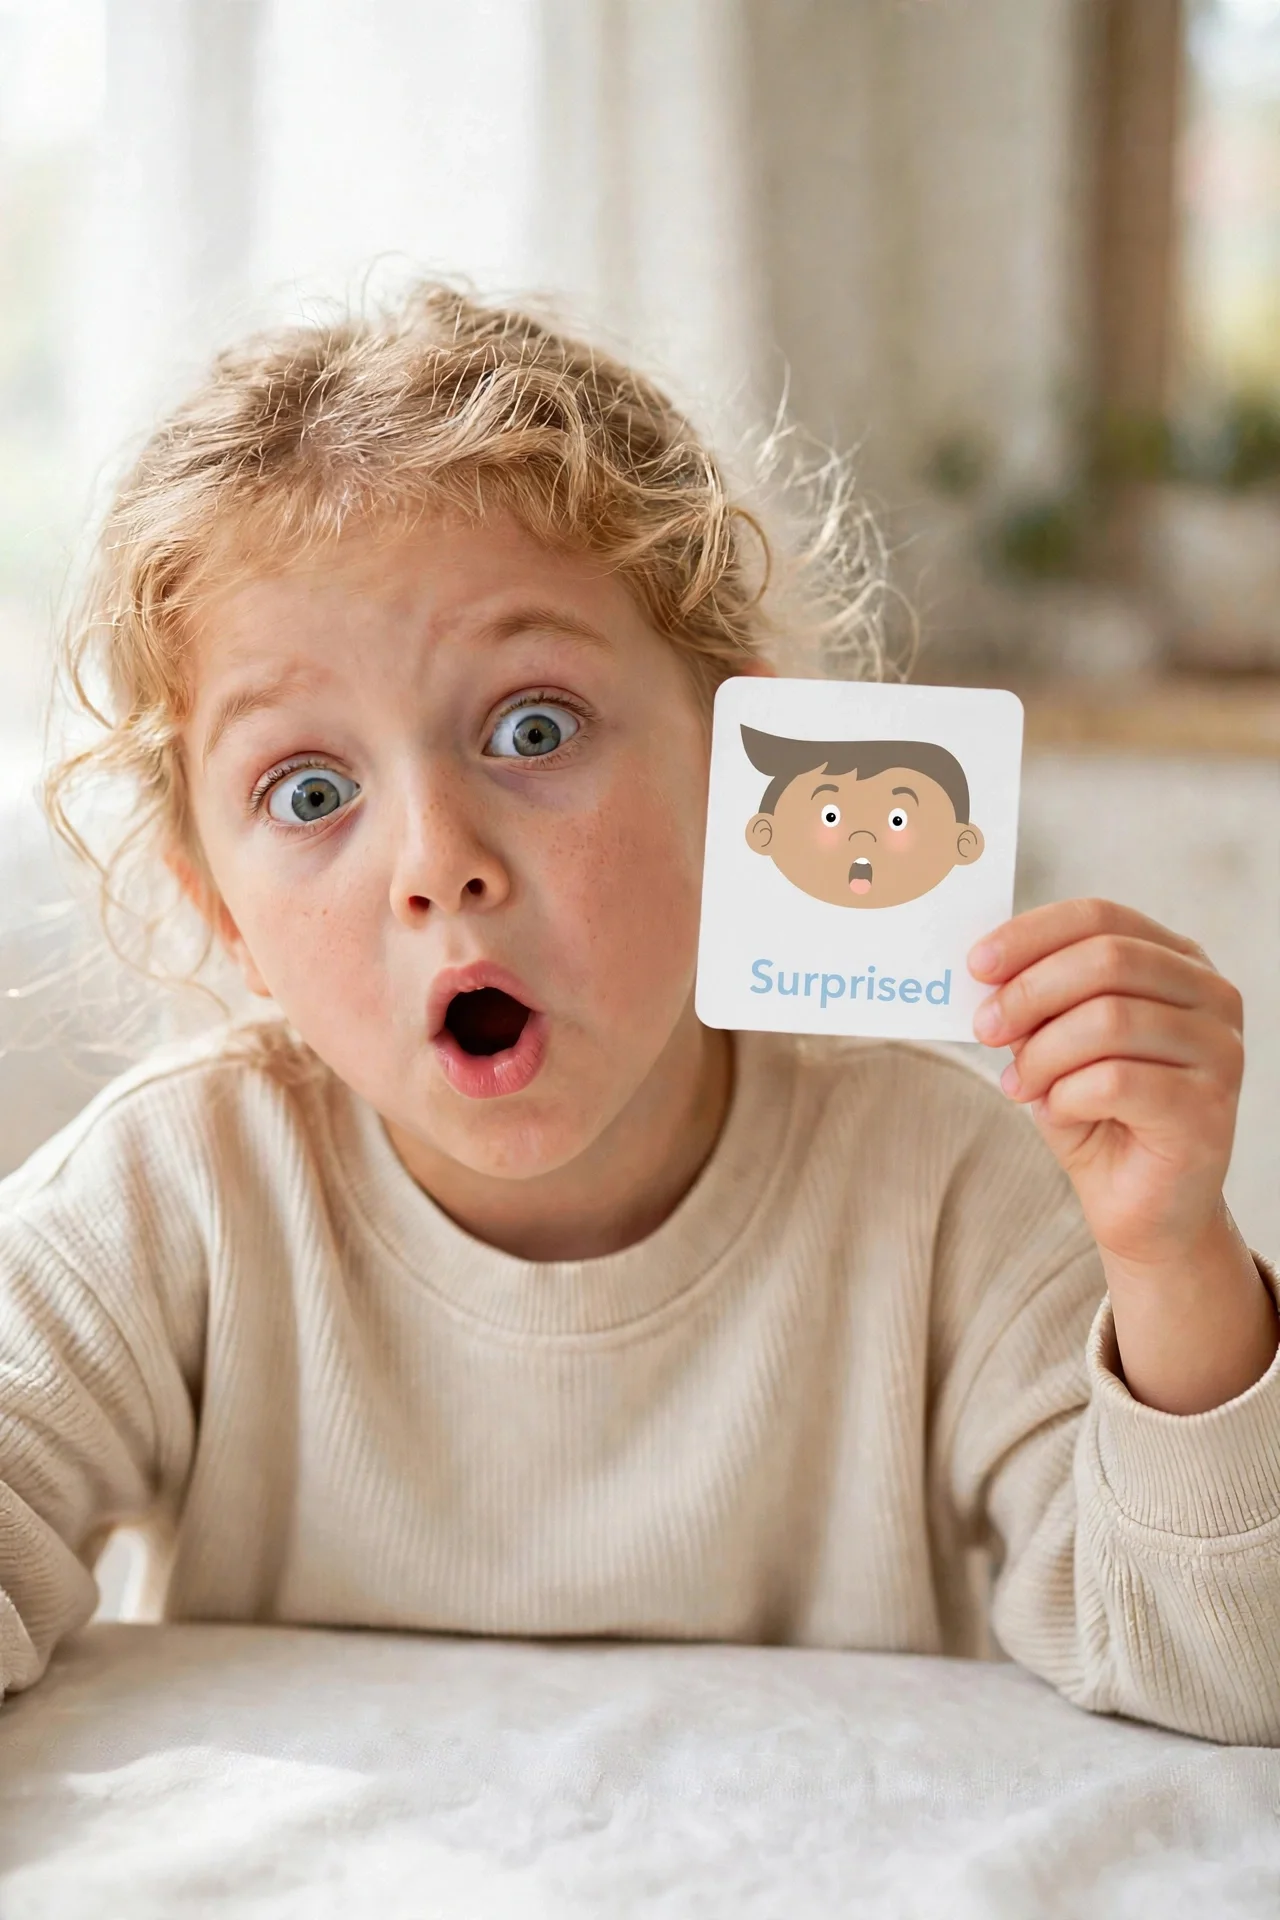
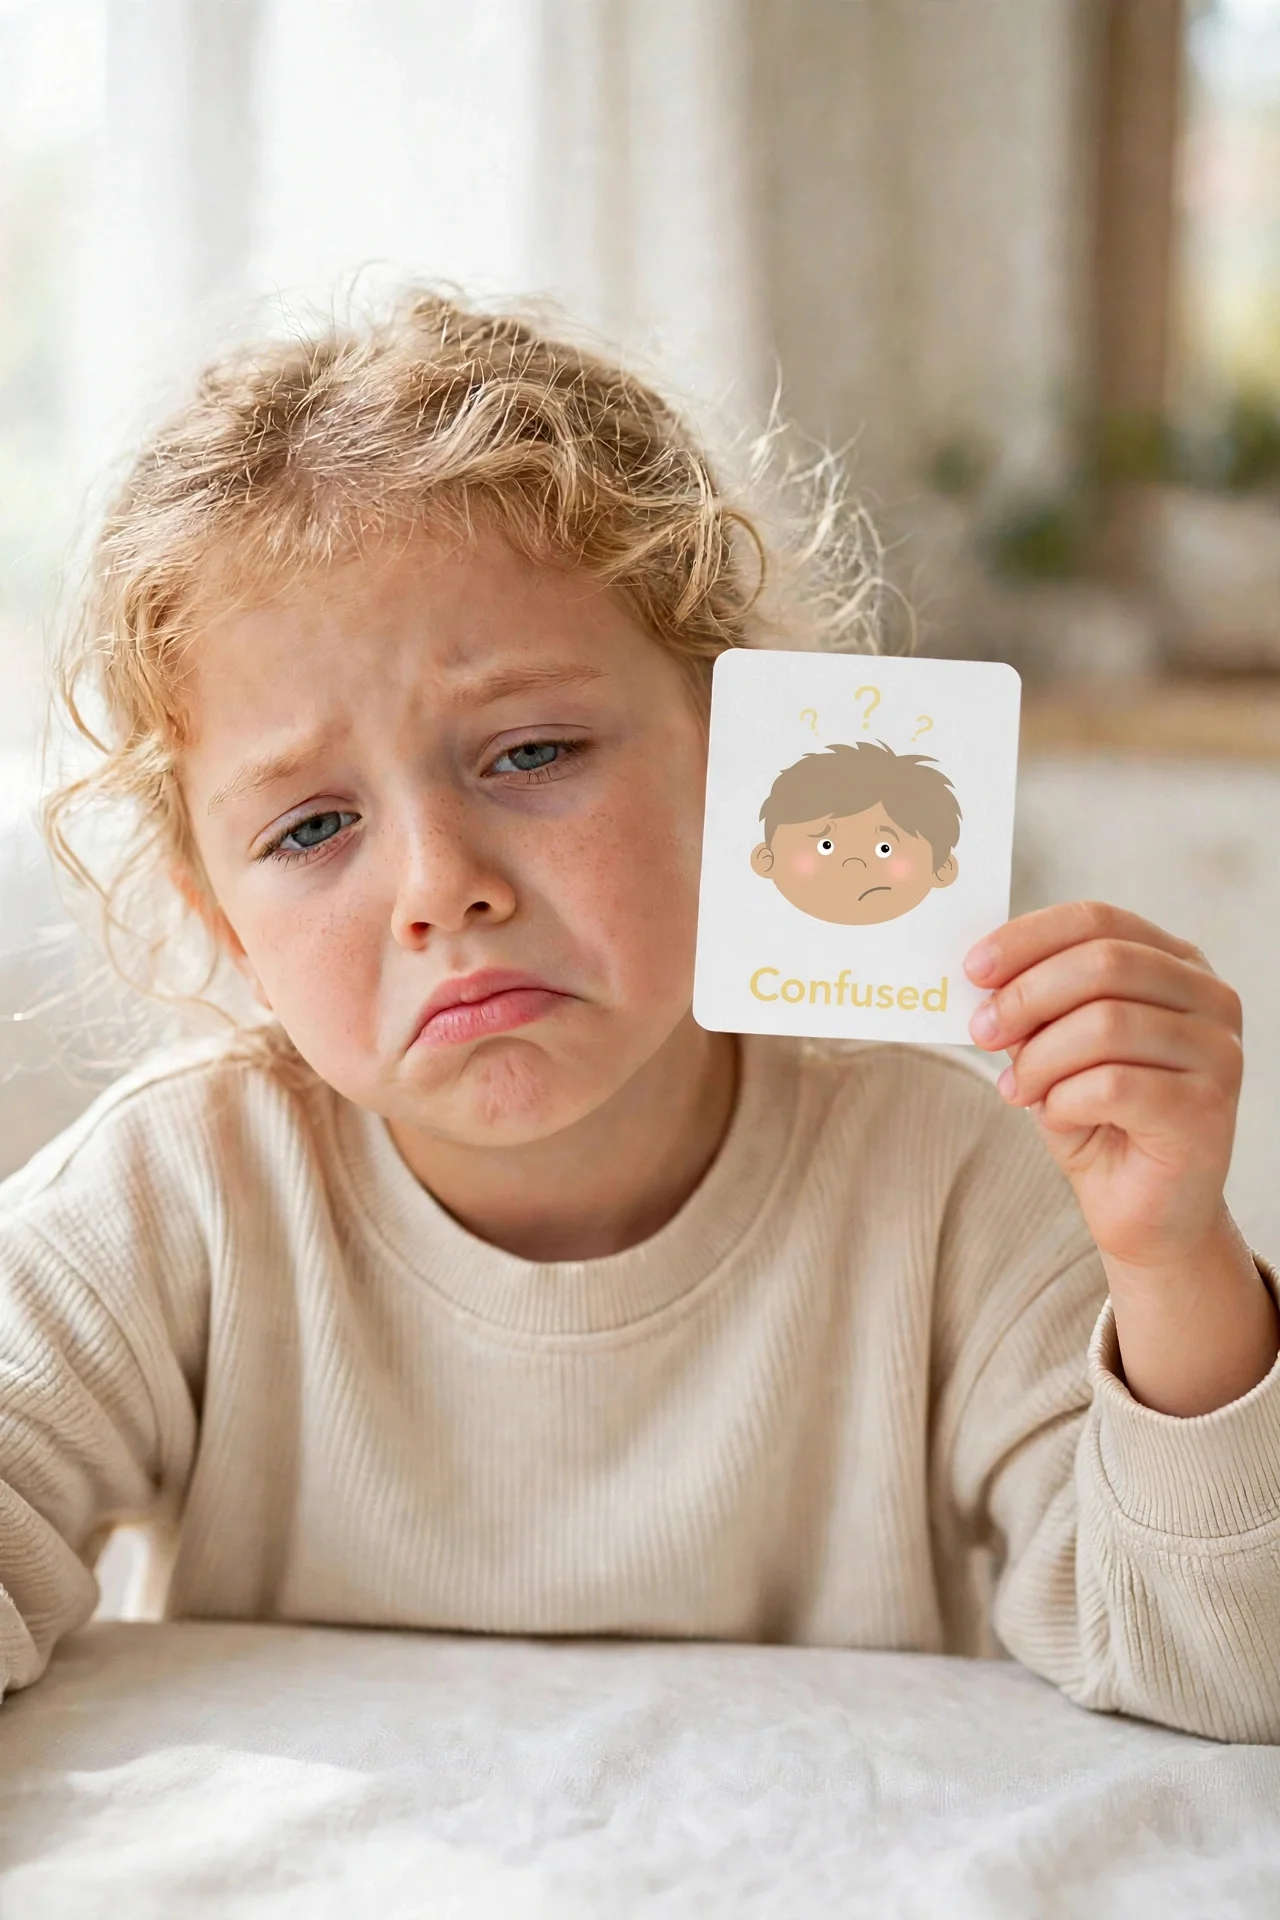
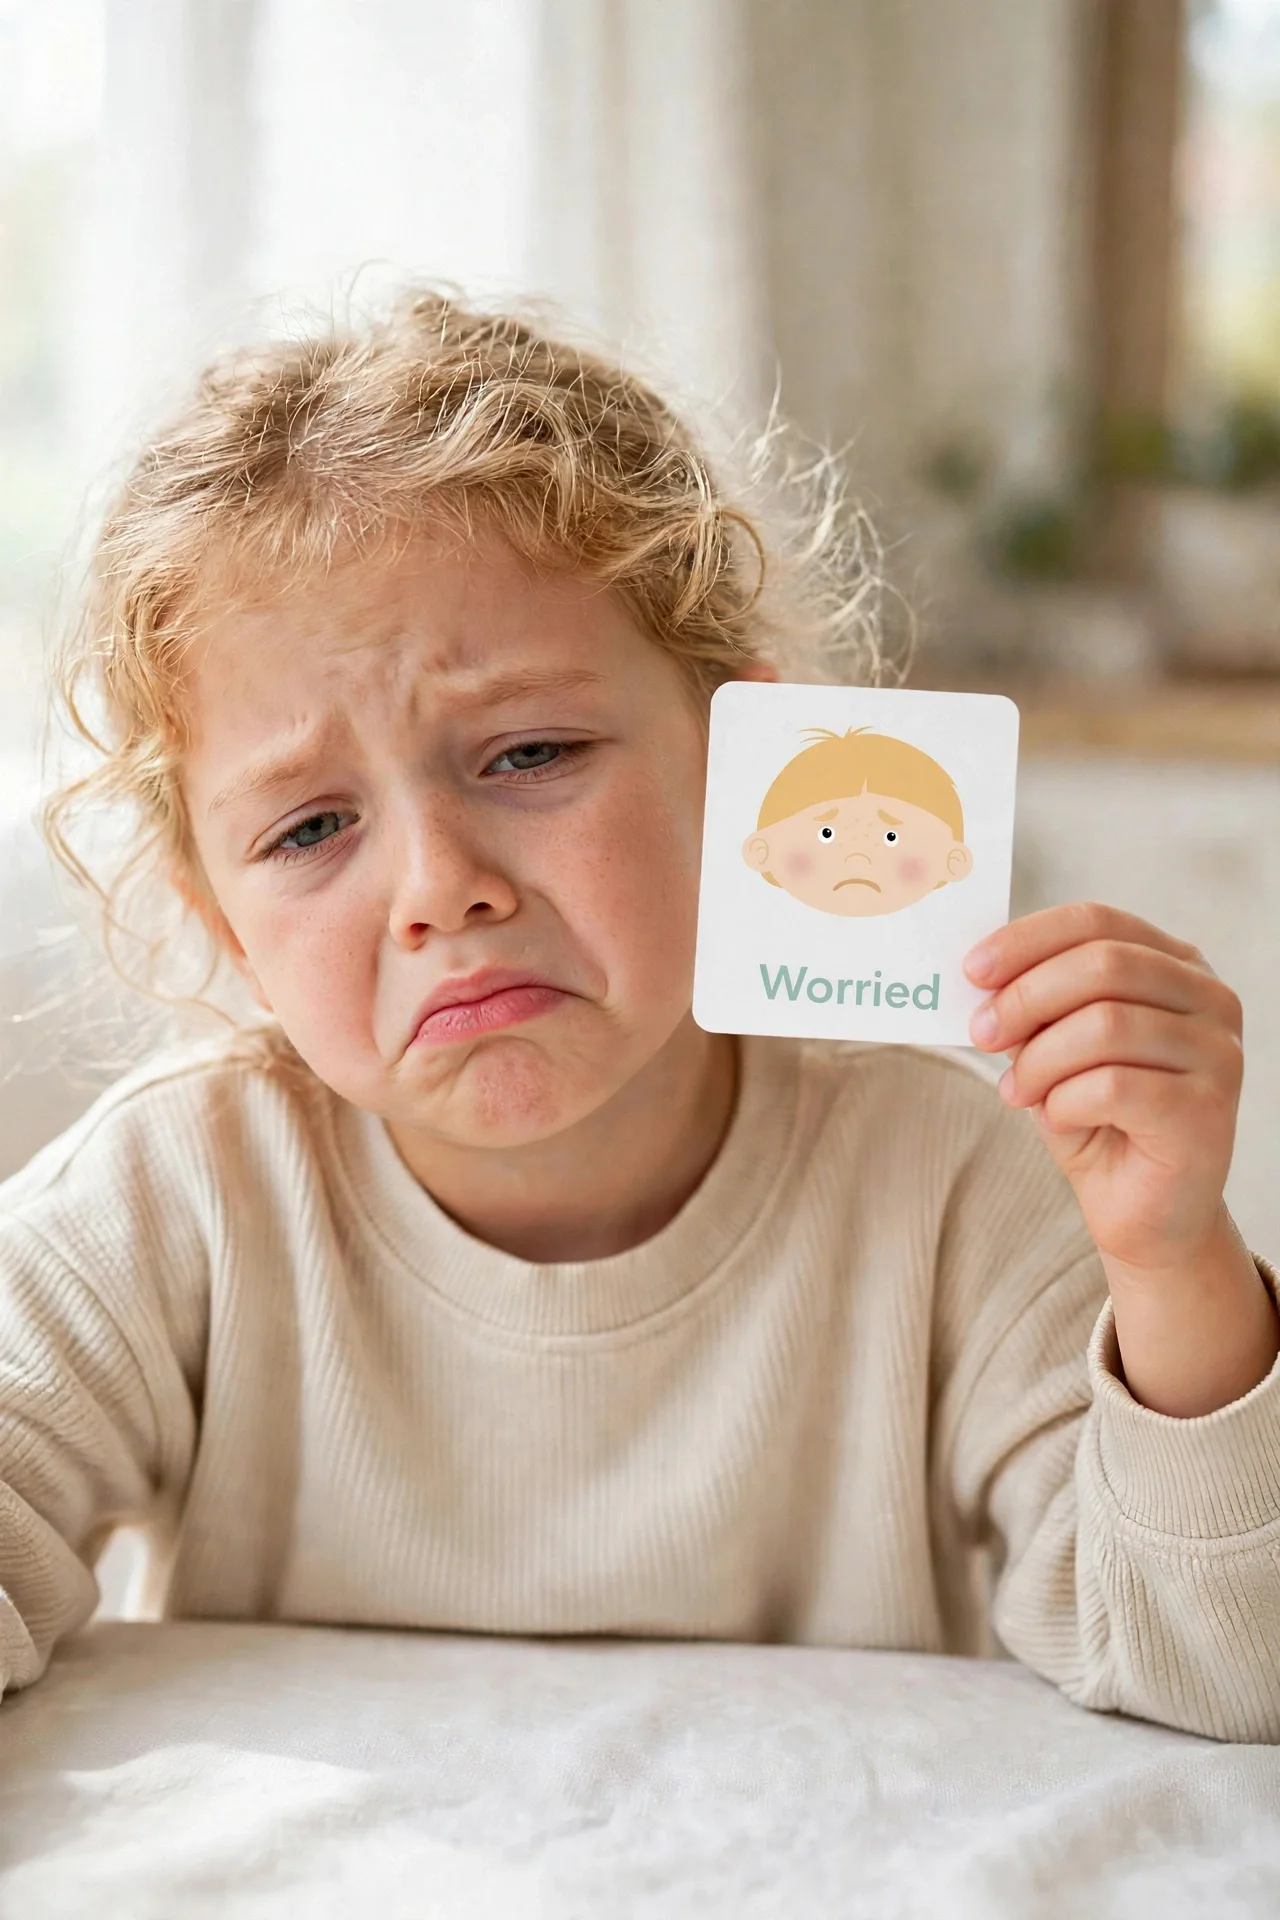
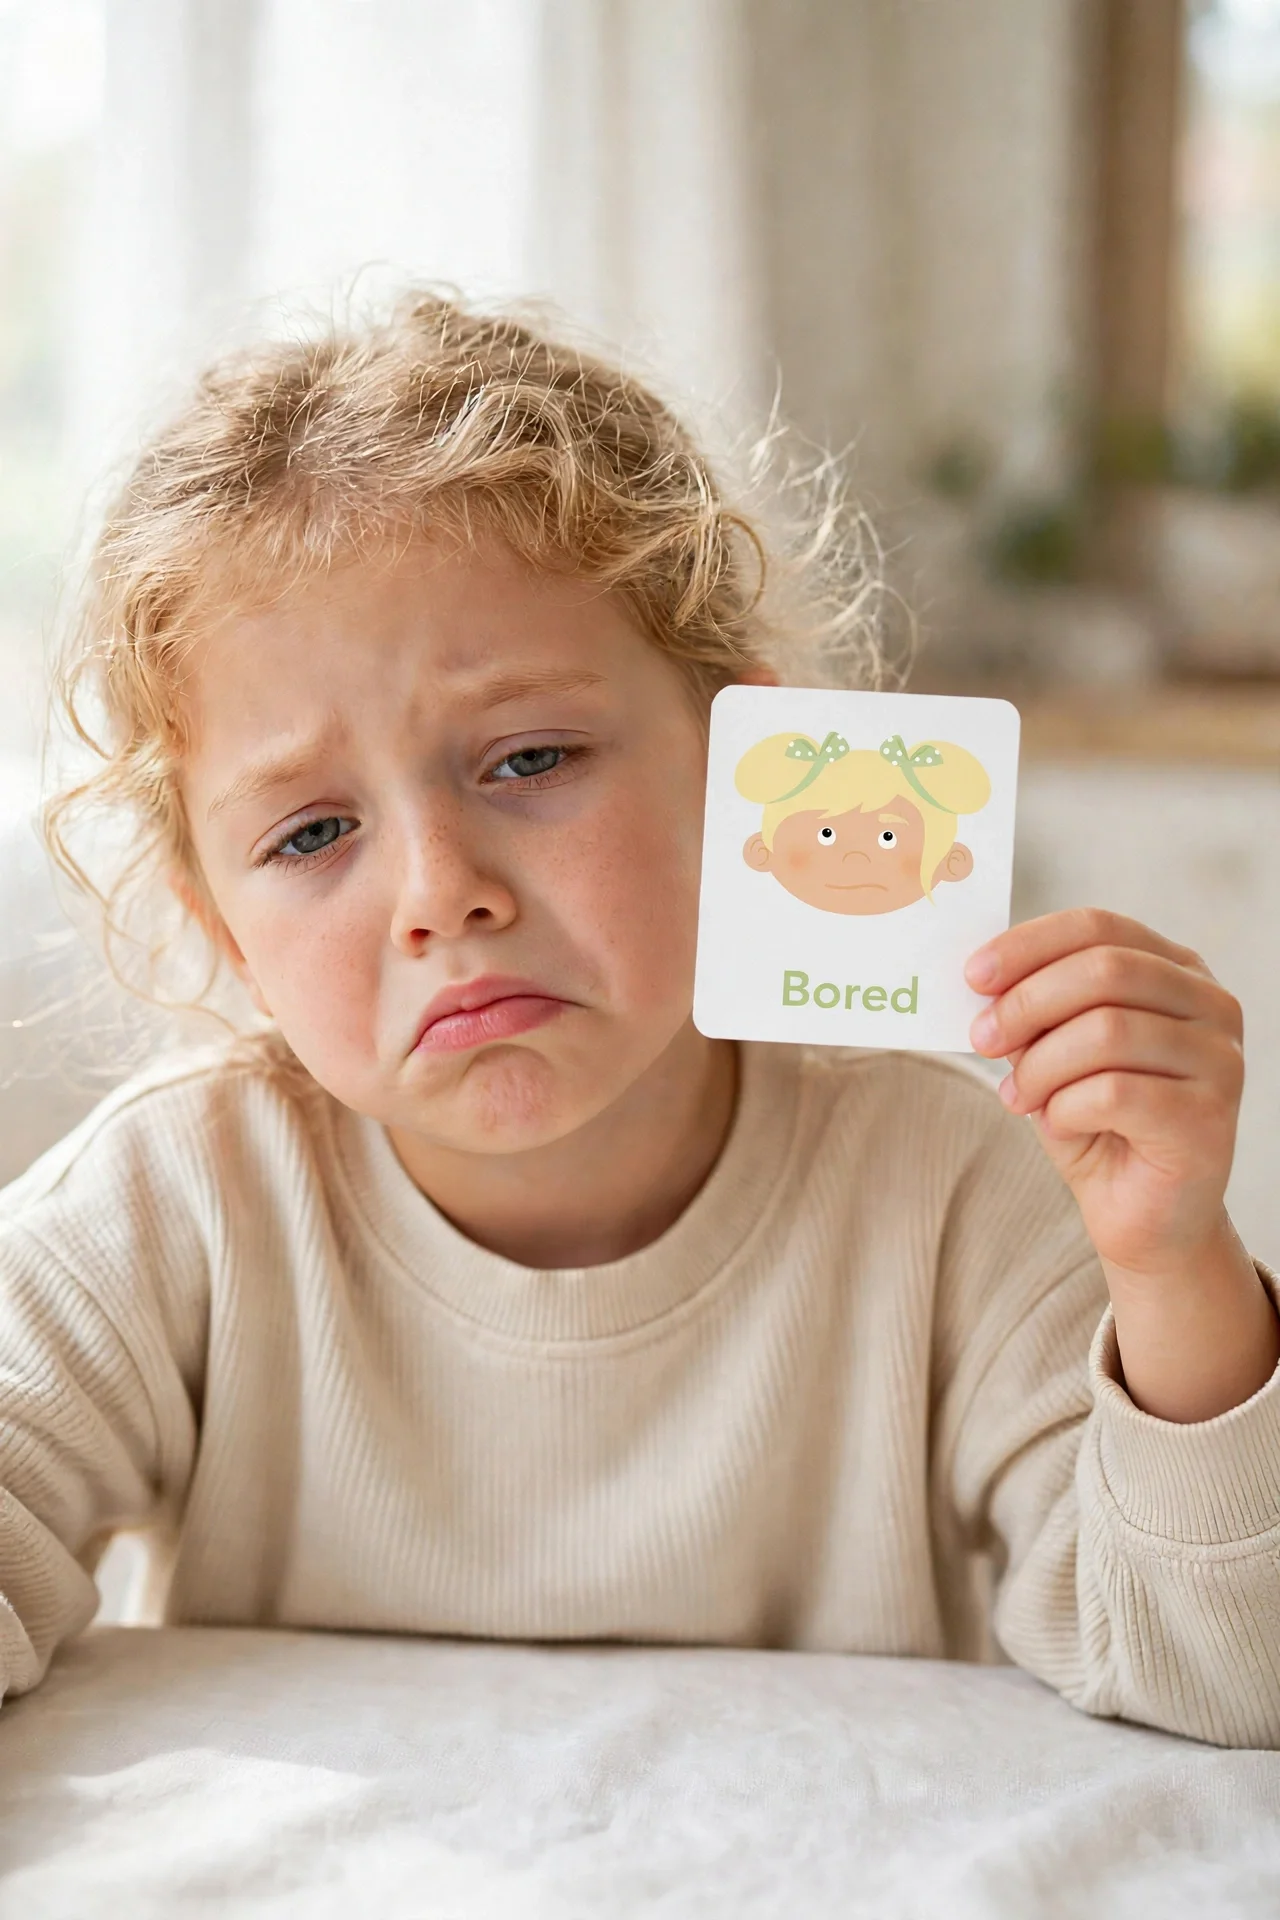
1. Mirror faces
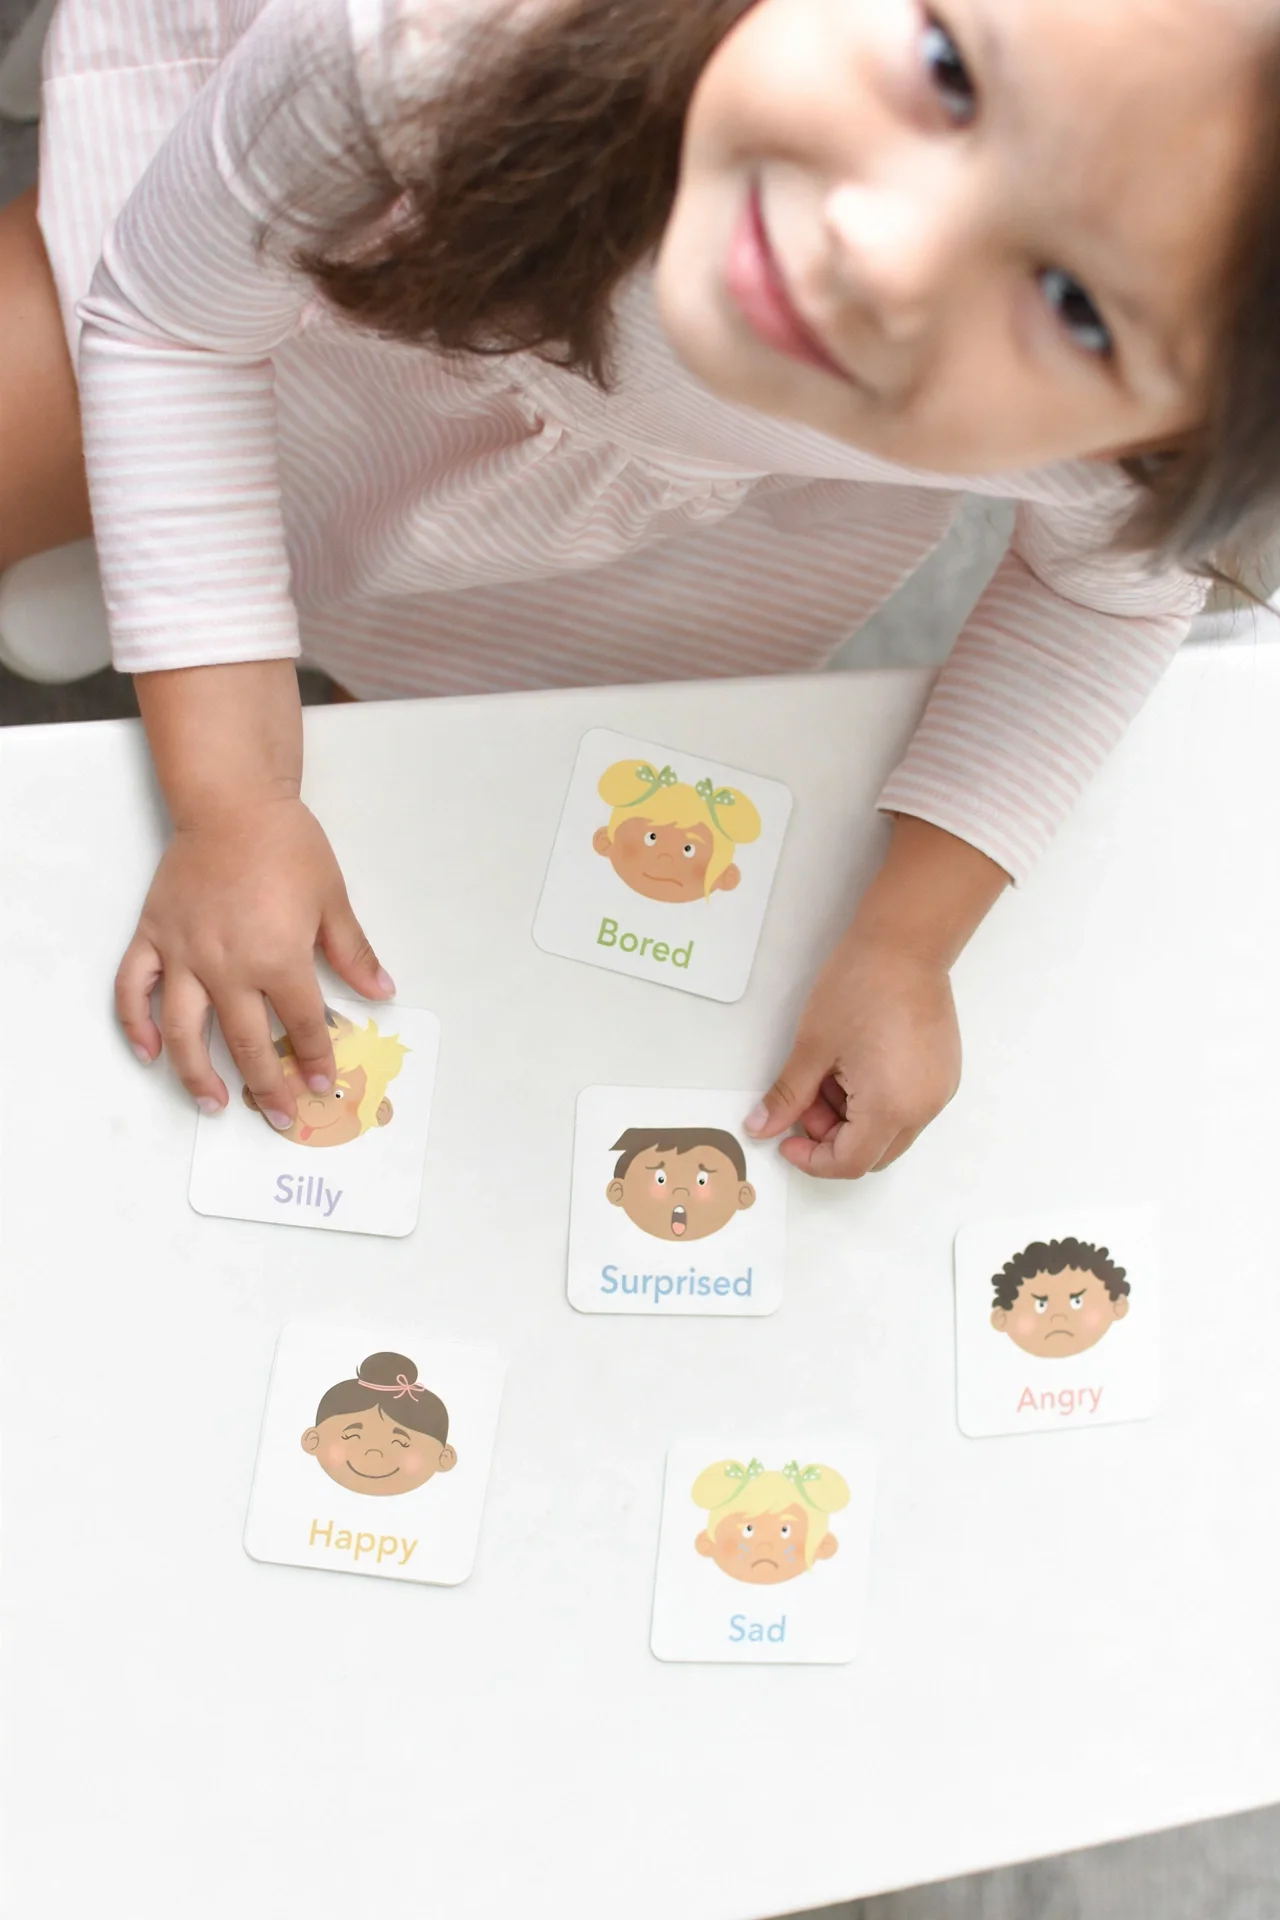
Hold up a card and make the face together — then let your toddler "teach" it back to you. Copying the expression wires the word to the feeling, and the silliness keeps them coming back. Work through the whole deck over a week: happy, sad, angry, silly, surprised, confused, worried, bored, excited, and embarassed.
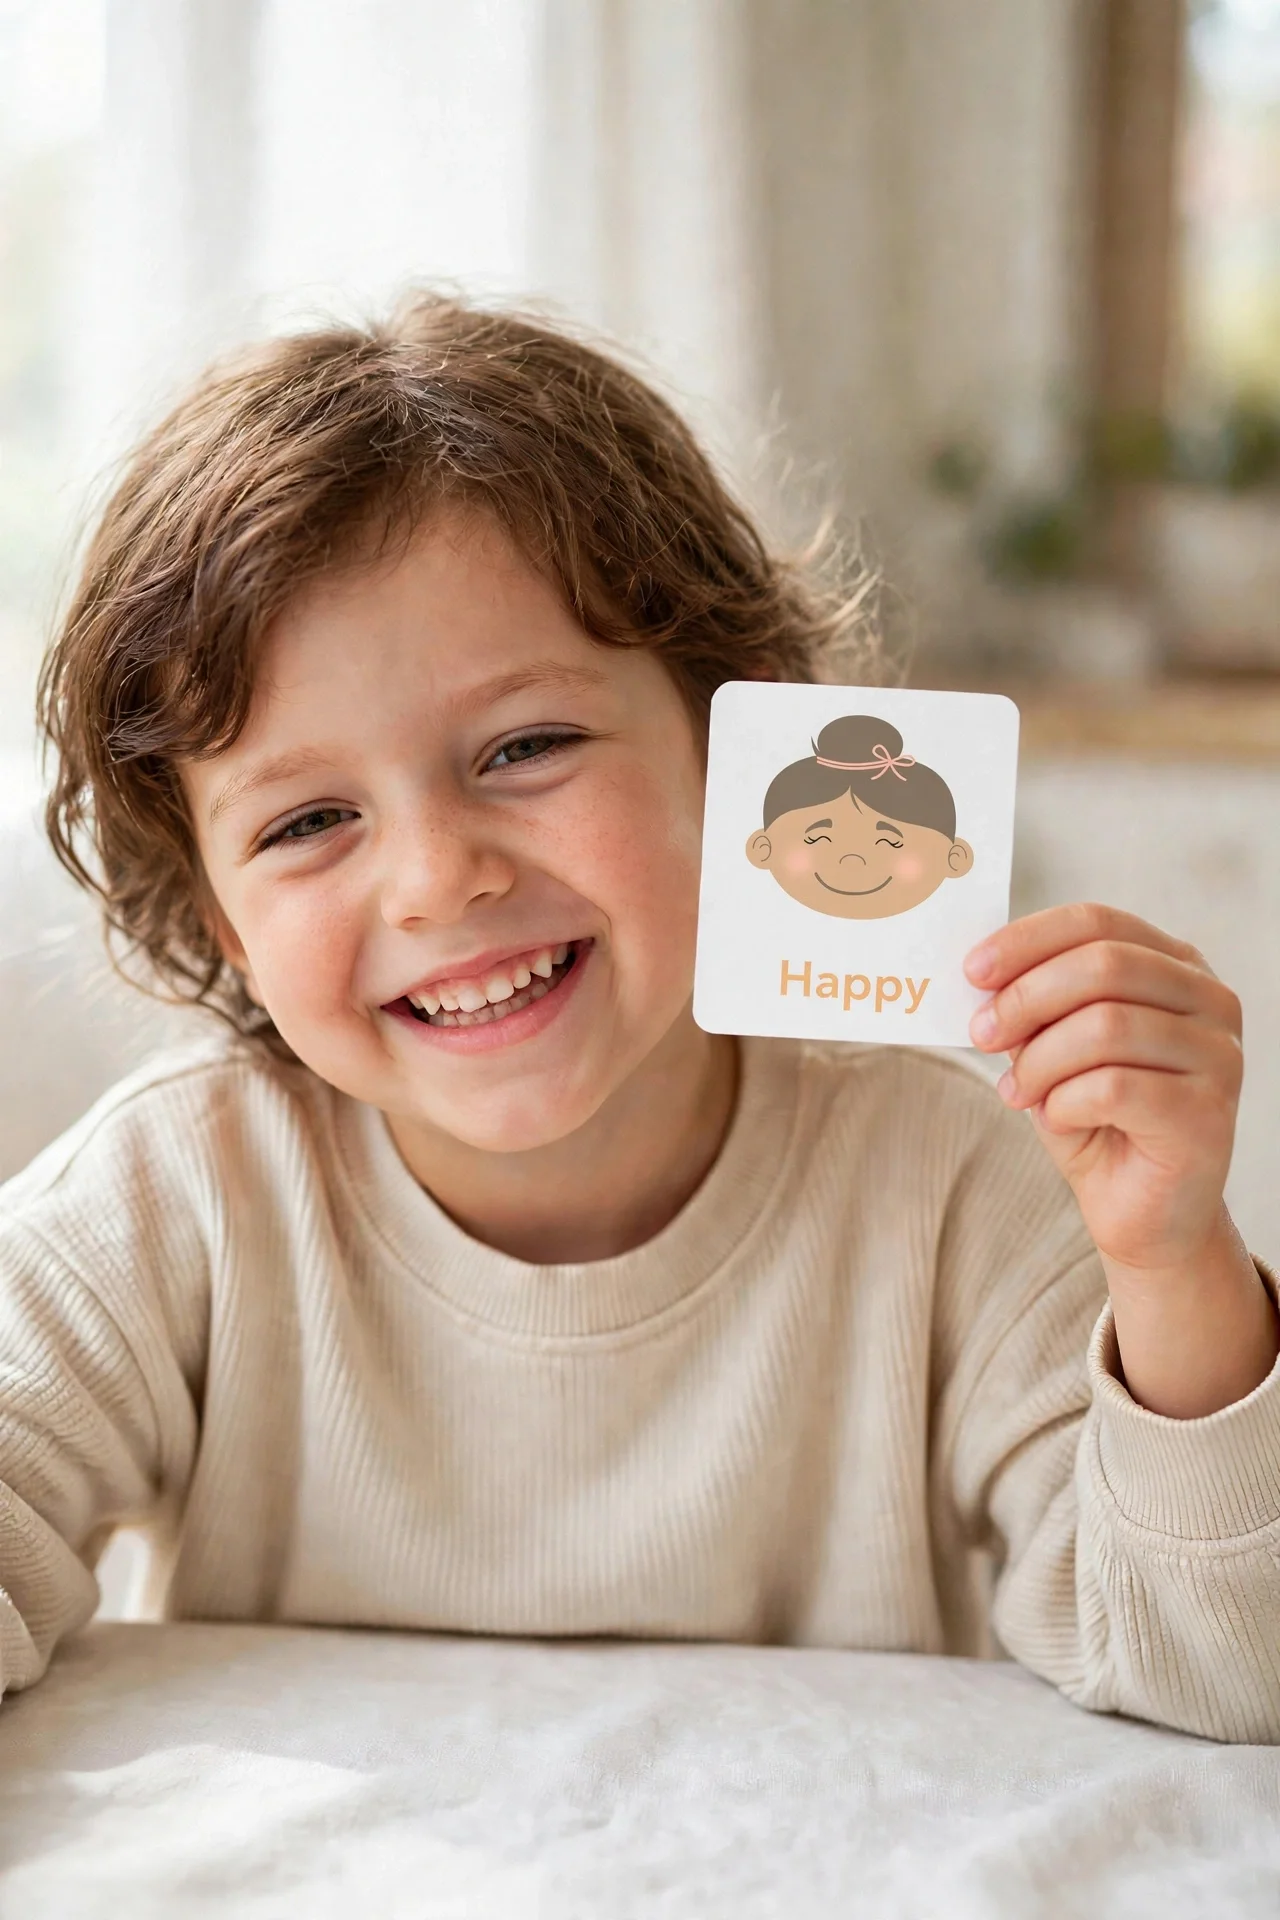
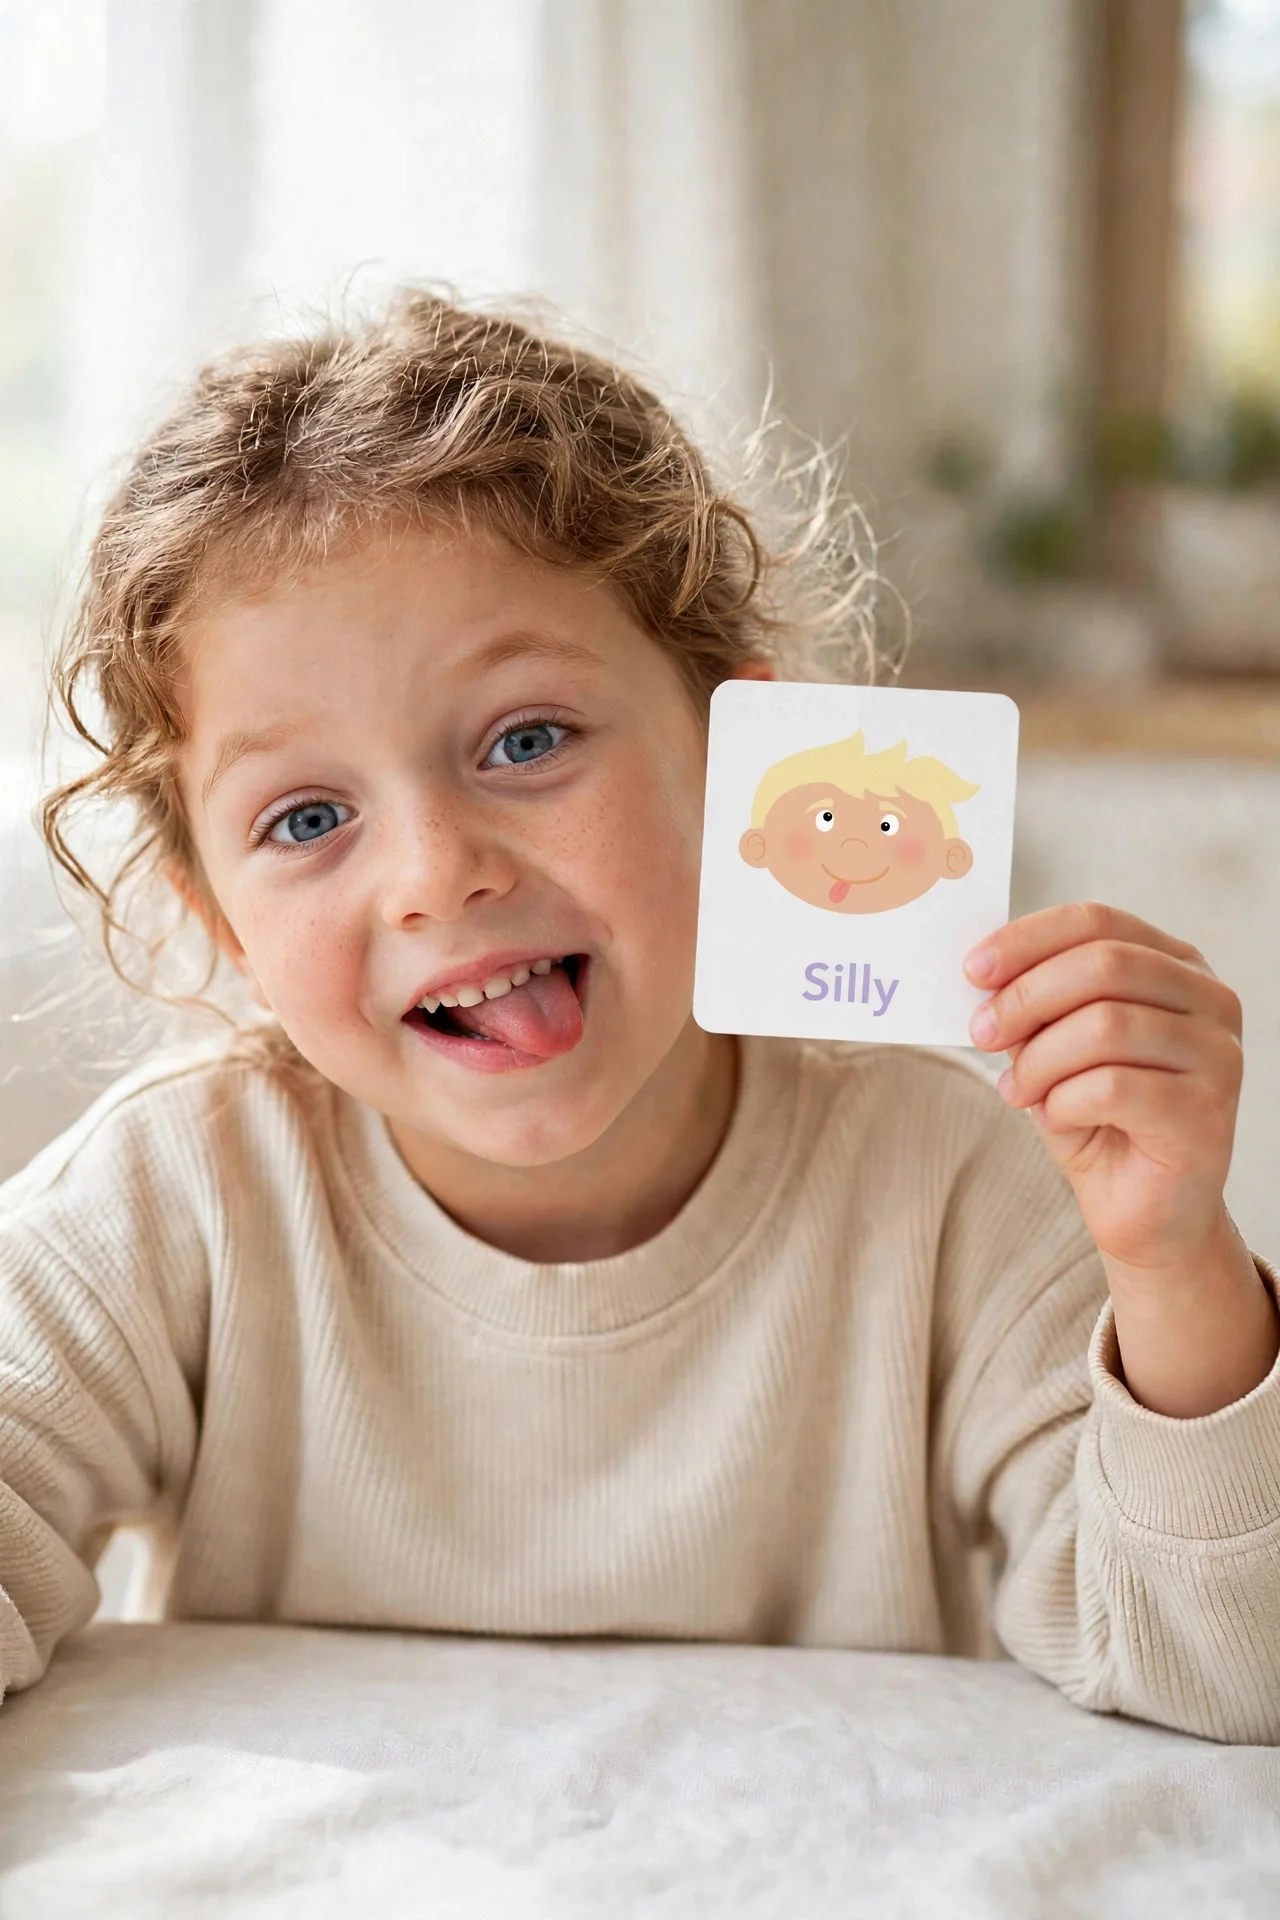
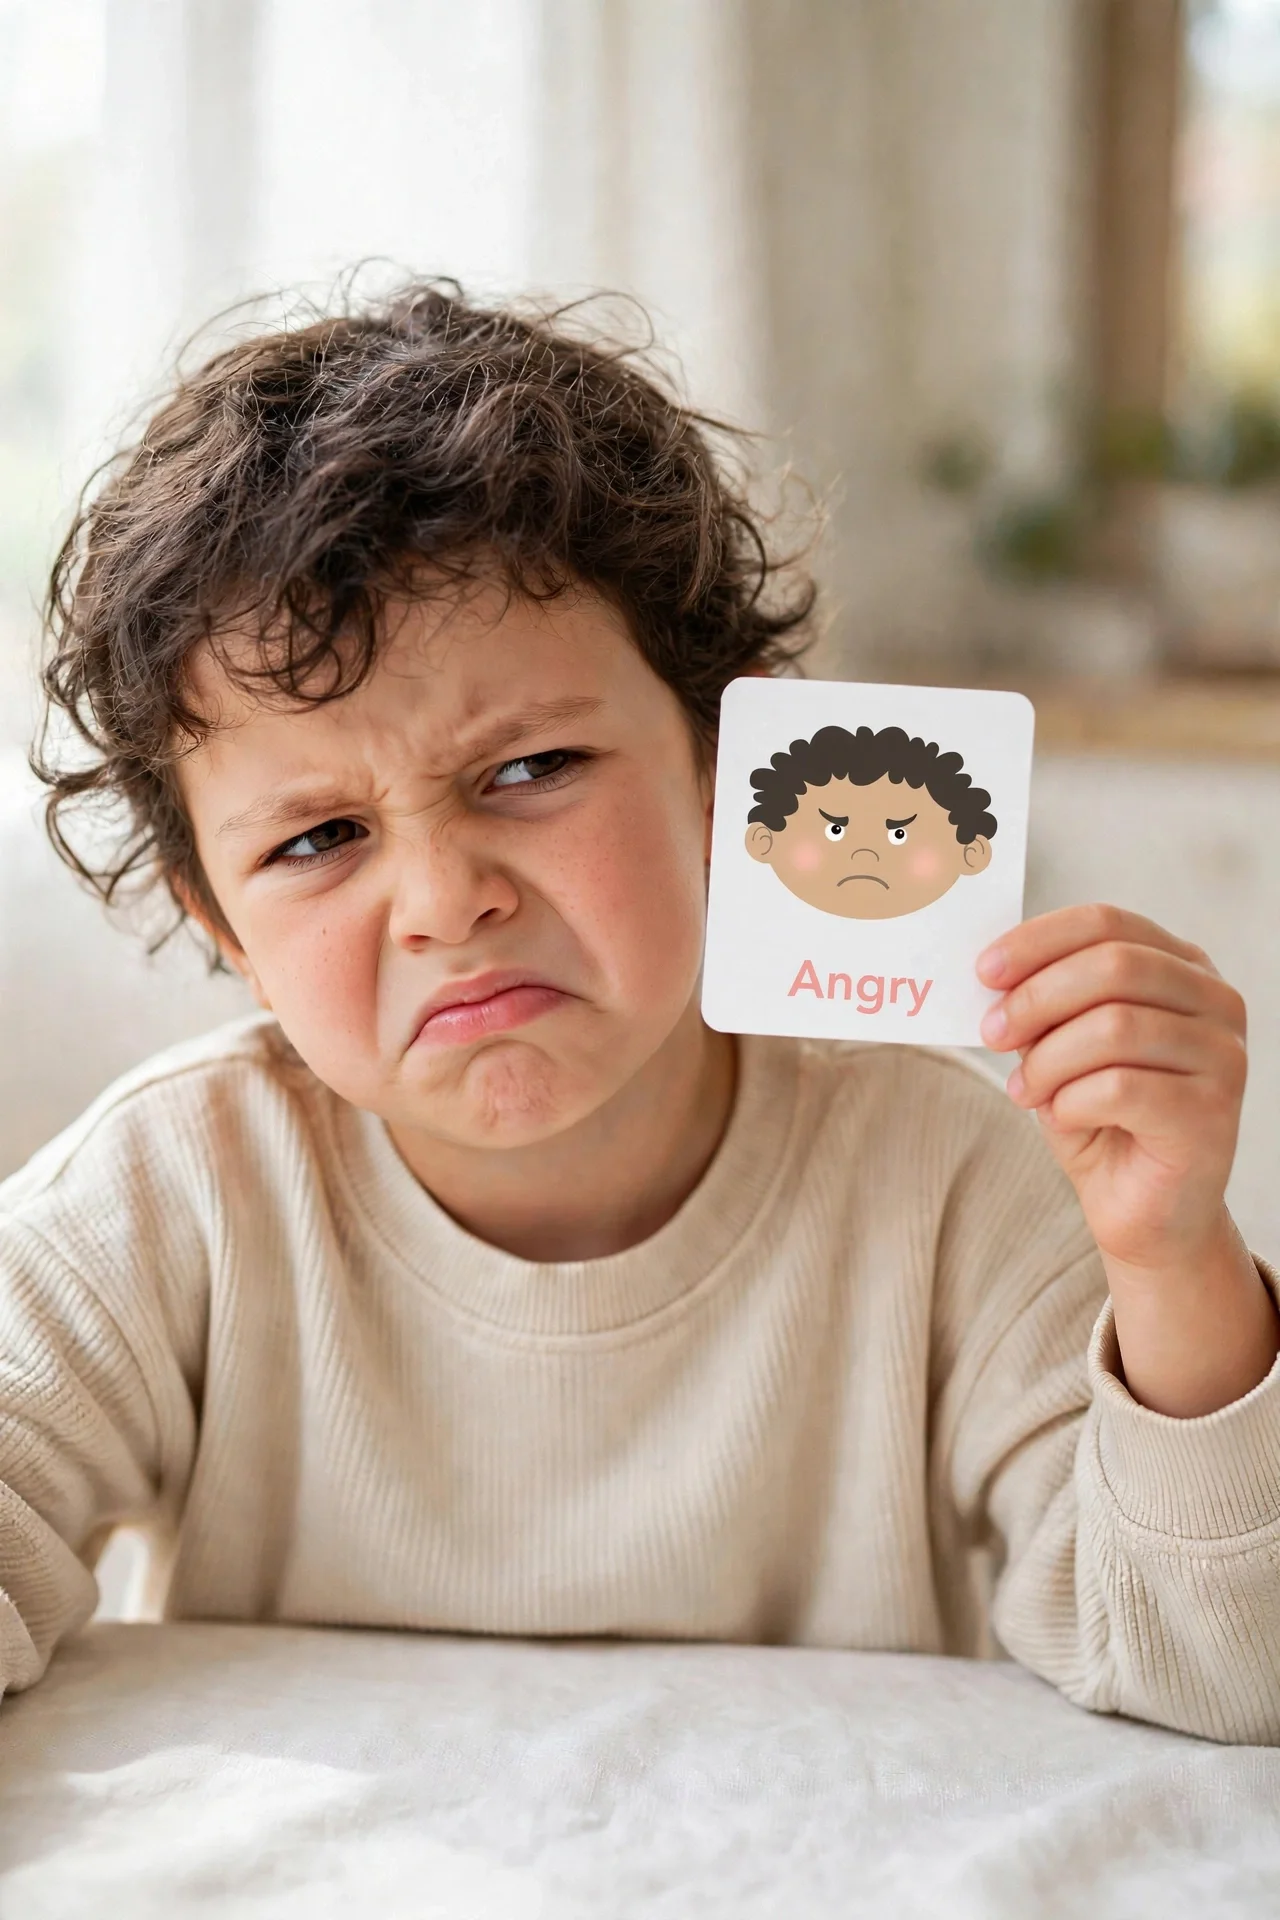
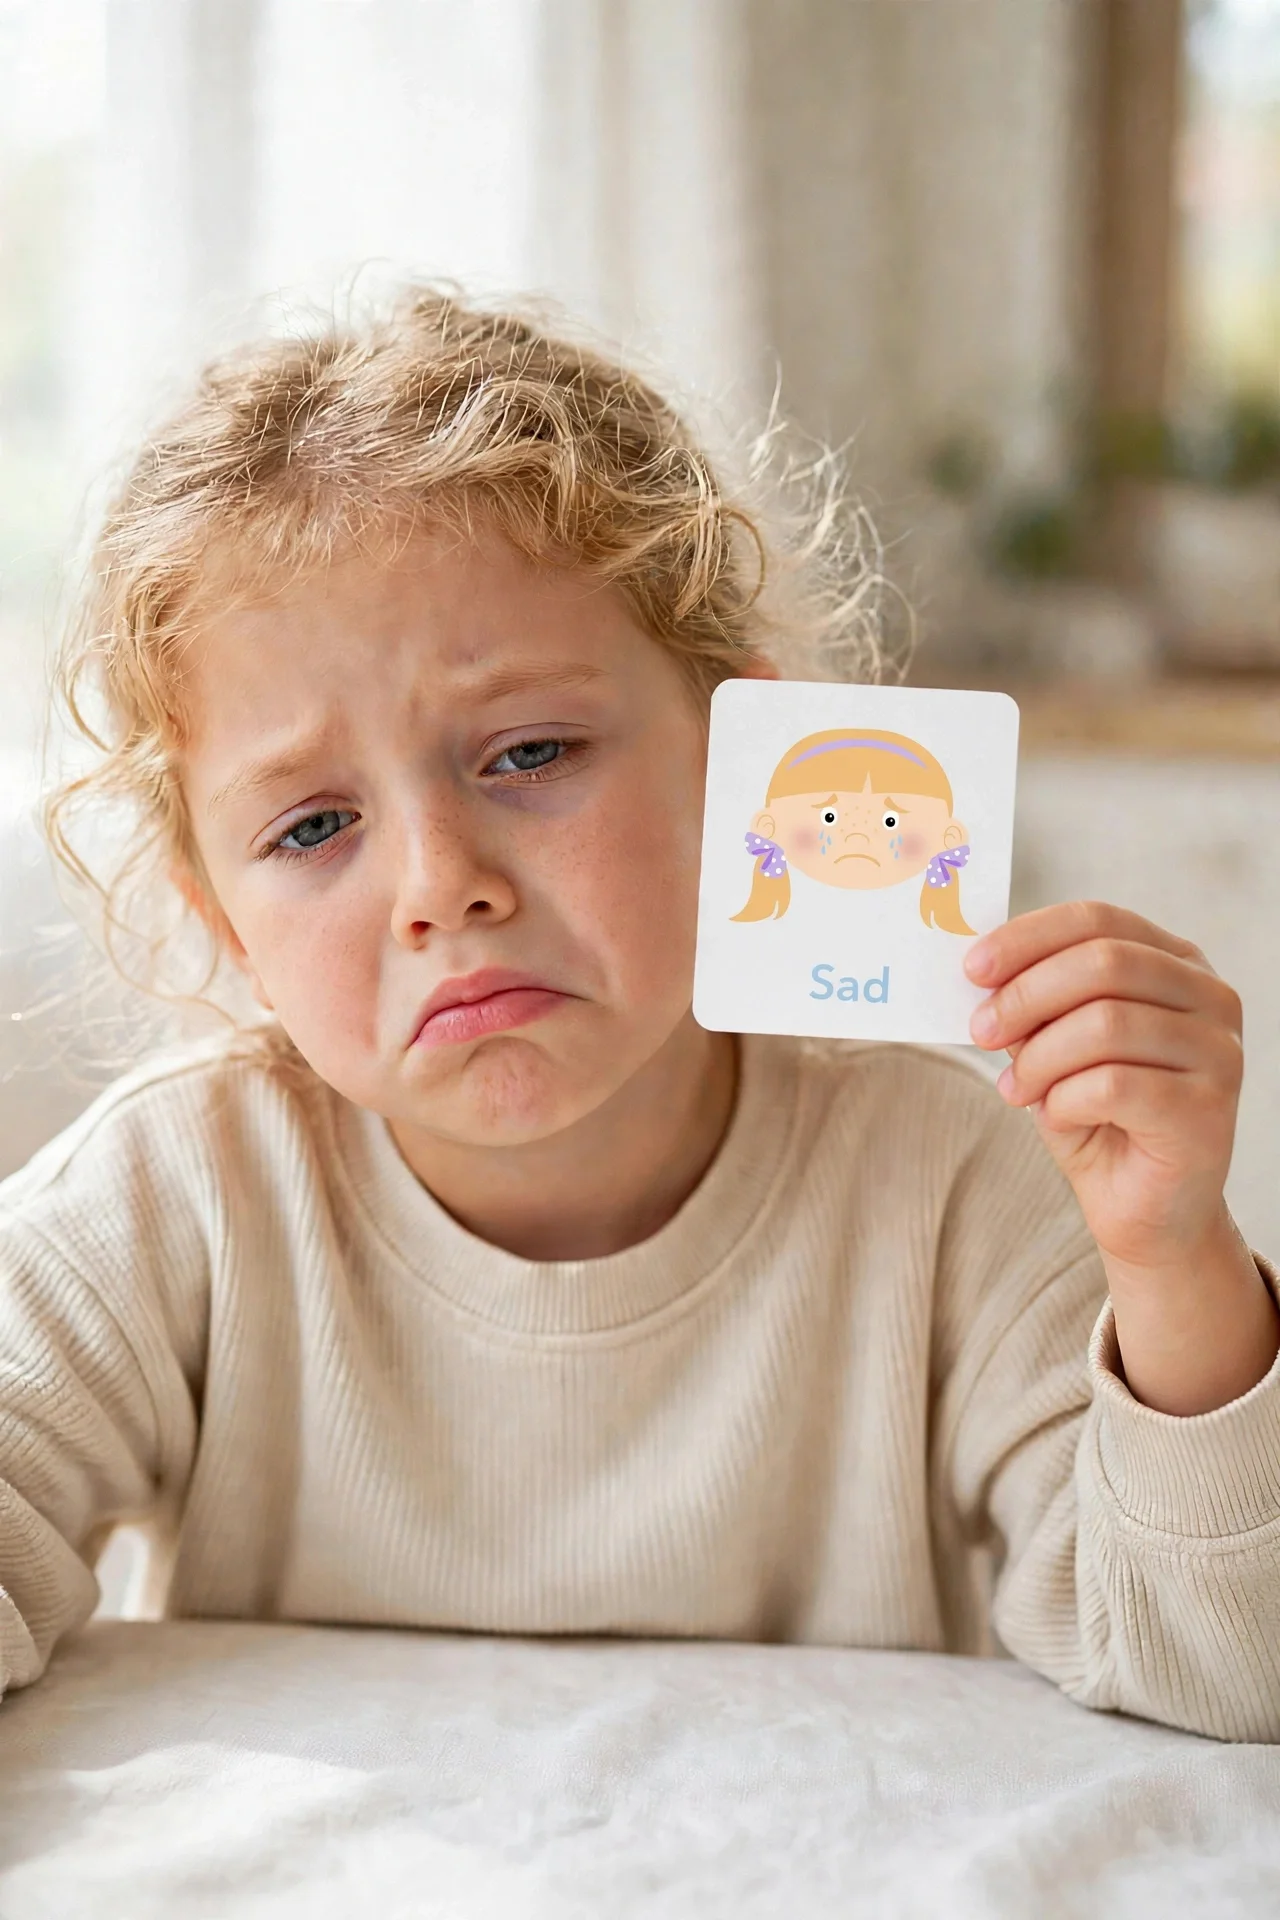
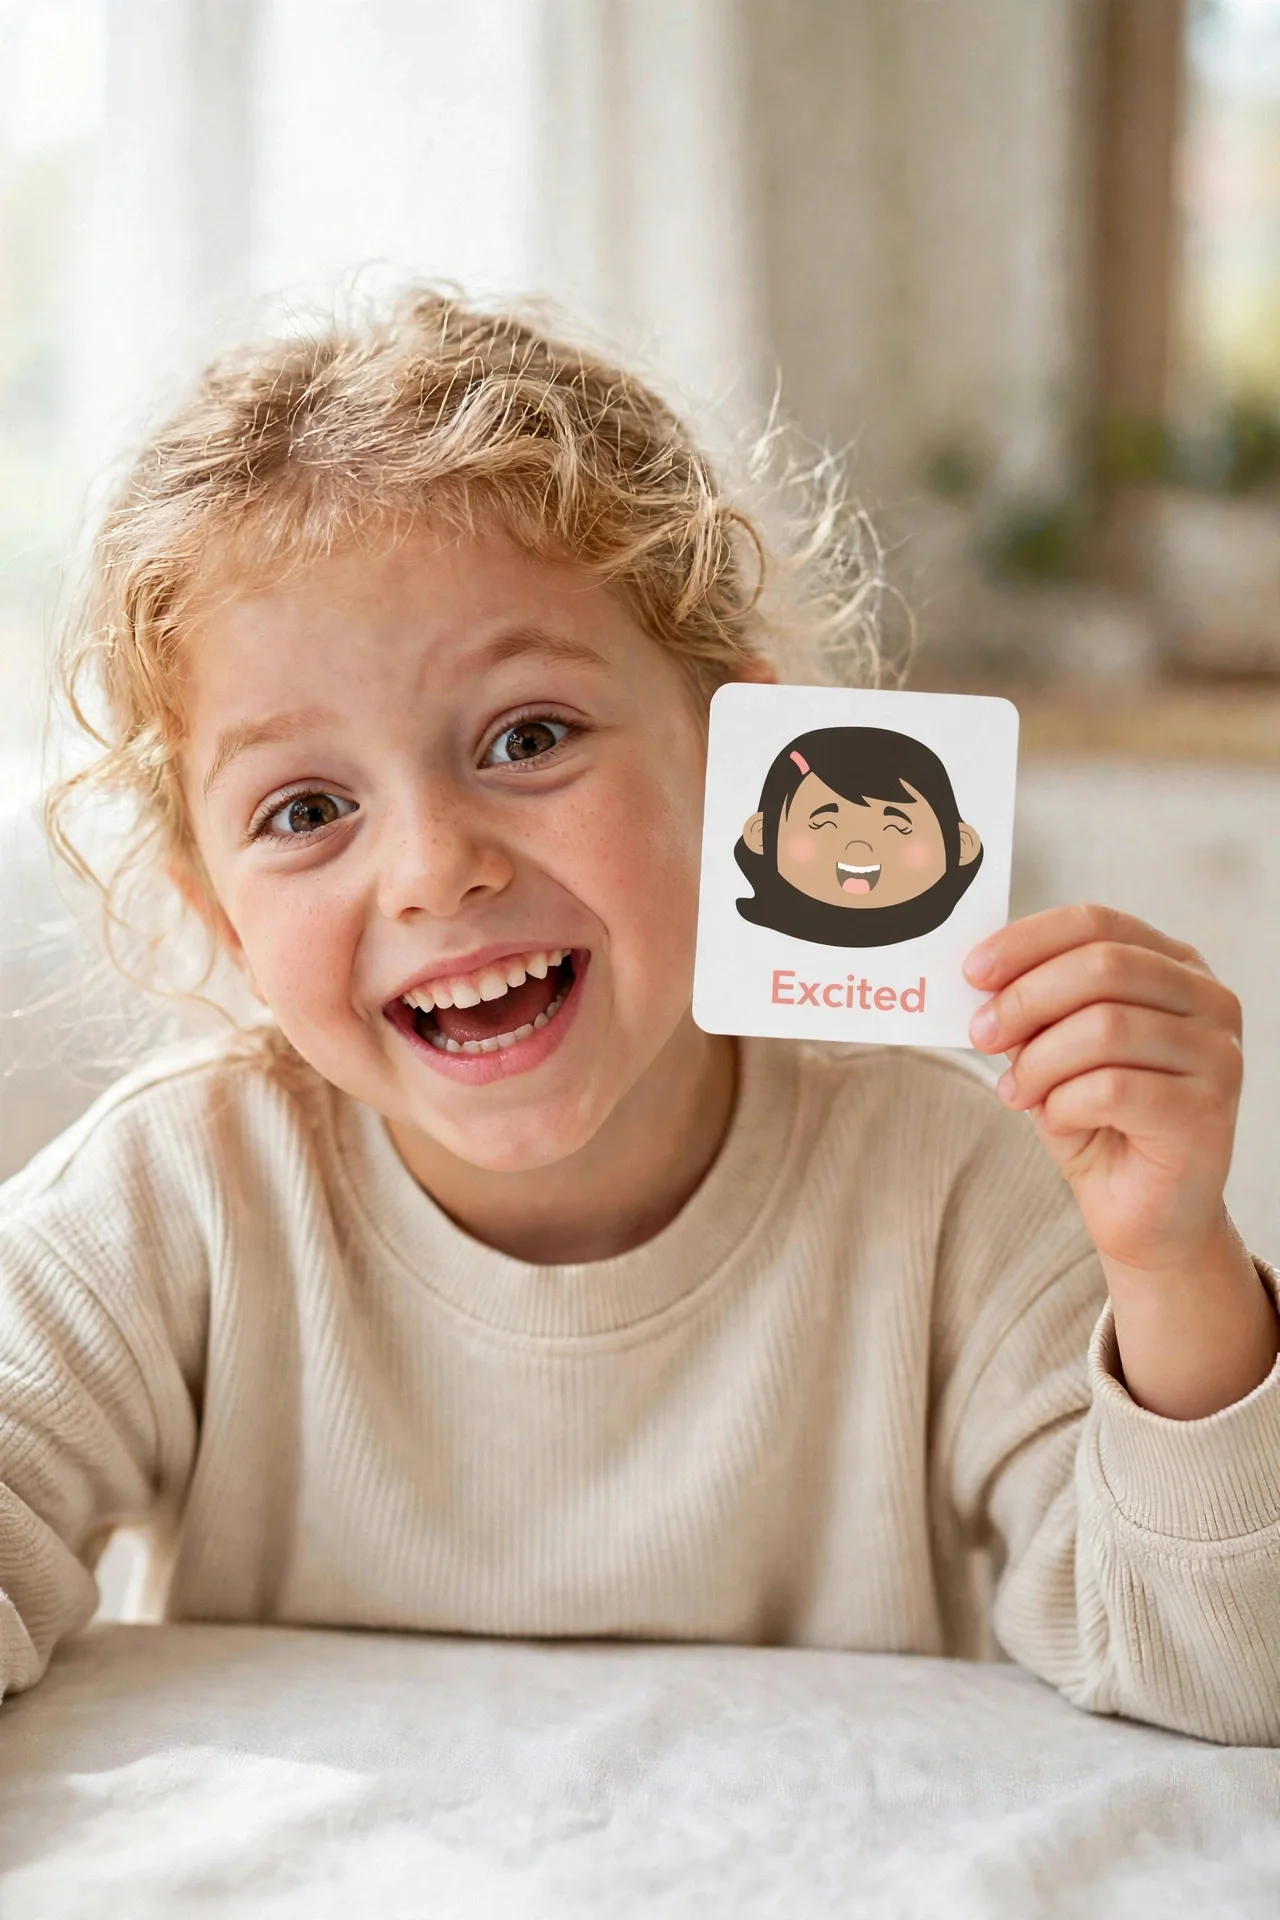
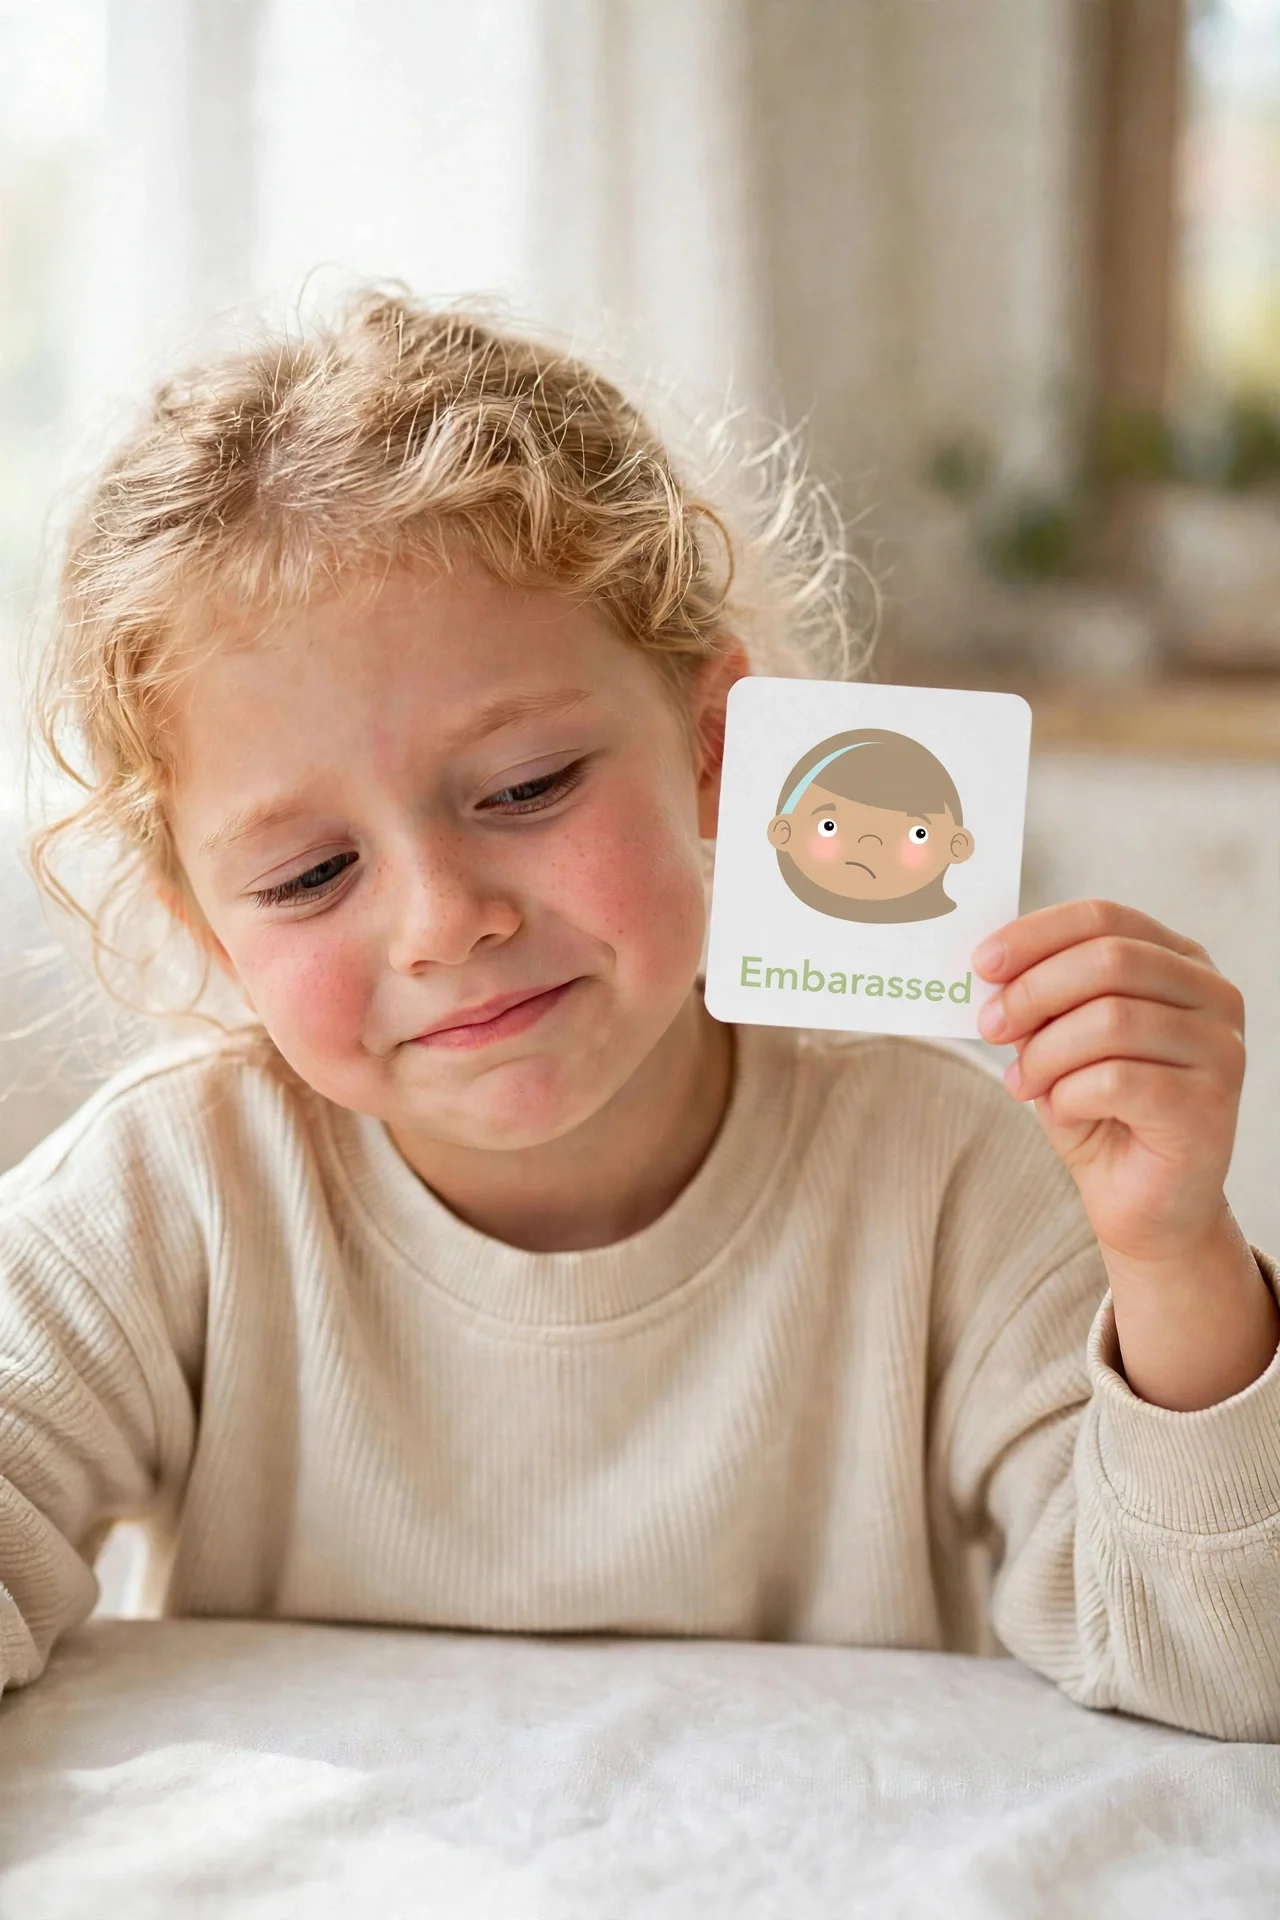
2. Backseat feelings check-in
Stuck in traffic? Fan out three or four cards and ask: "How are you feeling right now? Hold one up." No wrong answers, no fixing — just naming. It turns a restless ride into a two-minute vocabulary drill, and over time your toddler starts reaching for the words on their own.
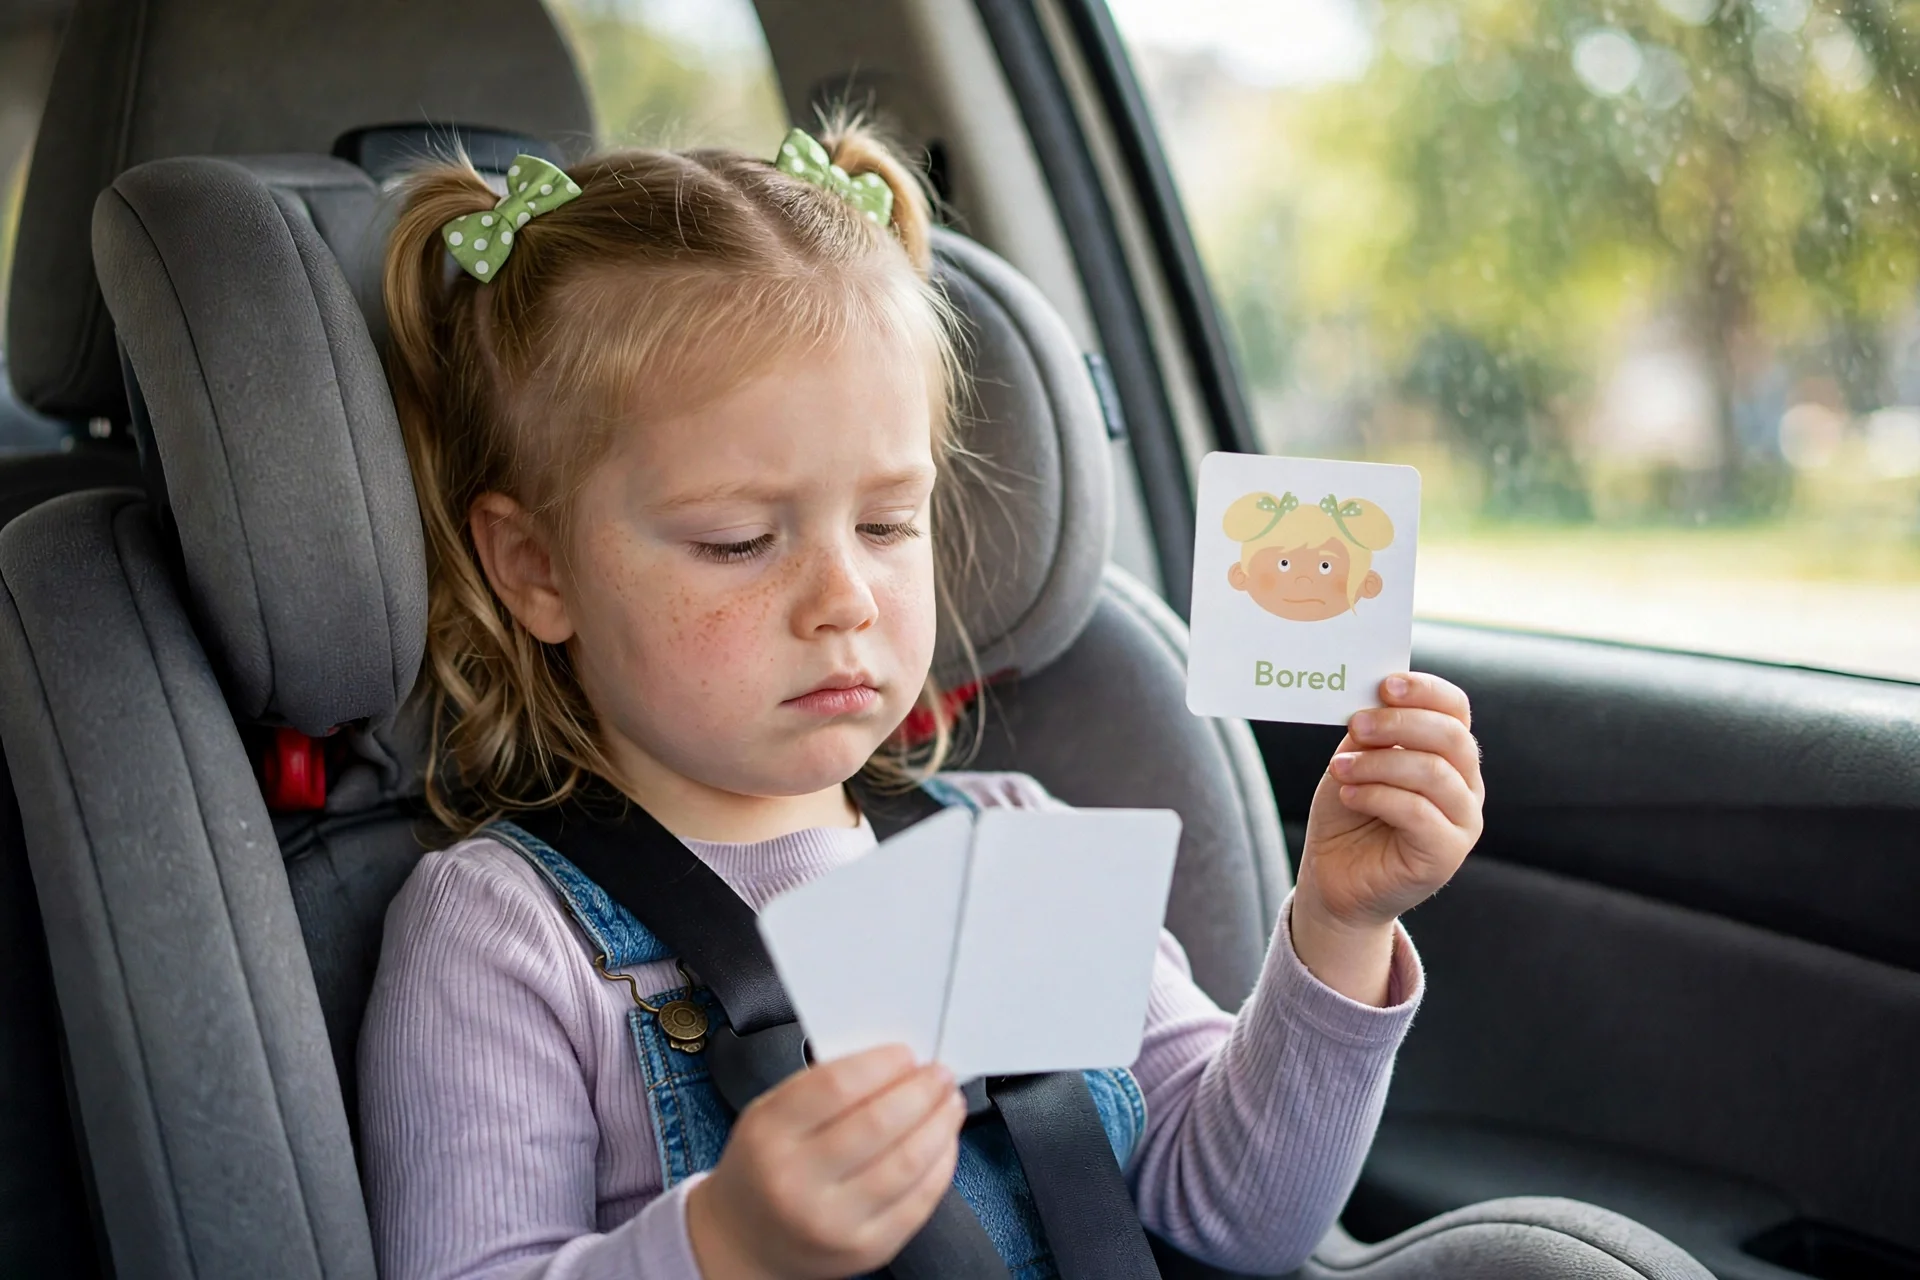
3. Grocery cart emotion hunt
Pull a card in the produce aisle: "Can you find someone who looks surprised?" Your toddler scans the store, studies faces, and connects the card to the real world. It keeps little hands and eyes busy in the cart — and it's genuinely good people-watching practice.
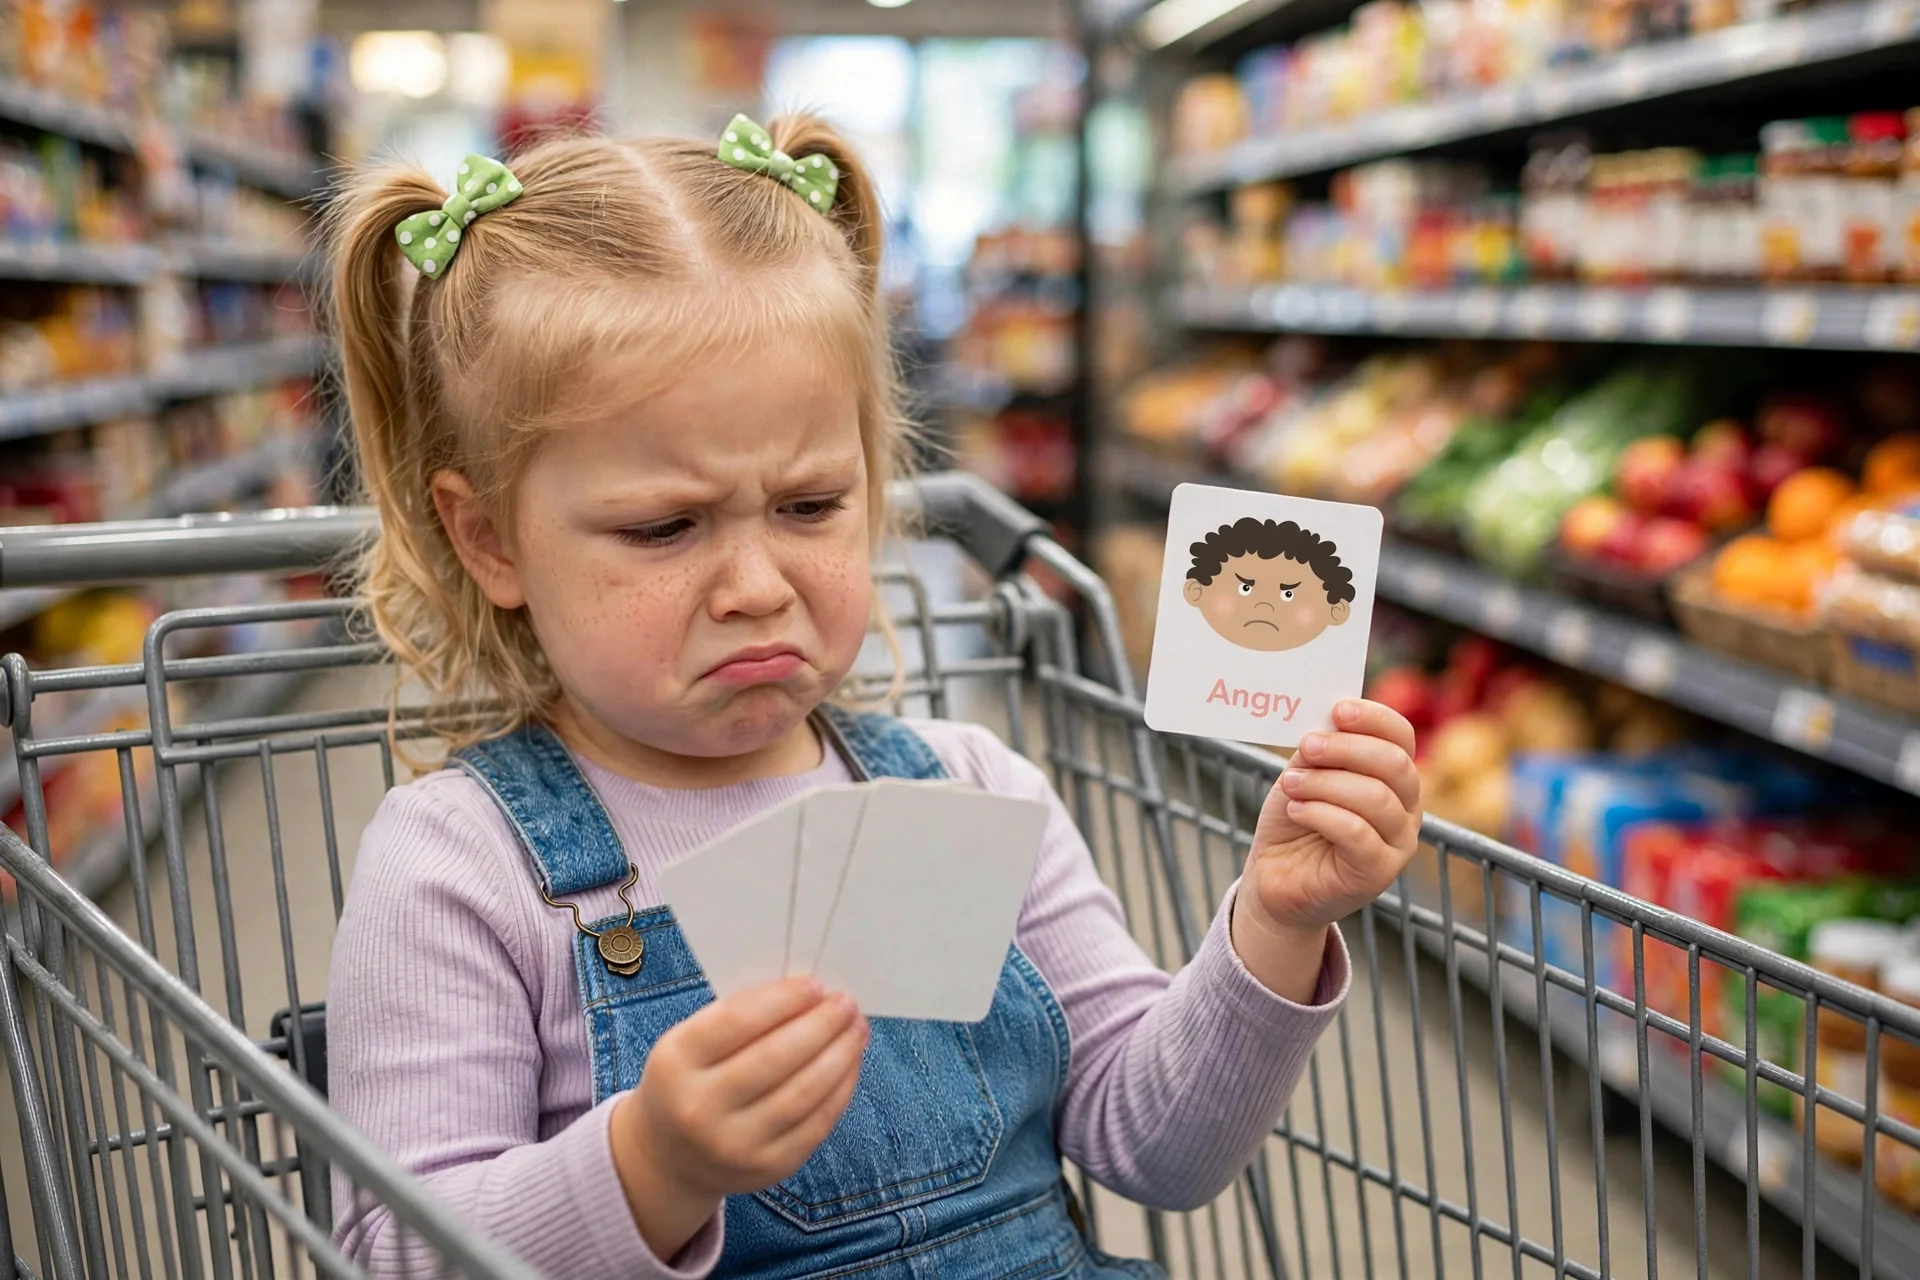
4. Restaurant wait game
The fifteen minutes before the food arrives are prime meltdown territory. Spread three small cards on the table instead: "Find the worried face." "Show me excited." It fills the wait with a game that builds vocabulary — and it's a lot quieter than a tablet at full volume.
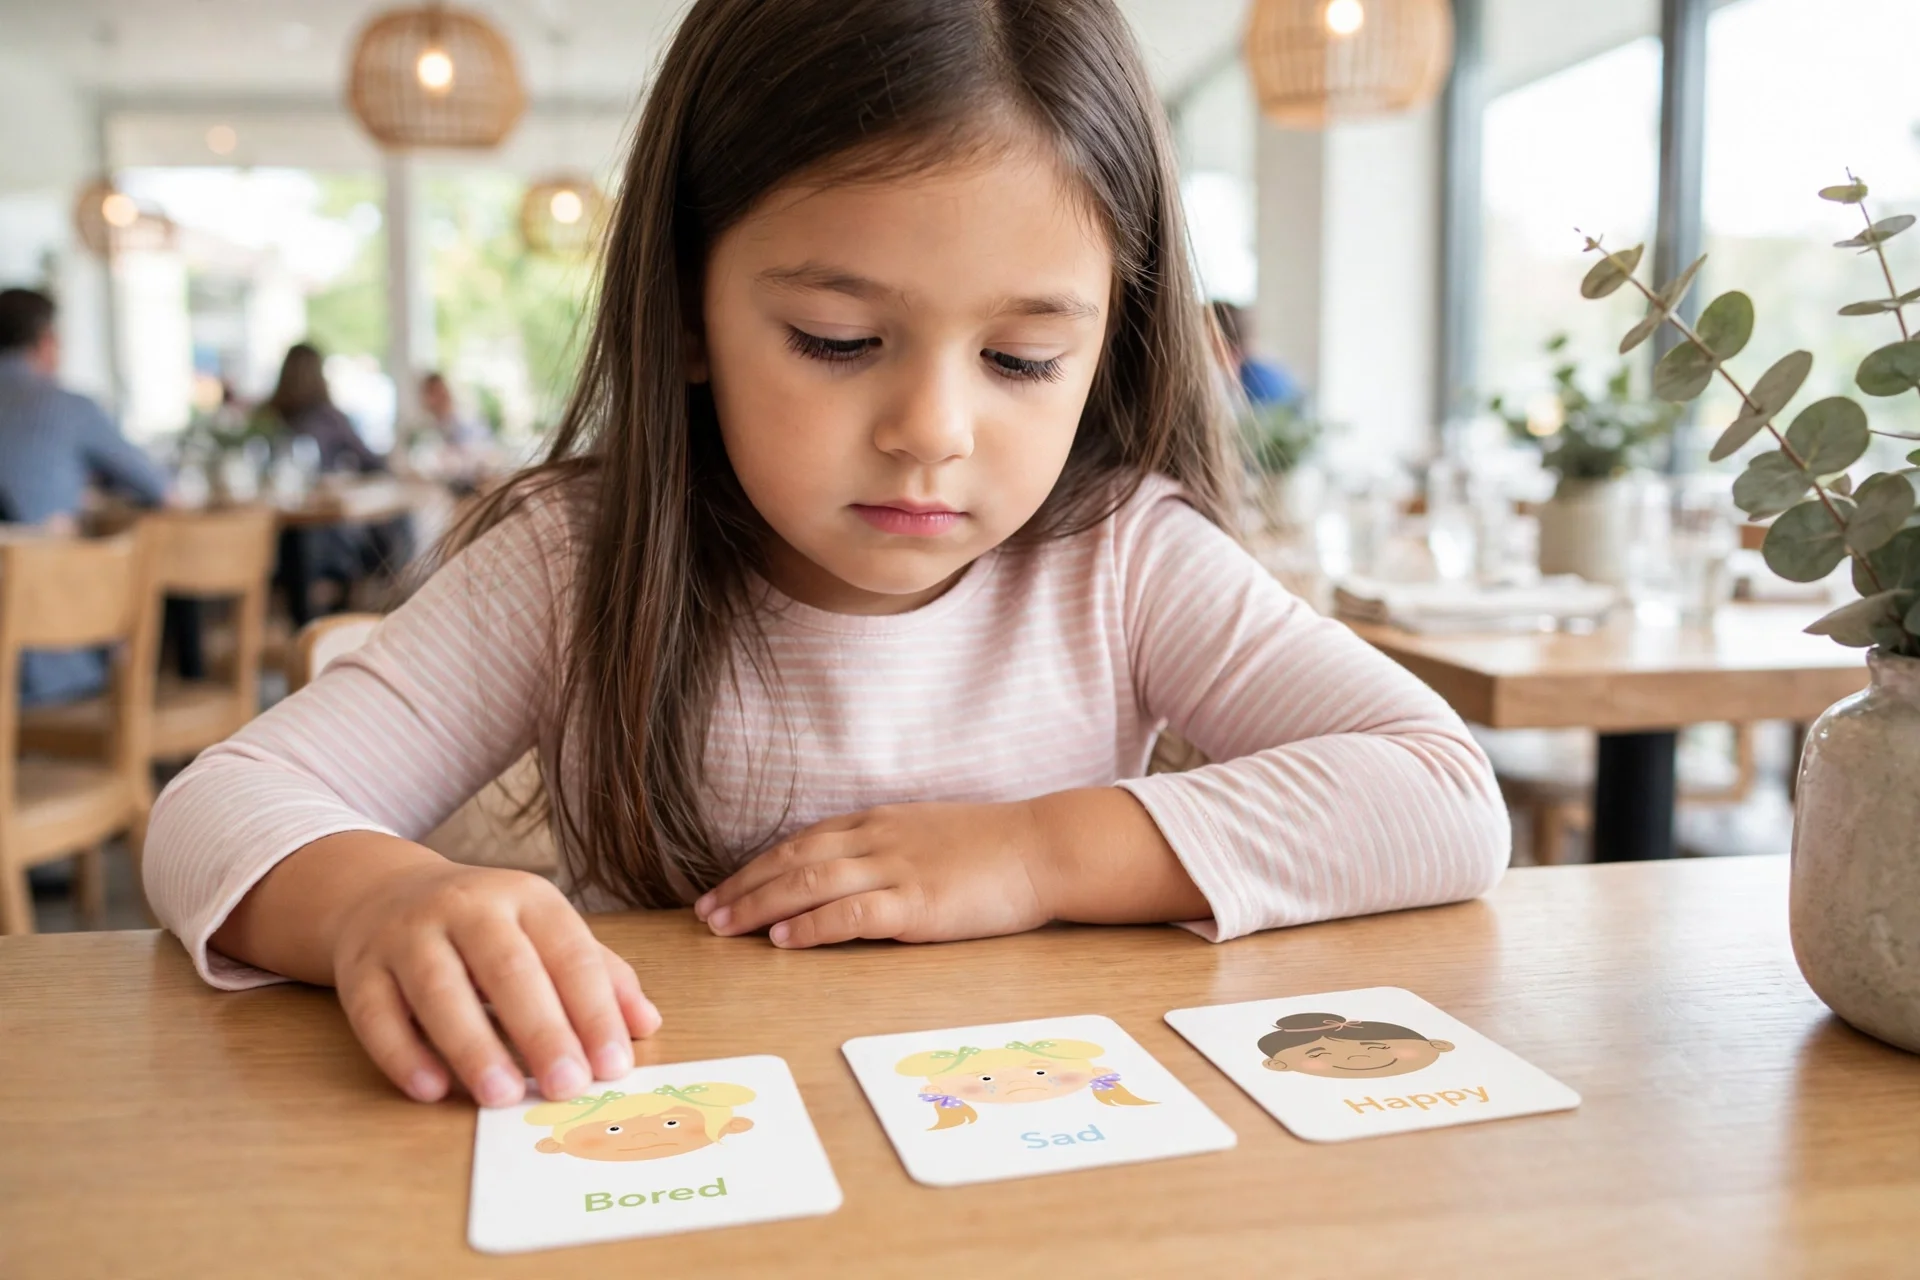
5. Match game, anywhere
Any flat surface works: lay out pairs face-down and flip two at a time. It starts as a memory game and ends as a feelings conversation — "You found two sads! When do you feel sad?" Our Emotions Flashcards were made for this, with English and Spanish emotion words on every card.
What age is this best for?
Around age 2 and up. Younger toddlers can start with just happy, sad, and angry; add the trickier ones (confused, worried, embarassed) as their vocabulary grows.
How many cards should I bring?
Three or four is plenty. Too many choices overwhelm a toddler mid-errand — depth beats breadth.
What if my toddler just wants to chew the cards?
Totally normal under two. Hand them one card as the "chew card" and play with the rest — or stick to mirror faces until the mouthing phase passes.
Do I correct wrong answers?
Gently, and rarely. Reflect what you see instead: "Hmm, your face looks a little droopy — could that be sad?" Modeling beats correcting.
The deck that goes everywhere
These games run on good visuals. Our Emotions Flashcards ($15) give toddlers the faces and words — English and Spanish labels, sized for little hands and diaper bags. For the at-home version of this work, see our emotions activities guide and our calming corner setup.
DIY Paper Fan Craft for Kids: Cherry Blossom Hand Fan
DIY Paper Fan Craft for Kids: Cherry Blossom Hand Fan
One sheet of paper, a handful of popsicle sticks, and a little pink paint — this cherry blossom paper fan is the sweetest spring craft, and it actually fans.
Best forAges 3+
TimeAn afternoon project
CostBudget-friendly
SkillsFine motor + creativity
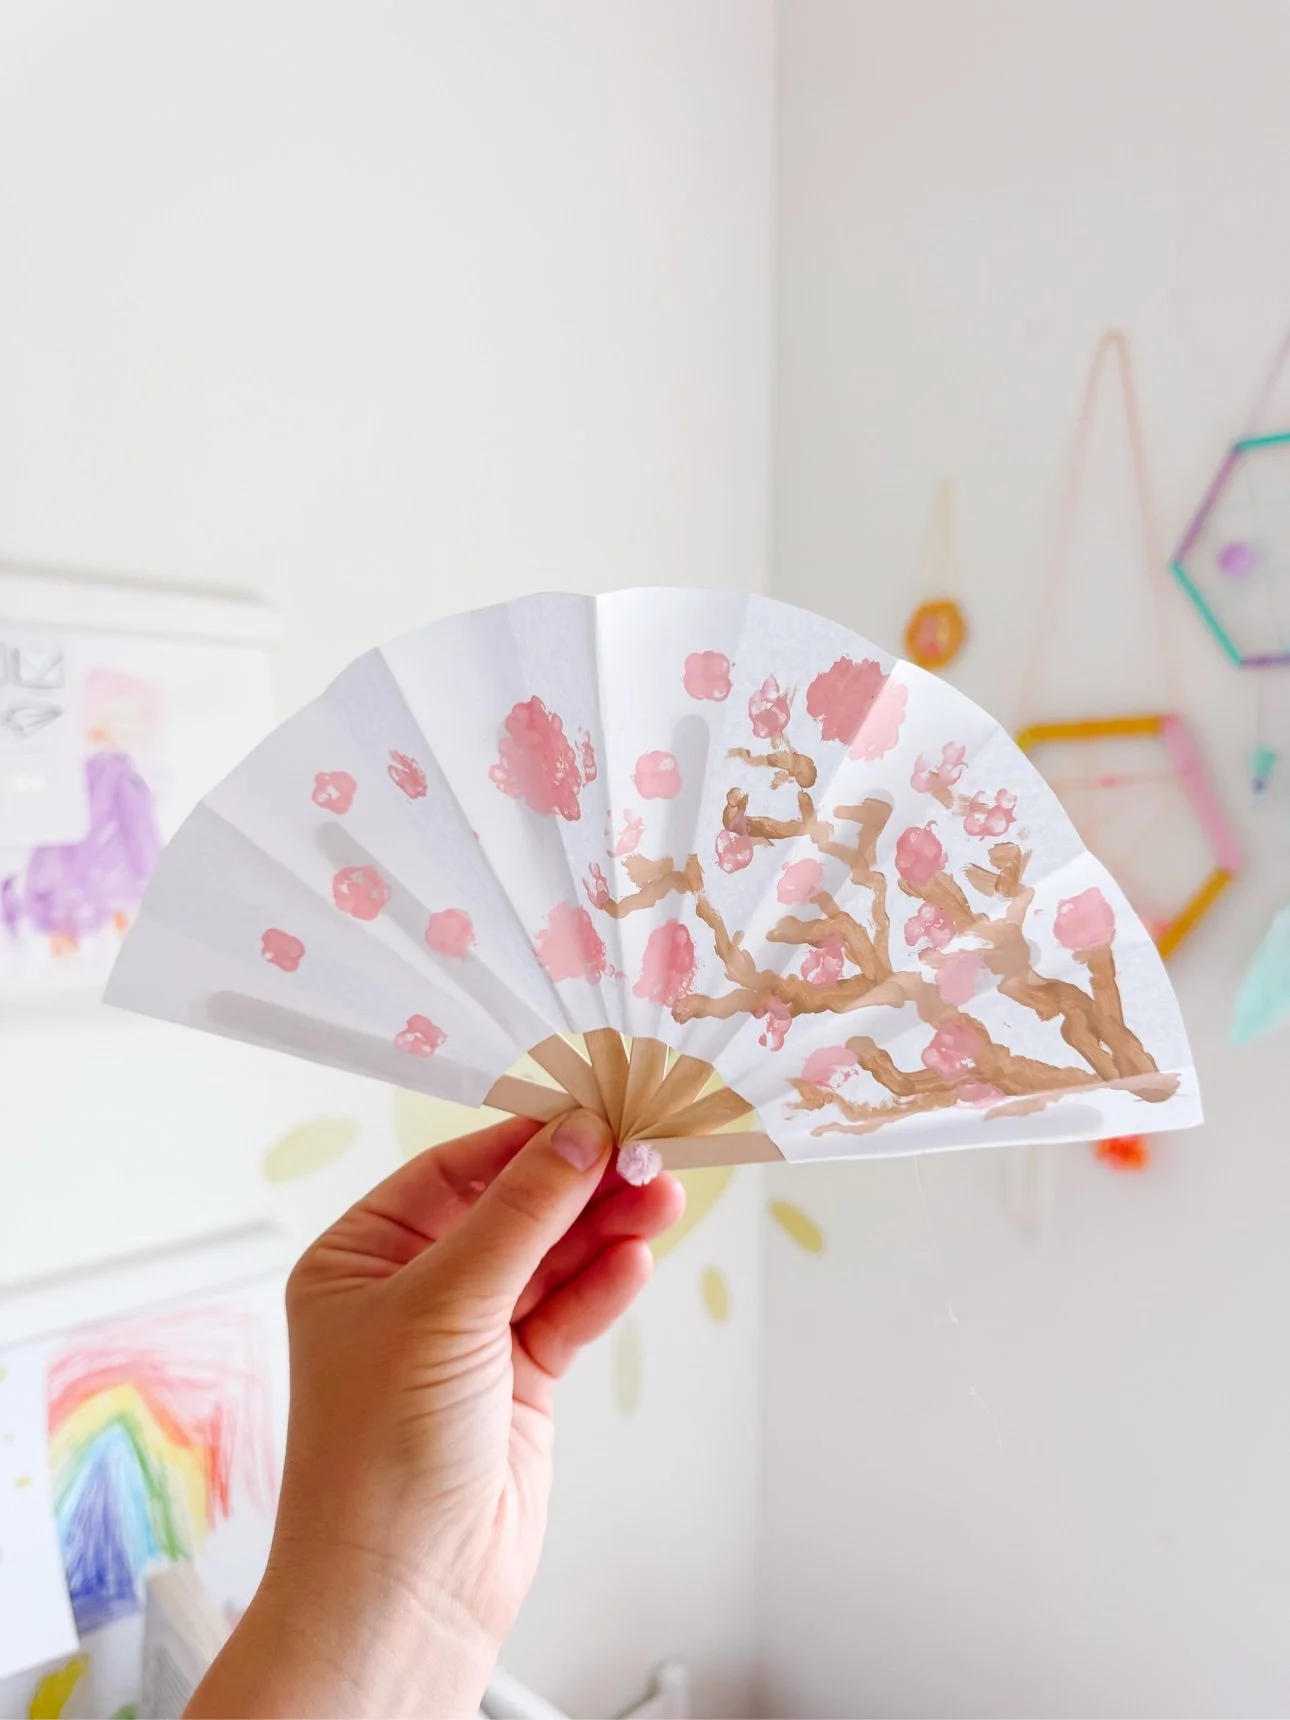
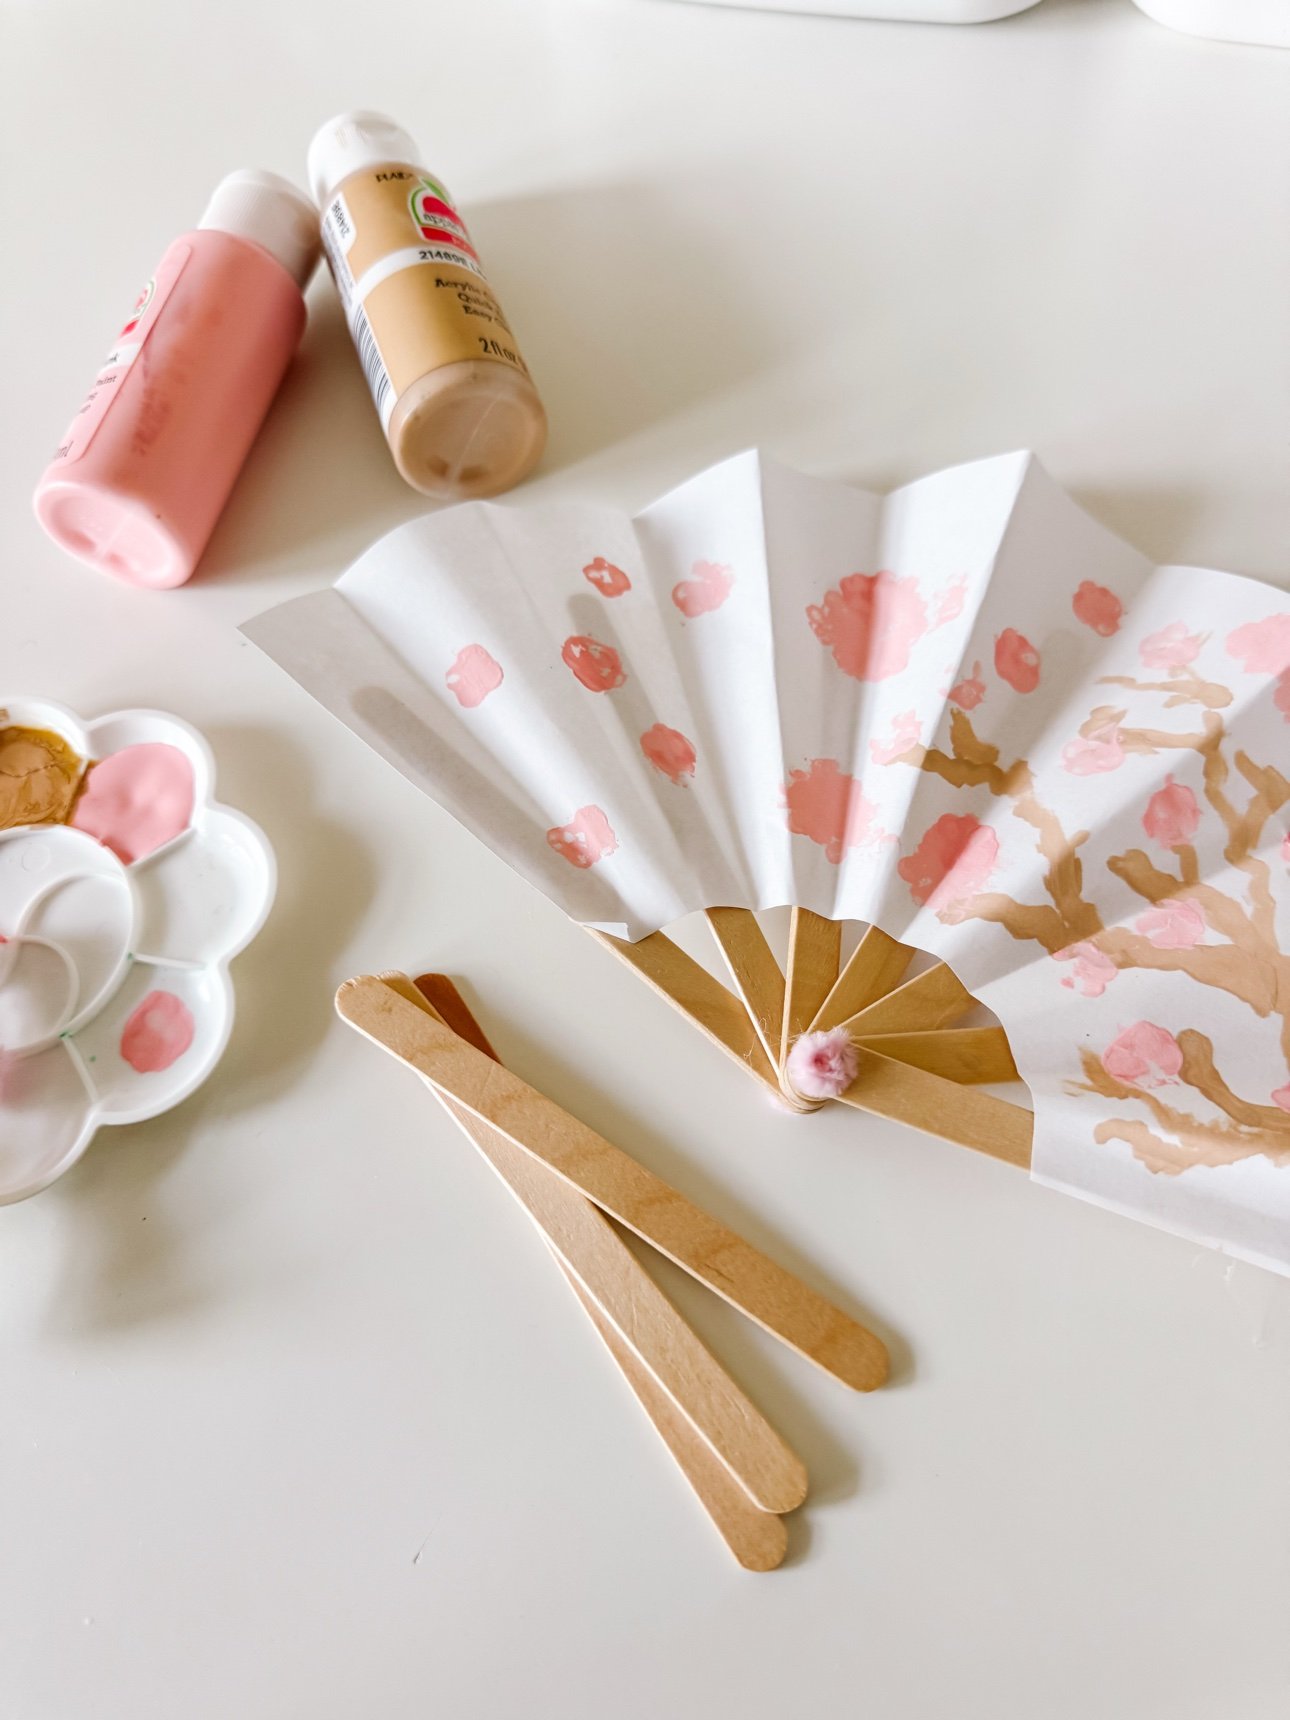
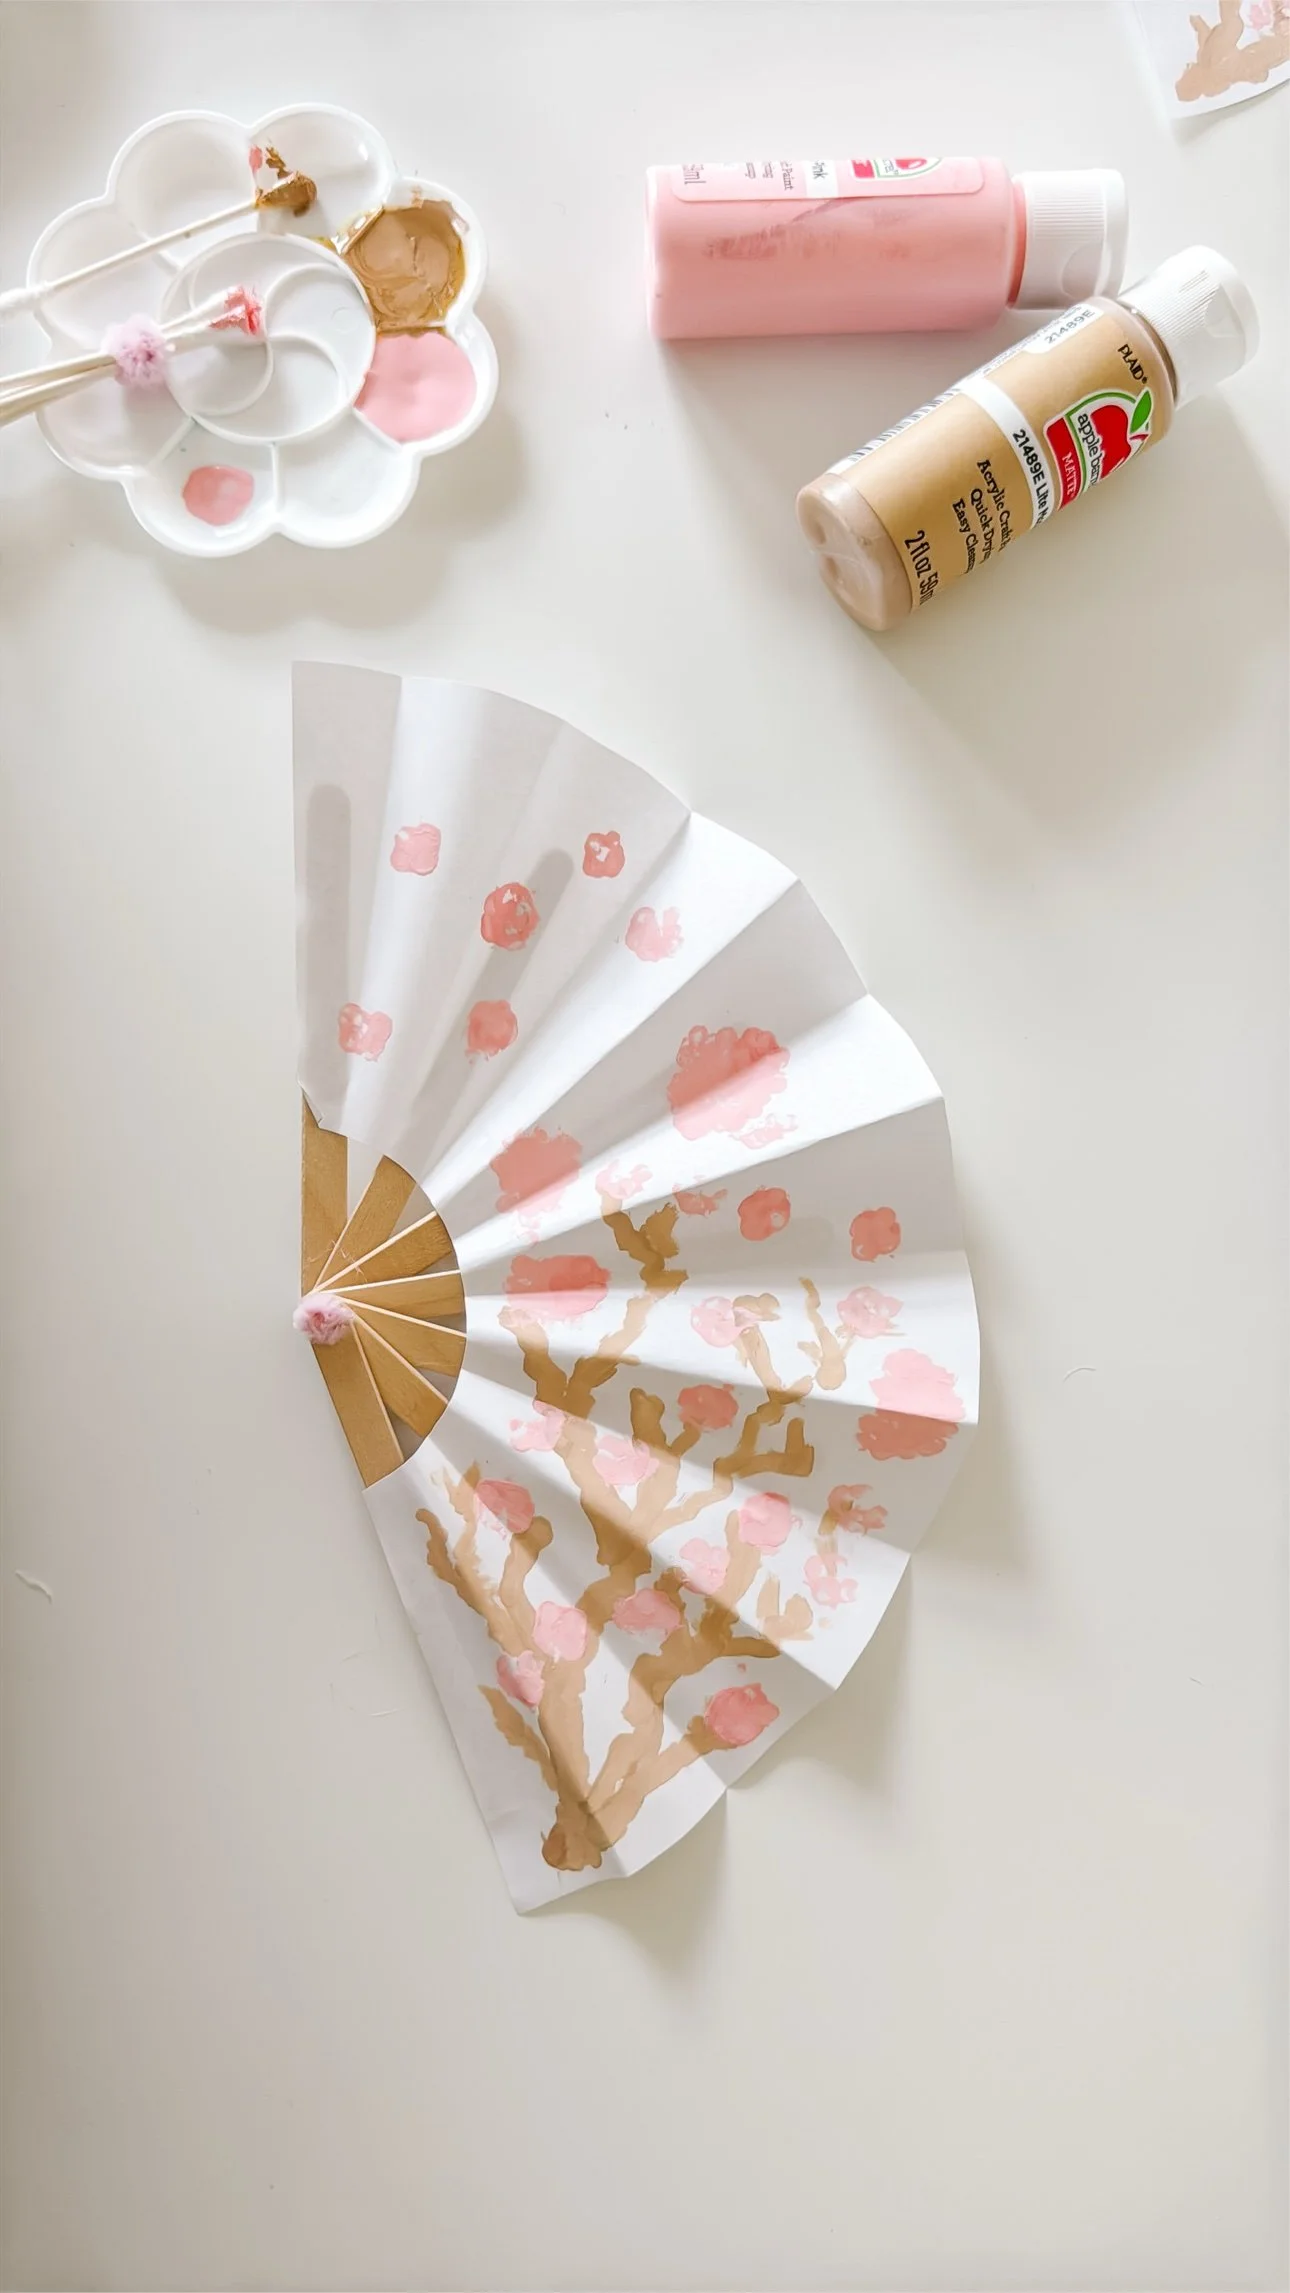
There is something about a paper fan that never gets old — the fold, the flick, the very serious fanning of absolutely nothing. We made this cherry blossom version with accordion-folded paper and popsicle sticks, then painted the blossoms on with pink and brown acrylic. It opens, it closes, and it looks like spring.
What you need
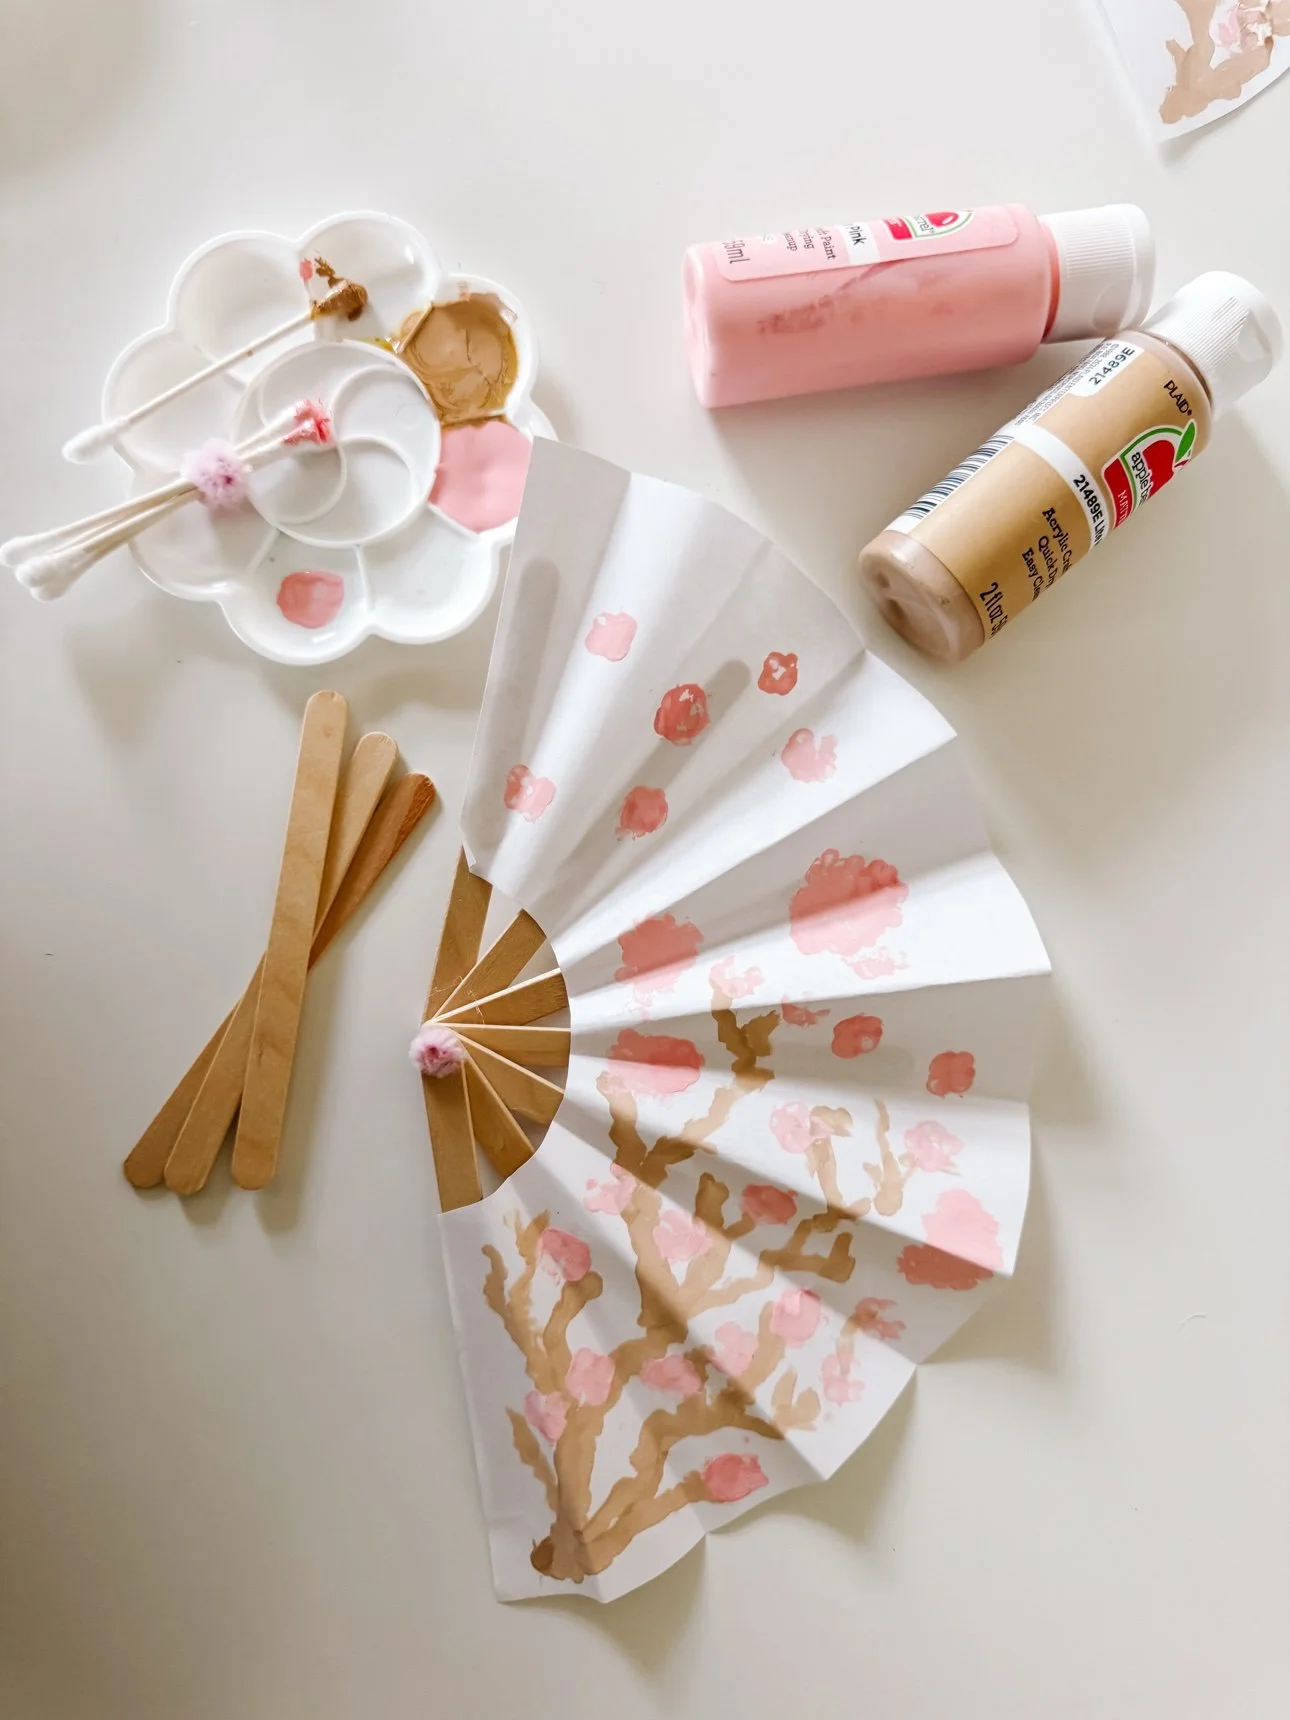
- White paper or light cardstock — one sheet per fan
- Popsicle sticks — 7–8 per fan
- Pink and tan acrylic paint — we used Apple Barrel
- Cotton swabs + string — bundled into a blossom stamper
- Glue gun and glue sticks, scissors, pencil and string for tracing the arc
How to make the paper fan
Step 1: Cut the fan shape
Tie a pencil to a length of string, pin the string end down, and swing a big arc across the paper — then cut it out. Trace a small curve at the narrow end (a tape roll works as a template) and snip that out too. This gives you the classic fan wedge.
Step 2: Paint the cherry blossoms
Paint a brown branch sweeping across the paper, then stamp on the blossoms in pink. The trick: bundle a few cotton swabs together with string to make a blossom stamper — it prints perfect little flower clusters, and it is a great job for small hands. Let the paint dry.
Step 3: Glue on the sticks
Flip the painted paper over and fan 7–8 popsicle sticks across the back, spreading them from the narrow point like sun rays. Hot-glue each one in place — adults handle the glue gun.
Step 4: Fold and finish
Accordion-fold the paper back and forth around the sticks, creasing firmly between each one, then glue the pinched base together. Open, close, fan — repeat all afternoon.
Tips for making it with kids
- Let kids do the stamping. The bundled cotton-swab stamper makes blossom clusters easy — no brush control needed.
- Adults handle the folds and glue. Crisp accordion folds and the hot glue gun are grown-up jobs; little ones paint.
- Paint before folding. It is much easier to paint the flat sheet first, then fold — just let it dry completely.
- Make a set. One fan comes together quickly once the shape is cut; they make sweet gifts tucked into cards.
What kind of paper works best?
Regular white printer paper works, but light cardstock holds its folds better and stands up to paint without wrinkling.
How do you keep the fan open?
The glued popsicle sticks hold the fan's shape — open it to the width you like and the sticks keep it there.
What age is this craft best for?
Ages 3 and up. Little ones paint the blossoms while an adult folds; older kids can do the whole thing themselves.
Arctic Animal Snow Globe Ornaments: Winter Photo Craft for Kids
Arctic Animal Snow Globe Ornaments: Winter Photo Craft for Kids
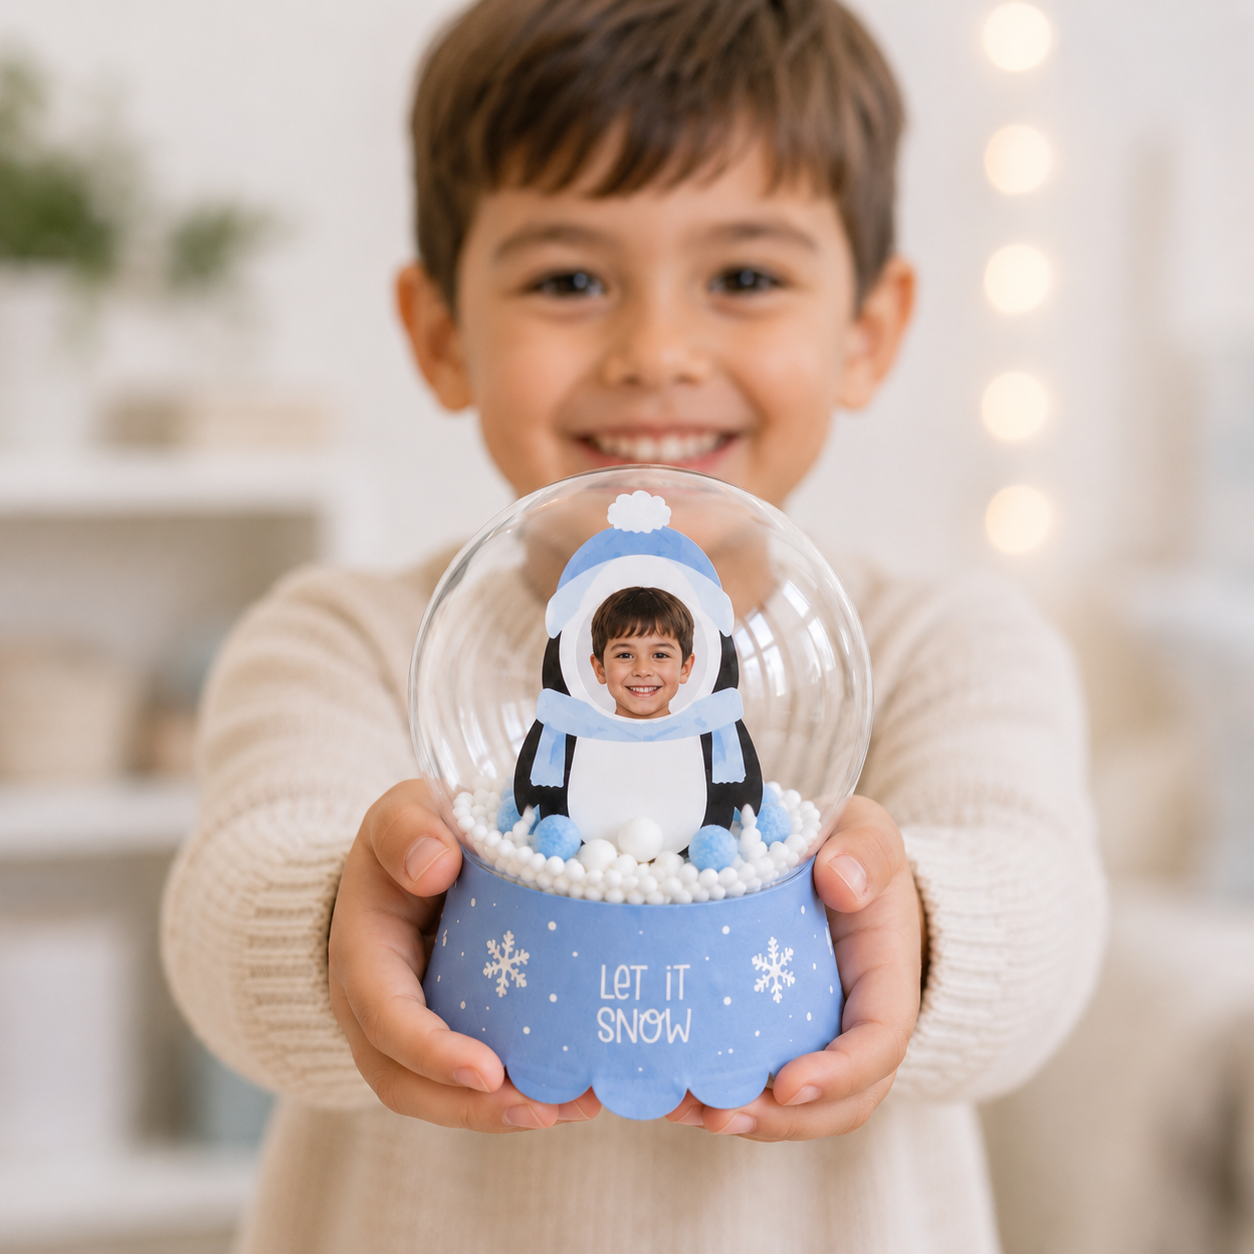
Not every winter craft has to be red and green — these arctic animal snow globe ornaments are the cool-blue alternative we reach for all winter long. A penguin in a bobble hat, a polar bear in earmuffs, and a fluffy arctic fox, each holding a child's photo inside a clear snow-filled ornament. They work for Christmas, for January winter units, and for anyone whose classroom palette runs more "let it snow" than "merry and bright."
This is the arctic animals design from our photo snow globe ornament collection — it also comes in pink gingerbread and reindeer & Santa. Same easy method for all three.
What You'll Need
- Printable arctic animals snow globe kit (also on Etsy) — 12 arctic animal photo cutouts plus "Let It Snow" collar wraps
- Clear plastic fillable ornaments, 3–4 inch
- Faux snow, white foam beads, or mini pom-poms in white and icy blue
- Small printed photos of each child (about 2x2 inches)
- Ribbon — icy blue or silver
- Scissors and clear tape
Step 1: Print the Kit
Print the arctic animals PDF — page 1 has 12 photo cutouts (penguin, polar bear, and arctic fox), pages 2–3 have the blue "Let It Snow" collar wraps with snowflakes. Cardstock recommended; these get handled a lot.
Step 2: Cut Out the Animals
Cut along the outlines. Kids inevitably have strong opinions about which animal they get — consider letting them choose, or assign one animal per table for a coordinated set.
Step 3: Add Each Child's Photo
Trim each photo to the round cutout and tape it behind the animal. The penguin's bobble hat and the bear's earmuffs frame faces so cutely — winter-craft gold.
Step 4: Fill the Ornament with "Snow"
Spoon in faux snow or foam beads, about a third full. White mixed with icy-blue pom-poms gives the loveliest winter-sky effect inside the globe.
Step 5: Tuck the Animal Inside
Stand the animal in the snow and snap the ornament closed. Tape the back if it leans.
Step 6: Wrap the Collar and Tie the Ribbon
Curl a "Let It Snow" collar around the base, tie an icy-blue ribbon bow, and you're done. These look beautiful grouped on a windowsill where the light catches the "snow."
Why Teachers Love This One
- It stretches past Christmas. Use it for December gifts AND January polar-animals units — two crafts in one kit.
- Non-denominational. Snowflakes and penguins work for every classroom in December.
- Pairs with books. Read a penguin or polar bear story first, then craft — instant lesson plan.
- Blue palette photographs beautifully for classroom newsletters and Instagram.
- Fine motor practice: cutting, taping, and spooning the snow all build little-hand strength.
Get the Printable Kit
The arctic animals snow globe kit is $5 and includes all 12 photo cutouts plus the collar wraps. Get it in the Goodnight Fox shop or on Etsy. See the full snow globe collection here.
Made them with your class? Tag @goodnightfox — show us your penguin parade! 💛
Shop the Materials
Some links are affiliate links. We only share things we actually use.
- Clear plastic fillable ornaments — View on Amazon
- White pom-poms (faux snow filler) — View on Amazon
- Foam beads — View on Amazon
- Snowflake sprinkles — View on Amazon
- Ribbon for wrapping — View on Amazon
Reindeer & Santa Snow Globe Ornaments: Photo Christmas Craft for Kids
Reindeer & Santa Snow Globe Ornaments: Photo Christmas Craft for Kids
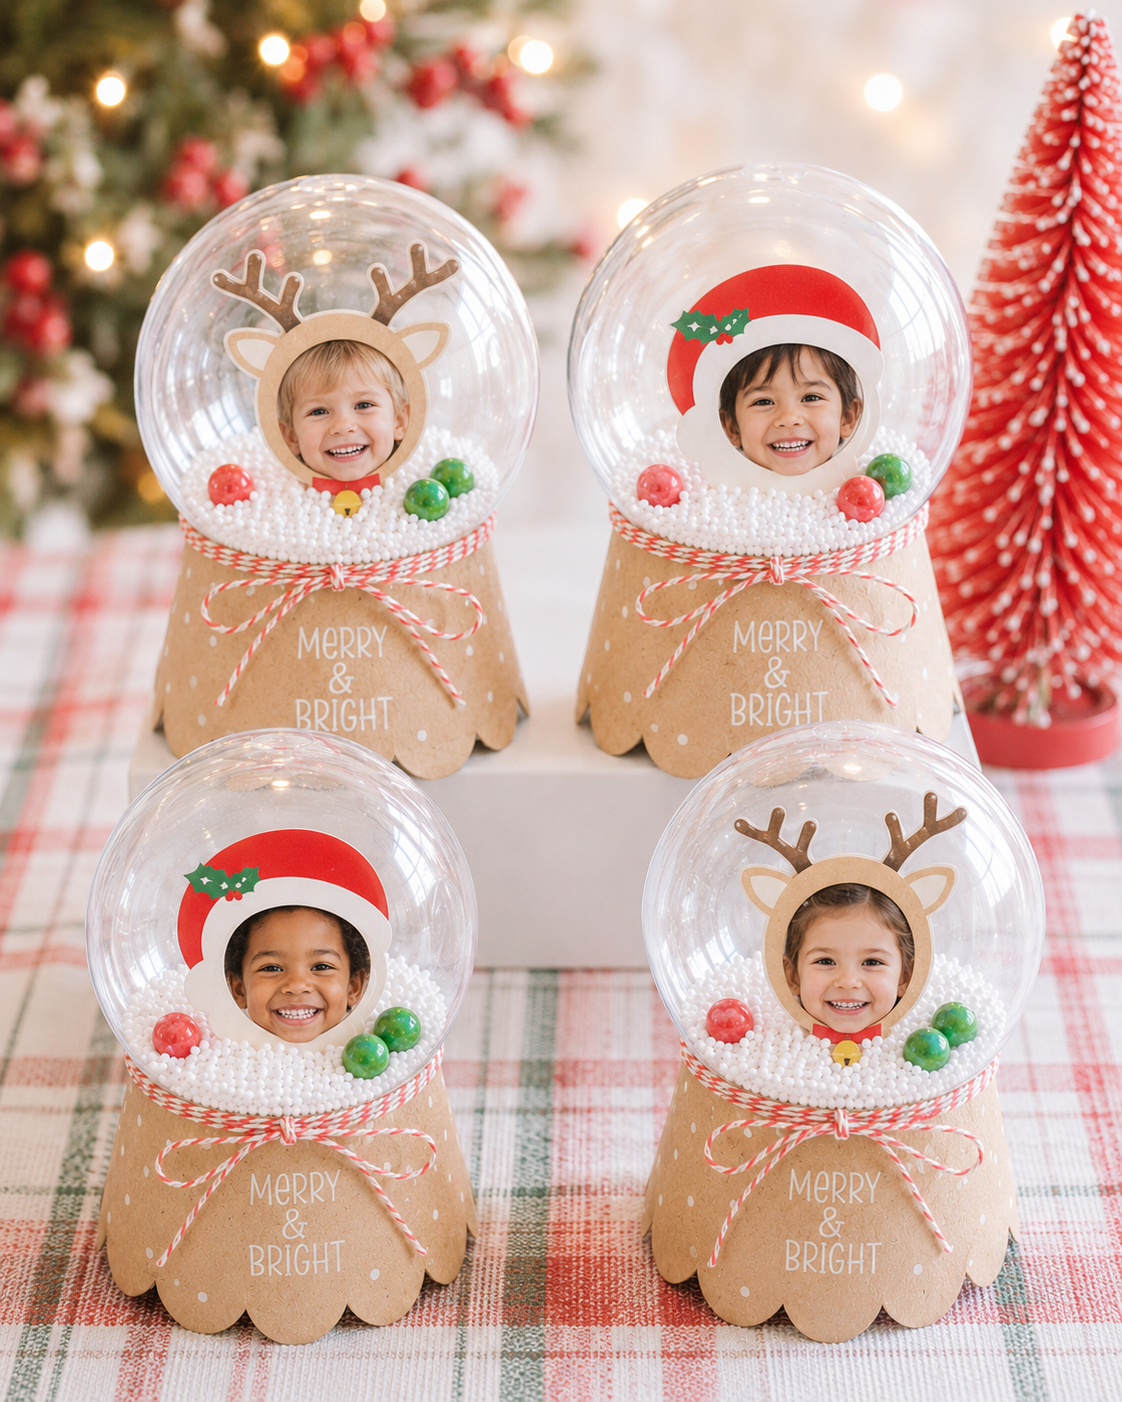
If you're looking for the classic Christmas classroom craft, this is it — reindeer and Santa photo snow globe ornaments. Each child's face peeks through a reindeer with jingle-bell antlers or a jolly Santa hat, all tucked into a clear ornament with faux snow. They look like something from a boutique gift shop, but each one costs very little and takes just minutes to assemble.
This is the reindeer & Santa design from our photo snow globe ornament collection — it also comes in pink gingerbread and arctic animals. Same simple method for all three.
What You'll Need
- Printable reindeer & Santa snow globe kit (also on Etsy) — 12 reindeer + Santa photo cutouts plus "Merry & Bright" collar wraps
- Clear plastic fillable ornaments, 3–4 inch
- Faux snow, white foam beads, or mini pom-poms (red and green poms are extra festive here)
- Small printed photos of each child (about 2x2 inches)
- Ribbon for the bow — red and white baker's twine is perfect
- Scissors and clear tape
Step 1: Print the Kit
Print the reindeer & Santa PDF — page 1 has 12 photo cutouts (reindeer with antlers and bells, plus Santa hats with holly), pages 2–3 have the kraft "Merry & Bright" collar wraps. Cardstock gives the sturdiest characters.
Step 2: Cut Out the Characters
Cut along the outlines. Let kids pick: reindeer or Santa? (In our experience it's about fifty-fifty, and the great debate is half the fun.) Older kids can cut their own; pre-cut for preschoolers.
Step 3: Add Each Child's Photo
Trim each photo to fit the round face cutout and tape it behind the character. The reindeer antlers frame little faces so sweetly — this is the step that gets the "awws" from other teachers.
Step 4: Fill the Ornament with "Snow"
Spoon faux snow or foam beads into the open ornament, about a third full. A few red and green pom-poms mixed into the white snow look incredibly festive against the kraft collar.
Step 5: Tuck the Character Inside
Stand the reindeer or Santa in the snow and snap the ornament closed. A small piece of tape on the back keeps wobbly characters upright.
Step 6: Wrap the Collar and Tie the Ribbon
Curl a "Merry & Bright" collar around the base to hide the seam, then tie your ribbon in a bow over it. These are gift-ready — no wrapping paper needed.
Tips for the Cutest Results
- Mix the characters. A mantel with alternating reindeer and Santas looks professionally styled.
- Red + green poms in the snow are the secret to the classic Christmas look.
- Baker's twine in red and white ties the whole kraft-and-red palette together.
- Classroom timing: this is a perfect December craft — it doubles as the parent gift, so it checks two boxes at once.
- Photo tip: slightly overexposed, smiley photos read best through the small cutout.
Get the Printable Kit
The reindeer & Santa snow globe kit is $5 and includes all 12 photo cutouts plus the collar wraps. Get it in the Goodnight Fox shop or on Etsy. Browse the full snow globe collection here.
Made them with your class? Tag @goodnightfox — we want to see your reindeer herd! 💛
Shop the Materials
Some links are affiliate links. We only share things we actually use.
- Clear plastic fillable ornaments — View on Amazon
- White pom-poms (faux snow filler) — View on Amazon
- Foam beads — View on Amazon
- Snowflake sprinkles — View on Amazon
- Ribbon for wrapping — View on Amazon
Gingerbread Snow Globe Ornaments for Kids (Easy Photo Christmas Craft)
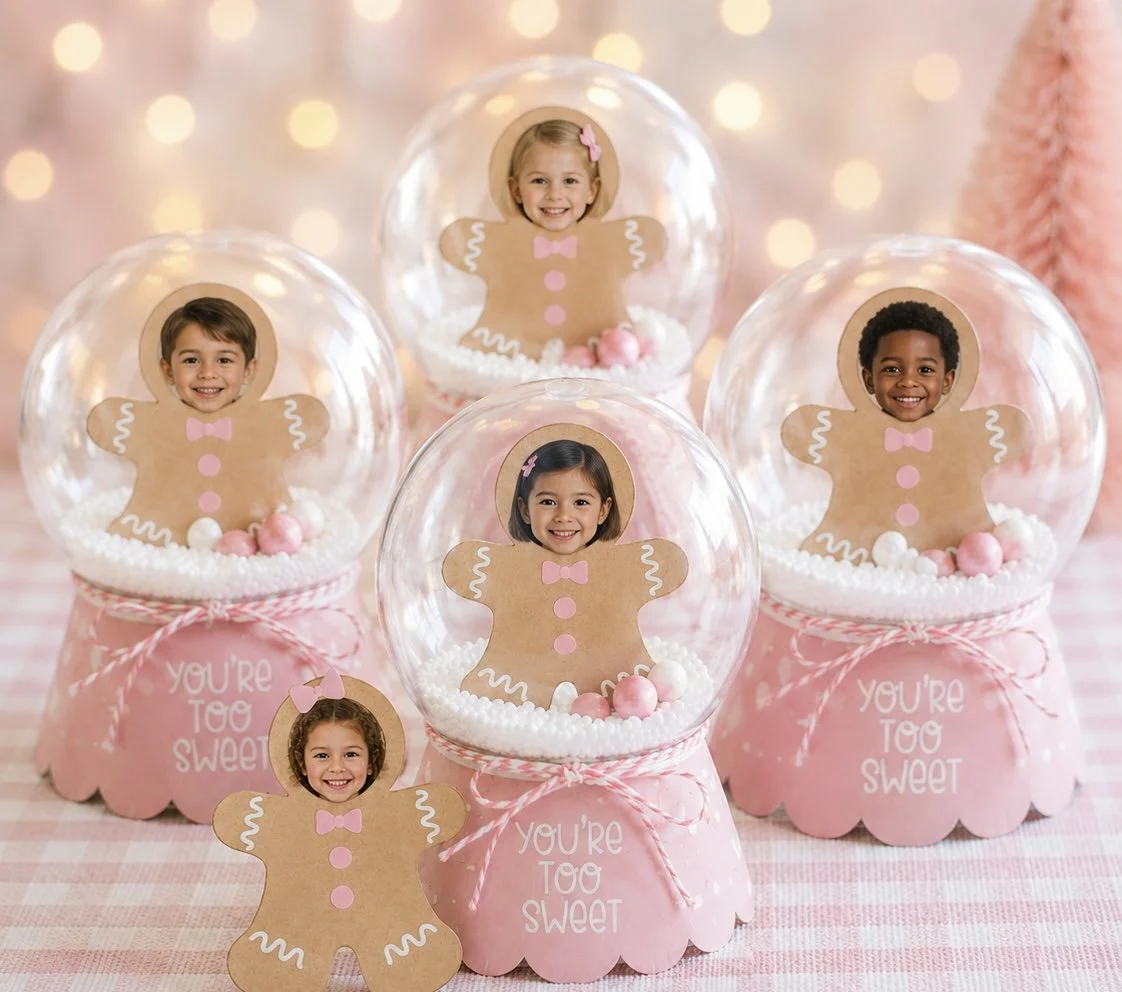
Gingerbread Snow Globe Ornaments for Kids (Easy Photo Christmas Craft)
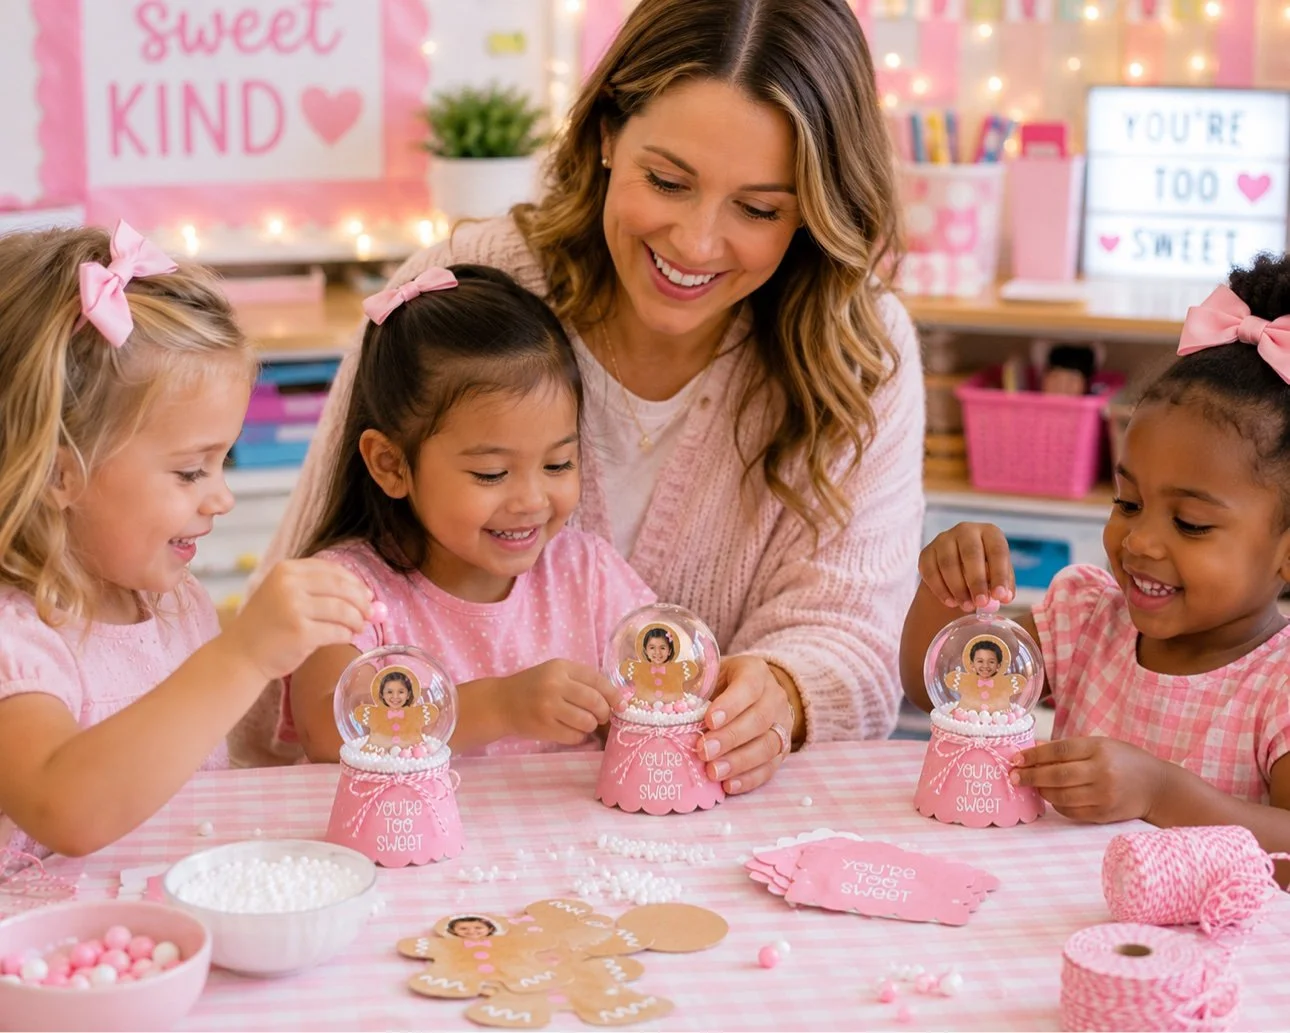
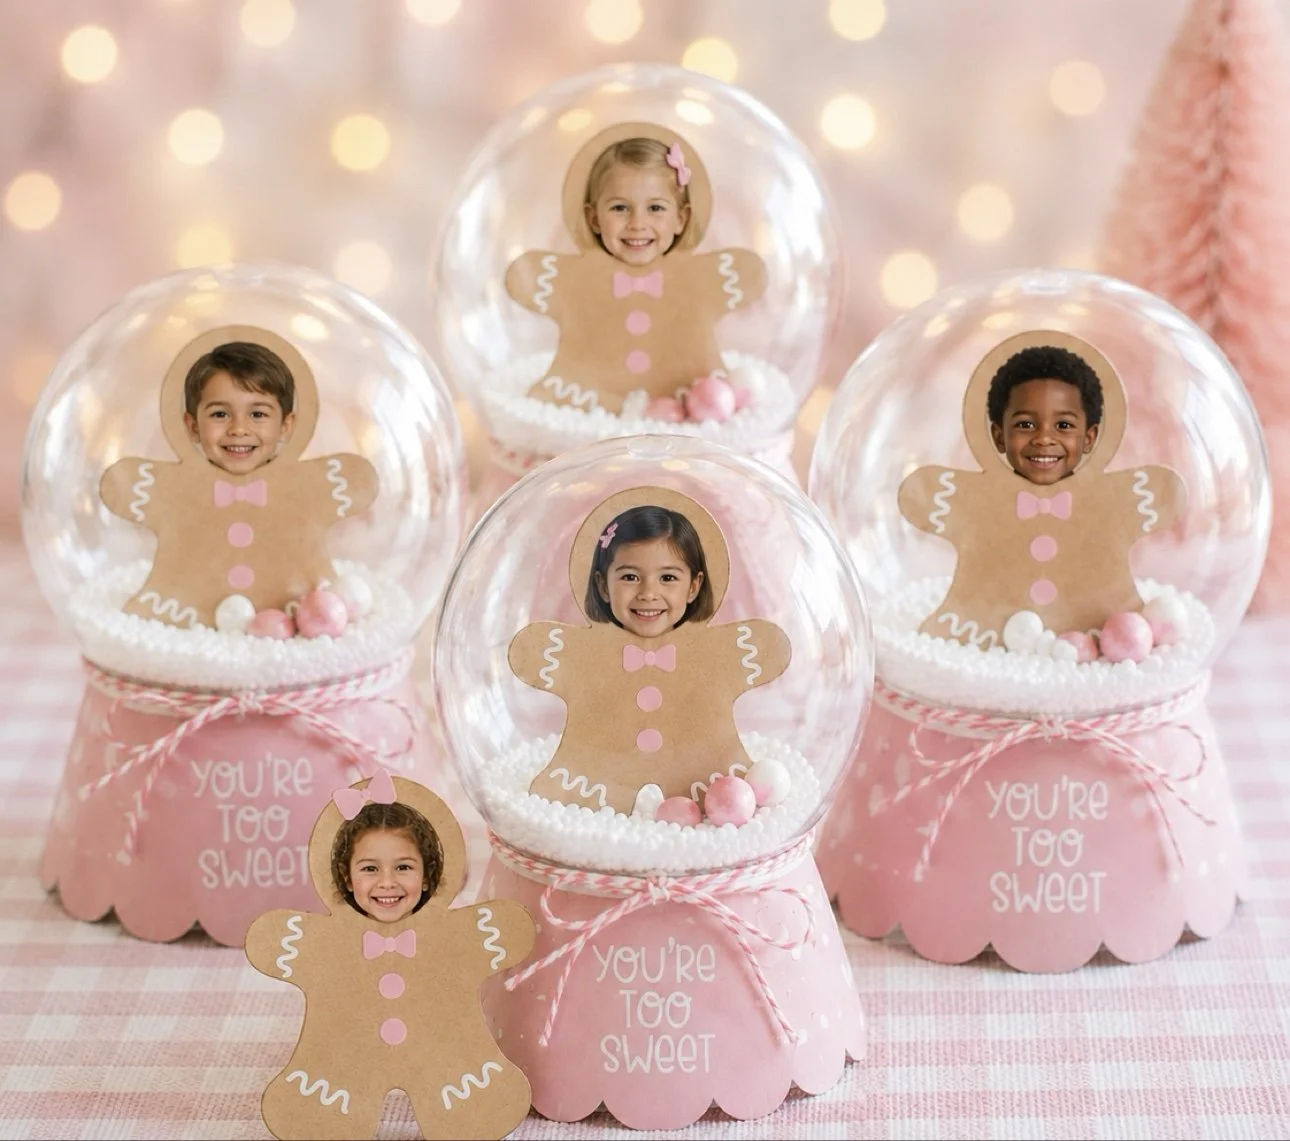
These gingerbread snow globe ornaments might be the sweetest Christmas craft we've ever made — each one holds a child's photo inside a pink gingerbread character, tucked into a clear ornament with faux snow. They take minutes per ornament, they cost very little, and parents absolutely melt over them. When my daughter was little, the photo crafts were always the ones that survived the annual clean-out.
This is the gingerbread design from our photo snow globe ornament collection — it also comes in reindeer & Santa and arctic animals. All three work the same way, so once you've made one batch, you can make them all.
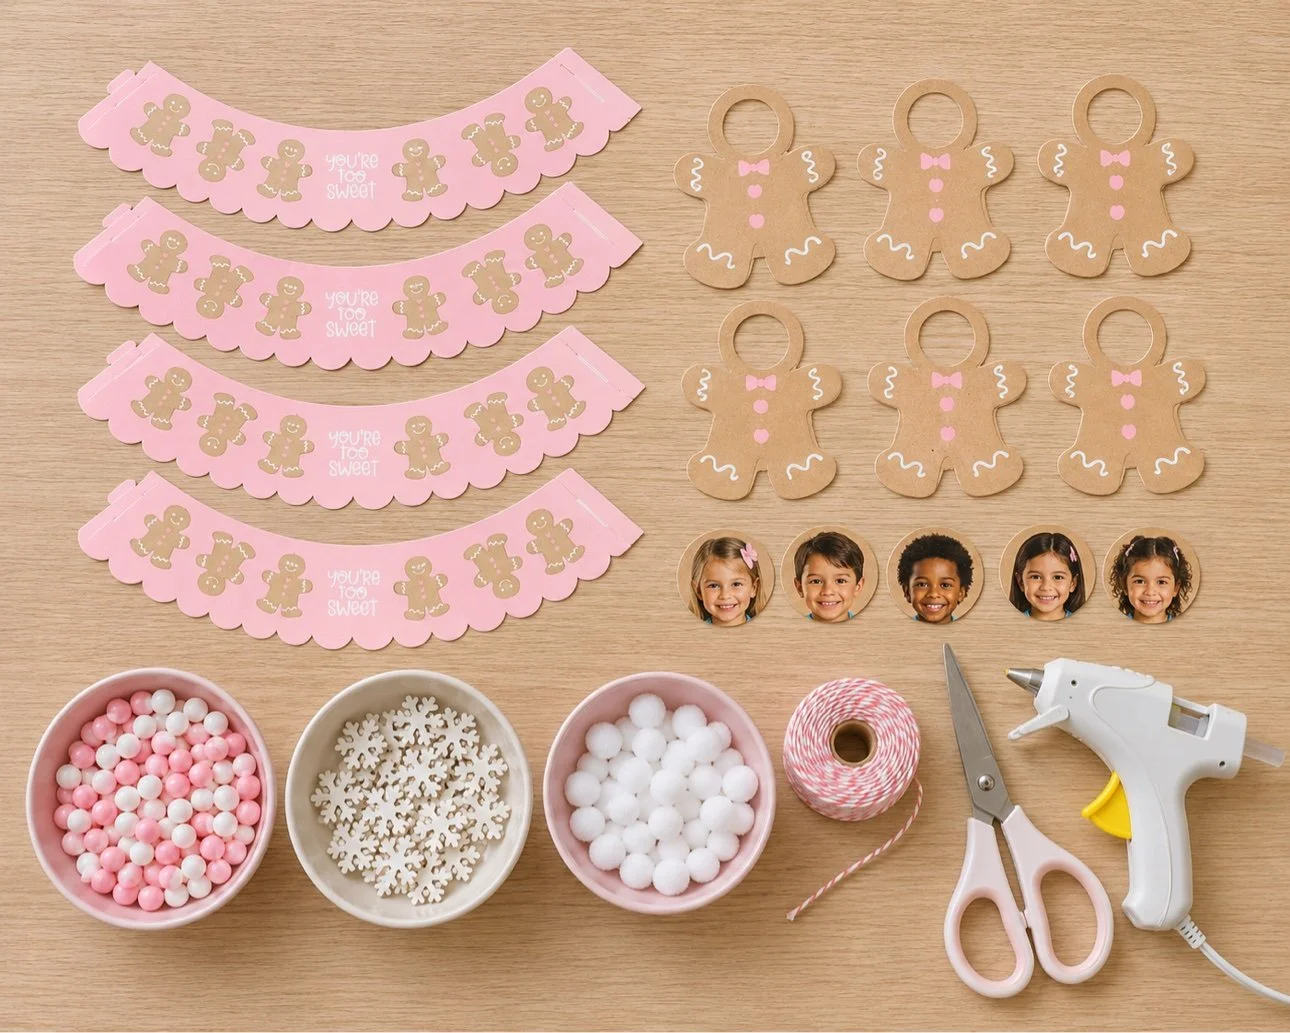
What You'll Need
- Printable gingerbread snow globe kit (also on Etsy) — 12 gingerbread photo cutouts plus "You're Too Sweet" collar wraps
- Clear plastic fillable ornaments, 3–4 inch (the two halves snap apart)
- Faux snow, white foam beads, or mini pom-poms in white and pink
- Small printed photos of each child (about 2x2 inches — school photos trim down perfectly)
- Ribbon for the bow
- Scissors and clear tape
Step 1: Print the Kit
Print the gingerbread snow globe PDF — page 1 has 12 gingerbread photo cutouts, pages 2–3 have the pink "You're Too Sweet" collar wraps. Cardstock makes sturdier characters, but regular paper works fine. Print one cutout sheet per 12 kids, and one collar sheet per 4 ornaments.
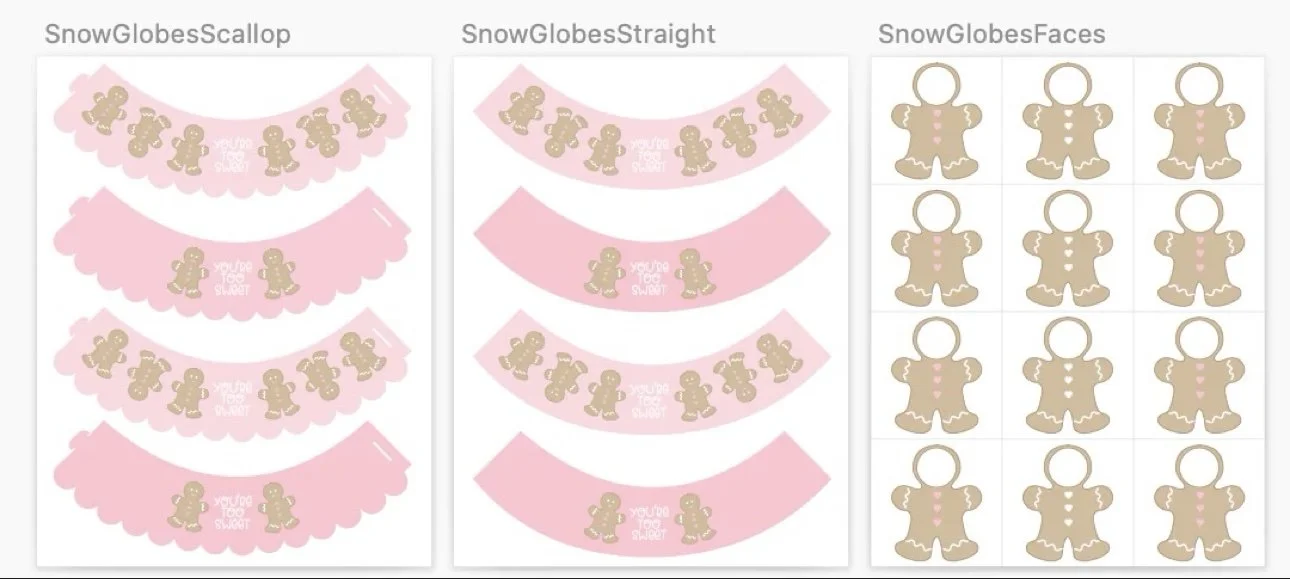
Step 2: Cut Out the Gingerbread Characters
Cut out each gingerbread character along the outline. Older kids can do their own cutting (great scissor practice); for preschoolers, pre-cut and let them do the fun parts.
Step 3: Add Each Child's Photo
Trim each photo to fit behind the face cutout and tape it in place from the back. This is the moment the craft turns into a keepsake — kids love seeing their own smile pop through the gingerbread.
Step 4: Fill the Ornament with "Snow"
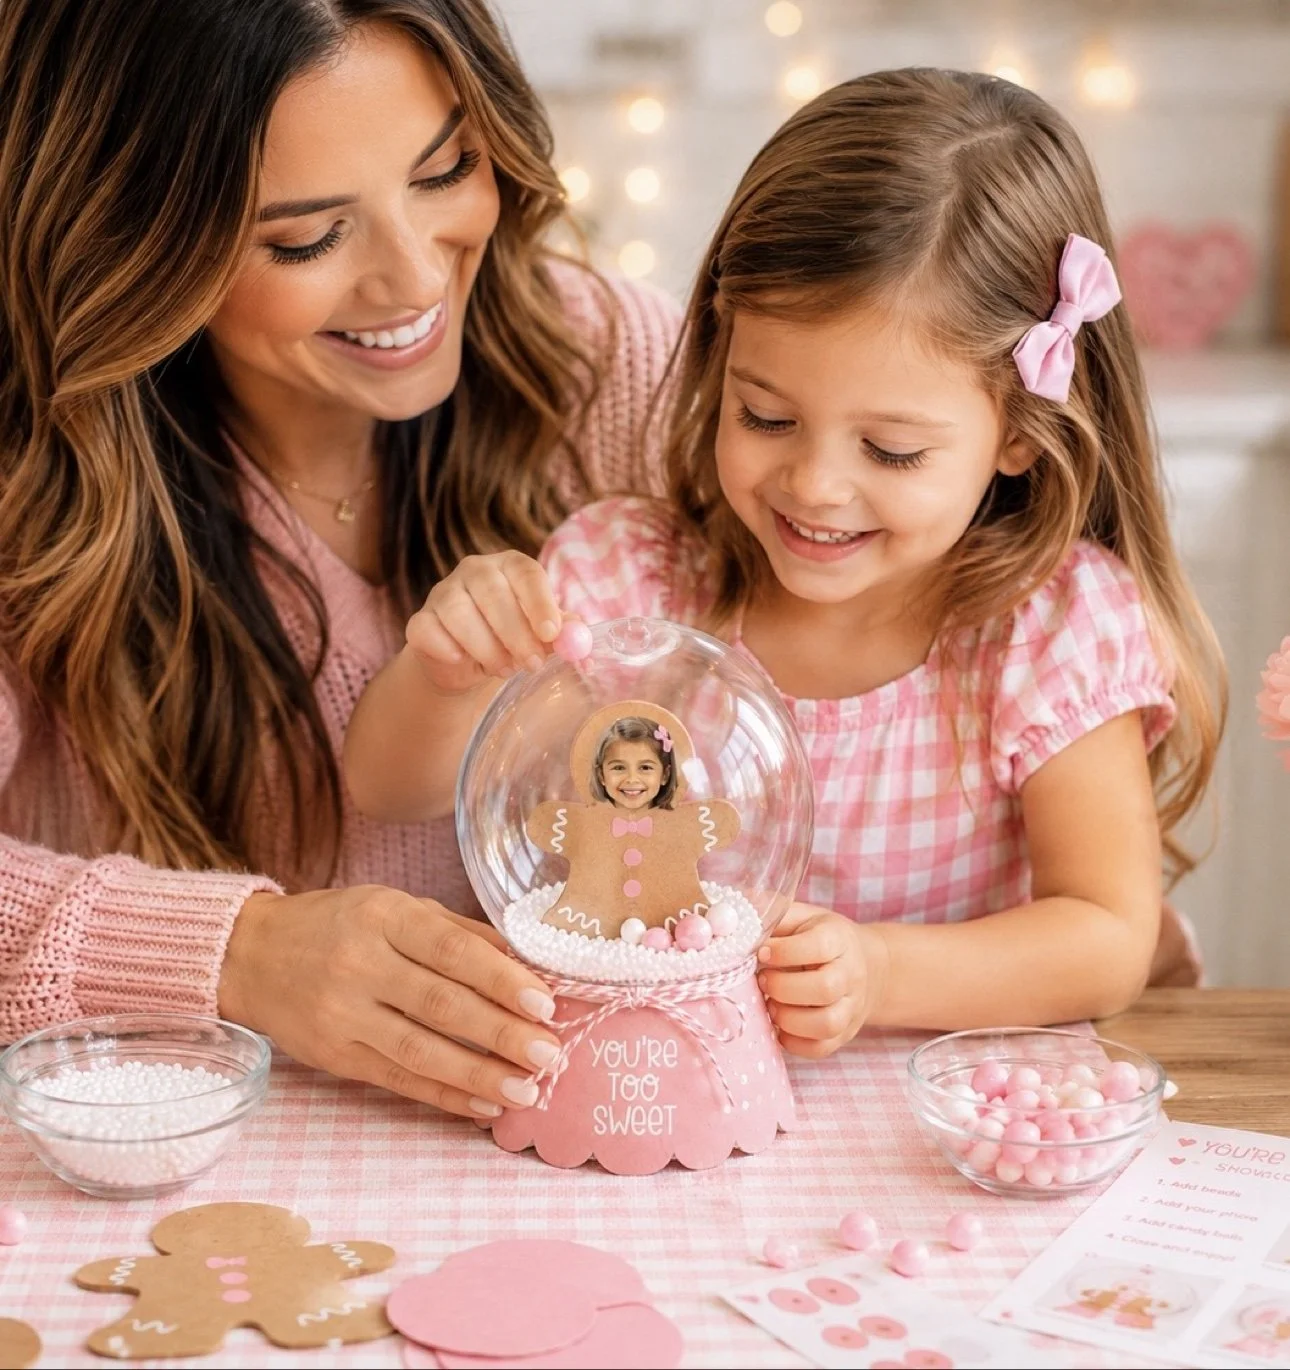
Open a clear ornament and spoon in faux snow, foam beads, or mini pom-poms — about a third full. Don't overfill; you want the snow to shake around when it's lifted. White and pink poms look especially sweet with the Pinkmas gingerbread.
Step 5: Tuck the Gingerbread Inside
Slide the gingerbread character into the ornament so it stands in the snow, then snap the two halves closed. If it tips, a tiny piece of tape on the back holds it upright.
Step 6: Wrap the Collar and Tie the Ribbon
Cut out a "You're Too Sweet" collar wrap and curl it around the base of the ornament where the two halves meet — it hides the seam and makes it look finished. Tie a ribbon bow over the collar. Done!
Tips for Classroom Batches
- Assembly-line it. One station for cutting, one for photos, one for snow-filling — a class of 24 can finish in under an hour.
- Pre-cut for little ones. Preschoolers do best with the photo-taping and snow-filling steps.
- Photo shortcut: ask parents to send a headshot, or use last year's school photos trimmed down.
- Cardstock matters if the ornaments will be handled a lot — the characters stand up straighter.
- Make extras. Teachers always wish they'd made one for the classroom tree.
Get the Printable Kit
The gingerbread snow globe kit is $5 and includes all 12 photo cutouts plus the collar wraps — print as many as you need for your whole class. Get it in the Goodnight Fox shop or on Etsy. Want all three designs? See the full snow globe collection here.
Made them with your class? Tag @goodnightfox — we'd love to see your little gingerbreads! 💛
Shop the Materials
Some links are affiliate links. We only share things we actually use.
- Clear plastic fillable ornaments — View on Amazon
- White pom-poms (faux snow filler) — View on Amazon
- Foam beads — View on Amazon
- Snowflake sprinkles — View on Amazon
- Ribbon for wrapping — View on Amazon
DIY Ghost Wreath: A Light-Up Tissue Ghost Craft for Halloween
DIY Ghost Wreath: A Light-Up Tissue Ghost Craft for Halloween
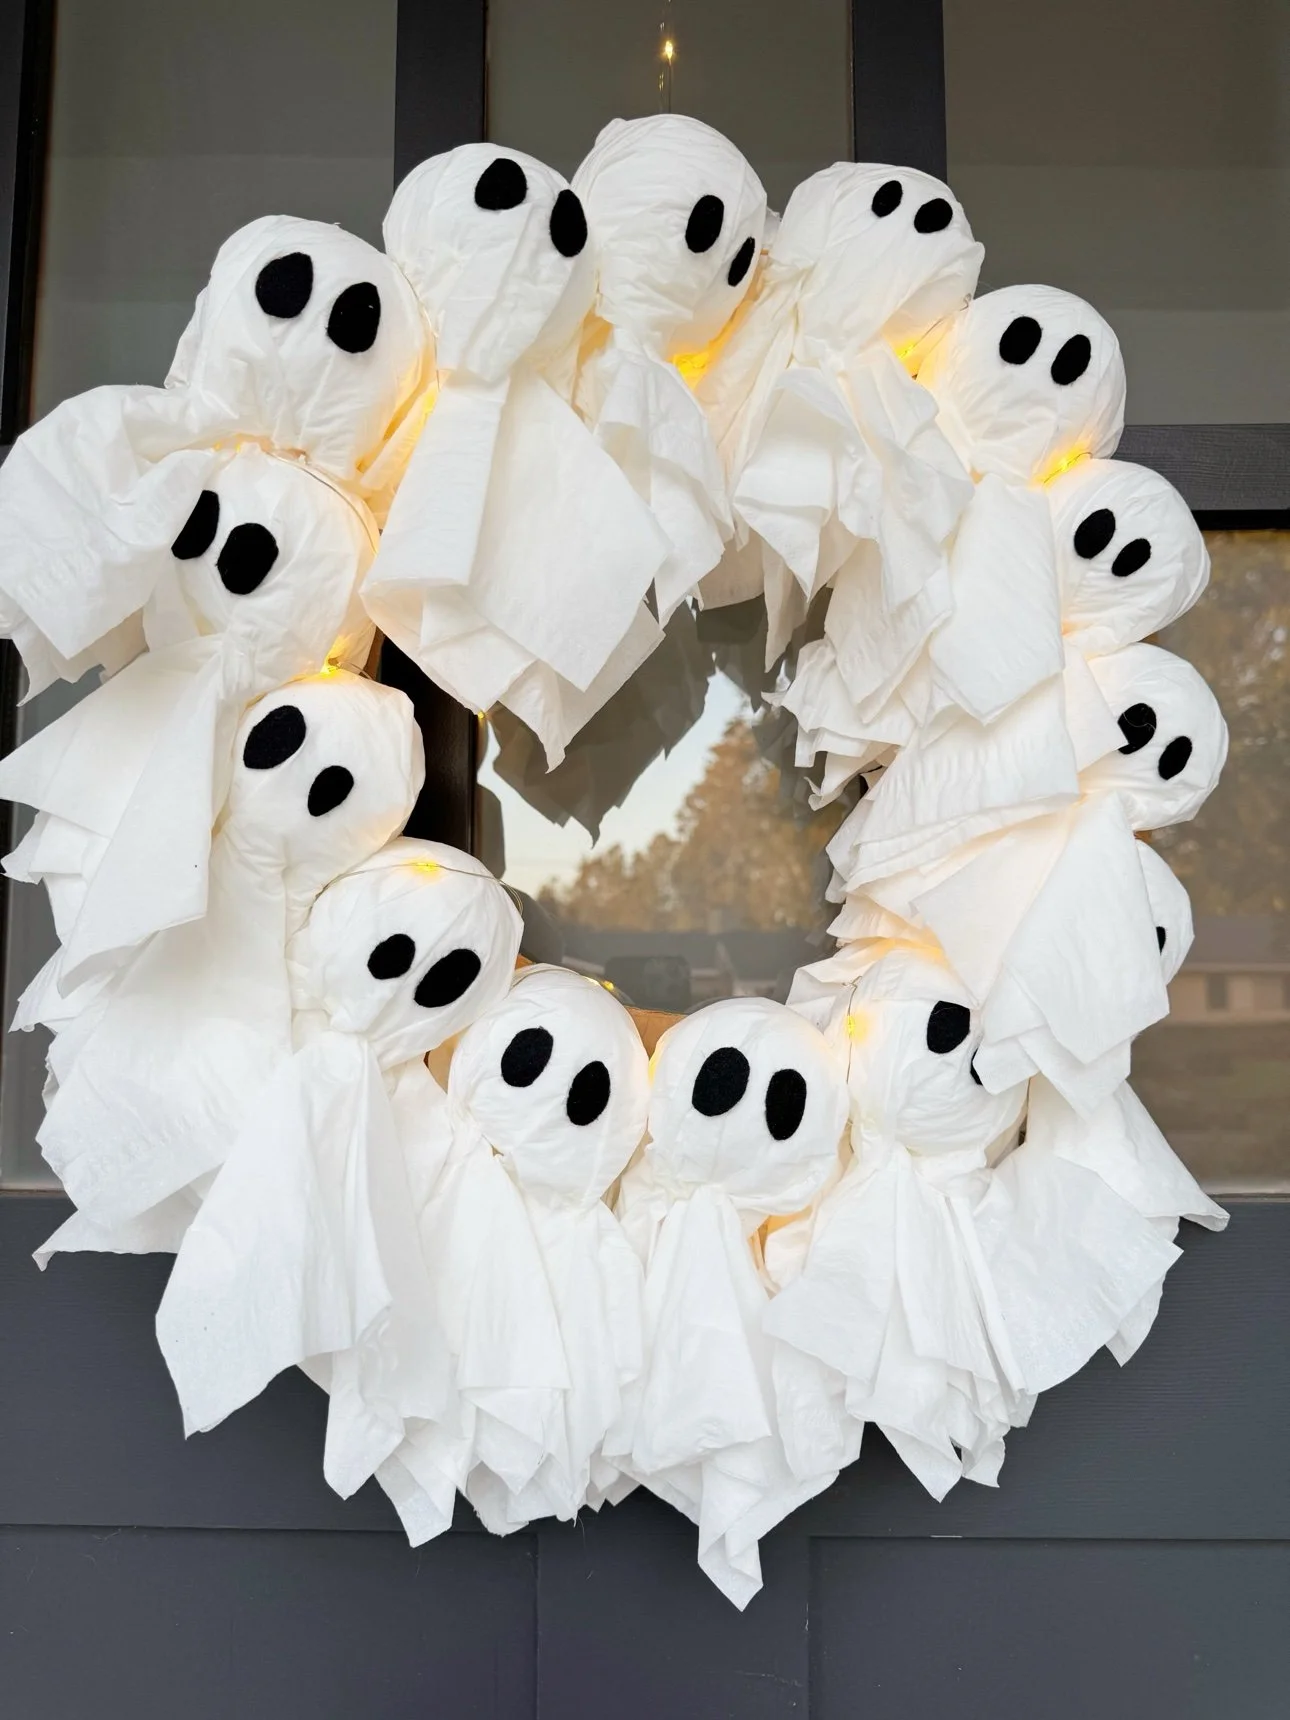
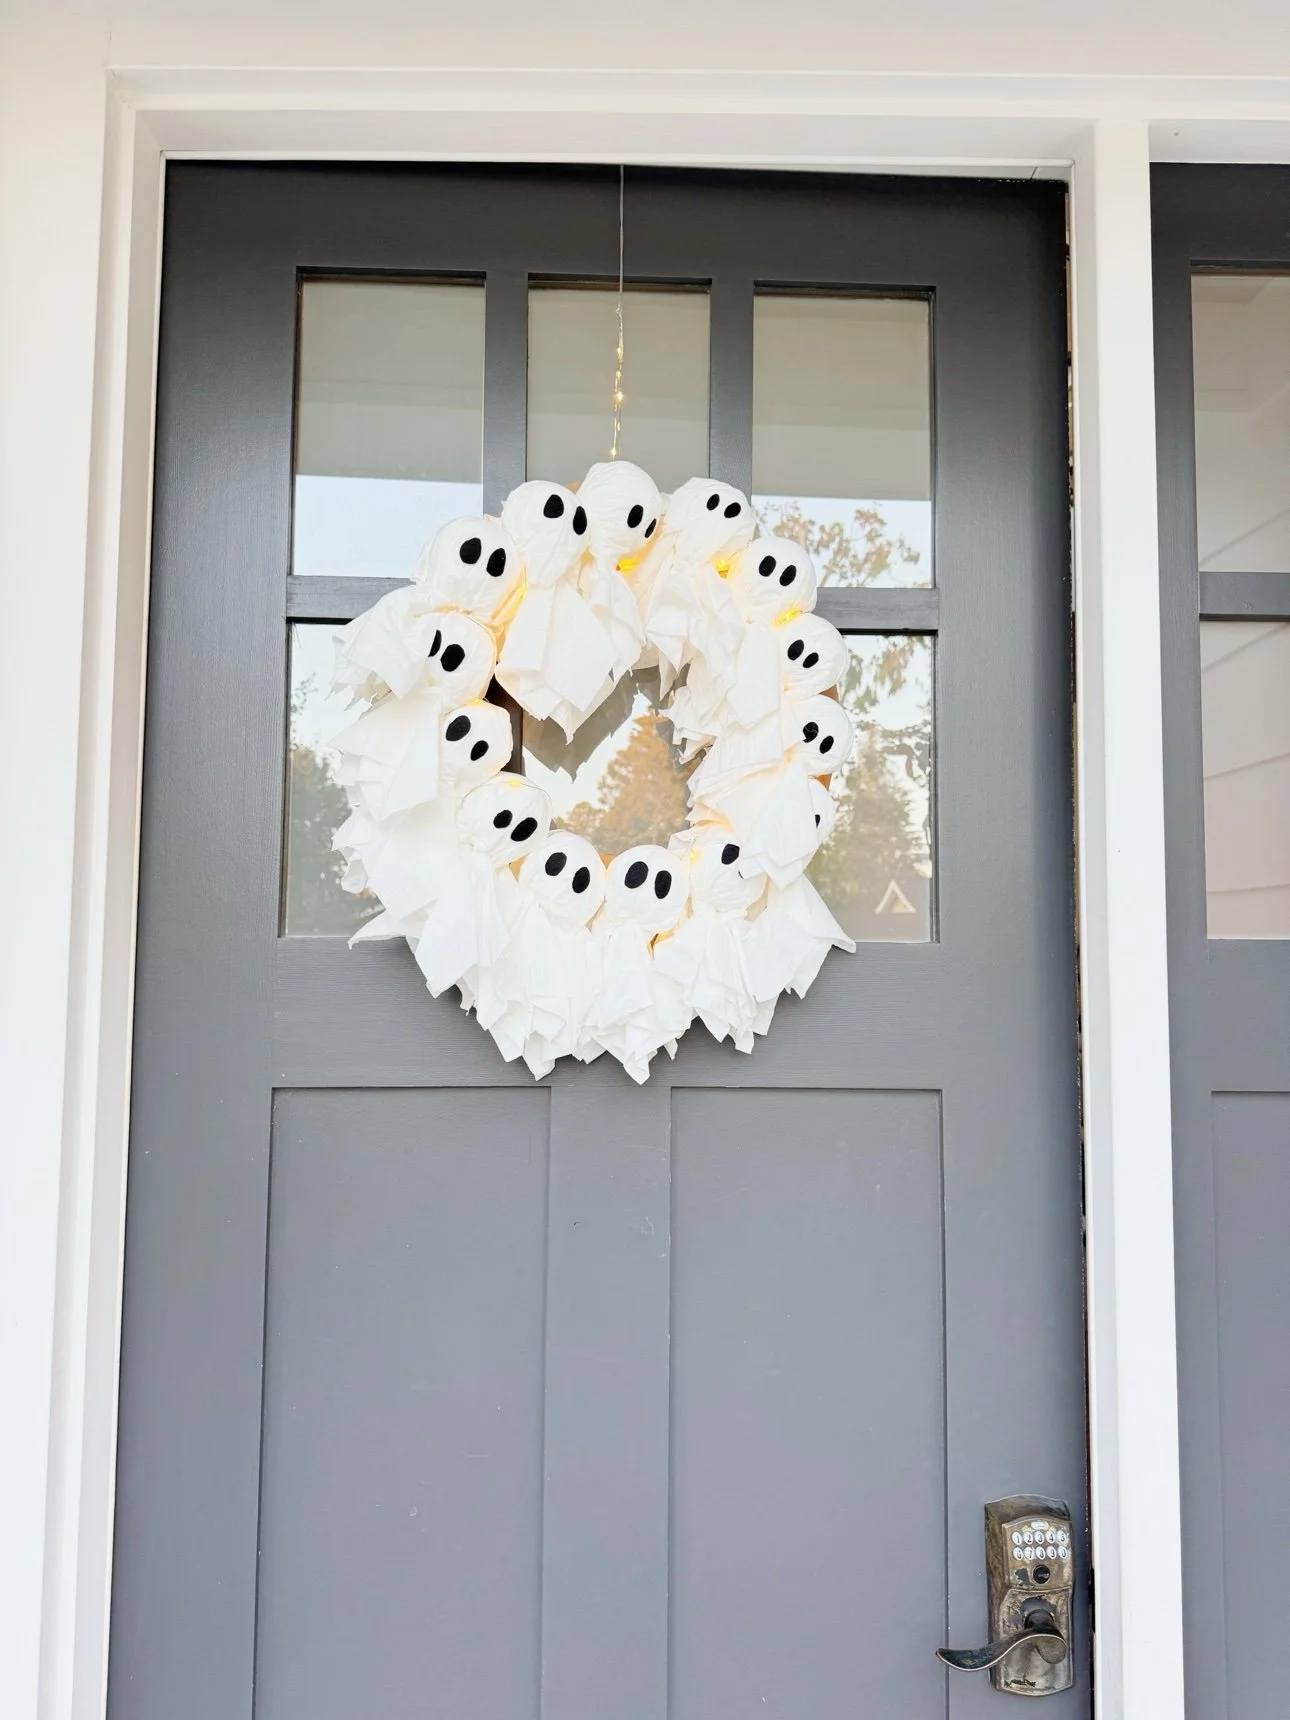
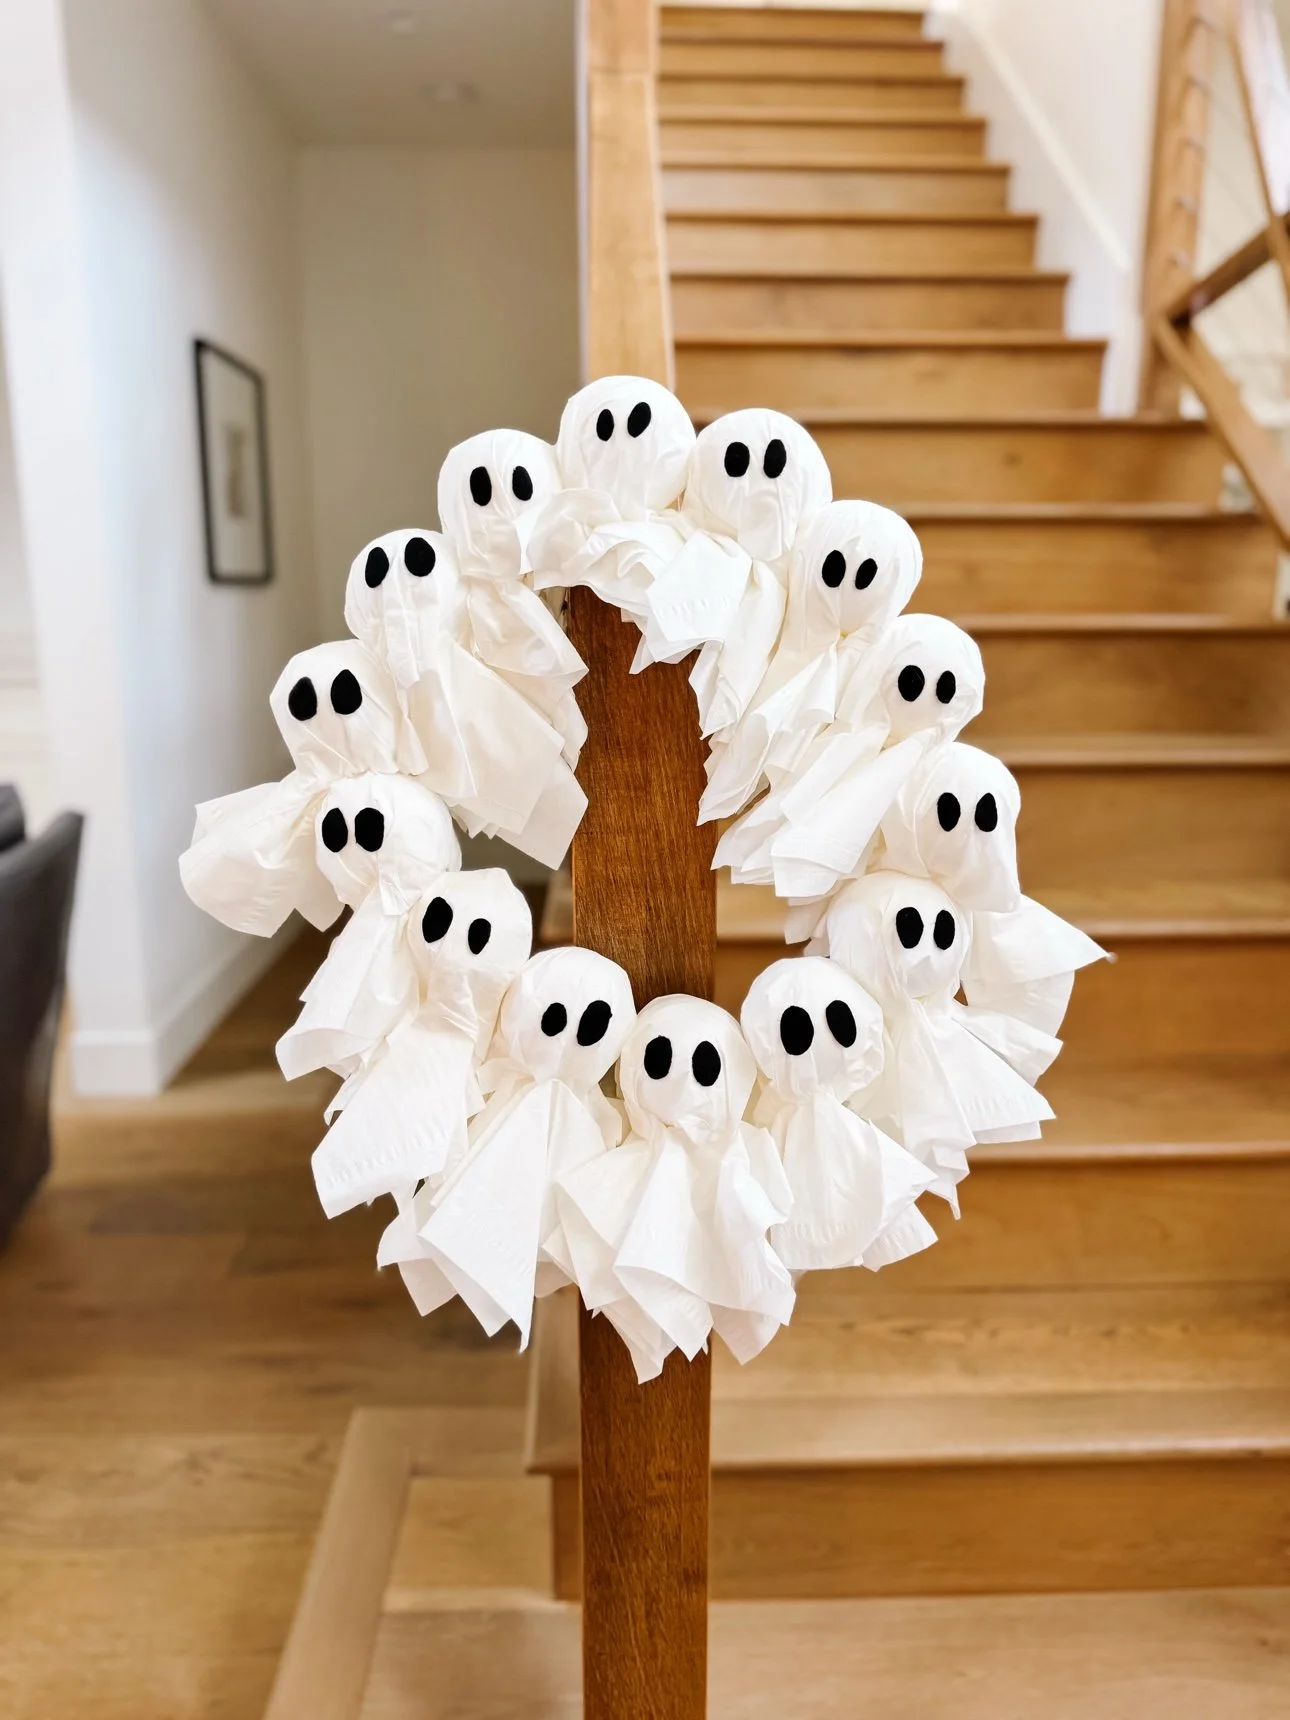
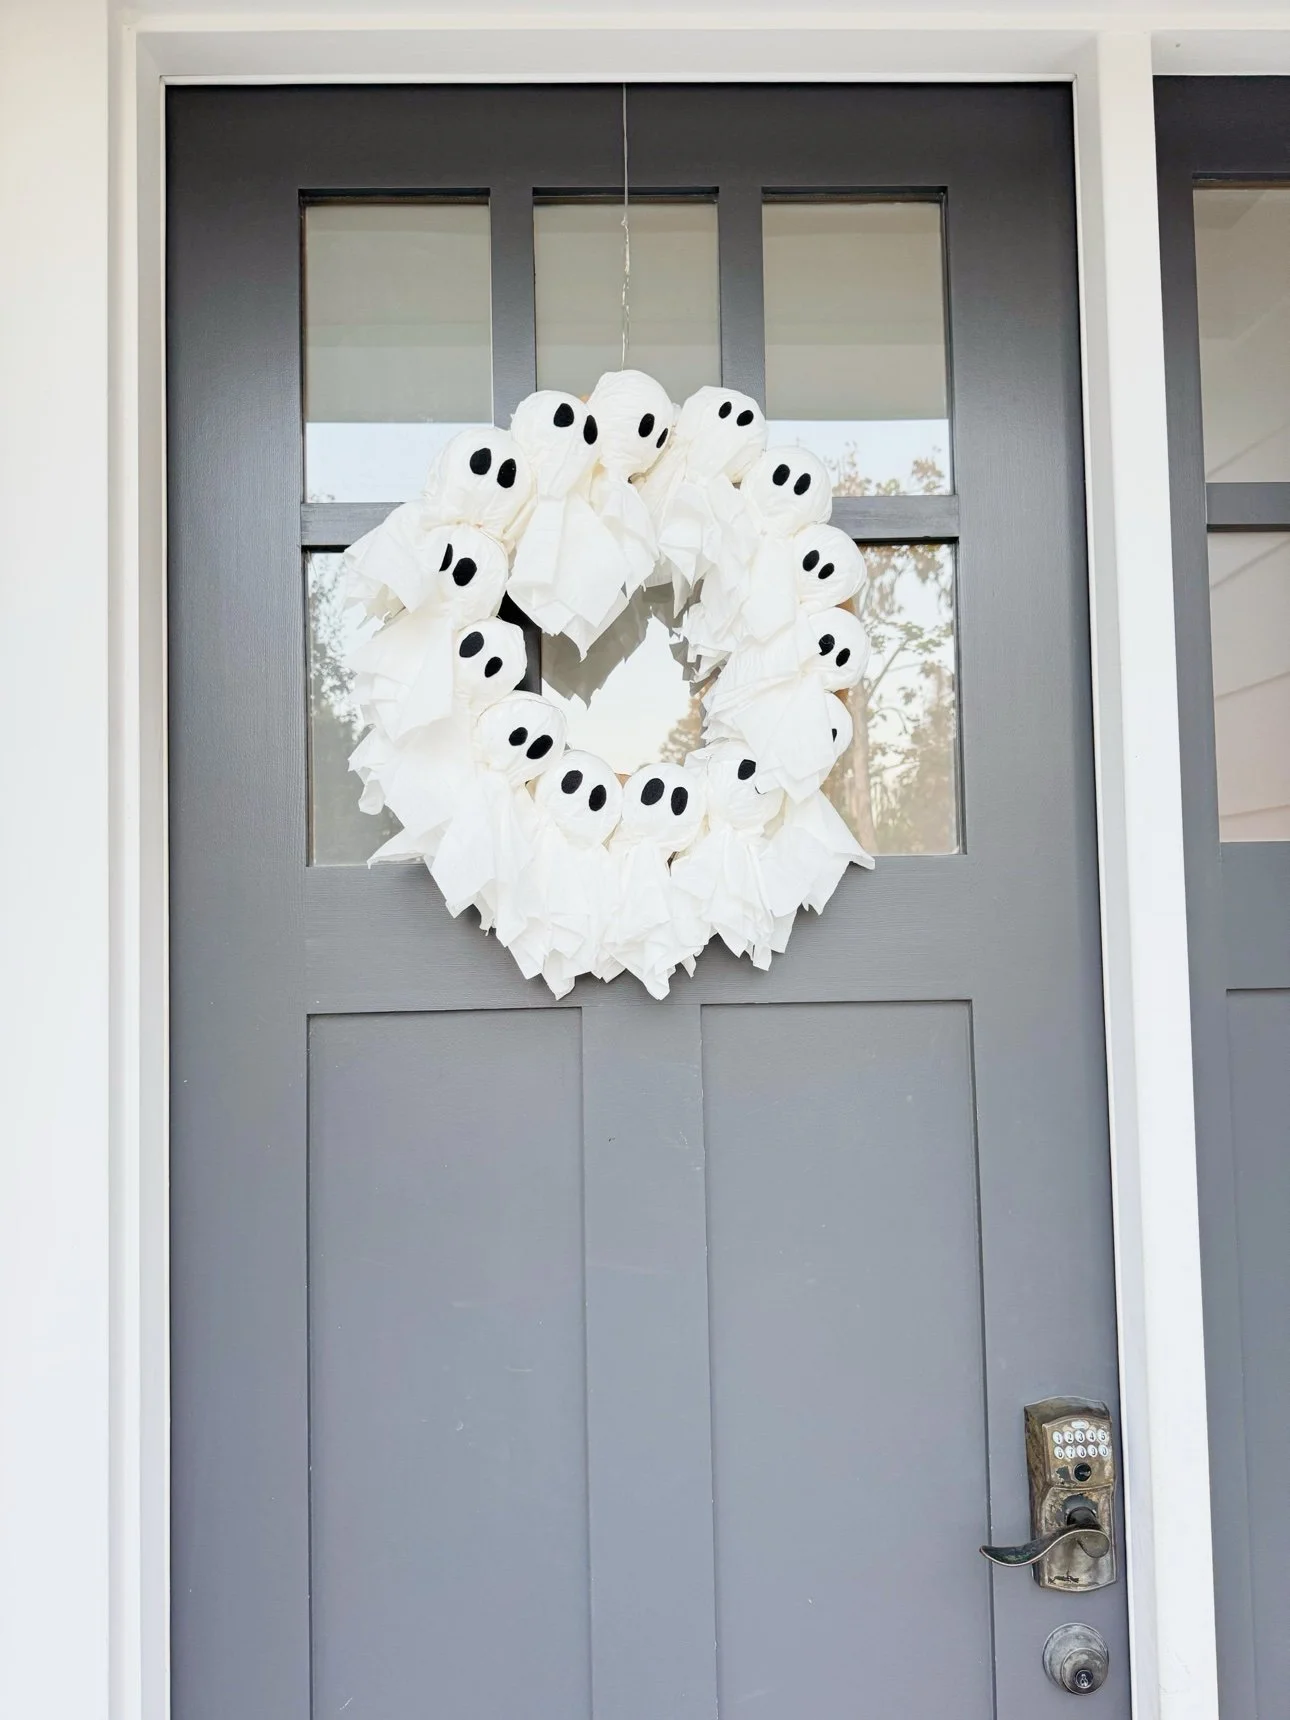
A crowd of little tissue ghosts, a string of fairy lights, and one very happy front door. This light-up ghost wreath is a sweet not-so-spooky Halloween craft — and it genuinely glows at night.
Best forAges 4+ (with adult help)
TimeAn afternoon project
CostBudget-friendly
SkillsFine motor + creativity
This DIY ghost wreath is made from the simplest supplies — white tissues, foam balls, a cardboard ring, and a strand of battery fairy lights — and when the sun goes down, the little ghosts light up from the inside. Most of the time goes to happily making ghost after ghost.
What you need
- White tissues — one per ghost (a dozen or so covers a dinner-plate ring)
- Foam balls — about 2 inches, one per ghost
- Cardboard — cut into a wreath ring for the base
- Craft sticks — to anchor each ghost to the ring
- Black felt — cut into little ovals for eyes
- Battery-operated fairy lights — warm white, one short strand
- Scissors, glue (hot glue for adults), string or ribbon for hanging
How to make the ghost wreath
Step 1: Cut the cardboard ring
Cut a large ring from sturdy cardboard — a dinner plate and a salad plate make good tracing templates. This is the base everything attaches to, so keep it wide enough to glue or poke the craft sticks into.
Step 2: Make the ghosts
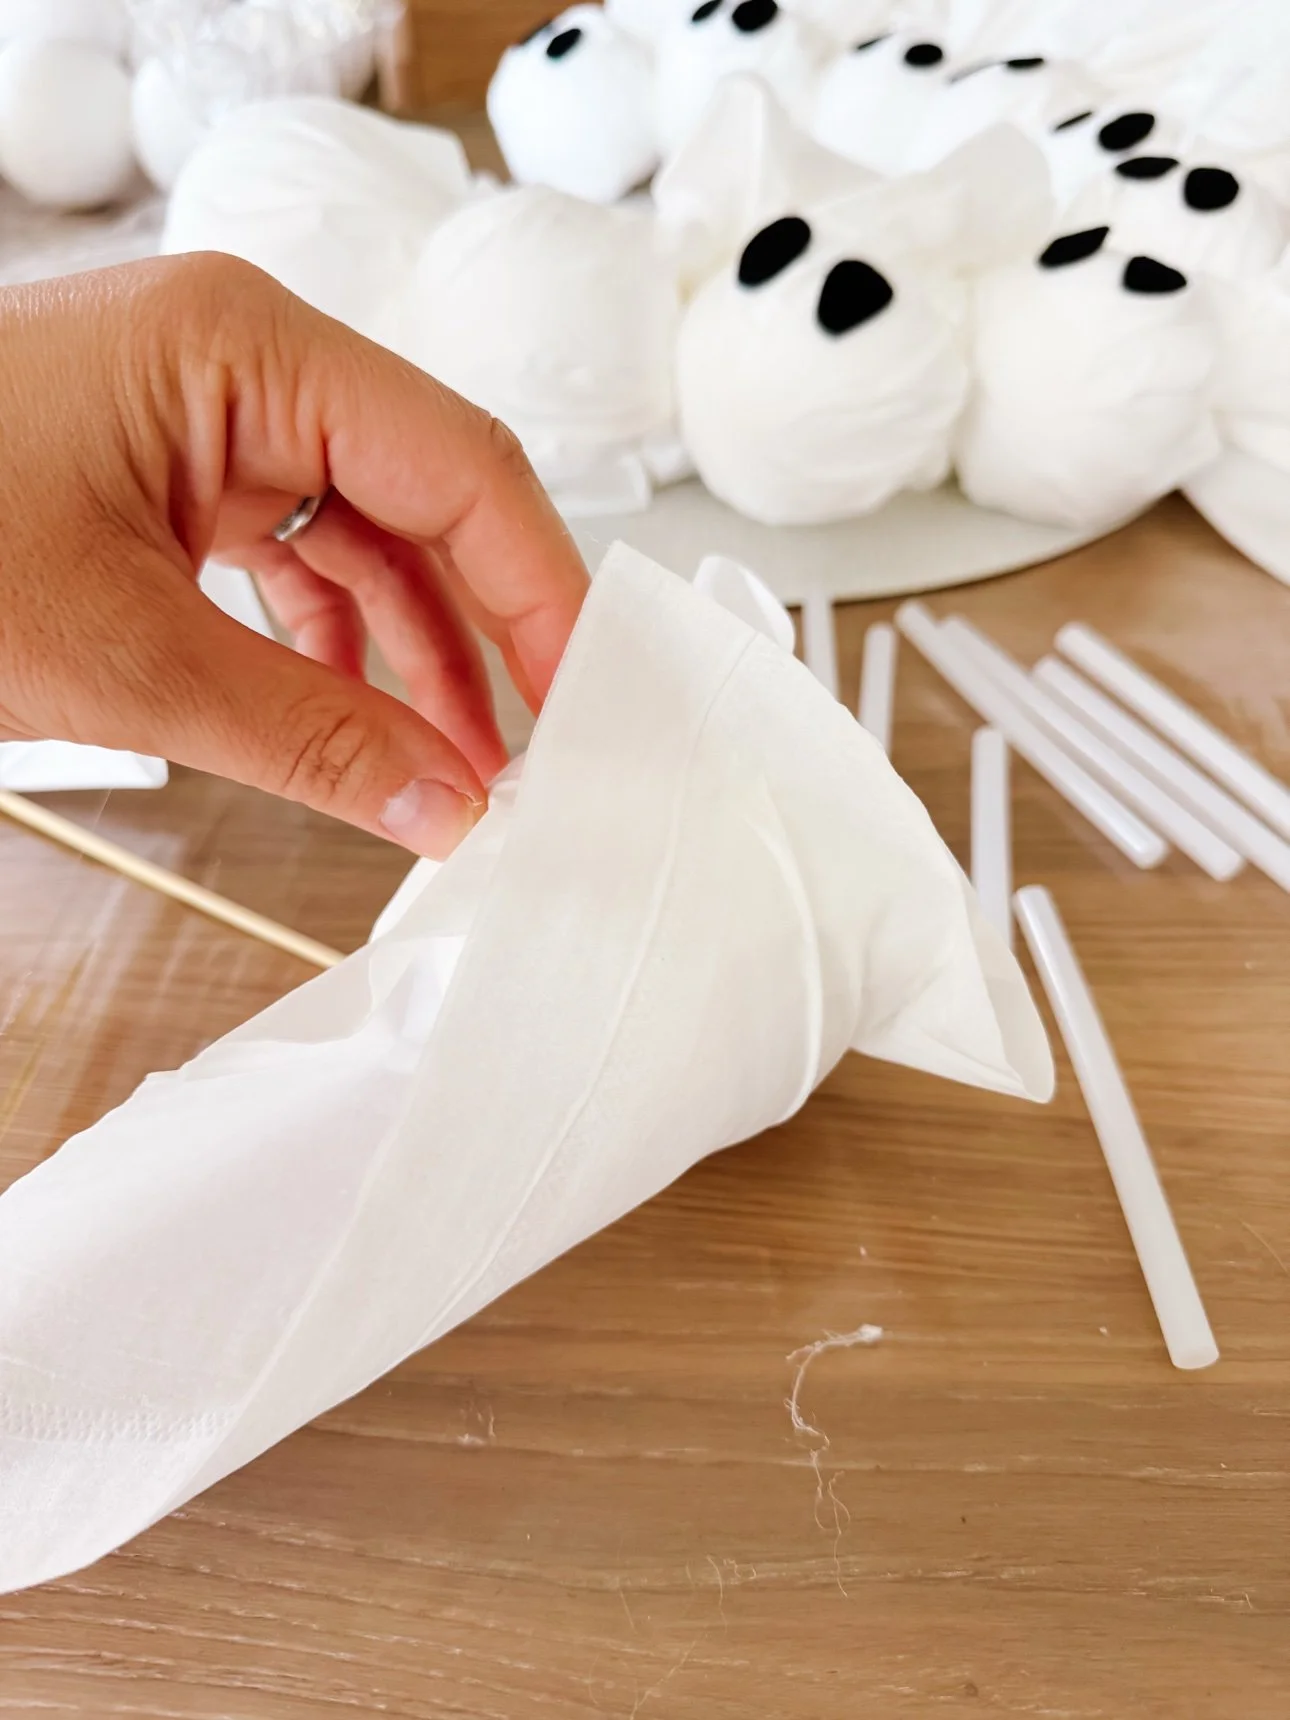
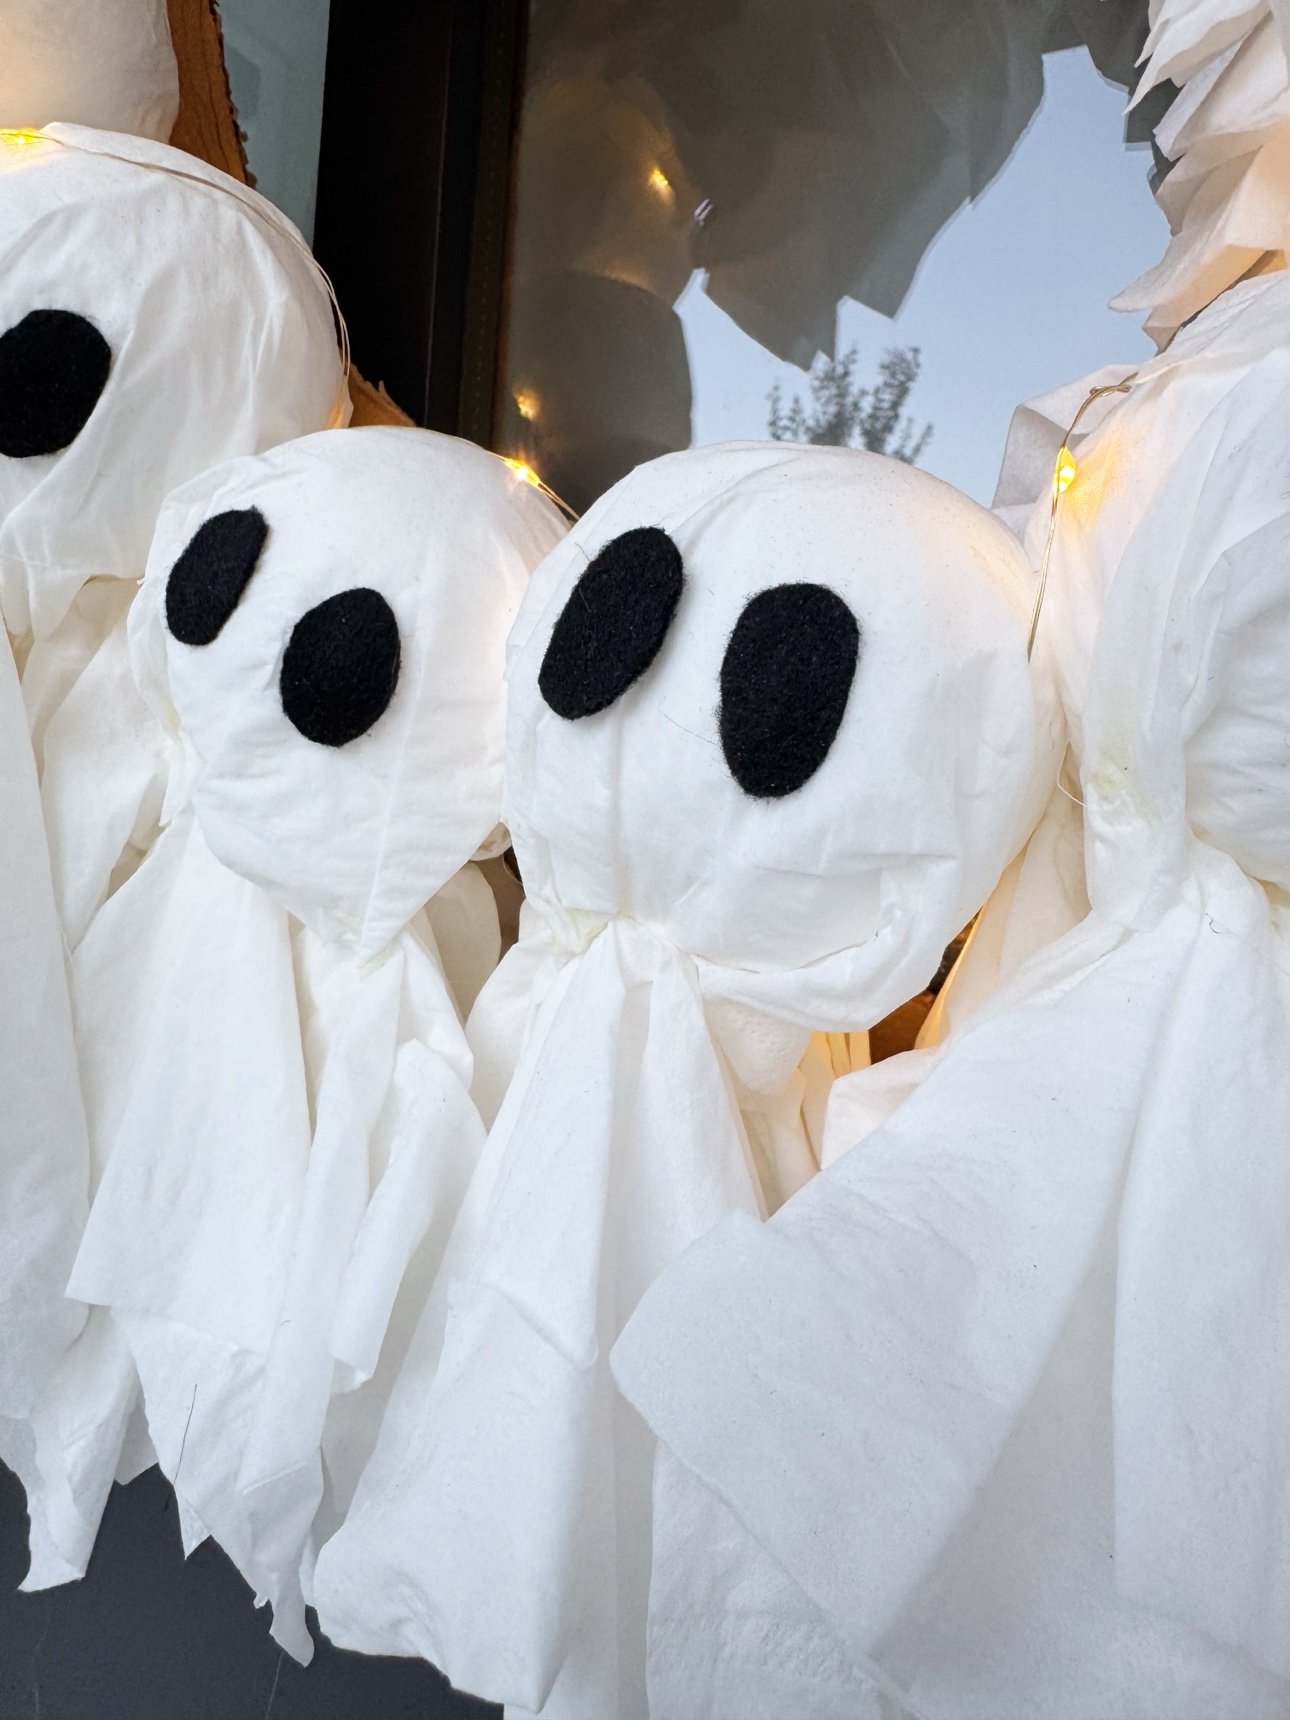
Center a foam ball on a tissue, gather the tissue up around it, and twist gently to form the ghost's head. Poke a craft stick up through the bottom into the foam ball so each ghost has a little handle — this is what you'll use to attach it to the ring. Glue on two black felt ovals for eyes. That is the whole ghost: tissue, ball, stick, eyes.
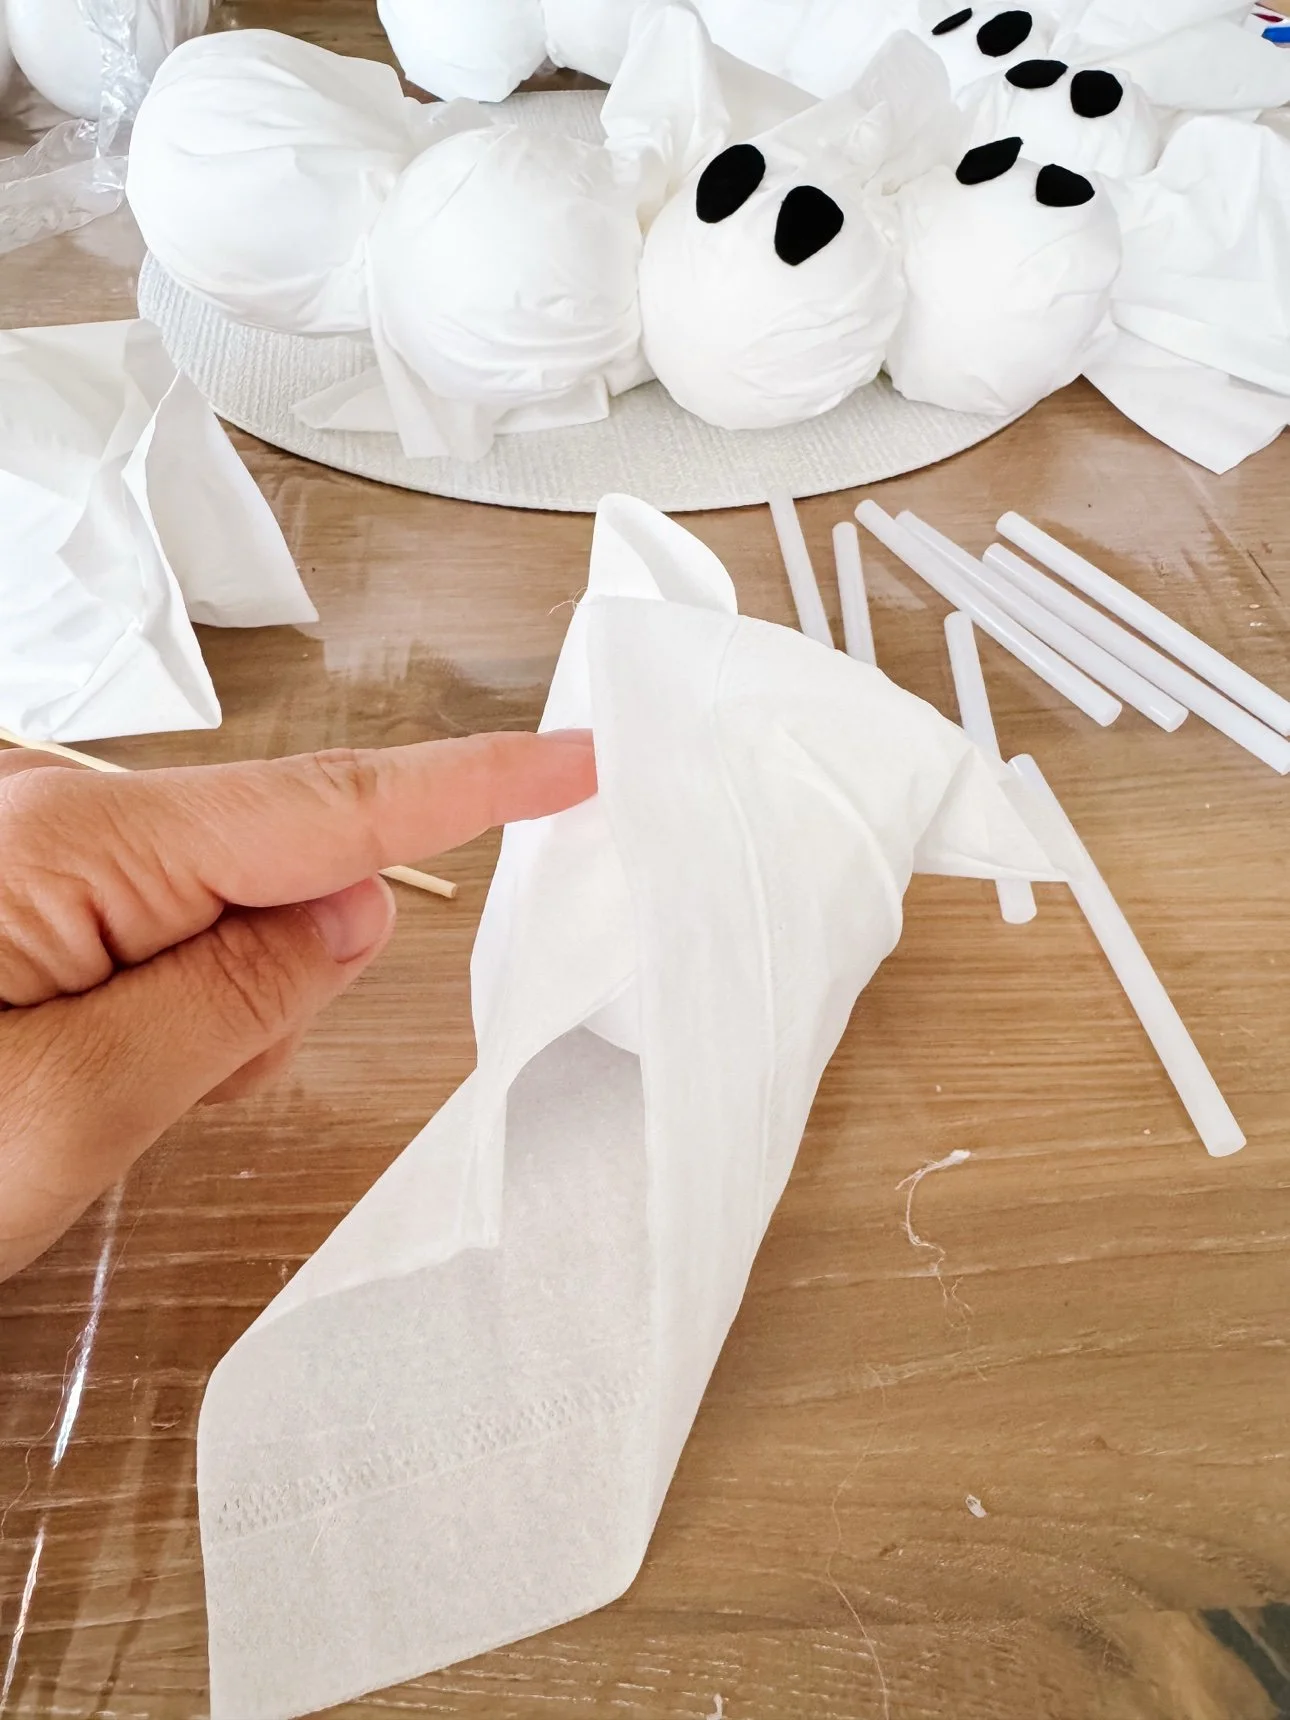
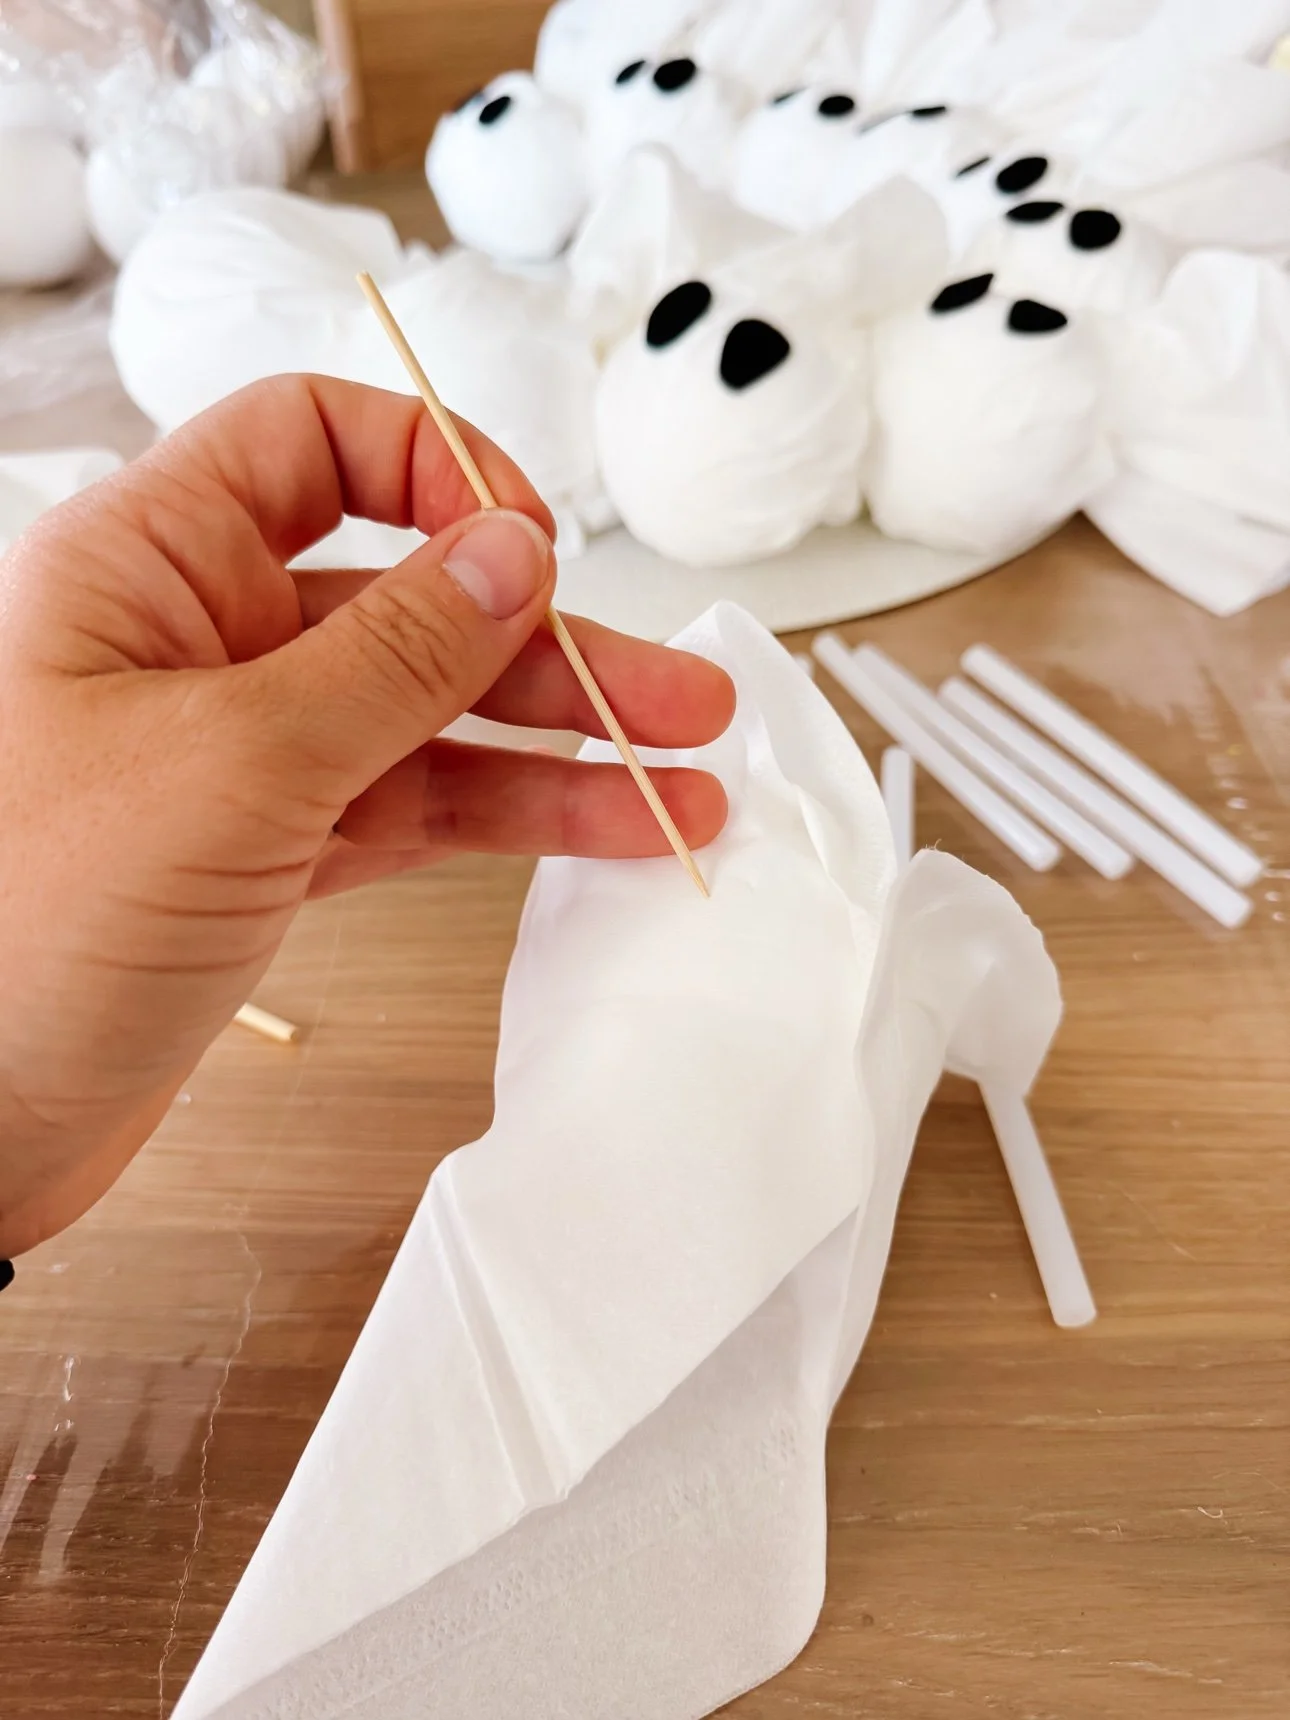
Step 3: Build the wreath
Work your way around the cardboard ring, attaching the ghosts close together so the cardboard barely shows — push the craft sticks through or hot-glue them in place (adults handle the hot glue). Slightly overlapping the tissue skirts gives the wreath that full, fluffy look.
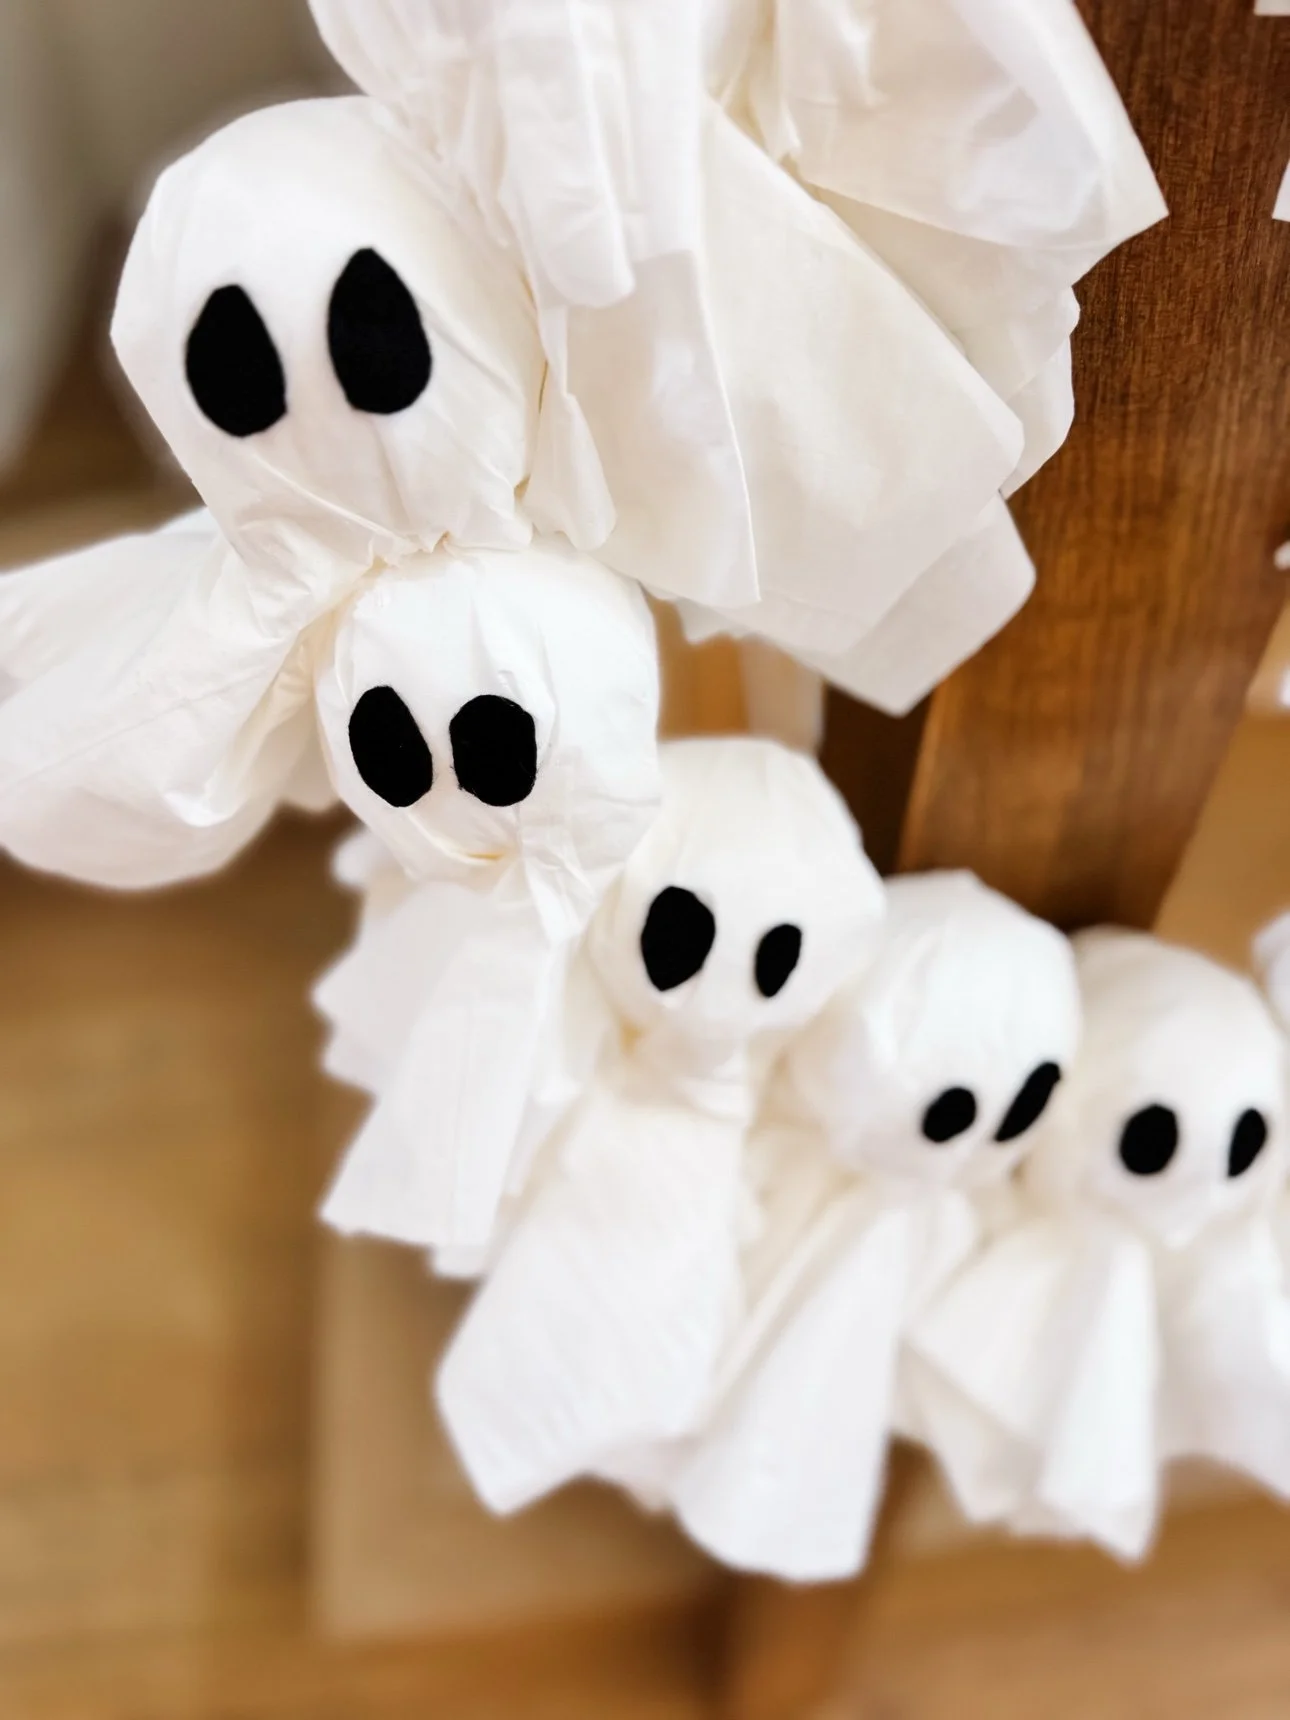
Step 4: Weave in the fairy lights
Wind the battery fairy lights through the ghosts, tucking the little bulbs between them so the glow comes from inside the crowd. Tape the battery pack to the back of the cardboard ring where it hides. Flip the switch and step back — this is the best part.
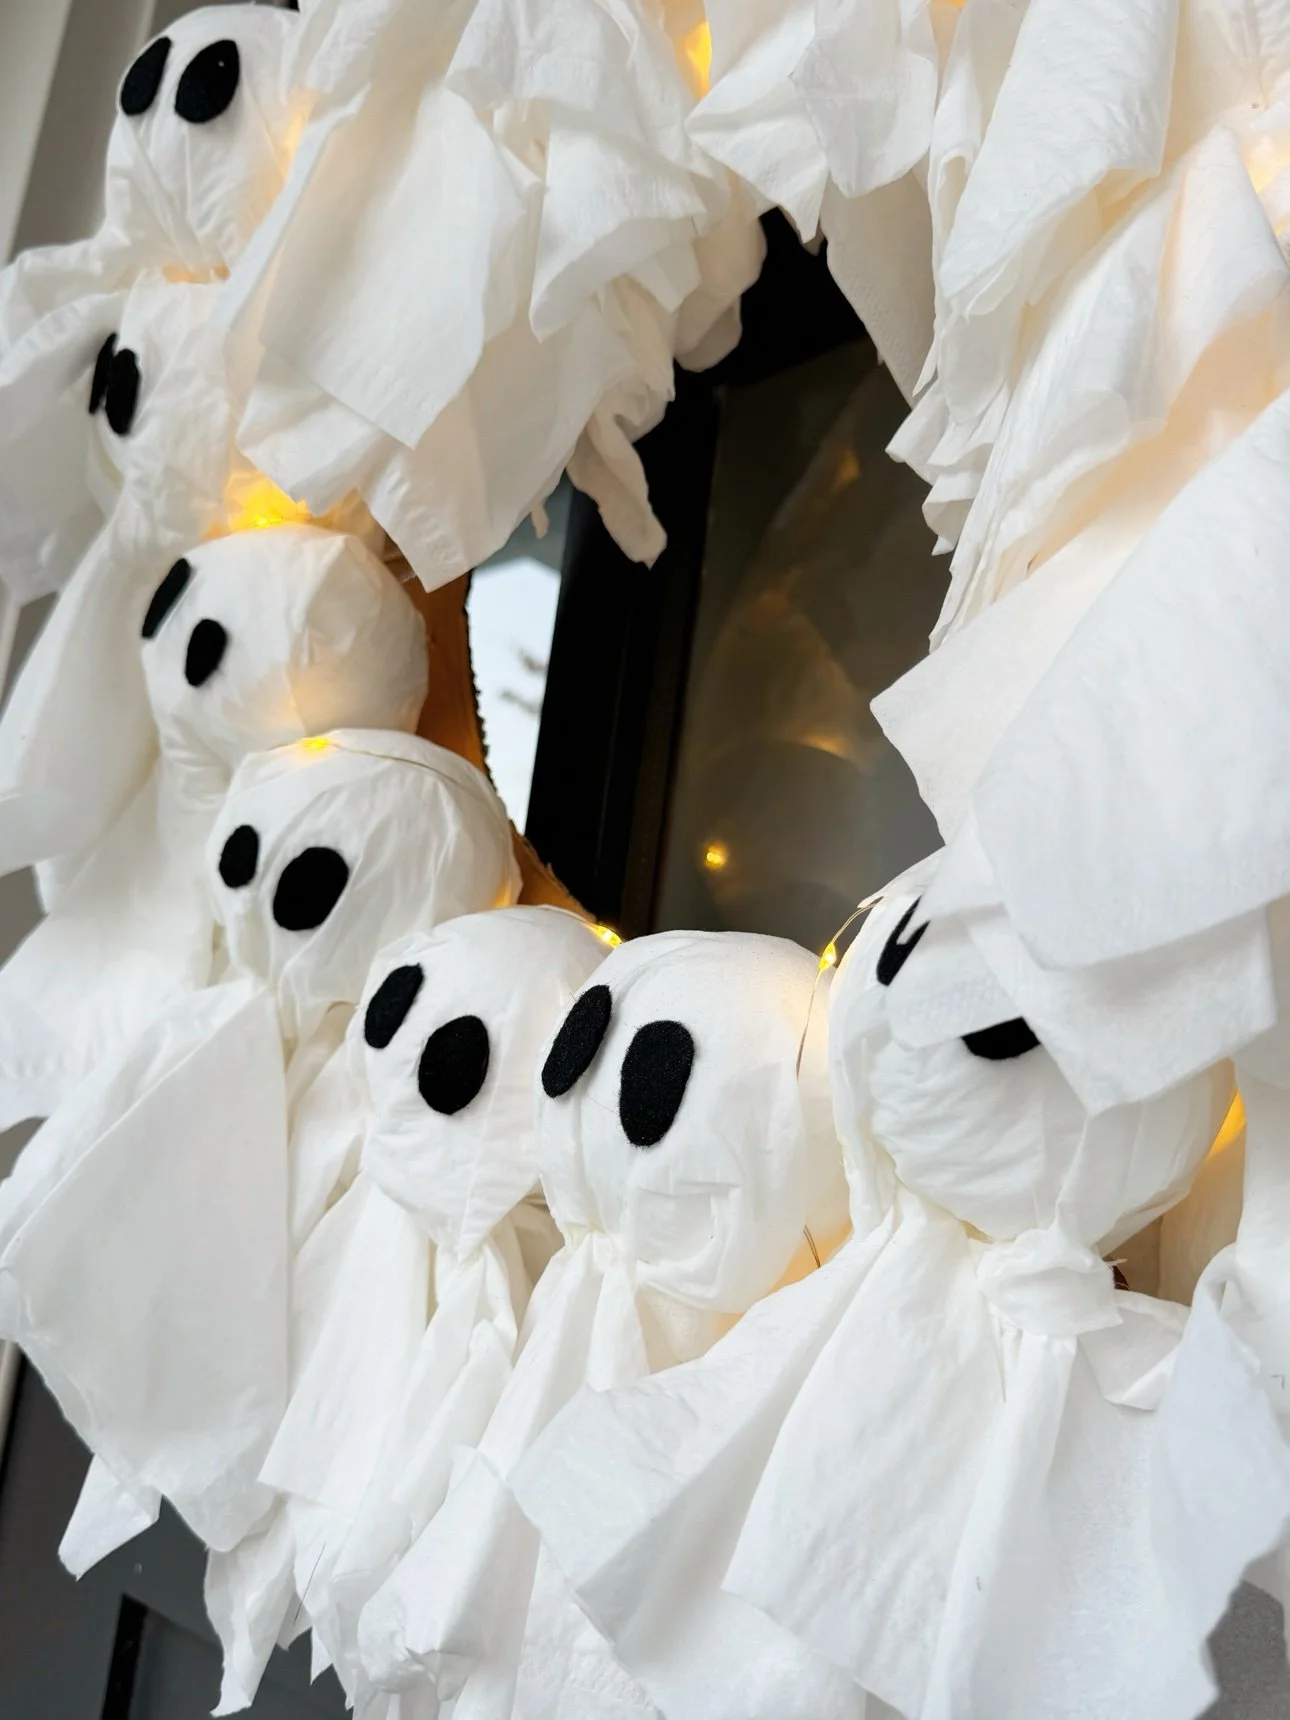
Step 5: Hang it up
Tie string or ribbon through the top of the cardboard ring and hang the wreath on the door — it is made to be seen by trick-or-treaters. It also looks adorable hung on a stair newel post indoors.
Tips for making it with kids
- Give kids the ghost-making station. Wrapping the tissue, twisting, and gluing on the felt eyes are all perfect kid jobs. Adults handle the hot glue and the cardboard cutting.
- Cut all the felt eyes first. A little pile of black ovals keeps the assembly line moving.
- Hide the battery pack. Tape it flat to the back of the ring so the front stays all ghosts.
- Porch, not rainstorm. Tissues and fairy lights are happiest under a covered porch or indoors.
Shop the materials
Some links are affiliate links. We only share things we actually use.
Free printable: Pin the Bone on the Skeleton
Keep the Halloween afternoon going after the wreath is hung — our free Pin the Bone on the Skeleton printable party game is perfect for a classroom party, a playdate, or family game night. Print it, blindfold the players, and see who gets the bone closest.
How many ghosts do I need?
It depends on your ring size — twelve 2-inch ghosts filled a dinner-plate-sized ring with the tissue skirts overlapping. Make a few extra; they are quick once you get the rhythm.
Can the wreath go outside?
A covered porch is fine. Tissues do not love direct rain, so bring it in during storms.
What age is this craft best for?
Kids around 4 and up can make the ghosts with a little help. Adults should handle the hot glue and cutting the cardboard ring.
How long do the fairy lights last?
A fresh set of batteries in a short LED strand usually runs several evenings. Switch it on at dusk for trick-or-treat season and off before bed.
Bedtime Routine for Toddlers: A Calm 7-Step Visual Routine That Ends the Battles
Bedtime Routine for Toddlers: A Calm 7-Step Visual Routine That Ends the Battles
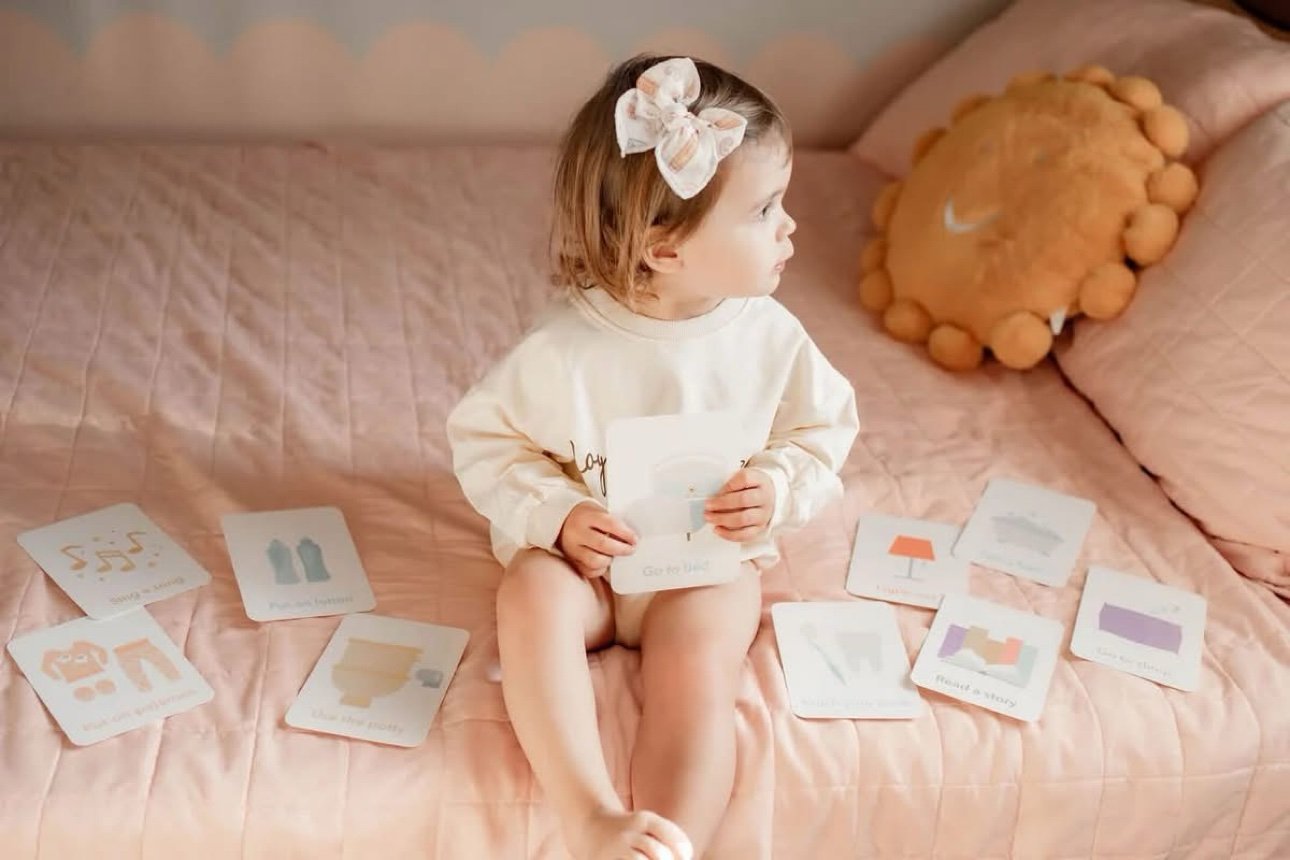
If bedtime at your house currently involves forty-five minutes of negotiations, three extra glasses of water, and a toddler who suddenly needs to discuss every stuffed animal's feelings — you are not doing it wrong. Bedtime falls apart for a simple reason: the sequence only exists in your head. Your toddler can't see what's coming, so every step feels like a surprise ending. A visual bedtime routine fixes exactly that — same steps, same order, every night, on cards your child can flip themselves.
Best forAges 1–4
Time20–30 minutes, nightly
CostFree (plus optional routine cards)
SkillsSequencing + independence
Why bedtime falls apart (and why a routine fixes it)
Toddlers don't stall at bedtime because they're difficult. They stall because transitions are hard and the evening sequence is invisible to them — bath, then teeth, then story feels like a series of ambushes when you can't see the plan. A predictable routine turns those ambushes into a path they can walk themselves, and that predictability is exactly what pediatric guidance points to: a consistent, calming pre-sleep routine — reading, bathing, quiet play — signals to a child that it's time to wind down (paraphrased from Sun Pediatrics' AAP-cited sleep hygiene guide).
The stakes are real but simple: the American Academy of Pediatrics recommends 11–14 hours of total sleep per day for ages 1–2 and 10–13 hours for ages 3–5, including naps (AAP News). A routine that starts at the same time every night is how those hours actually happen — not through willpower, but through rhythm. And a visual version of the routine does something extra: it hands the sequence to your child. Flipping each card is a tiny job with a visible finish line, and toddlers who feel in charge of the steps argue about them far less. Our visual schedule guide covers the daytime version of the same idea.
When she was little, our bedtimes ran on a picture chart long before I ever made routine cards to sell — a row of little drawings taped to the hallway wall, and she marched down that hallway flipping each one like it was her job. Because to her, it was. That's the whole method below: seven steps, same order, visible to the smallest person in the house.
The 7-step bedtime routine
Twenty to thirty minutes, same order, same time (within about half an hour), every night. The steps matter less than the sameness — pick your version of each and then don't improvise for two weeks.
1. The 10-minute wind-down warning
Bedtime starts before bedtime. About ten minutes out, dim the lights, turn off screens — pediatric guidance advises no screens in the hour before bed, since light and content both keep young brains wired — and announce the plan: "In ten minutes we start our bedtime steps." This is the runway, not the takeoff. When she was little, we'd do this with a silly "sun's going to bed too" announcement at the window, which bought us a surprising amount of cooperation for something so simple.
2. Bath or wash-up
A warm bath is the classic sleepy cue, and it doubles as the last big sensory play of the day. You don't need one every night — a warm washcloth on the face and hands does the job on off nights — but keep the slot in the routine either way, so the sequence never changes. Bath toys stay simple at night; this is floating-and-pouring time, not new-toy time.
3. PJs (with a two-choice vote)
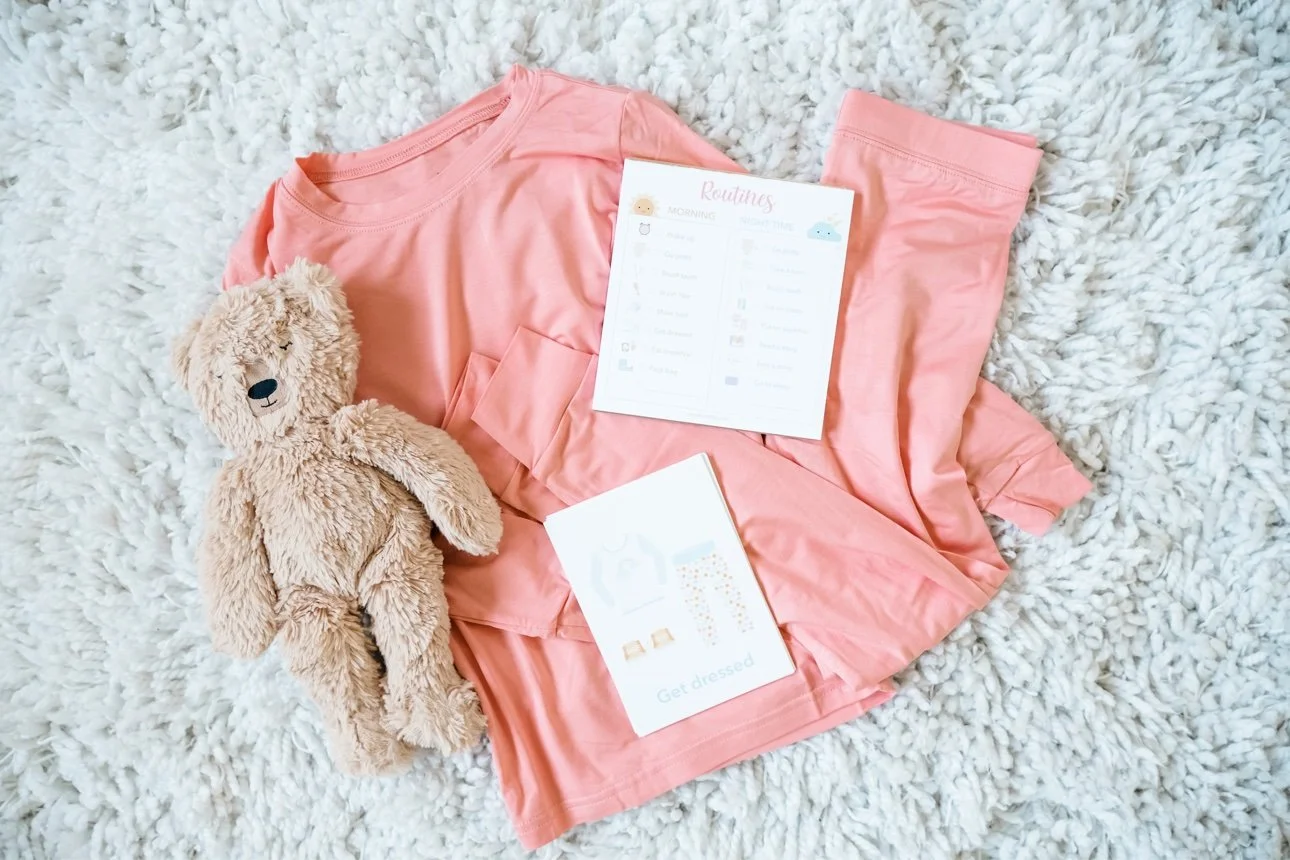
Hand your toddler exactly two pajama options and let them choose. This is the autonomy deposit that pays off later: a child who picked their own PJs has one less thing to protest. Lay them out in the same spot every night so the choice is part of the path, not a detour through the dresser drawers.
4. Brush teeth (same song, two minutes)
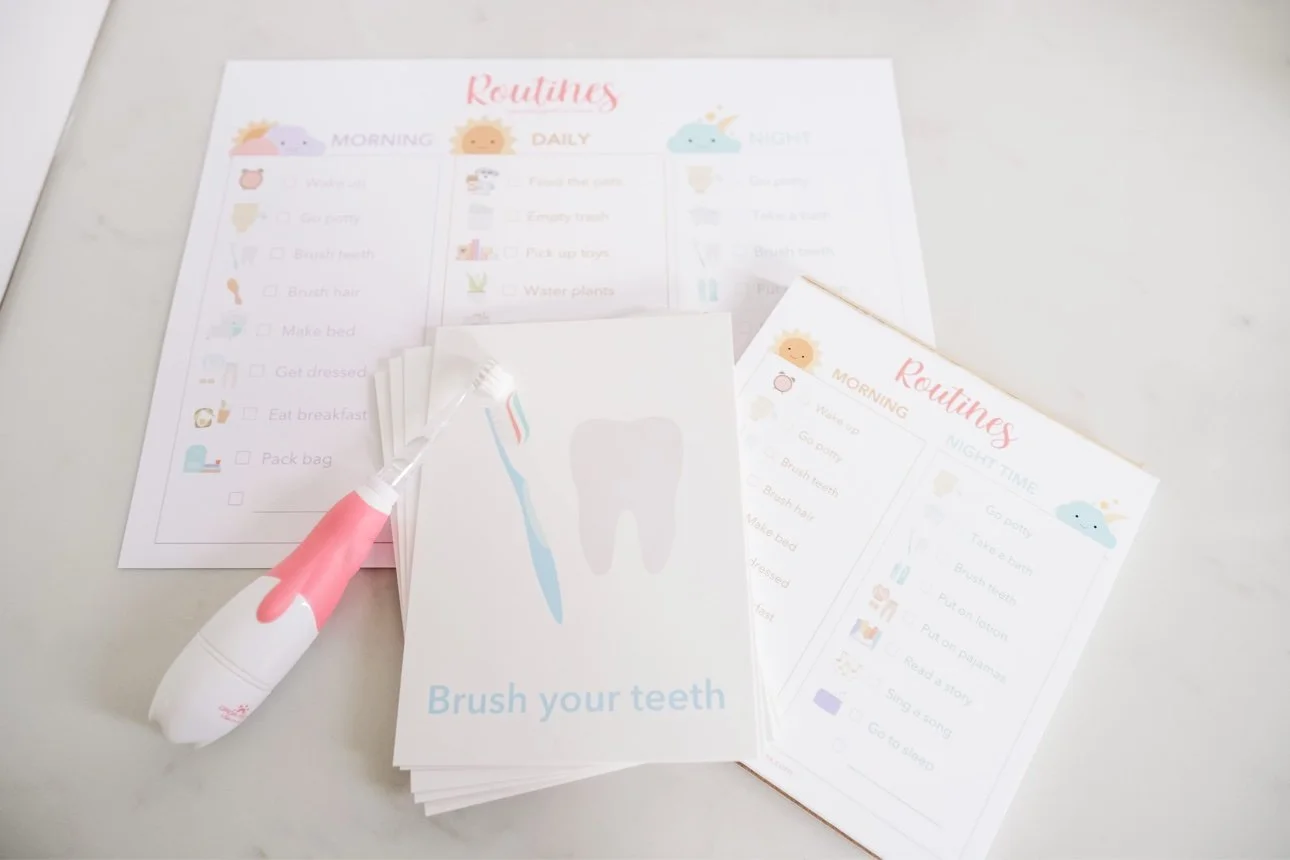
Same brush, same spot, same silly song or timer — the ritual is the point. Toddlers tolerate toothbrushing far better when it's step four of seven than when it appears out of nowhere. Let them "start" and you "finish," and keep it boring and quick.
5. Potty or fresh diaper
Last bathroom trip, last diaper change — handled now, in the routine, so it can't become a 9pm negotiation tactic later. If your toddler is potty training, this is also where the routine quietly does its work: same time, same expectation, no fanfare.
6. Story + the goodnight phrase
One or two books, in bed, read — not a tablet. Then the same short goodnight phrase every single night. Ours was short and always identical, and the identical part is what matters: a predictable phrase is a finish line your toddler can hear coming. When she was little, the phrase mattered more than the books — she'd recite it back at us before we finished, which told us the routine had officially moved into her head, where it belongs.
7. Lights out — and the chart's last flip
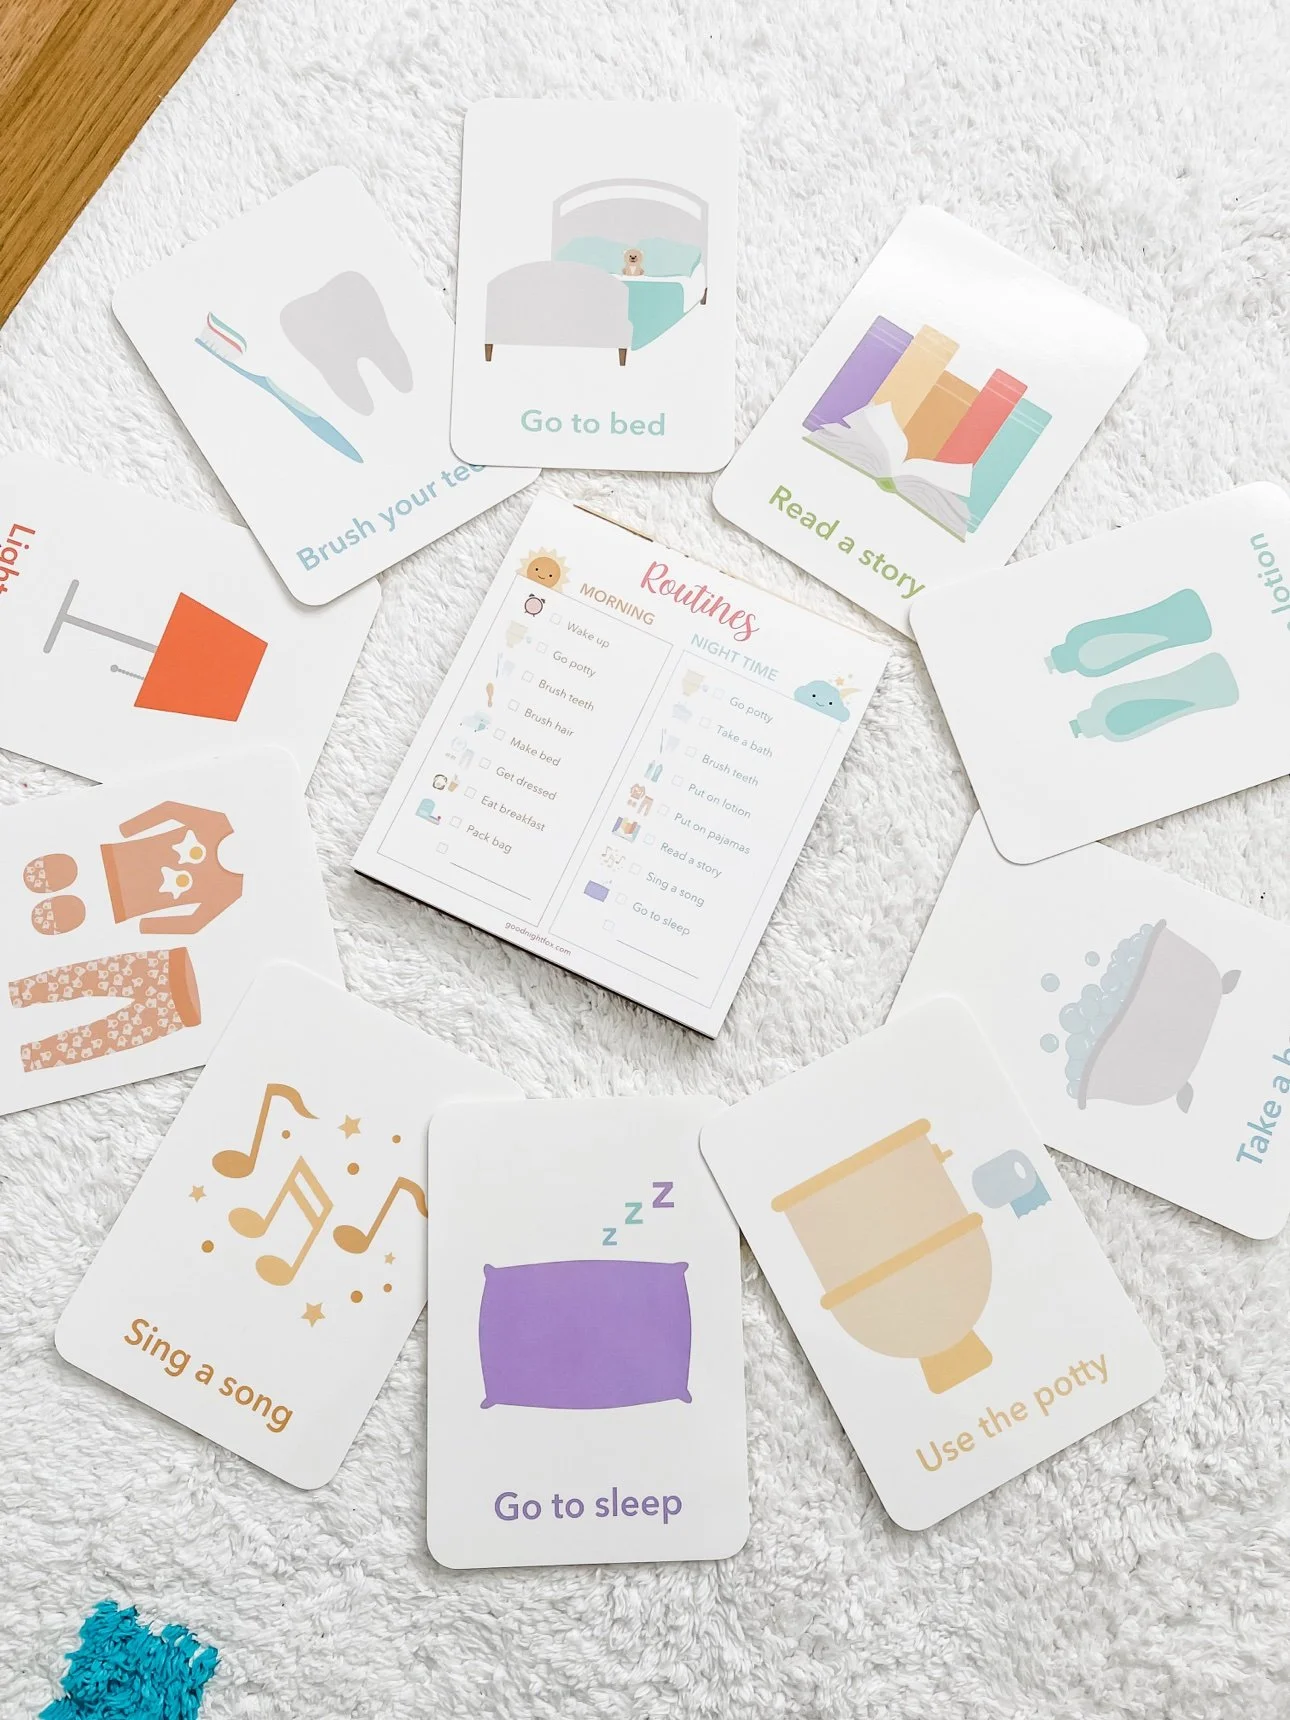
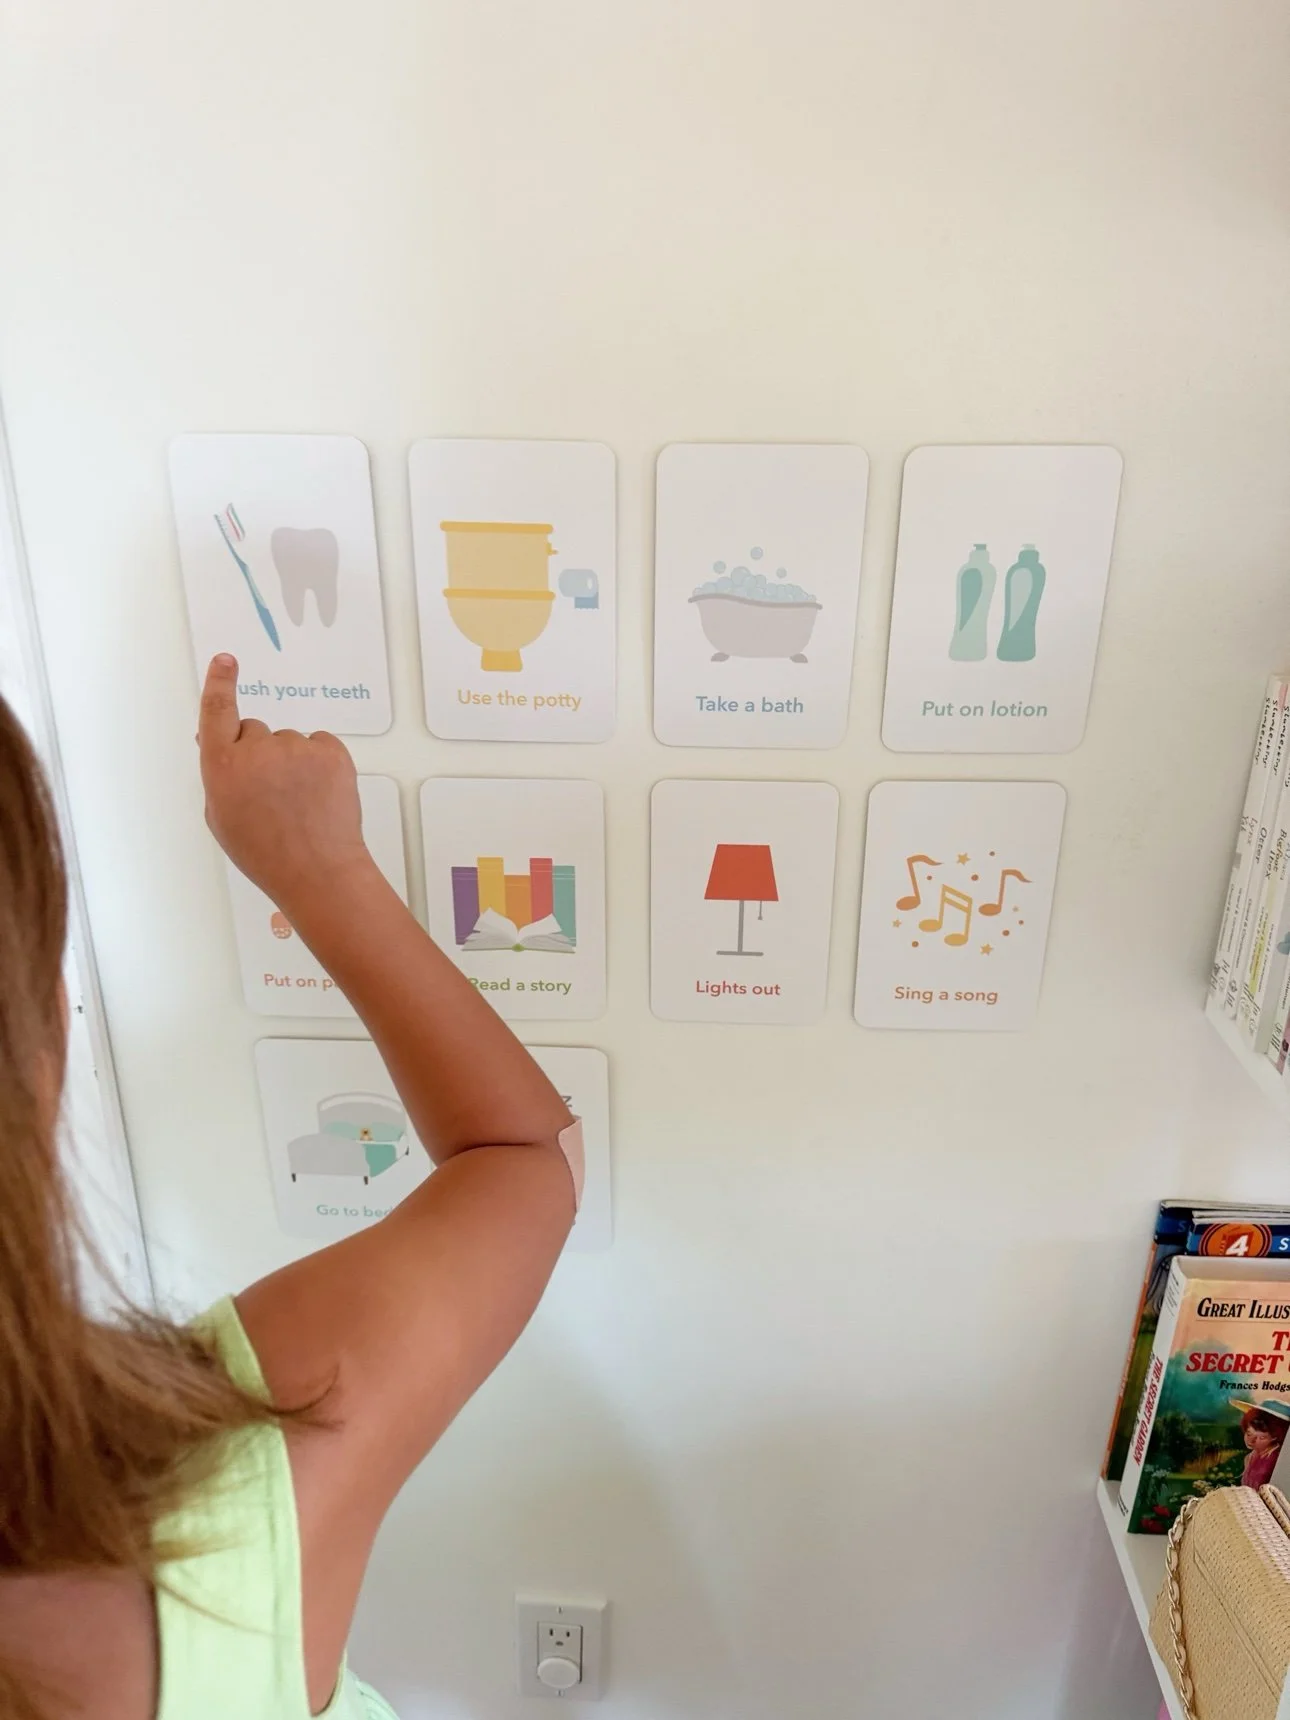
This is where the visual routine earns its keep. Line the steps up where your child can reach them — on the wall, on a ring, on the dresser — and let your toddler flip, check off, or turn over each card as you go. The last flip is lights-out, and they get to do it. A child who ends the routine themselves starts it more willingly tomorrow.

When they stall anyway (the greatest hits)
Even a good routine meets the classics. The answer to all of them is the chart, delivered on broken record:
- "One more story." "The chart says story is done — tomorrow we read two again." Then stop talking about it. Every extra word is a negotiation opening.
- "I'm thirsty." Build the water into step 5 — a small cup with the potty trip — so the request is already answered before it's asked.
- "I'm scared" / monsters. Validate briefly, keep the lights low and your voice boring, do one quick room check together as part of the routine — not as a new step invented at 9:15.
- Endless curtain calls. One calm return, one short phrase, no new steps. The routine is over; you're just the usher now.
The through-line: the chart is the authority, not you. "The chart says" ends arguments that "I said" starts.
What you can stop stressing about
- The "perfect" bedtime hour. Count backward from wake-up time using the AAP ranges above — the right bedtime is the one that delivers enough total sleep, not a number from a chart.
- A bath every single night. The slot stays; the water is optional. Nobody's sleep was ever ruined by a washcloth night.
- Doing the steps in textbook order. Your order is the right order, as long as it's the same order.
- Weekends. Pediatric guidance suggests holding the schedule within about 30 minutes even on weekends — close enough counts.
- Starting "late." A routine started at age three works fine. The best night to start was months ago; the second-best night is tonight.
Setup rules that make the routine stick
- Same order, same time, two weeks. Don't tweak it for fourteen days — the repetition is the method.
- Keep it to 20–30 minutes. Longer than that and the routine becomes the activity; the winding down should happen during it, not after.
- End in the bed. The last step happens where sleep happens — no couch-to-bed transfers after lights-out.
- Let them run the chart. Flipping the cards is the job; the job is the buy-in.
- Start on a calm night. Don't launch a new routine after a travel day or during an illness — begin when everyone's baseline is normal.
- Pair it with the morning. A visual morning routine bookends the night one, and the two charts together teach the full day's rhythm. Our general toddler routines guide covers the philosophy behind both.
What time should my toddler go to bed?
Work backward from wake-up time: ages 1–2 need about 11–14 hours of total sleep per day and ages 3–5 about 10–13 hours, including naps (AAP). For a 6:30am riser who naps 90 minutes, that usually lands lights-out somewhere between 7:00 and 8:00pm — but your child's actual sleep totals matter more than any posted bedtime.
How long should a toddler bedtime routine take?
About 20–30 minutes. Shorter than that and there's no real wind-down; much longer and the routine itself becomes the entertainment. If yours is running 45 minutes, something in the middle is a stall tactic wearing a routine costume — tighten it.
What if my toddler keeps stalling after the routine?
Make the chart the authority: "the chart says story is done." Build the usual requests (water, potty) into the steps so they're pre-answered, keep your voice boring after lights-out, and do one calm return with one short phrase. Consistency for a week or two is what retires the stalling — the routine has to outlast the testing.
Do we really need a bath every night?
No — but keep the bath slot in the routine every night, even if it's a warm washcloth on off nights. The sequence staying identical matters more than the water.
What if travel or illness breaks the routine?
It will, and that's fine. Bring the cards (or a photo of the chart) when you travel — the visual sequence survives new bedrooms surprisingly well. After an illness, just restart the same steps; most toddlers fall back into a known rhythm within a few nights.
The cards that run our bedtime
The whole method above runs on a visual chart — and our Night Time Routine Flashcards are exactly that: the evening steps on sturdy cards your toddler flips one by one, from wind-down to lights out. When she was little, the card-flip was the entire game — being in charge of the sequence turned bedtime from something done to her into something done by her.
Pair them with the Morning Routine Flashcards and the day has bookends: the night chart teaches the wind-down, the morning chart teaches the wake-up, and together they give your toddler the full day's rhythm at a glance.
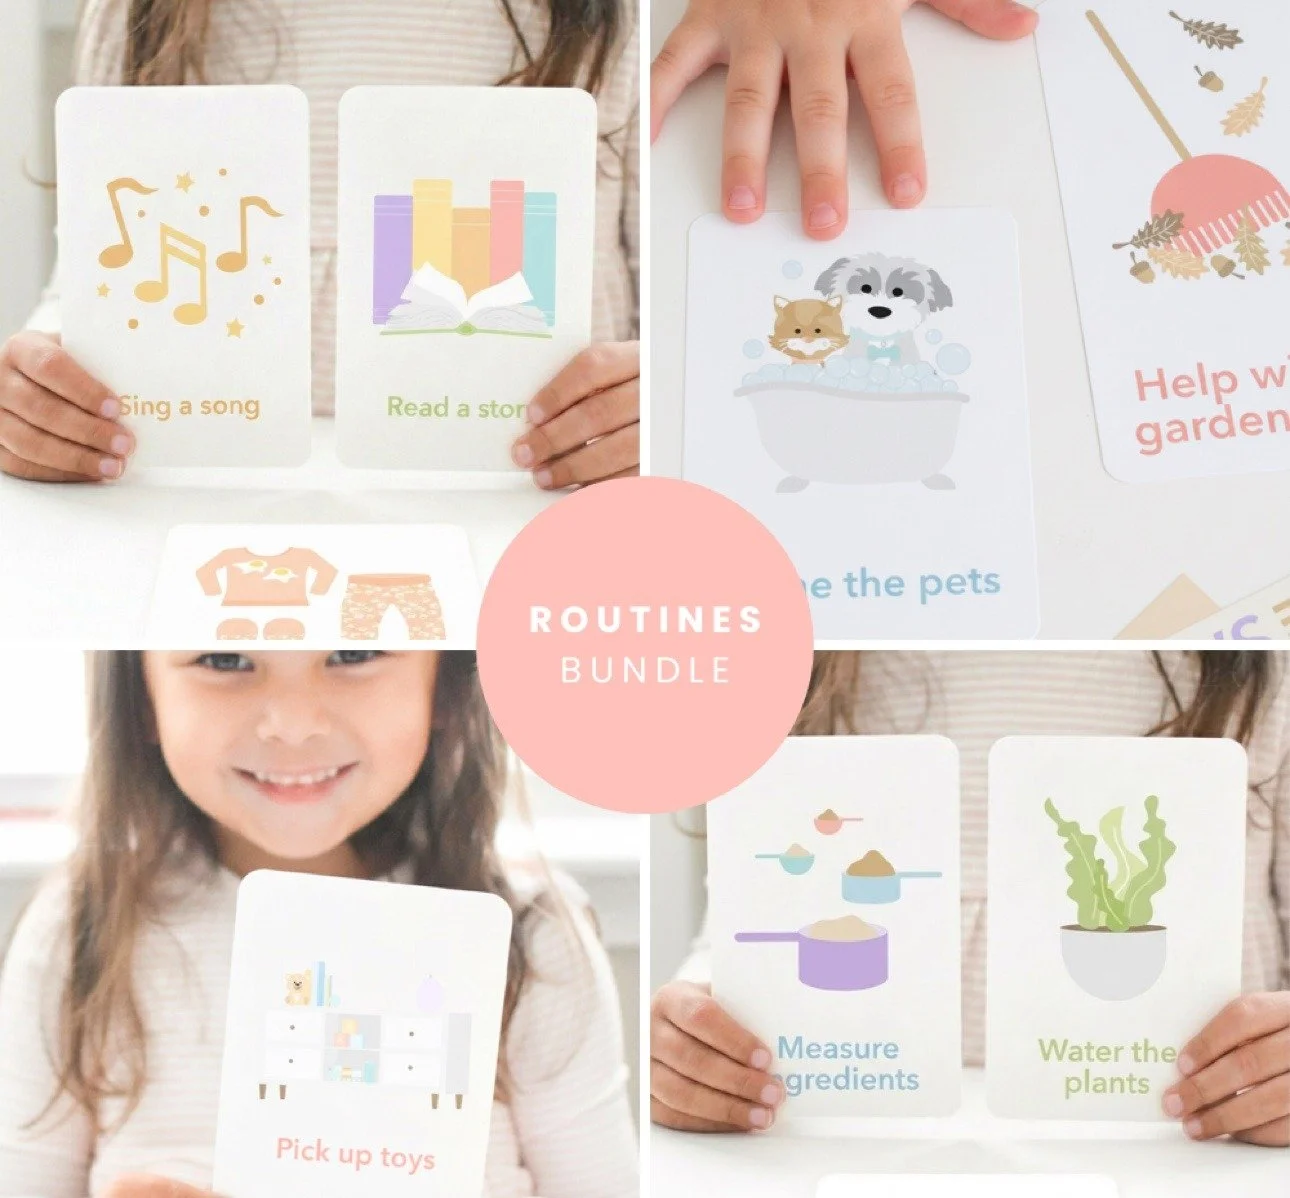
All of our routines bundles in one place — mix and match the cards your family actually uses.
Shaving Cream Easter Eggs: Marbled Eggs with Shaving Foam
Shaving Cream Easter Eggs: Marbled Eggs with Shaving Foam
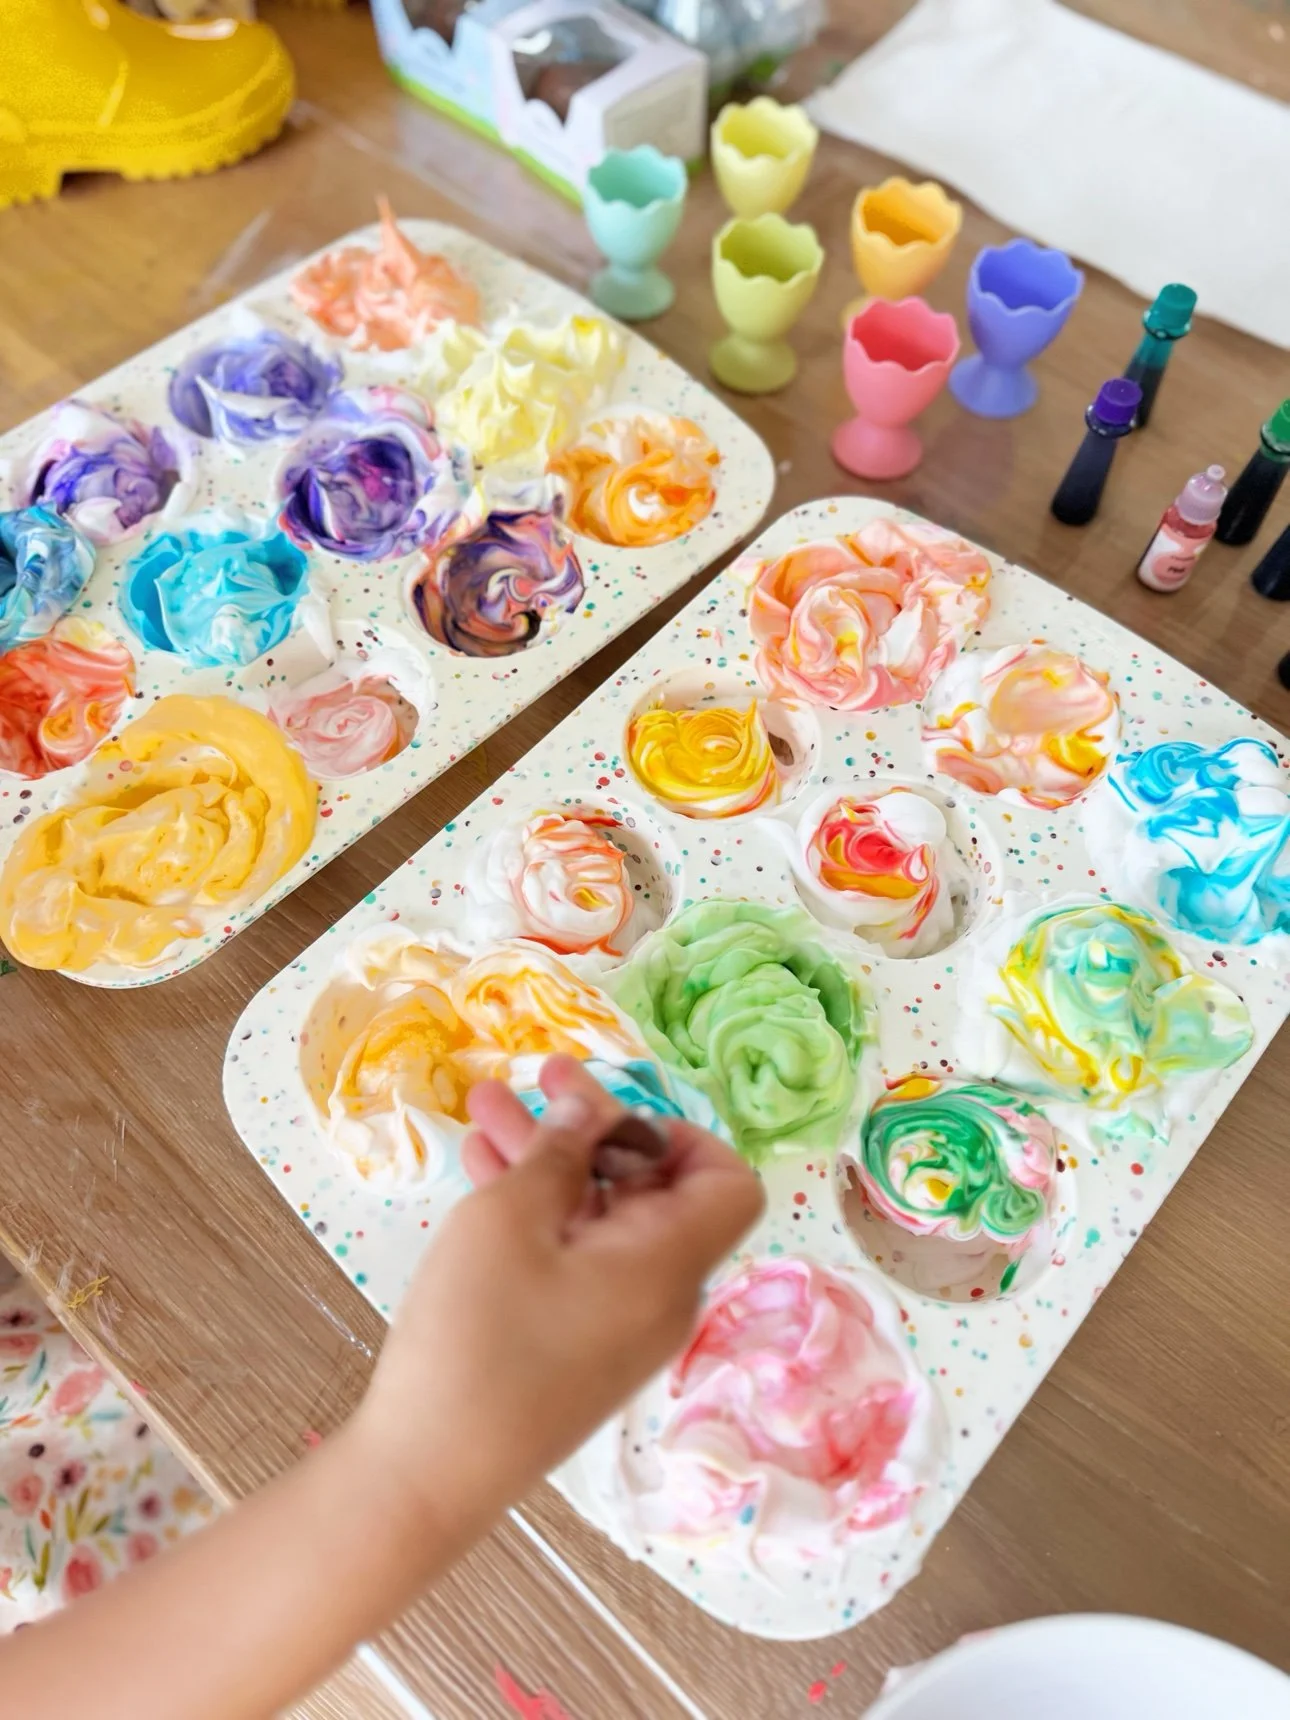
These shaving cream Easter eggs are the prettiest eggs we've ever dyed — swirly, marbled, watercolor-soft, and every single one is different. The secret is a muffin tin, a can of shaving foam, and a few drops of food coloring. It takes about ten minutes of hands-on time, and the reveal never gets old.
If you've never tried the shaving foam method, this is the year. It's the easiest "wow" Easter craft we know, and toddlers can do most of it themselves.
What You'll Need
- Hard-boiled eggs (cooled completely)
- White shaving foam — not gel, not menthol. Plain foam works best.
- Liquid food coloring
- A muffin tin (or a baking dish)
- Toothpicks or a skewer for swirling
- Paper towels and gloves or an apron
Safety note: shaving cream isn't food-safe, so treat these as decoration eggs — don't eat them. Grown-ups should handle the can, and little hands should be washed well afterward. If you want to eat your eggs, blow them out first and dye just the shells.
Step 1: Fill the Muffin Tin with Shaving Foam
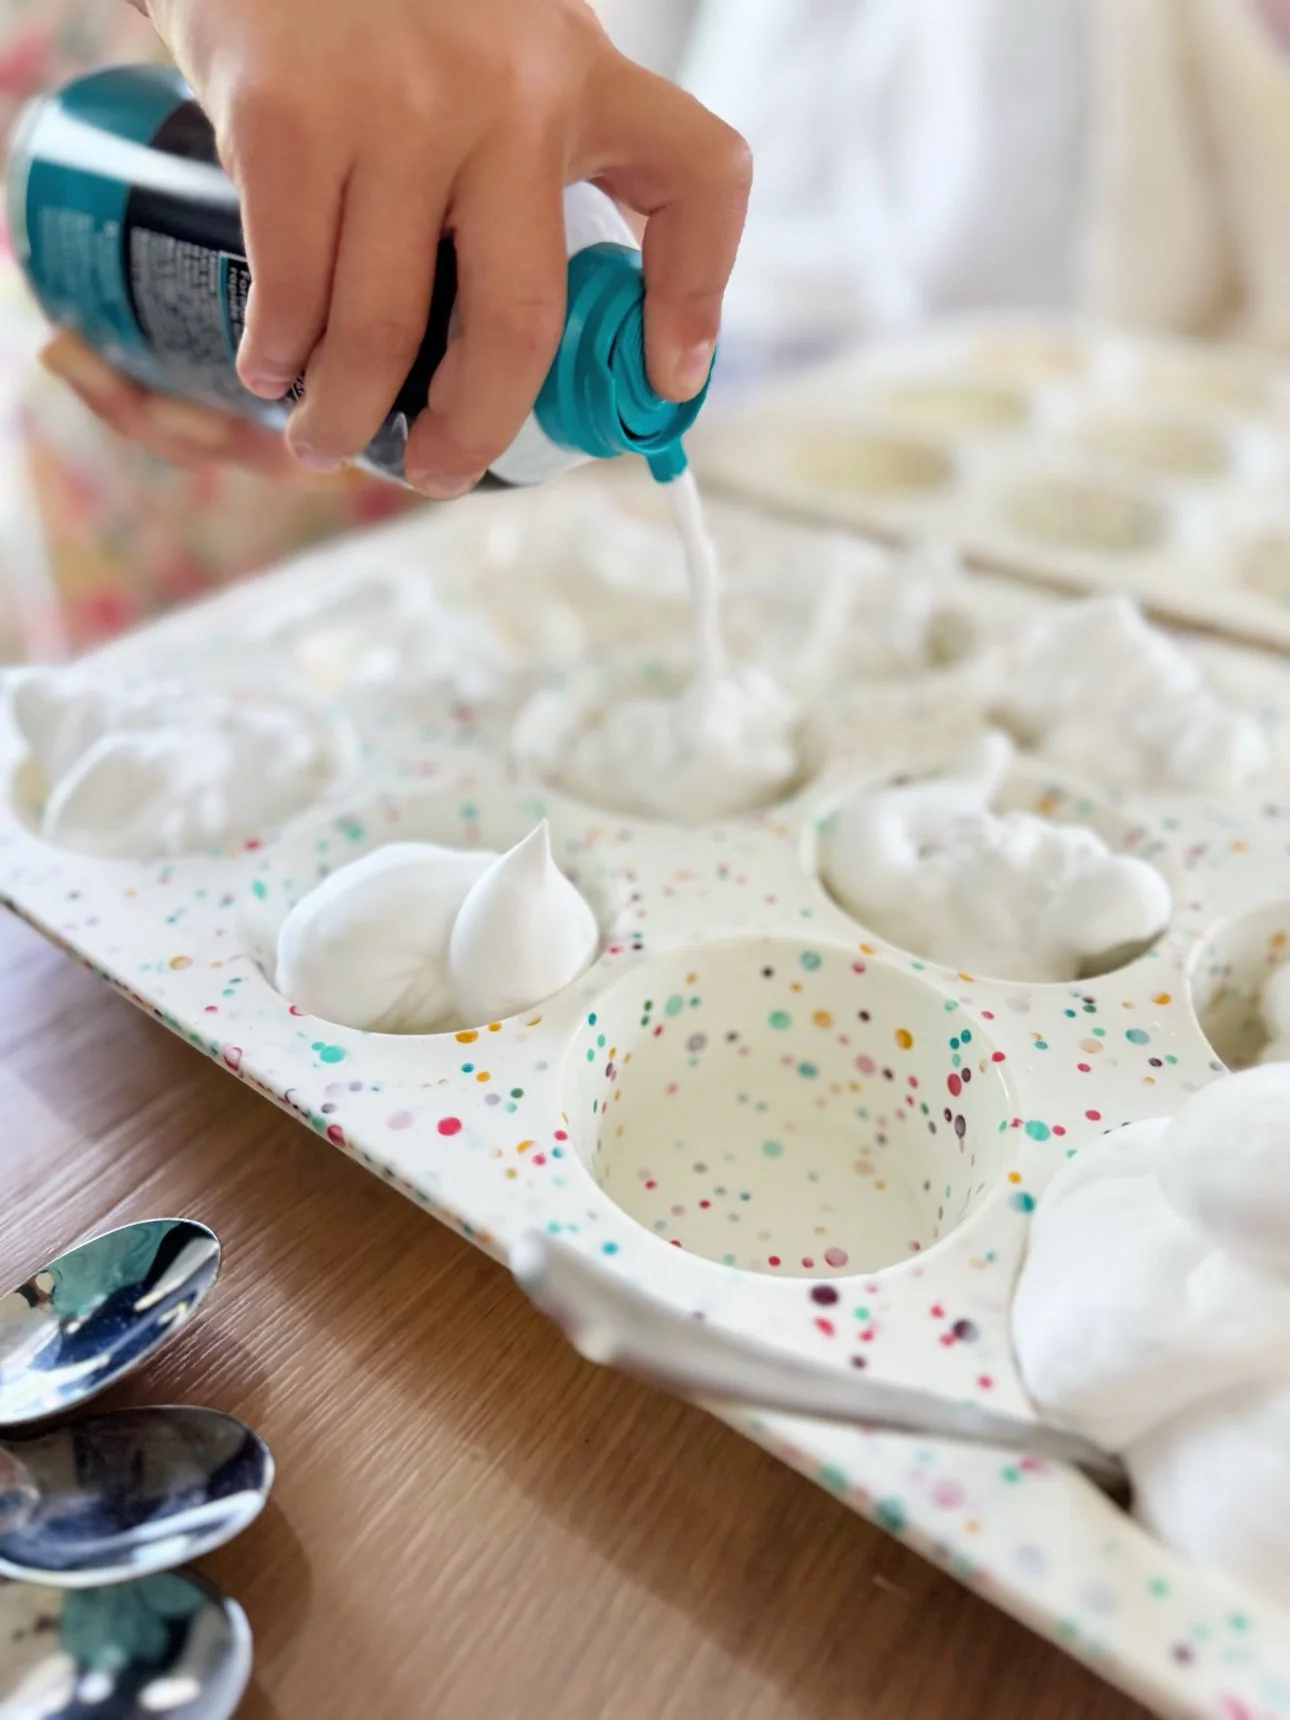
Spray a generous dollop of shaving foam into each cup of the muffin tin — enough to nestle an egg into. Smooth the tops lightly with the back of a spoon. This is the part kids love most, so let them go for it.
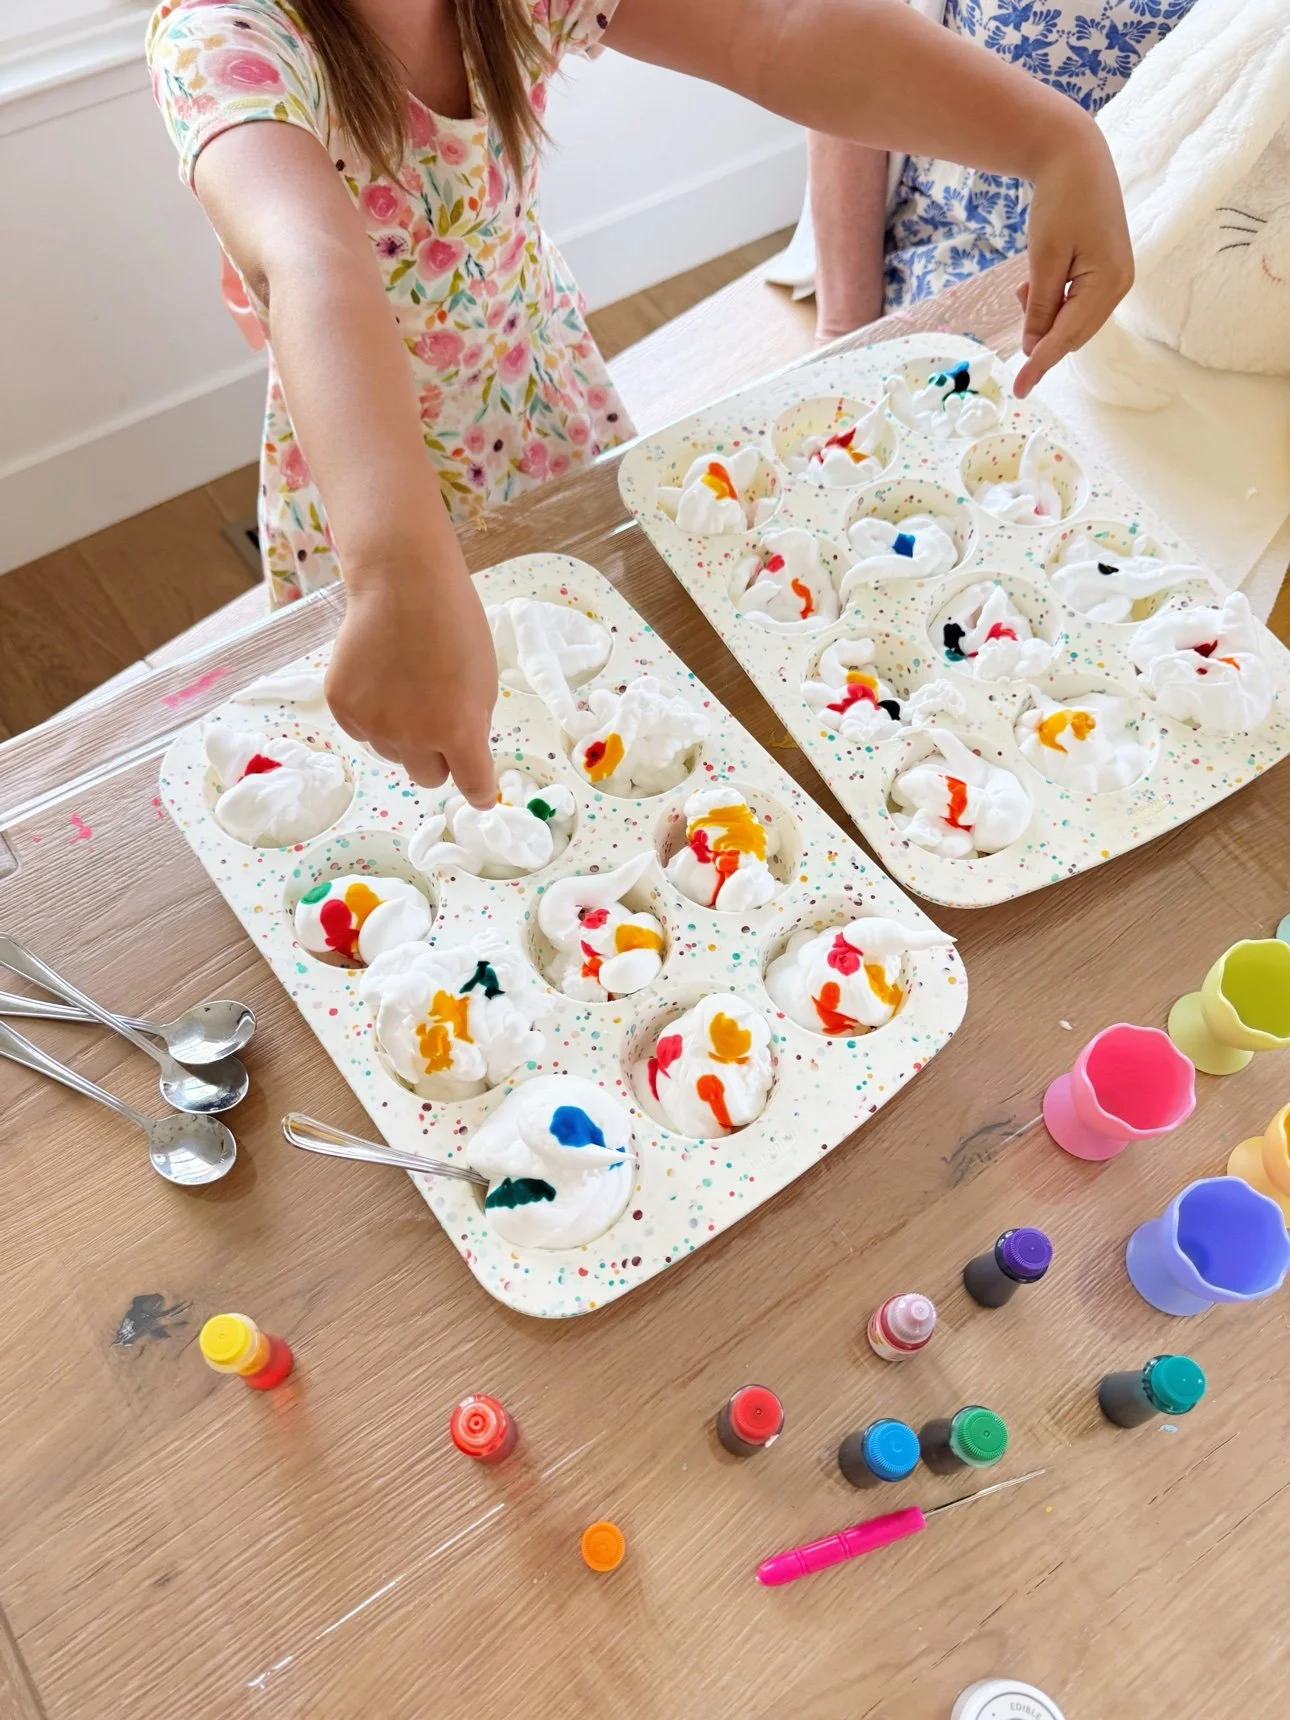
Step 2: Add Drops of Food Coloring
Add 3–5 drops of food coloring to each cup. Use 2–3 colors per cup for the prettiest marbling — pastels turn out dreamy, brights turn out bold. Don't overthink the color combos; they all work.
Step 3: Swirl — But Not Too Much
Drag a toothpick through the foam in lazy S-curves, just a few passes per cup. The magic rule: less swirling = more marbling. If you stir too much, the colors blend into one muddy shade. Stop while you can still see distinct ribbons of color.
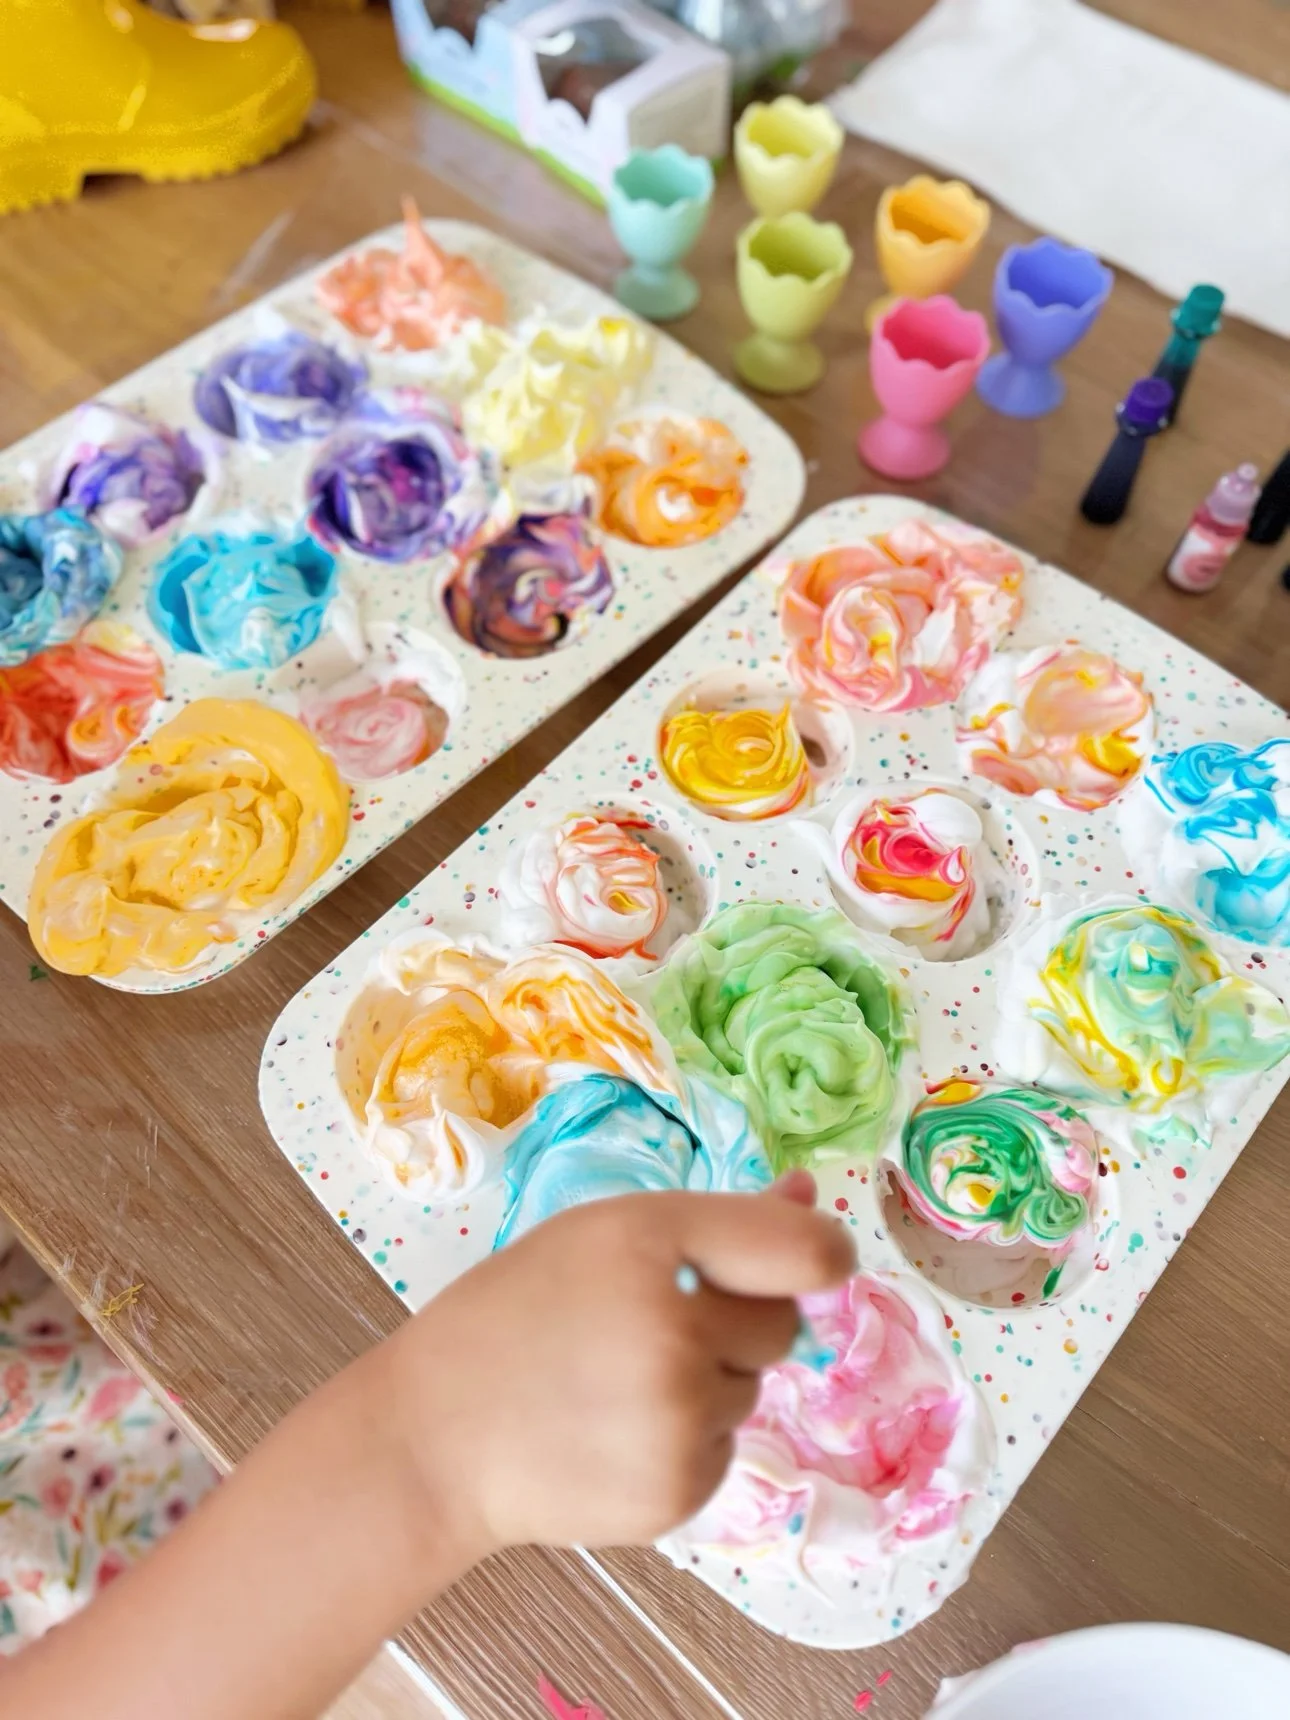
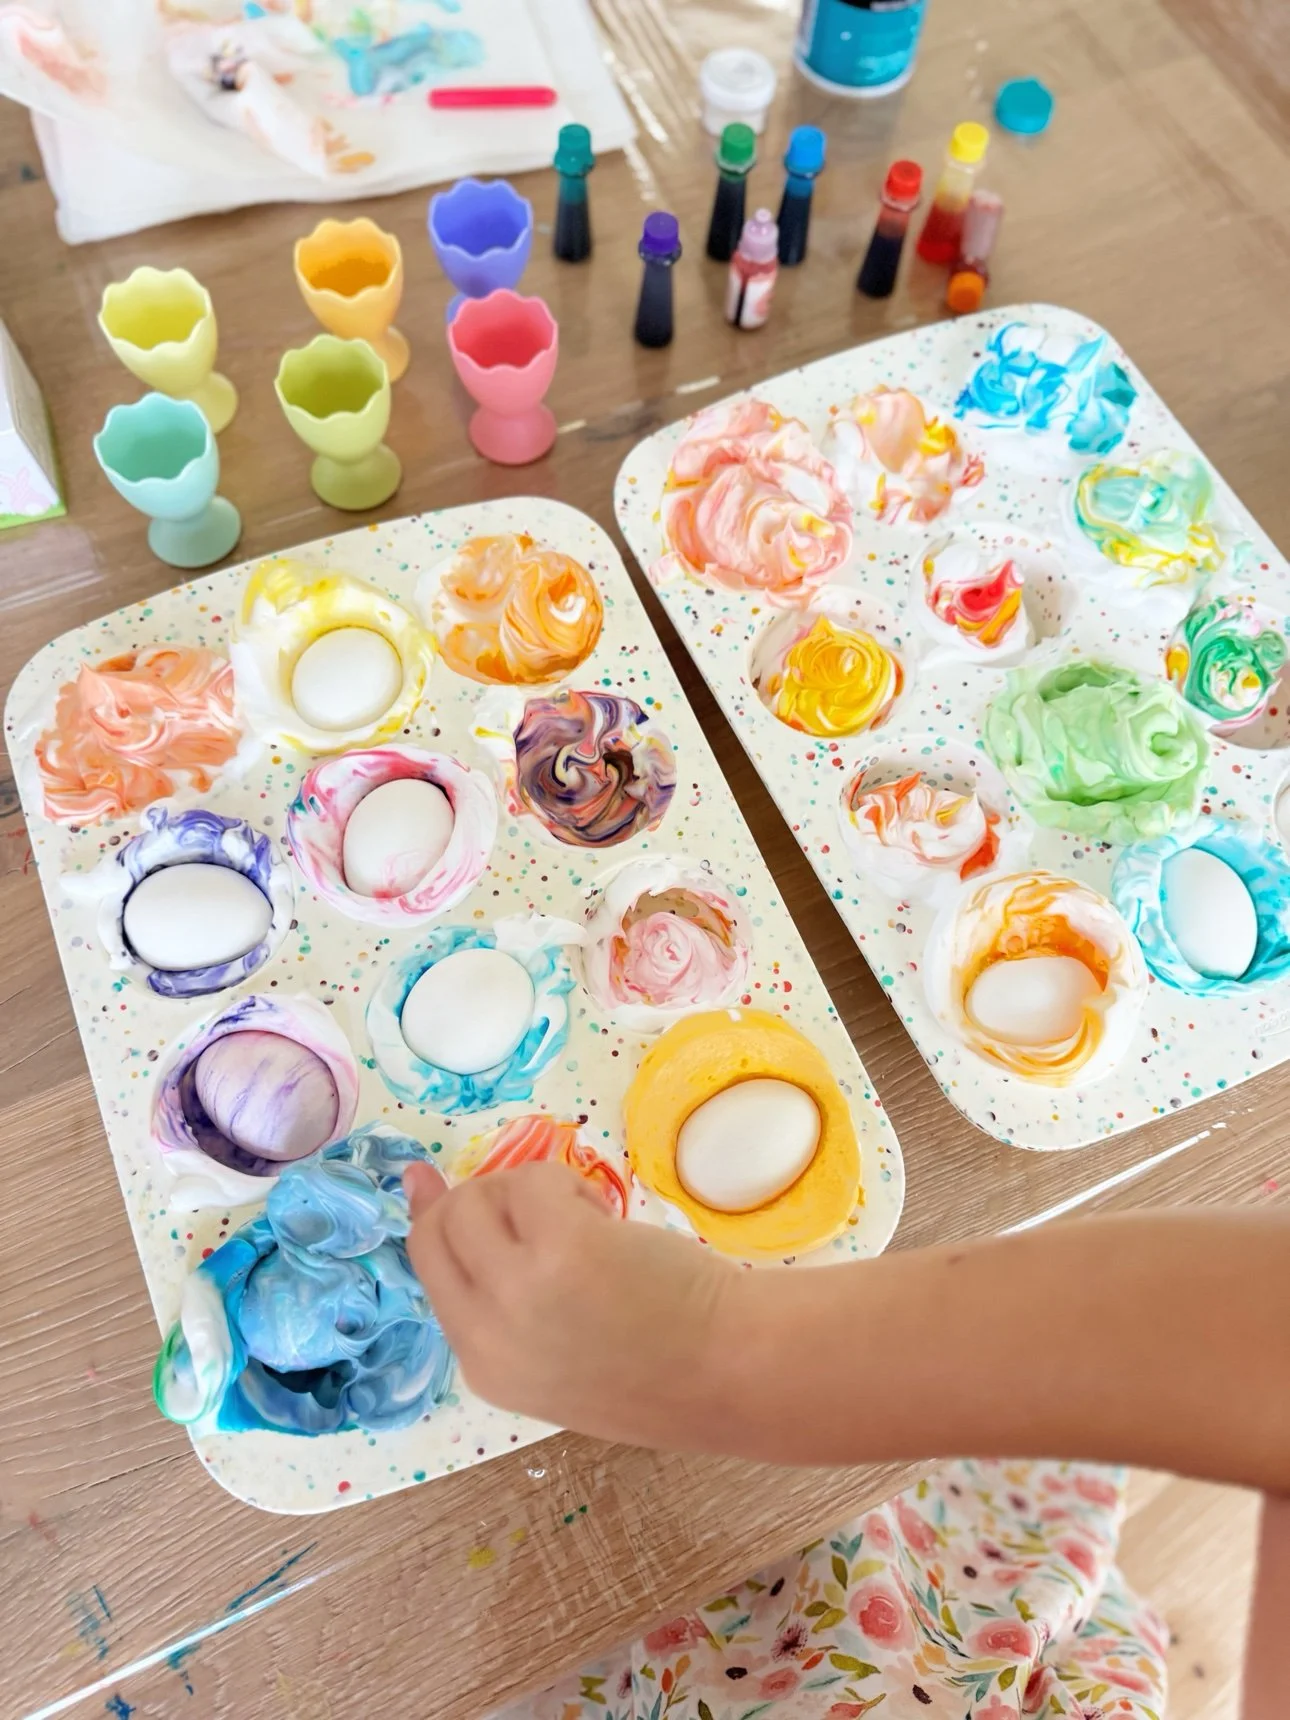
Step 4: Roll the Eggs in the Foam
Set a cooled hard-boiled egg into each cup and roll it gently through the colored foam until it's coated all over. Gloves help here — the food coloring will stain little fingers for a day or two otherwise (ask me how I know).
Step 5: Let Them Sit, Then Wipe Clean
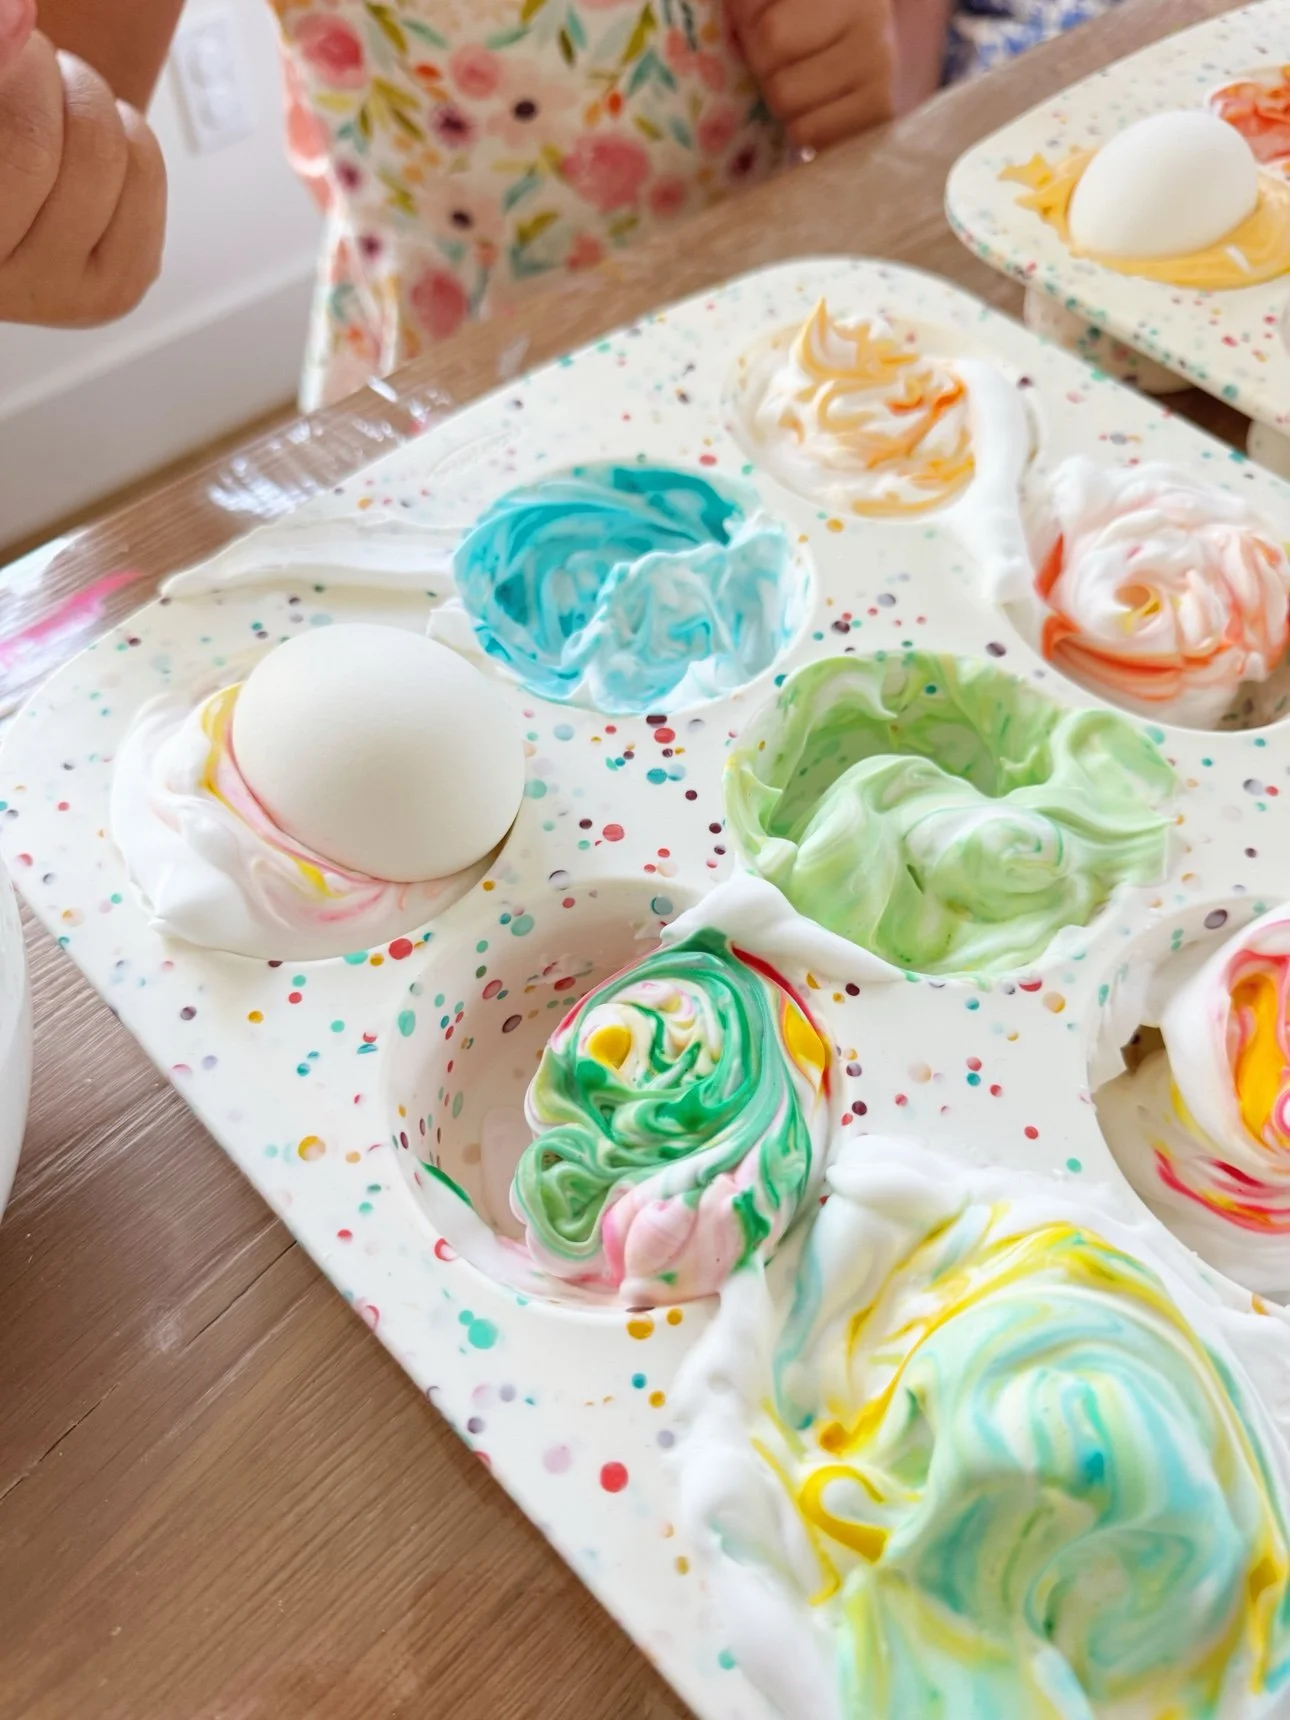
Let the eggs sit in the foam for 10–15 minutes — the longer they sit, the deeper the color. Then lift each egg out and wipe the foam off with a paper towel. Don't rinse under water; wiping keeps the marbled pattern crisp.
Set the finished eggs on a rack or in egg cups to dry completely.
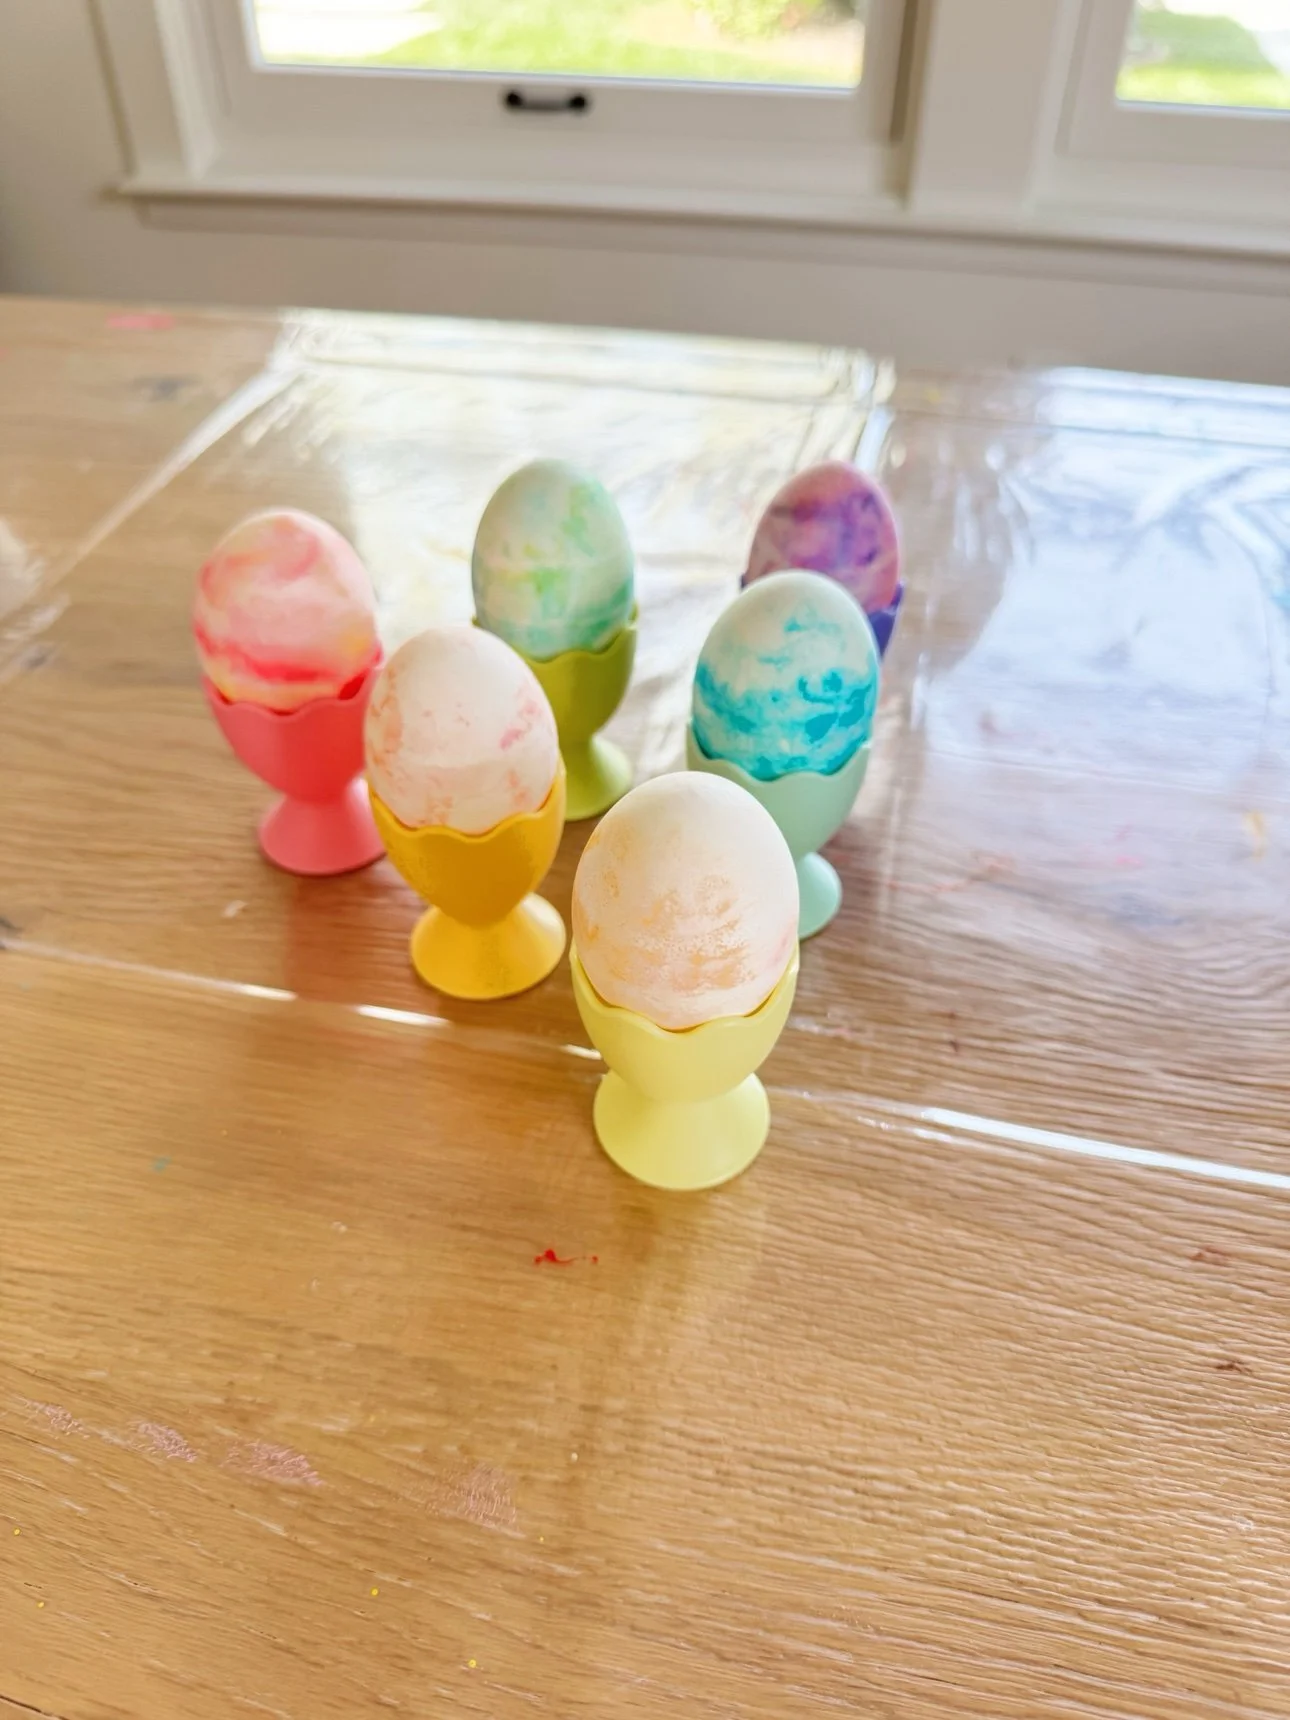
The Reveal
This is the best part. Every egg comes out completely different — soft watercolor swirls in pink, mint, sky blue, and lavender. No two alike, and somehow all of them gorgeous. We lined ours up in these little pastel egg cups and they looked like a candy shop.
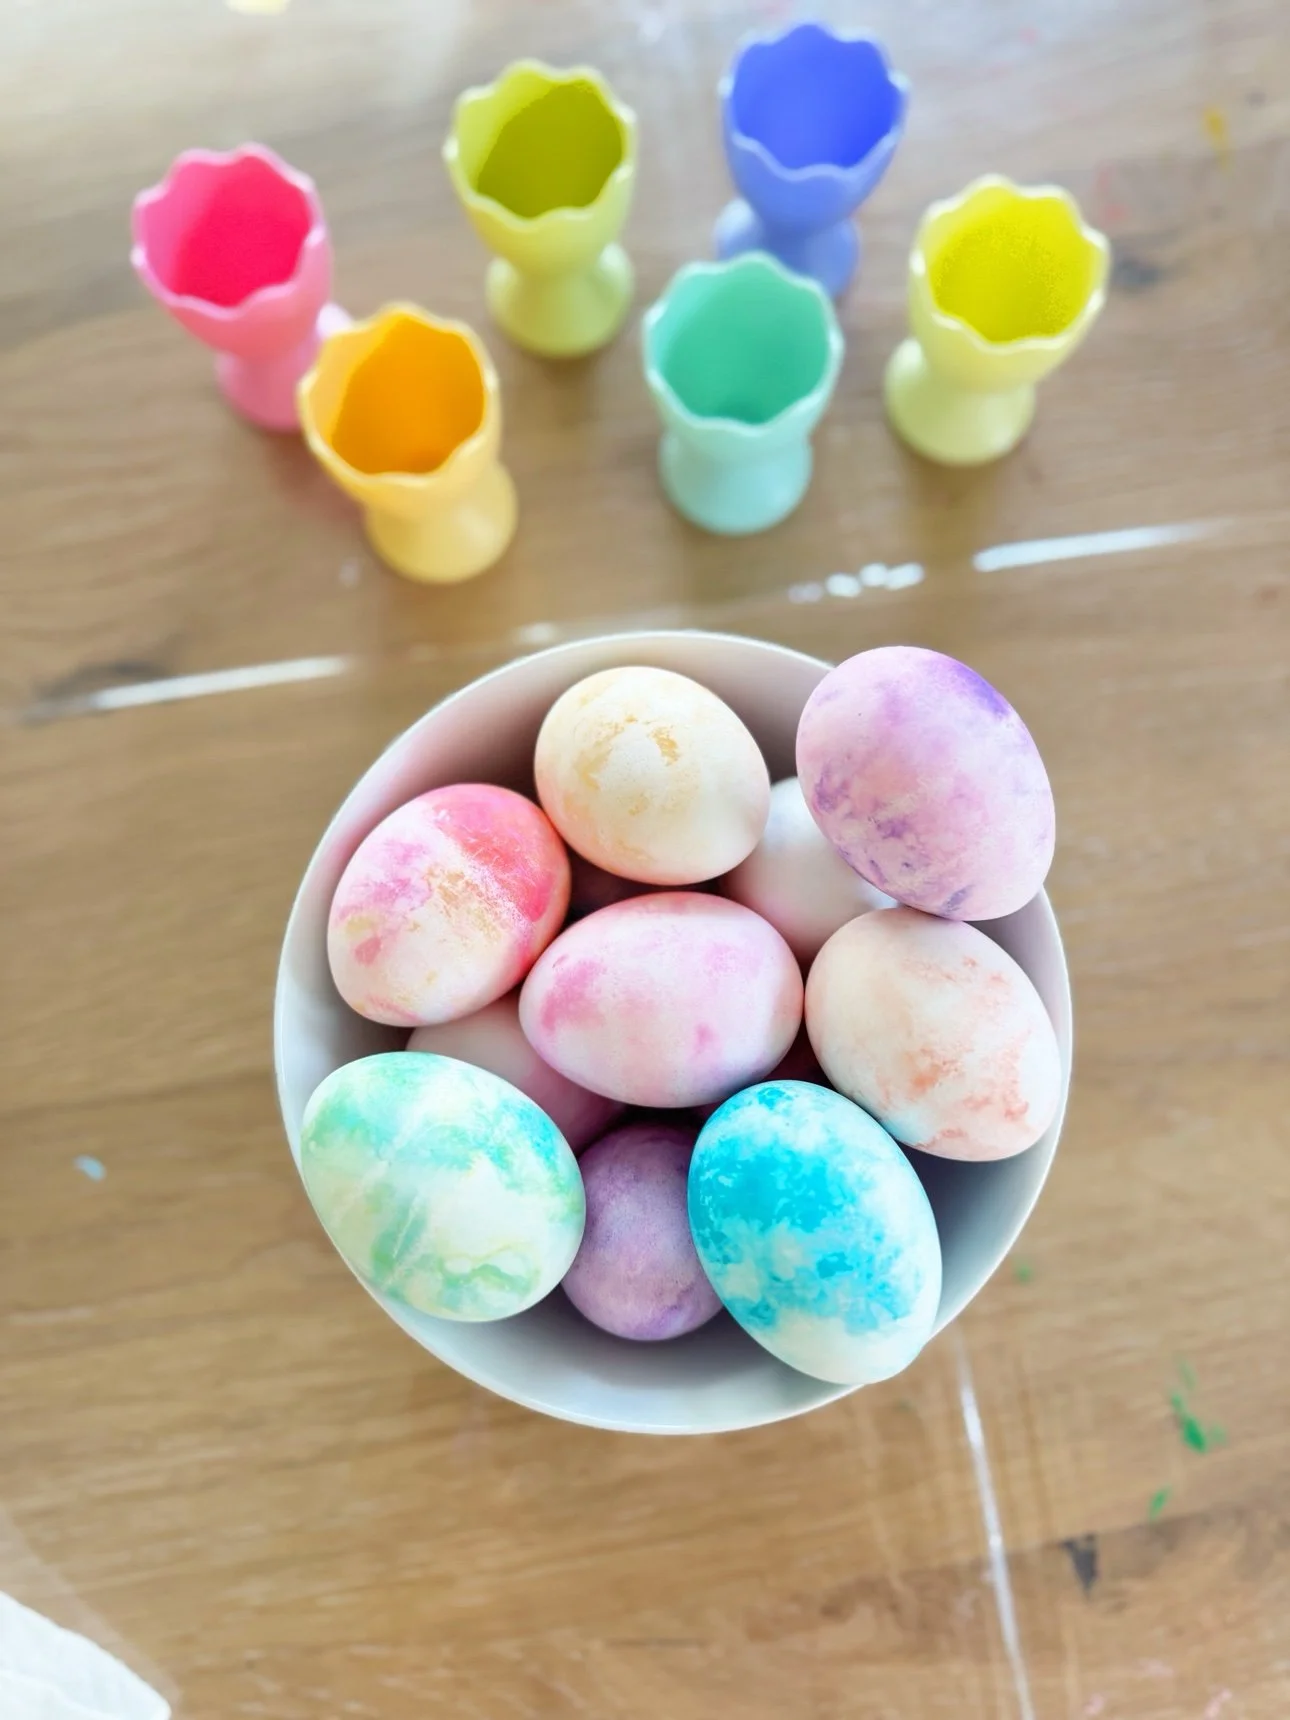
Tips for the Prettiest Eggs
- White eggs only. Brown eggs mute the colors.
- Cool eggs completely before dyeing — warm eggs melt the foam.
- Use foam, not gel. Gel shaving cream won't hold the swirls.
- Under-swirl. Two or three lazy passes with the toothpick is plenty.
- Wipe, don't rinse. Water washes the marbling away.
- Work fast-ish. The foam starts to deflate after about 30 minutes, so dye in batches if you're doing a lot of eggs.
Cleanup
The foam rinses right out of the muffin tin with hot water — it's actually easier cleanup than traditional dye cups. Wipe the table with a damp cloth before the food coloring sets, and toss stained paper towels. Hands wash clean with soap; any lingering color fades in a day.
Happy Easter, friends — tag us if you try these! We'd love to see your marbled masterpieces.
Fine Motor Activities for Toddlers: 8 Playful Ways to Build Strong Little Hands
Wondering how to build your toddler's fine motor skills? These 8 playful fine motor activities for toddlers build hand strength, pincer grasp, and eye-hand control — with household supplies, no worksheets.
Read more